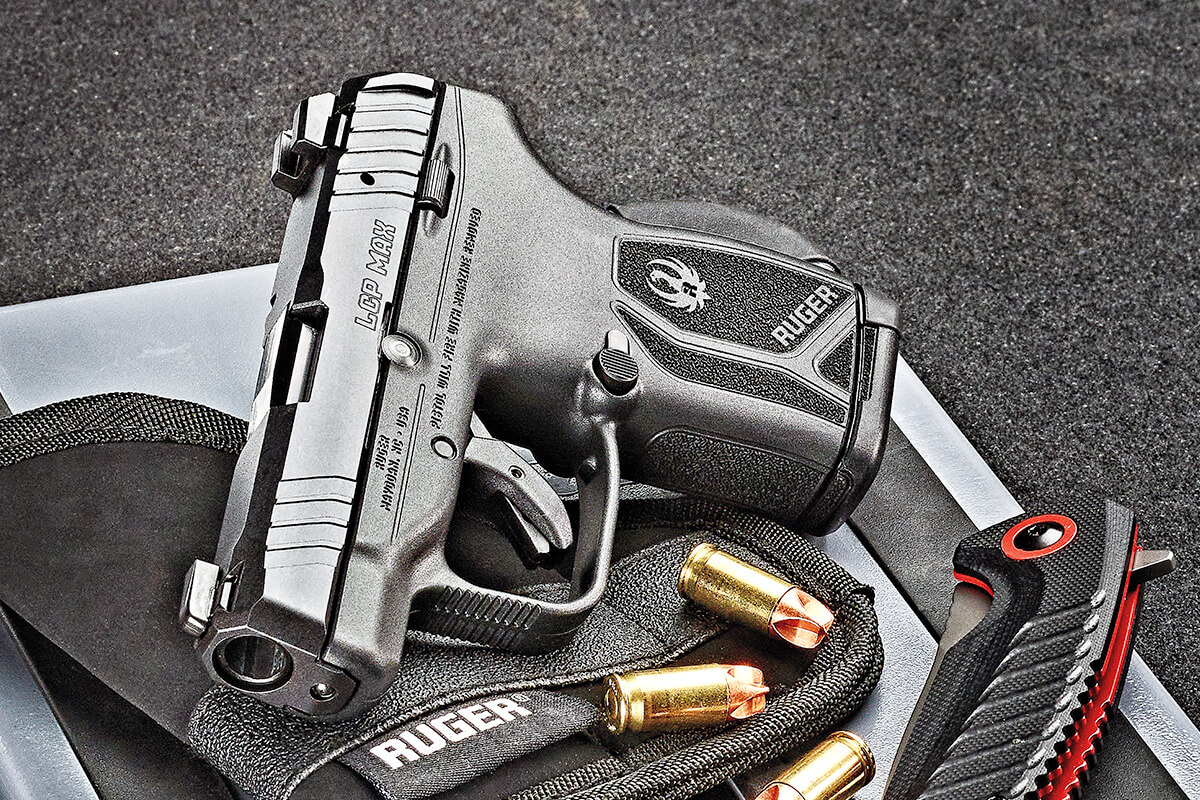
First, let’s get the biggest news about the new LCP MAX out of the way. It has a magazine capacity of 10 rounds, and an optional 12-round magazine is offered as an accessory. That’s twice the capacity of the previous .380 ACP LCP and LCP II pistols, which, by the way, are still in production. Ruger accomplished this increase in firepower by developing a double-stack magazine that is, surprisingly, not much wider than the original single-stack magazine.
Like the other LCP pistols, the new LCP MAX’s slide has cocking ears, grasping grooves (front and rear), and an external extractor. The top edges and the muzzle end are beveled for concealment and a smooth draw.
According to Ruger’s website, the LCP MAX has a 2.8-inch barrel, but according to my Stanley tape measure, the sample barrel measures closer to 2.75 inches, which is the specified length for the LCP and LCP II pistols. Either way, the barrel is finished in black, and the muzzle is crowned. The recoil guide rod is full length. And the chamber has view ports on both sides that serve as loaded-chamber indicators; they are not on top of the chamber like on many other pistols.
Whenever a .380 ACP pocket pistol is reviewed, readers ask whether it is blowback or recoil-operated because a lot of the older small-caliber, small-size semiautomatic pistols are blowback. The LCP MAX is a recoil-operated autoloader.
Like its predecessor, the LCP MAX utilizes a tilting-breech design. When a cartridge is fired, the steel barrel and steel slide remain locked together for a short distance of slide travel, after which the breech end of the barrel cams down, out of engagement with the slide. The slide then moves fully rearward, extracting and ejecting the fired case. Then the dual recoil springs return the slide to its forward position, picking up a cartridge from the magazine and chambering it. As the cycle is completed, the breech-end of the barrel cams up and locks into the slide.
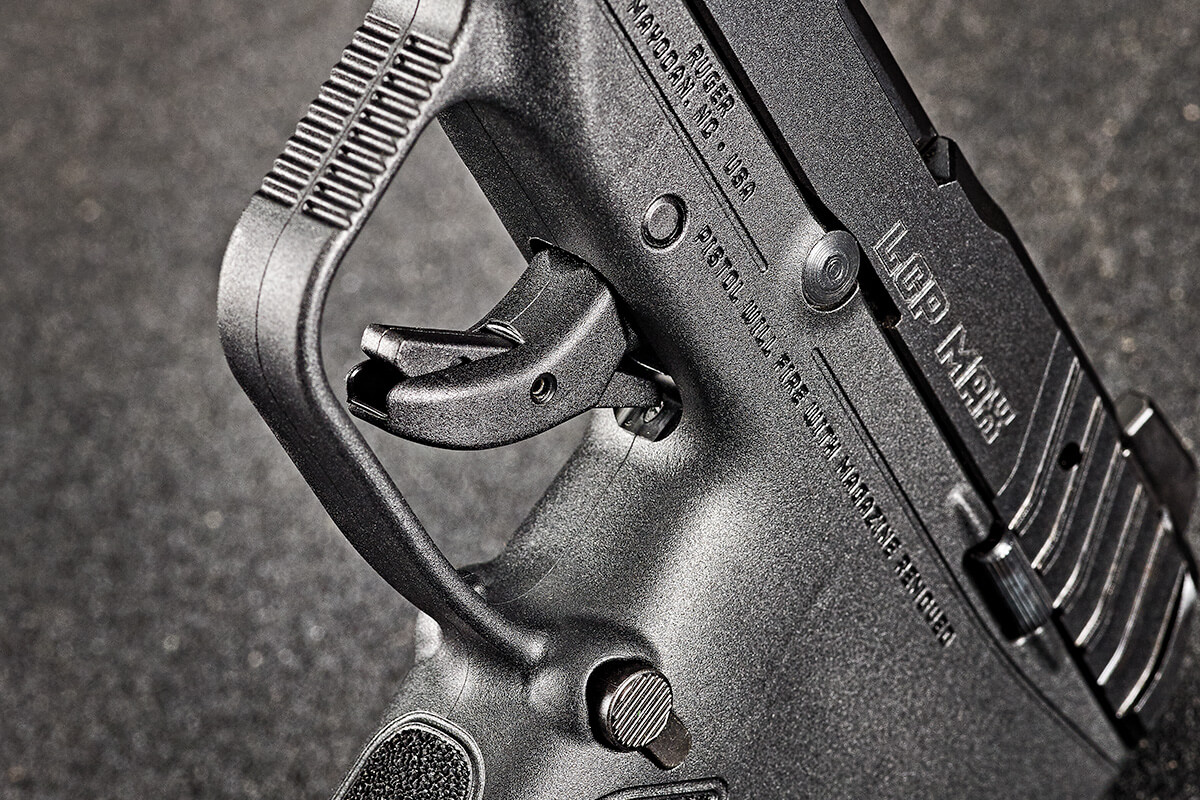
The LCP MAX uses Ruger’s Secure Action fire-control system similar to the Ruger-57 and Security-9 semiautomatic pistols. When the slide cycles, the recessed hammer is cocked fully. Squeezing the trigger (which involves pressing the built-in safety lever to allow the trigger to move fully to the rear) releases the hammer to strike the firing pin. The slide automatically locks back on an empty magazine.
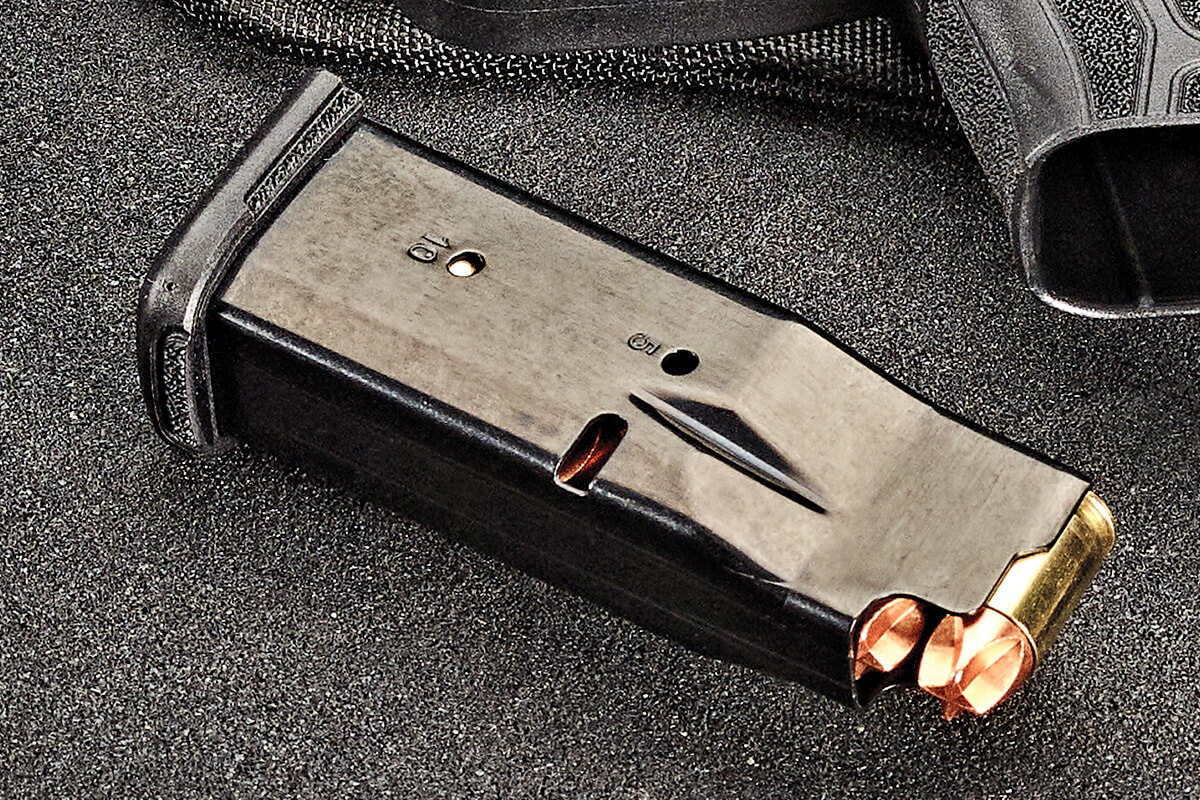
The biggest news about the .380 ACP LCP MAX is it has a newly developed double-stack magazine that increases capacity to 10 rounds, almost doubling the capacity of the original LCP. (Michael Anschuetz photo)
Speaking of magazines, the double-stack 10-round magazine that comes standard with the LCP MAX also comes with an interchangeable finger-extension baseplate. It doesn’t increase the magazine capacity, but it offers a bit more to grab onto. I didn’t use it in my shootout because I had a secure purchase using the flush-fitting magazine baseplate. (For the record, I wear medium-size gloves.)
But switching the baseplates is easy. Just push a pin punch or similar tool into the magazine seat where it protrudes into the hole on the baseplate. Slide the baseplate forward toward the front of the magazine. Use caution because the magazine spring is under heavy tension and can cause the forcible ejection of the magazine spring seat and the spring. The magazine spring seat, the spring, and the follower can be removed for cleaning at this juncture. Then just reassemble the parts, switching the baseplates.
The magazine’s metal tube has two witness holes on the right side; one has the number 5 near it, and the other has the number 10, indicating the round counts. The LCP MAX does not have a magazine disconnect safety, so that means it will fire with the magazine removed just like the earlier LCP and LCP II pistols.
The magazine release on the pistol’s frame can be switched from the left-hand side to the right-hand side. This procedure is a bit more complicated but still fairly user-friendly. The pistol needs to be disassembled, so let’s go through those steps first.
Once you’re certain the pistol is not loaded and the magazine has been ejected, pull the slide fully to the rear and engage the slide stop. Visually check the chamber one more time to be sure it is empty. Retract the slide and release it. Pry loose the takedown pin with a flat-head screwdriver or other blunt tool, then remove the takedown pin entirely with your fingers. Move the slide assembly forward and off the frame. The recoil spring guide rod assembly and barrel can then be removed from the slide.
(Michael Anschuetz photo)
To switch the magazine latch, first look down into the front of magazine well and locate the magazine latch. A wire coming up from the lower part of the magazine well engages the magazine latch, and it serves as the magazine latch spring and retainer. Use a pointed steel rod, such as a scribe, to approach the spring from the bottom of the magazine well. Push the wire to the side it is bent towards while prying it towards the rear of the magazine well until the wire comes free of the latch. The spring does not need to be removed.
Remove the magazine latch by pushing on the striated button side and pushing it all the way through the grip frame. Rotate the striated edge up to get around the end of the magazine latch spring and then down again to remove it from the frame.
Reinstall the magazine latch by starting the striated end into the opposite side of the grip frame. When the latch reaches the spring, rotate it past the spring and then rotate it back to reach the opposite side of the frame. The spring should lie against the flat on the magazine latch.
Use the pointed scribe to manipulate the wire magazine latch spring sideways, away from the striated button, until it locks itself into the magazine latch.
(Michael Anschuetz photo)
Reassemble the barrel and recoil spring guide rod assembly in the slide and install the slide onto the frame. Always check for proper function after reassembly before firing live ammunition. The company states it is safe to dry-fire an empty LCP MAX in moderation without damaging the firing pin or other components, but using a snap cap is recommended for continued dry-firing.
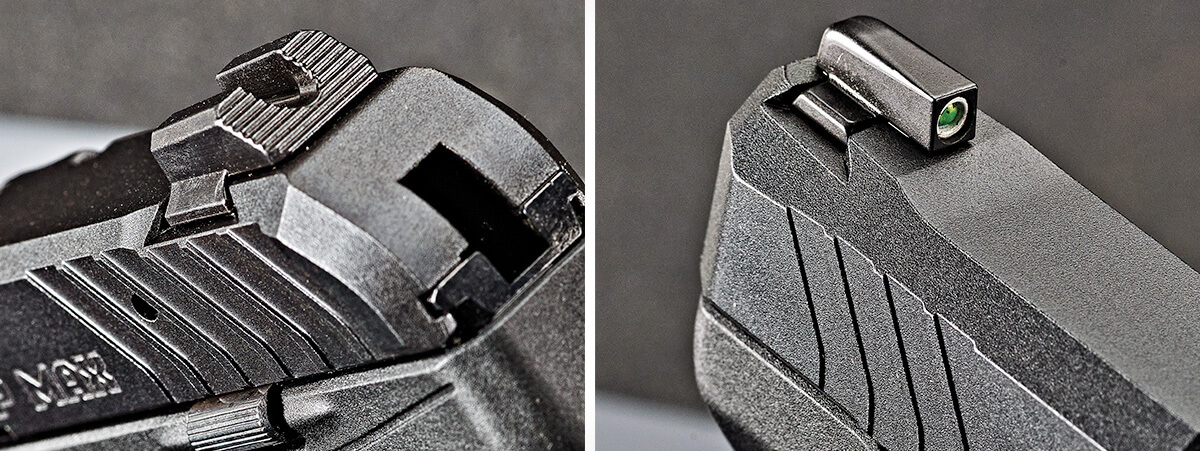
The pistol’s rear sight is all black with horizontal striations on the face and a U-shaped notch. The front sight has a green tritium dot with a white-outline ring around it. It and the rear sight are dovetailed into the slide. If windage adjustment is desired, drift the rear sight in the direction you want to move the point of impact on the target.
The high-performance glass-filled nylon frame has an aluminum insert and a rounded trigger guard that has coarse horizontal texturing on the front. The grip portion has fine texturing on the sides, the frontstrap, and the backstrap.
The LCP MAX comes with a pocket holster, a trigger padlock, and a polymer magazine loader.
The all-black rear sight has a U-shaped notch, and the front sight has a green tritium dot surrounded by a white ring. (Michael Anschuetz photos)
Range Results
I fired the new LCP MAX with eight .380 ACP factory loads ranging in bullet weight from 60 to 100 grains. The pistol functioned perfectly with all loads. Overall average accuracy for three, five-shot groups with each load at 25 yards was 4.49 inches. Its best single five-shot group measured 2.50 inches, and it came with Federal 99-grain HST ammunition. That load’s average accuracy was 4.00 inches. Shooting offhand at 10 yards with the Federal 99-grain HST ammo placed a full magazine of 10 rounds into a gaping ragged hole with all shots nearly touching.
The LCP MAX weighs just 10.6 ounces, so some recoil is expected even with the low-recoiling .380 ACP round. Some loads were pretty snappy in terms of felt recoil, but none were uncomfortable. The trigger pull averaged 6 pounds, 14 ounces for a series of 10 measurements with an RCBS trigger pull scale.
The only complaint I have from my shooting session doesn’t really have anything to do with the gun’s quality or function, but the sights were a tad fuzzy. But that is due to my poor eyesight.
Obviously, it’s time for me to get some new eyeglasses!
The LCP MAX features Ruger’s Secure Action Trigger and a reversible magazine latch. (Michael Anschuetz photo)
Ruger LCP MAX Specifications
Manufacturer: Sturm, Ruger & Co., ruger.com
Type: Recoil-operated, hammer-fired autoloader
Caliber: .380 ACP
Magazine Capacity: 10 rounds
Barrel: 2.8 in.
Overall Length: 5.17 in.
Width: 0.94 in. (slide is 0.81 in.)
Height: 4.12 in.
Weight, Empty: 10.6 oz.
Grips: Integral to polymer frame
Finish: Black oxide
Sights: U-notch, drift-adjustable rear; tritium/white-outline front
Trigger: 6.85-lb. pull (as tested)
Safety: Safety lever trigger, internal striker block
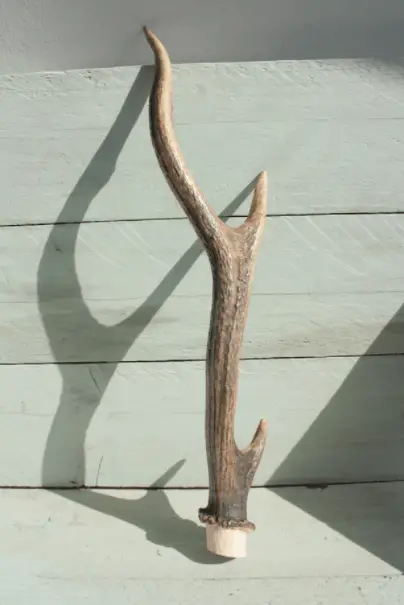
A spear shaft needs the right wood. The wood can depend if you use the shaft to decorate or for combat training. But, this can get tricky for reasons like durability, strength, and more.
So naturally, you must be wondering, what’s the best wood for spear shaft?
Hickory, ash, red oak, and acacia are great options for spear shafts. Hickory is a very reliable option whereas Ash provides a traditional feel. Red oak is a great option for decorative purposes while acacia is widely available.
To know more about these woods, keep reading our article. We have elaborated on their features and differences below just for you.
With the variety of options available, choosing wood for a spear shaft can be puzzling. However, we have four recommendations: Hickory, Ash, Red oak, and Acacia.
To help you understand these variations, we’ve put together a table.
Type of woodAdvantages Disadvantages HickoryAccessible Strong Durable Not as traditional as Ash Is heavier than other woods Rigid Ash Traditional Lightweight Flexible Prone to rot Not very durable Red oakDurable Great for decorative purposes Splinters easily Heavy to carry and use Difficult to cut and size Acacia Widely available Durable Expensive Temperature-sensitive
We understand that this isn’t sufficient information for you to make a final decision. This is why we’ll go over the differences in more detail below.
1. Hickory
This is the most common hardwood out there. If you’re making a spear for combat and throwing purposes, this is a great option. In terms of cost, hickory is really affordable.
This is because hickory is very strong and durable. So no matter how you throw or use it, your spear shaft will remain intact. There will be little to no splintering of the wood on heavy impact.
On top of that, hickory is widely available. You can easily get it from hardware stores or dealers. This wood is easy to maintain and only needs the occasional wipe down with a damp cloth.
However, this is very heavy wood, roughly weighing 2 pounds. So while yielding the shaft, you may think it’s too stiff and rigid. Also, you might want a spear shaft similar to those used in older civilizations. In that case, hickory isn’t the right choice.
2. Ash
Many spear shafts in history were made from ash. Similar to hickory, this is also a widely available hardwood for spear shafts. Ash is on par with hickory when it comes to cost.
The unique quality of this hardwood is that it’s light and flexible. This makes it easy to yield and maneuver in close range, up to 80 meters. Since it’s light, it’s also a great option for newbies learning to wield and use spears.
However, unlike hickory, ash isn’t very durable. If it bends too much, it’s tough to restore the original shape.
On top of that, ash is prone to rotting. This makes it tough to maintain. Chances are, your spear shaft won’t last longer than a year.
3. Red Oak
This is the most beautiful hardwood of the bunch. This brown wood with red undertones makes a very aesthetically pleasing spear shaft. It tends to be slightly more expensive than Ash and Hickory.
Red oak is also the toughest hardwood out there. So it’s on par with hickory in terms of durability.
However, since the wood is tough, it’s very difficult to cut and size it. If you’re new to spears, this will be very heavy to use.
Lastly, the wood is brittle and splinters easily. Consequently, it can’t take high-impact blows. So it’s best for decorative purposes only. It just needs regular cleaning with a rag.
4. Acacia
If you’re living somewhere where the aforementioned woods aren’t available, use acacia. This is a hardwood that’s available all across the world. It’s highly durable and resists splintering upon impact.
However, acacia is more expensive both in terms of price and maintenance costs.
The natural properties of the wood make it tarnish quickly. So it requires yearly maintenance in the form of polishing.
If you’re unsure about the type of polish to get, check the ones below. Any one of these will make your spear shaft shine.
Now that’s covered, let’s proceed.
Final Decision: What Is the Best Wood for A Spear Shaft?
Don’t have a preference for one over the other? We can assist you.
If you want to make a spear shaft for combat or throwing purposes, opt for hickory. It will give you the strength and longevity you need.
If you want a traditional or low-scale spear shaft, go for ash wood. However, for simply decorative purposes, stick to red oak.
Lastly, if you can’t find the other woods, go for acacia. Simply store the shaft in a cool place, below 86℉ to keep the wood from tarnishing.
We hope these let you decide the best wood for your spear shaft.
Frequently Asked Questions
Question: How thick should a spear shaft be?
Answer: Ideally, the diameter should be 1 to 1.5 inches. This is a good range of thickness that’ll let you handle the spear well. Anywhere in this range should allow you to handle the spear with one or two hands.
Question: How long should a throwing spear shaft be?
Answer: Depending on your height, it can range from 5.5 feet to 8 feet long. If the wood is light, then opt for 6 to 7 feet. This is the optimal length for single and double-handed throwing. If the wood is heavy, and you’re 6 feet or taller, go for 8 feet.
Question: How to take care of the spear?
Answer: After each use, wipe it down with a damp rag. Wait for it to dry completely. Opt for storing the spear in a cool and dry room. Once every 6 months, polish the spear to keep it looking brand new.
Final Words
With everything covered, now you should know the best wood for spear shaft. Make sure you pick the wood for the task it needs to do.
Good luck with the project and we hope the wood you pick serves you well.
If this article helped you, let us know in the comments below!
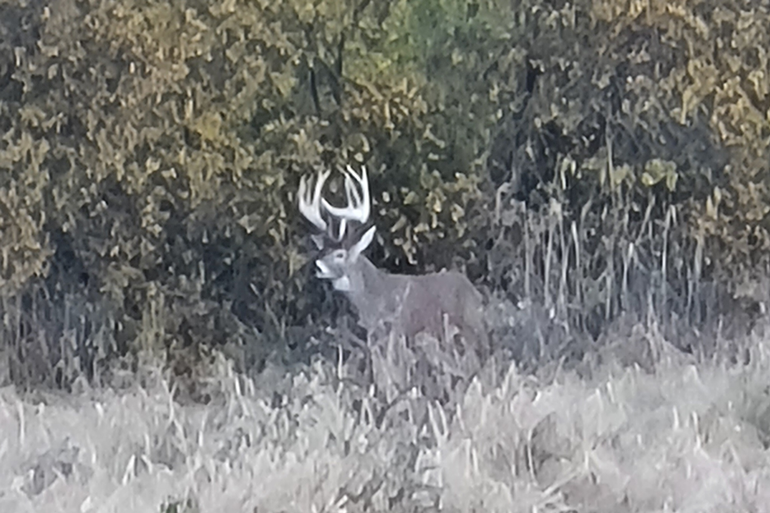
As a hunter, you want to score the deer with the highest number of points. Harvesting a 10-points buck is not only a matter of conquest but also of prestige. That brings us to the question, what are 10-points bucks?
Points on a buck are the distinct tines on its antlers. The more the tines, the more points a buck has. A 10-point buck has ten tines on its antlers.
For deer hunters keen on getting unique souvenirs from the animal, learning how to tell them apart by their points is a bonus. Not all bucks come with antlers that can be mounted as trophies. Continue reading as I explain what 10-point bucks are and how you can readily identify or even harvest one.
Are Buck Points Counted From the Size of His Antlers?
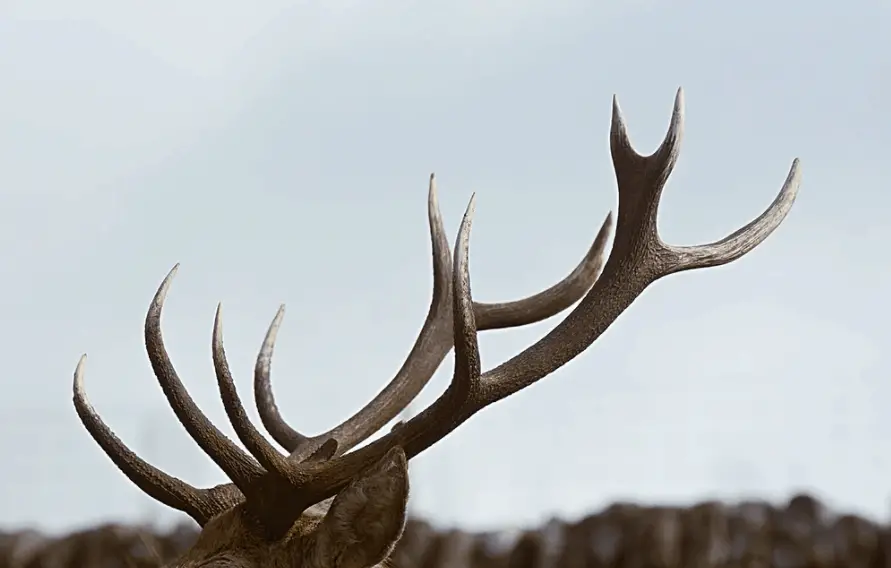
A deer’s antlers are made up of various parts. The main components are the beam, burr, brow tines, bay tines, tray tines, surroyal tines, plus the fork and crown. The beam or shaft is the central stem of the antler. The bony rim of the pedicle is known as the burr.
Brow tines refer to the place at which the first antler branches off. A bay tine is the second branching-off, while tray tines refer to the third branch-off. The fourth is the surroyal tine, and the fork is the point where an antler forks out into two tines. The tine at the top of a buck’s antlers is called a crown.
When antlers are developing during the late spring and summer, they have a consistent blood supply to help with growth. They’re usually covered with a soft hair-like material called velvet. In early fall, the blood supply declines, and the antlers harden.
A buck will rub its antlers against tree trunks, brush, and even rocks to get rid of the velvet. The points, therefore, refer to the number of tines on a buck’s antlers. That means that the rack will have ten points inclusive of all the tines and the central beam.
10-point Bucks Explained
10-point bucks are male deer that are mainly between three to five years of age. A 10-point describes the antlers’ size, not the weight or height of the buck. The size of these antlers is mainly determined by genetics, nutrition, and the deer’s age.
However, it’s important to note that some bucks, where there’s adequate food supply, manage to achieve the 10-points at an earlier age.
Typically, antlers start forming in April as the bucks get to enjoy more sunlight. During this growth period, they are covered by velvet, and their texture is spongy. The antlers become fully formed after only four months, and they harden completely during fall.
After the breeding season, that is, in between December and March, the antlers are now shed. A buck has a single antler on each side of the head, and each antler drops off by itself.
How to Count Bucks’ Points
A tine is any growth that protrudes from the main beam of the antler. Tines must be an inch long or more to qualify as a point. Any growths or nubs that measure less than one inch aren’t counted as points. So, for a 10-point buck, it will have ten tines, five on each side.
There isn’t an exact way to accurately calculate the age of a buck in the course of hunting besides examining its teeth. On the other hand, a buck between three and five years old will be a 10-point buck.
The antlers may start shrinking in size when the bucks reach approximately five and half years and above. As a hunter, you’ll need to consider other factors in distinguishing the bucks’ ages. Mostly, however, a healthy and mature 3 to 5-year-old buck will be a 10-point buck.
There are two methods of counting the points on a buck’s antlers. There is the Eastern Count and the Western Count.
Eastern Point Count
The Eastern Count takes into consideration all the total points on both antlers, including the eye guards. Therefore, in the Eastern Count, a 10-points buck will mean that the buck has 5 points on each side of its antlers, including the eye guards.
Western Point Count
The Western Count does not consider the eye guards and only counts the points from one side. So the same 10-points buck would be a 4-point buck when it is scored using the Western Count.
It is also essential to observe that most Whitetail deer are described according to the Eastern Count. The Western Count is usually applied for Mule deer and elk scoring.
How to Differentiate Bucks in their Various Age Brackets
Bucks in their different age brackets have other physical characteristics that make it possible to tell them apart. Hunters must learn how to tell the specific age of a buck by just looking at them. It comes in handy when making harvest decisions, which allows younger bucks a better chance of survival.
For instance, if you search for a 10-point buck, you need to know the exact physical characteristic to look out for.
The following are the age brackets of the bucks as well as their characteristics:
One-Year-Old Bucks
One-year-old bucks are very easy to identify. These male deer have similar builds with the does when you compare them to older bucks. They have thin necks, and their limbs appear more extended, which gives them a slim-looking body build.
There’s also a unique line that separates the shoulders and neck and some muscle definition. Their tarsal glands are slightly stained during the rut.
Two-Year-Old Bucks
Their waists are thin, and their legs still look like they are longer than their bodies. The tarsal glands are round, small, and stained moderately. The spread of antlers is similar in width to the ears.
For two-year-old bucks, there may be some slight muscle build-up on the neck during the rut.
Three-Year-Old Bucks
Three-year-old bucks have visible stomach lines, and backs are relatively taut and straight. Their necks are distinct from their shoulders, having thicker muscles. The chest starts to become deep compared to their hindquarters, but they still have thin waists.
Three-year-old bucks have legs that appear proportional to their bodies. The antlers now have an even spread outside or within the ears. The tarsal glands are dark and display plenty of staining during the rut.
These bucks have now achieved fifty to seventy-five percent of the maximum antler growth potential. Some of these deer qualify as 10-point bucks.
Four-Year-Old Bucks
Bucks in this age bracket will mostly qualify to be 10-point bucks. They have fully muscled necks that blend well into their deep chests and shoulders. Their backs and stomachs aren’t sagging, yet their high-end have rounded and filled-out appearances.
Four-year-old bucks have taut skin surrounding the jaws. The antlers are heavy, with many points, and they start to show off their potential. They have large, dark-stained tarsal glands during the rut that possibly extend to the legs.
Four-year-old male deer reach up to seventy-five to ninety percent of the maximum antler growth potential with proper nutrition. These bucks are different from their younger versions.
Five to Seven-Year-Old Bucks
Very few bucks live beyond five years except in some places with very favorable conditions. Bucks that are between five and seven years are mainly 12-point bucks. Five to seven-year-old bucks have very short legs for their bodies, and they have quite a number of the characteristics of four-year-olds.
The differentiating factor is that they may have pot bellies, sagging backs, and they have more rounded appearances making them look like small cows.
Eight-Year-Old and Above
A few of the free-ranging bucks will live beyond eight years, also known as the post-mature age. The bucks start to regress in their antler size and body. They also start losing the skin on the shoulders, necks, and faces. Additionally, they have pointy hip bones and shoulders while their antlers begin to show abnormalities related to aging, such as curvy or wavy tines or abnormal points.
While studying the specific physical characteristics of bucks in different age brackets, you’ll realize that there aren’t any specific age-related antler characteristics. Therefore, it’s a good idea not to rely mainly on the antler size when coming up with bucks’ ages.
Six Tips for Scoring 10-Point Bucks
It’ll soon be deer season, and there are ways to make your hunting more productive, with a pair of antlers to mount over your mantelpiece. The following tips will help you to hunt 10-point bucks more successfully. They include;
Scent Control
Bucks have susceptible protective systems in their noses that alert them when predators are close, including human beings. You must be invisible if you hope to hunt any of the 10-point bucks.
Use scent-free soap, which is highly recommended before going hunting. Even the towels you use to dry yourself up must be free from any scents. The same goes for your hunting clothes. Make it a habit of cleaning them with scent-free detergents, and remember to cover your face and head if possible.
Befriend the Wind
Paying attention to the wind is another superb strategy for controlling your scent. Failure to master the wind direction is a huge mistake that makes it difficult for hunters to hit their targets. The buck’s nose is the primary defense mechanism. If it smells a foreign scent, it will take off.
Observe Silence
Being quiet makes it hard for bucks to tell if the movement is from hunters or other animals. Bear in mind that bucks know precisely how human beings sound. Observe silence when getting your gun or bow up to the hunting stand.
It’s also a good idea to wrap metallic gear in duct tape to minimize noise while in the woods. In instances where you feel like coughing, try as much as possible to muffle it up.
Look for Coverage
Whether you are using lock-on stands or climbing stands, it’s advisable to select a tree that is close to another tree around it, behind it, or beside it. That offers some form of cover. Bucks have different lines of sight compared to humans.
If there are trees, leaves, or branches, use these for camouflaging your presence without blocking your shot. On a stand, hunting up in the trees is an added advantage since your scent will be blowing way higher above the ground.
Familiarize Yourself with the Hunting Ground
Be familiar with the hunting ground if you’re to find where the 10-point bucks are at any given time and where they are going. The buck trucks will always tell you if the bucks were already there.
Learn to Stalk the Does
Stalking the does is an excellent tip for any hunter hoping to bag a couple of 10-point bucks. That’s because when the rut is starting, bucks will generally go after the does.
Remember that the rut brings many changes, and most hunters know that this is the easiest time to hunt male deer. Bucks that mostly tend to move during the night will come out during the day.
There are several other tips that you can follow, but if you can faithfully follow the ones above, you’re bound to have an incident-free hunting experience. Most important is to have a keen eye, making it possible for you to point out a 10-point buck from a group of them.
Conclusion
When hunting, it’s advisable to give the younger bucks a chance to survive longer, which increases their chances of reproducing more.
If you are a hunter searching for a trophy, killing bucks eight years old and above isn’t advisable. The reason behind this is that their antlers will most likely have deformities. 10-point bucks are easy to pick out due to their distinctive features.
If you’re a turkey hunter, chances are you carry a crow call to locate roosted spring gobblers, which often shock gobble to it.
That same tool can be carried along during crow season, of course, to call crows in.
Crow calls tend to work to your position best on calm, still daybreak morning as these loud, raucous birds gather, interact and begin their morning’s business – which often involves feeding in pastures and farm fields.
Some crow callers also employ electronic calls (often legal; check your lawbook).
In my experience, windy gusts and rain showers dampen (pun intended) crow activity. Crow call and hunt these birds with this in mind.
Two vocalizations, among others, you make might include:
1. The so-called rallying call is a series of caw-caw-caw notes.
2. The distressful wailing crow call, a kind of painful, pleading effort, will bring them in as well.
In short, listen to crows on their daily patterns – they’ll teach you plenty about varying vocalizations.
Where to Look
Sure enough, the habits of crows can change on a daily basis, so regular scouting – as with other forms of hunting – is essential. Find their preferred local flyways.
And these birds migrate in late summer and early fall, gathering into a “murder of crows,” the collective noun for a group of crows.
Enough of the bookish stuff. Finding crows is as easy as talking to your local farmers.
Most will enthusiastically greet your request to hunt these black birds with affirmative responses.
Once crow hunting access is gained, arrive in the pre-dawn (as you would for waterfowl) and watch the early movements of crows.
Where are they roosting?
Where are they flying to feed and hang out as daytime arrives?
What food sources are they using?
This will set you up for your crow hunt, seasons providing.
Decoying Crows
You can use a dozen black plastic decoys or even bigger spreads to fool your crows (just as we’d increase the size of the spread in duck hunting).
Consider putting some in the trees surrounding your setup, as well as on the ground in front of you, in gun range.
Place one on a nearby fencepost or two, and try to envision how the decoying birds might see your hunting setup from the air.
As always, check your regs, but I’ve used a number of off-beat tricks to pull them in.
An old fox pelt can be propped in an open field, and this will definitely draw a look from nearby crows, often resulting in a band of the black birds coming in looking for a fight. A deer hide might pull them in, especially if you fashion it to look like a dead one.
Be inventive.
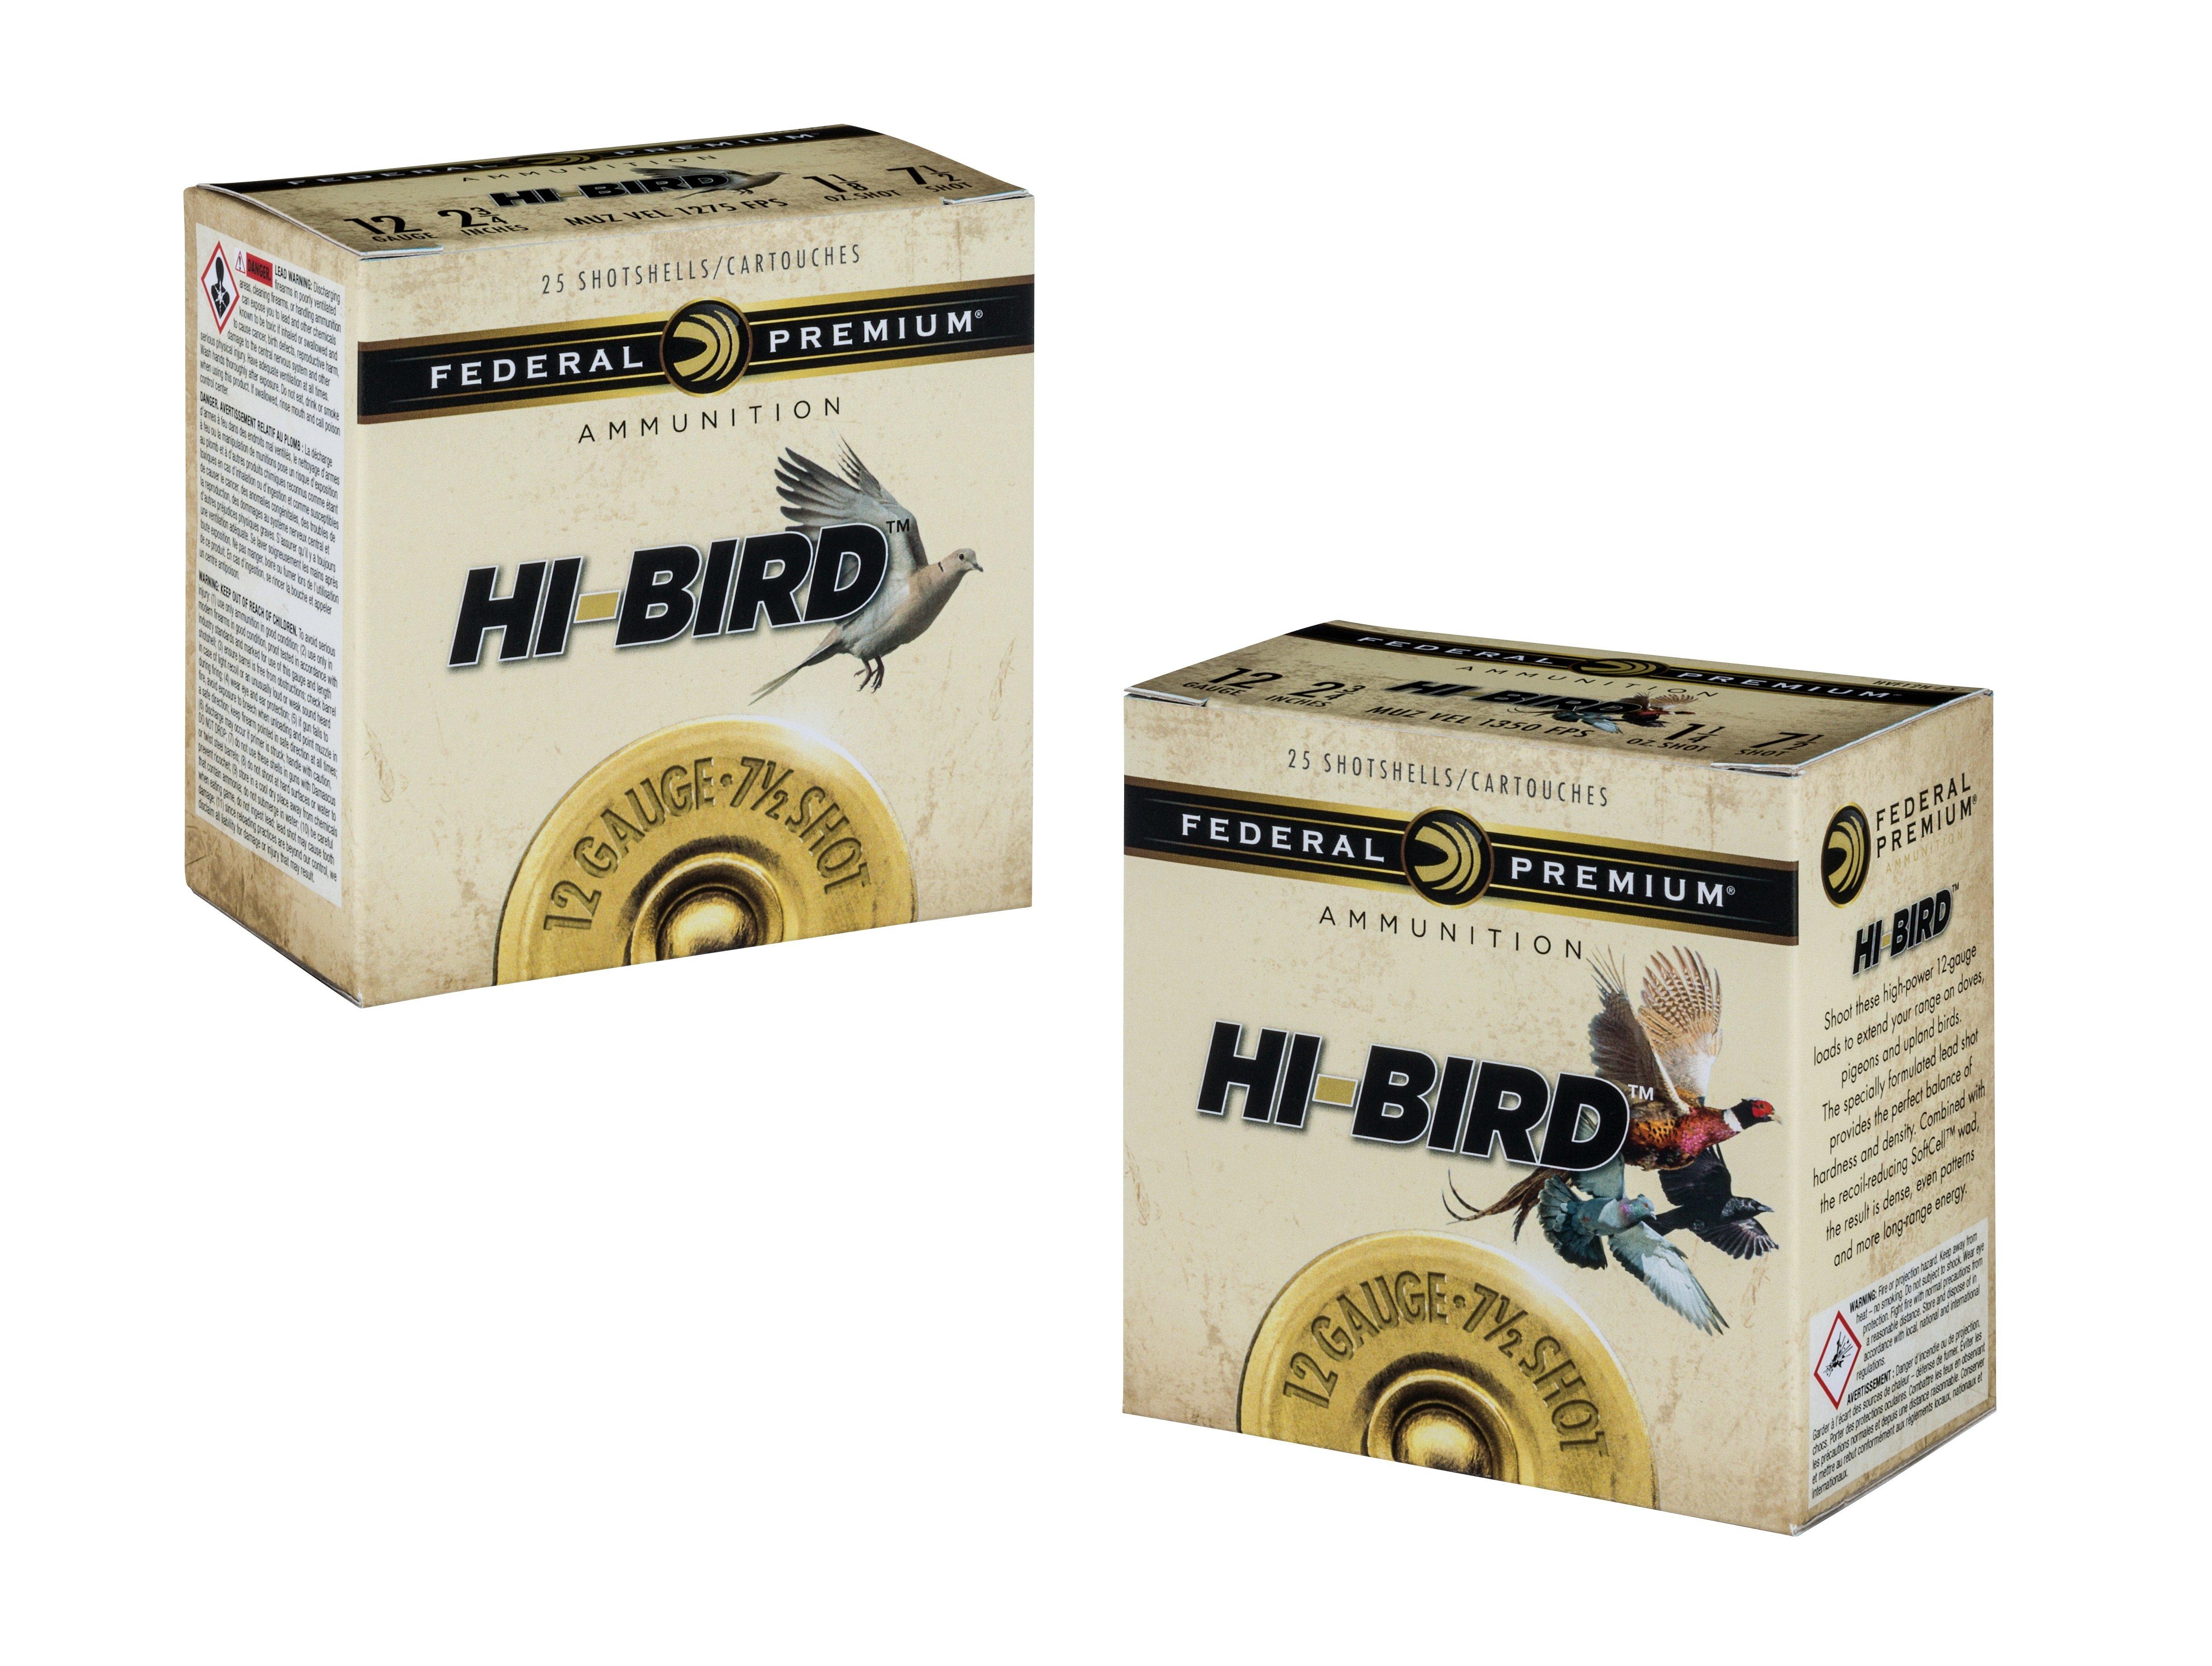
New Federal Premium Hi-Bird Load for Crows and More . . .
Go here.
Guns and Loads
Your old 870 pump will do fine for crow duty, as will your dedicated waterfowl shotgun. Either 12 or 20 gauge, it’s your decision.
A modified or improved-cylinder choke, shotgun depending, is likely best for your plans.
As shotgun loads go, No. 6 shot, to even No. 7 1/2s or 8s are a good bet.
You’re Hunting What?
Okay, well crow hunting might seem perfectly fine to us, but to some, it’s a bit odd.
And that’s fine.
However, keep in mind that perfectly legal daybreak gun blasts during the late summer months, and at times not perceived as “hunting season,” might draw some attention and even a phone call or two to the authorities.
I’ve heard of more than a couple guys who’ve had some unusual experiences as legal crow hunting goes.
At best, maybe a knock on a local door or two might help clear the air and let bystanders know what you’re doing – expecially on properties bordering farmland where you’re hunting.
Hide your face and head with BUFF® UV Multifunctional Realtree Headwear
Camouflage
Wearing camouflage from head to toe, including a facemask, is essential for crow hunting.
Many Realtree camouflage options will work to match the habitat you’re crow hunting.
“Crow hunting is a bit like duck hunting, as decoys and calling can often pull birds in for a shot from a camouflaged or natural blind.
Crow hunting is also completely different from anything else you may have done.”
Some state opportunities are available in summer, location providing; some in late winter and early spring, so match your surroundings.
As always, check your hunting regulations as well.
Go here for Realtree small game hunting and guns and shooting tips.
Follow us on Facebook.
Have you ever hunted crows? Any tips to add?
Please comment below.
Editor’s note: This Realtree.com post was first published August 15, 2017.
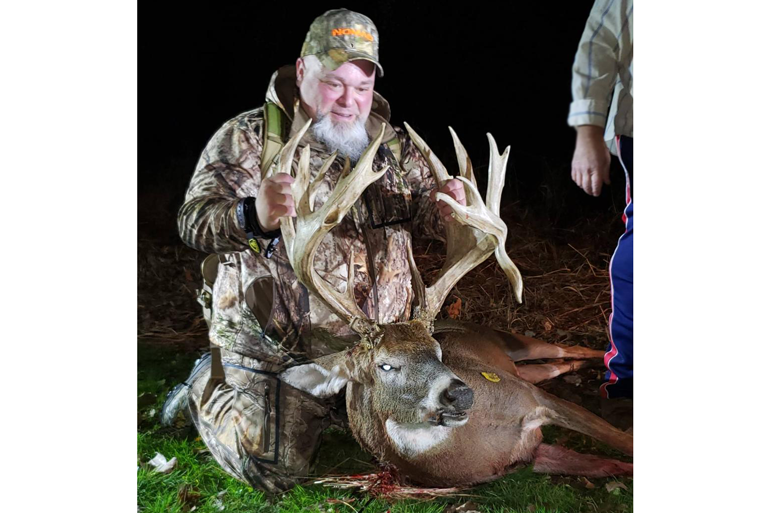
If there’s one enduring lesson from 2020, it’s that family matters. And for upstate New York bowhunter Phillip Pless, that’s never been more apparent than when it comes to the autumn pursuit of whitetails.
A disabled veteran from Newfane, N.Y. who served in the United States Navy, Pless saw all levels of family become an important cog in his recent hunt for a huge buck on a small farm barely 10 miles from Lake Ontario. From his wife to his extended family to even a late grandfather he never met; all played a key role in Pless’ recent bowhunt for a buck apparently destined for the upper reaches of the record book.
When the smoke had cleared from his recent outing, the 43-year old bowhunter — who has chased deer since he was 16 and has hunted whitetails with a bow since 2010 — had a massive 5 ½-year-old non-typical that could push up toward state-record status in the Pope and Young Club record book for the Empire State.
While he’ll have to wait until the mandatory 60-day drying period is over to find out what the buck’s official score is early next year, the early green numbers on Pless’ Nov. 8 bowkill put it into benchmark territory at 222 6/8 inches gross and 213 7/8 inches net.
If the numbers on the Pless buck hold, it stands to wrestle the top spot away in the archery record book from a 2011 buck taken in Suffolk County by Michael Giarraputo. That whitetail scored 209 6/8 inches net and has been the Pope and Young Club state record non-typical buck ever since.
Until Pless’ recent bowhunt, that is. Not bad for a bowhunter who wasn’t even sure if he would be able to get out into the woods on the fateful Sunday afternoon.
“I was at home watching the kids while my wife ran some errands, and I really had no plans to hunt that day,” said Pless. “Plus, the local fire company was having a raffle gun drawing on Facebook and I kind of wanted to watch that along with the Bills game.”
But when his wife Elizabeth arrived home around mid-afternoon — and with the Bills doing well on the gridiron in their eventual 44-34 win over the Seattle Seahawks — a beautiful fall afternoon in November proved to be too strong a temptation for the enthusiastic bowhunter.
“Since the Bills were winning, I said to my wife, ‘You know what? I’m going to go hunting,’” chuckled Pless.
So he quickly put on his new birthday present, a pair of LaCrosse rubber boots from his wife, and got dressed in his favorite Realtree Edge camouflage. Then Pless made the short 10-minute drive to the small family farm, hiked to his ladder stand, and put on a cover scent he relies heavily upon.
“I’ve tried to access my stands like the pros do,” said Pless. “I watch all of the TV shows and try to watch the wind like the pros do. But I also put on a Conquest scent on the bottom of my boots.”
After doing so, he climbed up to see what the afternoon would bring. Hopefully it would deliver a chance at a bruiser buck that Pless had seen for four years on his Wildgame Innovation trail cameras. But despite hunting the farm regularly, having a couple of the buck’s sheds, and having a growing library of trail camera photos, in the field sightings were all but non-existent for the big non-typical.
With any luck, that would change. But after getting settled in around mid-afternoon, the first hour was uneventful as Pless sat in his stand overlooking the old fruit tree farm that is now a mix of uplands, soybean and corn fields, as well as scattered woods.
As Pless waited, hoping to see the buck that had disappeared from his cameras in recent weeks, the beautiful fall afternoon with mild temperatures and light winds drew his wife to the family farm to walk with the couple’s young children — 3-year-old Grace, 2-year-old Liam, and the couple’s soon-to-be-born son Easton.
“After I had been sitting in the stand for a little bit, my wife had texted and said that she had come to the farm with the kids,” said Pless. “She asked if she could walk back that way with the kids. I told her yes, but not to come too far. When they got to a certain spot, I’d wave at them.”
But as Pless dropped his cell phone back into a pocket, he looked up and had to catch his breath — the giant buck he had watched for four years now was in the scrub field in front of him with a doe.
“I looked at him through my Vortex binoculars — I use the 10×42 Diamondback HD set — to make sure it was him, then I took couple of pics and sent them to my wife and told her not to come back here because he was here.”
While the full details of Pless’ hunt will be saved for a future issue of North American Whitetail magazine, suffice it to say that the bowhunter began a cat-and-mouse game with the giant buck that lasted into the final minutes of sunlight. At first, the buck disappeared into the woods while the original doe remained in the field. A short while later, the buck reappeared with a couple of other does and chased one around briefly as the group slowly advanced in the bowhunter’s direction.
When it seemed like the bruiser would come no closer, Pless decided to trust his long hours of practice work on the shooting range this year as he sought to improve his skills at longer distances. Drawing his Hoyt Maxus 31 back, he steadied the sight pin on his Trophy Ridge sight, touched the release, and let the Easton arrow and Rage broadhead sail downrange towards the buck 40+ yards away.
“As I drew back, I prayed to God that I wouldn’t miss and then I let the arrow go,” said Pless. “He turned a bit on the shot, but the arrow hit him and went through the shoulder, shattering it, and getting lung. He went about 80 yards, stopped about four times — each time I could see blood coming out — and then I saw him drop.”
Composing himself — Pless admitted he started shaking like a leaf after he cut the shot loose — the archer waited until dark. As he climbed down, the bowhunter ruefully discovered that in his haste to get out of the house and into his stand, he had left his flashlight at home. After using his cell phone light to briefly examine the area, Pless retreated to the farm house for a light and some tracking reinforcements.
“When we got back down in there, he wasn’t too far from where I had last seen him,” said Pless. “My arrow had gone through the right shoulder and gotten lung.”
With the deer now successfully recovered, Pless and his family members couldn’t get over how huge the buck was, both in terms of its antler dimensions and body size.
“He weighed about 250 or 260 before we gutted him,” said Pless. “And he was bigger (antler wise) than he appeared to be in the trail cam photos I had. He looked big in the pictures, but in person, he was just huge.”
Pless admitted that he was a little befuddled as he went about tagging the animal, getting it field dressed, and loaded up for the ride out.
“I couldn’t really concentrate as I tried to soak it all in,” he laughed. “I even asked someone for a pen five times. As it turns out, I had the pen in my hand all along.”
When you’ve just shot a buck that could be a new archery state record — in the year of the COVID-19 pandemic, no less — that’s understandable.
Now Pless will sit back and enjoy fresh venison on the family dinner table, look forward to the completion of a pedestal mount of the buck that is being done, and eagerly await the final scoring process in January 2021.
Phillip Pless (left) and his uncle Glenn Pless (right) show off a huge New York state typical buck, a record book certificate, and a photo of the late Clarence Pless, all from the year 1942. (Photo courtesy of Philip Pless)
Already, others in his small western New York region are pretty excited to hear the story and see the photos of this great buck.
“Yeah, my brother told me that this thing would go viral,” said Pless. “And I guess it has, because I’ve even had people approach me when I’ve been out and about. One was the other day in the parking lot of a gas station. The guy looked at me and said ‘Hey, is that you?’ And I said, ‘What do you mean?’ And then he said, ‘Are you the guy who shot that big deer?’ as he pulled his phone out and showed me a photo of me and my deer. And I said ‘Yeah, that’s me, I’m the guy!’”
In the meantime, as Pless enjoys his brush with local fame, he’s also filled with gratitude as the season of Thanksgiving approaches. First, for his wife and her daily work from home, along with her also trying to help her husband get into the woods to pursue his outdoors passion.
Next Pless is grateful for a host of friends and family members who have taken an interest in his hobby along with helping to drag the buck out, including Kevin Austin, Scott Pipelis, Jason Pless, and Connor Pless.
And finally, he’s thankful for the memory of one of his primary deer-hunting inspirations, the late grandfather that he never met, Clarence Pless. Years ago, the late hunter was passionate about his own pursuit of New York’s big whitetails, even taking a record-book giant with a shotgun.
“My grandpa Pless used to hunt, but I never got to meet him since he passed away before I was born,” said Phillip. “My grandpa was a good deer hunter, and last week, my uncle Glenn gave me some of my grandfather’s stuff because he thought I might like to have it. It included a picture of my grandfather at deer camp with several others.”
In that deer camp photo taken near Greenwood, N.Y., the black and white image shows several proud hunters along with several good bucks hanging from the camp’s sagging meat pole. And the biggest belonged to Clarence, who was also 43 at the time — a huge typical whitetail placing high up in the New York State Big Buck Club.
He’s heard the stories of his grandfather’s love of deer hunting from his dad Bruce, his uncle Glenn, and others — so much so that he felt his grandpa’s presence during his recent hunt for a record book giant.
“You know, I don’t honestly know how to feel about all of this, I guess it really hasn’t all sunk in yet,” said Pless. “But it’s been really exciting, and I’ve been telling others that I think my grandfather was either sitting beside me or was up above watching over me when I shot this deer. He shot his big buck back in 1942 at the age of 43 and I shot mine at 43 — my birthday was just the other day.”
Proving that even in a time of unprecedented health crisis and uncertainty, many of the things that have made our country great still remain, things like hope, family, love, and a desire to get outside to see and experience the great outdoors.
Pless certainly understands, especially this year, a time when the coronavirus has ravaged his home state.
“I know it’s been bad here,” said Pless. “But I don’t know anybody who has gotten it and suffered from it — at least no one in my family, thank the Lord.”
Whatever else people remember the year 2020 for, Pless will always remember it for something wonderful and grand every time he looks in the antlered direction of a certain big buck he dreamed of tagging for several years. In the end, it was a deer that lived up to the hype, in the passionate bowhunter’s mind at least.
“It is the buck of a lifetime,” agreed Pless.
In a year that will never be forgotten. May all of us as hunters be so blessed in the fall of 2020 as we head to the woods with the hope for a big buck, good health, and the love of family and friends tucked away in our back pocket.
Diana Stormrider comes from the queen of air rifles, Diana, a German-based manufacturer of compressed air and small-caliber weapons.
Since 1892, Diana has been a muse for hunters regardless of age, country, or shooting level.
Diana Stormrider is the first of a production line where Diana tried to make something in action like deviating from their performance line.
Though Diana Stormrider is on its experimental stage, the manufacturers have already come up with an updated version.
Performance in terms of accuracy is one thing that Diana did right with Stormrider.
You cannot ask for a better product at this price range.
A Stormrider which is a PCP gun costs you around $200, and this could not get any better.
Stormrider got its name for all right reasons and from performance to look, and everything in between you can easily rely on this multi-shot air rifle.
It is lightweight both in physical and financial terms.
The sleek design, high accuracy, pre-charged pneumatic feature set a new benchmark for low-cost air rifles.
I advise you not to go with the price tag.
You will soon understand what a gem a Stormrider is when it comes to serious shooting.
There exists a cheekpiece on the left side, and it is considerably raised for better positioning of this pellet gun.
This feature, though made for right-handed shooters, could be easily adjusted and helps the left-handed shooters as well, making it ambidextrous.
The grip and forearm are contoured with the checkered patterns, which are pretty much simple lines scribed by machine on the wood but good at the price point,
And you can easily find the perfect hold anywhere along the length of the checkered contour.
This will give you a confident hold of the gun.
The bolt action of Stormrider is pretty easy and light.
There is an integrated pressure gauge in the air gun for you to tack the air pressure inside the tank easily.
The butt comes with a rubber pad which is thin enough to go overlooked but contributes to a better grip.
For durability, I noticed bluing on the metal, and the breech was coated with powder considerably.
Though the wood looks somewhat dull compared to any high-end wood stock air gun, it has no actual defects.
Sight
Diana Stormrider comes with a regular open sight, which we can see on the top of the barrel band.
However, it lacks all the fiber-optic features.
The rear sight can be adjusted according to your need.
You can use a flat blade screwdriver for adjusting the rear sight which offers adjustment for windage and elevation.
An 11 mm dovetail ring is a feature of the Diana Stormrider and both the barrel and breech are grooved with it.
You can easily mount any scope of your choice.
The rear sight is removable and in reality, you actually have to remove it for mounting any scope longer than 10”.
This is because the breach is too small to accommodate both the rear sight and a long scope.
To use the barrel band as a front scope ring, this adjustment is necessary.
However, you can think of it as too much hassle, so we have a remedy for that too.
You have a choice of using the UTG BugBuster scope from Leaper that has a medium height air gun ring that you can attach to your Stormrider.
It fits perfectly in Diana Stormrider without removing the rear scope or irritating the magazine at all.
More importantly, the rear sight in this particular arrangement does not tamper with the sight picture through the scope.
You can go for any high-end scope as well which you can adjust easily by removing the rear sight
But most of such scopes which offer better performance are heavyweight.
The BugBuster is neither too big nor too heavy which is a big advantage considering the handling could be overbalanced due to weight.
The Stormrider was made to be compact and lightweight and any heavy scope just fails its purpose in the first place.
Velocity, accuracy and power
In case you are using large scopes, your chosen location to mount the scope ring should be the front of the breech, and the dovetail ring that we see on the barrel band.
In such cases, you must be worried about removing the iron sights but let me tell you it is no rocket science.
First, you get a small, around 2 mm Allen wrench with which you can open the front sight by just undoing a set screw.
In the case of rear sight removal, you need a flat blade as I mentioned above.
Velocity, speed, and accuracy are the trio that could make all the other points irrelevant when it comes to air guns.
You can adjust everything, compromise a little and forget about some uncomfortable positioning
But where modification can do nothing is in its velocity and accuracy specification.
This is why we will produce some test results made by using Diana Stormrider so you can get a clear picture of what it is capable of doing.
You may have other requirements or different expectations from your air gun so it is better you have the actual picture in mind.
Diana Stormrider Gen 2 follows the basic pattern of all PCP guns that shows a decrease in muzzle velocity with an increase in grain weight
And for the same condition increase in muzzle power.
Here, the test includes seven different pellets from five different manufacturers which are Gamo Raptor, H&N, Crossman, JSB, and RWS.
The velocity ranges from 1068 to 883 fps whereas the energy shows a range of 12-18 ft/lbs.
Before I get to the conclusion, I am going to present the actual test results
So you know on what basis I am deciding the best pellets for Diana Stormrider.
As I mentioned at the beginning, the first-generation Diana Stormrider comes with a single-stage trigger which is also non-adjustable.
The main problem with one stage triggers is unpredictability.
You keep pulling it and most of the time you have no idea when it would go off.
With Stormrider, you don’t have to worry about that.
It’s pretty predictable, and you will know the breaking point which will improve the performance and chance of hitting the target.
The trigger pull is also less so if safety is not on it could result in an accidental discharge.
The accuracy will also be less than that of any two-stage trigger.
In the first generation, the trigger pull weight is 3lbs 1oz with metal blades.
While in generation two, they provided a two-stage trigger that is adjustable.
They have better accuracy and safety as the trigger pull is higher.
You can adjust the position between the two stages as well.
The accuracy improves because after the first pull you can very conveniently make little changes in target and then pull the trigger for the final fire off.
Cocking and loading
The cocking and loading process in Diana Stormrider Gen 2 is also simple though somewhat strenuous.
The cock on opening action makes it harder to pull the bolt handle at the back than push it forward.
Pushing the bolt forward is actually easy and the action is light and simple.
While pulling the bolt back you may find it small and hard to grip, which also adds to the difficulty.
The magazine is loaded in a usual manner where you first rotate the top cover and put the first pellets in the rear of the magazine skirt first.
Then you put the rest of the pellets in nose-first.
Loudness
Diana Stormrider Gen 2 is not fully shrouded so it is not quiet like a Marauder, but it is also not a very loud gun.
There is a short suppressor at the front of the barrel which makes it quieter than other completely un-silenced air guns.
What I mean to say here is that you can shoot at it in your backyard, but it is definitely going to cause some eyes to roll.
While there is a shooting spree with a bunch of air guns, you can easily call it quiet compared to a lot of other louder ones.
The generation one Diana Stormrider sound rate is 3/5 whereas the second generation has a rate of 2/5.
Shooting Ability
Without wasting too many words I am giving the verdict.
Diana Stormrider is undoubtedly pleasant to shoot! It could be because of the lightweight and sleek design even a scope is mounted.
There is ample under the scope so you have easy access to the magazine.
The use of a single-shot tray is also easy and hassle-free.
However, the bolt handle and knob are smaller in size and can be troublesome for people with average hand size.
It is good for plinking, target shooting, small gaming,
Although shooters across the world are overwhelmed with its performance in target shooting.
1. “Exploring the Dietary Habits of Fawns: What Do They Eat?”
Fawns, which are young deer, have specific dietary habits that play a crucial role in their growth and development. These adorable creatures primarily rely on their mother’s milk during the early stages of their lives. The milk provides them with essential nutrients and antibodies necessary for their survival. This initial diet ensures that fawns receive a balanced intake of proteins, fats, and carbohydrates to support their rapid growth.
As fawns grow older, they gradually transition from a milk-based diet to consuming solid foods. Their diet expands to include a variety of vegetation such as grasses, leaves, buds, and shoots. Fawns are known to be selective feeders and may prefer certain plant species over others based on availability and palatability. Additionally, they may also consume fruits when available.
Dietary Adaptations
Fawns have evolved certain dietary adaptations that allow them to thrive in various habitats. For instance, they possess specialized digestive systems that enable them to efficiently extract nutrients from plant material. Their multi-chambered stomachs aid in breaking down cellulose-rich food sources like grasses.
Furthermore, fawns exhibit browsing behavior by selectively feeding on tender shoots and leaves rather than consuming large quantities of coarse vegetation. This behavior not only helps them obtain the necessary nutrients but also reduces the energy required for digestion.
In summary, understanding the dietary habits of fawns is crucial for conservation efforts and managing their populations effectively. By studying their feeding preferences and adaptations, researchers can gain insights into the availability of resources in different habitats and make informed decisions regarding habitat preservation and management strategies.
2. “Unveiling the Culinary Preferences of Fawns: A Guide to Their Diet”
The Delicate Palate of Fawns
Fawns, the young offspring of deer, have a unique and delicate palate when it comes to their diet. Their culinary preferences are shaped by their natural instincts and the availability of food sources in their environment. While adult deer primarily consume plant-based diets, fawns have specific dietary needs that cater to their growing bodies.
One of the key components of a fawn’s diet is milk. Just like human babies, fawns rely on their mother’s milk for nourishment during their early stages of life. The milk provides them with essential nutrients and antibodies that help strengthen their immune system. As they grow older, fawns gradually transition from a milk-based diet to a more diverse range of foods.
A Varied Menu for Growing Fawns
As fawns mature, they start exploring various food options to meet their nutritional requirements. Their diet expands to include tender shoots, grasses, and leaves from different plants. They particularly enjoy consuming succulent vegetation such as clover and alfalfa, which provide them with important vitamins and minerals.
In addition to plant matter, fawns also incorporate small amounts of insects into their diet. These tiny creatures offer an additional source of protein that aids in muscle development and growth. Fawns may feed on beetles, ants, and other small insects found in their surroundings.
Overall, understanding the culinary preferences of fawns is crucial for ensuring their proper growth and development. By providing them with a balanced diet that includes milk, plant matter, and occasional insect protein, we can support these young deer in reaching adulthood healthily.
3. “Feeding Time for Fawns: Understanding What They Nibble On”
Fawns, the young offspring of deer, have specific dietary needs during their early stages of life. Understanding what they nibble on is crucial for their proper growth and development. Fawns primarily rely on their mother’s milk for the first few weeks of their lives, as it provides essential nutrients and antibodies to boost their immune system. However, as they grow older, fawns gradually transition to solid foods.
What do fawns eat?
1. Grass and Forage: As fawns start weaning off milk, they begin to explore their surroundings and graze on grasses and other types of forage. These young deer often prefer tender shoots and leaves found in meadows or open fields.
2. Browse: Fawns also consume browse, which refers to the twigs, buds, and leaves of woody plants such as shrubs and trees. They may nibble on low-hanging branches or fallen leaves from a variety of vegetation available in their habitat.
3. Acorns and Nuts: Depending on the season and geographical location, fawns may have access to acorns or nuts from trees like oaks or beeches. These provide an additional source of nutrition that helps them meet their energy requirements.
4. Agricultural Crops: In some cases, fawns may venture into agricultural areas where they can find crops like soybeans or corn. While these food sources are not natural for deer, they can become a part of their diet if easily accessible.
It is important to note that while these are common food sources for fawns, their exact diet can vary based on factors such as geographic location, seasonal availability, and the overall health of the ecosystem they inhabit. Providing a diverse range of natural food options within their habitat ensures that fawns receive a balanced diet for optimal growth and survival.
4. “The Nutritional Needs of Fawns: Discovering Their Food Choices”
Fawns, or young deer, have specific nutritional needs that are crucial for their growth and development. Understanding their food choices is essential in ensuring their health and survival in the wild.
Fawn’s Dietary Requirements
Fawns primarily rely on their mother’s milk for the first few weeks of their lives. This milk provides them with essential nutrients, antibodies, and hydration. As they grow older, fawns gradually transition to solid foods. They start nibbling on grasses, leaves, and tender shoots found in their natural habitat. These plant-based foods provide the necessary fiber and carbohydrates for their developing digestive systems.
However, it is important to note that fawns also require protein-rich foods for optimal growth. They obtain this protein from sources such as insects, small mammals, and bird eggs. These animal-based foods supply them with vital amino acids necessary for muscle development and overall health.
To support the dietary needs of fawns, it is crucial to ensure a diverse range of food sources within their habitat. Maintaining healthy ecosystems with a variety of plants and insects will provide fawns with an adequate supply of nutrition throughout their early stages of life.
Overall, understanding the nutritional needs and food choices of fawns plays a significant role in conservation efforts. By preserving their natural habitats and promoting biodiversity within these environments, we can ensure that these young deer have access to the necessary nutrients for a healthy start in life.
5. “From Grass to Leaves: Unraveling the Food Selection of Fawns”
Fawns, the young offspring of deer, undergo a fascinating transition in their food selection as they grow. This study aims to uncover the factors that influence fawn’s dietary preferences and shed light on their nutritional needs during different stages of development.
Factors influencing food selection
Several factors contribute to the food selection of fawns. One key factor is availability; fawns tend to consume what is most abundant in their environment. For instance, during the early stages of life, when grasses are easily accessible and highly nutritious, fawns primarily feed on grass. As they mature, however, their diet shifts towards leaves from shrubs and trees, which provide a wider range of nutrients necessary for growth.
Another important factor is taste preference. Fawns have been observed to exhibit selectivity based on taste, showing a preference for certain plant species over others. This indicates that individual fawns may have unique preferences when it comes to food choices.
Furthermore, maternal influence plays a role in shaping fawn’s food selection. The mother deer’s diet during pregnancy and lactation can affect the composition of her milk and subsequently impact the preferences of her offspring. If a doe consumes a variety of plants during these periods, it can expose her fawn to different tastes and increase its acceptance of diverse foods later in life.
Understanding the factors that drive the food selection of fawns provides valuable insights into their nutritional requirements at different developmental stages. It also highlights the complex interplay between environmental factors, individual preferences, and maternal influences in shaping an animal’s dietary choices throughout its life cycle. Further research in this area can contribute to wildlife management strategies aimed at ensuring optimal nutrition for growing populations of deer and other herbivorous species.
6. “Cracking the Menu Code: Decoding the Feeding Habits of Fawns”
Fawns, the adorable young offspring of deer, have unique feeding habits that researchers have been trying to understand for years. In recent studies, scientists have made significant progress in decoding the menu code of these curious creatures.
The Importance of Milk
One key aspect of fawn feeding habits is their reliance on milk as their primary source of nutrition. For the first few months of their lives, fawns depend entirely on their mother’s milk for sustenance. This high-fat and nutrient-rich diet is crucial for their growth and development. Researchers have found that fawns consume milk multiple times a day, typically nursing from their mothers in short intervals.
Transitioning to Solid Food
As fawns grow older, they gradually transition from a milk-only diet to consuming solid food. This process usually begins when they are around two to three months old. During this time, fawns start nibbling on vegetation such as grasses and leaves alongside their milk intake. As they become more adept at chewing and digesting plant matter, solid food gradually becomes a larger part of their diet.
Understanding the feeding habits of fawns is essential for wildlife conservation efforts and managing deer populations effectively. By deciphering how these young deer obtain nutrients and adapt to different food sources throughout their early life stages, researchers can develop strategies to ensure optimal nutrition and survival rates among fawn populations.
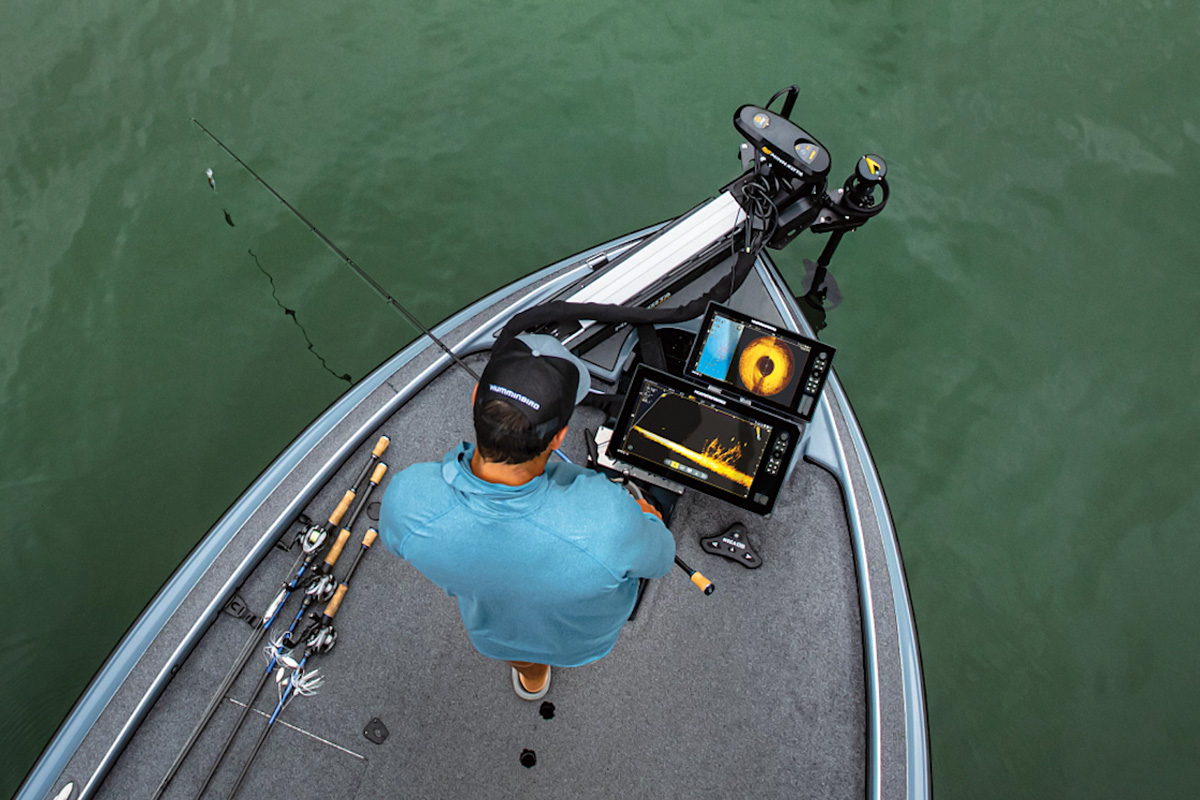
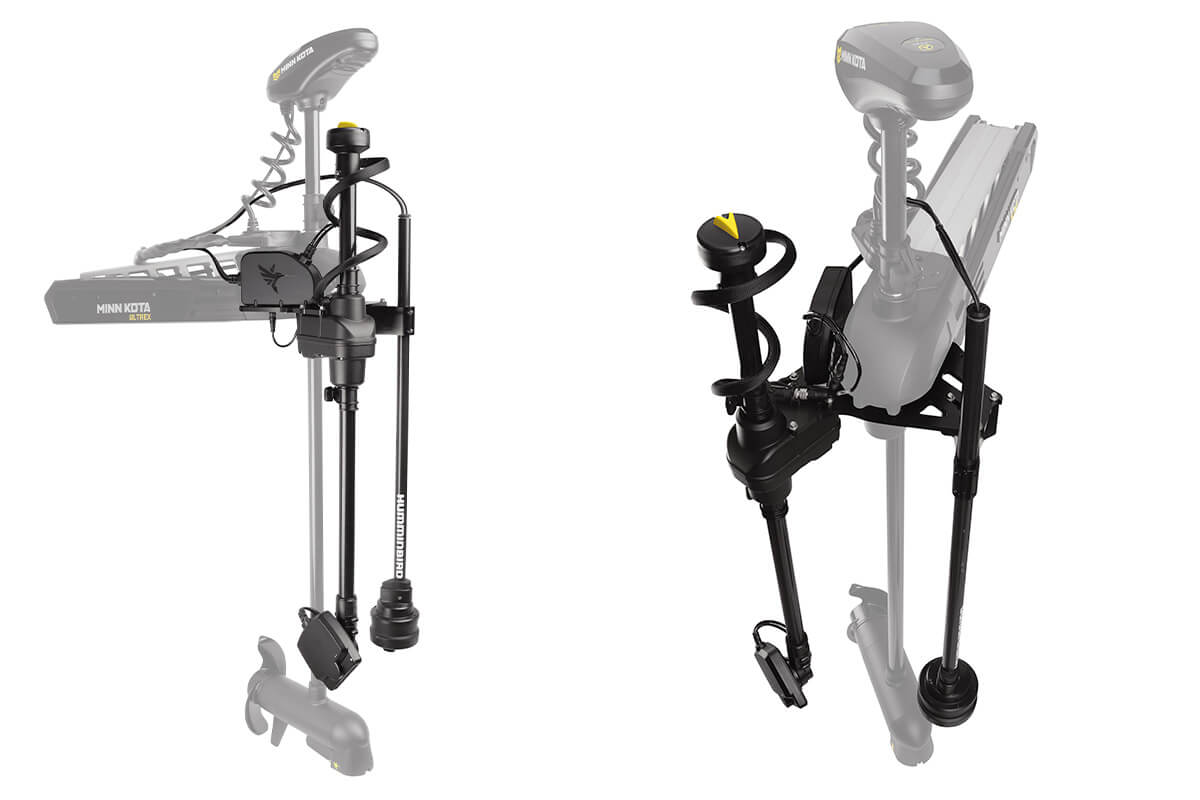
Humminbird’s MEGA Live Imaging TargetLock has created a buzz at ICAST 2022 in Orlando. (Photo courtesy of Humminbird)
Note: Check back for updates from ICAST 2022, scheduled July 20-22 in Orlando.
The annual ICAST Show in Orlando is a coming-out party for the best new fishing accessories each year, from gaffs and coolers to sunglasses and apparel.
Some are truly new, some may be a “new” update of a previous model. Whatever the case for the products introduced each year, anglers and industry folks love seeing them. You’ll see these cool new products on store shelves and websites now or in the coming months.
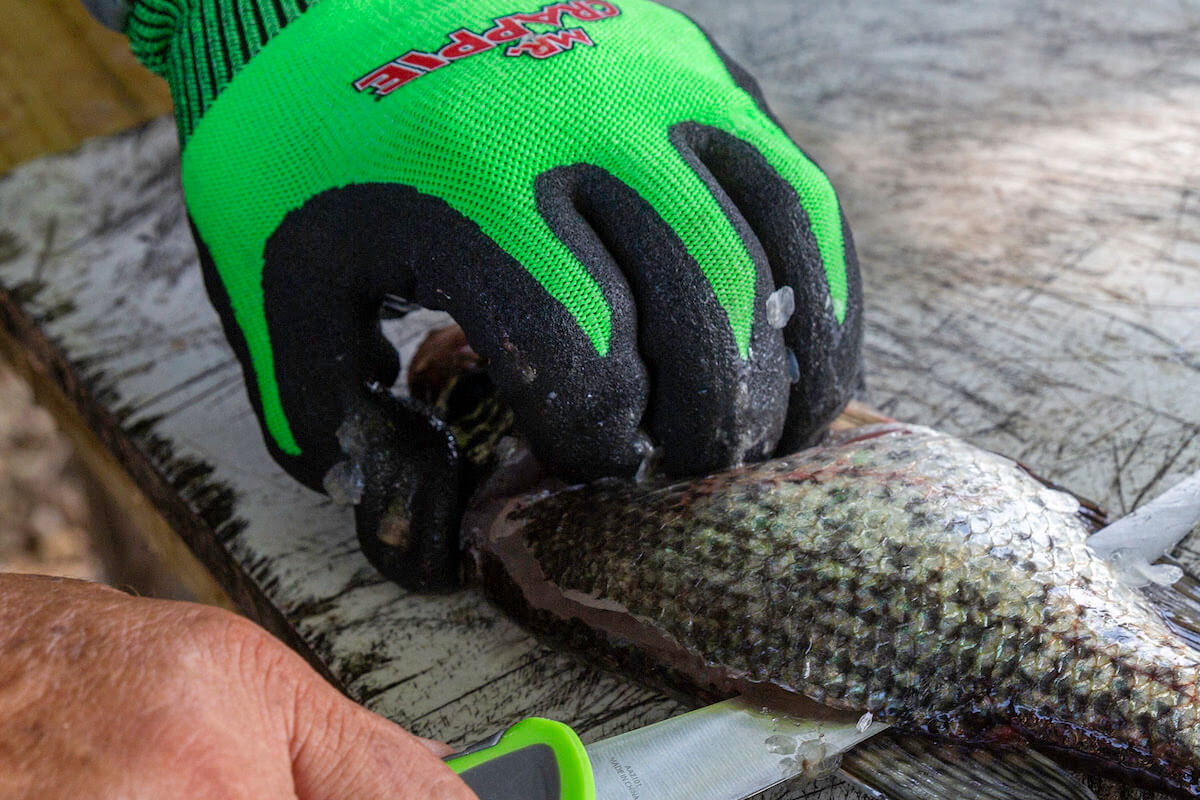
Cleaning fish is a chore, whether it’s a mess of catfish and crappie or offshore saltwater bigs such as cobia and snapper. Good gloves help the task. The new Mr. Crappie Slab Slanger Cut-Resistant gloves from Smith’s and Wally Marshall have been designed to handle any fish and processing work. The non-slip gloves are manufactured from food-grade high-performance polyethylene, which is four times stronger than leather and provides Cut Level 5 protection. The gloves are machine and hand-washable, shrink-resistant and breathable. Info: smithsproducts.com
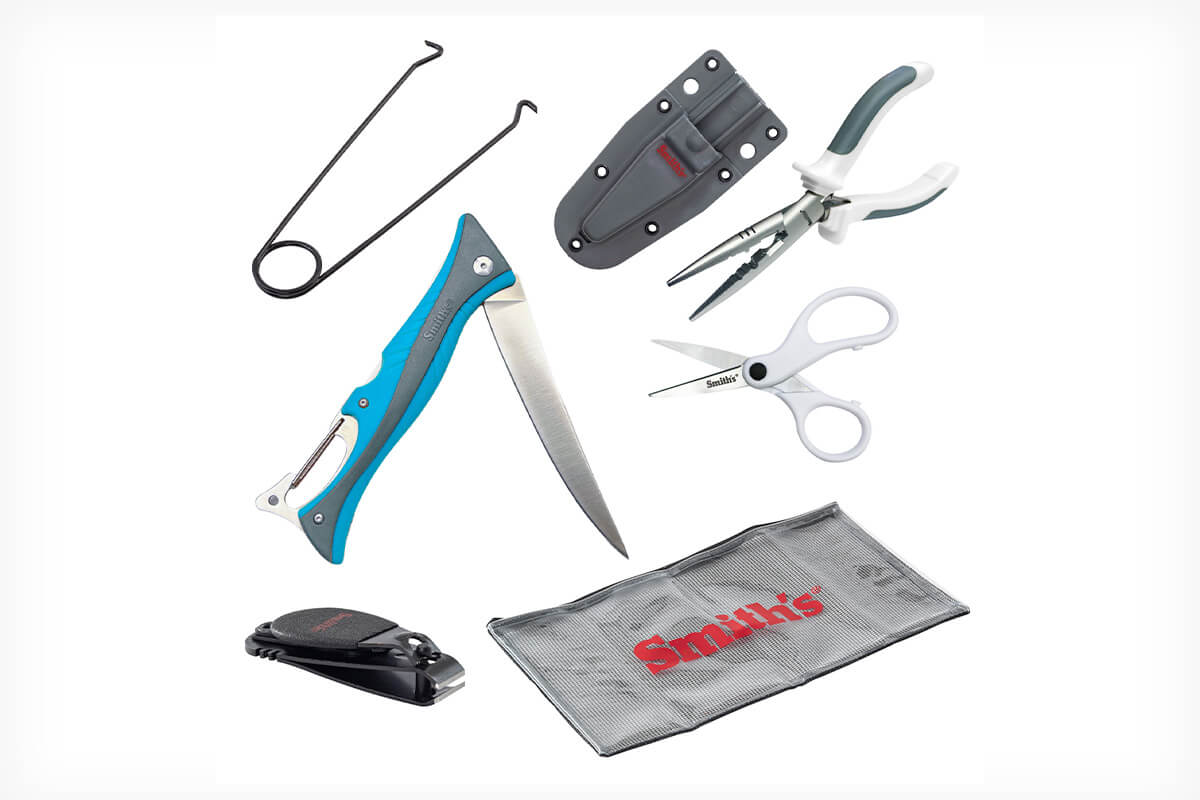
Smith’s Regal River Ice Fishing Tool Kit
Smith’s Regal River Ice Fishing Tool Kit
Ice fishing anglers need tough tools such as the seven essentials in the Smith’s Regal River Ice Fishing Tool Kit. When you’re going after pike and walleye on hardwater, you can’t afford to have mistakes. The new Smith’s tool kit includes a 9-inch jaw spreader, 6.5-inch stainless steel pliers and line scissor combo (with sheath and belt hook), line clipper, 4-inch folding flex fillet knife and a marine grade mesh tool bag. Info: smithsproducts.com
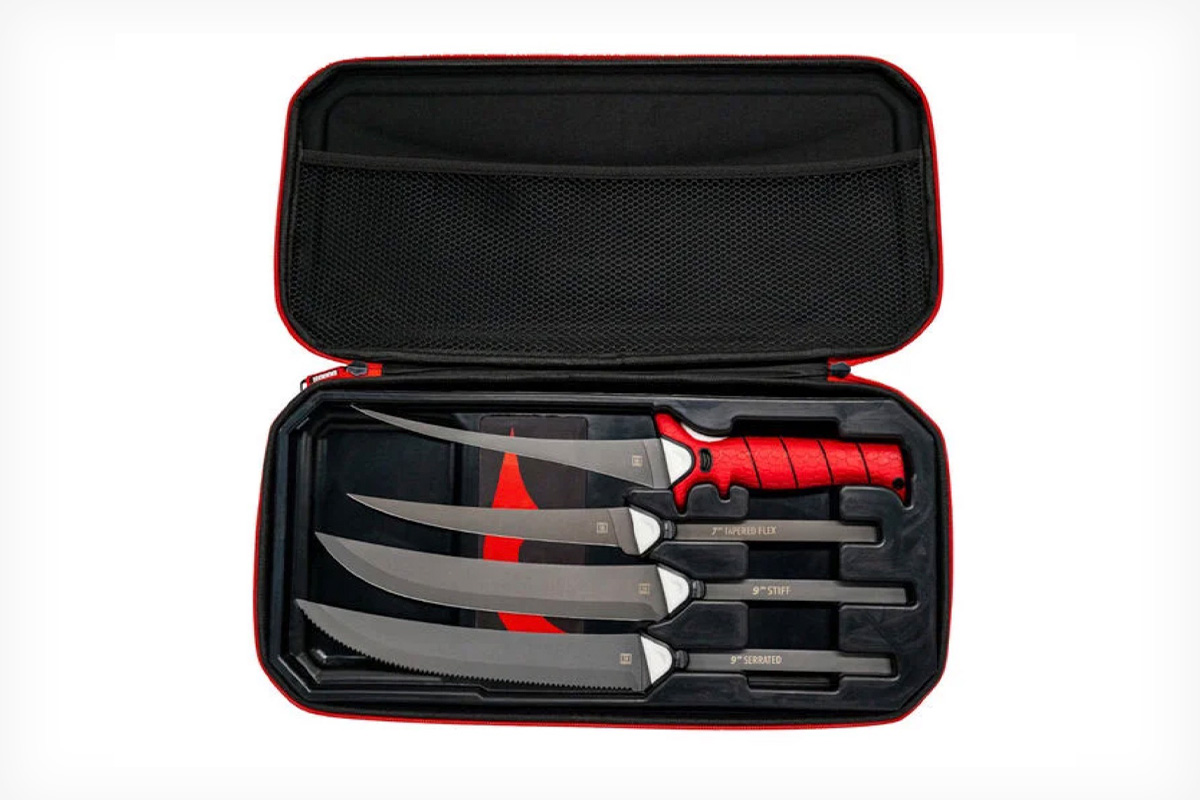
Bubba Multi-Flex Interchangeable Set
Bubba Multi-Flex Interchangeable Set
Bubba’s new Multi-Flex Interchangeable knife set features 9-inch serrated and stiff full-tang blades for whatever fish you need to process. The “squeeze and slide” mechanism allows for switching blades easily and also allows for better cleanup. The Flex-Change locking system keeps the blade safe and secure, and a non-slip grip handle offers a consistent feel. With versions for freshwater and saltwater, the set comes in a premium hard-sided carry case with a watertight seal, quick access handle and blade storage, and a flexible organizer for added storage. Info: bubba.com
Humminbird Mega Live Imaging TargetLock
Humminbird Mega Live Imaging TargetLock
No doubt, anglers have wondered if it would be possible to combine Live Imaging with TargetLock, giving them the ability fish more easily. capability? Humminbird has done that with the new Mega Live Imaging TargetLock. This new live sonar accessory provides anglers with the ability to control a Mega Live transducer independently of their Ultrex trolling motor’s steering. This gives anglers the power of Spot-Lock and boat control with their Ultrex motor, while introducing live sonar innovations exclusive to Mega Live TargetLock and Minn Kota Ultrex users. With the push of a button, the TargetLock feature locks the Mega Live onto structure and keeps it in clear view by automatically adjusting the Mega Live transducer as the boat moves position and changes direction. Whether the boat is moving, drifting, or Spot Lock is engaged, TargetLock does all the work to stay focused on structure and fish. Info: humminbird.com
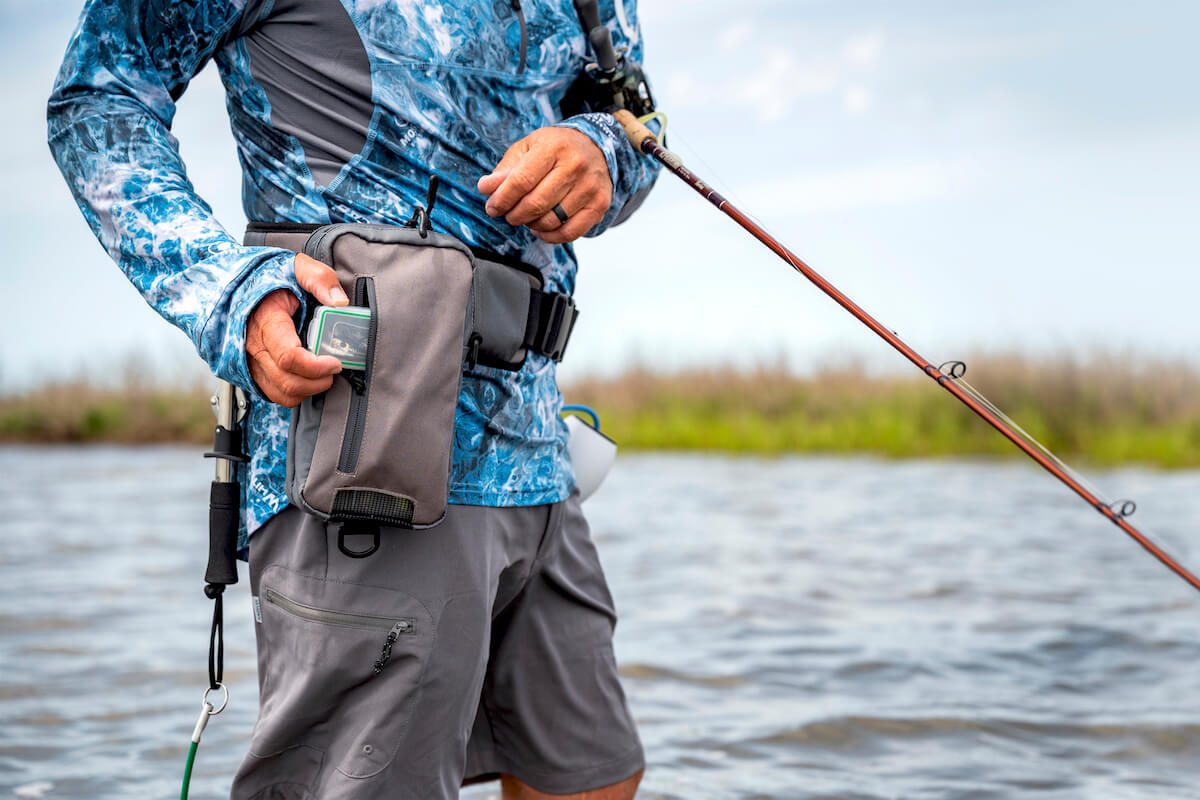
Frogg Toggs Coastal Wading Packs
Frogg Toggs Coastal Wading Packs
Frogg Toggs is introducing a series of coastal wading tackle packs that will work for inshore anglers as well as those wading freshwater streams for bass and panfish. The Coastal Wading Tackle Pack series is designed with high quality, functionality and portability in mind. Items in the series include the Tidal Sling with Waterproof Utility Box, Pursuit Wade Belt, Hightide Chest Pouch, Catchall Chest Pack, and Flats Sling Pack. Info: froggtoggs.com
Plano Edge Frog Box
Plano Edge Frog Box
Storing frogs always has been tricky for anglers. The baits get smooshed, rubber legs twisted, other additions such as blades maybe tangled. The new Plano Edge Frog Box eliminates that problem thanks to a cool design that vertically stores 50 baits by the line tie. Each bait has a hook; no more snags or tangles. The box also includes a WaterWick divider with a reusable moisture-wicking packet, a Dri-Loc O-ring seal and Rustrictor technology. An EZ Label system allows for quick identification of contents, and the DuraView crystal-clear polycarbonate lid shows what is inside. Info: planomolding.com
Frabill ReCharge Deluxe Aerator
Frabill ReCharge Deluxe Aerator
The Frabill ReCharge Deluxe Aerator is a mobile livewell aeration system with an induction motor that provides long use to keep bait lively. Outfitted with a rechargeable lithium battery, the ReCharge Deluxe Aerator can be conveniently recharged with the included 10V adaptor or through a USB cable. A water-resistant gasket designed with an anti-back flow check valve keeps water out and bait alive longer. The universal hang-on clip with stability posts allows anglers to bring it on fly-in trips, shore fishing, or on any boat. Now a bucket or nearly any waterproof container can become a viable minnow bucket. Info: frabill.com
Magma Crossover Series
Magma Crossover Series
Cook pizza, hibachi or whatever you’re craving on your next adventure with Magma’s new Crossover Series. This portable cooking system quickly transforms from stove into a grill, pizza oven and griddle via interchangeable tops. The Magma is made with high-end stainless steel for ultimate durability. The Magma versatile cooker is perfect for RVing, tailgating, car camping and overlanding. It also is available in marine versions with corrosion-free stainless steel. Info: magmaproducts.com
Bajio Roca Sunglasses
Bajio Roca Sunglasses
For the last few months I’ve been wearing the new Bajio Roca sunglasses in a variety of situations: on the lake fishing, at the golf course, around town. They’re lightweight, thanks to the bio-based nylon construction. Frames are comfortable but tight; I’ve experienced no nose-slipping even in sweaty conditions. One thing I love about them is the oversized frame that protects my eyes while preventing peripheral light and glare intrusion. Polarized lenses are crisp and clear; I’ve easily spotted bass and bluegill on beds in shady conditions or bright light shallow and deep. Smallmouth bass were easy to spot on beds on the Niagara River. The lenses also have Bajio’s blue light-blocking tech to minimize eye fatigue and strain. Bajio hit the scene with a splash in 2020 and continues to grow its mission-based company each year. The new Roca, which is named for the Roca Flat near Campeche, Mexico, is a great addition to the lineup. Info: bajiosunglasses.com
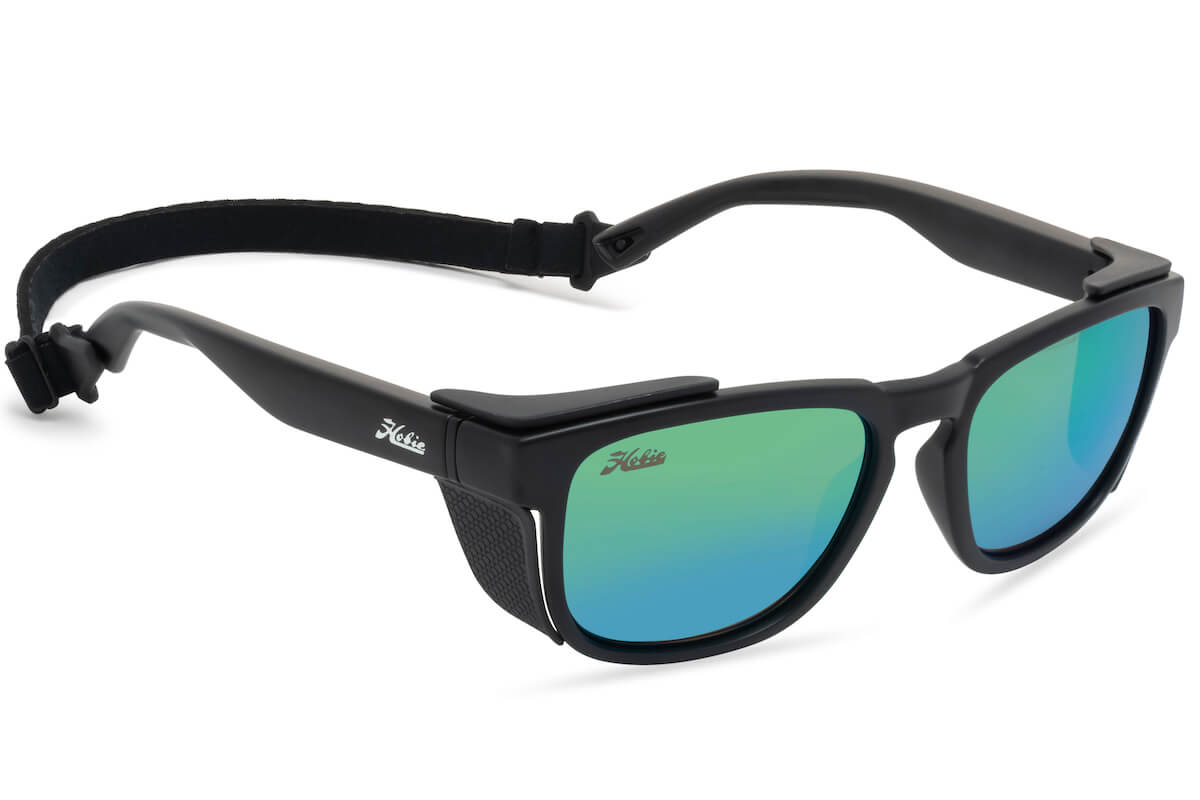
Hobie Monarch Float Sunglasses
Hobie Monarch Float Sunglasses
Hobie’s new Monarch Float sunglasses have two interesting features: they’re lightweight, which is a good thing for anyone wearing them, and they float. That’s also a good thing for anglers who sometimes, well, slip up and let their glasses fly off a deck, gunwale or their head. Hey, things happen. Quality lenses in four shades allow you to peer through water to find cover and fish; removable side shields and an adjustable neoprene retainer offer more comfort while blocking peripheral light and glare. Info: hobieeyewear.com
Ocean Waves Greenhorn Illuminator
Ocean Waves Greenhorn Illuminator Sunglasses
Ocean Waves Luminator lenses excel when fishing in low light or murky water. The glasses have two layers of Japanese Crown Glass, mirror-between-the-glass technology that prevents the mirror from getting scratched, polarization that blocks 100% of UV-A and UV-B radiation, and a resilient anti-reflective coating that absorbs glare and bounce-back of UV light. Luminator lenses give anglers additional advantages by brightening the entire visual field – perfect when fishing early or late in the day, under a cloudy sky or shady trees – while eliminating halos and unnatural light refraction. The Greenhorn frame combines a classic look with excellent eye coverage and a comfortable, secure fit. Available in either black or tortoise for men and women. Info: oceanwaves.com
Yeti Roadie 48, 60 Wheeled Coolers
Yeti Roadie Wheeled Coolers
Two new coolers from Yeti — the Roadie 48 Wheeled Cooler and Roadie 60 Wheeled Cooler — are maneuverable and durable. They’re built for your favorite trips: fishing, tailgating, hunting or wherever you need a solid cooler to keep things cold. Wheels and handles are built to last, and the coolers are designed to keep ice frozen and items cold for days. Info: yeti.com
Smith’s 60-Inch Insulated Cooler Bag
Smith’s 60-Inch Insulated Cooler Bag
Bait? Check. Fish after the day is over? Check. Sodas and brews for on the water, at the dock or around the campfire? Check. Smith’s new 60-inch Insulated Cooler Bag is designed for long-lasting hard use. I got to see this bag in action back in May at Kentucky Lake and it’s a champ. The bag has a non-corrosive zipper with pulls. It’s made from marine-grade tarpaulin inside and out, with a half-inch of dense, closed-cell insulation between. An adjustable, padded shoulder strap makes loading and carrying a breeze. Four heavy-duty grab handles – including two center padded handles and two large end handles – allow for a four-person carry when the bag is fully loaded. One uber-cool feature is the integrated drain port. Another is the sit-flat bottom that keeps the bag upright, even when loaded. It has a capacity of 205 quarts. Info: smithsproducts.com
Frogg Toggs FTX Elite Lite
Frogg Toggs FTX Elite Lite
Frogg Toggs is following its successful launch last year of its FTX Armor line with the new FTX Elite jacket and bibs, and the FTX Lite jacket and pants. The FTX Elite jacket and bibs feature the highest water hold-out in the Frogg Toggs line, along with an innovative wrist gasket and closure system, fully sealed and reinforced seams, two-way zipper with storm flap, vented hood and more. It’s available in sizes SM-3X. The FTX Lite jacket and pant combo is light, packable, portable and comfortable. It has similar features of the Elite line, but is more affordable. Info: froggtoggs.com
AFTCO Cocoboardies
AFTCO Cocoboardies
Recycling is vogue. Coconut fibers seem to be the rage this year and Aftco is on board with its new Cocoboardie boardshorts. They’re made with Cocotex fabric, a polyester that “is infused with activated charcoal from repurposed coconuts.” The shorts repel water, resist odor and dry quickly, thanks to the lightweight and moisture-wicking 4-way stretch material. They also have a reinforced pliers pocket for keeping tools or other items easily at hand. Info: aftco.com
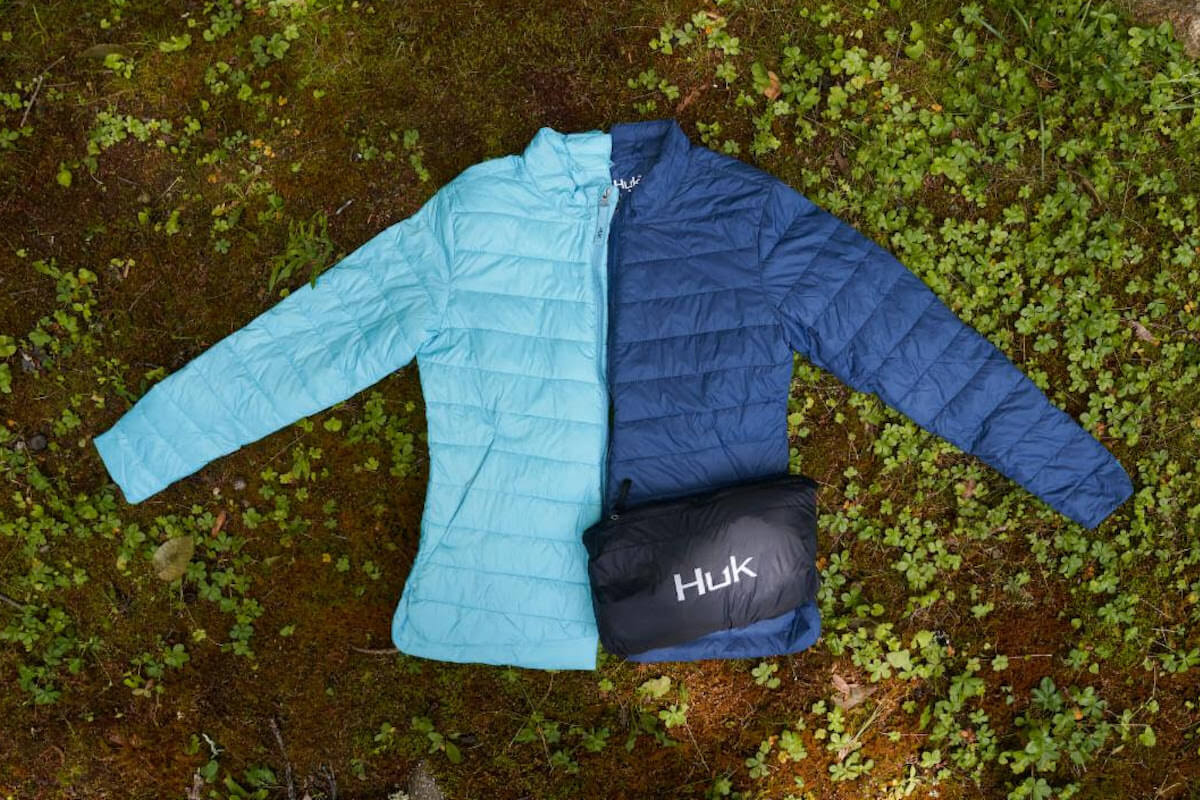
Huk Waypoint Jacket
Huk Waypoint Jacket
The new Huk Waypoint jacket is perfect for cool mornings aboard the boat or brisk evenings around the beach fire, when more than a hoodie is needed. The Waypoint Eco-Smart collection is made from recycled bottles; the Waypoint is at least 60 percent recycled consumer content. The Waypoint jacket adds warmth without weight thanks to its Primaloft ECO black 80-gram insulation. It is packable into its own pocket for storage and convenience. The Waypoint jacket’s shell is water-resistant and features a stretch binding at the cuffs and the hem to provide the right fit and block out cold air. It comes in sizes SM-3XL in five colors. Info: hukgear.com
Huk Women’s Rogue Wave Boots
Huk Women’s Rogue Wave Boots
Huk’s new Rogue Wave boots for women are designed for wet weather, slimy decks, sand, rocks and more. The slip-on boots are constructed of durable neoprene rubber. For positive traction in wet conditions, Huk developed the Grip-X Slice outsole traction pattern that grabs in all directions. Additionally, micro channel openings allow water to escape. The boots have heel and toe reinforced grab loops, breathable mesh liners, a rounded toe and a non-marking outer sole. They’re available in sizes 5-11 (full sizes only) in two colors. Info: hukgear.com
The following ammunition cartridge ballistics information and chart can be used to approximately compare .223 Remington vs .45-70 Government ammo rounds. Please note, the following information reflects the estimated average ballistics for each caliber and does not pertain to a particular manufacturer, bullet weight, or jacketing type. As such, the following is for comparative information purposes only and should not be used to make precise predictions of the trajectory, performance, or true ballistics of any particular .223 Remington or .45-70 Government rounds for hunting, target shooting, plinking, or any other usage. The decision for which round is better for a given application should be made with complete information, and this article simply serves as a comparative guide, not the final say. For more detailed ballistics information please refer to the exact round in question or contact the manufacturer for the pertinent information. True .223 Remington and .45-70 Government ballistics information can vary widely from the displayed information, and it is important to understand that the particular characteristics of a given round can make a substantive difference in its true performance.
Caliber Type Velocity (fps) Energy (ft-lb) .223 Remington Rifle 3150 1250 .45-70 Government Rifle 1680 2270
Velocity
As illustrated in the chart, .223 Remington rounds – on average – achieve a velocity of about 3150 feet per second (fps) while .45-70 Government rounds travel at a velocity of 1680 fps. To put this into perspective, a Boeing 737 commercial airliner travels at a cruising speed of 600 mph, or 880 fps. That is to say, .223 Remington bullets travel 3.6 times the speed of a 737 airplane at cruising speed, while .45-70 Government bullets travel 1.9 times that same speed.
Various calibers
Energy
Furthermore, the muzzle energy of a .223 Remington round averages out to 1250 ft-lb, while a .45-70 Government round averages out to about 2270 ft-lb. One way to think about this is as such: a foot-pound is a unit of energy equal to the amount of energy required to raise a weight of one pound a distance of one foot. So a .223 Remington round exits the barrel with kinetic energy equal to the energy required for linear vertical displacement of 1250 pounds through a one foot distance, while a .45-70 Government round exiting the barrel has energy equal to the amount required to displace 2270 pounds over the same one foot distance. As a rule of thumb, when it comes to hunting, muzzle energy is what many hunters look at when deciding on what caliber of firearm / ammunition to select. Generally speaking, the higher the muzzle energy, the higher the stopping power. Again, the above is for comparative information purposes only, and you should consult the exact ballistics for the particular .223 Remington or .45-70 Government cartridge you’re looking at purchasing.
Please click the above links to take a look at all of the .223 Remington and .45-70 Government ammo we have in stock and ready to ship, and let us know any parting thoughts in the comment section below.
Foundry Outdoors is your trusted home for buying archery, camping, fishing, hunting, shooting sports, and outdoor gear online.
We offer cheap ammo and bulk ammo deals on the most popular ammo calibers. We have a variety of deals on Rifle Ammo, Handgun Ammo, Shotgun Ammo & Rimfire Ammo, as well as ammo for target practice, plinking, hunting, or shooting competitions. Our website lists special deals on 9mm Ammo, 10mm Ammo, 45-70 Ammo, 6.5 Creedmoor ammo, 300 Blackout Ammo, 10mm Ammo, 5.56 Ammo, Underwood Ammo, Buffalo Bore Ammo and more special deals on bulk ammo.
We offer a 100% Authenticity Guarantee on all products sold on our website. Please email us if you have questions about any of our product listings.
A figure 4 deadfall trap is one of the easiest primitive traps, and all you really need is a few sticks, a sharp knife, and bait.
There’s no cordage or complicated snare knots, just the simple tension of a few sticks holding a big rock in position, just waiting for the right animal to trigger it.
In its simplest form, a figure 4 trap starts with just three sticks, each about 8 inches long and 1 1/2 inches in diameter. From there, each stick can be carved into a simple tension deadfall trap that comes together without any cordage or snares.
The weight of the rock pushes down on the sticks, and if the notches are crafted right, this creates tension that holds the whole deadfall trap together. It’s a precarious balance though, and all it takes is the tiniest touch on the baited end and the whole structure comes crashing down…ideally mashing your prey.
Figure four traps are wonderful if you live in an area with an abundance of large, flat-ish rocks like my home in Vermont. These types of deadfall traps are best suited to small game, such as squirrels or possibly raccoon if you find (and can move) a big enough stone.
I’m starting with three pieces of dry white pine, split like kindling. The straight grain makes carving much easier, but really any branch you can find in the woods will work.
This deadfall trap has three pieces, and for simplicity, I’ll refer to them as the vertical piece, diagonal piece and trigger piece. I’ve added a 4th piece to extend the trigger deeper under the rock and lashed it together with a bit of twine, but that piece is unnecessary I found.
The vertical piece is the easiest to carve, so start there. It’s basically just a stick with a pointed end. The point isn’t carved on all sides, just two of the faces, so it comes to a long linear point at one end.
The base end remains flat because that’s going to rest on the ground, or more specifically, another flat rock placed on the ground. Otherwise, the heavy rock pressing down on top would just drive it into the ground like a stake. Even a small-ish flat rock, maybe 4” in diameter prevents this, and also makes it easier to set the trap with a flat surface as a work area.
Here’s the vertical piece set into the figure 4 trap. All it needs to do is hook into the notch on the diagonal piece.
One more important thing to note about this first piece…the sides need to be squared off. This is important, as you’ll see later, since it allows the trigger piece to hook onto this stick.
Carving the Diagonal Piece
Next up is the diagonal piece, which is a bit more complicated, and has carved portions on both ends. The top comes to a rounded point where it will support the rock, and underneath it has a small notch for holding the vertical stick in place.
Start by rounding off the top end, and then notching into the stick about 2 inches below that. The notch should have a bit of a hook to it, which will help keep the vertical piece in place when they’re connected.
Carve the bottom of that same stick into a point, working just two sides so you have a long seam to hook into the 3rd piece (trigger piece).
Here’s what the diagonal piece should look like when finished:
Carving the Deadfall Trap Trigger
The final piece is the trigger stick or the horizontal piece in the figure 4 trap. This piece is the most complex because it needs to support the diagonal piece and hook onto the vertical piece. It hooks onto the side of the vertical piece, which is what creates the trigger tension.
Downward force from the weight of the rock above is pressuring the diagonal piece and trying to pull the trigger piece backward. It’s notched and hooked around the vertical piece, which is what holds the whole deadfall trap together until it’s tripped.
As I mentioned earlier, the vertical piece needs to be squared off so that the trigger piece can hook onto it. This is why…
Start by carving a notch at the back of the stick for the diagonal piece to rest against to tension the trap. Be sure to leave enough wood at the end that it won’t break out at the end when under stress. About an inch should do.
This notch should fit nicely into the bottom of your diagonal stick, and hook it in there with a bit of tension. Test the shape against your diagonal stick. This is the first of 3 different carved sections on the trigger stick.
Next, go to the other end and carve it into a narrow point to hold the bait. In my case, I’m using peanut butter, and more practically in the woods you might be using a tiny piece of meat or fruit and you’d need a sharp point to stick it to the trigger stick.
This is the most open-ended part of the whole trap, and really you can make it look like just about anything you’d like. Something small, so the animal has to nudge it a bit when they try to take the bait works best.
I could also imagine an alternate configuration where this trigger end is just a thin shelf to support some kind of seed or nut. It really depends on the bait you’re using, and how you want to dangle it out there.
Once you have that notch and the trigger point finished, place the pieces in figure 4 position to figure out where the side trip notch needs to be placed. This will vary a bit, based on the size of your wood and how you’ve carved the notches up to this point, but it should be about half way up the side of the trigger stick.
Carve the trigger notch out square so that the trigger stick hooks around the vertical stick. The finished trigger stick should look like this:
When I made this, I was concerned that my trigger stick was too short. As you can see, the side notch is about 2/3rds down the side of my stick and there’s not much trigger past the vertical stick on the figure 4.
I took another stick and lashed it together to extend the trigger further under the rock. In hindsight, that was completely unnecessary and the short trigger would work just as well.
I had a particularly long rock, so this trigger extension really gets the bait far underneath it. That’s totally optional, and actually limits the prey I can catch by putting the bait in a very small space.
A shorter trigger might mean catching something like a raccoon, but this long trigger placed far under limits the trap a bit. Luckily, I was targeting a tiny red squirrel that the best squirrel traps I could find hadn’t yet managed to catch. He was fun to watch, but when he took up residence inside the ceiling of my house we had to make other arrangements.
Be careful, of course, to check any local restrictions on trapping if you plan to deploy your deadfall trap. Also be aware that the trap will crush anything that trips it…including children, pets or toes.
If you do catch small game, try out any of these squirrel recipes. We really enjoyed traditional Brunswick stew, and country fried squirrel with gravy is a great breakfast.
All in all, the whole deadfall trap took me about half an hour to carve, sitting at the picnic table in our yard while the kids played nearby with their Tonka trucks. I don’t have a smartphone you see, so that means I get fun project time anytime the kids are self-entertaining. This, I can tell you, was a much more satisfying way to spend a few quiet minutes than scrolling Instagram.
It was a fun skill to practice, long in advance of being in a wilderness survival situation where I needed to harvest food with minimal equipment. Even lacking a knife, this trap could be made by carving with a sharp rock. It’d take a lot longer, but you could make it happen if you had to.
For me, it’s nice to know I have that skill under my belt, and now I’m looking forward to learning other types of traps.
More Bushcraft Skills
Looking for more bushcraft skills tutorials? Read on my friends…
"Unlock the Perfect Shot: Discover the Best Scope for Break Barrel Air Rifles. Enhance your shooting experience with precision and accuracy, as we delve...
")
")
")
")
")


 Review – The Best Name In The Air Rifle Game")