Basically, a gas piston air gun (also called gas strut, gas ram) works the same way as the spring piston gun.
But a gas ram gun has a gas-filled cylinder instead of a coiled spring.
The air in the cylinder is already compressed and you apply more pressure to it when you cock the gun.
The pressurized air is kept under tension until you release the trigger.
When that happens, the pellet is discharged out of the barrel due to the propellant force of pressurized air.
Pros
Cons
Lasts longer than the spring gun
Can be left cocked for days since there is no spring fatigue
Lighter than a spring gun
Less recoil than a spring air gun as there is no spring vibration when you shoot
Not affected by weather
Easy to cock
Unlike a PCP gun which expends air and has to be recharged after a certain number of shots, the air in a gas ram gun is retained and it works for years with stable power
Hard to find gun materials to modify
Won’t work at all if the gas leaks
Precharged Pneumatic (PCP)
The precharged-pneumatic (PCP) air gun uses high-pressurized air in the chamber as the propellant force to discharge the pellet.
The variable pump gun has a piston and a pressure cylinder in the chamber.
When you cock the gun, the air between the piston and cylinder is compressed.
It has nowhere to go and is forced into the cylinder.
The cylinder has a lock valve that lets the air in and keeps it there until you shoot.
When you pull the trigger, the pellet is propelled due to the force of compressed air.
Pros
Cons
Compact, lightweight, recoilless
Permits you to have control over the power of each shot. Pump more and you have more power. Pump less and you have less power.
Most have medium power
Self-contained, no pumping equipment required
Pumping action can be tedious at some points
Requires practice to master the cocking action
Requires significant time and effort to cock so it is not great for hunting situations since your animal target can run off if you miss the first shot and are still busy with the pumping action
If you’re looking to enhance and protect your air gun, consider exploring a professional gun refinishing service like the one offered by Texas Gun Club. Check out their gunsmith services to give your air gun a fresh and improved appearance.
CO2
A CO2-powered air gun works the same way as a PCP air gun but it uses carbon dioxide cartridges (CO2) as the power source instead of pressurized gas.
When you pull the trigger, the compressed CO2 is released and it causes the pellet to move forward inside the barrel.
Pros
Cons
Highly accurate
Easy to cock
Recoilless to shoot
Consistent on a shot-to-shot basis
Convenient for repeated shooting
Allows semi-automatic fire (fire as fast as you pull the trigger)
Not very powerful
Power and accuracy are affected by weather since the expansion of C02 is different at various temperatures
The cost of CO2 cartridges can add up if you shoot a lot
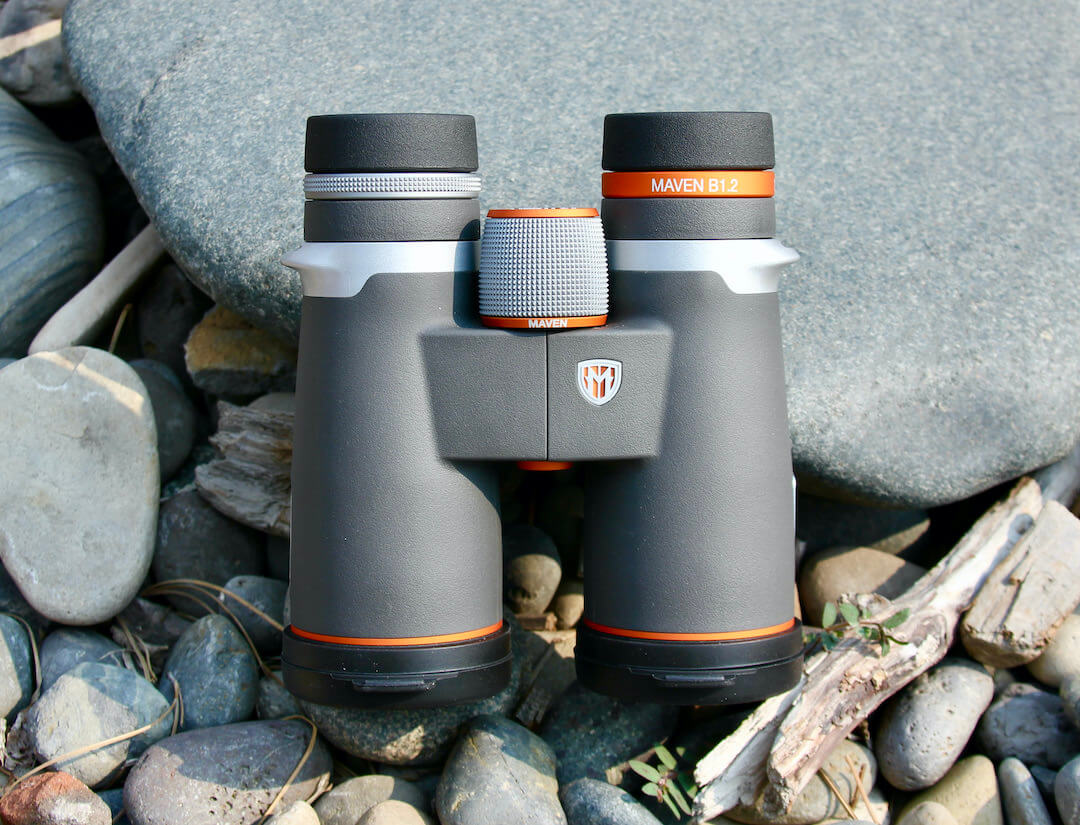
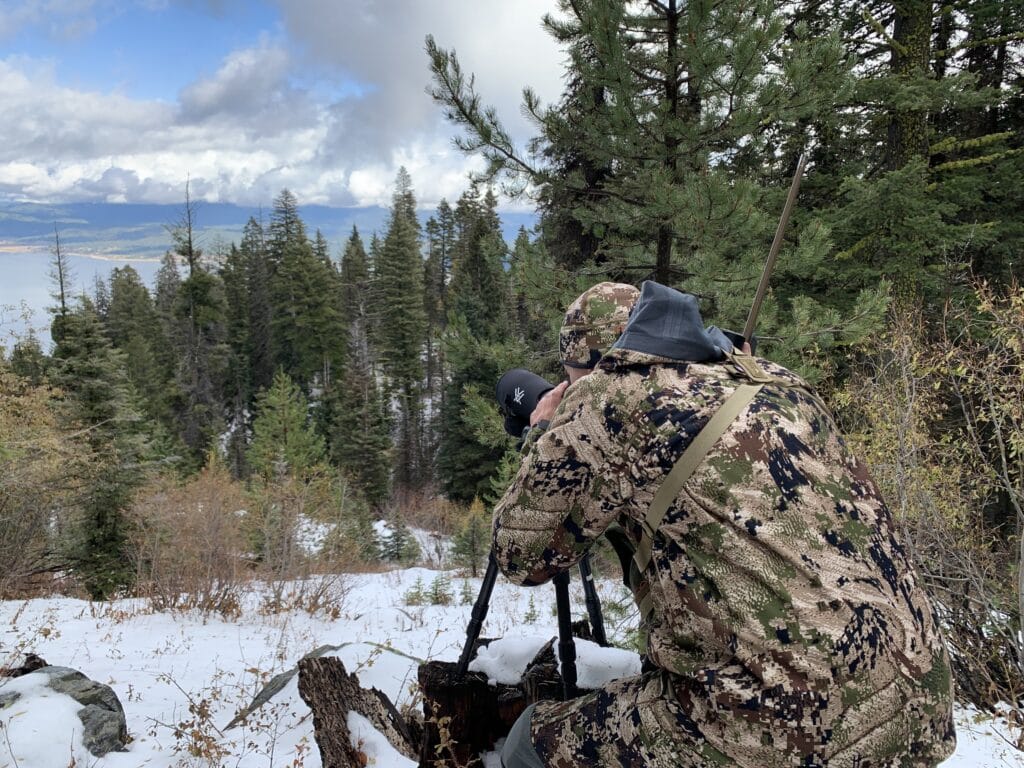
The newly upgraded Maven B1.2 binocular is now lighter, brighter, and more compact than the previous B.1. Better yet, it has improved coatings and a larger Schmidt-Pechan prism that delivers a wider field of view.
To get us a closer look, Maven sent Man Makes Fire a review unit. After testing the Maven B1.2 in 10×42, as well as putting it to work while archery elk hunting in Idaho, this is what we learned:
I very much liked the original B.1, which I hunted with for two years (full original B.1 review here). Still, I have to tell you: The new Maven 10×42 B1.2 is much better.
How is that possible?
For me, the B1.2 delivers two major improvements in usability. First, the new B1.2 is smaller so it’s easier to handle. It’s .5″ shorter than the B.1 and it weighs 2.7 oz less than the B.1.
The new Maven B1.2 binoculars now have a more compact frame that delivers a wider, more immersive Field of View.
These differences might seem like relatively minor changes, but in the field, they’re not. When you need to use one hand to grab your binoculars and take a quick look at what you hope is an elk or deer, the lighter and more compact B1.2 binoculars make this much easier. In addition, when I’m standing up and looking through the B1.2, I can hold it steadier for longer periods of time. That leads to an in-the-field information boost, and when I’m trying to find an elk, I’ll take any edge I can get.
To put this in perspective, consider this: Last year, on big-mile days I found myself thinking about taking the lighter (but not as crisp) Maven C.1 10×42 binoculars — just to save weight and gain some one-handed agility. This year with the B1.2 in 10×42, that’s no longer a question at all.
Bigger Field of View
The new B1.2 now includes a wider field of view. The new FOV is 362′ — which is just 21′ wider than the previous FOV.
How is 21 feet a big deal?
While the edge-to-edge clarity of the B1.2 binoculars is very good, having a wider field of view can help increase the perceived sweet spot as you’re looking through the binoculars. This lets your brain process more information and maybe see movement or an object that you might not otherwise notice. For me, technically getting a wider view isn’t that big of a deal when I’m trying to examine a hillside piece-by-piece . . . but how I feel when I do this, which can sometimes get tedious, makes a difference. This FOV boost makes the Maven B1.2 binoculars feel quite a bit more immersive than the B.1s.
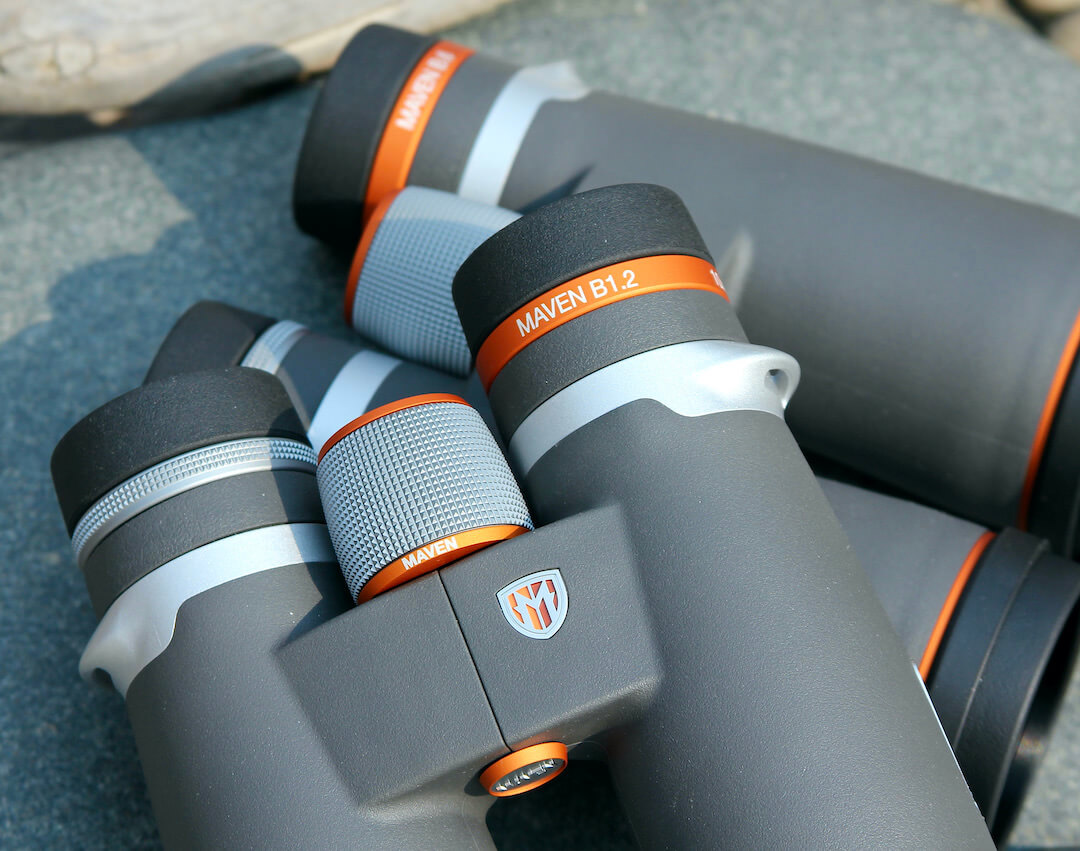
In photos the previous ‘B.1’ version (left) doesn’t seem much larger than the new ‘B1.2’ version (right). In person, though, the difference is a great usability improvement.
To be fair, the B.1s are already very good. If you already have a set of B.1s, the overall specifications mean you don’t have to upgrade. At the same time, here’s a warning: If you suffer from gear lust, don’t look through the new Maven B1.2 binoculars.
Check out Maven’s Customization Builder to see cool camo and color patterns!
Improved Coatings, Better Light Transmission
The biggest B1.2 surprise to me is that Maven found a way to improve its fully-multicoated ED glass. In case you’re wondering, optics manufacturers coat their lenses with secret sauces and ions and use techniques that reduce light refraction so that more light passes correctly through each piece of glass.
The glass itself is ED glass made in Japan and assembled in Wyoming — just like all the glass in Maven’s high-end optics. ED stands for extra-low dispersion, and it’s basically high-end glass that improves the delivery of wavelengths of light to reduce chromatic aberration (which I’ll get to below).
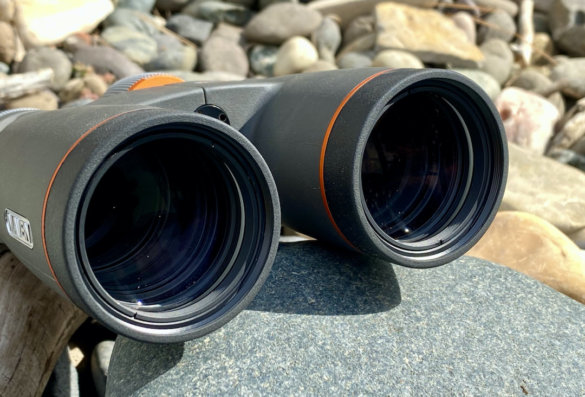
Hard to see here, the but interior of the barrels is pristine.
However, the new coatings, in combination with the new construction of the prism, has somehow resulted in a 3.6% boost of light transmission — up from 90.9% to 94.5%. That’s a very impressive gain. Incidentally, many optics companies don’t publish this sort of data, but Maven publishes a massive binocular comparison chart that shows key specifications across its entire line. So cool.
But wait, there’s more to this story: The new Maven B1.2 10×42 binocular now competes very closely, and sometimes beats, the light transmission percentages delivered by Maven binoculars with Abbe-Koenig type prisms. In general, Abbe-Koenig prisms deliver the best light transmission but they are heavier, longer, harder to manufacture, and cost more. The fact that the relatively short B1.2 with Schmidt-Pechan prisms can compete here is, again, impressive.
Chromatic Aberration
What is a chromatic aberration? In general, when you can see an outline of translucent color tracing an object’s edges in a high-contrast situation, you’re seeing a chromatic aberration. It occurs when different wavelengths of color don’t converge at exactly the same spot after passing through a lens. It’s more noticeable at higher magnifications.
I can spot a small bit of chromatic aberration with the Maven B1.2. In side-by-side testing with the B.1, the chromatic aberration effect is very similar — and quite small.
The fit-and-finish of the Maven B-series binoculars is excellent.
To test for chromatic aberrations, you can look through binoculars at a U.S. Air Force black-and-white test chart . . . or you can find a non-moving high-contrast subject in the sky. For example, if you look at a dark part of a tree branch against a bright sky, you can usually see some color fringing. In the Maven B1.2, it’s a very thin purplish hue. (Your brain has a tendency to ignore this, so with good glass you have to look hard to find it.)
At home, there’s a tree I use for this purpose — in addition to a U.S. Air Force test chart taped to my garage door when I’m more serious.
So, is this a problem?
For the vast majority of people it’s not. First, the color fringing effect is very small. Second, most people’s brains tend to filter it out as they process images. My recommendation? You won’t notice it unless you work very hard to find it. So don’t worry about it. Everything else is so rich and vibrant you won’t care.
Shop the new B.12 direct from Maven!
Maven B1.2 Specifications:
Magnification 8x 10x Obj. Lens Diameter 42mm 42mm Exit Pupil 5.25mm 4.2mm Field of View @1,000 yds 420′ 362′ Brightness 27.6 17.6 Light Transmission % 93.95% 94.50% Twilight Factor 18.3 20.5 Weight 26.8 oz 26.8 oz Dimension WxHxD 5.2″ x 5.7″ x 2.2″ 5.2″ x 5.7″ x 2.2″ Eye Relief 18.1mm 17.8mm Near Focus 4.9′ 4.9′ Prisms Type Wide Angle Schmidt-Pechan Wide Angle Schmidt-Pechan Prism Reflective Coating Dielectric Coating Dielectric Coating ED Glass Yes Yes Diopter Correction (DPT) +/-3 +/-5 Waterproof/Pressure Testing IPX7 (1m for 30 minutes) IPX7 (1m for 30 minutes) Functional Temp Range -13°~140°F -13°~140°F Frame Material Magnesium Magnesium Internal Gas Purge Nitrogen Nitrogen Tripod Adaptable Yes Yes Country of Origin Japanese components, assembled in the U.S. Japanese components, assembled in the U.S.
Price-to-Value Ratio
The three-position eye cups are easily removable for those times you need to clean out debris.
Maven is a relatively small Wyoming-based optics company. A key part of its business model and competitive nature comes from its direct-to-consumer business model. By cutting out the middle man, so to speak, Maven can deliver great optics that cost less than the competition.
The Maven model also lets the company avoid negotiating with retailers over price points and stock levels — which can affect product ingenuity, quality and consumer pricing.
The drawback to Maven’s model is that you can’t walk into a Cabela’s or Bass Pro Shops brick-and-mortar store and look through a Maven optic. You have to order it online.
Maven’s Customization Program
Speaking of ordering online, Maven has a cool customization program. For an additional charge, you can customize the body color with a camo pattern. In addition, you can customize the color of the neck strap rings, focus wheel, ocular lens rings, objective lens rings, tripod/hinge cap, and labeling. And then you can even have the bino engraved with up to 30 characters — which might turn the Maven B1.2 binoculars into a great hunting gift idea. And the kind of optic you’ll eventually pass down to your kids.
Unconditional Lifetime Warranty
The Maven warranty competes with the very best optics warranties in the business: If a Maven optic ever fails — or gets broken — for any reason, you can return it to Maven for a replacement.
But it gets better. Maven will also stand behind a Maven optic as long as it bears their name. This means that if your Maven binoculars fail your son or daughter in 30 years, Maven will still repair or replace them.
Competition & Alternative Options
There are many great binoculars to choose from these days. For the most part, any binocular that’s priced more than $900 or so will be very good. In fact, most midrange binoculars in the $500 price range will be so good that the vast majority of people will never have a need to upgrade. Case in point? The Maven C.1 10×42 and C.3 10×50 are pretty great. At $900-950, the direct-to-consumer pricing of the Maven B1.2 binoculars sets them up to compete well against binoculars that cost twice as much. Here are several other can’t-go-wrong competitive options you might consider:
Vortex Razor HD — The most widely known competitor to the Maven B1.2 is the Vortex Razor HD binocular. Vortex has generated a loyal following over the years by investing heavily in marketing and its customer service department, which also backs a no-questions-asked lifetime warranty. The Razor HDs in 10×42 are slightly taller, slightly lighter, and deliver the same FOV as the B1.2s. The key benefit is that you can find the Razor HD binoculars in brick-and-mortar stores. The key drawback is the increased price. Note: The term “HD” in relation to binoculars tends to be more about marketing a term that consumers have associations with rather than identifying a specific type of glass. When comparing one binocular to another among different manufacturers, “HD” doesn’t actually pinpoint any agreed upon difference. (The Razor HDs do use ED glass, in case you’re wondering.)
Swarovski EL with Swarovision — Pretty much everyone who has ever looked through Swarovski EL Binoculars can appreciate the build quality and optical fidelity. The main benefit of Swarovski EL series is the industry-leading quality. The main drawback is the very high price point.
Zeiss Victory SF — Aside from fantastic glass and overall quality, Zeiss fans appreciate the balance and weight.
Leica Noctivid — The Leica Noctivid in 10×42 rounds out the ultra high-end competition. At 30.3 ounces, they’re a bit heavy compared to the similar binoculars in this class, but the 376′ FOV leads the pack.
Maven B1.2 10×42 Review: The Verdict
All-in-all, the new Maven B1.2 is a worthy upgrade to its B.1 predecessor. If you already have a B.1, the B1.2 will deliver a slight optical boost, but that likely won’t lead to a logical decision to upgrade. If, however, the previous weight and size of the B.1 turned you off, the lighter B1.2 with its more expansive Field of View makes it far more packable and easier to hold steady. The bottom line is, the B1.2 delivers competitive specs, has an excellent price-to-value ratio, and is a delight to use. Very highly recommended.
Editor’s Note: Bob Judkins, an experienced crappie fisherman and member of the Oregon Bass & Panfish Club, offers his favorite equipment and tackle choices as well as some tips about where to catch local crappie, especially in the spring.
This rod is really light, so you can fish all day without much arm fatigue. That’s a great plus for older anglers like me.
My other rod is a Wally Marshall Signature Series WM80CP-2, 8′ light-action, 1/16 – 1/4 ounce lure weight, 2 – 6 pound line. That rod is good for fishing brush piles because it has a longer reach and a good backbone for lifting big slab crappie out of the nastiest brush pile.
Ultra-lights and micro-lights are fun rods for crappie fishing. I don’t use them anymore. I’ve lost too many big fish such as bass and channel cats while fishing for crappie with those rods, and you will probably hook one of these monsters while crappie fishing.
If you are a first-time crappie angler, you don’t have to go out and buy a dedicated crappie rod. The rod that you may have been using for trout fishing will work just fine.
Recommended Crappie Reel: Wally Marshall Pro WP30 Spinning Reel
This reel has a larger spool than most small reels. The larger spool helps reduce line twist, a common occurrence when using monofilament line and light jigs. The drag of this reel is really smooth and it will handle the largest of fish.
Recommended Crappie Line: Bass Pro Shop Premium Excel Monofilament Line
6-pound test, clear blue fluorescent (for high visibility)This is the fishing line I always end up using. It’s easy to see and “line watching” is important when you fish for crappie. Also, the memory of this line is not bad at all.
As far as super lines are concerned, I have used the Fireline Crystal in 6-pound test. It handles great and casts a long distance with no line twist, but I recommend that you tie on a clear monofilament leader.
The reason is as follows: A few years ago, I was fishing for crappie at Brownlee Reservoir with a friend. We were fishing the same depth, using identical jigs and bobbers, but we had on different fishing lines – mine was monofilament and his was a “superline.”
I was catching fish on every cast, but my friend was not. We then switched rods to see if that would make a difference. It did – no fish for me, but a fish on every cast for my friend. The conclusion was very clear to us: If you use a “superline,” tie on a clear leader.
Recommended Crappie Bobber: Weighted Torpedo Foam
Length: 1 ½” or 2”
There are so many types of floats to choose from – balsa, plastic, foam – and they all work well. I prefer the weighted torpedo foam for a longer cast.
This Northland jig is my favorite “go to” jig in color and size. I like its slow fall and small profile. It is a good jig for all panfish. My second “go to” jig is a Northland Gypsi Jig with crystal-flash in chartreuse and in 1/16 to 1/32-ounce sizes.
I use this jig in late summer and fall. It has a bigger profile with lots of flash. Soft plastic crappie jigs of different shapes and colors work well, too. If that’s what you have, use them.
COLOR?I’ve asked lots of crappie anglers, “What color is your favorite?” Their answers covered so many different colors. It may be that when crappie are on the bite, color may not be that important. But, when the fishing is tough, I “go to” the small Fire-Fly and white Crappie Nibble.
Recommended Crappie Bait: Berkley Crappie Nibbles
Color: White.
Crappie Nibbles come in other colors – pink, chartreuse, glow-in-the-dark. I’ve used them all. But WHITE nibbles are the ones to use and “I don’t leave home without them!”
Crappie Nibbles are really soft. If you take them out of the jar, spread them out and let them air-dry for 24 hours, they will firm up a bit and stay on your jig longer when used. But, if you dry them too long, they will become rock hard and you would not want that to happen. I keep two jars of “cured” nibbles ready to go.
When and Where to Catch Crappie in Oregon
For the beginner, the best time to fish for crappie is during spawning time in the spring. This is one of the easiest times to catch crappie. Spawning takes place when the water temperature is 62 – 65 degrees. Around Portland, this may be in May and June (give or take a couple of weeks). Small shallow ponds and lakes warm first.
My favorite small body of water is Vernonia Lake, located just south of the town of Vernonia, Oregon. To get there, take Highway 26 west to Highway 47; turn right; follow Highway 47 to Vernonia. Continue driving through town and you will find the lake to your right.
The travel distance from downtown Portland is about 50 miles. This lake is very people friendly. It has wheelchair accessibility, a small gravel boat ramp (boats with electric motors are allowed). Special Regulation: The limit is 10 crappie per day; no minimum length.
When I fish Vernonia, I go to the left of the parking lot and down to the wheelchair dock.
Most anglers will be fishing for trout in the main lake. I turn around and fish back toward the bank. I also fish the shade under the dock.
Use a 1/64 ounce Fire-Fly with Crappie Nibbles, a bobber, and jig it 2-3 feet down. This is a good place to start. If you don’t catch fish here, just move around the lake and try different spots.
In the Portland area, Swan Island Lagoon (on the lower Willamette River) can be a good spot. It’s a popular place and if your timing is right, you will have lots of company! It has good bank access.
Fish the west side of the Lagoon. Look for logs, pilings, docks and shade. They are all good spots to fish.
The Oregon Bass & Panfish Club is involved in a variety of angler education and fisheries enhancement activities. See their club page on this website.
At this time of the year in Alaska, a drive of more than a couple hundred miles will involve some time during darkness. While heading north to visit friends during the holidays, I spotted a small, bright spot in the roadway ahead.
As my lights got closer, a huge, brown ungulate appeared surrounding that tiny light spot. I slowed appropriately. A few miles farther down the road, a pair of bright spots appeared on one side of the road. A second later I was able to see the faintly lit image of a lynx crossing the road. I had first seen both of these animals because of their tapetum lucidum reflecting my headlight illumination.
While many are familiar with the phrase, “A deer-in-the-headlights look,” not as many may realize there is an interesting anatomical basis for this situation. Most nocturnal animals, like dogs, cats, deer, etc., will demonstrate “eye shine” when a bright light is shown on them at night. What happens is the light entering the animal’s eyeball is being reflected right back at us as if there were a mirror in there. The mirror analogy is actually pretty close to what is happening.
In order to understand how the tapetum lucidum works, we have to know a little about the layers inside the eyeball itself. First, the retina is the thin, innermost layer of the eye and it contains the light-sensitive cells called rods and cones, and lots of blood vessels. In very close proximity to the rods and cones is a black layer called the choroid.
The important choroid layer absorbs light that has just passed by the light-sensitive
rods and cones. In humans that do not have a heavily pigmented choroids, like albinos, to absorb the passing rays, light gets reflected and scattered inside the eyeball. These individuals suffer with visual difficulties and even small amounts of light are blindingly bright.
In nocturnal animals with a tapetum lucidum, the choroid, or a special portion of the retina, will act as a slight reflector. The actual tapetum lucidum can vary in its composition depending on the specific animal. Since there are so many different animals that exhibit “eye shine,” it is easy to understand that there are many different kinds of reflective layers.
In some, it is composed of a special layer of iridescent crystals like guanine, or in others it might be a layer of cells with reflective fibers.
No matter how the reflection by the tapetum is accomplished, the incoming light is reflected right back past the very rods and cones that it originally passed. This essentially gives the rods and cones a second chance to detect the same light rays. That simple reflection greatly enhances night vision.
Also, by reflecting the light exactly back from where it came, the animal is able to create a crisp visual image rather than getting a blurry image that would occur if the light scattered randomly within the eyeball. It is believed that cats can see about nine times better at night than we can, since they have a tapetum and we do not.
The color of the reflective “eye shine” will vary according to the animal. Many reptiles
show bright red eye shine, while mammals vary from yellow, white, blue and green. There are variations even within the same species and there are lots of examples of one eye reflecting back one color while the other eye reflects back a different color. Along with birds, some fish, like walleye, have a tapetum.
Most primates — like humans — pigs, kangaroos and other day-active animals do not have a tapetum lucidum. Accordingly, our night vision is mediocre compared to those animals that are active at night.
Humans can produce a confusing situation known in the photography arena as “red eye.” This occurs when a flash of light illuminates the blood vessel-rich retina in the back of the eye and the eyes appear to be red. There is no tapetum involved here, just illumination of blood vessels. If the source of the flash were somewhere other than on the camera, there would be no “red eye.”
Imagine how our flash pictures might look if we had chartreuse-colored blood?
Another unusual situation in humans and some animals is the white glow that can appear in the eyes. This “eye glow” occurs when there are cataracts. The glow is caused by illumination of the crystals embedded within the lens of the eye and, again, is not caused by a tapetum.
Moose certainly have a tapetum lucidum, but I have wondered why we don’t often see the same bright headlight reflection from moose eyes that can be seen from smaller animals like dogs or cats. The answer probably comes from several different reasons.
First, moose are large animals and their eyes are often held above the level where our headlights are aimed. Because a moose’s eyes are on extreme sides of its head, it is difficult to see both of their eyes at the same time. So we most commonly get a reflection from only one eye at a time.
I have not been able to find much documentation on the size of a moose tapetum compared with other animals. However, after shining a bright flashlight beam at a moose from various angles, I have discovered that the tapetum in a moose’s eye is mostly in the very back of the eyeball.
When the moose is at right angles to you, your lights are not striking the tapetum, and you only get a slight “red-eye” reflection.
Only when the moose is looking directly at you, and they don’t do this all that often, will you see the bright, two-eyed reflection.
So, as a moose crosses the road, you and I get a single, slight reddish glow from an eye that is not reflecting back much light from our headlights. No wonder we don’t easily see that moose crossing up ahead.
The next time your lights fall on an animal and you see the distinctive “deer-in-the-headlights” reflection, you will know that particular animal is normally active at night. You’ll also know they have a microscopically thin tapetum lucidum in the back of their eyeball that aids in their night vision.
David Wartinbee, Ph.D, J.D., is a biology professor at Kenai Peninsula College’s Kenai River Campus. He is writing a series of columns on the ecology of the Cook Inlet watershed.
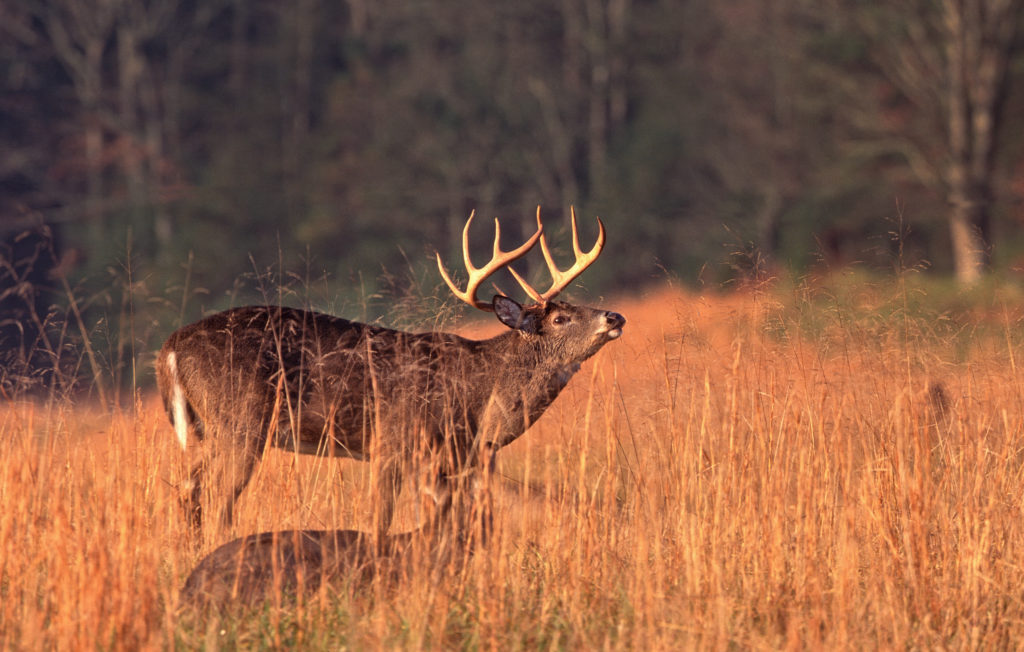
Hunters who can dissect and recognize the unique activities that occur during the lockdown phase of the rut are the ones most likely to earn a trip to the taxidermist.
Once bucks find a receptive doe they stick with her until breeding is completed in what is known by some hunters as the lockdown phase. This can be a challenging time to hunt mature bucks but it’s not impossible to put your tag on one during this period. (Photo: Getty Images)
It doesn’t matter if you pick up a rifle once a year and climb into your only treestand, or if you hunt the entire deer season across multiple states, every whitetail hunter has one thing in common: anticipation of the rut. That’s because the rut always makes deer more visible, more likely to fall into our laps, and ultimately we have a better chance to see big bucks during this period of the season. We all buy tags with the goal of punching them, and even those of us self-proclaimed “meat hunters” are mesmerized by a fine set of antlers.
While the rut is often referred to as a singular event, in reality it’s a series of events that are all biologically neces- sary for deer to do their business and create more deer. You don’t have to be a biologist to understand the whitetail’s breeding rituals, and thankfully there are plenty of places to apply your knowl- edge and hunt during the heart of the rut — when daylight deer activity is at its annual peak and your odds of scoring are highest.
The lockdown phase of the rut helped me kill my best buck to date, after an eight-hour standoff in the Nebraska Sandhills. Before I share that story, let’s brush up on some rut realities with whitetail biologist Dr. Harry Jacobson, and discover why he’s also a fan of hunting bucks during the lockdown.
RUT TRIGGERS AND TIMING The breeding and birthing schedule of whitetails is optimized to maximize fawn recruitment. Research and logic suggest weather greatly dictates the timing of this schedule, so that does drop fawns when Mother Nature is feeling warm and fuzzy.
White-tailed does carry their fawns an average of 200 days no matter where they call home, but there are some notable differences in the rut across the whitetail’s range. For instance, white- tails in Canada breed only once per year, usually in October/November. Canadian fawns are thereby born during summer, when they have plenty of time to insulate their bones before winter’s harsh grip takes hold. On the opposite end of the spectrum, Southern deer, living where the average climate is moderate, have a wider breeding period.
A decreasing amount of daylight — or photoperiod — is the primary trigger for whitetails to prepare their bodies for breeding. We refer to this initial stage as the pre-rut. Bucks start getting antsy and they become increasingly drunk with testosterone, priming them to establish their role in the pecking order. They rub trees and lose velvet on their antlers, their necks swell, they make scrapes, and they start sparring to prepare for the breeding war that looms on the horizon. When it comes to does, however, these changes are mainly within their internal reproductive system and therefore less evident.
While photoperiod is the main factor influencing rut timing, genetics can also play a role. Jacobson pointed to a study in which a handful of deer were swapped between Michigan and Mississippi, and the deer “… shifted their reproductive patterns about three weeks earlier or later, depending on whether in Michigan or Mississippi. However, regardless of geographic location, the rut of Mississippi deer was about seven weeks later than that of the Michigan deer.” Intriguing data, but under natural circumstances with native deer, you should be able to closely predict annual rut timing in your neck of the woods by photoperiod — because it’s consistent year to year.
Pre-rut bucks begin traveling more, hoping to find the first hot does on their stomping grounds. “Usually the first does to come into estrus for the year will trigger most of the buck fighting activity,” Jacobson explained. “It might be three to four weeks before the peak of the rut. The fights are most serious at this time of year, so this is when most buck-fighting trauma occurs.”
The pre-rut is chaotic, as anxious bucks impatiently wait for does to fulfill their breeding desires. It can be an exciting, yet frustrating time to be in the woods. You’re likely to witness chasing, fighting and an overall surge in deer movement. But this is also when bucks become unpredictable, and those you see are likely to be on a mission and difficult to stop for a shot.
WATCH: WHAT TO DO AFTER FINDING DEER SIGN IN THE WOODS
PEAK RUT AND LOCKDOWN And now, the moment we’ve all been waiting for: the peak rut. It’s a critical event for whitetail hunters because a doe — or multiple does — are ready to bow-chik-a-wow-wow with bucks on your hunting ground. This goes hand in hand with lockdown.
Lockdown is when an estrous doe is being tended by a buck or multiple bucks. Estrus lasts approximately 24 hours and the doe might only be receptive to breeding a fraction of that time, so her suitor will stick to her like Gorilla Glue.
“During that period she usually gets pushed into thick cover by a dominant buck,” Jacobson said. But other bucks will often be lingering nearby, hoping for their chance at some action. “I’ve seen 12 to 14 bucks hanging around a doe,” Jacobson added.
Strategically, Jacobson recommends covering lots of ground to make the most of lockdown. “Bucks can be downright stupid during lockdown, but it’s pretty unpredictable where they’re going to show up, so I go look for them by spotting and stalking,” he said.
“You need larger acreages to be able to do it.” This is easiest done with a rifle in hand, but don’t think for a second it’s impossible as a bowhunter. “I’ve used this tactic in several places — Texas, New York, Mexico — and I haven’t hunted with a rifle for well over 30 years,” Jacobson said.
How far will a buck travel during peak rut? According to Jacobson, it depends on individual bucks.
“Basically, you’ve got two types of bucks: the searcher that travels throughout the countryside looking for receptive does, and the buck that just waits in the neighborhood for the action to begin. But when the rut is on, both types of bucks will be traveling way more than at any other time of year.”
Bucks in open country with sparse cover are also likely to travel farther than their brush-country brothers, and they’ll also be more visible. Chasing Western whitetails during the rut can be very fun and productive. Regardless of your location, there’s one constant as noted by Jacobson.
“Bucks are much more approachable during lockdown than they are at any other time in the season. As long as the doe doesn’t see you, the bucks are going to stay. They almost ignore you.”
Buck-to-doe ratios, nutritional conditions, habitat types and other local factors can influence such deer dynamics during lockdown. Generally speaking, most does in one area will go into estrus within a short time window and get the opportunity to mingle with at least one buck.
“With a very low buck-to-doe ratio, there’s a remote possibility a doe won’t be bred on her first cycle,” Jacobson noted. If she doesn’t get lucky, she will go into estrus again 21 to 29 days later — referred to by some as the second rut. “If you have good nutritional conditions, upward of 40 percent of yearlings will breed during their first year of life,” Jacobson said. “This usually happens a month or two after the first rut. They’re using that extra time to reach a critical body weight that allows them to carry fawns as yearlings.”
Buck-to-doe ratios, nutritional conditions, habitat types and other local factors can influence such deer dynamics during lockdown. Generally speaking, most does in one area will go into estrus within a short time window and get the opportunity to mingle with at least one buck.
EIGHT HOUR STAND-OFF It was mid-November in north-central Nebraska — a remarkable region of the country where mule deer and whitetails thrive together in the rolling, rugged Sandhills. As I pulled into Goose Creek Outfitters, owner Scott Fink greeted me and my cameraman, Jeff “FaFa” Shelby. Two years had passed since I’d visited Goose Creek for an unforgettable mule deer hunt, when I killed my first muley buck that was locked down with a doe. This time, whitetails were on my mind.
Upon our arrival at dusk, I verified the zero of my Mossberg Patriot with Nosler Ballistic Tips punching a tight group at 100 yards. Scott added to the momentum of my confidence by laying out a game plan for the following morning. “A really big buck has been hanging around a swamp down the road. I think we’ll start by glassing that swamp tomorrow.” A deceiving warm breeze whispered across the prairie as we packed up and headed back to the Fink ranch, but ScoutLook Weather forecasted a cold front that would scream into the area overnight. Morning came quickly and two important predictions were validated as we glassed the Sandhills at sunrise: It was blistering cold and the swamp buck was there.
But the 150-class whitetail wasn’t across the road in the willow swamp where Scott expected. Instead, I spot- ted him through my 8X Nikon binocular on our side of the road — chasing a doe into a dense patch of cedars. Several minutes passed as I watched for the deer to pop out, but it didn’t happen. It was the tail end of the rut, but this buck was on lockdown with one last hot date.
These deer were tucked into a precarious position. They were downhill just far enough that I’d have to get even with them to be in comfortable rifle (and camera) range, but the only available cover would put them downwind. Scott backed out to reduce the human variable of our potential failure. FaFa and I plopped down in the wide open, with a stiff wind blowing across our desperate faces. I set up my shooting sticks and he deployed his camera tripod. We would wait until the buck surfaced outside the cedars, but like him, we knew this futile effort was at the mercy of a stubborn doe.
“There he is!” The buck came blazing out of the thicket on the doe’s heels. I didn’t even have time to shoulder my rifle, let alone prepare for a shot. They ran to the opposite side of an adjacent woodlot, out of sight. “Damn,” I whined to FaFa. “We’re probably screwed on this deal.” But holding onto a fragment of hope, we hurriedly ran uphill and circled around an evergreen windbreak, praying this would get us parallel to the deer while remaining downwind and in range. We found our new post and settled in.
The massive swamp buck reappeared in a flash, this time jumping a fence and showing himself just long enough to make us scramble for a shooting position, but just brief enough to compound our frustration as he disappeared again behind heavy cover. Seven hours had now passed since my first glimpse of this lockdown giant. The gloomy autumn light was fading, but our commitment to this hunt was burning stronger than ever.
One hour later — a total of eight hours on this rutting duo — I found a steady rest and sent a Ballistic Tip into the swamp buck’s broadside heart. Patience, determination and luck were all integral to my success … but I’d be remiss without extending some gratitude to the bossy doe that kept a lovesick buck on lockdown.
— Josh Dahlke is an outdoor writer and host of an online hunting film series called THE HUNGER. To see the author’s hunt featured in an exciting short film, search YouTube for “Hunting a giant whitetail on lockdown.” When his three freezers aren’t full of wild game, he suffers from anxiety and depression.
“What are you shooting?” This question comes up dozens of times at the range each day. While the recipient may be more inclined to answer with their rifle’s make and model, we all know the person is really asking about the cartridge. There is presumably no group of shooters that this applies more to than Precision Rifle Series (PRS) competitors. The debate rages on over which cartridge is best suited for long-range engagements, particularly when multiple targets and awkward shooting positions are involved. So much so that the PRS website surveyed shooters and compiled a list of the most popular rifle cartridges.
Here are the top five PRS cartridge choices, as well as my thoughts on each. They are listed in order of popularity.
1. 6.5 Creedmoor
No surprise here. Despite a rather slow start, this cartridge has exploded in recent years. At the time of this writing, 286 PRS shooters have reported the 6.5 Creedmoor as their match cartridge of choice. And with good reason—this round is efficient, ballistically sound and widely available.
If you asked me five years ago if you should buy a rifle chambered in 6.5 Creedmoor or .308 Win., the recommendation would have been .308 Win., hands down. The reasoning was both can be equally accurate and relatively wind resistant inside of 500 yards, but five years ago the tiebreaker was ammunition availability. Of course, this is no longer true and now many stores have more options in 6.5 Creedmoor than for .308 Win. Sure, there’s military surplus available in .308 Win., but those people seeking precision aren’t interested in inexpensive “machine gun” ammunition. The M118 rounds are as costly as nearly any other commercial offering. It seems that 6.5 Creedmoor is the most popular cartridge in long-range competition because it’s the most popular cartridge in long-range shooting—period.
2. 6mm Dasher
Flat shooting and stupid accurate, 6mm bullets are great as long as you get ‘em moving fast enough. In the PRS shooter survey, 182 shooters reported 6mm Dasher as their cartridge of choice. The 6mm Dasher came to be as a means of getting more velocity out of the 6mm BR cartridge. Making the cases involves little more than chambering a 6mm BR into a 6mm Dasher firearm and letting nature take its course. It sounds a little scary if you ask me, but it is indeed safe.
During the firing process, the case body elongates and the shoulder angle sharpens allowing for increased powder capacity and more consistent alignment with the lands. This hops up velocity and flattens its trajectory.
3. 6mm Creedmoor
“What he just said” is probably the easiest way to understand why the 6mm Creedmoor cartridge makes number three on the list with 162 shooters claiming that this is the secret to their success. Basically, take the uber-popular 6.5 Creedmoor and neck it down to take the faster and flatter shooting 6mm bullets and you have the 6mm Creedmoor.
The flatter the trajectory, the less perfect your range estimation needs to be. The availability of match-grade commercial ammunition made it an instant success for shooters who didn’t reload. This meant those with undeveloped range estimation skills could get into the game and score very well on unknown distance targets. Plus, firearms manufacturers like Savage offer rifles chambered in this cartridge that meet the requirements for PRS Production class, making it effortless to compete with this laser beam of a cartridge.
4. 6mm BR
Sure, we can do all kinds of things to increase the accuracy and effectiveness of the 6mm BR, but some argue that back in 1978 perfection was achieved. As the granddaddy to several modern long-range cartridges, 6mm BR finds itself squarely at number four in the rankings with 61 shooters choosing it.
The argument for its relevance stems around prolonged barrel life. While the sky is the limit on projectile velocity, that speed does a number on your bore and you will have at least one barrel job in your future. The 6mm BR does a good job of balancing velocity with barrel life and is made from components that are easy to find. There are even a few factory ammunition offerings available.
5. 6XC
It’s pretty hard to argue with champion shooter David Tubb on accuracy. Between his NRA High Power and Long-Range championship titles, it’s evident that he knows a thing or two about putting lead on target. His 6XC cartridge is touted as one of the easiest to tune 6mm cartridges and offers better barrel life than the 6mm Creedmoor. In terms of velocity, think of it as somewhere in between 6mm Dasher and 6mm Creedmoor. Of course, each shooter’s individual recipe will affect that relationship.
This round likely found its way on the list as the design of such a high-level competitive shooter, with 56 shooters reporting using 6XC in the survey.
Conclusion
As in the past, popular cartridges should continue to edge out competitors that don’t have a big following. For years, 6.5 Creedmoor has been my go-to, but that’s largely because it was frequently recommended to me in the past. Something that surprised me was that .308 Win. found itself just off of the list at number six. The most accurate rifle that I own is chambered in this classic multi-purpose round. How can a 68-year-old design outperform far more modern cartridges?
The answer is simple—because I shoot it the most. (Note: Fellow Shooting Sports USA author Jim Shults came to the same conclusion about the .308 Win. in this article—Ed.)
See more: Top 5 Precision Rifle Series Long-Range Scopes
Coyote hunting is my second favorite hunting sport, next to deer hunting. It’s fairly simple and doesn’t take a lot of gear to be successful.
The best time to hunt Coyotes is a winter morning or evening. Coyotes are desperate to eat in winter and respond well to food calls both day and night. It’s also easier to spot coyotes in winter after the cover brush has died back. Winter is the most forgiving time to hunt coyotes and a great time for beginners to start.
So, how do you find success consistently and how do you maximize your chances? I’ll go over nighttime vs daytime hunting, and what you can do to find good coyotes all year long.
The 3 Most Likely Seasons For a Succesfull Coyote Hunt
The most productive coyote hunts are usually in Winter, early Spring, and late Summer. Winter is when Coyotes are most hungry. Early Spring is mating season and mature males are easier to lure in. Late summer is when pups have matured and ventured out on their own, lacking experience.
The vast majority of coyote hunters agree that the easiest time to call in a mature coyote is during the height of winter. In winter, food is scarce and it takes more food to keep up their body temperature, so they get desperate.
Coyotes are usually far more willing to respond to a basic distress call in winter than any other time of year. And, they tend to respond much quicker. Hunger is the main driving force of nature and coyotes are no exception. When they get hungry, they will start taking big chances.
Early spring, February -March, males are looking for a mate. All you have to do is sound convincing. This is the one thing that takes precedence over finding a meal. A male coyote may forgo eating for days when on the trail of a female.
If you’re after a large, thick fur, this is probably the best chance of that. Furs are still in their prime from winter, and the wariest old coyotes lose all inhibition when looking for a mate.
The Fall hunt is when the woods and fields are filled with young male coyotes that just left their mother’s side. Their lack of experience makes them pretty vulnerable to calling in. But, they do learn quickly.
How to Hunt Coyotes in Winter.
Winter is the easiest time to spot a coyote. It’s also the easiest time to lure them in with a food call. by that, I mean something like the rabbit distress or woodpecker distress call. Replicate the sound of a free meal and it’s hard for a coyote to resist.
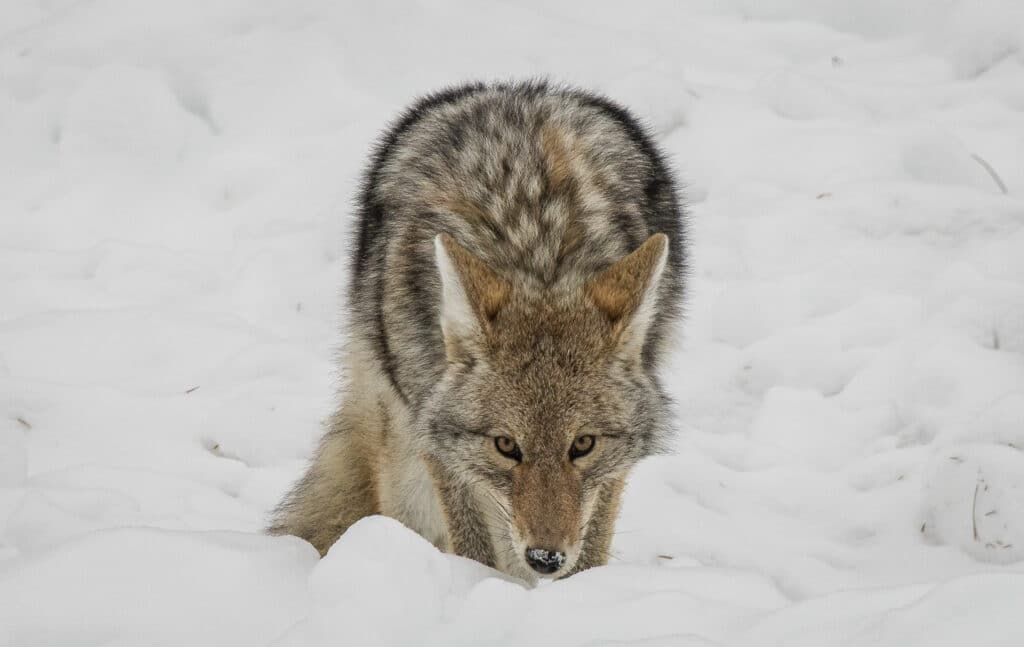
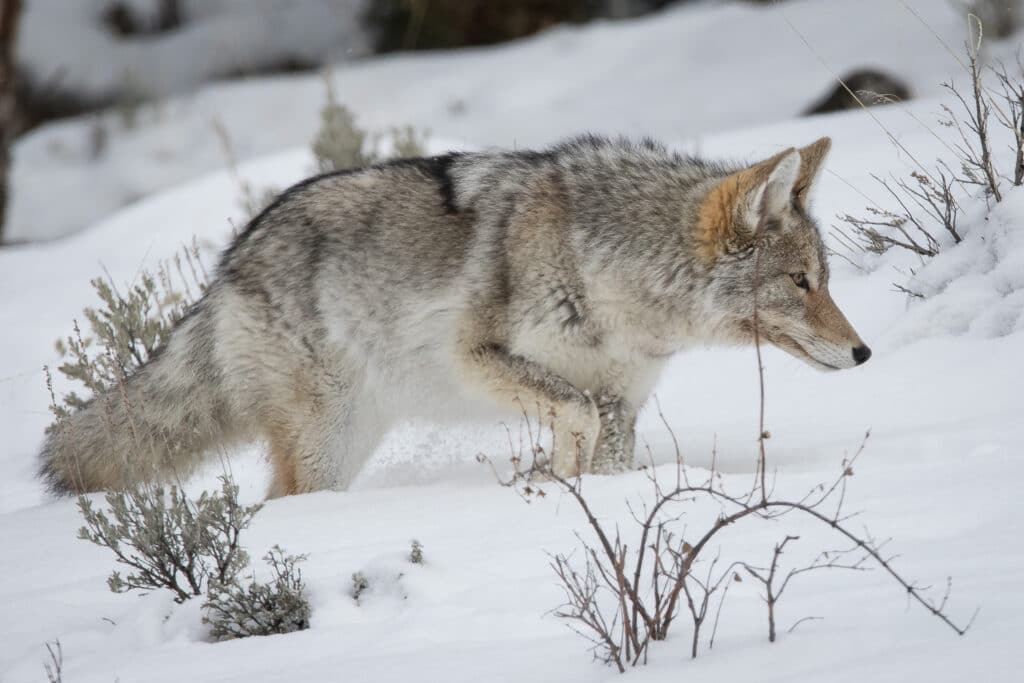
Besides the increase of food motivation, winter is an easy time to spot a coyote. Particularly if there is a light snow cover. Coyotes may seem light-colored most of the year, but they look like a large dark spot against a white, snowy field.
Plus, after the grasses have died back and the brush has lost its leaves, it’s only easier to spot a sneaking coyote. You’d be shocked to know how many coyotes are called in but never seen in the summer months.
You may think that since coyotes are easy to spot in winter, you would be too. I find it easier to hide in winter, particularly if it’s snowy. Snow camouflage hides extremely well against a snowy background. I have hunted with as little as a white sheet covering me. It’s pretty basic really.
My favorite method is to dig a hole in the snow and cover it up with my white snow poncho. I’m 90 percent below the snow and covered well. Nothing can see me then.
If you Live in a sane climate and don’t have snow, You’ll need to use something else to break up your outline like a tree or bush, unless you are hunting during a dark night.
My biggest tip to hunting coyotes in winter is to bring hand warmers. Hand warmers will keep your fingers able to operate your call and your trigger. I always carry two or three. Generally, they don’t get used, but sometimes they’re a lifesaver.
I actually know a guy who saved his life with hand warmers. During a negative 20-degree day in the Montanna mountains, he went through the ice on a lake. After crawling out, his fingers were unable to work his lighter to light a fire. He used about 15 hand warmers to bring up his body temperature from freezing.
Hunting Coyotes in Early Spring
Hunting coyotes in early Spring means learning to use howl calls. You can use The Lone Howl effectively. The Lone Howl is just a male announcing his presence in the area. That’s a good way to bring in a territorial, seasoned male.
Another great call is the Female howl, which is a higher pitch, just letting other dogs know who’s around. Finally, there are the Female Whimpers. The Whimpers is an estrus call, letting males know it’s now or never.
I personally don’t like the early Spring hunt because I often end up soaking wet. If the weather is right, cold and dry, I’ll be out hunting. If the snow is all melting and it may rain, no thank you.
In early spring, you may need to wear winter camouflage. If there isn’t any snow you’ll probably want a really good brown or tan, since you will be trying to blend in with whatever is on the ground. Of all the times to bring a hunting seat, Spring is it. Otherwise, you may end up with a really cold, wet caboose.
Hunting Late Sumner Coyotes
The Late Summer hunt is When you can find more coyotes, but they tend to be smaller. It is probably the second easiest time to call coyotes, and it’s easier to hunt in fall than in a cold winter. Most of the coyotes shot in late Summer are males, as they travel out and claim their own territory.
Late summer is certainly not for everyone. I enjoy a hot August day hunting coyotes. But my brother in Texas, not so much. If you don’t mind the heat, it’s a great time to find some mid-season success.
Another point here is that young coyotes don’t follow all the “rules”. Things like approach from downwind and approach cautiously from a position of cover; yeah they don’t always apply here. Be sure to keep your eyes moving and stay alert. They may be young and stupid but are still sneaky and quick.
If done right, territorial calls work well in this season. But, most hunters stick to the standard distress calls, for the most part, changing up only when things aren’t working as planned.
Although the late Summer season is filled with foolish young males, do your best not to tip them off. Try to keep still, quiet, and keep your scent down.
Coyotes are More Active Just Before Dawn
Coyotes are fairly nocturnal creatures and do most of their hunting under the cover of darkness when it’s easier to sneak. The most active time in my experience has been within a few hours of sunrise. But, coyotes are fairly active all night long.
Nighttime is generally when coyotes are hunting and making social calls. That behavior starts just after sundown, and it ends just before the sun comes up. Most of the activity is often at the beginning, or the end of an all-night hunt.
Camo isn’t that big of an issue when hunting at night. I’ve seen hunters go out in a black hoodie and come back with several dogs. you just need to be quiet. There is less ambient noise at night, and sound travels further in cooler air so coyotes will hear you easier.
Nighttime hunting requires either good lights or a basic night vision setup. Nightvision is more effective and much simpler than hassling around with lights. I don’t really recommend hunting with lights for coyotes, but some people do it regularly.
Lights can get the job done but are hard to work with and don’t tend to be productive in more hunted areas. A basic night vision like the SightMark Wraith costs around $450 and it’s a good scope for daytime use too.
Really, all you need is a gun and a night vision scope. A tripod or bipod helps a lot. It keeps the rifle steady and gets it above the level of grass and brush so you can make a clear shot.
If you aren’t into nighttime hunting, it may sound daunting and too complicated. Truth is, it’s kinda easier than hunting in the day, just because it’s easier for you to stay hidden.
I wrote a full-length article on Backfire about nighttime coyote hunting. Here’s a link to it.
This is Jim Harmer’s Sightmark Wraith on an AR-10 set up for nighttime hunting
Coyotes are Mostly Nocturnal, But not Completely
Coyotes are somewhat active during the day, and many are shot in daylight hours. They are much easier to spot in daylight, and shots are easier to make. a coyote can come in at any time, day or night.
It’s only been recent that nighttime hunting has become popular. It always used to be that coyotes were hunted nearly exclusively in the day. That changed as the tactical crowd started making night vision scopes more common.
Today, there are possibly more nighttime hunters than daylight hunters. And, because the price of quality night vision keeps going down, it’s something most people can do.
I still hunt mostly in the day, because hunting all night on the weekend messes me up come Monday. It works, and you have to do what works for you. Tons of coyotes are shot during the day.
Is it Better to Hunt Coyotes in the Morning or the Evening?
Early morning is often the best time of day to hunt coyotes. Depending on your area, it could be better in the evening, but most hunters prefer the morning hunt. Coyotes can be active all day, and you need to be vigilant at all times during a hunt.
There really isn’t a magic time to hunt coyotes. Like the old adage says, the best time to hunt is when you can go. It really falls down to personal preference, and whether or not you want to buy night vision. If staying out late isn’t going t work for you, that’s fine. Just hunt in the day. It works.
Coyote Hunting in Warm vs Cold Weather.
When hunting in the winter, it’s acceptable to call aggressively. In warm weather, you can call too much and scare away coyotes. Expect coyotes to be more forgiving and less wary in cold-weather, and more cautious in summer.
Being in Michigan, I know about cold. Cold isn’t usually the issue. The winter problems are moisture and wind. Consider carrying a neoprene ski mask in your pocket in case the wind comes up.
The biggest difference is how you dress. In winter, you need to stay warm and dry. You have to be fairly concerned with water repellent outerwear, and moisture-wicking or breathable underwear. Being cold and wet will kill any hunt.
If you start to sweat on your way to your hunting spot, unzip your jacket and/or take your hat off to cool down. Perspiration can make you cold when you sit down and stop moving.
If you can handle hunting in cold weather, go for it. It’s usually more productive. Just maybe bring an extra pair of socks in case your feet get wet.
The other concern is your calls. Mouth calls can freeze up, and electronic calls can have issues with freezing batteries. Prevent your mouth calls from freezing up by putting it in an inside pocket, or tucking it inside your sleeve. If it’s incredibly frigid, warm up your caller’s battery every hour in your car.
The most important accessory for coyote hunting in warm weather is bug spray. Mosquitoes or blackflies can eat you alive and make it impossible to sit still. I like the 99 or 98 percent DEET stuff. Don’t overdress, and bring water because you’ll sweat a lot.
If you avoid wearing dark colors and sit in the shade, you should be fine anywhere outside of Death Valley. I’ll also note that rifles shoot higher in the heat. Hot air creates less resistance on the bullet and increases the chamber pressure. That makes the bullet a bit flatter shooting.
The opposite is also true. Bullets lose energy quicker and start out with a tad less pressure in cold weather. Be sure to check your rifle’s zero at least in the season of your hunt.
Also, do you know why desert coyotes howl at night? It’s because they can’t see the cactuses ahead after sundown.
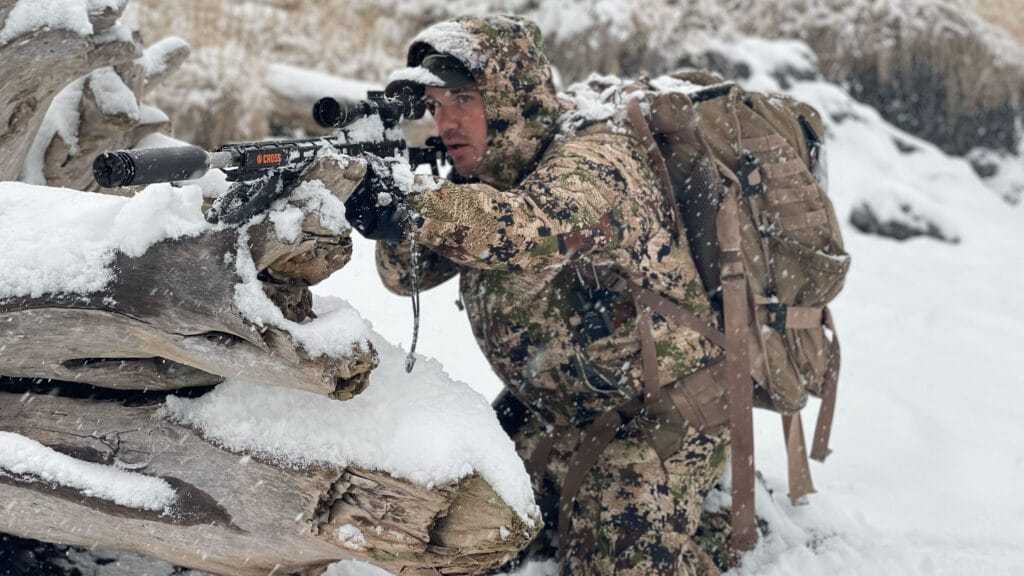
My thoughts on venomous snakes are well known among my hunting buddies. I think they have just as much right to be in the woods as I do. As a rule, I leave them alone and let them go about their snake lives while I go about mine. Growing up in an area with more than a few rattlesnakes and as dense a population of copperheads as anywhere I have ever traveled, I learned to watch for them at an early age.
That said, I’m a realist, and I know a lot of people don’t want them around their property, especially if children, livestock, or pets are in the area. So, any time I find out someone might be prone to killing a rattlesnake around their property, I always ask them to put them on ice and give me a call. Why, you might ask? Because rattlesnakes are delicious.
We’ve talked about frying them before here. But they are pretty good slow-smoked on the Traeger grill as well.
(Don’t miss: Deep-Fried Spicy Rattlesnake Recipe)
We’ve also talked about safety. Most people who get bitten by a venomous snake do so because they are messing with it. Don’t do that. Also, freshly killed rattlesnakes can still bite and can still inject venom. If you do kill one, use an ax, a shovel, or a machete to remove the head from a safe distance if the snake is freshly dead. If the snake has been frozen or on ice for a while, you are a little safer, but I still don’t like handling the business end of one. I don’t like to leave the heads where curious children or my dogs can pick it up, so I usually lop it off with a shovel, then dig a hole and use that same shovel to pick up the head and drop it into the hole and bury it.
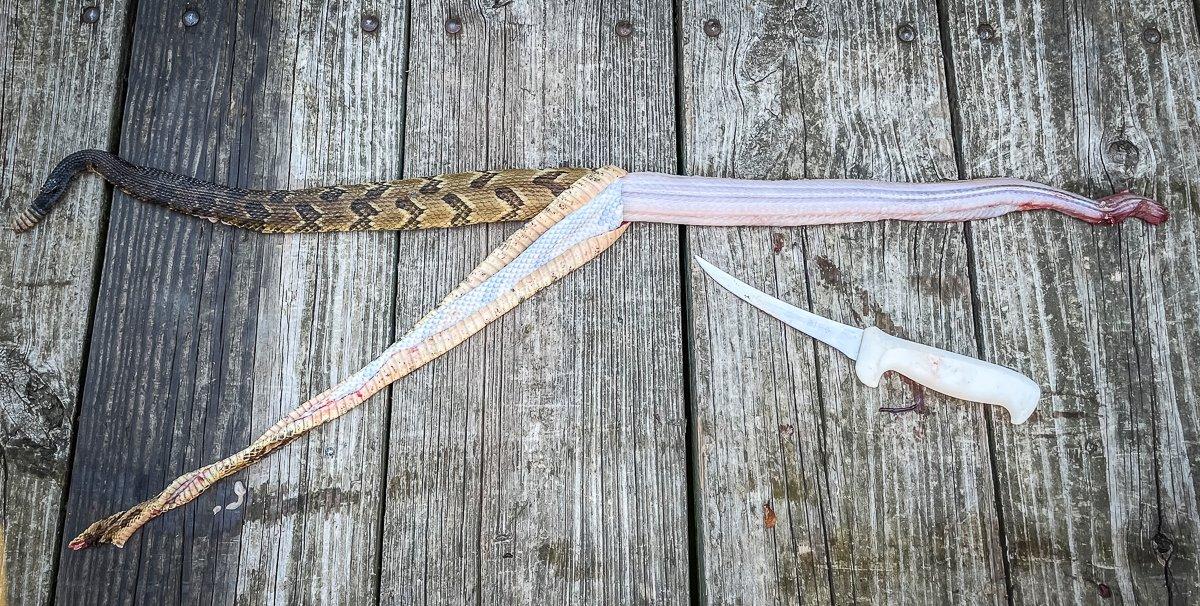
If you’ve never skinned a rattlesnake, you can see the steps involved here. Once you get the snake skinned, vacuum seal and freeze it for storage, or go ahead and cook it right away. Rattlesnakes have a pretty short shelf life, even refrigerated.
(Don’t miss: How to Skin and Prepare a Rattlesnake for the Table)
Another concern with snakes is that they often carry salmonella. I wear disposable gloves while cleaning the snake, wash knives and cutting boards well with hot, soapy water afterward, and always cook to at least 160 degrees Fahrenheit internal temperature.
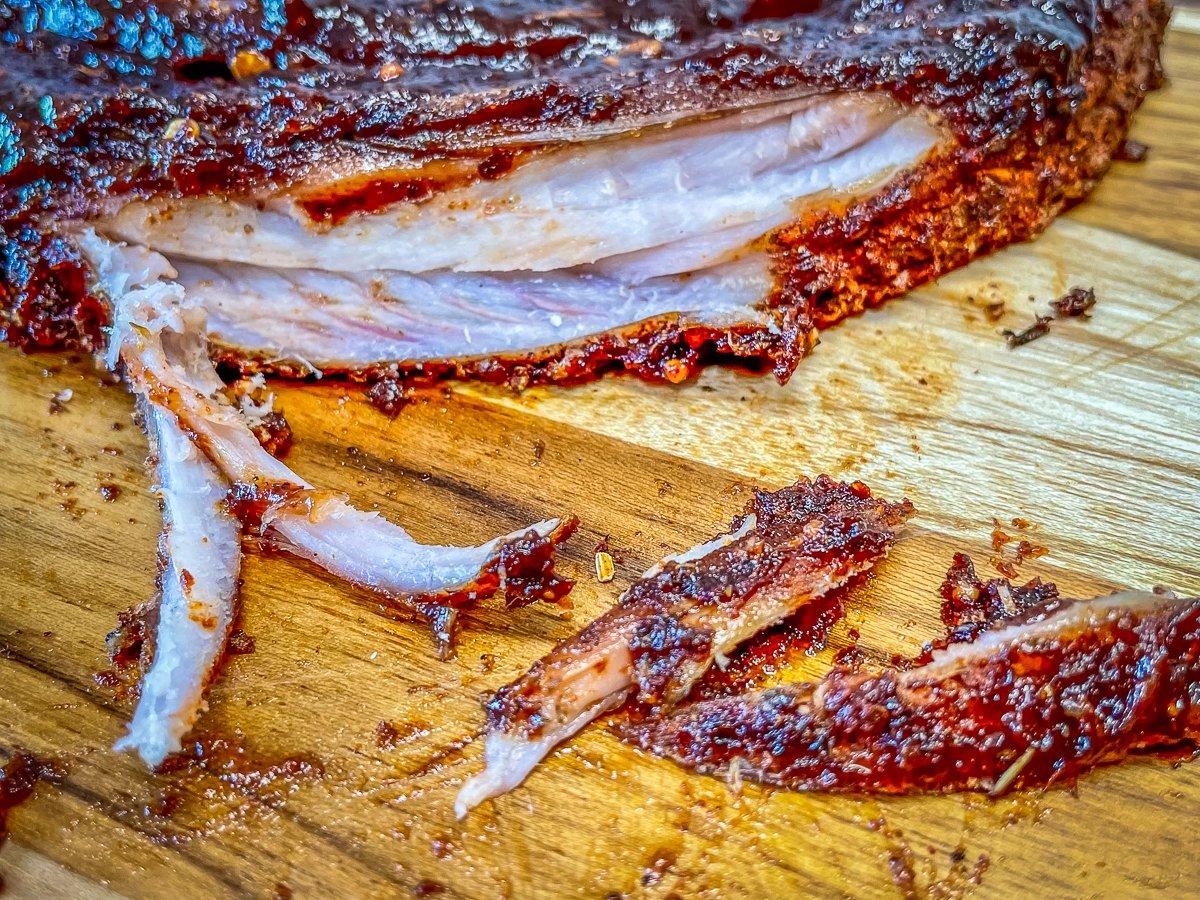
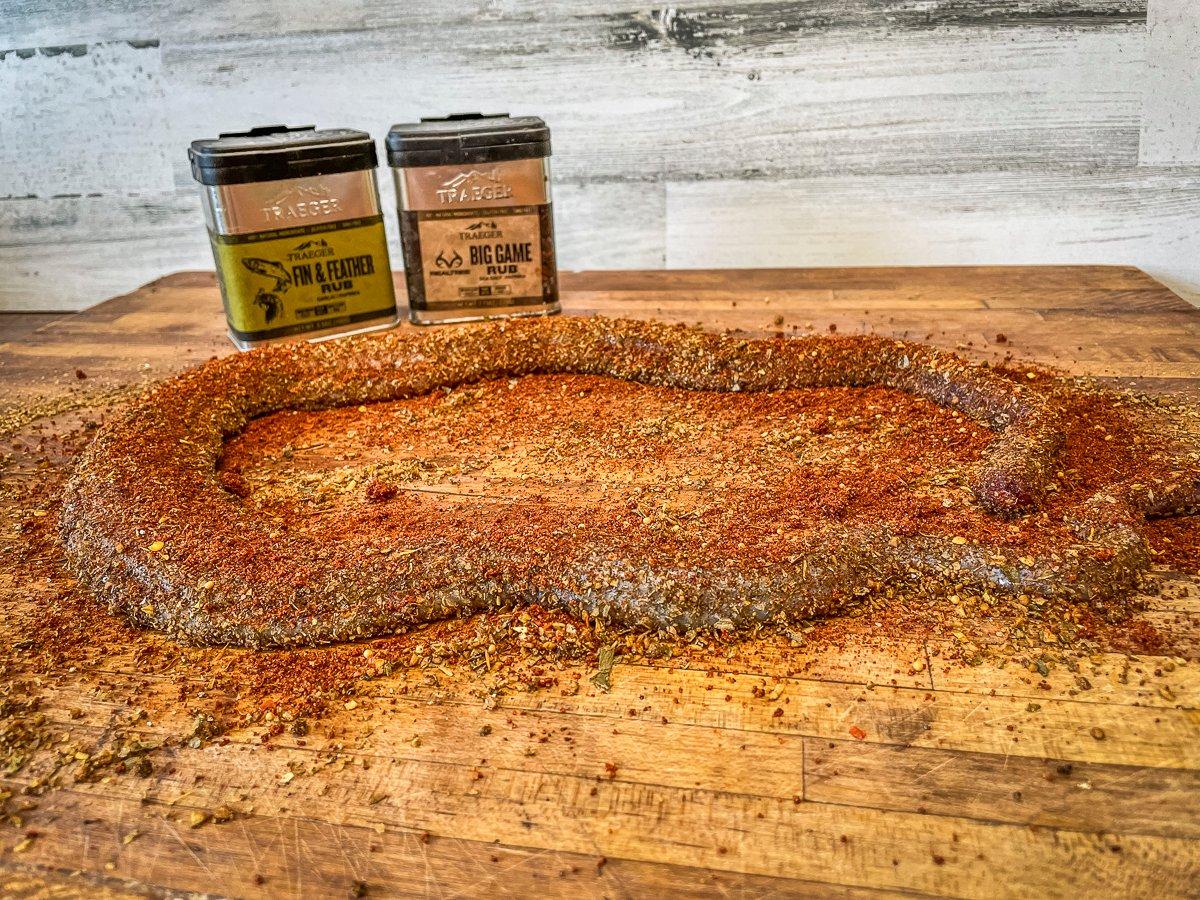
As far as the actual process of barbecuing a snake goes, there isn’t much to it. Skin the snake, remove the entrails, and rinse it well. Coat all surfaces of the snake well with your favorite BBQ rub. I used a combination of Traeger Big Game Rub and Traeger Fin & Feather.
Since snakes are shaped like, well, snakes, they can dry out pretty quickly at longer cooking times. To help combat this, I like to roll the snake up in concentric circles, and pin it together with a wooden skewer. Start from the tail section and roll the snake around itself, ending with head end on the outside. Run a wooden skewer in from the side to pin the rings together.
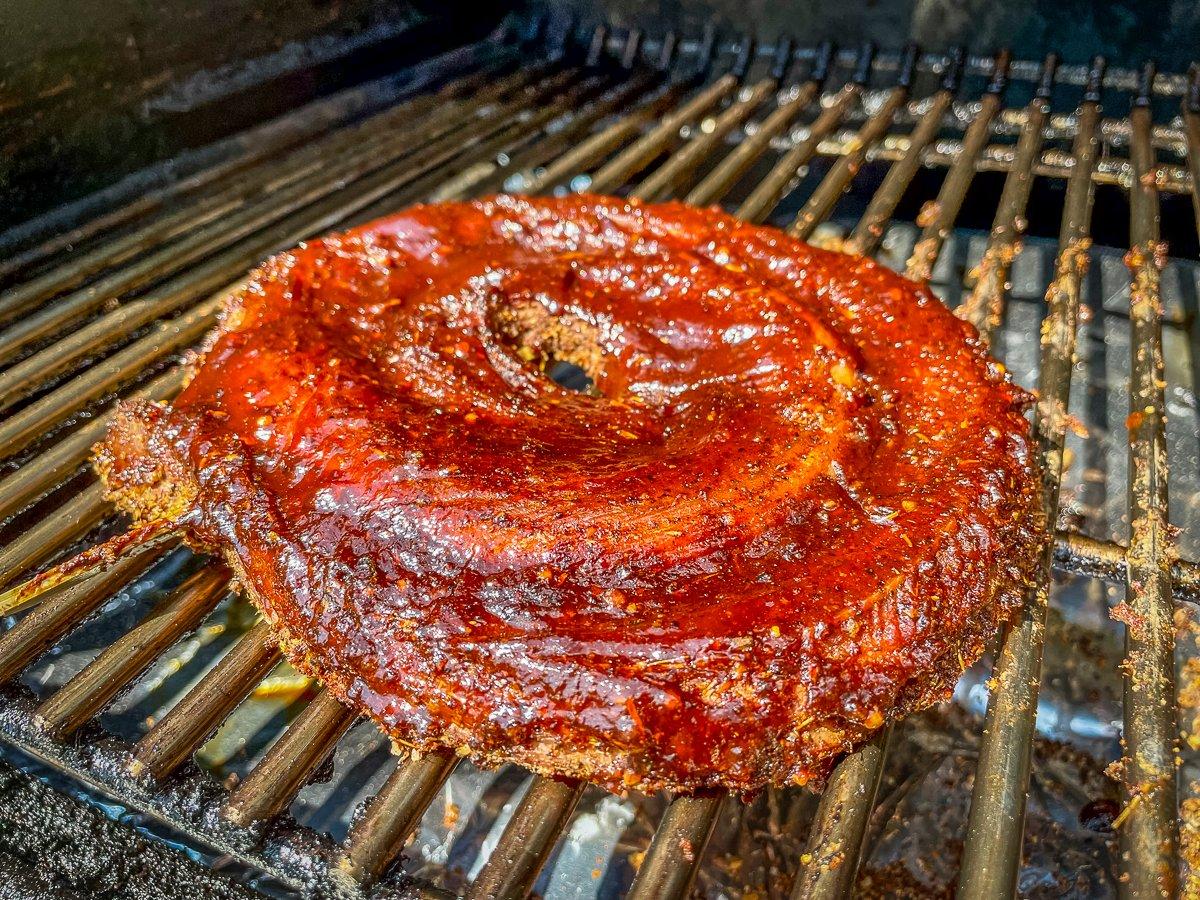
Move the rolled snake to a preheated Traeger grill with the temperature set at 225 degrees. Turn the SuperSmoke function on for more smoky flavor. About an hour into the cook, brush the snake with your favorite BBQ sauce. I used Traeger Texas Spicy for this one because it seemed like a perfect fit. Repeat the sauce every 15 minutes for the remainder of the cook.
Smoke the snake for 2 to 3 hours, or until a meat thermometer inserted into the thickest part of the meat reads 160 degrees. Rest the snake, loosely tented with foil, for 10 minutes or so before serving.
To serve, remove the wooden skewer and cut the snake into individual 4- to 5-inch sections, or just serve the snake on a cutting board or platter and let your guests pick the meat from the bones. Most of the meat will lie along the backbone, kind of a backstrap, so to speak, but you can also get meat from around the rib bones and along the belly.
We like to serve it with a cold beer for an appetizer.
(Hunt in any weather: Men’s Insulated Max-5 Waterproof Parka)
Gamo is a Spanish brand with over 60 years of market experience.
They specialize in rifles, bullets, and BB guns.
Airguns and pellets need to be precise in every detail, so they develop and manufacture them in the local facilities in Spain for the best quality control.
Gamo Coyote has innovative products at an affordable price, which is the reason why they are available in over 90 countries.
The whole gun is made by German craftsmen and will last for decades.
Although the gun is spring-powered, it is really compact and easy to hold and shoot.
The barrel is 19.5″ long.
The overall length is 45 inches.
The gun weighs around 9 pounds.
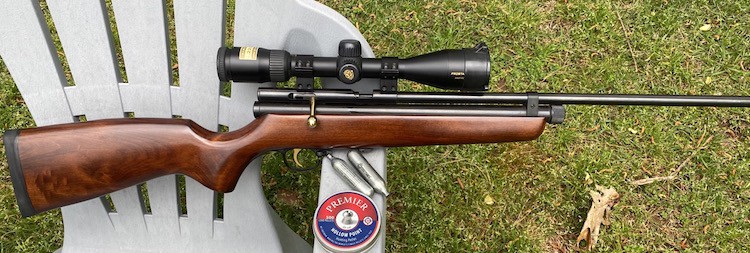
The RWS 34 .22 caliber air rifle is powerful and accurate.
The rifle also comes with a very accurate scope.
You can shoot down a pigeon up to 70 yards away.
It does have recoil as it uses a spring as the power source.
However, you won’t need to worry about recharging.
On .177 caliber, its velocity is 1000 fps.
On .22 caliber, its velocity is 800 fps.
The rifle is suitable for medium game hunting like rabbits, raccoons, etc.
Drawback: It has a single shot capacity.
When it comes to medium game hunting, you need a .22 air rifle, and the RWS .22 pellet model 34 air rifle is one of the best .22 air rifles for hunting at $300.
Crossing an alligator’s path in your own yard is, to put it mildly, not a pleasant experience. If it has already happened to you, then you know what I’m talking about. It’s a potentially dangerous situation, especially when it comes unexpectedly.
According to a study from Duke University (source) large predators, like alligators, are moving into unexpected areas that were former hunting grounds until humans have been taken over. Therefore, protecting your home from those animals is more current than ever.
So, how can you keep alligators away? Here’s a quick answer:
The first step to keep alligators out of your yard and pool is to eliminate all the things that might attract them. As a second step, put up a sturdy fence. That will effectively keep alligators off your property. Installing a pool enclosure is also a good idea, however, beware of natural alligator repellents.
Read on for the details.
If you live in a climate where meeting an alligator (or a crocodile) is a real concern (like South Carolina, Florida, or Louisiana), it’s a reasonable decision to make the necessary precautions to keep them away from your house. In this article, I’ll show you the most effective ways you can keep alligators out of your house, pool, and yard, so it is one less thing you have to worry about.
How fast can alligators run on land? Can you outrun them? Find the answer in this article.
Alligators usually visit your yard for a reason: they look for food, water, and sometimes shelter. So the first thing you want to do is make your yard unattractive for them. For this reason, eliminate all kinds of food (including garbage) that alligators might have access to from your yard. Never store leftovers in the open air and don’t forget to clean up after barbecuing.
The next step is to eliminate clutter: if your yard is clean and tidy there’s less chance that an alligator (or snakes) will use it as a temporary shelter.
Let’s move on to water. Alligators love water, so pools are definitely attractive factors for them. Of course, preventing alligators from having access to your swimming pool is much harder to accomplish than eliminating clutter or garbage from the yard.
Using a standard pool cover will keep smaller animals out of your pool but it’s often useless against larger critters, like alligators (not to mention that if the pool is often used, it can be a tedious job to cover it every evening). You can find both solid and mesh safety pool covers on the market but they’re usually for winterizing purposes and not suitable for daily use.
A built-in automatic pool cover can provide real protection but it’s pretty expensive and sometimes it’s not easy to add it to an existing pool. However, if you’re just planning to build a pool, I definitely suggest you consider this option. All-Safe sells pretty reliable and durable automatic pool covers that are very comfortable to use.
If installing an automatic pool cover is not an option for you, just continue reading: there are other methods to keep alligators away from your pool and I’ll show you all of them.
2. Put Up a Sturdy Fence
Will a fence keep alligators out of your yard?Fencing, when done properly, is definitely one of the best ways to keep alligators off your property. However, if you’re about to install physical barriers, like a fence, it’s essential to do it the right way so that alligators can’t get through it.
First of all, you have to bury the fence at least 1.5-2 feet into the ground to prevent alligators from digging under it. You can improve security by installing concrete footers, although it’s not an absolute necessity. Next, you want to make sure they can’t climb over the fence. You may wonder, “Can alligators climb fences?” Just have a look at this video:
Alligators can climb chain link fences.Period. Some of them can climb a 5 feet high chain link fence without any major difficulty (however it’s not typical).
So how can you make a chain link fence alligator-proof? Height is important but as you can see, in itself, it doesn’t always stop alligators. The solution is to install a fence that is at least 5 feet high and the top of it is tilted outwards (at a 45-degree angle). It’s also called an overhanging fence. If some adventurous gators try to climb it and reach the top of the fence, they won’t be able to climb over it thanks to the angled part. You can reinforce the top of the fence with barbed wires.
Instead of a chain link fence, you can put up a wooden or aluminum (or concrete) fence to keep alligators away from your yard. They can’t climb an aluminum or a wooden fence with a smooth surface if it’s high enough because there’s nothing they can use to support their weight while climbing it.
If separating your pool is all you need and want the least obtrusive method, then consider installing a fence made of thick and durable safety glass. It will prevent gators from accessing your pool while nothing will block your view. Just keep in mind that glass fences require more maintenance (cleaning) than regular ones.
I highly suggest that you consider some kind of fencing if there’s a pond, lake, or canal close to your backyard. Those are the habitats where alligators spend most of their time and if you live close, it’s much more likely that you’ll cross each other’s path.
Electric Fences
Electric fences are another solution: they can deter and keep alligators off your property effectively. One of their major advantages over chain link, wooden, and aluminum fences is the faster and easier installation. Also, they’re much less obtrusive than standard fences. The disadvantage is obvious: if someone or your pet touches the fence, it won’t be a pleasant experience.
Usually, a single-strand electric fence can provide sufficient protection against gators (but it’s not necessarily effective against other predators). The strand should run just a few inches above the ground so that alligators can’t pass under without touching it.
Electric fences are not difficult to set up and their operation is usually inexpensive.The vast majority of energizers (the unit you should connect the wires to) are high-voltage, low-amperage, and low-impedance. This means that the current will flow through the wires in pulses and due to the low amperage it won’t cause any permanent harm to those animals and humans who encounter the fence.
Modern electric fences with an approved energizer are pretty safe to use: despite being rather popular items, electric fences account for less than one serious injury per year worldwide (source). However, don’t forget that we’re talking about electricity. Keep toddlers and children away from electric fences and make sure you place warning signs on the fence.
Before building any kind of physical barrier around your property, don’t forget to check if you need a building permit for it.
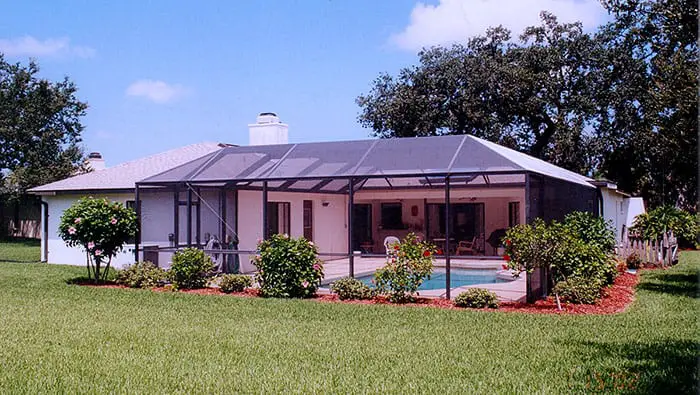
3. Install a Pool Enclosure
Pin
Installing a pool enclosure (also called a pool cage) is an effective way to keep alligators off your pool. While being one of the most expensive solutions, it has many advantages besides securing your pool from gators: it provides a certain degree of protection against harmful UV rays, helps you to keep the pool cleaner by keeping bugs and debris out, and extends your swim time by allowing you to use the pool independently from the weather.
On the other hand, a pool cage reduces the green areas and needs regular maintenance (like removing mildew from the enclosure). Also, a fence around your yard may give you a better experience as it gives you a greater sense of freedom and lets you enjoy your whole yard.
As always, make sure you check your local building code if you want a pool enclosure in your yard.
If you want to improve water quality and take pool safety to the next level, have a look at our article about the best alternatives to chlorine to avoid unpleasant odors, dangerous byproducts, skin and eye irritation, and other adverse effects.
4. Natural Alligator Repellents – Do They Work?
You won’t find any alligator repellent in the stores for a very simple reason: none are registered. However, you may have heard of different homemade repellents. One of the most popular methods is mixing humane urine with ammonia and spraying the mixture on the areas where alligators can enter your yard (practically around your property). The theory behind this method is that the smell of the mixture resembles the scent of predators so it may deter alligators.
There are two major disadvantages of using the combination of urine and ammonia as an alligator repellent. First, it smells terrible not only for alligators but for humans (and pets) too. Also, keep in mind that ammonia is a hazardous substance that can cause severe injuries in high concentrations.
Second, it’s not a reliable method: in certain cases, it may work but there’s no guarantee it will deter alligators. That’s why I don’t recommend using it, however, if you don’t mind the smell and don’t have kids and pets you can try it as a complementary method.
5. Alligator Traps
If you want to get rid of alligators, you may wonder if setting up a trap is a reasonable solution. First, it’s useful to know that if you want to use traps to catch alligators, you must have a permit because without it setting up an alligator trap is considered to be illegal. On the other hand, trapping alligators is not without danger: it does require expertise, experience, and proper equipment.
If there’s an alligator in your property or if you’re concerned about safety because gators appear more and more frequently in your neighborhood, call a professional. The state of Florida, for instance, has a program called SNAP (Statewide Nuisance Alligator Program) that was created to help you out when in trouble with alligators. You just have to call them, and they will dispatch one of their nuisance alligator trappers.
Putting It All Together
As you can see, when it comes to keeping alligators out of your yard and pool, there are only a few reliable methods that really improve safety. If keeping gators off your property is a top priority for you, then you can’t avoid installing some kind of sturdy physical barrier around your yard or pool.
Besides fencing, you always want to make sure there are no alligator attractants (like garbage, food, shelter) on your property. Water is essential for gators, so they love to visit homes with a pool. One of the best ways to prevent them from taking a bath in your pool is using an automatic pool cover. If it’s not feasible, you can install a pool enclosure (aka pool cage) or a fence around the pool area.
Every home is different, and sometimes you need personalized guidance. When in doubt, consult with a professional to find the best combination of the available solutions.
")
")
")
")
")


 Pin
Pin


