Home Blog Page 154

What Do the Numbers on a Fly Rod Mean? (With Fly Rod Chart)

0

When entering the world of fly fishing, there are certain aspects of it that become overwhelming. Learning the rod weights and correlating numbers takes time. Having a full understanding of these numbers will help you fish your waters in a much more efficient way. It took me several months to understand what weight rod I needed and when I needed it, but the extra research has paid off in the long run.

What do all the numbers mean on fly rods?

The list of numbers include weight, length, number of sections, action as well as the necessary size of the fly line. The higher the number, the larger the flies and line and the smaller the number, the smaller the flies and line.

Numbers on a Fly Rod

Which Fly Rod Weight Should I Get?

Choosing the proper weight of a fly rod is going to allow you to better target the fish and do so in an efficient way. You can make the proper distanced casts and have enough power to fight fish.

2-3 Weight Fly Rods

These fly rods are a blast to use. They’re a bit limited in where they can be fished, but they create wonderful experiences. 2-3 weight rods are ideal for casting delicate flies at small trout in skinny water. At some points, you’re reaching out with the fly, dropping it a bit upstream and letting it drift down in front of the fish.

How to fly fish for brook trout
Learn 👉 How to fly fish for brook trout

If you know you’re going to spend time on skinny water, do yourself a favor and pick up a finesse rod and enjoy all that it has to offer. They’ll allow you to really test your skills with presentation and casting.

You’re not going to throw 40-foot casts with these rods. Your max distance is going to be around 25 or 30 feet.

4-6 Weight Fly Rods

The 4-6 weight rods are the most common rods in a trout angler’s arsenal. These are perfect for small to large rivers. If you’re fishing out west in Montana, a 5 or 6-weight rod is perfect. You can get enough power to cast, but still delicately present flies if needed.

Casting a 9 foot 5 Weight Fly Rod

Many anglers choose to purchase a 4 to 6-weight rod for their first rig. It’s versatile and will fight the majority of freshwater fish that you find. If you know you’re interested in getting into the sport, but are unsure of what rod, then go with the 4-6 weight. You can throw streamers, dries and nymphs without having to worry about switching rods.

Guide Tip: I absolutely love 4 weight fly rods. Read what to use them for in this article 👉 What is a 4 Weight Fly Rod Good For

You’ll be able to throw 50 to 60-foot casts on a good day with some quality fly line. These rods are great to fish in rivers as well as still water. The versatility is ideal.

7-8 Weight Fly Rods

Your 7-8 weight fly rods are ideal for those larger freshwater fish as well as some saltwater fish. If you’re on your way to Alaska or Canada, a 7 or 8-weight will help in your attempts to catch steelhead. Also, these are great rods for pike, bass and muskie! Some would consider these to be a bit light, but depending on where you are, they’ll work just fine.

You can throw large streamers and poppers with these rods. They’re not great for finesse fishing due to the extra power that you receive with them. If you’re fishing flats or after other smaller saltwater fish, then the 7 or 8-weight would work well.

You can easily get 60 to-70-foot casts through strong current as well as larger lakes. At times, the extra power is necessary to help you get to the fish as well as fight them. While this is a bit more of a specialty rod, if you know you’re primarily after big fish, it’s well worth the investment.

Guide Pro Tip: Do you want a “general purpose fly rod” read this article for my recommendation 👉 What is the Best All Around Fly Rod

9-10 Weight Rods

Most anglers would say a 9 or 10-weight is perfect if you’re targeting salmon, striped bass, snook as well as other saltwater fish. You’ll see spey rods come in this weight as well! Again, they’re a specialty rod, but if you live in an area with these large fish or often travel to remote areas with large fish, then a 9 or 10-weight would work for you.

King Salmon Fly Fishing

You can make extremely long casts with these rods and fight double digit fish with no problem! Streamers are going to be the primary flies you throw with a 9 or 10-weight rod. Get after those big fish and put it to the test. You won’t regret it! There are few things that are more fun than a salmon on a 9-weight rod. You have to give it your all.

10 and Higher

Any rod over a 10-weight is created to be used in saltwater. Targeting tarpon, Giant Trevally, Sailfish and other large saltwater fish is going to require as much power as you can muster. Saltwater fish fight much harder than freshwater fish and will fight to their death. You need to be prepared to throw a heavy fly, heavy leader and fight monstrous fish.

Saltwater fly fishing excursions are wonderful. If you’ve never tried it, give yourself an opportunity to do so. Hiring a guide will help you learn a lifetime of useful information. These rods tend to be a bit more expensive due to their specific use, but if saltwater is your primary water, then it’s well worth the investment.

Fly Rod Selection Chart

To help fellow fly flingers choose a rod, I’ve put together a chart and a download – FREE. Look it over and download a copy to your phone.

Fly Rod WeightWhat Kind of Fish

Click on the below picture to get the a 3 page download that talks all about fly rod definitions. The best part – It’s FREE

Fly Rod Action

After you have chosen the necessary weight of your rod, the next step is choosing the proper action. The right action is heavily dependent on your experience, skill level and the type of fishing you’re doing.

Fast Action

A fast action rod is great for experienced and strong casters. They have the least amount of flex of any action and that allows for a strong fight as well as power to cast through the wind. In order to succeed with this rod, your technique and timing needs to be in line.

Medium-Fast Action

A medium or moderate fast action is quite versatile. You’ll find many 4 to 6-weight rods are moderate-fast action. You can throw dries, nymphs and streamers with ease. You’ll find that these rods have a bit more bend in the blank and not quite as much power.

You won’t be able to cut through the wind as well as you would with a fast action rod, but it does the job. If you’re new to the world of fly fishing, go ahead and give a moderate or medium-fast action a try. Bringing one rod to the river is much easier than several! Many expert anglers still use a moderate-fast action rod because of the sensitivity it provides.

Medium Action

A medium action rod is a solid choice for new fly anglers. It’s even more forgiving than a moderate-fast action rod, but it’s not nearly as powerful. You have to be careful with the size of fish you target when using a medium-action rod. Since it has a bit more bend, you won’t have the power to fight a larger fish.

Many affordable rod options are made with a medium action. You’ll find lighter weight rods with this action because you can nicely lay down small dry flies with the more rod bend. You’ll see about half of the rod bending as you cast.

Slow Action

Many classic fly rods are slow action. They’re a perfect option for the anglers looking to fish small streams and gently lay down small dry flies. Nearly the entire rod bends as you cast. If you’re new to fly fishing and are spending time on small streams, a slow action rod is a great choice.

The rod won’t make you feel as if you’re losing control of your line as you cast. Beware of using a slow action rod in windy conditions! It’s not ideal and you won’t make much progress if you’re looking to make casts over 20 feet.

Fly Rod Length

Fly rods often vary in length, but there are a few standard lengths that you must have. Try to equate the length of the rod to the control you’ll have over the fly line. Often being able to reach out just a bit farther can make the difference.

large open loop fly casting

9-Foot Rods

9-foot fly rods are common in 5 and 6-weights. These are long enough for you to throw dry flies, but also launch streamers quite a distance. A 5’ 9-weight rod is a great versatile option that you can use in almost any scenario that you would like.

8’ 6” Rod

8’ 6” rods are also another common length for 5 and 6-weights. They aren’t going to present dries as nicely, but they can work well with streamers and nymphs. The 8’ 6” length is the most versatile length that you’ll find on the market.

Rods Less than 8 Feet

Rods shorter than 8 feet are best used on small rivers and streams. They allow you to cast in tighter areas and do so accurately. If you know that you’ll be spending the majority of your time in skinny water, then a rod under 8-feet is going to be your best friend. Depending on your skill level, you can choose a different action.

Rods Longer than 9 Feet

Rods longer than 9 feet are often used for euro nymphing. These are ultra-finesse rigs and excel in tight conditions. Longer rods can be a challenge to cast and will get tangled in trees on the banks. However, they allow for a longer reach onto the water and extremely realistic fly presentations.

Number of Sections in a Fly Rod and Why

Most fly rods are either two or four pieces. When fly rods were first created, they were made in two pieces. As technology has developed, they are made primarily in four pieces.

As far as travel is concerned, a four-piece rod is ideal. You don’t have to pay to check your four-piece travel rod tube. If you travel with a two-piece rod, you’ll find that the majority of airlines are going to make you pay for it.

7-Piece Fly Rod, Great for traveling

You’ll even find fly rods that break down to seven pieces. These will fit on a personal item in your backpack! If you can’t take much on the plane, but still want to fish, then the 7-piece rod is perfect.

What’s a Great All-Around Fly Rod?

A great all-around fly rod is an 8’6” 5-weight fly rod. You can use these on small rivers, lakes as well as large rivers. If you choose a rod with this weight and length, make sure you have a moderate-action.

This provides you with the sensitivity to lay down dry flies, but still gives you enough length to make those longer casts with streamers. An 8’6” 5-weight fly rod is one that you can always use no matter where you’re fishing. It’s not a bad idea to own a couple of these rods depending on how much fishing you do.

Fly Rod Selection Guide

What Does a 5/6 Weight Mean?

A 5/6 weight rod is not uncommon to see. Essentially this means that the rod can hold both 5 and 6-weight line. If you do purchase one of these rods, it’s best if you go with a 6-weight line. It’ll give you a bit extra weight so you can make longer casts and get a true feel for the fly rod.

Do You Need More Than One Fly Rod?

The answer to this question depends on how much fly fishing you do. If you fly fish in large rivers, small streams and lakes, you’re going to want more than one fly rod. You won’t be able to fish all of these waters well with only one rod.

However, if you fish similar sized water and fish all the time, one fly rod will work great for you. If you’re like most fly anglers, you’ll quickly fall into the addiction of buying new fly rods.

Last Cast with the Perfect Weight Fly Rod

For beginners, choosing the right size rod can be intimidating. The numbers are confusing at first, but with a bit of research they all begin to make sense. If you match the rod, reel and line numbers, you should be in good shape. An improperly weighted rod is frustrating to use so make sure you put in the time to create a well-balanced setup.

The Firearm Blog

0

This review started when I said mean things about Turkish shotguns online. My comments were generally targeting the gas-operated bullpup magazine-fed guns, but I have had a generally negative view of most Turkish shotguns. That opinion is based on a parade of Turk shotguns that have come through the shop where I work. As a category, they have more issues than shotguns of other origins. But they also have price points that tend to be much lower. I was soon contacted by a VP at Four Peaks Imports who threw down the gauntlet. He offered to send out a shotgun from their lineup because he thought shooting one would change my mind. I respect his approach of choosing a public hater as a potential reviewer, and letting the product speak for itself. I selected the Aksa S4, and in short order, it showed up at my FFL.

Semi-Auto Shotguns @ TFB:

  • Mossberg 940 Pro Turkey Shotgun in Mossy Oak Greenleaf
  • Weatherby Expands Element Lineup with New Element Turkey Shotgun
  • New Enhanced Girsan MC312 Tactical Shotgun from EAA
  • Mossberg Unveils The New 940 Pro Tactical Semi-Auto Shotgun

TFB Review: Aksa S4 "Turkinelli" Clone

Attack of the Clones?

The Benelli M4 is a legend. There can be no debate on that point. It has been used by militaries, police forces, competition shooters, and people who just like nice shotguns. It has graced the silver screen and been used in Triple-A video games.

Whenever a gun reaches icon status, there will be clones. Some clones are more of an homage to a design, others are quite literal “clones” of the original. The Aksa S4 is the latter. Parts are generally interchangeable, including common upgrades like magazine tubes or stocks. It is not a Benelli but is impressively similar to the original.

TFB Review: Aksa S4 "Turkinelli" Clone

My negative view of Turkish shotguns generally stemmed from the obscene gas-operated bullpup magazine-fed guns that clutter the shelves of too many retailers, but the actual range of Turk scatterguns is very broad. There are pump guns with prices so low they look like misprints, and there are CZ-branded guns competing in the higher tiers. As a whole, this category of shotgun tends to cost less than comparable models made in the USA or places like Italy and Japan.

The S4 In Action

Gun reviews are intrinsically limited by (usually) having a sample size of one, and by not having unlimited time or ammunition. Multi-year, 10,000-round reviews across 20 sample guns would be an incredible source of data, but it is simply not feasible unless you are running some type of government procurement program. I was footing the bill for ammo and I most certainly do not have a Department of Defense budget. With those caveats in mind, it was time to start shooting.

TFB Review: Aksa S4 "Turkinelli" Clone

I did not lubricate anything, clean the gun during the review, or put thread locker on any screws before the initial break-in. Some reviews of similar models insist that these steps are necessary before shooting a Turkinelli. Instead, I stuffed shells in the magazine tube and started shooting. Gas-operated shotguns usually need some rounds through them before they operate reliably. That was true for the Aksa S4. In the first 50 rounds or so, there were a few failures to feed and failures to extract. After the first few boxes of shells, it smoothed out and operated normally.

I wanted to put a wide range of shells through the Aksa S4 because semi-auto shotguns can be picky with ammunition. I fired 550 rounds of birdshot, primarily 1 1/8oz and 1oz Winchester and Federal as found in your local Walmart. Outside of the initial break-in and one hang-up in the burndown (discussed below), it ran this ammo 100%. Some semi-automatic scatterguns struggle with this cheap ammo, but the Aksa S4 ran it like a champ.

TFB Review: Aksa S4 "Turkinelli" Clone

I also fired 110 mixed rounds of buckshot, slug, and turkey shells. The loads fired included Federal Law Enforcement buckshot and slugs, Fiocchi buckshot and slugs, cheapo no-name buckshot from a baggie in my basement, Winchester military 00 buck, and the least-expensive turkey shells from my local Sportsman’s Warehouse. Everything cycled fine, with the exception of Fiocchi low recoil buckshot. It did not like that load at all. Thankfully, that was the outlier.

TFB Review: Aksa S4 "Turkinelli" Clone

The manipulations are exactly the same on the Aksa S4 and the Benelli M4. I have shot Benelli shotguns in the past and there were no differences in the manual of arms. Both the M4 and S4 benefit from larger aftermarket bolt release buttons and extended bolt handles. Extended magazine tubes can also be added, though that can trigger 922(r) compliance issues. I chose to stick with basic upgrades for this review, which would not change any functional parts of the Aksa S4. I added a piece of industrial Velcro to the left side of the receiver for use with Esstac Shotgun Cards, and a Vortex Crossfire red dot on the factory optics rail. Some reviews of similar guns reported that the optics rail came loose after firing. This gun did not have that issue.

TFB Review: Aksa S4 "Turkinelli" Clone

The BurnDown

James has a history of blasting shells through shotguns as fast as he can to see what survives. Some guns handled it well, some did not. I wanted to do something similar, but with 200 rounds due to scarce ammunition and high prices. I did the burndown toward the end of the review, with about 325 rounds through the gun already. If something was going to fail, it would be more likely to fail with preexisting wear and tear before the real pain commenced.

The burndown was pretty simple. Load up 5+1, fire as fast as I could, load up 5+1 more, and do it again. There also were some top-off single loads mixed in too when I dropped a shell or missed the count on a reload. This was a truly unreasonable sustained rate of fire. The Aksa S4 got so hot that it scorched the leather glove on my lead hand through the handguards. My wife asked if I had eaten barbeque for lunch that day because the burning smell was so pronounced.

TFB Review: Aksa S4 "Turkinelli" Clone

How did the Aksa S4 fare? Excellent. It has one hiccup, a failure to feed at round 178 of 200. I pressed the bolt release button and the round fired and cycled normally. Once the gun cooled off a little, I fired the remainder of the buckshot, slugs, and turkey shells. All fired normally with no drama, including some 3″ magnum Ultra Turkey 1 3/4 ounce loads that damaged me, but not the gun. I was able to land a head shot on a 2/3 IPSC steel target at about 60 yards with a 3″ Federal slug as well.

TFB Review: Aksa S4 "Turkinelli" Clone

General Thoughts

A few sources had suggested that these guns were prone to parts breakage around the 500-round mark. I did not find that to be the case, but this is only one sample gun. What I can say from my totally non-scientific-definitely-not-an-engineer perspective is things look pretty good inside, and nothing looks like it is on the way to breaking.

The Aksa S4 includes 3 chokes (1 in the gun, two in a case), as well as a choke tube wrench. The wrench is pretty flimsy but it was able to remove the choke for the last few shells of the review. I did not see any marking on the chokes, so I used the age-old method of putting my finger in the front end to see how constrictive they were. I installed the most-constrictive one, and the patterns did shrink. Detailed patterning of shotguns is time intensive and beyond the scope of this review. What I can say is the chokes are there and if you feel like changing it up and looking at patterns, that option is available to you out of the box.

Conclusion

“Is it just as good?” is the wrong question. A clone that costs 70% less than the original Italian masterpiece will never be just as good. This is true with Italian guns, motorcycles, and food.

The real question should be “is it good when judged on its own merits?” and my answer is yes. It is a lot of gun for the money. Unlike many budget-oriented guns in its class, there is an aftermarket thanks to the M4 parts interchangeability. And it just might make you pick up a Benelli to round out the set some day.

Gamo Bone Collector Bull Whisper IGT Review

0

Remember the movie “The Bone Collector”?

When I heard that there is a gun named Bone Collector,

I thought that Angelina Jolie had switched her hobby from child-raising and charity to shooting sport.

In fact, the Bone Collector is designed in collaboration with Micheal Waddel and Travis “T Bone” Turner of the Bone Collector TV series.

The series portrays the culture of hunters and the brotherhood of sportsmen.

Therefore, it is no surprise that the gun is built on a forest theme:

A special hunter green, composite stock with dark grey rubber grip insert.

And the cool Bone Collector logo is prominently shown on the synthetic, high-grade stock.

Gamo really knows how to catch our attention!

(For more on the best air rifle brands, see this post)

Gamo Bone Collector – Gun Type

This is a gas-piston air rifle.

It gets power from Inert Gas Technology (IGT) which sets it apart from an ordinary spring gun.

IGT guns have no spring torque and no spring fatigue even if you leave them cocked for hours.

Besides, you can cock the gun and wait to take your next shot without worrying about metal springs taking a set or weakening.

Gas piston rifle is robust and does not lose anything in either area,

Plus the gas piston is known to shoot much smoother and delivers less twang and vibration compared to springers.

(For more on the 5 types of air rifles you need to know before buying, see this post.)

This gun is a break-barrel, single-shot gun with a rifled barrel.

(For more on things you should know about air rifle barrels before buying, see this post.)

Besides, the barrel is designed in a fluted polymer jacket style.

Fluting means cutting out material from the cylindrical surface, hence it is lighter and dissipates heat quicker

And you can enjoy long hours shooting without worrying about the overheated barrels.

Moreover, Gamo has installed a Bull Whisper noise dampener in this gun to cut the audible sound to the great extent.

It gives you lots of benefits at hand:

First, your hunting dog is less likely affected by noise.

Second, it reduces recoil and muzzle blast.

Third, it protects the shooter’s hearing ability.

And finally, it keeps your sensitive neighbor happy while plinking in the backyard and will not disturb your shooting fellows in the range.

Gamo Bone Collector comes in 2 calibers:

.177 and .22 so you can choose between one of these 2 calibers that you like most.

(For more on how to choose the right air gun caliber for your game, see this post.)

Stock

The stock is all-weather synthetic green stock.

The synthetic stock is extremely suitable for shooters who live in high-humidity places and hunters who go on long hunting trips.

(For more on the in-depth comparison between synthetic and wood stock, see this post.)

This stock has dual raised cheekpieces on the left and right sides so it’s extremely useful for left-handed shooters.

Besides, it has checkering on the grip and forearm to add friction to your hand when shooting, prevent slippage from the shooter’s sweat, and enhance accuracy.

Furthermore, the stock has a pistol grip:

It orients the hand in a forward, vertical way similar to the position one would take with a conventional pistol

So it gives you a natural and comfortable hold of the gun.

The Bone Collector’s stock features SWA – Shock Wave Absorber.

Let’s talk about it for a moment.

There is an entire industry centered around making after-market recoil pads.

Their intents are to reduce felt recoil because constant recoil pounding to your shoulders is painful and will stop you from shooting as much as you want.

While the gas piston is going to seriously reduce the vibration, the SWA buttplate will stop you from feeling most of the recoil and from the remaining movement of the gun.

In fact, it provides up to 74% more recoil absorption than a standard buttpad.

Moreover, it’s an adjustable buttpad with three removable absorption cells so you can customize it according to your own need.

Now you can shoot comfortably and enjoy long-hour shooting without pain on your shoulders.

More on the Gamo Bone Collector IGT here:

Ammo

With 2 types of calibers available, Gamo Bone Collector Bull Whisper has 2 corresponding types of pellets:

.177 caliber uses .177 pellet and .22 caliber use .22 pellet .

As you may know, a .177 pellet is cheap: you can buy a bunch of .177 pellets for half the money for the same amount of .22 pellets.

Besides, .177 is lighter and gives you higher velocity so it’s great for plinking and target shooting.

On the other hand, .22 pellets are heavier, more stable on their trajectory, and have more than enough muzzle energy to get the job done.

(For more on the differences between .177 & .22 and which jobs they do best, see this post.)

Sight

The Gamo Bone Collector Bull Whisper doesn’t come with traditional open sight.

No front sight, no rear sight.

Instead of an iron sight, Gamo put the 4×32 scope in it for more precision in the shooting.

Having this handy scope gives you dead-on accuracy in both short-range and long-range shooting.

(For more on how many types of air gun sights are out there and which one is suitable for you, see this post.)

Trigger

In the past, Gamo customers have swapped out their triggers for aftermarket ones.

There’s no need to do that anymore.

The Smooth Action Trigger (SAT), is light years better than the previous version.

It’s smooth and predictable.

What will that do for you?

It’ll improve your grouping because a heavy, unpredictable trigger is responsible for delivering large groups.

You’ll be amazed at how good a shot you are when you shoot the Bone Collector with the brand-new SAT trigger.

Velocity, accuracy and power

Gamo Bone Collector produces velocity up to 1300 FPS with .177 pellets and 975 FPS with .22 pellets.

These are exceptionally high velocities compared to other air guns on the market

And it puts this rifle belonging to the magnum class in the air gun world.

In addition, since the speed of sound is 1100 FPS (varying with altitude and temperature),

You may hear the loud crack if you buy a .177 caliber because the lightweight pellet breaks the sound barriers.

If you buy a .22 one then this is not an issue at all.

Chrony tests with both types of pellets give us the following results:

In .22:

Pellet (.22)FPSFPE
Crosman Premiere 14.3 gr74517.63 
18.2 gr pellet64016.56 
PBA 9.7 gr97520.48 

In .177:

Pellet (.177)FPSFPE
Beeman laser 7.1 grains92613.52 
PBA Gamo Raptor 5.4 gr130020.27 
Red Flame 7.9 gr100017.55 

As you can see, the velocities match the advertised numbers and even surpass them!

This is a phenomenon you don’t usually see because the advertising velocity is often the highest speed an air gun can achieve with its already-made capacity.

For this IGT pellet rifle, various shooting tests have been conducted by different shooters with positive results.

The common shooting groups are:

  • 1/4″ at 20 yards,
  • 1 1/2″ at 30 yards,
  • dime size at 20 yards,
  • dime size at 30 feet,
  • 1/4″ at 20 yards,
  • 1” at 30 yards,
  • 1/2″ at 10 yards,
  • cloverleaf group at 15 yards,
  • 1/2″ at 60-70 feet using RWS 7.4 gr,
  • nickel size at 30 yards,
  • 1/4″ at 75 feet,
  • 3/4″ at 30 yards,
  • nickel size at 50 feet with H&N Field Trophy and Baracuda Match pellet,
  • 1.5” at 50 feet with Crow Magnum,
  • 1/4″ at 10 yards,
  • 1/2″ at 50 yards using Crosman Ultra Magnum 10.5 gr,
  • 0.17” at 30 yards with Crosman Premiere 10.5 gr,
  • 1” at 60 yards,
  • 1” at 20 yards using domed lead ammo,
  • ¼” at 20 yards,
  • 1” at 10 yards,
  • 1” at 20 yards,
  • dime size at 20 yards with Crosman 14.3 gr,
  • 1.75” at 25 yards,
  • 1/2″ at 25 yards,
  • 1/4″ at 15 yards,
  • 1” at 30 yards,
  • 3/4″ to 1” at 15 to 20 yards with JSB 14.35 gr,
  • dime size at 50 feet,
  • and bull eyes at 25 yards.

(For more on everything you need to know about air rifle accuracy, see this post)

Furthermore, this Bull Whisper can:

goes through 1/4″ plywood at 50 yards,

pierce two layers of wood siding at 75 feet with 11 to 14 gr pellets,

destroy soda can at 50 yards,

penetrate 3/8” wafer board with Gamo PBA Platinum 5.2 gr,

drop jays at 50 yards and kill squirrels, raccoons woodchucks, and turkeys in 1 shot at 60 yards.

As you can see from those impressive numbers above, this rifle is extremely accurate

And generates more than enough knock-down power for small games at a shooting range of up to 50 yards.

(For more on the best air rifle for squirrels, see this post)

Accessories

The package includes a 4×32 scope, mounts, elasticized lens covers, hex wrench, cleaning cloth, and dozens of PBA ammo.

Specifications

  • Caliber: Available in both .177 and .22
  • Velocity: 1300 FPS with .177cal. 975 FPS with .22 cal.
  • Loudness: 3- Medium
  • Barrel Length: 19.13”
  • Overall Length: 43.75”
  • Shot Capacity: 1
  • Barrel: Rifled
  • Front Sight: None
  • Rear Sight: None
  • Scopeable : 11mm dovetail
  • Trigger: Two-stage adjustable
  • Buttplate: Rubber
  • Suggested for: Target shooting/Plinking/Small game hunting/Pest control
  • Trigger Pull: 3.74 lbs
  • Action: Break Barrel
  • Safety: Manual
  • Powerplant: Gas-piston
  • Function: Single-shot
  • Body Type: Rifle
  • Weight: 5.95 lbs
  • Cocking Effort: 32 lbs.

Customer review

There are lots of mixed customer reviews about this gun.

In positive reviews, we see that people love its outstanding features, awesome technology, great fit and finish, quality stock, incredible accuracy, and power.

In negative reviews, people mostly complain about 2 things.

The first is the low-quality scope: you can solve this issue simply by attaching another scope of your choice to it.

The second is the loud noise, and much louder than what they expect from a “whisper” gun.

There are effective solutions for those problems:

Make sure you clean the barrel several times to get rid of diesel in the bore,

And use heavier pellets instead of lightweight ones to make the gun go subsonic and doesn’t break the sound barrier.

Pros and Cons

ProsCons
  • Astonishing IGT and ND52 technology
  • Sensational forest-theme design
  • Incredible composite stock with rubber grip insert
  • Excellent trigger
  • Fantastic velocity
  • Jaw-dropping power
  • Decent scope
  • Not quiet as "whisper" with lightweight pellet
  • Dirty barrel out of the box

Price

The price for Gamo Bone Collector is about 200$.

It’s a bargain for a unique rifle that integrates a bunch of proven technology and produces superb power and dead-on accuracy.

Besides, there is little difference between the prices of the 2 calibers so you can choose the one that you like most.

Also, when you buy from PyramydAir, you save a whopping 90$ more than buying from Gamo’s site.

Conclusion

The Bone Collector has made quite a buzz in the air gun world.

Endorsed by iconic TV personalities, this gun paved its own way into the best-selling air rifle list on many retailer sites such as Amazon, Walmart, Pyramyd Air, etc.

Even if you are not a “Bone Collector” like Travis Turner, you will love this gun for its aesthetically pleasing look and extraordinary quality.

7 Things To Look for When Buying Your First Scope for Your Air Rifle

0

It’s exciting to buy your very first air rifle. However, once you go out there and start hitting targets that are further away from where you are, you’d realize that it’s not enough – you need to get the best air rifle scope!

Unfortunately, choosing the best one isn’t easy. With so many options, you can easily feel overwhelmed and confused. In the end, you may even pick the wrong scope and that’s just a waste of money.

To help make the process easier, here are seven things to look for when choosing a rifle scope:

1. The Right Type of Scope

For you to find the perfect air scope rifle, you need to focus on picking the right one not just for your gun but for your needs too. In general, there are two main types you can choose from: variable and fix.

A fixed air rifle scope is set to just one magnification. Because of that, you can’t make any adjustments.

Most scopes under this type have low magnification. Usually, they’re at 4×32.

Although fixed air rifle scopes don’t have great magnification levels, they have a large field of view. This makes them highly recommended for close-range shooting.

A variable air rifle scope, on the other hand, lets you adjust the magnification range. This allows you to get a larger field of view when you’re target shooting and zoom far enough to hit targets in the distance. 

2. Magnification

When you’re considering magnification, you have to understand how much your target can be magnified when you compare it with how it looks without your scope. 

Consider this:

If your scope has 3x magnification, it means that it’ll let you see targets as though they are four times closer.

If you are using your rifle to hunt a target that’s about 100 yards away from you, the scope can make it appear as if it’s only 25 yards away.

3. Reticle

This feature allows you to aim at your targets with your scope. It’s also a big help when it comes to estimating the wind.

Some scopes have the standard crosshair which offers one of the best accuracies. They are highly recommended for target shooters. Other scopes have the mil-dot which is good if you’re hunting in dark environments.

4. Lenses

When it comes to picking lenses, there are two things you need to think about. 

  • The diameter of the objective lens affects the amount of light that’s allowed in.
  • The bigger the lens in diameter, the heavier the overall weight of the scope gets.

Another thing you have to consider when picking scopes is the coating of the lens. Since glass has this ability to reflect light, you’d want coated lenses.

Also, make sure that it’s a high-quality coating so you can enjoy less glare and better light transmission.

5. Construction

Obviously, when looking for the best air rifle scope, you’d want something that can keep up with you.

Scopes vary in the diameter of their main tubes. You can get one from 25mm to 34 mm, depending on the brand you’re considering.

When you buy a scope with a bigger tube, you’ll have more space for its interior compartments. And because of that, you’ll get a better adjustment range as well. This is a big factor you need to consider when you’re doing long-distance targeting.

6. Eye-relief

The last thing you want to happen is to get yourself injured while firing your gun. While hunting and target shooting are exciting activities, getting a bruised eye isn’t.

To avoid that, consider investing in an air scope with higher-eye relief. The standard is around four inches while scopes of lesser quality can give you around 3 to 3.5 inches.

7. Turrets and Adjustments

When you’re hunting, you want everything to be all set. The last thing you’d want is to have turrets that fail halfway through your activity.

Turrets’ primary function is adjusting windage and elevation. The first one refers to the horizontal adjustment while the latter refers to the vertical adjustment of your scope.

Usually, these knobs are located on the right and top parts of your scope. You’ll find non-tactical models advertising turrets at 1/4” or 1/8”.

In Conclusion

The factors mentioned above can help make the process of picking the best air rifle scope easier and less stressful for you. However, ultimately, the best one will still depend on what you are planning on using your scope for.

If you’re shooting just within 100 yards, you can go with a scope with a magnification of 1x to 4x. If you’re aiming for something at more than 200 yards, it’s a good idea to go for a scope with 9x magnification.

For the other factors, consider picking based on what you need and what fits your air rifle. 

27 Best Tarp Shelter Setups for Camping (with Diagrams, Photos and Instructions)

0

When setup correctly, tarp shelters are like magic. With the right setup, you can stay dry in the rain, block rain, create a shady area to eat lunch, or even keep you warm on an unplanned night in the wilderness. There are literally hundreds of different tarp shelters you can use. Here I’ll go over the most important ones to know for camping, backpacking and survival/emergency use.

Want this information (and more!) in printable format?

Get my Camping Cheat Sheets!

The 42-page guide covers everything you need to know to enjoy the outdoors with confidence. Since you also like tarps, I’ll even give you a discount 🙂

Click Here for 50% Off

Jump to:

  • Infographic
  • Which tarp shelter setup is best?
  • Horizontal Ridgeline Tarp Setups
  • Diagonal Ridgeline Tarp Setups
  • Tarp Setups with Poles
  • Other Tarp Shelter Setups

Tarp Shelter Setup Infographic

tarp shelter setups infographic

Which Tarp Setup Is Best?

The best tarp setups for camping are arguably: the A-frame, Adirondack, plow point, and holden tent. However, the best tarp shelter setup depends on many factors like the weather conditions, how you’ll be using it, and pitching conditions. Ideally, you will learn several setups including at least one which can be pitched quickly, doesn’t require trees or a ridgeline, has a built-in groundsheet, and is closed on three sides for weather protection.

Note: To hang a tarp properly, you’ll need to know the 7 main tarp knots and how to tie out the ridgeline and guylines.

Recommended Tarps:

  • AquaQuest Guide Tarp: All-around good tarp which comes in a variety of sizes (10×10 size is 18.3oz).
  • REI Trail Break Tarp: For when you need a larger tarp for car camping (12’x12′ size and 33oz).
  • Sea to Summit Escapist Tarp: Lightweight tarp which is still durable (medium is 6 ft. 6 in. x 8 ft. 6 in and 9.5oz; large is 10×10 ft. and 12.3oz)
  • Twinn Tarp by Gossamer Gear: Even lighter tarp for serious UL backpackers (just 9.7oz)
  • Free Soldier Tarp: Very affordable tarp which is still lightweight. Plus it has tie-outs going down the middle! (large size is 118″ × 126″ and 42oz)

Don’t forget about cordage!

You will probably need at least 30 feet (10m) for a 10×10 tarp or 40 feet (12m) for a 10×15 tarp. I recommend getting REFLECTIVE paracord so you don’t walk into your ridgeline or tie-out points at night!

Horizontal Ridgeline Tarp Shelter Setups

These tarp shelters all have horizontal ridgelines. These are good options when you have two trees to pitch between. They are easy to learn and give you even headroom throughout.

The downside is that you’ll need a lot of rope (length of tarp + at least 8 feet for tying around trees). Some of the setups require even more rope to tie out guylines for walls or the roof. While many of these setups can be done with just poles, the roof has a tendency to sag.

Remember to make sure the ridgeline is perpendicular to the wind and the opening is on the leeward side!

1. A-Frame Tarp Shelter

A frame tarp shelter setup diagram

A frame tarp shelter setup in real life

The A-frame is one of the simplest and easiest tarp shelters to set up. It’s also somewhat versatile because you can hang it higher to get more headroom or hang it lower to get more interior space.

The major downside is that both ends of the A-frame shelter are open, so wind and rain can get in. For best protection, hang the A-frame so the openings aren’t facing the wind. If possible try to have at least opening next to a natural protection, such as a big bush which will block the wind from getting inside.

Instructions:

  1. Hang your ridgeline about shoulder height.*
  2. Put the tarp over the ridgeline. The midline of the tarp should be directly over the ridgeline.
  3. Spread out the sides of the tarp so they are taut. You can adjust the height of the ridgeline is you want the tarp to be higher or wider.
  4. Peg down the four corners of the tarp. Peg down the entire edge of the shelter for better weather protection.
  5. Use a prusik knot to secure the tarp onto the ridgeline

Notes:

  • A higher ridgeline will give you more headroom but will be narrower. A lower ridgeline will give you more width inside but less headroom.
  • A 9×9 foot tarp hung at a 60 degree angle will give you a width of 4.5 feet and max headroom of 3.9 feet.
  • It’s possible to use poles to hang the A-frame, but you’ll really need to stake them out. Even then, the roof will still sag – so it’s best to use a ridgeline for this tarp shelter.

Pros:

  • Adjustable height and width
  • Very fast and easy setup
  • Weather protection on two sides

Cons:

  • Somewhat claustrophobic inside

2. Lean-To Tarp Shelter

lean to tarp shelter setup

lean to tarp shelter setup in real life

Also called a wind break shelter, the lean-to tarp setup is fast and easy. The downside is that it doesn’t protect against rain well. It’s also not great against wind, unless the wind doesn’t change direction. For this reason, the lean-to is only recommended for tarp camping in good weather or as a quick shelter setup for breaks.

Instructions:

  1. Hang a ridgeline between two trees. Attach your tarp to the ridgeline. Alternatively, tie the top two corners of the tarp to the trees.
  2. Peg out the bottom corners of the tarp.

Notes:

  • You can also use poles to hang a lean-to shelter. In this case, first peg out the bottom two corners of the tarp. Then attach the top two corners to poles and stake them out.
  • The “Envelope” pitch is a variation of the lean-to. Simply fold the tarp under itself to create a groundsheet before attaching it to the ridgeline.

Pros:

  • Very fast and easy to pitch
  • Possible with square or rectangular tarps
  • Can pitch with ridgeline or poles
  • Good headroom and interior space

Cons:

  • Poor wind and rain protection

3. Wind Shed

wind shed tarp shelter diagram

wind shed tarp shelter in real life

Also called a fold-over wind shed, this tarp setup is a cross between a lean-to and an A-frame. Depending on the weather, you can set it up so the roof is flat (for more headroom and shade) or slanted (to repel rain). When the roof is slanted downwards (as in the drawing), the setup is called a “wind shield wedge.”

Instructions:

  1. Hang a ridgeline.
  2. Drape your tarp over the ridgeline so approximately 2/3 is hanging on the windward side and the other 1/3 is on the leeward side.
  3. Extend the longer side of the tarp to make an angled wall. Secure the corners to the ground.
  4. Using rope or poles, secure the corners of the shorter side to make a roof.

Notes:

You can pitch using poles instead of a ridgeline, but it’s somewhat tricky. You’ll need a lot of rope to stake out the poles to make it stable enough. Even then, the roof ends up sagging and doesn’t hold up well in high winds.

Pros:

  • Good headroom
  • Fast and easy setup
  • Wind protection from one side
  • Some rain protection

Cons:

  • Requires a lot of rope
  • Guylines are tripping hazard
  • Difficult to pitch with poles instead of a ridgeline

4. C-Fly Tarp Setup

c fly tarp shelter setup diagram

c fly tarp shelter setup in real life

The C-fly tarp setup is the same as the wind shield setup. The difference is that, with the C-fly, you fold under part of the tarp to create a groundsheet. Because much of the tarp is used for the groundsheet, you won’t have as much interior space or headroom.

As with the wind shield setup, you can keep the roof flat (for more headroom and shade) or angle it downwards (for better rain protection). When the roof is slanted downwards, it’s called a “C-fly wedge.”

Instructions:

  1. Hang a ridgeline about waist or shoulder height. A lower ridgeline will give you more weather protection but less headroom.
  2. Fold the tarp under on line AB. This will be your groundsheet. It should be at least 2 feet wide for one person.
  3. Drape the rest of the tarp over the ridgeline. AB should be on the windward side and CD should be on the leeward side.
  4. Adjust the tarp so line CD is sitting on the ridgeline. The part hanging over the ridgeline (CDFE) will be your “roof”.
  5. Pull corners A and B back to make an angled wall. Then stake them out.
  6. Use rope or poles to secure points E and F to make a roof.
  7. To make the shelter roof more taut, secure line CD to the ridgeline with a prusik knot.

C fly tarp setup instructions

Notes:

  • To keep the wall and roof taut, secure points C and D to the ridgeline using a prusik knot.

Pros:

  • Has groundsheet
  • Adjustable height/interior space
  • Decent weather protection

Cons:

  • No weather protection on two sides
  • Requires a lot of rope
  • Can trip over guylines in the dark
  • Difficult to pitch with poles instead of a ridgeline

5. Adirondack Wind Shed

adirondack tarp shelter setup

This is one of my favorite tarp shelters. It offers very good weather protection while still giving you lots of interior space and headroom. One side is open, so you can have a fire in front of the shelter. Leave the “roof” up in good weather. If the weather gets bad, simply re-stake point D to pull the roof down.

The setup is also fairly flexible: you can experiment with folding the tarp at different places. Make the triangle folds bigger for more weather protection.

Instructions:

  1. Hang a ridgeline about shoulder height.
  2. Fold the tarp so triangle AEF is on the ground. The line EF should be on the windward side and point A on the leeward side.
  3. Drape the tarp over your ridgeline. Line GH should be sitting on the ridgeline.
  4. Pull EFHG back to create a wall. If you aren’t happy with the angle of the wall, adjust the height of your ridgeline.
  5. Stake out points E and F
  6. Pull point C inwards to create a side wall. Stake it down. Do the same with point B.
  7. Using rope or a pole, stake out point D.
  8. To make the shelter more taut, use a prusik knot to secure points D and G to the ridgeline.

adirondack tarp shelter diagram instructions

Notes:

  • If you want to use poles instead of a ridgeline with this setup, you’ll probably need a partner to help.
  • Use fluorescent rope so you don’t trip over your guylines!

Pros:

  • Good headroom and interior space
  • Great wind protection
  • Decent rain protection
  • Has partial groundsheet

Cons:

  • A somewhat difficult setup which requires practice to get right
  • Uses a lot of rope
  • Guylines are a tripping hazard

6. Body Bag Tarp Setup

body bag tarp shelter

body bag tarp setup in real life

Also called a tube tent, this is a simple tarp shelter. Because it is so small and uncomfortable, it’s really only for emergency situations. It is only closed on two sides. However, because the openings are so small, the tree trunks used for pitching will actually provide some weather protection. For even more protection, pitch next to a bush, boulder, or other natural protection.

Instructions:

  1. Hang a ridgeline around thigh height.*
  2. Fold the tarp along AB to create a groundsheet.
  3. Drape the tarp over the ridgeline so CD is sitting on the ridgeline.
  4. Adjust the position of the walls then stake out points A, B, E and F.

body bag tarp setup diagram instructions

Notes:

  • A 9×9 tarp will only give you a bit more than 2.5 feet of headroom at the highest point.
  • I don’t recommend using poles for pitching the body bag setup. The roof will sag and there’s barely any headroom as is!

Pros:

  • Good rain and wind protection from two sides
  • Has groundsheet
  • Quick and easy to set up

Cons:

  • Open on two sides
  • Claustrophobic inside
  • No headroom and very little interior space
  • Have to crawl inside

7. Shade Sail

shade sail tarp setup with hammock

shade sail tarp setup with hammock in real life

The shade sail is also called the “hammock shelter” or the “diamond tarp.” Because it is pitched on the diagonal, you get more coverage. It’s popular for hammock camping and also as a sun shade for camp kitchens or even patios.

Note that the shade sail setup is not the same as the diamond fly. The diamond fly is also pitched on the diagonal, but one corner is staked to the ground. With the shade sail, both corners are elevated.

Instructions:

  1. Hang a ridgeline.
  2. Drape the tarp over the ridgeline. The diagonal midline should be on the ridgeline.
  3. Use a prusik knot to secure the corners to the ridgeline.
  4. Stake out the corners to create two angled walls. Keep the walls angled lower for more weather protection.

Notes:

  • If you aren’t using a ridgeline, then just tie the diagonal corners to trees. Or attach to poles. However, the roof will sag a lot without a ridgeline.
  • The guylines on this are serious tripping hazards. Use fluorescent rope!

Pros:

  • Easy to pitch
  • Lots of interior space
  • Decent protection from rain and wind

Cons:

  • Uses a lot of rope
  • Guylines are tripping hazards
  • Roof sags without ridgeline

8. Baker’s Wind Shed

bakers wind shed tarp setup

The baker’s wind shed tarp setup uses a rectangular tarp. The tarp needs to be at least 10 feet on the long side if you want to sleep in it with your head towards the side walls. If your tarp is very large, you could also sleep with your head towards the back wall of the shelter.

I personally don’t like the baker’s wind shed setup very much. The Adirondack gives you more protection without sacrificing much space. However, the baker’s wind shed can be good when tarp camping with multiple people all sharing one big tarp.

Instructions:

  1. Stake FG to the ground on the windward side.
  2. Pull point A inward. Line AF should be at approximately 90 degrees with FG. Stake point A to the ground. Then the same with point D.
  3. Attach points B and C to a ridgeline or poles.
  4. Tuck corners E and H underneath the shelter to create a partial groundsheet. Alternatively, you can leave them outside the shelter.

bakers wind shed diagram instructions

Notes:

  • Lines AB and CD are the height of the shelter when set up.
  • An 8×16 foot tarp can be folded so line BC is 6 feet long. This will give you a max height of 5 feet and a depth of 9.4 feet.

Pros:

  • Lots of interior space
  • Protection on three sides

Cons:

  • Need a long tarp
  • Not lots of headroom

Tarp Setups with Diagonal Ridgelines

These tarp setups are good for when you only have one tree. You can also use a pole instead of a tree for many of these tarp setups. Unlike with the setups which use horizontal ridgelines, the roof won’t sag as much. Another benefit of these setups is that they don’t use a lot of rope.

You can get by with just 3 feet of rope for pitching some (though I recommend always bringing more just in case!). There is less interior space around the foot-end of the shelter, so the tarp will trap heat better. The drawback of this though is that they are claustrophic and you may need to crawl in feet-first.

9. Bivvy Bag Tarp Shelter

bivvy bag tarp shelter setup

bivvy bag tarp shelter setup in real lifeAlso called the “cornet”, the bivvy bag tarp shelter is incredibly cramped (hence the name). However, it’s also one of the best tarp shelters for bad weather. You can pitch the bivvy bag on one tree or with a single pole. Unlike other tarp shelters which use poles, this one is actually easy to set up.

Ultralight backpackers will also love that the bivvy bag shelter requires just one guyline, so you save weight on rope.

What size tarp for a bivvy bag shelter?

You will probably want a 10×10 foot tarp for the bivvy bag shelter. The smallest size you can get away with is an 8×8 foot tarp. This will give you a shelter with an entranceway 4 feet tall and 4 feet wide and a length of 11 feet. But note that the groundsheet starts between CE (not at point D!). So, with an 8×8 tarp, the groundsheet length is only about 7 feet long. Because the end is so cramped, there’s actually barely enough room for a 6 foot tall person. You only get 3 feet of headroom at the place where the groundsheet starts and it gets narrow quickly.

Instructions:

  1. Fold the tarp in half on the diagonal line AD
  2. While holding the tarp upwards from point D, tuck sides AF and AB underneath so they are slightly overlapping each other. This will prevent the groundsheet part of the tarp from touching wet or muddy ground.
  3. Stake point A to the ground.
  4. Secure point D to a tree or pole.
  5. Adjust the walls and then stake out points E and C.

bivvy bag tarp shelter instructions

Notes:

  • The bivvy bag shelter is sometimes incorrectly called the
  • Because of the shape, this tarp shelter is not good for two people.

Pros:

  • Good weather protection
  • Has groundsheet
  • Uses almost no rope
  • Can pitch with one tree or pole
  • Traps body heat

Cons:

  • Very claustrophobic inside
  • No headroom
  • Have to crawl inside feet first

10. Hunchback Bivvy Bag

hunchback bivvy bag tarp shelter setup

hunchback bivvy bag shelter real life photo

The hunchback tarp shelter is a variation of the bivvy bag setup. It uses a pole to support the roof above the groundsheet. This allows you to angle point D downwards to create a “beak,” which means that the shelter roof blocks rain better.

Instructions:

  1. Fold the tarp in half on the diagonal line AD
  2. While holding the tarp upwards from point D, tuck sides AF and AB underneath so they are slightly overlapping each other. This will prevent the groundsheet part of the tarp from touching wet or muddy ground.
  3. Stake point A to the ground.
  4. Put a pole upright at point G
  5. Secure point D to the ground
  6. Adjust the walls and then stake out points E and C.

hunchback bivvy bag shelter diagram instructions

Notes:

  • This tarp setup doesn’t need a ridgeline or trees at all, but I included it in this section so you can see how it differs from the classic bivvy bag setup.
  • You can also set it up without a pole. In this case, you’ll create a tie-out point at point G and use guylines to attach it to a tree. Then you’ll tie the guyline at point D to the ground.

Pros:

  • Great weather protection
  • Has groundsheet
  • Uses almost no rope
  • Can pitch with one tree or pole
  • Traps body heat

Cons:

  • Very claustrophobic inside
  • No headroom
  • Have to crawl inside feet first
  • Requires a pole
  • Can easily knock pole over

11. Plow Point

plow point tarp shelter setup

plow point tarp shelter setup real life photograph

Also called the plough point, flying V or diamond fly, this is another easy tarp shelter. You don’t need to use a ridgeline at all – just tie it directly to a tree. However, the plow point does have a tendency to sag if you don’t use a ridgeline.

Instructions:

  1. Secure one corner of the tarp down on the windward side.
  2. Tie the opposite corner to a tree or secure it to a pole.
  3. Spread out the sides and secure down the remaining corners.

Notes:

  • Tying the tarp higher will give you more headroom but less interior space and weather protection.

Pros:

  • Very easy to pitch
  • Uses very little rope
  • Only needs one tree or pole
  • Adjustable height and interior space
  • Lots of room for gear storage

Cons:

  • Hard to get sides taut without ridgeline
  • No protection on one side

12. Half Pyramid Free End

half pyramid tarp shelter setup diagram

half pyramid free end shelter real life picture

I personally don’t like this tarp shelter setup very much. IMO, the A-frame closed end or diamond fly give better coverage while providing more interior space. The bit of groundsheet you get with the half pyramid isn’t enough to justify the lost interior space.

However, the half pyramid can be very useful when combined with other tarp setups. For example, you can use it to make a vestibule or close off the entrance of another setup. Or you can put two half pyramids together to make a fully-enclosed tent.

Instructions:

  1. Fold point A under the tarp. Stake down points E and F.
  2. Secure point D to a tree or pole.
  3. Pull in point B to create a wall. Depending on the angle of the roof, you may need to fold under some of the tarp. Stake down the corner. Do the same with point C.

half pyramid free end tarp shelter instructions

Pros:

  • Lots of headroom
  • Easy setup
  • Can be used with other setups
  • Decent weather protection

Cons:

  • Only partial groundsheet
  • Not much interior space

13. Forester

forester tarp shelter setup

forester tarp shelter setup real life pictures

The forester is a more difficult tarp shelter to pitch. It doesn’t work well with tarps made from more rigid materials (like painter’s dropcloth). You are better off using silnylon or canvas. Once you master this pitch though, it’s incredibly useful. You get excellent weather protection without sacrificing usable space.

Instructions:

  1. Stake down corner A on the windward side.
  2. Fold point D downwards to create point G.
  3. Support point G with a pole. It helps to have a partner hold it up for you while doing the next steps.
  4. Pull point C forward to create wall ACG. Stake point C down.
  5. Pull point B forward to create wall ABC. Stake point B down.
  6. Spread out triangles CGE and BGF to make door flaps.
  7. You’ll have a bit of extra tarp material hanging inside the shelter. You can use a clip to hold it out of the way.

forester tarp shelter setup diagram and instructions

Tip: If you are going to use this pitch frequently, I suggest making a little mark on your tarp where the pole should go. Also note the height of the pole. This will make it faster and easier to set up.

Pros:

  • Excellent weather protection
  • Doesn’t require trees
  • Uses very little rope
  • Lots of interior space and decent headroom

Cons:

  • Difficult to pitch, especially alone
  • Requires pole

14. Bunker Half Cone Fly

bunker half cone fly tarp shelter setup

The bunker half cone fly is similar to the plow point in that both are pitched on the diagonal. The difference is that the bunker setup uses two additional guylines to pull out the sides of the tent. This creates a V-shaped roof and two almost vertical walls.

While the configuration means you get slightly less interior space, you get much more headroom. This makes the bunker suitable for multiple people and much more comfortable for multi-night stays. It’s also better for larger tarps because the additional guylines prevent the walls from sagging.

Despite looking easy, the bunker half cone fly is actually a bit tricky to set up. You’ll need a good tarp too since the guylines put a lot of strain on the sides and they can easily tear.

Instructions:

  1. Stake point A to the ground on the windward side.
  2. Tie point D to a tree or a pole on the leeward side. Alternatively, you can run a ridgeline from point A to a tree and connect point D to it. This will help prevent the roof from sagging.
  3. Pull out point B and stake it to the ground. Do the same with point F.
  4. Attach a guyline to point C. Pull it outwards and secure it to the ground. Do the same with point E.
  5. If windy, stake down the edges on AB and AF

bunker half cone fly diagram and instructions

Pros:

  • Good weather protection
  • Lots of headroom in the front
  • Large entryway

Cons:

  • More difficult pitch
  • Roof sags without ridgeline
  • Requires two additional guylines

Tarp Shelters which Use Poles (No Trees Required)

These tarp shelters are a bit more tricky to set up because you’ll need to stake out the poles to keep them upright (which takes some practice). If you have a very large tarp, then you’ll need a long pole – which may require you lashing two poles together. But, these tarp shelters are good to know in case you can’t find a suitable tree for pitching against. They are also great tarp shelters for ultralight backpackers because you don’t need to bring much rope with some setups.

Note that there are also many UL tents which use trekking poles instead of normal tent poles. See the best trekking pole tents here.

15. Holden Tent

holden tent tarp shelter setup

Also called the “A-frame closed end” shelter, the holden setup is one of the best tarp shelters for ultralight backpacking, especially with two people. It is very fast to pitch and doesn’t require any trees.

For a tarp shelter with three walls, there is actually a lot of interior space inside and decent headroom. Since the shelter is open on one side, it doesn’t feel claustrophic either.

My main complaint with the holden tent shelter is that you have to lay the tarp flat on the ground. This means that, if the ground is muddy, the underside of the tent completely dirty. Thus, for muddy weather, you are better off with a shelter like the plow point.

Instructions:

  1. Lay the tarp flat on the ground.
  2. Stake out points A, B and C.
  3. Put a pole under the tarp at point E. You’ll need to angle it slightly forward.
  4. Pull point D forward to create a wall then stake it down. Do the same with point F. You might need to have a partner hold the pole upright while doing this.
  5. Secure the pole in position with a guyline.

holden tent tarp shelter instructions

Notes:

  • Depending on where you stake down the walls, you will end up with either a square or triangular interior.

Pros:

  • Good interior space
  • Decent headroom
  • Weather protection from three sides

Cons:

  • Can accidentally knock over the pole when getting in/out
  • Takes practice to pitch by yourself

16. Dining Fly

dining fly tarp shelter setup

The dining fly is one of the most important tarp shelters to know for car camping. As the name suggests, it is great for creating a covered area for cooking and eating. It might take a few tries to figure out the optimal height and roof angle (and thus the right pole length and guyline position). But, once you figure this out, the dining fly is actually pretty simple to set up.

Instructions:

  1. Lay the tarp flat on the ground where you want your shelter to be.
  2. Attach guylines (about 4-6 feet long each) to all four corners of the tarp.
  3. Stake out all of the guylines. They should be approximately 5 feet away from the corners of the tarp and set at a 45 degree angle from the corners.
  4. Find two very long poles. If you can’t find poles long enough, you can join two poles together using round lashings.
  5. Using half hitches, tie long guylines to the top of each pole.
  6. Push the first pole underneath the tarp so it’s at middle edge. It helps to have someone hold this pole in place while you do the next steps.
  7. Push the second pole underneath the tarp. Now the roof of the dining fly should be completely raised.
  8. Stake out the guylines on the poles.
  9. Adjust the guylines on the corners so the tarp is very taut.

Pros:

  • Excellent headroom
  • Lots of interior space

Cons:

  • Uses two very long poles and a lot of rope
  • Takes practice to set up, even with help
  • Rain and wind enter from sides when pitched high
  • Underside of tarp gets dirty when ground is muddy or wet

17. Toque Tent

toque tent tarp shelter setup

The toque tarp tent is quite different from the other setups. Instead of having the pole in the front of the shelter, the pole is set in the back. This means you end up with more headroom in the back (but a really low entranceway). Two guylines pull on the entranceway to create an awning. This awning does a great job of repelling water away from the shelter. However, the toque tent isn’t very stable in heavy winds.

Instructions:

  1. Fold the tarp so points A and B are together. Stake them to the ground together on the windward side. This is now called “point AB.”
  2. Put a pole under point G. The bottom of the pole should sit on point AB. This will make sides AG and BG stand straight up.
  3. Pull out point C to create triangular wall AGC. Stake down point C. Do the same with point F.
  4. Attach guylines to points D and E. Pull them outwards and stake them down. This will create a low awning.

toque tent diagram instructions

Pros:

  • Pole at back instead of blocking entryway
  • Good rain protection

Cons:

  • Weird interior space
  • Not very sturdy in high winds

18. Tarp Tent

tarp tent shelter setup

The tarp tent configuration can be a bit confusing at first. But, it’s actually not that difficult to set up. It’s a favorite tarp shelter for ultralight backpacking.

Instructions:

  1. Lay tarp flat on the ground.
  2. Stake out points A and B.
  3. Now stake out points C and D, making sure that folds AD and BC are nice and tight.
  4. Tuck corner F underneath fold AD. Then tuck corner E underneath fold BC.
  5. Point H is on the ground. Pull tarp corner G there and stake it in place.
  6. Point J is also on the ground. Pull tarp corner I there and stake it down.
  7. Put a pole underneath the tarp so it stands up at point K. Put a cloth over the top of the pole so it doesn’t tear a hole in your tarp.
  8. You’ll have a flap of tarp hanging in the entryway to the shelter.
  9. Attach guylines to the midway points on the flap (points L and M). Pull the guylines back and secure them to the ground along the walls of the shelter.
  10. Run a guyline from point N to the ground directly in front of the shelter.

tarp tent shelter instructions

Pros:

  • Excellent weather protection
  • Decent interior space

Cons:

  • Underside of tarp gets dirty if setting up on wet or muddy ground
  • Slightly more difficult to learn
  • Pole can get knocked over

Other Tarp Shelter Setups

Once you learn the basic tarp shelter setups, you will be able to experiment with variations to meet your needs — such as staking out an extra side to get more interior space or adjusting the position of the ceiling to block rain. Here are some examples.

19. Modified A-Frame

One wall of the tarp has been pulled outwards in the middle to get more interior space, but the sides are down for weather protection.

modified a frame tarp shelter pitch

20. Kayak Pitch

This is essential an A-frame tarp setup with one side more slanted down than the other. Instead of poles, kayak paddles are used.

kayak tarp shelter pitch

21. Large Bunker

This tarp setup a lot like the bunker half cone. However, there are extra guylines on the sides. This helps pull out the walls to keep them from sagging and to give you more interior space.

large bunker tarp shelter

22. UL Tarp Setup

Pitching low to the ground means you get weather protection even from a tiny, ultralight tarp. The head area is staked a bit higher so it isn’t as claustrophic inside.

ul tarp shelter setup

23. Wind Shed Variation

One walls slants and the other has a partial wedge to make use of the space and tree positions.

wind shed tarp shelter variation 1

24. Wind Shed Variation 2

wind shed tarp shelter variation 2

25. Half Tetra Wedge Cover

This is a flying half tetra wedge setup. The roof is angled downwards, which is great for directing water off the tarp in rainy weather.

half tetra wedge cover tarp shelter

26. Homemade Tarp

Here’s a very small, UL tarp made by Bob Cartwright of The Outdoor Station.

homemade tarp shelter

27. Umbrella

Here’s a way to set up a tarp so it makes an umbrella shape.

umbrella tarp shelter setup

Image credits: “Pyramid and Tarps” (CC BY-SA 2.0) by Umnak “Finland_Canoeing_01” (CC BY-NC-SA 2.0) by jjay69, “Kitchen Tarp” (CC BY-SA 2.0) by Umnak “Bob and Tarp” (CC BY-NC 2.0) by Andy Howell “Our Tarp at Petroglyph” (CC BY-SA 2.0) by Umnak “Tarp camp shelter” (CC BY-SA 2.0) by Umnak “Sheep Camp Tarp” (CC BY-SA 2.0) by Umnak “Inner Point Camp” (CC BY-SA 2.0) by Umnak “Sarah’s tarp” (CC BY-SA 2.0) by Umnak “Tarp Camp on Deer Island, Ernest Sound,” (CC BY-SA 2.0) by Umnak “Tarp Camp, Inner Pt” (CC BY-SA 2.0) by Umnak

Silencer vs. Suppressor: Is There a Difference?

0

We often get asked questions about silencers, such as how to buy a silencer or how to clean a silencer, that experienced users deem simple but are important questions for new gun and silencer owners. Thanks to misrepresentation in the media and politics about silencers, muzzle brakes, flash hiders, suppressor accessories, and even the simple act of barrel threading, it’s only logical that there is some confusion out there.

So, we are going to look at the various things you can screw onto the end of your rifle or pistol’s muzzle, what they do and how they work. If you already know this, great! Share this post to a new gun owner, or even an anti-gunner who has been left behind through media propaganda. And if you don’t know, read on!

Silencers and Suppressors: One in the Same

There is no difference between a silencer and a suppressor, and the terms are 100 percent interchangeable. Whether someone uses the term “suppressor” or “silencer,” they’re referencing the exact same thing. So why the different names, you might ask? Well, we must go back to the very beginning, with the invention of the Maxim Silencer. Invented by Hiram Percy Maxim, son of the famous machine gun inventor, the Maxim Silencer was patented in 1909 and was the first successful silencer on the market.

Now, truth in advertising laws were lax to nonexistent back then and breathtaking claims were the order of the day. Maxim advertised that his crude device made of stamped sheet metal baffles stacked inside a steel tube would render a firearm silent. This is pretty much impossible, even today unless you use a highly engineered device with carefully crafted subsonic ammo or low powered rimfire ammo.

In other words, a silencer isn’t exactly a “silencer.” It’s more like a muffler (which Maxim went on to develop for cars) or a device for suppressing sound. You know, a suppressor.

However, the name “silencer” stuck. Later on, shooters and manufacturers promoted the more accurate “suppressor” to reflect the reality of these devices.

Shop Silencers

Silencer vs. Suppressor – Does It Matter What You Call Them?

Probably not. After all, we are Silencer Central, and we sell the famous BANISH Suppressor, which shows how interchangeable the terms really are. But because the term “silencer” is so heavily ingrained in modern usage, it is as viable a term as “suppressor.” The difference between a silencer and a suppressor? Absolutely none.

Perhaps the only real problem now is that with two competing popular terms, folks can get confused — and that’s understandable. After all, the two really do sound like similar but different devices. But rest assured, there’s no difference and you can call a silencer a suppressor, or a suppressor a silencer. It’s completely up to you.

Now that we’ve cleared up the gun suppressor vs silencer question, let’s look at another area of confusion…

Shop Suppressors

Flash Suppressor vs Silencer

If suppressors are silencers, then are flash suppressors also silencers? Well, no they aren’t. While both devices are designed to suppress aspects of muzzle gas, they do two radically different things.

Flash Hider

What is a Flash Hider?

A sound suppressor works only on slowing down and cooling gas to reduce the sound of gunfire. A flash suppressor (or flash hider) works to reduce the visibility of flaming gas. While it’s true that a sound suppressor also reduces (or eliminates) muzzle flash, it’s a side effect of the gas containment. A flash suppressor, on the other hand, offers no sound reduction.

Flash suppressors are intended for the benefit of the person shooting the gun and reduce or almost eliminate the visual flame from a barrel under low light conditions. This makes it easier to see and is invaluable for self-defense situations and when hunting in low light conditions.

How Does a Flash Hider Work?

There are various sorts of flash suppressors on the market today that work in a number of different ways. Some are little more than cones or cans that contain and disperse the flaming gasses at the muzzle long enough for them to burn off or cool down. Others redirect the gas and flame in order to drive it away from the shooter’s field of vision.

Many flash suppressors are combined with muzzle brakes, which also redirect gas energy to reduce recoil. It only makes sense to combine the two products in that fashion, but not all flash suppressors are muzzle brakes, and not all muzzle brakes are flash suppressors. Confused? Don’t worry, we have a full article covering muzzle brakes vs. flash suppressors.

Why Are Flash Suppressors Regulated in Some States?

That’s a good question. The simple answer is fear and moral panic. Some people believe the purpose of a flash suppressor is to hide the gun and make it stealthier in use. Other people think that anything that makes a gun easier, more ergonomic or more comfortable to shoot somehow means the gun will magically kill people and be used in a crime. These misconceptions are often deliberately promoted by media and anti-gun crusaders, and sometimes reshape how the general public understands guns.

States like California which have an aversion to civil rights are busy making sure law-abiding citizens can’t reduce a bit of visual flash on the end of their self-defense pistol, hunting rifle or sporting carbine. This is simply because they think a bit of metal with notches cut in it or a metal cone turns a rifle into an assault rifle of some sort. There is no rational reason to regulate these very common devices, save for the desire to attack our gun rights and shared freedom.

Silencers vs. Suppressors vs. Flash Suppressors

Gun silencers and suppressors are two terms the same thing with each name born out of a different era in American history and marketing. They can be and are used interchangeably without affecting the meaning.

However, flash suppressors and sound suppressors are radically different devices doing different things, although a sound suppressor combines both functions due to the nature of how it operates. Hopefully, this clears up some confusion on seemingly identical and sometimes conflicting sounding terms.

Get Started

Want to learn more about silencers? Visit our products page and look over our line of suppressors.

Feel free to give us a call at 888.781.8778 or email customerservice@silencercentral.com to learn which one is best for you and how to buy it.

A Beginner's Guide to Shooting Magpies

0

It’s always open season when it comes to shooting magpies. Unlike game birds, such as pheasant and grouse, which may only be hunted during open season, magpies are grouped with crows and woodpigeons in the category of pest and may be controlled at any time of year.

You don’t need to apply for a licence to shoot magpies, as they are covered by general licence issued by government. However, if you don’t already know the details, you should familiarise yourself with the licence so you know where you stand. The licence stipulates certain conditions and is a permit to landlords, occupiers, and authorised persons only, so if you are not the owner or occupier, you will need their permission.

The licence allows for the control of magpies to prevent damage to specified items only, which include livestock, crops, timber and fisheries. So quite apart from safety considerations, you’d have some difficulty in justifying shooting magpies in a small town garden. You can find further information about licensing on the Natural England website at www.naturalengland.org.uk.

Getting Started

Once you’ve established there are magpies in a particular area, find a suitable place to lure them to near to a spot where you can settle down to wait. An ideal place to wait for magpies would be close to trees adjacent to a clearing or open field. Dawn and dusk are when you’re likely to see birds displaying bolder behaviour, as it is generally a quieter period in terms of human traffic.

One of the best ways to get a good shot at a magpie is to catch it while it is eating. Entice the magpies to within your range by leaving out a food supply such as a freshly killed rabbit or squirrel. Alternatively, you could make use of a decoy magpie bird. Magpies are highly territorial birds so will often come down to investigate an unknown magpie in their area. Artificial magpie decoy birds are a good option, as they are realistic and easy to transport.

You may need to spend several hours to get a shot at a magpie, so consider using a portable hide. If you plan to shoot early in the morning you might prefer to set up the hide the day before to avoid disturbance when you arrive for shooting. Use a good quality camouflage hide net and peg it down at the base so that it won’t rustle in the wind.

Other considerations

It sounds obvious, but make sure you stay on the right side of the law. You must comply with the requirements of the Firearms Act as well as the Animal Welfare Act. If you use live decoy birds, be sure to treat them in accordance with legal requirements. This is an area currently under review by European legislators, so keep abreast of any changes which might be introduced in the near future.

Magpie numbers have tripled over the last three decades and are considered by many to be the vermin of the bird world, but even though they are not the most popular bird, you never know who might take umbrage with seeing them being shot. As with all hunting, be respectful and make sure you kill quickly and cleanly. If you know the law and work within it, you will have no cause for concern when controlling the burgeoning magpie population.

What Colors Are Coyotes? – Coyote Colors (with Pictures)

0

Coyotes are medium-sized wild canids that could be traceable throughout the North American continent. These wild animals are known for their many features like size, body shape, color, and general behavior. You may confuse the coyote with wolves or dogs from some distance due to their similar standard appearance. However, there are a lot of differences in terms of their features and physical capabilities.

Some of these specific standard features are a long snout, pointed ears, a bushy tail, and noticeable coat color. When it comes to size, coyotes are bigger than foxes and dogs but smaller than wolves. In this article, we are going to discuss in detail coyote coloration or the color of coyotes.

Coyote colors

As we have mentioned before, coyotes exist throughout the different regions of North America. When it comes to coyote color variations, it also varies from one region to another. Generally, these animals are a mixture of many colors. It could be gray, light gray, red, peppered black, or white color. The inside color of the chin, chest, and belly is always white for coyotes of any region. You will also notice a spreading red color on the top of their nose. The color of the coyote has a lot of significance. Most importantly, it helps in the identification of coyotes from other wild animals.

Coyote fur colors

Coyote comes with fluffy fur which makes them larger than their usual weight and size. The fur of the coyote is highly helpful in keeping it safe from harsh weather. The fur is quite thick and long which makes the coyote appear larger than their actual body size. The fur color of the coyote varies from gray to reddish brown. You may also see the fully black fur coat of a coyote.

You may also notice more reddish or tawny tint color shade on the legs, face, and ears of a coyote. Moreover, coyotes also have very long guard hairs which are usually dark in color. By having a look at these varieties of colors, you can easily conclude that coyote is quite good at camouflaging themselves.

Coyote Color Variations: what color are coyotes?

Here we are going to enlist all the colors which the coyote can adopt. Coyote doesn’t have a single color. Most of the time, it comes in a variety of colors. Coyotes are actually the amalgamation of these colors. Some of the most prominent colors of the coyote are given as:

  • Gray
  • Brown
  • Tan
  • Red
  • Blonde
  • White
  • Black
  • Salt and pepper

Most of the time you will see the coyote only in these colors sometimes a combination of one or two of these colors. Sometimes the genetic mutation also happens in the coyote due to Melanism. This process generates a fully dark or black-colored coyote. You may also notice the happening of Albinism phenomenon in the coyote. It also leaves an impact in the form of any other color on the coyote.

Regional colors of the coyote

The color of the coyote also varies from one region to another. Let’s have a look at the colors of the coyote from different regions of the North American continent.

Eastern side coyote

Eastern coyotes are hybrid-type subspecies of the coyote. They take colors as well as other properties from both wolves and coyotes. These coyotes actually take more features from wolves. The size of this kind of coyote is also slightly larger than a normal coyote.

Eastern coyote comes with a combination of many colors. The most prominent colors of the eastern coyotes are gray, red, brown, tan, and blonde. You may also notice some rusty colors on these hybrid coyotes.

There are also multiple color phases of eastern coyotes during different times of the year. These are very rare colors of coyotes you can find on the field. You should consider yourself lucky if you witness these coyotes in the wilderness. Generally, you will find these wild animals in the east coastal areas or mid-west areas.

The eastern coyote has also been named as tweed wolf and normally exists in the northeastern parts of the USA and Canada. The eastern coyote comes with a fully white underbelly with a white chin and throat. There are also washes of black on their overall coat. Typically, these wild canid animals have very coarse fur which let them easily endure harsh winter weather.

Western side coyote

These coyotes originated from the western side of North America and gradually migrated towards all the corners of the continent. You can easily witness these coyotes in the western and southern regions of the USA, Canada, and Mexico. These animals come in reddish, tan, dark brown, blonde, orange, and gray colors. Western coyotes have a fully white belly with a slightly tan color combination. They have bushy tails along with black fur at the tip end. These coyotes do have not much heavier fur as compared to the eastern side coyote. It also makes them slightly smaller in size. Eastern coyotes also have longer legs as compared to Western coyotes.

Brown color coyotes

Many coyotes exhibit brown or dark brown colors including the eastern coyote. Eastern coyotes have different phases of colors like brown, dark brown, red, and blonde. You may not normally see brown color coyotes as the usual color of the coyote is tan, gray, and red. However, still, the brown color coyotes have a reasonable presence in North America.

Michigan coyotes

Coyotes in Michigan typically have the same color coat as you can see normally in the coyote. They are gray and red in color with a mixture of white. You may also some salt and pepper-colored coyotes in Michigan. However, a very rapid change is happening in the color of Michigan coyotes due to the movement of eastern coyotes in the mid-west areas. In these coyotes, there is more dominance of brown, dark, and tan colors. They have also been changing colors at different times of the year.

Black color coyote

Coyotes could also be black in color. This usually happens due to genetic mutation and the process is called Melanism. You may also find this kind of mutation in many other animals like badgers, bobcats, foxes, etc. However, it very rarely happens in the case of coyotes as compared to other animals like foxes who are almost 25% victims of the Melanism phenomenon. It is a very rare phenomenon and could happen to any coyote in the world.

A rare black coyote recorded by the trail cam.

Rare coyote colors

Most of the coyotes you will see in the normal colors but some of them also exhibit some unique or rare colors. It usually happens due to various reasons. Most importantly, it happens due to seasonal changes. For instance, they lose most of their heavy fur at the beginning of the summer season and expose their guard hairs.

In this way, you can easily see the inside color of the coyote. The color mutation also happens due to some other factors like Melanism and Albinism. Sometimes they are completely melanin and exhibit fully dark color and sometimes they are partially melanistic coyotes having some botches of black fur.

Do coyote coats change colors?

Yes, coyote changes the colors of their coat. Generally, they change the color of their coat on the basis of different seasons. There will be a complete change in their appearance in the winter as well as the summer season. Coyotes may look quite bulkier in the winter season as compared to the summer season as they have to face very harsh and cold weather in the winter season.

The coyote summer coat will be very thin and usually come with a mixture of red and gray colors. In the winter season, the coyote coat will be quite large, long, and heavy. They appear much larger than their original size. Coyote also changes the color of their coat due to various other reasons. For instance, the eastern coyotes exhibit four different colors throughout the whole year.

Coyote eye color

Many people are curious about the color of the coyote eye. Generally, they have yellow eyes with brown irises. Initially, at the time of birth, they have blue eyes and gradually transform colors. You will experience the change of color gradually as they grow older. Scientists have also exposed that the blue eyes coyotes have actually descended from the single blue-eyed coyote having mutant genes which causes the blue color in the eyes.

Frequently asked questions

Conclusion

People occasionally ask this question what color are coyotes? We have answered it in a very comprehensive to clear all your confusion about the color of coyotes. Coyotes exhibit many colors under different circumstances. We have explained in detail and clearly all the other aspects of these colors. By thoroughly reading this article, there will be no confusion left in your mind about the color of a coyote.

Where Warm Waters Halt in The Thrill of the Chase Treasure Hunt ~ by Del Shannon

0
treasure hunt book
The Thrill of the Chase book (with treasure poem inside)

Where Warm Waters Halt

By Del Shannon

(The following is written in a manner of ‘in my humble opinion’)

Where warm waters halt…

This is the now iconic first clue written by eccentric millionaire Forrest Fenn. He’s earned the “eccentric” title in spades because of a single act: About 7 years ago – nobody is exactly sure except Fenn himself – he stole into the mountains north of Santa Fe, New Mexico and hid a treasure chest filled with $2 million of gold, gems and other valuables. And in an act that can only be called defiant, he wrote a book and a poem that describes the route to get to the treasure and dared anyone to try and unlock the riddle and claim his cache.

Since publication of Fenn’s The Thrill of the Chase in 2010, thousands of theories have been offered up as the location of this first clue. The location of the starting point of the hunt for Fenn’s treasure puts into context every other clue. Fenn has said you’re wasting your time if you’re searching without knowing where to start.

So where do warm waters halt? Not far from Questa, New Mexico.

forrest fenn treasure hunt his books
Forrest with some of his books

I first heard about Forrest Fenn and his treasure chest while sitting in the breakfast area of the Taos Hampton Inn eating a self-made waffle and sipping coffee. I was there working on the reconstruction of the Cabresto Dam, just east of Questa. The Today show was on in the background and this is when I first saw Fenn, his piercing eyes revealing more intelligence than his carefully selected words. He was explaining that all you had to do was follow the nine clues spelled out in a simple poem and you were rich. Just like that, my curiosity was piqued.

Buying Fenn’s book and starting my search around Questa and Taos was obvious and easy. The land seemingly disappears into oblivion at the Rio Grande Gorge and thrusts to the heavens just steps away at the Sangre De Cristo Mountains, creating billions of hiding spots. Working in the area revealed that the landscape and its population are one and the same. The people of Questa and Taos stand out as easily as the canyons and peaks that surround them, none is even remotely like another.

Very little in the The Thrill of the Chase pointed me to anything that resembled the area around Questa and Taos. Fenn waxes Quixotic about his youth spent doing anything but focusing on school, holding a special place in his heart for Yellowstone.

One story in particular gnawed at me like an obsessive-compulsive beaver. In an early chapter titled “First Grade,” Fenn recounts being bullied by a boy named John Charles Whatever who often threatens to beat up Fenn, while at other times waves around a jar of olives in his face. The more I read and reread this passage the more it began to look like a ham at Chanukah – bizarrely out of place.

All I had to go on was the name “John Charles” and his olives, so I started there. After internet searches with dozens of permutations, I finally got lucky. After reading a history of Questa, once known as Rio Colorado, I learned that the great explorer, John Charles Fremont, once spent a few months during the winter of 1849 in Questa.

Fremont had tried to cross the southern Rocky Mountains in Colorado during the winter of 1848-49 and convinced 32 gullible men into joining his folly. Fremont was from an era where braggadocio was a suitable proxy for intelligence and thrived in an environment of delusional arrogance. By December 1848 eleven of his party had frozen to death and most others had started eating their belts. The party finally gave up and began limping their way south to New Mexico.

The surviving members stumbled into Questa in January 1849, but Fremont, sensing his men would be in an extended sour mood once they could again feel their feet and hands, headed for Taos. He was off to California a few weeks later

A tragic story, but this new knowledge didn’t appear to put me any closer to the Fenn’s treasure. John Charles Whatever’s olives did.

Besides being a lover of history, Fenn is a fly fisherman. The Red River fights its way out of the mountains near Questa, its last gauntlet is a maze of basalt boulders below a fish hatchery. Fed by springs, the water stays a consistent 48 degrees in the winter. In this same stretch of water there is a mid-winter (January through March) hatch of blue winged olive flies, which, along with the warmer water, coax brown trout out of the colder waters of the Rio Grande…along with the fishermen.

Fremont and his olives were pointing to Questa.

Thrill of the Chase book (opened to chapter ‘In Love with Yellowstone’

Still, more detail was needed, which came from another of Fenn’s stories. One evening, while re-reading the In Love With Yellowstone chapter I stopped after Forrest described his dismay after his father sold the families ’36 Chevy for a ’41 Plymouth. Why on earth was this such an important part of his life? And why didn’t he use the numbers ‘19’ in front of these dates. Every other reference to a year in The Thrill of the Chase uses all four digits – 1926 for example, the year his parents were married.

Forrest’s attempt at alarm over this car sale seemed insincere. After chewing on ’36 and ’41, which were details that seemed misplaced, and while using Google Earth to snoop around the Questa area, I noticed the latitude in the lower right hand corner. If I hovered the little electronic hand directly over the center of the village and it read 36 degrees, 42 minutes north. Hmmm… Then I moved it to the fish hatchery and it read – exactly – 36 degrees, 41 minutes, 0 seconds north. Holy crap!

Two hints at the starting place are compelling. If I could find a third it would concrete the location of “where warm water halt.” A local fly fisherman supplied my requested last hint.

Van Beacham is well known in Taos as the owner of the Solidary Angler, a local fly fishing shop and guide business. He’s also the author of A Flyfisher’s Guide to New Mexico, and this is how Van describes the Red River from the fish hatchery to its confluence with the Rio Grande in his book. “The lifeblood of the Rio Grande Gorge, the spring-fed section of the Red River extending from the hatchery downstream about 4 miles to the confluence with the Rio Grande is the main spawning tributary for browns and cutbows in the bigger river. It also provides major holding water for big cutbows and browns since the water stays about 48 degrees all winter long. Due to the warmer water temperatures, the Red River is the premier natural winter fishery in northern New Mexico.”

The Red River provides “holding water” for cutbow and brown trout because of its “warm water.”

It takes very little effort to connect the words “halt” and “hold.” In fact, they essentially mean the same thing. The word “hold” takes its origin, its etymology, from the Germanic word “halten,” which means “to hold.”

Bingo.

Warm waters halt in the Red River between the fish hatchery and its confluence with the Rio Grande. This is where anyone seriously searching for Fenn’s treasure must start.

thrill of the chase treasure hunt map
Poem and Treasure Map

Where to from there? Down river. Rio arriba.

In Fenn’s opening chapter titled “Important Literature” one of the books he talks about is For Whom the Bell Tolls. As with John Charles Whatever and his olives, if you look only at the surface you immediately reach a dead end, but when you dig a bit you realize there’s more to learn. Before Hemingway used the title for one of his books, For Whom the Bell Tolls was a line in a poem written by John Donne, a 16th century metaphysical poet. Donne begins with the famous first line of his poem, “No man is an island…” and ends with “…and therefore never send to know for whom the bells tolls; it tolls for thee.”

Follow the Rio Grande downstream from its confluence with the Red River and you eventually reach the John Dunn Bridge, named for the famous Taos gambler and entrepreneur Long John Dunn, an escaped convict from Texas who built the first bridge and toll road across the Rio Grande at this location. The splinters of Dunn’s original timber bridge are somewhere near El Paso, carried there by numerous spring floods, and in its place stands a steel truss bridge built by Taos County. Connecting John Donne and John Dunn was easy and obvious, especially after learning that both Dunn and Donne are different spellings of the Gaelic word for “brown.” And because Dunn and Donne are proper nouns, capitalize the ‘B’ and you have Brown. Voila.

But John Dunn’s home wasn’t at the bridge, it was in Taos just north of the plaza in the area now occupied by the John Dunn House Shops. How could the home of Brown be at the Dunn bridge if Dunn never lived there?

This problem was resolved by the author Max Evans and his book Long John Dunn of Taos. This homage to Dunn describes, among other things, his early 1900’s transportation company – really just several horses and a stagecoach – and how he met Taos visitors and artists at the nearest train depot in Servilleta, then the only way in or out of Taos. He piled them into his stage, headed east in a cloud of dust across the Taos plateau, and then snaked them into the Rio Grande Gorge via a harrowing and ridiculously steep switchback road.

Dunn built a stone hotel at the bottom of the gorge and on the edge of the Rio Grande where travelers were forced to spend the night, most of whom were grateful for the stop and for surviving the tormenting trip into the gorge, before delivering them to Taos the next morning. Dunn’s hotel was run by his mother, Susan Jane Dunn, who also lived at the site. A short rock wall on the east side of the river is all that’s left of Mrs. Dunn’s home, the home of Brown.

All of that is pretty convenient, but I still wanted more on Dunn. It turns out The Thrill of the Chase is almost overflowing with references to John Dunn. In the chapter “Looking for Lewis and Clark” Fenn talks about taking Babe Ruth candy bars with him when he and Donnie went into the mountains outside of Yellowstone for several days. The problem is the candy is actually called “Baby” Ruth bars. If you look into Babe Ruth you learn that a man named John Dunn (everyone called him Jack) signed Ruth to his first major league baseball contact. Hmm…

Or look at Fenn’s odd reference to Robert Redford in the “Important Literature” chapter. One of Redford’s most famous movie characters was The Sundance Kid (aka Harry Alonzo Longabaugh). In 1897, Longabaugh was arrested by Carbon County Montana Sheriff John Dunn after he and others from his gang robbed a bank in Red Lodge, MT. Wow!

Three separate John Dunn references in The Thrill of the Chase aren’t a coincidence.

The second clue – Put in below the home of Brown – points to the John Dunn Bridge. It’s too far to walk from where warm waters halt at the confluence of the Rio Grande and Red River; about 14 miles if you drive or eight-ish miles if you fight your way on foot down the Rio Grande. All these hints point to these locations as the first two clues.

But be wary from here. ‘Putting in’ could mean crossing the river or heading either up or down the canyon. And if you cross the river, which direction do you cross from? Do you head west or do you head east? You could go in three directions from the Dunn Bridge. I have my own ideas of where to head next, but not the chest, so they remain only ideas.

An obvious question remains: Why am I sharing this? It’s not as if I haven’t tried to find Fenn’s treasure on my own. I’ve made many trips to areas I felt certain that, when I walked out, I would be struggling to carry over 40 pounds of gold, jewelry and artifacts back to my car. But I’ve learned that the search isn’t as simple as my romantic visions make it out to be. It took a couple of years to unlock these first two clues and it may take much longer to unlock the rest.

And if I’m completely honest with myself, I’ll admit that I’d like the treasure found, in direct contrast to Fenn’s wishes that it be discovered 1,000 years from now. I’m a sucker for a good challenge wrapped in a mystery. So far I’ve done this alone, but I could be persuaded to work with someone else or as part of a larger group in the right circumstance. It’s always more fun to work with a team.

lost treasure
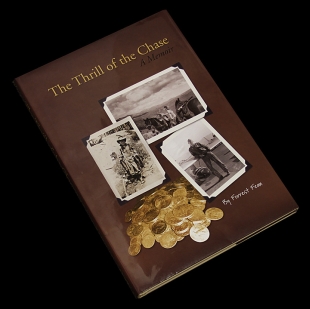
For the record, I didn’t contact Fenn for this story. What would he have said to me anyway? At best he would have complemented my sleuthing. More likely he would have just silently shrugged, smiled at me with his quick eyes, and walked away. I figure he’s done what he wanted to do and, whether or not he enjoys the attention he’s created, I’d make my own choice and leave him alone.

A final thought. To me, Fenn’s poem is a love letter to an area he unquestionably adores and which also helped him heal from his time in Vietnam. When you dig into the history of the Vietnam war, you learn that there is a Red River there too and pilots who flew into this maelstrom found some of the most dangerous air over this river.

I like to think that what Fenn found in New Mexico’s Red River was the thorough opposite of Vietnam’s. The paradox was not lost on him. In my mind I can see him casting for brown’s while marveling that one Red River could be filled to overflowing with death while the other held out its hand and reminded him there were still places where he could gently ease the visions of war from his head, replacing them with the rediscovered memories of the trout he chased in his youth as they led him, once again, to peace.

~by Del Shannon

.

If you would like to share your story or thoughts on MW, please send your submission to treasure@mysteriouswritings.com!

Always Treasure the Adventure!

.

Coyote Hunting in Pennsylvania: An Ultimate Guide for 2024

0

Howdy, fellow hunters and outdoor enthusiasts! Are you itching to go coyote hunting in Pennsylvania but don’t know where to start? Look no further because this ultimate guide has got you covered! As a proud resident of Pennsylvania and an avid hunter myself, I’ve spent countless hours tracking and stalking coyotes in this beautiful state. And let me tell you, there’s nothing quite like the thrill of the hunt in the Keystone State! So grab your gear, pack your sense of humor, and let’s dive into the wild world of coyote hunting in Pennsylvania together.

From the best hunting spots plus the essential equipment you’ll need to the coyote hunting laws in Pennsylvania, this guide has everything you need to know to become a successful coyote hunter in the great state of Pennsylvania. So, let’s get started and show those cunning coyotes who’s boss!

Why Hunt Coyotes in Pennsylvania?

Hey there, friend! Are you ready to learn why hunting coyotes in Pennsylvania is an adventure you don’t want to miss? Let’s dive into the exciting world of coyote hunting in Pennsylvania, where you’ll get to experience the thrill of the chase, improve your hunting skills, and contribute to the conservation efforts of the state.

The Impact of Coyotes on Pennsylvania’s Ecosystem

Coyotes are an invasive species that have been expanding their range throughout Pennsylvania since the 1930s. They are predators that prey on a variety of animals, including deer, rabbits, and rodents, and can have a significant impact on the ecosystem. Overpopulation of coyotes can lead to a decrease in the population of other animals, which can have a ripple effect on the entire ecosystem. This is why coyote hunting in Pennsylvania is not only a fun and challenging activity but also an essential conservation measure.

The Benefits of Hunting Coyotes in PA for Conservation

Hunting coyotes in Pennsylvania helps manage their population, which, in turn, has a positive impact on the ecosystem. Hunting can also help prevent coyotes from becoming habituated to human activities, which can be dangerous for both humans and pets. Additionally, coyote hunting in Pennsylvania helps generate revenue for the state’s conservation efforts, which can be used to support programs that protect wildlife and their habitats.

All in all, Coyote hunting in Pennsylvania is an exciting and rewarding activity that not only allows you to experience the thrill of the chase but also contributes to the conservation of the state’s ecosystem. With its beautiful forests, rolling hills, and vast open spaces, Pennsylvania offers the perfect setting for a memorable coyote hunting trip. So what are you waiting for? Grab your hunting gear and head to Pennsylvania for a wild and unforgettable adventure!

Coyote Hunting Laws and Regulations in Pennsylvania

Coyote hunting in Pennsylvania is a topic that definitely gets a lot of attention among hunters and outdoor enthusiasts. Whether you are a seasoned hunter or just starting out, coyote hunting can be a thrilling and challenging experience that tests your skills and knowledge. However, before you grab your gear and head out to the woods, it’s important to know the laws and regulations related to coyote hunting in Pennsylvania.

Here’s a quick rundown of the basics:

What is the hunting season for coyotes in Pennsylvania?

The hunting season for coyotes in Pennsylvania is open year-round. However, there are some specific regulations that apply to different hunting methods, such as trapping, night hunting, and using electronic calls.

What are the regulations for coyote hunting in Pennsylvania?

To hunt coyotes in Pennsylvania, you need a valid hunting license and a furtaker license. You are allowed to hunt coyotes during daylight hours and with any legal firearm or archery equipment. Hunting coyotes at night is strictly prohibited in the state of Pennsylvania. However, there are some restrictions on using bait or live decoys to lure coyotes.

In addition, you must wear at least 250 square inches of fluorescent orange material on your head, chest, and back combined, visible from all directions, during the firearms deer season and from November 15 through December 15. This requirement does not apply to archery deer season or coyote hunting.

What are the rules for night hunting and electronic calls?

If you are planning to hunt coyotes at night in Pennsylvania, you must obtain a special permit from the Pennsylvania Game Commission. You also need to have a light source that emits white or green light and is handheld or worn on your head.

The use of electronic calls is allowed for coyote hunting in Pennsylvania, but they must not mimic sounds made by game animals during their breeding season.

What are the penalties for violating coyote hunting regulations in Pennsylvania?

Violating coyote hunting regulations in Pennsylvania can result in fines, suspension of hunting privileges, and even imprisonment in some cases. It’s important to follow the rules and regulations to ensure the safety of yourself and others, as well as to protect the environment and wildlife.

Overall, coyote hunting in Pennsylvania can be a great experience if you follow the rules and regulations set by the Pennsylvania Game Commission. Remember to always be safe, responsible, and respectful of nature while enjoying this exciting outdoor activity. Happy hunting!

Best Coyote Hunting Spots in Pennsylvania

If you’re looking for some thrilling coyote hunting in Pennsylvania, you’ve come to the right place! Pennsylvania is a state with abundant wildlife and excellent hunting opportunities. But when it comes to coyote hunting, not all hunting spots are created equal. So, let’s explore some of the best coyote hunting spots in Pennsylvania.

1. Allegheny National Forest

If you’re a fan of public land hunting, then the Allegheny National Forest is the place for you. The forest spans across 513,175 acres, providing ample space for hunters to explore and pursue coyotes. The area is known for its dense forests, rolling hills, and numerous streams and rivers, making it an ideal spot for coyotes.

2. State Game Lands

Pennsylvania’s State Game Lands are a network of public hunting grounds spread throughout the state. With more than 1.5 million acres of land, it’s not surprising that some of the best coyote hunting spots are located here. One of the advantages of hunting on state game lands is the abundance of prey species that attract coyotes, including deer and rabbits.

3. Private Lands

While public land hunting has its advantages, hunting on private land can be a game-changer. Pennsylvania has plenty of private land available for hunting, but you’ll need to obtain permission from the landowner first. One perk of hunting on private land is that there is less hunting pressure, which means you’ll have a better chance of bagging a coyote.

4. Local Farms

Local farms can also be excellent coyote hunting spots in Pennsylvania. Many farmers welcome hunters onto their land to help control coyote populations, which can prey on livestock. These farms often have large fields and pastures that provide ample opportunities for spotting coyotes.

5. Wildlife Management Areas

Pennsylvania’s Wildlife Management Areas are public lands specifically managed to promote wildlife habitat and hunting opportunities. These areas often have well-maintained trails, food plots, and water sources that attract coyotes. Plus, hunting in these areas helps support the state’s wildlife management efforts.

When it comes to coyote hunting in Pennsylvania, there are plenty of options to choose from. Whether you prefer public or private land hunting, there are abundant coyote hunting spots across the state. Just make sure to obtain the necessary permits and licenses before heading out, and always practice safe and ethical hunting practices.

Preparing for the Coyote Hunt in Pennsylvania

Are you ready for an adventure in the Keystone State? Coyote hunting in Pennsylvania is not for the faint of heart. But with the right gear and knowledge, you’ll be ready to take on these elusive predators.

Choosing the Right Gear for Coyote Hunting in Pennsylvania

First things first, you need the right gear. You’ll need a reliable firearm, preferably a rifle or a shotgun, with a scope or iron sights. Make sure you check Pennsylvania’s hunting laws for the specific caliber and ammunition you can use.

You’ll also need warm and comfortable clothing, especially if you’re hunting in the winter. Dress in layers, and don’t forget about a good pair of boots. You don’t want your feet getting cold and damp while you’re waiting for your prey.

Finally, you’ll need calls and decoys to attract the coyotes. Electronic calls work great, and some hunters swear by mouth calls. Decoys can also help bring coyotes into range, but make sure you use them wisely.

Understanding Coyote Behavior and Habitat in PA

Knowing the behavior and habitat of coyotes in Pennsylvania is crucial for a successful hunt. Coyotes are adaptable creatures and can be found in a variety of environments, from urban areas to rural farmland.

One of the best places to hunt coyotes in Pennsylvania is near farmland, especially during the winter months when they are looking for food. Coyotes are also more active during the night, so plan your hunt accordingly.

Scouting for Coyotes in Pennsylvania

Before heading out for your hunt, it’s a good idea to scout the area. Look for tracks, droppings, and other signs of coyote activity. You can also talk to local farmers and hunters to get an idea of where the coyotes are most active.

Once you’ve found a good location, set up your calls and decoys and wait patiently. Coyotes are smart animals and can be difficult to lure in, but with a little patience and persistence, you’ll be sure to have a successful hunt.

Overall, coyote hunting in Pennsylvania can be a thrilling and rewarding experience if you’re well-prepared and have the right knowledge. So grab your gear, head out to the countryside, and get ready for an adventure like no other. Good luck and happy hunting!

After the Hunt in Pennsylvania

Congratulations, you’ve bagged yourself a coyote! Now it’s time to move onto the next steps. Field dressing and processing a coyote in Pennsylvania can be a bit of a challenge, especially if you’re new to hunting. My advice? Take it slow, and don’t be afraid to ask for help from a more experienced hunter.

Once you’ve got your coyote processed, it’s time to think about transportation. Pennsylvania has strict regulations when it comes to transporting coyotes, so make sure you’re up to date on the latest rules and regulations.

But what about the meat and fur? Don’t let anything go to waste! Coyote meat can be quite tasty when prepared correctly, and the fur can be used for a variety of purposes, from clothing to home decor. Get creative, and don’t be afraid to experiment with new recipes and craft ideas.

Overall, coyote hunting in Pennsylvania can be a challenging and rewarding experience. With the right gear, planning, and mindset, you’ll be well on your way to a successful hunt. And remember, always hunt responsibly and ethically, and follow all state and federal regulations. Good luck, and happy hunting!

Final Thoughts

As we wrap up our discussion on coyote hunting in Pennsylvania, I must say, I have thoroughly enjoyed this topic. Hunting coyotes can be an exciting and challenging experience that requires skill, patience, and a bit of luck. Plus, it’s a great way to connect with nature and appreciate the beauty of the outdoors.

Now, let’s talk about coyote hunting in Pennsylvania specifically. The Keystone State is home to a healthy population of coyotes, making it an excellent destination for hunters looking to bag a few. However, there are some things to keep in mind when hunting coyotes in this state.

First and foremost, make sure you have the proper permits and licenses to hunt coyotes in Pennsylvania. The state’s Game Commission has specific regulations and requirements for hunting coyotes, so be sure to check them out before heading out into the field.

Additionally, be mindful of your surroundings and the local wildlife. Coyotes are smart and adaptable creatures, but they are also known to be territorial and protective of their young. Be respectful of their habitat and avoid disturbing their dens or breeding grounds.

Finally, when it comes to coyote hunting in Pennsylvania, it’s always best to go with a buddy or a group of friends. Not only is it more fun to share the experience, but it’s also safer to have someone watching your back in case of any unexpected situations.

In conclusion, if you’re an avid hunter or just looking for a fun outdoor adventure, coyote hunting in Pennsylvania is definitely worth considering. Just remember to do your research, be respectful of nature, and above all, have fun! Happy hunting!

Best Air Rifle Deals

Popular Posts

PCP vs Gas Piston: Which One is Better?

0
The perfect airgun is a difficult pick when you are new to gun-hunting. There are a lot of things to keep in mind, starting...

Can a Felon Legally Possess an Air Rifle in Tennessee?

0
"Understanding the Legalities: Felon Ownership of Air Rifles in Tennessee" can a felon own an air rifle in tennessee? In the state of Tennessee, the ownership...

Gas vs Spring Piston: Which One is Better?

0
Today, you can find 5 different types of air rifles available in the industry. They are: spring pistons, gas pistons, PCP air rifles, variable...

Air Rifle vs BB Gun: Understanding the Key Differences and Choosing the Best Option

0
"Air Rifle vs BB Gun: Unveiling the Key Differences and Choosing the Perfect Weapon for Your Shooting Needs. Delve into this comprehensive guide to...

How to choose the right Air Gun Caliber for your game?

0
A story is told of three Native American hunters. Two are smart, the other somewhat ignorant. On the first day of the hunting season, one of...