Home Blog Page 127

Are Backyard Rabbits Safe To Eat

0

From destroying your lawn with brown urine spots to gnawing your plants down to the root, rabbits can be too big a burden to behold. Perhaps you think the best recourse for you would be to eat them. But the big question remains, are backyard rabbits safe to eat?

Backyard rabbits are edible and safe to eat, whether they are tamed or found wandering in your yard. As long as the rabbit meat is cooked thoroughly to 160-degree Fahrenheit internal temperature to remove any toxins, they are safe to eat.

The best rabbits for meat are Silver Fox, French Angora, and American Chinchilla.

Undoubtedly, your backyard rabbit’s main concern would be to eat without getting noticed or eaten. However, that does not mean that it is not safe for you, and neither should it mean you are free to dive in. Here are a few things you will have to keep in mind about eating backyard rabbits.

Eating Backyard Rabbits

If you were to imagine the sumptuous, fine eating of this cottontail, you might not want to resist.

First, rabbit meat is edible, whether your bunny is from the wild or tamed. But before you do that, it will be best to inspect whether the bunny is healthy or not.

One of the biggest concerns is the contraction of a disease called Tularemia, which can be passed to you upon touching the affected tissue or blood. Once you see any signs of this condition, avoid the rabbit. This condition is relatively predominant during cold seasons.

Usually, it would help if you wore latex gloves while gutting the rabbit. This move ensures that you do not expose yourself to any affected tissue or blood. Further, pay attention to the liver. If there are any white lesions on it, do not proceed to eat the rabbit.

Notably, there are times that you might misread the signs. In this case, ensure that you only eat rabbit meat that has been thoroughly cooked. The internal cooking temperature should be at least 160 degrees Fahrenheit. At this temperature, your rabbit meat is safe.

Which Backyard Rabbits Are Safe

There is no denying that sometimes you will want to raise backyard rabbits for meat. If this is the case for you, ensure that you go for the best breeds.

Usually, the best rabbits for meat would be Silver Fox, French Angora, and American Chinchilla. Besides, if you were to consider eating rabbit meat, these options should top your priorities.

  • Silver Fox: Whether you want to meat, fur, or pets, this breed will be the ultimate choice for you to raise. That they have large litters is no secret. Besides being beautiful, these rabbits assure you of not only safe but also tender meat. As long as they are healthy, there will be no reason for you to worry.
  • American Chinchilla: This breed has become relatively prevalent among people who do not put attention to the fur produced. Usually, they assure you of more than enough meat, thanks to their incredibly muscular bodies. Their sweet meat will, undoubtedly, get you smitten.
  • French Angora: While this breed is specifically for meat, its rabbits hardly come with enough meat. As if that is not enough, their fur is vulnerable to matting. That means you will need to keep brushing it from time to time. You will also need to be on the lookout for chances of getting attacked by the rabbit fever.

Here are the two incredible options from the wild.

  • Cottontail Rabbits (both mountain and desert): While they come with a relatively small stature, these rabbits have proven to be excellent delicacies. Their tasty and high-quality meat will readily get you smitten. In most cases, you can hunt them from the late evening into the night, thanks to their nocturnal nature.
  • Eastern Cottontail Rabbit: There is no denying that this is the most hunted rabbit in the US, thanks to the delicacy it provides. The cotton ball tail and the reddish-brown coat are some of the features that make this beauty distinctive. Usually, it would be best for you to hunt them at night, as they are nocturnal.

If the rabbits come into your yard during a time that you aren’t home or aren’t able to catch them, check out this cheap, effective, spring loaded trap on Amazon to setup in your backyard to easily catch and prevent them from running away.

Last update on 2024-11-16 / Affiliate links / Images from Amazon Product Advertising API

How To Tell If A Rabbit Is Safe To Eat

In most cases, wild rabbits come with warbles and parasites. While warbles might not pose any risk to human beings, pests and parasites could be a significant problem in the long run. For this reason, you need to be wary of rabbits that have fleas and ticks.

Besides that, you will have to check whether the rabbit has Tularemia, also known as rabbit fever. This condition could be fatal to both human beings and pets, and immediate medical attention will always suffice.

You can only check if the rabbit has this condition when eviscerating it. During this time, you will have to confirm whether there are any pin-sized lesions on the liver. The presence of these lesions shows that the rabbit is not healthy for you.

Dangers Of Eating Rabbit Meat

From how delicious rabbit meat tends to be, to how available they are, you will hardly want to resist eating them. However, there will always be a few dangers for you to keep in mind.

Unless you pay attention to these issues, you could end up unhealthy in the long run. Here are the two main dangers of eating this meat.

  • Tularemia: You can hardly ignore the impact that this condition could have on your health. In most cases, you will contract this illness when skinning the rabbit, as it is passed upon contact with affected tissues and blood. This condition will expose you to fever, chills, and body aches. Fortunately, antibiotics will be enough to treat this condition altogether.
  • De-Populating Wild Rabbits: While the rabbit population is relatively high, too much hunting could result in some species’ decline. For this reason, it would be best for you to be cautious about when and how to hunt. Perhaps, paying attention to the state regulations on hunting rabbits could be helpful in the long run.
  • Stomach Upsets: This issue will only arise if you do not cook your meat thoroughly. Experts suggest that you cook the meat to at least 160 degrees Fahrenheit. This way, the meat will be not only tender but also free from various pathogens.

Why Can’t You Eat A Rabbit In The Summer

Typically, you will be free to eat rabbit meat at any time. However, the restrictions during summer are thanks to the ease of spreading worms. Most rabbits will spread worms and parasites to other bunnies during summer, unlike when there is a drop in temperature.

However, all you need to do is to take all the necessary precautions mentioned above. It will be much easier for you to identify the presence of worms when you do so. If you do, it would be best not to eat that meat.

Is It Safe To Eat Jackrabbits

Did you know that jackrabbits are relatively akin to cottontails? While this is so, jackrabbits are typically hares.

That means that they will hardly be safe for you to eat, particularly when not cooked thoroughly. If you were to cook it accordingly, you would have no reason to worry about anything.

With their stringy meat, ensure that you take as much time as you can when cooking it. You will also need to aim at an internal temperature of over 160-degree Fahrenheit.

This way, you will be sure of eliminating all the toxins, worms, among other pathogens, that could be on the jackrabbit.

Helpful Tips To Know If Backyard Rabbits Are Safe To Eat

One of the biggest concerns one could have is understanding when rabbits are safe for you to eat.

One of the most prominent variables to consider would be the presence of lesions on the liver. There could also be a ton of worms under their skin.

Here are a few other tale-tell signs that your rabbit is sick:

  • Be wary of sudden stasis instances, which involves digestion problems, gas, cramping, and tooth issues.
  • Check whether the rabbit’s foot is raw or inflamed. If it is, it is a sign of sore hocks. Its meat could be dangerous.
  • The presence of deerflies and ticks on the coat of your rabbit could be a bad sign. Usually, these parasites could compromise your health in the long run too.

Final Thoughts

The safety of your rabbit delicacy is all dependent on how you prepare it. From using latex gloves when handling the meat to cooking it thoroughly, every precaution will suffice.

Whether your backyard rabbit is tamed or wild, the procedure remains the same. Are you still asking, are backyard rabbits safe to eat?

Well, it is time to get yourself this delicacy, with the only catch being to observe every precaution.

The Nuts and Bolts of Crossbow Accuracy

0
The Nuts and Bolts of Crossbow Accuracy
When it comes to crossbow accuracy, even the minutia matters.

Not all crossbows shoot dead-center right out of the box. Here’s a look at how to get the most consistent crossbow accuracy out of your gear.

After 25 years of hunting with, reviewing and shooting crossbows for the outdoor industry, I have come to one irrefutable conclusion: Not all crossbows are the tack-driving one-holers most hunters think they are — at least not initially.

To be fair, the majority of crossbows, even those that require the purchaser to mount their own scope, will cluster arrows in a 6-inch circle at 10 yards, but this is far from the holy grail of accuracy.

Achieving pinpoint accuracy with a crossbow begins with proper assembly of the crossbow, ensuring that all stock and scope screws, bolts and fittings are aligned and tight. When it comes to accuracy, even the minutia matters, like lubing the rail between shots per the manufacturer’s recommendations.

ARROWS

Believe it or not, an assortment of arrows can be found in some horizontal hunters’ quivers. It is essential that all arrows be of the same length and weight (and brand and model). Variations here can cause headaches when trying to get consistent arrow flight.

By all means, take the time to make certain all your arrows match prior to shooting them.

As anyone who has shopped for a new broadhead has discovered, there is a dizzying number available. Generally speaking, the shorter, tighter and more aerodynamic the design, the better the accuracy.

For most crossbow applications, mechanical-style broadheads perform best, as they wind-plane less than exposed-blade models (i.e., “fixed blades”). At 20 yards the differences are difficult to discern; however, as target distances increase, the errant broadhead’s flight miscue is multiplied.

ADJUSTABILITY

Many crossbows have adjustable stocks and foregrips. This allows the user to customize the length of pull. To achieve maximum efficiency, the shooter must hold and aim his crossbow the same way every time, without variation.

Because of these varying elements, it makes sense that a hunter should spend a considerable amount of time at the range to get the maximum accuracy out of his crossbow at 20, 30 and 40 yards.

While the majority of crossbows are suitably accurate for wild game at these distances, there are some variations that shooters must be aware of and be prepared to compensate for.

SCOPED

Most modern crossbow scopes are designed and made for crossbow shooting using crosshairs, circles or dots to indicate distances out to 60 yards (sometimes further).

Generally, all such scopes are accurate as designed out to 40 yards, after which accuracy tends to decline. The only way to find out is to sit down at a bench and shoot three or four arrows at each distance from a steady rest.

The basic standard is to sight in for 20 yards with the top-most scope reticle and then increase the distance in 10-yard increments.

For most crossbows, reliable accuracy under hunting conditions is assured out to 40 yards, but beyond that crossbow accuracy begins to fall off for a number of reasons, including wind deflection, loss of arrow speed and shooter error.

For all intents and purposes, hunters are advised to limit their shots at game to 45 yards (60 yards out West but only under perfect, windless, obstacle-free conditions). Target shooters may double those standards for competitions, although accuracy will inevitably fizzle as the distance to the target increases.

Crossbows
Shooting a crossbow through a chronograph indoors is a great way to measure a bow’s performance without being affected by wind.

CROSSBOW FORM

Because crossbows are built in a horizontal fashion, it is important that shooters address every aspect of the shot, including proper stance, foregrip, trigger pull and follow-through.

There are few better qualified to discuss the nuances of accurate crossbow shooting than Mark Beck, an International Bowhunter’s Organization (IBO) World Crossbow Champion.

Beck, who makes his living designing crossbows for Carbon Express, offered some surprisingly simple tips for crossbow shooters who want to improve their accuracy.

“Basically, crossbow shooters should use the same disciplines taught in firearms training,” Beck said, “but remember that the trajectory of an arrow is 1/10 that of the average firearm.

“Choose arrows that are within plus or minus 1 grain of each other,” Beck added, noting that hunters and target shooters should use field points or broadheads that are within 1 grain of each other.

Beck says there are four points to consistently accurate crossbow shooting.

First, he said, find the “balance point of the crossbow” and maintain a steady, consistent grip during each shot.

Beck says that shooters should strive to achieve the same field of view through the crossbow scope every time, because a skewed field of view has a tremendous effect on accuracy. Be sure the field of view is clear, sharp, centered, Beck advised.

Beck also stressed that shooters must seek a consistent cheek weld (where the cheek rests on the stock). The slightest variation will change the arrow’s point of impact.

“Some competition shooters mark the stock with tape to ensure that their cheek hits the same point each time,” Beck said. “The more consistent you are with your shooting position the more accurate you are going to be.”

Regarding triggers, Beck was adamant that shooters avoid tinkering with factory triggers to adjust pull weight or creep. Doing so, he said, could result in trigger failure, injury to the shooter, or damage to the crossbow and would void the manufacturer’s warranty.

Crossbows
Shooting a crossbow through a chronograph indoors is a great way to measure a bow’s performance without being affected by wind.

When it comes to trigger pull, Beck counsels, “Any crossbow can be fired accurately by using the first knuckle behind the fingernail as an anchor point. The second knuckle then becomes the pivot point. Practice your trigger pull using a slow, steady pull with the trigger held firmly behind that first knuckle.”

Finally, Beck recommended that bench shooters who intend to hunt deer, turkeys or other game spend time at a 3D range to get used to field shooting conditions and situations.

TREESTAND SHOOTING

Generally speaking, there is no need for elevation compensation when shooting 20 or 30 yards from tree stands that are 15 to 20 feet off the ground.

However, when elevations are much steeper (when hunting out of a tree stand that is 25 or more feet off the ground, or when the target is extremely close to the stand) it may be necessary to aim low in order to compensate for the arcing arrow.

It is recommended that tree stand crossbow hunters practice shooting at silhouette targets set at varying distances from the stand.

This includes shots near the tree base and out to 40 yards, especially when the elevations are such that ballistic compensation is required.

Whenever possible, practice shooting from the same stand you intend to hunt out of, whether fixed-position, ladder or a climbing tree stand. Have a partner place a foam target in various positions at random distances from the stand to simulate real-time hunting situations.

Use your range finder and your good judgment in deciding when to shoot or when to wait for a better opportunity.

GROUND BLIND SHOOTING

Shots from ground blinds are usually straightforward — assuming there are no obstacles or obstructions that might interfere with the crossbow or the arrow in flight.

More than one crossbow hunter has shot the ground blind instead of the trophy standing 20 yards in front of them. When preparing for the shot, make certain the arrow will clear the blind prior to attempting the shot.

Also, ensure that there are adequate, brush-free shooting lanes to avoid arrow contact with twigs, leaves and other debris. When cutting shooting lanes, consider the arrow’s arcing flight path, and cut paths high enough to allow the arrow to fly without impediments.

FREE-FORM SHOOTING

Stalking and still-hunting with a crossbow are challenging simply because crossbows are wide, heavy and awkward to carry over long distances. Always use a sling because carrying a crossbow at the ready while still-hunting will prove to be a chore for even the most athletic of hunters.

In any case, when shooting at game offhand it is important the hunter assume a solid stance with feet comfortably apart and shoulders back with the crossbow’s limbs level. Prop your bow hand into the ribs on the elbow and then use breathing techniques to steady the scope reticle.

COMMON MISTAKES

There are many common mistakes crossbow hunters make that can be easily addressed. The most common is failing to shoot your hunting arrows, those equipped with broadheads, prior to attempting to shoot them at an animal. If you don’t shoot your hunting arrows prior to using them in the field, don’t be surprised when you miss horribly.

Another common error affecting crossbow hunters is failure to use a range finder on every shot. An error in range estimation of just 5 yards can mean the difference between a hit or miss.

Upon arrival at your stand or blind, settle in and then spend some time ranging nearby landmarks. Determine where 20, 30 and 40 yards are by ranging individual trees, rocks or other prominent points. Some hunters use colored flagging or reflective tacks to mark yardages around their hunting site.

Many hunters use their crossbows only on weekends or holidays during the hunting season and then put them away until the following year. To remain familiar and effective with your crossbow, plan to shoot at least 20 arrows two or three times per week year ‘round. Shoot again any time the crossbow is transported, dropped, bumped or exposed to extreme temperatures.

Some crossbow hunters fail to maintain their crossbows per the manufacturer’s instructions. Over time crossbow cables and strings stretch or fray, limbs weaken and parts gum up. Every manufacturer has its own unique maintenance policy — make certain you read it and follow their recommendations.

Lastly, should your crossbow ever require repair, seek a trained professional who is familiar with your specific crossbow and factory-certified. If one is not available locally, by all means send your crossbow back to the manufacturer. Attempting to make your own crossbow repairs is never advised and can be dangerous.

Best Goose Decoy Spreads & Diagrams

0

Successful hunting sessions usually require you to bear the stiff North winds or endure the thick fog while paying attention to your goose spread.

The last part plays a quintessential role during any hunting expedition, and the lack of decoy placement knowledge can result in frustrating failed hunting attempts, especially if you are a novice hunter.

To bag multiple geese, hunters must utilize their hunting ground smartly while creating a foolproof strategy.

In this article, we shall peer into five of the most acknowledged decoy spreads for a successful hunting expedition.

5 Best Goose Decoy Spread With Corresponding Diagrams

The following are five of the best goose decoy spreads with matching diagrams to quickly understand the spread’s structure.

We highly recommend trying all five at multiple expeditions while gauging the season, terrain, and topography of the hunting ground.

#1 Classic U-Shaped Decoy Spread

The U-shaped decoy spread is the most classic and loved spread across the United States. The main shape of the setup alongside the decoy resembles a beautiful U, giving it the corresponding name.

Its U shape helps funnel the geese directly into the middle of this design, which falls in front of the shooters.

You can alter the blind placement according to the weather and climatic conditions, but ideally, a center U blind position can funnel all the geese near the shooter.

Hunters can usually benefit greatly when the blinds are placed in the far front area or apex of the spread during strong winds. Similarly, you can place the blinds at the back of your spread design, giving birds ample time to lower their height from the ground.

We highly recommend this position when you go on a group hunting trip.

Always remember that the wind’s strength dictates your blind placement; stronger winds are ideal for upfront blinds, while low wind conditions are preferable for further back blinds.

Also, ensure that you are hiding all the blinds properly by packing multiple decoys around them. We recommend following a random decoy placement pattern instead of a 2-2 ft measured gap.

A little random spread gives a natural look that can fool and lure the geese easily.

#2 Cross Wind + Sideways U Decoy Spread

Understanding the bird’s instincts and habits shall help you hunt better regardless of the season or hunting location. You will also need your best-looking geese for this specific decoy spread, as it is highly focused on the birds’ instincts.

This decoy is a sideways U decoy mostly used when encountered by crosswinds. Remember that hunters need to bring all their baits for this spread and ensure they look natural to perform effectively.

Start placing most of the decoys around the blinds so the spot is relatively hidden. Content decoys can be equally effective when placed nearest to the blinds.

Also, it is known that geese prefer to land in the middle of a group, so using their habit for our benefit can help hunters lure the bird better.

To do that, you can place four to five active geese in the middle of the zone. Try to use your best-looking geese for this action, and it shall be your staple spread during late-season hunting every year.

#3 The Double V Decoy Spread

Our third decoy spread is the double V design that works exceptionally well in water setup for puddle birds. Another fascinating positive of this spread is its ability to attract multiple primary, secondary, and even oddball duck species.

However, hunters must understand how to lure these geese and other birds.

You can start setting your first V slightly upwards where the wind is supposedly blowing parallel to the river/pond bank. For your second set of V, arrange the decoys behind the first V at a safe distance.

We suggest opting for a reasonable 10-20 yards distance between the first and the second V.

To make the spread more natural and attract small flocks or singles, consider placing single decoys between the V at regular intervals.

Furthermore, to increase the chances of attracting more birds, create secondary decoy spreads near the blind, especially between the gap of both the Vs.

Hunters must remember that puddle ducks habitually land behind the V decoy shape instead of landing in front like most divers.

On the other hand, southern waterfowl hunters hunting in November usually have great success with this spread using a mix of green-winged teal and mallards. Even black ducks, gadwalls, and pintails work well in the location.

#4 X Decoy Spread

X decoy setup is one of the most exciting decoy spreads and usually requires a lot of space for proper execution. The blinds are always positioned in the center of the X as the decoy geese extend in four corners.

That positioning is excellent and highly lucrative with little to no wind.

Additionally, this spread is ideal for hunters who want the benefit of shooting from all directions based on the bird’s landing. If you like the freedom to attack from all directions, this X decoy spread will surely be your staple design for future hunts.

Geese, like other birds, enjoy the safety of multiple birds in one place, but fortunately, this decoy is designed to give hunters ample void spaces for the geese to get drawn into. So, when talking about X spread, hunters get four voids covering all directions.

Shooters can begin hunting as soon as they spot the first group coming towards the spread. You can either consider shooting them overhead or allow them to land and then reposition to shoot for the entire day.

X decoy spread requires double the number of the decoy compared to standard or regular setups. However, hunters usually prefer this spread during the late-hunting season with a strong strategy while using their best-looking baits.

Additionally, this spread allows shooters to utilize the decoys collected for the past few seasons. Lastly, try to mud the blinds and brush them to blend well; it can make a lot of difference.

#5 The Crop Circle Decoy Spread

This crop circle decoy setup works flawlessly even during variable and light winds. Harvested grain fields look attractive enough that geese and ducks tend to come down in any direction.

Furthermore, the circle spread allows the ducks to be in the front, making shooting them far easier. .

To create the most authentic crop circle decoy setup, you need to set up a small flock in a circle with an individual decoy in the center of the ring. The geese then target the inside edge of the ring or directly aim at the center decoy.

The most common and successful decoy has to be the mallards; however, even gadwalls, pintails, and other species can entice the geese.

Furthermore, if you spot Canadian geese near your hunting ground, consider setting up a tiny group of goose decoys far from your main circle spread. Those secondary decoys will surely provide a bonus opportunity when you miss out during the crop circle.

How Many Decoys Should I Bring To Hunt Geese?

It varies from one hunter to another. Some people suggest a modest number, while others will spurt an astonishing number of decoys. However, in our experience, we can tell that even a setup of 15-20 decoys shall work in your favor, provided you know what you’re doing.

Similarly, if you wish to opt for more baits, consider sketching our setups that work well with hundreds of lures. The X decoy spread is one such setup that works efficiently with hundreds of lures.

Apart from personal preference and spread selection, three main factors influence the number of your spread:

Hunting Season

As a general rule of thumb, hunters need to increase or decrease their number of decoys based on the season and its progression. That is mainly necessary because as time progresses, so does the size of the flocks due to migration.

Another remarkable observation passed on for centuries is the geese’s preference. Usually, flocks never land towards decoy flocks smaller than the birds flying above. Thus, the bigger the congregation, the more decoys should be shelled out for the display.

Early season hunting is possible with smaller decoy spreads as the flocks are notably smaller. An average of 15-20 decoys will be sufficient for early-season hunting.

Additionally, we recommend limiting your decoy to a smaller number even if you have access to a good number of baits.

A cluster of lures in the early season can look highly unnatural. For mid-season, keep a safe number of 25- 40 decoys as you shall notice geese migrating to multiple hunting spots.

The birds will start feeling the hunting pressure from the mid-season, so to make the flocks comfortable, hunters need to arrange decoys anywhere from 25 to 40. Lastly, late-season calls for the most significant number of bait spread hunters can set.

Geese are usually in complete migration with many birds in their flocks; therefore, we recommend decoys anywhere between 50-80+.

Shooters must remember that birds feel the most hunting pressure in this period, so luring them becomes relatively challenging. You may succeed with smaller decoy setups if the area is filled with solo birds flying by.

Decoy Type

The decoy type that you will operate ends up playing a significant impact on the quantity required. The most popular decoys consist of windsock, shells, full-body, and silhouette decoys.

Hunters who often hunt with full-body decoys can get away with small spreads featuring lesser baits as the full-body ones have the most outstanding visibility amongst all decoy types.

If you are hunting Canadian geese, oversized shell decoys can undoubtedly become your best friend in the fields. However, shooters opting for silhouette decoys need a significant number of decoys for their spreads.

Since these decoys are 2-Dimensional, hunters need to use a massive number of baits facing in multiple directions.

Hunters On The Field

The decoys on the hunting field are directly proportional to the number of hunters on the ground. You might even see hunters preferring to stick to their ‘1 hunter = 2 dozen decoys’ formula. That formula is a safe bet which ensures that every hunter’s blind is well covered.

With each added hunter, the ground needs a group of decoys to hide that particular blind effectively. If hunters set up an X or V spread, then almost every shooter wants to be at the tip of the V and in the middle of the X.

At such times, to mask the uneven bumps and hunter silhouettes, you need to use a lot of decoys. That allows the hunters to have fair and better shooting opportunities as the geese approach their respective decoy spread.

Effective Goose Hunting Decoy Spread Tips

  • Hunters can successfully hunt even if they lack a massive collection of decoys. All they need is a foolproof strategy that works according to the season.
  • Ensure to leave enough void for the geese to land perfectly. Decoys that clump too close together usually discourage geese from approaching the spreads. A six to eight feet gap between each bait provides ample space for the birds to land without feeling any suspicion. However, you must place a few decoys together to show a small family grouping. That call is entirely dependent on the type of spread you have chosen in the first place. We recommend using your best judgment with acute observations for a successful trap.
  • Always use the wind speed and direction to your advantage. Geese are habitual to landing into the wind, so if the wind is supposedly blowing toward the west, these birds will land facing the west cutting the wind. Wind direction is crucial if you wish to bag multiple birds without losing sight of your prey.
  • Try to observe and replicate the behavior of the geese. While scouting for hunting grounds, consider studying the birds and their habits. Check whether they are flying solo or are always in a group. Also, kindly pay attention to their eating, resting place, feeding time, etc. Use this information to sketch an ideal spread that shall work in your favor on the day of hunting.

Conclusion

With those tips, we have come to the end of our geese decoy spread article. We highly encourage novice hunters to use our recommendations and reliable spreads for successful hunting expeditions.

Even if a spread setup doesn’t work out, opt for another while keeping track of the errors. With some consistent trial and error, you shall be able to master the art of skillful spreads.

Best Air Rifle Scopes

0

Some of the links below are affiliate links, meaning, at no additional cost to you, we will earn a commission if you click through and make a purchase.

The Top 3 Best Air Rifle Scopes Reviewed

Owning a good scope is a necessity for anyone with an air rifle. Scopes allow you to zero in on a target and ensures a fast, humane kill when hunting. I did the hard work for you and chose 3 scopes from my favorite brand: UTG.

UTG Pro is actually a part of the famous Leapers Company that is known for their durable, powerful scopes that pack power and accuracy into an affordable tier of scopes. Whether you’re a beginner and want to see what a difference scopes can be when shooting or you’re an experienced shooter looking to enhance the fun, you’ll find a scope that meets your need on our list.

The UTG brand also features superior light gathering technology for accurate, clear views even in low light conditions.

Keep in mind that all of these scopes are under $200 and have been thoroughly tested. They’re all great options, but the UTG 3-12×44 is the number 1 choice.

1. UTG 3-12×44 30mm Compact Air Rifle Scope Review

My first choice for the best air rifle scope. The 3-12×44 is precise, easy to adjust and mount, and comes with some of the best features on the market. It’s also a very affordable scope, which is another reason I like this model. After all, you’re probably going to mount this UTG model on a decent rifle.

Technical Specs

  • 30-millimeter
  • 3-12×44 magnification
  • 36-color reticle
  • Sealed and nitrogen filled tube
  • Fog-proof and rain-proof
  • Flip open lens cap
  • Sunshade
  • Zero locking / resetting turrets
  • Lifetime warranty
  • Parallax free view

Right out of the box, you’ll be able to tell just how solid of a design this scope has. Weighing just 1.4 pounds, it doesn’t add unnecessary weight to the rifle, and it measures 10.4” in length.

Click here to buy now and get discounted price on the UTG 3-12×44 30mm Compact Air Rifle Scope.

Mounting Made Simple

From the moment of unpacking to actually mounting and torquing the scope, it took about 5 minutes. Once mounted, I moved onto the turrets that allow for full adjustment of the scope. There are top turrets for locking and resetting. You’ll also be able to tune the windage and elevation to your liking.

The side wheel adjusting turret allows you to achieve a parallax-free view starting at 10 yards.

Looking into the scope for the first time, you’ll see that there’s a range-estimating reticle that allows you to judge your shot based on distance and make any necessary adjustments.

The EZ-TAP function can be controlled with a simple click and will allow color blind users to find the perfect color when shooting. Those that are not color blind will be able to see even in the harshest of conditions from heavy snow to torrential rain. This adds a whole new element to the way you can shoot your rifle.

Accurate at 200 Yards

I always start at a close range when trying to zero a scope, and then move back as necessary. The first few rounds were close to center, but it required a few more adjustments before I was able to achieve insane accuracy. I was able to hit ½” or less groups at 40 yards with no issue at all.

Moving back to 100 yards, the scope still held zero. Even after going back further, the scope held zero like a champ. After 300 rounds, the scope was still deadly accurate.

With 12x magnification, you’ll be able to zoom right into a target at ranges of 100+ yards. Whether your rifle can shoot adequately to hit the target at this range is another question, but most mid to high-priced options will.

As my first pick for any rifle, this is the perfect scope and it costs under $150. With the color enhancements and the fine tuning that’s able to be adjusted, this scope is good for small and large game as well as distance plinking. Holding true for over 300 rounds, you won’t need to make frequent adjustments to reach zero again no matter how much recoil your rifle has.

Check out the following video below for a more detailed look at this scope!

Click here to buy now and get discounted price on the UTG 3-12×44 30mm Compact Air Rifle Scope

2. UTG 3-9×32 Compact CQB Bug Buster AO RGB Air Rifle Scope Review

The Bug Buster is cheaper than our #1 choice and is the perfect scope if you’re on a budget. You’ll immediately notice that this scope has 9x magnification instead of 12x magnification. If you’re going to be shooting smaller game at a far distance, this may be a concern, but for the majority of hunters this won’t be an issue at all.

Technical Specs

  • 3-9×32 magnification power
  • 1-inch tube
  • Zero locking / reset turrets
  • Range estimating reticle
  • Fog-proof and rain-proof
  • Completely sealed
  • Nitrogen filled
  • ¼ MOA adjustments
  • Parallax Free view at 3 yards
  • RGB side wheel illumination
  • 13.9 ounce weight

I truly appreciate when a scope is lightweight. If a scope is too heavy, it can take more strength to get the perfect shot, and after a few hours of shooting, your arms tire. This 9.8” in length scope weighs just 13.9 ounces, adding less than a pound of weight to your rifle. For larger caliber models, this is a major advantage.

Click here to buy now and get discounted price on the UTG 3-9×32 Compact CQB Bug Buster AO RGB Air Rifle Scope

Easy Adjustments and Mounting

Mounting is a breeze with all UTG models, which is one of the reasons that this is my preferred brand. After reading users mounting this scope to their hunting rifles, I thought why not give it a try myself. After all, this model is very affordable.

The rock solid construction is accompanied by smooth, ¼ MOA clicks that allow you to perfectly set up a kill.

Making sure the screws were tightened and torqued, it was time to adjust the turrets to achieve zero. The reticle’s vertical axis should be adjusted followed by the windage and elevation.

Once all adjustments were made, I tested out the scope and was blown away by the accuracy.

Accurate and Clear

The first few shots were off as is normal. I needed to adjust the windage and elevation slightly, but once I was done, I did my first test at 25 yards. At this range, I was able to hit the bull’s-eye 25% of the time and accuracy only improved as I broke in my rifle.

After 250 rounds, I was getting tight groups and didn’t have to readjust the scope at all. It held zero perfectly.

Clarity is great even when it’s raining or temperatures change quickly and the scope should be foggy. The sealant is amazing, so you won’t have to worry about an unclear shot.

As for holding zero, after 400 rounds, the scope was still deadly accurate and did not need to be readjusted.

In low light conditions, this scope performed exceptionally well. The light gathering technology that UTG boasts about is very powerful. When in bright light conditions, I did have some issues as too much light was filtered into the lens and threw off my shot a bit. For a scope that’s under $100, this model performed so well that I would recommend it as the ideal entry-level or intermediate scope. It paired up really nice with some of my Benjamin air rifles.

While not as powerful as our first choice, this scope is still an amazing buy. Get a deeper look into this scope below.

Click here to buy now and get discounted price on the UTG 3-9×32 Compact CQB Bug Buster AO RGB Air Rifle Scope

3. UTG 4-16×44 30mm Air Rifle Scope Review

Our third choice could have easily been our first pick, but it does come with two drawbacks: it’s slightly more expensive and the magnification is not needed by all hunters. With 4-16×44 magnification, this scope is immensely powerful for anyone that just wants to enjoy plinking or is planning on eliminating a few pests in the garden.

Technical Specs

  • 30mm tube
  • Emerald lens coating
  • Shock-proof, fog-proof and water-proof
  • 4x to 16x power
  • EZ-TAP illumination
  • Parallax from 10 yards
  • Mil-dot range finder
  • ¼ MOA adjustments
  • Side wheel turret
  • Nitrogen filled and sealed
  • 15.2 ounce weight
  • 17.3” length

A super powerful scope, if you’re in the market for a scope with this level of magnification, I highly recommend this model. If you’re on a tight budget, my first and second choice models will blow you away.

Click here to buy now and get discounted price on the UTG 4-16×44 30mm Air Rifle Scope

Amplification Power

The amplification power of this scope is 4-16x which is powerful enough to see a fly at 80 yards, but it may be too powerful for your needs. Keep in mind that powerful scopes also require more light, so in low light conditions, you may experience an issue.

The EZ-Tap illumination rectifies most low light issues, allowing for a great shot.

A more powerful scope will also be heavier in most cases. While I listed the weight at 15.2 ounces, other product definitions go up to 24 ounces. I did not weigh the scope myself before mounting, but it does seem heavier than just 15 ounces.

Easy Adjustments and Holds Zero

Holding zero is so important when you’re hunting. You don’t want to waste time trying to readjust only to see your potential kill run away. All of these models hold zero exceptionally well.

Adjustments of ¼ MOA allow for the utmost in fine tuning, and there is also a side turret to adjust the parallax. The windage and elevation adjustments are just like the other options we mentioned and can be adjusted using the simple-to-click turrets.

So, how well did it hold zero? I attached this to a .357 caliber Benjamin Rogue to test it out and boy did it hold zero. After 300 rounds with this powerful rifle, there was no need to adjust or worry about hitting the target.

Just like with our first option, you can tap the EZ-Tap to on and will be able to see in virtually all light conditions. With 36-colors, you won’t have an issue at all even if you’re color blind.

If you’ve never had a scope that allows for parallax adjustments, you’ll quickly learn how useful and valuable this feature is when hunting. Every last bit of adjustments you do will make your shot closer to the bulls’-eye.

Why isn’t this model my first choice? It’s a little costly and provides too much power for most users. If you don’t have a high-end rifle, you don’t need a scope of this power. For under $175, this is a great option for anyone with a high-end scope that needs this level of magnification.

Need a better visual of this scope? Watch the video below.

Click here to buy now and get discounted price on the UTG 4-16×44 30mm Air Rifle Scope

After trying all three of these UTG scopes, it was tough to pick the best air rifle scope out of the bunch. When it comes to the perfect balance of power and affordability, the UTG 3-12×44 is the clear winner and our #1 choice.

Anyone on a budget will find that the less powerful UTG 3-9×32 is a great choice and is very affordable. Its low price makes it our #2 choice. Our #3 choice, the UTG 4-16×44, is extremely powerful and is really its own demise. It’s so powerful and higher priced than our other picks that it came a little lower on the list.

Which model is best for you? Any one of these scopes will all do the job adequately, but the UTG 3-12×44 is our go-to choice for beginners and advanced shooters alike.

If you’re looking for another air rifle scope, you might want to consider the CVLife Tactical 3-9×40 Optics R4.

The 5 Best Soft Plastics For Catching Gigantic Crappie

0

Flies and Roadrunner jigs were my most productive lures during my early years of crappie fishing. However, my selection of crappie lures has increased throughout the years as lure manufacturers continued to offer a variety of soft plastic baits for panfish. Some of the hottest soft plastic styles of crappie lures available today are double-tail grubs, minnow or shad imitators, twitch baits, and grubs.

Here’s a look at five Karl’s Amazing Baits for crappie and how you can use these lures to catch big slabs.

Martian

This is my favorite style of soft plastic baits for catching crappie in the winter when the fish are sluggish. Attached to a 1/16-ounce jighead, this lure can be fished ultra-slow because it doesn’t require much movement to make the thin twin tails quiver. I like to fish it vertically over deep brush piles and just let the movement of my boat create enough action on the lure to trigger bites from inactive crappie. The lure’s ribbed body is also ideal for holding scent gel in its ribs.

Mini Minnow

This is the soft plastic style I rely on for most of my crappie fishing tactics. The lure’s fluke-like design perfectly imitates the body of a minnow or young shad and its thin tail creates a subtle darting action similar to a fleeing baitfish. I can fish this lure vertically or horizontally for crappie suspended over brush piles and I frequently fish it 1 to 2 feet under a bobber to catch spawning crappie in the shallows. The lure’s subtle action and small profile make it ideal for tricking wary crappie in clear water.

Lil Twitchy

This miniature jerkbait features a classic minnow profile big crappie find irresistible. The lure’s single slender tail delivers a tantalizing quiver and shake with a twitch of the rod. I like to throw this lure on windy days when crappie are chasing shad along wind-blown rocky banks. It is also a good choice for fishing under a bobber with a twitch-and-pause retrieve.

Dub Grub

I rely on this grub for targeting aggressive crappie in dirty water. A heavier jighead such as a 1/8-ounce model will cause the lure to fall faster and generate the optimum action from its twin tails. I either cast this lure to brush piles and swim it over the cover or I pitch it into the brush and let it fall straight down to trigger strikes from crappie holding tight to the cover.

Paddle Grub

The kicking action of this 2-inch swimbait makes it the perfect choice for catching big crappie at various depths. When crappie are suspended high in the water column, I combine the swimbait with a 1/16-ounce darter jighead so the lure will fall slower and swim longer in the fish’s strike zone. I switch to a 1/8-ounce darter jighead for swimming the lure deeper in the water column. The paddletail provides plenty of kick so you can retrieve this lure at a slow, steady pace to trigger strikes from slab crappie.

Feature image credit: David Yang

11 Best Dog Foods for Hunting Dogs in 2024 – Reviews & Top Picks

0

Hunting dog eating

There are a variety of dog breeds that make excellent hunting dogs. The Labrador Retriever, Mountain Cur, Vizsla, and even the short Beagle, are a few examples of the perfect hunting companion. Although these dogs look completely different in color, size, and structure, they share the same instinctual nature: hunting. A hunting dog needs to have boundless energy to complete the tasks set by its owners. They need good muscle strength and strong bones to catch or retrieve game and walk long distances.

A hunting dog’s diet is vital for them to excel in their abilities and must include plenty of good nutrition. Always take your dog’s energy level, age, sensitivities, and weight into consideration when buying food.

We’ve listed a few great hunting dog food options below complete with in-depth reviews to help you in your search—but remember that due to their high protein and fat content, they’ll lead to weight gain if fed to an inactive dog. You may want to switch your dog’s food when out of hunting season.

divider-paw

A Glance at Our Winners in 2024

The 11 Best Foods for Hunting Dogs

1. Ollie Fresh Dog Food Beef Recipe Subscription Service – Best Overall

Hunting dogs work up quite the appetite in a day’s work. That is why it’s important to choose a hardy dog food that will satisfy their hunger while ensuring they receive the proper nutrients to maintain an active lifestyle. Ollie Fresh Dog Food Beef Recipe is our best overall pick for food for hunting dogs since this recipe is appealing, nutritious, and filling. With a limited ingredient list, starting with real meat proteins (also available in chicken, turkey, or lamb) and fresh vegetables rich in vitamins, minerals, and fiber, you can trust that your dog will be happy and healthy. Ollie’s meals are free of any byproducts or additives and are suitable for all life stages.

Once you complete a short questionnaire about your dog based on its age, weight, breed, and dietary needs, Ollie provides you with customized meal plans. You can also adjust the frequency of your deliveries, which eliminates the risk of running out of stock and last-minute trips to the store.

If you are looking for a dog food rich in antioxidants, that promotes healthy digestion and supports an active lifestyle, look no further than Ollie Dog Food.

Taste of the Wild High Prairie Grain-Free Dry Dog Food has three excellent first ingredients of water buffalo, lamb meal, and chicken meal, resulting in a high protein content of 32% for a low and affordable price, making this our favorite budget food for hunting dogs.

It has a fat content of 18% and contains complex carbs to give your hunting dog the energy they need while keeping them feeling full until its next meal. It contains prebiotics to improve your dog’s gut, resulting in less gas and healthier poop. The omega-3 improves their coat, leaving it soft and shiny. This dog food isn’t every dog’s pick, however, as some simply refuse to eat it.

Puppies need the best, and Adirondack’s dog recipe gives them just that, at an affordable price point. This puppy food is well-balanced and contains 30% protein and 20% fat to develop your pup into a strong and healthy dog that has lean muscles, ready for the hunting grounds.

This tasty meal is slow-cooked to preserve as many nutrients as possible and is free from fillers and artificial flavors. All the ingredients are from the USA and are of high quality. It’s suitable for pups with sensitive tummies and will pack the weight that they’ve lost back on in no time. Kibbles are small, which is great for pups but a struggle for bigger dogs.

Although expensive, ORIJEN Regional Red Grain-Free Dry Dog Food is well-loved by both dogs and owners and has every reason to be at the top of our list as our premium choice. With beef, wild boar, goat, lamb, and lamb liver as the first few ingredients, you already know that this is a meal suited for a high-performance dog, with a 38% protein content. It includes essential vitamins and minerals, with the remaining 85% consisting of animal ingredients.

The kibbles are freeze-dried coated, locking in the fresh, tasty ingredients. Dogs on this kibble often experience better skin and a reduction in rashes and shedding. They often start smelling better, too—from their breath to their odor. The only downsides are the price, and that the bag isn’t resealable.

Specifically designed for hunting dogs is the Inukshuk Professional Dry Dog Food. Due to its 30% protein and 25% fat your dog will receive the high nutrition and high energy necessary for a high-performance lifestyle. It’s also packed with prebiotics and omega-3 fatty acids to keep your dog healthy and their coat flourishing, along with aiding in good joints for their activities.

This kibble is nutrient-dense and contains 578 kcal/cup, which means that you can give your dog everything they need in a smaller serving of food, which ultimately saves you money. Inukshuk is a family-owned business that cares about dogs, and they give you the option to buy straight from them too.

The VICTOR Classic Hi-Pro Plus Formula Dry Dog Food is another great dog food for hunting dogs. 88% of this dog food is made of meat protein, with some of its ingredients being beef meal, pork meal, and chicken meal, giving your dog plenty of nourishing proteins.

It’s also high in fat, with a crude content of 20%, giving your hunting dog the energy they need for high performance. It’s suitable for active puppies and adults, as well as lactating females. It’s also packed with vitamins and minerals to maintain your dog’s health and is highly digestible.

All the ingredients in this product are sourced from the USA, with none of them containing gluten, corn, wheat, or grain. The kibble is small, though, and may prove challenging to eat for large dogs.

Even though the Wellness Core Grain-Free Original Deboned Turkey, Turkey Meal & Chicken Meal Recipe Dry Dog Food is pricey, it’s highly worth it and acts as one of the best foods you can get for your hunting dog.

Since it’s made from human ingredients, it’s packed with nutritious value. Most dogs love this food and tend to get upset if you switch from it.

Overall, it’s good for your dog’s coat and gives them a strong muscle tone. If you have the budget for food of this quality, we highly suggest that you do.

Taking it even higher in price is the Purina Pro Plan 30/20 Chicken & Rice Formula Dry Dog Food. We love this food as it is specially made for high-performance dogs, making it a perfect option for hunting dogs.

It’s a high-calorie food that will keep your dog energized and happy. The ingredients put focus on protein, which is the main reason why this food will keep an active dog energized. On top of that, it includes live probiotics that aid in your dog’s health.

Unfortunately, the food’s price has suddenly increased over the past while, leading many people to switch their dogs to something more affordable.

One interesting thing about the Blue Buffalo Wilderness Chicken Recipe Grain-Free Dry Dog Food is that it comes in small kibble sizes. While this may make some dogs frustrated, it’s great for hunting dogs that tend to eat their food incredibly quickly.

We love that it includes healthy carbs in the ingredients from foods such as peas and sweet potatoes. It’s also made with real chicken to help your dog put on lean muscle.

If you do not want small kibbles, you can move on from this particular option but if you’re happy with the kibble size, your hunting dog is sure to love the taste of this food.

Nature’s Logic Canine Duck & Salmon Meal is dog food for puppies and adults that are active in hunting, working, and sporting. It has one of the highest crude protein levels on this list at 38% and contains ingredients such as duck meal, turkey meal, and salmon meal.

This recipe is natural, right down to the packaging that was produced with renewable electricity. There are a couple of kibble options to choose from, allowing you to change your dog’s food up a bit, never giving them the chance to get bored. The price has increased a lot recently, though, which has left a few consistent customers unhappy.

The Holistic Select Adult Health Lamb Meal Recipe Dry Dog Food is excellent for picky eaters. Sometimes, all the different flavors can be too much for a sensitive dog, and they may do better on this single-protein dog food. The first three ingredients are lamb meal, oatmeal, and peas, and the rest are made up of probiotics, antioxidants, omega-3, glucosamine, and taurine that protect your dog’s heart and body.

The protein content is less than other dog foods on this list at 23% and a fat content of 15%, but that can be enjoyed on off-seasons when they don’t require as much energy as on the hunting grounds require but enough to keep them active for hiking and other outdoor activities. The downside is that there have been a few quality-control issues around this particular dog food.

divider-paw

Buyer’s Guide: Buying the Best Dog Food for Hunting Dogs

All the dog foods listed above are good, but how do you know they’re good for your dog specifically? Well, you’ll need to make the decision based on your dog’s lifestyle, weight, health issues, and age. If your dog doesn’t have any health concerns, any of these foods will do them well. However, if you’re considering a different food option for your hunting dog, there are a few factors that you should take into consideration.

Protein

First and foremost, your hunting dog needs a high-protein diet. Protein builds strong, lean muscles that give them the force to run, catch, and retrieve game while hunting. Make sure that an animal-derived protein is first on the list of ingredients because it’ll indicate that it’s the most amount ingredient in the product, which is what your hunting dog needs.

Also, look out for dog foods that have the name of the meat at the start of its name, as this indicates that the product will have at least 95% of the ingredients in the product. Venison, chicken, fish, and lamb are good, tasty protein options.

Carbohydrates and Fat

Your dog food should contain around 20% carbohydrates. Carbohydrates provide your dog with energy, but fats do too. Fats offer longer-lasting energy and contain lots of calories. The good fat content will give your hunting dog the energy and endurance they need, produce a healthy coat, and increase wound healing. However, they can increase the risk of obesity.

Image Credit: Vitalii Mamchuk, Shutterstock

Avoid Fillers

Many people have a negative understanding of by-products when it comes to dog food; however, most are completely safe and nutritious for your dog. Although they’re not suitable for people to eat, dogs will benefit from them as they come directly from an animal. By-products include the lungs, brain, liver, bone, intestines, etc., that aren’t dangerous to dogs.

Large amounts of fillers, on the other hand, should be avoided. They’re used in place of natural, high-quality ingredients and can lead to health issues, allergic reactions, and problematic weight gain. Most dog foods contain a few fillers, which is okay if they’re near the bottom of the ingredients list. Some fillers, such as rice, are considered “good” fillers, while you should always avoid MSG and syrups.

Energy

The number of calories you should serve your dog is going to depend on their weight and energy levels. During hunting season, your dog will burn more calories and will require more energy to perform well. Even the weather has an impact on their energy levels—if they’re hunting in the cold, they’ll be burning even more calories because their bodies will be working harder to keep them warm.

When your dog isn’t hunting, it won’t require as many calories because it won’t be burning as much energy. Feeding your dog the same number of calories as you fed them during hunting season may result in unhealthy weight gain.

A hunting dog burns more energy than a normal dog and, therefore, requires high-performance food, which differs from normal dog food with its higher protein and fat content.

divider-paw

Final Thoughts

At the top of our list is the Ollie Fresh Dog Food, thanks to the high meat protein and limited, human-grade ingredient list. The best budget dog food on our list is the Taste of the Wild High Prairie Grain-Free Dry Dog Food. It may be cheaper, but it doesn’t skimp on quality.

Remember to use these food options during hunting seasons as the high protein and fat content will cause weight gain if consumed the same way during off-seasons.

Featured Image Credit: Nadezhda Zaitseva, Shutterstock

6 Signs Your Bowstring Went Bad

0

Is there anything worse than lining up the perfect shot and having it miss because you didn’t check your bowstring? When it comes to your bow, it’s the bowstring that will go first. To keep this from happening at the worst of times, you need to know how to tell if your bowstring has gone or is about to go bad.

This article will focus on compound bows, but only because compound bows have more string issues than more traditional bows. This means that, if you’re using a longbow or a recurve bow, then you’ll also be able to find answers about your bowstring in this article because there are six key signs we look for:

Sign 1: Spotting a broken string or cable is a clear sign that your bowstring has gone bad and the only way to fix it is to replace it.

Sign 2: A frayed bowstring isn’t quite broken yet, but it is very close and will negatively affect your shooting experience, you can apply wax in an attempt to keep it together, but it is often best to just replace it.

Sign 3: As the string is pulled back shot after shot, stretching can occur. This is why you need to know how to recognize if you’ve overstretched your bowstring. Your bowstring will need to be replaced more often for stretching if you use it a lot.

Sign 4: As your bowstring gets older, there is a very real chance that it will stop being as waxy as it should be. A dried out bowstring is a sign that your string is going bad.

Sign 5: A bowstring is typically covered in a layer of thread called the serving. When this starts to separate from the string, you have an issue. This can be kept together with some tender care, but it is often a sign to replace your string soon.

Sign 6: Finally, if your bowstring is getting old, then it may be a good idea to replace it anyway because it’s just inviting problems. The older a string gets, the less structurally stable it is, and it is typically safer to replace before use.

So there you have it, six signs that your bowstring is going to need replacing. But if you really want to learn about each of these, then you will need to stick around to read the rest of the article.

Sign 1: A Broken String

This is the easiest problem to spot because it stands out. If you’re using a longbow or a recurve bow, then it will be literally impossible not to spot this problem. A compound bow will be a little different, however.

A compound bow doesn’t just have the main bowstring the way that a longbow does but rather it has quite a few cables that help in firing. These cables are all just as important as your main bowstring and, if any of them have broken, then you will have a hard time firing correctly.

These days, the material used for the strings and cables on your bow are most likely a highly durable fibre. These break less often than classic bowstrings, which had been made either from plants or the hide of hunted animals. However, these new synthetic fibres can break.

When you’re packing your hunting or target shooting gear, before you even leave the house, make sure you check your bow for any broken strings. If you are still new to archery and don’t know everything, you should check on your compound bow, then simply run your finger along each string and cable to see if it is broken anywhere.

Once you get to where you’ll be shooting, go ahead and check the strings one more time. This is a smart idea to do before you start shooting. Plus, if you run the finger test mentioned above, then this habit will also let you catch the next sign of a bowstring gone bad.

Sign 2: A Frayed String

A frayed string is harder to spot than a broken string because a frayed string is still fully connected. However, some part of the string is being rubbed against a solid object, and such can happen where the string meets the bow, or it is simply experiencing too much tension through usage and is starting to fray.

While a bowstring is made out of lots of fibres, they are worked into a string because each individual fibre isn’t very large. As these tiny strings begin to break apart, you see the larger overall bowstring fraying. If it is left without maintenance for a long time, eventually, a frayed bowstring will break.

A Frayed Archery String

If you are checking your gear before you leave the house, then you have the perfect opportunity to spot fraying. Many people notice that their bowstring is starting to fray, yet they keep using it anyway. They seem to think it will be easier to use the string a little longer than it is to simply replace it. They might even add some wax or something to the bowstring to keep it together, but there is no way to fix a frayed bowstring.

The section of your bowstring that is fraying represents the weakest part of your bow. As you continue to use it, you only manage to make it weaker. Eventually, the string has to snap, but you will be unable to predict when. It will happen when it does.

If you’re drawing an arrow when it snaps, which is likely considering how fraying happens, you are at risk of major injury. A string breaking on a compound bow has been known to cut through flesh and even muscle. Always, always check your string for fraying before use.

Sign 3: A Stretched String

Stretching your bowstring is the most important part of archery. If you can’t stretch your bowstring, then you can’t shoot an arrow. So, just how exactly can a stretched string be a bad sign?

What happens when you are shooting an arrow is that you are creating a tension in the bowstring. You are pulling it back when it wants to be at its resting position. When you let go of the bowstring it snaps back to this position. However, drawing back and firing your bow in this manner causes a release of energy within the bowstring, then on to the arrow. The more often you shoot, the more energy we are talking about. This energy appears in how the bowstring will start to stretch a little bit more each time it is fired.

As your bowstring begins to stretch, there isn’t much to worry about. It happens naturally anyway, and a little bit of stretch doesn’t really mess with your accuracy. But, as this continues, there will be a clear effect. More energy from each shot is absorbed by the bowstring, resulting in less energy making it to the arrow, thus also resulting in weak and inaccurate shots.

The stretching of the bowstring is called creep, and it typically happens somewhere between shooting 50 to 100 arrows. The fibers in the bowstring are being stretched out, making the string itself longer. Creep happens most often due to shooting, but poor storage of a bow in an overly hot location will also produce creep.

The only way to fix a stretched bowstring is to change it. You can’t shrink down a stretched string; you can only throw it out. Before you head out into the woods for some archery, try drawing back your bowstring a couple of times to see if it is as taut as it is supposed to be. If it isn’t, then you should replace the string.

This is one of the more common ways for your bowstring to go bad, as it happens naturally based on how much you are using it. Depending on the number of arrows you are shooting in a session, this could be a long time coming, or it could happen in a single afternoon. How often you experience a stretched string is entirely up to how much you shoot. If you shoot a lot, then you’ll want to keep extra bowstrings on hand whenever you go out.

Sign 4: A Dry String

A bowstring should be waxy. You may find that the string’s feeling in y0ur hand and fingers isn’t particularly pleasant; after all, when you first picture using a bow, you probably didn’t imagine the string as being waxy. However, this aspect is actually important for the string. A waxy bowstring is a functional bowstring, whereas a bowstring that has dried out is difficult to work with and reduces accuracy while increasing the risk of breaking.

Your bowstring needs to be waxed periodically. This is done by using a wax stick. These pretty much just look like a tube of lip balm, except you would run it over your bowstring rather than your lips. After you go over the string with the stick, make sure you use your thumb and forefinger to go over the string and work the wax into it fully. You can tell your string needs to be waxed when it feels dry to the touch, or if you see small hairs sticking out.

A Dry Archery String

These hairs sticking out from the bowstring are often described as “furry” as in “I have a furry bowstring.” It is this furry look that is the most disconcerting. The furry aspect of the bowstring comes from where the fibres that make up the string are starting to wear. A fresh waxing will help to keep the hairs in place and looking slick but it isn’t the end all solution. In time, you will find that your bowstring is looking furrier and furrier.

As a bowstring begins to reach the end of its life, it gains more issues staying waxy. You will find yourself needing to apply wax more and more often to prevent it from becoming furry. When this starts to happen ,you know that you’ll need to replace your bowstring very soon. This is because a dry bowstring leads to a furry bowstring, which then leads to a frayed bowstring.

So, not only do you need to check your bowstring to see if it is dry or waxy, but you will also need to pay attention to how often you are waxing it as well. It is a good idea to keep a record of how often you are waxing your bowstring. This can be on a calendar or in a notebook, but it can be just as easy to keep the record in your phone. Seeing how often you need to wax will help you to get a better sense of how long the bowstring will last overall.

Sign 5: A Seperated String

A bowstring is covered by a layer referred to as the serving. This is a thread that covers up the fibres of string. Compound bows also have serving overtop of the various cables that the bow uses. The serving is mostly there to go over the nocking area of the bowstring and help keep the arrow in the same position, firing with the same amount of power.

A compound bow has serving typically over any of the areas where the bowstring or one of the cables comes into contact with any of the pieces of the bow, like the roller guard or string stop. Those who use a compound bow must make checking the serving a part of their regular maintenance and check-up. This begins with the bowstring but then stretches out into the other areas where the serving has been added.

Serving should be a tight coil that wraps around the bowstring. But, because it is still made out of a fiber, it can break just as easily as your bowstring itself. Over time, the serving begins to separate and come apart from the string and cables that it is protecting.

When checking your serving, keep in mind that you should replace any you see that are starting to separate. However, the serving around the nocking area is absolutely the most important, and it must be changed immediately because it will have a direct effect on your shot, your accuracy, and the safety of the bow itself.

Sign 6: An Old String

The final reason is that you simply have a bowstring that is too old. All of the previous signs arise from the use of the bow itself. Each part of the bow degrades over time due to repetitive use. This is a natural part of archery and something that every archer needs to learn to deal with.

However, another issue that could cause your bowstring to degrade is time. You should never, ever have a bowstring on your bow that is more than two years old. The same goes for the cables used by a compound bow. If you are firing your bow regularly, then you’ll never make it this long without replacing them, but if it’s in storage, then it is easy to let a lot of time go by before using it again. Replace the bowstring before you hit this range.

If you’ve never had to change a bowstring before, don’t worry; it really isn’t that hard. This informative video will walk you through how to change your string and your compound cables:

You can purchase new strings for your bow individually or in bulk. I like making use of both from time to time. For example, I like to keep a lot of strings around, but I’ll also splurge from time to time to get a more expensive string like this one. I find it helps give a sense of the real difference between bowstrings. Spoiler: often there is very little.

Old strings should not be trusted. As much as you may just want the ability to pull your bow out of storage and give it a couple shots, it is always best to replace the string prior to shooting. There is not a set timeframe that works to set when a string should or shouldn’t be replaced, but I won’t shoot a string that hasn’t been tested in over a year. It is just safer to replace it with a new one and check all the pieces in the process.

Outro

So there you have it—six ways you can tell that your bowstring is going bad, ranging from the obvious to the more stealthy. The important thing to understand about this topic is that none of what you read matters in the least if you don’t put it into practice.

This means that you absolutely must make checking your bowstring a regular part of using your bow. You should never, under any circumstances, start shooting your bow before you have inspected it. Your bow may be a simpler weapon compared to a hunting rifle, but it requires just as much care and respect to keep it firing correctly.

So, next time you’re ready to hit the range or woods to start taking some shots, make sure you stop and inspect your string first. It’ll make your life a thousand times easier in the long run.

6 Places You Have to Hunt in Georgia

0

There’s no shortage of hunting adventure in the largest state east of the Mississippi River. Whether you’re a seasoned peach-state hunter or just passing through – there’s something for everyone. All you need is a hunting license to access these wild public lands.

Big Hammock WMA

Glennville – Tattnall County

A squirrel hunter’s paradise. All but 1,000 acres of this WMA is dominated by large acorn bearing hardwood forests. Twenty miles of foot access trails wind through swamp allowing hunters to quietly slip through the area that is very navigable even for beginners. There’s plenty of room for more adventurous hunters to journey “uncharted territory” where you may not even see another hunter, too. Don’t knock squirrel until you try it! There are some great squirrel recipes out there and the season runs from August 15th til the end of February.

BigHammock

Coopers Creek WMA

Suches – Union County

Chase some game in the foothills of the Appalachian Trail at Cooper’s Creek WMA. Part of the Chattahoochee National Forest, you’ll have 30,000 acres of beautiful mountain scenery to hunt on. Muzzleloader season is a fan-favorite offering great chances to harvest deer, bear, or hog. For a complete primitive experience, there’s plenty of opportunity for camping alongside mountain streams stocked with trout. Not in the mood for camping? No problem. You’re only a short drive from nearby Blairsville.

Crockford Pigeon Mountain WMA

Lafayette – Walker County

Put this place on your hunting destination bucket list. Crockford Pigeon Mountain is your one stop shop for a herd of quality hunting opportunities. Turkey and deer are on the menu for hunting success. You may come to the area to hunt, but you’ll fall in love with its beautiful natural features. Gorgeous overlooks, refreshing waterfalls, miles of trails await your arrival. There’s something here for all of the approximately 200,000 people a year who visit this natural wonder in the WMA system. Don’t worry hunters, the area is closed to all non-hunting activities while hunting is going on for safety.

CrockfordPgnMtn RandyWillingham Dec2011

Elmodel WMA

Newton – Baker County

Looking to shoot a few doves this season? C’mon down to southwest Georgia. Elmodel WMA has the Division’s only irrigated dove field complete with seventy-four acres of corn, sunflower and peanuts. There’s also another 100 plus acres of non-irrigated fields planted with sunflower and brown top millet you can drop a limit of birds on. Believe it or not, there is some good dove hunting after opening weekend. Late season hunts here have not only cooler weather, but good harvests!

Elmodel_Sunflower Stalk

Penholoway Swamp WMA

Jesup – Wayne County

Don’t let the name confuse you. There’s more than just swamp at Penholoway. From easily accessible upland pine and wildlife openings to a 6,000 acre boat only accessible island full of bottomland hardwoods. Whatever you flavor, there’s something for every hunter to try and nab the rabbit, turkey, or deer they’re after. Spend a day in the woods hunting the dramatic bluff line that divides upland and bottomland habitat. The property features so much early successional habitat (weed patches necessary for critters) that it’ll feel gamey just driving through it.

Penholoway_Bug Suck Lake

Sprewell Bluff-East WMA and Sprewell Bluff-West WMA

Thomaston – Upson County

Sprewell Bluff is the best option for anyone looking to take home some deer meat. Split by the Flint River, each side of the property has something to offer. The East side of the area offers archery deer hunting while the wild West side offers firearms opportunities.

Have questions? Here’s some hunter resources to help answer them. Want to find more areas? We have over a million acres of public land and we are certain that there is a WMA for you! Check out our interactive map to find what is special about all 100+ of our WMAs.

How to Set Up an AR-15 for Hog Hunting

0

hog-hunt-with-acog.jpg

“You have an AR-15. You’re coming.”

So, despite my naïve protests about being a shooter not a hunter, I was dragged into the world of tactical hunting. A pile of dead hogs later, I was hooked. I no longer own any of the gear I used that day. I’ve gone through many iterations and changes in my kit. Thanks in part to my role here at SHWAT.com I’ve had opportunities to try all kinds of configurations for hog hunting guns. So when I was recently asked about how to set up an AR-15 for Hog Hunting, I readily agreed to answer here. While I’ll be the first to say that there’s no one size that fits all, when you’ve finished reading I think you’ll have a better idea of how to set up your own AR-15 for some tactical hog hunting. Then it’s time to chase some wild boar!

Why focus specifically on setting up the AR-15 for hog hunting? It’s this generation’s gun, and for good reason. The limitless configurations make it one of the most versatile guns on earth. The hardest part is figuring out what you want, never mind need, as you customize your AR-15. Since you’re reading this, you’re more likely to own an AR-15 than any other single gun. Here are some questions and answers for you to consider when getting set up to hunt wild hogs with yours.

Caliber? Perhaps your first consideration is caliber. I don’t know how many different calibers an AR-15 can be built in. Hogs are hunted with a lot of them including .223/5.56, 300 Blackout, .458 SOCOM, 6.5 Grendel, 6.8 SPC II, and countless others. I’ve killed hogs with most of those and others as well. This will surprise some, but not everyone: I’ve killed more wild pigs with .223 than any other caliber. Modern loads render some of the old conventional wisdom obsolete. Remington Hog Hammer made with Barnes 62 grain TSX bullets has demonstrated excellent performance for SHWAT™ writer Brian McCombie, and I’ve had great experience with DRT Ammo’s .223 on hogs weighing 200+ pounds.

A lot of buzz over 300 Blackout during the past couple of years has lead many to explore that round. I’ve been cautious about getting too wrapped up in it, but I plan to give it a workout this year. Having hunted with sub sonic rounds through a short barreled AR pistol with Liberty Suppressors Mystic X silencer, I wasn’t impressed. Maybe it was the ammo; maybe the distance was too great. It was definitely quiet. We’ll try it again with some unique ammo, but super sonic 300 Blackout looks more promising. But like .458 SOCOM and 6.8 SPC II, your range is a bit more limited. If you’re hunting under 200 yards, any of these rounds should be great. If you’re planning longer range hog hunting, the 6.5 Grendel might just be your pick.

Day Night Hog Hunting gunDay or Night? Night hunting hogs is a real blast. Adding a white light to your gun is easy and doesn’t have to cost a fortune. If the shooting gets fast as the daylight fades to dark, your white light becomes a real asset. I’ve watched Bill Wilson of Wilson Combat point a white light at hogs who were undeterred by its presence. Bill has spent countless hours with the hogs figuring out which white lights scare them, and the specifics of color temperature and technique that leave hogs comfortable and vulnerable.

Most hunters effectively bagging hogs in the dark have instead employed a broad variety of weapon mounted green and red lights, particularly when hunting predictable places like feeders. Alternatively, you can also equip a feeder with remote control lights like the Inhawgnito, but that’s another story. Flashlights in white, green and red are all easy add-ons to your AR build that won’t trash your bottom line. An important side note: you’ll want your AR to use a hand guard that allows for mounting accessories. Three or four years ago that generally meant a quad picatinny rail. Today you have countless options.

Night Vision Gear for HogBut there are better, albeit far more expensive, doors to crash. Jump into the high tech world of night vision and thermal optics and you’re into a whole new level of the game. Instead of spending a hundred dollars for a light, you’ll spend ten to twenty times that to access what many consider to be the pinnacle of tactical hunting. Case in point: Recently I’ve been highly impressed by the line of thermal optics from IR Defense. I’ve watched IRD grow for a year, and recently hunted with their IR Hunter Mk II. Using this thermal optic, I was able to identify hogs at 400 yards and shoot them on the run at 125 yards. Thermal can fool you though. Rocks at a distance can look remarkably like a group of pigs far off. Stay tuned to SHWAT.com for more on that.

An alternative to thermal is traditional night vision (NV). We’re talking the usual green images. It’s great military technology available to us and allows for the use of infrared lasers and illuminators of countless price points and configurations. The best gear for this is almost as pricey as thermal, but has the added benefit of being able to drive and scan for hogs without any additional lighting. For as little as $3100 a number of manufacturers like TNVC are producing NV monoculars that can be mounted to your AR-15 or to a helmet. We’ll cover your NV options more thoroughly later on here at SHWAT.com.

Hunting during the day is pretty straightforward. Have an optic that works for your scenario and get to work. Obviously, your scenario makes a difference along with your preference in optics. Years ago I invested in a Trijicon ACOG ECOS system that gave me a 4x magnified optic with a red dot 1x unmagnified optic combination. It remains a favorite set up. Red dot sights like the EoTech and Aimpoint optics are super fast to use with both eyes open and I’ve enjoyed great success with them as well. If you plan on bagging multiple hogs from a group, you’ll be hard pressed to beat this kind of a set up.

Scope for Hog Hunting
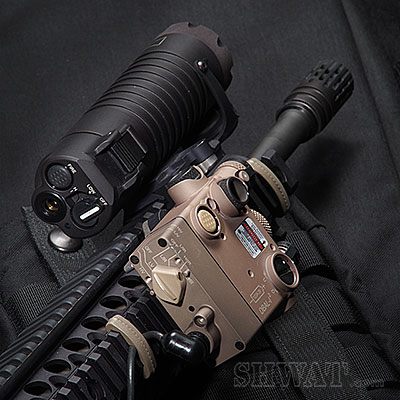
Alternatively, more magnification both increases the ranges you can make confident shots at and adds precision to virtually any shot beyond 50 yards. There are probably as many magnified optics choices as there are ammo choices. Lots of optics are good enough to hunt hogs mid day at 150 yards. Your run of the mill 3-9x scope might be just fine. However, cheap scopes simply aren’t as sharp and lose contrast quickly at higher magnification. Lack of high quality optical coatings can leave you unable to see clearly with your scope angled towards a late afternoon or early morning sun, washing out when pointed in the direction of the sun. Brands like Trijicon, Nightforce, US Optics and Bushnell Elite Tactical are all winners at various price and feature points.

How will you hunt? If you hunt from a blind you might not need a sling on your AR-15. I prefer spot and stalk hunts which leave me carrying my rifle so I value a sling. Single point slings are often preferred by tactical shooters, but for walking any significant distance, I prefer the stability of a good two point sling over an AR bouncing around on a single point sling. Over time I’ve collected a number of slings including convertible single/dual point models, but my go-to sling, a Viking Tactics two point padded model, remains my favorite.

Triggers? If precision is important to your hunting, you need an upgraded trigger. Truth is, once you’ve used a good drop in trigger replacement you’ll probably loath whatever trigger came in your rifle. I’ve pulled Timney, Wilson Combat, CMC flat triggers and plenty of others. It seems like there’s a new drop in trigger maker for the AR-15 popping up every other month. Most are pretty good; some have nice proven track records if that’s important to you.

While there’s no limit on interchangeable AR-15 configurations, these considerations combined with your personal preferences of brand, grips, stocks, etc. will get you all set to hog hunt with your AR-15. Fact is, getting set up to hunt hogs with the puzzle pieces covered here will also get you set up to effectively hunt various varmints, deer and other exciting prospects for the tactical hunter. Want to show off your favorite setup? Tag @SHWATteam on Instagram.

How to Conceal Carry in the Summer

0

It’s that time of year again; temperatures are creeping up, sweaters are being traded for tank tops, and people are taking off on vacation. But how do you successfully conceal carry through all of this?

You may be surprised to learn that concealed carry in the summer is just as easy as it is in colder months. The trick is to piece together the right wardrobe, wear the right holster, and do your research before taking any trips.

While you will probably have to make some adjustments and exceptions while learning how to conceal carry in the summer, it’s not as difficult as it sounds. The first thing to do is make sure you have the proper equipment.

What are the Best Summer Concealed Carry Holsters?

We don’t have to tell you that different holsters work better in different situations. But what is the best holster for summertime concealed carry?

The first thing you want to look at when it comes to CCW in the summer is your carry position. Inside the waistband holsters are generally considered the best way to conceal carry in summer. These holsters can be concealed under even a simple T-shirt, making them much easier to dress for in warmer seasons.

The next thing to consider is holster material. Hands down, the best holster material for summertime is Kydex. While leather is always a comfortable option, it does tend to get a bit sticky when it comes in contact with water, humidity, or sweat.

The Vedder Holsters LightTuck™ Kydex IWB holster is an excellent choice of summer concealed carry holsters. While it’s our most popular holster year-round, its slim design and built-in sweat shield make it easy to hide under lighter clothing and protect your weapon from moisture on your body.

If you just can’t bear to give up your comfortable hybrid holster during the summer months, an easy trick to avoid a sticky situation is to wear an undershirt. Yes, it’s an added layer of clothing, but having that thin layer of fabric between your holster and your skin provides a sweat barrier that allows you to carry a hybrid holster, or any holster for that matter, more comfortably.

Guns: Concealed Carry Options for Summer

LightTuck carry option for summer

In the winter, when thick layers of clothing are the norm, it’s easy to carry a gun of any size. In the summer, when these extra layers are shed for lighter, smaller articles of clothing, the smaller the gun the easier it will be to conceal.

Trading your full-sized weapon for a compact one will make concealed carrying in the summer a much easier task. If you’re looking for ideas, check out our lists of the best Glocks, Rugers, and Berettas for concealed carry.

That being said, you can successfully conceal most pistols in the summer, even larger ones, with the right holster, belt, and clothing combination. So let’s talk about how to dress for concealed carry in summer.

Concealed Carry Clothing for Summer

If you’re like most people, the minute those temperatures start to creep up, you’re trading your thick jackets and jeans for lightweight tank tops and shorts.

Not only does this make it harder to hide your muffin top, but it also makes concealing your carry pistol more difficult. But don’t worry, we have some tips and tricks for keeping things hidden under summer clothing (two birds, one stone, if you know what we mean!).

Luckily, it’s not as daunting as it seems. Concealed carry in the summer is just as easy as it is in the winter, you just have to get a bit more creative.

If you can pull them off, cargo shorts are your best friend. They are usually loose and riddled with pockets, making them an excellent choice for both waistband and pocket carry.

A concealable IWB holster, like the Vedder LightTuck™, is also surprisingly easy to conceal under a simple cotton T-shirt or tank top. If you prefer OWB carry, or your T-shirt just isn’t cutting it, a light, loose button-up shirt does wonders to conceal even larger pistols. Look for things like fishing shirts and Hawaiian shirts to wear either over a T-shirt or on their own.

When it comes to women’s concealed carry clothing for summer, skirts with belt loops are a great option. You can also easily conceal your gun under a loose-fitting shirt or wear a tighter shirt with a lightweight wrap or shawl-type garment to prevent printing. Any sort of shirt with an embellishment, like a knot, front tie, or another distracting style, also work well.

One of the best parts of summer fashion is that patterns and bright, distracting colors are everywhere (yet another reason Hawaiian shirts are great for CCW!). These patterns and bold colors work well to hide printing, no matter what shirt you wear.

Preventing Chaffing

Look, it’s nothing to be embarrassed about. Lots of people experience chaffing from their holster and firearm during the summer, and it’s one of the main reasons people decide to leave their weapon at home during warmer months.

If chafing has got you down, don’t worry. There are a few things you can do to help mitigate this uncomfortable situation. First, consider wearing an undershirt tucked into your pants to prevent contact between your body and carry system. If you live in a really hot and humid environment (ahem, Florida) and don’t want to wear an added layer, you can always try anti-chafing powders or rollers, which are quite effective.

Invest in a Good Gun Belt

Vedder Holsters Gun Belt

Few things reduce printing and make CCW more comfortable, like a quality gun belt. Whether you like tactical belts or stylish leather ones, a good gun belt is an easy way to make summer concealed carry a success. Unlike regular belts, EDC belts are designed to be thicker, stiffer, and more durable, preventing belt sag and reducing printing.

Use a Holster Claw

A holster claw is always a good idea and is especially useful in the summer. Holster claws are designed to reduce printing by pressing against your gun belt to draw the grip of your pistol closer to your body. You can order any Vedder LightTuck™ with an optional Holster Claw or buy one separately to add to an existing holster. It really does make a difference!

Carry Off Body

Off body carry is a bit of a controversial topic in the gun community, but sometimes it’s a good option if you’re struggling to conceal your weapon under summer clothing. If you are going to use this means of carry, it’s essential that you pair it with a proper holster. A pocket holster often works well for slipping into a purse or backpack.

Read more about the pros and cons of off body carry here.

Concealed Carrying While on Vacation

Ah, summer. The kids are out of school, the weather is warm, and the days are longer. It’s the ideal time to take that much-needed vacation. But how does concealed carry fit into your travel plans?

There are plenty of reasons why you might want to have your gun while on a trip. You’ll likely be around large groups of people and wandering into unfamiliar places, all of which warrant having a self-defense plan. But, with new places comes new rules, so how do you conceal carry while on vacation?

Concealed Carry While Driving

Holster in car

If you’re taking a road trip this summer, you’re probably wondering if you can have your gun in your vehicle with you. So long as you have a valid concealed carry permit, you can safely have a firearm in your car in most circumstances, though different rules may apply.

If you will be traveling through multiple states, it’s imperative to read up on their individual laws. Every state has different regulations when it comes to firearms, so you’ll want to make sure you’re complying with the laws where you’re going, even if you’re just passing through. You’ll also need to verify that the states you’re going to have a reciprocity agreement with the state where your carry permit is from so you don’t run into any issues.

You should also note that if you are pulled over, some states require you to disclose that you have a gun in the vehicle to the officer. Once again, read up on the laws in the states where you will be traveling before your trip so you can be prepared.

If you can bring your pistol, you’ll want to figure out how to carry comfortably while driving. You may want to consider a carry position that won’t be uncomfortable for long periods of sitting. Appendix and 4 o’clock carry are generally not recommended for driving as they tend to dig into your back or thigh after a while. Carrying strong side or cross draw works well in a vehicle as the gun sits out of the way on your hip.

You can always have your firearm off-body somewhere in your car, but if you choose to carry that way, be prepared to take it with you anytime you get out of the vehicle. You should also keep your vehicle locked while you’re fueling up so there’s no chance of someone walking away with your pistol.

Check out our article “Can You Concealed Carry While Driving?” for more tips.

Concealed Carry While Flying

We hope we don’t have to tell you that you can’t wear your gun on a plane (if you don’t know, TSA will be sure to inform you with a trip to airport jail). But you may not know that you can have a gun in your checked baggage, so long as you comply with certain rules.

The Transportation Security Administration (TSA) has a number of regulations that must be followed to check a firearm, including securing your unloaded gun in a hard-sided, locked container and checking in with airport security. Be sure to review all the rules before attempting to check a gun in your luggage.

As long as you follow the rules to the letter, you shouldn’t have any issues checking your firearm. You should be prepared to get to the airport a little early as the process does take additional time.

It’s also important to consider the city and state you will be flying into before bringing your gun. Like when taking a road trip, make sure to read up on the state’s individual laws and verify that your concealed carry permit is recognized there.

To learn more about concealed carrying while traveling by plane, check out our article here.

Other Factors to Consider

IWB (Inside the Waistband) carry Kydex Holster

Vacation Activities: Before you decide to travel with a gun, think about the activities you’ll be doing on your trip and where you will be staying.

If you’re planning a trip out here to Central Florida where you will be visiting one of our many theme parks, you won’t be able to take your weapon with you into the park and, therefore, may not want to bring it at all. On the other hand, if you’re taking a road trip to visit family, go camping, or visit some gun-friendly attractions, bringing your firearm should work out just fine.

Wherever you’re going, just be sure to check out local and state laws and think about the activities you will be participating in once you’re there. Many businesses and parks reserve the right to prohibit weapons in their establishment, so make sure you know the rules before you go.

Hotels: Another thing to consider when deciding whether or not to bring your gun on vacation is where you’re staying. If you’re staying with friends or family that you trust and are okay with you bringing your weapon into the house, then, by all means, bring your sidearm. It may be a different story if you’re staying in a hotel or rental home.

First, you must ensure the place where you will be staying doesn’t have any policies against firearms. Second, think about whether you will be able to take your gun with you when you leave your room. Whether or not you leave the “do not disturb” sign on your door, hotel staff have a key to your room and may access it at any time.

One way to help mitigate any potential issues is to bring a small travel gun safe to lock your weapon in while you leave. You can find lightweight, inexpensive options online.

Vehicle Rentals: If you’re planning to rent a car during your vacation, don’t just assume that you can have a gun in the vehicle. While many rental car agencies don’t have a specific policy against weapons in their cars, some do, so make sure you do your research beforehand.

Summary

With the right gun, holster, and clothing combo, concealed carry during warmer months doesn’t have to be difficult. When you’re learning how to conceal carry in the summer, consider the types of activities you will be participating in, the kinds of places you may visit, and the wardrobe you currently have.

If you’re looking for belts or holsters that are custom-made for your weapon of choice, we recommend visiting our Holsters by Gun Model page. For all of our belt and holster options and for more information to help you choose the carry system that works best for you, visit our Vedder Holsters website.

Looking for items beyond holsters and belts, check out our Resources Page for popular product links like lights, lasers, first aid, maintenance, and more.

*This page contains affiliate links. When you purchase a product included on this list, we receive a commission at no extra cost to you.

Best Air Rifle Deals

Popular Posts

PCP vs Gas Piston: Which One is Better?

0
The perfect airgun is a difficult pick when you are new to gun-hunting. There are a lot of things to keep in mind, starting...

Gas vs Spring Piston: Which One is Better?

0
Today, you can find 5 different types of air rifles available in the industry. They are: spring pistons, gas pistons, PCP air rifles, variable...

How to make a break barrel air rifle more powerful

0
"Unleash the Power: Mastering Break Barrel Air Rifles for Maximum Performance. Discover expert tips and techniques to enhance the power and precision of your...