Home Blog Page 98

What Powder Is the Only Kind That Should Be Used In a Muzzleloader?

0

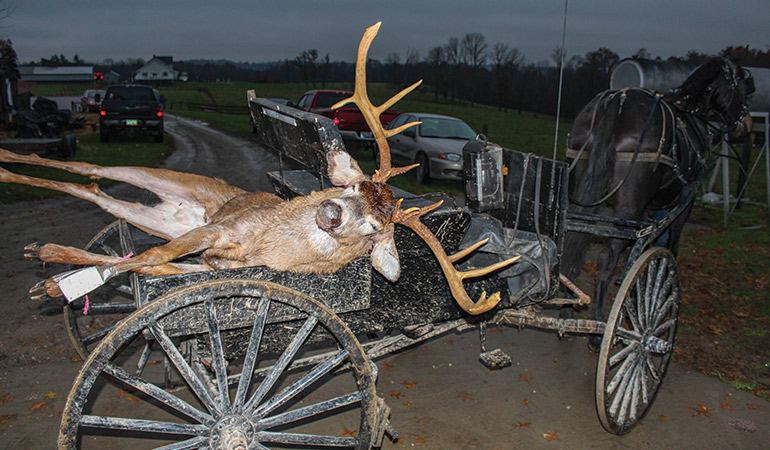
The muzzleloader hunting season is when many new muzzleloading rifle hunters begin harvesting prey using trusty, old-method firearms. With more game options and fewer hunters in the field, this early phase has the most excellent weather; it offers a chance to fill your entire season’s limit. But what powder is the only kind that you should use in a muzzleloader?

Black powder is the only variety of powder that you should load in a muzzleloader. Although synthetic alternatives exist, you should only use approved substitutes and never the new smokeless types. This propellant is easily ignitable, with a widespread reputation in the muzzleloading community.

Keep reading as I dissect the ins and outs of powder for muzzleloaders. We’ll talk about how to use and why only specific varieties are suitable for your firearm.

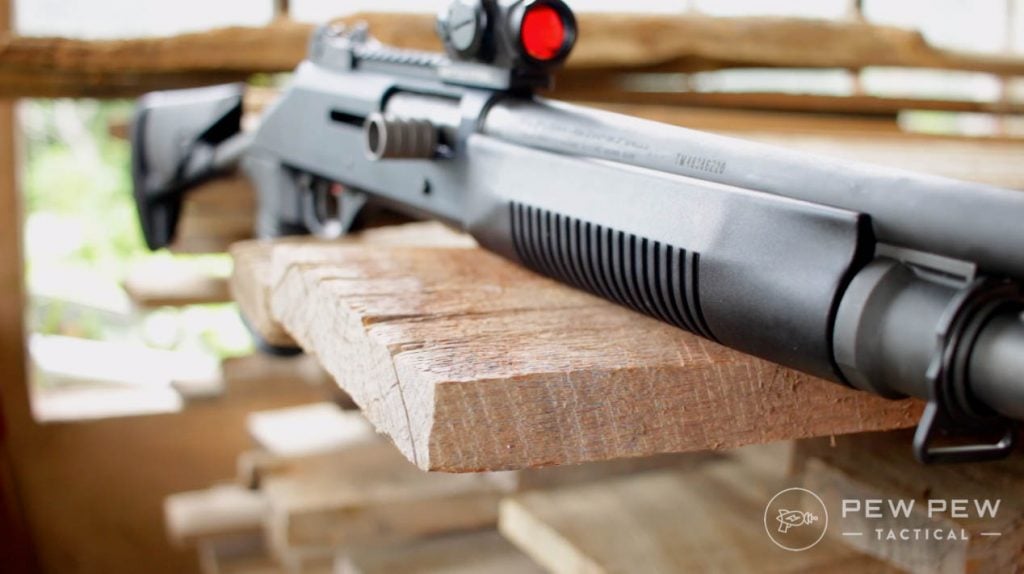
What’s a Muzzleloader Firearm?

With a muzzleloader hunting license, you’re entitled to one deer, rabbits, squirrels, quail, and migratory birds. Unlike modern firearms, you must load this rifle from the muzzle, which goes for each shot. There are no mechanical levers or bolts for load or reload, and designs include the inline and break action.

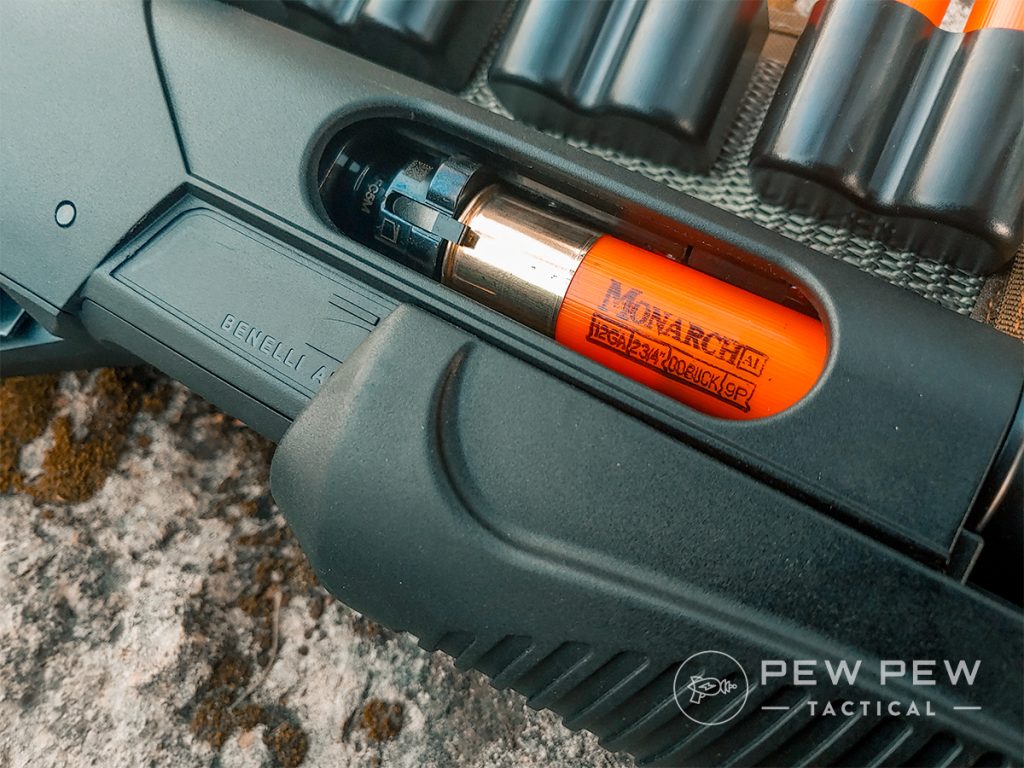
Your inline muzzleloader features a threaded breech plug at the end of a long tube on the shooter’s end. A nipple on this plug holds the primer, after which a hammer striker combination is the igniter or detonator of your powder charge. As the powder burns, gas pressure drives the propellant, often a ball, down the barrel and out the muzzle.

Many modern inline muzzleloaders use a 209 shotgun primer that doesn’t require a unique tool for capping or de-capping. Percussion caps are also used to make the powder explode. However, their breach plugs are different so that you can use 209 primers and Number Eleven caps interchangeably.

Break action muzzleloaders use a lever to pivot the barrel away from the stock, exposing the primer bay or recess. There are also falling block, trap door, plunger, and bolt action muzzleloader models.

What Is Black Powder, and Which Type Should Be Used in a Muzzleloader?

Are you starting as a muzzleloader shooter, or maybe the staggering options on offer for propellants are overwhelming? Contrary to years ago, this sector has come a long way in powder choices. It remains your choice of which brand is the best fit for your firearm.

Black powder is made from sulfur, charcoal, and potassium nitrate, also called saltpeter. This granular substance can be black, grey, or brown and ignites in a dense cloud of white smoke.

As the only powder that you should use in a muzzleloader firearm, black powder is available in four distinct granulations;

  • Fg is the coarsest grained black powder used mainly in cannons, ten or larger gauge shotguns, and rifled of .75 caliber or more.
  • FFg is medium-grained and typically used in shotguns of 20 to 12 gauge, muzzleloaders of .50 to .75 caliber, and pistols in .50 caliber and above.
  • FFFg is a fine-grained black powder that’s best used in pistols under .50 caliber, smaller shotguns, and rifles.
  • FFFFg is an extra fine-grained black powder used as a primer in flint-locking rifle flash pans.

The coarser the granulation of powder, the larger the caliber or gauge of your firearm. Unfortunately, the original substance is mainly inefficient and corrosive, not to mention messy. Actual black powder produces so much smoke because only about 50% of the loaded sample burns. Much of this is blown out of the muzzle as smoke, while other residues remain within your barrel.

Alternatives to Pure Black Powder for Use in a Muzzleloader

One of the ingredients of black powder for muzzleloader priming and firing is sulfur. That’s the reason a foul smell is emitted once you’ve fired your fire-stick, often confused with rotten eggs. The composition is also hygroscopic, meaning that it’ll absorb moisture that affects its ability to ignite when exposed.

This charge is a sensitively combustive compound that can be highly hazardous when mishandled. As such, black powder is classified by the federal government as an explosive. There are strict regulations concerning the manufacture, transportation, and storage of this propellant, leading to its unavailability commercially.

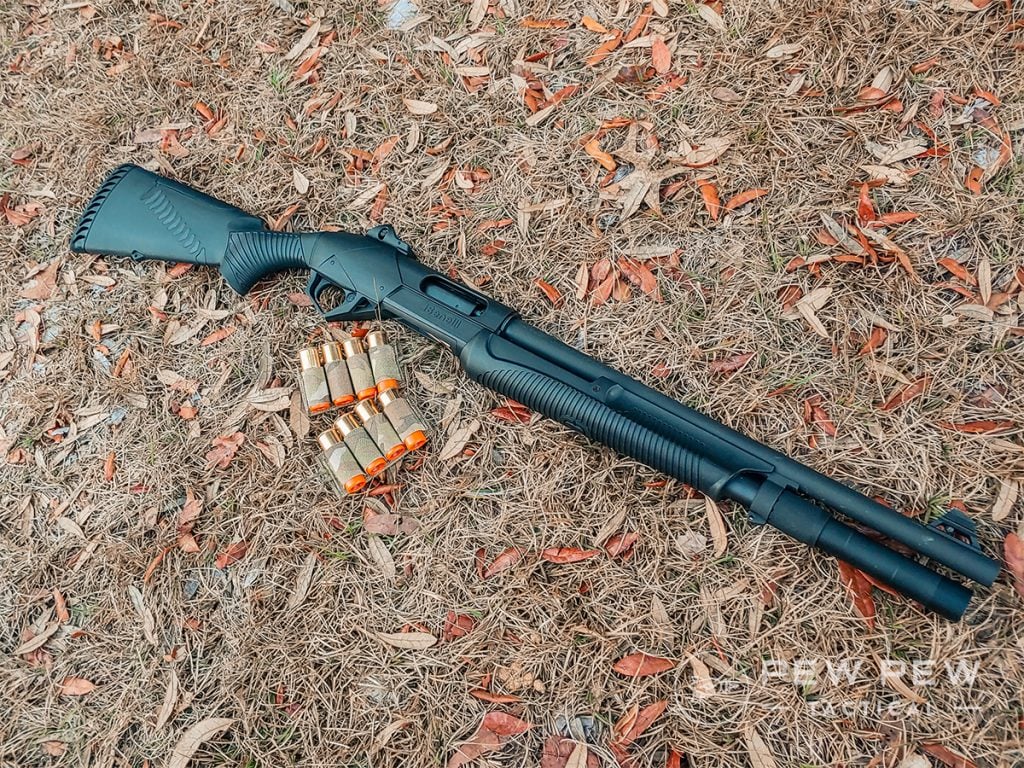
Black powder for muzzleloaders also comes in two presentations, including loose and pelletized powder. In the US, Swiss Black Power and Goex are the two most famous black powder brands among muzzleloader hunters. While Goex is more readily available, Swiss Black Power is regarded as the finer-grained and better propellant.
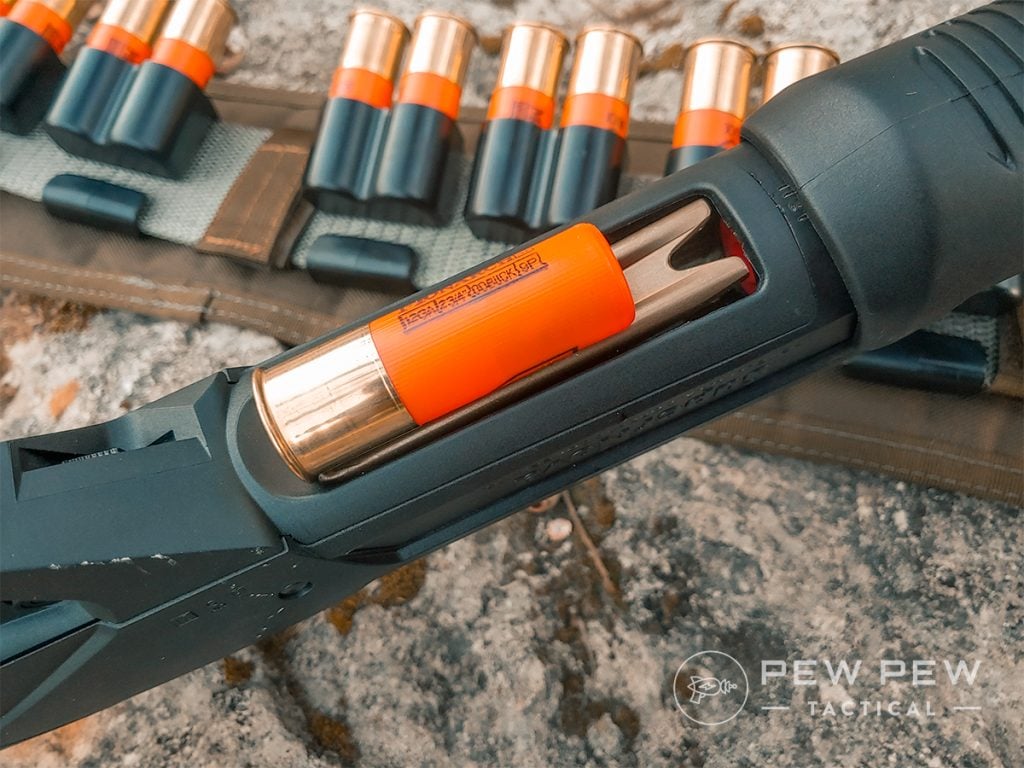
Loose Black Powder:

This is an accurate and precise propellant that will offer incredible pellet groups 200 yards. Blackhorn 209 is the most accurate loose powder substitute in the market. It is best when you’re looking to have an advantage at the range or against prey in the woods.

Pelletized Black Powder:

The pelletized black powder comes in pre-measured pellets that offer simplicity and ease of use with muzzleloaders. Sizes range from 30, 50, and 60 grains. All you need to do is to drop them into your firearm without measuring volume or mass. It’s, however, challenging to accomplish the fine-tuning of your grain usage with these black powder substitutes.

What’s the Safest Black Powder Substitute for Use in a Muzzleloader?

Issues with its storage, presentation, and how black powder ignites have driven many muzzleloaders to opt for substitute powders instead. Typically classified as smokeless propellants, alternatives aren’t subject to the same stringent regulations that surround true black powder. As such, they’re readily available commercially, leave less residual pollution and offer a powerfully efficient burn.

While more difficult to ignite than the original, some substitutes are available in pellet form, making loading easier. If you use 209 primers, you’ll have fewer ignition hangfires, familiar with Number 11 percussion caps and muskets. Another thing to keep in mind is that every substitute is denser than black powder, varying on the brand, and you should use volume and not mass load measures.

Pyrodex

Pyrodex is a popular black powder substitute that was the first developed for muzzleloader shooters. Although supposedly an alternative, this substitute is messy, smoky, and corrosive, just like the original black powder.

However, Pyrodex is easier to find on gun store shelves, unlike its predecessor, and it stimulates projectile performance up a notch. While more difficult to ignite than black powder, this alternate propellant is the easiest at combustion than other substitute powders.

If yours is a musket, an inline or side lock muzzleloader, or when you’re using a No. 11 caps, Pyrodex is an excellent substitute option. It’s available commercially in three granulation levels equivalent to similar black powder ratings. These include;

  • Pyrodex P:

This is equivalent to black powder of FFFg granulation and works best with pistols of less than .45 caliber and muzzleloader rifles.

  • Pyrodex RS:

Close to FFg black powder in size, Pyrodex RS works best with muzzleloading rifles and shotguns of 12-gauge or above.

  • Pyrodex Select:

This is the newer Pyrodex variant that’s more consistent in performance with shotguns of .45 caliber and above as well as muzzleloaders. While similar in granulation to Pyrodex RS, it’s more accurate and cleaner burning than Pyrodex P.

You can also find Pyrodex substitute powder in 50-grain pellets that assist in faster muzzleloader firearm loading.

Hodgon’s Triple Se7en

Known as triple 7 or 777, this is another popular black powder substitute that’s in use for muzzleloader hunting applications. Triple se7en is a relatively new propellant and is more powerful and consistent while burning much cleaner. Being slightly less corrosive than Pyrodex or true black powder, it’s slowly edging out other alternatives, including Pyrodex as the best propellant in use with muzzleloading firearms.

Hodgon’s 777 is available in loose powder presentations of both FFg and FFFg granulation. There are also 30, 50, and 60-grain pellets, and the company recently started offering 33-grain FireStar pellets. These propellants are star-shaped instead of the typical cylindrical pellet shape, and the manufacturer claims they offer higher velocities without much fouling.

Out of all the loads I tested, the 777 FireStar matched up well against other black powder substitutes. Apart from overall performance, the alternate propellant also produced consistent velocities compared to other muzzleloader loads that I put to the test.

Triple Se7ev is widely available commercially, and you’ll find them in any self-respecting sporting goods store. While there are no ignition issues if you’re using 209 primers, 777 is more difficult to ignite than Pyrodex and true black powder. For my CVA Optima Northwest and Wolf inline muzzleloaders, Hodgon’s is my preferred substitute powder, but I don’t recommend you use it inside lock muskets.

Accurate Blackhorn 209

The newest kid on the block for black powder substitutes is Blackhorn 209, featuring the highest velocities of all available alternatives. This powder has excellent performance consistency, which helps with its trajectory accuracy. As one of the cleanest burning muzzleloader propellants, it’s also non-corrosive, and it’s unnecessary to use bore swabs between shots.

Accurate Blackhorn 209, while not as readily available as Triple Se7en or Pyrodex, is still pretty easy to obtain that true black powder. As defined in its name, this substitute powder is designed for 209 primers like CCI 209M and Federal 209A.

This black powder substitute works best with breech plus and specific primers. I wouldn’t recommend using it with No.11 percussion caps or pistol and musket muzzleloader primers to avoid ignition problems. Instead, use an inline muzzleloader as a hunting choice for great results, but you can’t exceed a 120-grain charge.

What’s Best for Muzzleloader Loading, Pelletized, or Loose Black Powder?

Whether you are using loose or pelletized powder, you’ll prefer a load charge of around 100 grains. You can also use heavier projectiles that’ll max out your muzzleloader rifles on longer shots, such as 120 grains of Blackhorn 209. 150-grains of pelletized or loose powder will also work well, but maximum loading charge can cause you to lose placement and shot consistency.

I’ve seen hunters and shooters hit a bull’s-eye and then their following few projectiles pattern between 12 and 18 inches off the mark. The question for me for using both pelletized and loose powder is one of shot distance, ease of use, and cost. When I am shooting less than 150 yards, I employ pellets, but above that, I find loose powder a bit more accurate.

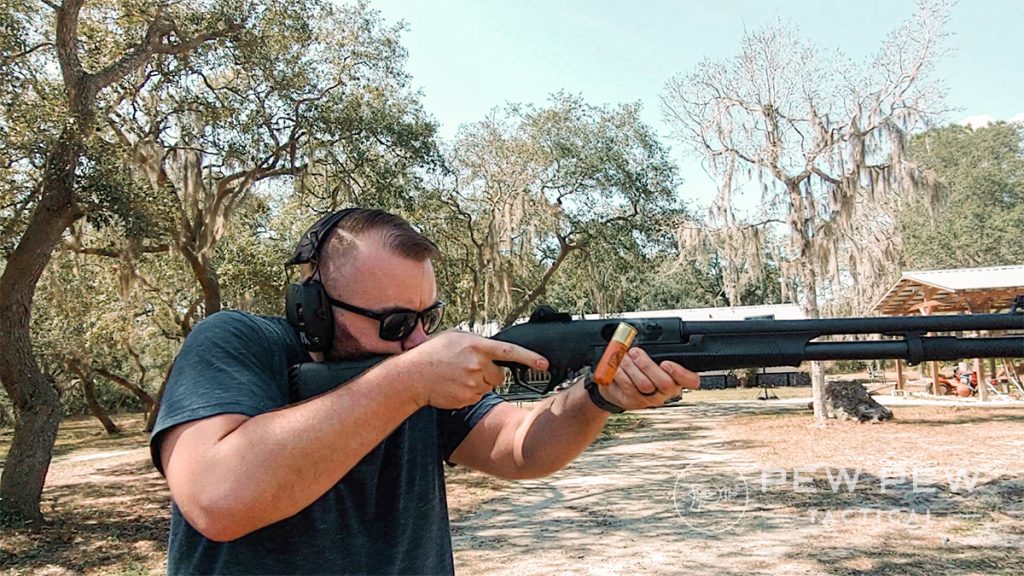
Avoid using a muzzleloader that’s not designed to shoot smokeless powder, as it can cause a barrel explosion. Smokeless varieties are those used in rifle cartridges and shotgun shells.

With new inline muzzleloaders, ignition uses the ubiquitous 209 shotshell primers, and for that reason, it’s not a problem to light off. Using an older No. 11 percussion cap, as is prevalent in unaltered original Knight Rifles, it’s better to use Pyrodex pellets. That’s because these feature a true black powder ring that’s easily ignited, thus offering the advantages of both original and substitute powders in one.

Conclusion

You can find true black powder in granular form, while its substitutes offer pellets that make it easy to load your muzzleloader. While these are the only powders that you should use with your firearm, you must measure loose powder before pouring it down your barrel.

Powder measures ensure that you have a consistent load every time. As such, you shouldn’t use a powder horn or manufacturer shorn to load your charge. Store muzzleloader powders of any type in cool, dry safes or lockboxes.

Ultra-Wide Whitetail Arrowed in Ohio Amish Country

0
Ultra-Wide Whitetail Arrowed in Ohio Amish Country
There’s a buggyload of buck! The dark, sweeping rack of this Amish country legend is a true show-stopper. Photo courtesy of Isaac Yoder

Isaac Yoder keeps busy. The 26-year-old is Amish, so he isn’t programmed to sit idly by. In fact, it’s his work ethic that eventually started him on the quest to kill an unbelievably wide-racked Ohio whitetail in 2018.

When his brother bought some land near their family farm in Belmont Co., Isaac began spending a lot of time there. He’s a farrier, a job that keeps him quite busy shoeing horses in the community. Isaac’s job actually played a part in how he was able to start hunting a truly superb buck.

Sitting on the porch after work on a hot July day back in ’17, Isaac let his mind drift to deer hunting. It was the time of year when he typically tries to find a buck to go after during hunting season. Without a target buck for the upcoming season picked out, Isaac decided to take a stroll to glass a nearby soybean field.

Right off the bat, he saw some bucks feeding on the tender summer crop. And then, a short distance from the bachelor group, Isaac saw another deer feeding in the field. This one’s head was down, and thus concealed by the beans. But when the deer raised his head, Isaac immediately knew he’d found a buck to go after.

“I’m telling you, when he lifted his head up, I started shaking,” Isaac claims. “The buck’s rack was so wide it seemed to go on forever.”

In fact, Isaac was so taken aback by the animal that he says, “I had the worst case of buck fever right then that I have ever had — more so than on any buck I have ever killed.”

That should tell you something about how wide this buck’s rack really is. It was wide enough, in fact, for Isaac to give the deer the apt nickname “747” in honor of the popular wide-body aircraft model by Boeing.

After spotting the huge whitetail, Isaac spent the rest of the night trying to convince himself that what he’d seen was actually real. The property on which he’d seen the buck butts up to his brother’s, and Isaac and his family had permission to ride their horses on it. But a conversation with the landowner, and an offer to shoe his horses, now meant that Isaac also could hunt the deer there.

Determined from the Start

Isaac doesn’t own any trail cameras, but a friend of his put some out. Soon they began getting the deer on camera. However, so were some hunters with permission to access neighboring properties. Isaac was determined to act quickly to harvest the magnificent buck before anyone else did.

If you want an example of how dedicated Isaac was to this buck, perhaps the hunter’s first trip to the stand says it all. Trail cameras had shown the buck was showing up around Isaac’s stand around 4:00 a.m. and hanging out until daylight. So, what did Isaac do? On opening morning of archery season, Isaac got into his stand at 1:00 a.m. The determined hunter sat there all day until shooting light had ended. In total, that was 18 hours on stand.

“I had every buck I knew of on the property walk by me at 25 yards and offer me a shot — every buck but him,” Isaac recalls.

He didn’t hunt the next day, and you guessed it: The buck showed up on camera in shooting light! And that’s how things would go between the two of them for the rest of the season. The game of cat-and-mouse dragged on for months, leaving Isaac frazzled.

The bowhunter saw 747 one time during the ’17 season, and he thought for a minute he was going to get a shot. But it didn’t work out that way.

trail cam photo of 747 buck
Trail camera photos of this Ohio bruiser were enough to convince Amish hunter Isaac Yoder that he was after the buck of a lifetime. Amazingly, the buck’s outside spread measures 35 1/8 inches. Photo courtesy of Isaac Yoder

Isaac was hunting a wooded area off a food plot, not far from a set of scrapes. The hunter wanted to be closer to the scrapes, as he felt that’s where 747 might show up. But Isaac was using a climbing tree stand, and there just weren’t any good trees to get in. He ended up being about 60 yards away from the scrapes. Sure enough, his only glimpse of the deer came as the buck worked the scrapes out of bow range.

The thought of letting an arrow loose did cross Isaac’s mind, but he wasn’t about to risk wounding the deer. He didn’t want it to go down like that. In fact, rather than take a shot he wasn’t 100 percent confident in, the gracious hunter would rather someone else make a good, clean shot on 747. That’s true hunter ethics.

On New Year’s Day ’18, 747 rang in the holiday by shedding his antlers. At that point, Isaac was done hunting him. Their chess match would have to wait until the coming fall to resume.

Restarting the Chase

When the time finally came to hunt 747 again, Isaac put together another piece of the puzzle. And he knew it could be the ticket for grounding the extra-wide buck.

The hunter worked out a deal with a neighboring landowner to be able to hunt a property that lies adjacent to the one where Isaac had first spotted the buck The landowner lives out of town and hunts the property himself, along with his children. Still, he gave Isaac the go-ahead. In exchange for hunting rights to the property, Isaac agreed to plant and maintain all the food plots on the property. He also vowed to hang and maintain the landowner’s tree stands and box blinds.

Isaac earned his keep around the farm, planting over seven acres of food plots, building and placing two box blinds and hanging and trimming tree stands for the owner, along with placing his own stands.

When September came around, Isaac began seeing 747 in the beans and corn he’d planted at the far end of the farm. Interestingly, though baiting is legal in Ohio, Isaac made the decision that he wasn’t going to hunt this buck over bait. Simply put, the hunter wanted to use another strategy to harvest the special whitetail.

As the season drew on, Isaac explains, the monster buck was showing up on camera nearly every day, either at one of the locations that Isaac wasn’t hunting or at a time when he wasn’t in the stand.

The labor of two hunting seasons was starting to wear on Isaac. He admits that by that time, he was physically and mentally drained. He just wanted the saga to end, one way or another.

Eerily, in mid-October, 747 vanished. Photos and all signs of him were gone. Hoping to find an answer to the buck’s disappearance, Isaac traveled to a nearby restaurant to see if he could chat with the father of one of the hunters on a neighboring property. The man frequented the joint, and Isaac had spoken to him of the buck before.

Luckily, Isaac connected with the man there. As the two discussed the deer and his behavior, the man mentioned that his son had gotten a photo of 747 at 4:00 a.m. that morning.

Leaving the restaurant, Isaac said to himself: Huh, typical for that deer to be so unpredictable.

Around the first of November, 747 showed up again around Isaac’s stands — and in daylight. Trail cameras showed him working scrapes at 9:00 a.m. on a regular basis. That’s all Isaac needed to know. The hunt was back on.

One of Isaac’s tree stands was ideal; it was situated in the woods about 80 yards from a food plot in a funnel area where deer travel around a ravine. For the next six days, Isaac hunted that stand. The wind was right, and he took advantage of it. While those six days passed without his seeing the deer, Isaac stayed determined.

The next day, on Nov. 8, Isaac was on stand again. At about 8:00 a.m., he stood up to stretch and looked into the food plot he’d checked just before standing up — and there was the buck. For the first time all season, Isaac was looking at 747 in the flesh.

The bowhunter already knew from the way the deer was walking that he would soon be standing just 18 yards in front of the tree stand. Sure enough, within a few minutes, 747 was working the scrape only steps in front of Isaac’s stand. “It felt like forever before he stopped working that scrape and turned to move so I could get a shot,” he remembers.

When the buck did move, Isaac couldn’t shoot; limbs protected the deer’s vitals. Then, when 747 started walking again, he wasn’t broadside as he’d been before. Instead, the huge buck turned and started walking head-on toward Isaac!

When the behemoth whitetail did finally turn broadside, Isaac drew his Mathews Halon and found a spot behind the buck’s shoulder to settle his pin. Isaac then waited for the buck to stop, but he didn’t. Then Isaac felt his bow arm come up against a tree limb. It was either shoot then or let the bow down.

Isaac shot.

Immediately 747 crashed away, bulldozing everything in his path.

“He even caught a decent-sized tree in his rack and actually ripped it out of the ground,” Isaac remembers. He was fearful the deer would break off part of his rack in the commotion.

After running 80 yards or so, the giant buck faded out of sight. Isaac decided to play it safe and back out of the area. He took the long way out, hoping his caution would prevent him from bumping the wounded buck.

Upon taking up the blood trail, Isaac found what appeared to be an area where the deer had bedded for a period of time. After first backing out to allow time for the buck to expire, Isaac returned to find 747 bedded and still alive. The hunter stalked to within 20 yards of him and landed a lethal follow-up shot.

And just like that, Isaac’s 2-year quest for the mega-wide whitetail had ended. Next, the celebrations commenced. Soon, photos of Isaac’s trophy were circulating on social media throughout the country. As the bowhunter says: “It felt like the whole world knew about this buck.”

In Conclusion

Isaac notes that he couldn’t be more grateful to the landowners who have allowed him to hunt over the years and who played significant parts in his tagging 747. And what of the gracious landowner who allowed Isaac to hunt in exchange for food plot work and stand maintenance? That family couldn’t be happier. There were absolutely no hard feelings or bad thoughts on their part. That’s proof positive they’re stand-up folks.

After being officially scored by a Boone & Crockett measurer, Isaac’s spectacular buck boasted a gross score of 175 inches. The buck is a mainframe 8-pointer with seven addition points. But without a doubt, the most incredible aspect of 747’s unique rack is its incredible width. Officially, the inside spread is a whopping 32 7/8 inches, while the outside is 35 1/8!

Those are numbers virtually never seen on a whitetail rack, and it’s easy to see why 747 garnered so much attention from whitetail fanatics everywhere. Bucks with wingspans so wide they’re named for jetliners just don’t come along every day.

6 Sneaky Coyote Tactics to Separate Yourself From Pack

0
6 Sneaky Coyote Tactics to Separate Yourself From Pack

There’s no need to let a spot rest after taking a coyote from it. Another will usually be ready to move in and take its place. (Photo by Josh Boyd)

Success is far from guaranteed when predator hunting, and every hunt holds just as many challenges as it does promise. To overcome these challenges, crafty predator hunters dig deep into their bags of tricks to turn the odds in their favor.v

Sometimes, the most overlooked or obscure tactic is the one that puts fur in the shed.

Few predator hunters’ bag of tricks run quite as deep as Tad Brown’s. Brown has spent decades chasing coyotes, bobcats and various other furbearers in every corner of the country, and he’s grown accustomed to meeting predator hunting’s challenges head-on.

The following are six of Brown’s most effective predator tips and tactics, which he regularly employs to produce consistent success.

1. Drive Instead of Walk

Over the years, the idea that vehicle traffic imparts undue pressure on local predator populations has been ingrained in the average hunter’s psyche. However, Brown feels this notion is of little merit, and that traveling as close as possible to your next set by vehicle can often be among the least invasive means of access.

“I won’t walk 10 feet to my spot if I can hop in my truck. Coyotes are so used to hearing vehicles now. You have guys checking cattle, working on plots, putting up hay and driving through farms. It’s a common occurrence, and coyotes do not pay it any attention,” says Brown.

However, he does warn against throwing all caution to the wind, and stresses the importance of remaining aware of common predator hunting fundamentals. “Just get right in there with them, but use a little common sense. You still have to have the wind to your face, and it still makes sense to hide your vehicle.”

2. Hunt Past the Initial Shot

Another tactic Brown feels others overlook is to continue calling even after the hunt’s first shots have been fired. While many believe that the sound of gunfire scatters wary coyotes to parts unknown, Brown says thinking along these lines often costs hunters more shot opportunities than they ever realize.

“Guys tend to think that once they’ve fired a shot, they’ve scared everything in the country. There is nothing further from the truth. I can think of at least a half-dozen instances where I’ve killed or shot at a coyote only to have a bobcat or another coyote come into the call,” Brown says.

He also finds it helpful to vary his calling in the moments directly following a shot. “A lot of times, after I bust a coyote, I will go to a ki-yi or pup distress,” he says. “Doing so seems to have some type of instinctual effect on them, almost like a challenge of sorts. Typically, I’ll only do this for a short period of time before changing back over to a prey sound.”

3. Hunt Quality Sets Regularly

Many predator hunters believe a location can be rendered useless by overhunting it and will allow a spot to rest for a significant period between hunts, especially after it’s produced success. On the contrary, Brown feels that nature fills the void any time predators are removed from an area, and the avoidance of quality setups can cost you fur in the long run.

“Most people discount a location if they’ve already called it. Coyotes are constantly on the move, and one will almost always take the place of another,” Brown says. “It’s almost like waiting in line for the bathroom. Once you take a coyote out of an area, others will be waiting for their turn.”

Brown has seen the benefits of frequently hunting the same spots within areas of high predator traffic on numerous occasions. “There’s a spot on a ranch I hunt that is like my honey hole,” he says. “If I’m out there for four or five days, and the wind is right, that will be the first set every morning. I’ve had hunts where a coyote responds every time I call at that location.”

predator hunting
Over the course of his career, Tad Brown has developed numerous calls and other products for brands like M.A.D. and Hunter Specialties. (Photo courtesy of Tad Brown)

4. Prepare Spots in Advance

For most, predator hunting tends to be a run-and-gun endeavor. Hunters often seat themselves in a promising looking spot and then make decisions on the fly. However, Brown says that one of his most effective strategies is preparing sets in advance.

“There isn’t anything worse than setting down in a spot, calling in a coyote and realizing you’re not in position to take advantage of it,” he says. “I like to go into an area ahead of time and sort out whether I will be able to kill a cat or coyote if they come down a particular road. I treat my predator hunting spots just like my deer or turkey spots. I like to trim shooting lanes and make sure I can see.”

Brown feels that this level of preparation not only increases his odds of success, it makes him a more effective hunter in general. “Sizing up a spot before hunting it allows me to make decisions about where and how to set up for a certain wind, as well as how best to call,” he says. “Knowing these things in advance and preparing each spot allows me to be a more efficient predator hunter and put more fur on the board.”

5. Let Curiosity Be Their Undoing

If you ask any number of predator hunters what they do to finish reluctant coyotes or bobcats, most will be adamant about varying up their calling in a bid to entice a frenzied response. Brown, on the other hand, finds that the best medicine for stubborn predators is often to let their curiosity get the best of them.

“Most guys go to a squeaker bulb or a coaxer sound to finish cats or coyotes. I tend to do nothing. I either stop calling or turn my volume way down. They know what they heard, and shutting everything off is more than a coyote or bobcat can stand,” says Brown.

He also emphasizes the importance of staying vigilant, even if a predator seems to lose interest after calling has ceased. “A lot of times a coyote will seem to slip off, and this might make you think he’s leaving. However, if you just sit there, he’ll often pop back into sight.”

6. Scale Setups Based on Location

Many hunters approach eastern predator hunting with a broad-stroke approach, mirroring many of the techniques that are commonly used when hunting in the Midwest and West. However, Brown feels that hunters often limit themselves by not tailoring their efforts to suit the area in which they are hunting.

“When hunting out West, you typically put several miles between sets. This is rarely the case when hunting in more populated areas in the East,” he says. “You almost have to treat densely populated areas like a miniature golf course. You aren’t driving that ball a couple hundred yards; you’re putting it just a few feet. When hunting the East, I typically tone my calling volume down and make more individual sets.”

He’s also quick to point out that eastern hunters are afforded a significant amount of opportunity based upon the general lay of the land. “If you were to hunt 1,000 acres of land, even if it’s more heavily populated, you can make far more sets back East than would be the case when hunting in the West.”

Much in the world of predator hunting has remained relatively unchanged over the past several decades. However, avowed predator hunting fanatics, such as Tad Brown, continue to experiment with new and innovative means of finding success. By utilizing such techniques in your own predator hunting, you’re likely to find yourself knee-deep in skinning duties this winter.

Coyote Kit

Gear that’ll take your game to the next level.

Alps Outdoorz Enforcer

If your predator hunting keeps you on the move, the Alps Outdoorz Enforcer backpack (above) is a one-size-fits-all solution for quick, convenient and comfortable setup. The Enforcer features 800 cubic inches of storage space, a removable kickstand frame and an integrated memory foam cushion. ($169.99; alpsbrands.com)

FoxPro XWAVE

FoxPro’s new XWAVE e-caller offers hunters a level of versatility that few other calls do. It features two swiveling high-definition speakers, a compatible auxiliary jack for decoy integration and 100 pre-loaded sounds with the capacity for an additional 1,000 sounds. The XWAVE is Bluetooth-enabled, allowing hunters full control from their mobile devices. ($699.95; gofoxpro.com)

Primos Double Bull Stakeout Blind

The Double Bull Stakeout Blind with SurroundView ensures that you are never left scrambling for a hideaway when gunning for predators. This two-wall blind features translucent panels that allow you to see out without predators seeing in. The Stakeout Blind is also extremely portable, weighing only 4 1/2 pounds, and deploys in seconds. ($99.99; primos.com)

Vortex Fury HD 5000

This range-finding binocular makes it possible to glass for coyotes while simultaneously gauging their distance. While looking through these 10X42 optics, a hunter can center a small crosshair and take distance measurements out to 5,000 yards. This state-of-the-art bino features a “scan” mode, which allows for real-time distance measurement when tracking moving predators. ($1,599.99; vortexoptics.com)

The .450 Bushmaster – A Big Bore, Big Game, Big Fun Blaster!

0

Remember your excitement when you got your first AR-15? If you’re like me, it was memorable! Now imagine something even more so – getting something BIGGER! Yes, it’s just a matter of time before you’ll get the itch to join the “BIG BORE” club. Typically characterized by calibers .44 greater, big bore ARs are a ton of fun to shoot, usually better for hunting and good for the ego! One of these “BIG BORE” bad boys is the 450 Bushmaster, a formidable beast with the ability to provide a one-shot kill at 250 yards. Feel the itch yet? I did, and that .450 Bushmaster became my first entry into the Big Bore Club.

.450 Bushmaster

The 450 Bushmaster DNA goes back to the legendary Col. Jeff Cooper and his disdain for the .223 caliber AR-15 platform. Cooper was convinced of the need to go bigger. He envisioned a cartridge for big game hunting out to 250 yards. That idea inspired Tim LeGendre of LeMag Firearms, LLC to develop the “.45 Professional Cartridge” which would utilize .452 projectiles.

Later, LeGendre licensed the .45 Professional to Bushmaster Firearms International. Bushmaster teamed up with Hornady Ammunition to produce it. Hornady wanted to modify the original concept to incorporate its 250 grain Super Shock Tip (SST) bullet. This forced a compromise to shorten the cartridge case and the Bushmaster 450 was born.

Hornady 450 Bushmaster

I’ve used Hornady ammo for years in most of my traditional hunting rifles, so the decision for me was simple. The .452” 250 grain FTX features Hornady’s Flex Tip technology is a solid choice. It provides great velocity and devastating energy out to 300 yards. It has a ballistic coefficient .210 and 2200 feet per second muzzle velocity. These FTX bullets (this one is built for the .45 Colt) are designed to have a much higher BC than normal flat-nosed bullets standard in those types of cartridges. The FTX bullets are somewhat soft and offer very good expansion, but are not the best bullets for the toughest game. In North America they are suitable for anything but brown or polar bears, and perhaps bison.

Zeroed at around 175 yards, this load is easily a 200 yard load without worrying much about hold overs.

Remington also jumped into the mix and now provides several options for the .450 Bushmaster. For reloading, the 275 grain Barnes XPB has a .215 ballistic coefficient. Designed for the increased muzzle velocity and long barrels available on .460 S&W hunting pistols, this Barnes solid projectile is a game-changer for the .450 Bushmaster. This is the load I would choose if I were using the .450 BM in bear country. Trajectory is basically identical to the Hornady 250 grain FTX load at practical ranges, so the same zero could be used for both in most cases. Zeroed around 175 yards, you would be in the kill zone out to 200 yards without holding under or over.

Also useful to reloaders is the Remington 260 grain Core Lokt Ultra Bonded bullet with its .144 ballistic coefficient. Core Lokt bullets have a strong reputation for being consistent performers. They may not be the flashiest new technology, but they have been working reliably for generations. They perform well at modest velocities, and it is hard to go wrong with a Core Lokt in any caliber.

This is a good tree-stand cartridge, and should roll up a pig nicely. Within reasonable ranges it will be fine for black bear, elk, or moose. It does not have quite as flat a trajectory as some of the others, but this is not a long-range cartridge anyway. Even if velocities are low for reliable expansion at longer ranges, a .45 caliber bullet doesn’t usually need much expansion.

For loaded ammo, Remington makes their 260 grain Premier Accutip. It certainly looks cool, but I can’t find the ballistic coefficient specs for this bullet anywhere. With a muzzle velocity of 2180 feet per second, Remington says it is the most accurate .45 caliber bullet ever made. It looks like this bullet performs on game about the same as the Hornady FTX bullet does, so it should be fine for anything up to moose or black bear. Like Remington’s Golden Sabre loads, this one has a brass jacket that is cut for expansion.

My introduction to Big Bore ARs was more luck than general curiosity. A few years ago, the Indiana Department of Natural Resources added three very popular hunting cartridges to its deer hunting approved list. The 450 Bushmaster, .458 SOCOM and .50 Beowulf made their way into regulation. I’d imagine every Hoosier with an AR started salivating at the opportunity of using his or her AR to hunt deer.

It took me several months of research to decide on which big bore caliber upper to purchase. At first, I was set on the .458 SOCOM, but at the time, ammo availability and pricing held me back from going that route. The 450’s strong following, ammo availability and pricing won me over and the rest is history.

I ordered the 450 Bushmaster upper from Rock River Arms since it works with my standard mil-spec 5.56/.223 receiver. No modification of the lower receiver was necessary and it comes with a 5 round Bushmaster magazine with a 450 follower. I had an extra EOTech XPS Holographic Sight available, so my upper setup was done within minutes.

The Hornady 250 grain bullet I used provides a flat trajectory out to 150 yards. With a fifty yard zero the the drop is only 1.7″ at 150 yards. With a 175 yard zero, it stays just inside the kill zone from 2.7″ high at 100 to 2.5″ low at 200 yards. This is an excellent setup for deer hunters who use tree climbers and shoot within a limited range. There is no need to memorize hold overs. Just point and shoot!

After months of waiting it was time to get some trigger time with the 450. The ballistics tables will only tell me so much and I was really curious how a “big bore” rifle would shoot. Admittedly, the ammo itself is visually intimidating and the stories I’d heard of this beast had me a little apprehensive.

450 Bushmaster AR15

My range day with the 450 was very different from what I’d expected. The anticipated bang and shock was nothing close to what I’d imagined. Much of the felt recoil was mitigated by the factory installed Izzy Muzzle Brake. My zero session at 50 yards was fun and effortless. I followed up with another half a dozen shots at 100 yards just for good measure. The “big bore” weapon system’s setup and Hornady accuracy gave me a strong sense of satisfaction and confidence. The real test was in November, deer hunting in Indiana. Here’s where the performance really showed >>>

Editor’s note: Special THANKS to Dylan Saunders for his assistance with this story.

Read more on .450 Bushmaster >>>

Benelli SuperNova Tactical Review: Best Home Defense Pump-Action Shotgun?

0

Do you associate Benelli with semi-auto guns?

Benelli M4 Handguard
Benelli M4

Most of us do…from the famed inertia system to the gas-eating Marine Corps-approved M4, and even the weird combination pump and semi-auto M3, the company is well known for its semi-auto models.

But Benelli’s SuperNova breaks that mold bringing a pump-action, 12-gauge shotgun that truly stands out in the very crowded pump-action market.

Benelli SuperNova Tactical

Unlike most Benelli’s, the SuperNova doesn’t break the bank either. It’s often priced competitively with Remington and Mossberg shotguns.

So, you know we had to get our hands on this gun and give it a try. Today, we’re reviewing the tactical variant of the gun with the field stock and ghost ring sights.

Benelli SuperNova Tactical Review at a Glance

Pros

  • Compact
  • Ghost ring sights but also optics-ready
  • Ergonomic design

Cons

  • Not a lot of customization options
  • Length of pull is a little long

The Bottom Line

The Benelli SuperNova is an effective, comfortable-to-shoot option for those looking for a shotgun for both home defense and hunting. And the price isn’t too bad either!

Specs & Features

Benelli doesn’t waste space and keeps the barrel at a trim 18.5 inches.

That’s the stock standard for a tactical 12-gauge, and while shorter is nicer, the NFA requires a stamp for anything less than 18 inches.

The 18.5-inch length gives some leeway for the inconsistent testing methods used by the ATF.

ATF Legal seagulls

The overall length of the weapon is 39.75 inches, and it weighs 7.6 pounds. The length of pull is a long 14.75 inches. Even henchman-sized guys like me find that to be a long length of pull.

We’ll talk more about that later…

The Benelli SuperNova comes with a 4-round magazine tube. Oddly enough, the magazine tube comes plugged to only allow two rounds to be loaded.

Benelli SuperNova Tactical

That’s common in sporting guns, and the purpose is to keep the weapon legal when hunting certain species of birds.

Removing the plug is easy enough. Four plus one is the absolute minimum for a tactical shotgun. I, like most, would prefer a little extra capacity in my defensive or tactical shotgun.

Benelli SuperNova Tactical

Luckily, adding a magazine extension is easy, and I did just that to get three extra rounds in the gun.

Beads make great sights, but ghost rings are better, and Benelli believes in ghost rings. It’s got a set of solid iron sights with a rear ghost ring and a big front sight. They are very well made sights, and very adjustable.

Benelli SuperNova Tactical Review: Best Home Defense Pump-Action Shotgun?

If you prefer optics, you’re in good company. The top of the receiver is drilled and tapped for an optic’s rail or mount.

The SuperNova works with Benelli M4-style optics mounts, just pop out the plastic plugs and pop on the scope mount with the screws.

Benelli SuperNova Tactical Review: Best Home Defense Pump-Action Shotgun?

Who Is It For?

While Benelli markets the standard SuperNova towards hunters, the SuperNova Tactical is geared more towards home defense. With that said, it can still make a great hunting gun.

Fit & Feel

Ergonomically the SuperNova provides a sound ergonomic experience. The trigger guard is massive, and your finger will find its way in. Its safety is reversible for lefties and is a push-button style that’s rather large and easy to engage.

Benelli SuperNova Tactical Review: Best Home Defense Pump-Action Shotgun?

The pump release is forward slightly of the trigger, and it’s intuitive. It’s big enough, and I doubt it’s an issue for lefties.

Using the magazine cut-off isn’t hard but takes a second to get used to.

You have to pull the pump slightly rearward, then hit the button and finish racking the pump rearward. Once the button’s pressed, rounds won’t feed from the tube, and you can do a hasty and intuitive slug select drill.

Loading rounds directly into the port of the weapon doesn’t pose a challenge either. That ejection port is massive and made for a 3.5-inch long shell. So shoving a 2.75-inch shell in the thing doesn’t create an issue.

Benelli SuperNova Tactical Review: Best Home Defense Pump-Action Shotgun?

Port reloads are how you get a gun in action when it runs completely dry. Being able to get a quick reload in the pipe can be critical. Keeping the gun fed is also easy. It’s got a big mouth in the form of a massive loading port.

It’s made for 3.5-inch rounds, and all that extra size gives you plenty of room to shove in standard 2.75-inch shells. It’s easily the fastest reload I’ve ever achieved with a pump gun.

My main problem with the gun’s ergonomics is the super long length of pull. It makes the gun feel unnecessarily long. The LOP makes it hard to assume a squared-off shooting position and forces a more sporting-style bladed stance to be used.

How Does It Shoot?

Benelli SuperNova Tactical Review: Best Home Defense Pump-Action Shotgun?

Speed means nothing without control. Banging hammers with the SuperNova and controlling the gun is quite easy. See those weird chevrons in the stock?

That’s part of the Comfortech stock, and those chevrons flex and cushion to reduce recoil and enhance control. With full-powered buckshot, the SuperNova stays comfy and won’t beat you up.

That long pump I mentioned earlier also features a good degree of texturing and a shape that makes it easy to get a grip on it.

Benelli SuperNova Tactical Review: Best Home Defense Pump-Action Shotgun?

When you run a pump gun fast, your hand might slip rearwards and off the pump or into a compromised grip. That’s not an issue with the giant Supernova pump.

I use a push/pull technique to mitigate recoil. The texturing, shape, and length grant me a rock-solid grip to push forward on the pump and help maintain control.

That long pump design also grants me more gun to grip. I injured my shoulders pretty bad when I was younger, and sometimes running a standard pump shotgun hurts.

Benelli SuperNova Tactical Review: Best Home Defense Pump-Action Shotgun?

The longer pump allows me to grip closer to the receiver and resists stretching my arms out.

It’s less weight on my shoulders and a much more comfortable experience.

What Sets It Apart?

The earlier Nova was a great gun, but not perfect. Benelli’s SuperNova took the criticisms of the Nova and perfected it.

The Nova featured a one-piece construction receiver and stock, so switching stocks wasn’t an option.

Benelli SuperNova Tactical Review: Best Home Defense Pump-Action Shotgun?

With the SuperNova, you can swap stocks. Additionally, the trigger guard is fairly large and accommodates gloved hands better.

The stock included with the SuperNova is Benelli’s famed Comfortech design which claims to reduce recoil.

The SuperNova comes with a shim kit that allows you to adjust drop and cast on the gun. It’s an interesting idea and handy for those who like things to fit just right.

How it stands apart from the Nova is one thing, but how does it stand apart from all the other guns on the market?

The most obvious difference is the polymer receiver. As far as I know, it’s the only pump gun with a polymer receiver.

Benelli SuperNova Tactical Review: Best Home Defense Pump-Action Shotgun?

You might ask if this is a concern, will the polymer receiver crack under pressure?

Well, the Nova and SuperNova have been kicking around for over a decade, and that hasn’t been an issue. Obviously, some metal sits into the receiver and forms a skeleton frame.

Polymer’s cool, but that’s not the only awesome feature. The super-long pump is interesting and allows for a whole lot of grip on the gun. Most guns have a space between the pump and the receiver, and the SuperNova does not.

Benelli SuperNova Tactical Review: Best Home Defense Pump-Action Shotgun?

In fact, the pump goes so far back that it overlaps the receiver by about a quarter inch. The long pump means shooters with short and long arms can easily use the gun. We aren’t done with the pump yet, either.

In the center of it sits a magazine cutoff device. It’s a button that, when pressed, prevents a shell from feeding into action. This is handy when you need to switch loads on the fly.

The SuperNova also chambers 3.5-inch shells, which is rare for a shotgun.

Benelli SuperNova Tactical Review: Best Home Defense Pump-Action Shotgun?

While 3.5-inch shells aren’t commonly used for defensive shooting, it’s always nice to have more versatility. The SuperNova could easily be a hunting shotgun, even if it’s a “tactical” model.

By The Numbers

Accuracy: 5/5

It’s a shotgun that does shotgun things. The big sights make it easy to aim and easy to adjust for using slugs of high-end buckshot. I give the gun major credit for that.

Reliability:5/5

Pump-action shotguns are inherently reliable. However, the Supernova takes it a step further with a rotating bolt that flings those shells out of the gun with reckless abandon.

Customization: 2/5

Mesa makes a stock and a side-saddle, and that’s about it. Not a lot you can do besides add an optic and extend the magazine tube. If you want customization, a Mossberg or Remington will take you a lot further.

Value: 4/5

It’s not as cheap as a basic Mossberg or Remington Express. They tend to cost right around 870 Magpul or Mossberg 590 prices. Although, you get a much more modern shotgun. It’s by far the cheapest Benelli.

Ergonomics: 4/5

The ergonomics mostly rule. I love the pump design, I love the huge ejection and loading port, and I love the reversible safety and the shim kit to change drop and cast. I don’t love the length of pull, though.

Overall: 4/5

The Benelli SuperNova is one helluva shotgun. It’s a sweet pump-action design that brings innovation into a market that hasn’t moved far beyond the 1960s.

Upgrades for the Benelli SuperNova Tactical

Unfortunately, there are not really a lot of upgrade options for the Benelli SuperNova. Mesa makes a great stock that shrinks the LOP down to 12.5 inches and adds a pistol grip.

Mesa also makes a nice side saddle that provides Picatinny rail and space for storing up to 6 shells.

Other than those two, however, there’s not much out there.

Final Verdict

On paper, the Benelli looks solid, and it’s not just good looks. At the range, it performs very well.

I’ve handled lots of pump-action shotguns, but I don’t think I’ve ever had an action as smooth or as light as the SuperNova’s. This includes a direct comparison to my 1971 Remington Wingmaster.

Benelli SuperNova Tactical Review: Best Home Defense Pump-Action Shotgun?

I’m surprised at how rarely I see the SuperNova mentioned in modern shotgun discussion. It’s a well-built, modern, and easy shooting gun. Benelli put the same innovation in it that they do all their guns.

It’s well on its way to becoming my favorite shotgun and might become my home defense gun sooner rather than later.

Have you shot the Benelli SuperNova? What did you think? Share your thoughts in the comments below. Want more tactical-style shotties? Check out our Best Home-Defense Tactical Shotguns.

Why do deer dash in front of vehicles?

0

“Why do deer risk their lives in front of speeding cars? Exploring the mysterious behavior that drives these majestic creatures into harm’s way, this headline delves into the intriguing reasons behind why deer have a tendency to dart across roads, posing a dangerous situation for both drivers and themselves. Uncover the factors at play and gain insights into this puzzling phenomenon.”

1. Understanding the Behavior: Why Do Deer Run in Front of Cars?

1. Understanding the Behavior: Why Do Deer Run in Front of Cars?

Deer running in front of cars is a common occurrence, and understanding their behavior can help drivers better anticipate and avoid collisions. Here are some reasons why deer may run in front of cars:

1. Sudden Movement: Deer are known for their quick and unpredictable movements. They may suddenly dart across the road without warning, making it difficult for drivers to react in time.

2. Territorial Instincts: During mating season, male deer become more aggressive and territorial. They may chase females or engage in fights with other males, leading them to cross roads in search of a mate or to defend their territory.

3. Foraging Patterns: Deer are herbivores and rely on vegetation for food. They often graze near roadsides where grass and plants are abundant. This puts them at risk of crossing roads while searching for food.

4. Habitat Fragmentation: As urban areas expand, natural habitats for deer are being fragmented by roads and development. This forces deer to navigate through unfamiliar territories, increasing the likelihood of encounters with vehicles.

To mitigate the risk of deer collisions, drivers should remain vigilant, especially during peak activity times such as dawn, dusk, and nighttime hours. Additionally, using high beams when driving in low-light areas can improve visibility and allow drivers to spot deer from a greater distance.

Tips to Avoid Deer Collisions:

– Upgrade your headlights to LED or HID bulbs for improved visibility.
– Be cautious when driving on roads bordered by woods or vegetation.
– Slow down if you spot a deer as they often travel in groups.
– Look out for glowing yellow eyes that indicate the presence of a deer.
– Pay attention to road signs indicating high deer populations.
– Use high beams when driving in low-light areas but remember to dim them for approaching vehicles.
– Be alert for recently killed deer on the side of the road, as more may be nearby.

In the event of a deer running in front of your car, it is crucial to prioritize your safety and take necessary precautions. Stay in your lane and apply the brakes evenly until you come to a stop. Avoid swerving into oncoming traffic, as this can lead to more severe accidents.

If a collision with a deer does occur, pull over if possible and ensure everyone in your vehicle is safe. Refrain from approaching or touching the injured deer, as they may be disoriented and pose a risk. Instead, contact the police to report the incident.

It is also important for drivers to review their auto insurance policies, especially comprehensive coverage, which may provide coverage for damage caused by animal strikes. By having appropriate insurance coverage, drivers can protect themselves financially in case of such accidents.

To ensure you have the right coverage for your car, you can log in to your Progressive account or call 1-866-749-7436. Progressive offers online auto insurance quotes and personalized assistance to help drivers find suitable coverage options.

Overall, understanding deer behavior and implementing preventive measures can significantly reduce the chances of collisions with these animals while driving. Stay alert, drive cautiously, and prioritize safety on the road.

2. The Science Behind Deer Behavior: Explaining Their Tendency to Run in Front of Cars

2. The Science Behind Deer Behavior: Explaining Their Tendency to Run in Front of Cars

Deer are known for their tendency to run in front of cars, causing accidents and damage. Understanding the science behind their behavior can help shed light on why they behave this way.

One reason deer may run in front of cars is due to their natural instincts. When faced with a potential threat, deer have a flight response, meaning they instinctively try to escape by running away. This flight response is triggered when they perceive danger, such as the sound or sight of an approaching vehicle. Unfortunately, this often leads them to run directly into the path of oncoming cars.

Another factor that contributes to deer running in front of cars is their limited depth perception. Deer have eyes positioned on the sides of their heads, which gives them a wide field of view but reduces their ability to judge distances accurately. As a result, they may misjudge the speed and distance of an approaching car, leading them to make poor decisions when crossing roads.

Additionally, mating season plays a role in deer-related accidents. During the breeding season from October to January, male deer become more active and aggressive as they compete for mates. This increased activity puts them at higher risk of crossing roads and colliding with vehicles.

To mitigate the risk of deer accidents, it’s important for drivers to be aware of these behavioral patterns and take necessary precautions. Slowing down during dawn, dusk, and nighttime hours can help reduce the likelihood of encountering deer on the road. Being vigilant and keeping an eye out for glowing eyes or recently killed deer can also provide valuable warning signs.

In conclusion, understanding the science behind deer behavior can help drivers anticipate their actions and take appropriate measures to avoid collisions. By being aware of when and where deer are most active and implementing safety measures like upgrading headlights and staying alert while driving at night, motorists can reduce the risk of accidents and ensure the safety of both themselves and these majestic creatures.

3. Unveiling the Mystery: Reasons Behind Deer Running in Front of Cars

3. Unveiling the Mystery: Reasons Behind Deer Running in Front of Cars

Deer running in front of cars is a common occurrence that can result in accidents and damage to vehicles. Understanding the reasons behind this behavior can help drivers be more prepared and cautious on the road.

One reason why deer may run in front of cars is due to their natural instinct to flee from perceived threats. When startled or scared, deer will often run in a straight line, which can unfortunately lead them directly into the path of oncoming vehicles. This instinctive response is heightened during mating season when deer are more active and prone to sudden movements.

Another factor that contributes to deer running in front of cars is their habitat and environment. As human development expands into natural areas, deer populations are increasingly forced to navigate through unfamiliar territories, including roads and highways. This increased interaction with roadways puts them at a higher risk of colliding with vehicles.

Additionally, certain weather conditions can influence deer behavior and increase the likelihood of encounters with cars. For example, heavy rain or snowfall can disrupt their usual patterns and force them onto roadways in search of food or shelter.

To mitigate the risk of collisions with deer, it is important for drivers to remain vigilant, especially during peak activity times such as dawn, dusk, and nighttime hours. Following the tips mentioned earlier, such as upgrading headlights and reducing speed when encountering wooded areas or deer crossing signs, can greatly reduce the chances of an accident.

In conclusion, understanding why deer run in front of cars can help drivers anticipate their behavior and take necessary precautions on the road. By being aware of their natural instincts, habitat encroachment, and how weather conditions may affect their movements, drivers can better protect themselves and avoid collisions with these unpredictable animals.

4. Decoding Deer Behavior: What Causes Them to Run in Front of Cars?

Deer are known for their unpredictable behavior, especially when it comes to running in front of cars. Understanding the reasons behind this behavior can help drivers take necessary precautions to avoid accidents.

Factors that cause deer to run in front of cars:

  1. Territorial instinct: During mating season, male deer become more aggressive and territorial. They may chase other animals or vehicles, leading them to run across roads without warning.
  2. Escape response: When startled or frightened, deer have a strong instinct to flee. If they perceive a car as a threat, they may panic and run directly into its path.
  3. Poor depth perception: Deer have limited depth perception, which means they may misjudge the distance and speed of approaching vehicles. This can result in them running into the path of an oncoming car.
  4. Habitat fragmentation: As urban areas expand and encroach upon natural habitats, deer are forced to navigate unfamiliar territory. This increases the likelihood of them crossing roads and encountering vehicles.

It’s important for drivers to be aware of these factors and adjust their driving habits accordingly. By understanding why deer behave the way they do, drivers can take proactive measures to reduce the risk of collisions with these animals.

5. Deer and Car Collisions: Exploring the Factors that Lead to Run-Ins

5. Deer and Car Collisions: Exploring the Factors that Lead to Run-Ins

Deer and car collisions are a common occurrence, with over one million accidents involving deer each year. These accidents result in approximately $1 billion in damages. It is important to understand the factors that contribute to these run-ins in order to reduce the chances of hitting a deer while driving.

Factors Contributing to Deer and Car Collisions

1. Location: While it is commonly believed that deer accidents only happen in rural areas, they can occur anywhere, including suburban areas and highways. However, living in a rural area does increase the likelihood of encountering a deer on the road.

2. Time of Day: Deer are most active during dawn, dusk, and a few hours after sunset. These low-light conditions make it difficult for drivers to spot them on the road.

3. Mating Season: Deer mating season occurs from October to January, during which they are more prevalent on roads. Animal strike claims are more than twice as likely in November compared to other times of the year.

Tips for Avoiding Deer Accidents

To minimize the risk of hitting a deer while driving, consider following these tips:

1. Upgrade your headlights: LED or HID bulbs produce brighter lights than traditional halogen bulbs, making it easier to spot animals from a distance.

2. Be cautious near wooded areas: If you are driving on a road surrounded by woods, be aware that deer could be lurking just out of sight, ready to dash across the road.

3. Slow down: Since deer usually travel in groups, if you spot one on the road, there may be more nearby. Reduce your speed and be prepared for additional deer crossing.

4. Look for glowing eyes: Deer have yellow eyes that appear to glow in the dark. If you see glowing eyes, assume it is a deer and slow down.

5. Pay attention to road signs: Deer crossing signs indicate areas with a high deer population. Stay vigilant when driving through these areas.

6. Use high beams: In low-light areas with minimal or no streetlamps, use your high beams for better visibility. However, remember to switch them off when approaching other vehicles.

7. Watch out for recently killed deer: If you come across a recently hit deer on the side of the road, be aware that there may be others nearby.

Actions to Take if a Deer Runs in Front of Your Car

If a deer suddenly appears in front of your car, take the following steps:

1. Blow your horn: Honking your horn can startle the deer and potentially scare it away from the road.

2. Stay in your lane: Avoid swerving into oncoming traffic if you see a deer. Instead, stay in your lane and apply the brakes evenly until you come to a stop.

Dealing with an Accident

If despite your efforts, you end up hitting a deer, follow these actions:

1. Pull over safely: If possible, pull over to ensure the safety of yourself and others in the vehicle.

2. Seek medical attention if necessary: If anyone in the car requires medical assistance due to injuries sustained from the collision, seek immediate medical attention.

3. Do not touch the deer: Disoriented and injured animals can be dangerous. Avoid approaching or touching the deer and instead contact local authorities or animal control.

4. Check your auto policy: If you have comprehensive coverage on your auto insurance policy, you may be covered for damages caused by hitting an animal like a deer (minus your deductible).

By understanding when and where deer are most active and taking precautions while driving, you can reduce the likelihood of encountering a deer on the road and minimize the risk of a collision.

6. Avoiding Car Accidents with Deer: Insights into Why They Run in Front of Vehicles

6. Avoiding Car Accidents with Deer: Insights into Why They Run in Front of Vehicles

Deer accidents are a common occurrence on the roads, causing significant damage and posing a risk to both drivers and the animals themselves. Understanding why deer run in front of vehicles can help drivers take necessary precautions to avoid such accidents.

One reason why deer may run in front of vehicles is their natural instinct to flee from perceived threats. When startled or scared, deer often react by running away, sometimes directly into the path of oncoming cars. This behavior is particularly common during mating season when deer are more active and prone to sudden movements.

Additionally, deer are attracted to certain areas that provide them with food and shelter. Roads that pass through wooded or rural areas are more likely to have higher deer populations, increasing the chances of encountering them while driving. It’s important for drivers in these areas to be extra vigilant and cautious.

To reduce the risk of hitting a deer, there are several steps drivers can take:

1. Be aware of the times when deer are most active: Dawn, dusk, and a few hours after sunset are peak times for deer activity. Drivers should exercise extra caution during these periods.

2. Upgrade headlights: Using LED or HID bulbs instead of traditional halogen lights can improve visibility on the road, making it easier to spot animals from a distance.

3. Slow down and stay alert: If one deer is spotted, there may be others nearby. Slowing down allows for better reaction time if additional deer suddenly appear.

4. Look for glowing eyes: Deer have yellow eyes that appear to glow in low light conditions. If you see glowing eyes along the roadside, assume it’s a deer and reduce your speed.

5. Pay attention to road signs: Areas with high deer populations often have warning signs indicating potential crossings. These signs serve as a reminder for drivers to be cautious and watch out for deer.

6. Use high beams in low-light areas: When driving in areas with limited lighting, using high beams can improve visibility. However, drivers should be mindful of turning them off when approaching other vehicles.

In the unfortunate event of a deer running in front of your car, it’s important to take certain steps to protect yourself and minimize damage:

1. Stay in your lane: Swerving to avoid a deer can lead to more dangerous situations, such as colliding with oncoming traffic. It’s best to stay in your lane and apply the brakes evenly until you come to a stop.

2. Pull over if possible: If it’s safe to do so, pull over after the incident to ensure everyone in the vehicle is okay and assess any damage.

3. Do not approach or touch the deer: Injured or disoriented deer can be unpredictable and may pose a danger if approached. Instead, contact local authorities or animal control to handle the situation.

4. Check your insurance coverage: If you have comprehensive auto insurance coverage, you may be protected against damage caused by animal strikes. Review your policy and contact your insurance provider for further information.

By understanding when and where deer are most active and taking necessary precautions while driving, drivers can reduce their chances of hitting a deer and keep themselves safe on the road.

In conclusion, the behavior of deer running in front of cars can be attributed to a combination of factors such as instinctual responses to perceived threats, lack of awareness of vehicles, and habitat encroachment. Understanding these reasons can help drivers anticipate deer crossings and take necessary precautions to minimize accidents.

Review: Schnee's Beartooth 200g Boots

0

Initial Impression “Are we hiking or are we hunting?” is a refrain I hear all too often at elk camp, usually as I charge up a mountain to warm my frozen toes. But if I sit down, the snacks and crinkly wrappers come out. Then we’re really not hunting. Enter the fully-insulated Beartooth 200g boot from Schnee’s. I’ll finally be able to sit still for a few minutes this fall—and they’re damn good for hiking, too.

Break-In Like most hunters in the area, my list of places to explore burgeons faster than I can cross spots off. This summer, I made it a priority to start checking out my areas of interest, most of which were high-alpine basins—the kind frequented by big mule deer bucks. Lacing up my new boots, I figured I could knock out two birds with one stone: find some big ol’ bucks, and break in my Beartooths. After dozens of miles, I accomplished only the latter. The deer proved elusive, but my boots are comfortable as ever.

Now, when I slip on my leathers, it’s like sitting down for a home-cooked pot roast after a cold winter day in the woods. I almost want to let out a sigh of relief. They’re comfortable and familiar, the leather melded perfectly to the shape of my feet. They almost feel like an extension of my body. I’ve tried dozens of different styles over the years, and finding the Goldilocks boot is an eternal challenge. But thanks to the Beartooth, I’ve finally found my new go-to.

What I Like The thing I appreciate most about the Beartooth is the soft sole (a flex two rating, on Schnee’s four-point scale). There’s been a push amongst major boot brands lately to make lighter weight boots with extremely stiff soles. Essentially, adapting alpine sheep-hunting boots to elk hunting—which results in boots that are fine for steep, rocky terrain, but not ideal for long hikes. For high-mileage situations, softer soles are the key to comfy feet. Think about it: trail-running shoes and everyday hiking boots have a large amount of flex, but are rigid in a few key spots. Those features make them comfortable to hike or run long distances in, and give the shoes better ground contact. The Beartooth feel like a sturdier, insulated version of a summer hiking boot or trail runner, making them ideal for hiking long distances in rain, snow, or shine.

The other thing I’ve noticed is how Schnee’s cleverly avoided a common pinch point that forms on the front of most mid-calf hunting boots. Instead of a single piece of rigid leather along the heel (like most other brands), the Beartooth’s have an oval-shaped soft spot stitched into the back. When the boot flexes as I hike, the leather compresses in that spot, eliminating any kind of pinching on the front—pretty clever, Schnee’s!

A Quality Boot Finally, the overall build quality of these boots jumps out immediately. Not a single stitch is out of place, and the leather is top-quality. I’ve been rocking a pair of uninsulated Beartooths for three seasons now (with heavy use) and haven’t encountered a single issue. And, the longer I wear them, the comfier they get—to the point of dreading taking them off at the end of the day in camp. I know that the 200g version is going to perform similarly this fall, even on the coldest of days in the Montana high country or on the prairie.

$480; schnees.com.

Brow Tine Deer: Things to Know?

0

Have you ever seen those unique-looking points extending from the red deer’s antlers? Those elegant and sharp curves are referred to as a brow tine.

But what exactly is a brow tine, and what purpose does it serve?

In this article, we will discuss all there is to know about the brow tine deer. Now, without further ado, let’s get started.

What is a Brow Tine on a Deer?

The brow tine is the first point where the antler branches off from the main beam. It is located near the base of the antlers, just above the deer’s eyes. The brow tine is an essential feature for hunters who are looking to identify and target a specific deer.

Brow Tine Deer: Things to Know

It serves as an indicator of a buck’s maturity and overall health.

Antlers are one of the most distinctive features of male deer, and they play a crucial role in many aspects of their lives, from mating rituals to self-defense. Antlers are made of bone, and they are shed and regrown every year.

Deer Antler Terminology – A Quick Overview

Deer antlers are a fascinating and complex feature of male deer. They play an important role in many aspects of the deer’s life, from mating to self-defense. Antlers are made of bone and are shed and regrown every year.

They grow in a branching pattern, with each branch having a specific name and location. Here’s a quick overview of some of the most common antler terminology:

Antler TermDescription

What Age Do Deers Get Brow Tines?

Brow tines typically emerge when a male deer reaches maturity. Brow tines can also appear in some deers as early as four or five months old.

However, there is a considerable variation in the deer population. The difference in growth patterns can be due to genetic factors. But it can also be due to nutrition and environmental conditions.

Here’s a brief data interpretation on brow tines in deers.

Brow Tines in Mature Bucks:

Brow Tines in mature bucks are an interesting aspect of deer anatomy. Brow tines represent the maturity and age of the animal.

Brow Tine Deer: Things to Know

As bucks mature, their brow tines tend to grow larger. Hence, making it easy to differentiate from those of their younger counterparts.

Larger & Defined Brow Tines:

As a deer matures and thrives in its environment, its brow tines tend to become more distinct and sizeable.

Brow Tine Deer: Things to Know

Hunters can use this information to make informed decisions about which deer to target, based on factors such as the size and age of the animal.

Why Some Deer Grow Brow Tines and Others Don’t

Not all bucks will grow brow tines, and some bucks may have smaller or less defined tines. The size and shape of the tine can also vary between species of deer.

For example, mule deer tend to have more prominent brow tines than white-tailed deer.

Despite these variations, the brow tine remains a valuable feature for hunters and wildlife enthusiasts alike. It serves as a visual indicator of a deer’s age and health, and it adds to the overall beauty and majesty of these magnificent animals.

Scoring Deer: Do You Count the Brow Tines on a Deer?

Deer hunting is a popular activity for many hunters, and for some, scoring the deer they take down is an important part of the experience. Scoring a deer involves measuring and adding up the length of each tine on the deer’s antlers, along with the length and width of the main beam.

While there are several different methods for scoring deer, one question that often arises is whether or not to count the brow tines when tallying up the total score.

In general, the more tines a deer has, the higher its score will be. However, not all tines are created equal, and some may be longer or wider than others, which can also affect the overall score.

When scoring a deer, it’s important to follow the guidelines set forth by the organization or competition in which you are participating.

Conclusion:

The brow tine is an important feature of deer antlers, as it serves as a visual indicator of the animal’s age and health. It can vary between species, with mule deer generally having more prominent brow tines than white-tailed deer.

Understanding the different features of deer antlers can help us better appreciate these magnificent animals and gain a deeper appreciation for wild creatures in general.

Do all Bucks have brow tines?

No, not all bucks have brow tines. While most bucks do have brow tines on their antlers, there is a small percentage of bucks that are genetically programmed to not produce brow tines.

However, it’s important to note that this trait is not necessarily passed along to their offspring, as antler potential is also influenced by the genetic contribution of the does.

Do whitetail deer have brow tines?

Yes, whitetail deer do have brow tines on their antlers. In fact, a single brow tine, also known as an “eye guard,” is commonly present on each antler, although it is not always guaranteed.

In addition to the brow tine, a typical mature rack for a whitetail deer will have two to four other tines per antler, along with the beam tip, resulting in a total of 4 to 6 points on each side.

Will a deer without brow tines ever grow them?

It is unlikely that a deer without brow tines will ever grow them, particularly if it is genetically programmed to not produce them. In the case of whitetail bucks, research has shown that if a buck has spiked as his first set of antlers, he has a 90 percent chance of developing into a buck with missing brow tines later in life.

How do you measure brow tines on a deer?

To measure brow tines on a deer, start by identifying the G-1 tine, also known as the brow tine, on each antler. Measure the length of the brow tine from the front to the tip of the tine.

If the tine splits into multiple branches, measure the length of the dominant branch. The other end of the split is considered an abnormal point and should be counted as a separate point.

Regardless of the number of points on the antlers, it is important to take four circumference measurements per side.

Do brow tines count?

Whether brow tines count towards the total point score of a deer depends on the specific scoring system being used.

In some scoring systems, such as the Boone and Crockett Club scoring system for mule deer, the brow tine or eye guard is not counted when determining the total number of points on the antlers.

This is because traditionally, mule deer have been counted using one side only, and a typical mule deer has four points on one side with brow tines. However, in other scoring systems, such as for whitetail deer, all the points on the antlers are typically counted, including the brow tines.

What makes a drop tine on a deer?

A drop tine on a deer is a tine on the antlers that grows downward instead of upward or outward. In most cases, drop tines are caused by genetic coding, meaning they are a natural variation in the buck’s genes.

While prior injuries can cause a buck to grow weird antlers, true drop tines are mostly the result of a whitetail buck’s genetics.

However, it’s important to note that not all deer will necessarily develop a drop tine, even if they have the genetic potential to do so. Other factors, such as age, nutrition, and overall health, can also influence antler growth and the development of drop tines.

What are G tines on a buck?

G tines are a way of referring to the tines or points on a buck’s antlers. Specifically, the brow tines are commonly referred to as G1 tines, and the next tine on the antler is referred to as the G2, followed by the G3, and so on.

The length of the G2 and G3 tines on a whitetail deer are often the most significant in terms of scoring, although this can vary depending on the specific antler configuration. When scoring a buck’s antlers, each tine or point is measured and added to the total score.

What Fuel do I use for my Lantern/Lamp? — The Source for Oil Lamps and Hurricane Lanterns

0

The simple solution is to consult the list of approved fuels below. However, for a more comprehensive understanding, it is important to consider three essential factors when determining the suitability of a fuel. If you have doubts about whether a fuel is appropriate for use, please refer to these three major criteria below.

The fuels approved for both indoor and outdoor use in Tubular Lanterns and Flat Wick Oil Lamps are as follows:

Indoor Use:

1. Lamplight Farms® Clear Medallion Brand Lamp Oil , (#60020, #60003 aka #6300, #60005 aka #6400, and #6700 Only) Flash Point: 145 Degrees Fahrenheit

2. W.M. Barr & Co. Klean-Heat® Kerosene Substitute (#GKKH99991, 128oz, sold by Home Depot SKU #391-171) Flash Point: 145 Degrees Fahrenheit (Do Not Purchase Klean-Strip 1-K “Kerosene”)

3. Genuine Aladdin® Brand Lamp Oil (#17552, 32 oz., and #17554, 128 oz.) Flash Point: 141 Degrees Fahrenheit

4. MVP Group International Florasense® Brand Lamp Oil (#MVP73200, 64oz. and #MVP73201, 32 oz., Sold by Wal-Mart ) Flash Point: 142 Degrees Fahrenheit (Purchase only the clear unscented version of this fuel.)

Outdoor Use:

1. Non-Dyed (Clear) Kerosene with a Flash Point Between 124 and 150 Degrees Fahrenheit

2. Coleman® Brand Kerosene Fuel (#3000000270) Flash Point: 130 Degrees Fahrenheit

3. Crown® Citronella Torch and Lamp Fuel (#CTLP01, #CTLP02, #CTLP48) (OUTDOOR USE ONLY, cut 50:50 with kerosene to extend wick life.) Flash Point: 141 Degrees Fahrenheit

4. Tiki® Brand Citronella Torch Fuel (OUTDOOR USE ONLY, cut 50:50 with kerosene to extend wick life.) Flash Point: 145 Degrees Fahrenheit

3 Requirements for a Safe Fuel:

Flashpoint,

Viscosity,

Purity.

Lets go over each characteristic.

Flashpoint: The Temperature at which the fuel will give off enough vapors that they can be lit in air. This is a critical measurement, if the fuel you have has too low of a flashpoint, the fuel in the tank can heat up past the flashpoint and create enough vapor in the oil tank that will ignite from the flame. This will either cause a blow torch affect, and adjusting the wick will not fix the issue, or the flame could simply ignite the fuel in the tank and cause an explosion. This is why using the correct fuel is VERY IMPORTANT.

Dangerous Fuels Include: Gasoline, Coleman Fuel, White Gas, Paint Thinner, Mineral Sprits, Wood Alcohol, Naphtha, Turpentine, Benzene and any other fuel with a flash point under 124 degrees F.

If a lantern ever has a flame which you can not control, immediately place a bucket over the lantern to kill off the oxygen supply to the lantern. You can also bury the lantern in dirt or sand to kill airflow.

Note: Center Draft Oil Lamps often warm the oil more in usual operation and thus we suggest a slightly higher flashpoint fuel for these lamps if a lamp shows signs of acting as a runaway with any approved fuel listed above. Fuels around 145 to 175 Degrees F should suffice.

Viscosity: The Thickness of the liquid does matter as well, proper Kerosene and Lamp Oil need to be very thin for the cotton wick to carry the fuel to the flame fast enough. If the fuel is thicker, the cotton will struggle to do it’s job, the top of the wick will dry out and the flame will then start burning the wick instead of the fuel. This will cause soot to come off of the flame, as well as more poisonous Carbon Monoxide.

Incorrect Fuels Include: Paraffin oil*, Olive Oil, Vegetable Oil, Canola Oil

Any food grade fuel, as well as fuels that contain Citronella. Citronella can be used in oil lanterns only outdoors, but must be mixed with Kerosene 50-50 to thin out the fuel.

Purity: The purity of a fuel matters as well. If a fuel is a pure oil, usually of Petroleum, and follows the other two rules above, it is a good fuel to use in Tubular Lanterns and Flat Wick Oil Lamps.

Fuels that are impure can include those with dyes to color the fuel, Fuels with added scents to make them smell different. This also includes Paraffin Fuel, and Citronella.

Paraffin in the U.K. is kerosene. Paraffin Oil in the UNITED STATES is Liquid Candle Wax , and is mis-labeled for use in oil lamps and lanterns, when in fact it is only suited for Candle Oil Lamps that use small diameter (under 1/4”,) round wick. 99% or 100% Paraffin Oil is NOT designed or suitable for use in tubular lanterns or oil lamps that use flat wick, or Kosmos or Matador type oil lamps. Further, it burns only 1/2 as bright of any of the approved fuels listed above. Paraffin oil has a much higher viscosity and a flash point of 200 degrees or higher, as compared to the flash point of 150 degrees for kerosene. These differences inhibit the necessary capillary action of the wick, and will cause Lamps and Lanterns with 3/8″ or larger wick to burn improperly and erratic. This is because the Paraffin Wax and any other contaminates will clog the wick as the Cotton acts as a filter for the lantern. When the Wick Clogs, the flame will dry the top of the wick and burner the cotton instead. When that occurs, excess amounts of Carbon Monoxide are produced, which is a poisonous gas.

Once a wick is contaminated with paraffin oil, it must be replaced in order for the lantern to burner properly. If you must use paraffin oil, it may be mixed 1:10 to 2:10 (one to two parts paraffin,) to ten parts standard lamp oil or kerosene so that it will burn satisfactorily. Paraffin Oil is sold in the United States under the following trade names, which should be avoided except for use with lamps or lanterns with 1/4” Round of 3/8″ flat or smaller wick:

Aura OilCrown RoyalFirelight GlassOrvis Lamp FuelNorthern LightsNorthwestPure LiteRecochem Ultra-Clear Lamp OilSoft LightTropical LightsUltra-PureWeems & Plath

CAUTION:Diesel and Aviation fuel should not be used in any wick lamp or lantern as the fumes from fuel additives can be FATAL if inhaled.

THE MINIMUM RECOMMENDED FLASH POINT FOR KEROSENE FOR USE IN OIL LAMPS AND LANTERNS IS 124 DEGREES FAHRENHEIT.

How Many Shots Can I Get from a CO2 Cartridge?

0

The most common question people tend to ask when they first experience a CO2 air gun, is how many shots they can get from one cylinder. I would like to be as specific as I possibly can drawing my experience from the use of air guns. However, there is no single answer to this question. It varies depending on the air gun and the size of the CO2 cartridge you are using.

There are also so many other reasons that may lead to a long-winded answer. In this article, we will highlight everything you need to know about CO2 cartridges so that we can understand how CO2 air guns work and how to get the most from a single cartridge.

How Many Shots Can I Get from a CO2 Vessel?

The number of shots one expects from a CO2 vessel ultimately depends on the amount of gas used to create the velocity in each shot. The general rule that follows is that a CO2 canister powered pistol will give anywhere between 50 to 100 if all parts are functioning at top levels. However, you should expect far fewer shots when using a CO2 powered rifle as it takes more power hence more CO2 to give greater velocity and range. A rifle powered with CO2 gas will deliver between 40 to 50 shots per canister.

When considering CO2 powered air guns, you should note that it is a refrigerant gas and will therefore cool as it expands. What this implies is that when you fire your air gun in quick succession the canister will become cooler and hence lose velocity on subsequent shots. The gas in the cylinder loses its pressure as it becomes cooler.

As a rule, air gunners avoid rapid shooting when using CO2 powered air guns. Once pressure decreases and velocity falls it becomes more challenging to hit the same targets at the same distances which make target training almost impossible.

However, when using CO2 powered air guns, the ability for it to get back to its normal temperature is not long. Some take between 11-15 seconds while others may take an even shorter time if the temperature is ambient enough. But do not let temperature dissuade you from getting a CO2 powered rifle. Besides these minor setbacks, CO2 powered air guns have consistent velocities if you can keep the CO2 in its liquid state.

How Long Will my 12-gram CO2 Cartridge Last?

Again, the answer varies and you will see why later in the article. But the answer is not a fixed number and one 12-gram CO2 cartridge can, therefore, deliver around 30 to 200 shots from an air gun. The reason there is so much variation has everything to do with the nature of the CO2 gas and how other factors influence the outcome of your shots.

Factors That Determine How Much Co2 Used While Shooting a Co2 Air Gun.

Temperature

Temperature affects the number of shots a Co2 canister can deliver. The reason is simple, for Co2 gas to expand, there must be heat. Therefore, the more heat there is available the more shots you will get from your air gun. The reverse is also true. When shooting your air gun in extremely cold weather there are chances that the CO2 will freeze up and your air gun fails to fire.

The warm temperature will give you more power and also probably more shots from your CO2 canister. Therefore, it is advisable to consider the area you live in before investing in a CO2 air gun.

CO2 Canister Size:

When using a CO2 air gun, the more shots you take consistently the cooler the canister and the CO2 inside the canister become. As already discussed, each time you fire your CO2 powered air gun the canister becomes cooler as it gets used up.

What this implies is that when you have a smaller canister it will cool much faster than that with a higher capacity. So, when using a smaller canister like the 12-gram CO2 cartridge, always take rest between shots to make the air gun more efficient and achieve consistent velocities. A 12-gram CO2 cartridge may only give you between 20-30 good shots before you must let it warm up a bit and then take other shots.

Some CO2 air guns in the market can deliver more shots and probably take longer to cool down. An example is the 88-90-gram CO2 tanks that allow users to enjoy a rapid-fire in target shooting before having to wait for it to warm up again. Some manufacturers still maintain the 12-gram size tanks but offer a dual canister. The result is that you will fire better and probably more than a single 12-gram cartridge would. Also, there will be more shots between each warm-up time because of the dual capacity.

Semi and Full Auto

The market has both semi and full auto CO2 powered air guns. It sometimes beats logic as one might wonder how effective a full-auto CO2 powered air gun would be if rapid-fire affects the velocity leading to poor performance.

It is tempting to shoot fast anytime you have a semi or full auto air gun and this is a great dilemma for rapid shooters. One reason that makes full auto air guns ineffective is when they use CO2 to power the shots. It gets worse if you consider a full auto air gun that uses a 12-gram Co2 canister to power its shots.

For instance, let’s consider the KWC Mini UZI that can fire both in the semi-auto and full-auto mode yet it uses only a single 12-gram CO2 canister. When using the KWC Mini Uzi in semi-auto mode, you should expect at least two rounds of 25 shots only if you allow it to warm up between reloads.

The same KWC Mini Uzi when shooting in full auto mode you should only expect one magazine of shots before it cools down. After the reload then you should consider switching back to semi-auto mode. Well, this is if only you want to get half a magazine of shots before the canister becomes depleted.

Shooting Pace

When shooting in semi-auto or full auto mode, you can decide to take time and fire single shots to become more precise. The more pace you have in between shots the lesser shots you will get from a single canister.

You should take time between shots if you want more power from your air gun. The only way to avoid getting fewer shots is to also avoid the temptation of blasting shots regardless of the air gun you are using. An alternative is enjoying your blast from your semi or full auto air gun but stocking up more CO2 cartridges.

CO2 Valve Settings

On almost all CO2 air guns there must be a valve that regulates how much CO2 will be used. The valve setup is a simple one that opens up once the hammer is dropped for only a brief period to allow CO2 to escape the canister and into the barrel and breech area. What follows is that the gun propels the air pellet, BB, or Airsoft round in the chamber.

The power of the shot is determined by how long the valve stays open and the amount of CO2 used. The higher the CO2 the valve releases, the higher the velocity but also fewer shots from a single cartridge.

How Exactly Does the CO2 Work?

Understanding CO2 Cartridge Pressure

There are many air gun enthusiasts that feel the pressure concerning how a CO2 powered rifle works. Even though many understand that they need pressure some do not think beyond loading the cartridge and taking shots.

Now that we already know how to maximize your CO2 cartridge to get more shots, we must understand how the process begins.

When CO2 gas is compressed in a canister it can power an air gun to fire pellets at significant velocities. CO2 is a gas that can turn to liquid when mechanically compressed. Because of this unique nature, the CO2 gas can achieve higher pressure of up to 852.8 psi especially if it combines with an ideal temperature of about 70 degrees Fahrenheit.

If you have an air gun, the ideal pressure should be a minimum of 850 to 900 psi. Therefore, the CO2 powered air gun can reach these pressures comfortably. The pressure is also affected by temperature and the state of the CO2 when fired. You will get higher pressures from your cartridge if the CO2 is mostly liquid compared to gas when you fire.

CO2 is a complex substance that can form solid to a gas without necessarily passing through the liquid state. What this means is that the pressure inside the canister is a result of the temperature of the gas. Therefore, when you mechanically compress the CO2 in its gas state it turns to liquid when the right pressure is attained. It explains why the pressure will remain constant in the canister until all the liquid is finished. Hence no CO2 air gun will lose its velocity because there is little liquid CO2 left in the canister.

CO2, Pressure, and Temperature

The general principle of CO2 and temperature is that when it reaches around 70 degrees Fahrenheit the gas will obtain a pressure equivalent to 852.8 psi and this can be contained in a vessel. If the canister still has more CO2 it is converted into a liquid state.

Hence inside the canister is a pressurized gas that sits above the liquid when at room temperature. The process that follows each shot means that some gas is released and immediately converts the remaining liquid into gas for subsequent shots. All this time, ensuring that the pressure is equalized for the right temperature.

What this means, is that pressure inside a CO2 canister is directly dependent on the temperature. Warmer temperatures are the best, and cooler temperatures affect velocity as well.

Understanding CO2 and Velocity

As mentioned at the beginning of the article, velocity and CO2 are related. You can see this as you reach near the end of your CO2 in the canister. You will notice that the pressure slightly drops and the velocity becomes compromised as well.

To adjust the velocity of your CO2 air gun when it is almost finished, consider taking shots in warmer temperatures. As a general rule, never fire your CO2 air gun below 60 degrees Fahrenheit as this jams the projectile.

Conclusion

CO2 is among the simplest ways you can power your air gun. It requires little expertise to operate, and enjoy lots of years of target shooting with fewer hassle in between.

Best Air Rifle Deals

Popular Posts

Air gun 101: What is a PCP air rifle? Is PCP gun the best...

0
A PCP air gun is one of five types of air rifles in the market today. PCP air guns have become more and more...

Pump Air Rifles vs Break Barrel

0
Exploring the Pros and Cons: Pump Air Rifle vs Break Barrel - Unveiling the key differences and advantages between two popular air rifle mechanisms....

Best Distance for Sighting In an Air Rifle

0
Shooting with an air rifle always seems like a thrilling experience, but if you are a newbie then you have lots to learn. One...