Home Blog Page 86

Jigging for Big Trout in Rivers by Bill Herzog

0

I started using jigs for trout here in eastern Washington a few years ago.

First as a novel alternative to heavily pressured trout, then as I discovered their versatility and raw effectiveness, they became my out-of-the-truck first shot go-to for all trout species.

brown trout fishing bill herzog jigs twitching fish montana washington idaho

In all the lakes I happen to be at the time, large or small, from April to November, jigs catch trout of all sizes as well, or dare I say better than most techniques. Best of all, it gets the attention of larger fish with regularity. So it made perfect sense to me to bring my plethora of jigs with me on a spring trip to western Montana last April.

Turns out, jigs work well over there in all types of water, not just lakes, but rivers as well. And no one, I mean no one is using these things in Big Sky rivers.

Recently transplanted 35 year ex-Forks steelhead guide JD Love and I were floating a few rivers near his new home in western Montana last early spring, and once again in mid-October. The rivers we targeted are no secret; they are some of the more famous trout streams on the planet.

The Jefferson below the mouth of the Big Hole; the big Missouri below the confluence of the Jefferson, Madison and Gallatin; the Madison just above the entrance of Ennis Lake. Even smaller streams like the Beaverhead and Ruby, which we fished from shore, all just a short hike from the parking spot provided excellent jig fishing.

All feature a thousand wild trout per mile (or more) and all are more than famous for brown trout measured in pounds.

Let’s not forget the world record brown trout was caught on a twitched jig.

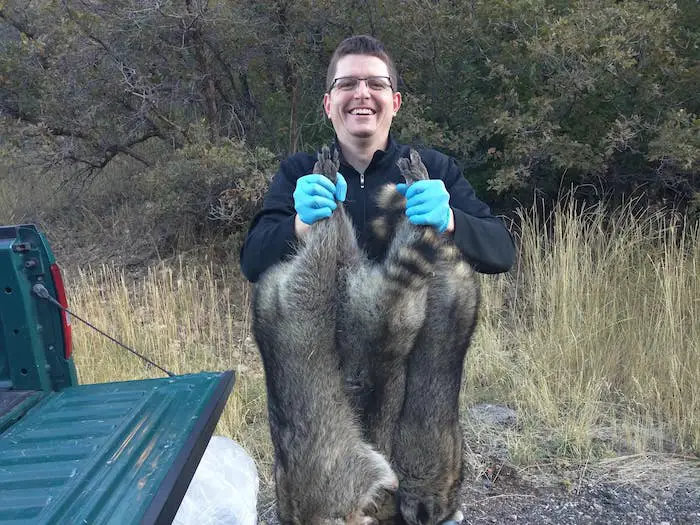
Our last day of the season was spent floating the Jefferson from Twin Bridges to Silver Star access. It was Wild Kingdom that day; we saw a few moose (a little too close), a billion deer, partying packs of skunks and too many migratory waterfowl.

The jig of trout choice that day (water had 4 feet of visibility) was either a yellow or white ¼-ounce head with a #1 Gamakatsu jig hook; brown/light green hackle collar and 5” fire tiger rabbit strip tail. Lots of contrast, bright colors to show well in the deeper slots and faster water.

brown trout fishing bill herzog jigs twitching fish montana washington idaho

We hooked around 40 trout, mostly browns but a few rainbows that would have passes for small summer steelhead back home, including one about 7 pounds that fought like a Dean River steelhead. Most of the browns (and rainbows) in all the rivers we fished were 16 to 24 inches, biggest perhaps 5 pounds. All struck the jigs with a ravenous rip-down.

My “new thang” is large brown trout.

You know we river rats love a new challenge; mine somehow morphed to finding large, wary fish-eating trout on light gear. And since we really don’t have that many brown trout fisheries around my house in eastern Washington, some travel is necessary. Just so happens I now have a great friend who lives a 9-iron shot (and guided there for years in the 70s) from the best brown trout rivers on North America.

Montana trout fishers, fly tossers in particular, have a jones for large brown trout.

Sure, they take big dries and nymphs as well as any trout, but the real kings of the riffles want a steak, not a peanut. As you will find out from the many articles and just conversations with trout fishers, the largest browns will chase and strike something that is almost 1/3 the length of their body.

That is why when you see a guide boat float by bets are there are at least two fly rods on board rigged with 4- to 6-inch gaudy, articulated streamer flies for targeting the rulers of the river.

Big wily browns seem to strike brightly colored jigs a bit more than natural-toned.

brown trout fishing bill herzog jigs twitching fish montana washington idaho

Trout seem to strike out of curiosity at these big jigs. This may be why a bright attractor pattern is more effective than a natural one. The trick to getting the largest ones is not so much “matching the hatch,” but showing them a possible large meal when they want it. If a 10 pounder just ate a 12-inch whitefish, he is not eating (striking) again until hungry.

Timing is everything, and covering as much water as possible in a day gives you the best odds of finding one that just strapped on the feed bag.

Gear anglers also know this, as you will see them tossing spinners, some spoons but primarily jointed similar-sized Rapalas to stir up the carnivorous larger browns, and even rainbows. But no jig tossers in any of the rivers. You may think, the natural progression from a large streamer would be a jig tied similar. Nope.

After speaking with several long time guides, plus dialing up the ol’ Internet looking for information, remarkable as it may seem there is just nothing on the subject. If those anglers are out there, there are either very few or they are well hidden and secretive.

Plenty of info on jig twitching in general in lakes or fishing tiny jigs in rivers…tossing big rabbit jigs for trophy browns in rivers, zilch. I really could not believe it, but a light bulb, flickering and fizzling as it was, lit up.

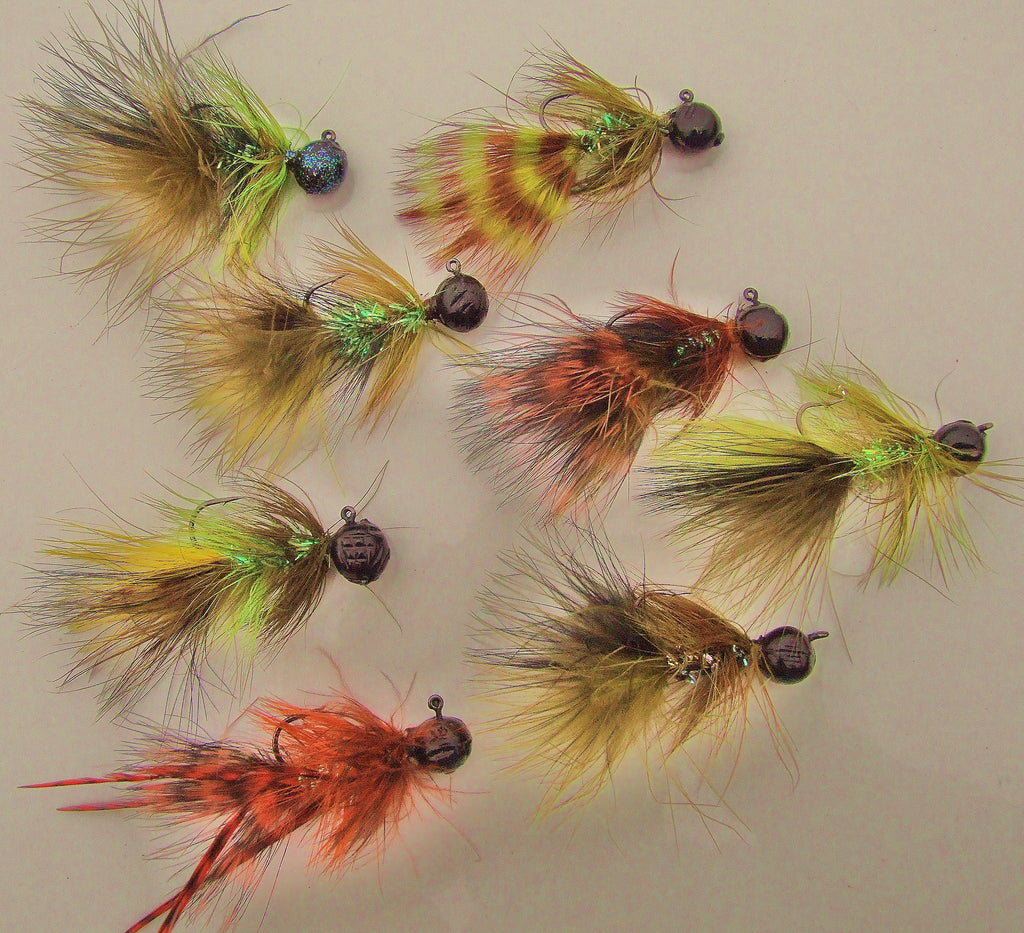
Knowing this, I returned home to the fly vise and did some modifications on the standard-issue trout jig. My working-class jigs are primarily 1/8 to ¼ ounce with hackle body/marabou tails, the whole jig approximately 3 to almost 4 inches. These are marvelous attractors for cutthroat, rainbow, and brook trout; hundreds of great trout have gripped these for me the last 5 years.

Taking a leaf from the streamer fisher’s bible, I made something that mimics the big streamers so popular in Montana and other rivers that feature outsized browns. Except the jig, having a concentrated weight on its head, sinks faster than any sink tip and can be presented where and when a fly, no matter how it is weighted, cannot. Enter the rabbit strip jig.

brown trout fishing bill herzog jigs twitching fish montana washington idaho

As we all know, nothing in the water is as life-like as rabbit. Marabou is close, and it is a fine addition (collars, etc.) to a rabbit strip. Jig twitching is all about the world of swimming prey. Big brown trout are meat-eaters; they can ingest (and will attack) something that is 1/3 the size of their bodies.

Whether that prey is small fish, like trout or sculpins, darting crayfish, big leeches or even snakes, they all swim erratically. That is why an undulating, wiggling “breathing” rabbit strip jig pretty much is unbeatable if you want a gimme shot at Ike.

Let’s look at rods, reels, lines for jigging in rivers for large trout, then a bit on techniques for fishing big bunny jigs in rivers.

The Gear

Short, fast action ultra-light rods are key when casting/presenting jigs. My choice is a GLoomis ultra-light spin rod. It loads fast with 1/8- to ¼-ounce jigs, casts and sets hooks with deceptive power. I’ve landed trout to 12 pounds on it and never felt under gunned. Put a Shimano Stradic on it, fill it with 10 pound (fishes heavier) yellow V2 Slick Power Pro, and place a 7-foot top shot of 12-pound high-quality fluorocarbon with a uni knot.

brown trout fishing bill herzog jigs twitching fish montana washington idaho

Line shyness is rarely a factor, do yourself a favor and “beef up” that top shot, nothing less than 10-pound test. The super line does not stretch; its 6-pound test mono diameter is perfect for longer casts, spool capacity, amazing feel, and hook sets that mono can’t touch. This outfit or one similar is ideal for tossing/twitching jigs either in a river or in lakes.

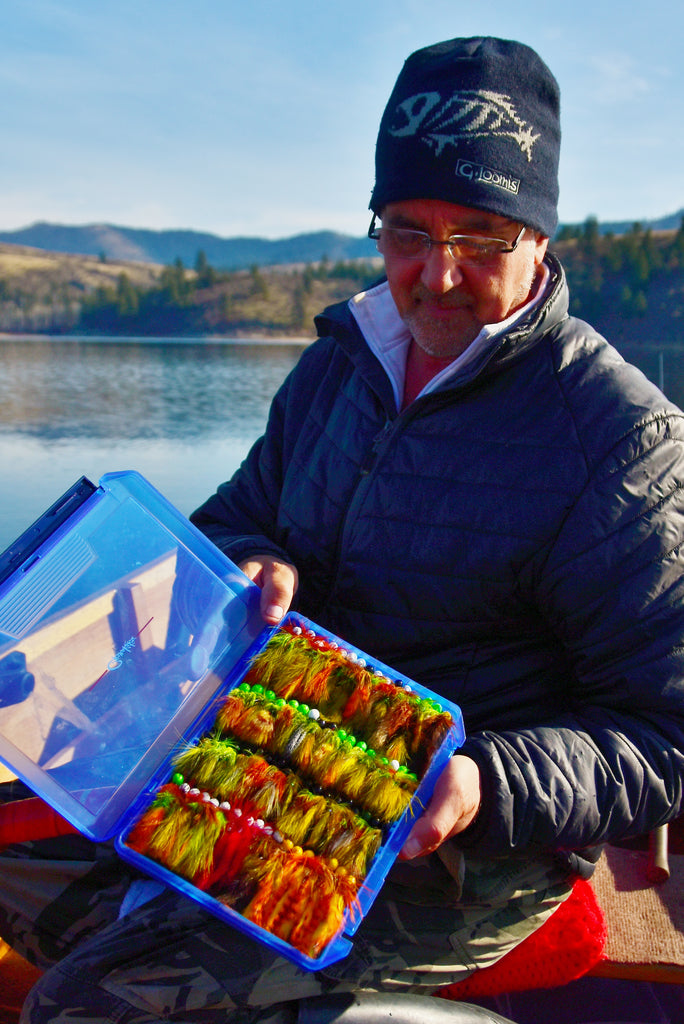
I try to keep three rods in the raft/drift boat rigged with jigs of slightly different color schemes, for example, one with white head with brown/green hackle body/fire tiger bunny strip tail; yellow head/dark red hackle body/fire tiger bunny tail and black head/brown hackle body/olive black stripe bunny tail. I’m not a fan of using any type of flash in my jig patterns but if you want, go for it. What isn’t tried won’t work.

The Technique

For smaller rivers, requiring shorter casts and/or shallower holding areas in larger rivers, a 1/8-ounce jig head is all you need.

For example, in the shallow/riffly Madison a 1/8-ounce head got down immediately in the mostly shallow riffly runs, while a ¼-ounce was necessary in the bigger Jefferson and Madison when longer casts and deeper spots are the norm. Read your water, adjust accordingly.

Now you are on one of those famous rivers.

Where do I look for trout? First, unplug your steelheading brain and leave it in the truck. Those gorgeous, long sweeping gravel bars, transitioning from shallow slow flows out to deeper, faster water… forget it. Nobody home.

Only whitefish, sculpin and small juveniles will be there in the “steelhead” transition water. This drove me batcrap nuts looking at all those juicy runs that hold no fish.

These trout live right next to cut banks, near woody debris and slack water side channels (like coho salmon love). If there is no other deepwater escape (like the primarily riffle configured Madison) then look for structure of any type.

If I had to pick one type of water to concentrate on, it would be cut banks.

That is where the insects and small creatures fall off the grasses into the water, plus the best cover. When targeting cut banks, try to position yourself as close to the bank as you can without spooking fish. Casting upstream parallel to the bank allows the jig to stay in the “loaded” water longer. Rather than casting toward the bank and retrieving the jig away, it stays in the strike zone for far more of the presentation.

brown trout fishing bill herzog jigs twitching fish montana washington idaho

Before making a cast or beginning a presentation, keep this in the front of the brain at all times: All injured, disoriented creatures move downstream at some pace because they cannot fight the current, or escaping from a predator is far more likely to be successful going swiftly with the current than attempting to go against. Cast upstream from your position whenever possible; this allows the jig to sink unimpeded by current, allowing it to drop into target water as swift as possible.

Your jig should land as close as possible to cut banks, submerged/partially submerged trees, boulders, and edges of back water. Large trout, any trout, will be tight up against this structure/drop off. Work it back, at or slightly slower than current speed back to your position, much like a spinner for summer steelhead. Don’t be too fast to begin your presentation, as this causes the jig to leave the “sweet spot” quickly.

Allow it to drop as close as possible to the bottom as well.

The best part about casting jigs is there is virtually no water that cannot be fished.

Skinny slack edges, plunge pools, long riffles, you name it, the jig works there. Do try to keep the jig near the bottom but try to avoid rapid banging, as all this does is kill the action, chips off all your head paint, and greatly increases the chance for snagging up and losing your jig.

brown trout fishing bill herzog jigs twitching fish montana washington idaho

The classic “twitch/drop/twitch/drop/reel” will get bit, but try not to be too robotic or lazy. A short, swift movement of the rod tip will be all you need to impart plenty of action to the jig. Long, up-sweeping motions rarely work. Try to shake up the rhythm of your retrieve, because nothing injured swims in rhythm. They can go side to side, wiggle rapidly, dart several feet, or a few inches. So, there is not one tried and true method of “twitching” for big river trout. There are not two, or five either.

Different speed of retrieve, all through the water column. Try a drift, casting upstream from your position. Pretend its 1985; you have a chunk of pencil lead on and a Corky. Keep the jig just above the bottom, “glide” it along at current speed and impart zero action. Something different is often what works. Regardless of the type of presentation, try to keep a slight bow in the line, never slack but never taught, as if you were spoon fishing. This allows more imparted action to the jig. Also, try and move the rod tip a foot or so rapidly side-to-side when retrieving; it will add a zigzag motion to the jig.

brown trout fishing bill herzog jigs twitching fish montana washington idaho

And here’s something I learned after missing too many really large Montana browns- do not give up on a presentation until the jig is ready to be lifted out for the next cast.

I’ve had great fish swirl at the jig just before lifting it out for the next cast. Before you pull the lure out of the water, let it hang and wiggle a bit a few feet off the rod tip. Surprise! That is when you will be glad for at least 12-pound test shock tippet off that braid.

The biggest rainbow I’ve ever caught in Montana was seven pounds, it gripped the jig inches under the water immediately before I was about to re-cast. I peed a little.

When you find yourself in western Montana- and I hope you do- if you just want to catch a lot of trout with the chance for a larger one, toss 1/6th oz. silver bladed/yellow bodied Rooster Tails or smaller, natural-toned jigs. Or indicator fish with a fly rod with weighted nymphs if you really want some numbers.

brown trout fishing bill herzog jigs twitching fish montana washington idaho

Casting/retrieving an F-9 rainbow trout pattern Rapala will also get big fish eating browns, but they are not as versatile in ability to hit virtually any type of water like a jig. But remember- big fish, big lure.

And how did we do, last spring and fall twitching large rabbit/marabou jigs for aggressive, carnivorous browns? Well first, check out the pictures smattered around this article and just know there were plenty of players in all the places we fished.

There are so many more rivers, even many other stretches of the same ones we fished that crowding I promise will never be an issue. Even if there are some folks floating in front of you, know that none of them will be twitching big rabbit jigs. They will be nymphing with an indicator or stripping large flies on fly rods.

brown trout fishing bill herzog jigs twitching fish montana washington idahoThe novel alternative will always be in your favor. It’s so fun in fact I’m going back to western Montana in 2020 not once but half a dozen times…with 100 newly tied rabbit jigs.

My ten-pound brown is waiting….

– written by Bill Herzog

How To Skin A Raccoon – Step By Step Guide

0

Skinning your first raccoon can be a daunting task but it should not much different than skinning a coyote. Remember that a raccoon is more delicate than a coyote and you should take your time especially on the first one to make sure you get a good pelt when you are done.

How to skin a raccoon

The method we are going to discuss in this article is how to tube skin a raccoon. Tube skinning is one of the most common ways and it can be used when selling your fur to a fur buyer, tanning, wall hanging, or slightly modified for taxidermy purposes.

Tube skinning works for many types of animals in North America. This includes the fox, coyote, bobcat, raccoon, and anything in between. If you are looking to trap raccoon then checkout our raccoon trapping guide. It explains what traps, bait, and sets to use when trapping raccoon.

Is It Hard To Skin A Raccoon?

Skinning a raccoon can be a little hard at first. If you are skinning a raccoon for the first time it may take an hour to skin it. Take your time though you should not be in a hurry when you are first starting out and raccoon pelt will turn out good.

When I skinned my first critter I was trying really hard to do a good job and didn’t have much practice skinning. There is a learning curve to it but it is something you can learn as you watch someone skinning a raccoon and then try it a few times.

I have added several example videos at the bottom of this article so you can see when different methods of skinning a raccoon. Watch when the person skinning the raccoon is pulling and when they are cutting.

Skinning a coyote and a raccoon are very similar. Checkout our article on how to skin a coyote for more tips on skinning.

How Long Can You Wait To Skin A Raccoon?

Usually, you are hunting and trapping raccoon in the cold months. October to February is when most raccoon have the best fur.

In cold weather, raccoon will not spoil for two to three days and can be skinned. A raccoon in warm weather needs to be skinned within a few hours. Raccoon fur left on the carcass can start to spoil or get green belly and the fur will start to turn a greenish color.

Green belly is not initially bad if it is light green but as it progresses and the bacteria growing on the raccoon skin can cause the fur to slip or fall off the hide.

Green belly can be cleaned off with hydrogen peroxide and may not initially ruin a skin.

Tools For Skinning A Raccoon

  • Raccoon Gambrel
  • Skinning Knife
  • Tail stripper
  • Tail zipper or splitter

How Do You Professionally Skin A Raccoon?

Most people professionally skinning raccoon are doing it to sell the hide and make money. The tube method is the most common method when selling raccoon pelts.

Steps To Skinning A Raccoon

  • Cutting Direction: When skinning a raccoon you may think the cutting direction is down so you can get the skin off but that will cause you to nick the fur and put holes in it. Your cutting direction should be perpendicular to the carcass and should cut the white membrane that appears between the carcass and the hide when pulling down on the fur.
  • Nicking the hide is not a huge deal and can be fixed. Even professionals do it. It can be sewn together later in the fur preparation process but it is best to avoid it. If you have nicked the fur be careful when you pull the fur down off the raccoon that you are not making the hole bigger and stretching it out.
  • Hang the raccoon up upside down by the back feet with a gambrel or rope around the legs.
  • Split the fur along the back of the legs where you see a color change in the fur. Start at about the back of the knee and cut in deep. and go around the top of the anus.
  • Work the sin off around the legs by spreading the hair away from where you just cut and skinning the hide around the leg.
  • Split the fur at the knee of the raccoon and leave the rest of the fur on the foot. When you have enough fur worked down and pull the fur down to about the level of the tail.

How To Skin a Raccoon Tail

  • Skin down around the tail creating a gap between the fur on the back and the carcass. Work and skin the fur down the tail an inch or two.
  • Use a tail stripper around the meat of the tail and pull down on the fur and tail stripper while you also push up on the raccoon with the other hand right where the tail connects to the rest of the carcass.
  • Use a tail zipper or knife to split the tail all the way to the bottom so the tail can dry out.
  • You should now be able to grab a large chunk of fur and pull down all the way to the shoulders and maybe a little farther.
  • Now you should be able to stick a bar into the flesh between the neck and shoulder on both sides and pull down until the fur on the front leg goes over the elbow joint. The fur can then be cut around the leg and pulled through the leg hole.

How To skin a Raccoon Face, Ears, Lips and Eyes

  • You can now give another good tug down now that the front legs are out. The head should be the only thing left in. The fur should have stopped at the ears.
  • Cut straight into the head and you should be able to cut the ear cartilage at the base of the ear on both sides. You can now stick your finger in the ear and not too hard pull down on the hide and continue skinning.
  • You should start getting into the lips on the sides of the head. They should start to split from the carcass at the corners of the mouth. You can stick your finger in there and pull fairly hard and keep skinning down the rest of the head remembering to cut perpendicular to the carcass.
  • Next, the eyes should be cut fairly deep keeping the eyelashes intact. Again you will cut straight keeping the cuts a little deeper around the eyes.

How To skin a Raccoon Nose and Lower Jaw

  • Once both eyes are cut skin the nose all the way down the front of the head until you are about a half-inch from the end of the nose. Then cut straight towards the bottom jaw and cut the nose off. The top of the fur should now be free.
  • Next, skin the bottom jaw down about two inches from the end the cut it off leaving the bottom few inches of fur on the carcass. You won’t need that piece. You should now be done.

How To Skin Raccoon Paws or Feet

In the tube method of skinning a raccoon you should not need to skin the feet. As stated above you can cut the fur at the elbows and you will be done.

If you are skinning a raccoon for taxidermy then you will need to skin out the feet or paws. You also do not want to cut and leave any of the fur on the carcass.

When skinning out the feet first you will want to split the back of the leg instead of skinning down and cutting it off. Continue skinning down the leg until you ar a few inches from the top of the foot.

You can now split the back of the leg until you come to the big pad at the bottom of the foot. You will then start to skin down the foot until you reach the tird joint on each toe.

You will need to work down and skin each toe individually as you work the hide down. Split the third joint at each toe as you reach it. The middle toes are longer and will be farther to skin than the side toes so finish out the site toes first.

Learning More

I have added a few videos here to help you get a few perspectives on and tips on how to skin a raccoon. Watch these videos and you will see that each person has their own little tricks.

How to Skin a Raccoon Fast

Raccoon Trapping Equipment

  • MB 450 Traps
  • Best Coyote Traps
  • Pack Basket
  • Trapping Bag
  • Buckets
  • Trapping Hammer
  • Trapping Sheds
  • Trapping Cabins
  • More Trapping Equipment

The Spiritual Meaning of Deer: Uncovering the Mystical Significance

0

“Unveiling the Spiritual Depth: Exploring the Profound Meaning Behind Headlines” This thought-provoking headline delves into the intriguing world of spiritual significance lying beneath seemingly ordinary news headlines. Join us on a captivating journey as we unravel the hidden spiritual messages and explore their impact on our lives. Discover how even the most mundane headlines can hold profound truths and awaken our inner spirituality.

Exploring the Spiritual Meaning Behind the Appearance of a Deer

Exploring the Spiritual Meaning Behind the Appearance of a Deer

The appearance of a deer in Native American folklore is often seen as a sign that one must follow their intuition. It is believed that if a deer appears out of nowhere, it is a message from the spiritual realm urging individuals to trust their instincts and make decisions based on their inner guidance. Furthermore, if the deer is considered one’s spirit animal, it signifies that the person possesses strong intuition and is highly sensitive. They navigate through life gracefully yet purposefully, able to adapt and change directions swiftly when necessary. The deer’s ability to regenerate symbolizes its deep connection with life’s mysteries and its power to handle challenges with gentleness and grace.

Spiritual Significance of Seeing a Buck Deer

In the anecdote shared by the author, they mention an extraordinary encounter with a buck deer after praying for divine intervention regarding their financial situation. The rarity of seeing bucks in their area during hunting season made this occurrence even more significant for them. The appearance of the buck confirmed to them that their prayer had been answered by a higher power. This experience highlights the spiritual significance attributed to encountering specific animals or signs in nature as messages from the divine.

The Symbolism of Integration and Kindness

In dreams, deer often represent kindness and gentleness. Some dreams are believed to be precognitive, offering insights into future circumstances. If one dreams about encountering a deer, it may suggest that they will face challenging situations where choosing a path of kindness and gentleness will be beneficial compared to more harsh approaches. The act of looking at you may indicate that the deer is sharing its energy with you, creating a sense of unity between nature and oneself.

Overall, exploring the spiritual meaning behind the appearance of a deer reveals its symbolism as an intuitive guide, representing gracefulness, adaptability, regeneration, and handling challenges with gentleness. Whether encountered in real life or within dreams, the presence of a deer can serve as a reminder to trust one’s instincts and embrace kindness and compassion in navigating life’s journey.

Unveiling the Spiritual Significance of Encountering a Deer

Unveiling the Spiritual Significance of Encountering a Deer

Encountering a deer in Native American folklore is believed to hold significant spiritual meaning. It is seen as a sign that one must follow their intuition and trust their instincts. If the deer is considered your spirit animal, it suggests that you are a highly sensitive individual with strong intuition. You navigate through life gracefully yet purposefully, and have the ability to adapt and change directions swiftly when necessary. The deer’s symbolism also extends to its regenerative qualities, as it is deeply attuned to the mysteries of life. Furthermore, the deer embodies the power to face challenges with gentleness and grace.

The Significance of Requesting a Deer as a Divine Confirmation

In the personal account shared above, an individual sought divine guidance regarding their financial situation and specifically asked for a buck deer to appear on their property as confirmation from God. This request held great significance because, in over four decades of living there, neither they nor their family had ever spotted a buck deer before. The next morning, their prayer was seemingly answered when they witnessed a buck deer standing just 30 yards away from them. This encounter provided undeniable confirmation for them that their prayer had been heard and answered by a higher power.

The sighting of this rare buck deer not only served as a physical provision for the individual and their family but also carried deep spiritual meaning. It reinforced their belief in divine intervention and reaffirmed their connection with something greater than themselves.

The Symbolism of Kindness and Gentleness Associated with Deer

In various cultures and spiritual beliefs, encountering or dreaming about a deer is often associated with kindness, gentleness, and other positive attributes. Some dreams are even believed to be precognitive, offering glimpses into future circumstances where choosing kindness and gentleness may be essential in navigating challenges.

When a deer looks at you, it is believed to be sharing its energy with you. This exchange can create a sense of oneness with nature and a feeling of being weightless yet grounded simultaneously. The spiritual significance of encountering a deer encourages individuals to embrace these qualities in their own lives, fostering compassion, empathy, and a harmonious connection with the world around them.

In conclusion, encountering a deer holds deep spiritual significance. It serves as a reminder to trust one’s intuition, adapt gracefully to life’s changes, and approach challenges with gentleness and grace. Whether encountered in physical form or through dreams and symbols, the presence of a deer invites individuals to integrate kindness and compassion into their lives while fostering a deeper connection with nature and the spiritual realm.

The Deep Spiritual Symbolism of Seeing a Deer

The Deep Spiritual Symbolism of Seeing a Deer

Seeing a deer holds deep spiritual symbolism and is often considered a sign from the universe or a higher power. In Native American folklore, the deer is seen as a spirit animal that represents highly sensitive individuals with strong intuition. When encountering a deer, it is believed that one should follow their intuition and trust their instincts.

Graceful Movement and Quick Adaptability

Deer are known for their graceful movement and ability to change directions quickly if necessary. This symbolism reflects the importance of moving through life with purpose and adaptability. Just as the deer can swiftly change its course, we too must be open to new opportunities and ready to adjust our path when needed.

Regeneration and Connection to Life’s Mysteries

Another significant aspect of the deer’s symbolism is its ability to regenerate. The deer is highly attuned to life’s mysteries, representing a deep connection with nature and spiritual energies. This connection allows them to handle challenges with gentleness and grace, emphasizing the importance of approaching difficulties in life with compassion and understanding.

List:

– Strong intuition: The presence of a deer signifies that you possess strong intuitive abilities.
– Graceful movement: Like the deer, you have the capacity to navigate through life gracefully.
– Quick adaptability: You can change directions swiftly when faced with unexpected circumstances.
– Regeneration: The deer symbolizes your ability to heal and bounce back from challenges.
– Handling challenges with grace: Just as the deer handles difficulties gently, you have the power to face obstacles in your life with poise and kindness.

Overall, encountering a deer holds deep spiritual significance. It serves as a reminder to trust your intuition, embrace adaptability, connect with life’s mysteries, and approach challenges with gentleness and grace.

Understanding the Spirituality Associated with Deer Sightings

The Significance of Deer as a Spirit Animal

In Native American folklore, the deer is often seen as a powerful symbol representing intuition and sensitivity. If you see a deer appear out of nowhere, it is believed to be a sign that you must follow your intuition. People who have the deer as their spirit animal are considered highly sensitive individuals with strong intuitive abilities. They navigate through life gracefully yet purposefully, and can adapt and change directions quickly when necessary. The deer’s ability to regenerate is also symbolic of being attuned to life’s mysteries and having the power to handle challenges with gentleness and grace.

A Personal Experience with Deer Sighting

The author shares a personal experience where they were facing financial difficulties and prayed to God for help. They specifically asked for a buck deer to appear on their property as a sign from God. The next morning, they witnessed a buck deer standing near their chain link fence, confirming their belief that it was a spiritual intervention. This encounter not only provided them with meat for several months but also reinforced their faith in divine guidance.

Deer Symbolism in Dreams

In dreams, seeing a deer can carry various meanings, including kindness, gentleness, and precognition. Some dreams may serve as glimpses into future circumstances where choosing a gentle and kind approach will be beneficial. The act of the deer looking at the dreamer is believed to transfer its energy, creating a sense of oneness with nature and grounding oneself spiritually.

Overall, encountering deer or having them appear in dreams holds spiritual significance tied to intuition, sensitivity, gracefulness, adaptability, and handling challenges with gentleness. It serves as a reminder to trust one’s instincts and embrace kindness in navigating life’s journey.

The Intuitive and Mystical Meaning of Spotting a Deer

The Intuitive and Mystical Meaning of Spotting a Deer

Spotting a deer in unexpected circumstances can hold deep intuitive and mystical meanings. In Native American folklore, the appearance of a deer is often seen as a sign to follow one’s intuition. If the deer is considered your Spirit Animal, it signifies that you possess strong intuition and are highly sensitive. You navigate through life gracefully but with purpose, able to change directions swiftly when necessary. The deer’s ability to regenerate symbolizes its deep connection with life’s mysteries, while its gentle and graceful nature represents its power to handle challenges with ease.

When faced with financial difficulties, one individual turned to prayer for guidance and asked God for a sign regarding their situation. They specifically requested the presence of a buck deer on their property, as they had never seen one in the 40 years they had lived there. The next morning, their request was seemingly answered when they spotted a buck deer just outside their back door. This encounter held significant spiritual meaning for them, as it confirmed their belief that God would provide for their needs.

The immense size of the deer further emphasized the divine intervention at play. Despite being over 300 pounds themselves, it took both the individual and their spouse over 10 minutes to drag the deer even a short distance. This single act of hunting provided them with enough meat to sustain them for three months. The experience served as a reminder of the abundance that can come from relying on intuition and trusting in higher powers.

Overall, spotting a deer holds symbolic significance beyond its physical presence. It serves as a reminder to trust your instincts, embrace gracefulness in navigating life’s challenges, and remain attuned to the mysteries that surround us. By following these principles, one can find guidance and abundance even in unexpected circumstances.

Key Points:

– Spotting a deer is often seen as an intuitive sign.
– Deer are considered Spirit Animals in Native American folklore, representing sensitivity and strong intuition.
– Deer possess the ability to regenerate and handle challenges with grace.
– A personal experience showcased the power of prayer and divine intervention, as a requested buck deer appeared on their property.
– The encounter provided an abundance of meat, highlighting the importance of trust and intuition in navigating life’s challenges.

Unlocking the Spiritual Message Behind the Presence of a Deer

Unlocking the Spiritual Message Behind the Presence of a Deer

The presence of a deer in one’s life can hold significant spiritual meaning. In Native American folklore, the deer is often seen as a symbol of intuition and sensitivity. If the deer is your spirit animal, it suggests that you possess strong intuition and are highly attuned to life’s mysteries. You navigate through life gracefully yet purposefully, and have the ability to adapt and change directions quickly if needed. The deer also represents regeneration, as it is deeply connected to the cycles of life.

The Significance of the Deer’s Appearance

When a deer appears out of nowhere, it can be seen as a sign from the universe or higher power to follow your intuition. It may indicate that you are on the right path and should trust your instincts in making decisions. The sudden appearance of a deer can serve as a reminder to stay connected with your inner wisdom and listen to your inner voice.

The Gentle Strength of the Deer

One of the remarkable qualities associated with deer symbolism is its ability to handle challenges with gentleness and grace. Despite being a powerful creature, it moves through life with elegance and poise. This aspect serves as an inspiration for individuals who resonate with the deer spirit animal, encouraging them to approach difficulties in their own lives with kindness and compassion.

The Symbolism of Regeneration

The deer’s connection to regeneration signifies its deep understanding of life’s mysteries. It reminds us that even in times of hardship or loss, there is always room for growth and renewal. The deer teaches us to embrace change and embrace the opportunities it brings for personal transformation.

In conclusion, encountering a deer holds spiritual significance related to intuition, sensitivity, gracefulness, adaptability, gentleness, and regeneration. It serves as a reminder to trust our instincts, approach challenges with compassion, and embrace the cycles of life. By understanding the symbolic messages behind the presence of a deer, we can gain deeper insights into our own spiritual journey.

In conclusion, whether something has spiritual meaning or not is subjective and varies from person to person. While some may find deeper significance in certain experiences or objects, others may not. Ultimately, the interpretation of spiritual meaning depends on an individual’s beliefs, values, and personal experiences.

Multi-Purpose Footwear For Advanced Bowhunting

0
Multi-Purpose Footwear For Advanced Bowhunting
Hunters rarely think about how their foot health and comfort translates to a more enjoyable time in the field, but it’s undeniable that high-quality boots and a good hunt are tightly linked. (Photo courtesy of Danner Boots)

Five years ago I ditched the couch potato lifestyle and started running. It sucked, but as I got into the process I realized that I didn’t hate it as much as I expected — at least most of the time. The runs that were chock-full of misery were those where I didn’t get much sleep the night before or where my feet were beat up.

As far as sleep, that’s fodder for a different article. When it comes to foot-care, I found a few things to be helpful that have migrated from my life as a runner to my life as a hunter. And while it may not seem like a big deal, especially to the whitetail hunter, good footwear is a game-changer.

Here’s why:

From Deer To Elk & Back Again

As a traveling bowhunter, I use to think about western hunting much differently than my midwest whitetail adventures. That’s not the case anymore, and my hunting tactics have converged to mirror both pursuits more closely than I ever thought possible — and so has my choice of boot.

While I do like knee-highs for some whitetail hunting, particularly if I need to wade through a creek or a swamp to get to my spots, I’m mostly reliant on quality leather boots — the kind that are a necessity in the elk mountains.

Danner-Pronghorn-Sidehill.jpg
Western hunts, as well as whitetail forays, demand the right leather boot that provides a high level of comfort, support and traction.

The first thing worth looking for, whether you’re a deer hunter, an elk hunter — or both — is comfort. This is a no-brainer but it’s amazing how a little extra weight or some stiffness in the wrong spot can turn miserable after a few miles. Comfort starts with fit, of course, so if you’re not wearing the right size of boots you’re already in trouble. You might think you can make up for the difference with your sock choice, but you can’t. One hike up a mountain or into the woods to check trail cameras and you’ll be deep into regret and blistered up.

Wear the right-sized boots, and pay attention to how tall they are. Light hikers that fit like running shoes are comfortable, but they belong on trails and not in the timber. For hunting and scouting you need some support, and for most of my pursuits I’m looking for boots that are at least eight inches tall.

This is important in the whitetail woods, but a game-changer in steep terrain. Naturally, it’s easy to think about the uphill aspect of elk hunting and the support your feet will need, but it’s the side-hilling and downhill treks that will get you.

Side-hilling, with 40 pounds in your pack, is a great way to figure out how much support your boots offer. Add in an elk quarter and a lot of extra weight, and you’ll really understand what you’re dealing with when it comes to potential ankle sprains or worse.

For the downhill treks — which tend to be more dangerous than uphill because you’ve got loose rocks and gravity conspiring against you with each step — you’ll need support on the top and the bottom of your boots. Quality tread, the kind designed to grip where grip isn’t easy to find, can keep you upright and in one piece. That’s something hard to understand when you’re breaking your boots in at home in Michigan or Pennsylvania and not faced with the reality of elevation and the up-and-down places elk and mule deer call home.

Whitetail Considerations

Maybe you won’t hunt elk — that’s okay. If you stick to the whitetail woods you may wonder why you need a good pair of boots. Well, you can roll your ankles in deciduous forests, too. While falling down a river bluff isn’t as dangerous as falling down a mountain, it’s not that much fun either. And it’s really not fun in the dark when you’re slipping in to a rut stand you’ve been saving for just the right conditions.

Quality leather boots are a necessity in the elk mountains, as well as the whitetail woods. Take care of your feet and you’ll surely have more enjoyable hunts overall.

The kind of tread that will help you in the mountains will also help you at home on the whities, and in other situations, might save your hide as well. Last fall, while bowhunting some public land in Oklahoma, I was blessed with a buzzer-beater buck. I watched him tip over as the light faded on my last night down there and to put it mildly, was pretty jacked up about filling my tag.

When I climbed down to go look at him, my knee-high boot slipped off of my climbing stick and caused a puckering, find-religion-now moment even though I was attached to a lifeline. The upshot here is that well-designed tread is good for more than the mountains…

Danner Pronghorn — Fifth Generation

The boots that are winning me over this year — and that I’ve scouted deer in, hung stands while wearing, and are traveling with me 19 hours west to hunt elk in Colorado — are the Danner Pronghorns. I’ve covered more ground while bowhunting in the Pronghorns over the years than any other boot, and their latest version is the fifth generation, which represents a new-age return to the old classic 851 design.

Danner-Pronghorn-5G-Close.jpg
Danner has designed its new Pronghorn boots around the TERRA FORCE® NEXT™ platform, which utilizes a shank system to provide total arch support and torsion control — two things that will keep your ankles intact and your feet pain-free after miles of hiking each day.

This means that the fit and comfort level of these new Pronghorns is off the charts, but now those attributes are combined with the TERRA FORCE® NEXT™ platform, which is designed to promote all-terrain arch support, stability and torsion control. They are also built with Vibram® Pronghorn Outsoles so that there will be no complaints when it comes to traction no matter what type of terrain you hunt.

Pronghorns are also waterproof thanks to a GORE-TEX membrane, and can be ideal for mid- to late-season hunts if you opt for the insulated versions (400g or 800g PrimaLoft®). Unlike similarly priced offerings that claim to be waterproof, these Pronghorns are also incredibly breathable. That’s one of those things that is hard to appreciate until you’re putting on the miles in the early season.

The real kicker, at least for yours truly, is that for half of the price of competitor’s boots, you can get the Pronghorns and know that they’ll last. The most disappointing boot experience of my life was finally getting my hands on a pair of $500 leathers, only to toss them two seasons later because they had fallen completely apart. My last pair of Pronghorns lasted me three times as long, and that’s through a lot of use. This is one of the many reasons that for almost two decades, Pronghorns have been the go-to choice for western hunters and whitetail junkies alike, which is something not destined to change any time soon thanks to the newest version.

Conclusion

No matter what you hunt, or how you scout, quality footwear is key. Find yourself a pair of boots that will allow you to do the things you need to do to be successful and remember that the right boot can take you across the flattest whitetail territory as well as up the steepest mountain basin, so choose wisely.

Best Duck Decoys of 2022

0
Best Duck Decoys of 2022

Our top pick duck decoys of 2022. (Photo courtesy of Dive Bomb Industries)

Wildfowl Podcast Episode 34

DON’T MISS Episode 34 – 2022 Giant Gear Issue Series – Decoys with MOJO and Big Al’s

Dive Bomb Industries – F1 Wigeon Floaters

Dive Bomb Industries - F1 Wigeon Floaters
Dive Bomb Industries – F1 Wigeon Floaters

Many waterfowlers can’t think of duck and goose hunting without thinking about Dive Bomb, and for a good reason: their decoys work incredibly well. If it’s not already in your floater arsenal, one go-to should be the F1 Wigeon. A one-piece decoy that showcases lifelike perfection, these white-shouldered bad boys are sure to grab the attention of passer-by ducks and get them to put their feet down. These decoys have been hand-crafted by World Champion Jon Jones, and each six-pack comes with four upright drakes and a pair of active hens.

$75/6-pack | divebombindustries.com

Lifetime Decoys – FlexFloat Pintails

Lifetime Decoys - FlexFloat Pintails
Lifetime Decoys – FlexFloat Pintails

Lifetime Decoys has recently rebranded themselves as Heyday, but their famous Hydrofoam decoys remain the same. Pintails are one of my all-time favorite ducks. The boy birds are beautiful, and I love to see that white chest and black sprig in flight. The problem for many is finding a decoy with a sprig that’s not brittle as an icicle. That problem, luckily, has been eliminated. Enter Lifetime’s damn near indestrucbile FlexFloat Pintail. Available in 12 packs with eight drakes and four hens, the Flexfloat design means the sprig won’t snap off the bulls or hang on decoy bags. At 8.9 pounds per dozen, light weight is another plus.

$300/dozen | heydayoutdoor.com

Final Approach – HD Green-Winged Teal

Final Approach - HD Green-Winged Teal
Final Approach – HD Green-Winged Teal

New from Final Approach are several duck species-specific floaters, but we love an excellent early-season teal shoot, and these caught our eye. Decoy realism is remarkable, and the waterfowl masses will appreciate the full-size, one-piece construction. These floaters work well for stand-alone teal sets and make great filler decoys, especially when you want more ducks in the spread and the walk from the truck is long, and weight and space are critical.

$100/dozen | fabrand.com

Tanglefree – Flight Series Canvasback

Tanglefree - Flight Series Canvasback
Tanglefree – Flight Series Canvasback

Most duck hunters, me included, get smitten when they see the large red head and coal-black bill of a drake Canvasback. It’s moments like these when having the most realistic fakes come into play, and it’s hard to beat Tanglefree’s Flight Series Canvasback Decoys. Carved by Michael Braun, these four males and three hens sport ultra-realistic paint schemes and feather detail. The high-density foam fill is tough to beat, as is the tried-and-true weighted keel.

$85/6-pack | tanglefree.com

MOJO Outdoors – Flock-A-Flickers 2

MOJO Outdoors - Flock-A-Flickers 2
MOJO Outdoors – Flock-A-Flickers 2

Waterfowl hunters refer to it as a “flash” or “flick” — that brief glint seen when watching content ducks sitting on a pond or field. When passer-by ducks see these glints of movement, it gives them the confidence to come in. MOJO knows a thing or three about helping hunters put ducks in the decoys, and the new Flock A Flicker 2 4-Pack features an improved design with the same effective spinning wing beats that create that flash and flick, and the unit will work in water or on dry ground. Each unit can be programmed to spin at different times via the random on/off timers, and each will operate for up to 30 hours on three AA batteries.

$100 | mojooutdoors.com

Lucky Duck – Super Swimmer HDi

Lucky Duck - Super Swimmer HDi
Lucky Duck – Super Swimmer HDi

Realism on the water is essential to getting wings to cup and feet to drop, and one of the best tools you can add to your waterfowl arsenal to ensure this is Lucky Duck’s Super Swimmer HDi. This swimmer uses a jet-propulsion system to create natural swimming movement, and the decoy has a trio of timer modes. The durable EVA plastic handles wear and tear and promises no-fail use season after season. The Super Swimmer HDi includes a 12-volt lithium-ion rechargeable battery and a smart charger.

$180 | luckyduck.com

Decoy Central – Super Block Green-Winged Teal

Decoy Central - Super Block Green-Winged Teal
Decoy Central – Super Block Green-Winged Teal

Super Blocks are tough, affordable decoys than can bulk up your spread by mixing them in with your more expensive, ultra-realistic decoys. Floaters have high-contrast paint for great visibility and realistic detail, and are available in Mallard drake, Greenwing Teal drake and Lesser Canada Goose. Mallard feeding butt and mini spinner also available. Floaters have weighted keel with multiple head positions.

Starting at $30 | decoycentral.com

Avian-X – Topflight Early Season Mallards

Avian-X - Topflight Early Season Mallards
Avian-X – Topflight Early Season Mallards

Often, the difference between scratching out a few birds and filling duck totes is details. Enter Avian-X’s Topflight Early Season Mallards. These decoys accurately capture the early plumage of drake and hen mallards, and when this detail is combined with top-end paint adhesion, you get mallard imposters that bring ducks close. Each six-pack comes with a Feeder Drake, Feeder Hen, Swimming Hen, High-Head Drake, and a pair of Swimmer Drakes. The weight-forward swim-keel maximizes natural movement in the water.

$170 | avian-x.com

MOJO Outdoors – Mini Mallard Elite

MOJO Outdoors - Mini Mallard Elite
MOJO Outdoors – Mini Mallard Elite

MOJO’s Mini Mallard Elite is a waterfowling win and a staple for many duck killers. Smaller in size, this decoy is remote-ready and a breeze to tote around. The position of the motor, battery, and other operating components ensure less wobble, and the cam lock support pole, drop-in battery and on/off magnetic wings make setup quick. This realistic-looking duck fake comes with MOJO’s Multi-Decoy remote/receiver.

$120 | mojooutdoors.com

Vortex vs Leupold: Rifle Scopes Brand Battle and Comparison

0

Vortex and Leupold scopes are some of the best optics on the market today. However, both have their strengths and weaknesses that can make either the better scope manufacturer for your needs.

For starters, both brands offer different types of scopes at varying price points. The most common price points are entry-level ($500), mid-range ($500-$1000), upper mid-range ($1000-1500) and high-end ($1500 up).

This review will compare the best Leupold vs. Vortex scopes at each price point. I will then discuss their best features and pit them against each other.

Finally, I will conclude with a verdict on which of the two optic brands, Vortex or Leupold, comes out on top with the best bang for your buck.

Vortex vs. Leupold: Comparison of Scope Series and Offerings

In this head-to-head battle of Leupold vs. Vortex scopes, I have split each rifle scope offering from the two brands into budget categories, from below $500 to upwards of $1500.

If you are eyeing any of these excellent scopes between Vortex or Leupold, take note of the Vortex Viper, Diamondback, Venom, Strike Eagle, PST Gen II, Razor HD, and Golden Eagle.

On the Leupold scope side, meanwhile, keep an eye out for the Leupold VX-Freedom, FX fixed power scopes, Mark 3HD, VX-3HD, VX-5HD, VX-6HD, Mark 6, and Mark 8 models.

Entry-Level Scopes (Up to $500)

On the lower end of the price spectrum, you have the budget/entry-level scopes. Comparing the variety of offerings between the two brands, there are more Vortex scopes, with 40 Vortex models offered (like the Diamondback line) at this range vs. the 27 models for Leupold.

In terms of the magnification range, both Leupold and Vortex offer similar scopes. Vortex offers slightly more with a 3-12x scope model, but other than that, they are highly similar at this price point.

In terms of optical clarity, Leupold scopes on the budget end are slightly better, with better eye relief. They also offer a custom dial system (CDS) to help with bullet drop compensation.

That said, Vortex Optics offers these entry-level scopes at lower prices, the highest being $370, while Leupold scopes tend to be just under $500.

Since these optics are meant for inexperienced shooters looking to buy an affordable first scope, I give the win to Vortex.

WINNER: Vortex

Mid-Range Scopes ($500-$1000)

Fighting in the mid-range battle of Leupold vs. Vortex, you have optics lines such as the Vortex Viper, Strike Eagle, and Venom. On the Leupold optics side, the available options include the Mark 3HD, VX-3HD, and VX-5HD.

Vortex offers 22 models as part of their mid-range series, while Leupold offers 32 models. Scopes from Leupold tend to have more magnification or zoom level range options, with more low to medium-zoom models focused on hunting.

On the other hand, Vortex scopes in this price range lean more towards the higher zoom levels. This means they are probably a better option for long-range shooting than Leupold, which is preferable for closer-range engagements.

Leupold scopes in this price range are usually up against the $1000 price point, while Vortex scopes are $150-$200 cheaper.

This bracket is a tie because of how similar both scope brands’ products are at this specific price point.

WINNER: Draw

Upper Mid-Range Scopes ($1000-$1500)

When comparing upper mid-range scopes between Leupold vs. Vortex, you can consider Leupold models like the Leupold VX-5HD and Leupold VX-6HD and Vortex models like the Vortex PST Gen II and Vortex Razor HD LHT.

It is at this point that the glass quality starts to improve significantly. While both offer excellent glass clarity, Leupold has slightly better glass. Their scopes use the same technology they use for their Leupold Binocular lines.

Any Leupold rifleman scope in this price range also has the CDS turrets as standard, which helps improve the longer-range accuracy of users. Vortex scopes do not have this option.

Both Vortex and Leupold scopes are a lot closer in terms of price point. Therefore, I will have to give the slight edge and prefer Leupold due to their slightly superior optical quality and better adjustment turrets.

WINNER: Leupold

High-End Scopes ($1500 and up)

When pitting Leupold vs. Vortex rifle scopes at the higher-end spectrum, consider the Vortex Golden Eagle, Vortex Razor HD, Leupold VX-5HD, Leupold VX-6HD, Leupold Mark 6, and Leupold Mark 8.

Leupold offers 38 scopes, while Vortex Optics only has 16 scopes at this range, meaning they have more options for better rifle scopes in this category. Leupold and Vortex scopes in this category focus on long-range hunting or shooting.

When it comes to high prices, there is a Leupold scope that costs upwards of $4500, which is more than any Vortex Optics scope. However, your primary focus is the performance rather than price value when choosing at a premium scope range.

Therefore, I prefer Leupold because of its slightly better scope glass clarity, and wider variety of options for those looking for a high-end, top-of-the-line scope.

WINNER: Leupold

Vortex vs. Leupold: Comparison of Scope Features

When picking between Leupold and Vortex optics, there are a few features that you must consider.

  • Unique features and technologies
  • Accuracy
  • Reliability
  • Reticle options and ballistics solutions
  • Look and feel
  • Budget and price range
  • Warranty and customer support
  • Brand history
  • Ease of use

Each person will have different priorities in what they value in a scope, and what’s number 1 on this list will often come down to personal preference.

Picking the best Vortex scope and the best Leupold scope requires picking one that has the features you deem to be the most important in spades.

Features and Technologies

When comparing a Leupold and Vortex scope, one of the first differences you will notice is the set of features and technologies stuffed in. Both companies’ scopes have different design philosophies.

Leupold scopes have a focus on premium optical quality and easily adjustable turrets. On the other hand, Vortex scopes are focused on long-range shooting since they use many bullet drop-compensating reticles.

Both brands’ scopes have excellent light transmission and optical clarity, but Leupold scopes use superior construction technologies and scope components, especially in their cheaper optics.

This is unsurprising since they also have great-quality Leupold binoculars. While Vortex Optics also offers great technologies that are more focused on their reticles, it cannot compare to the Leupold options.

Accuracy

As mentioned, when comparing Leupold vs. Vortex optical performance, Leupold’s scopes are often superior. While it does not mean Vortex scopes are inaccurate, you get top-quality optics with Leupold.

Both optics manufacturers offer a multitude of construction features on the optic glass, like fog-proof multi-coated lenses to minimize light reflection. However, Leupold’s models usually have better light transmission.

This ultimately means that in low-light situations, a Leupold scope will give you a clearer view of the target, and you will hit it more consistently. However, even Vortex’s optics perform better than other optics in this regard.

Both brands also offer red dot sights with the same outstanding engineering as their long-range counterparts.

Red dot sights or even iron sights are more appropriate if you are only going to be shooting at close range, but fortunately, they can be mounted alongside your scopes for rapid transitions.

Reliability

Almost all scope models from the two brands are made of aircraft-grade aluminum and have fog-proof, waterproof, and multi-coated lenses. They are all also shock-resistant.

For example, the Leupold VX Freedom is constructed of aircraft-grade aluminum and is 100% waterproof, shockproof, and fog-proof for the best performance in any and all conditions.

Vortex scopes are also constructed well, so I must make this comparison segment a draw.

You will not have any difficulties or issues with the scopes from Leupold and Vortex randomly losing zero, whereas this is not always the case with less battle-tested brands.

Reticle Options and Ballistics Solutions

Leupold and Vortex scopes offer different reticle options. Leupold optics usually incorporate the duplex reticle that is popular for hunting. Therefore, it focuses on having a clear, unobstructed sight picture.

On the other hand, Vortex uses BDC (Bullet Drop Compensation) hash-marked reticles and usually offers two options when you buy – Dead-Hold BDC and V-Plex. This reticle is better for shooting at long distances.

Both brands also have first and second focal plane reticle options. They are also illuminated in the first or second focal plane, which is great for shooting in lower-light conditions.

While both scope manufacturers offer illuminated reticle options, Leupold has far more scope models with that option when compared to Vortex.

Look and Feel

When comparing the look and feel of Vortex and Leupold scopes, they are pretty comparable. Most scopes today use an overcoat over the aluminum to make them look uniformly matte and sleek.

Regarding the overall housing of the scopes, both Leupold and Vortex are large enough for performance purposes but not too bulky that they get in the way or appear too big on a rifle. They even offer compact optics if size and weight are major considerations.

The one thing that can distinguish top-tier scopes from the rest is the ease of using the adjustment turrets. Vortex Optics generally have great feeling (and easy to use) windage and elevation turrets.

However, Leupold’s Custom Dial System (CDS), which they use on all their models from low to high end, is just better. It clicks easily enough to adjust quickly but not too easily to be accidentally adjusted when you don’t mean to.

Budget and Price Range

This is one of the most important factors when choosing a scope because you want the best value for the hard-earned money that you make.

While Leupold’s scopes are not the most expensive for their features, Vortex is simply unmatched at giving you more than what you pay for. They consistently offer features and optical quality at lower price points.

This is especially true for their lower and mid-range scope options, where Vortex models are usually $150-$200 cheaper than their Leupold counterparts. That is where the budget savings can truly be felt.

Warranty and Customer Support

Leupold’s warranty offerings are some of the best in the business. They have a lifetime guarantee, regardless of whether you were the rifle optic’s first or tenth owner. They are also not particular about whether you kept the original receipt or not.

The same thing goes for Vortex’s warranty. They call it the “VIP Warranty,” where they will repair or replace any scope you buy from them. That is a lifetime guarantee.

They are also the same when it comes to exceptions to the rule. One mistake most people make is modifying their scopes or adding extra coatings, which will void the warranty.

However, both are perfect examples of what scope brands should follow when it comes to customer service.

After all, an unlimited lifetime warranty offering full repair or replacement with no questions asked – forever, will ensure a user base that lasts a lifetime.

Brand History

When it comes to the history behind both of these rifle scope manufacturers, Vortex Optics is a relatively new manufacturer. They have been producing and selling optics and other sporting goods since 2004.

Other than the rifle scopes they make, they also make wildlife-watching binoculars. Their claims to fame are their excellent value for money and VIP warranty since day one.

However, Vortex cannot compare to Leupold when comparing brand history. The company has been operating for more than a century and has been making rifle scopes since after World War II.

Their rich history also includes providing American law enforcement equipment and accompanying the military in operations across the globe.

Two of their scope series are also noted to be the most popular in America by the NRA.

Vortex vs. Leupold: Which Is Better?

Leupold scopes are the winner for most people, especially those looking for an all-around high-quality scope for hunting or daily use. It also has a rich history, being THE choice for uniformed personnel and civilians alike.

However, Vortex provides much better value for money with their lower prices, which is the most critical factor in choosing a rifle scope for many people.

They also have more reticle options better suited to long-range shooting than Leupold.

The rifle scope you choose will heavily depend on personal preference and your use case. For bang for your buck, Vortex is the best. For the best optical glass possible, choose Leupold.

Frequently Asked Questions (FAQs)

After learning more about Leupold and Vortex optics, you might have some other questions about the two scope brands. Here are answers to the most commonly asked questions on this match-up.

What Are the Main Differences Between Leupold and Vortex?

The main differences between Vortex and Leupold models are the price and quality of the optical glass. Generally, Leupold scopes use higher-quality glass than Vortex.

However, Vortex offers optics at a lower cost, meaning they give users a better bang for their buck. It is the preferred option if you need something that gets the job done reliably for less money.

On the other hand, if you are looking for the best scope for the price in terms of quality, Leupold should be your top pick.

Is the Vortex Diamondback Worth It?

The Vortex Diamondback is one of the best starter hunting rifle scope options for those on a budget. This is because of the outstanding reliability, fog-proof design, good zoom level options, and value for money.

You are getting a scope that is not too bulky or heavy, utilizes good-quality glass, and, best of all, is cheaper than other options that offer similar features or zoom levels.

Is the Leupold Mark 5 Worth It?

The Leupold Mark 5HD line offers some of the best quality optical glass you can find at its price point. It offers features like HD lens coatings, a wide array of zoom lenses, and great adjustment turrets.

It is also much lighter than other optics that offer the same zoom lenses, up to 20 ounces lighter than some models. This is particularly useful if you walk a lot with your rifle and do not want to feel the weight.

While it is not the cheapest scope, coming in at just below the $3000 price point, it is worth it. It can go from 5x to 25x zoom with just a few clicks and is clear enough to see the farthest targets without you needing to squint.

Does the US Military Use Leupold Scopes?

The previously mentioned Leupold Mark 5HD is the rifle scope chosen by the US Military as the Army Precision Sniper Rifle Scope. This means it will be one of the main scope options used by precision shooters across all the branches.

This is because of its perfect variety of zoom levels, plus the reliability and optic performance that this particular Leupold model showcases. It is also lighter than other options from optics manufacturers in the same category.

Furthermore, the addition of fog and waterproofing ensures that military snipers will not have issues shooting in less-than-ideal conditions.

Are Vortex Scopes Used by the Military?

Over 250,000 Vortex optic models have been selected by the US Military as their optic of choice on their Next-Generation Squad Weapon System. While they are not in use yet, they will be soon.

The features that this model is required to have include a variable magnification optic, backup etched reticle, atmospheric sensor suite, laser rangefinder, compass, and a ballistic calculator.

These are premium features that may make their way towards the consumer market, too.

Final Thoughts on Vortex vs. Leupold Rifle Scopes

The choice between Leupold or Vortex optic models highly depends on what you value and your personal preferences. Both Vortex and Leupold are great brands that offer high-quality tactical products.

If you value having the best quality optical glass, are more focused on hunting, and are willing to spend a bit more, choose Leupold Optics. They are the best fit for your needs.

On the other hand, if you want the best value for money, are on a tighter budget, or need more options for BDC reticles, then getting Vortex Optics is probably your best bet.

This lines up with what I recommend at each budget price point. If you are getting a budget to mid-range optic, then get Vortex. If you are getting a more expensive model, go for Leupold.

How To Get Water From A Well Without Electricity

0

If you’re going off-grid, you’ll need a water source, usually in the form of a well or borehole.

That’s all well (excuse the pun) and good when you’ve got the power to pump water from it, but if the grid goes down, you’re effectively upstream without a paddle.

Don’t despair – there are several ways to get water from your well without electricity – it just takes a little preparation and forethought.

7 Ways To Access Your Well Water Without Electricity

#1 Generator

Solar pump

Although only 5% of American homes have backup generators, they are one of the best ways to ensure consistent power regardless of grid problems or extreme weather conditions.

While a dual fuel generator may provide the most cost-effective solution, few can produce the voltage needed for a deep well pump to operate.

For deep well pumps, a diesel generator will provide a more effective solution as they are both portable and powerful enough to produce the pump’s required 220v.

#2 Solar Pump

wind turbine

There are numerous different types of solar well pumps available, the best of which can pump water from depths of 600’ or more.

A surface solar pump is a viable option for shallow wells and to move water from your storage tank to your home. For deeper wells, you’ll need a submersible solar pump.

The best solar well pumps can run off batteries as well as sunlight, making them a suitable option for accessing water during extreme weather conditions, as well as during a power outage.

On our small-holding, a submersible solar well pump pushes water to a storage tank at the top of the hill; we then rely on gravity to transport that water down to the house.

The benefit of this two-pronged approach is that we’re not solely reliant on the solar pump, and therefore sunlight, but can get a consistent water supply straight to the house regardless of the weather or the national electricity supply.

#3 Wind-Powered Pump

Green Hand Cistern Pump

A wind turbine isn’t something you can always rely on to provide water when you need it as you can be sure the wind will drop the instant you decide you need it, but you can use it to pump water to a holding tank which can then be transported to your home by gravity.

Many home wind turbines can be hooked up to solar panels, providing two alternative power sources for those inevitable emergencies. Read more about hybrid wind and solar systems.

Although you’ll need to invest a few hundred dollars in a good-quality wind turbine, once in place, it costs very little to run or maintain.

If you lack the funds to buy a wind turbine but have an abundance of DIY know-how, you could make your own out of PVC piping, and an old car fan as demonstrated in the video below.

#4 Hand Pump

How To Get Water From A Well Without Electricity

One of the simplest ways to get water from a well when the power’s down is via a hand pump. The best hand pumps can be alongside your electrical submersible pump, making it easy to swap from one.

Hand pumps are particularly effective for shallow wells and can draw water from a depth of 25’ or less without undue muscle fatigue on your behalf.

Accessing water that’s over 30’ down requires significantly more muscle power, which is why some deep well hand pumps can be linked to a windmill or operated via a foot valve.

A shallow well hand pump is simple to install and relatively affordable. It’s well worth paying that little bit extra for a high-quality pump, however, as you’ll be relying on it in your hour of need.

While you can pick up a pitcher pump for as little as $50, it’s more advisable to invest a few hundred dollars in getting a more reliable, better quality model, like the Pressurized Sealed-Top Water Pump from Lehman’s.

Deep well hand pumps cost considerably more, especially the Bison Stainless Steel Deep Well Hand Pump that can draw water up from depths of 300’. You may well need to be a potential contestant for the World’s Strongest Man competition to achieve this, but it is possible!

The best deep well hand pumps come with a lifetime warranty, require little maintenance and no priming, meaning that you can install them and forget about them until an emergency arises.

The main benefit of a hand well pump is that it requires nothing more than muscle power to operate it, which means you’ll have access to water in all weather conditions. If you opt for a solar pump, you’ll be reliant on sunlight whereas, with a generator, you need fuel.

The hand pump needs nothing at all, making it by far the most sustainable and reliable approach.

#5 Well or Sleeve Bucket

The sleeve bucket is the simplest and cheapest way to get water from your well without electricity. Also known as torpedo or cylinder buckets, the modern-day “well bucket is simply a long, skinny bucket that can be lowered into the narrow confines of a well casing to bring water to the surface.”

A high-quality sleeve bucket from Lehman’s costs less than $100, is made of galvanized steel, and can hold nearly 2 gallons of water. It has a handy device that enables you to discharge water from the bottom, rather than attempting to up-end it and empty it from the top.

If you’ve got access to some rope and PVC piping, you can easily make your own sleeve bucket which, while not as sleek or voluminous as a bought model, will still do the job effectively. Find out how to make your own PVC well bucket below.

The only problem with using a well bucket is that you’ll need to remove your submersible pump to get access. With most pumps, this is a fairly simple operation but it’s inconvenient nonetheless and not something you need to do if you have a hand pump.

#6 High Lifter Or Hydraulic Ram Pump

Depending on the topography of the land, you could use a hydraulic ram pump or a high lifter to access your well water. Both these pumps use downhill water pressure to push the water up to a higher point than the original source.

These gravity-fed water systems are easy to install and maintain but are only effective where there is a continuous supply of water and room to install the pump at least a foot and a half below that source.

While hydraulic ram pumps need a higher flow rate and can be rather noisy, high lifters can cope with as little as one gallon per minute and operate in virtual silence. As they are both self-powered, they don’t require any fuel, solar power, or electricity, so can operate regardless of power outages or severe weather conditions.

#7 Build An Emergency Pump

While I don’t feel my DIY skills would be up to the task of making a sleeve bucket, let alone an emergency well pump, there are plenty of people who’ve done just that and are willing to share their designs and methods.

The simplest type of pump to make is one that, like the pitcher hand pump, uses suction to draw water up. Designs like these are cheap and easy to make but will only work effectively on shallow wells.

For deeper wells, a vacuum pump is more effective and, although these are slightly more complicated and expensive to build, there are some informative online tutorials that give a complete list of materials and step-by-step instructions on how to complete the project.

Conclusion

If you’ve already got alternative energy sources, like wind or solar, on your property, getting water from your well when the grid goes down isn’t too much of a problem.

When severe weather conditions, like heavy rain or gale-force winds, disrupt your electricity supply, however, they’re liable to play havoc with those alternative sources as well, leaving you at the top of the well without any water.

The most reliable and sustainable ways of getting water from your well, therefore, are those that rely on gravity, like the hydraulic ram or high lifter systems, or those that need only muscle power.

While sleeve buckets are reliable and easy to use, in many cases, you must remove your submersible pump before you can start accessing the water, which is why the hand pump is the best method of getting water without electricity.

You can install a hand pump alongside your existing electrical pump so you can switch easily from one to the other without having to uninstall anything at all. A top-quality deep well hand pump can draw water from depths of up to 300’, keeping dehydration at bay whatever the weather.

Read more about the different types of well pump.

9 Best Group 27 Deep Cycle Battery 2024 – For Terrestrial and Marine Vehicles

0

We have discussed a lot of different types of batteries on our blog. We have talked about batteries based on performance, functionality, weather, usage and a lot of other factors.

In this article, we are going to discuss the different batteries available for you if you need a car battery, specifically the best group 27 deep cycle battery. Different cars with different designs require different size batteries.

Now, if you know about batteries, you must also know that the design of batteries also affects their performance. As it turns out, Group 27 is one of the most popular battery groups and is very common in vehicles, both terrestrial and marine.

Group 27 batteries offer a great size-to-performance ratio. They are mostly used in vehicles requiring high power such as Jeep Wrangler. Group 27 batteries are also seen in other domains such as scooters and other appliances. It greatly depends on what the type of battery is.

In this article, we’ll be mostly looking at deep-cycle batteries. It is very important, however, to figure out beforehand what kind of battery fits your requirement. Getting the wrong battery can be a real hassle and can often cause problems in the long run.

Luckily, we have discussed at the end of this article how you can find the best deep-cycle battery for you. But before that, let us have a quick look at the different products available in the market for you to choose from.

Best Group 27 Deep Cycle Batteries – Our Top Picks

How to find the Best Group 27 deep-cycle battery?

Best Group 27 Deep Cycle Battery

Choosing a good battery can be really tricky but in this section, we are going to talk about a few points you can keep in mind while buying a new deep-cycle battery.

Since you have already identified the size of the battery you want, a lot of the work is already done. Keep these points in mind when you buy a deep-cycle battery.

Capacity

Needless to say, one of the most important features of deep-cycle batteries is their capacity. 100Ah batteries are widely used but that doesn’t mean that a 100Ah battery would be the best choice for you too.

As the capacity increases, the price also increases and you should try to figure out your exact power consumption to get a good idea of the exact battery capacity you need. It will help you save some money and also improve your overall performance.

Battery Type

We have looked at a few different battery types in this article. Flooded, AGM, Li-Ion and Gel are some of the most common battery types available in the market. Each has its own advantage and disadvantage.

Before you buy a battery, make sure you read about the different battery types available in the market and see which one’s the best for you.

Price and Warranty

Last but not the least, you should always make sure that you get reliable batteries. Getting a reasonably priced battery with a good warranty is a safer option than buying cheap batteries with no warranty.

There are a lot of budget options when it comes to batteries but make sure the battery you are buying has a decent quality.

Batteries with warranties are always a good deal as it makes sure your investment is safe in case something goes wrong.

Here is a helpful video on how to choose the right car battery:

FAQs

Conclusion

In this article, we discussed the best Group 27 deep-cycle batteries available in the market. Towards the end, we also talked in brief about some things you should look out for while buying yourself a deep-cycle battery. We hope you found the article helpful.

How to Eat Acorns

0

Yes, you can eat acorns, and all acorns are edible — it’s just that most need special processing. Here’s how to go about it.

Blue oak acorns in a bowl
Photo by Hank Shaw

If you haven’t read my other acorn posts, Acorns and the Forager’s Dilemma is an introduction to the use of acorns; the Forager’s Dilemma is, in a word, starch. Starch (carbohydrates) is the toughest thing to gather, and is a primary reason why humans settled down 10,000 years ago to grow grain.

Next I wrote about how various world cultures have traditionally used acorns, cultures ranging from Korea to Japan to the Native Americans, Europeans and North Africans.

Let me say loud and clear that you can eat acorns and all acorns are edible, at least all species of acorns are. We’ll get into details in a bit.

Basically there are three ways to eat acorns: Eating them as nuts (they are a lot like chestnuts), making acorn flour, or cooking in acorn oil. I have not yet tried to make acorn oil, but that link leads you to my friend Sam Thayer’s website; he sells it.

Collecting Edible Acorns

First you need to get yourself a supply of acorns. Go find some oak trees; they’re the ones with all the acorns that have fallen down around them. I know this sounds condescending and stupid, but oaks come in so many varieties that in autumn this really is the easiest way. It is a bit of a crapshoot, as it is tougher to determine a variety of oak by its acorn than by its the leaf — you can do it, but it is a little harder.

You can gather acorns anytime from September until early spring. I find gathering as the acorns fall is best. Suellen Ocean, who wrote a very useful book Acorns and Eat ’em,
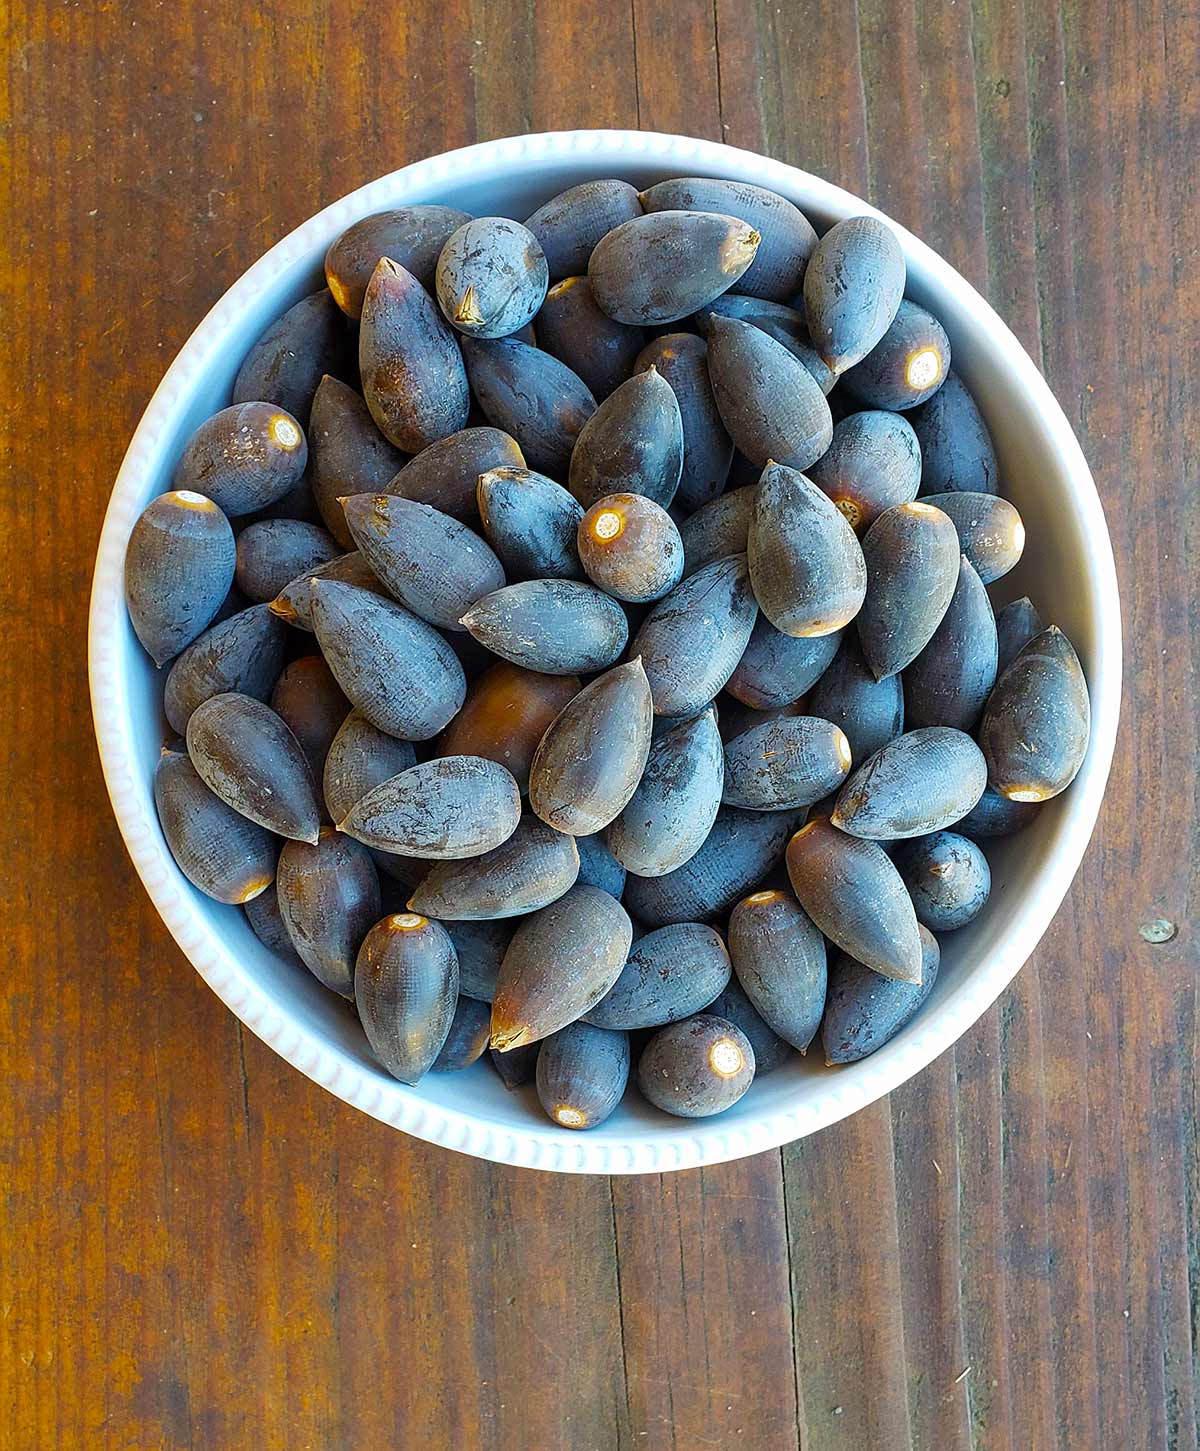
says she likes to collect Tanoak acorns in February and March, after many have begun sprouting.

She says acorns with sprouts between 1 to 2 inches long are still good to eat, but discard any acorn meats that have turned green. Ocean says recently sprouted acorns a) have begun to turn their starch into sugar, and b) are foolproof: “If it is sprouted, it’s a good acorn and I haven’t wasted time gathering wormy ones.”

A word on worms. When I first gathered acorns, little did I know that I had gathered scores already infected with the larva of the oak weevil. Nasty little maggoty things, you can tell they are inside your acorn if there is a little hole in the shell. Look for it, discard that acorn and move on. But know that oak weevil larvae bored those holes from the inside out. Like Alien.

It’s helpful to know what kind of oak you are dealing with because acorns from different oaks have different levels of tannins in them; more on that in a bit. If you don’t know your trees, start looking for little green acorns in May. Pick a leaf and compare it to oak leaves online or in a guidebook. Gather acorns and compare them to online images and guidebooks; different oaks bear acorns with different shapes.

With that in mind, remember that not all oaks are created equal, and the fundamental fact to know if you are going to eat acorns is that you are dealing with a wild food, and as such must contend with tremendous variability, both in species and even among individuals of the same species.

Some oaks bear acorns so low in bitter tannins that they can be eaten raw. Legend says that California Indians fought over these trees, which makes some sense because one mature Valley Oak can drop 2,000 pounds of acorns in a really good year. A ton of sweet acorns may well be worth fighting over.

That said, even “sweet” acorns should be leached to remove what tannins exist in them because several studies show that unleached acorns can make you constipated and can harm your teeth. Of all the species I know of, only the imported European cork oak and the Emory oak of the Sonoran Desert come close to being “sweet.”

Tannins aren’t the only thing that makes different species of acorn different. UC Riverside Professor David Bainbridge wrote in a 1986 academic paper that depending on species, acorns can range in fat content from 1.1 percent to 31.3 percent, protein from 2.3 percent to 8.6 percent, and carbohydrates from 32.7 percent to 89.7 percent. That is a huge range!

What does it mean? It means that in the kitchen you treat acorns from different species very, very differently. A fatty acorn will make a meal, like ground almonds. A carb-rich acorn — like Valley Oak acorns — makes a drier flour, more like chestnut or chickpea flour (acorns lack gluten and so will not rise.)

California black oak acorns on tree
Photo by Hank Shaw

Differences in Various Oaks

Here’s a general breakdown:

‘Sweetest’ Acorns, meaning lowest in tannin: East Coast white oak, the Emory oak of the Southwest, the pin oak of the South, the valley and blue oaks of California, the burr oak of the Midwest, as well as the cork oak and the well-named bellota oak of Europe. To my California readers, know that there are an awful lot of cork oaks and burr oaks planted in towns and cities here, so keep your eyes peeled.

Largest Acorns: Valley oaks are really big, as are East Coast White oaks. Burr oaks are large, too, as is the California Black oak.

Fattiest Acorns: The Eastern red oak acorns I’ve used have a very high oil content, and I’ve read that the Algonquin used red oak acorns for oil. In the West, the champions are both live oaks, the Coastal and the interior live oak, as well as the tanoak and black oak, which is Quercus kellogii.

Shelling Acorns

I found that shelling the acorns is the most onerous part of dealing with them. They have an elastic shell that resists normal nut crackers. I found whacking them with a hammer to be the best way to open up an acorn. Some people use a knife, and I do this with green acorns, but not fully ripe ones.

Best way to whack ’em is to put the flat end (the side that used to have the cap) on a firm surface and rap the pointy end with a hammer, or, with long, tapered acorns like cork oak or Valley oaks, just whack the side.

Acorns are far easier to shell after they’ve dried. If you choose to dry them, do this in wide, shallow pans so they don’t get moldy. Once dried, I’ve worked with two-year-old acorns and they were fine. They will need an overnight soak before grinding, however.

Red oak acorns have a “test,” a skin that doesn’t want to come off, just like a chestnut. Easiest way to deal with this is to freeze your fresh acorns for a week or two before cracking. This will slip the skin off the nut. The skin is bitter, but it’s not that big a deal if you are making flour.

Shell your acorns into water. The meats oxidize, and you will get a lighter-colored flour if you do this. It’s aesthetic, but it matters to me.

Tannins

All acorns should be leached with water to remove bitter tannins, which will a) make your mouth feel and taste like felt, b) make you a bit nauseous, and possibly c) constipate you for days.

Getting those tannins out is the big barrier to cooking with acorns. But it ain’t no biggie. With my valley oak acorns, after shelling I drop the acorn meats directly into my stockpot that was two-thirds full of water. When I fill the pot about a third of the way up with shelled acorns, if I am in a hurry, I bring the pot of water to a boil. The water turns dark. As soon as it boils, pour the water off into the sink and repeat the process.

It requires about five changes of water to get valley oak acorns to taste like chestnuts. I did this all while watching football, and did not miss a snap. Other oaks will require more or fewer changes of water. Choose the “sweetest” acorns on my list above for the least amount of work.

There is a better method, but it takes days. Grind the raw acorns into flour, then mix a ratio of 1 cup of acorn meal to 3 cups water, or more water if you have large containers. Pour this all into a glass jar with a lid and put it in the fridge. Every day you shake the jar, wait 12 hours or more, then pour off the water — and the tannins.

How long? Anywhere from a week to two weeks, depending on how bitter your acorns are. This is a good way to leach acorns without using fuel for boiling water, and you do not denature a particular starch in the acorns that acts a little like the gluten in flour, i.e., it helps the flour stick to itself. I go into the full process of cold leaching acorns here.

If you plan on baking with the acorn flour, use the cold-water leaching method.

Photo by Hank Shaw

Once your acorns are free of tannins, you need to figure out what to do with them. Regardless, you need to dry them first or they will rot. Acorn grits can be patted dry on a tea towel. If it is hot out, lay the acorns out on cookie sheets and dry in the shade. You could also put them in an oven set on “warm.” You can also put the acorns in a dehydrator set on low heat, which is what I do.

You can also freeze your fresh acorn meal. Store dried flour in jars in the fridge. Why the fridge? What fat there is in acorns will go rancid pretty quick if you left the flour at room temperature.

What you can now do to eat acorns is pretty limitless.

My first success was an acorn flour flatbread in the style of an Italian piadina. I also make an acorn flour honey cake, which is really very tasty — almost like gingerbread cake. The flour also makes an excellent pasta dough when mixed with regular flour.

Other Ways To Eat Acorns

I will also substitute about 1/5 of the flour in my homemade flour tortillas with acorn flour, and I also make mean acorn gnocchi.

Use your imagination!

Confessions of a fisherman, hunter and tinkerer

0

Image

A few years ago I wanted some new decoys and I had some shells and a couple full bodies. I had also hunted over Silos with friends, so I knew they would work. I looked at the prices and being the eternal tinkerer that I am, I said “I can make those WAY cheaper than that!” and off I went. 😀 I researched making them and did all the planning. Now I will talk to you about making your own silhouette decoys and the process for making them.

They are just made out of 4mm Corrugated cardboard, welding rods and spray paint. you get a lot of decoy for very little money and a bit of sweat equity. I bought 3 sheets of 4mm plastic cardboard from a sign shop and I think being careful spacing them and using a few magnums I got 44. If I got rid of the magnums I probably would have got over 4 dozen. The picture below has 15 here on a 4×8 sheet and I got 17 on another by not using magnum decoys.

Image

and some of the cutout silos:

Image

I borrowed a buddy’s silos to use as patterns. I traced his on 1/4″ plywood and used them as a pattern. I think the centers are copies of some commercially sold stuff and the two outer one are magnums. You can trace existing Silos or just draw your own patterns. If I did it again, I would probably not use the magnums again. They take a lot of space up when making the silos and in my opinion, don’t look any better in the field.

I used welding rod as I had seen some one else suggested before and melted them in so I never leave a rod in the field to blow a tracker tire as that sure to lose rights to hunt next year! I cut them out one at a time with a box cutter knife. I bough 3 sheets for $36 something in ’07 and got 15 on one and 17 on the other. I trimmed out the last sheet and ended up with 4 dozen decoys.

Here is the finished on with the folder spray patterns I made next to them

Image

To prepare the silos to paint the plastic cardboard I laid the silos on my work bench one at a time and sanded them with an orbital sander and 80 grit. I wanted them rough so they would hold the paint and reduce any possible shine.

The far right template is used to make the white cheek. The one on the top right is used to protect the black neck area when spraying the body. Top left to protect the tail and white from body paint. Left middle to protect tail when spraying white belly. And bottom left to spray white belly again if over spray got on it.

I sprayed several to get a pattern of how to make them. I do the black head and tail first. Then the white belly both two coated. Then gray the body and then camo brown the upper and center body. The lightly over spray the brown to lighten it some and fade it into the gray, Very little !! I use Krylon camo brown for the Canada Goose and it’s too dark so I lightly dust with grey primer at 18″ and lighten it up.

Next I made a template for feather lines. I took a goose picture and photo shopped it for black lines where all the feather lines are. Then printed it on manilla folder and out out the area when the black lines where. Then clothes pinned the template over the decoy and used a dusting of grey primer to make the feather lines. Below is what my template looked like.

Image

Here is the finished silo with the template next to it.

Image

My advice is to fit them with the rods just before painting. I am using welding rods and knocking off the covering. Heating the tip and pushing it in. Then pull it out and heat the last inch quick and back in all the way and let it melt in to stay for eternity.

One thing I learned. Make sure the holes inside run head to tail or parallel to the ground. The welding rod does not want to stay in when the holes are going up. That’s how you want the lines to run on yours, or less than 45 degrees from parallel with the ground. When the holes run parallel with the ground the necks and tails seem to be a lot stronger, you just have to heat and melt the rods into the silo. They are also much easier to paint with the stakes in and out in the yard than on the work bench. I paint one then go to the next and leave them out to dry.

Some of the welding rods came loose later on and I pulled them all and use Gorilla glue and they have never come out again.

Best Air Rifle Deals

Popular Posts

Air Gun 101: How many types of Air Gun Sights are there and which...

0
The former American president, Joe Biden, was recently quoted saying: If you need more than ten rounds to hunt, you better stop that business and...

Air gun 101: How Nitro Piston technology can make your shooting sport more exciting?

0
In the air gun market today, there are many air rifles made with nitro-piston technology Even the best-selling lists on gun retailer's sites have a...

Best Air Rifle Brands – Who Makes the Best Pellet Gun?

0
In Jeff Bezos’ own words: "A brand for a company is like a reputation for a person. You earn reputation by trying to do hard...

Air gun 101: Everything you need to know about air rifle accuracy

0
Wyatt Earp has said: Fast is fine, but accuracy is everything And I just thought how many airgunners are obsessed with muzzle velocity and muzzle energy,...

Can a Felon Legally Possess an Air Rifle in Tennessee?

0
"Understanding the Legalities: Felon Ownership of Air Rifles in Tennessee" can a felon own an air rifle in tennessee? In the state of Tennessee, the ownership...