Home Blog Page 84

Small Spreads for Snows: It might be time to rethink the “bigger is better” mindset. Use these tips to secure success with a small(er) spread. – Delta Waterfowl

0

Going Small for Snows

No trailer (or three) jam packed with snow goose decoys? S’no problem! Here’s how to make a smaller spread work this spring.

By M.D. Johnson

Eighteen hundred. Two thousand. I’m not sure what the exact number was … hell, I don’t even know if the young man who orchestrated the menagerie of plastic knew the exact number. What I did know was it was a lot of decoys. And battery-driven spinning things. And speakers to rival a Rolling Stones concert. A lot of stuff.

The young man—now much better known—was Tony Vandemore, co-owner of the Missouri-based Habitat Flats and an authority on white goose hunting. I’d joined Vandemore for early-season teal, wood duck, and mallard hunts, but this was my first experience with snows. So when the young man instructed us to get down and flicked the power switch, bringing to life eight speakers and a pair of rotary decoy machines, I listened. But when I finally saw the geese he was looking at—so far away they looked a lot like flecks of pepper on a paper plate—I wondered to myself, “What the hell is this kid doing?”

Moments later, and after taking my inaugural ride in the eye of a white goose hurricane, I realized he knew exactly what he was doing.

And so it was with my further experiences with snows in Missouri, Iowa, Nebraska, Kansas, and South Dakota—concert hall sound systems and a virtual sea of plastic. Fifteen hundred. Twenty-five hundred. But it wasn’t just me, for it seemed to most hunters that massive spreads and big numbers were the only way to go when it came to fooling spring snows.

“Either go big,” I was told time and time again by those foolish enough to chase white geese, “or don’t go at all.”

And that’s just the way it is … or is it?

A man holds a set of flat goose decoys in his hands as more lay on the ground in the background.

Defining ‘Small’

Let’s begin by addressing perhaps the most challenging part of the small spreads for snows equation, that being the definition of the word “small.” For a group accustomed to setting 4,500 decoys, a mere thousand might be small; for those rigging 1,000, then 400 to 500 may fit the bill. Much of it, then, lies in what one’s used to. It’s an eye of the beholder sort of thing, I reckon.

“Downsizing for me is 300 to 500 full-bodies,” said Vandemore “We’ve done this quite a bit in Arkansas, and 300 full-bodies is what we typically run in Saskatchewan in the fall.”

Eleven hundred miles east of Vandemore’s digs in north-central Missouri lies Easton, Maryland, home to some of the nation’s deepest goose hunting traditions, as well as to legendary callmaker, Sean Mann. No stranger to geese, be they darks or lights, Mann is the mastermind behind the Eastern Shoreman goose call, one of the most recognizable hunting instruments ever to be crafted. But while the World Champion and Champion of Champions built his reputation on Canadas, he’s certainly no stranger to the ins and outs of spring snows.

“To me a small spring snow spread would be 300 decoys or fewer,” Mann said, “If I’m hunting a water hole, I may use as few decoys as three dozen floaters.”

That’s not to suggest committing the sin of shooting a roost, Mann continued, but rather, strategically targeting water where the birds are going to hydrate. In Maryland, says Mann, that means avoiding setups on alkali ponds, which birds will use to roost but won’t drink from. Dry-feeding snows must drink afterward to digest their food. Find their watering hole, and it won’t take a massive spread to find success.

Coming back around to the word “small,” Nick Costas, who owns Split Reed (splitreed.com) and Thunderbird Outfitters in Saskatchewan, is quick to admit he’s not a “spring snow grinder” like some folks, but he does his fair share of chasing the white fowl.

“For years, 100- to 150-dozen socks, rotary machines, clone decoys, fliers … the monster set-ups were the big thing,” Costas said. “And people still do it. They’re hunting a 10,000-bird feed. They’re laying in the decoys under the socks. A huge spread with a lot of motion: That’s their play.”

Costas was convinced to rethink this mindset during the spring 2018 season.

“That was a tough year for snows in Arkansas, the year I guided down there,” he explained. “There weren’t a lot of juvies. We came out running 100 dozen socks with rotaries, and didn’t have a lot of success. So, we started packing in layout blinds, with 300 full-bodies and no motion, and had success—forty- to 80-bird shoots. To me 300 full-bodies is a small spread.”

As importantly, it’s enough to work.

Dynamic Decoys

Now don’t get me wrong: I’m not saying there’s not a lot of thought that goes into setting out a 2,000 mixed rig of full-bodies, silhouettes, socks, rotary machines, fliers, layouts, A-frames, and anything else worthy of inclusion in these so-called “monster spreads.” There is! But I will say there’s a great deal more margin for error when setting 2,000 fakes as opposed to artistically arranging Mann’s 36 floaters or Costas’ 300 full-bodies, e.g. preparing for a wind shift, selecting blind locations, and most significantly, concealment to the point of invisibility.

“When I say ‘300 full-bodies,’ I would likewise run a small sock or silhouette spread, if that’s what I had,” Costas clarified. “Not everyone can afford 300 full-bodies … and if there was a consistent snow goose feed, I would have confidence running 300 silhouettes or socks, especially depending on the wind. I’m not the guy who’s going to say you need highly expensive decoys to kill snow geese. I don’t believe that.”

So is there a right way and a wrong way to set those 300 decoys, be they full-bodies, socks, or silhouettes?

“More thought definitely goes into setting a small snow spread than when I’m rigging 1,500 or more,” Vandemore said. “But it’s still a fairly routine configuration, with more on the upwind side and fewer downwind.”

Perhaps not surprisingly, Mann’s thoughts on the subject are similar to Vandemore’s, but with an added element which, to those who’ve spent time peering through a windshield, is quite understandable.

“I try to duplicate or set the exact picture of what I’d seen during my scouting,” Mann said. “The birds know where they want to be, and more importantly, why they want to be there. I don’t need to know why, but I do need to know where, how, and of course, when.”

Costas breaks a bit from the traditional “tight is better” theory of setting a snow goose spread, especially when he’s working with but a handful of decoys.

“I’m running my spread looser than most,” he said. “I’m creating a lot of little pockets, and giving the birds options where they can land.”

What the young man said next truly hit home.

“I know it’s not spring, but this works in the fall in Canada: I’ll run 10 dozen silhouettes, hide out of the spread, and kill tons of snow geese like that,” Costas said. “I’d say that’s a very small snow goose spread, but mind you, I’m running that when they’re coming to that exact field. My philosophy is that the more crap I put out there, the more opportunity I have to mess the situation up.”

Goose Decoys are seen in the foreground as a group of hunters waits inside their blind for the birds to come.

Visibility and Acoustics

Sooner or later, be the rig large enough to cover several football fields or as small as the average driveway, a conversation surrounding spring snows will turn to the topics of sound and motion. Monster spreads often combine the motion and movement akin to a Mardi Gras parade. Constant sound. Spinning. Flapping. Flying. Flipping. Shaking. It’s like hunting geese in an enormous snow globe—with speakers blaring.

A spread of snow geese decoys in a field can be seen from the sky. The elaborate spread is set to lure in the geese.

A small spread though, and the variables of sound and motion, change a touch.

“I’ll still use rotary machines in a small spread,” said Vandemore. “But I’ll put them on short posts close to the ground.”

In the East, Mann believes in the back and forth of his socks as it pertains to motion and is a firm believer in an old school motion tool.

“If I can be in the spread, I’ll use a square black and white flag for attraction and attention,” he said. “I’m not using it for constant motion, but to refocus birds when they’re headed my way. If they start to get bored, as evidenced by birds starting to fall out of the flock or even the entire bunch beginning to slide off, I’ll flip the flag and try to get them refocused.”

Sound is, of course, another variable in the small snow spread; however, here the question is whether to use electronics (e-callers) or to return to the tried-and-true mouth calls … or, both?

“You definitely still need the tunes (e-callers), but you really need to think about volume and lowering that when the birds get closer,” Vandemore said. “Often, I’ll still run two e-callers, but I can get away with one situationally. Don’t overlook the fact that 300 decoys cover a lot less real estate than do 1,000, so it matters where your sound is coming from and how much sound you’re putting out.”

Costas is on the same page with Vandemore when it comes to sound production.

“I adjust my e-caller volume, depending on the birds,” he said. “It’s just like (mouth) calling for ducks and geese—you’re going to be a little louder when you’re trying to get their attention versus when they’re finishing.”

Mann’s theory on the audible is different.

“Volume is often overdone with white geese,” he said. “Snows have great hearing, and they know what they want to hear. Sound quality is the most important aspect. You have to sound like them and know what they’re trying to say. It’s not just creating noise. It’s being a good family group of great-sounding birds.”

Further, Mann walks both sides of the e-call/mouth call fence in the spring.

“I like e-callers when allowed, with a very small group sound and four speakers,” he said. “I’m looking for the sound to ‘move’ around the speakers, as if the birds were talking across the flock on the ground. And I use a White Out (mouth call) to produce specific sounds that complement the electronics.”

However, Mann has hunted snows for decades minus the battery-powered devices.

“I still do more hunts without the e-caller than with,” he said, “I’m okay combining the e-caller with a good call, as long as I have a remote for the electronics. No remote? No e-caller.”

Top Priority: Concealment

Back and forth. This and that. Pros and cons. Ask 100 snow goose wizards the same question, and there’s an awfully good chance you’ll get 100 different responses; however, one common denominator they’ll all agree is the need for total concealment. It’s a fact for snow geese, a young ’fowler once told me, that, “If you ain’t hidden, you ain’t shooting.”

“Concealment is always a top priority for snows,” Vandemore said. “But even more so when you’re working with a small spread and you don’t have 1,000 decoys to help take some of the birds’ attention off your hides.”

Two men in white suits sit among their white snow geese decoys in a field on a hunt.

Mann agreed, noting, “Concealment is without question the primary element. You can’t beat these birds if you’re exposed.”

Costas summarized the matter especially well.

“With a small spread, you need to be hunting the right, consistently behaving birds, and you have to have a great hide,” he said. “Concealment is my ‘thing’ when it comes to snows.”

“Consider that snow geese get shot from the inside of spreads for months on end. So when snows slowly fly up to a spread, they’re looking down. They’re looking for those people they’re accustomed to in the usual spots. That’s the theory behind using 100 dozen decoys: You can hide yourself in the spread, and by the time the birds get to the head, they’re low enough to shoot. You can’t do that with 300 decoys. That’s a small, realistic spread that’s not packed super tight. It doesn’t look like a strip of toothpaste. It says to the birds that this is calm, natural feed, and they need to be there.”

And if you effectively communicate that magic combination to a massive flock of snows, it doesn’t really matter if you’ve put out 300 socks or 5,000 full-bodies—your shotgun barrel is about to get hot!

M.D. Johnson’s decoy trailer is ready for spring in Cathlamet, Washington.

Tips for Listening for Turkey Gobbles

0

Ron Jolly | Originally published in GameKeepers: Farming for Wildlife Magazine. To subscribe, click here.

listening for turkeys

I remember being cold! I remember the fog on the Tensas River in northeast Louisiana hung like a thick blanket in the air. The myriad of sound coming from the hardwood forest on the river’s bank was a bit confusing to my ears. The waves lapping on the side of an old Jon boat was another distraction. My Dad sat in the stern of the boat and I sat on the middle seat with his best friend Mr. Sonny Hudnall. I remember straining my ears to hear a sound they were hearing that I could not. Their mission was for me to hear my first wild turkey gobble. Again Mr. Sonny asked, “Did you hear that?” Sure, I thought. I hear water on the side of the boat, birds in the trees, water dripping off the trees into the river. “Did I hear what?” was my answer. “It will sound like oble, oble, oble,” said Mr. Sonny.

I strained to hear the sound and finally thought I did. “Was that him?” I asked. My Dad leaned close to my ear from behind and said, “Son, that was the turkey you just heard. He has gobbled six times since we have been here. He is about a quarter-mile away. You just have to learn to separate all the sounds from the sound you want to hear. Focus on that sound and you will hear it clearly. The secret to hearing is in the listening!”

That morning was the first time I heard a wild turkey gobble. There have been many lessons learned about wild turkeys since that morning over fifty years ago, but none as important as how to listen for, and hear turkeys. Here are some tips that will help you.

Know What You Are Listening For

Learning what to listen for is the first step to hearing more turkeys. The gobble of the wild turkey is one of the most unique sounds in nature. To the experienced turkey hunter there is no other sound that can be confused with a gobble. To the novice it is a sound that can be hard to discern, especially when it is far away. Even harder to detect are the more subtle sounds made by turkeys such as drumming, yelps, and scratching in leaves. All these sounds can tell you that turkeys are near.

There are three places turkeys make sounds—when they are in the tree, when they are flying into or out of the tree, and when they are on the ground. Turkeys gobble, yelp, cackle and drum in the tree and on the ground. Turkey hens often cackle when flying up to or down from the roost. The thump of wings is another distinct sound made by turkeys. In most cases a gobble in the tree has a different sound than a gobble made on the ground. It is clearer and less muffled.

As a general rule a gobble made in a tree can be heard twice as far as one made on the ground. That same “twice-as-far” rule applies to all other turkey sounds.

gobbling turkey
A gobbler in an open field will sound clear and can generally be heard twice as far as a gobbler in timber.

Judging distance and coursing sound are other factors in turkey hunting success. Hearing a turkey sound and identifying that sound is step one.

To successfully hunt that turkey you must know the direction the sound came from and how far away it was. The first step to hearing more turkeys is to know what turkeys sound like. Experience and exposure to turkeys can teach you what to listen for. A better way is to watch other hunters. Videos and DVD’s put you in the woods with experienced hunters.

Listen to the sounds on the DVDs and learn how turkeys sound in the wild from your living room. Some companies offer videos dealing with nothing but turkey sounds and identifying what each sound is and what it means.

Isolate and Concentrate

listening for turkeys
Cup your hands behind your ears and open your mouth. This gathers more sound into your ears. Obviously, you can’t hear behind you as well, but it helps to collect more sound-waves and pinpoint where it is coming from.

The second step to hearing more turkeys is to isolate yourself from any distracting noise. If you are listening with a hunting partner, distance yourself from your partner. This will eliminate any distracting sounds they make or the temptation to talk. It also helps to triangulate the sound’s direction.

Choose a listening place where you can stand or sit motionless and be comfortable. I like to rest my back against a tree or sit on a log. I do not shuffle my feet in the leaves and I do not tinker with gear. I focus on hearing turkeys. You probably think I am talking only about hearing a gobble, and that is true for the most part, but eliminating any distracting noise applies when you are listening for turkey sounds in general.

Sound Advice

Two-time World Turkey Calling Champion Larry Norton is an experienced turkey hunter who has spent years guiding clients at commercial hunting operations like Bent Creek Lodge in Alabama. Norton offers some good advice on hearing more turkeys. “I guide hunters who have hunted for years and hunters who are hunting turkeys for the first time. It is our job to get each hunter on a turkey and hopefully get that hunter a shot. That all starts with hearing, coursing and getting into position on a gobbler,” says Norton.

“I like to start on high ground. From there I can hear more country. Many of my clients like to stand close or talk while we are listening for a roosted gobbler. I simply tell them in order to start the hunt we have to first hear a gobble and I can do that best when there are no distractions. Most hunters understand this and give me space.”

“At this point we are listening at day break for sounds turkeys make in the tree. We are primarily listening for a gobble but other sounds can disclose where turkeys are. If I hear hens tree yelping, cutting or plain yelping I know where a flock is located. I hope to hear a gobble, but if I do not I still assume a gobbler is near. If I do not hear a gobble at another location I will go to the hens and hope a gobbler will fire up after the flock flies down. At least I know I have put my client near turkeys,” says Norton.

“There are times when you do not hear turkeys on the roost and this is when you have to change tactics. I go to an area where turkeys frequent and slow way down. I move a few yards and stop to listen. I like to slip to near the top of a ridge where I can hear into the next hollow. I use the ridge to keep turkeys from seeing my approach. Now I am listening for sounds other than gobbles. “I listen for the distinct swish, swish, swish of turkeys scratching in leaves or for drumming. Turkeys are constantly making soft purrs, whines and yelps. This helps keep the flock together and these sounds cannot be heard from very far away. Many times if you hear these sounds and listen really closely you will hear drumming. When you hear any of these sounds set up right there. The turkeys are close!”

Cheat Norton also uses a Walker Game Ear to enhance his hearing ability. He cautions that there is a learning curve associated with mechanical hearing devices. “You have to learn to course with the Game Ear,” says Norton. “You also have to realize that sounds you hear using a mechanical device are always further away than they seem. I use the Game Ear to get in the general area of a turkey then rely on my own ears to close the deal but I know people who use them the entire hunt. It depends on you.”

My wife, Tes, suffers from hearing loss and uses mechanical hearing devices made by E.A.R., Inc. “I put them in before I leave in the morning and take them out when my hunt is over,” said Tes. “I cannot do without them. It was frustrating at first because all sounds are magnified. The sound of your steps, the birds, the wind, traffic, everything! I really had to work at getting used to them, but it was worth the effort.”

wild turkeys
Use topography to your advantage. Try to locate from higher up when possible and from the leeward side of cover when there’s a wind.

“Coursing and judging distance were also challenging, but in time it all came together. It really helped to go with someone who could hear well and compare what I thought I was hearing to what that person was hearing. After only a few outings I gained confidence in my ability to hear, course, and judge the distance to that sound. I never go hunting without them,” said Tes.

There are other ways to enhance the ability to hear more turkeys. Cup your hands behind your ears to gather more sound into your ears. You will be able to hear better in the direction you are facing but not as well in other directions. Turn your body to listen in all directions. Open your mouth while listening. This opens the ear canal and allows more sound into the ear. Slow your breathing. Take shallow breaths with your mouth open. This reduces the sound of air moving in and out of your lungs and eliminates some of the noise that competes with your ability to hear. Close your eyes. This helps you concentrate on hearing and eliminates visual distractions going on around you.

Avoid direct contact with the wind if at all possible. On windy days listen from the down-wind side of a ridge or hill. Face into the wind and allow the wind to bring sound to you. I am blessed with good hearing ability but I carry a single over-the-ear device made by Woodland Whisper that I use when I cannot hear turkeys with my own hearing. Often that device allows me to hear a gobbler that I could not hear naturally. Problem is, that turkey is usually too far away to get to. If that turkey is on the property I can hunt I will be there to listen next time.

Common Sense

Never listen near running water, traffic, or construction. Avoid any foreign noise that competes with your ability to hear turkeys. Move as far away from distracting noise as possible. Be aware of the time of day. Turkeys generally fly up to roost near sundown. Turkeys generally fly down from their roost as soon as they can see the ground. It is important to know if a turkey is on the ground or in a tree because a gobble from roost can be heard farther than a gobble on the ground.

Hearing a turkey gobble in the rain is challenging at best. If you’re confident of the path that turkeys take on your hunting property, set up a ground blind. A ground blind is an excellent way to hunt turkey in the rain. Your gear and calls can stay dry while you wait on a gobbler to respond. Turkeys, in general, are not as vocal as usual when it’s raining, so they need to be close to respond to your call. You will want to call more than normal as the rain makes it hard for hunters and gobblers to hear.

If you know where a gobbler roosts at night, set up nearby the following morning. In the west, using binoculars or spotting scopes can help you track a turkey’s movements in the evening. If you are in an area where timber prevents you from using optics to track turkey, you can use a locator call to find them. A locator call like an owl call used in the evening can get a gobble response from a roosted tom. Once you get an answer, plan your morning sit accordingly. Knowing where a gobbler is roosted will help you hear him the next morning.

Before you can expect a gobbler to respond, you have to be proficient with your turkey calls. If what you are producing is not realistic, you may not get a response. Worse, you may scare the turkey away. Work with all your calls until you are proficient with the clucks, yelps, putts and purring that a hen might make.

The Secret to Hearing is in the Listening

It is my firm belief that the key to turkey hunting success is the ability to “hear turkeys.” When you hear and identify a turkey sound you can judge where the turkey is, how far away he is and the direction he is moving. This information tells you where you need to go. Very few turkey hunts end with a turkey in your vest that did not start by first hearing turkeys. Learn how turkeys sound. Put yourself in the best position to hear and concentrate. Do this and you will hear more turkeys!

47 Best Baits for Yellow Perch Fishing

0

Sharing is caring!

Yellow perch are a popular gamefish in their native range in parts of the Midwest and Canada, as well a wider area of North America where they now thrive.

Why not? Perch are incredibly tasty and at times can be caught in huge numbers … if you know what you’re doing.

One of the most important things you’ll need to know to catch lots of fillet-worthy perch is what to put on the hook.

This article reveals dozens of the best baits for perch we know, which at times can result in excellent catches. Some will be obvious, like the ever-effective minnows and worms. Some are a little unusual.

And a few will surprise the heck out of you but can really get the job done.

Many of these bait types can be used all year, whether under the summer sun when you might be fishing deeper water or in the dead of winter while ice fishing.

To put this article together, we consulted with Bill Janowich. Simply put, Janowich has been perfecting his fish-catching techniques longer than I’ve been alive.

“I’ve been perch fishing for over 70 years, so I’ve seen a thing or two,” said Janowich, who lives in Ohio near Lake Erie. His favorite perch bait on that Great Lake is a 2-inch shiner minnow.

“However, there are many other fisheries in the world, and many different methods of catching perch,” he told us. “Sometimes, necessity is the mother of invention.”

We already have a complete guide to yellow perch fishing on this website.

This article complements the fishing guide by going into more depth on the many baits that will have you catching these fish 12 months out of the year, whether you’re fishing them under the blazing summer sun or through the winter ice.

A variety of baits also can be used in conjunction with Janowich’s own perch-fishing kit.

“I have personally used most of these baits myself,” he said. “Live bait is usually more effective than artificial lures.”

To help you keep them all straight, we’ll divide the types of baits into broad categories.

Don’t see your secret bait for catching yellow perch? Send us a comment below.

Fishy Baits

A man and a woman hold two large yellow perch, including an exceptionally large specimen.
Photo courtesy of CatchPerch.com

While the smaller perch feed primarily on insects and crustaceans, the big yellow perch you really want to catch love nothing better than a meal-sized minnow or cut bait.

Often the best minnow or cut baits to use are those that live in the water where you are fishing, because that’s what the perch are already eating.

One note here is that live fish aren’t always legal baits, so check the regulations where you will fish to be sure it’s allowed. In some waters or entire states, live fish and other aquatic creatures aren’t permitted because their use can result in invasive species.

Here are some great examples of using fish as bait to catch yellow perch.

Live Minnows and Other Swimmers

Various types of shiners, freshwater shad, and other small fish are incredibly effective yellow perch baits when fished live right near the bottom.

While many perch anglers prefer small minnows, Janowich likes to fish minnows in the 2- or even 3-inch size range. While that seems big for perches’ small mouths, perch love a nice meal and larger perch will be drawn to larger baits.

In fact, Janowich caught the 14.5-inch jumbo perch pictured above on a 3-inch emerald shiner. It was certified as an “outstanding catch” in Ohio and “fought like a northern pike,” he said.

If smaller 1-inch baits are all you can get, they will work well but also will result in catching some small yellow perch, but bigger ones also will take it.

The following are some minnow and other aquatic baits that might work well, given their availability and legality where you are fishing. Other local options may also be effective.

Shiners

Closeup photo of an emerald shiner minnow in water.
Photo by U.S. Geological Survey

This is a common family of minnows with hundreds of types, and they are among the best live bait you can get.

For example, emerald and spottail shiners are native to the Great Lakes, where shiners are Janowich’s first choice for perch bait. Emerald shiners are more common, but those spot-tails can be excellent if you can find them.

Shiner numbers are down in some areas of the Great Lakes, so catching them can be more difficult.

Bait shops also will sell other small bait fish, such as golden shiners and fathead minnows. Minnow prices at bait stores have gone up in recent years, but they are still worth seeking out, Janowich said.

Dead minnows, including commercially brined or home-salted varieties, aren’t as good as the live variety and at times can be mushy, but these still can be among the best bait alternatives if live minnows aren’t available, Janowich added.

Shad (various types)

Closeup of a single gizzard shad out of the water.
Photo courtesy of Depositphotos

Depending on where you are, there may be some freshwater shad available. Gizzard shad are fairly common in the Upper Midwest, and thread fin shad are another variety that might be available where you are.

Herring

These are in the same big family as shad and are similarly effective bait where you can obtain them.

Mosquito fish

Often can be caught in shallow water in lakes and ponds, or might be sold locally.

Suckers

There are a wide variety of suckers across the U.S., and if they co-exist with yellow perch, the small ones will be on the perch’s menu.

Gobies

A closeup of a round goby in a fish tank.
Photo courtesy of the U.S. Geological Survey

These are destructive invasive species in many waters including the Great Lakes. Turn the tables when you catch one and turn them into bait.

Crayfish

Live or dead, the soft-shelled ones are especially good perch bait.

Tadpoles

Or pollywogs or whatever you call them, the larval stage of amphibians (often frogs) make excellent bait fished live. They can be found and netted in abundance at certain times of the year, often in the spring.

Freshwater Eels

Smaller eels are excellent perch baits, if you can get them. They are favorite forage for finny fishes and also have lots of action like leeches or lively worms.

Cut Baits

The above types of fish can be used dead, either whole or as cut baits.

Simply fillet larger fish and cut them into about 1-inch long strips of about a quarter inch wide, keeping the skin on to help hold your bait to the hook.

Generally speaking, the best cut baits use fish that are available in the waters where you are fishing.

Some cut bait types to consider include:

Yellow Perch

That’s right. Yellow perch are cannibals and will eat their own. Use the first one (or maybe the first smaller one) for bait to catch more in its own school.

Catch that first perch, especially a smaller one you don’t mind sacrificing, and fillet it out. Cut the fillet into strips that are 1 inch long and about a quarter inch wide, in a pennant shape and rig it up to your hook.

Other types of fish fillets also will often work.

Bluegill

Closeup of a bluegill fish isolated without a background.
Photo courtesy of Depositphotos

These panfish may be fished as cut baits as described for perch, or if you can catch them small enough, they also can be great live baits for perch.

Bluegill have a naturally sweet meat, and as we’ll discuss more further down in this article, perch love sweets. (Woe is the life of a bluegill, as the bigger ones not only are good eating for humans but make excellent bait for larger fish including giant flathead catfish.)

Crappie

Crappie fish close up laying on a bed of brown pine needles and green leaves.
Photo courtesy of Depositphotos

Considered in a similar orbit with yellow perch for their fine eating, crappie cut baits (or very small live crappie) are also a favorite on the perch diet.

White Bass

These are usually larger than yellow perch, but they can be used both for cut baits or, if you catch a very small one, as a live bait for perch.

White Perch

These are often predators of yellow perch, but if you catch a smaller one you can turn the tide and turn it into cut bait or use as a live bait.

Steelhead and Other Trout

While steelhead and their trout cousins are generally too large to use whole, they can be used as cut baits, including using the intestines, fins and eyes (see more on those below).

Fish Tails

Closeup of a trout tail showing spots and fin rays.
Photo courtesy of Depositphotos

That’s right, if you want your bait to look like a fish, start with a fish fin.

Simply cut off a piece of the tail fin, hook it up and drop it down to where the perch are. They’ll pretty much fight to get to it first. And that’s no fish tale (but it is a fish tail).

Yellow perch and some of the other species mentioned above work great for this.

Fish Intestines

“This is an old Canadian charter technique. Catch a fish, cut it open, cut out the intestine, cut it into 3 inch strips and attach to your hook. They last forever and are an excellent bait for all kind of fis,” Janowich said. We’ll take his word for it!

Fish Eyes

Fish eye very close-up.
Photo courtesy of Depositphotos

Fish eyes, and especially perch eyes, are a tasty offering if you’re a perch.

“Best thing is they’re free and present a ‘good-looking’ choice (sorry, couldn’t resist),” Janowich said.

Worms, Larvae and Other Crawlers

This category covers all sorts of critters in the worm and insect families that fish find irresistible.

Earthworms

Fishing hooks baited with earthworms isolated on white background.
Photo courtesy of Depositphotos

The old reliable worm is among the top baits for yellow perch. For one, they simply work. Also, it’s hard to beat their availability, whether from your garden or the bait shop, they are easy to get for a day of fishing.

Nightcrawlers

Closeup of nightcrawler earth worms used for fishing bait.
Photo courtesy of Depositphotos

Buy them at the store or, in some areas, catch them sticking out of their holes at night or hiding out under a piece of wood.

Also known as Canadian nightcrawlers, lob worms and dew worms, these are a premium bait for perch and other game fish.

They can be used whole or cut into pieces, depending on your needs.

There also are African and European nightcrawlers primarily available by purchasing, but the more common North American version is all you really need.

Red worms

Closeup of a lot of red worms for fishing.
Photo courtesy of Depositphotos

Have a garden compost bin? You probably have these small worms, also known as red wigglers. You also can purchase them directly for bait or to start a colony.

They are a little challenging to hook up, but their active wiggling on the hook is nearly impossible for a perch to pass up.

Garden Worms

Whatever you can dig up in the yard or find under a rock at the lake will probably get the job done.

Some types don’t hold on a hook as well as others.

Larval Baits

Mealworms

Closeup of yellow mealworms on a wooden background.
Photo courtesy of Depositphotos

These yellow critters are beetle larvae and make excellent perch, panfish and even trout bait.

You likely can buy them at a bait shop or pet store (they are sold as food for reptiles, aquarium fish and other pets). They also are fairly easy to raise at home, as I used to do. (Pro tip: the beetles are escape artists, so make sure you have a secure container.)

You’ll use smaller hooks with mealworms than you will with some baits, due to their size.

Waxworms

These are the larvae of a wax moth. Like mealworms, look for them both in bait and pet shops.

Ice fishermen often tip their lure hooks with these or similar live baits for added attraction.

Maggots

Closeup of maggots often used for fishing bait.
Photo courtesy of Depositphotos

Yes, those larvae of the pesky house fly or similar insects. Bait suppliers will carry them in some areas because they are excellent for perch and several other types of game fish, from panfish to kokanee salmon.

Squats and pinkies are generally smaller maggots from other fly species and also work for perch bait. The “caster” form of a maggot, one that is turning into a pupae, also will do the job.

Leeches

These relatives of the earthworm come many species of their own, but leeches can be broadly categorized by blood-sucking and non-blood-sucking.

If you have a choice at the bait shop or while catching your own, Janowich highly recommends the non-bloodsucking variety, and not just because you don’t want them turning the tables and making you the bait.

The non-bloodsuckers feed on lots of things perch eat, which provides a more appetizing scent from the leech.

Janowich likes to hook them right on the sucker end to allow the rest of the leech to wriggle and writhe freely in the water. Perch won’t resist it.

Grasshoppers

Grasshopper isolated on white background.
Photo courtesy of Depositphotos

Switching to baits found on land, grasshoppers are fantastic baits for perch as well as bluegill, trout and other fish that commonly eat insects.

Once the hoppers come out each year, they should be easy to net in grassy fields and similar areas.

On the hook, they wiggle enticingly, and perch can’t resist.

Crickets

Fish them like a grasshopper, with very similar results.

Compared to grasshoppers, crickets are more likely to be sold in bait shops and pet stores and might be available for longer periods.

But they are a little softer on the hook.

Imitation Baits

This section is about artificial baits made to look much like the real thing, and there are lots of options here because yellow perch will bite plenty of different things.

While purists like Janowich will nearly always stick with the real thing (and the real thing really works), imitation baits have their place.

Some anglers simply don’t want to fuss with live baits or baits that will spoil quickly. Having a jar or plastic bag full of artificial bait already in your tackle box has its appeal.

Note that I’m most experienced with the Berkley line of imitation baits, but try out the ones that work for you.

Artificial Minnows

Hate messing with the real thing … or have trouble finding them to catch or buy?

Artificial minnows along the lines of Berkley’s Gulp! minnows will often do the job, even if not quite as well as an actual live minnow.

We’ve seen some ads for products such as Magic Emerald Shine Minnows that might work similarly.

Artificial Worms

Berkley has a variety of products that fall under the category of fake worms, including PowerBait and Gulp! lines of earthworms, nightcrawlers and angle worms in natural colors as well as some brightly hued options among artificials.

But you certainly don’t have to limit yourself to Berkley products, especially in this category, as lots of companies make soft plastics in worm form.

Try scented artificial worms for increased catches.

Artificial Mealworms

Berkley’s Power Honey Worm is a good imitation bait closely resembling a mealworm, if you like to fish with smaller baits but can’t get the real wiggly kind.

Artificial Maggots

Grossed out by real maggots? Or maybe just don’t have them handy? A jar of Berkley Gulp! maggots can fill that need.

These are a very small bait and often used to tip the hook on a small lure such as spoon, spinner or jig for yellow perch as well as other game fish (including kokanee salmon where I live).

You’ll find some cheaper brands online as well, but we don’t have experience with them.

Artificial Waxworms

Not everyone makes this type as they are somewhat similar to mealworm and maggot baits, but Lunkerhunt has a few varieties that are available through various retailers.

Crappie Nibbles

These tiny pre-formed dough baits work great on the tips of lures.

How do we know? When we’re crappie fishing and put these on the tip of the jig hook, if there are yellow perch in the neighborhood, they won’t stay off the hook.

Even if you’re only after perch, try tipping the hook of a small jig with a Crappie Nibble and fishing it in schools of perch.

A few other companies make similar products as well.

From the Grocery Store

These fishing baits aren’t really intended as such, but they definitely will catch yellow perch. Fresh out of worms or minnows? Stop by the supermarket on your way to the lake.

Meat and Seafood

Hot Dogs

A package of raw hot dogs on a white background.
Photo courtesy of Depositphotos

That’s right, “tube steaks” aren’t just for baseball games and campfires. Hot dogs will catch yellow perch in addition to some other game fish (catfish, anyone?). Tear or cut them into bait-sized pieces.

Some anglers suggest that the beef hot dogs, while popular at the ol’ ballgame, are less attractive to perch than those made of chicken or turkey, Janowich said.

Also consider, “smokeys” type of franks are tougher on the hook and produce even more oily scent to attract fish.

Bacon

It’s not just what brings you to breakfast, it’ll bring perch to your fishing hook. Use pieces of bacon raw for best results, as the oily scent it sends out will get the sleepiest perch up and at ‘em. It also will stay put on your hook longer.

Chicken Liver

Fresh raw chicken liver in a bowl on a white background.
Photo courtesy of Depositphotos

These little organ meats are sold both in grocery stores and some bait shops. Yes, they are often thought of as catfish bait, but their scent will bring in the perch and other types of fish as well.

Shrimp and Prawns

Raw prawns isolated on white background.
Photo courtesy of Depositphotos

Though typically saltwater species are sold for human consumption, shrimp and prawns are excellent bait for quite a few freshwater fish, including perch.

Cut them into fish-sized pieces, but leave the shell unpeeled when possible, as they’ll stay on the hook better if stabbed through the tough shell.

Anchovies

If you think of anchovies only as a pizza topping or perhaps as bait for larger fish like catfish and salmon, you might be missing the boat. Or at least the perch.

Cut these oily saltwater baitfish into pieces and the perch will lining up for a salty bite.

Sardines

Fresh caught sardines over an ice bed.
Photo courtesy of Depositphotos

You know those jokes about being packed together like sardines?

Well, these oily fish sold in tins have tons fish-attracting scent that a school of yellow perch won’t ignore. These are typically labeled Pacific wild caught.

On Other Store Aisles

Candy

That’s right, just like me, perch have a sweet tooth.

While it won’t last long if you hook a Hershey’s chocolate bar square on your hook, look for chewier textures that are more likely to last in the water.

Our suggestion: Try a candy gummy bear or other shape and you’re likely to land some sweet-loving perch. Heck, there are even gummy worms, so it was made to be!

Chewing Gum

A chewed piece of pink chewing gum isolated on white.
Photo courtesy of Depositphotos

What’s even tougher than a gummy candy? How about chewing gum.

Janowich suggests you chew the gum yourself just a minute to get it the right consistency, but leave most of the flavor in the gum before hooking on a piece.

The sweetness will attract the fish, and the rubbery texture will help keep it on your hook.

Golden Raisins

A heap of golden raisins over a white background with light shadows.
Photo courtesy of Depositphotos

The light-colored types come in various colors and will catch the fish’s attention better than your standard black raisins.

Hook them in place and they will swell up a bit on the hook while releasing a sweet scent that appeals to perch.

Sweet Corn

An open can showing yellow corn inside on a white background.
Photo courtesy of Depositphotos

Buy a small can of sweet corn. The kernels are sweet, brightly colored and tough enough to stay on the hook while attracting yellow perch.

Garlic

Not a sweet or a meat, but garlic is strongly scented and for whatever reason, fish like it. Why do you think so many artificial baits are scented with it? Try the real thing if you run out of your favorite standard bait.

The Weird

Shoe Laces

A pair of shoelaces looped over a white background.
Photo courtesy of Depositphotos

Uh-huh. You’ll have to cut them up, but make them look like a worm or a leech on the hook and suddenly a day on the boat when you left the bait at home is a day you’ll probably catch a perch or two.

And it really only has to work once, because you’ve already learned that fish fillets, guts and even eyes of that first catch will bring fish to your hook.

Rawhide

Even better than your typical shoe laces is rawhide, like the ones you tie up your boots with or other types of rawhide.

Strips of rawhide not only look like a tasty worm or eel, rawhide won’t rip off your hook easily. So, cowboy up and catch some perch!

Cigarette Butts

Two cigarette butts isolated on white.
Photo courtesy of Depositphotos

This is the first time on this website that we’ve suggested anglers hook on a piece of trash, but you’d be amazed at how well it can work at times. And they really stay on the hook.

“They stay on the hook for a long time and have been known to produce large quantities of perch,” Janowich told us. “I learned this trick by accident while on a fishing trip to Georgian Bay in Canada. For giggles, I baited one on a hook in shallow, weedy water and the perch went crazy.”

Acknowledgements

Northern Ohio resident Bill Janowich contributed many of the yellow perch fishing bait ideas in this article. Janowich is a life-long perch fisherman and has developed a perch-fishing kit he sells online at catchperch.com.

Do you have a favorite yellow perch bait we haven’t covered in this article? Leaving a comment below gives us the permission to add it to this article and/or publish it elsewhere. Comments must be approved. Leave a name as you would like it to be published and an email we can use to contact you if necessary. Your email address won’t ever be published.

How To Get Rid Of That Frozen Chicken Taste [6 Quick & Practical Ways]

0

Most people will have a few bags of frozen chicken in their freezer. It can be easy to forget about one or two bags only to discover them too late – when they’re freezer burnt.

Freezer burn has a very distinctive taste, but it’s hard to describe. Off, weird, old, musty, and ‘like the freezer’ are some of my attempts.

So, how do you get rid of the taste of frozen chicken? To get rid of frozen chicken taste, marinate or brine the chicken and cut off any visible bits of freezer burn. You can also opt to use the chicken in a dish where its flavor will be overpowered, such as a curry, enchiladas, or something spicy.

Related: How To Store Raw Chicken In The Freezer

How to make frozen chicken taste better

The freezer taste that clings to your chicken is not a seasoning anyone would choose. A simple frying, grilling, or baking won’t be enough to shake it off.

Sadly you can’t get rid of the taste of freezer-burn completely, but you can improve it to the point where it’s barely noticeable.

Here are a few ways to go about making your frozen chicken disaster edible.

Word of warning: you may see varying success depending on how badly your chicken has suffered in the freezer.

But the way I see it is that the only thing you have to lose is time.

You either throw the meat out straight away or try and save it. If you save it great. If not you can throw it away, but at least you tried.

Cut off any freezer burnt bits

The most important thing to do is to cut off any obvious bits of freezer burn. Cut them off before you cook the chicken.

This will get rid of the worst tasting bits, but it won’t completely solve the problem. Freezer burn affects the whole piece of meat and not just the visible bits. The rest of the chicken probably won’t taste great either, but that’s where the next tactics come into play.

Marinate or brine the meat

Marinating meats is a classic way to flavor them, and it’s even more important when you’re dealing with freezer burnt chicken.

A good, strong marinade will help mask the frozen taste, and adding something acidic to the marinade will help to tenderize the meat.

Acids break down some of the proteins and fats in the meat, making it more tender. Balsamic vinegar is a good option. It’s acidic and adds a slightly sweet flavor to the chicken.

Put a small but concentrated amount of your chosen marinade into a ziploc bag and add the frozen chicken. As the chicken defrosts, the juice from the chicken will mix with the marinade and dilute it. Shaking the bag a few times as the chicken is thawing will help to ensure even coverage.

Brining meat is similar to marinating.

Make a saltwater solution and let the chicken sit in it as it thaws. The primary goal of brining is to tenderize the meat, the flavor comes second.

The salt solution will replace some of the lost moisture in the chicken and help bring it back to life. You can also add some herbs and spices to the brine mix such as sage, black pepper, or garlic. This will help to give the chicken a subtle flavor.

Grind or shred the chicken and put in a sauce

One of the best things you can do to disguise badly frozen chicken is to use it in a dish where the texture or taste of the actual chicken doesn’t matter too much.

Grinding or shredding the meat means you no longer need to worry about the texture of the meat because you’re changing it anyway.

Grind the chicken up with a meat grinder (link to amazon) to make meatballs or burgers and add whatever additional flavors you like to mask the ‘frozen’ taste. Thai chicken meatballs are super tasty and a little different from the usual Italian recipes you’ll find. You need lots of garlic, chili, ginger, and kaffir lime (if you can get hold of it).

Just like ground meat, shredded meat can be easily flavored. You can slow cook it in a crockpot with lots of sauce to mask any off-tastes. Add bbq sauce to make an alternative to pulled pork, or use salsa and black beans to make a delicious burrito filling. You’re basically turning the chicken into a sauce delivery vehicle.

Related: How To Reheat Frozen Shredded Chicken

If you want something cold, you can poach and then shred the meat to make a chicken salad.

Use it to make a stock or soup

If the frozen chicken taste is really offending you, then use it to make soup or stock. That way, you can still make use of the chicken without actually eating it.

Don’t worry. The chicken won’t leave a frozen taste in your stock. It will taste just like regular chicken stock.

Thaw the chicken and simmer it in water along with some vegetables. Once it’s done you can strain the chicken and either get rid of it or shred it and put it back into the soup.

This technique works best if your chicken is on the bone. The bones tend to add a lot of nutrients and extra flavor. However, it will also work fine with boneless chicken.

Make a curry / stew

Curries and stews tend to be very strongly flavored. The sauce is the star of the dish, and the chicken is more of a filler. As a filler, the chicken’s flavor gets lost and you can forget about the fact it doesn’t taste perfect.

Any recipe will do so just pick your favorite curry or stew and get cooking.

If you’re pressed for time a quick alternative to curry is to slather hot sauce on your chicken. This may not mask the texture but it will definitely hide any bad tastes.

Return it (if store bought)

If you bought the chicken pre-frozen from a store then the likelihood is you can return it.

Most food stores will accept returns if you’re not happy with the quality of the food. Simply state you found the taste and texture of the chicken unacceptable.

Of course you wont be able to return the chicken if you bought it fresh and froze it yourself.

What causes frozen chicken to taste bad and how to prevent it from happening again?

It’s no secret that freezing foods can affect their quality, but it’s not always clear why. There are two factors at play with chicken: the chicken’s texture altering and freezer burn.

Texture changes

As the chicken freezes, ice crystals form inside it. The sharp edges of these ice crystals rupture the chicken’s cell walls, causing the muscle fibers to weaken and break down. This noticeably alters the chicken’s texture and means the meat can no longer hold in moisture effectively. As the chicken thaws, lots of moisture will be lost leading to a dry piece of chicken.

You can’t prevent these ice crystals from forming as it’s part of the freezing process. But you can minimize how many form and how big they are. The quicker you freeze the meat, the less time the ice crystals have to form.

Chill the meat in your fridge first so it’s as cold as possible before going into the freezer. Then flash freeze the meat uncovered for a few hours. Uncovered meat will freeze faster than covered meat. Once the meat has frozen solid, make sure to cover it before leaving it for longer-term storage. Effective wrapping of the meat will help to prevent freezer burn.

Freezer burn

Freezer burn is the next issue and can affect both the taste and texture of frozen chicken.

Freezer burn occurs when the chicken is exposed to cold air. The cold air draws moisture out of the surface of the meat, leaving it severely dehydrated. Freezer burn isn’t unsafe to eat, but it doesn’t taste very nice.

It’s easy to see freezer burn on chicken because the meat changes color. The meat will turn white and look visibly tougher.

Luckily, freezer burn is completely preventable. You may have fallen victim to it this time, but you don’t have to again. Prevention is key to avoiding frozen chicken taste.

To prevent freezer burn, you need to prevent any air exposure. One way to do this is to wrap each individual bit of chicken in a double layer of plastic wrap or tin foil and then put it in an airtight container.

Related: How To Break Apart Frozen Chicken

Alternatively, if you have a vacuum sealer at home you can use this. Vacuum sealers are great because you can be sure no air will be in contact with your meat. I recommend the Greyon food saver (amazon link). There is a slight upfront cost involved, but it will save you money in the future because you’ll never need to throw out ruined frozen food again.

War could limit ammo supply

0

Expect the price of ammunition to rise substantially in 2024 as manufacturers dedicate materials to supply the war in Ukraine.

The first hint appeared Monday when Vista Outdoor announced the sale of its outdoor sporting products division to Czechoslovak Group for $1.91 billion. Vista Outdoor brands include Federal, CCI, Speer, Heavy Metal, Bushnell, Butler Creek, Hoppes, and Remington, which owns a large ammunition plant at Lonoke.

A source in the retail side of the Vista universe said that Czechoslovak Group wants the ammunition making capacity for the war in Ukraine. A Reuters article on Monday reinforced that opinion. It said, “Czech-based CSG has seen its revenue and profits rise since Russia’s invasion of Ukraine as demand for heavy military equipment and ammunition to ship to Ukraine soared.”

In December 2022, Czechoslovak Group also acquired 70% of Fiocchi Munizioni, which in November 2022 announced plans to build a firearms primer manufacturing facility in Little Rock. It is one of only six primer manufacturing facilities in the United States and is also the world’s only source for lead-free primers.

When interruptions occur in the firearms industry supply chain, the retail ammunition and ammunition reloading markets get pinched the hardest. Shortages are most noticeable for 9mm Luger, 40 S&W and 45 ACP, all common law enforcement and military cartridges. Accelerated production of ammo for military and law enforcement also causes shortages in the civilian market. This reduces availability of 380 Rem., and 22 LR, which manufacturers de-emphasize when producing high-demand military and police cartridges.

Robin Sharpless, executive vice-president of Redding Reloading Equipment, said that ammunition and reloading component shortages always accompany periods of political and social unrest.

When shortages are most acute, scarcity of factory loaded ammunition is equally acute. Scarcity triggers binge buying among some customers. Big box retailers sell an entire pallet of ammo to a few customers as soon as it leaves the truck. Moving inventory quickly is an objective in the retail paradigm. It doesn’t matter if it moves through three customers or thirty.

Sharpless said that during the coronavirus pandemic, he noticed the same behavior in the reloading components market.

“If you were watching Facebook forums, you’d see posts that would say, ‘Cabelas got so many primers, and I got them ALL!'” Sharpless said. “I talked to one of those guys. He loads a box of ammunition a year. He shoots a couple of deer a year, so that’s, what, half a box at most? But he’s got 3,000 years worth of primers. It’s an ‘I’ve got them and you don’t,’ thing. Those behaviors do hurt the market.

David Stone, president of Dong’s Sporting and Reloading Goods in Tulsa, noticed the same thing in the ammunition market.

“During the pandemic in 2020, there was no rimfire and no 9mm,” Stone said. “One guy told me he had a 50-gallon drum full of 22 rimfire shells. Never in your entire lifetime are you going to shoot all those. There are thousands of hoarders like that.”

Some retailers, like Fort Thompson’s Sporting Goods in Sherwood, flatten the supply and demand curve locally to a small extent by limiting the amount of ammo and components that individuals can buy at one time. Rationing ammo and components ensures that products are available to the maximum number of customers.

Rationing ammo is important during buying spree periods because it engenders trust, Stone said. Nothing frustrates a customer more than an unavailable product.

“I’m here every day and I watch my inventory level,” Stone said. “Big chains have got corporate people that watch stuff. They’ll ship a hundred boxes to a store. One person can walk in off the street and buy it all. I don’t do that.”

Even when ammo is available, reloading supplies often remain scarce for a long time. An associate at Fort Thompson Sporting Goods said it’s because ammo manufacturers consume the bulk of powder, primers, brass and bullets.

“A lot of the primers are staying with the manufacturers because they’re producing cartridges,” the associate said. “If they can’t get primers, they can’t produce cartridges either. Vista owns CCI and Federal, and Vista owns Remington. Hodgdon owns most of the powder brands, so they’ve all got the same issue. Powder is going to the manufacturers to produce the bullets. It’s all a chain deal. Reloaders get the leftovers.”

Sometimes, Stone said, it pays to play a hunch.

“I’m kind of a gambler,” Stone said. “When I saw a primer shortage coming, I gave somebody I’ve never done business with $150,000 up front for primers. When those came in, I gave them another $150,000. That’s a gamble that paid off.”

Even when demand stabilizes, non-endemic factors, like a trucker strike or dock worker strike, can cause a spike in demand and a dip in supply, Stone said.

“Let’s say there’s a trucker strike. There’s no freight coming in. That kind of kills everybody’s plan,” Stone said.

The solution, Stone said, is equivalent to retailer hoarding. He said he buys enough to get him through the lean times. When the supply reflows, he overstocks again.

“The last big shortage was 2013,” Stone said. “I hated it that I ran out, so I over bought. I’ve had primers since 2013. I bought too many then, and I’m glad I did. It’s already paid for.”

With a major supplier intending to devote production for the foreseeable future to a war that has no foreseeable end, the supply of hunting ammo could be tight for years. Stocking up now while supplies and prices are favorable might help see hunters through some upcoming lean times.

Pilsen Mushroom Man – Foraging

0

Morel Festivals of Midwest

It’s soon to be spring in the Midwest and with spring comes urgent need to get to the woods and beat out the crowds for the coveted morel mushroom. With hundreds of thousands of morel enthusiasts competing for diminishing hunting grounds and urgently checking morel maps and forums to see if morels are fruiting locally, communities with prime hunting grounds are planning entertaining and educational festivals. Most festivals are replete with carnivals, parades, grand forays with prizes for the largest haul, and morel auctions there’s fun for the entire family.

Simply put, Morels have an incredible, meaty flavor and are the most sought after mushroom in the US. Many folks begin hunting morels and then move on to other mushrooms, but most continue to only hunt this special fungi. If you’ve never hunted them, this is your opportunity to get out there and learn, while meeting professional foragers and learning from some of the best.

Some festivals, Like Illinois’s Midwest Morel Festival in Ottawa, Illinois concentrate on mushroom picking education through their Morel University classes, others like Wisconsin’s Musconda Morel Festival offer free rides back to your hotel for those that over indulge. All festivals stress the educational and recreational experience that a good day in the woods brings.

Each festival is put together by dedicated folks who enjoy the outdoors and are committed to others having good experiences. Whether you’re a beginning morel hunter or a seasoned pro, there’s always something to learn and great folks to meet at these fantastic events.

There have been countless books written on Morel Hunting, and I’m sure you’ll be able to find a few at each festival, but the real deep seated knowledge comes from doing and learning from some of the best is not only possible, but highly achievable by attending one of these fests.

Please click the title of each festival to go directly to that festivals website.

mansfield

Mansfield Village Mushroom Festival – April 29th – 30th, 2017

Where: Mansfield Village – Parke County, Indiana

When I was a young lad my mother’s first brand new car was a 1967 VW Transport. My earliest memory is traveling with my parents and seven kids and two dogs to go to family reunions in Crawford County, Indiana. My older sisters would lead the singing, “We’re going, we’re going, we’re going to Marengo, Indiana, We’re going, we’re going we’re going to Marengo, Indiana!” was the constant refrain.

Always from Chicago we’d hit 65 to Indy and then 37 south and turn left toward English, Indiana, the county seat. Each summer we’d take a few extra hours, often to my fathers chagrin, to travel Parke County and hit the many covered bridges on the way back after a long weekend of too much food and too much play down on the farm.

This festival pairs the best family entertainment, a judged car show, and mushroom hunting. There’s nothing better for a spring weekend than to roll into town and put up for a decent show of oldies music, good beer, and decent food, all while checking out the best in central Indiana’s antique cars. One thing you won’t find here is a guided hunt. There’ll be people to tell you where to go (whether you believe them or not is up to you) but there are prizes for every category.

Don’t miss the daylong Morel Auction on the steps of the Red Barn beginning promptly at 10:00 am on Main Street. Yeah, seriously, the Old Red Barn in Downtown is a feature and important part of this community. Hit it up, hang out and let this mushroom fest connect with you and your family.

And of course I would be remiss if I didn’t recommend that you and yours would travel the county and see each of the 31 different covered bridges.

MMFlogo.jpg

Irvine, Kentucky – April 29th – 30th – Mountain Mushroom Festival

Nestled on a peninsula of land surrounded by the Natural Bridge Resort State Park, Irvine is about 30 miles South/Southwest of Lexington, Kentucky. The Mountain Mushroom Festival features about 100 booths of arts and crafts and vendors. A parade, and carnival will also be ongoing, a 5k fun run, mushroom auction, tractor show, antique car show and cake decoration demonstration and contest are in the works.

Setting itself apart from other festivals an agate and mineral hunt is scheduled for the Mountain Mushroom Festival has, a canoe and kayak 6 mile run and a mushroom photography show. Daniel Spicer won last years men’s 5k race, Ashley Hood-Morley snagged the women’s best time fir the Fungus 5k footrace.

The Mountain Morel Festival is the only known to have a beauty and talent pageant, from 6 months to 21 years, boys and girls.

Ottawa, Illinois – May 6th – Midwest Morel Fest

On the banks of the Illinois River about an hour and a half from Chicago and about a fifteen minute drive from Starved Rock State Park and it’s famous lodge, the Midwest Morel Fest will be a large draw, featuring a “Learn to Hunt” Guided Foray by Morel University, and the Championship Foray on Saturday. The Fest also features a morel museum, a home made craft fair and tours of the local and beautiful Reddick Mansion.

The Ottawa, Illinois Midwest Morel Fest has been the place to be since 1996, and Ottawa is it’s third home, originally begun in Magnolia, Illinois for ten years it had a great run. The Henry, Illinois Chamber of Commerce organized it for several years until the economic downturn, and now the fine folks in Ottawa do the hard work of organizing it.

Sure to delight will be the home brew beer tasting and home brew seminar during their Morel Mash Up a silent auction and of course, the Morel Auction.

This years festival is a one day spectacular beginning at 7:30 am for registration, 8:30 Morel University “How to hunt Morels” class. Guided hunts and the Championship Hunt beginning at 9:00 am, prizes awarded at 2:00. Beer tasting begins at 12:30, the annual Morel Auction kicks off at 1:00pm

Tom Nauman, the fests founder tells me, “Last year was a fantastic success, morels started a couple weeks early and stuck around a couple weeks after the fest, 2016 was such a huge success. With the warm winter it seems we’ve got the perfect weekend picked and we’re anticipating a lot of repeat attendees so sign up early!”

morel-uuniversity-honor-society

The 2016 Illinois State Morel Mushroom Hunting Championship awards were presented to: Largest Morel went to Randy Dedecker (length plus girth at 12.5 inches) and the Grand Champion with the most found was Randy Dedecker, again, as usual. Lisa Walner, the woman’s champion snagged 17 morels.

Wyoming, Illinois – May 6th – Stark County Morel Fest

This one day Morel Festival is actually set for the first Saturday in May every year, by county decree. This festival is is halfway between Moline and Davenport, Illinois and features a morel auction and the usual round up of excellent middle American festival fare such as pork chops and sausage sandwiches as well as a round up of kids activities like ring toss and hay rides.

The new home for the fest is Catalpa Grove, five miles due west of Wyoming on route 17. The Rock Island Trail abuts the Catalpa Grove, and the and the Spoon River flows through the grounds, but don’t tell anyone, this might just be the best kept secret for small mouth bass fishing, according to the locals.

Duke Frisby, the Stark County Morel Fest founder is a stalwart in the Morel Mushroom hunting community in Central Illinois – The history of how this festival got started is really the method to get things done anywhere – whether it be a small community or large. – during a meeting with county officials regarding putting in new canoe ramps to further recreation and tourism the county decided to send it to die in the Road Department. During the same meeting and without skipping a beat Duke decided to punt and get some yardage for his community, he suggested that the county host a Morel Mushroom Festival to bring in tourists, and spur the local economy. They bit the bait and it’s been nine years of very successful Stark County Morel Festivals.

Duke Frisby told me via secured communications that a group of rabble rousers from Missouri way are going to hit the low Montana plains and score a several hundred pounds of morels between them, at least 100 pounds of which are coming back to the auction and a morel fry up at the Festival.

The Catalpa Grove Inn will be the Morel Auction Headquarters beginning at 2:00 pm, with space for overflow bidders sheltered outside it should be a full house. Rumor is that there will be a poker run that culminates at the Inn if the weather is right, so bid early and bid often! In previous years the Lions Club hosted a Biscuits and Gravy Breakfast, as of press time we were unable to find confirmation on the biscuits.

Richmond Banner

Richmond, Missouri – May 4th – 6th – “The Mushroom Capital of the World” Morel Festival

“The Mushroom Capital of the World” Morel Festival kicks off May 4th through the 6th. Attracting upwards of 5,000 people it features a kids hay ride, grand parade, carnival and a 5k run, the festival is in it’s 24th year. Organizer Natalie Lamar, a fourth generation morel hunter says, “The morel season kicks off next week, I find it a little odd that there have been morels found to the north, usually they’re fruiting here first, but with a few cool nights and warms days we’ll see a fantastic crop.”

In its 37th year the festival that began as a sidewalk sale in 1980, promises to add more food vendors to feed the over 5,000 expected attendees. Apparently the Society for Creative Anachronism also attends this festival.

Mesick, Michigan – May 12th – 14th – Mesick Annual Mushroom Festival

The Mesick Morel Festival lies just outside the Manistee National Forest and Mesick is located about 15 miles south of Traverse City, Michigan . The Fest features a flea market, an antique car show and three days of carnivals – moms ride free with kids on Mother’s Day. This fest also features a magic show, beer tent and horse pull. Sponsored by the local Lions Club the Mesick Fest also features a Softball Tournament, a 5k run, Grand Parade and a carnival. After Saturday’s Parade there will be a “Mud Bog Competition” in which 4 WD racers will compete in a mud track race.

The Mesick Chamber of Commerce concludes that Mesick is the Mushroom Capital of the Midwest, as well as being a small town with a big heart. I do know that they run a heck of a parade!

This Festival has too many activities to list, the days are packed whether you want to spend time on rides and games with the kids or want to sneak away into the woods, it’s got something for everyone.

Lewiston Banner

Lewiston, Michigan – May 13th – Lewiston Morel Mushroom Festival

The Lewiston Morel Mushroom Festival is a one day event with morning guided forays, mushrooms tastings, an arts and craft show as well as an outdoor equipment show featuring archery, hunting and equipment. Lewiston is in Eastern Michigan in the Center of Grayling State Forest, about 30 miles north of Huron National Forest. The Grayling State Forest is home to some of the largest morels found.

National Banner 
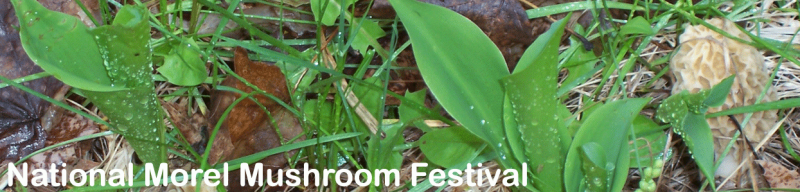
Boyne City, Michigan – May 17th – 21st – “National Morel Mushroom Festival“

Up the glove in Michigan, spot on Lake Charlevoix the Boyne City Morel Fest is in the heart of Michigan’s Morel Country. A Carnival Midway is set up for the fest, with Music Friday and Saturday Night. The Grand Championship Foray is on Saturday, on private grounds, with participants bused over to the undisclosed location.

“I’ve been going since I was a youngster,” says Ashleigh Harris of Michigan Mushroom Marketplace, “And this is the seventh year as the sole mushroom vendor. This fest has not only cooking demonstrations but a tasting and cooking competition,” says Harris.

Ashleigh and Ken Harris, her co-owner of MMM, lost their retail shop in 2016 due to an electrical fire and have since focused on wholesale to restaurants across Michigan of both foraged and cultivated mushroom and wild foods. They’ll be opening their retail shop in 2017 and again feature prepared foods, pizzas and ready to go soups and compound butters. The entire mushroom community is anxiously awaiting their new store, myself especially because she owes me a pound of compound butter.

Musconda

Muscoda, Wisconsin – May 20th – 21st – Morel Mushroom Festival

The Musconda, Wisconsin morel festival, in it’s 34th year, the festival is sponsored by the local American Legion. The Town of Musconda is nestled in state forests on the Wisconsin river halfway between Madison and Prairie du Chien, and attracts folks as far away as Chicago and the Quad Cities attracting about 3,000 people. The prime morel spots west of Lake Michigan happen to be right around Musconda.

Cinda Johnson is one of the folks that help organize the fest, Cinda says shes been coming to the festival for over 20 years, “I love being outdoors in the woods, I love the possibility of finding that honey spot.” As usual she says, “the mainstage music will be at the firehouse, but this year they’re having a DJ at Mushroom Head Quarters.”

The festival funds the local American Legion Hall’s activities, including local little league teams.

black-morel-hottenanny

Minnesota! Black Morel Hootenanny – May 19th – May 21st Superior National Forest

This is a semi-private event, ticketed event – part camping trip, part music and food festival, part certification course. Located north of Duluth, Minnesota this trip is sponsored by Gentleman Forager, a company that specializes in full day and weekend forays throughout Minnesota.

The chefs the Gentleman Forager wholesale to come out and lead cooking demonstrations and cook most the meals. Local musicians set up and put on professional shows. The location is the real star though, and if you’ve ever wanted to see “God’s Country,” look no further.

This is certainly an a-typical morel mushroom event, camping, guided mushroom foraging, chef driven meals, certifications, and a slight edge of roughing it, this may not be for everyone, but if you’ve got the steel, then you should check it out.

Sometimes there are lesser events that don’t really include a festival. If you’re in the area, they’re really worth checking out, though may not be a family destination. These I list below.

St. Louis area – Pere Marquette Morel Festival – April 23 pierre-marquette

Pere Marquette Morel Festival is at one of Illinois most beautiful State Parks, with a lodge built by the Civilian Conservation Corps in the 1930s in the Arts and Crafts style. Arts and craft vendors will be selling attractive handmade merchandise, and I predict there will be plenty of “backroom” morel sales in the parking lot.

This will be a great day for people from Saint Louis to Peoria. If the season is early it’ll blow away other festivals with large blondes, if it’s late then your practically guaranteed to go home with the great black morels that blanket the area!

Come for the festival, and stay in the lodge! You can rent a cabin, stay in the “Modern Wing” (circa 1988) or the Historic Wing which has the best views. With phenomenal fried chicken dinners the lodge’s restaurant is a mandatory stop after a day of morel hunting. Stop by the lodge’s winery (yes, the State Park Lodge has its own winery!) for a tasting and bring a few bottles home. You can rent a boat, a bicycle or even a horse!

This festival includes prizes for the smallest, largest and most gathered during the great hunt that kicks off at 1:00 pm. Don’t blink because you might miss this one, it starts at 11:00 and and ends at 3:00 pm. Prizes include a nights stay in the lodge!

bcsp

Brown County, Indiana – May 3 – Nashville, Indiana

On Saturday, May 3rd, 2014, Brown County State Park will celebrate the 8th Annual Morel Mushroom Sale & Festival! Cooking demonstrations, kid’s coloring tents, and prizes for the largest morel.

There will be a noon cooking demonstration, morel sale at 1:00 pm, as well as local musical acts. 3:30 pm is the largest, smallest and most prize awards.

browncounty2015

Brown County, Indiana – On Hiatus – “Simply Music, Simply Morel Fest”

Unfortunately, as of this writing, the “Simply Music, Simply Morels Festival” is not being organized for 2017. We’ll update you as soon as new information is known.

Beautiful Brown County is about an hour from Indianapolis and about four and a half hours from Chicago. Rolling hills and beautiful scenery of this driftless region, along with the abundance of recreational forest land make this a truly special part of the Midwest. The people in Brown County will welcome you and make you feel like you belong. Brown County is home to Brown County State Park, Yellow Wood State Forest as well as parts of the Hoosier National Forest.

With the emphasis on education the fest has in the past booked great mushroom hunters to lead forays, Folks like Leon Shernoff of Mushroom, the Journal, Eric Osborne of Magnificent Mushrooms, Andy Methven co-author of 100 Cool Mushrooms and UI Mycologist, and Thomas “The Mushroom King” Weipert from Lewiston, Montana comingto to lead forays, cooking demonstrations and giving lectures on tree identification. Rob Poe (me) spoke in 2015, with Dave Gold of Odd Produce in Chicago about how to make a living foraging ethically full time.

r_wildMorel-21web

Now with almost every weekend over the next month and a half booked, all I can say is, have fun! And save some for me!

Feel free to contact me to add your festival to the list

All morel hunters should take a look at the Morel Fact or Fiction Game!

Bow Arm Shoulder Pain: A Common Issue Among Archers and Bowhunters

0

Causes of Bow Arm Shoulder Pain

Shoulder pain is almost inevitable for archers and bowhunters due to the repetitive motion of shooting a bow. This motion puts significant stress on the shoulder joint. According to a research study by van Doorn et al, shoulder pain is the third most common musculoskeletal complaint treated in physical therapy. From my experience as a physical therapist, I have found that shoulder pain is often caused by repetitive activities.

Common shoulder issues among archers and bowhunters include shoulder instability, scapular dyskinesis, rotator cuff disorders, biceps tendinopathy, bursitis, and shoulder impingement.

Shoulder instability

Occurs when the shoulder joint (glenohumeral joint) is unable to maintain its proper position due to excessive movement in the ligaments, joint capsule, or from insufficient dynamic stability of the rotator cuff musculature. This instability can result in frequent dislocations, subluxations, or allow excessive movement of the shoulder which causes undue stress and eventual pain, swelling, weakness, or limited range of motion.

Scapular dyskinesis

Refers to abnormal movement or positioning of the shoulder blades (scapula) during shoulder movements and limits the efficiency of the complex shoulder joint.

Rotator cuff disorders

Refers to a group of conditions that affect the muscles and tendons that attach the shoulder blade to the upper arm bone. The rotator cuff muscles include: supraspinatus, infraspinatus, teres minor, and subscapularis. These four muscles work to stabilize the shoulder joint and keep the ball and socket joint centered in optimal position. Rotator cuff disorders can include inflammation, tears, or degeneration resulting in pain and weakness.

Biceps tendinopathy

Refers to pain and inflammation of the biceps tendon, which attaches the biceps muscle to the shoulder and elbow. This pain is usually located on the front of the shoulder and can cause a popping sensation in the shoulder. Biceps tendinopathy can be caused by overuse, degeneration, postural abnormalities, or poor shooting form and technique, and can result in pain, weakness, and limited mobility.

Bursitis

Refers to inflammation of the small fluid-filled sacs that provide cushion between the tendons and bony structures. Bursitis can be caused by overuse or injury, and can result in pain and limited range of motion.

Shoulder Impingement

Occurs when the tendons or bursa in the shoulder become compressed or pinched during shoulder movements, resulting in pain and limited mobility. It can be caused by a variety of factors, including overuse, poor posture, or structural abnormalities in the shoulder joint.

It’s important to understand that the shoulder is a complex joint that involves many muscles, tendons, ligaments, and bones. If the riser and cam, or scapula and humerus, are not in the optimal position, then this may lead to bow failure or shoulder dysfunctions and pain. The aforementioned shoulder dysfunctions can occur separately, but oftentimes, they are interrelated and occur at the same time.

For example, shoulder instability can lead to scapular dyskinesis because the shoulder blade has to compensate for the unstable joint. Scapular dyskinesis can then cause rotator cuff disorders because it changes the mechanics of how the rotator cuff muscles work. Rotator cuff disorders can also lead to biceps tendinopathy because the biceps tendon works closely with the rotator cuff muscles and, in my opinion, should be considered part of the rotator cuff for all practical purposes. Bursitis can develop as a result of any of these conditions because any abnormal movement or positioning of the shoulder can compress or pinch the tendons or bursae in the shoulder joint.

This is a brief explanation of how complex the shoulder joint is and highlights the importance of addressing any shoulder pain as early as possible to prevent further dysfunction and pain while shooting a bow and arrow.

By addressing the underlying dysfunction, archers and bowhunters can prevent the development or progression of other shoulder dysfunctions and minimize the risk of further damage or injury.

Prevention and Management of Bow Arm Shoulder Pain

Archers and bowhunters can prevent and treat bow arm shoulder pain with archery-specific exercises. Archery-specific exercises should include both compound and accessory exercises that target the rotator cuff, scapula, and arm musculature to help stabilize the shoulder and meet the demands of shooting a bow.

Core strengthening, balance training, and mobility exercises are also vital in maximizing success and reducing risk of injury.

Self-filming while shooting a bow and arrow will help identify shooting flaws and provide feedback on what may be contributing to your bow arm shoulder pain.

Shooting a bow and arrow with poor archery form can compound shoulder problems and increase the risk of injury.

To manage existing bow arm shoulder pain, modify shooting frequency, reduce draw weight, ice, modify shooting form and technique, or take a 1-2 week break from shooting.

Step-by-Step Return to Shooting After a Shoulder Injury

1. Start with shorter distances: It’s important to start at a shorter distance, such as 10 yards, and gradually work your way up to longer distances. This will help you ease back into shooting and prevent re-injury.

2. Decrease the draw weight: Using a lighter draw weight can help reduce the strain on your shoulder as you work your way back up to shooting your normal draw weight. Increase the draw weight by no more than 5-10% in one week.

3. Focus on form: When returning to shooting, it’s important to focus on your form and technique. This can help you prevent future injuries and improve your accuracy. I am a strong believer in self-filming to identify poor shooting form.

4. Incorporate stretching and warm-up exercises: Incorporating stretching and warm-up exercises into your routine can help improve your flexibility and reduce the risk of injury.

5. Perform supplemental exercises: Progressive archery-specific exercises targeting the rotator cuff, scapula, and core musculature will help restore and build the strength necessary for performing archery and bowhunting at a high level.

6. Listen to your body: It’s important to listen to your body and take breaks as needed. If you experience pain or discomfort when shooting, it may be a sign that you need to take a break or reduce the volume of your shooting.

7. Seek professional guidance: If you’re unsure about how to safely return to shooting after a shoulder injury, it’s always a good idea to seek guidance from a healthcare professional or qualified archery coach. They can help you develop a safe and effective plan for returning to shooting.

Return to Archery Guide

Use this table as a guide to your recovery and return to shooting a bow and arrow. It’s important to note that these guidelines are just a starting point and may need to be adjusted based on individual recovery, physical ability, and experience with archery. Additionally, it’s important to always listen to your body and adjust accordingly. It may be a good idea to discuss your return to shooting with a healthcare professional.

.300 Win. Mag. vs .300 PRC — Cartridge Clash

0
.300 Win. Mag. vs .300 PRC — Cartridge Clash

The .300 Win. Mag. debuted way back in 1963 and was an immediate success. Based on a shortened .300 H&H Mag. case, the .300 Win. Mag. offered better ballistics than the H&H from lighter, standard-length actions. To improve performance from the Win. Mag.’s shorter 2.62-inch belted case, engineers removed most of the parent cartridge’s body taper and increased case capacity.

The .300 Win. Mag.’s popularity continued to grow. By the 1990s it surpassed the .30-06 as the cartridge that had collected the most Boone & Crockett record-book animals.

Over the decades other hot .30s have challenged the .300 Win. Mag. for its crown, but none has done serious damage to its appeal. But in 2018 Hornady came out with a totally different fast .30. Known as the .300 PRC (Precision Rifle Cartridge), this new beltless offering is based on the .375 Ruger, a beltless magnum that outperforms the .375 H&H in a standard-length action.

Both the .300 Win. Mag. and the .300 PRC feature a rim diameter of .532 inch, so both require a magnum bolt face. The .300 PRC’s case is the same diameter as the .300 Win. Mag.’s belt, and the .300 PRC has less taper and a 30-degree shoulder as opposed to the .300 Win. Mag.’s 25-degree shoulder. So even though the .300 PRC case is slightly shorter at 2.58 inches than the Win. Mag., it offers about five percent more capacity.

The .300 PRC has a long neck and added head height, which allow it to be loaded with high ballistic-coefficient bullets. The .300 PRC was designed as the ultimate precision long-range, medium-bore rifle cartridge, and even though it’s only a couple years old, the PRC is already a standout in the world of precision shooting.

Hornady

The .300 PRC has some serious street cred, but it doesn’t beat the Win. Mag. on all fronts. For starters, the Winchester will fit in a standard-length action without modification. The .300 PRC will fit in most long actions, but the cartridge’s greater overall length—3.34 inches for the Win. Mag. versus 3.70 for the PRC—will likely require a longer magazine.

The .300 Win. Mag. isn’t that far behind .300 PRC ballistically. Hornady’s .300 PRC Precision Hunter load pushes a 212-grain ELD-X bullet from the muzzle at 2,860 fps while the company’s .300 Win. Mag. Precision Hunter load fires a 200-grain ELD-X bullet at 2,850 fps. With a 100-yard zero the .300 Win. Mag. drops 12 inches at 300 yards while the .300 PRC drops 11.6 inches.

The Winchester does all this with less recoil. What’s more, most .300 Win. Mag. barrels have 1:10 twists and will effectively shoot bullets ranging from 150 grains up to 200. The .300 PRC features a 1:8 twist, ideal for bullets from 200 grains and heavier.

But if you look more deeply at the ballistics, you’ll notice a gap. The .300 PRC consistently carries 250 to 300 additional foot-pounds of energy over the Winchester at practical hunting ranges. At 1,000 yards the .300 Win. Mag. load drops about 20 inches more than the .300 PRC, but the most dramatic difference is in handling wind.

At 1,000 yards the 212-grain .300 PRC drifts 10 inches less in a 10-mph crosswind than the .300 Win. Mag. Now that Hornady is offering its 250-grain .308 A-Tip bullets with a G1 BC of .878, handloaders can really improve ultra-long-range performance. And because the .300 PRC has less free-bore and headspaces off the shoulder rather than the belt, accuracy potential is excellent.

In practical terms, both will serve hunters and shooters well. Hunters will appreciate the .300 Win. Mag.’s wide selection of rifles and ammunition, while target shooters will like the .300 PRC’s accuracy and ballistics. Ultimately, it depends on whether you want the .300 Win. Mag.’s versatility or the .300 PRC’s long-range potential.

Crosman Vantage Review – The Cheapest Nitro Piston Gun Available

0

Don’t let the mediocre look of the product images fool you about this rifle.

This gun could be the one of the best value guns you can find on the market.

Read more to find out why.

Crosman Vantage – Guntype

This airgun is powered by Nitro Piston Technology. Read more about nitro piston technology here to see how it can make your gun sport more exciting.

Crosman Vantage NP has a caliber (the internal diameter of the bore) of .177 ( 4.5 millimeters). It is a single-shot, break-barrel gun with a rifled barrel. For more on how to choose the right air gun caliber for your game, see this post.

Stock

The stock is made of handsome, brown hardwood so it can endure impact, stress, and collision in daily life.

Moreover, hardwood can be refinished easily at any time so it has a very long lifespan.

Plus, the stock is ambidextrous so you can use this gun with ease whether you are a lefty or a righty.

Ammo

Crosman Vantage NP uses .177 pellets as its only source of ammunition.

Since the .177 is the standard caliber accepted by all global 10 meters shooting organizations,

.177 air guns are generally more accurate than other types of air rifles due to the given extra attention for it.

Besides, .177 is the easiest-to-find pellet in the store today and often costs less money than .22 or .25 pellets so it’s very cost-effective if you shoot a lot.

For more on the differences between .177 & .22 and which jobs they do best, see this post.

Cocking and Loading

Cocking the gun:

First, put the gun ON SAFE, hold the gun by your side, then firmly tap the muzzle end to expose the breech.

Let the gun rest on your upper thigh and grasp the muzzle end.

Continue to pull the barrel down to its limitation to perform cocking action

Loading the pellet:

With the breech open after cocking, put the pellet (with the pellet’s nose lying forward) into the breech.

Then pull the barrel up to its original position until it locks and you are ready to fire

Sight

Crosman Vantage NP comes with a traditional open sight which is elevated to satisfy the pickiest shooters:

The front sight is a fiber-optic sight that uses optical fiber for the dot so that it’s brighter than the dark surrounding.

The rear sight is fiber optic sight, too, and it is fully adjustable for windage and for elevation.

Fiber optic sight gives you a huge advantage in low-light conditions and it provides faster target acquisition in normal circumstances.

Velocity, Power and Accuracy

This air rifle boasts a velocity of up to 1200 FPS, which makes this rifle belong to the magnum class of air guns.

Since the speed of sound is about 1100 FPS (vary with altitude and temperature),

You can hear the loud crack if you use a lightweight projectile when shooting due to the super-fast pellet breaking the sound barrier.

Chrony tests give us the following results:

This nitro piston rifle delivers 930 FPS and 15.18 FPE with Crosman Premier Hollow Point pellet 7.9 grains.

Although it’s not near the stated number of manufacturers, it still gives you more than enough knockdown power to take care of birds, starlings, squirrels, etc.

For Crosman Vantage NP, various shooting tests have been conducted by different shooters with positive results.

The common shooting groups are:

  • 1-2” at 30 yards,
  • dime size at 40 feet,
  • 1” at 30 yards,
  • less than 1” at 25 yards,
  • 3/4″ at 20 yards,
  • 1/2″ to 1 1/2″ at 35 feet
  • and 1.5” at 50 feet.

As you can see, this gun is a tack driver up to 30 yards .

Shooting range and intended use

The effective shooting range of this gas piston rifle is up to 30 yards. You can use this gun for target shooting, plinking, small game hunting, and pest control.

Maintenance

Crosman Vantage NP requires little maintenance:

Just remember to oil your gun with Crosman RMCOIL Chamber Oil to keep it as good as new .

Noise

Remember the claims of Crosman that Nitro Piston reduces 70% less noise?

Well, it’s true in this case.

The Crosman Vantage received lots of praise for its quietness, some shooters said that this gun’s even quiet like Benjamin Titan or Crosman Nitro Venom.

Specification

  • Caliber: 0.177”
  • Velocity: 1200 FPS
  • Loudness: 3 – Medium
  • Overall Length: 45”
  • Shot Capacity: 1
  • Barrel: Rifled
  • Front Sight: Fiber Optic
  • Rear Sight: Fiber Optic, fully adjustable for windage and elevation
  • Scopeable: 11mm dovetail
  • Trigger: Two-stage adjustable
  • Buttplate: Rubber
  • Suggested for: Plinking/Target shooting/Pest control/Small game hunting
  • Action: Break barrel
  • Safety: Manual
  • Powerplant: Gas-piston
  • Function: Single-shot
  • Body Type: Rifle
  • Weight: 7.1 lbs

Customer Reviews

There are lots of customer reviews about this gun.

In positive reviews, people love this gun because it’s quiet, accurate, has great fit and finish, is easy to cock, and has enough power to get the job done.

They also think that although the scope is not top-of-the-line, it appears to be adequate.

There are few negative reviews about this nitro piston rifle, mostly concerned with defective products that they get but that’s a predictable risk when you are buying online

Pros and Cons

ProsCons
  • Quiet
  • Magnificent Nitro piston technology
  • Excellent craftsmanship
  • Outstanding accurate
  • Awesome power
  • Adequate scope
  • Imported from another country

Price

The price for Crosman Vantage is only about 90 dollars.

It’s the best choice for the money and is a steal at this price.

In fact, this is the cheapest Nitro Piston gun available in the market.

Conclusion

The Crosman Vantage is an unsurpassed air rifle for the money.

It’s like you buy a tuned gun, not only much smoother and much quieter, but it’s also more powerful.

If you are looking for a decent, break barrel gun, with the added scope and proven nitro piston technology, this is a good deal to go for.

Preseason Archery Workouts: Get in Shape for the Hunt

0

In bow hunting, weeks or months of preparation come down to a single moment. To capitalize on your opportunities, your body must be ready. Picking the right workouts can make the difference between a successful hunt and heading home empty-handed.

Preparing your body is just as important, if not more so, than picking the right gear and finding the perfect spot. Training builds trust in your physical capabilities, which gives you confidence heading into the backcountry.

This article will arm you with the knowledge you need to get ready for hunting season. You’ll learn which fitness qualities are important for an archer, and how to train them. Plus, you’ll we’ll share several of the best exercises that’ll make you a better bowhunter. Let’s start by looking at the muscles needed for shooting a bow.

What Muscles Are Used in Bow Hunting?

A bowhunter’s legs must be strong enough to carry them great distances, which means they have to have endurance as well. The arm, shoulder, core, and back muscles all have to be strong enough to draw and aim the bow. Hunting is a full-body activity that requires strength and endurance.

The entire leg is engaged during hikes for backcountry hunting. From the quadriceps running down the front of your thigh, to the hamstrings on the back, powerful glute muscles above those, and your calves running down the backs of your lower legs. They’re all involved in hiking and trekking in the wilderness.

To handle your bow specifically, your back muscles need to be strong. The latissimus dorsi, rhomboids, teres major, and trapezius help you draw the string. Your biceps, triceps, and deltoids help you draw and hold the bow in place.

And to the surprise of many, your core muscles are also used in archery, including the obliques, which run down either side of your torso. These muscles help you turn and stabilize your spine when shooting.

As you can see, bow hunting is a full-body workout. From draw strength to leg endurance, high-performance bow hunters train year-round to get their entire bodies and mind ready for the season.

Is Archery a Full-Body Workout?

While bowhunting in the backcountry is a full-body workout, archery is more specific. You don’t really need your legs to shoot a bow. Your arms, back, and shoulders do almost all of the work. To be a great archer you need to be strong enough to draw your bow and hold it steady.

Consider this: you can probably shoot a bow just as well from a seated position as you can while standing. Plus, you might not have the luxury of shooting from a standing position while hunting.

For that reason, it’s important to incorporate archery-specific exercises into your workout routine. While you’ll need cardio and leg exercises for hunting in general, bowhunters and archers alike need to carve out space in their workout to strengthen the arms, shoulders, and back muscles.

3 Pre-Season Workouts for Bow Hunters

Hunting — and bowhunting in particular — places unusual demands on muscles we don’t typically use on a day-to-day basis. That’s why training needs to be specific to the needs in the field. We’ve created a specialized program that focuses on creating strength and mobility for carrying a pack and bow across miles of rugged terrain as well as for drawing and holding your bow steady. In the rest of this article, we’ve made 3 of our pre-season workouts available so you can get a better idea of what MTNTOUGH training is all about. While these are just a small sliver of what’s inside, you’ll at least be able to understand how an entire program will make you physically and mentally tougher for hunting season.

If you can get through these workouts one to two times ahead of the season, you’re going to be way ahead of the curve when you head to the hills with your bow. To build trust in your body, you need to build resilience in key areas.

For example, the hips and shoulders. The hips support your legs and help you cover miles of rugged terrain. Your shoulders allow you to draw a bow and aim with unwavering accuracy. On top of that, you need to incorporate strength training and cardio into your routine.

Workout #1: Hip Health Workout

This hip workout combines cardiovascular conditioning on the rower, followed by resisted hip movements and some extra hamstring strengthening to get your hips in shape for hunting season. You’ll build endurance in your legs and upper body while making your hips more resilient. Here are the exercises in the workout:

1. Row Ergometer

The rower is a perfect complement to this hip workout because it uses a mix of upper and lower-body muscles, meaning you won’t exhaust your hips because it’s low-impact. If your hips are bothering you, it should offer a relatively painless way to warm up.

  • Step 1: Strap your feet snugly into the rower
  • Step 2: Grab the handle
  • Step 3: Sit up tall in the seat and slide your body as close to the front of the rower as you can
  • Step 4: Press with your legs, pulling the handle
  • Step 5: Once your knees are nearly straight, lean back slightly and pull the handle into your chest
  • Step 6: Reverse the steps to return to the start position

2. Banded Hip Flexors

This exercise strengthens the hip flexors, the muscles in front of your thigh that lift your leg. They often lack strength, particularly if you sit a lot at your job. Strengthening them can help prevent hip injuries.

  • Step 1: Tie a band to a fixed object behind you, as low to the ground as possible
  • Step 2: Face away from the band and get into an elevated push-up position with your hands on a bench or wall
  • Step 3: Put your foot in the band
  • Step 4: Drive your knee up to the chest, pushing against the resistance of the band
  • Step 5: Return to the start position to complete one rep

3. Standing Fire Hydrants

Perhaps you want a visual, but this exercise looks a lot like what a dog does when it pees on a fire hydrant. It targets the gluteus medius, a muscle on the side of your hips, that’s ignored by many other leg exercises.

  • Step 1: Place a min-band around your knees
  • Step 2: Cross your arms in front of your chest, or keep them by your sides
  • Step 3: Slightly bend both knees
  • Step 4: Lift one leg as far as you can backward and to the side

4. Single Leg Hamstring Curls

Weak hamstrings can lead to muscle strains or sprains if you put too much force on them. Leg exercises like squats and lunges don’t target the hamstrings very well. In fact, not many exercises isolate them properly, but the hamstring curl does.

  • Step 1: Get a slider or roller that can glide under your foot
  • Step 2: Lie on the ground with one heel on the glider, crossing your arms over your chest
  • Step 3: Bridge your hips into the air a few inches
  • Step 4: Keeping your hips in the air, slide your foot away from your body until you feel the tension in your hamstrings
  • Step 5: Slide the glider back towards your body as far as you can to complete one rep

Now that you know the exercises, it’s time to combine them into a workout. You’ll row, do a hip strengthening exercise or two, then repeat. In total, you’ll row 3,000 meters.

  • 250-meter row/10 banded hip flexors on each leg
  • 250-meter row/10 banded hip flexors on each leg
  • 500m row/3 sets of 10 standing fire hydrants on each leg/3 sets of 10 single-leg ham curls on each leg
  • 500m row/3 sets of 10 standing fire hydrants on each leg/3 sets of 10 single-leg ham curls on each leg
  • 250-meter row/10 banded hip flexors on each leg
  • 250-meter row/10 banded hip flexors on each leg
  • 500m row/3 sets of 10 standing fire hydrants on each leg/3 sets of 10 single-leg ham curls on each leg
  • 500m row/3 sets of 10 standing fire hydrants on each leg/3 sets of 10 single-leg ham curls on each leg

Workout #2: Shoulder Health Workout

If you’re unfamiliar with the Assault bike, you’ll be well-acquainted after this workout. Similar to the hip health workout, you’ll alternate a cardio exercise with shoulder-strengthening movements. This workout targets the muscles that archers need to shoot with range and accuracy.

Here are the exercises you’ll see in the workout:

1. Assault Bike

This isn’t your average spin bike. It’s a full-body machine that uses a fan in the front to increase resistance as you pedal harder. In this workout, you’ll use calories burned as a measurement of distance. The assault bike mainly works the legs, but the upper body pushes to add power.

  • Step 1: Adjust the seat of the bike so that your knees are almost entirely straight at the bottom of each cycle
  • Step 2: Sit on the bike and put your feet on the pedals, gripping the handles
  • Step 3: Pedal with your feet, simultaneously pushing the handles on one arm and pulling with the other

2. Renegade Rows

As an archer, you need to push with one arm (the arm holding the bow) and pull with the other (the arm that draws). This exercise perfectly mimics that movement, strengthening your shoulder, back, arm, and core muscles. Generally speaking, rowing exercises are some of the best for archers.

  • Step 1: Get into a push-up position, holding a dumbbell in each hand
  • Step 2: Keeping your hips squared to the ground, lift one dumbbell up until your wrist hits your rib cage
  • Step 3: Lower the dumbbell to the ground, then repeat on the other side to complete one rep
  • Step 4: You can optionally add a push-up to increase the intensity

3. TRX Y’s

Strengthening the back of your shoulder is important for an archer. This exercise does just that, using the smooth resistance of the TRX to strengthen the muscles around your shoulder blade and the back of your shoulder joint.

  • Step 1: Hold the handles of a TRX and lean back, walking your feet forward so that your body is at an angle relative to the ground
  • Step 2: With a slight bend in your elbows, raise your arms straight overhead
  • Step 3: At the top of the movement, your arms should form a “Y”
  • Step 4: Lower your arms so that they point to the site where the TRX is attached

4. Push-Up +

The push-up+ is a regular push-up with a little something extra at the top. You’ll do a scapular protraction at the top, which is when you move your shoulder blades away from each other. This strengthens the pecs and rotator cuff muscles to make your shoulders more stable.

  • Step 1: Get into the push-up position
  • Step 2: Perform a regular push-up
  • Step 3: Once you get to the top, continue to press the ground away from you, lifting your upper back toward the ceiling
  • Step 4: Return to the regular push-up position, relaxing your upper back, to complete one rep

5. Weighted Superman

The superman exercise strengthens your lower back, glutes, and shoulders. This variation targets the shoulder muscles even more by adding weight. You’ll work the back of your shoulders, strengthening them through a wide range of motion to make them more resilient.

  • Step 1: Lie on the ground on your stomach with a weight in each hand
  • Step 2: Lift your legs and feet off of the ground
  • Step 3: Lift your arms off of the ground, holding your hands close to your ears
  • Step 4: Reach forward with the weights as far as you can, then return your arms to the start position
  • Step 5: Lower your arms and legs to the ground to complete one rep

For this workout, you’ll alternate the Assault bike with shoulder exercises. Each round you’ll do either an endurance ride on the bike or a sprint. And each round the endurance distance decreases by 10 calories. Renegade rows and TRX Y’s are performed after the endurance ride. After sprints, you’ll do the push-up+ and weighted supermans. This workout will wear you down and rebuild you stronger than ever before – you got this!

  • 70 cal endurance bike
  • 10 renegade rows on each arm, 10 TRX Y’s
  • 10 cal bike sprint
  • 3 rounds of 10 push-up+, 10 weighted supermans
  • 60-cal endurance bike
  • 10 renegade rows on each arm, 10 TRX Y’s
  • 10 cal bike sprint
  • 3 rounds of 10 push-up+, 10 weighted supermans
  • 50 cal endurance bike
  • 10 renegade rows on each arm, 10 TRX Y’s
  • 10 cal bike sprint
  • 3 rounds of 10 push-up+, 10 weighted supermans
  • 40 cal endurance bike
  • 10 renegade rows on each arm, 10 TRX Y’s
  • 10 cal bike sprint
  • 3 rounds of 10 push-up+, 10 weighted supermans
  • 30-cal endurance bike
  • 10 renegade rows on each arm, 10 TRX Y’s
  • 10 cal bike sprint
  • 3 rounds of 10 push-up+, 10 weighted supermans
  • 20 cal endurance bike
  • 10 renegade rows on each arm, 10 TRX Y’s
  • 10 cal bike sprint
  • 3 rounds of 10 push-up+, 10 weighted supermans

Workout #3: Mountain Man Workout

You’ve read through one workout to strengthen your hips and one workout to improve your shoulder strength for archery. This workout is designed to prepare your legs for hunting season so that they can take you as far as you need to go.

You’ll need a weighted pack for this workout to simulate the demands placed on your legs during hunting season. We’re big believers in functional fitness. Here are the exercises you’ll see in the Mountain Man Workout:

1. Treadmill incline/decline walking

To simulate walking up and down mountains, set your treadmill to an incline of 15. You must walk facing both forwards and backward to prepare for hunting season because walking down a mountain with heavy gear can be just as difficult as walking up.

  • Step 1: Set your treadmill to an incline of 15
  • Step 2: Set your speed to an even pace that you can walk at without feeling like you need to grab onto the guard rails
  • Step 3: Try to maintain a relatively upright posture as you walk

2. Lateral Step-Ups

You’ll need a box or bench for this leg exercise. Since you’ll already have a weighted pack on your back, you shouldn’t need extra weight. Rather than stepping straight forwards and backward, this movement prepares you for the often-awkward and unpredictable steps you’ll be taking in the wilderness.

  • Step 1: Stand next to a box or bench
  • Step 2: Place your inside foot on the top of the surface, slightly in front of your body
  • Step 3: Lean onto the elevated leg and step up by pressing down with that leg
  • Step 4: Once you have both feet on the box and are standing tall, step down with your outside foot
  • Step 5: Step your inside foot back to the ground to complete one rep

3. Walking Lunges

This movement prepares your legs for grueling, uphill treks. It works the quadriceps, hamstrings, and glutes, using the weight from the pack on your back to push the leg muscles to the point of fatigue.

  • Step 1: Find a clear space with room to walk forwards and backward
  • Step 2: Take a lunge step forwards, planting your front foot flat on the ground
  • Step 3: Bend your front and back knee, lowering your body towards the ground
  • Step 4: As you go down, lean over your front leg slightly with your torso
  • Step 5: Step forward with your back foot, coming up to a standing position with both feet together
  • Step 6: Lunge with the other leg to complete one rep

Benefits of Pre-Season Bow Hunting Workouts

Preparing your body for hunting season is essential if you want to hit the ground running. You don’t want to waste any opportunities you might have because your upper body muscles aren’t up to the task of accurately shooting your bow. If you find the perfect spot, your legs should be able to take you there without giving out and forcing you to quit.

Unlike hiking or other mountain athletics, you start the journey with a heavy pack, but if you’re successful, you’ll leave with a significantly heavier pack. Sure, you’ll shed some pack weight along the way as you munch through your rations, but with hard work and some luck, the toughest physical challenge will be hauling elk quarters down the mountain at the end. Thankfully a heavy shot of primal adrenaline will help you along the way, but if you want to truly breathe in the victory lap, you’ll need to be in peak physical condition far before bow season begins.

The workouts above prepare your body for the various demands hunting will place on it. A study performed on rugby players found that adding only 10 training sessions before their season started reduced the risk of injury by 17%. With even more time spent training, your injury risk should drop even further.

Even though it’s not viewed as a traditional sport, hunters are mountain athletes nonetheless. So prep your body the same way athletes of other sports would. This isn’t some marketing gimmick either. It’s backed by data and scientific research – in fact, preseason training is the key to improving performance. For instance, a study performed on soccer players showed that sprint training in preseason improved their performance more than playing small games. The take-home point is that going out on small expeditions won’t prepare you for the big hunt in the same way that time spent in the gym will.

Upper body strength is one of the most important factors in archery technique. The shoulder workout will build all areas of the shoulder so that you can use your upper body to draw the bow and confidently take a shot. Strength training improves your technique, and it makes you more confident in your shot. That self-belief is crucial for your next hunt.

Make Every Shot Count

To take advantage of each hunt, you have to prepare your body beforehand. Working out before hunting season can make you more confident in your shot and allow you to cover more ground. Each workout you do before hunting season will make your life a little easier.

With that being said, you won’t get results if you walk into the gym and start doing random exercises. You need a program that targets the specific qualities that a hunter needs, like leg muscle endurance and upper body strength. Plus, you have to take care of your joints to make sure you don’t get hurt.

For guidance, check out the Backcountry Hunter Series. It’s specifically designed for people like you to maximize your performance. If you’re not ready to commit to anything, try the free 14-day MTNTough trial for access to all fitness content.

Best Air Rifle Deals

Popular Posts

Gas vs Spring Piston: Which One is Better?

0
Today, you can find 5 different types of air rifles available in the industry. They are: spring pistons, gas pistons, PCP air rifles, variable...

PCP vs CO2 Guns: Which One is Better?

0
The most talked-about debate between hunters and gun enthusiasts is what the best power source of a gun is.  The five main sources of power...

Best Air Rifle Brands – Who Makes the Best Pellet Gun?

0
In Jeff Bezos’ own words: "A brand for a company is like a reputation for a person. You earn reputation by trying to do hard...

Can a 22 air rifle kill a deer?

0
"Debate over whether a 22 air rifle can effectively take down a deer has sparked curiosity among hunting enthusiasts. With its lower muzzle velocity...

Synthetic vs Wood Stock: The Final Showdown Between Brunette And Blonde

0
I understand that you’re here to get some quick facts on synthetic vs wood stocks Probably to guide your purchase.  Quick alert - the debate...