Home Blog Page 62

How To Tan a Squirrel Part 1: Fleshing, Salting, & Rehydrating

0

This article will go through the process, step-by-step, of how to flat tan a squirrel skin using the Advanced Tanning Solutions Tan-a-Fur Skin Kit. We are demonstrating on squirrels, but the process is similar for other fur skins.

The Tan-a-Fur Skin Kit includes everything you need to tan a life-size mountain lion, a medium bear, or several small animals. It’s a perfect kit for beginner or experienced home tanners and DIY taxidermists. You’ll get a professional-quality result with a simple, all-in-one experience.

The kit includes:

  • Fleshing/Shaving Tool
  • Degreaser
  • Pickle Tan
  • Fur Oil
  • Softening Stone
  • Silk Powder
  • Dust Mask
  • Non-Latex Disposable Gloves (2)

You will need table salt, bleach, baking soda, a plastic bucket, and hot water.

Before You Begin

The skinning process should already be done. We like to say, “treat it like you’re going to eat it.” Meaning, get your animal dressed, skinned, and on ice (both meat and hide/skin) as soon as possible after the animal is harvested. This will prevent bacteria from starting to grow which will cause hair slippage, specially with small game, like squirrels.

Step 1: Fleshing a Squirrel Skin

The following process is basically the same for any of your small critters with fur. Even though you’ve skinned your squirrel, there’s likely a little bit of membrane and flesh that remains attached to the skin. The first step is to remove as much of that as possible to achieve a soft and supple tan.

Since you’re making a flat skin, you won’t need to do any face turning. Face turning is the process of turning the face inside out to flesh that area. It also involves splitting the nose, ears, and lips and then turning the ears inside ou (for larger animals)t. This is done for taxidermy purposes if you were going to mount your tanned hide or fur skin.

Using the fleshing tool that comes in the kit, gently scrape, peel, and pull away all the little bits of flesh and fat that remain on your skin. Fleshing always works best when you go with the grain of the hair, so start at the head and work your way to the tail. Feel free to also use your fingers to pull off loose pieces. Use the pointed edges of the fleshing tool to get into tighter areas, like the tail, especially for smaller rodents, like squirrels.

☞ This type of fleshing is called “table fleshing.” The rounded edge you see on the tool is for pipe fleshing. With pipe fleshing, you would lay your skin over a pipe, stretch it tightly, and then use that rounded edge to scrape the flesh. That type of fleshing isn’t necessary with squirrels, but you can use pipe fleshing for beavers, raccoons, possums, and other greasier, fleshier animals.

Removing the musk glands

Removing the musk glands

Most fur-bearers have little sacs, called musk glands near the tail. They are oily, greasy, and don’t tan well so they need to be removed. Simply pull them away using the edge of your fleshing tool as shown.

How do you know when your hide is clean?

You’ll know your hide is clean when you see a blue color on the skin. If you see the blueing, it means there’s no flesh there to scrape off. But dark areas and white areas are flesh and fat — those need to be removed.

clean hide

Once you’ve removed all the flesh, the musk glands, and all the membrane from your hide and you’re happy with it, you’re ready to move on to the next step — salting.

Step 2: Salting a Squirrel Skin

salting a squirrel skin

The salting process removes all the fluids, oils, fat, and non-tannable proteins from your skin. It will dehydrate the skin and help to lock the fur in to prevent hair slippage — nobody wants a bald squirrel!

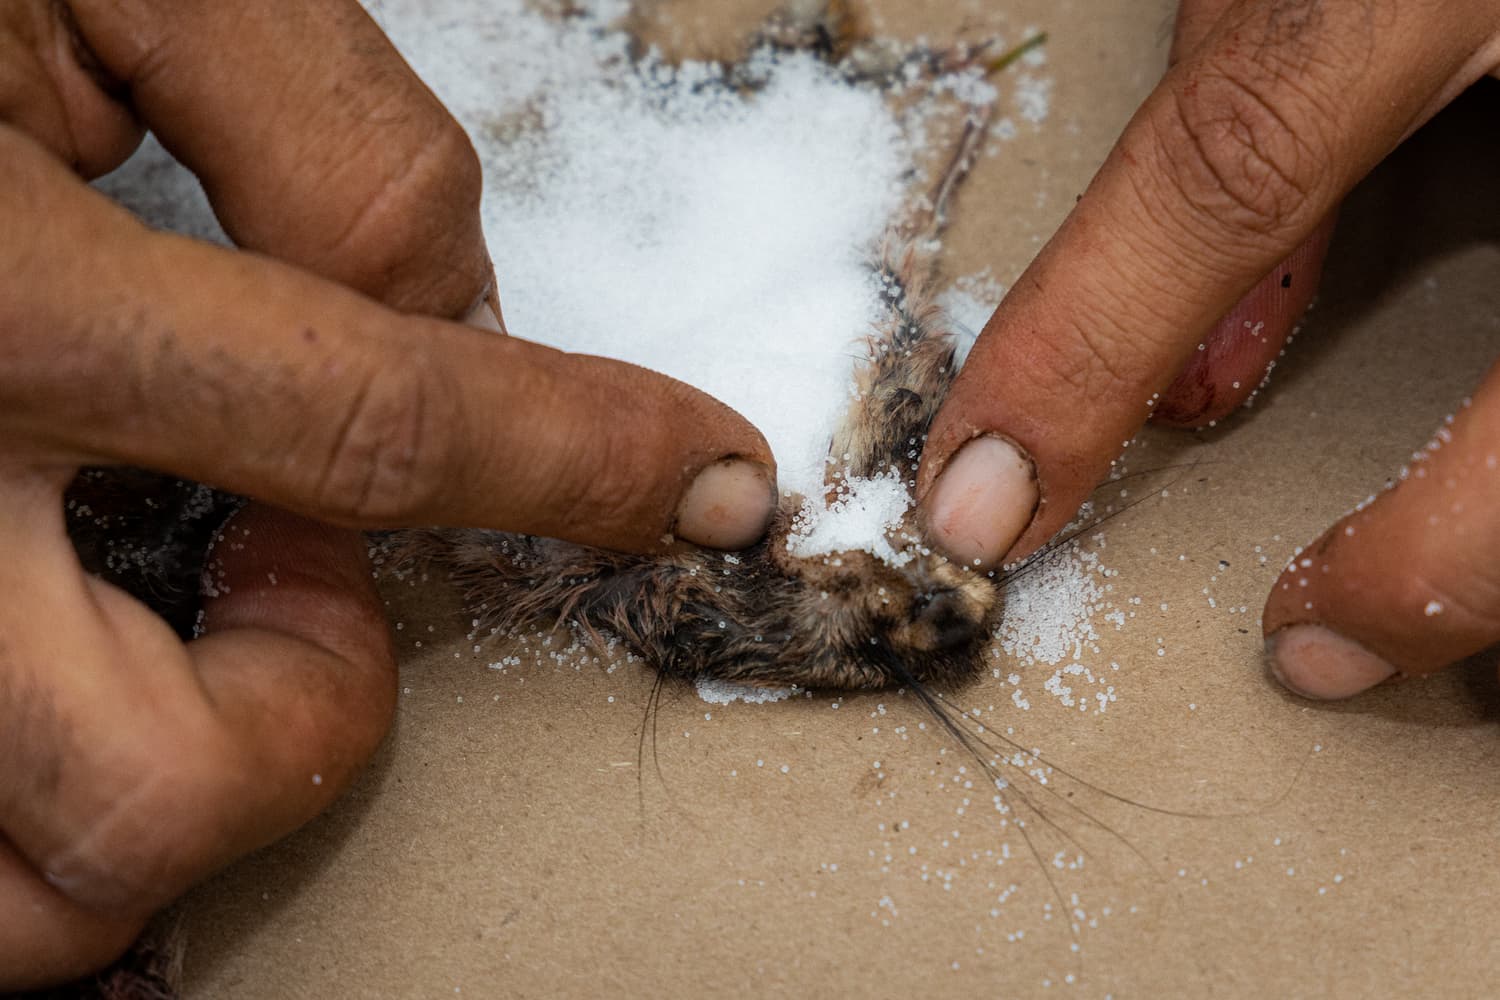
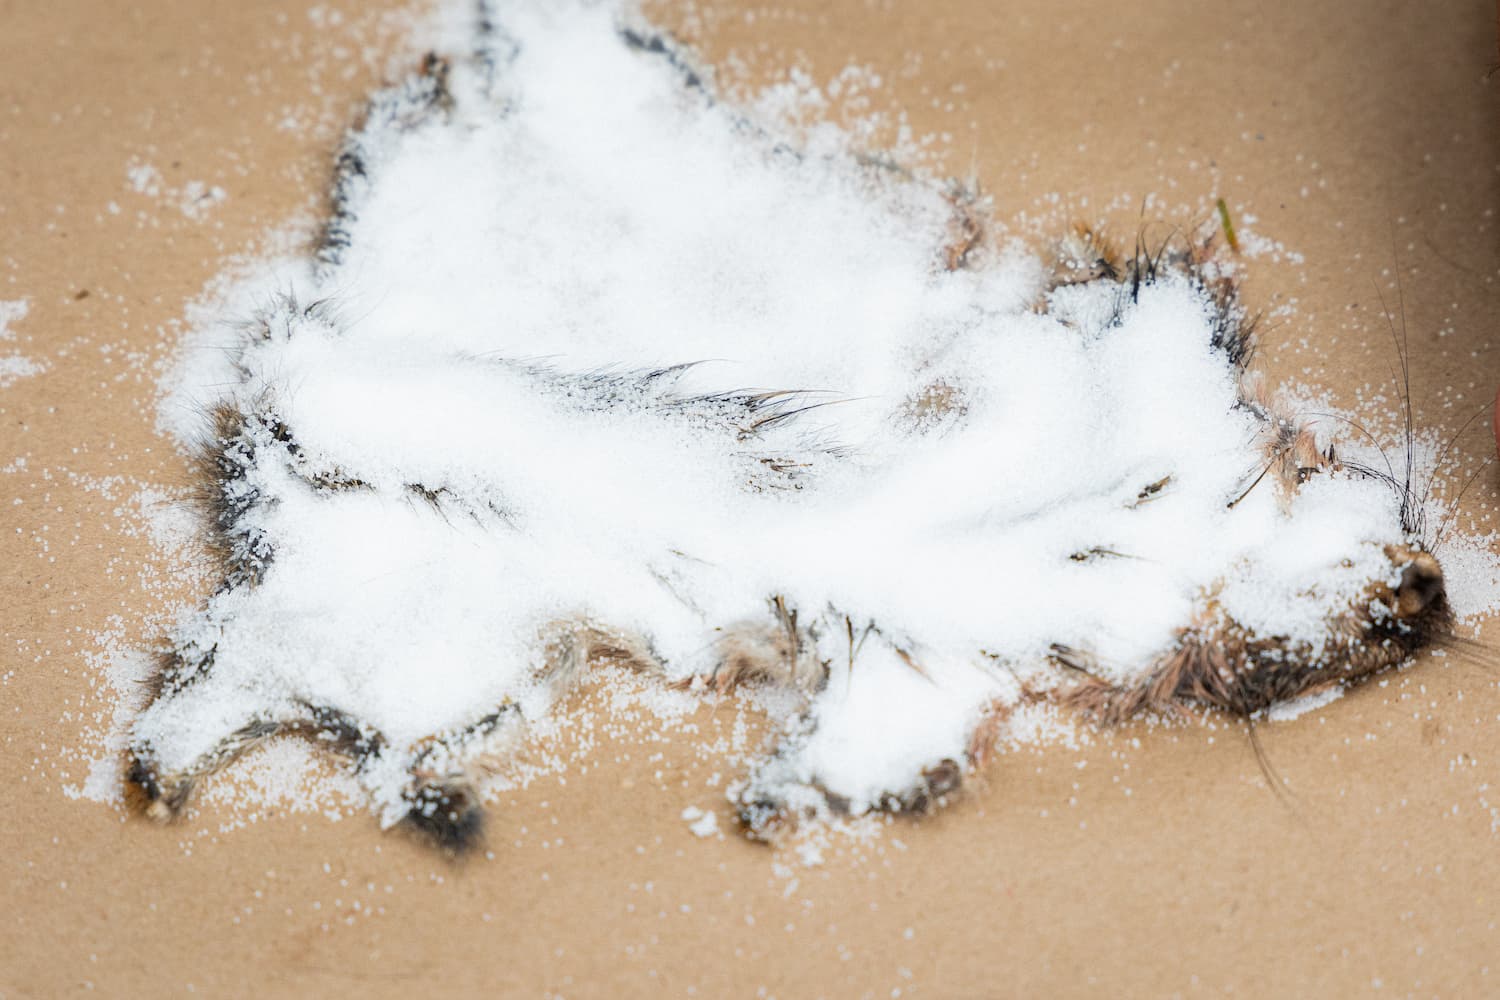
To salt the skin for a flat tan, flip the face open and add a generous amount of salt to this area then fold the lips in. Next, apply a heavy layer of fine table salt over the entire skin so you can work it into the edges. Make sure every bit of the flesh areas gets salted. If you’re worried about staining, use non-iodized salt.

salting the squirrel skin - face

Salting the tail

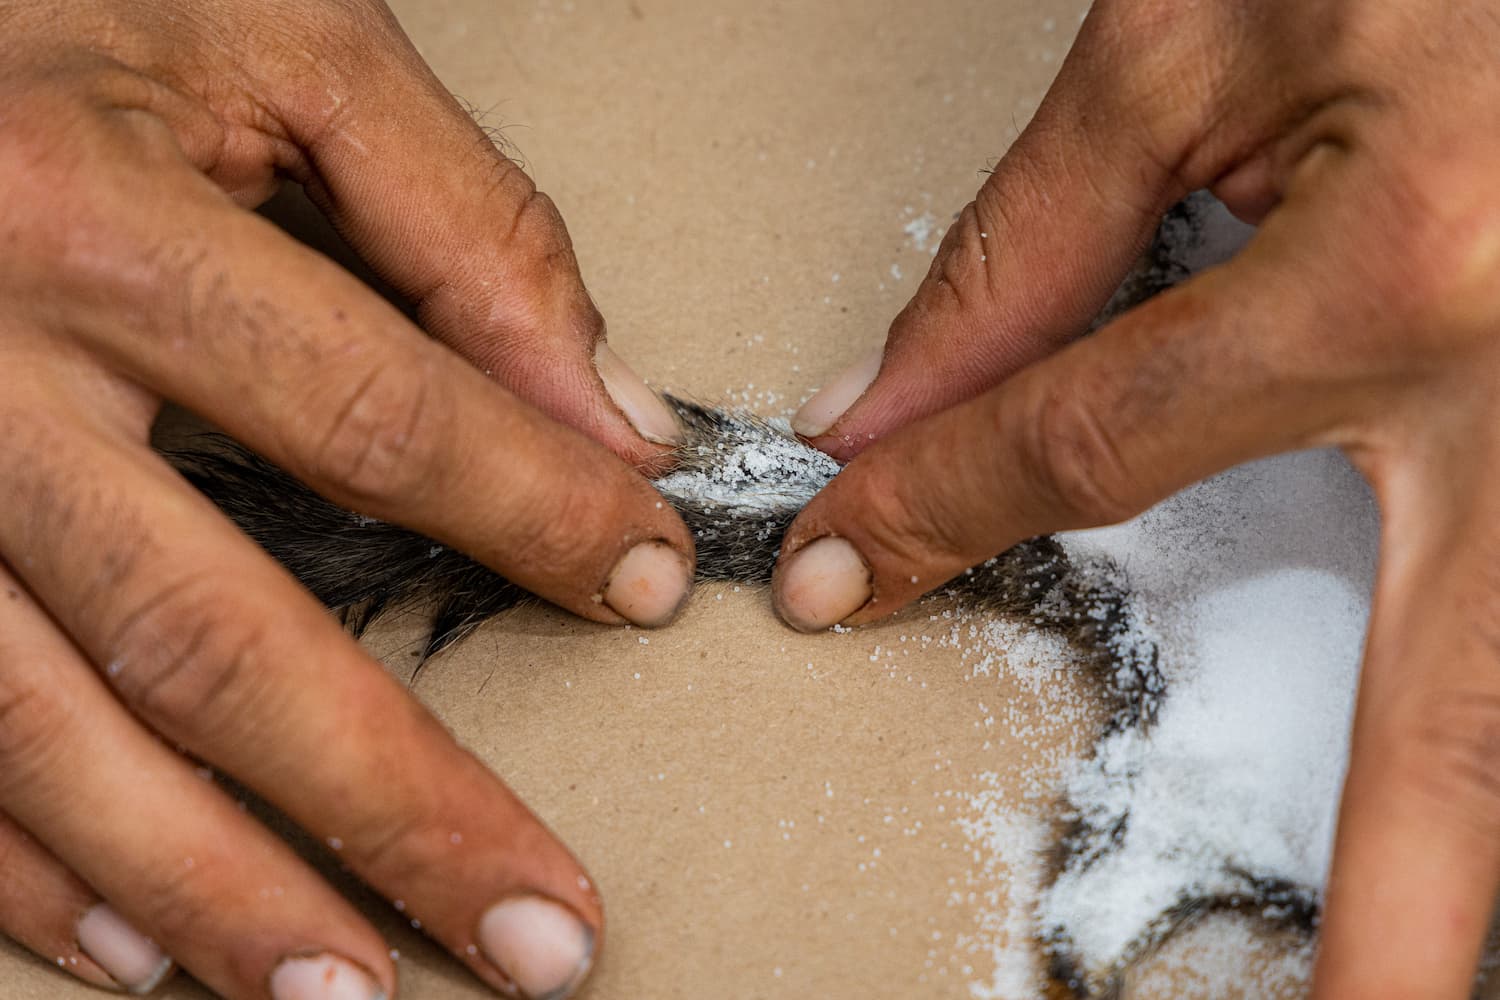
After you’ve salted the squirrel’s body and face, open the tail all the way down and apply salt to fill in the crease. Next, pinch the tail together, just to keep all the salt in the tail. After that, you’ll flip the tail so that it rests on top of the body. Finally, add additional salt to cover the tail, just to make sure the whole tail gets nice and dry.

salting the tail 1

salting the tail 2

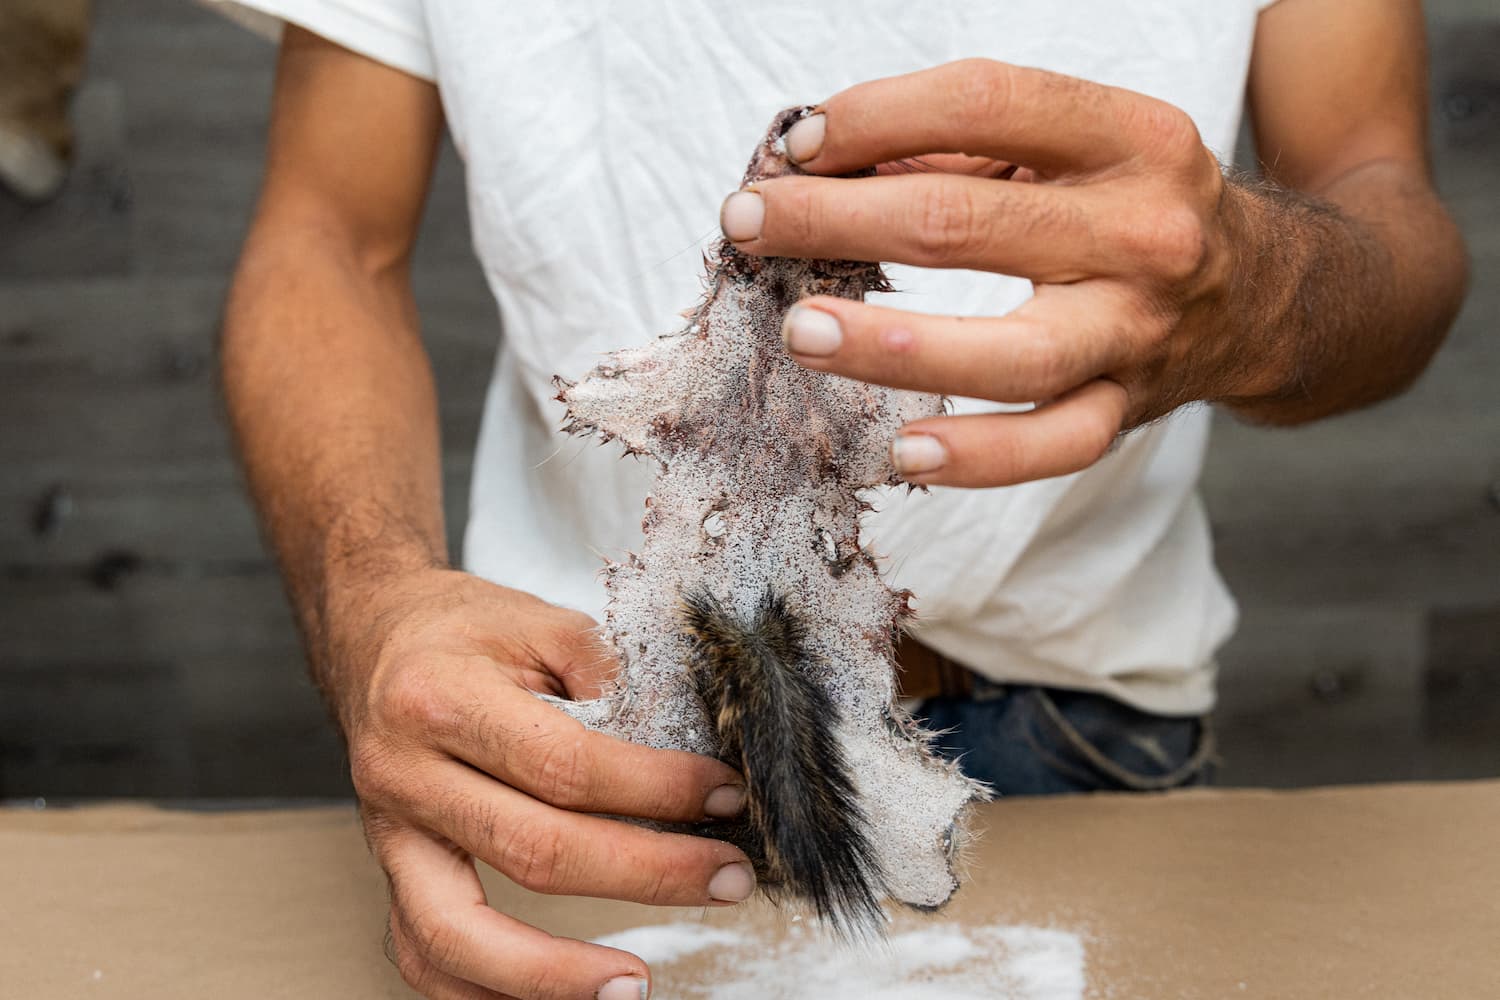
Let your skins dry in salt overnight for about 12 hours. Larger fur skins need 24 hours to dry. The next day, shake off the excess salt and if the skin still feels damp, re-apply another layer of clean salt and let it sit again overnight.

shaking off excess salt

When your skin is dry, you’re ready to move on to the next step, rehydrating your squirrel skin.

Step 3: Rehydrating a Squirrel Skin

Now that your squirrel is dry salted, it’s time to rehydrate it. You rehydrate your hide by putting it in a rehydration bath that consists of the following items PER gallon of hot water. Since the squirrels are small we mixed just 1 gallon of rehydration solution, but larger skins will require a bigger bath:

  • ¾ cup of salt
  • 1 teaspoon of Advanced Tanning Solutions Degreaser (in the Tan-a-Fur Kit)
  • ½ teaspoon of bleach

Mix to dissolve the salt and let the bath cool to room temperature. Do NOT put skins in hot water as this will cause bacteria to grow resulting in hair slippage.

Shake off the loose, excess salt. Don’t grab any chunks of salt and pull them, you will risk pulling out fur with it. Instead, crush or pinch the salt, and it should fall off easily. This goes for the salt that’s packed into the tail and face area, too.

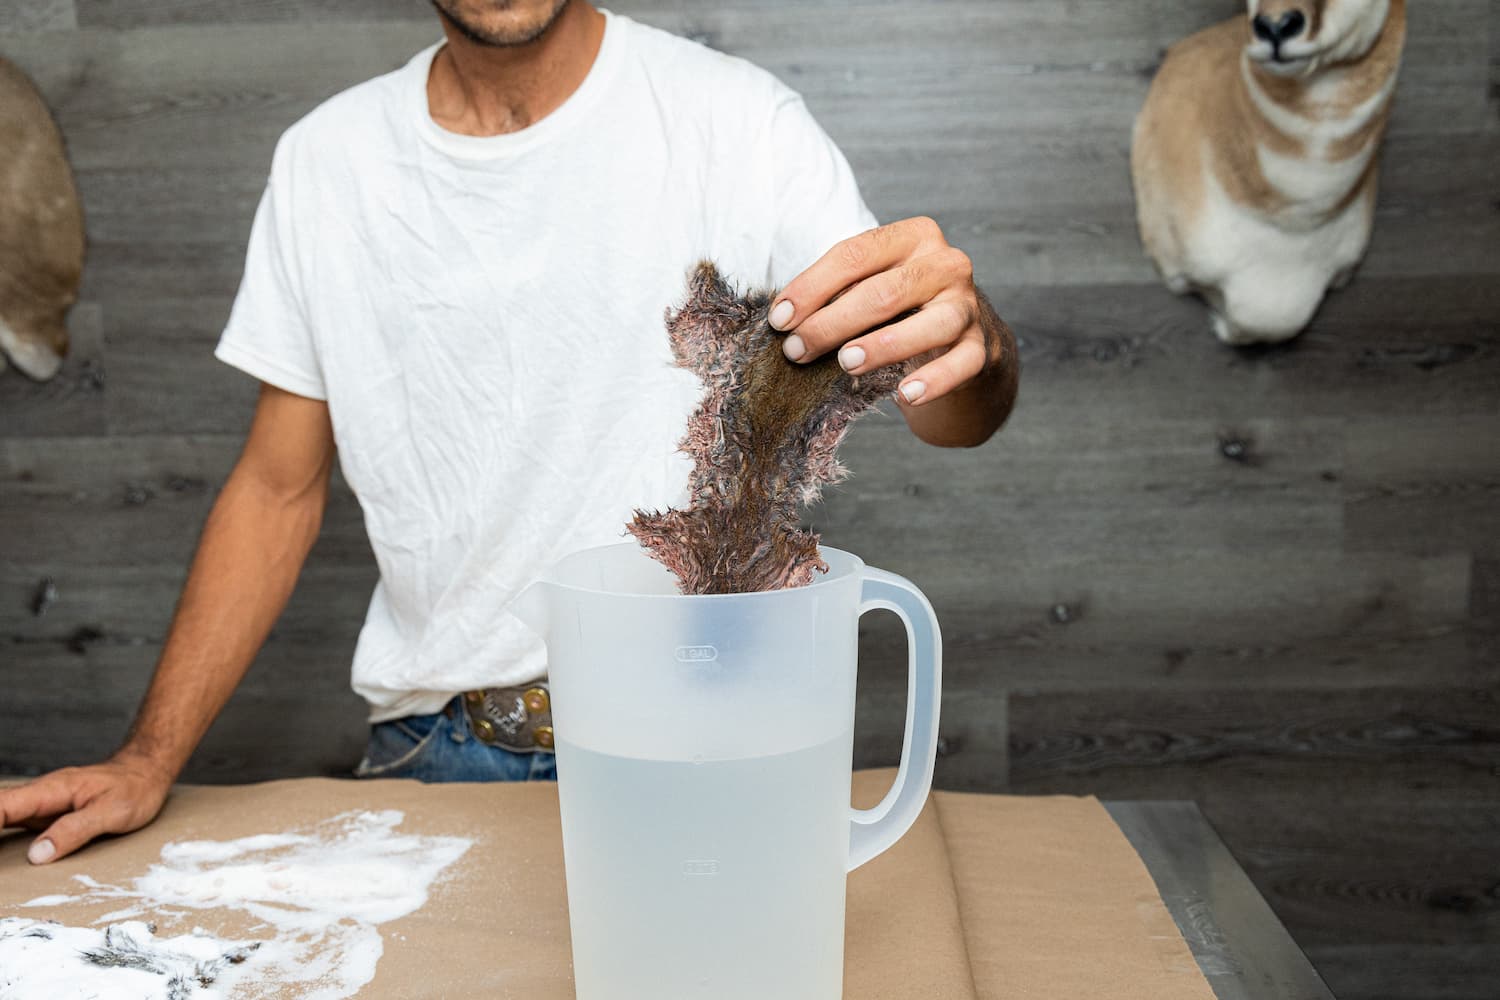
You’ll notice the hide is dry and stiff. Next, dunk your skin in the rehydrating bath, much like you were dunking a cookie in milk. When it starts to soften and bend, you can let your skin gently sink into the bath.

rehydrating squirrel skin

Soak your skin in the rehydration bath until it is soft and supple. You’ll notice some layering of color in the water as a result of the degreaser working as it pulls the dirt and blood out of the skin. The result will be a soft, fluffy fur rather than greasy fur.

After rehydrating

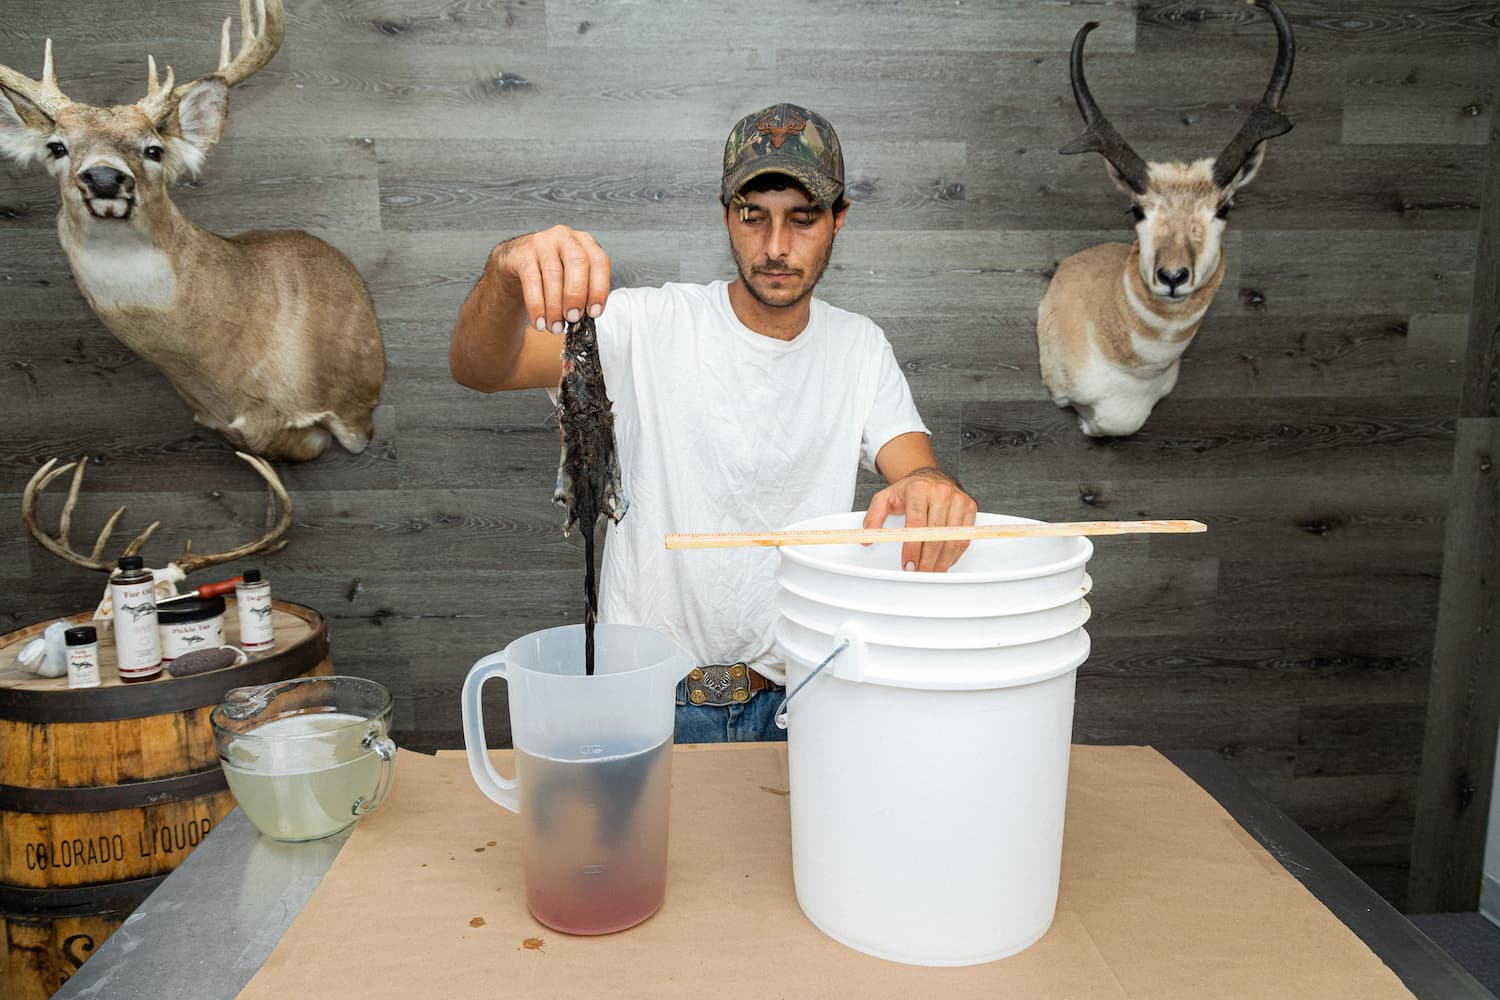
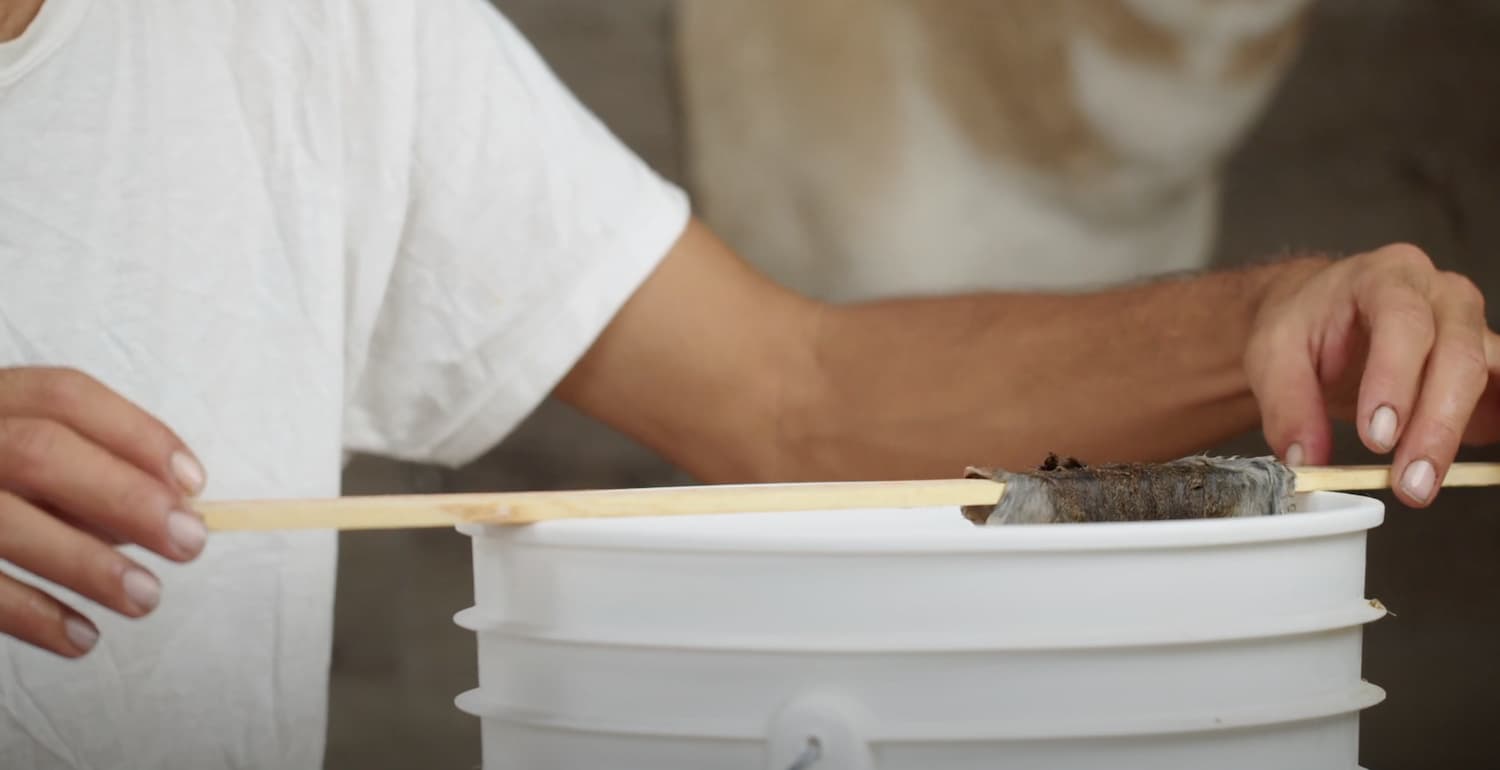
When the skins are relaxed, remove from the rehydration bath, give it a very gentle squeeze to remove excess liquid, and then hang it — fur side out — over a bucket to drip dry.

removing the skin from rehydrating bath

You can see the Degreaser working as it pulls the dirt and fluids out to the bottom of the rehydration bath.

hanging skin to drip dry

In about 15 minutes, your squirrel skin will be ready for pickling. To continue, see the next guide in our series How to Tan a Squirrel Part 2: Pickling and Shaving.

Are raccoon rodents?

0

Are raccoons rodents? This is a question that many people ask about this commonly seen animal. Raccoons are considered by some to be in the same family as rats and mice, while others believe they are their own unique species. In this article, we will answer this question and provide you with more information about raccoons. Keep reading!

What are raccoons classified as? Are raccoon rodents or marsupials?

Raccoons are generally classified as either rodents or marsupials. They belong to the Carnivora order, meaning it’s a meat-eater, although a raccoon will eat anything available, including whatever is growing in your garden or sitting in your garbage can. Raccoons are members of the Procyonid family, which also includes ringtail cats, coatis of South America, and kinkajous of Central and South America.

Where does the word “raccoon” come from?

The word ‘raccoon’ is derived from the Algonquin Indian word ‘arakun,’ meaning ‘he who scratches with his hands.’ Raccoons are excellent climbers, often scaling trees and fences to get at food or avoid predators. They have sharp claws that enable them to climb and grasp things easily.

What do raccoons look like?

Raccoons are medium-sized animals with a body length of around 40 centimeters (16 inches), plus a tail that can add another 20 centimeters (8 inches) or more. They weigh between 4 and 12 kilograms (9 and 26 pounds). Males are generally larger than females. Raccoons have dense fur that consists of a soft undercoat and coarse outer guard hairs. The fur is usually grayish-brown but can range from pale silver to black. There is often a distinctive black “mask” across the eyes.

(Is Squirrel A Rodent? See this post for more)

What do raccoons eat?

Raccoons are omnivores, meaning they will eat just about anything. In the wild, their diet consists of fruits, vegetables, nuts, insects, rodents, small mammals, and even eggs. They are also known to eat garbage and pet food left outdoors.

(Do Raccoons Eat Cats? See this post for more)

FAQs

Raccoons vs. Possums: What’s the Difference?

Possums and raccoons may look similar, but there are some key differences between these two animals. For starters, possums are marsupials, meaning they have a pouch in which they carry their young. Raccoons, on the other hand, are not marsupials. Additionally, possums are typically smaller than raccoons and have longer noses. Possums also tend to be timider than raccoons and will usually only come out at night, whereas raccoons are active both day and night.

What is a Raccoon’s lifespan?

In the wild, a raccoon typically lives for 2-3 years. However, if they are living in captivity (i.e. in zoos or as pets), they can live for up to 20 years.

Are Raccoons dangerous?

While raccoons are not typically aggressive, they can be dangerous if they feel threatened. They may also carry diseases that can be harmful to humans, such as rabies. If you come into contact with a raccoon, it is important to wash your hands thoroughly and avoid touching your face. If you are bitten by a raccoon, you should seek medical attention immediately.

(How to get rid of chipmunks? See this post for more)

What do I do if I have a Raccoon problem?

If you are having problems with raccoons on your property, there are a few things you can do to deter them. First, make sure that there is no food or water available for them. This means keeping your garbage cans covered and not leaving pet food outside. You can also try to scare them away by making loud noises or shining a light on them. If these methods do not work, you may need to call a professional wildlife control company or use an air rifle to get rid of them. (For more on the best air rifle for pest control, see this post)

What Kingdom do Raccoons belong to?

Raccoons belong to the Animalia Kingdom.

What class do Raccoons belong to?

Raccoons belong to the Mammalia class.

What phylum do Raccoons belong to?

Raccoons belong to the Chordata phylum.

What family do Raccoons belong to?

Raccoons belong to the Procyonidae family.

What order do Raccoons belong?

Raccoons belong to the Carnivora order.

What genus do Raccoons belong to?

Raccoons belong to the Procyon genus.

What species do Raccoons belong to?

Raccoons belong to the Procyon lotor species.

In what type of habitat do Raccoons live?

Raccoons can live in a variety of habitats, including forests, mountains, and marshes. They are also commonly found in urban areas.

What is the main prey for Raccoons?

Raccoons eat fish, nuts, berries, and corn.

What is a 10-point buck?

0

If you are like most people, you have probably heard the term “ten-point buck” but may not know exactly what it refers to.

In this post, we’ll explore the origins and definition of the term “ten-point buck.” We’ll also provide some tips on how to identify one if you happen to come across one while hunting. Stay tuned!

WHAT DO POINTS ON A BUCK MEAN IN HUNTING?

When discussing “points” in hunting, they are referring to the tips of each piece that is over an inch long.

You may hear everything from spikes (one point), two points, or six-point – ten points being even bigger than those smaller ones! But what does it all mean? It means using the points as a benchmark to describe the quality of the deer.

The anatomy of a Whitetail’s antlers is made up of the following:

  • Burr or pedicle
  • Brow tine
  • Main beam
  • Non-typicals

The classification and scoring of a Whitetail’s antlers are done by using the more common Boone and Crockett method. This method uses a combination of letters and numbers, more specifically the letters “H” and “G” and numbers 1 to 8.

Gs – These are used to name the normal antler points on a buck. G1 refers to the brow tine on a Whitetail as that is the first point, then G2 for the next point, and so on. It is important to note that the point on the main beam of a buck is not assigned the letter G although it is considered a point.

Hs – The H is used to measure the circumference of the antlers on a Whitetail. There are only four H measuring areas on a Whitetail’s antlers and regardless of the number of points it has, there will only be four Hs.

WHAT IS A 10-POINT BUCK?

As we stated above, in the Boone and Crockett method of scoring, a 10-point buck is simply a deer with 5 points on each side of its rack. These points can be any size, as long as they are over an inch long.

HOW OLD IS A 10-POINT BUCK?

The age of a 10-point buck can vary. If the deer is a yearling, it will likely have 8 or 9 points. A 2.5-year-old deer will typically have 10 points, and a 3.5-year-old deer will have 11 or 12 points. bucks typically reach their full antler potential at 4.5 years old, at which point they will have the potential to grow up to 15 points.

(For more on the best spring air rifles, see this post)

IS A 10-POINT DEER GOOD?

The answer to this question is subjective. Some hunters prefer to hunt bucks with large antlers, while others are more interested in the meat. Ultimately, it’s up to the individual hunter to decide what they consider to be a “good” deer.

How Big Is a 10-Point Buck?

The size of a 10-point buck can vary depending on the age and health of the deer. A yearling buck is typically around 3 feet tall at the shoulder, while an adult buck can be up to 4.5 feet tall. An adult buck will also weigh more than a yearling, with males averaging between 150 and 250 pounds.

HOW TO SEE A TEN-POINT BUCK?

Although ten-point bucks can be found in many parts of the United States, they are most commonly seen in the Midwest and southeastern states. If you’re hoping to catch a glimpse of one of these deer, your best bet is to head to a state like Illinois, Indiana, Iowa, Ohio, or Pennsylvania during the fall hunting season.

(How Long Do Squirrels Live? See this post for more)

TIPS FOR IDENTIFYING A 10-POINT BUCK

Now that you know what a 10-point buck is, you’re probably wondering how you can identify one if you come across one while hunting. Here are a few tips:

Look for a deer with ten points on its antlers. This is the most obvious way to identify a ten-point buck.

Measure the length of the deer’s antlers. If the antlers are at least ten inches long, you may be looking at a ten-point buck.

Check the size of the points. If the points are large and evenly spaced, you may be looking at a ten-point buck.

Look for other signs of a ten-point buck. These include large body sizes, thick necks, and heavy antlers.

Conclusion

To sum up, if you do come across a 10-point buck, be sure to take the time to identify it properly before taking a shot. Happy hunting!

The Loudest Presentation: 5 Bass Poppers to Disrupt and Attract More Fish

0

The best bass poppers make a lot of noise on the water, and that is what makes them so effective. They’re one of the oldest lures, but over time, testing has lended them quite a nice hand. Now we have poppers of all different shapes and sizes that work better than ever before.

Through my personal experience and other anglers’ knowledge and expertise, I’ve put together this list of the best poppers for bass fishing. These topwater lures will help you clean house on any freshwater pond or lake, so keep reading.

Our Picks For The Best Bass Poppers

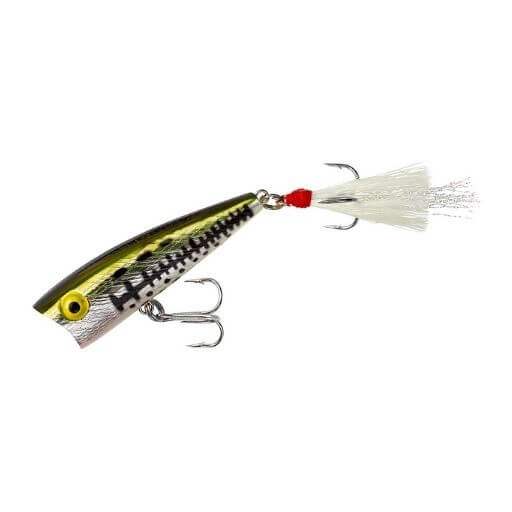
Rebel Lures Pop-R Topwater Popper

Rebel Lures Pop-R Topwater Popper

BEST BASS POPPER OVERALL

  • Type: Teeny Popper
  • Size: ⅛ ounce
  • Color: Ol’ Bass

FEATURED SPECS

  • Design of the mouth spits water which creates a loud noise and vibration to attract ornery bass

EXTRA FEATURES

  • Comes with two treble hooks and a feather-like tail which improves the action and natural appearance

BUYING ADVICE

  • You can use both a straight retrieval or erratic jerking to imitate an injured baitfish

Pros

  • Strong company reputation
  • Great topwater action
  • Versatility

Cons

  • Many anglers recommend swapping the hooks

It’s a no-brainer that the Rebel Pop-R is the best topwater popper for bass fishing. If you’ve ever watched a bass fishing tournament or attended one, I can guarantee you’ve seen this lure used many times. It’s won hundreds of thousands of dollars in tournament money for many professional anglers.

When you cast it out, and it hits the water, you’ll hear the pop. Then, as you’re retrieving it, the lure spits water out using the concave mouth, which creates a lot of disturbance to attract the bass.

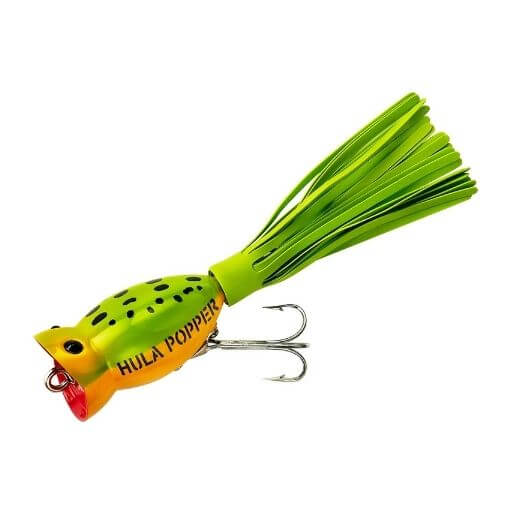
Arbogast Hula Popper

Arbogast Hula Popper

RUNNER-UP BASS POPPER

Specs

  • Type: Hula Popper
  • Size: 1 ¼ – 2 ¼
  • Color: Yellow Belly

FEATURED SPECS

  • Features an extra-strong and sharp treble hook to make it easier to set the hook

EXTRA FEATURES

  • The hula popper creates a loud popping sound when it hits the water, and it bubbles as you retrieve

BUYING ADVICE

  • Locate some grass beds and cast this right in there because it’s meant to imitate a jumping frog

Pros

  • Great loud presentation
  • Large lure catches big bass
  • Works well at night too

Cons

  • The lure is a bit large for some

Here we have another legendary lure with a long-standing history of creating successful anglers out of newbies. The skirt on this one pulsates, so it creates a clicking noise as you retrieve it. You can pair that with the concave mouth that creates a bubble trail.

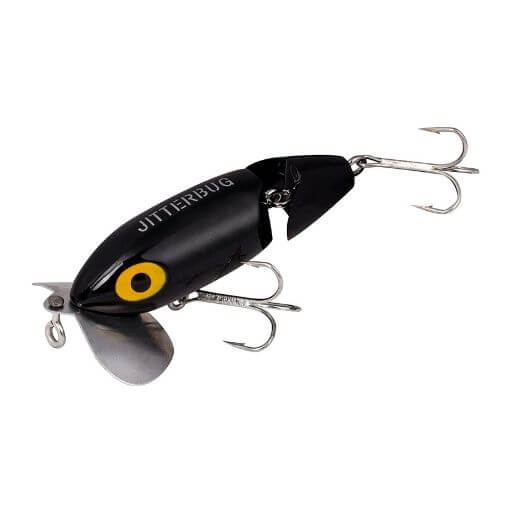
Arbogast Jitterbug

Arbogast Jitterbug

BEST JITTERBBUG

Specs

  • Type: Jitterbug
  • Size: 2 ½ inches and ⅜ ounce
  • Color: 16 color variations

FEATURED SPECS

  • The double cupped lip creates an extremely loud presentation when it hits the water

EXTRA FEATURES

  • This lure is small, so it’s great for casting large distances

BUYING ADVICE

  • Make sure to choose your color to mimic your surroundings. They offer a wide assortment of colors.

Pros

  • Loud presentation
  • Great casting distance
  • Exceptional night time lure

Cons

  • Too many buying options

It’s not often that I would say having too many lure options is a bad thing, but it is when they’re confusing. I find this lure to have too many size variations where some are jointed, and some aren’t, it makes it confusing.

If I were you, I’d go with a non-jointed small lure option and purchase a couple of them in different colors, so you have one for each situation. I highly recommend getting a black one because this lure creates such a loud presentation; you don’t need the bass to see it for night fishing.

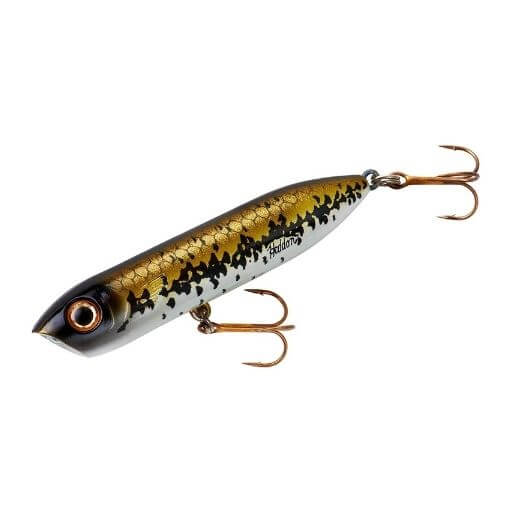
Heddon Chug’N Spook Popper

Heddon Chug

BEST SPOOK

Specs

  • Type: Popping Spook
  • Size: ½ ounce
  • Color: Black Shiner

FEATURED SPECS

  • Thin profile allows this lure to move through the water quickly while chugging and spitting

EXTRA FEATURES

  • Also comes with a loud rattle inside to add to the already loud presentation

BUYING ADVICE

  • These come in both fresh and saltwater options. That makes this one of the best poppers for striped bass as well.

Pros

  • Simple and effective
  • Comes with a wide range of colors and sizes
  • Torpedo movement through the water

Cons

  • Made in China

Don’t get confused by this lure. We’re not talking about the standard Heddon spook here; the company also makes a popper with a similar design. The only difference between this and the original spook is the concave mouth.

While it does a great job of creating noise from its mouth, the ticker on this lure is the internal rattle paired with the mouth.

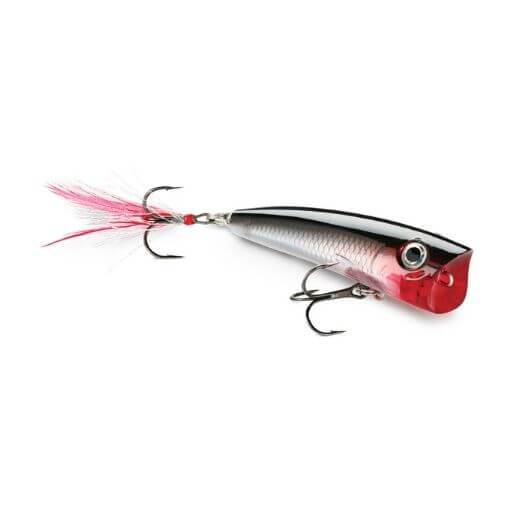
Rapala X-Rap Pop 07

Rapala X-Rap POP 07

BEST SPITTER

Specs

  • Type: Spitter
  • Size: 2 ¾ inches
  • Color: Silver/Red

FEATURED SPECS

  • Incredibly lifelike appearance meant to mimic an injured shad or minnow

EXTRA FEATURES

  • Deep cupped mouth with extended top lip spits water as you retrieve it

BUYING ADVICE

  • These work great near docks or low hanging trees because they have a long casting system that provides pinpoint accuracy on your cast.

Pros

  • Rapala reputation is always good
  • Tail-down design improves the presentation
  • Great spitting action
  • Lifelike appearance

Cons

  • Fragile hooks

If you’ve read any of my other reviews, you know I like to stick with a great company. Rapala bass lures are some of the best on the market, and the design of this one really proves that to us.

Whether you’re looking at the arched back to create a better presentation or the precisely cupped mouth which spits water and makes noise, this lure is designed perfectly for its intended purpose.

What Are Poppers?

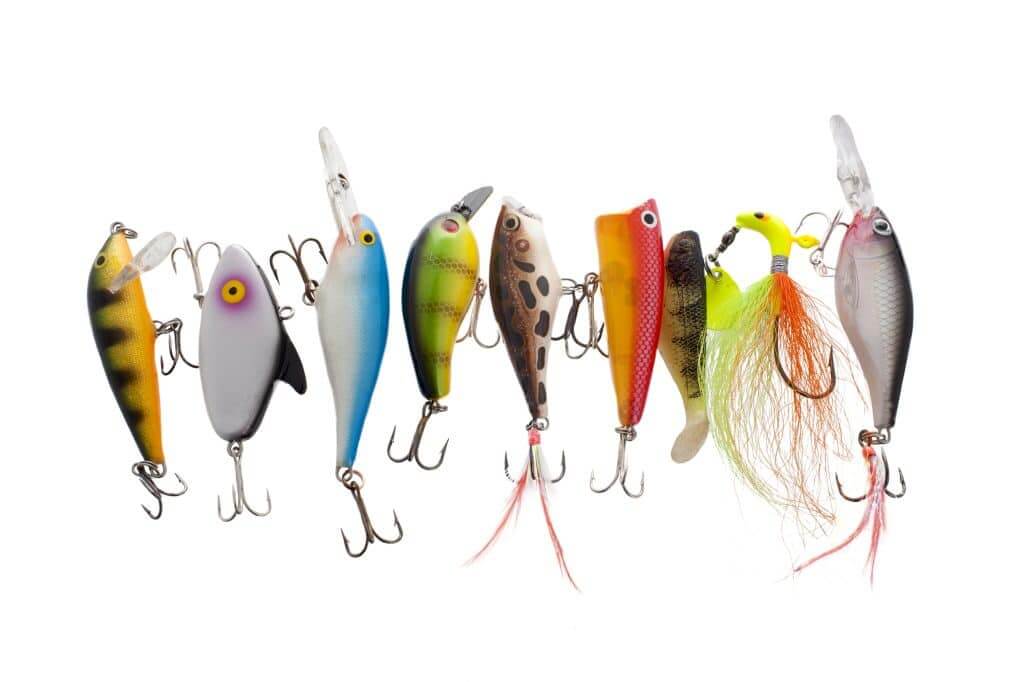
Close up image of different and colorful fishing lures against white background

Poppers are a topwater lure that make a loud popping and spitting sound when they hit the water and retreat. They come in a few different designs and styles, but the selling point is the design and shape of their mouth.

These are not weedless lures because they often come with two treble hooks. You’ll want to fish these near the weeds, but not necessarily in them. Having a bit of clear water allows the design to work it’s magic.

The topwater nature of these make them a great lure for smallmouth bass but certain options like the spook also dive a little so they work well for largemouth bass too.

Types of Bass Poppers

You’ve got a large assortment of bass fishing lures that claim to be poppers, but overall, we’re sticking to two main types. You have chuggers and spitters. They’re both very similar, but the presentation they create in the water is what makes them a little different.

Chuggers

Arbogast Hula Popper

The chugger is a lot like the Arbogast Hula Popper we reviewed above. These create a loud pop sound when they hit the water, and then they bubble when you retrieve them. As you pull them in, they almost shroud themselves in bubbles, and when they pop, that’s when you get the loud noise you’re looking for.

Spitters

Rapala X-Rap POP 07

The main difference between these two is in the shape of their mouth. When you look at a spitter closely, you’ll notice that the top lip of the concave mouth sticks out a little further than the bottom lip. As a result, these lures don’t create that bubble shroud and trail; instead, they spit the water back out somewhat like a water wheel.

It makes a softer sound, but I’ve found that the noise is more consistent, which is what drives bass crazy. Our top pick above is a perfect example of a high-quality spitter.

Features to Look For in the Best Poppers

Popper bass fishing is pretty basic, and most of the lures operate in the same fashion. When you’re shopping around, make sure to look for the following features to determine you have the right lure in your hand.

Concave Mouth – The main feature that makes this lure tick is the design of its mouth. The mouth either spits or chugs, and both of these create a loud noise when they hit the water and when you retrieve them. One sure-fire way of knowing you have a popper is by looking at the design of the mouth.

Treble Hooks – Topwater poppers for bass fishing always come with at least one treble hook. This is because you need to be able to set the hook when a bass comes at you from a variety of different directions. Many of the stock hooks that come with lures are low-quality, so be sure to pay attention to that.

Color Variations – Color is an important buying factor because it will impact your success. I always suggest mimicking the color of your lure to match the surroundings where you’re fishing. Most popular companies like Rapala or Rebel offer an assortment of colors, so you don’t have to worry about that.

How to Fish Poppers for Bass

Interestingly enough, there aren’t too many bass fishing tips I can give you on fishing poppers. They’re one of the simplest lures to fish, which makes them great for beginner bass fishing. You have two options for retrieving.

You can play it safe and follow a steady retrieval. You’ll do this by casting out and retrieving by cranking the reel at a normal pace. The popper will spit and chug as you do this at a natural pace.

If you’re looking to make things a little more interesting, you can cast out, leave the rod tip down and use the tip to jerk the lure in an erratic motion. For this, I suggest getting a lure with a little red on it. Some of the options recommended above have red bellies.

For this, to work best, you’ll keep the line tight, lift the rod tip up quickly, reel in the slack, and repeat this process. The bass will think your lure is injured, and they’ll be more likely to strike it.

Best Time to Use Poppers for Bass

While there isn’t a “wrong” time to fish poppers, any self-respecting bass angler would tell you that night time, overcast, or dusk is the best time to use these. When it’s dark, bass can’t see the lure as well, so they rely on what they hear.

For this situation, having a loud lure that draws a lot of attention is the key to success. Again, be sure to keep everything else in mind as well. Choose a color that relates to the time of day. If it’s pitch black out with very little moonlight, go with a completely black lure.

If you’ve got some moonlight, choose something that might reflect some of that light. Go with a silver shad color or something like that.

Also, keep in mind how your presentation needs to change based on the time of day and year. When it’s a cooler, overcast day – you need to slow it down. When it’s hot, and the sun is still beaming down at 9 pm, you can afford to pick up the pace a little.

Final Thoughts

The best bass poppers aren’t hard to find because so many of the most popular lure brands make a ton of them. I suggest sticking with the Pop-R, Heddon, and Rapala when it comes to these. Even if you have to pay an extra buck or two, you know you’re getting the highest quality lures.

The best thing about poppers is that they’re easy to fish. If you have a kid or a friend who is looking to get into fishing, get them hooked by rigging a topwater popper and showing them how easy it is to catch bass with the right lure and the proper strategy.

We love talking to our community here at Anglers.com, so be sure to drop us a comment with your favorite popper story and tell us more about how you like to fish these lures.

Good luck out there!

What is the Best Broadhead for Elk Hunting?

0

When you strip away all the fancy gear, the expensive packs, boots, garments, etc.. hunting elk with archery tackle really boils down to two very simple yet ultra important concepts.

1. Be accurate and precise at distance with your equipment

2. Maximize penetration of your arrow

There is zero argument about elk hunting popularity being on the rise. The influx of new archery hunters, difficulties of legally travel abroad to hunt, and increased content around western hunting all has played a part of the elk hunting surge! With that in mind, we’ve also seen a continuous rise in the questions surrounding the business end of your arrow.

“What is the best broadhead for my elk hunting trip?”

“What broadhead should I be using for elk?”

“What is the best broadhead for elk?”

Elk are certainly not whitetails, but they are certainly not water buffalos either! Outside of the animal itself having a reputation of carrying tough hides and a more dense skeletal structure, what other factors should you be considering when trying to pick the best broadhead to harvest an elk with?

YOUR SHOOTING PLATFORM

Regardless of the animal you are hunting, the very first stop in your process of selecting the right broadhead is your shooting platform. Your bow is the largest factoring part of the equation, PERIOD.

Someone shooting a recurve should not be choosing the same arrow and broadhead setup as someone shooting a crossbow or compound. Taking that a step further, draw weight and length, arrow speed, arrow weight, etc, should all factor in to your broadhead choice.

If we’re talking about a crossbow platform, I am shooting fixed blade broadheads. It’s really that simple. I don’t have to think about it, and I don’t have to consider anything else… I don’t even have to wonder. A fixed blade broadhead that is tough, has excellent penetration statistics, something that has thick blades is what I’m looking for. Flight characteristics at high speeds is critical when shooting a crossbow. A general rule of thumb is vented blades tend to perform better than solid blades and cutting diameters no more than 1 1/2″ tend to be more accurate at longer distances. Our K2-Fixed and Fixed EXT broadheads offer everything a crossbow hunter dreams of.

When we’re talking about compounds you really have a wide variety of broadhead choices. Fixed blades, hybrid blades, and mechanicals are all options but not all are created equal. Pending your bow and arrow setup you have some really good options. The key factor is, again, your bow setup. Understanding your bow’s capabilities with your exact draw length and total arrow weight is ultra important. Low poundage shooters and, in some cases, you folks with short draw lengths really need to take a hard look at fixed blade broadheads. Having the understanding that in certain setups you just can’t afford to lose any KE, these types of scenarios IS THE REASON Afflictor’s hybrid broadheads were created. The patented drive-key design offers next to no loss of KE, and with blades opening at impact, you have a true fixed blade broadhead when entering the animal. We can’t say that about other mechanicals. Across the board, whether you are looking at Afflictor’s fixed blade or hybrid blade broadhead offerings, there’s multiple solutions for all compound shooters. Regardless of your broadhead choice, the important message is make sure you understand your setup and that your bow is a fine tuned machine!

When we are looking at the more traditional setups, these guys tend to like a traditional broadhead, right? A single bevel or potentially other fixed blade options, but some trad guys are actually shooting different hybrid broadheads. Something like our Hybrid X or our K2 Mini in the heavyweight stainless steel versions where they’re getting into 175 grains, are really gaining popularity. An outside the box solution for traditional archers, but hybrid designs can be a viable option.

YOUR ARROW BUILDS

The other consideration on your setup is around your arrow builds.

For seasoned elk hunters, their arrow builds and broadheads go hand in hand with their shooting platform. Since the western hunting is growing and evolving, there’s a lot more new elk hunters in the mountains, and we’re a trend of eastern guys thinking elk are just big deer. “I’m a whitetail hunter and I’m going elk hunting. That mindset is a mistake.

You need to understand you WILL need more Kinetic Energy and Momentum for pass through shots on elk…regardless if you are shooting a mechanical, hybrid, or fixed blade broadhead. You need to understand that the average archery shot on an elk is much longer than the average shot on a whitetail. You need to understand and plan for this. If you are an eastern guy and truly just want to shoot the same arrows for both species, the best advice is to take the “reverse engineer” approach. Build and shoot what will work for the tougher animals and it will work for whitetails.

HUNTING STYLE AND POTENTIAL SHOT OPPORTUNITIES

  • Where are you going to be hunting?
  • Are you going to be hunting a waterhole with a standard blind placement?
  • Are you going to be spot and stalk?
  • Are you going to be calling?
  • Are you willing to take a shots that is pushing your limits?

Not all western states have the same elk hunting regulations when it comes to archery equipment. Make sure you read and fully understand the regs of the state where you hold your elk tag. Some states have specific requirements around broadheads. For a quick break down you can check out one of our other blogs by clicking here.

Your hunting style will certainly impact the potential for tough shots. If you are planning to only ambush hunt elk, similar to whitetails, shot opportunities tend to be closer and with less obstructions. If you’re like the majority of elk hunters, calling and glassing to locate animals and then closing the distance, it’s pretty common to face less than ideal shot angles, obstructions, and some serious distance.

All these variable influence what type of broadhead will perform best, but the common theme doesn’t change. Make sure you have enough KE and Momentum with great long distance flight characteristics.

CUTTING DIAMETER

One consistent theme over the years, no matter what part of this industry I’ve been, it seems that elk hunters have a preference for a certain diameter cut, no matter what broadhead that they’re shooting….1 1/2″. Now, of course, there’s highs and lows to that, but I’m just saying as an average, in our experience for most people, what they’re looking for is 1 1/2″ cutting diameter.

The discovery behind that is that seems to be the cut that offers the greatest penetration for most people’s set up. When that broadhead hits that 1 1/2″ mark, it seems to really be able to pass through elk and still carry good flight characteristics.

Why does size make a difference? Well, when you start getting into broadhead diameters that are 2″ and up, you really have to have the right setup to drive that home for enough penetration to do fatal damage. You may also be handicapping yourself a little bit because the larger blades sometimes are a little more fragile. They require a lot more energy to open, penetrate, and to pass through. So you really have to be considerate of your overall setup when you’re considering using a larger cut blade. On top of that, larger blade diameters typically do not fly as well as smaller blade diameters.

FIXED VS MECHANICAL

This debate also lives in the elk bowhunting world too. It will never end…it’s like the old Chevy vs Ford talk.

Fixed broadheads are simple in our eyes. They take out some of the performance variables out of the equation, and you know, with the right placement you’re not going to have any problem with an elk. The challenge is long distance flight characteristics. Even though this shouldn’t be any issue with a well tuned bow, folks still want to shy away from the added work in tuning their setup.

Mechanicals have come a long way since their inception. They’re tougher and more reliable than before. Now you can get them with thick blades and some designs don’t require a lot of energy to open. Again, you have to do a little bit of research around your setup to make sure you’re making the right purchase.

When push comes to shove, you need a sharp broadhead that performs at distance. Outside of understanding the archery regulations in the state you are hunting in, confidence in executing a well place shot is king. What ever broadhead gives you these three things is the broadhead you should be shooting.

Author: Chris Creed, Afflictor Broadheads

How High Should My Tree Stands Be?

0

Home Blog How High Should My Tree Stands Be?

There are a vast array tree stands and other hunting options on the market today (ground blinds, elevated box blinds, etc.). Just as varying are the heights of ladder stands and recommended tree stand height. So the question is, how high does your tree stands actually need to be?

This can be a complicated topic simply because there is no right answer for every scenario. However, there are several things to consider that will help you make the best choice for your hunting location.

First of all, the type of tree you intend to hunt out of plays a big role. If you’re in a grove of pines or cedar trees with low hanging branches, it will likely provide a fair amount of natural cover and you can get away with hanging your tree stand lower. All you have to worry about is making sure there are adequate shooting lanes where you anticipate the deer to be moving.

In a bigger hard woods with trees that might not have many low hanging branches for cover, the higher you can place your tree stand the better. Often times 20 feet is the benchmark. This will get you up high enough to be out of direct line of sight for any deer in the area and is not so high that a hunter feels uncomfortable climbing to and getting into the stand safely.

If you’re using a climber, you are limited based on the shape of the tree. Obviously you cannot climb above any branches with a climbing tree stand, but you also want to take any large knots or other abnormalities of the trunk of the tree into account. They can be obstacles as well.

Personally, the higher the better. I have been in open trees without a low level canopy to provide any sort of concealment and on any given day, a deer might bust you or they might not take notice at all. A lot of this depends on the amount of movement you’re making. That is why I prefer to be up around 25 or 30 feet if at all possible. The further I am from a deer’s line of sight, the better off I am in case I do need to move or make other adjustments. At these heights you will definitely want to consider how you’ll need to compensate for shot angle when shooting, however. A little extra practice from an elevated position will go a long way to help.

Something that I ALWAYS use to ensure my safety is a safety harness system. There are several brands that make products like these and they are all equally sufficient to keep you safe while you’re hanging the stand, climbing into and out of, as well as hunting from it. What you need to know is that a lineman’s belt that can strap to your harness and around the tree will make hanging tree stands incredibly easy and far safer for you.

Once the stand is in place make sure there is a safety strap in the tree that you can secure your harness to while you’re hunting. The final piece to this safety system is a life line. You can purchase these ropes or you can make your own lifelines. Several companies make these rope kits you can purchase that are around 30 feet in length. It is a rope system with a prussic knot that you can slide up and down the rope as you climb. The knot is designed to slide when it supports no weight but catch when weight or force is applied to it, as in the event of a fall. This way you are connected to the tree by some means at all times during your climbs, ensuring the most effective safety measures possible.

Hopefully these tips will help your tree stands be more effective and safe this fall. For more tips and helpful articles like this one, sign up to receive our newsletter. Best of luck to all you hunters. Shoot straight!

Complete Guide about Tea Harvesting

0

Almost as important as tea processing is tea harvesting. As you may know, simply growing the tea plants can be a major challenge for the farmers, and it can take years to perfect.

Finally, after all the work the farmers have put into growing the tea, it comes time to pick the leaves. The tea harvest is something that comes a few times a year and it can actually determine the quality of a tea in many cases. The quality of a tea is not just determined by how the tea is grown and processed, but also how it is picked.

This said, let’s go into the detail to understand the tea harvesting process 🍃🍵

What is tea harvesting?

Harvesting tea leaves is an important stage in the tea production process. As you may know by now, a farmer can greatly change the flavor of a tea by harvesting tea leaves from different parts of the tea plant or at different times. This is one of the many calculations a farmer needs to make, in order to improve the flavor of the tea he produces, and to maximize the yield of his tea field.

How to Harvest Camellia sinensis

Harvesting tea leaves is just like harvesting the leaves of any other plant. You want to ideally pick the leaves at the stem, so it doesn’t interfere with the integrity of the leaf itself. Tea harvesting can require a lot of skill and it can be a full time job. For a tea like gyokuro for example, one of the most prized leaf teas in Japan, you need to pick the top three leaves of the tea plant. These are the sweetest in flavor and highest in nutrients.

You first need to identify the top three leaves of the tea plant and then you need to grasp the stem of the tea plant a few millimeters below the third leaf. Then you can gently pull up until you hear a small pop sound, and the leaf should be separated. This method of harvesting tea leaves is extremely time consuming but it can yield great quality green tea.

How many times can you harvest tea in a year?

Harvesting tea leaves is something that can happen up to 4 times per year. After the tea is harvested for the first time in early spring, it can then be harvested a second time in June or July. Tea from the second harvest is the second highest in nutrients and flavor, so it is often used for more inexpensive teas. Farmers may also combine leaves from the first and second harvest to lower the price of the tea, while still providing plenty of flavor. During the summer, the temperatures in much of Japan can get quite hot, so it is a lot of work to harvest during this time.

The tea plant can be harvested a third time in late summer, but this is really more common in southern Japan. The third harvest of the plant will produce very low quality tea that is lower in nutrients. The tea plant needs sufficient time to pull nutrients from the soil and when it is harvested in such a short amount of time, it is unable to produce as strong of a flavor.

In mid October or mid November, some tea plants will be harvested for a fourth and final time. This is known to some as Aki Bancha, or fall harvest. Some farmers choose to sell this tea to customers, but farmers like Mr. Watanabe in Yakushima have a different plan for the leaves. He harvests the leaves in fall and then actually uses them as a fertilizer for the plant. His thought behind this is that the tea plant has absorbed nutrients from the soil all year, so now it must return some at the end of the year.

How are the best leaves selected?

If you are producing a premium quality Japanese green tea, it has to come from the first harvest. The tea plant is harvested up to 4 times from April, all the way to November and the quality declines with each harvest. After the last tea harvest in November, the tea plant has all winter to build up nutrients and it releases those nutrients in the first sprouts of the spring time. These fresh spring leaves are the most flavorful, and therefore they command the highest price.

Tea picked during the first harvest is called ‘Shincha‘ and it is one of the highest regarded teas in Japan. Serious tea drinkers will wait around all year to be among the first to purchase the new Shincha harvest in springtime. This practice used to be more common decades ago, but now with the widespread use of refrigeration, the tea can be kept fresh all throughout the year. Shincha tea, like the Shincha from Mr. Nuruki can be quite flavorful, with a light sweet and savory flavor.

Once fall comes around in Japan, it becomes especially important for farmers to fertilize their tea crop. The soil must be set up for the long winter ahead, so the tea plant can rest and absorb nutrients ahead of the spring harvest. A lot of farmers will use a type of straw on the base of the tea plants. This serves a few important purposes. First, it allows the tea plant to retain moisture by locking in water. It also fertilizes the tea plant and keeps the roots warm through the winter.

After a long winter, the sprouts of the tea plant will begin to come up in the spring and soon they are able to be harvested. The most common way to harvest the tea plant in Japan is with this motorized tea harvesting machine. This is the most efficient way to harvest tea, and it’s one of the reasons why the tea plants are organized in these neat rows. The harvester will trim these like hedges and overtime they will develop a neatly carved shape.

Tea Harvester

The tea harvester is one of the more common tools used in tea harvesting. This tool is operated by two people, as they hold each side of the machine and walk along each side of the tea rows to trim the top leaves.

After being cut, these leaves are kept inside a net and collected afterwards. This tea harvester combines the precision of hand picking with the speed of the mechanical tea harvester, which we will mention next.

Mechanical Tea Harvester

The mechanical tea harvester is an innovative invention when it comes to harvesting tea leaves. This machine is essentially a combine that can be drive between the rows of the tea plant and automatically harvest them. The advantage of the mechanical tea harvester is that it is much faster than the hand held tea harvester. It simply skims the top of the tea bush to trim the top leaves of the tea plant and collect them into a net.

The downside of the mechanical tea harvester is that it is not as accurate as the hand held tea harvester. Because the mechanical tea harvester is so large, it is very difficult to control and you can be as precise with the harvesting as you can be with the hand held version. The results will show up in the leaves. You want larger leaves in the case of gyokuro and sencha and as long as the leaves look good, the tea harvester must work just fine!

Is a Tea Harvester better than a Mechanical Tea Harvester?

Technically the regular hand held tea harvester is better than the mechanical tea harvester, but there are a few different variables. The mechanical tea harvester is large and less maneuverable, but as long as all the tea rows are the same height, it should be able to get the job done. For this reason tea harvested with the mechanical tea harvester is not necessarily worse, it just comes down to what the final leaves end up looking like.

Handpicked tea leaves

Occasionally, tea like ceremonial matcha and Gyokuro will be made with hand picked leaves. This method of tea harvesting extremely expensive in Japan, but the benefit is that the leaves are picked perfectly. On one day out of the year, people from all around the town will gather on this field to pick the fresh sprouts of the tea plant. There is a precise method to their picking. They want to select the top 3 leaves of the tea plant, so they will pick slightly underneath the third leaf. Once the leaf has been picked, they will drop it into their basket and then look for the next one.

If a farmer wants to produce a more inexpensive tea like Bancha, they will select leaves lower down on the tea plant, along with some stems as well. This method of tea harvesting can give the farmer a much higher yield. The leaves are more mature, and not quite as flavorful. The more mature leaves of a Bancha are lower in caffeine and they can produce a quite pleasant citrusy flavor, with notes of cereal, popcorn and wood.

As you can see, the harvest can be an important factor in determining how prized a tea is. Depending on when it is picked, how it is picked and where on the tea plant it is picked, the tea can be in a completely different category. If you are interested in trying some first harvest teas with larger leaf pickings, we highly suggest you checkout our selection of gyokuro teas. These teas are designed to have an incredibly sweet flavor and a savory finish. They are known as being the most sought after leaf teas in Japan and a lot of work goes into their harvest. Try them out for yourself and let us know what you think!

Liberty Safe Alternative — American-Made Gun Safes

0

For 35 years, Liberty Safe has been our best-selling brand. Based in Payson, Utah, Liberty’s premier production line is manned by Americans. It’s the only US manufacturer offering a full range of entry-level to high-end gun safes. However, we do offer many other U.S.-built safe brands that provide a Liberty Safe alternative.

Although Liberty is the household name, when it comes to quality U.S.-built safe manufacturers, others such as Browning, Champion, Superior, and Rhino offer alternatives to Liberty that might align with your needs. We compiled a short list to compare with Liberty Safes best sellers for your reference.

8 Liberty Safe Alternative Gun Safes

Although Liberty is the household name, when it comes to quality U.S.-built safe manufacturers, others — such as Browning, Champion, Superior, and Rhino — offer alternatives to Liberty that might align with your needs.

While we’re well-versed in the selection of gun safes for sale (you might even call us gun safe nerds), we know that comparing multiple brands can be confusing. The following list outlines Liberty’s best sellers and the closest American-made alternative.

DISCOUNTS & REBATES: The following prices listed below do not reflect any current sales and or rebates available. Additionally, we are currently offering 12-month same as cash financing to qualifying individuals.

1. Liberty Centurion Alternative: RHINO RBFX

Rhino is a veteran-owned gun safe manufacturer located in Caldwell, Idaho. It’s named after the fighter jet Don Suggs flew — a McDonnell Douglas F-4 Phantom. (A twin-jet, all-weather aircraft that had top speeds more than twice that of sound!) An innovative manufacturer, Rhino offers both a patented swing-out gun rack and their new patented SafeX™ Security System.

Liberty Centurion Price Range: $799 – $1,299 Fire Rating: 40 MinutesSteel: 14 Gauge

Rhino RBFX (Featuring Rhino’s Revolutionary New Anti-Pry Technology)Price Range: $1,309 – $1,938Fire Rating: 40 Minutes Steel: 14 Gauge

2. Liberty USA Alternative: none

We hate saying there’s no solution for something. Our team bends over backward to help customers achieve their goals. But when it comes to finding a Liberty safe alternative for the USA series, we can’t. There simply isn’t a comparable American-made gun safe at this price point at this time.

3. Liberty Colonial Alternative: BROWNING HUNTER SERIES

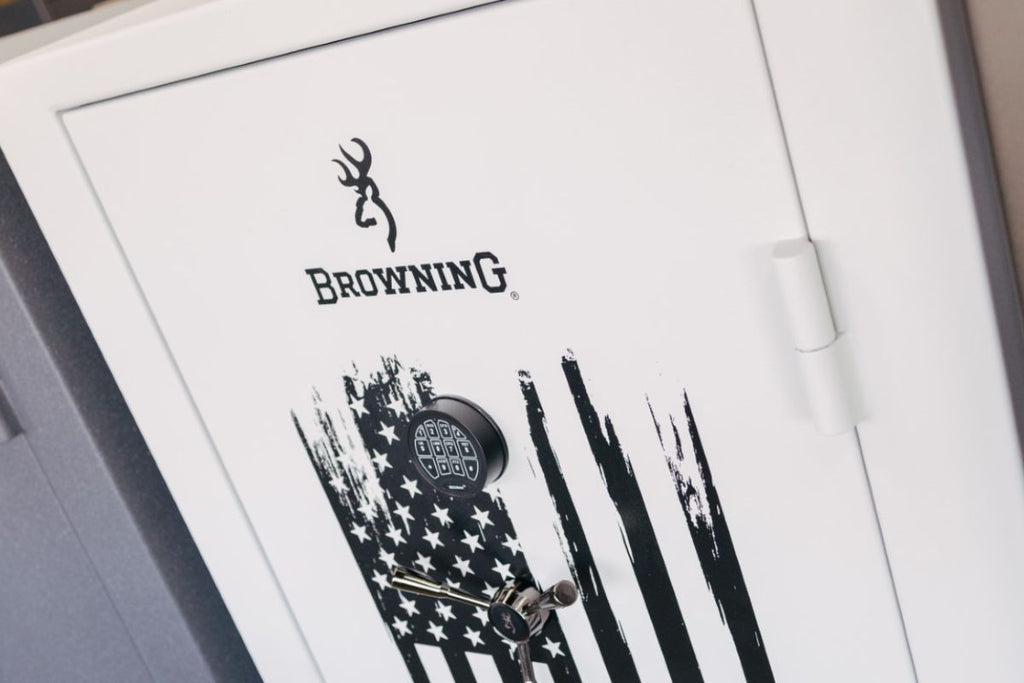
Browning Hunter Series

Browning can trace its roots back to 1878, when the Browning Arms Company was founded in Ogden, Utah. It made a name for itself as a sporting gun manufacturer. Over the decades, it has offered a wide assortment of outdoor gear — including gun safes.

Liberty ColonialPrice Range: $2,299 – $3,599Fire Rating: 75 MinutesSteel: 12 Gauge

Browning Hunter SeriesPrice Range: $2,469 – $3,669Fire Rating: 80 MinutesSteel: 12 Gauge

4. Liberty Fatboy Jr. Extreme Alternative: BROWNING HUNTER PATRIOTIC 49

Browning Hunter

In a head-to-head comparison, The Browning Hunter Patriotic 49 weighs 165 pounds more than the Fatboy Jr. Extreme and can hold one additional long gun. It’s also important to note that the Hunter Patriotic 49 is 11.5 inches taller, requiring a larger ceiling.

Liberty Fatboy Jr. ExtremePrice Range: $2,799 – $2,899Fire Rating: 75 MinutesSteel: 12 Gauge

Browning Hunter Patriotic 49Price Range: $3,389Fire Rating: 80 MinutesSteel: 12 Gauge

5. Liberty Franklin Alternative: BROWNING 1878 Series

Browning 1878

Once again, this U.S.-built Liberty Safe alternative is a bit pricier. It also packs on a few more pounds, weighing roughly 75 pounds more than similarly sized safes within the Franklin series.

Liberty FranklinPrice Range: $2,899 – $4,899Fire Rating: 110 MinutesSteel: 12 Gauge

Browning 1878Price Range: $3,169 – $7,019Fire Rating: 90 MinutesSteel: 11 Gauge

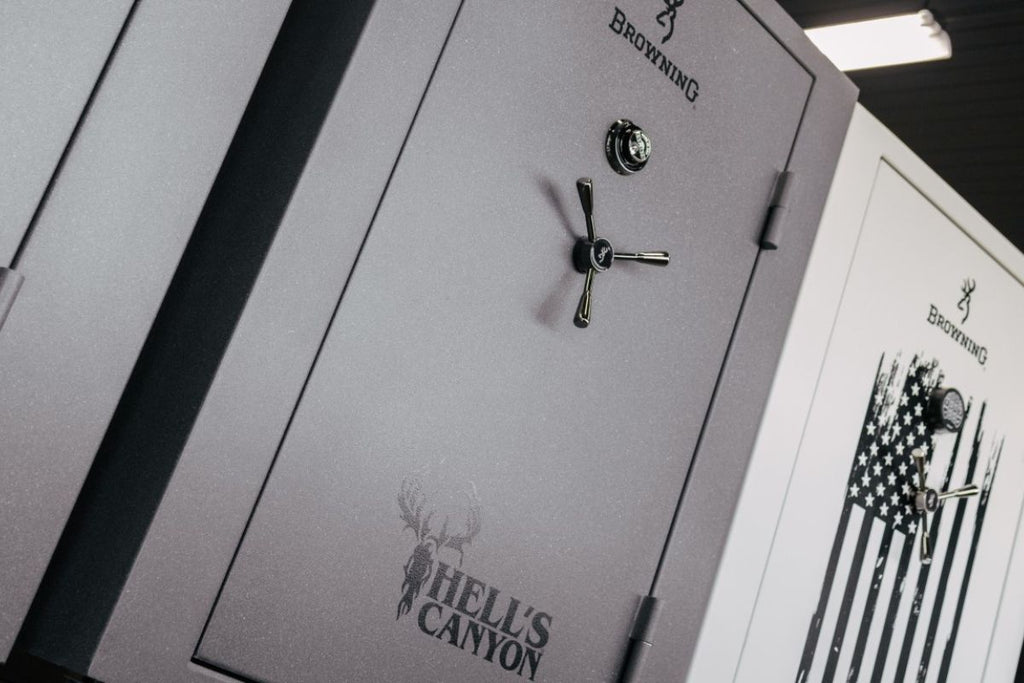
6. Liberty Fatboy Alternative: BROWNING HELLS CANYON 49

Browning Hell

Head-to-head, this is where we start to see more comparable safes from U.S. manufacturers. They offer similar footprints and storage capacity. One of the primary differences between these two safes is Liberty’s patented flat bar design.

Liberty FatboyPrice Range: $3,999 – $4,199Fire Rating: 110 MinutesSteel: 11 Gauge

Browning Hells Canyon 49Price Range: $4,389 – $4,969Fire Rating: 90 MinutesSteel: 11 Gauge

7. Liberty Lincoln Alternative: CHAMPION SUPERIOR MASTER SERIES

The Superior Master series produced by Champion offers top-tier security and uncompromising craftsmanship. It features thick, reinforced, pry-resistant doors — along with an intelligently designed interior to maximize long-gun and valuable storage.

Liberty Lincoln SeriesPrice Range: $4,099 – $6,599Fire Rating: 120 MinutesSteel: 10 Gauge

Champion Superior Master SeriesPrice Range: $3,599 – $7,899Fire Rating: 120 MinutesSteel: 11 Gauge

8. Liberty Presidential Alternative: AMERICAN SECURITY BFX SERIES

AMSEC BFX

Established in 1946, American Security (aka AMSEC) manufactures some of the strongest gun safes and commercial safes in the world. The BFX series is its premier consumer gun safes. The series features a UL certified RSC burglary rating, aligned with an adjustable interior for customizable storage solutions.

Liberty Presidential SeriesPrice Range: $7,099 – $10,499Fire Rating: 150 Minutes (2.5 Hours)Steel: 70 Gauge

American Security BFX SeriesPrice Range: $5,752 – $9,667Fire Rating: 120 MinutesSteel: 11 Gauge

What to Know About Alternatives to Liberty Gun Safes

Liberty Safe Sells the Only Entry Level American-Made Long Gun Safe

If you want an American-made gun safe for $1,000 (or less), Liberty is your only option.

American Flags Look Cool. They Don’t Guarantee a Made-in-the-USA Safe.

We love Old Glory. And we think things decorated with her look pretty darn cool. But beware a wolf in sheep’s clothing because it’s not uncommon for a foreign gun safe manufacturer to print an American flag print on their product. The flag doesn’t mean it was actually made in the U.S.

How To Keep Yourself Protected When Going Hunting: A Guide

0

Hunting is a thrilling outdoor activity enjoyed by many enthusiasts. Whether you’re a seasoned hunter or a novice, prioritizing your safety is essential when venturing into the wilderness. By taking certain precautions, you can ensure a safe and enjoyable hunting experience. In this guide, we will explore crucial points to keep yourself protected while hunting.

Proper Planning and Preparation

Before heading out for a hunting expedition, thorough planning and preparation are key. Start by familiarizing yourself with local hunting regulations and obtaining the necessary permits. Research the specific rules and regulations for the area you plan to hunt in, as they may vary depending on the location and the type of game you intend to pursue. Study maps of the hunting area to understand its topography, potential hazards, and legal boundaries.

It is also important to inform someone reliable about your trip, including your expected return time and the location where you will be hunting. Provide them with relevant contact information and instructions on what to do in case they don’t hear from you within a reasonable timeframe. Additionally, carry a means of communication like a mobile phone or a two-way radio to stay in touch with others if needed.

Dress Appropriately

Choosing the right attire is vital for both comfort and safety during a hunting trip. Opt for clothing that provides effective camouflage and blends well with the natural environment in which you will be hunting. Consider the predominant colors and patterns of the landscape during the season you plan to hunt. This will help you remain undetected by your game.

Ensure your attire includes bright-colored elements, such as an orange hat or vest, to enhance visibility to other hunters in the vicinity. This is particularly important to avoid any mistaken identity accidents. 

Additionally, for those seeking an extra layer of protection, considering the use of a bulletproof vest can be a worthwhile option. While not commonly utilized in standard hunting scenarios, bulletproof vests can provide an added level of safety in specific situations where there may be a higher risk of accidental discharge or when hunting in areas where firearms are more prevalent. You can get more information from https://bulletproofsupplystore.com/, but generally, bulletproof vests are designed to absorb and distribute the impact of bullets, reducing the risk of serious injury. Consult local laws and regulations regarding the use of bulletproof vests during hunting activities and consider professional advice to choose a vest that suits your specific needs.

Handling Firearms Responsibly

Firearm safety is of utmost importance when hunting. Always treat firearms as if they are loaded, even when you are certain they are not. Familiarize yourself with the specific features and operation of your firearm, whether it’s a rifle, shotgun, or bow, and ensure it is in proper working condition before every hunting trip. Regularly inspect your weapon to check for any signs of wear or malfunction.

When transporting firearms, always follow local laws and regulations. Ensure they are unloaded, securely stored, and properly cased or holstered. When handling firearms during the hunt, maintain the barrel pointed in a safe direction, away from yourself and others. Never place your finger on the trigger until you are ready to shoot. Remember, proper firearm safety practices are critical to preventing accidents and ensuring the well-being of everyone involved.

Be Aware of Your Surroundings

Maintaining awareness of your surroundings is crucial for your safety while hunting. Regularly scan the area for other hunters, as their presence may not always be immediately apparent. Communication is key in such situations, so consider using a whistle or other agreed-upon signals to alert nearby hunters of your presence.

Before taking a shot, always positively identify your target and what lies beyond it. It is essential to have a clear line of sight to your target without any obstructions that could cause a bullet or arrow to deviate from its intended path. 

Avoid wearing headphones or engaging in activities that may distract you from your environment. Be cautious of potential obstacles like fallen trees, uneven terrain, or wildlife that may pose a threat. By remaining vigilant and alert, you can reduce the risk of accidents and ensure the safety of yourself and others.

First Aid and Emergency Preparedness

No matter how careful you are, accidents can still happen. Therefore, it is crucial to carry a well-equipped first aid kit and have a basic understanding of first aid techniques. Your first aid kit should include items such as bandages, adhesive tape, antiseptic wipes, tweezers, and any necessary prescription medications. It’s also a good idea to carry a compact manual that provides instructions on basic first aid procedures.

Learn how to treat common hunting injuries like cuts, sprains, or burns. Understand the signs and symptoms of more serious conditions, such as hypothermia or heat exhaustion, and know how to respond accordingly. Additionally, include essential items like a flashlight, whistle, and compass in your survival kit. These tools can be invaluable in emergencies or when unexpected situations arise.

Familiarize yourself with basic survival skills such as building a shelter, starting a fire, and finding sources of potable water. While these skills may not be necessary for most hunting trips, knowing them can provide added confidence and security. Stay up-to-date with weather forecasts and be prepared for sudden changes in weather conditions.

Hunting is an exhilarating outdoor activity that allows us to connect with nature and challenge our skills. However, ensuring our safety should always be the top priority. By following the points outlined in this guide – proper planning, appropriate attire, responsible firearm handling, situational awareness, maintaining hydration and nourishment, and being prepared for emergencies – you can significantly minimize the risks associated with hunting.

Shotgun Choke Tube Information

0

What Is A Shotgun Choke?

A choke is simply a tapered constriction of the gun barrel’s bore at the muzzle end. The exit end of the choke is smaller by some dimension than the actual bore of the barrel. This difference is the amount of constriction. For example if the bore of the barrel is .730 and the exit dia of the choke is .710 you have a constriction of .020. The amount of constriction for a given degree of choke will also vary between manufacturers. As a general rule for standard chokes the total range will be between .000 and .045 thousandths of an inch under bore diameter. In the case of special purpose turkey chokes it can be as much as .100 or 1/10th of an inch. The length of the choke can vary as well. Most, but not all chokes will have an overall length of between 1.5 and 4 inches. Note that many fixed choke barrels marked skeet will actually be .000 or cylinder.

They can be grouped in 3 general types:

1- Fixed chokes- They are made as an integral part of the barrel and cannot be readily changed except by a gunsmith and any alteration is considered permanent.

2- Interchangeable chokes- These can be of the “screw on” style which is externally attached or the “screw in” which is recessed into the barrel. To change the degree of constriction you simply remove and replace with a choke of a different diameter.

3- Adjustable chokes- This style of choke is adjustable throughout the entire range by turning a sleeve, which collapses or allows a collet to expand thus changing the exit diameter. A popular choke of this type is the Polychoke.

The internal design of chokes can also be broken down into three main groups:

1- Conical Parallel- This style has a cone that blends into a parallel section which helps to stabilize the shot charge as it leaves the choke.

2- Straight Conical- This has a cone only. Where the cone stops is the point where the shot exits the choke.

3- Wad Retarding-They do not have the constriction in the same manner as either of the above designs but instead use bumps or projections to alter the shot pattern.

The most common design in use is the conical parallel. All Trulock Chokes are of this design.

Shotgun Bore Diameter and Pattern Performance

I am often asked the above question by people who are interested in purchasing a new shotgun. They reason that if a specific bore size inherently gives better, that is more even patterns, then it makes sense to purchase a shotgun with that bore diameter.

Shotguns that were made in the U.S.A. were for many years, all of the same nominal bore diameter (.730 plus or minus the tolerance of the individual manufacturer) as the U.S. standard for 12 ga was .7299. With the rise in popularity of foreign shotguns such as Beretta we were introduced to smaller bores running in the nominal .721/.725 diameter. Stan Baker to the best of my knowledge was the first to do extensive experiments with backbored barrels (the process of enlarging an existing bore diameter) taking the 12 ga bore up to a nominal 10 ga diameter of .775. Some time back Browning added a new choke design to their line which they named Invector Plus to differentiate it from their original design called Invector. The new chokes and the barrels were based on a nominal .740 bore diameter. I believe that Browning was the first company to offer a factory barrel with a bore diameter that was significantly larger than standard. Currently most of the major shotgun manufacturers offer at least some models with bores larger than their “standard” bores. Some have gone totally to a new larger bore. The results of this are that today’s shooter has a very wide range of bore diameters to choose from.

Pulling from my memory I can recall the following nominal 12 ga. bore sizes. These may not be exact numbers as each manufacturer has plus and minus tolerances. Some of the below numbers have been rounded when converting from metric measurements and some for my convenience.

.725

.730

.733

.735

.740

.745

.774

Now that you have all of the background information, you can get my answer.

I have always been able to obtain the pattern that I was looking for within reason (no 100% patterns at 80 yards) with all of the above bores by patterning with different chokes and or shells. I have had shotguns on occasion that took quite a bit of work to obtain the pattern I wanted but this has never been limited to a certain bore size as they were always a random mix.

Shotgun Patterns

Patterns are normally expressed as a percentage such as 50%, 60%, 70% ect. This is the commonly accepted method comparing pattern density. In a 50% pattern ½ of all the pellets contained in the shell will strike inside of a circle of 30 inches in diameter. To find the percentage of any given load divide the number of hits inside the circle by the total number of pellets contained in the shell. You can obtain the approximate number of pellets any given load will have from a shotgun shell reloading book or you can open a couple of shells and actually count the pellets. Normally all pattern testing is done at a distance of 40 yards with the exception of cylinder and skeet 1 chokes in all gauges and all chokes for the .410 bore which are normally measured at 25 yards. Industry pattern percentages for chokes were developed using the preceding distances. If you want to compare any given choke to the industry figures you should do your pattern testing at the same distance.

The purpose for this is to allow you to select a choke that will throw a pattern that is as large as possible without having the pellets so far apart that the target can move through the shot string without receiving multiple hits. For shooting both game and clay targets you want a pattern that is perfectly even in pellet distribution over the 30-inch circle. Having said that, and after looking at thousands of patterns over a span of 25 years I could count on my fingers the number that I would call “even” and if these were measured close enough they would not have qualified. In this instance “very close” is excellent. Two exceptions to the preceding would be buckshot and turkey patterns. With both of these you are looking for a tight center cluster of pellets.

One thing to remember –The only thing that is consistent about shotguns is that very few things are consistent. Identical guns with the same degree of choke and using the same shell may not pattern the same. The same load between various brands of shells can pattern differently. Patterns will change when changing from hard to soft shot. Patterns can change when anything in the shell changes such as different wads, powders or primers. What I am trying to get across is that when you change anything such as brands, shot size, or components you will need to check the pattern as it could have changed, sometimes by an extreme amount.

Once you find a choke/shell combination that gives you the pattern you want it should remain reasonably consistent as long as nothing is changed. I am satisfied as long as the percentage stays within a 5% plus or minus deviation.

The below chart shows the relationship between the degree of choke, the percentage and constriction based on lead shot. Keep in mind that the percentages are a guide only. What you actually want is a pattern that is dense enough to insure multiple hits on your target at the distance you normally shoot.

Lead Shot Choke Chart

Constriction Percent Cylinder .000 40 at 40 yds- 70 at 25 yds Skeet 1 .005 45 at 40 yds- 75 at 25 yds Imp Cyl .010 50 at 40 yds Skeet 2 (lite mod) .015 55 at 40 yds Modified .020 60 at 40 yds Imp Mod .025 65 at 40 yds Full .030 70 at 40 yds Extra Full .040 73 at 40 yds Turkey .045 Plus 75 PLUS at 40 yds

Keep in mind that this chart should be used as a starting point only. Select the choke and pattern it. Change chokes or loads as needed to get the pattern you want. If you do not pattern your gun please feel free to accept this chart as being infallible.

What Choke Should I Use

The most frequently asked question we get is “What choke do you suggest”?

Use a choke that will give you 70 or so percent patterns at the distance you plan to shoot.

If you look back at the “lead shot choke chart” it is obvious that open chokes at long distances will have a much more open pattern than tighter chokes. I will not argue the point that you can certainly break/kill targets at 40 yards with a skeet choke but the odds are certainly not in your favor. Try your best to estimate the distance that you would normally encounter for a specific shooting condition and select a choke that gives you an evenly spaced 70% pattern with your choice of shell. Rarely, will your estimate be “on the money” so test pattern this combination at distances both closer and farther from your established base line. If the shooting distances change then change your choke to match them.

When I first started dove shooting many years ago, I noticed there were always one or two men at every shoot that almost never missed a bird. After long observation I realized that the one thing that each had in common was that they picked their shots instead of blasting at every bird in the field. They were simply shooting those birds that were within range of whatever gun/choke/shell combination they were using. In my opinion shooting range equals 70% pattern density.

While there are other variables, for all practical purposes chokes will have the biggest effect on pattern density. I look at density from two different ways. The first is the pattern percentage. This is simply a figure telling you how many pellets out of the total number of pellets that were fired at the target hit inside a thirty-inch circle. Example: 250 pellets were in the shell and 200 landed inside the circle. Divide 200 by 250 = 80%. Percentage is percentage and it does not matter what size of shot is used.

The second way is pellet spacing. Common sense tells us that a 1-¼ oz. load of #8 shot will have many more pellets than a 1-¼ oz. load of #4 shot. If both loads pattern at 70% you will have more # 8 shot in the target than you would have with 4’s. The pellets must be close enough that the target cannot slip through. While I generally think that the 70% rule is sufficient, some of the larger pellets may not give enough density. Pattern and make sure.

How To Pattern

I like to use paper that measures 4 feet square. Paper this size may be hard to find locally. If it is not available try taping several sheets of butcher paper or newsprint together. Bruce Buck the “technoid” of “Shotgun Report” suggested using red resin flooring paper. This is available at any home supply store and shows the pellet holes perfectly when viewed from the back. He noted it is available only in 36-inch wide rolls but it cuts and tapes easily. If you use small paper and your gun does not shoot to the point of aim, part of your pattern could be off of the target. You would probably confuse this with a bad pattern. Mark the target center for use as an aiming point. I strongly suggest that you use a padded shooting bench when patterning. At this point you are not checking the gun for fit and a bench rest helps to remove some of the variables. Note that if your head/eye is not located in the same place on the stock between bench rest and offhand shooting your point of impact will be different. From the correct distance, shoot at the center of the target. I would do this a minimum of 5 times on different targets with each shell or choke that is being tested. You will need to draw a 30-inch circle around the most dense portion of the pattern on each target. If you intend to do much of this get a 30-inch diameter piece of thin Lexan [Plexiglas]. You can easily move this around on the paper to find where to draw the circle. Count the pellets inside of the circle. Divide this number by the total number of shot contained in the shell and you will have your percentage. Take the percentage from each target, add them and divide by the total number of shots fired for each shell or choke. This will give you the overall average for that test. Sounds like a royal pain doesn’t it? It is, but there are no short cuts if you really want to know what your shotgun is doing.

After you have finished look carefully at each pattern for holes that are big enough to let your intended target slip through. You want a dense enough pattern to ensure multiple hits.

Point of Impact

We are asked on occasion about chokes that do not center the pattern exactly on the aiming point. Most shooters want a shotgun that centers the pattern exactly with the point of aim. Most shotguns are manufactured in theory to do this. The problem arises between theory and fact. It is not unusual to find shotguns that shoot high or low and to the right or left or a combination of these. Shotguns that pattern ½ above and ½ below the point of aim have what is commonly known as a 50/50 pattern. One that shoots ¾ of the pattern over and ¼ under the point of aim has a 75/25 pattern and so on. Certain guns are designed to give patterns other than 50/50. WE WILL ASSUME that you know if your gun was designed to give a pattern other than 50/50.

Some of the common reasons for off center patterns are listed below.

1-Defective choke tube

2-Bent barrel

3-Choke/barrel alignment

4-Loose barrel

5-Poor gun fit

6-FLINCH

This could also result from a combination of any of the above.

To check your gun for point of aim we suggest the following

1- Shoot from a padded rest.

2- Make sure to get perfect bead alignment if your gun has a center bead, if it doesn’t get the rib perfectly flat, with the bead visible.

3- Use the same load as you will use in the field or on the range.

4- Squeeze the trigger. This is easier said than done as most shotgun trigger assemblies give anything but a good pull.

5- Use targets with a center aiming point.

Shoot several targets, change chokes and repeat.

I would suggest you do this with several different chokes. If you are using aftermarket chokes also test some of the factory tubes that came with the gun.

1- If all of the chokes shoot to the same spot or at least very close to the same, your problem is not with the chokes.

2- If your point of impact changes with each choke you test your problem is not the chokes.

3- If one choke shoots to a different point of aim and the others do not. I would say that choke is defective and a call to the manufacturer would be in order.

One other thing you should be aware of is the “point of convergence” [POC]. This problem will be found only on side-by-side or over/under shotguns. Both barrels should shoot to the same spot. Again what works in theory seldom works in practice. Generally with O/Us the top barrel will shoot high. When testing for proper POC you will find it somewhat easier if you use tight chokes. If the POC is close, be happy, many are not. If you cannot live with the error I suggest you talk to the manufacturer.

Steel Shot/Waterfowl Chokes

Much has changed over the years with steel loadings. The quality and consistency of the shells has been greatly improved. However, the fact that steel shot exerts much more stress on choke tubes has not changed. The problem is that steel shot is much harder than lead. It will transmit much more energy to the choke when it strikes the conical portion and if the tube is not of sufficient strength it will cause it to deform. This is known as “choke creep”

Over a period of time choke creep can lock a choke in the barrel so that it is next to impossible to remove. Most Trulock Chokes are rated for use with steel shot from cylinder bore through improved modified with the exception of the Tru-Choke S.D. which are not recommended for any shot other than lead. In addition our Super Waterfowl Choke was designed especially for steel and all other environmentally friendly shot.

It is strongly suggested that you use our Extended Precision Hunter style choke for steel shot as they normally give a superior pattern over the flush style chokes.

Close Range -approximately out to 30 yards – Skt 1= pattern percentage of about 55% Medium range- approximately out to 35 yards-Skt 2 [light mod] =pattern percentage of 65%

Medium range- approximately out to 35 yards-Skt 2 [light mod] =pattern percentage of 65%

Long Range-35yards and further- Improved Modified =pattern percentage of 75%

Extreme Range= Super Waterfowl series=pattern percentage of 80% plus

The above suggestions normally work well with number (4, 3, 2 ect.) size steel shot. If you are using letter size (BB, BBB ect.) steel you may find your best results using cylinder (close range) improved cylinder (mid range) and modified for long range.

If you are switching from standard velocity steel to fast steel and you notice a decrease in pattern performance try backing off of choke constriction by .005 from whatever size you presently use.

These suggestions should be used as a starting point and should not be taken as a substitute for patterning your shotgun.

The recommendations below are for Trulock Chokes only.

Tungsten Iron- Use the same choke constrictions as you would for steel shot.

Tungsten Shot such as Hevi-Shot, Hevi 13, Winchester Extended Range and Federal Heavyweight.

For waterfowl and upland bird hunting we suggest you use two sizes smaller shot than you would with steel. We find that these alloys can be used in chokes with much more constriction than you can use with steel shot and they retain velocity much better. This, in my opinion makes them the ultimate choice for long range shooting. For normal patterns using # 6 thru # 2 size shot we like a skt 1 for close range, a skt 2 (light mod) for mid range and improved modified for long range. For shots on the long side of 40 yds try the extra full constriction or one of our Super Waterfowl chokes.

This type of shot can be used in our turkey chokes and normally deliver excellent patterns.

Bismuth – Use the same chokes you would use with lead shot.

All current production Trulock Chokes are marked on the body if rated for steel or tungsten or both.

Turkey Chokes

We make a wide assortment of chokes that fall under this heading. No one choke works well in all guns with all loads but one thing has to be consistent, the shot shell. You will have to shoot premium factory loads or assemble your hand loads with the best components available in order to get good dense patterns at long range. While this basically holds true for all shotgunning it is especially so when hunting turkeys. You have a very small kill zone even when the bird is at close range and it is imperative that you know exactly what your shotgun and shell is capable of doing. In testing different shells we have found several that work very well.

1- Hevi Shot

2- Federal Premium Mag Shok Heavyweight

3- Winchester Supreme Elite Xtended Range Hi-Density- No longer loaded but some existing stock may be on dealer’s shelves.

4-Winchester Long Beard™ XR™ Scroll down for more information

As a rule we found that the shells with “heavier than lead” pellets shot tighter patterns than those using lead but this may not be the case with your gun.

To get a dense pattern with a tight center you will need the Precision Hunter style choke. Our three most popular chokes have exit diameters of .670, .665 and .660. Although some shotguns like a .680 generally one of the above ends up working better. We also make a.650 and .640 but these are better suited to card shooting and not live bird hunting as they like smaller # 8 shot better. The smallest exit diameter does not always give the tightest pattern. We find that the smaller the exit diameter the more erratic the patterns. Normally one particular load will pattern considerably better than the rest. Let me repeat that you will be wasting your time to shoot a cheaply made or promotional type shell. We have patterned the above listed shells with our chokes and make the following suggestions.

Suggested turkey chokes and shot size

.690 first choice for .774 bore guns- #5/6 lead, #6 “heavier than lead”

.670 first choice for .740 bore guns- #5/6 lead, #6 “heavier than lead”

.665 first choice for .730 bore guns- #5/6 lead, #6 “heavier than lead”

.660 first choice for .725 bore guns- #5/6 lead, #6 “heavier than lead”

We have NOT had a chance to test Remington’s replacement for Hevi Shot but will do so and post the results.

Please note that a choke of a given exit diameter is usually going to give a different pattern when used in guns of different bore diameters.

Take a Beretta at .723 a Remington at .727 a Browning I.P. at .740 and using a .660 in all three guns normally gives three different patterns. Just because a .660 worked very well in your Remington does assume it will work great in your Browning.

Special Turkey Chokes for Specific Shells

Trulock Fed # 7 turkey chokes

After testing the Federal Heavyweight turkey # 7 we were so impressed we designed a series of turkey chokes especially for this shell. It gave very good results as per the below pattern. The folks at federal tell me that the # 7 tungsten pellet has the same killing power at 40 yards as a # 5 lead pellet.
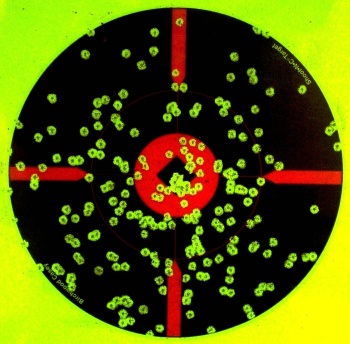
Federal #7 turkey load fired through Trulock Fed #7 choke at 40 yards.

Winchester Long Beard™ XR™ turkey chokes

These shells use lead shot that are encased in a special solid buffer that fractures upon firing. I don’t have a clue what the buffer is but I can tell you that patterns fired using this type of shell are amazing.

We developed a line of turkey chokes for this shell that is shot size specific. We make chokes specific to the #4, #5 and #6 shot sizes.

Combine the Longbeard XR™ turkey load with Trulock’s new LongBeard XR choke tubes to maximize the shell’s performance. With this remarkable combo, you can expect 10% greater penetration over standard lead loads beyond 50 yards and twice the number of pellets in a 10″ circle out to 60 yds.
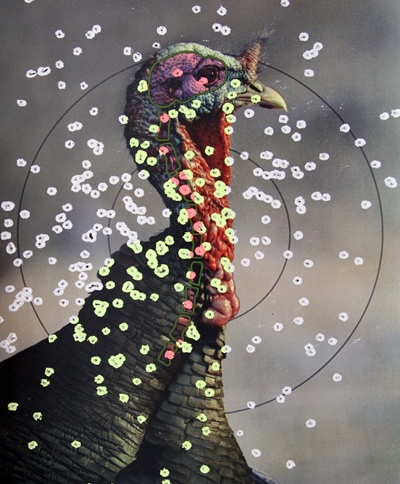
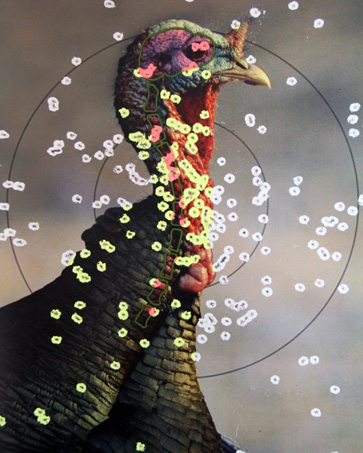
#5 Shot #6 Shot

Chokes for Buckshot

As with Turkey chokes you will be trying to get a very dense, tight pattern but since you have such a small number of pellets you cannot afford to have as many fliers. However, the rule about using premium shells does not change. Hard, plated pellets with a buffer will normally shoot tighter patterns with fewer fliers than those loads made with soft lead and no buffer. I would suggest the Precision Hunter style choke [extended] with a constriction of .030. This would be our full choke. Some gun/load combinations will work better with a constriction of .040 (extra full). One of these two constrictions will normally give you a very dense pattern.

The only sure way to know for sure which choke your gun likes the best is to test pattern and see.

Do not use turkey chokes for “00” buckshot. They have too much constriction and will decrease not increase the density of the pattern.

The constrictions suggested were based on the use of 00 size pellets.

We have patterned Hevi Shot’s 9-pellet buckshot load.

We consistently got 6 of the 9 pellets in a 10-inch diameter circle at 40 yards using an extended full and ex full choke.

00 and 000 Buckshot Choke Tubes For Big Game

Deerstroyer™ Choke Tubes

At the 2015 SHOT Show we introduced our Deerstroyer™ style of choke tubes especially for 00 and 000 buckshot sizes. All of these are made in a 4 inch overall length. For 2016 we have redesigned this choke internally for improved pattern performance. All of the Deerstroyer™ chokes have a nominal .030 constriction based on average bore size for each specific model.

Boar Blaster™ Choke Tubes

The Boar Blaster™ style of choke has a totally new internal design consisting of 5 steps with 6 parallel sections. This design has been tested with numerous loads of 9 and 15 pellet 00 and various 000 shells and has shown an increase in pattern density over conventional conical parallel choke designs with every load we have tested. Made from high strength stainless steel with a black oxide finish and knurled head.
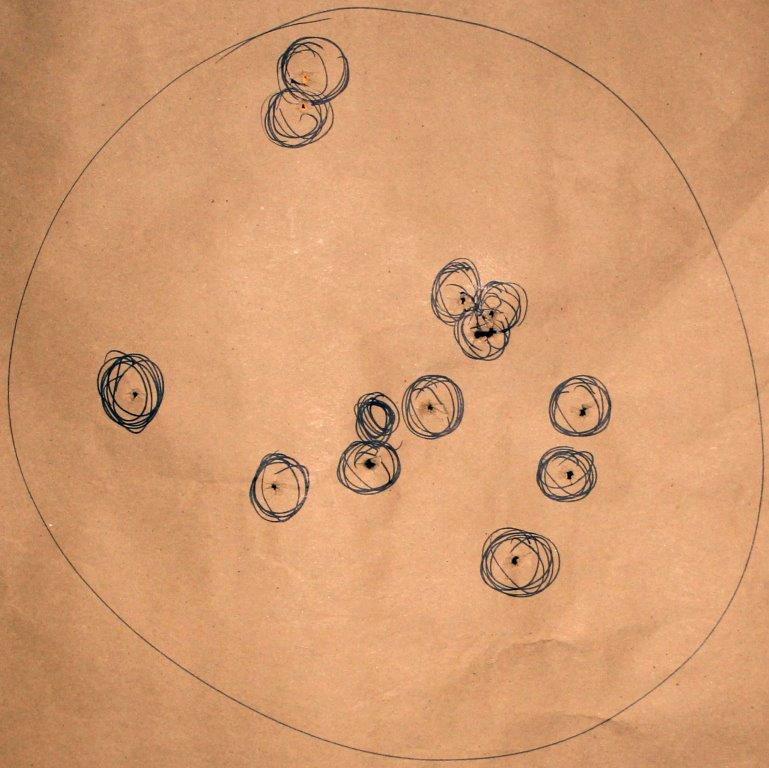
Predator/Varmint Chokes

Our suggestions on chokes are as follows.

Mossberg 835’s and similar .774 bore shotguns .710 exit diameter

Browning Invector Plus and similar .740 bore shotguns .680 exit diameter

Remington and similar .730 bore shotguns .670 exit diameter

Beretta Optima Plus and similar.733 bore shotguns .683 exit diameter

Benelli Crio Plus, Mobil style and similar .725 bore shotguns .665 exit diameter

We suggest the below loads

Hevi-Shot Dead Coyote (T Pellets)

Win Xtended Range HD Coyote (B Pellets)

Number 4 buckshot

In any given shotgun you may find one load patterns tighter than another. You will have to pattern your gun to find the best load.

Predator™ Choke Tubes

At the 2015 SHOT Show we introduced our Predator™ style of choke tubes especially for # 4 buckshot and the large pellet predator tungsten loads. All of these are made in a 4 inch overall length with a longer (3 inch) than normal conical section for less pellet deformation. All of these chokes have a nominal .050 to .060 constriction based on average bore size for each specific model.

Choke Cleaning

Ideally chokes should be cleaned each time the gun is used. Plastic fouling and powder residue will build up in screw in chokes much faster than in fixed choke guns. Powder fouling will also work between the choke and the choke counter bore in the barrel. Remove the choke and clean with a toothbrush using some sort of solvent. We use and suggest Choke Shine as a cleaner. Simply, drop the choke into the solution for a short time and it will come out with the fouling dissolved. Clean the inside of the barrel with a cleaner/lubricant such as Clenzoil making sure the threads do not have any residue, lightly wipe the choke with oil and reassemble.

Remember that rust can occur in the barrel and freeze a choke in place even if the choke is made from stainless steel. Waterfowl hunters should pay particular attention to keeping the choke and barrel clean.

Choke Tightness

Although this seems like a no brainer we believe that there is a proper way to install a choke tube. When changing a choke in the field or at the range, wipe the choke with a clean rag to keep any abrasive from being ground into the threaded area of the choke/barrel. Finger tighten and then use a wrench that properly fits the tube to finish tightening using a moderate amount of pressure. This will help keep the choke from loosening up when in use. When a choke is not properly seated the possibility of the shot charge striking the edge of the choke greatly increases. If this happens a bulged barrel and a ruined choke are almost guaranteed. Most chokes will loosen and back out to some degree if they are left finger tight. A perfectly clean, dry choke installed in a clean, dry barrel and moderately tightened with a wrench should not work loose. Having said that, most shooters are better off to make sure that there is a light coating of oil on the choke before installing as this will help prevent rust in the barrel. All chokes should be checked on a regular basis for tightness.

Prior to doing anything with a choke, be sure the gun is unloaded and the muzzle pointed in a safe direction.

Frozen Chokes

We have pulled frozen chokes in our shop of almost every brand. Normally by the time we get the barrel one or more people have attempted to remove the choke. Did you ever wonder where the saying “Fixed Guns Repaired” came from? This is a problem that can be prevented 99% of the time by simply cleaning the choke/barrel on a regular basis. The number one problem is RUST in the threaded area of the choke/barrel. If you keep this from forming, you generally will not experience any problems. The second problem is choke creep [expansion]. This fortunately is much less of a problem than rust. This is caused normally by using large steel shot in tight chokes [full or tighter]. Follow the manufacturer’s suggestions when using steel shot and the odds are very much in your favor that you will have no problems. If choke creep happens you will notice the choke becoming harder to remove and install and if you continue shooting it will eventually lock itself in the barrel.

If you find yourself with a frozen choke my first suggestion is to take it to a competent gunsmith. Make sure the smith has some experience in this line of work.

The information below is not intended to be all inclusive instructions. If you are not responsible for your own actions do not attempt to use any of the suggestions.

Unload the gun, remove the barrel from the action and soak the muzzle in a can of penetrating oil for several days. Make sure the container has a sufficient amount of oil to completely cover the barrel as deep as the choke is recessed. Use a proper fitting choke wrench and try to work the choke back and forth in small increments. If this does not work try letting it soak several more days. Heat applied to the choke area can be of help. Never get the barrel so hot that you cannot touch it with your hand for several seconds. Do not use a hammer of any kind to try and “tap” it. Soaking and low heat will get most frozen chokes out. Take your time, we have seen a number of barrels ruined because of impatience.

Choke Storage

We suggest that you keep your chokes in a padded case especially designed for them. There are a number of quality cases on the market for under $10.99. The purpose is to keep them from hitting each other or any hard object that could cause burrs or deformation. Chokes are particularly susceptible to denting in the skirt area. We have seen this occur on numerous occasions when chokes stored in plain boxes were dropped. We also urge you to clean all of the chokes that have used when you clean your gun. Alloy steel chokes need a light coat of oil prior to storage and stainless steel keeps its rust resistant properties best when it is free from all contamination.

British Shotgun Choke Tube Constrictions

Choke constrictions in Britain are normally marked using a different method that what we are accustomed to seeing here in the United States. In some cases the same name is used in both countries with an entirely different meaning as to the amount of constriction in the choke.

The below chart gives a comparison between the choke name and the amount of constriction.

Constriction Constriction British US Trulock MM Inches Marking Marking Marking .00 .000 Cylinder Cylinder Cylinder .13 .005 Imp Cyl Skeet Skeet 1 .25 .010 1/4 Imp Cyl Imp Cyl .50 .020 1/2 Modified Modified .75 .030 3/4 Lite Full Full 1.00 .035 Full Full

We have tried to give you a very basic course on chokes and their use. If we can be of any service to you please call us. We will be glad to help with any questions or problems you may have. This will be a constantly evolving paper. If you would like to see any subject discussed concerning chokes or related please let us know.
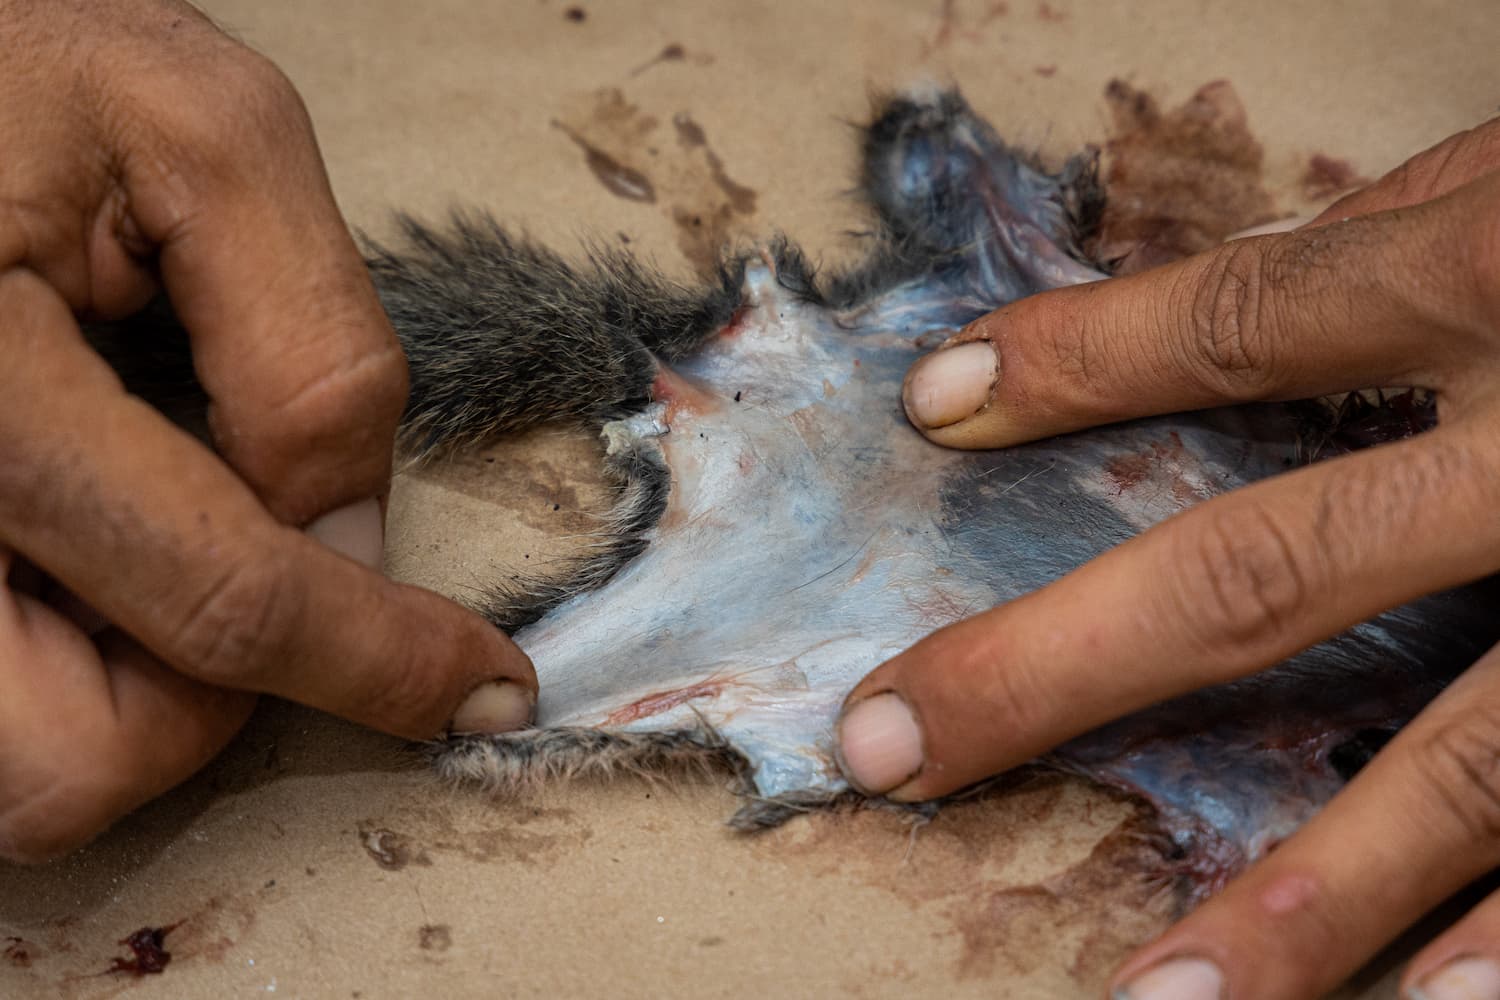
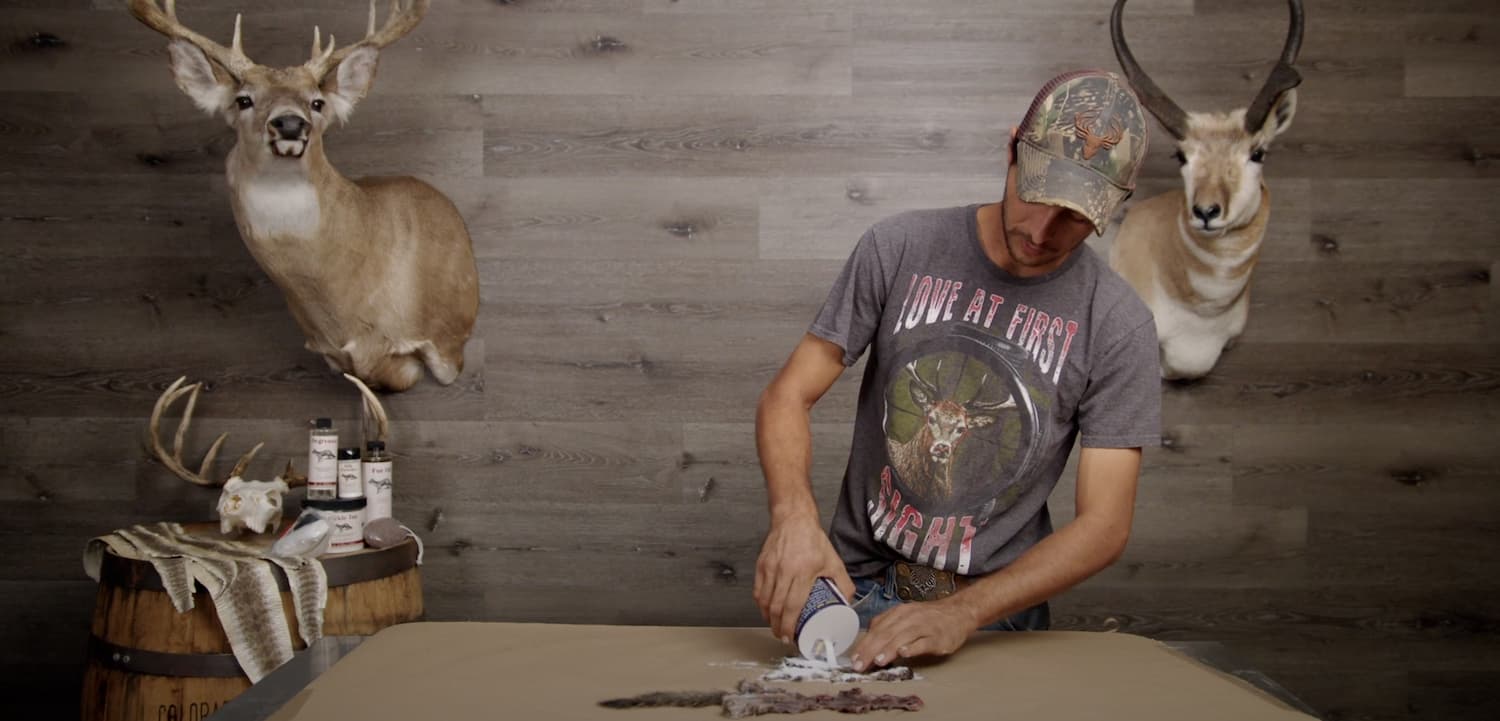
Best Air Rifle Deals

Popular Posts

Master Small Game Hunting with an Air Rifle: Tips and Techniques

0
"Experience the thrill of small game hunting with an air rifle! Embark on a captivating journey as you test your accuracy and precision in...

What can you kill with a 177 air rifle?

0
"Unleash Your Precision: Discover the Power of a .177 Air Rifle to Take Down Targets with Accuracy. Explore the Versatility and Potential of this...

Air gun 101: The differences between .177 & .22 – Which jobs they do...

0
I’ve always believed the popular phrase: “It’s not the size of the dog in the fight that matters - but rather the size of the...

Air Rifle Scope vs. Rifle Scope – Which One Fits Your Shooting Needs?

0
"Air Rifle Scope vs Rifle Scope: Unveiling the Ultimate Precision Optics. Discover the essential differences and benefits of these two optical devices, empowering shooters...

.22 vs .25 Air Rifle: The Ultimate Comparison Guide

0
When I first got introduced to the world of rifles, I often thought that a bigger caliber meant better performance. So, I thought that...