Home Blog Page 37

Air gun 101: Everything you need to know about air rifle accuracy

0

Wyatt Earp has said:

Fast is fine, but accuracy is everything

And I just thought how many airgunners are obsessed with muzzle velocity and muzzle energy,

Yet few really bother about air rifle accuracy.

Well, perhaps it’s a general assumption that if an air rifle is fast enough, then it is accurate.

And not just that.

I’ve come across several air rifle myths that seriously need to be debunked.

Allow me to mention just a few before we get into the dynamics of air rifle accuracy:

  1. Longer barrels are more accurate than shorter barrels
  2. Cheap or expensive, all pellets are the same
  3. It is best to use pointed pellets when hunting instead of domed or hollow-point pellets
  4. To get a good quality airgun, you have to drain your wallet
  5. All air rifle barrels should be cleaned regularly
  6. Purchase a high-end scope to improve your airgun accuracy
  7. Chinese, American, Turkish, German, etc. airguns are all the same
  8. You can’t recondition a broken airgun to proper functionality
  9. Air rifles will never be as accurate as firearms
  10. Use a BB gun to scare animals away
  11. It’s impossible to find hunting permissions nowadays

I blame this for misinformation. 

For now, let’s debunk the myths surrounding air rifle accuracy.  

First of all, what is air rifle accuracy?

I can confidently define air rifle accuracy as the ability of the air rifle to shoot ammo and hit the intended target. That’s all.

When you aim at a target, you really expect the pellet to land right where you wanted it to. 

After all, you’ve learned how to use the open sights, or the scope, you’ve mastered the correct way to hold the airgun,

And you have great expertise in pulling that trigger – whether one-stage or two-stage. 

And then it seems you can’t just hit the target.

Sometimes the pellet hits many inches above the target, sometimes below, sometimes to the right, sometimes to the left .

When that happens:

  • Some people blame the air rifle for inaccuracy
  • Some people blame themselves
  • Some people blame forces of nature

For your information, all the three groups of people are correct. But let us focus on the first group. 

How is air rifle accuracy measured?

To measure accuracy, you need to have some paper target, preferably patterned like a darts board, with the bullseye at the very center.

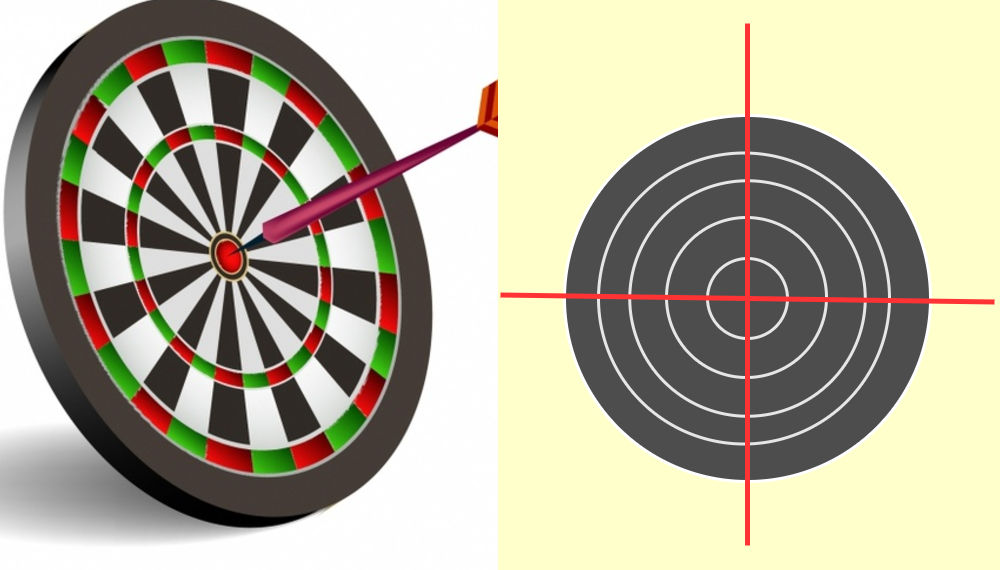
Now stand with your air rifle at some specific distance from the target – 10 yards, 20 yards, 30 yards, 40 yards, 50, yards, 100 yards, or whichever distance you like.

This is because, when it comes to describing the accuracy-test results, you have to be specific regarding the distance from the target the test was done.

The results are not always the same for different distances.

Aim at the bull’s eye – in this case, the intersection of the 2 red lines. Fire 5 shots, each time aiming at the bull’s eye.

You can do 10 if you like.

The pellets will hit the target paper, but very unlikely at the very same spot.

You are likely to have the pellet marks spread as follows.

Use vernier calipers or a plain ruler to measure the distance between the two pellet marks that are farthest from each other.

Assuming this distance is ¾ inch and you took the shots standing 20 yards away from the target,

The accuracy of the air rifle can be stated as ¾” at 20 yards.

There must be some reason why all the pellets don’t hit the bull’s eye as intended.

Here are the reasons. 

Main reasons for inaccuracy

1. The barrel

When you pull the trigger and the pellet begins its ballistic flight, the very first component of the air rifle to guide the flight path of the pellet is the barrel.

Barrel design

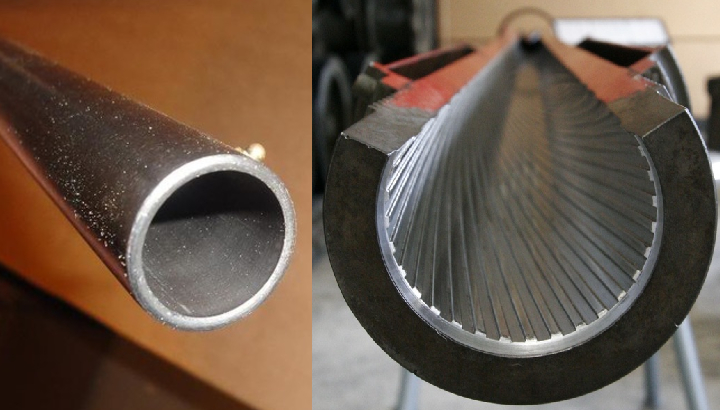
The design of the interior of the barrel – what we call the bore – can affect the movement of the pellet within the barrel.

The three most common designs are:

  • Smooth bore barrel
  • Rifled barrel with spiral grooves
  • Rifled barrel with longitudinal grooves

The spiral grooves in rifled barrels cause the pellet to spin along its longitudinal axis as it flies out of the muzzle.

This makes the pellet fly a long distance and in a more straight flight path. 

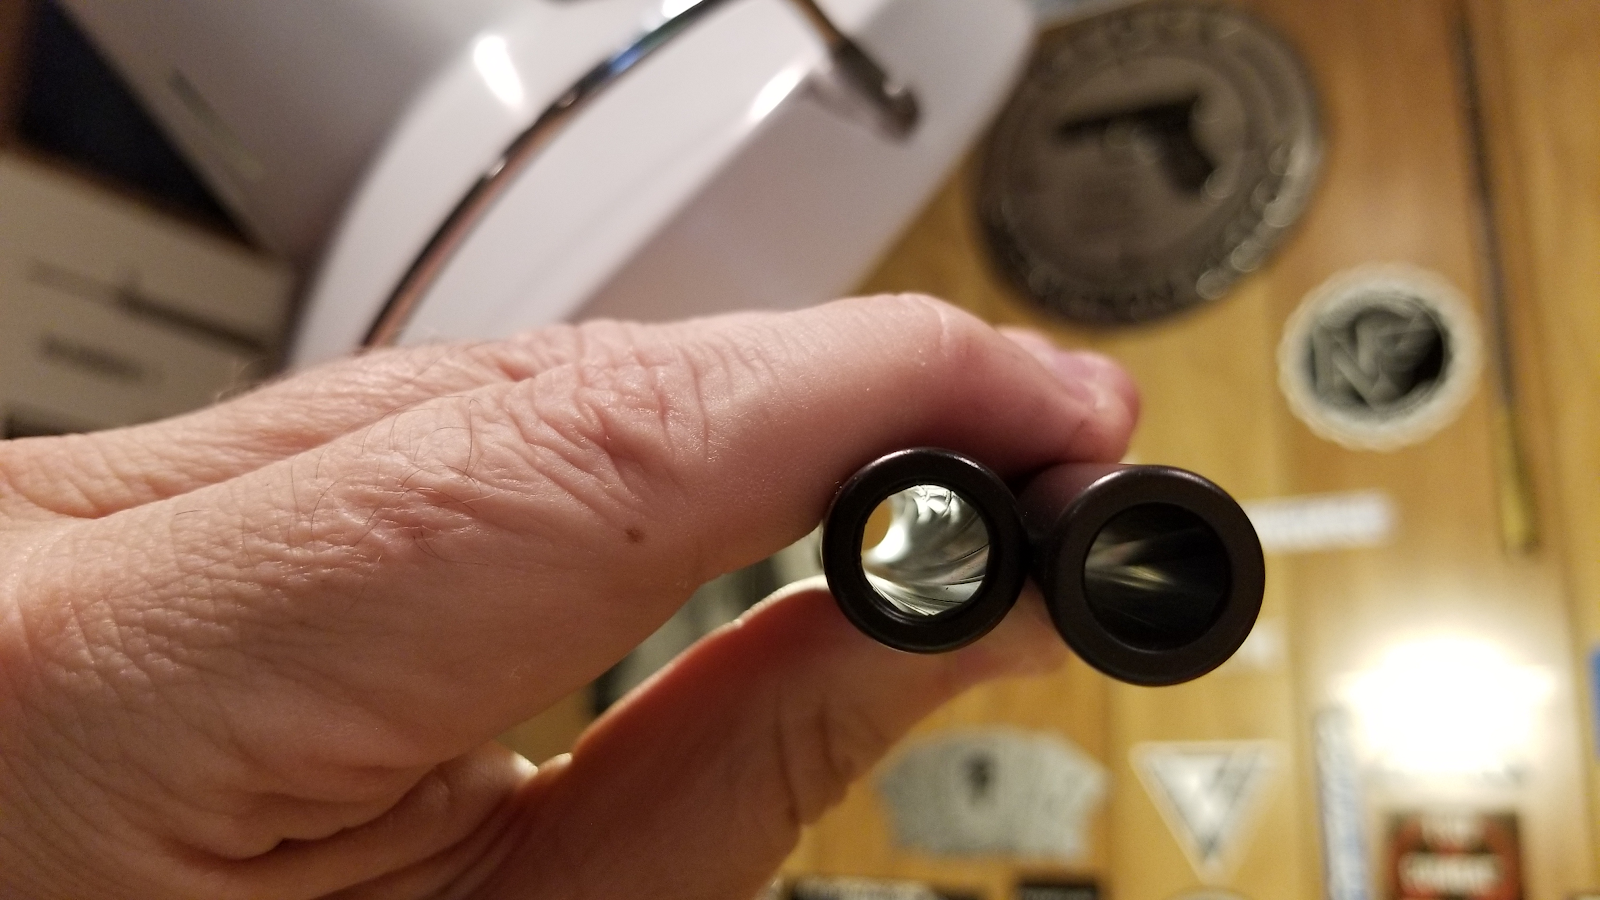
For smoothbore barrels, the pellet flies without this spin.

As such, it tends to lose energy after some short distance.

If the target is far, a pellet shot from a smoothbore barrel will most likely veer off its straight flight path.

This implies that air rifles with rifled barrels tend to be more accurate (even in long ranges) than air rifles with smoothbore barrels. 

Imperfections in the barrel  

Apart from the barrel design, the bore may have some burrs and other tiny imperfections, especially for brand-new rifles.

This is normal in many steel products and should not be taken as incompetency on the part of the manufacturer.

As a matter of fact, that is what led to the idea of seasoning air rifles after purchase – or rather breaking-in air rifles.

The process aims at shooting as many pellets as possible in the hope that the abrasive nature of the pellets will get rid of these burrs.

If the imperfections are more pronounced, they can have a significant effect on the ballistic flight of the pellet.

The pellet may bounce off a bump within the bore and change direction, as well as lose speed. 

Barrel Alignment

Suppose the longitudinal axis of the barrel is not perfectly parallel to the longitudinal axis of the scope.

That means the barrel will be pointing in a different direction from your line of sight.

You don’t expect a pellet shot from such a rifle to hit the bull’s eye.

In line with this issue is barrels that are not firmly fixed to the stock. This can be a result of:

  • Poor machining quality by the manufacturer
  • Mishandling by the airgun user
  • Warping and thickening of the stock due to absorption of moisture – especially for wooden stocks
  • Loose screws

Whenever you fire a shot, the resulting action and reaction forces may cause the barrel to slightly move from its initial position, thus affecting the flight of the ammo.
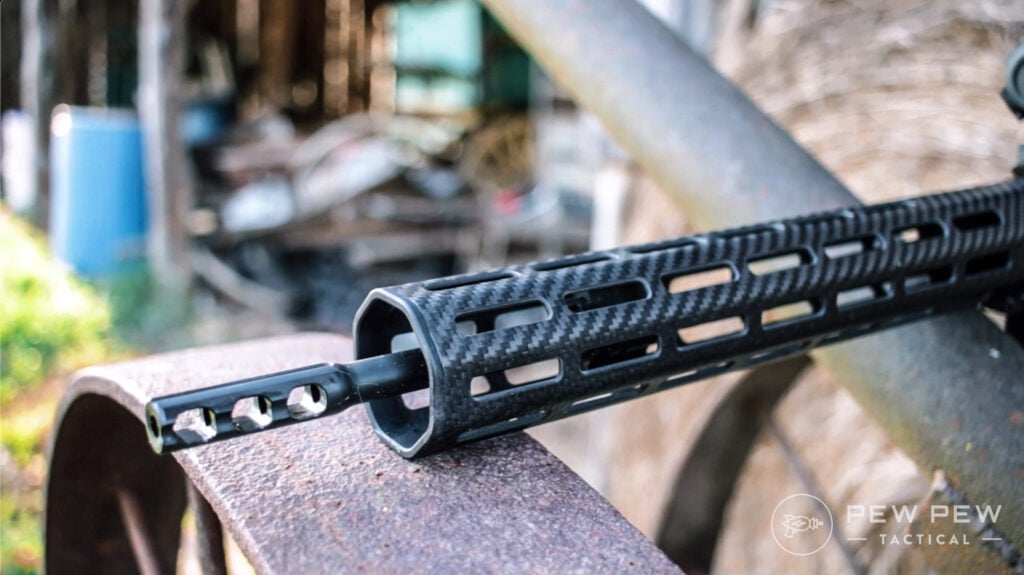
Muzzle damage

The muzzle is the front-most part of the barrel from where the ammo exits into the air.

Any damage, corrosion, flaw, or obstruction around the muzzle can significantly alter the intended flight of the pellet. 

2. Pellets

Crosman’s Jock Elliot narrates his harrowing experience of how he came to the conclusion that airguns are as individualistic as people.  

It was kind of an air rifle accuracy test.

The weather was perfect, the guy was good, and the gun was awesome.

He tried to shoot groups but it seemed the airgun was not just getting it right.

He tried different target distances – all this proved futile.

He used all his popular pellets – the shot groups still looked horrible.

As a last resort, Jock tried some pellet brands he rarely uses.

And that worked the magic.

It’s fantastic – or rather confusing – how two identical Benjamin Trail NP air rifles can fail to shoot with similar accuracy using a given pellet brand.

But that’s the reality of the matter – just like you can be a die-hard football fan while your identical twin brother has no idea who CR7 is.

The bottom line is that there is the most perfect pellet for your air rifle out there.

It is not guaranteed that even the pellets supplied with the airgun will work best.

It is upon you to test and test and test – until you find the perfect match. 

3. The powerplant

It is now a popular saying in the airgun world that PCPs and gas piston airguns are more accurate than springers.

That might be true, but the actual culprit is the air rifle user.

Obviously, springers produce more recoil than PCPs and gas piston airguns.

Recoil is known to generate vibrations that destabilize the hold of the airgun. 

If you hold a springer flimsily, it is very likely that your shots won’t be accurate.

The slight movements of the airgun affect the flight path of the pellet.
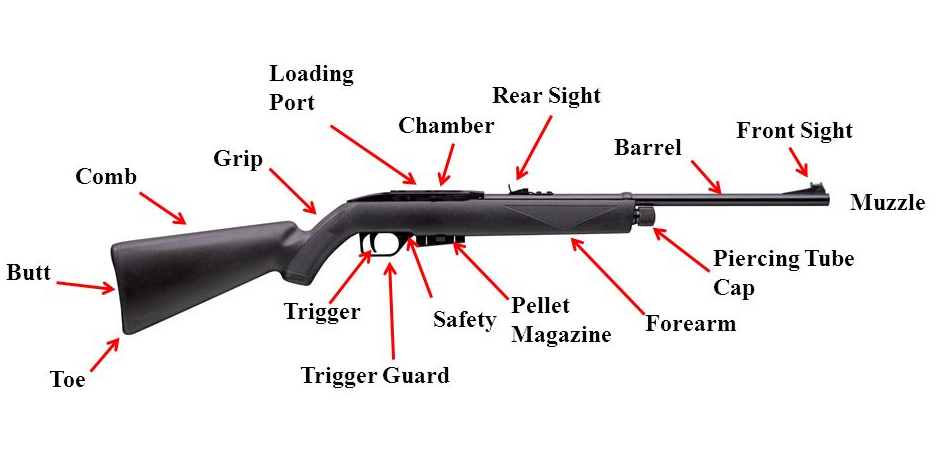
4. The trigger

The more confident you are on the trigger, the more accurate you are likely to turn out.

Some triggers are so perfectly made that you know the exact distance to pull them before the airgun fires.

The pull is likewise not too heavy nor too light.

That’s what brings accuracy.

If the trigger pull feels so heavy, it may be difficult to master exactly how much you pull it before it fires .

The same is the case with a trigger that is too light and those that are not crisp.

Tips to improve air rifle accuracy

To improve your air rifle accuracy, you basically have to rectify the problems mentioned above.

Do the following to boost the accuracy of your air rifle.

  1. Use a spirit level to ensure that you are holding your air rifle as level as possible, and not in a slanted position.
    • Some airguns have their own in-built spirit levels, but for others, you’ll need a separate one.
  1. If your trigger is adjustable, tune it to a position that is crisp and predictable enough – making sure it’s not so heavy nor so light.
  2. Use good quality scope mounts that perfectly align the scope with the barrel.
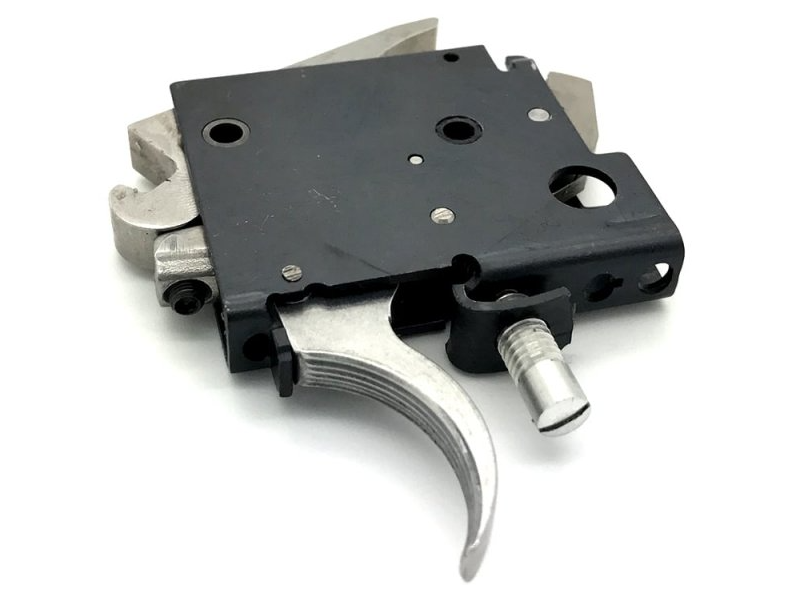
  3. Have some adequate eye relief when shooting – don’t place your eye too near the rear lens, or too far from it.
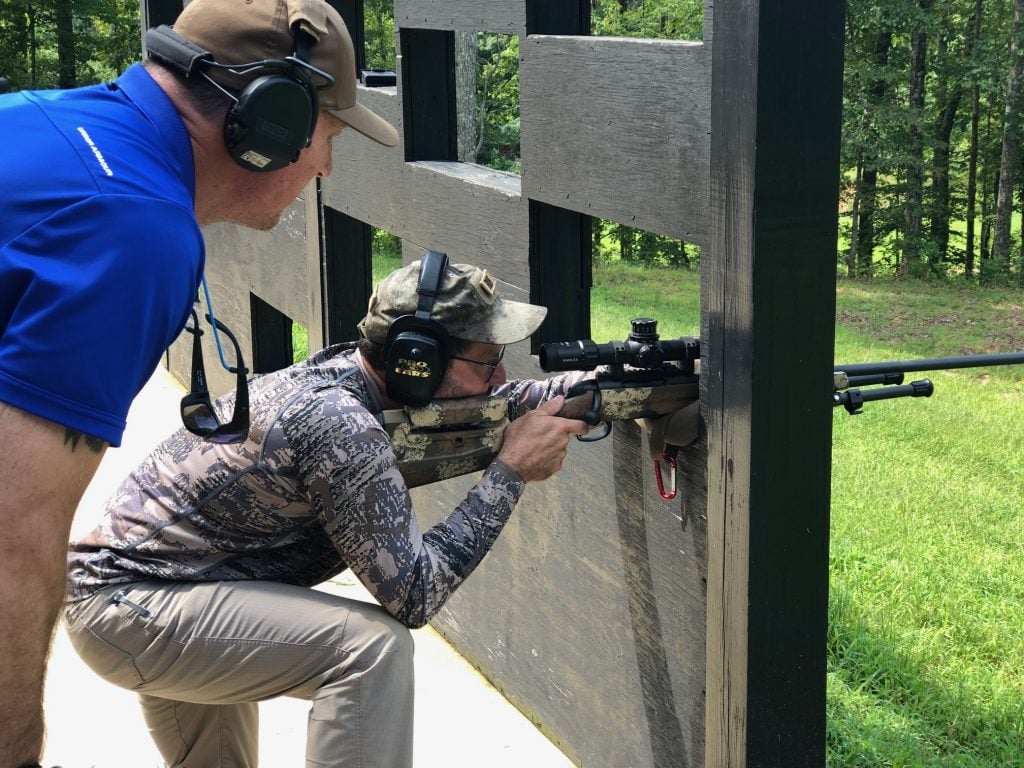
  1. Make yourself as stable as possible before shooting.
    • Perhaps kneeling will give you more stability than standing – or even leaning your body against a tree.
  2. Master the correct way of holding your air rifle and stick to that.
  3. Try out different pellets until you find the brand and type that your air rifle likes.
    • Then stick with it, as long as it serves the purpose.
  4. Tighten loose screws on the stock to ensure the point of aim is as close as possible to the point of impact.
  5. Clean your barrel in case the inaccuracy problems are caused by leading.
  6. Master your trigger control.
    • Pull it steadily – rather than snatch it vigorously.
  7. Invest in a good air rifle scope specifically designed for either target shooting or hunting
  1. Don’t buy the most powerful air rifle if you are just starting out in this shooting hobby.
    • Powerful airguns usually produce much recoil and may be heavy and longer than the rest.
    • You’ll need to be a skilled shooter to shoot accurately with them.
  2. From experience, it is good to sight in your rifle at around 30 yards if you are using a .177 or .22 caliber air rifle.
    • You won’t have accuracy problems for targets that are a bit farther or nearer by 15 yards.
  3. Don’t use junk pellets for sighting in and then your preferred pellet brand for the actual shoot.
    • Use the same pellets all through for more accuracy.
  1. Practice with your air rifle until you can consistently achieve 1-inch shot grouping at your typical target distance.       

In conclusion

There are several factors that can affect the accuracy of airguns.

Some of these factors relate to the airgun itself, while some concern the user of the air rifle.

For the rifle-related factors, the barrel and pellets cause nearly 90% of all the accuracy problems.

Do all the other factors contribute a mere 10% to the air rifle accuracy issues?

That tells you to wisely choose your air rifle by considering the quality of the barrel, as well as purchasing quality pellets from trusted brands. 

Once these two are sorted, work on your shooting skills until you get it right.  

Frequently Asked Questions

1. What affects air rifle accuracy?

Airgun accuracy is mainly affected by the following factors:

  • The type of barrel – whether rifled or smooth bore
  • The presence of imperfections within the bore of the barrel
  • The brand, shape, and weight of pellets used
  • Whether or not the air rifle has been sighted in properly
  • Whether or not the scope is mounted properly
  • The bedding quality of the barrel on the stock of the air rifle
  • The preciseness of the trigger
  • The capability of the shooter to properly hold the air rifle, aim at the target, and make a confident shot 

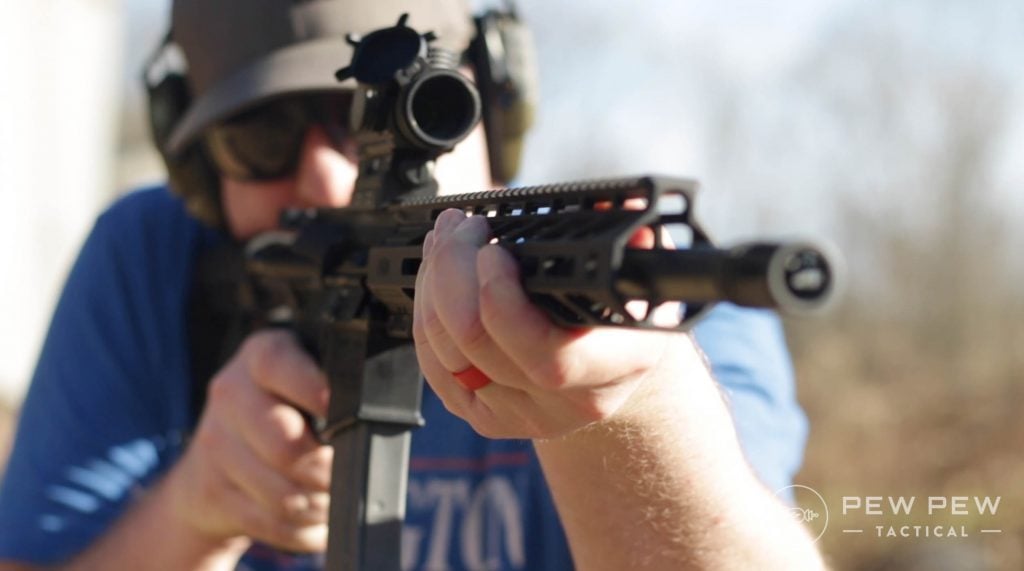
3. How to hold an air rifle for accuracy?

If you are right-handed, follow the following steps.

If you are left-handed, replace every ‘left’ with ‘right’ and every ‘right with ‘left’.

  • Place your left palm under the forearm of the air rifle. Leave the palm open rather than tightly clenching the gun.
  • Wrap your right hand around the pistol grip with your forefinger gently resting on the trigger
  • Let the butt pad rest on your shoulder and gently press your cheek against the stock. 
  • You can now breathe in, breathe out, pull the trigger.

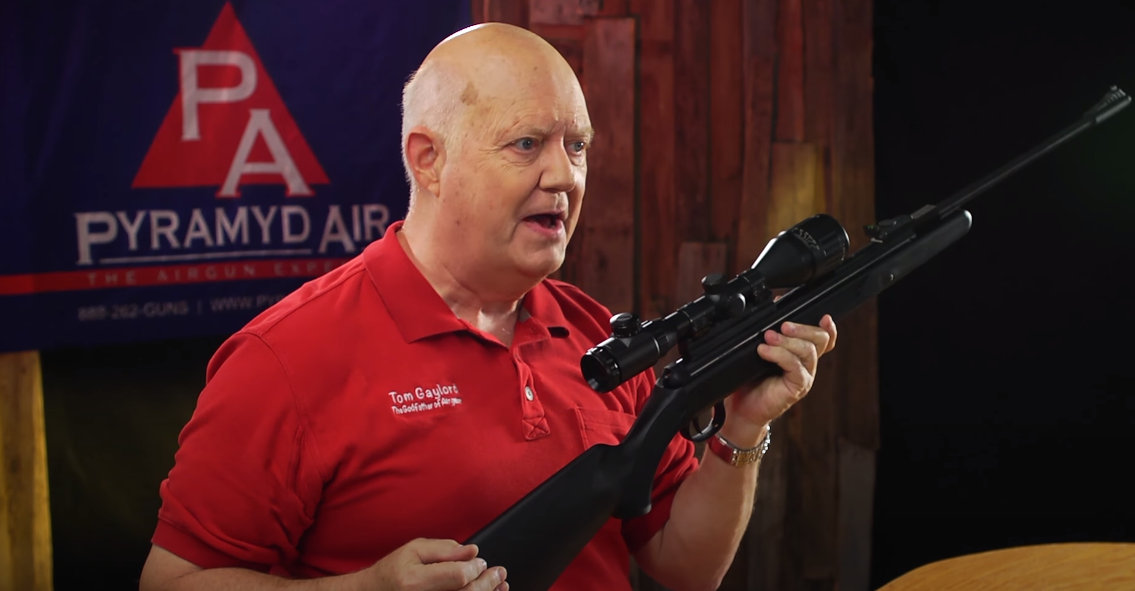
This is what we refer to as the artillery hold. 

Watch Tom Gaylord below for more details on the artillery hold:

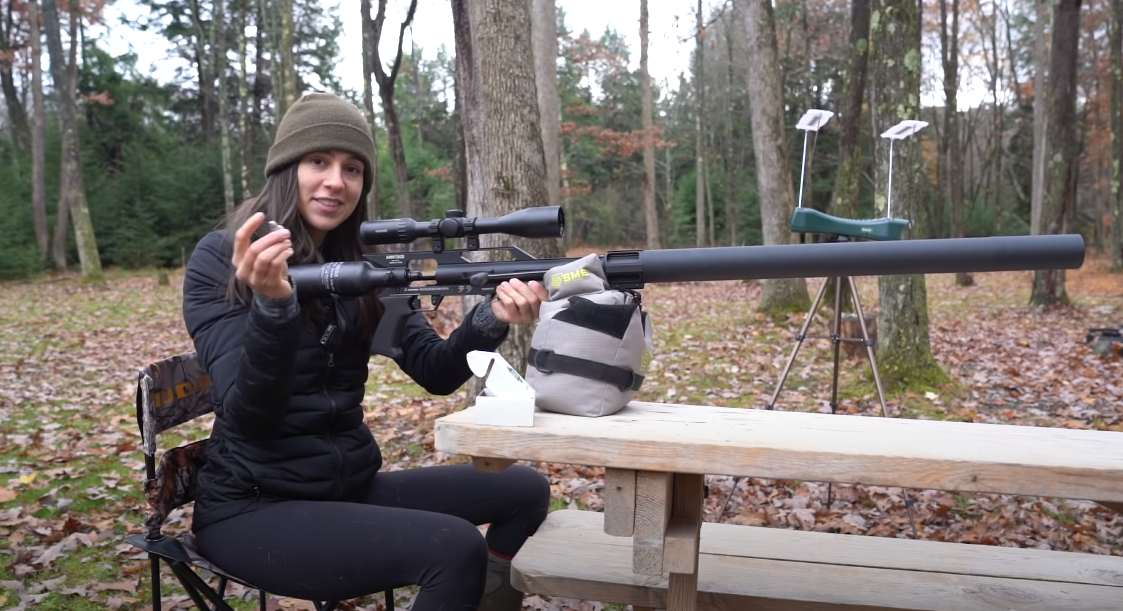
You may also wish to use some fixed support for the air rifle instead of your palm.

Virtually any support can work, but you better go with a custom-made bipod stand.   

4. What is the highest-rated air rifle in accuracy?

The Benjamin Marauder PCP air rifle is one of the highest-rated airguns in terms of accuracy.

It is capable of 1.5” shot groups at 100 yards. And it gets even better at closer shooting ranges.

Great shooters have even achieved 1’ groupings at 70 yards. 

One famous shooter, Ted, was able to achieve the following shot groups with the .25 Benjamin Marauder at 100 yards.

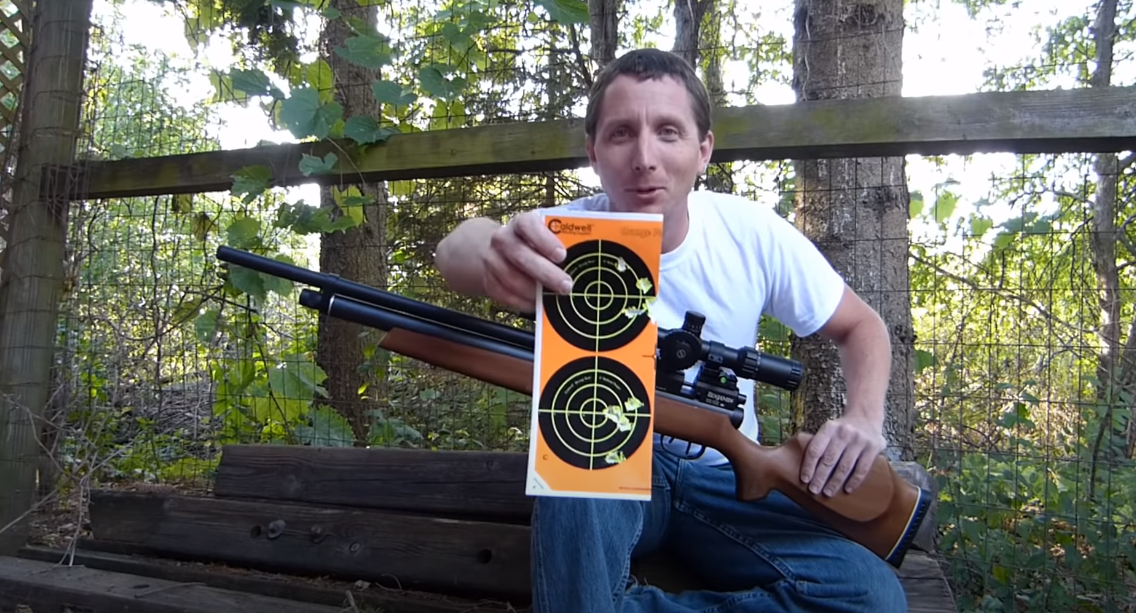
Looks too good to be true! 

=> Read Benjamin Marauder pellet gun review here

5. How to improve the accuracy of CO2 air rifles?

In addition to the general air rifle accuracy tips just discussed, CO2 air rifles beg a little more simply

Because they use CO2 cartridges as their main power plant.

The CO2 in the gas cylinder exists as both a pressurized gas and a liquid.

When some of the gas is released upon firing a shot, some more liquid CO2 turns into a gaseous form.

The pressure within the cylinder, therefore, remains somewhat constant until all the liquid is used up.

Now, the pressure of CO2 depends on the temperature.

A decrease in temperature will cause the pressure to drop.

And that means less velocity for the pellet.

Imagine you sighted your gun at 35 degrees celsius and you are now shooting the gun at 25 degrees Celsius.

You will very likely not hit the point of aim.

Therefore, the best practice is to sight in your CO2 air rifle at the same temperature you’ll be doing the real shooting.

For semi-automatic air rifles – which allow you to fire multiple shots in quick succession – it’s a good practice to allow some seconds to elapse before making the next shot.

Every time you fire a shot, some CO2 changes from liquid to gas.

This cools the air rifle and tends to reduce the pressure in the cylinder.

Therefore, each subsequent shot becomes less and less powerful.

Lastly, ensure all seals are tight enough to hold the gas without leakages.      

7. How far can a pellet gun shoot accurately?

Some high-end pellet guns are known to have great accuracy even up to 300 yards.

However, a great majority of pellet guns are limited to shooting ranges less than 100 yards.

The less powerful ones will not shoot accurately beyond 30 or so yards. 

8. How far can a .22 air rifle shoot accurately?

The current world record for the longest airgun hit stands at 1400 yards.

That’s a whopping 1.28 km!

The air rifle used was the .22 Altaros M24 – which mimics the legendary M24 sniper rifle. 

However, note that this is an isolated shot.

It may be difficult to get a measurable group of shots at that distance.

As a matter of fact, the manufacturer states that the accuracy of the Altaros M24 is 1 MOA up to 200 yards,

Which is equivalent to 2” groupings at 200 yards. 

Other high-end .22 air rifles boast 1” groups at 100 yards, while others claim to be as accurate as ½” groups at 50 yards.

Repeatedly getting such good accuracy results is challenging.

You rather set your mind to something like 1” groups at 30 yards, 2” groups at 50 yards, and 4” groups at 100 yards.

9. What is a good accuracy for a .22 air rifle?

As elaborated in the previous question, some expert air gunners have achieved exceptionally good accuracy with their .22 air rifles.

  • 1” groupings at 100 yards is considered exceptional accuracy
  • 0.5” groupings at 50 yards is also considered exceptional accuracy

Good accuracy for a .22 air rifle is something in the range of:

  • 1” shot groups at 30 yards
  • 2” shot groups at 50 yards
  • 4” shot groups at 100 yards.

11. .177 or .22 – which is more accurate?

At some fixed distance, say 50 yards, a .22 pellet will more likely hit the point of aim than a .177 pellet.

You see, the .22 pellets are heavier than the .177 pellets, and therefore are less likely to be swayed by the wind. 

But in yet another twist, the speed of .177 pellets is usually higher than that of .22 pellets.

As such, the .22 pellets tend to lose their flight power faster than the .177 pellets.

In such a scenario, the .177 air rifles can be said to be more accurate than .22 air rifles.

Additionally, it is now known that airgun manufacturers give better attention to .177 air rifles so as to boost their accuracy beyond what the .22 air rifles can achieve

Since the .177 airguns are mostly used in target shooting competitions. 

With all these facts in mind, neither of the two air rifles can be openly termed as more accurate than the other. 

(For more on the differences between .177 & .22 and which jobs they do best, see this post.)

12. What is the most accurate .22 pellet?

We just agreed that air rifles are generally fussy when it comes to pellets.

No single brand will produce the same results in several different air rifles.

But to narrow down your search, consider trying the following trusted brands:

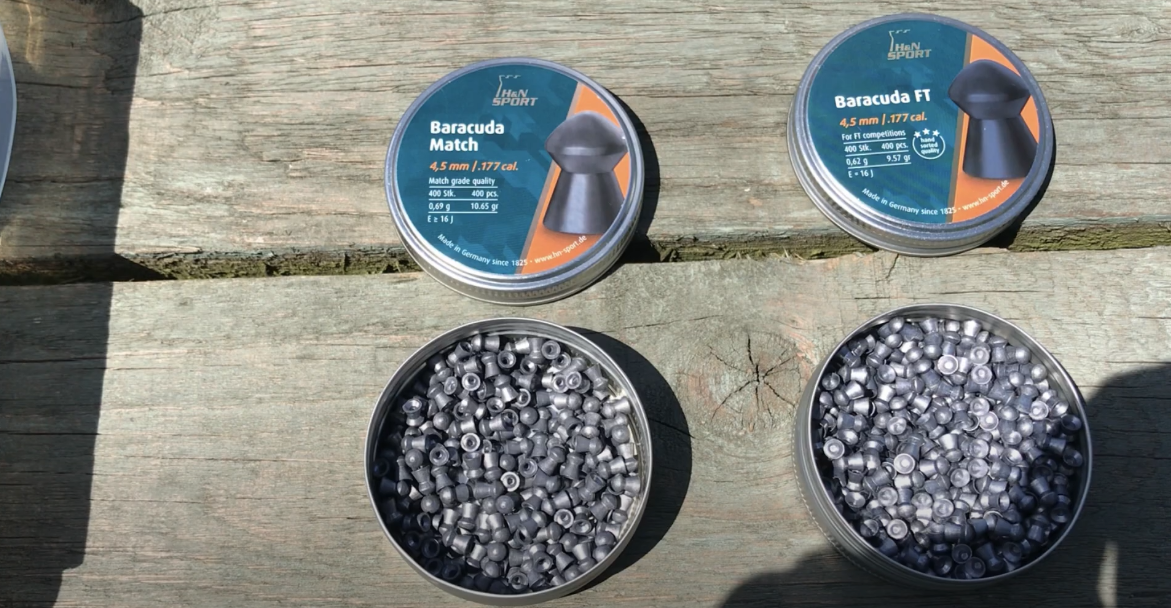
  • H & N Baracuda Match pellets
  • JSB Jumbo monster pellets
  • RWS Hobby pellets
  • Crosman premier pellets
  • H & N field target trophy

13. Are pointed pellets more accurate?

In some way, yes.

This is because of the streamlined shape that makes the pellet face the least air resistance on its flight path.

However, the round-nosed pellets are also streamlined to some extent.

And many other pellets have some element of streamlining.

Maybe the biggest difference would be noted if there were cube-shaped pellets. 

15. Does cleaning your rifle affect accuracy? 

Not necessarily.

The bore of the barrel naturally cleans itself as you regularly shoot pellets.

However, there are instances when the dirt within the bore can be so stubborn that the natural cleaning process is not effective.

In such cases, thoroughly cleaning your air rifle may improve accuracy.

Cleaning in the wrong way may also negatively affect accuracy.

Take the example of using water on a wooden stock.

Wood thickens and warps when it absorbs moisture.

The result is poor bedding quality of the barrel and a subsequent decrease in accuracy.   

19. What is the most accurate .177 air rifle?

The Air Arms S510 XS Ultimate Sporter Air Rifle easily delivers sub-MOA shot groups at 100 yards.

This is possible with the 1035 fps muzzle velocity and 3626 PSI PCP power plant.

A single fill gives you 40 fully-powered shots. You will however have to cough a colossal 2,000 USD to acquire this beast.

If you have less than 200 bucks but are still enthusiastic about great accuracy, go for the likes of the Hatsan 95 Break Barrel Air Rifle

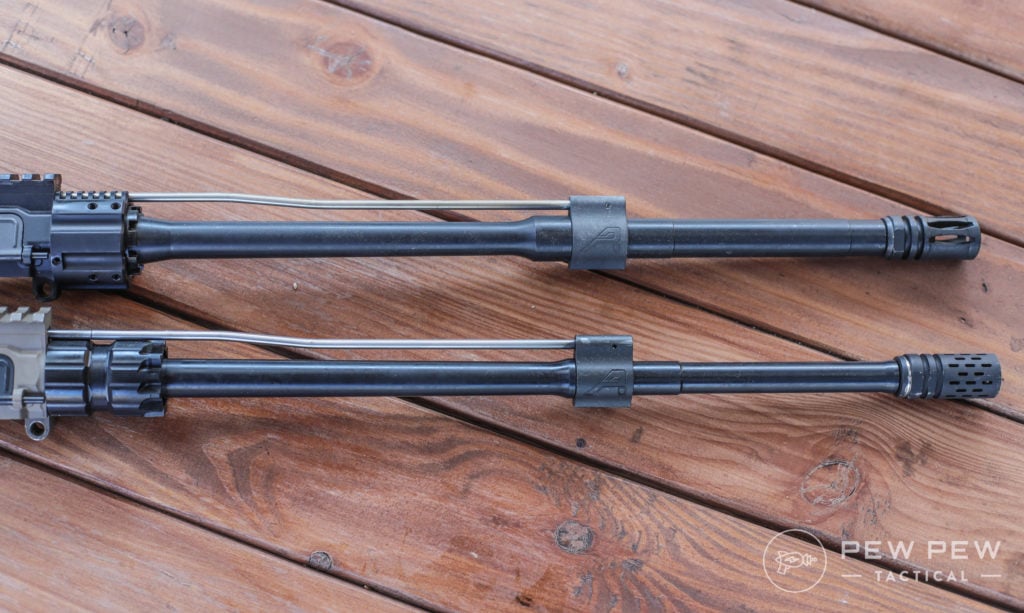
20. Air rifle barrel length vs accuracy?

As highlighted in the intro section of this piece, the notion that air rifles with longer barrels are more accurate than those with shorter barrels is nothing but a myth.

There are air rifles with shorter barrels that are more accurate than their counterparts with longer barrels.

It’s rather the quality and design of the barrel that matters when it comes to accuracy.

However, for CO2 air rifles, a longer barrel improves the muzzle velocity and punching power of the pellet up to a certain optimal length.

Beyond this optimum point, muzzle velocity and energy start decreasing.

Altering the barrel length in CO2 air rifles, therefore, has a significant effect on air rifle accuracy. 

Top 6 .22 WMR Hunting Loads

0

Introduced in 1959, the .22 Winchester Magnum Rimfire (22 WMR) is the quintessential ranch rifle round. The “.22 Mag,” as it’s less colloquially coined, delivers external and terminal ballistics sufficient to rid the pasture, woodlot and garden of marauding varmints, pests and predators out to 150 yards. When a quality rifle is placed in the hands of accomplished marksmen, that distance can be stretched a bit further. Despite the .22 Magnum’s uptick in external ballistics over the .22 Long Rifle (22 LR), perceived recoil is virtually nonexistent, making it ideal for multi-day prairie dog and ground squirrel shoots. Shooter fatigue with the cartridge is purely fictional.

Further endearing the .22 WMR to homeowners with neighbors is its reduced report; unless ultra-long volleys are commonplace, it’s unlikely that the sound will burden either the nearby residents or livestock within earshot. Ammunition is surprisingly affordable and diverse, too. In fact, 50-round boxes of ammunition in wide-ranging configurations range from $10.99 to $17.99 at MidwayUSA. Given such an assortment—the abovementioned retailer lists 26 different loads on its website—and price range, how do you know what to select? That’s the intent of this article—to provide an unbiased perspective.

In the subsequent paragraphs, I describe the particulars of six current .22 WMR hunting loads, as well as each load’s performance with regard to accuracy from a bench rest at 100 yards (five consecutive, five-shot groups), velocity and terminal performance at 50 yards in modeling clay. Velocities were recorded using a Competition Electronics ProChrono Digital 15 feet from the 20 ½-inch barrel of the test rifle, a Henry Repeating Arms Lever Action Octagon Frontier topped with a Bushnell Banner 3-9X40 riflescope. Bear in mind that as a lever-action rifle, the Henry was incapable of illustrating functionality of the ammunition in a semi-automatic, .22 WMR-chambered arm, and inherent accuracy shouldn’t be judged solely based on results from a single rifle, either. Lastly, I noted the advantages and drawbacks associated with each load. Here are my discoveries.

1. CCI Maxi-Mag .22 WMR 40-Grain Total Metal JacketParticulars: Featuring a full metal jacket, 40-grain bullet propelled to 1875 fps—for 312 ft.-lbs. of energy—this load was designed primarily for plinking and perforating paper; however, it’d nicely pull double-duty for those who want neutralize varmints or even dispatch porkers. Concerning the latter, from the field reports that I’ve read it’s the cat’s meow for exterminating feral hogs—to each their own. MSRP: $11.79 per 50-rnd. box; midwayusa.com.

Test: Across a Competition Electronics ProChrono Digital chronograph at 15 feet, the load averaged 1768 fps. Concerning accuracy, the flat-point, no-lead-exposed bullets proved to be near the top of the heap. In fact, for five consecutive, five-shot groups, it averaged 1.11-inch. The single smallest group measured 0.78-inch. As for its performance in the modeling clay, forget everything that you know about TMJ bullets—it doesn’t apply here. This bullet expands violently; weighing 33.4 grains, the recovered bullet measured an impressive 0.702-inch in diameter. Still, penetration was fairly deep.

Advantages: Eye-opening terminal ballistics, accurate, low cost, no-lead-exposed bullet.

Drawbacks: Looking for a non-expanding bullet to minimize pelt damage? This isn’t it.

2. Federal Premium V-Shok 30-Grain Speer TNTParticulars: This devastating round employs Speer’s appropriately named “TNT” bullet; pairing a lead core and thin jacket in a cavernous, hollow-point configuration maximizes expansion while simultaneously reducing penetration—perfect for stopping critters on the spot and reducing the risk of ricochet. Enhancing the external and terminal ballistics of the 30-grain bullet, its speedy 2200 fps velocity resulting in 322 ft.-lbs. of energy at the muzzle. MSRP: $12.99 per 50-rnd. box; midwayusa.com.

Test: Despite the test rifle’s 20½-inch barrel, this load achieved 2147 fps—only 53 fps less than the velocity achievable from a full 24-inch barrel. Accuracy with this round was respectable, averaging 1.39 inches for the 25 shots. Terminal performance in the modeling clay could be summed up with one word: devastating. The bullet created an immense yet relatively shallow cavity and completely fragmented. It’s little wonder why so many hunters report instantaneous kills on game upward the size of coyote.

Advantages: Shocking terminal performance, good accuracy, reasonable cost, reduced risk of ricochet.

Drawbacks: Want deep penetration? Look elsewhere.

3.CCI TNT Green .22 WMR 30-Grain Lead-Free Hollow PointParticulars: This is one of the few lead-free options in .22 WMR. It features a California compliant, 30-grain hollow-point bullet propelled to 2050 fps. Energy is 280 ft.-lbs. MSRP: $15.99 per 50-rnd. box; midwayusa.com.

Test: Taking into account its lightweight, 30-grain bullet, the recorded velocity of 1960 fps revealed that this is no speedster. That has little effect on its terminal performance, though. In fact, the projectile created a sizeable and surprisingly deep wound channel in which it fully fragmented, leaving the once-compressed core material strewn about. With such expansion characteristics, ricochets would be highly unlikely. The load’s strong showing with regard to terminal performance was somewhat offset by its accuracy potential; in the Henry it averaged 1.95 inches, which is large for extended-range work on smallish species.

Advantages: Lead-free (California compliant), good terminal ballistics.

Drawbacks: Pricey, lackluster accuracy.

4. Hornady 30-Grain V-MaxParticulars: The unabashed long-range option of this assemblage, this load employs Hornady’s 30-grain, polymer-tipped V-Max bullet propelled to 2200 fps, making it ideal for stretching the distance on wary varmints and predators. In addition to increasing the ballistic coefficient (BC) for improved external ballistics, the tip ensures explosive expansion even at the reduced velocities at distance. Recovery distances will be short—if the animals move at all. Energy is 322 ft.-lbs. As an aside, this bullet has a lead core, therefore it’s not California compliant for hunting; however, Hornady manufactures a lead-free option in its 25-grain NTX load. MSRP: $11.69 per 50-rnd. box; midwayusa.com.

Test: Averaging 2166 fps, the Hornady 30-grain V-Max load was the fastest of the group. It was also the most accurate; in fact, the average for five consecutive, five-shot groups was a remarkable 0.94-inch. The single smallest group measured a diminutive 0.21-inch. Between its speed and accuracy, this is the go-to round for stretching the distance. True to its lineage, the 30-grain V-Max bullet proved to be extremely explosive in the modeling clay; only a few shards of the jacket and core and the tip were recovered.

Advantages: Extremely accurate, fast, excellent terminal performance, reduced risk of ricochet, low cost.

Drawbacks: None

5. CCI .22 Mag GamePoint 40-grain Jacketed Soft PointParticulars: Unique in this grouping, the GamePoint load—marketed as a small-game load—features a 40-grain, jacketed, soft-point bullet, which is designed for controlled expansion and deep penetration. Said characteristics will endear it to pursuers of larger, tougher predators, such as coyotes. Propelled to 1875 fps, the bullet produces 312 ft.-lbs. of energy at the muzzle. MSRP: $12.99 per 50-rnd. box; academy.com.

Test: At 1915 fps, the Competition Electronics chronograph revealed that this load was slightly faster than the published velocity. Accuracy wise, the load did good but not great; for 25 shots it averaged 1.65-inch. What stands out about this load is its terminal performance. Constructed more like a big-game bullet than one for varmints, the recovered bullet weighed 39.9 grains—virtually 100 percent weight retention. Moreover, the bullet, which measured 0.545-inch in diameter, created a large wound cavity and penetrated deep. For coyotes and other large nuisance species within the .22 Magnum’s realm, there’s none better.

Advantages: Deep-penetrating, high-weight-retention bullet (perfect for larger animals within the cartridge’s capabilities), descent accuracy, moderate cost.

Drawbacks: More likely to ricochet than the more fragile bullets.

6. CCI Maxi-Mag .22 WMR 40-Gr. Jacket Hollow PointParticulars: Ah, yes, the omnipresent Maxi-Mag .22 WMR load; perhaps none is as so persuasive. The 40-grain, copper-plated-lead, hollow-point bullet is pushed to 1875 fps, for 312 ft.-lbs. of energy. Designed for small game and varmints—think utilitarian—the projectile offers controlled expansion for deep(ish) penetration. Because of its terminal performance, though, only with headshots should it be utilized on edible game. MSRP: $11.79 per 50-rnd. box; midwayusa.com.

Test: This load clocked 1759 fps from the Henry’s abbreviated barrel. Concerning accuracy, at 1.90-inch for it left much to be desired; you’ll struggle to make consistent hits on small species at the 22 WMR’s farthest reaches. The load offered a useful blend of terminal ballistics. Only the GamePoint and TMJ loads out-penetrated the Maxi-Mag 40-grain JHP bullet, and the cavity it produced was sizable. Given the recovered projectile expanded to 0.438-inch in diameter and weighed 17.5 grains, a sizeable portion of the bullet pierced deep while the washed off material would naturally serve to damage vital organs and structures.

Advantages: Utilitarian bullet design, low cost

Drawbacks: Unimpressive accuracy

The .22 WMR is a top-notch cartridge for eliminating nuisance animals at ranges out to 150 yards. However, its maximum potential is unlocked only through load selection. Here you’ve been introduced to six options among the many in the marketplace. One of them will help you extract the most from your “.22 Mag.”

5.56 vs 9mm: A Complete Breakdown

0

Two of the most common calibers on the market are the 5.56 rifle caliber cartridge and the 9mm pistol caliber cartridge. They’ve both been around for decades – the 9mm has been around for more than a century – and they’ve both cemented their place in the firearms world.

The popularity of these two calibers is driven by their diversity. They are used successfully in a wide variety of the same situations and settings despite being radically different in every way.

Let’s take a look at how 5.56 and 9mm stack up against one another while recognizing that it is indeed an apples to oranges comparison in many instances.

Specs of 5.56 & 9mm

The 5.56 cartridge and the 9mm cartridge are visual and technical polar opposites. The overall lengths between the two – both the bullets and the cartridges – are completely different. The weight of the bullets for each cartridge is also significantly different. Material makeup, however, is where their paths cross.

Here’s how the 5.56 and 9mm compare and contrast with one another in a series of crucial aspects.

Weight

Bullets in 9mm cartridges weigh more than bullets in 5.56 cartridges. The two most popular bullet weights for 9mm are 115 grains and 124 grains. For the 5.56, the two most popular bullet weights are 55 grains and 62 grains.

This means that the heavier 9mm bullets will leave the barrel with more energy than a 5.56 bullet, but the lighter 5.56 bullets will leave the barrel with more speed.

Materials

There’s a finite number of materials to use in the creation of cartridges, and so there’s a fair amount of overlap between the two calibers. Both can be made with steel or brass cartridge cases and both can be outfitted with bullets made from a variety of steel, copper, and lead alloys to fit certain purposes.

Length

The biggest visual difference between 5.56 and 9mm cartridges is their overall length. Since the 5.56 is designed for a rifle action and the 9mm is designed for a pistol action, they are vastly different in terms of size.

The average length of a 9mm cartridge is 1.16″ overall while the average length of a 5.56 cartridge is 2.26″ overall.

Noise Differences Between 9mm & 5.56

The 5.56 rifle cartridge is inherently more powerful than the 9mm pistol cartridge, so you might expect the 5.56 to be a lot louder than the 9mm, but that’s not the case. They’re actually pretty close to one another.

The 9mm cartridge averages about 166 decibels while the 5.56 cartridge averages about 169 decibels. Either way, that’s still very loud and well above the threshold of 140 decibels for hearing damage.

Both calibers benefit greatly from the use of a suppressor, and the sound levels can be brought down to a hearing-safe level when used in conjunction with the right load of ammo.

Ammunition for 9mm & 5.56

Because of the popularity of both 9mm and 5.56 calibers, there are a plethora of ammunition choices for each on the market. Do your own research based on the specific firearm and specific purpose before deciding on which kind of ammunition will work best for your application.

Subsonic ammo is available for both calibers, which eliminates the typical crack of a gunshot as it breaks the sound barrier. If you’re using subsonic ammo with a suppressor, you’ll definitely be bringing the decibel levels down to a hearing-safe level.

Just be aware that subsonic ammo operates differently in semi-automatic weapons, which depend on the gases to cycle the action of the gun. Make sure to test out your combinations before trusting your life to them.

Effectiveness of the Weapons

Weapons chambered in 5.56 or 9mm are incredibly effective. There’s a reason that the 9mm cartridge has been adopted the world over for police and military purposes when pistol-caliber weapons are applicable. In that same vein, the 5.56 cartridge is also popular all around the world where rifle-caliber weapons are applicable.

The simple fact of the matter is that these two calibers would not have survived and thrived for this long if they were not effective in their given weapons systems.

Accuracy

Both 9mm and 5.56 cartridges are very accurate. In the hands of a competent shooter who knows what they are doing, there’s no reason to expect anything other than accurate shots from a firearm chambered for 9mm or 5.56 ammo.

Uses for 9mm & 5.56

As you might have guessed, the popularity of the 9mm and 5.56 cartridges is due in no small part to the wide variety of uses to which they are suited. They often overlap one another for a variety of reasons and purposes and are used by countless individuals in similar situations who have determined for themselves that these calibers are the best choice for the given job.

Home Defense

A handgun or pistol caliber carbine chambered in 9mm is the gun-caliber combo of choice for countless people. A 9mm handgun can sit on the nightstand and be grabbed in a flash. Or, a 9mm pistol-caliber carbine can be retrieved quickly and provide the benefit of a longer barrel and accuracy with the same cartridge.

Similarly, AR-style pistols in 5.56 are common selections for plenty of people when it comes to home defense. You can have the power of the 5.56 in a smaller package that is more easily maneuvered through a home than would be possible with a 16″ carbine or even a 20″ rifle.

Hunting

Both calibers are very popular for hunting. Of course, it is key to know the specific type of ammo you will be using and how it performs when paired with the firearm of your choice. For example, you wouldn’t hunt squirrels with a 20″ rifle chambered in 5.56 and you wouldn’t hunt buffalo with a 4″ pistol chambered in 9mm.

As long as you make the proper pairing for the game you’re hunting, then there’s no reason not to use 9mm or 5.56 cartridges in those situations.

Marksmanship/Sport

Without a doubt, one of the most popular uses for 5.56 and 9mm cartridges is in the marksmanship and sports competition settings. There’s no shortage of training and competition opportunities for firearms in both calibers. In fact, there are some sports, such as 3-Gun, where you’ll use a handgun chambered in 9mm and a long gun chambered in 5.56 for different stages of the same match.

The Final Verdict: 5.56 vs 9mm

As we mentioned at the beginning, comparing 5.56 to 9mm is a sort of apples to oranges situation. Of course, there’s a great deal of overlap between the two, but the ultimate decision of which one to choose is up to you.

Regardless of which one you choose (or hey, choose both – this is America!), there’s no denying that the best way to step it up a notch is by shooting 9mm or 5.56 with a suppressor.

At Silencer Central, we have no shortage of great suppressor options for 9mm and 5.56 and we can make sure you’ve got the right one for your specific needs. Give us a call and we can talk you through your options and get you started on the path to suppressor ownership. We make the process as easy as it can be, letting you do the entire thing from the comfort of your own home.

From the initial paperwork to the final delivery to your door, we will handle it all for you. Get started today and enjoy the benefits of shooting 5.56 and 9mm suppressed!

Shop Suppressors

Barrel Break-In: What Is It & How To Do It Right [Guide]

0

For whatever reason, the topic of barrel break-ins comes up in two main groups amongst gun owners…

First, the precision shooters. Second, the guys that skimped on quality parts.

Rock Island Armory VR80 Barrel

This topic pops up time and time again online either as a question on “how-to” or as a response to something not going right. I’m going to get on my soapbox for a minute and try to set the record straight on this a bit.

Is a break-in process necessary for your barrel? Let’s dive in, talk about it, and help you reach a conclusion!

Barrel Break-In: What Is It?

Before we tackle whether or not your barrel needs to be broken in, let’s discuss what a break-in is and what it is supposed to do.

Faxon Ion Pencil Barrel

When you get a new barrel, there are going to be some tiny imperfections that are inherent to the process of making it. Please take note, I said tiny, not obvious.

A quality-made barrel will have microscopic nicks, pockets, and other suck shallow “holes” in metal that are part of the machining process or the make-up of the metal used.

These may or may not be visible if borescoped. However, it shouldn’t be visible if you look down the barrel before assembly.

Aero Lightweight Barrel vs Regular

The break-in process in theory should help to fill in or fix any of these imperfections.

By shooting a round, then cleaning any corrosive agents out of the barrel before they can set in, you are smoothing things out and creating a more uniform surface.

The actual process of this can vary from shooter to shooter, but the idea is the same.

Shoot a shot, clean the corrosives out, allow the barrel to cool (depending on conditions). Shoot a shot, clean, and cool. Repeat.

Faxon Firearms Ascent AR-15

This variation is also where things get a little wonky and can border on the mystical.

Plus, breaking in a barrel isn’t always necessary in the first place.

Precision Shooting

Breaking in a precision gun, be it bolt-action or semi-auto, is a necessary part of owning the gun.

Gap Grind PRS
These guys know what’s up. (Photo: K&M Precision)

With precision shooting, eliminating any variables to control your shot placement is the primary focus.

To that goal, breaking-in can tighten up groups and reduce flyers to some degree. This is due to the “break-in shots” achieving a barrel free of anything that might impact the spin of the bullet.

Say, for example, that a tiny burr was riding up in the barrel and it hit the bullet just before exiting the muzzle. That is going to affect the spin, trajectory of the bullet, and ultimately change the point of impact.

My precision guys are some of the most superstitious, must-adhere-to-tradition members of the barrel break-in cult you will find.

broke meme
Gap Grind PRS

I live in Nevada, and it gets hot during the spring and summer months (consistently over 110 degrees Fahrenheit in Las Vegas). I know guys that refuse to shoot more than one shot every couple of days when breaking in a barrel to allow it to fully cool.

Why? That’s what the guy who taught them to shoot did, and the guy before him handed that down, and so on.

I am not saying that allowing your barrel to cool longer is a bad thing. I am asking what’s going to be achieved by waiting 48 hours that isn’t achieved in an hour?

Small Machining Marks on Upper Receivers

Other examples are shooters that will only run their lucky number of patches down the bore, shooters that will only shoot on the hour, or any other number of things that supposedly work for them.

The Budget Boys

The other group I see consistently talking about barrel break-in are the guys that buy low-quality parts from manufacturers that use their customer base as a form of quality control.

CVA barrel mood ring
These guys spending on their guns.

This mostly seems to be guys in the AR-15 crowd that think the 0 MOA guarantee on their $79 barrel is going to deliver.

Companies that improperly machine barrels seem to draw in shooters that think saying, “I need to break in my barrel” will do anything. It won’t.

When rifling is improperly cut, when barrels are improperly crowned when gas ports are improperly sized, and when there are visible imperfections from the manufacturing process, no amount of “break-in” is going to fix the issue.

Your barrel is already broken.

PSA 7.5 AR-15 Pistol with SB Tactical Brace
Small machining marks. These are upper receivers, but the concept is the same.

(Quick side note: machining leaves marks, there are times tool marks are ok and other times when it isn’t.)

There is a reason Mike Mihalski of Sons of Liberty emphasizes the barrel as, “the heart of the gun” in his armorer’s course.

Aero Precision M4E1 ATLAS Testing

Properly made AR-15 barrels can be upwards of $400 and that’s because proper manufacturing from good materials takes time, and labor isn’t cheap.

Unless you have built a PRS-style AR, a barrel break-in isn’t needed.

While it can certainly act in the role to an extent, the AR-15 was never intended to be a precision weapon. It was a gun designed for infantry to fight battles with.

Winchester 32 Piece Cleaning Kit
Don’t bother breaking in this guy

If your barrel is so poorly made that you cannot hit a man-sized target at a few hundred yards due to imperfections in the barrel, then get a new barrel.

How-To Break In a Barrel

Now that I’ve addressed what and who, I may as well tackle the how.

I will discuss the method of barrel break-in I use for my precision guns — bolt or PRS-style ARs.

This method was passed on to me by Ryan Furman.

Crimson Trace RAD Max Range Shooting
Aero Precision M4E1 ATLAS Testing

The appeal of the process is that it is a no-nonsense, no-frills, get it done and get shooting approach to things.

This approach has helped me to break in barrels while at the same time developing hand loads. It’s not only a time-saver but will also save some life on your barrel.

First, you’ll need a few factory rounds to get on target.

11. Faxon Bantam Integrated Brake Barrel
Not that many

After that, I use whatever load I’m testing to try and find the nodes. (If you are unfamiliar with handloading this part may be a bit confusing).

Fire a shot, then give the barrel a swab with Bore Tech Eliminator.

The directions call for three to four patches soaked in Eliminator, then 10 to 15 passes with a tight-fitting nylon brush.

You then want to let the Eliminator soak for about five minutes. Push dry patches through until they come out clean, and you’re done.

Fire another shot, and repeat the process.

On days where the heat is excessive, I’ve found it necessary to set my gun in the shade with a fan (or in my car with the AC on high) to get the barrel to cool down without wasting time.

After 20 or so rounds, a thorough cleaning is in order with the normal procedure and equipment you use.

Barrel Break-In: What Is It & How To Do It Right [Guide]
Winchester 32 Piece Cleaning Kit

There you have it. No need to wait days, pray to the ballistic gods, or sacrifice a chicken for help.

Conclusion

Barrel break-ins have their time and place, but they have become convoluted in superstition and mystery.

Barrel Break-In: What Is It & How To Do It Right [Guide]

The process is straightforward when you strip away all the fluff. Fire a shot, clean some of the carbon and copper out, then repeat.

So, find a process that works for you and stick with it. If something isn’t working, figure out why and change it.

Barrel Break-In: What Is It & How To Do It Right [Guide]

Do you break in your barrels? Let us know below. Need to pick up an AR barrel? Check out our article on the Best AR-15 Barrels.

How To Choose The Best Red Dot Sight For Glock 43x Mos

0
Red dot sight

Choosing the right red dot sight for Glock 43X MOS can greatly enhance your shooting accuracy and speed. Here are some steps to help you choose the best red dot sight for your Glock 43X MOS referenced from Weaponspecialist.org:

How To Choose The Right Red Dot Sight For Glock 43x

Check Compatibility

Ensure that the red dot sight you’re considering is compatible with the Glock 43X MOS. The MOS system has a specific mounting platform for optics.

Some red dot sights may require adapter plates, so make sure you have the correct plate for your sight or that it comes with the sight.

Determine Your Budget

Red dot sights vary significantly in price, so establish a budget before you start shopping. While quality can often correlate with price, there are excellent options available at various price points.

Consider Reticle Type

Red dot sights come with different types of reticles, such as the standard dot, circle-dot, or crosshair. Choose a reticle that you find easy to acquire and use effectively.

Reticle Size

Smaller reticles are generally better for precision shooting, while larger ones can be faster to acquire. Consider your intended use when selecting the reticle size.

Battery Life

Check the battery life of the red dot sight. Longer battery life is generally more convenient, as you won’t need to replace the battery as frequently.

Some sights have solar panels or motion-activated features to extend battery life.

Durability

Ensure that the red dot sight is built to withstand recoil and harsh conditions. Look for sights with durable construction and waterproof, fog-proof, and shockproof features.

Mounting Height

Consider the height of the red dot sight and how it aligns with your iron sights. Some sights may require suppressor-height sights or specific co-witnessing setups.

Size and Weight

The size and weight of the red dot sight can affect the balance and handling of your Glock 43X MOS. Opt for a sight that complements the pistol’s size and weight.

Brand Reputation

Research the reputation of the manufacturer. Well-established brands are more likely to produce reliable and high-quality red dot sights.

Read Reviews

Read reviews from other Glock 43X MOS owners and shooters who have experience with the red dot sight you’re interested in. This can provide valuable insights into its performance and reliability.

Try Before You Buy

If possible, visit a local gun store or shooting range that offers red dot sights for testing. This will allow you to get a feel for different models and determine which one works best for you.

Warranty and Customer Support

Consider the warranty and customer support offered by the manufacturer. A good warranty can provide peace of mind in case of any issues.

Top 5 Red Dot For Glock 43x Mos

  1. Trijicon RMR (Ruggedized Miniature Reflex): This is an extremely popular choice for many firearms, including the Glock series. It’s known for its durability, clarity, and battery life.

  2. Holosun HS507C-X2: The Holosun HS507C-X2 is a versatile and sturdy red dot sight. It offers multiple reticle options and boasts an impressive battery life. It also has a solar fail-safe system to keep it powered in all conditions.

  3. Leupold DeltaPoint Pro: This sight is designed with a large field of view and is built for speed. It is also known for its robustness and reliability.

  4. Vortex Venom: The Vortex Venom is a high-performance, yet reasonably priced, red dot sight. It has a 3 MOA dot reticle, easy-to-use controls, and a top-load system for changing batteries without having to remove the sight.

  5. Aimpoint ACRO P-1: The Aimpoint ACRO (Advanced Combat Reflex Optic) is a compact, enclosed system that is designed to withstand the harshest conditions. Although larger than some options, it’s incredibly durable and reliable.

Ultimately, the right red dot sight for your Glock 43X MOS will depend on your personal preferences, shooting style, and intended use. Take your time to research and choose a sight that suits your needs and enhances your shooting experience.

Written by: Cecil B. DeMille – Weapon Specialist

Can you shoot air rifles in city limits?

0

“Urban Air Rifle Shooting: Navigating City Limits for Safe and Legal Recreation. Explore the rules and regulations surrounding air rifle usage within city boundaries, ensuring a responsible and enjoyable shooting experience in urban areas.”

can you shoot air rifles in city limits

Garden Target Shooting With Mat Manning

Shooting air rifles within city limits is a topic that often raises questions and concerns. The regulations regarding shooting air rifles in urban areas can vary depending on the specific city and local ordinances. In some cities, it may be prohibited to discharge any type of firearm, including air rifles, within city limits. This is primarily due to safety concerns and the potential for noise disturbances to residents.

However, there are also cities that allow shooting air rifles within certain limitations and under specific circumstances. These restrictions may include requirements such as using a designated shooting range or having a certain amount of acreage for shooting on private property. It is important to thoroughly research and understand the local laws and regulations before engaging in any shooting activities with an air rifle within city limits.

In conclusion, shooting air rifles within city limits is generally not allowed due to safety concerns and local laws. It is important to check with local authorities and adhere to regulations in order to ensure the safety of oneself and others.

25 DIY Deer Blind Plans to Build a Safe Hunting Spot

0

Building a DIY deer stand is an excellent way for avid hunters to enhance their hunting experience. Learn how to build homemade deer stands with these 25 free DIY deer blind plans to build a safe and comfortable hunting spot easily. These free deer blind plans designed for everyone, from beginners to seasoned builders.

These DIY deer blind plans include step-by-step instructions, detailed guidelines, and PDF downloads, making the process as easy as possible. Incorporate homemade deer stands into your next hunting adventure or nature observation to improve your experience.

Our collection of DIY deer blind plans features a wide range of styles and designs, such as elevated hunting blinds, mobile deer blinds, homemade tree stand blinds, and box blinds. These plans cater to various preferences and uses, such as bow hunting, rifle shooting, or wildlife photography. Choose between using scrap wood, pallets, or new materials to make the perfect deer blind, depending on your budget and preferences.

So, gather your tools and materials, and embark on your DIY deer blind project today! With our 25 free DIY deer blind plans, you’ll have plenty of options to choose from and make a custom and practical hunting blind that will enhance your outdoor experiences. Don’t wait any longer – start building your very own DIY deer blind today!

1. DIY Elevated Deer Hunting Blind Under $500

DIY Elevated Deer Hunting Blind Under $500

Revamp your hunting experience with a custom-built, elevated DIY deer blind designed for optimal visibility and protection against weather elements. This innovative project requires basic tools and materials, easily sourced from any home improvement store. Remarkably budget-friendly, you can erect this stand on a weekend with a spending limit of approximately $500.

This deer blind, fashioned from common lumber, blends functionality with portability. It conveniently fits into the bed of a standard full-size pickup, specifically designed with the dimensions of an F-150 in mind.

Despite its compact design, it comfortably accommodates two people and is sturdy enough to withstand harsh weather conditions, proving its worth during below-freezing pre-dawn hunts. Elevate your deer hunting experience and embrace the rugged appeal of this hunting blind today! outdoorlife

2. How to Make Deer Blind From Pallets

How to Make Deer Blind From Pallets

Transform your hunting experiences with a budget-friendly DIY box blind! Rising prices of building materials don’t need to hinder your plans. This practical guide demonstrates how simple materials like pallets, 4x4s or 2x4s, exterior grade screws, and a tarp can be repurposed into a sturdy, modular hunting blind.

Designed to be accessible, the structure requires basic tools like a drill, sawzall, and tape measure. This encourages family participation, offering a fun outlet for your kids to sketch out the plan.

From gathering materials to setting up the structure, this guide provides a step-by-step process, ensuring that anyone with some initiative can set up their box blind. It’s a rewarding project that enhances your hunting experience and brings family bonding time. Get started today and make lasting memories with your loved ones. themeateater

3. How to Build a Mobile Deer Blind

How to Build a Mobile Deer Blind

Unleash your inner craftsman with a DIY mobile deer blind on a running gear project! This intriguing endeavor starts with affordable farm running gear and involves the construction of a 4×4 frame, 2×6 floor, and 3/4″ plywood floor. It offers a blend of green-treated and standard materials, with unique features like angled corner walls, bow windows, and sliding horizontal windows for an optimal viewing experience.

Unique elements include a cost-effective door with a combo handle for security and noise-damping acoustic foam panels. You can personalize your mobile deer blind with creativity, akin to the joy of painting happy little trees on its exterior.

The result? A functional, transportable deer blind offering an exceptional view from inside, further enhanced with magnetic window screens and a blackout curtain. Get ready to build this fantastic piece, engaging adults and kids in a fun-filled, hands-on activity. Perfect for all DIY enthusiasts out there! bowhunting

4. Homemade Tree Stand Blind

Homemade Tree Stand Blind

If you love hunting, you’ll love these DIY deer blind plans that will help you build your own deer blind that is comfortable and effective. Envelop yourself in nature with this comprehensive guide to constructing a DIY deer stand blind. Made to provide an elevated and sheltered view for deer watching, this 6′ x 6′ structure is an immersive outdoor project that ensures a cost-effective and rewarding experience. Materials include treated timber, decking boards, plywood panels, corrugated red asphalt roof panels, metal brackets, PVC pipes, and assorted hardware.

Not to forget, several cans of camouflage spray paint blend your blind with the surroundings seamlessly. The building process is a meticulous blend of planning, assembling, and finishing, focusing on stability and longevity. From crafting the platform and frame to installing a sturdy ladder and comfortable seating, each step is outlined clearly, ensuring a smooth construction journey.

Enjoy the tranquility of nature in your deer stand blind, a unique and purposeful addition to your outdoor space. So go ahead, gather your tools, and embark on this nature-oriented project to witness the harmony and allure of the wild from the comfort of your deer stand blind. instructables

5. Building Your Own Platform Deer Stand

Building Your Own Deer Stand Platform

Enjoy the captivating view of your rural surroundings with your DIY deer stand, built to withstand the elements and provide a unique vantage point for observing wildlife. With the help of a cordless hammer drill and impact driver combo kit, this project uses sturdy dimensional lumber to construct a safe and secure platform. Explore your property’s wildlife, from colorful birds to majestic deer, all from your homemade perch.

Building a deer stand starts with a solid foundation of 2×6 pressure-treated lumber, precisely structured for balance and strength. The framework is further fortified with Timberlake screws, made effortless by the robust tools from the Milwaukee M18 FUEL line.

The project proves to be an exciting endeavor, not just as a means of observing wildlife but also as a functional structure for seasonal hunting. Before embarking on this project, comply with local zoning laws and building codes for safety. So gear up, engage with the outdoors, and make an enduring symbol of your love for nature with your deer stand. homefixated

6. Inexpensive DIY Hunting Blind

Inexpensive DIY Hunting Blind

Learn the art of building effective DIY hunting blinds. These blinds hide hunters from their prey, allowing for a more successful hunting season. This project covers three unique designs – the box stand, the hay bale blind, and the natural blind. With each design explained in detail, you’ll understand the cost, materials required, and step-by-step instructions for construction.

The box stand is an elaborate structure that can comfortably accommodate two people. It requires treated lumber, plywood, and corrugated tin sheets for a $100-$300 budget. The hay bale blind is simpler, leveraging existing hay bales in a field to camouflage the hunter, requiring a minimal budget of about $100.

Lastly, the natural blind is a cost-free structure built using surrounding vegetation. Building hunting blinds brings utility and helps make a stronger bond with nature. This cost-effective guide helps you maintain the age-old hunting tradition while ensuring safety and comfort. whitetailproperties

7. Making Your Own 5×5 Deer Blind

Making Your Own 5x5 Deer Blind

Breathe new life into your hunting experience with a DIY 5×5 deer blind project. This unique project utilizes sturdy 2x4s for framing and painted OSB for walls, topped with lightweight steel roofing, making a durable yet affordable deer blind. Its total construction cost rings up at just around $300. This project is easy in difficulty level, inviting everyone to try. The result? A durable, functional, and cost-efficient deer blind that’s perfect for your next hunting adventure. Embark on this project and showcase your skills while benefiting from the functionality of a custom-made deer blind. howtospecialist

8. How to Make a Deer Stand at Home

How to Make a Deer Stand at Home

Prepare for deer season with this comprehensive guide to building your elevated DIY deer stand! This hands-on project provides an exceptional view 17 feet up and includes optional elements for comfort and concealment, such as a blind and roof.

You’ll work with common materials like 16-footer 2x4s and a nail gun to assemble the ladder and frame, ensuring your stand is secure and practical. With careful measurements, cutting, and assembly, you’ll attach the ladder to the frame, strengthen the structure, and add the roof and side panels.

Additionally, the stand offers two design options: a simpler single deer stand or a slightly more complex double deer stand, catering to your specific hunting needs. Harness your craftsmanship to make this innovative deer stand and elevate your hunting experience! diytyler

9. Free Wooden Deer Stand Plan

Free Wooden Deer Stand Plan

A deer blind is a must-have for any hunter. Learn how to make your own with these DIY deer blind plans that are easy and inexpensive. Immerse yourself in the thrill of the hunt with the ultimate homemade box deer hunting stand! Expertly built with an emphasis on stability, portability, and affordability, this DIY hunting stand offers optimal concealment and protection from the elements as you pursue your game. Constructed primarily from 2×4 pieces, this stand includes a 4’x4′ platform approximately 6 feet off the ground, complete with a roof for added shelter.

Customize your stand with as many shooting windows as required at your preferred height. The beauty of this project is its transportability – the components fit snugly into the back of a pickup truck, enabling fast assembly on-site with just a single ratchet wrench.

If you’ve multiple hunting locations on your property, this cost-effective solution, estimated at around $150, offers the ideal alternative to expensive commercial options. Now it’s time to gather your tools, source your materials, and build your perfect hunting vantage point! freedeerstandplans

10. How to Make a Deer Stand

How to Make a Deer Stand

Transform your hunting experience with this practical and moveable DIY deer stand. This detailed guide will lead you through making a sturdy, weather-resistant deer stand using basic materials such as cedar, pine, or redwood lumber and plywood. The design includes a floor, sides, a front face, a back face, and a roof, ensuring a comfortable and secure perch for your hunting expeditions.

Follow the step-by-step instructions to accurately measure, cut, and assemble each component. Remember the importance of drilling pilot holes for a tighter lock and right-angled corners for a professional result.

The structure can be easily disassembled and relocated according to your hunting needs. The highlight of this deer stand is its portability, enabling you to adjust to changing wildlife patterns. Enhance your outdoor experience with our free deer stand plans today. myoutdoorplans

11. 8 X 8 Hexagonal Bow Deer Blind Building Plans

8 X 8 Hexagonal Bow Deer Blind Building Plans

Make a spacious hunting hideaway with this simple DIY blind construction guide! The aim is to make a blind that comfortably fits a family and can be assembled in a garage and transported for assembly. You’ll need 2x4s, 4x4s, 1/2″ plywood, gate hinges, blind windows, paint, and blind platform brackets.

Begin by assembling an 8’x8′ base using the platform brackets. Build individual panels for the front and sides, attach them to the platform, and secure them to each other. Build an “L” shaped frame for the rear wall and ceiling joists. Cut out the door, attach the roof, add shingles, and paint. This versatile blind will add a practical and enjoyable feature to hunting trips. reckonill

12. How to Make Your Own 4×6 Elevated Deer Blind

How to Make Your Own 4x6 Elevated Deer Blind

Revamp your outdoor experience with a DIY 4×6 elevated deer blind! This fun family project is practical and rewarding, perfect for enthusiastic nature lovers. Using common tools, such as a hammer, saw, and drill, you’ll work together to construct a sturdy structure elevated for an optimized view.

The process incorporates materials like Plexiglass for windows, enhancing visibility while maintaining the shelter. This unique design also features window dividers on each 6′ side, catering to your personalized viewing needs.

Building this deer blind offers a fun, engaging activity that brings families closer while honing woodworking skills. Plus, the end product provides an ideal spot for wildlife observation, capturing those elusive deer moments like never before. So, get your tools ready and embrace the adventure of building today! myoutdoorplans

13. Build a Ladder Stand for Deer Hunting

Build a Ladder Stand for Deer Hunting

Delve into the craft of building a DIY ladder stand for deer hunting. Constructing your own provides cost savings, customization, and a unique perspective for a successful hunt. This guide takes you through six key steps, from choosing the perfect tree to testing the final setup. Materials needed include 2×4 inch treated lumber or cedar beams, plywood for the seat, and an array of tools.

It emphasizes that a ladder stand is not just an impressive feat but a vital tool for hunting, offering a bird’s eye view of the area and excellent camouflage. But remember, safety is paramount; always use a safety harness and routinely inspect your tree for stability. This guide gets you closer to a fulfilling hunting experience. deerproject

14. Small Deer Stand Design

Small Deer Stand Design

Make your hunting experience even more memorable with the perfect DIY small deer stand design! This woodworking task can be completed in three days at approximately $250. All the necessary supplies can easily be procured, marking it an easy-level task.

The resulting deer stand is an impressive testament to your craftsmanship, showcasing your skills to the world. Not only does it offer a practical application for nature enthusiasts, but it also provides a satisfying creative outlet.

The project plan, available on the provided link, makes the process manageable and enjoyable. Build your deer stand today and immerse in the thrill of DIY woodworking! howtospecialist

15. Build Your Own Deer Stand

Build Your Own Deer Stand

A deer blind can improve your hunting experience and success. Find out how to make your own with these DIY deer blind plans that are detailed and practical. Embark on a self-sustainable journey with a DIY elevated deer stand that will bring a fun and practical addition to your homesteading adventure. This tutorial demonstrates how to build a 4×8 elevated deer stand or hunting blind, proving functional and engaging. Anyone can enhance their woodland spaces with minimal equipment and a do-it-yourself spirit.

As they utilize their 18-acre land, they inspire others to embrace simple and sustainable lifestyles, turning dreams into reality. Every step in their process, from suburban life to rural homesteading, brims with useful insights and wholesome experiences.

This tutorial doesn’t just guide you in making a deer stand; it fosters a deeper connection with nature and stirs the innate human desire for simplicity and sustainability. Build your deer stand today and start your adventure!

16. DIY Gaint Deer Hunting Blind With Scrap Wood

DIY Gaint Deer Hunting Blind With Scrap Wood

Venture into the world of DIY wildlife ventures with a comprehensive guide on building a deer hunting blind using scrap wood. This project is an ideal opportunity for outdoors enthusiasts, promoting resourcefulness, creativity, and eco-friendly practices.

You’ll require basic tools and equipment, such as a hammer, saw, screws, and scrap wood. Preparation involves sourcing your materials and selecting an optimal location for your hunting blind. Following step-by-step instructions, you’ll build a sturdy and practical hunting blind, enhancing your hunting experience.

This innovative project utilizes waste materials and fosters a deeper connection with nature. The scrap wood serves as the main ingredient in this exciting project. Relevant to those interested in hunting, DIY projects, and sustainable practices, this giant homemade deer hunting blind promises an engaging, informative, and rewarding experience.

17. Homemade 7×7 Deer Stand

Homemade 7x7 Deer Stand

Gear up for a hands-on experience with this detailed guide on crafting your 7×7 deer stand! This unique project adds to your hunting skills and provides a practical and comfortable shooting box blind designed for effective deer hunting.

With this DIY guide, you’ll gain insights into building a sturdy 7×7 blind on top of a deer stand platform, all accomplished within an impressive 3-day timeline.

Learn how to enhance your outdoor adventures and foster your passion for hunting through this well-explained DIY deer stand walkthrough. It’s time to boost your hunting efficiency and enjoy an elevated perspective of your hunting terrain!

18. DIY 2×4 Deer Stand With Box Blind

DIY 2x4 Deer Stand With Box Blind

Building your own deer blind can be a rewarding and fun project. Follow these DIY deer blind plans that will guide you step by step. Craft your hunting hideout with this DIY 2×4 deer stand and box blind – the perfect way to get close to wildlife! Perched 17′ high, this DIY stand offers a wide viewpoint and conceals you comfortably as you wait for whitetails.

Its construction materials include Ondura Premium Panels, which provide added concealment, with various tools like Counter Sink Bit, Better Vue Screen, and Kreg Forman, to mention a few.

The process is straightforward, and the end product serves the purpose effectively. Furthermore, the stand incorporates an optional blind and roof to enhance your hunting experience. Build your deer stand now and get ready for a productive deer season.

19. Cheap DIY Deer Stand in 10 Easy Steps

Cheap DIY Deer Stand in 10 Easy Steps

Boost your hunting experience with an economical yet effective DIY deer stand built by your hands! Understand the essence of constructing a sturdy, scent-free deer stand through a simple and concise 10-step process. The guide is designed to be customizable, fitting your precise requirements without the need to overspend on brands.

You can craft your hunting tower by incorporating resources like durable wood, common tools, and insightful tips. Appreciate the thrill of deer hunting from a vantage point crafted by you, adding an extra layer of satisfaction to your outdoor adventures.

The process will save you money and arm you with a skill useful for many hunting seasons. Build your affordable deer stand today and experience hunting like never before!

20. Simple DIY Deer Blind on a Budget

Simple DIY Deer Blind on a Budget

The perfect solution for the outdoorsman on a budget, build your DIY deer blind and get ready to make memories! With careful planning and a budget of around $500, you can build a robust 6×6 blind with a 7′ roof, elevated 6 feet off the ground, boasting a unique trap door entry.

It’s the perfect solution for those facing high wood costs but wanting to experience the benefits of a quality deer blind. This project results in a sturdy structure that fits the financial plan and meets the creator’s vision and satisfaction.

Look forward to detailed plans, available for free download soon that will guide you through the build process, offering clear instructions for an even more optimized design in the coming season. Make sure to follow the progress and start preparing for your own elevated box blind project.

21. DIY Custom Deer Blind

DIY Custom Deer Blind

Take your hunting experience to another level with an insane custom DIY deer blind build, complete with a 32″ TV and 10,000 BTU Heater! This unique project brings comfort and convenience to your hunting activities, providing you with the ultimate hunting hub in the wilderness.

The materials needed include a ProCom MG10TBF 10,000 BTU Heater, a 32″ TV, an assortment of screws, an air fan, a flush mount, and more. With the right preparation, you’ll build a deer blind that provides an optimal vantage point and keeps you comfortable during long waits.

This project blends the thrill of hunting with the luxuries of home, making it a unique approach to outdoor pursuits. The step-by-step guide to building this great deer blind is straightforward and rewarding, giving you an elevated hunting experience. Transform your hunting activities today with this ultimate project!

22. Build Your Own Shooting House

Build Your Own Shooting House

Unleash your creativity in building a low-cost box blind for deer hunting with an insightful DIY guide that provides an efficient solution in preparing for the hunting season. This simple yet highly effective structure is built from readily available materials, making it a budget-friendly option.

The build requires a few tools and a dash of handiwork but promises excellent results in the form of a sturdy, practical shooting house.

Despite its uncomplicated design, it offers comfort and convenience for hunting enthusiasts, underlining its effectiveness as a significant asset for a successful deer season. Make the most of your hunting experience by building this user-friendly, cost-effective box blind today.

23. Building a 6×8 Octagonal Elevated Box Deer Blind

Building a 6x8 Octagonal Elevated Box Deer Blind

Gear up to take your hunting game to a new level with a 6×8 octagonal elevated DIY box blind. Designed to accommodate two adults, this spacious blind offers strategic visibility and comfort. With sheet goods optimization in mind, its dimensions have been tweaked to 5’10” x 7’10”, facilitating material utilization and cost-effectiveness.

It uniquely features a trap door entry for a discreet approach. Though you might not see significant savings from this optimization in a single build, multiple constructions will benefit. Embrace the thrill of the hunt in this well-designed and crafted blind. Start building today to enhance your outdoor adventures!

24. Portable DIY Hunting Blind

Portable DIY Hunting Blind

Explore the intriguing process of constructing a portable deer blind on a truck bed trailer, as depicted in a comprehensive DIY tutorial. This simple yet effective blind design aims to exchange ideas, spark creativity, and generate discussions among individuals eager to build their mobile blinds.

The guide also outlines potential custom additions, such as camouflage mesh curtains, gun racks, heater mounts, shelves, and hooks, that can be integrated into the design to enhance its functionality.

This cost-effective project offers an exciting DIY challenge and a practical application for outdoor enthusiasts. Embrace the joy of building your portable deer blind and make your hunting experiences more convenient and enjoyable.

25. Easy DIY Deer Blind Under $500

Easy DIY Deer Blind Under $500

Intensify your hunting adventures with a functional DIY deer blind built for under $500! This shooting house is both cost-efficient and easy to construct, raising the bar of your hunting experience. With accessible supplies such as lumber, screws, and roofing materials, you’ll build a sturdy, reliable structure.

Preparations are simple: measure, cut, and organize your materials beforehand. You’ll follow a systematic construction guide that ensures your deer blind stands strong and true. Imagine peering out from your elevated perch, blending seamlessly into the environment, waiting for the perfect shot.

This deer blind is remarkable for its practicality, enhancing your hunting skills while providing a comfortable shelter. Build your deer blind today and elevate your hunting game to unseen heights. It’s informative, helpful, and engaging – a worthwhile project!

Conclusion:

diy deer stands

In conclusion, these 25 free DIY deer blind plans offer various options for constructing deer blinds and stands to suit various preferences and budgets. Ranging from pallet-based designs to elevated options and even mobile blinds, these DIY deer blind plans cater to hunters at different skill levels. Utilizing homemade DIY deer stand plans coupled with creativity and resourcefulness, anyone can build a cost-effective and functional deer blind. So, gear up, pick a plan, and start making your very own customized deer hunting experience.

FIRST-PERSON HUNTING REPORT: Tagging the Idaho state-record moose

0

BY ROBERT RIPLEY

In June of 2021, I was shocked to learn I had drawn an Idaho moose tag for the 2021 season. I quickly found the outfitter that held the permit for the unit I was to hunt — Broadmouth Canyon Ranch, which runs a famous high fence elk hunting program. They do own a large amount of land that is fair chase property. Little did I know, I was going to go on a hunt that was almost perfect.

Because of prior hunts in early in October, I got to the lodge on October 28. News of my moose tag had proceeded me. When I entered, I was an instant celebrity. All of the elk hunters wanted to talk about moose hunting and my tag. We all oohed and aahed at the moose head that hung over the fireplace.

My guide Tate and I met at breakfast well before sunrise. He said he knew a couple of places that should hold moose. We would be glassing off of some ridges. I pointed out that this was my first moose hunt and no clue what to look for. He said we would be hunting the Shiras moose, which is the smallest moose in North America, and that a good bull would have ten points on both sides.

We rode a side-by-side on dirt roads I will never find again. It was well below freezing and we had no windows on the side by side so warm gear was necessary. After a cold ride we came up on a ridge, made a hard left then slammed on the brakes. Tate pointed to my right where two cow moose stood 25 yards from us. They were not spooked, they just stood and stared. This had to be a good omen, right?

We turned around to find somewhere we would not spook them. We began glassing as the light of dawn creeped over the mountains. We glassed an area of deep canyons that stretched for miles. I’ve hunted wild hogs in California for years. It’s not unusual to glass a pig that turns out to be a burned out log so when I saw black that is what I assumed. But everything black was a moose, 13 in all, 9 that were bulls. There were two that looked big to me. Tate said I could shoot one of them on Wednesday if we had not found one bigger, and that was two days away.

We left that ridge to glass a new one. There were not as many moose but one looked good a couple miles away. Then Tate got excited. He said the one he could see was enormous. He got out his spotting scope and hooked up a camera so we could see it easier. It was indeed bigger than anything we have seen so far. He was feeding on a nob about a mile and a half away. Initially Tate wanted to wait for him to bed down. But that idea lasted a whole two minutes. He said, “Let’s kill that monster!”

We would not see the moose for the stalk down. We had the wind in our faces. We worked our way down a steep canyon wall. At the base of the wall was a long grove of dead trees that extended at least a mile down the canyon. Just outside of the trees was a game trail that rivaled the lanes of the highways I had used to get to the lodge. I’m five foot, nine inches, at best, and Tate played center for his college basketball team. It took almost two of my strides to match his one. He was pumped up with adrenaline and we made great time.

There were two nobs, one closer to us and one where the moose was. We stopped at the base of the first one and made a plan as we shucked off our jackets and backpacks. We would slowly climb to the top of the first nob, set up the shooting sticks and should have a 100-yard shot. We did exactly as planned, but the moose wasn’t involved in our planning. He was not there. It was comical as Tate and I looked for him then looked at each other. We did not think he had busted us because he could not have seen or smelled us.

Our new plan was to quietly and slowly climb the second nob while looking over both sides to see if he had wandered off. We climbed the second nob as planned, Tate was to my right just forward of me. At 61 years old, you find that you will trip over any little thing — roots of bushes, rocks, blades of grass, you get it. As I walk, I look forward every couple of steps to find those things that can trip me. As I scanned the ground in front of me, I looked up. There was six inches of moose antler over a bush right in front of me. I whispered, firmly, “Tate!” That’s all it took, we both dropped to the ground.

Tate asked me if I was comfortable shooting freehand? I’ve done it but I didn’t want to mess up a shot on possibly my only moose. He quietly set up the shooting sticks. He said to shoot fast as the moose will probably see me. With my adrenaline sky high I squatted behind the shooting sticks, place the muzzle of my rifle on the V of the sticks, took a deep breath and stood up slowly. As I stood I pushed the rifle forward on the sticks, bringing the rifle up to my shoulder, he did look at me as I put my eye to the scope, clicked off my safety and fired. He dropped where he stood. No steps, no running, just dropped dead.

Tate and I cheered. We jumped up and down, fist pumped and high fived. As we walked up to the moose I realized how big he was. Much larger than any elk I have ever harvested. Tate and I oohed and awed. Tate said it was the biggest ever harvested on the ranch — it was 11 by 11. It was much larger than the one over the fireplace at the lodge.

It green scored at 160 inches. After the 90-day drying period required by Boone and Crockett, it measured at 152 7/8 inches, the Idaho state record is 150 inches.

Maximize Your Harvest: Discover Creative Uses for Deer Hides

0

Discover the artistry of deer hide: Unleash your creativity and explore endless possibilities with this versatile material. From crafting exquisite leather goods to creating stunning home decor, learn the secrets of transforming a deer hide into unique pieces that reflect your personal style. Let your imagination run wild as you delve into the world of deer hide projects and unlock its true potential.

A Step-by-Step Guide: How to Tan and Use a Deer Hide

Tanning a deer hide is a rewarding skill that allows you to utilize every part of the animal and create high-quality leather for various projects. While it may take time and effort, the process is satisfying and worth learning. In this article, we will discuss the steps for tanning using a store-bought tanning solution.

To begin, you will need a tanning oil (such as NuTan) and several substances to adjust the pH of the hide throughout the tanning process. These include white vinegar, salt, baking soda, hydrated lime or lye, and a large plastic tub or bucket.

If you plan on tanning your hide right away, start by removing it from the deer without cutting into the skin. Trim any uneven edges or tough portions of the hide to ensure even tanning. If you need to save the hide for later, roll it up in a plastic bag and freeze it or salt it to prevent rotting.

The first step in tanning is fleshing the hide, which involves scraping off any bits of flesh or gristle. This can be messy and smelly, so protective clothing is recommended. Use a very dull blade or a fleshing knife to scrape off the flesh.

Next, remove the hair from the hide by submerging it in an alkaline solution called a “bucking” solution. You can use hydrated lime or lye to make this solution. Leave the hide submerged for a couple of days until you can easily pull out a small section of hair.

Once the hair has been removed, scrape off the grain layer underneath with firm pressure using your fleshing tool. Flip over the hide and repeat this process on the flesh side to remove any remaining bits of flesh or membrane.

After scraping, soak your hide in fresh water until it returns to a soft and flexible state. You can add ammonium sulfate to speed up this process. Once the hide is ready, prepare a pickling solution using white distilled vinegar, water, and salt. Submerge the hide in this solution for 2-3 days.

Remove the hide from the pickling solution and neutralize it by soaking it in a mixture of water and baking soda. Rinse thoroughly with fresh water and wring out any excess moisture.

Apply your tanning oil generously to both sides of the hide and let it soak in for 30 minutes. Fold the hide with the flesh side on the inside, wrap it in a tarp, and leave it overnight. The next day, wipe off any excess oil with a clean rag.

To keep the hide soft and flexible as it dries, stretch and work it every 5-10 minutes until completely dry. Hang it up or nail it to a sheet of plywood for this process.

Once dry, you will have a soft but strong piece of deer leather that can be used for various projects such as bags, gloves, tool straps, knife sheaths, and more.

Learning how to tan your own deer hides allows you to fully utilize your harvest and create unique items with your own two hands. While there are specialized tools available for tanning, you can start with basic equipment like a dull blade or hatchet. With practice and experience, you can refine your tanning skills and explore other tanning methods such as brain tanning or vegetable tanning.

Remember to always wear protective gear when working with chemicals or sharp tools during the tanning process.

Maximizing Your Harvest: Creative Uses for Deer Hides

Maximizing Your Harvest: Creative Uses for Deer Hides

Deer hunting is not just about filling the freezer with meat. It’s also an opportunity to learn new skills and make use of every part of the animal, including the hide. Learning how to tan your own deer hides can be a rewarding way to create high-quality material for various projects.

While there are services available for taxidermy or turning deer hides into wall hangings, many hunters enjoy being part of the process themselves. Tanning with a store-bought tanning solution is a great way to start, as it requires less specialized knowledge and materials compared to other methods like brain tanning or vegetable tanning.

To begin the tanning process, you will need a tanning oil (such as NuTan) and some common household items like white vinegar, salt, baking soda, hydrated lime or lye, and a large plastic tub or bucket. Specialized tools like a fleshing knife or fleshing beam can make the job easier but are not necessary.

The first step after a successful deer hunt is to skin the deer carefully. By hanging the deer and using gravity to pull the hide off, you can avoid cutting into it. Trim off any uneven edges or tough neck portions of the hide for even tanning.

If you plan to tan your hide right away, proceed with fleshing it. However, if you have other tasks to attend to first, you can preserve the hide by freezing it in a plastic bag or salting it until you’re ready.

Fleshing involves scraping off any bits of flesh and gristle from the hide’s surface. This step can be messy and smelly, so protective clothing is recommended. Any dull blade will work as a fleshing tool.

After fleshing, it’s time to remove the hair from the hide. This can be done by submerging the hide in an alkaline solution called a “bucking” solution. Hydrated lime or lye can be used to make the solution, but caution must be taken as these substances are caustic. Agitate the solution daily for a couple of days until the hair comes off easily.

Once the hair is removed, scrape off the grain layer underneath it using a fleshing tool. Flip the hide over and remove any remaining bits of flesh or membrane from the flesh side.

To return the hide to a neutral state, rinse it in fresh water and change the water regularly until it becomes soft and flexible again. Adding ammonium sulfate to the water can speed up this process.

Next, preserve the hide by submerging it in a pickling solution of vinegar and salt for 2-3 days. Then, neutralize the acidity by soaking it in a baking soda solution before rinsing thoroughly.

After wringing out excess water, apply tanning oil generously to both sides of the hide. Let it soak in overnight before wiping off any excess oil with a clean rag.

To keep the hide soft and flexible as it dries, stretch and work it every 5-10 minutes while hanging or nailed to a surface. This will open up the fibers and prevent stiffness.

Once completely dry, you’ll have a soft yet strong piece of deer leather that can be used for various projects like bags, gloves, tool straps, knife sheaths, or ax strops.

By learning how to tan your own deer hides, you can maximize your harvest and create unique items while honoring the animal you harvested.

From Field to Finished Product: Making the Most of Your Deer Hide

From Field to Finished Product: Making the Most of Your Deer Hide

When it comes to hunting, many hunters focus on filling their freezers with meat and overlook the potential of the deer hide. However, learning how to tan your own deer hides can be a rewarding skill that allows you to use every part of the animal and create beautiful, high-quality materials for various projects.

Tanning a deer hide using a store-bought tanning solution is a great starting point for beginners. You will need some common household items such as white vinegar, salt, baking soda, hydrated lime or lye, and a large plastic tub or bucket. Additionally, specialized tools like a fleshing beam and knife can make the process easier.

The first step is to remove the hide from the deer without cutting into it. Hanging the deer and using gravity to pull off the hide is recommended. Once you have the hide free, trim any uneven edges and tough neck portions for even tanning.

If you’re not planning to tan the hide immediately, you can either freeze it in a plastic bag or salt it to prevent rotting. Salting involves covering the flesh side with non-iodized salt and tightly rolling it with fur side out.

To start tanning, fleshing is necessary to scrape off any bits of flesh and gristle from the hide. This step can be messy and smelly, so protective clothing is recommended. Any dull blade or tool can be used for fleshing.

After fleshing, removing the hair from the hide is done by submerging it in an alkaline solution called “bucking.” Hydrated lime or lye can be used to make this solution. The hide should be fully submerged in the solution and agitated regularly until hair removal becomes easy.

Once all hair has been removed, scraping off the grain underneath is important for even tanning. Flip the hide over and use firm pressure with your fleshing tool to remove the grain. Rinse the hide thoroughly with fresh water.

The next step is pickling, where the hide is submerged in a solution of vinegar and salt for 2 to 3 days. This process preserves the hide. After pickling, neutralizing the acidity is necessary by soaking the hide in a baking soda solution.

After rinsing, wring out excess water and let the hide air dry until it is moist but no longer dripping. Apply tanning oil generously on both sides of the hide and let it sit overnight wrapped in a tarp. The next day, wipe off any excess oil with a clean rag.

To prevent stiffness during drying, move and stretch the hide every few minutes until it dries completely. This helps keep the fibers flexible and results in a soft but strong piece of deer leather.

Tanned deer hides can be used for various projects such as bags, gloves, tool straps, knife sheaths, and ax strops. By learning how to tan your own deer hides, you can fully utilize your harvest and create unique items with your own two hands.

Note: This information is provided as a general guide. It’s important to follow specific instructions provided by tanning solution manufacturers or seek guidance from experienced tanners for best results.

Unlocking the Potential: Practical and Unique Ways to Utilize a Deer Hide

Deer hunting is not just about filling the freezer with meat; it’s also an opportunity to learn new skills and make use of every part of the animal. One often overlooked part is the deer hide, which can be transformed into beautiful, high-quality leather for various projects. While there are services available for taxidermy or turning the hide into wall hangings, learning how to tan your own deer hides allows you to be a part of the process and provide for yourself with your own two hands.

Tanning using a store-bought tanning solution is a great starting point for beginners. You’ll need some common household items like white vinegar, salt, baking soda, hydrated lime or lye, and a large plastic tub or bucket. Specialized tools like a fleshing knife and fleshing beam can make the process easier but are not necessary.

The first step after a successful deer hunt is skinning the deer. It’s important to do this carefully to avoid cutting into the hide. Once you have the hide free, trim off any uneven edges and tough neck portions so that it tans evenly.

If you’re not planning on tanning right away, you can either freeze the hide or salt it to prevent rotting. Rolling it up in a plastic bag and labeling it before freezing is an easy option. Salting involves covering the flesh side of the hide with non-iodized salt and rolling tightly with fur side out. Store in an airtight container until ready for tanning.

The next step is fleshing the hide by scraping off any bits of flesh or gristle. This can be messy and smelly, so protective clothing is recommended. Any dull blade will work as a fleshing tool.

After fleshing, it’s time to remove the hair from the hide by soaking it in an alkaline solution called a “bucking” solution. Hydrated lime or lye can be used to make the solution, but caution should be taken as these are caustic substances. Agitating the hide in the solution for a couple of days will loosen the hair fibers, making it easier to remove.

Once the hair is removed, the hide needs to be neutralized and rinsed. This involves soaking it in fresh water until it returns to a soft and flexible state. Adding ammonium sulfate can speed up this process.

To preserve the hide, it needs to be pickled in an acid and salt solution. White distilled vinegar and salt are commonly used for this step. After pickling, the hide is neutralized again with a baking soda solution and thoroughly rinsed.

Finally, tanning oil is applied to the hide to preserve and soften it. The hide is folded with the flesh side on the inside and left overnight for the oil to soak in. Excess oil is wiped off, and then the hide is stretched and worked while drying to keep it soft and flexible.

Tanned deer hides can be used for various projects like bags, gloves, tool straps, knife sheaths, or ax strops due to their toughness and flexibility. By utilizing every part of the deer you harvest, you not only gain valuable skills but also feel a sense of satisfaction knowing that nothing goes to waste.

Preserving Memories: Transforming a Deer Hide into Meaningful Keepsakes

Preserving Memories: Transforming a Deer Hide into Meaningful Keepsakes

One of the first steps after a successful deer hunt is skinning your deer, but often the skin itself becomes an afterthought as you focus on processing the meat. However, learning how to tan your own deer hides can be a rewarding way to use every part of the animal and create beautiful, high-quality material for various projects.

Tanning with a store-bought tanning solution is a great starting point for beginners. You will need some common household items like white vinegar, salt, baking soda, hydrated lime or lye, and a large plastic tub or bucket. Specialized tools like a fleshing beam and knife can make the process easier but are not necessary.

The first step is to remove the hide from the deer without cutting into it. Once you have the hide free, trim off any uneven edges and tough portions so it tans evenly. If you’re not tanning right away, you can freeze the hide or salt it to preserve it.

To tan the hide, start by fleshing it to remove bits of flesh and gristle. This can be messy and smelly, so protective clothing is recommended. Next, use a “bucking” solution with an alkaline substance like hydrated lime or lye to remove the hair from the hide easily.

After scraping off all the hair and grain from both sides of the hide, return it to a neutral state by soaking it in fresh water. You can add ammonium sulfate as a deliming agent to speed up this process. Once neutralized, pickle the hide in an acidic solution of vinegar and salt for 2-3 days.

After pickling, neutralize the hide again with baking soda solution and rinse thoroughly. Wring out excess water and apply tanning oil generously on both sides of the hide. Let it sit overnight before wiping off any excess oil.

To dry the hide, stretch and work it regularly to keep the fibers flexible. Hang it up or nail it to a surface and continue stretching and working it until completely dry. Once dry, you will have a soft yet strong piece of deer leather that can be used for various projects.

Tanning your own deer hides allows you to be part of the process and create meaningful keepsakes from your hunts. From bags and gloves to tool straps and knife sheaths, tanned deerskin can be used for a wide range of applications. So embrace the opportunity to learn this skill and make the most of your harvest.

The Art of Tanning: Discover the Rewards of Processing Your Own Deer Hide

The Art of Tanning: Discover the Rewards of Processing Your Own Deer Hide
The art of tanning your own deer hide is a rewarding and fulfilling process that allows you to utilize every part of the animal. While many hunters may send their hides to be taxidermied or turned into wall hangings, there is something special about being able to make something with your own two hands. Learning how to tan your own deer hides not only allows you to use every part of the animal but also results in a beautiful, high-quality material that can be used for various projects.

Tanning with a store-bought tanning solution is considered the perfect “gateway” tanning process as it requires less specialized knowledge, time, and material gathering compared to other methods such as brain tanning or vegetable tanning. You can easily purchase a tanning solution online or at hunting gear stores.

In addition to the tanning oil, you will need several substances to alter the pH of your hide throughout the tanning process. These include white vinegar, salt, baking soda, hydrated lime or lye, and a large plastic tub or bucket. While there are specialized tools available for tanning, such as a fleshing beam and fleshing knife, you can use alternatives like a sawhorse and dull blade if needed.

The first step in tanning your deer hide is removing it from the deer without cutting into the hide itself. Hanging the deer and using gravity to pull off the hide is recommended. Once removed, trim any uneven edges and tough neck portions for even thickness during tanning.

If you plan on tanning immediately, proceed with fleshing the hide by scraping off any bits of flesh and gristle. This step can be messy and smelly, so protective clothing is advised. If you have other tasks to attend to before tanning, you can either freeze the hide in a plastic bag or salt it to prevent rotting until you’re ready.

After fleshing, it’s time to remove the hair from the hide. This can be done by placing the hide in an alkaline solution, known as a “bucking” solution, which causes the hair fibers to slide out easily. Hydrated lime or lye can be used to make the solution alkaline. The hide should be fully submerged and agitated regularly for a couple of days until the hair comes out easily when tested.

Once the hair is removed, you will need to scrape off the grain underneath using a fleshing knife or alternative tool. Flip the hide over and remove any remaining bits of flesh or membrane from the flesh side. Afterward, soak the hide in fresh water until it returns to a soft and flexible state.

To preserve the hide, it needs to be pickled by submerging it in an acidic and salt solution. White distilled vinegar mixed with water and salt is commonly used for this step. Leave the hide in the pickling solution for 2-3 days before neutralizing it with a baking soda solution and rinsing thoroughly.

Finally, apply your tanning oil to both sides of the hide and let it soak in overnight. Remove any excess oil with a clean rag before drying your hide while stretching and working it periodically to keep it soft and flexible.

Once completely dry, your deer hide will be ready for use in various projects such as bags, gloves, tool straps, knife sheaths, or ax strops. The process may take time and effort but knowing that you have utilized every part of your harvest is incredibly satisfying.

In conclusion, there are several options for what to do with a deer hide. It can be tanned and turned into various useful products such as clothing, bags, or rugs. Alternatively, it can be donated to organizations that use animal hides for educational purposes or conservation efforts. Whatever the choice may be, recycling and repurposing deer hides helps ensure that no part of the animal goes to waste.

9mm vs 10mm – Cartridge Comparison

0

When it comes to self-defense, there are several valid arguments for the 9mm vs 10mm handgun. Both are very popular and have their advantages and disadvantages. However, the 9mm is widely regarded as the ‘ideal’ handgun for self-defense and is one of the most highly used handguns in military and police forces. This goes for both home defense and conceal and carry. The popularity of the 9mm means that largely we have to defend the 10mm to justify it as a viable option.

Understand that the decision of which handgun to buy is a very personal decision. Every person has a different preference on weight, size, power, and recoil. Some people plan to conceal and carry, while others plan to use the weapon for home defense. Some stay in the city and worry about crime, while others spend time in the wilderness and are more concerned with predators. Before making a purchase, weigh your priorities and options to find the perfect fit for your needs.

Because of this, it’s difficult to label one as a better cartridge than the other. We will take a look at these two cartridges and discuss how they are similar and how they differ in some key ballistic and performance categories. We think that by the end of the article you will see that both have merit in the world of handguns.

History

The 10mm handgun was developed through a group effort by Col. Jeff Cooper, Norma, the FBI, and Smith & Wesson. The firearm was designed for use by FBI agents but was quickly set aside for other weapons. Some people claim that the recoil was too much for the wimpy FBI agents. However, the truth is that the weight and power simply slowed down their firing. Additional weight and recoil make target acquisition take a bit longer. When an agent is defending themselves and trying to put two or three rounds on a target quickly, the 10mm was not ideal.

The FBI did find that with different ammo, the 10mm handgun performed better in speed tests. The FBI lite load drastically reduced recoil and helped with performance. However, with a lighter load, it eliminated the need for such a heavy gun. This brought the FBI back to the 9mm, .45 caliber, and sparked the design of the .40 Smith and Wesson. It makes a strong argument for the 9mm vs 10mm.

The 9mm was first developed and used by the German military in the at the turn of the 20th century. From then, the cartridge saw use in both World Wars and was eventually accepted as a highly effective caliber by other European countries and North America. The 9mm soon replaced the commonly used .38 cartridges in the law enforcement community due to its stopping power and low recoil and is probably the most highly used round behind the .40 S&W. The 9mm provided extreme ease of handling, more stopping power than previously used rounds, and could carry more rounds in the magazine.

direct comparison 9mm vs 10mm round

Let’s just take a look at the specifications of these two cartridges and see how they compare and contrast.

9mm10mm Parent Case7.65x21mm.30 Remington Bullet Diameter0.355”0.400” Neck Diameter0.380”0.423” Base Diameter0.391”0.425” Case Length0.754”.992” Overall Length1.169”1.25” Case Capacity13.3gr24.1gr Max Pressure (SAAMI)35,000psi37,500psi

From the cartridge measurements and specifications, it should jump out immediately that the 10mm Auto is a larger round than the 9mm.

10MM cartridges can hold much heavier bullets than the 9mm with some hunting and self-defense rounds coming in at 180-200gr. These bullets are much heavier than the more common weights used with 9mm rounds which commonly fall between the 115 and 140gr weight.

The 10mm Auto can be packed with a higher charge, which is needed to push such heavier caliber bullets at speeds needed for hunting and self-defense purposes. We will see shortly how these differences affect the terminal ballistics of these handgun rounds.

To compare, we select several specific rounds for each cartridge to compare in several categories. While these selections are only a small window compared to the amount of selections available, they will give us a good idea of how the two cartridges stack up next to each other, and for the most part, these trends can be extrapolated to most options available. Those rounds are listed below.

We also want to point out that you can play around with cartridge loads, including how hot the load is and the bullet type. A lot of shooters will reload their own ammunition to tailor their ammo to their needs. In this article, we are only looking at factory loads of these two handgun cartridges.

Stopping Power

One of the biggest discussion points when evaluating the 10mm vs 9mm or any other comparison of two handgun rounds is power. In self-defense, power equates to penetration or over-penetration. There are two schools of thought on power. Some gun owners want as much power as they can handle. They want to put down any target with one shot, regardless of what happens behind the target. This makes more sense for gun owners that use their handgun in the wilderness. You certainly do not want a lack of power if a bear or a wild hog is charging you.

On the other hand, is it responsible to have that much power? You might take down your target with one shot, but possibly injure or kill somebody standing behind that target or even in another room. It is quite possible for a strong round to travel through a body and then keep going through a wall. In ballistics gel tests a 9mm would typically travel about 13 inches after impact, while the 10mm was sometimes over 17 inches. This means that a 10mm could potentially travel through two people at center mass and still keep going. That is a huge amount of power. Of course, a lot of factors go into penetration and penetration is not the sole determinant of how effective a round is at disabling or deterring an aggressor.

However, in the question of bullet penetration from a 9mm versus a 10mm the key lies in the ammunition. More velocity does not always mean deeper penetration. When you switch to jacketed hollow point defense rounds, the penetration is about the same. The reason is that increased velocity causes a hollow point to spread faster after impact and to spread further. This creates more resistance and slows the bullet more than a round traveling at slower speeds. If you hit your target, the hollow point is just as safe as a 9mm round. While we will look at some numbers shortly, keep in mind that bullet type plays just as big a role in power and penetration. Two bullets with the same energy traveling downwind will penetrate differently if one is a controlled expansion bullet while the other is a hollow point.

More importantly, you should always think about the collateral damage before you fire any handgun. If you are not confident that you can hit your target without hurting other people, you do not take that shot. It is that simple. If gun owners are responsible about the way they use their firearms to defend themselves, then power is rarely an issue.

Before we move on, let’s take a look at some numbers for several popular 9mm and 10mm cartridges. We will look at the energy that is carried by the bullets, which transfers to the target and causes damage. And though we have talked briefly about penetration and the pros and cons to a deep penetrating defense-round, we will compare some sectional density data between the two.

Energy

The kinetic energy that is carried by a bullet is transferred to the surrounding tissue of the target. This kinetic energy damages and destroys tissue, organs, and nerves as it passes through. While only one variable in a bullets power, it is an important one and is easily comparable between rounds. Let’s take a look at the kinetic energy of the rounds we have selected for comparison and see if there are any trends we can pick up on.

9mm vs 10mm stopping power comparison

It is very clear from this graph that the 10mm Auto rounds carry a much higher amount of kinetic energy from the muzzle out to 50 yards. Right at the muzzle, the 10mm Auto rounds are carrying anywhere from 300-400 more ft.lbs of energy than the 9mm rounds. A lot of shooters might consider this overkill, and for the range or maybe even intruders, it may well be overkill. For taking large game or punching through cover, it’s the amount of energy that is needed to be confident in stopping a charge.

Though the 10mm Auto has a significantly more amount of energy, the 9mm is not to be scoffed at. For self-defense purposes, having a force of 250+ ft.lbs from 25 yards and in is more than enough to cause enough damage to stop an intruder in their tracks. This decrease in kinetic energy, as we will see, also aids in other characteristics that make the 9mm one of the more popular personal defense rounds throughout the world.

Penetration

The best visual method of measuring penetration is through the use of ballistic gels, which we alluded to earlier. While there is nothing wrong with this method, it sometimes gets blown out of proportion, especially when you are trying to compare it to an armored or heavily clothed target, or an animal with a thick hide and skin.

In this section, we will look at the sectional densities of the various rounds. The sectional density is a measurement that comes from the bullets diameter and weight. The higher the sectional density, the greater the penetration potential. Using this, it doesn’t matter what the target is; we can still make accurate comparisons between rounds. We should note, and we discussed this earlier, that the bullet design and jacket are also major factors in how a bullet penetrates. Hollow points with higher sectional densities still might not penetrate as much as a FMJ with a low sectional density.

Still, we have a good selection of bullet types for our 9mm and 10mm selections so the sectional densities should give us some interesting comparisons.

sectional density and penetration of the 10mm vs the 9mm

Overall, the 10mm Auto rounds have slightly higher sectional densities than the 9mm rounds. With that being said, we can see that it varies from round to round. The 147gr 9mm round has just as high a sectional density as the 10mm rounds. Others that have lower sectional densities still might penetrate more than other with higher sectional densities due to their bullet design. For example, full metal jackets have a higher penetration than hollow points because they will not expand as rapidly.

For the 10mm rounds, you do need extra penetration for some applications such as hunting. Because of this, a lot of 10mm rounds have bullet designs that feature more controlled expansion. This allows the bullets to reach vital organs of larger animals but still provide enough expansion to cause maximum damage to surrounding tissue. While penetration is an important component to a bullets and cartridges stopping power, it is only a small portion of the overall equation and has other factors that contribute such as velocity, which we will move on to in the next section.

Velocity

Talking about velocity is important when discussing two handgun cartridges that are going to be used for self-defense purposes. Velocity plays a key role in terminal ballistics of the firearm, such as the categories we just finished discussing, and it also plays a role in how the bullet behaves when shot. Though the latter isn’t discussed as often because of the ranges shots are most often taken with these rounds.

Still, we felt that velocity is an important component to properly picking the right cartridge for your needs and will take a look at the muzzle velocities out to 50 yards for the rounds we have used in previous sections.

Velocity compared 9mm versus 10mm auto

We can tell right off the bat that the 10mm Auto rounds have a higher muzzle velocity than the 9mm rounds. Most show around 100-200 ft/s increase in velocity, though the heavier 147gr 9mm round shows similar velocity patterns.

This trend continues for the rounds as they move downrange to the 50-yard mark. This trend makes sense as we already know that the 10mm Auto cartridges can pack a substantially larger amount of powder charge than the 9mm and is needed to fire the heavier pullets at a speed where the round would be effective in self-defense and hunting situations. Of course, the speed that these large bullets can travel is most likely going to mean an increase in the amount of recoil.

The increase velocities of the 10mm Auto rounds also affect the bullet’s penetration. The faster rounds can overcome resistance once it hits the target. Of course, expansion is going to slow down the round as it moves through tissue, but as a general trend, when looking at two of the same bullets, the once with a higher velocity is going to penetrate deeper.

Recoil

Recoil is probably the biggest argument in the 9mm vs 10mm debate, but it should not be. Yes, it is true that almost anybody can handle the recoil from a 9mm. Yes, the average 10mm round has noticeably more recoil than the average 9mm round. However, you will see a wide range of results based on the 10mm rounds you choose. If you go with a large, high speed round you will notice the recoil. However, there are plenty of rounds that have a similar kick to a 9mm. Experience handling firearms also plays an important role in handling recoil. Are there instances where the 10mm proved too much for certain agencies such as the short time in service for the FBI, sure, but that does not mean that is a round that no one of could become accustomed to handling with confidence.

Let’s take a look at some recoil data from several popular rounds for both cartridges.

9mm vs 10mm recoil compared

What we are looking at here is the recoil energy produced from firing each specific round. While this is not the actual felt recoil, we can be safe assuming that increased force generated is going to equate to more felt kick.

It’s also important to remember that other factors come into how much recoil is felt when firing both of these rounds. Probably the biggest factor is the weight of the handgun. Shooting the same round from a 2lb and a 1lb handgun is going to feel differently. Most handguns chambered to fire a 10mm handgun is going to be heavier than a handgun chambered to fire a 9mm. This is especially true for handguns designed for concealed carry.

Still, for comparison, we have generated the below data by using a constant firearm weight for all of the rounds.

This is a category where there is no debate. The 10mm Auto rounds produce a significantly more amount of recoil than the 9mm. While the numbers do a good job showing this distinction, we recommend shooting both of these on the range one after another if you have the opportunity. The numbers alone don’t do the difference justice.

For all but the heaviest 9mm round, the 10mm Auto rounds generate 2 to 3X the amount of recoil energy. For handguns, when you get into the 10+ ft.lb of energy for recoil, you are talking about some pretty dramatic recoil and the ability to influence your shot. It also has a big role in putting quick consecutive shots on target.

While the difference in recoil is pretty drastic, it all comes down to the purpose for which you will be using your 10mm. If you are going to be in the bush and need it for protection against predators, then a heavier round and heavier recoil makes sense. Chances are you will only get one shot off anyways. If you are a city dweller and plan on using it against two legged predators, a light round is fine. There is no real benefit to using a more powerful 10mm round for normal self-defense.

Accuracy

In our experience, accuracy with a handgun is all about the handler. At the ranges you are going to be taking shots, there is no wind at play or bullet drop to compensate for. What does effect accuracy the most is inexperience handling nerves, adrenaline, and anticipating recoil.

For the latter, it’s all about practice on the range. We don’t put a lot of stock in other peoples ideas of accuracy. Most of them are phenomenal marksmen. We don’t doubt that, but trying to measure accuracy is difficult in our eyes because of all the factors that can go into it and vary from day to day.

The shooter and the firearm all impact accuracy and to tell which round is more accurate, you need to be on the range with your own handguns and rounds and measure groupings for several days.

With that being said, all of the rounds we have listed in the article and used for comparison have a good reputation for tight groupings at ranges within 25 yards. And since we are talking about the 9mm vs 10mm, recoil is going to play a significant role in any difference in accuracy between these two rounds.

With the 10mm Auto rounds having a significantly more amount of recoil compared to the 9mm rounds there is going to be a learning curve when it comes to placing consecutive shots on target. It’s not impossible, but a lot of potential buyers are going to be looking for a handgun where they can rattle off several shots without having to bring the gun back down several inches to re-center.

Price

In the cost debate between the 9mm vs the 10mm, the 9mm has a slight edge. While the guns themselves are similar in cost, the rounds off the shelf are much more affordable for the 9mm. However, there are two significant points to consider that negate this cost difference. One is that the cost to reload your own 10mm is almost identical to the cost to reload your own 9mm ammo. More and more gun owners are moving to reloading their own ammo to save on cost. I recently wrote an article that showed reloading the average 9mm round saves 73% versus the cost of buying off the shelf.

Moreover, when disaster strikes and ammo is hard to find the 10mm will still be left on the shelf. The 9mm ammo will be the first to go because a much higher percentage of gun owners use 9mm ammo. For me, this is even more important than the cost of the round. Many people hesitated to use their .22 rounds until the option of buying online came around. You simply could not find it in stores. All in all, we would call it a wash for many gun owners.

Let’s take a quick look at how much some specific rounds of this ammunition would cost you at local retailers and online vendors.

AmmunitionPrice (20 Rounds) 9mm Hornady Critical Defense FTX 115gr$17.29 9mm Federal American Eagle FMJ 115gr$14.29 9mm Winchester PDX1 Defender Bonded Jacketed HP 147gr$18.79 9mm Remington Ultimate Defense BJHP 124gr$22.99 10mm Federal Vital-Shok Trophy Bonded JSP 180gr$32.49 10mm Winchester Super-X Silvertip Hollow Point 175gr$21.99 10mm Hornady Custom XTP Jacketed HP 180gr$16.49 10mm Hornady Custom XTP Jacketed HP 155gr$16.49

Unless you’re looking to stock up on some of the high grade hunting ammunition options for the 10mm, there is not a huge difference in price between the better 9mm and 10mm rounds.

You can buy cheaper 9mm ammunition in bulk if you’re just looking to burn some powder at the range and for this, there are not as many options for the 10mm at the same price.

Availability

This is probably the most distinctive difference between these two cartridges. Without a doubt, the 9mm is much more readily available than the 10mm. While the 10mm has had a small resurgence in the handgun world over the last couple of years, you can find an abundance of 9mm ammunition at just about any retail store that carries ammunition. With the 10mm round, you are restricted to large retailers that carry a wide range of ammunition, and even then, you might not be able to find the exact round you are looking for. The internet has made it a bit easier to get your hands on 10mm rounds, but you will also find a lot of boxes out of stock or on back order.

As we stated earlier, there are also a lot more people looking to buy 9mm ammo. For normal day to day use, there is enough to go around, but if the time came to start stocking up heavily, the 10mm, in the end, might be left sitting on the shelf. That’s of course completely hypothetical.

Applications

The purpose of your firearm may greatly determine your argument between the 10mm vs the 9mm. The 9mm has several models with several sizes and several purposes. Just looking at the Glock you have a 17 for home defense, a 19 for primary conceal and carry, and a Glock 26 for a backup or pocket pistol. All of these models have good stopping power but different sizes for anybody’s specific needs. It’s honestly one of the best all around rounds for personal protection. The stopping power and the low recoil make it a round that anyone can become comfortable handling.

The 10mm is a bit more limited. If you needed to, you could use a 10mm for conceal and carry. It would be difficult. The gun is fairly large which makes it hard to conceal and less comfortable. Its primary purpose would be for home defense or wilderness defense and hunting purposes. While this limits the marketability of the 10mm over the entire potential customer base, it makes it the perfect weapon for a portion of the market. The 10mm is a niche around if there ever was one.

Best Rounds

We have looked at several specific rounds for both the 10mm and 9mm cartridge. We want to just briefly pick some of our favorite rounds from this selection for specific purposes. This is by no means a definitive answer for the different categories as we realize that there are a multitude of other options out there and of course, personal preference is a huge factor. Still, for those shopping around, these are our list for the best hunting, self-defense, and range rounds for both the 9mm and 10mm auto cartridges.

Hunting/Wilderness Protection

We don’t recommend the 9mm as a hunting cartridge. If you are looking for a handgun cartridge that is going to be effective hunting or for defense from large predators, you really need to look at larger calibers, such as the 10mm. As far as hunting rounds go, we love the 10mm Federal Vital-Shok Trophy Bonded JSP 180gr rounds. They have the penetration and energy to get through heavy hide, skin, and bones and cause massive damage to vital organs.

Self Defense

One of our favorite 9mm self-defense rounds is the Winchester PDX1 Defender Bonded Jacketed Hollow Point. The 147gr bullet gives it a little bit more punching power and the jacketed hollow point can punch through thicker clothing and still cause a considerable amount of tissue damage. It has a bit more recoil than other 9mm rounds, but it’s nothing you cannot acclimate yourself to after a few hours on the range. Heavier handguns will minimize recoil and makes it perfect for a home defense round.

Range

For this section, we only have a pick for the 9mm, and that is the Federal American Eagle FMJ 115gr rounds. For 50 rounds under $15, it’s hard to find a better deal on reliable ammunition that is not going to jam constantly and foul up your chamber and barrel. They also make a more than effective self-defense round as well.

Conclusion

The comparison between the 9mm vs the 10mm is a tough one for us. The 10mm has die-hard fans that are incredibly loyal. These owners love the power. They like knowing that their target will be disabled with one well-place shot. However, the majority of the market prefers the 9mm. It is more versatile, easier to handle, and safer in the minds of some users. There were undoubtedly several FBI agents that would prefer the power of the 10mm. In the end, the majority ruled and smaller firearms were chosen.

Again, this is a very personal decision. We like both weapons and own both for different reasons. When heading on a hog hunt in March, the 10mm will be along. For everyday purposes, the 9mm is used. Your best bet is to try out both at the range and see how they feel. For most people, if you can handle the recoil the 10mm is pretty incredible. Take your time and find the option that best fits your needs. Despite the differences in the 9mm vs 10mm, both are quality options. We are sure you will be happy with whichever option you choose.

Best Air Rifle Deals

Popular Posts

How far can an air rifle shoot accurately?

0
An air rifle's effective shooting range depends on various factors, including the type of rifle, the caliber, and the power source. Generally speaking, most...

Air Rifle vs BB Gun: Understanding the Key Differences and Choosing the Best Option

0
"Air Rifle vs BB Gun: Unveiling the Key Differences and Choosing the Perfect Weapon for Your Shooting Needs. Delve into this comprehensive guide to...

Air gun 101: How Nitro Piston technology can make your shooting sport more exciting?

0
In the air gun market today, there are many air rifles made with nitro-piston technology Even the best-selling lists on gun retailer's sites have a...

Air gun 101: What is a PCP air rifle? Is PCP gun the best...

0
A PCP air gun is one of five types of air rifles in the market today. PCP air guns have become more and more...

PCP vs CO2 Guns: Which One is Better?

0
The most talked-about debate between hunters and gun enthusiasts is what the best power source of a gun is.  The five main sources of power...