Home Blog Page 35

How To Read Topo Maps: The First Step to Become a Better Deer Hunter in Hill Country

0

Topo maps have a variety of applications, but when talked about in the hunting community it’s generally related to scouting where folks are using them to identify key terrain features. Whether you’re a new hunter or you have a few seasons under your belt, topo maps can seem a bit more intimidating than satellite imagery. However, if you want to hunt whitetail deer in hill country being able to read topo maps is a necessity. Once the very basics are understood it actually becomes quite easy to pick apart key topo features and really get solid visuals of what the real-life ground actually looks like. Once you can visualize, your digital scouting efforts will become much more cohesive with time spent burning boot leather.

Map basics

One of the very basics to reading any map is orientation. This topic is fairly controversial amongst my peer group and has caused more than it fair share of needless miles. Personally, I like to keep my North orientation on all maps facing up. It’s just the way I was taught as a kid, what I’ve seen most often throughout my career in construction, surveying, and has just been the norm throughout my circle of influence. This “North” orientation concept comes from the invention of the compass and understanding of magnetic north from early Europeans. Keeping a North orientation is probably most common but truth be told, there’s really no wrong or right. Whatever orientation used just needs to be consistent amongst communication.

So what is a topo map? A topographic map or sometimes referred to as an elevation map is simply a detailed two-dimensional representation of the Earth’s surface shown as a series of contour lines with each line having a different elevation. The association of elevation with the contour lines allows the reader to interpret the three-dimensional lay and vertical scale of the land.

Contour lines show elevation change and are used to measure the steepness/grade of terrain. Contour lines also signify key terrain features which will always be represented in a consistent manner. Understanding some steadfast rules of contour lines can help you become very efficient at digital scouting topo maps and provide insightful knowledge on how an animal may traverse the topography.

10 Rules of Contour Lines

  • Every specific point on a contour line has the same EXACT elevation.
  • Contour lines separate downhill from uphill.
  • Contour lines do not touch EXCEPT at a vertical edge or cliff. Because each line carries a different elevation it is impossible to have two lines at one elevation.
  • Every 5th line is darker in color and/or thicker. This is known as an INDEX line. Also, INDEX lines will usually carry an elevation number.
  • Contour lines get closer together in steep terrain and farther apart on flat terrain. This is specifically important when looking for bench-type features in the hill country.
  • Contour lines that close or form circles represent a hilltop or a depression.
  • Closed depressions with no outlet have HACHURE marks on the downhill sides of the contour lines.
  • Contour lines will make a V shape when crossing a valley or drainage. The V will always point uphill.
  • Contour lines will make a V or U shape when coming off a ridge top. The V or U will always point downhill. Often times creating a what people refer to as a point and/or spur.
  • Contour lines on the opposite sides of a ridge or valley occur in pairs.

Key Topo Features

You’ll find that the contour line rules above are related to some type of key terrain feature or features. To take those rules a step further lets put some correlation and context around whitetail hunting and show some visuals examples.

Ridge Tops

Tops are fairly easy to identify by either referencing index lines, closed circle, and/or parallel contour lines. Ridge tops are exactly what you’d think….the very top of a ridge. While ridge tops might not offer the most favorable hunting locations, there will typically be a sign there. From my experience, most of that is laid down during night time hours which shifts this feature into a scouting location for both boots on the ground and trail camera sets.

Ridge tops become extremely useful for access routes to and from stand locations. While understanding the big picture of the area (bedding structure, feeding locations, predominant wind directions, travel routes, etc) tops allow you clean access by keeping your scent cone blowing in nondeer areas.

Bottoms

Bottoms or valleys can be identified in the same way ridge tops are but with one addition, traditionally bottoms will have some type of water feature. Bottoms are a great place to look for a sign but again generally speaking most of it will be laid down during night hours. We generally look at these areas for general trail camera locations for the sole purpose of gathering an inventory of the local deer.

Bottoms can be extremely difficult to hunt due to swirling winds and thermal pools however it’s not entirely impossible. Given a zero wind day with high or rising barometric pressure they can be hunted with caution. Bottoms can also offer great access routes because you are able to visually and audibly keep yourself hidden.

Drainages

Drainages are exactly what they sound like….a drainage ditch coming off the hillside and are found in a variety of depths, steepness, and width. Drainages can be spotted on the topo as bends in the majority of the contour lines on the hill said. As the stated rule says above, this will create a V or U shape with the point leading uphill. Wider drainages will look more like a U and narrower drainages will look more like a V. Often times folks may refer to larger drainages as “draws”.

Drainages are one of my favorite features to mark on my map and then go scout. They can provide excellent hunting opportunities pending the sign is there. They not only create a barrier for animals to navigate but double as a pinch point as often you’ll find animals hug the very top of the drainage. They also offer great potential access to stand locations and thermal advantages for evening hunts.

The image above shows 3 different drainages obviously labeled as A,B, and C; each of which have distinct characteristics and advantages. Drainage A is your typical larger drainage that some might refer to as a draw. This might be an area to scout for the potential nighttime sign. Drainage B is smaller in relative profile yet much shorter/steeper than drainage A. This may bode well for access pending there is a sign there to hunt. Drainage C is actually several drainages in close proximity that creates a “bowl” in the hillside. This type of feature is important as the actual drainages and ridgetop reduces potential areas of animal travel creating several pinch points to scout.

Saddles

To whitetail hunters, a saddle is simply a low spot on a ridge top. Generally, it can be identified when contour lines are making a V or U shape off a ridge top that is pointing towards one another from two separate directions. This feature is important because it often provides the path of least resistance for animals to travel and creates a valuable pinch point.

In my opinion, nearly all saddles are at least worth taking a look at. What I’ve found over the last 5 years of hunting public land is that most majorly defined saddles like shown in the photo below will draw human attention, so don’t be afraid to look at saddles that are less subtle.

Points and Spurs

While the verbiage may differ from hunter to hunter, the importance of points/spurs remain the same. Points/Spurs are secondary ridges, usually short in relative length, that stem from the main ridge and are identified by a V or U shape pointing downhill.

For Whitetail hunters points/spurs are key features for a multitude of reasons. The first is that they often provide bedding opportunity for whitetails. These are also great areas to scout for deer trails and rub lines as whitetails will often travel vertical pending the steepness of the point. One advantage to hunting points or spurs is that the wind will generally be consistent once you understand the wind/air currents in the area.

Benches

Image example of a Bench on a topo map

If you’re unfamiliar with this term, a bench is just a relatively flat spot on a hillside. Benches are the hardest of these key features to identify consistently. The more easily seen benches are really just shown by contour lines spread out further in a specific area or elevations compared to the other contour lines of the hillside. With 20′ contour lines a bench can be less than 20′ wide without varying the distance between lines. These subtle benches can often be dynamite spots as they are typically overlooked but the downside is you will likely have to spend some time walking some of these prospected areas.

Benches allow deer to easily navigate hillsides without having to sidehill and also give whitetails a flat area to scrape on. Both great reasons to scout and run trail cameras on benches.

While this article should provide a plethora of knowledge and insight for folks of every map reading ability, don’t feel intimidated if some of this sounds foreign. Everyone has to have a starting point, but hopefully having resources like this and tools like OnX Hunt moves you along that learning curve a tad bit faster. For more helpful content on trail cameras, and hunting strategies be sure to check out the Exodus YouTube Channel and The Exodus Podcast.

Author: Chad Sylvester, Exodus Outdoor Gear Co-Founder/Owner
Multi-Purpose Footwear For Advanced Bowhunting

0
Multi-Purpose Footwear For Advanced Bowhunting
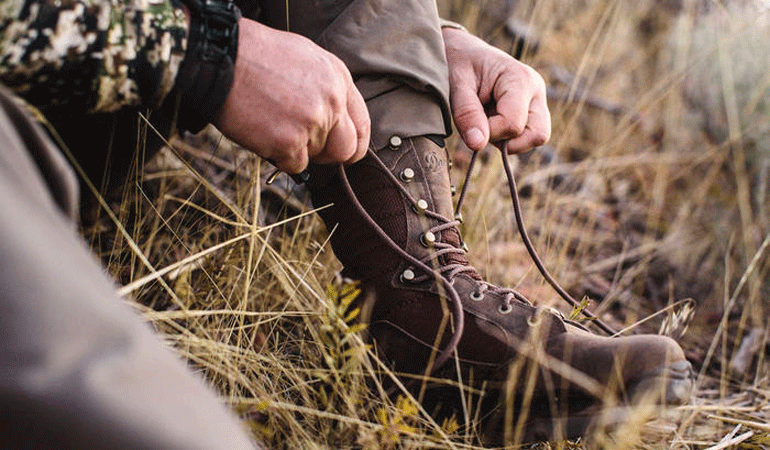
Hunters rarely think about how their foot health and comfort translates to a more enjoyable time in the field, but it’s undeniable that high-quality boots and a good hunt are tightly linked. (Photo courtesy of Danner Boots)

Five years ago I ditched the couch potato lifestyle and started running. It sucked, but as I got into the process I realized that I didn’t hate it as much as I expected — at least most of the time. The runs that were chock-full of misery were those where I didn’t get much sleep the night before or where my feet were beat up.

As far as sleep, that’s fodder for a different article. When it comes to foot-care, I found a few things to be helpful that have migrated from my life as a runner to my life as a hunter. And while it may not seem like a big deal, especially to the whitetail hunter, good footwear is a game-changer.

Here’s why:

From Deer To Elk & Back Again

As a traveling bowhunter, I use to think about western hunting much differently than my midwest whitetail adventures. That’s not the case anymore, and my hunting tactics have converged to mirror both pursuits more closely than I ever thought possible — and so has my choice of boot.

While I do like knee-highs for some whitetail hunting, particularly if I need to wade through a creek or a swamp to get to my spots, I’m mostly reliant on quality leather boots — the kind that are a necessity in the elk mountains.

Danner-Pronghorn-Sidehill.jpg
Western hunts, as well as whitetail forays, demand the right leather boot that provides a high level of comfort, support and traction.

The first thing worth looking for, whether you’re a deer hunter, an elk hunter — or both — is comfort. This is a no-brainer but it’s amazing how a little extra weight or some stiffness in the wrong spot can turn miserable after a few miles. Comfort starts with fit, of course, so if you’re not wearing the right size of boots you’re already in trouble. You might think you can make up for the difference with your sock choice, but you can’t. One hike up a mountain or into the woods to check trail cameras and you’ll be deep into regret and blistered up.

Wear the right-sized boots, and pay attention to how tall they are. Light hikers that fit like running shoes are comfortable, but they belong on trails and not in the timber. For hunting and scouting you need some support, and for most of my pursuits I’m looking for boots that are at least eight inches tall.

This is important in the whitetail woods, but a game-changer in steep terrain. Naturally, it’s easy to think about the uphill aspect of elk hunting and the support your feet will need, but it’s the side-hilling and downhill treks that will get you.

Side-hilling, with 40 pounds in your pack, is a great way to figure out how much support your boots offer. Add in an elk quarter and a lot of extra weight, and you’ll really understand what you’re dealing with when it comes to potential ankle sprains or worse.

For the downhill treks — which tend to be more dangerous than uphill because you’ve got loose rocks and gravity conspiring against you with each step — you’ll need support on the top and the bottom of your boots. Quality tread, the kind designed to grip where grip isn’t easy to find, can keep you upright and in one piece. That’s something hard to understand when you’re breaking your boots in at home in Michigan or Pennsylvania and not faced with the reality of elevation and the up-and-down places elk and mule deer call home.

Whitetail Considerations

Maybe you won’t hunt elk — that’s okay. If you stick to the whitetail woods you may wonder why you need a good pair of boots. Well, you can roll your ankles in deciduous forests, too. While falling down a river bluff isn’t as dangerous as falling down a mountain, it’s not that much fun either. And it’s really not fun in the dark when you’re slipping in to a rut stand you’ve been saving for just the right conditions.

Quality leather boots are a necessity in the elk mountains, as well as the whitetail woods. Take care of your feet and you’ll surely have more enjoyable hunts overall.

The kind of tread that will help you in the mountains will also help you at home on the whities, and in other situations, might save your hide as well. Last fall, while bowhunting some public land in Oklahoma, I was blessed with a buzzer-beater buck. I watched him tip over as the light faded on my last night down there and to put it mildly, was pretty jacked up about filling my tag.

When I climbed down to go look at him, my knee-high boot slipped off of my climbing stick and caused a puckering, find-religion-now moment even though I was attached to a lifeline. The upshot here is that well-designed tread is good for more than the mountains…

Danner Pronghorn — Fifth Generation

The boots that are winning me over this year — and that I’ve scouted deer in, hung stands while wearing, and are traveling with me 19 hours west to hunt elk in Colorado — are the Danner Pronghorns. I’ve covered more ground while bowhunting in the Pronghorns over the years than any other boot, and their latest version is the fifth generation, which represents a new-age return to the old classic 851 design.

Danner-Pronghorn-5G-Close.jpg
Danner has designed its new Pronghorn boots around the TERRA FORCE® NEXT™ platform, which utilizes a shank system to provide total arch support and torsion control — two things that will keep your ankles intact and your feet pain-free after miles of hiking each day.

This means that the fit and comfort level of these new Pronghorns is off the charts, but now those attributes are combined with the TERRA FORCE® NEXT™ platform, which is designed to promote all-terrain arch support, stability and torsion control. They are also built with Vibram® Pronghorn Outsoles so that there will be no complaints when it comes to traction no matter what type of terrain you hunt.

Pronghorns are also waterproof thanks to a GORE-TEX membrane, and can be ideal for mid- to late-season hunts if you opt for the insulated versions (400g or 800g PrimaLoft®). Unlike similarly priced offerings that claim to be waterproof, these Pronghorns are also incredibly breathable. That’s one of those things that is hard to appreciate until you’re putting on the miles in the early season.

The real kicker, at least for yours truly, is that for half of the price of competitor’s boots, you can get the Pronghorns and know that they’ll last. The most disappointing boot experience of my life was finally getting my hands on a pair of $500 leathers, only to toss them two seasons later because they had fallen completely apart. My last pair of Pronghorns lasted me three times as long, and that’s through a lot of use. This is one of the many reasons that for almost two decades, Pronghorns have been the go-to choice for western hunters and whitetail junkies alike, which is something not destined to change any time soon thanks to the newest version.

Conclusion

No matter what you hunt, or how you scout, quality footwear is key. Find yourself a pair of boots that will allow you to do the things you need to do to be successful and remember that the right boot can take you across the flattest whitetail territory as well as up the steepest mountain basin, so choose wisely.

Subsonic 22LR Ammo: What You Need To Know?

0

Are you a noise-sensitive shooter? Then you must know about the “Subsonic 22LR”, a good round for quiet hunting.

Subsonic .22LR ammunition offers a quieter, more accurate, and less disruptive shooting experience. It is a valuable choice for target practice, hunting, and pest control, contributing to firearm longevity and safety.

In this blog post, we’ll delve into the intriguing world of subsonic .22LR, uncovering its unique characteristics, benefits, and versatile applications.

Let’s start..

What Is Subsonic Ammunition?

The term “subsonic” refers to the bullet traveling below the speed of sound, which is approximately 1,125 feet per second (340 meters per second) at sea level.

These loads range in muzzle velocity from 300 fps to 1,040 fps, depending upon the load and its intended purpose, compared to the standard long rifle load with a muzzle velocity of 1,200 fps.

Subsonic cartridges are loaded to operate at speeds less than sound speed, preventing the bullet from making a supersonic shockwave or “crack” as it travels through the air.

Unlike standard ammunition, which propels bullets faster than the speed of sound, subsonic ammo moves at a quieter, slower pace.

This reduced speed is a defining feature of subsonic ammunition, and it significantly impacts how it performs.

What Are The Characteristics of Subsonic .22LR Ammunition?

  • Reduced Velocity: Travels at slower speeds, typically around 1,000 feet per second or slower, keeping the bullet below the speed of sound.
  • Quieter Performance: Generates significantly less noise when fired compared to standard .22LR rounds.
  • Heavier Bullets: Often features heavier bullets for enhanced stability and accuracy.
  • Shorter Effective Range: More effective at shorter to moderate ranges due to its lower velocity.
  • Reduced Recoil: Generates less recoil compared to standard .22LR rounds.
  • Potential for Increased Bullet Expansion: Slower velocity can increase bullet expansion upon impact.
  • Shot-to-Shot Consistency: Offers greater shot-to-shot consistency in terms of ballistics.
  • Versatility: Compatible with various .22LR firearms, including handguns, rifles, and semi-automatic weapons.

How Subsonic .22LR Ammo Differs From Standard .22LR?

Here are the differences between subsonic .22LR ammo and standard .22LR ammo in simple bullet points:

What Is Subsonic 22 LR Good For?

Subsonic .22 LR ammo is a type of ammunition that travels at a velocity below the speed of sound. This makes it much quieter than standard .22 LR ammo, which travels at a velocity of about 1,125 feet per second.

The main applications of subsonic .22 LR ammo are:

  • Hunting small game: Subsonic .22 LR ammo is ideal for hunting small game such as squirrels, rabbits, and groundhogs. The reduced noise makes it easier to approach the animals without spooking them, and the lower velocity also means that the bullets are less likely to over-penetrate and injure other animals.
  • Pest Control: Subsonic ammo is a humane choice for pest control around farms and properties, as it eliminates pests with minimal noise disturbance.
  • Shooting indoors: Subsonic .22 LR ammo is a good choice, as the reduced noise will not disturb others. This makes it a popular choice for target shooting, plinking, and pest control in areas where noise is a concern.
  • Use with a suppressor: Subsonic .22 LR ammo can be made even quieter when used with a suppressor. This makes it a good choice for situations where stealth is important, such as law enforcement operations or pest control in urban areas.
  • Reduced recoil: Subsonic .22 LR ammo has less recoil than standard .22 LR ammo. This makes it a good choice for recoil-sensitive shooters like young shooters or people with disabilities.
  • Firearms Training: Subsonic .22LR ammo is valuable for training, particularly for beginners or individuals learning to manage recoil.
  • Recreational Shooting: Subsonic .22LR ammo is popular among recreational shooters for target practice. Its reduced noise and recoil make it enjoyable for extended shooting sessions.

Overall, subsonic .22 LR ammo is a versatile round that can be used for various applications. It is a good choice for hunters, target shooters, and anyone who wants to reduce noise.

What Are The Safety And Legal Considerations Of 22lr Subsonic?

Safety and legal considerations are essential when using subsonic .22LR ammunition. Here are some important points to keep in mind:

What Are The Pros & Cons Of 22LR Subsonic?

Subsonic .22LR ammunition has pros and cons, and understanding these can help you decide whether it’s the right choice for your shooting needs. Here are the pros and cons of .22LR subsonic ammunition:

Hot New Fishing Gear for the Summer of 2022

0

We try to cover cool new fishing gear as it hits the streets, and as FishTalk reader know, nothing related to fishing is out of bounds. For the upcoming summer of 2022 we have four totally awesome goodies and we’re hoping that at least one of these will be of interest to you no matter what sort of an angler you are. Here goes:

columbia fishing shirt
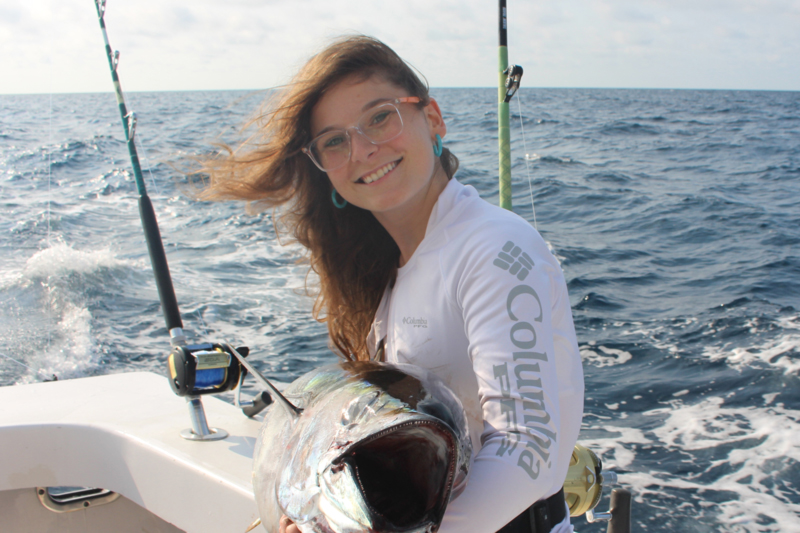
Our intrepid FishTalk fishing reports editor Mollie Rudow gave Columbia’s PFG line a serious workout.

Columbia PFG Shirts and Shorts

The Columbia PFG line makes no false promises — if anything, it overdelivers. Last summer, I tested out some of their gear both on and off the water to see how it holds up. Trying out their Women’s PFG Tidal II Shorts, Women’s PFG Tidal Tee II Long Sleeve Shirt, and Women’s PFG Tidal Tee Hoodie, I stepped onto boats fully outfitted in clothing to fish.

IMO, the most impressive feature of Columbia’s gear is how fast it dries. When tuna fishing in the Women’s PFG Tidal II Shorts and Women’s PFG Tidal Tee Hoodie they got totally soaked in fish blood, then blasted by a saltwater washdown to remove it. The spray removed all the blood, leaving the shorts looking new and dry within 15 minutes. Within 20, the Tidal Tee Hoodie was also totally dry. All of the clothing provided excellent movement and avoided chaffing; scooping crabs off the trotline truly put this to the test. During the scooping the clothes were comfortable, and the shirt cuffs even withstood the blue-crab-claw test. The PFG Tidal II Shorts also have two spacious front zippered pockets, which comfortably held my phone, wallet, and a variety of snacks throughout the day.

All in all, Columbia’s PFG line is lightweight, durable, highly functional clothing that’ll seriously up your comfort and flexibility on the water. Many of their options, including the ones I tested, offer Omni-Shade UPF 50 sun protection, an absolute essential for time on the water. While made for fishing, I also wore the shorts and both shirts while white water rafting, hiking, running, and generally out and about. I ended summer with a tan line proving how much I enjoyed these shorts — if you pick some up, I reckon you will too. Price: $40 to $60.

-By Mollie Rudow

frabill power pack
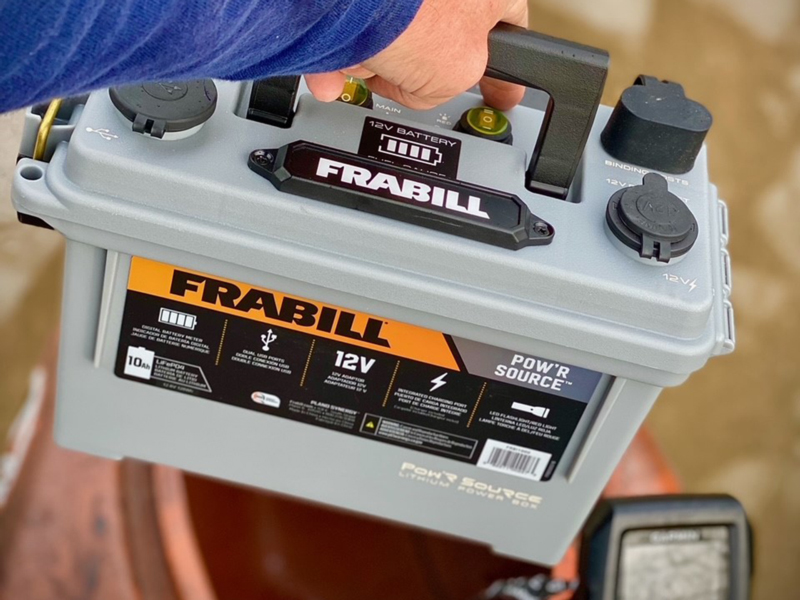
Power up with the Frabill Pow’R Source.

Frabill Pow’R Source

New for 2022, the 12-V lithium battery Pow’R Source from Frabill is sure to power all your camping and fishing needs. The lightweight 10-amp-hour battery is housed in a hardy waterproof case that features two USB ports, a 12-V outlet, and binding ports. Whether you’re powering your fish finder, recharging your phone, or using the flashlight feature to tie on a bait, the Pow’R Source is a surefire way to power up your day out on the water. I tested it while kayak fishing and it powered my Garmin Striker fishfinder for four fishing days in a row, without making so much as a dent in the juice supply. Price: $219.99.

snakehead jawbreaker
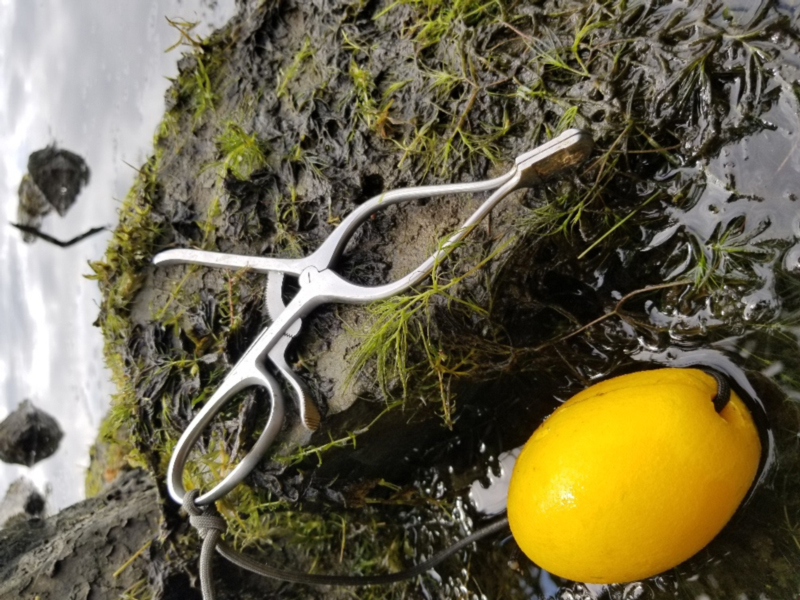
Tame those snakes, with the Snakehead Jawbreaker.

Snakehead Jawbreaker

Prying open the mouth of an angry snakehead is no easy chore, at least it isn’t if you don’t want your fingers perforated, but you’ll have to master the task to retrieve your topwater frog post-catch. Enter the Snakehead Jawbreaker. We spotted this inventive tool while wandering the Pasadena Sportfishing Group’s fishing tackle show, and it struck us as the perfect solution to the average snakehead’s angry attitude. Slide the bill into the fish’s mouth, squeeze the handles, and these reverse-hemostats ratchet open to spread the fish’s jaws wide and keep ‘em that way. The tool also has a large float attached so dropping it overboard isn’t a disaster. Price: $39.99.

quatro braid fishing line
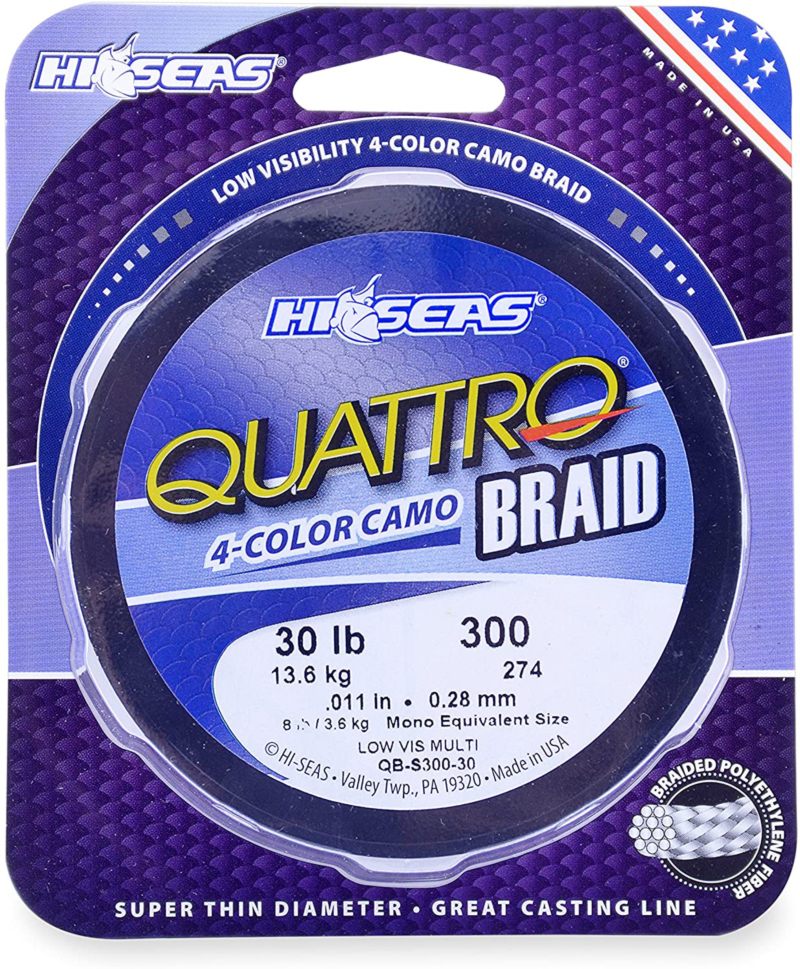
Looking for a line that’s better than the average braid? Check out Quattro Braid.

Quattro Braid Fishing Line

Ever wonder what braid line looks like underwater? Well, the fish won’t tell us. We can, however, try casting with camo. We did just that after spooling up with Hi Seas four-color camo Quattro Braid in 20-pound test. The concept behind Quattro is incorporating blue, black, green, and red colors patterned in short random lengths, to break up visual patterns in the water. Yet you can still spot this line above the waterline like bright-colored hi-vis lines — without tipping off the fish to your line’s presence. This line feels like other braids with zero stretch and sensitivity that mono can’t even dream of coming close to. However, made with tightly woven ultra-high-molecular polyethylene fibers, it also offers a bit less diameter than some competitors and measures up at .008 inches versus the common .009 inches. If you like the idea of casting with 20-pound line that has the diameter of six-pound mono and offers a unique way to visually deceive those dwellers of the depths, check this stuff out. Price: $25.99/300-yard spool.

-By Staff

How to Hunt Squirrel: 13 Hunting Tips (Best Times, Guns, & More)

0

1. Review the Legal Terms

Most importantly, you must have the legal right to go squirrel hunting. Before you head off to the woods, get a small game license (you need licenses for almost all types of game) for the place you are going to hunt.

The terms for attaining a license vary by state or province. So, review the regulations for hunting squirrels in your specific area.

You might only be able to go hunting during specific times of the year when it is squirrel season. This season takes place in most regions during the fall and winter months. The dates vary by each place. There are also rules on where you can hunt.

You may be allowed to hunt on a certain state or provincial park grounds. Some places require you ask for direct permission from the property owner before you start hunting.

Check the bag limits, too. There may be a limit to how many squirrels you can hunt in one day, as well as during an entire season.

2. Choose the Right Time

Look for squirrels during the early morning or late afternoon hours because squirrels are most active at these times. Morning is when squirrels go out to look for food.

It is easy and necessary for them to find food early in the day when they are at their hungriest. Avoid hunting squirrels in inclement weather, as like deer, they move around and can be harder to track.

Late afternoon to early evening is when squirrels bring food back to their habitats. This is when most squirrels are busy foraging, so you should be able to spot them moving around.

3. Look in the Right Places

Plan your hunts in areas where you are the most likely to find squirrels. Check areas where there are lots of trees. These include trees that produce nuts and other items squirrels commonly consume. An oak tree is one of the most popular places to see squirrels.

Any tree that produces the types of nuts or fruit that squirrels enjoy is the place to locate squirrels. Be aware of the type of trees in the area, so you can determine if they are places squirrels may be searching for food.

4. Find the Best Weapon for Squirrel Hunting

Shop around to get the right squirrel hunting weapon before leaving on a hunting trip. Do some target practice using a small game weapon that works best for squirrels.

In the end, choosing the right squirrel hunting weapon boils down to personal choice. Here are the best weapons for squirrel hunting in my opinion:

The Shotgun

Shotgun Squirrel Hunting

Use a shotgun to cover a larger amount of space during your hunt. The spread of a shotgun shell can cover much of a squirrel’s body at once, thus ensuring a better chance of a kill without damaging too much meat.

Be sure to aim the shotgun carefully so it targets the precise area you want to shoot.

Look for a six-shot because it is large enough to target a squirrel without ruining the flesh. Also, choose a barrel 26 inches in length or greater so the shell will move precisely.

Remember, a shotgun will make a loud sound with each round. The noise will most likely scare the other squirrels away. Focus on being precise and cautious when shooting at squirrels or any other small game, for that matter.

When you take aim, remember that the spread on the shotgun shell will move outward a few centimeters after you shoot.

The .22 Caliber Rifle

22 Rifle Hunting Squirrel

The second option for a weapon to use is a .22 caliber rifle (my favorite). This rifle uses a smaller ammunition that targets the squirrel and other smaller game with precision.

The ammo will not damage much of the squirrel meat, either. A .22 caliber rifle produces a longer range than a shotgun. The rifle also lets you go after just one part of the squirrel’s body.

Aim to be accurate and hold your firearm steady. Fortunately, most .22 caliber rifles come with an automatic reloading feature. This feature lets you add multiple rounds into the rifle before you start shooting and release one of the rounds every time you fire the trigger.

Be sure to regularly clean the muzzle and barrel to get a more accurate shot.

This rifle works best when you attach a scope to it. A scope gives you a clearer view of your target. It is also important to take wind, elevation, and distance into account when using a scope.

Bow and Arrow

Bow Hunting Squirrel

Another option for hunting squirrels is with a bow and arrow. But take note that most squirrels are small and less than a foot in length.

Because they are so small, it could be difficult to hunt squirrels with a large bow and arrow. In other words, leave your deer hunting bows at home.

You should sharpen any arrow you use so it can pierce the squirrel’s body with ease. Even so, any arrow you aim incorrectly could cut through too much of the squirrel’s body, leaving little meat or fur to use.

The Air Rifle

While this might not look daunting, an air gun can be deadly to squirrels, and it is the cheaper option of the bunch. Air rifles are best suited for small game like fowl, rabbits and squirrels.

The only major downside is that it requires a lot of practice for a humane kill, as the area that you must hit is very small for an instant kill.

If you want the animal to die instantly and avoid needless pain or tons of frustration, aim for a head shot, which is also difficult to pull off on such small targets. Plus, larger squirrels can absorb multiple hits and evade if you miss the head.

Here’s some smooth action with an air rifle:

Meat Sticks Recipe: How to Make Homemade Venison or Beef Sticks

0

Meat sticks, snack sticks, beef sticks, slim jims, whatever you want to call them, these on-the-go meat snacks are a staple in sausage making. A cousin of jerky, this semi-dry sausage is thinner in diameter and can be made from pork, beef, venison or other combinations of wild game.

Meat sticks are ground then stuffed in either collagen or natural casings. They can be seasoned with virtually any profile and enhanced with add-ins like high-temp cheese, encapsulated citric acid or cultures. No matter how you flavor your meat sticks, they’re the perfect hand-held meat snack and are a great way to utilize your venison or leftover trimmings.

Tools of the Trade

  • Meat Grinder with 3/8” and 3/16” plates
  • Meat Mixer or Your Hands
  • Meat Lug or Large Food-Safe Container
  • Stuffer (13 or 16mm horn)
  • Smokehouse

Meat (and Fat) Instructions for Meat Sticks

For this venison snack stick recipe, making sure you have the right meat-to-fat ratio is important. For the best meat sticks, you’ll want to shoot for a range of 15-25% fat and 85-75% lean for the finished product. Any leaner, and you risk a dry and crumbly texture in your snack sticks. This is especially important when making deer sticks. When working with venison, we recommend adding about 50% venison and 50% pork trim with 50% fat content into your snack sticks. Pork trim, or the trimmings from the shoulder or butt, are typically available at your local butcher shop (make sure to call ahead!). If you want to be really precise, you can separate the visible fat from the meat and weigh them out separately to get the exact ratios right for your venison sticks.

Grinding & Mixing for Snack Sticks

Meat sticks don’t require a very fine grind, as you’ll want to retain some visual separation of fat and meat in your final beef sticks. To get the right snack stick texture, we recommend grinding twice; the first pass through a 3/8“ plate then twice through a 3/16” plate.

Pro tip: Remember to always keep your sausage stick’s meat cold! We recommend popping your meat block back into the cooler between grinds to prevent smearing.

Once each of your proteins has been ground, you can begin mixing either by hand or by using a meat mixer. We recommend doing it by hand for batches less than 25 lbs as you don’t want to break the any encapsulated citric acid or high-temp cheese you’re adding into your snack sticks.

Beef Sticks Seasoning & Additives

Begin by adding your seasoning to your meat sticks. Whether you’re making pork, venison, beef sticks, we recommend our No. 765 Honey BBQ Snack Stick Seasoning or No 769 Willie’s Seasoning. Both have a great depth of flavor that are equally good on their own or mixed with other additives like high-temp cheese. Other favorite meat stick seasonings are:

  • No. 769 Honey Sriracha Seasoning: Sweet with just the right amount of heat. Comes with Speed Cure. Perfect for beef sticks.
  • No 491 Seven Pepper Seasoning: Feel the burn! This blend is just like the name implies with chili, jalapeno, chipotle, habanero and red peppers. Comes with Speed Cure. Amazing for venison sticks.
  • No. 798 Pepperoni Stick Seasoning: The delicious taste of pepperoni in a snack form. Comes with Maple Cure. Best for pork sticks.

If your seasoning doesn’t have any larger pieces, you can season after the first grind and have the grinder do some of the distribution for you.

All of our meat stick seasonings come complete with cure for up to 25 lbs. of meat. Nitrites help preserve the red in the meat in the absence of oxygen and also kill bacteria that can result in food-borne illnesses. Add the appropriate amount of cure for your meat batch to your water and stir to combine.

Once the seasonings and cure have been well incorporated into your meat stick mix, this is the time to add in any other flavorings. We like to add in high-temp cheddar cheese and encapsulated citric acid. Encapsulated citric acid gives a mouthwatering tang to your finished sausage sticks and because it’s coated, won’t break down the texture of the meat.

For meat snack sticks, you’ll want to get a good amount of protein extraction before stuffing. The end results should be sticky and pasty, with seasonings well incorporated throughout. For proper jerky stick flavor and color development, refrigerate your meat mixture overnight or for several hours before stuffing.

Shop Sausage Seasoning

Meat Sticks Casings

Meat sticks have a smaller diameter and are typically made with either natural sheep casings or small collagen casings. We prefer the irresistible “snap” that comes from natural sheep casings, but collagen casings will offer better uniformity and rich mahogany color for your snack sticks. For the best beef sticks, we recommend:

  • 20-22 mm Natural Sheep Casings (Home Pack)

  • 20-22 mm Natural Sheep Casings (Preflushed)
  • 21 mm Mahogany Processed Collage Casings

  • 21 mm Clear Processed Collagen Casings

Shop Sausage Casings

Meat Sticks Processing

One of the trickiest parts of making meat sticks is the processing or smoking process. If the sausages heat too quickly, the fat has the potential of melting out of the beef stick and the encapsulated acid can break down. The key is to gradually increase the temperature to ensure there’s no fat or additive loss inside the snack sticks.

The type of combustible you will use for smoking also has an impact on the taste and smoking process of your meat sticks. It is best to do some research and figure out which material you should use to obtain the best beef sticks.

To make the best smoked snack sticks, we recommend using a high quality electric smokehouse, like the Pro Smoker PK-100, which uses sawdust as smoke fuel. Always refer to your manufacturers instructions for smoking times and temperatures, but as a general rule, our recommend processing schedule is:

  • Set smokehouse to 120° F. Hung sausage sticks and set in the smokehouse to dry for ½ hour (no smoke)
  • Increase temperature to 130° F and smoke for 1 hour (dampers closed 75%)
  • Increase temperature to 150° F and smoke for 1 hour
  • Increase temperature to 170° F and remove smoke
  • Cook until internal temperature of the snack stick reaches 155° F degrees

Shop Smokers

Cooling

There are two ways to cool down sausages and snack sticks after the smoking process: air drying or ice bath. If you choose to air dry, let the meat sticks rest at room temperature for about ½ hour to bring the internal temperature of the snack sticks down to 110 degrees before placing them in the fridge to cool completely. The ice bath method goes faster, but both processes with get the casings to firm up and create the nice snap texture when you bite into your beef sticks.

Once in the fridge, wait until the snack sticks reach an internal temperature of 39 degrees before vacuum packing or storing. If properly sealed and packaged, snack sticks can last in the freezer for several months or in the refrigerator for 2-3 weeks.

Enjoy Your Homemade Beef Sticks!

You now have succeeded in making your own homemade meat sticks! Whether you chose to follow it as a venison or beef sticks recipe, we are sure you will feel proud every time you go for a quick meat snack!

Don’t hesitate to check out all our sausage recipes and meat & sausage tips!

For printable instructions, see our recipe for Honey BBQ Venison Snack Sticks.

What’s the World Record for Largemouth Bass? The Top 15 Bass Ever Caught

0

When it comes to bass fishing, it’s all about the sport of it. As you almost certainly know, bass anglers are out for a brain-bending hunt for big bass and what they want to eat, an unforgettable fight, and a stellar photo at the end of it.

However, before any bass angler starts to resuscitate their catch and watch it swim back off to fight another day, there’s one important detail that has to be gauged for any of it to mean anything: The size.

Any good fisherman will take plenty of pleasure in simply enjoying a nice fight and lipping a fish, but there’s something about the thrill of reeling in a massive bass after it has jumped all over the surface and put your equipment through the wringer.

Today, we’re going to talk about the top 15 largemouth bass ever caught; including where, when, and how they were caught. Using this information, and of course, building your own skills and intuition as an angler might just help you land the next record-shattering largemouth when you hit the water.

Buckle up, and let the history lesson begin.

world record for largemouth bass

1 – Current World Record – Lake Biwa, Japan

First up is the current world record. This impressive 22.311-lb bass was at Lake Biwa in Japan. This is the largest recorded largemouth bass ever caught, and what makes the catch even more impressive is the low number of largemouth in Japan. This is because they were introduced specifically for sport fishing. After a short time, they were labeled an invasive species, and they’re only found in a few select lakes that have now had their native ecosystems ravaged by the predators.

The angler that pulled this bad boy in is Manabu Kurita. He pulled the lunker in with a Deps Slide Swimmer 175 in 2009 at the age of 32. He has since tied his own record in 2022.

2 – Second Place – Lake Montgomery, Georgia

This one goes way back to 1932 when an angler by the name of George Perry caught a 22.25-lb largemouth at Lake Montgomery in Georgia. What makes this record so special isn’t that it’s a world record. Those are beaten by mere ounces across the fishing community all the time. No, this is special because it was the world record for largemouth bass from 1932 all the way until 2009 when Manabu Kurita nabbed the current world record at Lake Biwa. A little over two decades more, and he would have had a century-long world record. More importantly, this was from before sport fishing was big. It was a way to secure food, and anglers weren’t using the most advanced techniques and equipment back then.

Perry caught the monster on a Creek Chub Fintail Shiner; the only lure he and his friend had at the time of the catch.

3 – Third Place – Castaic Lake, California

This is the third-place record as of this writing, and it was made at Castaic Lake in California on March 12, 1991 by Robert Crupi. This whopper weighed 22.063 pounds, and it was just slightly shy of beating the 1932 record George Perry is famous for. Unlike the other records, Crupi didn’t use lures for this impressive catch. It was just good old-fashioned live bait on a basic float rig.

Being in the top three without using a fancy lure is a huge accomplishment, and you’ll be happy to know that Robert Crupi is still angling in the L.A. area now that he has retired as an LAPD officer.

4 – Castaic Lake, California – Michael Arujo

Another impressive catch was made at Castaic Lake in 1991; just seven days before Robert Crupi broke the 22-lb mark, Michael Arujo had caught a lunker weighing 21.75 pounds. That wasn’t quite close enough to George Perry’s long-standing record, but it was a massive breakthrough for the lake, and it is the fourth largest bass ever caught and officially recorded.

Arujo made the catch of his life with two different bummers attached to it. He was just shy of the world record, and a week after getting lauded for the second largest bass in the world, Robert Crupi came in and knocked him down to third place in the same watering hole. It’s a great catch, but you know that one had to sting a bit.

5 – Lake Dixon, California – Jed Dickerson

This 21.688-lb lunker was, like over half of this list, also caught in the Los Angeles area of California. A trend you’ll be noticing pretty quickly with the world record list.

While the bass is just shy of the 22-lb mark, it stood out for its unique spotted pattern and acquired the nickname “Dottie”. Dottie was caught in 2003.

6 – Lake Casitas, California – Raymond Easley

Raymond Easley’s 21.2-lb largemouth turned heads in 1980 as the first bass to breach the 20-lb range since George Perry’s legendary catch. While Easley’s catch isn’t the thing of legend, it is still a record holder. It’s the largest largemouth bass caught on an 8-lb line as of the time of this writing. It’s also worth noting that he wasn’t bass fishing at the time. He was teaching less experienced friends how to catch crawfish, and he happened to get lucky.

7 – Castaic Lake, California – Robert Crupi

Yes, the third-place world record holder is actually known for multiple catches. Just a year before he came close to dethroning George Perry’s age-old record, Robert Crupi caught a 21.1-lb largemouth bass at Castaic Lake, California; not far from where he’d later catch the 22 pounder he’s known for. Again, he’s one of the few world-record anglers to use live bait for their catches, and he’s one of the few with two records to his name.

8 – Miramar Reservoir, California – Dave Zimmerlee

Dave Zimmerlee caught a 20.938-lb largemouth at the Miramar Reservoir in California in 1973. This was not quite as close as Crupi’s catch in 91, but it was the first catch to get somewhat close in 40 years. Not only that, but it was the California state record and held its position for a fair amount of time.

9 – Castaic Lake, California – Leo Torres

Yet another Castaic Lake record, this catch by Leo Torres happened shortly before Crupi’s first 21-lb catch. Unfortunately, it wouldn’t last long as it was still in the 20-lb range at 20.86 pounds. Still, it was the catch of a lifetime shared by few anglers, and it’s yet another testament to the high catch potential of Castaic Lake.

10 – Lake Dixon, California – Mike Long

This 2001 catch was made at Lake Dixon, California by Mike Long. The catch was 20.75 pounds; just mere ounces behind the area’s top records, and it’s one of the top records at Dixon’s watering hole.

11 – Lake Hodges, California – Gene Dupras

This is Lake Hodges first appearance on this list, and it happens to be its largemouth bass record. Gene Dupras boated a 20.25-lb largemouth in 1985 on artificial lures and put the watering hole’s name on the map. While this is on the lower end of the 20’s, it’s still an important catch in the bass fishing world.

12 – Miramar Reservoir, California – Johnny Garduno

This 20.25-lb catch by Johnny Garduno in 1990 is tied with the number 11 spot placed by Gene Dupras, but it doesn’t hold the reservoir record as that was accomplished in 1973 with a 20.983-lb largemouth. Still it is the catch of a lifetime for the angler, and it’s just ounces off of the watering hole’s record; proving big bass aren’t just a fluke at Miramar.

13 – Big Fish Lake, Florida – Fritz Friebel

Florida is known for some good bass fishing, along with some unique species of bass besides largemouth. So, while this is the one and only largemouth record from Florida on our top 15 list, it’s worth noting that the state pops up frequently with longer, more lenient lists.

This one was caught by Fritz Friebel in 1923, and at 20.123 pounds, it held the world record until George Perry set his nearly 80-year-long record.

Again, keep in mind that sport fishing wasn’t really a thing back then, and neither George Perry or Fritz Friebel would be considered professionals nowadays. They were just good old boys enjoying a bit of fishing. That’s an important detail for later.

14 – Lake Mission Viejo, California – George Coniglio

This 2006 record isn’t the biggest in the world, country, state of California, or even Los Angeles county, but it is the Lake Mission Viejo record at 19.7 pounds. George Coniglio still holds the lake record, and there’s no denying that, even compared to the 20+ pound fish on this list, no angler would brush off a 19-pound hog.

15 – Castaic Lake, California – Mark Balloid

What’s a better way to finish our list off than to return to yet another 1990 beast from Castaic Lake? On March 30, 1990, just shortly after Robert Crupi’s first record fish, Mark Balloid caught a 19.5-lb lunker that, while still a bit smaller than Crupi’s catches at the lake, was a massive accomplishment.

largemouth bass world record

How to Use This Information

Now, besides learning about some amazing largemouth, what good is this list for you, the average fisherman? Well, as it turns out, there’s quite a bit you can learn from it.

Here are the points we believe stand out the most.

It’s Not Restricted to Gatekeeping Pros

Did you notice that two of the earliest world-record catches, and several of the more modern catches, weren’t made by professionals on $40,000 bass boats with $700+ rods? Nope. They were caught by regular fishermen who, sometimes, weren’t even trying to catch record-breaking bass.

The point to understand the most from this is that the record holders involved knew how to react to the hard fights those 19 to 22-lb fish were putting them through, and even with the 1920s and 30’s equipment, they were able to work those basses back to their boats. George Perry, the man with the longest-lasting world record, and who is still in second place globally, caught his lunker in a homemade boat with the only lure he had on him. He stated that he wasn’t worried about losing the fish, but he didn’t want to lose his Creek Chub.

You don’t need a second mortgage and a very angry wife to pick up the big fish. You just have to know what you’re doing when they bite.

Water Counts

What makes the current record so impressive isn’t just that it broke George Perry’s almost century-old record. It’s that it happened in Japan where largemouth isn’t even native.

If you noticed, up until that point, the entire top 15 list is comprised almost entirely of Californian lakes and reservoirs, and a couple of names pop up several times to dominate the list. Notably, Castaic Lake shows up a lot.

If you want to catch big bass, you can do that anywhere there is bass. Kurita proved that by shattering George Perry’s long-standing record. However, your chances are quite a bit higher if you find the waters known for producing such abnormal bass specimens.

Unfortunately, that same concept can lead to higher pressure from other fishermen. Everyone wants the world record with sport fishing, and you won’t be the only one running to a well-known watering hole.

Pressure Increases, and Catches Go Down

If you notice, the predominant body of water on this list has basically all of its notable entrees set in the early 90’s. Not a single Castaic Lake record of real notability has cropped up since.

That doesn’t mean big fish aren’t found there, but it given its history of producing jaw-dropping trophy bass and the drop off, it’s safe to assume that “something” has put a damper on what the lake is producing.

That damper is typically waves of fishermen, both responsible and irresponsible, attempting to get in on the trophy-sized action.

This increases pressure and makes fish more finicky, and if the water is being overfished or the fish aren’t being released properly, numbers can drop; effectively ruining what the hole was known for.

Keep that in mind, and don’t always hunt your next trophy at a certain hole just because it’s famous.

Know – Adapt – Catch® more with BassForecast.

Learn More How BassForecast Works

Top 5 Crossbows for 2024 | Deer & Deer Hunting

0

The new crossbows for 2024 are faster, more accurate and quieter than ever.

1. TenPoint Flatline 460

crossbows for 2024

TenPoint’s new Flatline 460 Oracle X with the Burris Oracle X rangefinding crossbow scope gets the job done quickly and efficiently. It launches arrows at 460 fps from a stable, comfortable platform measuring only 26.5 inches long and 7.5 inches wide, with a 14-inch power stroke. The RX8-Cam™ system produces such high speeds, and Vector-Quad™ cable technology utilizes four cables, eliminating cam lean and generating straight-nock travel for pinpoint accuracy. A new, 1.5-inch longer dovetail and new aluminum Scope Struts provide a rock-solid foundation for optics mounting. Plus, the center-mounted riser eliminates the nose-heavy feel of traditional crossbows. Its ultra-light, two-piece TEC-TACTICAL stock is built for comfort, with an adjustable buttplate of up to an inch for a perfect fit. The included Burris® Oracle X™ Rangefinding Crossbow Scope features a built-in laser rangefinder that is activated via wireless remote. It instantly ranges game up to 200 yards away, and allows for 20-yard aiming in the event of a battery failure. Other features include an ACUslide with Auto-Brake Gear System for safe de-cocking, S1 zero-creep 2-stage trigger, Veil Alpine camo and more.

MSRP: $3,299 | tenpointcrossbows.com

2. Wicked Ridge Blackhawk XT

crossbows for 2024

The Blackhawk XT from Wicked Ridge provides numerous features and the power to take down big game at an affordable price. Made in America, it is equipped with the built-in ACUdraw or ACUdraw 50, making cocking and de-cocking the bow quiet and easy. The ACUdraw is a fully integrated, user-friendly crank cocking device that reduces the draw weight to 5 pounds. The ACUdraw 50 takes the 50% reduction rope-cocking concept to an easy-to-use level with self-retracting cords and hooks that magnetically store in the buttstock’s unit when not in use. The bow’s 175-pound draw design consists of a lightweight riser and machined aluminum limb pockets fitted with 11-inch WRX laminated limbs. Powered by heavy-duty, machined 5S Cams and DynaFLIGHT 97 string and cables, the Blackhawk XT measures a narrow 15 inches wide and drives arrows downrange at speeds up to 380 fps. Other features include a fully integrated fore-grip backed up with elongated safety wings to keep the shooter’s hand safely below the bowstring’s path. The fully enclosed triggerguard provides added safety from accidental discharge. Its stock also features a picatinny rail below the front of the barrel to mount additional accessories. The package includes a TenPoint 4×32 scope, three Alpha-Nock Carbon arrows, a cocking device, and a quiver.

MSRP: $549 with ACUdraw; $449 with ACUdraw 50 | tenpointcrossbows.com

3. Barnett Hyper XP 405

This new crossbow utilizes the HyperFlite narrow-diameter arrows for deeper penetration, less wind drift, increased durability and engineering for delivery of maximum kinetic energy. The Hyper XP 405 features a narrow, 10-inch-wide profile when cocked. The parallel limb configuration, combined with a track-mounted string damper, significantly reduces recoil and noise while enhancing accuracy. Pairing the Hyper XP 405 with 22-inch, .204-diameter HyperFlite arrows increases the arrow’s flight and improves downrange accuracy with speeds to 405 fps and 138 foot-pounds of energy. Other features include a metal-injected molded trigger and TriggerTech Frictionless Release Technology. This provides a reliable, crisp, 3-pound pull for consistent shots and improved accuracy. An Anti-Dry Fire (ADF) system and a nock sensor ensure the crossbow cannot fire unless the arrow is loaded correctly. It also comes with finger safety reminders above the fore-grip, an adjustable buttstock for length-of-pull, and a 4-5x32mm red/green illuminated scope for bright or dim light.

MSRP: $599 | barnettcrossbows.com

4. AXE Crossbows AX440

Axe® Crossbows continues to define performance with the introduction of the AX440. At a maneuverable, stable and easily shouldered 30.5 inches long and less than 12 inches axle-to-axle (cocked), the weight of the 440 is centered over the shooter’s hand by way of a balanced shoot-through stock and riser design, and reverse limb system. This configuration empowers the most efficient part of the split limb system from just 15 inches of power stroke to launch bolts at 440 fps. The Axe cam system is linked by cables that run parallel to each other, rather than from the top of one cam to the bottom of the other. This design eliminates cam lean and limb torque, and is further enhanced by a cable brace that engages the riser to aid in the limitation of flex away from the center of the crossbow. The stock of the AX440 also eliminates the rail and utilizes dual carbon guide rods along the entire length of the stock. Combined, all of these features create a free-floating arrow system that minimizes contact, friction and torque along the arrow’s entire path. The result: greater efficiency, accuracy and speed.

MSRP: $2,099.99 | FERADYNE.COM

5. Bear Archery Constrictor Pro

crossbows for 2024

The Constrictor Pro is a proven performer, redesigned for even more power on an extremely compact frame. The Constrictor Pro measures a mere 8.125 inches wide cocked, and roughly 12 inches wide uncocked, making it perfect for hunting in tight quarters. The crossbow is equipped with an ambidextrous top mount quiver that sits on a 360-degree pivot and allows the hunter to position the quiver in any orientation. This ready-to-hunt package includes Illuminated Reticle/Speed Adjustable Scope, three Bear X TrueX arrows, a four-arrow quiver, sling, manual cocking sled and arrow lube/string wax. Available in Stone/Veil Whitetail or Stone/TrueTimber Strata color and camo combinations.

MSRP: $699.99 | beararchery.com

CHECK OUT MORE NEW GEAR FOR 2024:

Top 14 Blinds, Treestands and Targets for 2024

Top 9 Bow Sights, Releases and Rests for 2024

Top 15 Broadheads for 2024

Top 9 Hunting Arrows for 2024

Top 10 Hunting Bows for 2024

Trolling Fishing Tips and Techniques for Walleye

0

Trolling fishing is a popular technique used by anglers to catch this prized freshwater game fish. The method involves dragging one or more baited lines or lures behind a moving boat at varying speeds and depths until a walleye takes the bait.

Trolling for walleye can be done on freshwater lakes or rivers, and requires specialized equipment and techniques to be successful. Walleye trolling can be a fun and challenging way to target these elusive fish and is a favorite among many anglers.

Trolling Fishing A Historical Overview

Trolling Fishing A Historical Overview

Walleye trolling has been practiced for many years, with the first recorded use of this technique dating back to the early 1900s.

At the time, anglers used hand-cranked reels to drag baited lines behind their boats.

As technology improved, the method became more efficient with the development of electric trolling motors and other specialized equipment.

Today, walleye trolling is a popular sport enjoyed by anglers all over the world, and has even led to the development of specialized boats and equipment designed specifically for this type of fishing.

Despite the advancements in technology, the basic principles of trolling fishing for walleye remain the same – drag a baited line or lure behind a moving boat to attract and catch walleye.

Essential Gear For Successful Trolling Fishing

Essential Gear for Successful Walleye Trolling Fishing

To be successful at trolling fishing for walleye, you’ll need a few key pieces of equipment.

The first is a trolling rod and reel setup, which should be strong enough to handle the weight of your lures and the fight of a walleye.

Look for a trolling rod that is at least 7 feet in length and has a medium-heavy power rating. Using a sensitive fishing rod can aid in detecting bites and setting the hook properly

Opting for a reel with a smooth drag system can assist in wearing down a walleye and reducing the risk of line breakage. A drag system that is rated for at least 10-12 pounds can help you handle a larger walleye.

The Penn Fathom Lever Drag 2 is an excellent option to consider.

With its user-friendly design and lever drag system, this reel provides a smooth and intuitive experience.

A level wind reel is ideal for trolling, as it distributes line evenly across the spool and can help prevent tangles.

A downrigger or planer board can help you get your lures to the right depth and keep them there.

Investing in a quality trolling rod and reel setup can make a big difference in your success when trolling for walleye.

You’ll also need a trolling motor or an outboard motor that is powerful enough to move your boat at a slow and steady pace.

2019 Tracker Pt175tf Location

Boats Suitable For Trolling Fishing

Having the right boat can make a big difference in your success.

Ideally, you’ll want a boat that is stable, maneuverable, and has plenty of space for you and your gear.

A flat-bottomed boat, such as a jon boat or a bass boat, can be a good choice for trolling, as they offer good stability and maneuverability in calm waters.

Alternatively, a larger boat with a deep-V hull can be a good choice if you plan to fish in rougher waters or if you need more space and storage for your gear.

Equipping your boat with a trolling motor and depth finder can assist you in navigating the water and identifying the prime locations for trolling fishing.|

To ensure a successful fishing trip, it’s crucial to have a high-quality net and cooler on hand.

Trolling Motors For Walleye Trolling

There are many great trolling motors available in the market, but one of the best options for trolling for walleye is the Minn Kota Endura C2 55. This motor is known for its reliability, durability, and quiet operation. It has a 55-pound thrust, making it powerful enough to handle rough water conditions and strong currents. Additionally, it features a telescoping handle, allowing for easy control and maneuverability. Overall, the Minn Kota Endura C2 55 is an excellent choice for any angler looking for a quality trolling motor for walleye fishing.

Best Lures And Baits For Walleye Trolling

Best Lures and Baits for Walleye Trolling

Walleye are often attracted to lures that mimic the movements of their natural prey, such as minnows or leeches.

The best walleye lure baits can vary depending on factors such as water temperature, time of day, and the specific body of water you’re fishing

Recommended baits are crankbaits, spinnerbaits, and spoons. Designed to attract walleye.

A depth finder or fish finder is also useful for locating schools of walleye.

It also helps determining the depth at which they are feeding.

Recommendations For Lures Based On Water Depth

Recommendations For Lures Based On Water Depth

Less than 15 feet a floating crankbait or spinner rig can be effective.

These lures can be trolled at a slow speed near the surface, which can attract walleye that are feeding on smaller baitfish.

15-30 feet. A deep diving crankbait or a jig and plastic tail can work well in medium depth water.

These lures can be trolled at a moderate speed to get them down to the right depth and keep them there.

Use a downrigger for depths over 30 feet.

A deep diving crankbait or a spoon can work well in deep water, as they can replicate the movements of larger baitfish that walleye may be feeding on.

Speed And Depth For Walleye Trolling

Speed And Depth For Walleye Trolling

Speed and depth are critical factors to consider when trolling for walleye.

Generally, a speed of 1.5 to 2.5 miles per hour is a good starting point for trolling.

You may need to adjust your speed based on the behavior of the fish and the conditions of the water.

If you’re not getting bites, try slowing down or speeding up your trolling speed to see if that makes a difference.

As a general rule, walleye tend to be found at deeper depths during the day and shallower depths in the early morning or evening.

Using a depth finder can be helpful in determining the ideal depth for your lure.

Once you’ve found the right depth, be sure to maintain a consistent speed and depth as you troll to maximize your chances of getting a bite.

Tips For Avoiding Snags And Tangles

Tips for Avoiding Snags and Tangles

Snags and tangles are a common problem when trolling for walleye, and can quickly become frustrating if you’re constantly having to untangle your lines or retrieve snagged lures.

One of the best ways to avoid snags is to keep your lure at the right depth for the conditions of the water you’re fishing in.

Using a line counter reel can be helpful in keeping track of the depth of your lure and reducing the risk of snags.

Locations For Trolling Fishing For Walleye

Locations for Trolling Fishing for Walleye

Wisconsin is home to some of the best walleye trolling locations in the United States.

One of the most popular destinations for walleye fishing in the state are Green Bay & Lake Winnebago.

Green Bay is located in northeastern Wisconsin.

The bay covers an area of over 1,600 square miles and has an average depth of only 20 feet.

Ideal habitat for walleye. Some of the most productive areas for walleye trolling in Green Bay include the waters around the Fox River, the Pensaukee River, and the Oconto River.

Known for producing some of the largest walleye catches in the country.

Other notable lakes for walleye trolling in Wisconsin include Lake Michigan, and Lake Superior.

When choosing a location to troll for walleye, it’s important to consider factors such as water temperature, depth, and structure.

Walleye tend to be most active in water temperatures between 55-68°F and are often found near structures such as drop-offs, weed beds, and submerged rock piles.

It’s also important to pay attention to weather conditions, as changes in wind and cloud cover can affect the feeding patterns of walleye.

Enjyo Your Trip

Enjoy Your Trip Walleye Trolling Fishing

Don’t forget to take in the scenery and appreciate the beauty of the great outdoors while you’re out on the water.

Anglers are required to obtain a fishing license and follow specific size and bag limits for different fish species.

It is important to avoid damaging habitats and follow proper waste disposal methods to avoid polluting waterways. Grab your gear, head out to your favorite fishing spot, and enjoy the thrill of trolling for walleye.

Catch more walleye with our trolling fishing tips & techniques! Learn to choose the right equipment and read the water.

Guided Walleye Fishing With Captain Lonney

For 25 years Green Bay Trophy Fishing has guided and provided helpful information to anglers in and around Door County. We are some of the most experienced fishing guides in Green Bay and pride ourselves on being experts on everything related to fishing in the area.

If you are interested in booking a walleye fishing charter, you can view our rates or contact us here.

If you really must try eating slugs, here’s how to do it safely

0
If you really must try eating slugs, here’s how to do it safely

(Thinkstock)

Once again this year, every lilac in Southcentral seems to be showing signs of the latest surprise invasion. They are each harboring lilac leaf miners. Those brown patches on most leaves contain a caterpillar, one of the life stages of the pest. These eat tissue between the leaves and then use a silk thread to roll up the leaf and create a cocoon so they can pupate.

After a week, the caterpillars are transformed into small, fingernail-size moths. You may have seen them on your lawns. These will lay eggs, which will hatch into caterpillars, and the cycle will repeat. I am not sure how many cycles these moths have here in the summer, but elsewhere there are several. Let’s keep an eye on untouched leaves for the rest of the season and see what happens. Citizen science at work.

Fortunately, we are getting flowers before the leaf damage is visible. And, usually these kinds of population explosions work themselves out as natural predators take care of the problem. I have my fingers crossed.

Perhaps it is best to just see if nature will do her thing. Still, will someone remind me to suggest spraying lilacs with Bt next year just before these guys start eating? You might consider spraying this year if your leaves have not rolled up. And, you can squish the brown patches, but you will be working all day to do just one decent-size shrub.

Speaking of leaves, slugs are always around once eggs hatch early in the season. They have just gotten big enough lately to be seen easily. You know the routine. Trap them outside your gardens with beer or yeast in shallow containers they can get into and drown.

Every year I am asked if our slugs can be eaten. They can, but be careful, as slugs can carry a parasite gained from eating rodent feces which causes a form of meningitis in the human brain. If you are going to eat your slugs, you have to cook them. You also might want to purge their waste systems. I don’t recommend the practice. There are plenty of other strange things to eat out there.

Like mushrooms! The wet weather has caused the annual August explosion of fungi. I shouldn’t have to tell you to not eat any you cannot identify — just like no one needs to tell you to mask up because you already do — but I will! You need a good mycological identification book and, preferably a real experienced guide as well before you eat even the four or so that are all over, easily identified and delicious.

Some folks expend a lot of energy picking them. I leave my mushrooms in place. They are fruits of an extensive underground network, and you are not going to eradicate them. In fact, you don’t want to! Most of the mushrooms that pop up this time of year are fruiting bodies of the vast mycorrhizal fungal network that is feeding our trees. Those amanita? They support the birches in your yard.

You may not know that moose love mushrooms. So do squirrels and other animals. Treat them like summer bird feeders, only look for mammals.

Two question about the ability to grow peonies from seeds collected from plants that are now beginning to produce pods. What a loaded question!

First, seeds are not ready yet. Let the pods develop and collect them in September. These may or may not be true to the parent because they may have cross-pollinated with a different type.

Outside, these seeds are planted in a bed someplace that can be watched and maintained for the four-year-or-so wait for a decent plant. The seeds need a couple of warm months and then the chill of winter. We may or may not get enough warm time before winter here, so you can plant them indoors starting in October.

And finally, should you cut back peony plants to prevent diseases? First, of all, don’t do anything right now. Let your plants continue to grow and feed the root system. I know the standard advice is to remove peony leaves from the garden in the fall. I never have and have not had problems. If you do remove the leaves, make sure to mulch the remains to replace what you took away, and mark where the plant is so you will know next spring. Without this year’s stems it may be hard to find.

Jeff’s Alaska garden calendar

Alaska Botanical Garden: I know you read this, but have you joined, checked the website, gone to a Thursday socially distant picnic and generally taken advantage of this great institution? You should. alaskabg.org

Lawn pattern contest: Keep those wonderful lawn pattern photos coming in. It is not too late to mow a pattern into your lawn. Winner gets an autographed copy of one of my books.

Tomatoes and cucumbers: Cloudy, raining days mean no pollination, unless you be the bee.

Kohlrabi: How long are you going to wait to harvest yours? Baseball, not softball size is the way to go.

Butter and eggs: Their flowers are opening. When you encounter them, pick and remove from the landscape.

Dahlias, delphiniums: Stake yours. Those flowers are heavy when wet.

[Because of a high volume of comments requiring moderation, we are temporarily disabling comments on many of our articles so editors can focus on the coronavirus crisis and other coverage. We invite you to write a letter to the editor or reach out directly if you’d like to communicate with us about a particular article. Thanks.]

Best Air Rifle Deals

Popular Posts

How Far Can a .22 Air Rifle Pellet Travel?

0
"Unveiling the Power: Exploring the Distance Capabilities of a 22 Air Rifle Pellet. Discover the fascinating journey of a 22 air rifle pellet as...

Can a 22 air rifle kill a deer?

0
"Debate over whether a 22 air rifle can effectively take down a deer has sparked curiosity among hunting enthusiasts. With its lower muzzle velocity...

Pump Air Rifles vs Break Barrel

0
Exploring the Pros and Cons: Pump Air Rifle vs Break Barrel - Unveiling the key differences and advantages between two popular air rifle mechanisms....

Synthetic vs Wood Stock: The Final Showdown Between Brunette And Blonde

0
I understand that you’re here to get some quick facts on synthetic vs wood stocks Probably to guide your purchase.  Quick alert - the debate...

What can you kill with a 177 air rifle?

0
"Unleash Your Precision: Discover the Power of a .177 Air Rifle to Take Down Targets with Accuracy. Explore the Versatility and Potential of this...