Home Blog Page 212

AR-15 Cleaning and Maintenance [Ultimate Guide]

0

So you just bought a new AR-15 and took it to the range.

You ripped through a few boxes of ammo and now you’re home and you need to know….how do I clean this thing?

Maybe you’ve pulled the pins and separated the upper and the lower and you have no idea what to do from there.

It looks intimidating, right?

Feeling a bit overwhelmed?

No need for that, cleaning the AR-15 is pretty easy!

I’m going to show you just how easy it is to tear your rifle apart, clean it in depth, and put it all back together without fear of damaging anything or leaving any parts out.

Now…with a quick video too!

If that helped, please subscribe to our YouTube channel since we’re adding new videos every week!

Step One: Get the Tools to Clean Your AR-15

If you already have other guns, and you’re cleaning them like you should be (you are cleaning your guns regularly right?) then you most likely already have just about everything you need to clean an AR-15, except for some AR-specific things like a bore brush for your particular caliber.

If you don’t already have cleaning supplies, or if you want to build a complete AR-15 cleaning kit that you can carry to the range or competitions, you have two options: build a kit, or buy one.

Which one is better?

That’s going to be a decision you have to make for yourself.

If you just want a kit that works, or maybe you don’t shoot your AR a lot and aren’t worried about maximizing your cleaning efficiency, then just buying a pre-made kit is perfectly fine.

But, if you are a high volume shooter and you need to clean your rifle frequently, or you’re like me and just enjoy the Zen-like process of cleaning your guns, you’ll probably want to build the perfect kit to meet your needs.

Let’s look at the pros and cons of these two approaches.

Buying a Pre-Made Gun Cleaning Kit

First, if you want to order a kit that will have just about everything you need, there’s no shame in that. Not everyone has the time or energy to build a kit from scratch, and there are several good options out there. The downsides of buying a totally pre-made kit are you can only reliably find universal cleaning kits that are going to include a bunch of extra brushes and bore snakes that you won’t necessarily need.

All Gun Cleaning Kits

Think of the pre-made kit like an off-the-rack suit. Sure it’ll work, but its never going to be as nice, or as personalized as a bespoke option.

Basically, off-the-rack is fine, but you wouldn’t want to wear it to your wedding or wear it every day.

The same goes for these pre-made kits…you wouldn’t want to rely on them for something important, say, if you’re a competition shooter, and you’ll want a more personalized option if you’re going to be using it a lot.

That being said, these kits are perfectly fine for most folks, and they’ll be good if you have other guns or other AR-15 calibers, or are looking at acquiring some in the future. Our favorite is the GuardTech.

With these kits or any kit, you buy/build, you’ll want to make sure that they include the correct size bore snakes and brushes, as well as the other tools that work with your AR-15. Make sure you match the caliber to your gun, or you’re going to have to buy another…and you’ll feel a bit silly in the process.

Check out all our favorites in Best Gun Cleaning Kits.

Building Your Own AR-15 Cleaning Kit

Because cleaning a gun is a process that can vary so much from person to person, it’s best that you build a kit that meets your own needs. You can always pick up several different pre-made kits and combine them into one giant “frankenkit”.

If you’re going to build your own kit, I recommend buying a nice case such as this Plano 3-Tray Tackle Box with Dual Top Access, but anything from a cardboard box on up will do.

Next, you’ll want a cleaning mat to keep your parts visible and to keep everything organized. A white sheet or tablecloth will do, but I like this Gun Cleaning Mat because it also includes a handy parts list, making it perfect for a beginner.

From there, you’ll want to buy the brushes and bore snakes/rods for your particular AR caliber. I’ve included some links to .223/5.56 caliber ones below since these are the most common flavors of AR on the market, but you’ll need ones that match your particular caliber.

Here are some kits that include more or less everything you need:

  • Gunmaster 223/5.56 AR Rifle Cleaning Kit ($12) – This is the one in my case up top.
  • Real Avid Gun Boss – AR/.223/5.56 Compact Rod-Type Cleaning System Kit ($30)
  • Otis Modern Sporting Rifle & AR Cleaning System ($43)

With these kits, you should have the brushes, bore snakes/rods, punches, and other various and sundry things you will need, other than your consumable cleaning supplies such as solvent, lubes, and cleaning patches.

The only other things you may find useful (especially if you want to get into some light gunsmithing) is a better punch set like this Ultimate Arms Roll Pin Punch Set ($29.99) and an AR-15 Vise Block ($49.99) that fits into the mag well of the rifle so you can secure it in a bench vise without scratching the finish on your gun.

Best AR-15 Cleaning Solvents and Lubricant

  • Hoppe’s No. 9 Gun Bore Cleaner ($7.46)
  • Hoppe’s No. 9 Lubricating Oil ($6.99)
  • CLP Oil, Solvent, and Lube Combination ($33)
  • Ballistol Multi-Purpose Aerosol Can Lubricant Cleaner Protectant ($10) (We love this one so much, we wrote a Ballistol Review)

Step 2: Prep the Area and Clear the Firearm

First, lay out your cleaning mat and throw on some gloves. Some of these chemicals are toxic and you want them in the gun, not on your skin or in your body.

Next, round up all the ammo for your gun, and move it off the table. Seriously. Get it out of the room, if possible. This eliminates the possibility of a round finding its way into the chamber at any point.

Next, clear and render safe your firearm. (That’s fancy talk for making sure the gun can’t go pew, pew pew, or pew pew pew for any reason.)

Here’s the full procedure

  1. Point the rifle in a SAFE direction.
  2. Remove the magazine.
  3. Place the weapon on safe (don’t worry if you can’t because the hammer isn’t pulled back).
  4. Lock the bolt to the rear.
  5. Visually inspect the chamber and remove any ammunition that may not have been ejected.
  6. Release the bolt.
  7. Place the weapon on safe.

Step 2: Separate the Upper Receiver from the Lower Receiver.

Push the take-down pins out and pull the two halves apart. Some pins can be pushed out with your finger, others may require the use of a punch. Be careful whatever you use so you don’t scratch your finish. I recommend a nylon punch from one of the kits above for general use.

Step 3: Remove the Charging Handle and Bolt Carrier Group

Step 4: Disassemble the Bolt Carrier Group

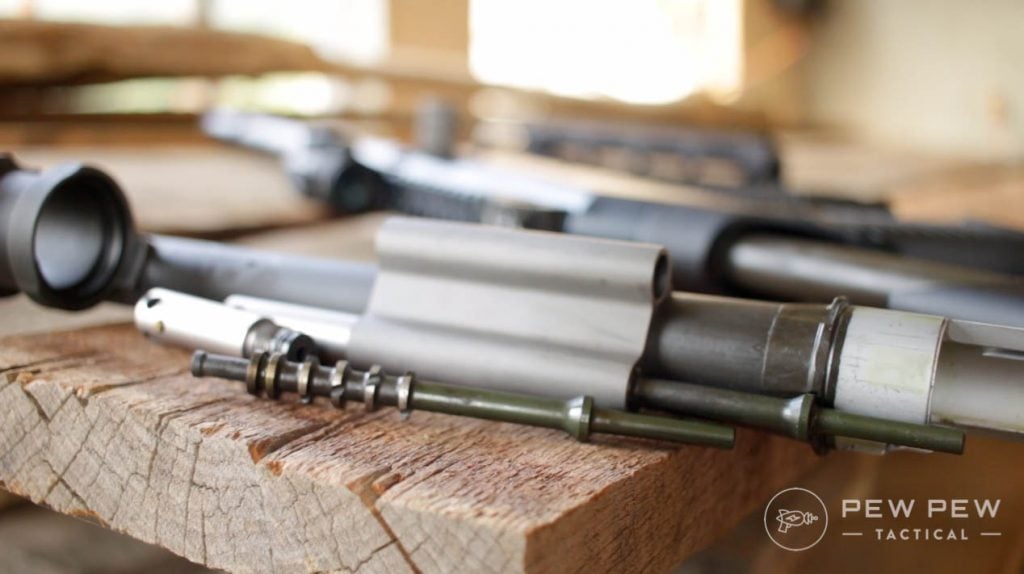
First, push the bolt to the rear (pictured above) and remove the firing pin retaining pin using your pick. Remove the firing pin and set it aside. Rotate the cam pin ninety degrees and remove it. Now the bolt should slide right out!

Step 5: Disassemble the Bolt

Once you have the bolt out of the bolt carrier group, use a punch and your mallet to remove the extractor pin, and then remove the extractor and set it aside.

Step 6: Remove the Buffer and Buffer Spring from the Buffer Tube

Using a calloused finger, or a punch, press down on the buffer retainer. Remove the buffer and spring from the tube. Remember the retainer is under pressure, so try not to push down on it too far and slip once the pieces are out.

Otherwise, you’ll spend the next few hours looking for it after it springs off to the other end of the room.

Step 7: Clean the Chamber and Barrel

Everyone has their method for this, but there are a few things you need to remember.

The most important thing is that you clean the chamber and barrel from rear to front. You want to make sure the debris comes out the front of the barrel, and that any brush you use on a rod is inserted from the rear – go with the bullet.

This helps keep the rifling intact. The movies are wrong; you don’t clean from the muzzle to the chamber!

This area takes some creativity to clean up, but with time you’ll find what works for you. This is a good place to drop a little bit of that Bore Cleaner you picked up.

Step 8: Clean the Bolt Carrier Group

This is easier than the chamber and barrel.

Give everything a good scrub. Look for carbon buildup, especially at the rear of the firing pin.

Clean the extractor well, attention to detail is key. I make sure my rags are all plain white and cleaned after every use with bleach.

Set one aside as an “inspection” rag so you can easily find missed carbon.

When you’re finished, reassemble the bolt carrier group in the exact opposite order of disassembly. Make sure your bolt is fully to the front so it can be reinserted in the upper. A flick of the wrist helps this along.

Step 9: Clean the Buffer Assembly

This part is easy. Get a rag with a little lube on it and wipe it all down.

Unless you took your rifle to a really cool obstacle course, you probably won’t need to get back in the tube itself. Wipe down the spring and buffer and you’re all set.

During this step, if you have a collapsible stock it’s not a bad idea to remove it and wipe down the outside of the buffer. It’s an option if you have been in a messy environment, but not needed for range trips.

Step 10: Clean the Charging Handle and Upper Receiver

Just like the buffer assembly, a lightly oiled rag is all you should really need here.

You’ll find what works best for you, but once reassembled the charging handle should move effortlessly within the upper receiver.

Step 11: Clean the Fire Control Group (FCG) and Lower Receiver

This takes a brush, oil, and patience.

It generally doesn’t get too fouled up. Pay attention to your FCG and make sure there are no cracks on the hammer or anywhere on the lower receiver.

Step 12: Reassemble your Rifle

Work backward from the takedown, just like the bolt carrier group. After the fifth time, you do this it will become second nature! It should look something like this when you’re done.

Step 13: Lubricate your Rifle

There are more details to this, but I’m going to keep it simple for right now. All the pieces of your bolt carrier group and your charging handle should receive a light coat of lubricant. It should have a nice sheen to it.

Your FCG, mag release button, bolt catch button, safety selector should all get a drop or two of lubricant. Fiddle with them a touch to work it in there. Bottom line, anything that moves needs to have a bit of lubricant on it.

Step 14: Perform a Function Check

You put all your ammo away at the beginning of this whole deal (right?) so there should be no way a round is anywhere near the chamber but do a safety check just in case.

Then:

  1. Point the weapon in a safe direction.
  2. Pull the bolt to the rear and release it forward.
  3. Place the rifle on safe. Squeeze the trigger. If the hammer doesn’t drop, you passed that step.
  4. Place the rifle on fire and pull the trigger. The hammer should fall. If it does, then you’re all finished with the hard part.

Step 16: Clean Your Magazine

This is an often overlooked step. It doesn’t need to be cleaned after every trip to the range. Just pay attention to it during loading.

Does it bind up? Can you hear dirt rattling around in there? Is it hard to load?

Cleaning the magazine is just like cleaning the buffer assembly. Use a pick or whatever you have handy to remove the base plate.

Remove the spring and follower. Wipe it all down and clean it up. Reassemble in the reverse of disassembly.

These are pretty straightforward. If you’ve invested in anti-tilt followers for your GI magazines, this is a great time to install them.

Step 17: Maintenance

Just like the break-in procedure, every rifle has its own maintenance schedule. Consult the manufacturer for more. A general rule of thumb is to give your rifle a thorough inspection every thousand rounds. Once you hit the five thousand round mark, it is a good idea to move to inspections every five hundred rounds.

The most common failures occur in the various springs (specifically the extractor spring), and in the O-Rings on the bolt carrier group. If failures begin, start there!

Keeping a clean and properly lubricated rifle will naturally reduce the risk of failure and extend the life of your rifle. During each cleaning, inspect all parts of cracks, burrs and general wear and tear that may bring your rifle out of spec.

Some Final Thing to Consider When Cleaning an AR-15

Do you shoot corrosive ammo? Check out our handy guide for more information and proper cleaning instructions.

Take your time. You want to be as thorough as possible. Really get inside the bolt carrier with every rag and cleaner you possibly can.

When inserting the firing pin retaining pin, remember the big hole is where it goes in. If you put it in the small hole on the other side, you’re going to have a bad day.

Anything that moves on your rifle should get at least one drop of lubricant whenever you clean. Just like an engine, that oil is important! I cannot stress this enough.

That about does it for this one folks, if you have any questions or want to tell us about your own cleaning procedures, drop us a line in the comments below! Want to see what can happen when you DON’T clean your AR…check out 8 Most Common AR-15 Failures.

Ramps ~ Identifying & Foraging Wild Leeks (Allium tricoccum)

0

Wild Leeks, also known as Ramps (Allium tricoccum) are a favorite of foragers in the Northeast, and they often make their way into farmer’s market stands throughout the region. Learn how to find, identify and use wild leeks, all while foraging them sustainably.

Ramps are incredibly popular with foragers and home cooks, perhaps because they’re some of the earliest spring greens. Not the earliest by far, as they in close competition with many other spring wild edibles like homemade maple syrup, marsh marigold, Japanese knotweed, dandelions, chickweed, morel mushrooms, and many others.

I imagine part of their appeal is that they’re what’s called a “spring ephemeral” which means they’re a plant that comes up early for a quick 6-8 week burst, and then they die back for the rest of the year. The foraging window is short, which makes them all the more appealing.

Add in the fact that they’ve seen a lot of press in recent years in high-profile places like the new york times, and you have an incredibly popular tiny onion…

Yes, they are more or less tiny woodland onions. Their intense peppery green onion flavor is distinctive and delicious and makes some of the best darn pesto around.

Rams are only available native to the Northeastern US, and growing up in California I’d never heard of them, but a neighbor took me foraging for Ramps shortly after I’d moved to Vermont more than 15 years ago and I’ve been hooked ever since.

You’ll often see bundles of them for sale at farmer’s markets and natural food stores in the spring (late April to Early May), where they’re sold whole (bulb and all). They’re also available online from D’artagnan and from a few shops on Etsy.

These days, with their increase in popularity and slow growth rate, it’s recommended that you only harvest the greens (leaving the bulbs to come back next year).

The leaves are by far the tastiest part, so it’s a better strategy anyway.

What are Ramps?

Ramps (wild leeks) are a slow-growing native wild edible plant that’s found in the northeastern US. They have a unique growth habit, sprouting in the early spring for a quick burst of growth before dying back for the rest of the year.

They’re known as a “spring ephemeral” which means they’re only around for a short time. They grow under mature hardwood forest canopies, and they’ll sprout before the trees have leafed in for the season. During these early few weeks, they’ll soak up as much sunlight as they can before the canopy fills in, leaving them in deep shade.

This short growth window means ramps grow very slowly, and it takes around 7 years for a ramp to reach seed-bearing age. They tend to grow in dense carpets under hardwood trees, slowly expanding the colony each year.

Native Range for Ramps

While ramps are well known throughout the US thanks to positive press, whole foods markets, and fancy food blogs, they are really only grown in the northeast. It is possible to cultivate ramps, provided you have a mature hardwood forest ecosystem with a reasonably cool winter.

(You can buy sustainably harvested ramp seeds here, if you’re interested in starting your own patch.)

That said, their native range is limited to hardwood forests of the northeastern US. They’re also found in some locations in the southern and central US (range map – zoom for detailed view by county).Wild Leek Ramp Range Map

Identifying Ramps

Wild leek is pretty easy to identify in my opinion. It all starts with seasonality and location. They’re only around for a short window in April and May, and will only be found under hardwood trees.

Ramps can’t compete with other plants in full sunlight, but when hardwoods provide dense shade during most of the growing season, ramps eke out an existence by soaking up all the early spring sunlight before the canopy closes.

Start by looking in hardwood stands in April and May, and they’ll usually grow in dense clusters since little else can live in this dense shade environment.

Ramp plants each have 2-3 leaves with a bright yellow/green color coming out of a red stem. Each plant is small, but it’ll look like a carpet as they grow close in colonies.

The image below shows the base of a wild leek with three leaves, along with the bright red stem leading into the ground. Below ground the perennial bulb is white (but you should leave it there).

If you do try to pull the bulb up by hand, you’ll find it’s almost impossible without a trowel. Ramps are really well-rooted and they don’t give it up easily. The tissues right at the soil level are delicate, and if you touch you can feel the outer layers slip off (like an onion with very thin layers).

Pull a bit harder and the ramp bulb will almost always break off at the soil line (unless you dig it up). That’s part of the plant’s defense mechanism, as they’re predated by deer which could easily pull them up if they didn’t break off with a gentle tug.

That ramp has worked for at least 7 years to make that bulb, so it doesn’t want to give it up easily, to humans or other animal predators.

(I mention this for practicality’s sake since it is honestly an unholy pain to harvest the bulbs, which don’t have nearly as much flavor as the leaves anyway. Stick with the leaves, it’s a more sustainable option, tastes better and it’s a lot less work!)

If the winter was relatively mild, you’ll often find ramp seed heads from the previous year still sticking up on browned stalks. The seeds themselves are shiny, black, and hard in clusters at the top of browned plant material from the previous year.

The seeds can be harvested if you want to start your own ramp patch on wooded land. (They can also be purchased here, harvested sustainably in Vermont.)

The plant’s flower after the leaves have died back, and you’ll see white flowering umbels sticking out of the ground in early summer. They usually set seed by mid to late summer, and you can go back to the ramp patch to harvest seed if you hope to establish a colony elsewhere.

Generally, the seed doesn’t travel far, and each seed head will eventually tip over to land about 8 to 12 inches from the mother plant. That’s one reason for their dense colonies, though they are spread by small mammals too.

The seed is slow to germinate, often taking well over a year, possibly because it’s often held on stiff dead seed stalks for a year or more before it eventually tips over. It’s almost as if they’re sticking out there begging something to come along, scoop up the seed and establish a new patch somewhere else.

Nonetheless, when the seed pods are persistent, it’s an easy way to help identify them. It doesn’t happen every year, and if there’s particularly windy fall weather, intense storms, or just a bad winter they may well all have hit the ground before the next foraging season comes up the following year.

The last identifier is smell…ramps have an intense onion/garlic smell that’s impossible to miss. Gently tear a leaf and it’ll be unmistakable (and your hands will smell like garlic all day).

Ramp Look-Alikes

I’ll put it out there…ramps are pretty easy to identify.

They are a low-growing green plant found under hardwoods with 2-3 bright green leaves, a red stem, and an intense onion-y scent. There’s very little that matches that description, especially in the early spring in the northeast.

That said, every spring plant identification forums are inundated with pictures asking, “Are these ramps!?!?!”

The answer most often is no…because optimistic foragers are really just hoping that anything low growing and green this time of year is actually wild leeks. I’ve seen pictures of hostas…like literally garden hostas in grandma’s flower garden misidentified as ramps (thankfully, hostas are edible too).

There are a number of early spring plants that are toxic though, so you will want to be careful.

There’s a lot of greenery out there in the early spring, more than you’d think looking at lackluster brown lawns in the suburbs that haven’t started re-growing yet. The woods are quicker to rebound, and most of the greenery out there isn’t ramps.

I’d be particularly on the lookout for Lilly of the Valley and False Hellebore, both of which are deadly toxic.

They also look a bit like the Canadian Mayflower, which has edible berries later in the season and is closely related to Solomon’s Plume, and the berries taste much the same. (I have no idea as to the edibility of the leaves in the spring, but it’s a nice thing to come back to later in the season).

Sustainable Ramp Harvesting

Ramps are incredibly well adapted to their growing niche, and they’re still quite common here in Vermont. You’ll see dense patches of them driving around country roads in the spring, especially near sugarbushes.

That’s not the case everywhere though, and in many places they’re over-harvested. They’re actually threatened in Quebec, and their harvest is regulated in some areas.

They’re relatively easy to identify and expensive to buy, so it makes sense to just take to the woods and find your own.

The problem is, you never really know how many other people are foraging a patch (even in the most remote areas). A patch might look huge, but it’s being foraged by dozens of people each year and it’s slowly shrinking given its slow growth rate.

Remember that if you pull up the whole bulb, it’s going to take a seed around 18 to 24 months to germinate and then another 7 years to mature. Pull bulbs every year and you’ll have a problem, especially if many people are harvesting the same patch.

The most sustainable way to harvest ramps is to simply harvest the leaves, and no more than one leaf from each plant. The plants each produce 2-3 leaves a year, so you’ll be able to look as you harvest to make sure there are 1 to 2 leaves remaining so that this slow-growing plant can continue to thrive.

Beyond the pure sustainability angle, there are actually a good number of reasons to harvest just the ramp leaves. The most convincing, in my opinion, is that the leaves are the tasty part.

The bulbs are fine too…but honestly nothing special. They’re more or less like a shallot, mildly onion-y with a bit of crunch. The leaves though, they’re magic. An intense flavor that’s like nothing else, and bright green color to liven up any dish.

For flavor’s sake, harvest just the leaves and then pick up a few shallots at the farmer’s market if you have a dish that calls for cooking with whole ramps.

I’m hoping that a combination of laziness (given that they’re hard to pull), sustainability concerns, and flavor would help convince you to just harvest the leaves. But if you’re still not convinced, there’s one more incredibly good reason to leave the bulbs behind.

Many of the places where ramps grow are pristine wilderness…but some aren’t!

Listening to a podcast interview with Arthur Haines, he explains yet another good reason to exercise enlightened self-interest and leave the bulbs behind:

“Many of the major rivers where wild leeks grow are also home to industrial discharges because there are factories, mills, and other such industries along with them. And many of the things that are produced for these environmental pollutants from the mills turn out to be lipophilic, in other words, they are attracted to fats. And the first place that these environmental pollutants meet up with fats in a plant is in the cell membranes of the roots. There is a lipid by-layer there. And so things like dioxin, and polychlorinated by-phenols, two great examples…they are concentrated in the soils and in the underground storage organs, which includes things like bulbs, corms, roots, and rhizomes of the plants.

Interestingly, things like PCBs are poorly translocated to the aerial portions of the plants. With a couple of exceptions, that means they’re mostly confined to the underground storage organs. Where I’m going with all this, is if you don’t know where those wild leeks were collected, it’s actually a real health insult to you to eat those bulbs because they probably represent the highest level of pollution of that plant.”

Harvesting Ramp Leaves

So even if you don’t buy the sustainability reasons to just harvest the leaves, or quite frankly, just don’t care…there are still really good reasons to stick with leaves.

  • Taste better
  • Easier to Harvest
  • Easier to Clean
  • More likely to be Free of Contaminants

Sustainably Harvesting Ramp Bulbs

Does that mean harvesting ramp bulbs is unsustainable? Not necessarily…

Not everything is quite so black and white.

If you’re harvesting a patch on your land that you know for a fact is not harvested by anyone else, and that patch is healthy and thriving, then it’s totally possible to harvest wild leek bulbs sustainably. That’s a lot of ifs…

Even still, given their low reproduction rate, sustainably means harvesting no more than around 5% of the patch on any given year. That may sound like nothing, but ramps patches can be huge.

I know someone whose been farming the same land for 50 years, and it includes a large sugarbush completely covered with wild leeks. He harvests literally hundreds of bundles each spring and sells them at the farmer’s market each year.

The patch has grown over the past 5 decades, and now he’s retiring and turning the farm (and the managed ramp patch) over to his daughter, healthier than when he started.

Just because you see whole ramps at the farmer’s market doesn’t mean they’re necessarily unsustainable, and sometimes it’s best to reserve your judgment. For all you know that vendor has been carefully managing the patch for decades, carefully stewarding it for the next generation.

Ramp Recipes

Ramp leaves have an intense flavor that’s absolutely unforgettable. If you’ve found wild ramps (or just picked them up at the local farmer’s market), you’ll want to make the most of this short-lived wild spring green.

Their spicy green flavor goes well when balanced by fats and rich dishes, and my absolute favorite ways to preserve ramps is by turning them into ramp compound butter and ramp pesto.

Beyond blending the leaves with fats in butter or olive oil-rich pesto, you can honestly use them anywhere you’d use either fresh or cooked green, or anywhere you’d like a garlic-y flavor.

Try any of these tasty ramp recipes:

  • Ramp Pasta ~ The Mom 100
  • Potato Salad with Ramps and Radishes ~ Relishing It
  • Pizza with Ramps & Wild Mushrooms ~ Saveur
  • Ramp Lasagna ~ Local Kitchen Blog
  • Ramp Jam ~ Saveur
  • Bacon and Ramp Viniagrette ~ Saveur
  • Ramp and Mushroom Tart ~ Saveur

Ramp Bulb Recipes

If you do happen to have access to sustainably harvested whole ramps, these recipes make use of the whole plant (including the bulb).

  • Grilled Ramps ~ Serious Eats
  • Ramp Risotto ~ Serious Eats
  • Pickled Ramps ~ Practical Self Reliance

Spring Foraging Guides

Ramps are one of the first wild edibles of spring, but they’re not the only tasty thing to find this time of year!

  • Spring Foraging: 20+ Wild Edibles to Find in Spring
  • 60+ Dandelion Recipes
  • Foraging Morel Mushrooms
  • Foraging Chickweed
  • Foraging Marsh Marigold
  • Foraging Plantain Herb
  • Foraging Yarrow
  • Foraging Nettles
  • Foraging Burdock
  • Foraging Japanese Knotweed

Foraging Wild Leeks

Polar Bear VS Grizzly Size: A Comprehensive Comparison

0

Polar bears and grizzly bears are two of the most iconic bear species, each displaying unique characteristics and behaviors. When discussing their size, one question often arises: which bear is larger? In this article, we will explore the differences in size between polar bears and grizzly bears, touching on key factors that contribute to these variations.

Polar bears, native to the Arctic region, are considered the largest land carnivores. Males typically weigh between 770 and 1,500 pounds and have a massive build. On the other hand, grizzly bears, found in North America, display a more varied size range. Mainland grizzlies tend to be smaller, with their weight reaching up to 860 pounds in some cases.

These size differences can be attributed to several factors such as habitat, diet, and genetics. By comparing these majestic animals, we will gain a deeper understanding of their incredible adaptations and how they have evolved to thrive in their respective environments.

Comparison of Physical Characteristics

Polar bears and grizzly bears exhibit distinct differences in size and physical characteristics. As the largest bear species, polar bears generally are bigger than grizzlies, with adult males reaching lengths of up to 10 feet. Grizzly bears, on the other hand, are smaller, typically growing up to 8 feet long.

Size and Weight:

  • Polar Bears: Adult male polar bears can weigh up to 1,700 pounds, with females weighing around 50% less.
  • Grizzly Bears: Capable of reaching 800 pounds, male grizzlies usually weigh less than their polar counterparts, while females have a similar weight difference as polar bears.

When standing on their hind legs, the heights of these bears differ as well:

  • Polar Bears: Males measure 5.9 to 9.8 feet tall and can reach more than 11 feet (3.3 meters) when standing on their hind legs, while females range from 5.9 to 7.8 feet.
  • Grizzly Bears: Around 3.5-4.5 feet tall when walking on all four paws and can reach more than 8 feet (2.4 meters) when standing on their hind legs.

In terms of fur color, polar bears have a thick white coat, aiding in camouflage and insulation. Grizzly bears, on the other hand, display different shades of brown fur, often with lighter or darker tips, giving them a “grizzled” appearance.

Enhancing their hunting and swimming abilities, polar bears have larger and more paddle-like paws compared to grizzlies. Moreover, polar bears boast longer necks and narrower heads, adapted for catching seals in the water. Conversely, grizzly bears have a wider and more robust head, along with a noticeable shoulder hump, designed for digging and catching prey on land.

Polar Bear Size and Weight

Overall Size

Polar bears are among the largest members of the bear family. They typically stand around 5 feet at the shoulders, making them taller than their grizzly bear counterparts, which stand a little over 3 feet at the shoulders. The largest recorded polar bear measured 12 feet tall and weighed around 2,209 lbs (1,002 kg).

Weight Distribution

Male polar bears tend to weigh between 770 and 1,500 pounds, while female polar bears usually weigh between 330 and 650 pounds. It is important to note that polar bears’ weight can fluctuate depending on factors such as age, food availability, and their specific habitats.

Grizzly bears, on the other hand, are lighter and have a more varied weight range depending on their subspecies. The largest subspecies of brown bear, the Kodiak bear, has an average weight of 660 to 1,320 pounds for males and 330 to 715 pounds for females.

Grizzly Bear Size and Weight

Overall Size

Grizzly bears have a height of approximately 3.5-4.5 feet at the shoulder, with a total length of around 6.5 feet for both males and females. Although they may not be as tall as their polar bear counterparts, grizzlies are still considered as one of the largest terrestrial predators.

Weight Distribution

The weight of grizzly bears can vary greatly, reaching up to 860 pounds. It is important to note that male grizzly bears typically outweigh females by a significant margin. This sexual dimorphism is evident in their size, with males being around 20% larger than females.

Comparative Analysis

Polar bears and grizzly bears are both impressive animals with unique characteristics. In terms of size, polar bears tend to be larger than grizzly bears on average.

An adult male polar bear can grow up to 10 feet tall (3 meters) when standing on its hind legs, and typically weighs between 900 to 1,600 pounds (400-725 kilograms). Grizzly bears, on the other hand, can reach heights of 8 feet and weigh up to 860 pounds.

In terms of their habitats, polar bears primarily live in the Arctic regions where they can blend into the snow with their white fur. On the contrary, grizzly bears are typically found in North America, particularly in the western parts of the United States, Canada, and parts of Alaska. Their habitats differ significantly, which attributes to some of the differences in their sizes.

Given their size and weight, polar bears have a stronger advantage when competing for resources and hunting prey. However, grizzly bears are also considered powerful hunters, making them formidable competitors in their respective environments.

It’s important to note that the sizes of individual bears can vary, and both species have plenty of individual variance. Factors such as age, sex, and access to food resources can impact a bear’s size throughout its life.

Implications of Size Difference

Hunting Tactics

Polar bears and grizzly bears have different hunting tactics due to their size differences. Polar bears, being larger, rely mainly on their immense strength to catch seals and other marine mammals. They are excellent swimmers and can travel enormous distances in search of food. Grizzly bears, on the other hand, are more opportunistic and adaptable hunters. Their smaller size allows them to be more agile and chase various prey, including smaller animals, fish, and even scavenging on carcasses.

Survival Rate

The size difference between these bear species has a direct impact on their survival rates. Polar bears, with their larger size and massive body weight, can store more fat reserves, enabling them to survive harsh Arctic winters and periods of food scarcity. Grizzlies, being slightly smaller, have lower fat storage capacity, which can affect their survival in difficult conditions. However, their adaptability and diverse diet may compensate for this disadvantage.

Habitat Influence

The distinct size of polar bears and grizzly bears is influenced by their respective habitats. Polar bears have evolved to become the largest bear species, with adaptations especially suited for the extreme Arctic environment. Their large size combined with their thick coat of fur allows them to retain heat more efficiently, crucial for survival in the frigid Arctic temperatures. Grizzlies, predominantly living in North American forests and mountain ranges, have evolved to be somewhat smaller, enabling them to navigate their terrain for food and shelter more efficiently.

Frequently Asked Questions

Is a polar bear larger than a grizzly bear?

Yes, polar bears are generally larger than grizzly bears. Polar bears usually measure between 2.4 and 3 meters in length and can weigh up to 1,700 pounds, while grizzly bears measure around 2 meters in length and weigh about 860 pounds on average.

Would a grizzly bear beat a polar bear?

It is difficult to predict the exact outcome of a hypothetical battle between a polar bear and a grizzly bear. However, polar bears are larger and have a stronger bite force of around 1200 psi compared to grizzly bears, which have a bite force of about 975 psi. These factors give polar bears an advantage, but the outcome would depend on the individual circumstances.

How do Kodiak bear sizes relate to polar and grizzly bears?

Kodiak bears, a subspecies of brown bears, are similar in size to polar bears. Some Kodiak bears can reach up to 1,500 pounds in weight, which is close to the size of the largest polar bears. However, grizzly bears, which can also be considered a subspecies of brown bears, tend to be smaller than both polar bears and Kodiak bears.

What is the largest bear ever recorded and what species was it?

The largest polar bear ever recorded was in 1960 and measured 3.65 meters (12 feet) tall, weighing around 2,209 pounds (1,002 kg). This polar bear holds the record for the largest bear ever documented.

Which is considered more dangerous: polar or grizzly bears?

Both polar bears and grizzly bears can pose a threat to humans. However, polar bears are more likely to be considered more dangerous due to their greater size, increased aggression, and capacity to travel large distances in search of food. It is essential to exercise caution and maintain a safe distance from both species in their natural habitats.

Conclusion

Polar bears and grizzly bears are both remarkable and powerful animals, but they differ significantly in size. Polar bears are generally larger than grizzly bears, making them a force to be reckoned with in the wild. This size difference plays a crucial role in their hunting abilities and overall strength, with polar bears being more capable of taking down larger prey and fending off other predators.

Size differences between polar bears and grizzly bears can be attributed to various factors such as their habitat, diet, and genetics. Polar bears, primarily living in the harsh Arctic environment, rely on a diet of seals and other marine mammals that provide a high-fat intake for survival. Grizzly bears, on the other hand, consume a more diverse diet, including vegetation, berries, and smaller animals, contributing to their varying sizes depending on location and food availability.

In conclusion, the larger size of polar bears compared to grizzly bears has adapted them to their Arctic habitat, contributing to their status as one of the world’s most powerful land predators. Both species, however, play vital roles within their ecosystems, and their unique differences make each bear species fascinating in its own right.

Most Expensive Recurve Bow in the World

0

The best recurve bows can usually cost a fortune. In general, more expensive recurve bows tend to offer an advantage over less expensive counterparts. Especially when competing at a professional level. So, it makes sense if you are an advanced archer or an athlete looking for the most expensive recurve bow in the world.

There are quite a few really pricey bows out there. We are not talking about specialty bows but rather the most expensive recurve bow available to anyone.

The most expensive publicly available recurve bow is the Sanlida Archery Olympic Recurve Bow. This is a common bow used by Olympic athletes and offers one of the most accurate shots in the sport.

We review the Sanlida Archery Miracle Olympic Recurve Bow going over what makes it so special (and expensive).

Most Expensive Recurve Bow in the World

Sanlida Archery Olympic ILF Recurve Bow Review

If you want to compete at the highest level of target shooting, let’s say the Olympics, Sanlida Archery Olympic ILF Recurve Bow is a deservingly good choice. But, you may ask, “why this recurve bow?” First, this recurve bow is designed by Sanlida Archery, a reputable brand known for making archery equipment that offers incredible performance at a great value. Only a few archery brands do it better than Sanlida Archery.

Second, it comes with a full kit. The recurve bow includes everything you need for your target shooting. The interesting thing is it’s a ready-to-shoot bow, meaning that you don’t have to set it all up from scratch. You could adjust it to suit your preference if need be. The bow comes in four separate versions – 66″, 68″, and 70″, with varying tension levels. The item’s weight is 1300g (about 48 lbs), which is quite heavy. The weight is okay since the bow is tailored towards advanced archers and competitive athletes.

Another good reason is the construction. Each accessory is designed with high-quality material, and the bow itself is CNC machined 6061-T6 aluminum to enhance its strength. The limbs are made of premium-quality carbon and foam materials, while the riser is metal to add to the overall strength of the bow.

Table could not be displayed.

Pros

  • Ultimate Performance – the ready-to-shoot bow is designed to offer the best performance, thanks to the included accessories and construction. Archers can attain advanced level shooting with high precision using this equipment and boost their chances of success in competitions.
  • Great Design – with aluminum and carbon the main materials for the parts, you should expect the Sanlida Archery Olympic ILF Recurve Bow to last long enough. It’s strong and has an adjustable wooden grip, with a strong ILF recurve riser and limbs capable of seeing you through any target shooting competition.
  • Powerful – shooting precision is essential in archery. This recurve bow helps you to achieve that. Typically, a heavy bow can hinder shooting efficiency, but not the Sanlida. Despite its 2.8 lbs weight, the bow feels light and powerful simultaneously when holding it. This gives you the confidence to shoot.
  • Excellent Customer Support – if there’s one thing you should commend Sanlida for, it’s their customer service. The manufacturer ensures that customers are utterly satisfied with their products. The customer service is ultra-responsive and ever-ready to attend to your complaints.
  • Good Value for Money – although the price is over $900, the bow still comes at an unbeatable value compared to its rivals. When you consider that it comes with all the accessories needed in the kit, you will be excited to cough out such an amount for the recurve bow. It comes at one of the lowest costs around.

Cons

  • Expensive – this isn’t a con per se, considering that we are reviewing an expensive recurve bow. However, some archers with a limited budget may want to reconsider purchasing the bow.

Structure of the Bow – Riser, Limbs, and String

The ILF riser and limbs are solidly made, while the string is too robust to break. The beautiful anodizing ILF riser is aluminum, making it difficult to break easily even when used intensively. The riser comprises an adjustable wooden grip with bolt systems, sight, and stabilizers that are all durable. Overall, the bow doesn’t feel flimsy.

The lower and upper limbs are made of high-quality advanced carbon and foam materials that flex well. Thanks to these materials, the recurve limbs deliver a greater amount of kinetic energy more efficiently when the bowstring is released. This boosts the speed of the shot. The bowstring in the lowest version is 66”, which is normal for an archery athlete.

The bow’s string is also sturdy and holds power excellently. In addition, it stretches pretty well, which helps to exert more force on the shot for better output. You can’t fault this recurve bow.

Is an Expensive Recurve Bow Worth the Price?

The price of the Sanlida Archery Olympic Recurve Bow is fair, considering that the bow is for advanced target shooting. Beginners may question the price’s outrageousness, but it’s not typically for simple target shooting or practice. There are other bows available for such activities, and they come at a more affordable price than the Sanlida Archery Olympic ILF Recurve Bow.

The recurve bow’s advanced features make it ideal for Olympians. It can enhance the shooter’s precision, thanks to the sight and stabilizers. The wooden grip is also fully adjustable to match the riser, which improves shooting precision and balance. It gives the ultimate performance at an incredible value.

Apart from athletes, archers who need a bow with advanced features for the fun of shooting can also purchase this bow. The bow’s weight can be a hindrance if you aren’t a fit person. But, with all things being equal, you should enjoy recording those great shots with the bow. This bow is worth the price, and we recommend it.

The Sanlida Archery Olympic ILF Recurve Bow includes the following accessories;

  • Bow
  • Instruction manual
  • Sight
  • Advanced string
  • Weight
  • Sight pin damper
  • Arrow rest
  • Carbon stabilizer long rod
  • Riser
  • Limbs damper
  • Stabilizer and riser damper
  • Clicker
  • Cushion plunger
  • Limbs.

Final Thoughts

With Salinda Archery Olympic ILF Recurve Bow, shooting targets has never been easier. It possesses the capabilities to make you a champion in any target shooting competition. Although it doesn’t come cheap, it’s one of the most accurate even when compared to others within its range.

This Sanlida recurve bow is the most expensive recurve bow in the world but that’s what Olympic accuracy takes. With all the accessories included, you don’t need to make extra purchases. You can kickstart your journey to being a champion with this powerful bow.

5 Tips for Preparing for an Unforgettable Hunting Experience

0

Hunting is an exciting and rewarding activity that can bring together family and friends for a shared adventure. To make sure you have an unforgettable hunting experience, it’s important to plan ahead and be prepared. Here are five tips to help you get ready:

Get the Right Gear

Going hunting can be an exciting and fulfilling experience. To make it even more enjoyable and successful, you must be sure to have the right gear. Having the ideal equipment for your hunt is essential for increasing comfort and effectiveness in the field.

In order to get the best out of a hunting session, it’s important to make sure that you are prepared with items such as firearms, boots, clothing, scopes, and camping supplies.

If possible, upgrade your rifle by getting a rifle sling, a bipod, laser sights, a cheek riser, a suppressor, etc.

Purchasing gear appropriate for your preferred game and location would go a long way in ensuring that your hunting trip is successful and memorable.

You can also rent a campervan from Travellers Autobarn, which will give you the freedom to explore and hunt in some of the most beautiful locations across Australia.

Practice Your Skills

An unforgettable hunting experience starts with preparing your skills. Practicing your shooting, tracking, and navigation methods can help you feel confident in the field. A few key elements to practice are accuracy, strength, and speed. Being accurate with your aim allows you to rapidly fire at targets without wasting too much ammunition or being off-target. Having physical strength means that you can move quickly between environments and easily carry any sort of equipment needed for the journey.

Lastly, having a good speed in target recognition gives you the advantage of spotting what it is you’re looking for faster and making better decisions about whether or not to continue pursuing a hunt. With enough hard work and dedication added into the mix, practicing these essential skills will ensure a successful and amazing hunting experience.

Know the Rules and Regulations

As with any activity, it’s important to know the rules and regulations set forth for a hunting experience. Being aware of local laws, conservation initiatives, and any other policies will help ensure a safe, effective trip. Understanding what type of game can be hunted in an area is essential, as well as knowing size requirements, season restrictions, and even daily bag limits.

Having this knowledge before heading out can help ensure that you have the best possible hunting experience. Additionally, knowing the rules can save hunters from potentially costly legal consequences if they are improperly informed about their state’s regulations. Learning the rules is an essential part of preparing for an unforgettable hunting experience!

Research Your Location

No matter what type of hunting experience you are embarking on, research is key to a successful experience. Before you even leave home for your hunting trip, knowing the land and potential areas where the game can be found is imperative for success. Researching the location can help you understand the local climate, terrain, and any regulations or rules placements that may be different from your regular hunting spot.

With advances in technology, such as online mapping systems, geolocation devices, and weather apps, it has never been easier to be knowledgeable about your target location. Gathering this information before setting out on your hunting adventure will ensure that you come prepared with all the necessary items for an unforgettable experience!

Make Safety a Priority

Hunting is an enjoyable and unique experience, but for it to be truly memorable, safety must come first. Before heading out on the hunt, packing the right items and checking them twice is key. A hunter should have basic medical supplies such as bandages and antiseptic wipes in their day pack, as well as a signaling device like a whistle or flare in case of emergency. Being aware of one’s surroundings and engaging in dialogue with other hunters are also important safety tips.

Additionally, hunters should carry a topographical map plus a compass or GPS system so they don’t get lost, wear blaze orange so that other people can visually identify them right away, and locate hunting areas that do not allow motorized vehicles in order to avoid injury from ATV crashes, and stay calm when wildlife spooks — the wet ground may result in slipping and tripping hazards. Taking these steps will help ensure that the hunt remains safe while retaining its special charm.

Bottom Line

Hunting is an incredible experience that requires preparation and dedication. With the right essentials such as accuracy, strength, speed, knowledge of the rules and regulations, research on your target location, and a sense of safety at all times — you can have an amazing hunting experience!

0

“Survival Bows And Who Should Consider Owning One” was the topic of my previous article and we talked about exactly what a survival bow was good for and where they excelled in the world of archery. We even mentioned that such bows may slowly start to be renamed the “compact modern longbow” and as such form a new segment of the archery market more widely accepted than a weapon thought to be useful purely as a survival tool.

Today however we deal with one of the most widely misconstrued perceptions of what makes a good survival bow. In order to do this we need to take a look at the industry benchmark for what is believed to be a good bow and that is of course no other than the compound bow.

We also need to look at a few other options to compare to and this is where more traditional bows such as the recurve bow, the longbow and the compact modern longbow come into play.

I have many a time come across forums filled with pages and pages of people discussing (and sometimes even arguing) about what the best bow for a survival or SHTF situation would be. There is a somewhat clear divide in opinion on what the answer to this question is and it generally comes from two very distinct camps of people.

The first camp is a camp of people who seem to be more open minded. People who like to question things and make their own opinions based on extensive research and personal experience, as well as the actual experience of others. They ask questions, debate with fair reasoning and seem to have experienced the use of many types of bows and equipment suited to the outdoors. They seem to be more experienced in the outdoors in general and have a wealth of knowledge of what it means to be an outdoorsman. It is this camp that seem to be more open minded toward considering a more traditional bow such as a recurve bow or compact modern longbow for a survival or SHTF situation.

The second camp of people seem to be more set in their thinking. They seem to be more biased in their approach to the debate and almost exclusively seem to have little real world outdoors experience other than their annual 200 yard walk to their tree-stand for the yearly whitetail hunt. Added to this they deem any bow other than a compound bow to be substandard, almost without exclusion and with further prodding it normally comes out that that is all they have ever shot.

It is no wonder that newcomers to the world of “survival archery” can be so confused when it comes to choosing a bow for a survival or SHTF situation and its time to put some thoughts on the table and take a look at the pros and cons of what makes a good survival bow and then discuss which type of bow may be better between a more traditional bow and a compound bow. For the purposes of this article we are going to look specifically at takedown bows (recurves, longbows and compact modern longbows) vs compound bows:

Let’s first take a look at what attributes make for an ideal survival bow. Survival bows need to be:

  • Powerful enough to hunt game the size of deer and antelope.
  • Accurate enough to take small game such as rabbit, squirrel and medium to large birds.
  • Durable enough to last a lifetime
  • Easy to maintain
  • Easy to transport and free up your hands for other tasks or to carry other equipment such as rifles for self defense.
  • Light enough to allow for carry of other necessary equipment
  • Simple enough to require no or minimal tools
  • Adaptable enough to allow for multiple users or unit members both left and right handed

Those who are trained and experienced in the outdoors in a wide variety of skillsets including survival, hunting, tactical, backpacking, etc will quickly appreciate ALL of the points above. You see a survival or SHTF situation would incorporate most if not all of these skillsets and not just a hunting skillset. That is why I am kicking off this “debate” with a list of “What would make for an ideal survival bow?”

Now let’s move on to compare takedown bows and compound bows against this list of points.

The Compound Bow definitely has plenty of power and is as accurate as bows come, but when it comes to durability one has to question them by considering the amount of moving parts involved as well as just how “fragile” these parts are when it comes to the bow taking knocks and bumps when spending extended time off the beaten path. Personally if I had to make it through a SHTF situation I would not feel terribly comfortable putting it through even the smallest amount of hardship I may encounter on my journey, especially if I wanted it to last a lifetime.

Ease of maintenance is also a big issue when it comes to a SHTF scenario. One usually requires special tools and jigs to restring and maintain a bow and you certainly won’t be able to carry those around with you. Sure you may have these at home, but if you had to move you would have a problem.

Ease of transport is another big disadvantage to compound bows. Unless you are strapping them to your backpack (which increases the risk of damaging them) you will either need to leave it at a basecamp or carry it in your hand and that not only reduces the tasks you can accomplish and where you can travel, but it will certainly become a nuisance at some stage. Imagine trying to move through thick underbrush or climb up banks or swim across a river. Certainly not ticking the box of easy to transport.

From a tools perspective you will be fine so long as you don’t need to change or maintain anything, but scene as this is a bow that is needed to last a lifetime, you will at some stage need those tools and as mentioned above you will at some stage have issues.

And finally, the last point of allowing for multiple users. A compound bow is great in that it allows for various poundages to be dialled in on the same bow. Which is great right? The drawback is that it allows for either a left or a right handed archer, not both and therefore cannot be used in an ambidextrous way. Luckily most archers are right handed so this point is less important than others above.

The Takedown Bow segment has three main categories in the form of the takedown recurve, the takedown longbow and the compact modern longbow such as the SAS Tactical Survival Bow and the SAS Recon Folding Survival Bow (soon to launch at the writing of this article) from Survival Archery Systems.

Each of these 3 types of takedown bows has its own unique attributes which we shall summarize briefly against each of the points on our list.

Bow power is something that is misunderstood when it comes to actual takedown ability. Native North Americans were harvesting bison, elk, moose and deer with bows in the 30#-40# range and it all comes down to arrow placement and blood-loss. If you hit your quarry with any bow 45# and up in the vitals it is pretty much game over. There is enough penetration power to cause enough blood-loss that the quarry will go down. What is important thereafter is your ability to track the quarry after having given it enough time to bleed-out. So takedown bows are a good choice for a survival or SHTF situation for sure.

The accuracy of takedown bows whilst not as good as that of a compound, is generally good enough for small game if you have put in the practice. Don’t think you can just stuff a takedown bow in your bag, whip it out and shoot a squirrel at 30 yards when you get hungry; you will learn a hard lesson. Takedown bows, unless fitted with a well sighted sighting system take practice to learn to shoot with an instinctive style. Other than that they are accurate enough to do the job and thus tick the box.

Durability of takedown bows with respect to real world abuse is orders better than that of a compound bow as you typically only have 3 major parts securely bolted together. The riser and two limbs. Wooden limbs and wooden risers typical of many takedown recurves and longbows are not as durable as composite limbs such as those used on compact modern longbows such as the SAS Survival Bow range, so choose carefully. Composite materials are not only stronger than wood, but can weather out the elements such as rain, sunshine, heat and cold and generally last much, much longer. Wooden products require much care whilst composite materials can take substantially more abuse.

Aluminum is also a great riser material as it has very stable mechanical properties that engineers can use to accurately develop bows to ensure they are working well below material fatigue limits, thereby ensuring your bow will last a lifetime. This is important to remember; if a manufacturer does not claim to have designed a bow using engineering principles then beware, because it normally means designs are more based on touchy-feely shape decisions rather than on structural integrity through material selection and detailed analysis.

Ease of maintenance is up next and again, takedown bows require very little maintenance and just a tool or two at most. Wood certainly requires maintenance to keep it in good condition, but composite limbs and aluminum risers require little to no maintenance at all. You also don’t need special tools for compact modern longbows such as the SAS bows, but for recurves and longbows you will generally need a stringer and an allen key or two.

When it comes to multiple users takedown bows generally cannot account for different poundage needs from users. You are pretty much stuck with one poundage unless you are carrying spare limbs around with you. Recurves and longbows with cutouts restrict left and right hand usage with the same bow, but compact modern longbows with non-cutout shapes such as that on SAS Survival Bows allow for both left and right hand usage by simply swapping the bow between hands.

Lastly, let’s talk about transport ability and weight. This is where the big gamechanger comes in when it comes to choosing a bow for survival. Takedown bows are all comparatively light enough for easy transport when you have other gear you need to ruck around. From a packability point of view they are even better, because they can fit into large backpacks which not only helps protect them, but get them out of your hand. Compact modern longbows are the most compact of the lot and can even fit into one-day packs if they are shorter than the magic number of 21″.

Straight limb bows such as longbows and compact modern longbows pack down much better than recurve bows do and take up much less space. Recurve and longbow limbs are usually quite a bit longer than compact modern longbow limbs so are only compatible with very large backpacks, but all takedown bows are much more suited than a compound bow to a SHTF scenario.

This is super, super important to understand when making a decision on buying a bow for survival. Skilled and experienced outdoorsmen with all the skills we spoke about earlier will tell you that having a bow that can easily fit in a backpack is pretty much the crux of your decision. Why, you ask? Well its like what my dad used to tell me when I was a kid trying to do stuff in the workshop and I had a whole bunch of tools I was trying to use, “Put that down and use both hands boy.” He was right and it comes down to freeing your hands up. It makes almost everything you do so much easier.

Like carrying a rifle if you are in a tactical survival situation for instance. Or how about dragging your bike rack deer back to camp? Climbing, swimming, hand-to-hand combat, running with a pack; the list goes on.

Having the ability to get your bow out the way is in my opinion THE most important attribute of a bow for survival and this is exactly why Survival Archery Systems developed its patented SAS Tactical and Recon Folding Survival Bows. They not only pack down very, very compact, but they are the only bow on the market that has a solution for the transport and protection of your takedown arrows. Our customer’s feedback speaks for itself and the number of repeat sales purchased for friends and family seals our opinion on why we believe that the SAS Survival Bows should be your bow of choice if you are looking for a compact, silent bow for survival that will not only last a lifetime but will do the job you need it to do, each and every time.

Well I hope that helps you in your decision in which bow to choose.

To get more info and get yourself one of the very popular SAS Survival Bows for your bugout or survival bag click this link now – https://www.survivalarcherysystems.com/products/survival_bow.

What Do Grubs Taste Like? Do They Taste Good?

0

Most people would not find a plate of fried larvae appealing.

However, there are many ethnicities across the world who consume insects on a regular basis.

These groups of people will tell you that edible insects are extraordinarily flavourful and delicious.

There’s also a current trend in the US where people are switching to edible grubs as a protein source since they are energy-packed and nutrient-rich.

They are also easy to grow or find and relatively straightforward to prepare.

If you’re one of the many, who wish to make a conscious effort towards sustainable methods of living and are wondering what do grubs taste like, keep reading to find out.

What are Grubs?

Grubs are the larvae of beetles.

These white worm-like creatures are often mistaken for worms, but they are actually the larval stages of several species of beetles, like the scarab or June beetles.

If you find it hard to identify these creatures, you can look at their color; most larvae are white or off-white.

Their legs and appendages are located near the head, and they can grow up to ¼ or more than an inch long.

The larvae have a C-shaped body that is wrinkled and soft to the touch.

Many of these baby beetles are considered pests that destroy the natural vegetation grown around homes.

These insects are found buried in the ground.

They feed on the roots of plants until they mature into a pupa.

Many insects are eaten worldwide, and grubs are just one variety of bugs considered edible.

Although, once the pupae have completed the chrysalis stage, most adult beetles cannot be consumed.

What Do Grubs Taste Like?

Grubs are a very non-conventional ingredient to have in your pantry, and many might not be aware that such a product is available for consumption.

So, what does it taste like? Well, many have compared it to chicken or even beef.

Some have even said the grubs have fruity flavors.

These creatures are soft and pack a whole lot of flavor in their tiny bodies.

Most people will agree that the larvae taste like soft, tender beef bone marrow.

Some have said the taste resembles bacon when roasted over an open flame.

The bugs can be cooked in many ways and with various ingredients.

Depending on the cooking method, you can improve the flavor of the larvae immensely.

Some communities that consume bugs regularly are known to eat the grub raw.

If you’re bold enough to try them fresh and uncooked, be prepared for a bit of bitterness.

However, that does not last because most grubs have a nutty aftertaste with a cheesy texture.

Not only are they delicious, but grubs are also known to be highly nutritional.

They come packed with protein and all sorts of minerally goodness.

They are rich in Vitamin C, healthy fats, iron, zinc, phosphorus, etc.

Nowadays, many people, even in the west, have accepted these little critters as part of their diet.

Once you get over the fact that they are considered ‘pests,’ you’ll be surprised by how delicious they can be and how easy it is to prepare them.

Can You Eat Grubs?

Before trying anything new, you’re bound to ask, is it good? Or what does it taste like? You may even be asking whether you can eat it.

The latter may be an appropriate question to ask when it comes to this particular food group.

The answer is a resounding yes.

You can undoubtedly consume grubs.

These pasty white creatures are part of a larger group of insects that are considered edible.

If you’re reading this article, you’re most likely venturing into new, unusual culinary territories.

Bugs are definitely a different gastronomic experience.

They aren’t that appealing to look at, but they have intense flavors that will whet your taste buds.

There are places where these small umami-filled edibles are a common item at a dinner table and are enjoyed by the entire family.

Grubs can be cooked and served in several different ways, and people all over the world will claim that their method is the best.

Nonetheless, deep frying, steaming, and roasting are the most popular ways to prepare insects.

So, the next time you come across a plate of creepy crawlies, why not give them a taste?

Conclusion

A lot of research and study is going towards finding alternative protein sources for a sustainable lifestyle.

Grubs, mealworms, and maggots have all been deemed worthy of being served as a dinner menu item.

They are nutritious, filling, and high in calories.

Even though the idea of having worms on your table may be offbeat, you might actually enjoy eating them.

Here’s your sign to go and try out some grubs for your next meal; you will not be disappointed.

Entomophagy might be the change you need to shake up the monotony of life.

About The Author

Crosman Nitro Venom .22 Review

0

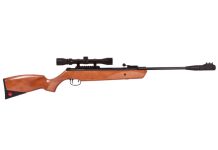
The Crosman Nitro Venom 0.22 caliber air rifle has been loved by many shooters for having some amazing features

That sets it apart from other spring air guns.

With its high-quality technology, quietness, high power, and high velocity,

This one is a hidden gem on the vast sea of air guns that can take your shooting to the next level.

Crosman Nitro Venom .22 – Guntype

crosman nitro venom .22 | crosman nitro venom .22 review

This airgun has nitro piston technology,

which works on the principles of gas ram technology.

Gas ram technology was first invented in 1976 by Ben Taylor and his colleagues who were frustrated with the performance of springers.

Today, Crosman has taken the gas ram technology one step first with its licensed nitro piston technology.

A nitro piston air gun offers lots of advantages in comparison with traditional spring air guns.

I wrote the whole post discussing what nitro piston technology is, its merits, and its demerits here.

However, here is a quick breakdown for you now.

If you’re unfamiliar with this type of technology, then don’t worry.

Nitro piston technology is a newer technology that uses a nitrogen-filled gas ram propulsion system instead of a coiled spring.

There is a nitrogen cylinder and piston inside the chamber which is already held under pressure.

You apply more pressure to it when cocking the gun, and when that pressure is released when you pull the trigger.

Once the trigger is pulled, the gas expands and the piston is propelled forward.

It comes back rapidly after the air transferred ports; since the chamber is sealed, the air can only go behind the pellet.

As a result, the pellet is discharged from the barrel due to the propellant force of compressed air.

A nitro piston air gun offers lots of advantages in comparison with traditional spring air guns.

We have the whole post discussing what nitro piston technology is, its merits, and its demerits here.

click for the lowest price

The internal diameter of the Crosman Nitro Venom is 0.22 caliber, which is known as the king of hunting caliber.

The 0.22 has more knockdown power than the 0.177 ;

Many times the 0.177 won’t hit bone or organ and ends up shooting through the bullet so the animal runs off.

In contrast, the 0.22 caliber is heavier than the 0.177 caliber and is more likely to stop the animal in its tracks. 

For more on how to choose the right air gun caliber for your game, see this post.

The Crosman Nitro Venom 0.22 is a break barrel air rifle.

In order to cock it, you have to slap the muzzle firmly while holding your air gun upward.

You can then insert the pellet (with the pellet’s nose lying forward and the pellet’s skirt facing you).

Once the pellet is inserted, swing the muzzle back to its original position . 

While this may sound complicated, this type of cocking easily becomes second nature.

Additionally, with the break barrel, you can shoot as much as you want.

You never have to worry about shooting capacity or when your air gun is running out of power like other CO2 or PCP air rifles.

Additionally, the Crosman Nitro Venom 0.22 is a single-shot action air gun.

It helps you to not waste bullets as well as provide a better hunting experience since you know that your shot must count. 

The barrel of the Crosman Nitro Venom 0.22 is a rifled steel barrel, which makes the bullets spin.

Furthermore, this barrel is fluted.

Fluting removes material from the cylindrical surface and creates grooves.

This type of barrel is more lightweight compared to non-fluted and it dissipates heat quicker as the air inside the barrel reaches the surface.

(For more on things you should know about air rifle barrels before buying, see this post.)

Stock

The Crosman Nitro Venom 0.22 air rifle has a handsome, brown hardwood stock.

A wood stock adds rigidity but mainly provides the shooter with a feeling of connectedness with the rifle.

Unfortunately, a hardwood stock can expand or contract due to atmospheric changes

So it is recommended that you perform glass bedding (filling gap in stock with epoxy-based material) to keep it in shape.

For more on the in-depth comparison between synthetic and wood stock, see this post.

Other advantages of the Crosman Nitro Venom 0.22 stock is that it is ambidextrous,

Which provides more versatility in the shot, either for practice or location, and can be shared between opposite-arm shooters.

It also has nice checkering in the grip and forearm to prevent slippage from the shooter’s sweat, which enhances the shot and accuracy.

Furthermore, the stock comes with a sculpted rubber recoil pad for a more comfortable recoil position.

Even though the nitro piston produces much less recoil than a traditional spring-piston gun,

Having a rubber recoil pad is very helpful in reducing the amount of recoil and shoulder fatigue from extended shooting sessions.

Crosman Nitro Venom stock

The stock of the Crosman Nitro Venom 0.22 has a lot of interesting features that will help you achieve more accurate shots from the artillery hold position.

The artillery hold, if you’re unfamiliar with it, is an improvement in artillery style shooting that was refashioned by Tom Gaylord, an air gun legend, in 1990.

The artillery hold differed from traditional holds of that time which required a very stiff hold with very little room for recoil.

Tom’s adjustments were not new – in fact, holding the gun with less grip was actually an ancient shooting technique.

However, since his refashioning, it has become more widely accepted. 

The term artillery comes from the fact that even though the artillery machines recoil a lot (sometimes they can kick back up to a few feet ), the carriage remains stable.

Using the same principle, the key to the artillery hold is to let the gun float in your arms when you aim.

This style is much more efficient than a stiff hold since the pellet moves the gun around and, well, you can’t keep the barrel stiff no matter how hard you try. 

When looking at the Nitro Venom you’ll notice that this gun was designed for an improvement in the artillery hold shot.

The stock has a raised cheekpiece which limits the contact area between your cheek and your air rifle.

The forearm is designed in a beavertail style so there is a wider surface area to hold and balance the gun.

Ammo

Naturally, the Crosman Nitro Venom 0.22 air gun uses 0.22 pellets to fire.

These pellets are heavier than 0.177 pellets (with an average weight of 14-21 grains), the shot is more stable and won’t be greatly affected by wind.

It also has more knockdown power and retains more energy after it hits the target.

Therefore, it is a great choice for hunters and pest eliminators who want to get the job done in one clean shot.

For more on the differences between .177 & .22 and which jobs they do best, see this post.

The recommended pellets for the Crosman Nitro Venom 0.22 are the Crosman Hollowpoint, Crosman Pointed pellet, Crosman Destroyer, and RWS 0.22.

Velocity, Accuracy and Power

The Crosman Nitro Venom 0.22 has a very high power output very high velocity compared to other air rifles

And is a great choice for people who want to get rid of nuisance varmints in their property.

This gun produces a velocity of 950 feet per second (FPS) with alloy pellets and 800 FPS with lead pellets.

This rifle has a maximum power of 21 foot-pounds of muzzle energy (FPE; i.e., the kinetic energy of the pellet when it leaves the muzzle).

The average power is 15-18 FPE, which is more than enough to take out tree rats, rabbits, possums, and armadillos in one clean shot. 

PelletsVelocity (FPS)
Lead pellets800
Alloy pellets950
Minimum FPEAverage FPE
2115-18

It is very doable to get one-inch consistent shooting groups at less than 30 yards .

From 40 to 75 yards, you can hit a tin can with this gun.

Some customers have impressive accuracy results, such as:

  • two pellets at the same place at 20 meters out of the box,
  • a half inch grouping at 40 yards,
  • and a quarter-sized grouping at 50 yards.

Additionally, customers can confirm that at 40-50 yards, this air gun can take down squirrels. At 40 yards, it kills turkey. And at 30-40 yards, it takes down a woodchuck.

Distance in yards:203040506075
Tin can  ????
Repeat shot?     
¼    ?  
½   ?   
1 ?    
Squirrels  ??  
Turkeys  ?   
Woodchuck ??   
Crosman Nitro Venom review

The video below will give you general ideas about the power and accuracy of this air rifle based on the ballistic gel test and accuracy test:

Crosman Nitro Venom .22 Optic

The accessory rail is a Picatinny style rail, which is almost identical to the weaver rail, except it has a series of ridges located at precise intervals along the rail.

The Picatinny rail is the most versatile, flexible, and universal of all optic bases.

Crosman Nitro Venom scope

This gun does not come with open sight, but instead has a 3 – 9 x 32 mm CenterPoint scope as the sighting device.

This is a very flexible scope and is suitable for all-range shooting.

Crosman Nitro Venom sight

While researching this air rifle, I found some customer reviews complaining about this scope.

They said it lacks a parallax adjustment.

A parallax adjustment would account for the parallax illusion,

Which is an optical illusion that occurs when a target’s image is not focused correctly at the reticle plane.

In a hunting situation, the  parallax effect inaccuracy is minor:

  • A 4x scope focused at 150 yards will only have 8/10 inch of error in the distance of 500 yards.

Therefore, parallax has no considerable effect inaccuracy as long as your eyes stay in the optical axis of the scope. 

(For more on how many types of air gun sights are out there and which one is suitable for you, see this post.)

Trigger

Crosman Nitro Venom trigger

The trigger safety of this Crosman Nitro Venom 0.22 is manual.

When you want to shoot, you just have to pull the safety forward before you are ready to fire.

When you don’t want to shoot, pull the safety backward to lock the gun.

Noise

As I said earlier in this review, the Crosman Nitro Venom 0.22 is a very quiet gun.

You can shoot it in your backyard without bothering your neighbors or you can take it to the field to enjoy the stealth and silence it brings for hunters.

Shooting range and intended use

The effective shooting range for the Crosman Nitro Venom 0.22 air rifle is less than 100 yards.

It can be used for target shooting, plinking, small game hunting, and small and large pest control.

Accessories

This air gun only has a 3 – 9 x 32 scope as an accessory.

If you find it a little bit heavy, you can buy the sling mount for easier carrying.

Maintenance

The Crosman Nitro Venom 0.22 requires very little maintenance. It only needs Crosman’s  RMCOIL Chamber Oil every few hundred shots.

Crosman Nitro Venom .22 Specification

  • Caliber: 0.22
  • Velocity: 950 FPS with alloy, 800 FPS with lead
  • Weight: 7.375 pounds
  • Barrel Length: 18.63 inches
  • Overall Length: 44.25 inches
  • Capacity: single-shot
  • Action: break barrel
  • Barrel: rifled steel, fluted
  • Open sight: none
  • Optic Rail: Picatinny style
  • Optic: 3-9 x 32 Centerpoint scope
  • Recoil pad: sculpted rubber
  • Powerplant: Nitro piston

Warranty

As of this date, the Crosman Nitro Venom 0.22 has a one-year limited warranty from the date of purchase.

Crosman Nitro Venom .22 Customer Reviews

In general, people love this gun for its high-tech feature, high velocity, awesome power, and extreme accuracy.

Pros and Cons

ProsCons
  • Handsome look
  • High velocity
  • High power
  • New technology with lots of advantages
  • Great scope
  • Quiet noise
  • Impressive stock
  • No parallax adjustment on scope (not a big deal as explained in this review)
  • Made in China
  • Not easy to modify the gun

Price

The Crosman Nitro Venom is only $150, which is very affordable considering all the amazing benefits that you get with this gun. 

There are a couple of different listings online but the listing I found with the lowest price comes even cheaper than the price on the manufacturer’s site or other e-commerce sites like PyramydAir, Walmart, or AirgunDepot.

click for the lowest price

Conclusion

The Crosman Nitro Venom 0.22 is an amazing air rifle that comes at a very affordable price range.

I highly recommend this gun for those who want to own a high-tech, dependable air gun without breaking the bank.

Air gun 101: How Nitro Piston technology can make your shooting sport more exciting?

0

In the air gun market today, there are many air rifles made with nitro-piston technology

Even the best-selling lists on gun retailer’s sites have a bunch of nitro-piston air guns at the top

Such as the Crosman Nitro Venom, Benjamin Trail XL 1500, Nitro Venom DuskCrosman Vantage, and so on.

In this post, we will take an in-depth look at the nitro piston air gun so you will know whether you need one, whether one is right for you, and whether you should buy one at all.

When do nitro piston guns come to the market?

The very first air gun made with nitro piston technology was the Nitro Piston Short Stroke (NPSS).

It was introduced publicly for the first time in the summer of 2009 by Crosman Corporation.

Crosman had this technology licensed under the name Crosman Nitro Piston TM and used it for gun manufacturing in a wide range of air rifles.

How it works?

A nitro-piston air gun is a spring gun without a spring.

Instead of using a coiled spring as the power plant, it uses a nitrogen-filled cylinder.

The nitrogen in this cylinder is already kept under pressure and you put more pressure on it when you cock the gun.

The air is held under tension until you pull the trigger.

When that happens, the pressurized air expands and propels the piston forward.

The piston, in turn, comes abruptly at the air-transferred port.

The compressed air has nowhere to go but behind the pellet, as the chamber is sealed completely.

As a result, the pellet is pushed out of the barrel due to the driving force of the compressed air.

Advantages of nitro piston air gun

Nitro piston guns do have plenty of advantages in comparison with spring air guns. Here they are:

First, a nitro piston air gun is lighter than a spring air gun.

This is a real advantage for the guys in the field all day who carry their guns around.

Second, the nitro piston produces much less recoil than the traditional spring gun.

When you shoot a spring air gun, the spring extends, causes strong vibration to the barrel in all directions, and generates lots of recoils.

With a nitro piston gun, the nitro piston extends smoothly and has less effect on the barrel so it has much less recoil.

The minimal recoil of a nitro piston gun gives us several benefits.

First, since the recoil is inconsiderable, a nitro piston gun requires less practice to hold the gun properly.

Second, because of very little recoil, most shooters (even the average skilled shooters) can shoot accurately with minimum effort.

Third, with the spring gun, if you don’t hold your hands in the same place every time you shoot,

A quarter of an inch in the difference of hand position can mean a half of an inch in difference in Point of Impact (the point the pellet hits the target).

However, since there’s less recoil, when you are in the field and have your gun on a bipod or other shooting rests (rock, tree, etc),

There is virtually no effect on POI EVEN if your hand positions change over the shot cycle.

Third, a nitro piston gun fires 55 % faster than a coiled spring gun and 15% faster than a simple gas piston.

It means that a nitro piston has a faster lock time (the time the pellet remains in the barrel until it is discharged)

And a faster lock time means better accuracy.

Fourth, a nitro piston is not affected by the weather.

With a spring gun, the main coiled spring is lubricated with grease.

When the weather gets cold, springs get harder and tougher.

So it slows down the gun and makes it hard to cock. 

With a nitro piston, the nitro cylinder is lubricated with high-tech lubrication

So it operates almost the same regardless of the outside temperature.

Fifth, a nitro piston can be left cocked for days.

With a springer, if you left the gun cocked for a long time, the spring would lose its strength which leads to a reduction in the gun’s power and accuracy.

But with a nitro piston, you can leave it cocked for as long as you like. Nothing wears out.

And a little thing to note is that even though you can leave the gun cocked, you still have to shoot, cock, and de-cock the gun every few months to prevent the seal from getting bonded with the bore.

Sixth, since it doesn’t have spring torque like a spring air gun, a nitro piston gun is very easy to cock with only 28 lb of required cocking effort.

Seventh, a nitro piston produces 70% less noise over the shot cycle than a coiled spring gun.

This type of air gun is absolutely quiet and is great for field hunting where stealth is needed.

Eighth, a nitro piston is more long-lasting than a spring air gun.

The general rule is not to get spring compression over 50% to remain its reliability.

But in the air gun world, it is not uncommon to make the compression up to 100% to maximize performance.

This weakens the spring and shortens its lifespan.

However, with a nitro piston, it doesn’t care about compression. Nothing here affects its life.

That’s why the life cycle of an average spring gun is only 5000 shots while the nitro piston can easily get 10,000 shots before it loses power.

Bonus: Fred Eichler, the most interesting bowhunter in the world, is excited about Benjamin and Crosman’s cutting edge new nitro piston break barrels here:

Disadvantages of the nitro piston

Although the nitro piston has lots of advantages, it does have some disadvantages.

First, if the spring of a spring air gun is damaged or defective, it still works to produce some velocity.

If the gas ram fails, it doesn’t work at all.

But if the gas ram does fail, it will fail in the first few weeks after you buy it so you can return it anytime you want.

Second, it’s hard to find a replacement nitro ram if you want to service and modify this type of air gun.

There’s no way you can purchase an after-market nitrogen strut.

However, these disadvantages are really minor.

Conclusion

Understanding precisely what nitro piston technology is, and its pros and cons give you more information and confidence in the search for the best air rifle that fits you most.

If you want to enjoy smoother cocking, quietness, less recoil, high accuracy, and less maintenance for the gun then a nitro piston gun is for you.

However, if you want to buy a gun to service and modify it for better performance later, you shouldn’t put the nitro piston air gun in the potential buying choice list.

Essential Stalking and Still-Hunting Skills

0

All day I’d shadowed the herd, waiting for the right opportunity to close in for a shot. There were about 40 cow elk in the herd and five bulls, each big enough to drop the string on, should one wander within range of my longbow. I began my day still-hunting along the petering-out ends of a series of ridges and into a three-month-old burn, where I found an unlikely herd of elk bugling their way through blackened tree trunks and brush stubble. I followed them out of the burn and into a lush canyon bottom where I ran out of cover. So I watched the elk climb a barren canyon wall and crest over into the next canyon, and I then ambled my way back to camp for a snack. Those elk would find a shady northeast-facing timber patch to bed in for the day, and I figured I could catch up with them mid-afternoon when they got hungry for their own snack. And that’s just what I did, zipping an arrow through a nice bull’s lungs at 23 yards as he worked his way around the fringes of the herd at dinnertime.

Closing to within bow or rifle range of big-game animals can offer a supreme challenge that requires its own set of specialized skills. I like to divide them into two categories: stalking and still-hunting. While stalking, you first spot your quarry, and then move in for a shot. When still-hunting, you sneak your way through likely habitat in search of a shot. Here are a few tips, tactics and techniques that will help you close the distance on a wily mule deer buck or a big, call-shy bull elk. You might even employ them on a pronghorn or whitetail, if conditions are right and you possess tons of patience.

StalkingGlass Up a Beast: The first element to a successful stalk is spotting your prey. We don’t have room enough in this article to cover the intricacies of spotting in detail, but in short; use the best glass you can afford, find a good vantage point and let your eyes do most of the walking. You can cover far more country, find more animals and contaminate less territory through glass than you ever will on foot. Once you’ve spotted, watched and read the body language of your quarry, you’re ready to begin your stalk.

Plan Your Route: Before leaving your vantage point, study landmarks, choose a goal shooting position and plan your route to that position. It’s really easy to loose track of where the animal is, and where you are in relation to your goal position, once you leave your vantage point. Plan carefully, and use landmarks to guide your way.

Stay Under Cover: While executing your stalk, try to stay completely out of sight of your quarry. Land mass offers the best cover; utilize hills, rocky outcroppings, ravines and other terrain to shield you from sight. Vegetation is second best; use heavy brush, tree lines and waist-high grass to block your prey’s vision while you close the distance. If you run out of land mass and vegetative cover, you can make like a wisp of smoke and move closer using environmental changes such as drifting cloud shadows, fluctuating winds and natural distractions like other animal movement that draws your quarry’s attention.

Use a Decoy: In certain circumstances, such as stalking pronghorn across short-grass prairie, a decoy can render an otherwise impossible stalk very doable. I’ve used a folding cow (of the moo variety) decoy to close within pronghorn under those very conditions. I’ve also used folding elk decoys with good success while bowhunting elk, and I’ve hid behind my saddle horse and closed the distance on elk when hunting in mustang country, where the elk are used to seeing horses. The key is to blend in, seem like part of your quarry’s daily surroundings, and move like a cow, elk or horse, rather than like a hunter hiding behind a decoy.

Play the Wind: Always, always, keep your wind (or scent) from reaching the animal you’re trying to stalk, particularly when you’re bowhunting. If they catch your wind, the game is over. So circle that extra mile, climb that extra ridge or wait that extra hour to make sure the wind is in your favor. Speaking of wind and extra hours, often the best time of day to put a stalk on an animal—especially in high-elevation mule deer or sheep country—is after the morning thermals have performed their capricious dance and everything has settled down for the day. Wait and watch until the wind has steadied and the animal has gotten up from its first bed, grabbed a quick snack and relocated to a shady position. Now the wind and your prey are likely to stay put for a few hours, giving you an honest chance to close within archery range.

Be Aggressive: I’ve often watched novice hunters begin a stalk with the utmost care; moving slowly and stepping quietly while the animal they’re stalking is still a mile or more away. That’s silly. Your first task when stalking from long distance is to close that distance as rapidly as possible. If you don’t, that animal will likely be gone when you get there. So get out of sight, and then close in aggressively. Once you’ve closed within a couple hundred yards, then it’s time to slow down and stalk carefully.

Be Patient: It’s been said that a hunter’s biggest attribute is patience. I agree. Once you’ve closed to within earshot of your prey, it’s time to slow down, become part of the environment and drift closer for a shot. Pay critical attention to cloud movement and shadows, wind gusts and air movement, and other factors that can conceal or reveal your presence. Blend in, move in concert with nature and relax: Prey animals can feel a predator’s intent, so don’t study them with a hard gaze, and don’t covet those backstraps sizzling on your evening campfire just yet. Just stay calm, work your way into position and make a steady shot. Then you can celebrate.

Still-HuntingHunt Wildlife-Rich Areas: When still-hunting, you try to slip into an animal’s habitat, spot them before they’re aware of your presence and make a shot. Obviously, you must hunt where game likes to hang out. Use pre-season scouting, your knowledge of the area and the species, and current wind direction to decide to where to still-hunt that day.

Use the Wind: The best still-hunting days are windy. Everything in the outdoors is noisy and moving on a windy day, meaning you can move and make noise too, with less likelihood of being discovered. Your ideal strategy is to still-hunt in an upwind direction, but hunting crosswind will work just fine, too. Try to move with the wind gusts and blend in with your surroundings.

Stay in the Shadows: Direct sunlight makes you stand out like the proverbial sore thumb, no matter how good your camouflage. Do your best to keep to the shadows, especially when you stop to look and glass.

One Step, Two Looks: The biggest challenge when still-hunting is to see your prey before it sees you, so here’s how you move: take one step, then take two long looks. Study the area in front and to the sides of you intently for any motion, anything that stands out or anything out of place. What you see might be the curving line of an antler, the texture of deer hair or the flicker of an ear. Search as far away as you can see, but study everything close-in as well; while still-hunting, it’s not unusual to close within a few yards of an animal before either of you is aware of the other’s presence.

Use Binoculars: While on the subject of looking, always carry a binocular and use it. You can study surrounding brush and vegetation using your binos like a microscope. Here’s how: Look deep into the tangle with your bino, and turn the focus knob until the area you’re looking at becomes sharp. Study that region for a moment, then turn the knob a little to focus closer or further out—it’ll highlight an entirely different section of habitat. Take your time and pick the area apart piece by piece.

Don’t Hurry: Still-hunting is not a speed game. Rather, you might take an hour to cover 40 yards, or an entire afternoon to hunt through a three-acre patch of woods. But if you’ve got a good idea those 40 yards or three acres holds game, what better way to spend an hour, or an afternoon?

Still-Hunt When it’s Damp: Everything gets quiet in the woods when it’s damp, or wet from a recent rain. That makes for good sneaking conditions; sticks are less likely to snap underfoot, leaves don’t crunch like cornflakes and your movement is muted. It’s a good time to be in the woods.

Deer Walking: We don’t always get to hunt in windy, damp or quiet conditions. Sometimes it’s simply impossible to move without making noise. When that happens, just make like one of the locals; imitate the natural sounds game make while moving. One of my favorite techniques is what noted traditional hunter and archer Fred Asbell calls “deer walking.” To deer-walk, simply imitate the one-two, one-two, one-two cadence of a four-footed beast by first stepping your heel on the ground, then a split-second later snapping down the ball of your foot, to create that one-two cadence. (You can reverse this if it’s more comfortable, using a first-ball-then-heel approach.) Take a few steps, hesitate, look for game, and then move ahead a few more steps, trying to imitate a deer’s movement pattern. Try it sometime; you’ll be surprised at how well it works.

Stay Ready: Shot opportunities can happen very fast when still-hunting, so stay on your toes. Often you’ll see your quarry just a split second before he sees you. Just stay calm, make the shot and then celebrate having successfully implemented one of hunting’s most skill-demanding techniques.

Best Air Rifle Deals

Popular Posts

Air Rifle Scope vs. Rifle Scope – Which One Fits Your Shooting Needs?

0
"Air Rifle Scope vs Rifle Scope: Unveiling the Ultimate Precision Optics. Discover the essential differences and benefits of these two optical devices, empowering shooters...

PCP vs Spring Piston: Which one is better?

0
When reading about guns in the search for the first one that would be perfect for you, an age-old debate comes into question. Should...

Air Rifle vs BB Gun: Understanding the Key Differences and Choosing the Best Option

0
"Air Rifle vs BB Gun: Unveiling the Key Differences and Choosing the Perfect Weapon for Your Shooting Needs. Delve into this comprehensive guide to...