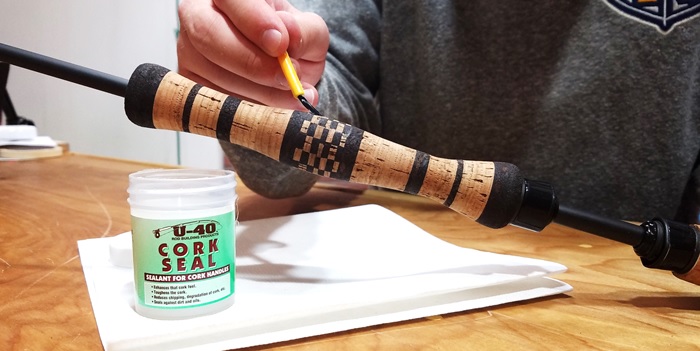
When it comes custom rod building and fishing in general, cork will always be a popular grip because of its traditional look and classic feel on any fishing rod. With that said, the big knock against cork is its tendency to slough, erode, and chip over time, but just one coat of U-40 Cork Seal will prevent these factors and so much more.
Whether installing a traditional cork grip or the more inventive cork checkerboard handle, each initially look great, but the wear and tear of constant fishing will do significant damage to the cork itself. Protecting the cork’s surface is crucial to preserving its initial look and extending the cork’s lifespan. The ultimate protector of cork, U-40 Cork Seal works by sealing the cork’s surface to maintain the natural look and enhance the cork’s grip.
Sealing the Cork Grip
While out on the water, cork grips contact all sorts of damaging contaminants. From fish guts and mud to the very oil on our hands, cork is constantly exposed to harmful materials in the fishing environment. These materials penetrate the cork’s semi-porous structure causing unfortunate deterioration.
By sealing the cork’s surface, U-40 Cork Seal outworks the damaging materials to in turn preserve the cork look and feel fishermen love. The cork soaks up the U-40 Cork Seal to prevent the worst of oil, mud, water, fish guts, and even eggs from entering the cork. Not only does U-40 Cork Seal defend your cork handle assembly, it also looks great getting the job done.
Preserve’s Traditional Cork Appearance
Although U-40 Cork Seal can’t stand up to your dog’s teeth, it does work extremely well in reducing the potential for any chipping or sloughing from the cork’s surface. In addition to fishing, cork handles are often damaged during the packing and transporting phase of the fishing trip. The added protection of U-40 Cork Seal is a huge benefit in each of these phases.
Since cork’s surface is semi-porous, it accounts for its lightweight benefits however, it also causes the cork to be easily soiled. Once unwanted materials penetrate the cork’s surface, the cork’s gradual deterioration begins. The protective layer provided by U-40 Cork Seal stands between the cork and the exposed environment to keep the handle both clean and intact.
Strengthen the Cork Feel
Knowing that U-40 Cork Seal prevents all unwanted debris from penetrating the cork’s surface, it also helps by enhancing the feel of the cork. This means that it prolongs the initial grip that makes cork so popular among rod builders. By capturing and preserving the initial grip, U-40 Cork Seal ensures your cork handle maintains peak performance every time it’s on the water.
5 Simple Steps to Seal Your Cork Grips
The ultimate protector of cork, U-40 Cork Seal takes only one coat to seal the cork’s surface and protect the cork’s natural look and grip. Follow these steps to successfully coat your cork handle assembly:
1. Clean Cork Grip
Using some warm — lightly soapy — water and a sponge, gently rub the soapy sponge over the cork grip. For problem areas, use a little more pressure with the sponge. Once satisfied, rinse the cork with plain water to remove all the soapy residual.
2. Wait for Cork to Dry
With all the soap suds removed, leave the cork out to dry. Make sure the cork is completely dry before moving on to applying the U-40 Cork Seal.
3. Apply U-40 Cork Seal
Next, apply U-40 Cork Seal to the dry cork’s surface with a bristle brush to ensure you cover the entire surface. Use the brush to wipe away any excess that will not soak in to prevent the U-40 Cork Seal from sagging, streaking or running.
It is important to only apply one coat considering the second coat will not penetrate the first.
4. Let U-40 Cork Seal Cure
After the cork is completely covered and all the excess is removed, clean the brush right away in running tap water. Then, let the sealed cork cure. It will be dry to the touch in 30 minutes and ready to use in only 24 hours.
5. Get Back on the Water
Once 24 hours pass, get back on the water with your sealed cork handle that can now outlast the elements of fishing to look and feel brand new every time. With the application of U-40 Cork Seal, your cork will look, feel, and fish as genuine as its first day on the water.
Check out U-40 Cork Seal available at Mud Hole to save your cork handle assemblies.
In this article, I’m going to show you seven quick and delicious ways to add that all-important fat to your ground beef.
Let’s get straight to the juicy bit.
How do you add fat to lean ground beef? The best way to add fat to lean ground beef is to use beef back fat (tallow). Ensure the tallow and beef are cold before mixing them together. An easy fix is to grate butter or cheese into the beef. Or mix in a fattier meat like sausage or chorizo.
You can add fat to your ground beef in a variety of forms. Here are the best things to add:
Beef fat (tallow)
Bacon or bacon fat
Butter
Chorizo
Sausages
Cheese
A fattier type of mince
Keep reading to find out more about each option.
Add beef fat
This is my personal favorite. Adding beef fat to lean ground beef can transform it into something truly magical.
The trick to using beef fat is to use BACK FAT specifically.
Why?
Back fat is more ‘buttery’ and has a melt in your mouth texture VS regular beef fat.
Many butchers give it away for FREE. And even if your local butcher decides to sell it, it won’t be expensive.
How to add beef fat (tallow) to ground beef
Assuming you’ve got your tallow ready to go, you’ll need either a food processor or a dedicated meat grinder for the next part.
Ensure both the tallow and beef are COLD before adding to your food processor. I recommend placing them in the freezer for around 20 minutes before your ready to process them. If the meat is too warm it will smear and you’ll end up with mushy ground beef.
The same applies to your grinding equipment. Place it in the freezer at least one hour before you need to use it.
Work out how much tallow you need to get the desired lean to fat ratio. If you’re unsure, skip to this section where I cover it in detail.
Grind together the ground beef and the tallow just until they’re both properly mixed. Don’t overdo this step. Too much handling can also result in a mushy texture.
It’s that simple.
If you don’t have a grinder or food processor at home, you may have some luck asking your butcher if they’d be willing to work in the fat for you.
Add bacon or bacon grease
Bacon is here to save the day. You have three options when it comes to adding bacon to ground beef:
Grind raw bacon and mix with the ground beef before cooking/making patties
Add cooked bacon to your ground beef
Use the bacon fat/drippings
Mixing ground (or finely chopped) raw bacon with your beef before cooking will create a deliciously fatty and flavorsome patty.
But it means you’ll have to cook the burger ALL the way through. You don’t want any raw bits of bacon lurking in the middle of your burger.
Like your burger to have a bit of pink?
Cook the bacon BEFORE adding it to the ground beef.
Or use the leftover bacon grease – which by the way tastes AMAZING. You can mix a bit into the burger, or simply cook the burger using the fat. Learn how to collect and store it here.
Add sausage
Sausages are a great way to make your ground beef more juicy and fatty. And it’s super easy.
You don’t need any additional equipment to mix them together.
Take the skin off the sausage, and then mix the meat and ground beef together in a bowl.
Voila! Problem solved.
Just like with bacon, you’ll need to make sure that you cook the burgers all the way through if you add raw sausage.
Add chorizo
Chorizo is yet another insanely delicious way to add flavor, fat, and life to your ground beef. As the burgers cook, the chorizo oil will seep out into the meat. YUM.
I keep it simple when adding chorizo. If the beef is 90% lean, I recommend adding 1 part chorizo for 3 parts ground beef.
Remember: cooking is an art, not a science. You won’t do any harm by tweaking the above ratio to your liking.
Psst… make sure all your guests like chorizo before going full steam ahead with this option.
Add cheese
No good burger is complete without a hefty portion of cheese to go with it.
So why not add some cheese into the beef instead of on top of it?
Adding cheese is a foolproof way to add fat and oozy-juicy-ness (is that even a word?). All without needing to add any other meats.
Here are a few of my personal favorite additions:
Blue cheese
Feta cheese
Cream cheese
Simply add a generous helping of your favorite cheese into the raw ground beef and gently mix by hand.
If you’re using a solid cheese I recommend cutting it into small chunks or use a cheese grater.
Cold cheese works best for this task. I’d even go as far as freezing the cheese for 20-30 minutes before mixing it into the raw beef.
Add butter
Let’s not forget about butter. Adding butter to ground beef elevates the beef’s flavor profile while not adding any other distractions (flavors). Butter also adds moisture and tenderness to the beef.
And it’s very likely that you have some handy right now.
How to add butter to ground beef
Dice or grate the butter into small pieces (too big and you’ll have pockets of air in the beef once the butter melts).
Ensure the butter is cold (like ice cold) before adding to the beef. I recommend freezing both the butter and beef for about 30 minutes to make sure they’re at a similar temperature.
Gently work the butter pieces into the ground beef and form individual patties. A light touch is crucial here to prevent the ground beef from turning mushy.
Mix in a fattier mince
This option might seem obvious, but sometimes we miss the obvious options!
You don’t have to stick to using one type of beef.
If you have an old pack of 15% mince (pork or beef) in hanging around in your freezer, take some of this and mix it into your 5% mince to increase the fat content.
You can go with 50:50 if you want to significantly increase the fat levels, or just add a handful. It’s totally up to you.
How much fat should I add to my ground beef?
I’ve created a handy table to help you calculate how much fat to add to your ground beef.
Let’s go through a quick example to illustrate how it works.
You have 10% fat ground beef (90% lean) and decide you want to make burgers with 30% fat (70% lean).
Now you have to match the type of ground beef you have (in the columns) with your desired ground beef type (in the rows).
40% Fat30% Fat20% Fat20% Fat15% Fat10% 7% FatThe percentages in the table represent how much pure fat to add to the total original weight of your ground beef.
To turn 10% fat ground beef into 30% fat ground beef, you’ll need to add 22% of the total weight of your original ground beef in pure fat (e.g. tallow, bacon fat, butter).
Confused? Lets go through a real life example:
If you have 2lbs of 10% fat ground beef, you’ll need to add 7oz (0.44lbs) of fat to make a 30% lean mix. 0.44 lbs is 22% of 2 lbs.
If you aren’t interested in being so scientific, you can approximate! Your burgers will still be delicious.
Tips for making lean ground beef juicy
Here are a few final tips to help you get maximum juiciness and tenderness from your ground beef:
Don’t overwork the meat. Overworking the beef makes it tough and lifeless. Treat it gently and you’ll be rewarded.
Cooking burgers? Just flip them ONCE. Pretty much the same logic as #1. Also, avoid the urge to press the patties too much with your spatula when cooking (unless you’re planning to smash them!).
The fattier the beef, the more heat you need. Generally speaking, leaner cuts should be cooked on a medium flame, whereas high-fat cuts should be cooked on a high flame. Adjust depending on the amount of fat you decide to add.
I wanted to share something with you guys that has really changed the way my family and I have been running trotlines. However, before I lay out the design for you… let me say that I realize we all have our preferences on how to do things (especially fishing). Saying that one method is the “absolute best” is like saying one muscle car is better than all the others, or that one type of truck model is the best ever built. You’re never going to get everyone on the same page agreeing on this… and I’m okay with that.
If you have a different method that you think is better; please feel free to share it in the comment section below. The more discussion the better….
Ok, back to the post.
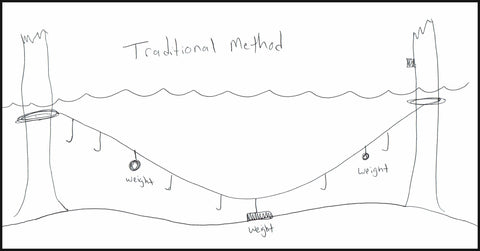
For as long as I can recall my family and I have been running trotlines on Lake Sam Rayburn and Toledo Bend (more recently). We have used the traditional design (see image below) which involves tying the trotline off at both ends (usually to a stump), and then sinking the line to the bottom in the middle. We’ve used this method the majority of my life and have done really well with it.
This is an “old-school” design that was probably used by your great great grandfather if he ran lines. It has literally been around forever, and it works great. However, this design is based off the old assumption that catfish are simply “bottom dwelling scavengers” and not much else. We know this isn’t true (see my last post about the Best Catfish Bait), but we still set our lines out in the same old fashioned way.
I want to encourage you to try this “new” (it’s not really new… just different) method if you haven’t. It has literally changed the way my stepdad and I fish, and I don’t see going back to the traditional method of running lines anytime soon. This has consistently produced more and LARGER catfish for us. Pretty much all the large catfish pictures you may have seen on our site, Facebook Page, or Instagram have been caught using this method.
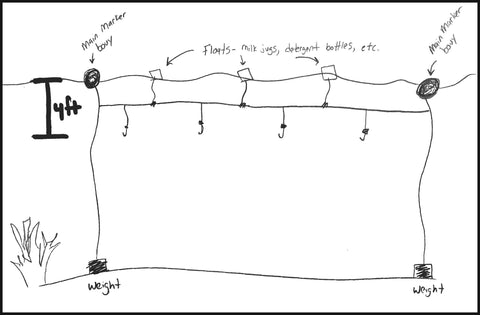
Ok, so here’s how to set the line. First check out this basic diagram – I’m obviously no artist, but you’ll get the point.
The obvious difference between this method and the old method is that you will now be floating the hooks and bait. This will have the wind and wave action moving your bait around and helping you to catch more fish. Cool huh?
As for actually setting up your line, you can go as cheap or heavy duty/expensive as you’d like. However, I would strongly recommend that you do the work up front and create a solid-stout line that you can catch those large cats on… because you will be hooking them and nothing is more frustrating than losing those huge fish.
Here are a few tips for setting up your line:
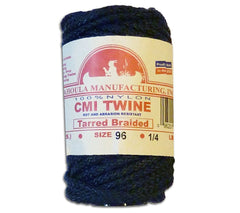
Used HEAVY Line – I recommend using 96 Tarred Nylon which is about 600 lb test. Pro-Tip… the larger line is thicker and WAY EASIER on your hands when running lines all day. You’ll thank me later.
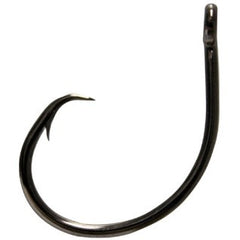
Circle Hooks are a MUST – an instant way to catch a minimum of 20% more fish per run (even if you don’t use the new trotline model) is to switch to circle hooks. A 6/0 straight hook won’t give you half the holding power that a 6/0 circle hook will provide. They’re that good… and definitely worth the extra cost.
Swivels, Swivels, Swivels – Those cheap trotline clips are great for smaller fish and setting quick lines; however if you’re going after large catfish then you need to be using swivels. These will help to prevent a large fish from getting off the hook by keeping them from tangling the staging line into the main line. I recommend using the 3/0 to 6/0 Swivels as they’re super heavy duty and will last you at least 2-3 years in the water.
Tight Lines – Get your line as tight as possible before setting the hooks. You can use about 50lbs of cinder (or whatever) on each end and this will do the trick to keep it still. In all honesty, you likely don’t need this much weight as they will sink into the mud and get covered… I just tend to overdo things. = )
Use Clear Bottles – You don’t need a lot to float your lines. I recommend using clear Gatorade type bottles every 10-20 feet (whatever you prefer) to keep your lines afloat. Using the clear bottles will help to “hide” your line at a distance from folks you don’t want to find it.
Fish Shallow – Keep your main line about 4 feet below the surface. This will allow boats to pass over the top, but still keep your bait in the hot-zone. This works great for summer months when the water is hot.
I think that’s about it. I feel confident that if you take the time to set your lines up using this method that you will find yourself catching more and larger fish. It’s worked for me, and pretty much everyone I know now uses this method over the traditional one of sinking your lines.
One final thought, and a bit of a selfish plug… you’re going to need good bait to catch fish. If you haven’t checked out our different bait fish traps yet, then please take a minute to check them out here:
Click Image For Info
I sincerely hope that you’ve enjoyed this article and have found at least something useful. If you have, please don’t hesitate to share it on Facebook with your fishing buddies. Thanks for reading, and God bless!
Hardworking outdoor apparel and gear, supported by partnership with American Hiking Society
MOUNT HOREB, Wis., April 6, 2022 /PRNewswire/ – Duluth Trading Company is relaunching its Alaskan Hardgear brand under a new brand name, AKHG™. The reintroduced AKHG™ will showcase an expansion into womenswear, extended sizes, all-weather performance apparel and gear alongside a commitment to conserving the outdoors with a two-year partnership with the American Hiking Society. Inspired by the Alaskan wilderness, AKHG™ is built to perform year-round in a variety of conditions – from the harshest to the most serene – and celebrates the rewarding moment arriving at camp and every bit of leg work it took to get there.
“There’s an undeniable growing desire across communities to explore the world around us and partake in the activities that come with being outdoors,” said Neala Shepherd, Senior Vice President, Customer Experience, Duluth Trading. “AKHG™ aims to provide clothes and gear for those who love the rolled-up-sleeves side of adventure and embrace the work that goes with exploring in the wild.”
With more size-inclusive offerings, weather-shielding fabrics, convertible features, and technical design elements that boost versatile, long-term use, each new AKHG™ style delivers superior quality, comfort, and function to let wearers Live Life Less Soft™. The brand continues to feature the ingenuity and innovative technology that Duluth Trading customers have come to know and love.
This spring, brand fans are encouraged to get outdoors and discover the latest from Duluth Trading and AKHG™:
The Crosshaul CollectionWith an exceptionally strong TOUGH COTTON™ finish, the Crosshaul Collection is three times more abrasion-resistant than regular cotton without sacrificing softness or breathability. New styles include the Women’s Plus AKHG™ Crosshaul Collection Cotton Short Sleeve Tee ($34.50) and the Men’s AKHG™ Crosshaul Cotton Hoodie ($64.50).
The Renew Bamboo CollectionThe eco-friendly Renew Bamboo Collection debuts with the Women’s AKHG™ Renew Bamboo Short Sleeve Shirt ($29.50) and similar styles. Transforming bamboo into a modern performance rayon, the fabric is blended with recycled polyester and spandex to enhance moisture-wicking and sun-blocking power, while still feeling supremely soft and flexible.
AKHG™ Olympic Coast Rain GearSeam sealed with a 2.5-layer fabric designed to prevent clamminess, the rugged-yet-soft Olympic Coast Raingear features 15K waterproofing and breathability. Built to withstand high winds and rain, the collection is durable and remains lightweight enough to pack into its own pocket. New styles include the Women’s AKHG™Olympic Coast 2.5L Rain Jacket ($129.50), Men’s AKHG™️Olympic Coast 2.5L Rain Jacket ($129.50), Women’s AKHG™Olympic Coast 2.5L Rain Pant ($119.50), and Men’s AKHG™️Olympic Coast 2.5L Rain Pant ($119.50).
Perfection Loop Fishing ShirtsMade with a lightweight, free-moving nylon blend, AKHG™️ Perfection Loop Fishing Shirts are sweat-wicking, fast-drying, and snag resistant. Featuring a generous amount of pockets, adjustable cuffs, convertible sleeves, a hook-and-loop rod holder for hands-free fly tying, and back vents, the new fishing shirts offer portable performance for long days on the water. New styles include the Men’s AKHG™️Perfection Loop Fishing Shirt ($89.50) and the Women’s AKHG™️ Perfection Loop Fishing Shirt ($89.50).
Strengthening its investment in making the outdoors accessible, AKHG™️ simultaneously launches as the Exclusive Apparel Sponsor of the American Hiking Society’s National Trails Day® for 2022 and 2024. American Hiking Society is a national organization empowering all to enjoy, share and preserve the hiking experience. Aimed at advocacy and trail service, National Trails Day® improves trail access for millions nationwide, hosting events across all 50 states with participation by hikers, bikers, rowers, horseback riders, trail clubs, federal and local agencies, land trusts, and businesses.
About AKHG™AKHG™ is an outdoor apparel brand within the Duluth Trading Co. family that was created for those who roll up their sleeves for adventure and Live Life Less Soft™️. The brand’s collection of apparel, accessories and gear offer functional design inspired by life in the vast Alaskan wilderness. Built to withstand the harshest of climates and toughest terrain, yet versatile enough for varied outdoor recreational uses like hiking, fishing, camping, and snow sports, AKHG™️ is dedicated to honoring the work of play. All products built by Duluth Trading Co. are backed by the company’s “Superior Standard” and supported with outstanding customer service under the “No Bull Guarantee.” To learn more, visit www.duluthtrading.com or one of the 65 Duluth Trading store locations nationwide.
About American Hiking SocietyFounded in 1976 American Hiking Society is the only national nonprofit organization dedicated to empowering all to enjoy, share and preserve the hiking experience.
The deadly tactic of back-trolling earned its stripes in the early 1960s when walleye anglers learned from fishing pioneers like Al and Ron Lindner, Spence Petros, Carl Malz and regular contributors to Fishing Facts. It was an era when anglers were creating and perfecting the techniques of fishing nightcrawlers and leeches with tools like bottom bouncers and the then newly invented Lindy Rig.
The challenge was to troll slow enough to keep those baited rigs in contact with bottom structure or nearly touching weedlines that followed highly irregular shapes—a favorite haunt of walleyes. Trolling forward in a 16-foot V-bottom aluminum boat, even with a 10-hp motor, was too fast for these light rigs. However, if an angler put the motor in reverse and trolled backward, the blunt face of the transom slowed the boat enough for an effective presentation.
Back-trolling seemed a perfect solution until it was necessary to troll into the wind, which caused waves to break over the transom, filling a boat with water. Of course, this was before bailers were popular, as these were low-tech aluminum fishing boats. Anglers found it difficult to hold a rod, steer the motor backward and use a bucket to bail water out of the boat. But walleye anglers, being a creative bunch, soon fashioned transom-mounted splashguards to keep out the water. Soon in those days there were almost as many articles on how to make your own guards as there were on back-trolling. Some were made of aluminum, Plexiglas and thick sheets of rubber. Then some were bolted on while some were clamped to the transom.
“Now, we even put backsplash guards on our bass boats to keep waves from washing over the transom when we must use a launch ramp that faces the wind,” Al Lindner said.
Today, anglers and writers don’t mention the back-trolling tactic as often. But according to Lindner, it is still “the absolute, most precise way to keep a lure on structure and in the strike zone.”
Still wondering about the popularity of back-trolling today, we contacted professional guide Tony Roach. According to him, back-trolling is alive and well, even graduating to big-water boats in the 18- to 20-foot range.
“I have a 20-foot Lund Pro-V with a 200-hp tiller-steering motor,” Roach said. “With the SmartCraft feature, I can run the motor as low as 500 RPMs, which is fine for trolling at 1 to 1.5 mph.”
His engine has a standard shaft length, but he runs a four-blade prop instead of a three-blade model, believing it moves a more appropriate amount of water. Roach has two Minn Kota trolling motors. The bow-mount unit can self-deploy with a remote control while the transom-mounted unit has tiller steering.
Even with today’s battery- and trolling-motor technology, wind and waves can be too much for the strongest 36-volt motors to keep a boat on structure for very long.
So why is back-trolling so effective?
“The bow swings too much for precision trolling forward,” Roach says.
He also says the flat part of the transom allows an angler much more boat control.
“It also allows you to hold yourself better in the current (for river fishing).”
Even salmon anglers who fish rivers have created their version of back-trolling while using the tactic to slip downstream and bounce crankbaits off the bottom. However, they point the boat upstream and row just fast enough to let the boat slowly slide downstream.
Conventional back-trollers are in luck—they no longer have to design and build their own backsplash guards. There are at least two manufacturers who build backsplash units specifically for your chosen boat and model including Wave-Wackers and Whitecap Splashguard. Stock models are available from Ve-Ve Incorporated.
While back-trolling may not be an all-encompassing panacea, it is alive and well. However, it has been kept in the background for a reason.
Dicks Sporting Goods offers a generous return policy for their customers, however, there are a number of things to be aware of which we’ll cover below.
The company was established by Richard Dick Stack in 1948. Dicks Sports return policy is very generous in its terms and conditions, which is very convenient for its users.
We’ll discuss the terms outlined in their return policy, including refunds, exchanges and how to return your goods.
Customers can return their goods within 60 days of purchase, either by mail or in-store, according to the company’s terms in the Dicks Sporting Goods return policy. Dicks Sporting Good return policy allows you to return unworn, unwashed, undamaged, or defective merchandise purchased online or in-store.
Moreover, the company has extended its return period to 90 days for both online and in-store orders from the previous 60 days. This has also extended for Calia and Field, Golf Galaxy and Stream.
Most products are returnable within 30 days at Dick’s Sporting Goods Warehouse stores, which has a separate policy in place.
How To return Products at Dick’s Sporting Goods
Dicks returns gives you two options to return its product – by mail or by visiting any of the Dicks stores. We have provided the details of both the return policies below
Dicks Sporting store return policy
Before returning your products, make sure that it is unworn, unwashed, and undamaged.
Here are some easy steps to go through, if one wants to return the merchandise by paying a visit to the nearest store:
You can locate your nearest store by visiting this link.
When you know your local store to return your product, pack your product in the original packing.
Accompany your product with an original slip.
Store personnel will help you in processing your return.
Your refund will be immediately processed to your original form of payment.
You can also contact your local store operator to know more.
return policy for online Via mail
Are you too lazy to walk-in to your nearest store, Dicks provides you the option to return the items by mailing it to them.
The company will issue a refund for the purchase price of the item within 60 days of return.
To return items by mail, you need to go through the following steps:
To start your return with Dick’s Sporting, visit the website.
Go to the return page by visiting this link.
Fill in the order details and Zip code and proceed as per given instructions, and you will get the return label.
Click on the “Find order” tab to go to your order details.
The return label has a return department address (place of returning), and the packing slip contains the specific instructions to return.
Attest the return label to your package.
Now you can schedule a pickup or drop off at the carrier of your choice or UPS drop-off location.
Shipping and handling charges are not refundable.
Exchange Policy
Dicks Sporting exchange policy for the company is the same as its return policy, you need to return your items within 90 days to get the product exchanged.
Follow the below steps to get your product returned:
Start your return by visiting the website and follow the instructions as given in the ‘return by mail’ process.
Place the new order for the replacement.
See Also: Wayfair Return Policy
Refund Policy
Returns are generally directed to the original mode of payment by Dicks, make sure that the items are in original condition.
If you return your item in the store, it can take up to 14 business days for the refund to be processed to your original form of payment. If it’s been more than 14 days, you should first reach out to your bank or aggregator.
If you have returned your item by online mode, it usually takes 2—3 weeks from DICK’S Sporting Goods to receive your return for a credit to be issued. Dicks will issue Refunds to the original form of payment for the purchase price of the item, including sales tax
Type of paymentThe Number of days you will get a refund in:Refund and Credit PolicyCredit card/debit cardCashPayPal
Exclusions
They have a different policy for different products like dicks shoe return policy, dicks bike return policy, dicks sporting goods kayak return policy, dicks sporting goods return policy for online stuff, etc.
Dicks sporting goods return policy is pretty favorable for its customers; it requires you to return the items before 90 days to get a full refund. It takes 14 days for processing of your return:
Products and purchasesProduct ConditionReturn PolicyGiftYeezy productsDICK’S Sporting Goods, Golf Galaxy and Field & Stream’s all productsBaseball bats, electronic scooters and bikesElectronicsPre-owned golf clubs and demo clubs
If you wish to return without receipt, you can do so without an original sales receipt or pack slip, but the product must be returned using a valid ID, and you will receive a store credit for the lowest selling price.
FAQs
Can I return Items To Dicks Without a Receipt?
Returning goods to Dicks Sporting Goods without a receipt is possible, however, you may only be eligible for store credit and are required to present your ID. It may be possible to receive an email copy of your receipt. All decisions are final and at the discretion of management.
Conclusion
Do you know that Dick’s sporting entered into women’s athletics in 2015 and into team sports in 2016?
Dick’s Sporting Goods offer quality products, but then also you end up getting a damaged item… Hard luck! Don’t worry and file a return request immediately.
Don’t forget to check these out – GameStop, and Nike Return Policy.
For further queries about Dicks Sporting Goods return policy, I’d suggest you comment down below and our experts are more than happy to answer.
The world of hunting has witnessed an unparalleled revolution since the first introduction of hunting saddles in the 1960s. With an ever-increasing demand for reliable, comfortable, and adjustable hunting gear, the saddle market has transformed and adapted to offer some of the most versatile solutions for contemporary hunters. At the heart of this evolution, Trophyline® has carved a niche for itself, setting the gold standard in hunting saddles and creating a legacy that outshines many.
Trophyline’s® primary objective, since its inception, has always been to design a quality product that ensures the hunter remains both mobile and safe during the pursuit of their game. This commitment is reflected in the impressive range of saddles they’ve developed over the years, with a particular emphasis on the needs of hunters, Comfort, Adjustability, Customization, Mobility, Weight, Dependability, and above all, Safety. Let’s dive into the factors you should consider when finding the best saddle in 2024:
Video: Deciding on a new saddle or an upgrade to your current saddle hunting setup? Robert from Trophyline ® walks you through a a detailed guide on what saddle might be best for you.
Comfort-This factor is slightly subjective and also obvious. Can you sit in your saddle all day? Is it comfortable? Does it support you in all the right places and eliminate things like hip pinch?
Adjustability/Customization-You want to be able to streamline the saddle to your individual figure. Can you adjust it to fit your body? Are the Pouches and attachment points easy to reach? Are there enough places to attach your needed accessories?
Mobility- Can you wear your saddle when walking in miles deep? Is it cumbersome? Loud? Or too bulky to get into your hunting zone stealthily and comfortably?
Weight –At the end of the day you’re either wearing or packing a saddle in, and if it seems too heavy or bulky you won’t take it. Weight is one of the largest contributing factors for a lot of people diving into saddle hunting, so it is in the list of considerations. Too heavy? Too Light? Goldilocks zone?
Dependability-What materials are used to build the saddle and how were they tested? This is the actual physical construction of the saddle. Will it break, rip or come apart? Or was it all built to stay together.
Safety-Safety factors are the features built into the saddle, separate linemans loops, bridge loops, leg straps, fully adjustable belts. These are the things that keep you safe in the tree and should be looked at when considering your safety in a saddle.
Saddle Hunting – It’s a System Not Just a Saddle
Today, saddle hunting is no longer just about having a simple piece of gear. It’s about creating an integrated system that molds to your specific hunting style and scenario, providing an unparalleled level of adjustability and customization. A saddle is the pivot point around which your hunting experience revolves, and Trophyline® understands this better than anyone.
Whether you are walking through the woods or packing your saddle in your backpack, mobility plays a critical role. With the relaunch and introduction of the renowned Ambush saddle (which is no longer available), Trophyline® redefined the standards of mobility and safety. The Ambush saddle was a leap forward in design and technology, merging comfort and convenience seamlessly, thus simplifying the hunt and making it more efficient.
Continuing our commitment to innovation, Trophyline® has launched new additions to our saddle range, such as the Covert Lite 2.0, the Covert Pro 2.0 , and the Venatic. Each of these models has been designed keeping in mind the varying demands of hunters, from the beginner to the veteran. All three models have been rigorously third-party tested, ensuring they uphold the highest standards of safety and quality that Trophyline is synonymous with.
The Ruger Mini-14 has proven its ruggedness since it started riding around in pickups in 1974, but getting it to consistently shoot neat little groups at 100 yards has often been an exercise in frustration. Accuracy—frankly not the Mini-14’s strongpoint—has generally taken a backseat to its simple and reliable operation. With competitive action-shooting events on the rise, Ruger decided to address this issue, introducing the Mini-14 Target Rifle accompanied by claims of minute-of-angle performance.
Appropriate for a Mini-14 derivative, the Target Rifle keeps the fixed-piston gas system and rotary bolt with dual locking lugs borrowed from the M1 Garand and the line’s military inspiration, the M14. The investment-cast receiver and L-shaped charging handle have a matte-stainless finish. Scope bases integral to the receiver—a feature that debuted on the Mini-14 Ranch Rifle during the early 1980s—also fittingly appear on the Target Rifle. Ruger includes high, 1-inch rings for mounting an optic, which is mandatory since the receiver and barrel are devoid of iron sights. Other features manifest in the Mini-14 family and carried on with the Target Rifle are a Garand-style safety, stout magazine release lever and ventilated, fiberglass handguard that covers the barrel from receiver to gas block.
The similarities end there.Ruger started its Mini-14 makeover by going straight for what most often is the deciding factor in a rifle’s accuracy—the barrel. Though the lightweight, 18 1⁄2-inch barrel of the standard Ranch Rifle makes for quick and easy handling, it has many times bore the brunt of the criticism stemming from inaccuracy. The Target Rifle, in contrast, has a heavy, hammer-forged, stainless steel barrel that is .78 inch in diameter where it emerges from the gas block, with an additional 3 1⁄2 inches of length. Its six-groove rifling has a 1:9 RH twist to stabilize all but the heaviest .224-caliber match bullets.
Prominent on the barrel is a 41⁄2-inch-long, harmonic-dampening weight. The 3⁄16-inch-thick sleeve slips over the barrel, and four Allen-head screws keep it in place. A series of helical grooves on the barrel’s surface allow the position of the harmonic dampener to be changed by turning it after loosening the attachment screws. Rotating the harmonic dampener clockwise moves it toward the receiver, while turning it counterclockwise shifts it toward the muzzle.
Barrel harmonics, or the vibration of the barrel during firing, can greatly affect point of impact and group size. Functions that occur within a rifle such as the firing pin striking the primer, the ignition of the propellant, the expansion of the propellant gases and the bullet’s contact with the rifling as it travels through the bore all produce a number of vibrations that are ultimately transmitted to the barrel. These vibrations cause the barrel to move in an arc, even before the bullet has exited the bore. If these vibrations were absolutely consistent, there would be a lot of rifles shooting one-hole groups. However, their magnitude and duration vary from shot to shot, and five bullets may leave the bore when the muzzle is at five different points on the vibration-induced arc. In part, this is why even a very tight group will still somewhat resemble a triangle.
One way to control vibration is to add weight to the barrel, which soaks up the impulses. The heavy barrel on the Target Rifle works together with the harmonic dampener to reduce the amplitude of the arc, making bullet exit, and therefore point of impact downrange, more consistent. Different loads, of course, can produce different amounts of vibration, and the ability to adjust the harmonic dampener allows the shooter to tune the barrel to obtain the best accuracy with any given ammunition.
A beefy barrel does not a target rifle make, so Ruger continued overhauling the Mini-14 by giving it a stock eminently suited for shooting from the bench. The thumbhole buttstock has a large, triangular-shaped cutout just behind the pistol grip that not only lets the thumb encircle the pistol grip, but also provides a stable shelf on which its fleshy base can rest. Along with the slight swell to the pistol grip, the design promotes a steady, repeatable hold. The stock’s high, slim comb rises slightly at the heel and digs into the cheek for a tight weld. So it will nestle solidly into a sandbag, the toe is rather thin and parallels the comb for 3 inches. The stock’s lower line then curves dramatically upward before running forward to the pistol grip, forming a hook for the non-shooting hand to press against and keep the rifle firmly settled on the bench. Three removable, black plastic spacers just forward of the rubber buttpad let shooters adjust the stock’s length of pull from 14 to 15 1⁄2 inches in 1⁄2-inch increments. In keeping with the theme of the Target Rifle, Ruger gave the fore-end a 2-inch-wide flat spot to make it easy to rest the gun on sandbags or hold in an offhand position. The stock is constructed of a gray laminate that complements both the stainless finish of the rifle’s metal and the black handguard.
A Mini-14 that will shoot minute of angle? I, too, was skeptical. But to give the Target Rifle a fair chance, I topped it with a Sightron SII Big Sky 4.5-14×42 mm scope and waited for a calm day to test Ruger’s claim. I picked the 55-grain soft-point load from Black Hills to start. The first several groups from the 100-yard line were around 2 1⁄2 inches—pretty much what I expected from a Mini-14 and certainly nothing to write home about. Then I began playing with the position of the harmonic dampener and shot as many holes in the criticisms of this autoloader’s accuracy as I did targets. With this particular load, the rifle liked the forward end of the harmonic dampener to be positioned about 3⁄4 inch behind the muzzle. Thusly tuned, it produced five, five-shot groups that averaged 1.03 inches. Pretty dang close, and two of those groups measured inside the minute-of-angle standard. I tried several other loads, including some with match bullets weighing between 69 and 75 grains, but none of them delivered the accuracy of my first pick. The runner-up was the 50-grain Winchester Supreme Ballistic Silvertip load, which averaged 1.10 inches after 25 shots. Perhaps with a little more tweaking I could find the harmonic dampener’s sweet spot with these other loads and shave a little from their group sizes.
True to the nature of the Mini-14, I experienced no failures to feed or fire during testing, and that was during approximately 400 rounds of 12 ammunition types over three days. No complaints there, but I did have an issue with the Target Rifle’s trigger. At 5 1⁄2 pounds of pull weight, it’s quite heavy for a rifle intended for target work, and I had to squeeze through a lengthy amount of creep. Nonetheless, I learned to live with it, and from the factory the Target Rifle performed as advertised.
The Mini-14 is rarely described as being pinpoint accurate, and in fact, until now it was never made to be. With some modifications, Ruger has turned this ubiquitous truck gun into a rifle ideally suited for chewing out bullseyes. I’d call the Mini-14 Target Rifle accurate any day.
We recently sat down with Q’s Kevin Brittingham to get an update on the highly anticipated launch of 300 Blackout’s “bigger brother” – the 8.6 Blackout. Our last update on the round was in February 2020, just before the pandemic. While we recently released the full audio of the conversation, we wanted to pull the highlights of that recording as it pertains specifically to 8.6 Blackout, and where it stands as we enter the summer of 2021.
EDITOR’S NOTE – Our January 2022 Update on the status of 8.6 Blackout with Kevin is now live on ARBuildJunkie.com.
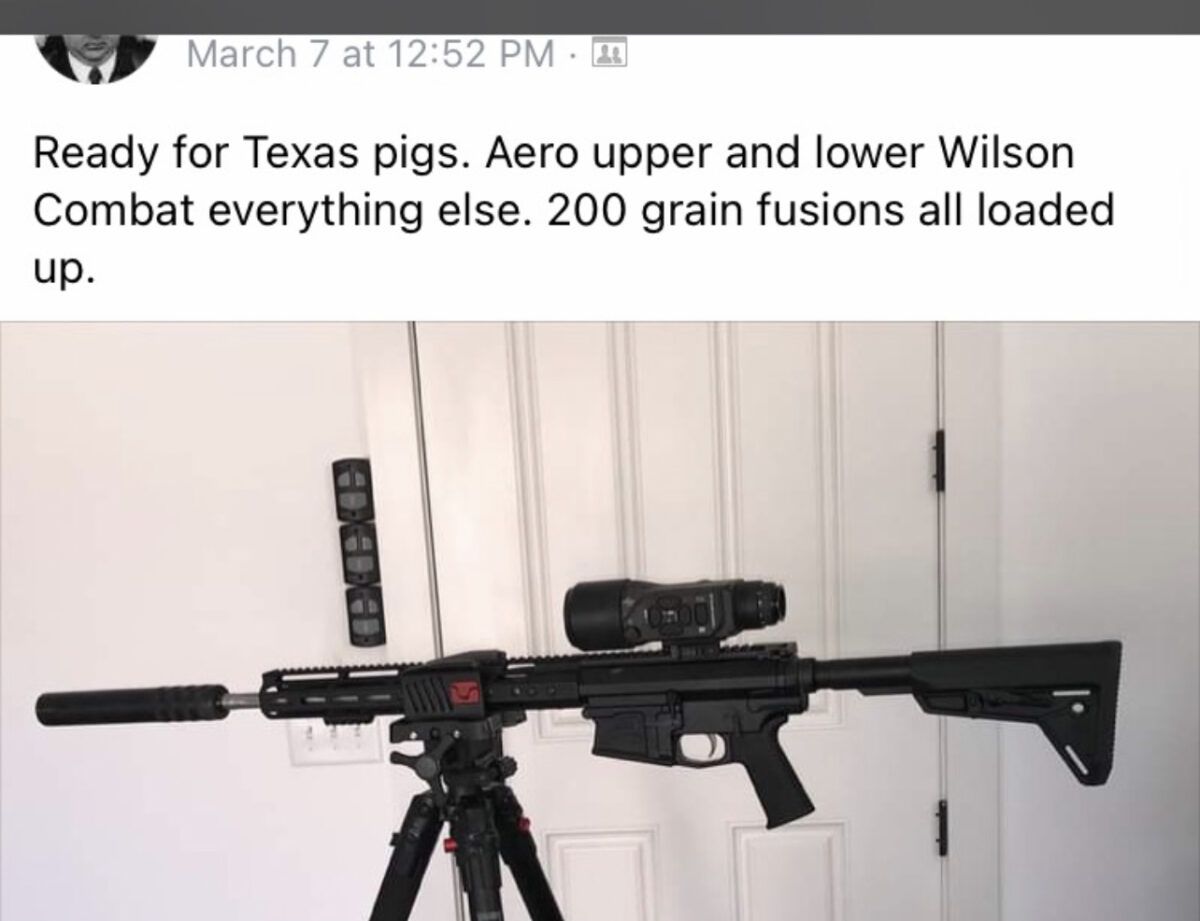
Kevin Brittingham, Q – It would be in production if it were not for the whole ammo crisis. We have production brass now. We are making millions of shells and now it’s a matter of loading time at Hornady, and some others. Primers and powders are also becoming a problem. But we have the cartridge squared away. It’s going to cost about what a 6.5 Creedmoor costs…before COVID, that was $1.10 to $1.20 a round.
8.6 is still a 6.5 Creedmoor shortened case, blown out for a .338 bullet…For supersonic, the lightest bullet is going to be between 150 and 160-grain. Out of a 12″ barrel, we’ll be able to get somewhere close to 2,400 feet a second with that. We’ll have subsonic up to about 360 grain.
One of the first two offerings of this for supersonic is going to be a Barnes 210-grain bullet. It’s about 2,000 feet per second out of a 12″ barrel. It’s a 1-3 twist, so we’ve settled on the twist. We’re using some of the energy that is wasted, converting that to kinetic energy now by spinning the bullet faster. So in supersonic, it is more kinetic energy on target by spinning the bullet fast.
Discreet Ballistics did a great video that did a split screen where the only difference is that one is a 1:7 twist and the other is a 1:3 shooting gelatin. You can see that the 1:3 is two to three times the initial wound cavity…same muzzle velocity, same barrel length. Everything was exactly the same.
Fast twist also gives you the big, long, slow subsonic bullet. It gives you several things. The first being better accuracy because when the bullet is long and slow, you need to spin it faster. For expanding subsonic bullets…it is more reliable expansion at lower velocities, which is great for hunting with subsonic. This is going to be the first subsonic, sub-MOA cartridge, and that’s due to the fast twist. You’ll be able to shoot groups at 300 meters that are sub-3″ with the subsonic…the first offering in subsonic will be a 300-grain Sierra Match King 338 bullet, loaded to 1,050 feet per second out of a 12.5″ barrel.
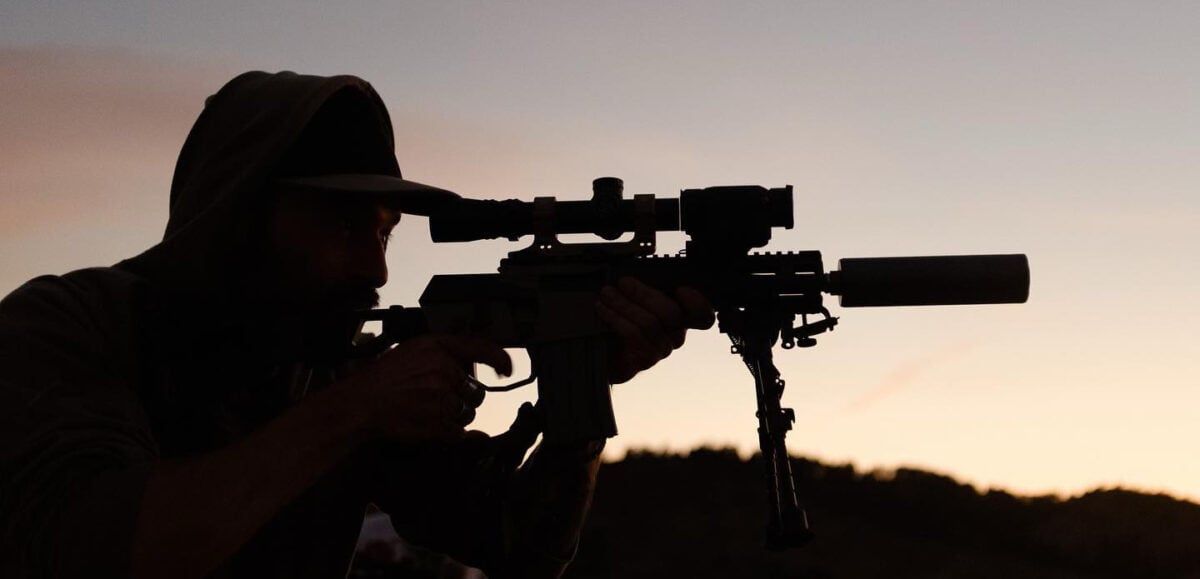
After that will be the target supersonic and the expanding subsonic. It will go from there, and you’ll see other manufacturers as capacity opens up…Basically, the way to describe (8.6 Blackout) is that it is double what 300 Blackout is. It’s double the range. So, if you are comfortable with shooting a deer at 150 yards with a Honey Badger, you can shoot at 300 yards with a 12.5″ 8.6. It’s super quiet in subsonic as well. We’ll offer two silencer lengths, a short one for hunting and a full-sized one as well.
Another advantage of the lower velocity supersonic is it’s incredibly quiet as a supersonic when the bullet is going 2,000 to 2,400 feet per second, compared to something shooting 3,500 feet per second or something like that.
Q: My brother built a .338 Federal AR for hog hunting and he raves about it. Can you address to readers who might ask why not simply choose .338 Federal?
Kevin Brittingham, Q – Let me use .260 Remington vs. 6.5 Creedmoor as an example. .260 Remington is a great cartridge, and it really spawned 6.5 Creedmoor, which everyone knows is incredibly popular. The reason .260 didn’t become popular and 6.5 did is because the .260 case is too long. .260 was originally a 110 or 120-grain bullet. If you load a 140 or 150-grain bullet, it doesn’t fit into a magazine or into a short action if you seat the bullet correctly.
.338 Federal AR built by author’s brother for hogs. VERY effective…
So, they shortened up the case, used different powders, a different shoulder, made it more efficient, and you can get almost everything out of a 6.5 Creedmoor that you can get out of a .260, and with a big, long bullet, you can seat it correctly in the throat, and you can get full performance. You can’t do that with a .260. The case is too long.
After we did 300 Blackout, Ethan and I did a few guns in .338 Federal, Model 7s…The problem with that is if I want to load a 300-grain subsonic bullet and seat it correctly…you don’t get all the efficiency. So, you’re limited on your subsonic and your big, supersonic bullets.
With that being said, .338 Federal, inside 300 meters is superior to .308. It’s an incredible cartridge. But if you want subsonic capability, and you want to load big, long bullets supersonic and subsonic, and you want to fit them into a magazine, you have got to shorten the case. So, we didn’t do it to be different. We wanted to start with .338 Federal, but you can’t get everything out of it – have full mag capacity, long bullets, have it cycle in a gas gun, and fit into a short action.
People ask about 375 Raptor…it does not work full mag capacity in a gas gun super and subsonic. You can’t feed it in an AR reliably. It may be enough for people who tinker or are not serious about it, but it could never be a military cartridge. We’re trying to cover as much as we can with this.
Q: Where do we stand on an 8.6 gas gun currently? I recall a mention of using a POF-USA Revolution as a start, or something similar?
Kevin Brittingham, Q – Since we spoke, the owner of POF was killed. So, that’s kind of dead in the water. I do need to reach out to them. We’re going to get some of those guns and do it ourselves…8.6 in a 9″ is way more effective than 300 Blackout. We can build a 9″ gas on their Revolution or Rogue or whatever they call their gun, that weighs almost what our Sugar Weasel weighs…and you’d have twice the capability.
So, we’re not currently working on it, but we have prototype guns. The very first one that we did was a Noveske. It cycled at full mag capacity super and subsonic, and locked open on the last round.
This isn’t just a bolt gun cartridge, or a subsonic cartridge, and it’s not just a super. It’s all of it, just like 300 Blackout, barrel change only.
But, yeah, there will be gas guns. That was a huge consideration in the development of this. The first things you’ll see are probably barrels offered, or we’ll build The Fix in a 12.5″ as a pistol or SBR. Eventually, we’ll have 16″ barrels available as well for our rifle. Whether it’s SAAMI-approved or not, we’ll share the chamber drawings and everything where people can build barrels for Remington 700s and also Stoner-based guns (AR-10s and SR-25s)
We may also have a gas gun that is available in it as well. Initially, we’ll partner and support companies like Noveske, LWRC…Todd Huey of Lone Star Boars has a 12.5″ LWRC. He’s a good testimony to the Barnes 210-grain. He called me and said he shot a pig with it and he had never seen what he saw. He described it as basically he hit this pig, and it did a flip.
The very first animal I shot was a white-tailed doe in south Texas. I shot it at about 50 yards with The Fix with a 12.5″ barrel and the Barnes 210, she was broadside, and it also did a flip. I could send you a picture of the wound. It’s horrific.
Q: Let’s wrap up with timing…
Kevin Brittingham, Q – I have no idea. I’ll say we’ll be getting the first million shells in here pretty soon. We got the first production run of shells here last month. Powder and primers are the problem.
So, the first 100,000 rounds and maybe the first million will be utilized for marketing, and this year, you’ll see ammo available. There are loading dies available through Hornady now. You’ll see shells, brass available. We stopped at a 1:3 twist so you can use current Barnes .338 bullets. All the bonded bullets that we’ve tested so far…a non-bonded bullet will come apart out of the muzzle with a 1:3 twist, but bonded and solid coppers that we’ve tested stay together out of the muzzle. We’re going to put out load data, chamber drawings, all of that stuff.
As production capacity becomes available with Hornady, Discreet Ballistics, Gorilla, and some of the other companies, you’ll start to see ammo available. This year, we’ll also have barrels for the Fix available, and we’ll also have gas gun barrels available, or you’ll see drawings and us partnering with those gas gun companies, and they’ll be able to do it. But, considering the state of ammo in the industry right now, what you’ll probably see is people that who are into it will probably have to load most of their own ammo.
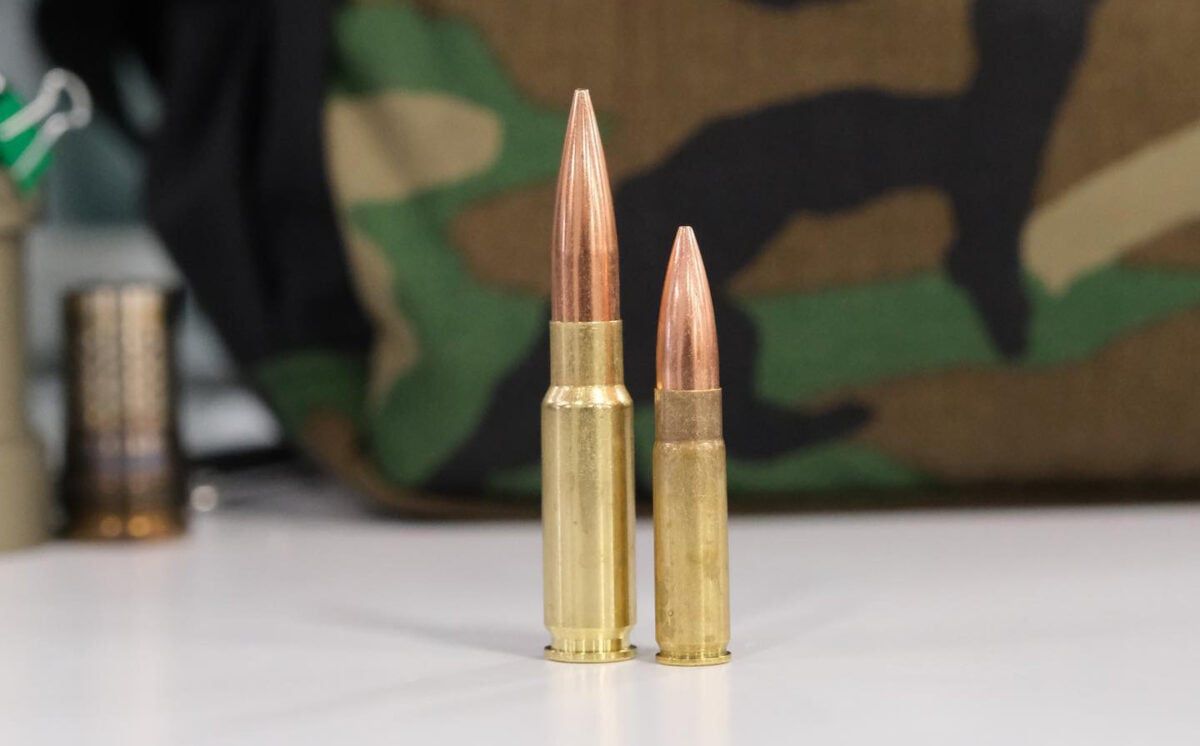
A lot of firms out there are building custom bolt-action rifles for big game hunting. There is seemingly no end to high-end production, semi-custom and custom rifles on the market. Prices and quality run the gamut. In 2015, Andrew Foster set out to be different from the rest. He founded AllTerra Arms in Boise, Idaho, with the hope of “designing, patenting, and building the most accurate and reliable rifle on the planet.”
AllTerra’s Mountain Shadow Carbon is one of the rifle designs that evolved from Foster’s vision. Customers can choose from off-the-shelf rifles or use AllTerra’s website to custom-configure their own creations. Choices begin with choosing the basic rifle model, a right- or left-handed action and chambering. The stock is next, and buyers can customize length-of-pull, various camo patterns and even choose the style of sling swivel stud or hardware desired.
Barrel length is the next choice, followed by several trigger and floorplate options. Eight different metal finishes are available, all of them Cerakote. The final choice is which mount and optic are desired, with options from Leupold, Nightforce, Steiner, Swarovski, Kahles and Zeiss. AllTerra will mount a customer-provided scope for a fee.
AllTerra’s Mountain Shadow Carbon is built on the company’s precision-made Convergence action. The action is CNC machined on pre-hardened 416 stainless steel. This is tough on tooling and is more expensive to produce, but it eliminates the possibility of warpage during the heat-treat process.
The bolt raceways are EDM cut, another expensive and time-consuming process that produces excellent results. The Convergence has an integral recoil lug, a side-mounted bolt stop and a TriggerTech Primary trigger. This trigger is user-adjustable, and my sample broke cleanly at 2.1 pounds right out of the box.
The action uses a dual opposing lug bolt setup, similar to that of the Remington 700 and its clones. The bolt is machined from hardened 4140 chrome-moly steel. The bolt handle is machined from the same billet as the bolt body, eliminating a potential failure point. The bolt handle is skeletonized.
A mini M16-type extractor is used along with two plunger-style ejectors. In addition, the ejection port is machined oversize to allow plenty of room for loading or unloading the chamber. Unlike some rifles out there, the Mountain Carbon Hunter cleanly ejected loaded rounds, something that is sometimes necessary in the real world. The entire feeding, ejection and extraction system proved to be very reliable during my testing.
Although detachable magazines are available as an option, the standard Mountain Shadow Carbon uses an internal magazine with a hinged floorplate. I prefer an internal magazine over the detachable variety on a hunting rifle because it’s one less thing to lose in the field.
The steel magazine box is extended in length to allow for the long VLD-style bullets that are becoming so popular thanks to their ballistic properties. The bottom metal is fully machined from aluminum as is the magazine’s follower. The floorplate can be released using the button inside the trigger bow, dumping the magazine all at once. In 6.5 PRC, the magazine has a 3+1 capacity, which is pretty standard for that chambering.
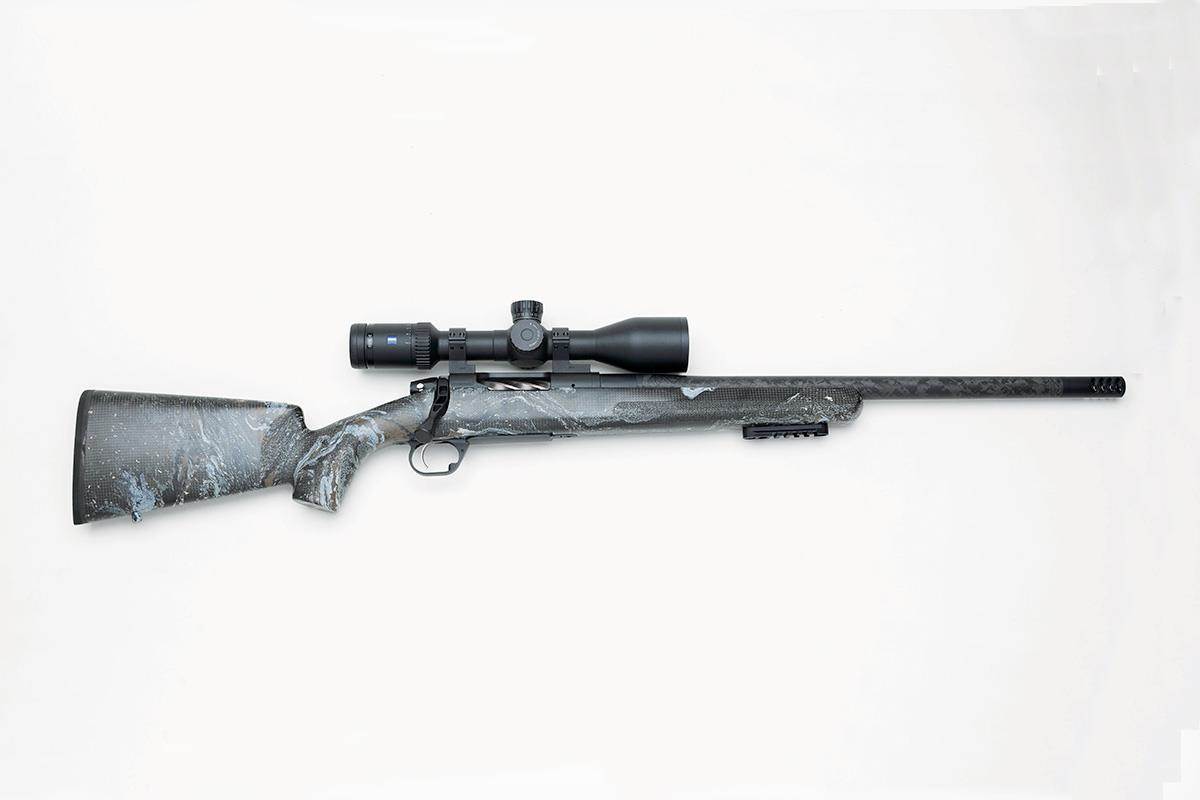
As the name suggests, the 20-inch barrel on the Mountain Shadow Carbon is carbon-fiber-wrapped. The contour is similar to the Proof Sendero Light that I’ve used on several rifle builds. I am a fan of the shooting and handling characteristics of this contour. The barrel is threaded 5/8×24 at the muzzle. The test rifle included an eight-port muzzle brake that all but eliminated the felt recoil of the 6.5 PRC.
The stock on the Mountain Shadow Carbon is a proprietary design that is available in various colors and camouflage patterns. The stock has a semi Monte Carlo-style cheekpiece and some reverse drop on the comb. The pistol grip is a comfortable compromise between that of a traditional sporter and many of today’s nearly vertical designs.
The fore-end swells outward to a semi-beavertail profile that is conducive to shooting from rested positions. Both the fore-end and pistol-grip sections are textured to make things less slippery when wet. On my test rifle there is a traditional sling swivel stud at the toe of the stock and a Picatinny rail section where the forward stud would usually be found. This not only allows for the easy mounting of a bipod or tripod, but also offers a QD-style female sling swivel attachment point.
The barreled action is pillar-bedded inside the stock, and the barrel is free-floated the length of the fore-end.
The base rifle weighed six pounds, four ounces without an optic or mounts. With a Zeiss Conquest V6 3-18x50mm mounted in Talley lightweight bases, the overall package came to seven pounds, 13 ounces. The whole package balanced very well and would be pleasant to carry in steep terrain.
There’s little doubt that this rifle was built using top-quality parts. AllTerra didn’t just select the best components that it could source, though. It also deviated from well-established machining techniques in hopes of building a more accurate rifle.
On most bolt-action rifles, barrels are mated to the action using threads. A turned-down section of the barrel at the breech end called the tenon is threaded to match the threads on the receiver. When the barrel is torqued into place on the action, proper headspace is established.
I know from building my own bolt-action rifles that the alignment between the threads, the chamber, the bolt face and the receiver ring can all be critical factors in accuracy as well. To that end, AllTerra added a few steps to the barrel fitting process. Two sections of the tenon, one ahead of the threads and one behind, are turned to a specified diameter. These “seating rings” interface precisely with sleeves in the receiver.
Using this method, the barrel not only is threaded into place, but also there’s press-fit contact at both ends of the tenon. AllTerra calls it the Dual-Lock Barrel Seat. If any other builders are using such a method, they are not advertising it. AllTerra claims this design provides superior harmonics, making the rifle less sensitive to various types of ammo.
Fitting the barrel is one thing; cutting the chamber is another. Chamber-to-bore alignment is one of the most critical elements of accuracy. AllTerra’s standard is to coaxially align the bore to within 0.0001 inch before cutting the chamber. Chambers are then drilled and bored before the finishing reamer cuts to the final dimensions. This helps prevent the reamer from wandering as it cuts its way down the bore. It is a time-consuming process, but it pays big dividends on the range.
The innovation doesn’t end there. Beyond excellent accuracy, AllTerra wants its rifles to be reliable in the field. The same ultra-tight tolerances that are conducive to accuracy can often be detrimental to reliability.
Practically speaking, if two parts fit together perfectly the tiniest bit of dust, dirt or grit will gum up the works. Since it’s impossible to avoid such things in the real hunting world, clearances must be built in to allow for environmental debris. The bolt’s profile is full size at the front and rear, where it locks into the receiver, but it’s relieved 0.050 inch toward the center of the bolt body to provide such a clearance. Spiral flutes cut into the bolt also give debris a way of migrating out of critical areas.
The action lugs on the Convergence are conical and lock securely into the elliptical raceway on the receiver while allowing additional tolerances where needed. Finally, the bolt body is coated in nickel boron, a super-slick and corrosion-resistant finish.
The base price for the Mountain Carbon Hunter is $6,250. According to the custom configurator on AllTerra’s website, my rifle as tested would retail for $6,550. Adding the Zeiss optic would bring the total up to $8,449.
While $6,550 is nothing to sneeze at, it is comparable to the price of rifles built by competing companies. With this price comes an explicit guarantee of both accuracy and reliability. AllTerra guarantees that rifles will shoot sub 0.5-m.o.a. three-shot groups with premium factory ammunition and sub 0.25-m.o.a. groups with AllTerra Arms’ own handloads. It also pledges that the rifle will cycle in all conditions and will show no significant change in accuracy when shooting different bullet weights.
I tested the Mountain Carbon Hunter with three different hunting loads: AllTerra’s own handloads that used a 143-grain Hornady ELD-X bullet, Hornady’s new Outfitter 130-grain CX load and a 140-grain Berger load from Gunwerks.
The test rifle came with a test target showing two three-shot groups with an average of 0.17 inch shot on two different dates by two different shooters. I have no reason to doubt the veracity of those targets, but I was incapable of shooting groups that tight with this rifle.
My best results came with AllTerra Arms’ own ammunition and averaged 0.48 inch. That is absolutely nothing to sneeze at, and I would happily hunt with this rifle and load all day long.
I have yet to encounter a hunting scenario where the ability to shoot a 0.25-m.o.a. group was necessary. That said, I was unable to shoot the rifle to a level that would meet the company’s strict accuracy guarantee with this optic and any of the three loads I had access to. As for the other elements of the guarantee, I can report that point-of-impact shifts were minimal between the three ammo types, and reliability was 100 percent.
This is an obviously well-built and well-thought-out rifle. I can find no flaws with its construction or performance. It is light and portable without losing practical shootability, and the fit and finish are excellent. In this chambering, this Mountain Carbon Hunter could be a do-it-all rifle for all but the largest of North American game. At this price point, it’s not a rifle for everyone, but the premium components and quality construction displayed throughout come at a premium.
"Understanding the Legalities: Felon Ownership of Air Rifles in Tennessee"
can a felon own an air rifle in tennessee?
In the state of Tennessee, the ownership...
")
")
")
")
")


 Review – The Best Name In The Air Rifle Game")


 When it comes custom rod building and fishing in general, cork will always be a popular grip because of its traditional look and classic feel on any fishing rod. With that said, the big knock against cork is its tendency to slough, erode, and chip over time, but just one coat of U-40 Cork Seal will prevent these factors and so much more.