Home Blog Page 105

Recovering a Gut-Shot Animal

0
Recovering a Gut-Shot Animal

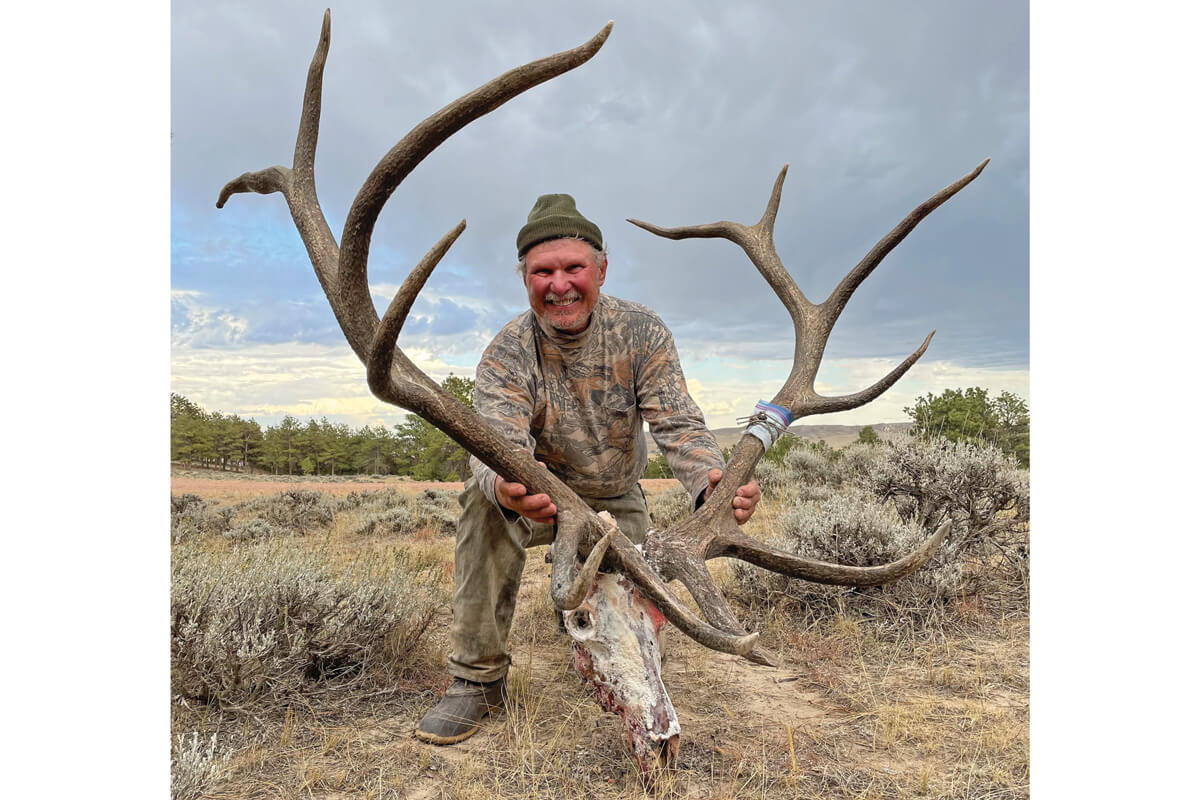
The rack of the bull called Needle is a lasting memento of a difficult hunt followed by a difficult recovery. This elk is the largest I’ve shot in my home state of Wyoming.
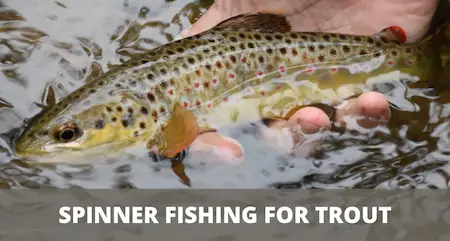
Hunt #1

I was halfway down the long ridge when a bugle erupted to my right. Far below, a 300-inch 6×6 was chasing cows in a timber-dotted draw. I craned my neck to locate the new bull in the dim predawn light. What I saw sent a shiver down my spine.

A wide, massive rack floated above a ridge 400 yards to the south — a rack I thought I would never see again. Days earlier, I had dogged that very bull from dawn till dusk as he pushed three-dozen cows and calves across deep canyons and near-vertical slopes. When the sun finally sank, the large Wyoming six-point was still beyond bow range, surrounded by his harem and posing on a rugged point of rock. He bugled, grunted, and plunged out of sight.

Hard hiking across miles of terrain had failed to show me that elk again. There would be no mistaking his wide-flung antlers with the broken left brow tine. After searching till my eyeballs ached, I figured he was gone for good.

Then, miles away from where I’d chased him, here he was again. A parade of cows and calves trotted across a knob and dipped out of sight. Ears and antlers followed, also sinking below the horizon.

I forgot the smaller bull below me, trotted into a deadfall-littered ravine, and hustled up the other side. I had barely reached the top when cow elk began filing across the main canyon 600 yards below. They joined the bunch with the other bull, creating a massive herd. I stopped counting at 60 elk.

Last in line was the heavy-antlered bull. As I watched through my 10X binoculars, he charged through the milling cows — screaming like a banshee and pacing back and forth. The smaller bull turned and fled. That 300-incher looked like a baby compared to the big guy.

A coulee angled steeply downhill toward the herd, and I ducked into it. Twenty minutes later, I crossed the main canyon and crept uphill through stunted evergreens. Elk were chirping and crunching in a meadow above the trees.

I slipped between two pines and peeked uphill. Cows and calves were feeding in an old burn, and several drifted within 15 yards. I eased an arrow from my hip quiver, nocked the shaft, and waited. The herd bull was nearby, hidden beyond the grassy folds. A stiff morning downdraft blew in my face.

Minutes passed before the bull bugled again just out of sight. I gripped my bow as cows trotted downhill toward me. Instantly, tall antlers rose above the slope.

The bull swaggered out and stopped barely 30 yards away. One cow nearly stepped on me as she scooted away from the rut-crazy male. I drew as the bull nosed another cow, planted my 30-yard pin behind his shoulder, and released.

The cow squirted ahead, the bull lunged forward…and the G5 Striker V2 broadhead smacked him dead-center with a “plop” no bowhunter wants to hear. Elk scattered in giant clouds of dust. The bull walked 100 yards, bedded, stood again, and trudged over a ridge. I backed away immediately. Gut-shot animals always die, but you should never push them.

The cool, sinking breeze had started swirling as the morning air heated up. I hoped the bull would not smell me and go on high alert. That hope was wrong.

Hunt #2

I’ve never lost a gut-shot animal. This happens to every bowhunter sooner or later, but unless spooked, a paunch-hit critter normally travels less than a half-mile. If you wait several hours before following, the result is usually good.

Midafternoon found me snooping along the likely path my bull had taken. Two spots of dark blood on a log and fresh tracks in the dust confirmed his path down a timber-choked draw. Another spot of body fluid 300 yards farther along proved the bull had continued downhill to the bottom of the ravine. I could not find another speck of blood, and the ground in the bottom was hard as a rock.

By dark, I’d scoured every slope and ravine within a half-mile. An old burn dominated the area, and it was mostly open enough to see a downed animal. Next morning, my friend Tommy Moore and I strapped on our hiking boots and continued the search. By midday, we were certain my bull had traveled farther than a half-mile. I suspected the wounded elk had smelled me on shifting air currents before I was able to leave. Juiced up on adrenaline, it was hard to say which direction he’d gone, or how far.

Deep canyons fanned out to the north, east, and south. Tommy and I canvassed the country within a mile, slowly hiking ravine bottoms and slopes in a grid pattern. It was too early for birds to find the carcass or death odor to set in. A tough situation. The sun set on that first full day of searching.

Tommy had to work the next day, but my wife, Greta, drove from home to help me. We searched from daylight till dark over the next four days, fanning outward across vast expanses of terrain within one to two miles. An animal can always crawl in a crack or stop in thick cover, where you might walk past and miss it only feet or yards away. But daytime temperatures were climbing into the 80s. Ravens, eagles, and magpies lived in the area, and such scavengers always descend on a carcass within a few days. After five days, the stench of decay should be detectable for several hundred yards.

The key was getting close to where the elk had dropped, and we certainly had not done that. Greta and I began calling my bull “Needle.” The haystack we were searching was incredibly big and rugged.

Day Six dawned warm and clear. Miraculously, Greta spied a dry, matchhead-sized drop of blood on a tree branch nearly one mile from where I had hit the elk. My wife’s eyes are incredible.

The bull had left the ravine and headed south. Two long, narrow, and fairly open canyons sliced the country even farther in that direction than we had looked — two to three miles away and a greater distance than I had ever seen a paunch-hit animal go.

Greta drove our pickup to the top of the first draw and dropped me off. Two hours later, I met her at the bottom. No birds, no coyotes, no smell. The place I’d hit the elk was 1¾ miles to the north.

Greta left me again at the head of the second canyon — 2¾ miles from impact.

“This is crazy,” I muttered, as I dropped into the narrow cut. I was beginning to believe we might never find Needle.

Halfway down the ravine, something white flashed to my right. A lone magpie sailed across a draw 100 yards above me and vanished beyond a ridge. The bird was alone, but it was the only one I’d seen that day. I decided to investigate.

As I crested the ridge, the bird flew from a tree and floated into another draw.

What the heck, I thought. Might as well follow.

I reached the top just as the bird dove into a clump of densely packed evergreens. As I eased ahead, four magpies erupted from the same spot. The Wyoming breeze fanned my face, carrying the faint smell of decaying carcass. I trotted down the hill as more birds scattered from the thicket. Seconds later, a fat antler tine appeared through the screen of limbs.

Not much later, Greta and I did a happy dance on the upwind side of the elk. Coyotes and birds have to eat, too, so nothing goes to waste in the woods. Selfishly, I was sad about all that ruined meat. But hairy and feathered scavengers had already polished off most of the bull’s rear end, and I knew not one scrap would be left when they were done.

I removed the head with knife and rubber gloves. A generous sprinkling of borax, salt, and baking soda on the de-fleshed skull cut the odor to nearly zero. I had gorgeous antlers to remind me of both hunts — the challenging sneak, and the taxing recovery. My 2021 Wyoming bull later scored a touch over 360 record-book points, in spite of two battle-broken tines on the left side. Intact, he would have scored over 370…one of my best-ever elk.

According to my GPS, Needle traveled just over 2¼ miles before he dropped. Our smartphones confirmed that Greta had walked over 30 miles looking for that bull, and I had walked over 50 miles. If you search hard and long enough for a mortally hit animal, you will almost certainly find it eventually. The double-hunt process might not always be fun, but the conclusion will be thrilling for a number of reasons!

Following Up a Center Hit

An animal hit solidly in the paunch with a sharp broadhead requires patience. It will always expire, but you must wait at least six to eight hours before beginning the search…preferably more if daylight allows. If it is pushed or smells you, it might travel much farther than the normal 400 to 800 yards.

After waiting, you should look for blood, body fluid, and tracks. Try to predict the most likely travel routes, and remember that gut-shot animals sometimes move uphill. Proceed slowly with eyes peeled, in case you need to take a finishing shot.

Beyond 24 hours, you should grid-search terrain, preferably with the help of friends. It is your responsibility to recover the animal, even if you lose the meat. Keep looking — it’s the ethical thing to do — and the critter will almost certainly be yours.

What Are the Best Terrain Deer Signs to Look For?

0

Question:When hunting big woods, what are the best terrain features to look for when trying to find deer signs? — Joe Barrett, Cheltenham, Pa.

Saddles

Why bucks use them: Saddles may not be my go-to terrain feature because they don’t occur everywhere, but they are easy to find and easy to hunt. Saddles offer the two things that bucks look for when traveling: the path of least resistance and a low profile. Mature bucks typically slink around like ghosts — just out of sight — they are around but not really visible. Saddles permit this behavior by reducing the amount of time the buck remains on the skyline.

Saddles accomplish the buck’s second goal by lowering the ridge line. When he is crossing from one slope to the other, the saddle makes the mission easier. Saddles funnel all manner of game. I have hunted some impressive trails through saddles up in the mountains when chasing elk, but here we will focus on whitetails.

How to find them: To find saddles you need a topographical map. Saddles will appear as a gap between the contour lines that make up the ridge top. It is easier to show you what a saddle looks like on a topo map than to try to describe it, so I have included a map image for that purpose.

The weakness of relying on topo maps to find saddles is the scale of most maps. Most depict a terrain variation of 20 feet between adjacent contour lines. That means that for a saddle to appear on the topo map, it has be 20 feet deep. I have hunted many saddles over the years that were only five to ten feet deep, yet they were very productive stand locations. There is only one way to find these shallow saddles and that is on foot. You have to walk the ridge tops. If the ridge dips you have a saddle. Start looking for stand locations.

How to hunt them: With a gun, saddles are a killing field. Set up along the top of the ridge, right where it drops off into the saddle. This gives you the best field of fire to cover anything using the saddle and by staying high, you remain in the consistent wind that stream over the ridge versus dropping down over the top where the wind is sure to swirl.

With a bow, most saddles are less exciting, but still worth hunting. Bucks don’t generally flow right through the bottom like water, so you have to pick a side. The wind, not the sign, dictates which side you should pick. If the wind is 90 degrees to the ridge, you can hunt either end of the saddle equally well. However, if it is quartering across the ridge, you must favor the downwind side of the saddle or you will spook too many traveling deer.

Saddles are best during the rut when bucks are actively cruising. They can also be very good on opening day of the firearms season when other hunters keep the bucks moving. Saddles are not as productive during the early bow season or during the late muzzleloader season unless they lie directly between feeding and bedding areas.

Bedding Ridges

Why bucks use them: I don’t hunt bedding areas early or late in the season because of the risk of spooking deer. However, during the rut, the reward is worth the risk. Things are more chaotic and the deer don’t notice my coming and going as readily. Bucks move through these bedding areas looking for does, creating activity that is very consistent. Many of my best bucks have come from this exact pattern and I look for it as my number one morning option everywhere I hunt.

I hunt ridges nearly every morning during the rut because that is where I find the action. Bucks come through these areas looking for does all morning long. I once hunted a single ridge stand 14 mornings during a 16-day stretch. It never grew old and I eventually shot a great 10-pointer.

The buck parade typically starts shortly after the does arrive — roughly an hour after sunrise. They stay on their feet until late morning if the day is cool, offering several hours of possible action each day.

How to find them: Like all terrain features, ridges show up best on a topo map, but because of shadowing, ridges also show up pretty well on aerial photos. Finding a ridge is only the start, you then need to decide where along the ridge to hunt. I favor funnels in all my whitetail hunting, and surprisingly there is a common funnel on ridge tops.

The areas where a ridge narrows are natural locations for a tree stand. In most parts of whitetail country, a ridge narrows because a draw or ravine runs up from the valley below to end at this point along the ridge line. As deer travel the side of a ridge, they will detour up and around that ravine. So at the place where a ravine cuts into the side of the slope, the bucks will bottleneck closer to the top of the ridge. This is also a natural place for bucks to cross a ridge, another reason to select a stand right at the head of a ravine.

How to hunt them: Determine where the deer are likely feeding and then enter the ridge stand from the opposite direction. Don’t hunt the stand unless the wind is blowing from the feeding area toward the bedding area (into your face as you walk in). Once settled in the stand, the wind will carry your scent over the valley on your downwind side (assuming the ridge is at least 60 to 80 feet high), and ideally over the noses of any deer traveling the valley below.

I have hunted a few of these stands where the conditions were perfect. There was literally no way for the deer to smell me because the ground dropped away quickly on the downwind side and my scent didn’t hit the ground until it was hundreds of yards away and sufficiently diluted that it evoked no reaction from the deer. I love setups like that.

Ditch and Creek Crossings

How bucks use them: Now we are getting into what I think is the best natural stand location in rolling or rugged areas. Again, we are dealing primarily with bucks that are on the move during the rut. They are covering ground and looking for does. In the course of their travels, they will have to navigate through (and around) creeks and ditches. You can easily find and hunt the crossings they are likely to select. I bet ditches and creeks have played a role in at least a third of the bucks I have shot in my life.

How to find them: Ditch and creek crossings are the first thing I look for when hunting a new area. In fact, where these terrain features are common, you can build your entire season around them. Creeks scream at you from topo maps, are obvious on aerial photos and you literally stumble over them (or into them) when walking the property. Ditches are less obvious from the map study, but equally easy to find with your feet on the ground.

Creek crossings generally occur at the center of an S curve in the creek. The bends of the S are generally holes with high banks on the outside while the straight portion between bends is generally shallower with a lower bank. That is where the deer cross.

Some creeks don’t meander, making it much harder to find crossings without actually walking the banks of the creek, looking for cross trails.

Ditch crossings typically take three forms. Either the deer go around the ditch at the top or bottom (comprising the first two forms) or they cross the ditch itself at a place where the banks are gradual. The first two crossings are easy to find from a map study, but you have to walk the ground to find the third type.

How to hunt them: This is why I love ditches and creeks. They offer a no-brainer entry and exit route. At least half of my stands rely on creeks or ditches to permit undetected access. I get right down in them and sneak along. Even if I don’t hunt right on the edge of the ditch or creek, I use it to get in and out.

Go in before the season with a chainsaw and remove all the brush and fallen trees from the ditches so you can walk through easily and quietly, even in the dark. Now you have a corridor that permits you to stay out of sight, keep your noise to a minimum and lay down scent in a place where deer are unlikely to walk. This is the definition of the perfect entry and exit route.

Creeks are not as easy to navigate when they are carrying a lot of water, but when they are low they also represent the perfect access route. In fact, I like the undetected access afforded by creeks and ditches so much that I go out of my way to find stands along these corridors just so I can use them to slip in and out.

Field Crossings

How bucks use them: Many people call them swales. If you think bucks love to use saddles when they are located in the woods, you should see the way they use them in an open field. These swales are basically saddles across open fields, a way for the buck to stay out of sight as he traverses open land.

How to find them: These crossings are generally evident by two brushy ravines on an aerial photo. The ravines extend into the open ridge from the opposite slopes of the ridge, pointing at each other like huge, brushy fingers. This is the narrowest crossing point on the ridge — again reducing the buck’s exposure while traveling.

How to hunt them: The opposing brushy fingers are both good stand choices, deciding which to hunt comes down to the direction of the wind and the availability of good trees. This would be a good stand for all phases of the rut and the place that bucks will use to enter the field to feed during the early and late season — an all-purpose stand. These are fun spots to hunt too, because you can see well in all directions.

Bluff Edges

How bucks use them: Any buck cruising along a side hill will funnel up the slope to bypass the steepest section by walking the bluff edge. Very rarely will they traverse the near vertical slope unless someone is pushing them. One of my best stands of all time was located at the top of an abandoned rock quarry.

Talk about a steep bluff! I hunted it when the wind was blowing out over the quarry so no deer ever smelled me on stand. I accessed the stand by walking up the slope, right on the edge of the quarry, so I got in and out without detection. I messed up on one of the biggest 8-pointers I have ever seen in my life from that stand, but that is another story.

How to find them: You can sometimes see bluffs when studying an aerial photo, but they are much easier to see on a topo map. Where terrain is the steepest, contour lines are very close together signifying a fast change in elevation. When you see contour lines that are close together, you are looking at a bluff.

How to hunt them: As mentioned, bluff stands are among my favorites because they offer incredible advantages and a very straightforward hunting plan. Place your stand near the edge of the bluff and then hunt it with the wind blowing out over the valley below. There is no way that a deer will be able to smell you. If you can climb the bluff from below, you have the ultimate stand setup, one where the deer never detect your entry or exit and they never smell you while on stand. It doesn’t get any better than that.

Best Binoculars Under $100 in 2024: We Review the Top Cheap Binos on the Market

0

If you’re anything like me, I want to get the best of what my money can buy.

I set a criteria for the best binoculars under $100 from Vortex, Celestron, and Bushnell.

But I also recommend a couple cheap binos that are worth it – real glass, decent focus, and a good build.

To provide some real input, I also field-tested some of my very own personal cheap binoculars!

8 Best Binoculars Under $100 In 2024

  1. Nikon Aculon A211 8X42 – Editors Choice
  2. Celestron Outland X 10X42 – Best All-Round
  3. Bushnell H20 10X42
  4. Vortex Raptor 8.5×32
  5. Bushnell PowerView 10×50
  6. Celestron SkyMaster 25×70
  7. Binoteck 10×42 – Best Under $50
  8. Tasco Essentials 10X25

The Best Cheap Binoculars Under $100

Not all binoculars cost several hundred dollars. But not all binoculars will be a one-time, lifetime pair. However, you can still get something that’s worth it for daily use for less than $100.

You don’t have to compromise for plastic “glass” or generic no-name brands. Vortex, Bushnell, Nikon, and Celestron have quality binoculars in this cost-conscious price range.

Though these budget binoculars don’t have industry-level resolution or military-grade toughness, they can get the job done.

For the money, they’ll perform for recreational applications, some hunting, and definitely neighborhood spying – oops, I meant, “observation.”

With decent to above-average glass and performance, my top 8 binocular picks, including a couple of my own field-tested models, meet my criteria.

Our 8 Top Binoculars Less Than $100

1. Nikon Aculon A211 8×42 – Editors Choice

The Aculon is always priced below $100, no matter what!

With this Nikon hanging from your shoulder, you’ll have an extremely wide field of view, fully multi-coated lenses, and aspherical glass elements to help you get the best image quality possible from a cheap binocular.

Even with only 8X power, you can still mount this baby to a tripod. Nikon knows how to jam in quality for the lowest prices possible. It’s probably why it’s such a popular buy among the hunting community. Are you ready to join the “in” crowd?

2. Celestron Outland X 10×42

Unlike most binoculars in this price range, you’re getting a lightweight roof prism bino from the Celestron Outland unit. For under 100 bucks, you’ll be set to go without the added weight holding you back.

Pros:

  • BaK4 glass
  • Waterproof
  • Fogproof
  • Better quality strap

Cons:

  • Multi-coated

I’ve had my hands on the Outland X and they were an extremely convenient pair to have for quick glassing and some occasional birding. It’s light weight at 23.6 oz – not the lightest out there, but still good for today’s standard.

The strap is better quality than what comes with most cheap binoculars – the case is better too. I think its real value will be from its clear glass performance. Though it has only multi-coated lenses versus FMC, it’s not unlike similar alternatives from known manufacturers in this price range.

The entire body is fully protected by a rubber armor, and as is typical with roof prisms, it’s fully waterproof and has been nitrogen-purged. This is a big deal because most budget binoculars will be weather-resistant at best.

If you’re looking for a slimmer binocular versus the bulky builds of the Porros, the Outland is your pick!

3. Bushnell H2O 10X42 Roof

Bushnell knows how to appeal to the cost-conscious buyer. They have a wide inventory of binos priced just right and the H2O is a winning optic among them all.

Pros:

  • Eye relief
  • Lightweight
  • BaK4 glass
  • Roof prism
  • Waterproof

Cons:

  • Multi-coated

For under 100 bucks, having multi-coated optics is the standard. However, this “standard” paired with roof prisms without the addition of phase or prism-specific coatings does result in a slightly darker image than what you’d expect. It may not be as clear a picture compared to a Porro prism bino with multi-coated optics, but on a good day for being outside, you likely won’t notice the difference.

For recreational purposes like observing wildlife while at the lake, casual bird watching, or on a hike, the H2O binos should be just what you need. Because of its roof prism design, it can be made waterproof which it is. It’s also lightweight at 25 ounces that is around the standard for a 10×42 bino these days.

Keep your glasses on with this small pair because it has decent eye relief of 17 mm and twist-up eyecups which is a step up from the fold-up or winged kind often seen in this price range. The compact bino comes with the usual: neck strap, nylon carry case with belt loop, looped rubber lens caps, and a hinged eyepiece cover.

As an entry-level bino that has been bought, used, and put through the ringer by several hundred buyers, it’s a solid buy.

4. Vortex Raptor 8.5×32

You read this right! There’s a Vortex in this price range. It’s no gimmick. The Raptor is a high quality binocular that smokes many other Vortex units when it comes to the ratings.

It’s extremely popular with the masses, and us, for its wide field of view, fully multi-coated lenses, and weatherproof-ability. Even better, it’s more compact and lightweight than its Porro prism bino competitors!

Plus, the warranty on it is practically unbeatable. Technically, this Vortex doesn’t belong in this price range, so if you’re going to spend less than 100 bucks, you better get it while it’s on sale!

5. Bushnell Powerview 10×50

If you’re looking for that Mossy Oak finish that compliments every hunters’ gear, the Powerview 10X50 more than gets the job done.

It’s extremely popular, and it’s been built to impress. With large objectives and the InstaFocus system, you’ll be glassing past sundown.

It’s an impressive, all-purpose binocular that has basic features, but the price can’t be beat for the 10X50 platform with the stylish finish. Thanks to the PowerView, you’ll have max power for max hunting success!

6. Celestron SkyMaster 25X70

For long-distance viewing in the skies or on the ground, you’ll need the long reach of the SkyMaster 25×70 binoculars. With high power and low cost – we’d say Celestron has found the perfect balance in this SkyMaster model.

Pros:

  • Price
  • High power
  • 70 mm aperture
  • BaK4 glass
  • Porro prism

Cons:

  • Short eye relief

A SkyMaster is no small binocular. It has big expectations to fill and so its large frame is a direct reflection of its capabilities. Weighing a heavy 52 ounces and measuring 8.7 x 4.3 x 11 inches in size, this bino is not meant to be handheld by any means. It’s intended to be mounted to a tripod that you’ll have to purchase separately, but it does come with an included tripod adapter that’ll save you a few bucks.

The large objective lenses that are 70 mm in diameter are directly related to the overall weight of the bino. With those large peepers, it’ll allow in as much light as possible to provide a bright, clear picture of celestial bodies or that far-away herd of caribou in the distance.

As a Porro prism bino, it doesn’t need any fancy prism coatings – good thing because it doesn’t have any. All air-to-glass surfaces are multi-coated, it’s water-resistant and not waterproof, and it lacks gas-purged chambers for fog-proof protection – all of which is standard for an optic under 100 bucks.

However, the downer is the short eye relief. For those who don’t wear spectacles or sunglasses while using binoculars, the 13 mm should be fine. For everyone else – it may be uncomfortable to use.

This SkyMaster giant is for adventurers on a budget who enjoy seeing stars or wildlife. It’s not a professional-grade optic, but it is a fun one the entire family can get hours of enjoyment from.

Best Binoculars Under $50

Yes, I have a couple suggestions for this very low price range. You really can’t go cheaper than this if you plan on taking your binoculars seriously. So, here is my recommendation if you have less than $50 to spend.

(By the way, the Bushnell PowerView 10X50 mentioned above is just barely over the $50 price tag. It’s also worth considering if you want a full-size binocular and can stretch your budget by just a few dollars more).

7. Binoteck 10X42 – Best Under $50

The Binoteck 10×42 binoculars are surprisingly very good considering its very low price point. With BaK4 glass, fully multi-coated lenses, and a 305 ft FOV, the Binotecks do ‘cheap’ very, very well.

Pros:

  • FMC coatings
  • BaK4 glass
  • Adjustable eyecups
  • Good focusing
  • Tripod adaptable

Cons:

  • Not waterproof
Best Binoculars Under $100 in 2024: We Review the Top Cheap Binos on the Market
Adjustable eyecups
Best Binoculars Under $100 in 2024: We Review the Top Cheap Binos on the Market
Water-testing
Best Binoculars Under $100 in 2024: We Review the Top Cheap Binos on the Market
Objective lenses
Images by Tina Fa’apoi (Own Work) for Target Tamers

The Binotecks are water and dust-resistant with an IP55 rating, so heavy rain and even accidental submersion must be avoided – you do not want water in the eyepieces. Yes, I did it and they survived, but do as I say not as I do. Though not fog-proof, they did fantastic with moving from a warm truck to freezing temperatures outside.

I really don’t have any serious complaints about them. I took them on a December elk hunt in mountain timber a couple years ago. To my surprise, they did well for around 20-100 yards. When I had longer glassing terrain, I couldn’t get the sharp resolution I wanted. Though they won’t be going for another hunt, the clarity was beyond what I expected for under $50. Don’t let the digiscoping fool you – the image quality is much better in person.

The Binotecks have adjustable eyecups, a diopter, and a tripod receiver. I don’t think you’ll need to mount it since it’s exceptionally lightweight at 16 oz. I’m accustomed to 10x42s weighing in over 21 oz and I can feel the difference. Though it has a good rubber armor, the weak points are at the objective and eyepiece bells. I suggest resisting the temptation to peel it back.

I’m happy to report that I could acquire collimation (no double vision) with these cheap Binotecks. I adjusted with the diopter for my vision thus avoiding the need to wear my glasses. I’d say the eye relief is around 15mm. With my glasses on, it’s tight – doable but uncomfortable.

Overall, my box only came with the rainguard (eyepiece cap), lens caps, neck strap, and lens cloth. I’ve been impressed enough with the Binotecks to keep and recommend them as a recreational and convenient pair for quick glassing.

Available at: Amazon

8. Tasco Essential 10X25

Spending bare minimum doesn’t mean you have to settle. What it does mean is you can have the Tasco Essentials 10X25 binoculars with the roof prism design, fully multi-coated optics, and a plethora of available color finishes.

They are compact, foldable, and lightweight. Are you landing a quality binocular for a song – oh yeah!

In fact, this Tasco has a surprising number of reviews online, and a very impressive customer satisfaction score considering they will put you back a mere $25. They might not be your lifetime buy, but at this price they will make a great starter binocular.

What to Look for in a Cheap Binocular

Making the most of every penny when you’re spending in this price range comes down to knowing a bit about binoculars. Keep it simple by maintaining your sights on quality glass and durability.

Glass Quality

While you’re not going to get Zeiss or Swarovski glass in this price range, you can still look for the best coatings of what this price category has to offer and that would be fully multi-coated lenses.

Since special coatings for roof prisms are rare on binoculars under $100. You may want to put your money into a Porro prism binocular if you want the best glass performance in this price range. If you don’t mind glassing with something a little bulky and heavy, it’s likely to be your best buy here.

You’ll see a lot of standard configurations, examples: 8×42 and 10×42, in this price range. Going higher in magnification with the glass expected at this price point may result in degraded image quality.

Magnification Power, Prism & Glass Comparisons

Eye Relief

The eye relief is the distance from your eyes to the eyepiece in which you can acquire a full field of view free of aberrations.

The lower the number, the tighter the eye relief. Physically, this means it brings the lenses closer to your eyes and they can can dig into your brows and the bridge of your nose. The higher the number, the longer and more comfortable it is – especially for those who wear glasses.

Eye Relief & Exit Pupil Comparisons

*Not disclosed: best guesstimate from personal hands-on experience

Durability

Not all binoculars in this price range will be weatherproof – if it is, excellent! Most will be water-resistant at best, but it’s common sense to avoid heavy rain and submersion with budget binoculars.

The very best in this price range will not only be waterproof but fogproof too. The barrels are purged of oxygen with an inert dry gas like nitrogen. This keeps mold and fungi from growing on the inside and from internal condensation from fogging up the lenses. Body armor will also help your binoculars last longer.

Waterproof & Fogproof Comparisons

*Water-resistant – not waterproof

Cheap VS Junk: The Difference

There’s a difference to buyer satisfaction when buying low budget binoculars when you’re informed. When you don’t know what to look for, you are at risk of buying junk – plastic lenses and the lot.

Look for the type of glass the prisms have been made with, what level of coatings they have, if they have a wide FOV, are tripod adaptable for mounting, or if they’re water and fogproof. When you know to look for at least a few of these things, you’ll know how to make the most of your hard-earned money.

Not all cheap binoculars are bad. These are the gems that are worth the money!

Further Reading

  • Bushnell Fusion 1-Mile ARC Rangefinding Binoculars Review (w/ Angle Compensation)
  • Celestron Outland X 10×42 Review – Popular Binoculars (Model 71347)
  • Celestron TrailSeeker 8×42 Binocular Review (Model 71404)
  • Bushnell Legend 10×25 Ultra HD Binocular Review – With Compact Roof Prism (Model 190125)
  • How to Adjust Binoculars: 4 Essential Adjustments to Master Today

How To Fish For Crappie: Catchin' Slabs All Summer Long

0

Crappie readily bite for nearly everyone in the spring, but these panfish become more of a challenge to catch in the heat of summer.When the summertime sun raises water temperatures above the 80-degree mark, crappie seek deeper water and heavier cover. The fish still remain active though as they feed on schools of shad passing through the crappie’s hot-weather haunts.

On my home waters of Lake of the Ozarks, summertime crappie fishing poses two problems: heavy recreational boat traffic and a lack of visible cover. I solve the first problem by fishing early and late in the day to avoid traffic. Crappie tend to burrow into the middle of brush when recreational boaters churn up the water and it becomes difficult to position my boat in the rolling waves and properly present my lure through the brush.

Some fish can also be caught in the clear water early and late in the day, but mid-day action is slow as the crappie suspend over deep water. In the stained water areas of a lake, the fish stay shallower and are easier to catch throughout the day.

How To Fish For Crappie In Shallow Water

Minnows are the most popular summertime bait for anglers fishing a tight line off docks or spider rigging in boats. Since a crappie’s appetite is voracious during the summer, I select larger minnows (sometimes bigger than 3 inches) for my bait. I prefer using 2/0 and 3/0 hooks because the bigger hook is easier to remove from a crappie and the fish don’t swallow it as much as they do a smaller hook.

Jigs are also productive for summertime crappie. I use either a single 1/16-ounce jig for shooting docks or a double rig for vertically jigging above brush piles. The double rig consists of a 1/16-ounce jig spaced 18 inches above a 1/8-ounce jig at the end of my line.

While my home lake lacks visible cover, Truman Lake is another one of my favorite summertime crappie fisheries that has plenty of it. Lots of standing timber was left in Truman when the Army Corps of Engineers filled the lake.The lowland lake has more turbid water so crappie can be caught in both shallow and deep water in the summertime. A shallow-water pattern produces best when a summertime shad hatch occurs, but for most of the summer you need to fish deeper water.

How To Fish For Crappie In Deep Water

The shallow pattern consists of dipping minnows with a long pole and slip-bobber system in timber along fence rows and tree lines on the main lake or creek channel. You can catch these fish less than 10 feet deep and sometimes even as shallow as 2 feet. The slip-bobber system allows you to adjust your bobber up or down to find the magic depth in which the crappie are holding. Use number 2 or 4 hooks and pinch on a couple of number 5 split shots about 2 to 3 inches above the hook. Keeping the weight close to the minnow will restrict its movement to prevent hang-ups in the heavy cover.

Summertime Crappie Fishing: Deep Water

The deep-water pattern works best in timber along main lake bluffs and channel swings during the hottest part of summer. The fish will vary in depth from 15 to 25 feet depending on the lake’s thermocline. The same slip-bobber rig used for catching shallow crappie also works in the deeper water because the fish will be suspended in the timber. If it’s too windy the bobber will bounce too much in the waves and make your presentation look unnatural. Remove the slip bobber rig then and present your minnow vertically on a tight line next to the timber to trigger a bite.Try these patterns for crappie action as hot as the summertime weather.

Top 11 garden plants for chickens and ducks

0

What are chicken and ducks’ favorite garden plants? Find out what treats you can grow in your garden to share with your feathered family members!

Do you have chickens or ducks? If so and you love your flock as much as we do, your birds are likely spoiled rotten. And completely ungrateful…

It’s important for your flock’s health, longevity, and egg production to make sure they have optimal nutrition. In addition to their primary food, we like to give our ducks plenty of fresh garden goodies throughout the year, which is one of many reasons we maintain a large organic garden/edible landscape.

Over the years, we’ve learned what garden treats our ducks do and don’t like. Now, we’re always sure to grow their favorite varieties to keep them spoiled with fresh organic produce every season of the year.

The fruits and veggies on this list are also some of our favorites to eat as well. So when our ducks aren’t looking, we’ll steal food from “their” garden. (Shh, don’t tell them.)

Top 11 garden plants for chickens and ducks

If you’re a gardener (or aspiring gardener) with spoiled fowl, you might want to grow the plant varieties we mention below. Depending on where you live, the dates/months that you’ll grow and harvest these plants will vary, but you can just follow the instructions on your seed packets to get great results.

Based on the preferences of our Welsh Harlequin ducks combined with feedback from other gardeners we know who raise ducks and chickens, here are the top 11 garden plants for chickens and ducks (in no particular order):

*note: growing info below is based on our temperate climate region, Zone 7B

1. MILD Asian Greens

Season: fall, winter, spring

Light: full sun-part shade

Description & growing notes: Napa cabbage, vitamin greens, mibuna, bok choy, and similar MILD Asian greens all offer a similar, delicious flavor. Our ducks love them, and we do too.

Our ducks do not like spicy greens such as mustard greens or arugula.

2. Chicory

Season: spring and fall

Light: full sun-part shade

Description & growing notes: There are tons of varieties of chicory, and they come in all different sizes, shapes, colors, and flavors. Our ducks like it all.

Our favorite chicory varieties for ducks are “leaf chicories” which feature tall upright leaves. You can cut all the leaves at once about 5″ above the ground and they’ll grow back within weeks, making them a highly productive cut-and-come-again veggie.

Leaf chicory is often sold as “dandelion greens” in high end grocery stores even though they’re totally different plant species. In addition to their productivity, one of the best things about them is they’ll produce continuously from fall through spring. We use row cover/low tunnels to keep it happy in the winter.

3. Lettuce

Season: spring and fall

Light: full sun-part shade

Description & growing notes: Did you know that in poultry heaven, the clouds are made of lettuce? At least that’s what our ducks tell us…

They seriously love the stuff, and it’s hard to pick their favorite lettuce variety. Our recommendation: get the ‘Wild Garden Lettuce Mix‘ from organic plant breeding genius Frank Morton’s farm. It offers a dazzling array of colors, sizes, and shapes.

4. Kale

Season: fall, winter spring for us (our hot humid summers are tough here for kale)

Light: full sun-part shade

Description & growing notes: Our girls aren’t too picky about which kale they’ll eat, but for some reason they seem to prefer extra frilly-leafed varieties. Perhaps it’s fun for them to grab and rip the frilly leaves versus the flat leaves (like Lacinato).

One thing we’ve noticed is that the flavor of kale takes on a more intense, almost spicy flavor as the plants get stressed in late spring-summer in our climate zone. Our ducks stop eating it then but absolutely love it every other season.

5. Mâche

Season: fall, winter, spring

Light: full sun-part shade

Description & growing notes: Another incredibly cold-hardy green. We’ve had mâche survive uncovered down into the single digits.

The plants stay small throughout the winter, then doubles in size nearly every week in the late winter/early spring until it starts producing tiny flowers and seed pods.

Mâche greens are delicious – they taste almost nutty. Some of our ducks also love eating the tiny seeds off the plants, which are probably loaded with good omegas which then go into their eggs.

6. Austrian Winter Peas (the greens/leaves, not the pods)

Season: fall, winter, spring

Light: full sun-part shade

Description & growing notes: Peas aren’t just a spring plant if you know the right varieties. ‘Austrian winter’ peas are the cold-hardiest variety we grow, surviving uncovered to around 10°F.

The peas from the mature spring pods make a killer dried pea for soup, but they’re not as good as snap peas for eating raw. The real magic of ‘Austrian winter’ peas is in the delicious edible shoots/leaves, which taste every bit as good – if not better – than sugar snap peas.

They’re very high in protein, and as you might have guessed, our ducks LOVE them. These also make a great nitrogen-fixing cover crop. Learn more about how to grow & harvest Austrian winter peas.

7. Snap Peas (for the peas in the pods)

Season: fall, winter, spring depending on your agricultural zone

Light: full sun-part shade

Description & growing notes: Pretty much every duck parent we know (and we know lots of them) say their ducks go absolutely bonkers for peas in the snap pea category. Thus they grow snap peas and/or buy bags of frozen peas from the grocery store.

However, our flock of Welsh Harlequin ducks must be broken as we’ve never managed to get them to eat a single pea. Don’t take our ducks’ word for it. Peas will likely be very popular with your ducks — if not, you can enjoy them!

8a. Small Tomatoes (currants & cherry)

Season: summer

Light: full sun (smaller-fruited currant and cherry tomatoes can actually grow in part shade, although they won’t produce as much fruit.

Description & growing notes: We have no idea why, but tomatoes are probably our ducks’ absolute favorite food. If we were the only thing standing between our ducks and a tomato, we’d be seriously worried for our health.

We love and recommend ‘Matt’s Wild Cherry’ tomatoes (in the small tomato category) for a few reasons:

  • the plants are incredibly robust and need no care;
  • the small tomatoes are the perfect size for a greedy duck bill to gulp down whole;
  • they readily reseed and come back in the same spot year after year; and
  • they’re an absolutely delicious tomato for duck slaves (aka humans) to enjoy by the handful as well.

8b. Large tomatoes (beefsteaks)

Season: summer

Light: full sun (with the larger sized fruits, tomatoes require a full sun spot – minimum 6 hours of direct sunlight per day).

Description & growing notes: One of our favorite things to do on a summer evening is to score a large beefsteak tomato with a knife, put it on the ground, do our “duuuuuckliiiiing” treat call which sends our flock flap-running across the yard, then watch as our flock viciously rips the innocent tomato to shreds within seconds.

It’s like Shark Week, but with tomato juice instead of blood and ducks playing the role of Great White sharks. We’re not sure who gets more pleasure from this activity, us or the ducks. We hope you and your feathered family takes as much pleasure from tomato-sharking as we do.

9. Sunberries

Season: summer

Light: produce most fruit in full sun, but tolerate part shade

Description & growing notes: A relatively unknown fruit attributed to the famous plant breeder, Luther Burbank, sunberries (aka wonderberries) are related to tomatoes and other nightshade fruit, but taste more like a mild blueberry.

The 2-3′ tall plants form prolific clusters of berries that ripen black. Ducks, chickens, and humans are all happier when sunberries are ripe.

Do note that some of our ducks absolutely LOVE sunberries and some are meh on them. Who’s to know the mind of a duck.

10. Ground Cherries

Season: summer

Light: full sun for best fruit production and flavor

Description & growing notes: This strange little husked fruit blew our minds when we first ate it many years ago. It tastes like a cross between a pineapple and a tomato.

Ground cherries are a staple in our summer garden every year. As it turns out, our ducks love them to, especially Svetlana the flock matriarch who could eat her body weight in ground cherries if we let her. Find out how to grow, harvest and use ground cherries.

11. Chickweed

Season: fall, winter, spring

Light: grows well but will go to seed earlier in full sun; thrives in part shade

Description & growing notes:

Chickweed is a delightful “weed” that grows abundantly in the winter and spring throughout the US. The flavor is sweet and mild and most similar to corn silk (yes, the frills that stick up out of the top of a corn husk).

It was brought over by early European settlers since it’s one of the earliest greens to produce, and has since naturalized all over North America. It’s one of the most cold-hardy greens you can grow – we’ve had it live uncovered through 10°F.

It grows crazy fast in the spring and our ducks will absolutely gorge themselves on it. Yes, the reason it’s called “chickweed” is that chickens do indeed love it too. Once you know what chickweed looks like, you’ll probably see it everywhere during its growing season.

Update: What plants our ducks do NOT like

Just as in humans, there seems to be wide variability in what one duck or chicken (or flock) likes versus another. We talk to lots of poultry parents whose birds like things our flock won’t touch, despite repeated exposure.

For example, our ducks do NOT like: watermelon, blackberries, blueberries, strawberries, beautyberries, grapes, or many other fruits. Other people report that their ducks love these treats.

Since our ducks won’t touch them, these plants are not included in the favorites list above. If you find that your flock does like them, grow away!

KIGI,

Other helpful duck articles that’ll quack you up:

  • What to feed ducks to maximize their health & longevity
  • 5 tips to keep your ducks from destroying your yard
  • Do duck have teeth? Learn all about ducks’ amazing digestive system…
  • Duck winter care tips
  • Duck summer care tips
  • How to build a DIY self-cleaning duck pond

and more duck articles from Tyrant Farms!

6 Ways to Scent Control Your Clothes Before the Hunt

0

Here are four ways to try controlling scent on your hunting clothes this season, and two that maybe you should avoid.

Whether you are trying to get the human scent off of your deer hunting clothes, or trying to add some that could change the game, we all know one thing when it comes to our favorite quarry: their noses rule and we have to try and beat them!

Deer will see you, hear you and smell your human odor before you ever know that they are there. Turn the tide with some of these tried-and-true, but not very well-known methods of adding scent to your clothes.

They just might fool that big whitetail into thinking you’re something else.

1. Pack it in the pines

First, get over to the dollar store and pick up some of those small, drawstring, linen jewelry pouches. Next, get yourself outside and find the nearest set of pine trees.

Now, fill the bags with green needles and pack them in every inch of your hunting clothes. You really can’t overdo it too much, as pine scent is so very prevalent in most wooded areas. Pack everything in a new garbage bag and let it simmer.

Once you take your clothes out and start hunting, leave the pouches in the bag and put your clothes back in to store for the next hunt.

2. Add some smoke and ash

Like baking soda, ash is a great odor remover, and you can basically use it in the same way. You can bag it the same way, but you’ll have to be more careful working with it. You’ll want to start outside at the fire pit, and since you’re there, start a fire!

Bring some of your other items that you want to get ready for your hunt and let them get some of that smoke “flavor” as well. Deer aren’t spooked by smoke and it’s a great cover-up. I know people that swear by smoking little cigars when they hunt, so why not the natural stuff?

3. Put some oak fruit on it

I hunt the oaks. There’s an oak bottom swamp I’ve been hunting for the last 10 years that has deer trails running in and out of it like an eight-cylinder piston with acorns everywhere.

I’ve learned that above and beyond making my clothes scent-free, adding a little acorn scent is like cooking a steak on the grill to us. Use the garbage bag method and toss in some cotton balls that have been dressed with one dip of the bottle of acorn scent. Too much can be a bad thing with this as you don’t want to stink like an acorn factory.

4. Have it there waiting for you

What smells more like your hunting area than… your hunting area? It needs to be done after a frost or in colder weather. It is best in the more northern climates as insect penetration can happen if you’re not careful.

You’ll need to check the weather to determine just how long you could leave it out there. I’ll leave my coat and bibs out overnight at least as they’re the last thing I’ll put on anyway.

Now, here are two ways that I used for years that I do not recommend for obvious reasons. Ticks carrying Lyme disease present a real danger nowadays, and it’s no longer feasible to try these methods, but to each their own.

Since it’s not easy for most to take their clothes out into the woods to get that natural smell that we all want, you might try this at your own risk.

5. Put it on the wood pile

Again, wait for the first real frost. I always liked to put it on there in a way that I could leave it for days at a time. There’s nothing I like more than fresh oak or ash logs split and ready to burn except when they’re leaving their scent on my hunting clothes.

6. Bury it in the leaves

Leaf litter is everywhere. It might be the most natural smelling thing you could use to make your outerwear the stuff that will bend that big buck’s nose the other way while you’re right in front of him.

I used to put my clothes on the wood pile and then bury it with leaves! Since your yard is probably full of them and you’re sick of raking it all, try putting it to good use.

Given that we’re all looking for an edge, maybe one of these methods will help you to get a little closer to your buck. After all, success is what we’re all chasing out there and maybe this will help!

All photos by Craig Raleigh

NEXT: 11 THINGS THAT EVERY DEER HUNTER DIDN’T KNOW THEY NEEDED

WATCH

Vortex vs Leupold: Rifle Scopes Brand Battle and Comparison

0

Vortex and Leupold scopes are some of the best optics on the market today. However, both have their strengths and weaknesses that can make either the better scope manufacturer for your needs.

For starters, both brands offer different types of scopes at varying price points. The most common price points are entry-level ($500), mid-range ($500-$1000), upper mid-range ($1000-1500) and high-end ($1500 up).

This review will compare the best Leupold vs. Vortex scopes at each price point. I will then discuss their best features and pit them against each other.

Finally, I will conclude with a verdict on which of the two optic brands, Vortex or Leupold, comes out on top with the best bang for your buck.

Vortex vs. Leupold: Comparison of Scope Series and Offerings

In this head-to-head battle of Leupold vs. Vortex scopes, I have split each rifle scope offering from the two brands into budget categories, from below $500 to upwards of $1500.

If you are eyeing any of these excellent scopes between Vortex or Leupold, take note of the Vortex Viper, Diamondback, Venom, Strike Eagle, PST Gen II, Razor HD, and Golden Eagle.

On the Leupold scope side, meanwhile, keep an eye out for the Leupold VX-Freedom, FX fixed power scopes, Mark 3HD, VX-3HD, VX-5HD, VX-6HD, Mark 6, and Mark 8 models.

Entry-Level Scopes (Up to $500)

On the lower end of the price spectrum, you have the budget/entry-level scopes. Comparing the variety of offerings between the two brands, there are more Vortex scopes, with 40 Vortex models offered (like the Diamondback line) at this range vs. the 27 models for Leupold.

In terms of the magnification range, both Leupold and Vortex offer similar scopes. Vortex offers slightly more with a 3-12x scope model, but other than that, they are highly similar at this price point.

In terms of optical clarity, Leupold scopes on the budget end are slightly better, with better eye relief. They also offer a custom dial system (CDS) to help with bullet drop compensation.

That said, Vortex Optics offers these entry-level scopes at lower prices, the highest being $370, while Leupold scopes tend to be just under $500.

Since these optics are meant for inexperienced shooters looking to buy an affordable first scope, I give the win to Vortex.

WINNER: Vortex

Mid-Range Scopes ($500-$1000)

Fighting in the mid-range battle of Leupold vs. Vortex, you have optics lines such as the Vortex Viper, Strike Eagle, and Venom. On the Leupold optics side, the available options include the Mark 3HD, VX-3HD, and VX-5HD.

Vortex offers 22 models as part of their mid-range series, while Leupold offers 32 models. Scopes from Leupold tend to have more magnification or zoom level range options, with more low to medium-zoom models focused on hunting.

On the other hand, Vortex scopes in this price range lean more towards the higher zoom levels. This means they are probably a better option for long-range shooting than Leupold, which is preferable for closer-range engagements.

Leupold scopes in this price range are usually up against the $1000 price point, while Vortex scopes are $150-$200 cheaper.

This bracket is a tie because of how similar both scope brands’ products are at this specific price point.

WINNER: Draw

Upper Mid-Range Scopes ($1000-$1500)

When comparing upper mid-range scopes between Leupold vs. Vortex, you can consider Leupold models like the Leupold VX-5HD and Leupold VX-6HD and Vortex models like the Vortex PST Gen II and Vortex Razor HD LHT.

It is at this point that the glass quality starts to improve significantly. While both offer excellent glass clarity, Leupold has slightly better glass. Their scopes use the same technology they use for their Leupold Binocular lines.

Any Leupold rifleman scope in this price range also has the CDS turrets as standard, which helps improve the longer-range accuracy of users. Vortex scopes do not have this option.

Both Vortex and Leupold scopes are a lot closer in terms of price point. Therefore, I will have to give the slight edge and prefer Leupold due to their slightly superior optical quality and better adjustment turrets.

WINNER: Leupold

High-End Scopes ($1500 and up)

When pitting Leupold vs. Vortex rifle scopes at the higher-end spectrum, consider the Vortex Golden Eagle, Vortex Razor HD, Leupold VX-5HD, Leupold VX-6HD, Leupold Mark 6, and Leupold Mark 8.

Leupold offers 38 scopes, while Vortex Optics only has 16 scopes at this range, meaning they have more options for better rifle scopes in this category. Leupold and Vortex scopes in this category focus on long-range hunting or shooting.

When it comes to high prices, there is a Leupold scope that costs upwards of $4500, which is more than any Vortex Optics scope. However, your primary focus is the performance rather than price value when choosing at a premium scope range.

Therefore, I prefer Leupold because of its slightly better scope glass clarity, and wider variety of options for those looking for a high-end, top-of-the-line scope.

WINNER: Leupold

Vortex vs. Leupold: Comparison of Scope Features

When picking between Leupold and Vortex optics, there are a few features that you must consider.

  • Unique features and technologies
  • Accuracy
  • Reliability
  • Reticle options and ballistics solutions
  • Look and feel
  • Budget and price range
  • Warranty and customer support
  • Brand history
  • Ease of use

Each person will have different priorities in what they value in a scope, and what’s number 1 on this list will often come down to personal preference.

Picking the best Vortex scope and the best Leupold scope requires picking one that has the features you deem to be the most important in spades.

Features and Technologies

When comparing a Leupold and Vortex scope, one of the first differences you will notice is the set of features and technologies stuffed in. Both companies’ scopes have different design philosophies.

Leupold scopes have a focus on premium optical quality and easily adjustable turrets. On the other hand, Vortex scopes are focused on long-range shooting since they use many bullet drop-compensating reticles.

Both brands’ scopes have excellent light transmission and optical clarity, but Leupold scopes use superior construction technologies and scope components, especially in their cheaper optics.

This is unsurprising since they also have great-quality Leupold binoculars. While Vortex Optics also offers great technologies that are more focused on their reticles, it cannot compare to the Leupold options.

Accuracy

As mentioned, when comparing Leupold vs. Vortex optical performance, Leupold’s scopes are often superior. While it does not mean Vortex scopes are inaccurate, you get top-quality optics with Leupold.

Both optics manufacturers offer a multitude of construction features on the optic glass, like fog-proof multi-coated lenses to minimize light reflection. However, Leupold’s models usually have better light transmission.

This ultimately means that in low-light situations, a Leupold scope will give you a clearer view of the target, and you will hit it more consistently. However, even Vortex’s optics perform better than other optics in this regard.

Both brands also offer red dot sights with the same outstanding engineering as their long-range counterparts.

Red dot sights or even iron sights are more appropriate if you are only going to be shooting at close range, but fortunately, they can be mounted alongside your scopes for rapid transitions.

Reliability

Almost all scope models from the two brands are made of aircraft-grade aluminum and have fog-proof, waterproof, and multi-coated lenses. They are all also shock-resistant.

For example, the Leupold VX Freedom is constructed of aircraft-grade aluminum and is 100% waterproof, shockproof, and fog-proof for the best performance in any and all conditions.

Vortex scopes are also constructed well, so I must make this comparison segment a draw.

You will not have any difficulties or issues with the scopes from Leupold and Vortex randomly losing zero, whereas this is not always the case with less battle-tested brands.

Reticle Options and Ballistics Solutions

Leupold and Vortex scopes offer different reticle options. Leupold optics usually incorporate the duplex reticle that is popular for hunting. Therefore, it focuses on having a clear, unobstructed sight picture.

On the other hand, Vortex uses BDC (Bullet Drop Compensation) hash-marked reticles and usually offers two options when you buy – Dead-Hold BDC and V-Plex. This reticle is better for shooting at long distances.

Both brands also have first and second focal plane reticle options. They are also illuminated in the first or second focal plane, which is great for shooting in lower-light conditions.

While both scope manufacturers offer illuminated reticle options, Leupold has far more scope models with that option when compared to Vortex.

Look and Feel

When comparing the look and feel of Vortex and Leupold scopes, they are pretty comparable. Most scopes today use an overcoat over the aluminum to make them look uniformly matte and sleek.

Regarding the overall housing of the scopes, both Leupold and Vortex are large enough for performance purposes but not too bulky that they get in the way or appear too big on a rifle. They even offer compact optics if size and weight are major considerations.

The one thing that can distinguish top-tier scopes from the rest is the ease of using the adjustment turrets. Vortex Optics generally have great feeling (and easy to use) windage and elevation turrets.

However, Leupold’s Custom Dial System (CDS), which they use on all their models from low to high end, is just better. It clicks easily enough to adjust quickly but not too easily to be accidentally adjusted when you don’t mean to.

Budget and Price Range

This is one of the most important factors when choosing a scope because you want the best value for the hard-earned money that you make.

While Leupold’s scopes are not the most expensive for their features, Vortex is simply unmatched at giving you more than what you pay for. They consistently offer features and optical quality at lower price points.

This is especially true for their lower and mid-range scope options, where Vortex models are usually $150-$200 cheaper than their Leupold counterparts. That is where the budget savings can truly be felt.

Warranty and Customer Support

Leupold’s warranty offerings are some of the best in the business. They have a lifetime guarantee, regardless of whether you were the rifle optic’s first or tenth owner. They are also not particular about whether you kept the original receipt or not.

The same thing goes for Vortex’s warranty. They call it the “VIP Warranty,” where they will repair or replace any scope you buy from them. That is a lifetime guarantee.

They are also the same when it comes to exceptions to the rule. One mistake most people make is modifying their scopes or adding extra coatings, which will void the warranty.

However, both are perfect examples of what scope brands should follow when it comes to customer service.

After all, an unlimited lifetime warranty offering full repair or replacement with no questions asked – forever, will ensure a user base that lasts a lifetime.

Brand History

When it comes to the history behind both of these rifle scope manufacturers, Vortex Optics is a relatively new manufacturer. They have been producing and selling optics and other sporting goods since 2004.

Other than the rifle scopes they make, they also make wildlife-watching binoculars. Their claims to fame are their excellent value for money and VIP warranty since day one.

However, Vortex cannot compare to Leupold when comparing brand history. The company has been operating for more than a century and has been making rifle scopes since after World War II.

Their rich history also includes providing American law enforcement equipment and accompanying the military in operations across the globe.

Two of their scope series are also noted to be the most popular in America by the NRA.

Vortex vs. Leupold: Which Is Better?

Leupold scopes are the winner for most people, especially those looking for an all-around high-quality scope for hunting or daily use. It also has a rich history, being THE choice for uniformed personnel and civilians alike.

However, Vortex provides much better value for money with their lower prices, which is the most critical factor in choosing a rifle scope for many people.

They also have more reticle options better suited to long-range shooting than Leupold.

The rifle scope you choose will heavily depend on personal preference and your use case. For bang for your buck, Vortex is the best. For the best optical glass possible, choose Leupold.

Frequently Asked Questions (FAQs)

After learning more about Leupold and Vortex optics, you might have some other questions about the two scope brands. Here are answers to the most commonly asked questions on this match-up.

What Are the Main Differences Between Leupold and Vortex?

The main differences between Vortex and Leupold models are the price and quality of the optical glass. Generally, Leupold scopes use higher-quality glass than Vortex.

However, Vortex offers optics at a lower cost, meaning they give users a better bang for their buck. It is the preferred option if you need something that gets the job done reliably for less money.

On the other hand, if you are looking for the best scope for the price in terms of quality, Leupold should be your top pick.

Is the Vortex Diamondback Worth It?

The Vortex Diamondback is one of the best starter hunting rifle scope options for those on a budget. This is because of the outstanding reliability, fog-proof design, good zoom level options, and value for money.

You are getting a scope that is not too bulky or heavy, utilizes good-quality glass, and, best of all, is cheaper than other options that offer similar features or zoom levels.

Is the Leupold Mark 5 Worth It?

The Leupold Mark 5HD line offers some of the best quality optical glass you can find at its price point. It offers features like HD lens coatings, a wide array of zoom lenses, and great adjustment turrets.

It is also much lighter than other optics that offer the same zoom lenses, up to 20 ounces lighter than some models. This is particularly useful if you walk a lot with your rifle and do not want to feel the weight.

While it is not the cheapest scope, coming in at just below the $3000 price point, it is worth it. It can go from 5x to 25x zoom with just a few clicks and is clear enough to see the farthest targets without you needing to squint.

Does the US Military Use Leupold Scopes?

The previously mentioned Leupold Mark 5HD is the rifle scope chosen by the US Military as the Army Precision Sniper Rifle Scope. This means it will be one of the main scope options used by precision shooters across all the branches.

This is because of its perfect variety of zoom levels, plus the reliability and optic performance that this particular Leupold model showcases. It is also lighter than other options from optics manufacturers in the same category.

Furthermore, the addition of fog and waterproofing ensures that military snipers will not have issues shooting in less-than-ideal conditions.

Are Vortex Scopes Used by the Military?

Over 250,000 Vortex optic models have been selected by the US Military as their optic of choice on their Next-Generation Squad Weapon System. While they are not in use yet, they will be soon.

The features that this model is required to have include a variable magnification optic, backup etched reticle, atmospheric sensor suite, laser rangefinder, compass, and a ballistic calculator.

These are premium features that may make their way towards the consumer market, too.

Final Thoughts on Vortex vs. Leupold Rifle Scopes

The choice between Leupold or Vortex optic models highly depends on what you value and your personal preferences. Both Vortex and Leupold are great brands that offer high-quality tactical products.

If you value having the best quality optical glass, are more focused on hunting, and are willing to spend a bit more, choose Leupold Optics. They are the best fit for your needs.

On the other hand, if you want the best value for money, are on a tighter budget, or need more options for BDC reticles, then getting Vortex Optics is probably your best bet.

This lines up with what I recommend at each budget price point. If you are getting a budget to mid-range optic, then get Vortex. If you are getting a more expensive model, go for Leupold.

Spinner Fishing For Trout (Detailed Guide)

0

UPDATED 03 NOVEMBER 2024

by Robert Ceran

Spinner fishing is one of my favorite ways to catch trout in almost any kind of water. In addition to being fun, it also regularly produces big fish that bite aggressively on these classic trout lures.

Another advantage of this technique is that it’s relatively easy to set up your gear and get started, making it an excellent technique for beginners.

In this article I’ll walk you through the basics of how to set up your gear for trout fishing with spinners, as well as the best lures, tactics and locations to help you catch more fish with this method.

Are spinners good for trout?

Yes, spinners are great for trout fishing, because their rotating blades produce strong vibrations in the water, which is very effective at triggering bites.

Another reason why these lures work so well is that the moving blades generate flashes of light in the water, creating an additional visual stimulus that resembles a small minnow behaving erratically.

These lures also make a excellent search baits, since you can easily cover a lot of water by casting while systematically moving around a lake or pond.

That’s why spinning for trout is usually my first tactic when exploring a new fishery.

Trout fishing spinner setup

The first thing you need to do is set up a good trout rod, reel and line. Here are the tackle components you’ll need:

  • Rod: 6 to 7 foot, fast action, ultralight power spinning rod
  • Reel: 1000 to 2000 size spinning reel
  • Main line: 10 pound test braided line
  • Swivel: Size 10 barrel or snap swivel
  • Leader: 4 to 6 pound test fluorocarbon

The best trout fishing rod to use for this is an ultralight power rod for spinner fishing, since that will enable you to cast ultralight lures (such as a Rooster Tail) over longer distances.

If you’re going to fish in a stream with overhanging trees and bushes, it’s best to choose a shorter rod around 6 feet long.

On the other hand, if you’re going to be casting from the shore of a lake, it’s better to choose a longer rod between 7 and 8 feet, as that will increase your casting distance and will also improve your line management during lure retrieval.

My favorite size spinning reel to use for this technique is a 2000 size, since that’s light enough to work well with lightweight lines and small lures, but it’s also big enough to hold enough line for casting longer distances.

The best main line to use is a 10 lb test braid, since this has excellent casting properties, which increases your casting distance by 10 to 15% compared to other line types.

In addition to this, braid has almost zero stretch, which increases the sensitivity of the whole setup and enables you to feel every single vibration of your lure during retrieval.

If you don’t want to use braid, monofilament is also a good option as a main line for this type of fishing. Now let’s talk about the terminal tackle and leader rigging.

How to rig a spinner for trout fishing

If you’re spinner fishing for trout that aren’t line shy, you can tie your main line directly to a snap swivel, and then attach the snap to the eye of your lure.

The advantages of this rigging is that it is very easy to tie, and it’s also very easy to switch out your lures, since you just need to open and close your snap. Incidentally, this is also one of the best steelhead rigs.

However, in heavily fished lakes and rivers there’s a good chance that the fish are line shy, and this is especially true if you’re angling in clear water.

In that case it’s best to tie a 1 to 3 foot leader with 4 to 6 lb test fluorocarbon.

Fluorocarbon line has much lower visibility in the water compared to braid, and using a fluoro leader thus gives you more stealth.

Tie a size 10 swivel between your main line and the leader, and then tie the fluoro leader directly to the eye of your lure.

If you want to fish in deeper water or in a strong current, add one or more split shot weights above the swivel, which will help to get your lure down into the strike zone faster.

What is the best spinner for trout?

The 4 best trout spinners are:

  • Rooster Tail: This lightweight lure works best for a slow retrieve speed. Needs additional weight if you want to fish it deep.
  • Panther Martin: Heavier body than the Rooster Tail, helping to increase casting distance, and for getting it down into deeper water more effectively.
  • Blue Fox Vibrax: These lures come with a vibrax blade mechanism that produces sounds by rubbing against the bell shaped body of the lure, thereby emitting stronger vibrations in the water than a regular lure.
  • Mepps Aglia: A classic lure that has been around for many decades, and continues to catch fish reliably every season.

While there are many other options on the market, the ones above are my all time favorites, and have caught countless fish for me over the years.

But keep in mind that each of these fishing lure brands comes in a multitude of sizes and colors, and in general it’s best to have as many different options as possible in your tackle box.

The fish can be quite picky at times, and having the right color combination can make the difference between catching your limit or going home empty handed.

If you’re fishing in a heavy current with deep water, you may also want to try out lures with extra weight, or with a torpedo shaped body, which sink faster and are specifically designed to fish in these conditions.

What is the best size spinner for trout?

The best lure size to use depends primarily on the size of the fish you’re expecting to catch.

Spinner blade sizeWeightRecommended use 07/64 oz.Small brown and brook trout in streams 11/8 oz.Small brown and brook trout in streams 23/16 oz. Average size rainbow and brown trout 31/4 oz.Average size rainbow and brown trout 43/8 oz.Big rainbow and brown trout 57/16 oz.Big rainbow and brown trout 65/8 oz.Steelhead

Trout Spinner Size Chart

The table above shows the recommended sizes for catching different species and sizes of fish.

While you sometimes catch small trout on a big lure and vice versa, in general there’s a clear correlation between the size of the lure and the size of the fish that you catch.

So if you’re targeting trophy fish, it’s better to choose one of the bigger sizes (3, 4, or even 5).

On the other hand, if you’re targeting small brookies or brownies in a shallow stream, go with the smallest size you can get away with (0 or even 00), as these small fish have a hard time getting a big lure into their mouth.

What color spinner should you use for trout?

The two best spinner colors for trout (that consistently catch most fish) are a golden blade with black body, or a silver blade with yellow body.

With that being said, it’s necessary to keep in mind that bites can be triggered to bite on a wide range of colors, and which one works best can be very different from fishery to fishery, and even from day to day on the same lake or river.

So you may encounter situations where the colors that usually produce the most fish don’t work, and you need to mix things up in order to get bites.

Because of this complexity, it’s important to have as many different colors in your tackle box as possible, in order to be able to do some testing in order to figure out what works best on any particular day.

In general, it’s best to use more subdued colors like blue or black on bright days with clear water conditions.

On the other hand, brighter colors such as yellow, chartreuse, or pink can work better on overcast days, or in stained waters, or if you’re fishing for trout at night.

Where to use spinners for trout

The great thing about this technique is that it’s easy to cover a lot of water, which means you can use it as a search bait to find locations where you can catch trout.

Here are some of the best places to cast your lures:

  • The inlets of tributary streams of lakes
  • Drop off zones along weed flats
  • Shore points and other underwater structure
  • Old river channels in reservoirs
  • Stocking areas

When searching for hungry fish, it’s important to keep in mind that they tend to be more mobile than many other fish species, and don’t usually spend the whole day in one spot. So if you don’t get any bites, just move on to the next spot.

If you know the stocking area(s) of your lake, it’s always a good idea to start there, as some fish will stay close to these spots for a long time before they disperse in the lake.

How to catch trout with spinners

The best way to catch trout on spinners is by using it as a search bait to cover a lot of water in a short time.

The most common way to do this is to cast your lure out from shore, but you can also throw it from a boat or kayak, and you can even troll it.

Spinner fishing for trout in lakes

When casting from shore, divide the water in front of you into a pie chart, and cover it systematically with a series of casts that move from one side to the other (either clockwise or counterclockwise).

After you finish covering a particular spot this way, move on to the next one.

You’ll usually get very aggressive bites on these lures, so if you don’t get a bite, that either means there are no fish around, or they don’t want to eat your spinner. Because of this it’s best to keep on moving, until you find hungry fish.

Very often trout relate to the bottom, and can be found cruising 2 to 3 feet above the bottom. Because of this, it’s usually best to fish close to the bottom.

After casting it out, let it sink to the bottom before starting to retrieve it, and then retrieve it with your rod tip down to the water.

Casting spinners for trout from a boat

If you’re using a boat, this often gives you access to deeper water than casting from shore, which can be ideal for targeting fish during the summer, when they retreat into deeper water during the day.

In order to fish in deep water, it’s necessary to add additional split shot weights above the swivel on your rig. That way you can even use lightweight options (such as the Rooster Tail) to fish in deep water.

Spinner fishing for trout in rivers

When fishing for trout in streams and rivers, it’s important to stay mobile and cover as much water as possible.

That means you’ll be finished with one location in just a few casts, after which it’s time to move on to the next spot.

The only exception to this is if you get a short strike, and then try out a different style or color to try and trigger another bite from the same fish.

When casting a lure in a stream or river, it’s usually best to cast across the current, and then let the current carry it downstream while you retrieve it, thus forming an arc.

If you want to target a specific feeding lane, it’s best to cast slightly upstream of it, and let the lure swing into that area during the retrieve, as the current pushes it downstream.

Trolling for trout with spinners

Trolling is a great technique for catching more fish in lakes, as it enables you to cover more water with less effort than if casting your lure.

If you’re trolling for stocked rainbow trout, you can use the same setup and rigging as for casting from a boat, though you may want to add additional split shot weights to get your rig deeper in the water.

However, if you want to troll in deeper water than 10 to 15 feet, refer to our guide on trout rigging for trolling to get the best setup for your specific purposes.

Do Turkeys Eat Ticks? All You Need To Know – Stop Ticks

0

Yes, Turkeys eat ticks. An adult turkey is one of the best tick-eaters that it can eat nearly 200 or more ticks a day. Wild Turkeys in the forest floors, swamp regions, and grasslands are the best natural pest controllers. Domesticating Turkeys is one of the best ways to keep the ticks in control. But it is more significant to know more about the turkey-tick relations, effectiveness of tick elimination, etc before proceeding with your domestication idea.

How Dangerous Are Ticks To Humans?

Not all tick species are dangerous. Some prominent ticks can be vectors of life-threatening diseases to humans and animals.

Ticks are parasites that feed on blood. They are disease-causing insects with tiny hard heads and oval-shaped bodies. They are typically flat, brown, oval-shaped, and small and measure only a few millimeters in length. Ticks mostly live in woody, and brushy areas, clinging to shrubs and grasses, and they crawl on animals’ hair or skin when they move past and brush against it. You can find a large population and species of ticks in the USA, UK, Europe, and other western countries.

Most prominent diseases carried by ticks include:

  1. Lyme Disease
  2. Tularemia
  3. Anaplasmosis

Diseases transmitted by ticks to humans may cause symptoms as mild as a localized rash to as severe as joint infections, cardiac distress, and even death if left untreated.

Ticks pose a genuine problem to pets, livestock, and local wildlife. Animals become anemic if they are hosted by large number of ticks. If left untreated, anemia can cause lethargy, weight loss, organ failure, and death.

Best Animal For Tick Control

Biocontrol is the correct method to control the tick population in one place. Meaning, we use one organism to reduce the spread of another organism. In that sense, Using natural tick predators on our property helps us keep the tick population in control.

Some animals that help humans control the tick population are frogs, lizards, squirrels, opossums, some birds, ants, and fire ants. In this list, opossums are the best tick hunters that play a vital role in controlling the tick population. They eat almost 5000 ticks per season – a considerable part in tick destruction. But we cannot raise opossums on our farm. Do you know Turkeys are one of the best predators of ticks that is safe and you can possibly grow them in your farm.

Turkeys And Ticks:

How to raise turkeys on our farm to control the tick population?

Raising turkeys on your farm is not a complicated process. They need some extra care than chickens on your farm. These birds spend most of their time hunting, pecking, scratching, and foraging for food. Once you start to have them in the yard, you will love them. They eat some foods like snails, fish, and lizards. They eat grains, nuts, fruits, insects, and vegetables too.

Do turkeys carry ticks?

Yes! They may carry ticks sometimes. But it is not much harmful to humans or other domestic organisms like dogs, cats, cattle, etc. A research found that turkeys eat almost all ticks – in their larval and nymph stages. They also remove a maximum number of ticks from their body during self-cleaning. So, it is hard for the ticks to escape turkeys.

When we raise turkeys on our farm for tick control, proper vaccination, biosecurity against outside contamination, management practices, and good hygiene are essential. Using antibiotics helps us treat and control diseases in turkeys and improve their overall health.

Do Wild Turkeys Eat Ticks?

Yes! They do. You can find wild turkeys in the suburban areas, grasslands, shrublands, etc. more often eating ticks. The presence of wild turkey is a threat to the ticks population. But you might be amazed if you know which type of turkey eat most ticks? If that i your question, here is the fact!

Which type of turkey eat most ticks? – Domestic or wild turkey:

Generally, domestic turkeys do not bother ticks as they have more options to eat other than ticks. They will fill their stomach with grasses, sweet corn, tomatoes, summer squash, lettuce, etc. Thus, it is obvious that wild turkeys are the potential predators of ticks compared to domestic turkeys.

Domesticated Turkeys and all the five subspecies of the Wild Turkeys eat ticks. Wild Turkeys will consume Ticks when they find them. They are not active hunters but they eat ticks on the ground, in the grass, in low vegetation, and even on their own bodies during self-grooming. Even though these birds are tick hosts, they tend to eliminate more ticks than they spread.

How Many Ticks Does Turkey Eat In A Day?

Turkeys have sharp eyesight and acute hearing, making them talented tick gobblers. A fully grown turkey can consume 200 or more ticks per day. A turkey family, including a female turkey and her two generations along with her mate, can consume around 3800 ticks per day.

Can Turkeys acquire Lyme Disease After Eating Ticks?

Lyme disease is the most threatening tick disease spread to humans by infected ticks. Blacklegged or deer ticks act as vectors of Lyme disease in humans and animals.

Turkeys do not get Lyme disease from eating ticks. The ticks have to be attached to the hosts for more than 36 hours to transmit the disease. There is no possibility for this to happen after the ticks have been killed and eaten by the Turkeys.

Other Birds That Eat Ticks

Chicken:

Chickens eat ticks. They will be able to consume 80 ticks per hour. Chickens will help control the ticks in the backyard. Chickens have been discovered as natural predators of ticks by a study published in 1991. They consumed around 3 – 330 little critters in a single session.

Ducks:

Ticks are fond of moisture, and the Ducks are the most appropriate choice in wet and muddy areas. Though ducks cannot completely eat all the ticks in an area, they can significantly keep down the tick numbers. They are beneficial to the farmers.

Guineafowl:

Farmers use guineafowls as a natural tick repellent. Guinea fowl can eat as many as 1000 ticks per day.

Cattle Egret:

The cattle egret is a bird species that lives in grasslands and cattle pastures in many regions. It removes and eats ticks and flies from the body of animals. Thus, these species do their part in controlling the tick population. These birds ride on cattle backs to pick ticks and eat.

They have a diverse diet chart that depends on the habitat. Generally, these birds are insectivores, and their favorite foods are grasshoppers, locusts, and crickets. Ticks are also on their diet chart but only in small numbers. Some other prey of cattle egrets include earthworms, spiders, crayfish, mollusks, tadpoles, frogs, snakes, lizards, rats, fish, and birds.

Partridge:

Partridges look small, plump, and cute. You can find these ground-dwelling game birds throughout the United States and near water sources. They eat ticks and contribute a remarkable portion to tick control. The thick bristles on their tongues act as a brush-like tool for catching insects and ticks. They can pick and consume all types of ticks, even under leaves and grasses.​​​​​​​ These birds help keep the population of ticks in control by taking ticks as food.

Roadrunner:

Roadrunners belong to the cuckoo family with the native of North America and Mexico. They eat ticks occasionally. So this behavior will not affect the presence of ticks in the environment. These birds get ticks on their feathers and body when they hunt food sources like lizards, mice, insects, snakes, etc.

Their favorite foods: black widow spiders, millipedes, centipedes, crickets, grasshoppers, beetles, caterpillars, snails, mealworms, cockroaches, tarantulas, mosquitos, and dragonflies.

Woodpeckers:

Woodpeckers can naturally eat more ticks. They do this with their long and sticky tongues. The Woodpecker population has a vital role in controlling Lyme disease around the world. Some other favorite foods of woodpeckers: Ants, beetles, termites, spiders, caterpillars, bird eggs, other arthropods, small rodents, nestlings, fruit, lizards, sap, and nuts.

Oxpecker:

An oxpecker is a bird that feeds on ticks and commonly lives in Africa, Asia, and Australia. They often sit on large animals like giraffes, zebras, buffalo, and rhinos. Then they start eating ticks and lice from their body. These birds use their sharp beaks to remove pests from an animal’s skin. Usually, these birds live in woodlands or grasslands and help animals keep their body healthy and clean. They also eat flies, maggots, and all other kinds of larvae from their host body.

Do Quail Eat Ticks?

  • Quails usually forage on the ground and eat what they find. Many people and various communities, especially farmers use quail for tick control in their farms. They can naturally eat more ticks and control tick infestation. Generally, quails are ground birds that dig around in the ground to find food. They consume ticks when they get them from the ground.
  • Like any other animal, quails also get ticks. But they do not have proper immunity to tick bites. So sometimes, these ticks bite may create harmful effects on the overall health of quail. Once you find any tick infestation on your farm quail, ask for medical support. Otherwise, those ticks may start latching onto the quail’s skin.
  • We know that deer ticks are the prime cause of Lyme disease. In some areas, people use quail to control Lyme disease.

How many quails do we need to control ticks in a particular place?

It entirely depends on the area of the place and the severity of the tick infestation. Quails eat all the ticks effectively wherever you allow them to roam freely. Setting them free in the backyard is the best idea to control the ticks population there. Around ten quails are enough for controlling ticks in an area of 1 acre.

Can quails get Lyme disease by eating ticks?

No! They can not get Lyme disease from eating ticks. They receive this disease only when the microbes that cause Lyme disease enter their bloodstream. When quails eat ticks, they will get digested, and there is no direct contact with the bloodstream.

Final Thoughts

Turkeys have proved to be effective in controlling the tick population. So, growing or domesticating some turkeys is best if you live in a tick-infested area. But never forget to follow the precautionary measures advised by the government to prevent tick infections. Turkey treatment might be an additional way to prevent ticks but being precautionary is the basic thing that needs to be followed to prevent tick infections.

FAQ

Q1. Do turkeys transmit ticks?

Wild turkeys do not spread deadly ticks. A recent study shows that turkeys get rid of as many ticks as they carry. The reason? Turkeys eat ticks.

Q2. Which animal eats the ticks the most?

Opossums are one of the top predators of ticks and kill more than 90 percent of the ticks they encounter. Opossums are good at removing ticks, and they can eat up to 5,000 ticks per season.

Q3. What kills ticks naturally?

Eucalyptus and Neem oil can kill ticks effectively. Just combine 4 ounces of purified water into a spray bottle and 30 drops of your carrier oil of choice. Shake well and spray anywhere you want to kill ticks.

Best Air Rifle Deals

Popular Posts

PCP vs CO2 Guns: Which One is Better?

0
The most talked-about debate between hunters and gun enthusiasts is what the best power source of a gun is.  The five main sources of power...

Air gun 101: What is a PCP air rifle? Is PCP gun the best...

0
A PCP air gun is one of five types of air rifles in the market today. PCP air guns have become more and more...

Guide to find Best Scope for Break Barrel Air Rifles

0
"Unlock the Perfect Shot: Discover the Best Scope for Break Barrel Air Rifles. Enhance your shooting experience with precision and accuracy, as we delve...