It is no secret that dogs are the most efficient trackers on the planet. They are very useful for hunts and save the hunters a lot of time and effort.
Here is our rundown of the best deer tracking dogs breeds:
Bloodhound
Bloodhounds are highly efficient trackers and are widely used by hunters to track deer. These scent hounds were originally bred for hunting large game-like deer and boars and are extremely persistent once they catch a scent.
They are also famous for effortlessly pursuing cold trails that other dogs aren’t able to track. This is why bloodhounds are also used by the police to track missing persons and fugitives.
The bloodhound is also the first animal whose evidence is considered legally legitimate in court. They also have a keen sense of hearing which helps them while tracking prey.
Even though they are quite relentless on a hunt, they make very loving and obedient companions to humans. They have a gentle nature and make good pets for families.
Beagle
Beagles are one of the most popular dog breeds as pets. They are also very intelligent and very useful on a hunt. Bred as hunting dogs, they have great tracking instincts and love working.
Beagles have a lot of energy and need adequate training to keep them occupied the right way. They love being stimulated and thus tend to make themselves very useful while hunting.
They have a very loud bark which comes in handy while chasing deer in thick forests. Beagles have short legs , but it does not deter them from chasing fast-moving prey like deer.
Their astute sense of smell has led to them being employed as detection dogs for agricultural imports all over the world.
German Shepherd
German Shepherds are fast, intelligent and highly trainable. Combined with their impressive tracking abilities, these skills make them very adept at tracking animals like deer and foxes.
With a high level of focus and a keen sense of smell, they make very efficient hunting dogs. Distractions do not bother them and they usually finish the job at hand even with difficult circumstances.
They are known all over the world for their vast capabilities. German Shepherds make up a significant population of K-9 units.
With a long history as working dogs, German Shepherds have proven themselves capable of all kinds of work including police work, bomb detection and disability assistance.
Scottish Deerhound
These scent hounds were specially bred for hunting deer. They have an impressive stature and are often mistaken for greyhounds.
Scottish deerhounds are very fast and are capable of chasing prey through rough terrain. This is because they are sighthounds, not scenthounds. They were used to hunt deer by coursing, a hunting method based on speed.
They have obedient personalities and are usually very eager to hunt. Their enthusiasm needs to be put to good use through training and outdoor activities. Deerhounds could turn destructive if they get bored.
Dachshund
Their looks can be deceiving but dachshunds actually make great hunting dogs. Though they were bred to track down and apprehend smaller prey like rabbits and badgers, they can flush deer out of forests or sniff out dead or injured deer.
Dachshunds have a long history as hunting dogs and the urge to track is quite innate in them. Despite their short stature, they have very good endurance. Their only flaw is perhaps their tendency to get distracted.
This problem can be tackled with a lot of dedicated training. Food is a huge motivator for dachshunds, so you might want to keep a lot of treats on hand while training this highly capable dog breed.
What they lack in size, they more than make up for with their impressive sense of smell. In fact, the part of the brain that is responsible for analyzing scents is 40 times bigger in dachshunds than humans.
Plott Hound
Plott hounds are native to North Carolina. They are also the official state dog and serve as K9 deputies in the sheriff’s department. Plott hounds are well built, strong and quite suited to hunt big game like deer.
They love a challenge and do not fear intense activities. Curious and athletic by nature, Plott hounds are widely used as hunting dogs all over the country.
With impressive speed and plenty of stamina, Plott hounds are relentless on the hunt and do not give up until the job is done.
Great Dane
Originating in Germany, Great Danes are one of the largest hunting dog breeds in the world. Deer hunters often use them for their speed and strength.
Their nature is completely opposite to their appearance—they are quite gentle and love company. Though they aren’t really known for their sense of smell, Great Danes are working dogs and have proven themselves useful to deer hunters.
Basset Hound
Basset Hounds are scent hounds bred for hunting small game. They have a very keen sense of smell and have an impressive running speed despite their short legs. They also have great stamina, which helps them on long hunts.
Basset Hounds are very fond of tracking and love hunting, making them enthusiastic partners to hunters. They have a playful temperament and make great pets for families with children.
They have a very independent nature which, while helpful in hunting, could be a problem while training. Owners need to spend a lot of time and energy to make sure their Basset Hounds are trained properly.
Black and Tan Coonhound
The Black and Tan Coonhound is native to America and was bred as a hunting dog. It has great tracking abilities and hunts entirely by scent. It is famous for its success with tracking down cold scents and is frequently used for search and rescue missions.
They are quite large and very efficient in hunting big game like deer. Despite their persistence and tenacity during a hunt, Black and Tan Coonhounds are quite calm and friendly indoors.
They are quite independent, making them efficient hunters. They need a lot of training as they can get a little stubborn, as is typical of hunting dogs.
English Springer Spaniel
English Springer Spaniels make great hunting companions. Though they were originally bred to flush prey out of hiding, they are effective at tracking bigger game-like deer or foxes.
Known as gun dogs, English Springer Spaniels would chase birds into flight, who would then be shot down by hunters. They also retrieved prey, making them very useful to hunters.
They are very enthusiastic and always eager to please, making them easy to train and work with. With amazing stamina, tracking and retrieving abilities, the Springer Spaniel is an amazing tracking dog.
Belgian Malinois
The Belgian Malinois resembles the German Shepherd in both stature and ability—it has a keen nose and is often used as a service dog by the police and the military.
They are very intelligent and extremely loyal to humans. Known for forming deep connections with humans, these dogs are highly trainable and love being engaged.
Their endurance level, strength, smartness and tracking capabilities make them efficient hunters. They have a lot of energy and do not give up the pursuit until they hunt down their prey.
German Shorthaired Pointer
German Shorthaired Pointers are favored due to their expertise in tracking both on land and water. Traditionally a breed hunting, they are quite cooperative and have a strong hunting drive.
They have a high energy level and excel at many activities, making them quite popular at dog sports. Apart from being used as hunting dogs and family pets, German Shorthaired Pointers are also used in search and rescue missions.
They have a playful nature and love being around humans and other animals. It might take a bit longer to train them since they don’t usually reach mental adulthood until they turn at least two years old.
There are many different types of fishing, yet which is the most effective? In this guide, we will explain everything you need to know about fly fishing, including whether you will catch more fish and how to catch as many fish as possible. We believe that fly fishing can be one of the most productive forms of fishing.
One of the unique things about fly fishing is that every detail of your cast can be customized to specifically target the sort of fish you’re aiming for. You can utilize a general-use fly rod, or you can opt to purchase a rod that has been designed to assist you in specific ways. Combined with the endless amount of techniques and combinations it gives you the most optimal approach at catching large amounts of fish.
What is fly fishing?
Before we delve deeper into fly fishing and just how effective it is, it is essential to explain what this method involves. When fishing via traditional means, a cast is made that will use some sort of bait or lure, which is attached to the end of the line. The line is typically one of the newer braided lines or a monofilament.
One thing that is noticeable about this type of setup is that the line is a lightweight and very thin material, with the bait or lure being the heaviest part. This makes it so that when the cast is let loose, your bait or lure is what will carry momentum through the air, trailing the lightweight line behind.
Now, if you were to cast an object that was light in weight, you would have noticed that making the cast go very far is a challenge! In all traditional types of fishing, it is the weight of the lure that is vital.
Traditional Lure Casting Method
If you have ever seen someone fly cast, you will have probably noticed some distinctive differences between traditional lure casting and fly casting. Specialized fly fishing equipment is used by the angler to achieve this cast. This includes a purpose-built fly rod, as well as fly, tippet, leader, and a fly line.
The main difference when it comes to fly casting is that the artificial flies utilized to catch the fish are very lightweight. Even when you use much larger flies for pike or bass fishing, the weight is going to be minimal when compared with traditional bait, such as casting a spinning lure.
Fly Casting Method
With this approach, the key to getting the fly out to where the fish are is with the right fly line. In this casting method, the fly line is the weight. Through the use of a casting method that enables the fly line and the fly roof to work in unison, the weight of lined is utilized for carrying the fly out in front of you through the energy being transferred that has been built up in the line, down through the line, and out toward the end of it.
The most important aspect of fly fishing is knowing how to fly cast. There are some specific techniques in fly fishing that are not going to need much casting. However, the vast majority of what you will do in fly fishing will incorporate casting.
So, now let’s get into fly fishing and what it actually is. This revolves around the presentation of an artificial lure called a fly to a fish, which will typically imitate some sort of insect. This is the basic concept of fly fishing. The aim here is attempting to mimic the natural food base for a fish, getting them to take the fly. You are mostly trying to trick the fish.
The flies that you use for this can vary to insects that live under the water’s surface to those that float on the surface, from caddis to mayflies. Different approaches to fly fishing are required based on the type of fly you use. Some of the materials that tend to be used are as follows:
Feathers from birds, such as pheasants and ducks
Hairs and furs from animals, like moose, elk, deer, muskrats, and beavers
Wires, tinsel, and other types of ribbing materials
Tungsten beads, brass, and glass
Artificially created synthetic materials
The Main Differences Between Spin Fishing and Fly Fishing
In order to give you a true reflection of the differences between spin fishing and fly fishing, we have put together the main differences in a table below.
Differences
Spin Fishing
Fly Fishing
Lures vs. flies
Spin fishing utilizes heavier lures, which frequently imitate fish.
Fly fishing uses flies – including streamers, emergers, nymphs, and dry flies – to imitate all of the different types of food that fish feed one.
Rod type
Spin rods are used. They are heavier lines, which are cast monofilament lines that have a single cast.
Fly rods are used. These use false casting to cast the line, which is lightweight.
Lakes vs. rivers
Spin fishing tends to mainly be done on Stillwater.
Fly fishing tends to be done on moving water. However, it can also be done on Stillwater as well.
Line type
A monofilament line or another sort of line is used to cast lures that are heavier and do not require a heavier line to cast.
To cast the lightweight flies, a fly line, tippet, and leader are used.
Presentation
Spin fishing works effectively when imitating crawdads or baitfish. They are presented in the water at all depths, after which they are retrieved and then brought to you.
Fly fishing enables you to have a stealthier and upstream presentation. When you are fly fishing, you can also work in tighter quarters.
Some other differences do exist between the two types of fishing. However, we hope that the table above will help you to clearly understand the main differences between the two.
Does Fly Fishing Catch More Fish?
While each of the fishing styles is different, they all offer unique advantages in specific situations. However, there are a number of reasons why people believe that you can catch more fish with fly fishing, so let’s take a look at them below…
You can customize your fishing experience.
One of the unique things about fly fishing is that every detail of your cast can be customized to specifically target the sort of fish you’re aiming for. You can utilize a general-use fly rod, or you can opt to purchase a rod that has been designed to assist you in specific ways.
Once your rod has been personalized, this gives you the ability to customize your line. The weight, style, and length can be adjusted. This means your line is going to more significant meet your needs; you can amend the tippet and the leader. With fly fishing, you can quickly achieve a shorter or longer leader.
When it comes to tippets, there are several different styles of tippets that can be utilized with your line. The leader and the tippet are utilized so that the line is virtually invisible to the fish. They also make it a lot easier for the flies to be attached and detached from your line, enabling easy and quick transitions between casts.
One of the most customized parts of fly fishing is the flies. There are a number of different flies that you can buy that can help you with attracting the sort of fish you want to catch. You can do some research, watch your surroundings, and tie your own flies. This means that your fishing experience is ultra-customized, and it also means that you are going to be able to increase your chances of catching as many fish as possible.
The fly is delivered to the fish in a manner that is inconspicuous
Aside from the benefits that have been mentioned so far, there are a number of other advantages that are associated with fly fishing that tend to make it more beneficial. This includes the fact that the fly is delivered to the fish in a manner that is inconspicuous when the cast is done properly. The fly will be cast against the current, and then it is allowed to drift for a distance, in the same manner, that a typical bug falling into moving water would. Your goal here is to make sure the fly is delivered in a manner that the fish does not think there is something unnatural about it. If you are able to fool them, they will take a bite on the line.
You can catch a wide range of species
Last but not least, another reason why people believe you can catch more fish with fly fishing is that you will be able to catch all types of species. This includes bluegills, bass, trout, and many more.
Some of the main species of fish that fly fishing are successful with are as follows:
Bonefish
Tuna
Tarpon
Carp
Panfish
Bass
Pike
Salmon
Grayling
Trout
How to catch even more fish with fly fishing
As discussed, there are a lot of different characteristics that are associated with fly fishing that result in it being more successful than conventional fishing. However, this is only going to be the case if you get your technique down. With that being said, below, we are going to reveal some of the different tips that you can use in order to catch more fish with fly fishing.
Watch the bugs
The first step you need to take when fly fishing is to be observant and watch the bugs! Before you begin to cast away, you need to pay attention to the bugs that are near the water or on the water. Take a look at what kind of bugs the fish are eating. By doing this, you will be able to determine what sort of fly is going to be the most effective and result in you catching the most fish. You also need to think about what trout could be eating under the surface of the water. Try some of your wet flies or nymphs that match the most common underwater snacks. Simply choosing a fly without thought is not the way to go if you want to catch as many fish as possible while trout fly fishing!
Test the length of your leader
The next tip to ensuring you catch as many fish as possible when fly fishing is to test the leader’s length. Depending on the technique and fly you use, you may want either a shorter or longer leader length. For wet or dry flies, try using a longer leader. This should be anywhere between 12 and 20 feet. A shorter leader is going to be more beneficial if you are utilizing a streamer, so go for something between seven and eight feet. It is more than okay for you to try out different lengths on your leader so that you can figure out which is going to be the most effective for you and the fish you are trying to catch.
For more information on leader length check out our full article here:
Approach fish carefully
When you are stalking fish, make sure you approach low and make the most of any cover that you can, for example, bushes and long grass rushes. If you can, make sure you keep a low profile, especially when you are on a high bank with the skyline behind you. Remember, when a fish is deep, it is going to be able to see you from further away than fish that are close to the surface. This is because of the way in which fish see. They have an impeccable vision. They have the ability to uniquely adapt their vision to distinguish predators and locate food. This is why you need to do everything in your effort to blend into your surroundings. You may not think so but wearing bright clothes is only going to lower your success rates.
Walk softly and be as quiet as possible
Once you are in pole position, it is important to walk softly and to be as quiet as possible. This is something a lot of people take for granted. Nevertheless, fish are as sensitive to vibration and noise as they are to visual warnings. If you walk softly on the banks of the river and you try to wade as quietly and slowly as you can, you will definitely notice better results. Of course, trout don’t have ears, but what they do have is lateral lines that they use for detecting vibration and movement in the surrounding water.
Avoid overcasting to the fish
This is one mistake we see a lot of people make when it comes to fly fishing. Catching a fish does not always demand that you use a long cast. After all, you never know what fish could be right in front of you, do you? Before you attempt to catch any fish that are further away, make sure you check the area close to you. Not only do you never know what sort of fish are going to be near you, but it is going to be a lot easier for the hook to be set from a shorter distance rather than one that is far away.
Use the entire rod
Another tip that is important when it comes to fly fishing success is to use the full rod. A lot of fishermen think that they are more likely to win a fight against a fish if the rod is as straight in the air as possible. However, the outcome is not usually a positive one when this happens. Instead, the line either breaks, or the rod does. Instead, you should make sure your rod is nearer to a 45-degree angle instead. This will mean that you are not just using the tip of the rod; you are going to be using the entire rod. When it comes to fighting a fish, it is not all about strength. In fact, it is skill that is most important.
Stay safe
We also have to stress just how important it is to stay safe! After all, if you hurt yourself, you are not going to be able to catch as many fish as possible, are you? There are lots of different steps that can be taken here. For example, you need to wear a hat and some sunglasses so that your eyes are protected. When spotting fish, premium quality polarized sunglasses are always going to provide you with help. Plus, only wade if you need to, and make sure you are always careful when you do. Use a wading belt as well; this is a must.
Cast from your elbow and wrist
Last but not least, our final tip when it comes to getting your technique right in order to catch as many fish as possible is to make sure you cast from the elbow and wrist. A good cast does not mean that the whole arm must be utilized. Instead, it focuses more on the movements of your wrist. Your wrist needs to be straight, yet it should also be relaxed. It is the rod that needs to be doing the vast majority of the work for you. It takes a lot of practice in order to get the perfect cast. Therefore, the best thing that you can do in this regard is to practice, practice, and practice some more!
More Fish, and More Consistent Results
Not only do you have the potential to catch a greater number of fish with fly fishing but you can expect more consistent results as well. This comes down to the tactics that are involved in fly fishing. When you are spin fishing, the lure, whether it is biological or artificial, is put into the water’s depths in order to try and allure the fish into biting it. The lure needs to look like a source of food in order to tempt the fish so that they bite it. Some people have stated that the fish need to be in a certain type of feeding mood in order for this type of fishing to be successful.
When it comes to fly fishing, the end goal is to try and trick the fish into biting a fly that looks like one of their food sources. This can be a fly, as mentioned, or another type of aquatic insect. This is done on top of the water, at the bottom or anywhere that the fish are feeding. The key here is to try and mimic the natural behaviors of the food source as closely as possible, so that is presented in a way that fools the fish and they take the bait.
If you have ever tried fishing before, you will have probably experienced the instance whereby your lure is presented and the fish end up being spooked on the impact of the lure entering the water. This is something that does not happen with fly fishing because the presentation is on the water and above the fish. Because of this, you are unlikely to spook the fish, and this is how you end up with results that are a lot more consistent.
Other Reasons Why Fly Fishing is More Productive
Aside from being able to catch a greater number of fish, because you can personalize your fishing experience, there are a number of other reasons why fly fishing is considered better than spin fishing, and so we are going to take a look at these below.
You will enjoy the experience
Not only can you customize your fishing experience to ensure you catch more fish but there is no denying that fly fishing is much more experienced orientated as well. There are more factors that go into fly fishing and a lot of different things that need to be considered. This is why fly fishing is more fun. It can also be more challenging and more practice is needed in order to get it right. However, isn’t this what the thrill of fishing is all about?
Local chefs are hunting mushrooms for Lowcountry restaurant menus.
Story by Robyn Passante
Mushroom lovers search for Chicken of the Woods mushrooms October through February. Many claim the mushroom tastes like chicken. It can be used as a substitute for chicken in a vegetarian diet.
When Red Fish sous chef Josh Goldfarb spied a 7-pound Chicken of the Woods mushroom growing high on a tree earlier this year, the avid mushroom forager made a mental note to return soon with a way to retrieve it.
Unlucky for him, fellow forager Chaun Bescos spotted it too — and he keeps an extension ladder in his car all winter for just such an occasion.
“It adds to the fun of it, the treasure hunting feel,” says Bescos of the camaraderie and competition among the handful of certified mushroom foragers in the Lowcountry. Bescos, chef at WiseGuys, helped teach Goldfarb about foraging when Bescos was executive chef at Red Fish, and now the two share information — and occasional, good-natured ribbing — regarding their lucrative pastime.
Locally sourced mushrooms, prized for their flavor and their health benefits, are popping up more and more on menus across the Lowcountry, thanks to the hard, hot work of Bescos, Goldfarb and a few others.
Red Fish sous chef Josh Goldfarb shows off a massive lion’s mane mushroom he found here in the Lowcountry. The mushroom produces huge delectable fruiting bodies that can be an awesome addition to any meal.
How lucrative is it?
Chanterelles are probably the most popular and most plentiful wild mushroom in the area, and Goldfarb says a little hard work can yield a sweet paycheck. “During summertime if the weather’s right, we can pick up about 100 pounds a week if the conditions are right, and sell them for 20 bucks a pound retail,” says Goldfarb, who spends about 15 hours per week foraging in the summer, and sells first to Red Fish and then to a handful of chefs at other restaurants. “It’s hard, but it’s worth it.”
Why is it hard?
“It’s a mosquito and tick battlefield,” says Bescos, a Hawaii native who has spent time living and foraging in the Pacific Northwest and in upstate New York. “I’ll come home and have 30 ticks on me. It’s no joke. It’s hot, and you’re dripping sweat when you’re out there in the woods but you gotta dress up in full pants, long underwear, you gotta wear long-sleeved shirts. I wear two to three shirts, I tuck ’em in, long snake boots and then I put on that DEET and go.”
Goldfarb, who moved here from Dallas in 2014, agrees on the relative misery of the conditions in the South. “I come back and even after wearing 100 percent DEET, I’m covered in mosquito and chigger bites. It’s very miserable. But we enjoy getting out in the woods. And I enjoy the check that comes with it.”
OK but otherwise, how hard is it?
“I wouldn’t recommend anybody go out in the woods and try to pick mushrooms unless you absolutely know what you’re doing,” says Goldfarb, who along with Bescos had to go through a two-day training and test to become a certified forager in the state. It’s illegal for those who aren’t certified to forage and sell wild mushrooms — mostly because there are toxic lookalikes out there that can seriously harm or kill those who eat them.
“When I pick, I separate my mushrooms. I don’t put them together,” says Bescos, explaining that if he were picking chanterelles and mistakenly picked a jack-o’-lantern mushroom, the poisonous chanterelle lookalike, even if he realized his mistake and threw out the jack-o’-lantern before preparing the rest of the bunch, “that one jack would make everybody that had that dish sick, just from getting some pieces (of it) mixed in with the chanterelles.”
Where do you forage?
The guys are secretive about their specific hot spots, but Goldfarb has one prime plot in Ridgeland that isn’t technically his but has become his through the generosity of a stranger.
“We were out pickin’ and this guy drove up on this little 4×4 and said, ‘Hey, this is my land.’ We said, ‘Oh, we’re sorry, we didn’t know.’” He asked Goldfarb and his friend what they were doing and when they told him about mushroom foraging, he was intrigued. “He’s given us permission to keep returning to his land, and we’ve found lots of beautiful mushrooms — lion’s mane, Chicken of the Woods, chanterelles — over the seasons. And we invited him to come eat at Red Fish and we made him a mushroom-themed dinner for him and his family. It was really cool.”
Local ‘shrooms
There are 20 wild mushrooms now approved for certified foragers in South Carolina, North Carolina and Georgia. Three of the most common wild edibles on local menus:
Golden Chanterelles – Bright orange-yellow edible that grows on the ground with the root system of live oaks, benefiting the trees. Typically can be found from mid- to late-May until the end of October.Lion’s Mane – Edible, medicinal white mushroom with hanging spines that grows on dying oak trees. Known to enhance nerve regeneration and boost the immune system. Typically can be found between Halloween and Christmas.Chicken of the Woods – Bright yellow-orange edible that grows on dead or dying hardwood trees and is said to taste like chicken. Typically can be found from late October to mid-February.
Fun facts
Lion’s mane are large, white, shaggy mushrooms that resemble a lion’s mane as they grow. They have both culinary and medical uses.
•Mushrooms are also called toadstools.
•Unlike plants, mushrooms do not require sunlight to make energy for themselves.
•A single Portabella mushroom contains more potassium than a banana.
•Mushrooms are made up of around 90 percent water.
•China produces about half of all cultivated mushrooms.
•Mushrooms spores repel over 200,000 species of insect.
•Mushrooms have fewer calories than a rice cake.
•Ancient Egyptians referred to mushrooms as the plant of immortality in hieroglyphics.
•Mushrooms contain more protein than most vegetables.
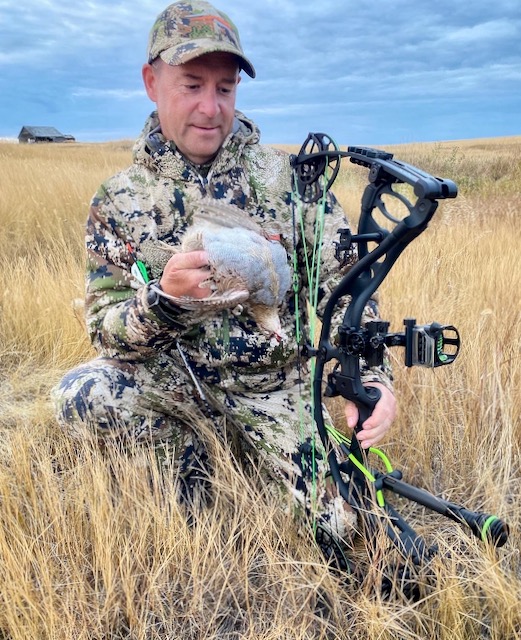
I haven’t taken all of Canada’s upland game bird species with my bow—yet—but I’ve arrowed plenty of willow ptarmigan and grouse, and most recently Hungarian partridge.
In the process, I’ve learned that success depends on how well you understand the birds you’re targeting, what equipment you use and, most importantly, being ready to seize the opportunities. Here’s what you need to know to start bowhunting for upland birds.
BIRD BEHAVIOUR
Whenever you’re big-game hunting, stay alert for ruffed, spruce and even blue grouse. In areas where they’re unpressured, they’ll often hold, allowing you to move in close for a shot. Similarly, on the tundra and in the mountains, willow and rock ptarmigan will typically exhibit little fear of humans, again allowing you to move into range. Ten- to 20-metre shots are typical with these sporting birds. By comparison, quail, chukar, Hungarian partridge, sharp-tailed grouse and pheasant are more flighty, making them all the more challenging.
SPECIALIZED GEAR
If you’re bowhunting birds on the ground, just about any standard fletched hunting arrow will suffice. If you plan to shoot birds in flight, however, you’ll want to specialize your equipment.
Being able to slow down your arrows so they travel a shorter distance will make the recovery of your arrow and downed quarry that much easier. For this, you need to shoot Flu Flus, arrows fletched with larger diameter feathers (typically four inches wide). Basically, Flu Flus come out of your bow at full force, but the tall feathers create drag to quickly slow them down. They are available for carbon and aluminum shafts suitable for shooting out of compound and traditional bows, as well as for wooden shafts made for longbows and recurves.
Hungarian partridge offer a challenge
From a compound bow, a Flu Flu may fly as far as 75 metres before slowing down. Out of a traditional bow, on the other hand, it may slow down after 25 metres. My favourite all-around Flu Flu arrow is a 5/16-inch diameter Easton Traditional Only 600-spine carbon shaft with four fletches. You can also build your own Flu Flu arrows using TrueFlight’s Spiral Wrap Flu-Flu Cut Feathers, which are easy to wrap.
Both compound and traditional bows work fine for upland birds, but the tips you choose should be specific to the type of hunting you plan to do. My favourite tip for birds on the ground is a 100-grain G5 Small Game Head. A Zwickey Judo Point also works very well. Go with either 100-grain screw-in tips for carbon arrows or 135-grain glue-on tips for traditional wooden shafts. Judo tips have small-diameter, spring-loaded arms to inflict damage, but the arms also serve to snag grass and dirt to quickly stop the arrow. Other options include variations of rubber tips, such as Bludgeon Screw-In Blunts for carbon arrows.
Some bowhunters who target pheasants and other upland species on the wing will opt to use a larger diameter tip, such as a Snaro Screw-In Bird Point. Its flat nose delivers a killing shock, while the four-hoop design increases the odds of success by tangling up in the bird’s wings. Made for all carbon and aluminum arrows, it comes with either a three- or six-inch wingspan.
TECHNIQUE
Sneaking up on some upland birds on the ground isn’t too difficult. You just need to be able to gauge when you’re close enough to take the shot, but not so close that you flush the bird. Shooting birds in the air is a different story, however.
If you’re using a compound bow, you’ll want to draw and ready yourself for the flush. With a traditional bow, it really depends on your shooting style; instinctive shooters tend to find it easier to shoot moving targets. As with shotgunning, it’s about learning how much to lead the bird, and determining how long to delay in aiming and releasing. You also need to accommodate for arrow speed. All this can be frustrating to master, but it becomes easier the more you do it.
With that in mind, it pays to practise a lot before you hunt. From a safe spot off to the side, have a friend stand 20 metres away and toss a foam target up in the air to simulate a flushing bird. Eventually, you’ll sort out the timing, aiming and lead to make the shot—and be ready for the real thing.
If you are not so well versed in American history, Ishi was the very last member of the Yahi tribe.
The rest of the tribesmen had perished in the California genocide between 1849 and 1870.
For the next 44 years, Ishi survived in the wilderness with a few relatives of his, until he was “discovered” .
Two other well-known hunters, Art Young and Saxton Pope took him in as a refugee.
That is when Ishi passed on his unrivaled hunting skills to the native American Tribe known as Yahi.
Ishi had really mastered the art of stealth hunting.
Additionally, he would call quite a number of game animals with his own mouth!
And that’s how he survived for decades in the wilderness.
Then came the beloved Teddy Roosevelt – the 26th US president from 1901 to 1909.
How he loved wildlife!
So much so that he traveled with 250 men to the jungles of Africa for a hunting trip.
By the close of the trip, they had hunted down 1,100 game animals – of which 500 were large species – think of buffaloes, rhinos, elephants, and the like.
While Ishi mainly used the bow and arrow, Teddy Roosevelt gloried in his .500/450 caliber Holland & Holland double rifle, as well as the .405 Winchester firearm.
Now, firearms and crossbows aside, can an air rifle sneak you into the hunter’s hall of fame?
That is actually the thought that ignited my interest in air rifles.
For now, let us focus on break-barrel air rifles.
Top-rated Break Barrels Air Rifle
If you are in a hurry, here is an overview of all the candidates in our list of best break barrel air rifles 2026:
Germany has been known to produce some of the best goods around the world, and the German-based Beeman is no exception.
Statista’s Made-In-Country Index reveals that:
“Made in Germany” is the most highly regarded quality label for goods and services around the world, outshining other major exporting nations’ trust marks such as “Made in USA” or “Made in UK”.
Perhaps the first feature of Beeman R9 you’ll fall in love with is the Rekord trigger.
Certainly, it is of the two-stage adjustable design – with the first stage comfortably light and the second stage adequately crisp.
You only need a 2.1-pounds pull on the trigger to fire the airgun.
Additionally, you’ll marvel at the exceptional attention to detail employed in manufacturing.
Talk of a splendidly stained hardwood ambidextrous stock onto which other fittings and moving parts are attached with the highest achievable level of precision.
The Beeman R9 is equally good in performance, on top of the looks.
The .177 caliber gives you an average of 14 FPE, while the .22 model yields about 17 FPE.
That should be enough for all your plinking, targeting shooting, pest eradication, and small game hunting needs.
Accuracy
Calibers
Pellets
Distances
Groups
.22
Crosman Premiere Hollow Point 14.3 gr
20 yards
dime size
.22
Air Arms Diabolo Field 16 Gr
25 yards
dime size
.177
H&N Baracuda Match 10.65 gr
10 yards
0.16"
.177
H&N Baracuda Match 10.65 gr
20 yards
0.17"
.177
H&N Baracuda Match 10.65 gr
30 yards
0.49"
.22
Predator GTO 11.75 Gr
25 yards
0.5"
.22
Predator GTO 11.75 Gr
50 yards
1"
.22
H&N Barracuda Hunter Extreme
20 yards
1/4"
.22
RWS Meisterkugeln 14 gr
50 yards
dime size
.177
Beeman Kodiak Match 10.65 gr
60 yards
quarter size
.22
H&N Field Target Trophy 14.66 gr
25 yards
0.5"
.177
H&N Baracuda Match 10.65 gr
25 yards
0.4"
.22
Beeman FTS Double Gold 14.66 Gr
25 yards
one hole
.22
JSB Exact pellet
25 yards
dime size
.22
RWS Hobby pellet
30 meters
dime size
.22
JSB Diabolo Exact Jumbo Express 14.3 gr
50 yards
quarter size
.177
H&N Field Target Trophy 8.64 Gr
25 yards
dime size
.177
H&N Baracuda Match 10.65 Gr
25 yards
dime size
.177
RWS Supermag 9.3 gr
25 yards
1/2"
.177
Crosman Premier Heavy 10.5 gr
20 yards
dime size
.177
Predator Polymag 8.0 gr
25 yards
1/4"
.177
Beeman FTS 8.64 gr
50 yards
7/16"
.22
RWS Meisterkugeln 14gr
20 yards
0.22"
.22
JSB Hades 15.89 gr
25 yards
0.44"
.22
H&N Terminator 16.36gr
25 yards
0.35"
.22
H&N Terminator 16.36gr
50 yards
0.65"
Chrony tests
Calibers
Pellets
FPS
FPE
.22
H&N Field Target Trophy 14.66 gr
750
18.32
.20
JSB Exact 13.9 gr
708
15.48
.20
H&N Field Target 11.42 gr
772
15.12
.22
Predator GTO 11.75 Gr
757
14.95
.20
H&N Field Target 11.42 gr
780
15.43
.22
RWS Meisterkugeln 14 gr
741
17.07
.22
H&N Field Target Trophy 14.66 gr
730
17.35
.20
Beeman H&N Match 10.03 Gr
820
14.98
.22
Beeman FTS Double Gold 14.66 Gr
680
15.06
.177
JSB Match Diabolo Exact 8.44 Gr
860
13.86
.22
Crosman Premier Hollow Point 14.3 Gr
725
16.69
.22
H&N Field Target Trophy 14.66 gr
700
15.95
.177
JSB Match Diabolo Exact 8.4 Gr
803
12.03
.177
Crosman Premier 7.9 Gr
830
12.09
.22
RWS Meisterkugeln 14gr
713
16
.22
JSB Hades 15.89 gr
656
15.19
.22
H&N Terminator 16.36gr
658
15.73
.22
H&N Baracuda 18.21 gr
651
17.14
.22
Predator GTO 11.75 gr
814
17.29
.22
JSB Exact Jumbo 13.43 gr
674
13.55
.177
Beeman Kodiak 10.6 gr
770
13.97
.177
RWS Hobby 7.0 gr
931
13.45
Recommended uses
Target shooting/plinking
Pest control/ small game hunting: squirrels, raccoons, chipmunks, possums, starlings, pigeons.
The Weihrauch HW90 Breakbarrel Air Rifle combines quality construction with superior accuracy.
With over 50 years of manufacturing experience, Weihrauch sets the standard for air rifles. The natural proportions and beautiful deep bluing give the rifle a classic aesthetic that is sure to stand the test of time.
While many modern airguns provide accuracy, those familiar with Weihrauch’s products know no other brand delivers the same level of precision and reliability as this model.
Whether shooting with or without a scope, you can be sure that you will hit the 10-ring time and time again.
The Weihrauch HW90 break barrel air rifle is a powerful, reliable hunting rifle that you can depend on for decades of use.
Perfect for small to medium-sized pests and games, the gas spring ensures easy cocking while you wait for the ideal shot.
Unlike traditional metal mainsprings that may weaken with time, the HW90 consistently performs at its best no matter how often it’s used.
With hunting with air rifles becoming increasingly popular, this product is perfect for states that are specifying particular games which can be hunted with them.
If you’re not a hunter but still have an interest in quality air guns then the Weihrach HW90 break barrel rifle won’t ever let you down.
Extremely sturdy and long-lasting, this gun will give you optimal performance on a day out at target practice or plinking. With extraordinary craftsmanship embodying German engineering standards, this gun will be sure to bring many years of fun and service.
Accuracy
Calibers
Pellets
Distances
Groups
.177
Beeman Kodiak 10.65 Tapered dome
25 yards
dime size
.25
Diana magnums 20gr
20 yards
3/4"
.22
H&N Field Target Trophy 14.66 Gr
40 yards
0.15"
Chrony tests
Calibers
Pellets
FPS
FPE
.25
JSB Match Diabolo Exact King 25.39 Gr
562
17.81
.25
JSB Diabolo Exact King Heavy 33.95 Gr
426
13.68
.25
Eun Jin 35.8 Gr
460
16.82
.22
Webley Mosquito 14.35gr
726
16.8
.25
Beeman Kodiak Extra Heavy 31.02 gr
590
23.98
.22
Crosman Premier Hollowpoint 14.3 gr
787
19.67
.22
H&N Hollow Point 12.65 gr
879
21.71
Recommended uses
Target shooting/plinking
Pest control/ small game hunting: squirrels, rabbits, rats, pigeons.
Pros and Cons
Pros
Cons
Made in Germany
Beautiful laser engraved stock and deeply blued steel
Built like a tank
Great adjustable trigger
Great accuracy, velocity, and power
Excellent durability
Admirable safety mechanism
Benefits of gas pistons - including no spring fatigue
More effort is required when cocking the rifle
The heavyweight necessitates a sling if you intend to use it for hunting
As you can kill the listed animals with less FPE than the stated values if you are more accurate.
Game
Minimum acceptable caliber
Minimum energy (FPE)
Small birds
.177
5
Medium birds
.177
7
Large birds
.22
11
Squirrel sized game
.22
9
Rabbit sized game
.22
9
Racoon sized game
.22
25
Possum sized game
.22
25
Fox sized game
.22
35
Coyote sized game
.30
50
Javelina sized game
.357
90
Small deer
.357
100
Medium deer
.40
150
Larger deer
.45
200
Hog
.45
200
The above narration is meant to show what you are capable of doing with the Diana 350 Magnum – which shoots pellets at a maximum muzzle velocity of 1250 fps, delivering a killing power of about 23 FPE on average.
That is sure enough for many small-sized and medium-sized games.
The Diana 350 Magnum is a high-powered spring piston air rifle that is perfect for plinking and small game hunting. With its streamlined Monte Carlo beechwood stock and adjustable 2-stage T06 trigger, the Diana 350 Magnum is a force to be reckoned with on the backyard range.
Available in .177 and .22 caliber, this springer can send rounds flying at speeds up to 1,250 fps, making it more than capable of taking down small games at long range.
Each Diana 350 Magnum comes with adjustable rear sights for quick and easy target acquisition, and an 11mm Dovetail scope mount for adding a scope for even more precision.
Add in the Diana T06 2-stage adjustable trigger, which allows you to customize the pull weight, sear engagement, and length of the first stage, and you have a recipe for success on your hands.
So whether you’re looking to take down some tin cans on the range or put meat on the table, the Diana 350 Magnum is sure to get the job done.
Features
Deep blued
Rear is adjustable
Raised cheekpiece
Monte Carlo buttstock with ventilated buttpad
Beech stock
11mm scope rail
Ideal for hunting
T06 Trigger
Accuracy
Calibers
Pellets
Distances
Groups
.22
JSB Jumbo Heavy 18.13 gr
30 yards
0.5"
.22
JSB Diabolo Jumbo 15.89 Gr
30 yards
3/4"
.22
Crosman Premium Ultra Domed 14.3gr
60 yards
1"
.22
Beeman Crow Magnum 18.21 gr
30 yards
nickel size
.177
Beeman Kodiak 10.65 gr
25 yards
dime size
.22
JSB Diabolo Exact Jumbo 18.13 gr
100 ft
nickel size
.22
H&N Crow Magnum 18.21 Gr
20 yards
1/2"
.22
Beeman FTS Copper 14.72 gr
25 yards
1/2"
.177
Crosman Premier 7.9 gr
25 yards
dime size
.22
Beeman Kodiak
50 yards
one hole
.22
JSB Predator
30 yards
one hole
.22
Predator pellet
50 yards
one hole
.22
Crossman premier hollow point
30 yards
0.5"
.22
JSB Diabolo Exact Jumbo 18.13 gr
25 yards
0.58"
Chrony tests
Calibers
Pellets
FPS
FPE
.22
JSB Diabolo 18.13 gr
775
24.19
.22
JSB 15.89 gr
769
20.87
.22
JSB Jumbo Heavy 18.13 gr
738
21.93
.22
RWS Superdome 14.5 gr
875
24.66
.22
Crosman Premier Pellets 14.3 Gr
850
22.95
.177
H&N Baracuda Hunter 10.49 gr
980
22.38
.177
Air Arms Field Heavy Pellet 10.34 gr
986
22.33
.177
Beeman Kodiak 10.65 gr
930
20.46
.22
JSB Diabolo Exact Jumbo 18.13 gr
788
25
.22
RWS Meisterdugeln 14.0 Gr
815
20.65
.22
H&N Baracuda Hunter Extreme Pellets 19.09 Gr
752
23.98
.177
Crosman Domed Field 10.5gr
930
20.17
.177
RWS pellet 8.2 gr
1055
20.27
.22
RWS Superdome 14.5 Gr
949.8
29.05
.22
Crosman premier 14.3 gr
855.44
23.24
.22
JSB Exact 15.8 gr
757.9
20.16
.22
RWS Superdome 14.5 Gr
847
23.1
.177
Crosman Premier Light 7.9 gr
850
12.68
.177
Crosman Premier 10.5 grain
810
15.3
.22
RWS Hollow Point 14.2 Gr
825
21.47
.22
JSB Diabolo Exact Jumbo 18.13 gr
778.4
24.4
Recommended uses:
Target shooting/plinking
Pest control/small game hunting: woodchucks, possums, gophers, rabbits, eastern grays, crows, squirrels, raccoons, jackrabbits, feral cats, groundhogs, and small foxes.
Pros and Cons
Pros
Cons
Powerful and well-finished
Great for shooting rabbits, crows, Eastern grays, and woodchucks
Quality of the beechwood stock and the deep blueing of the metal
The most powerful break barrel air rifle: Hatsan 135 QE Vortex
The Hatsan Model 135 Vortex QE Breakbarrel Air Rifle is the perfect choice for serious outdoor enthusiasts, hunters, and air gun shooters.
Built with Hatsan’s Vortex gas piston, this air rifle provides smoother cocking and shooting with no spring torque or spring fatigue.
Its QuietEnergy shroud and integrated sound moderator make it approximately 50% quieter than without it. The precision rifled, German steel barrel allows for superior accuracy.
The Quattro 2-stage adjustable match trigger is adjustable for trigger-pull weight, first stage, second stage, and length of travel; plus it features a gold-plated metal trigger blade for an extra touch of style and luxury.
Cold weather? No problem: the Hatsan 135 was designed to function perfectly in cold climates.
The Hatsan 135 Vortex QE Breakbarrel Air Rifle is the perfect addition to any outdoors enthusiast’s arsenal, delivering maximum performance and power.
With a max muzzle velocity of 1550 feet per second and a max energy of 34 FPE, this high-powered air rifle offers powerful shooting capabilities.
Hatsan’s patented Shock Absorber System (SAS) and rubber recoil pad work together to reduce felt recoil for comfortable shooting and ease of use.
This air rifle also boasts an 11mm dovetail & Weaver optics rail with an included scope stop, so you can pair it with your preferred scope for precise accuracy.
Even without one, you won’t experience difficulty hitting your target — each Model 135 QE comes standard with micro-adjustable green fiber optic rear sights and a fixed red fiber optic front sight.
To ensure your safety while in use, this air rifle includes manual safety, automatic cocking safety, and an anti-bear trap mechanism.
From its stylish ambidextrous Turkish walnut stock featuring an adjustable Monte Carlo comb and stylish checkering on both the grip and forend, to its powerful design that shoots pellets up to 1000 feet per second in .177 cal, this gun will give you everything you need to take on small game.
But that’s not all – it also has built-in sling mounts so that wherever you go shooting, carrying your rifle will be easier than ever before.
If you’re an outdoors enthusiast or hunter with a taste for the finer details in rifle design, the Hatsan Model 135 QE is the perfect fit for you; reliability and precision combined with elegance and comfort.
Features:
Single shot, break barrel
Vortex gas piston
QuietEnergy shrouded barrel with an integrated sound moderator
Rifled German steel barrel
Quattro 2-stage adjustable trigger, with metal trigger blade
Automatic cocking safety
Resettable manual safety
Anti-bear trap safety
11mm dovetail and Weaver optics rail with metal scope stop
Ambidextrous stock with adjustable Monte Carlo cheekpiece
Turkish walnut stock with checkering on grip and forend
SAS (shock absorber system) and rubber butt pad for recoil absorption
Micro-adjustable rear sight, for both windage and elevation, with green fiber optics
Fixed front sight with red fiber optic
Built-in sling mounts
6 lbs.
Max Velocity* – Lead-Free Pellets – .177 cal – 1550 FPS, .22 cal – 1250 FPS, .25 cal – 900 FPS
Max Velocity* – Lead Pellets – .177 cal – 1300 FPS, .22 cal – 1000 FPS, .25 cal – 850 FPS
Max Muzzle Energy** – .177 cal – 28 FPE, .22 cal – 33 FPE, .25 cal – 34 FPE
Accuracy
Calibers
Pellets
Distances
Groups
.25
JSB Diabolo Exact King Heavy 33.95 Gr
25 yards
dime size
.25
JSB Diabolo Exact King Heavy 33.95 Gr
35 yards
nickel size
.30
JSB Diabolo Exact 44.75 Gr
25 yards
quarter size
.25
H&N Grizzly 31 gr
40 yards
1"
.30
JSB Diabolo Exact 50.15 Gr
30 yards
one hole
.30
Predator Polymag 44.75 gr
50 yards
.75"
Chrony tests
Calibers
Pellets
FPS
FPE
.25
JSB Diabolo Exact King Heavy 33.95 Gr
746
42
.30
JSB Diabolo Exact 50.15 Gr
553
34.06
.30
Predator Polymag 44.75 gr
533
28.24
.30
JSB Exact 44.75gr
534
28.34
.25
H&N Field Target Trophy 20.06 gr
780
27.11
.25
H&N Hornet 22.07 gr
750
27.57
.30
JSB Diabolo Exact 44.75 Gr
570
32.29
.25
H&N Grizzly 31gr
692
33
.22
JSB Match Diabolo Exact Jumbo Heavy 18.13gr
810
26.42
.25
JSB Diabolo Exact King 25.39 gr
820
37.92
.30
JSB Diabolo Exact 50.15 Gr
595
39.43
.22
H&N Slug HP Heavy 36 Gr
716
40.99
.30
Predator Polymag 44.75 gr
550
30.07
.30
JSB Diabolo Exact 50.15 Gr
553
34.06
.22
Crosman Premier 14.3 gr
924
27.12
.25
H&N Field Target Trophy 20.06 Gr
785
27.46
.22
Predator Polymag 15.89 gr
938
31.05
Recommended uses
Pest control/small game hunting: squirrels, rabbits, raccoons, coyotes, groundhogs.
Pros and Cons
Pros
Cons
Incredible wood and craftsmanship
Beautiful stock and barrel
Adjustable 2-stage trigger
Very steady and balanced due to the weight
Universal weaver/11mm dovetail rail
Nice fiber-optic sights with adjustable rear
Adjustable cheek rest and recoil butt pad
Effective shock absorbent system at reducing the recoil
Heavy
Cocking mechanism takes power
Hard to find ammo if you choose a .30 caliber version
Best break barrel air rifle under $150: Black Ops Tactical Sniper Combo
Meet the Black Ops Tactical Sniper Spring piston Breakbarrel Air Rifle. With its outstanding accuracy and range, it is the perfect tool for outdoors enthusiasts and avid air rifle shooters.
This high-powered pellet gun is capable of firing .177 caliber (4.5mm) pellets at speeds up to 1,250 FPS with incredible consistency and power.
You don’t need to worry about spooking the game when using this Sniper Rifle as it was designed to be extremely quiet, in fact, it comes with an attached suppressor for sound control.
With a simple cock break loading mechanism and durable construction materials, you can trust that you are getting quality and performance from this air rifle every time you use it.
The Black Ops Tactical Sniper Spring piston Breakbarrel Air Rifle is the ultimate tool for all outdoor enthusiasts and hunters who strive for accuracy and precision.
This high-caliber air rifle boasts a smooth trigger pull, blued steel construction for incredible toughness and durability, as well as a comfortable grip for hours of comfortable shooting.
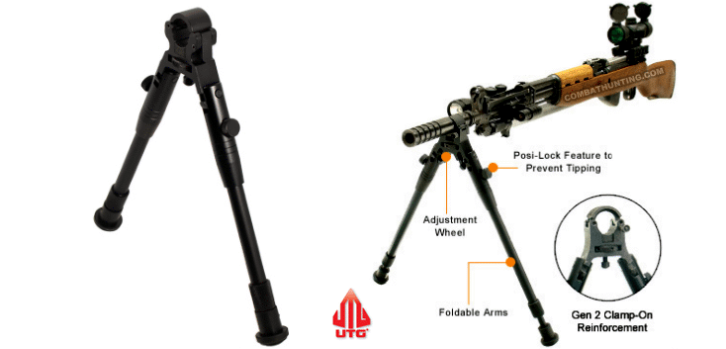
The sniper piece also comes with a 6-inch Picatinny rail for mounting any compatible optics or accessories, plus an adjustable bi-pod to ensure you hit your target every time.
And if that wasn’t enough, this air rifle also comes with a 4×32 rifle scope with cover and an adjustable cheek rest so that you can get into proper shooting form even faster.
Features:
Powerplant: Gas-piston/Spring -piston
Break barrel
Single-shot
Muzzlebrake for extra cocking leverage
Weaver/Picatinny optics rail
Adjustable comb
Synthetic stock
Automatic safety
44 lbs. cocking effort
44 inches long
Bipod legs extend from 8″ to 10″
Bipod legs fold up out of the way
Includes 4×32 scope (unmounted), mount, and adjustable bipod attached to the forearm
Includes detachable open sights (.22 cal version only!)
Accuracy
Calibers
Pellets
Distances
Groups
.177
Crosman Premier Hollow Point 7.9 gr
20 yards
0.5"
.22
Crosman Premier Hollow Point Pellets 14.3 Gr
10 yards
nickle size
.22
Crosman Premier Hollow Point Pellets 14.3 Gr
20 yards
dime size
.22
H&N Crow Magnum 18.21 Gr
35 yards
quarter size
Chrony tests
Calibers
Pellets
FPS
FPE
.177
Crosman Premier Hollow Point 7.9 gr
947
15.74
.22
RWS Hyper Velocity 11 gr
833
16.95
.177
Crosman Destroyer 7.90 gr
1081
20.5
.177
H&N Baracuda Match 10.65 gr
925
20.24
.177
RWS HyperMAX 5.2 Gr
1232
17.53
.177
RWS Hobby 7gr
1057
17.37
.177
RWS Superdome 8.3 gr
937
16.19
.177
JSB Match Diabolo Exact 8.44 Gr
986
18.22
.177
H&N Field Target Trophy 8.64 Gr
938
16.88
.177
H&N Crow Magnum 8.80 Gr
918
16.47
.177
Gamo Rocket 9.6 Gr
902
17.35
.177
Crosman Premier Heavy 10.5 Gr
855
17.05
.177
Beeman Silver Arrow 11.57 gr
808
16.78
Recommended uses
Target shooting/plinking
Pest control/small game hunting: rats, raccoons, quails, doves, rabbits.
Pros and Cons
Pros
Cons
Impressive tactical design
The safety switch location in front of the trigger makes it easy to use “blind”
The durability of the bi-pod, and the spring-assisted leg extension design is up to par.
Best break barrel air rifle for the money: Gamo Swarm Magnum 10X Gen3i
The Gamo Swarm Magnum 10x Gen3i Gas-piston Break-barrel Air Rifle is the perfect embodiment of cutting-edge air rifle technology for outdoors enthusiasts and air rifle shooters alike.
An innovative 10X GEN3i Inertia Fed Magazine allows for the rapid reloading of 10 shots in a lighter, more compact, and low-profile package.
An upgraded mechanism makes the magazine rotate to rapidly insert pellets into the breech using the inertia of the recoil when shooting.
The improved accuracy, smoother operation, and terminal penetration make this air rifle a must-have for any competitive marksman.
Ultimately, experience maximum performance in an outdoor setting with IGT Mach 1 high-power gas piston technology.
With more precision, less vibration, and true knockdown power, this 33-millimeter cylinder sends pellets up to 1650 FPS with alloy ammo – allowing you to strike targets with maximum force and accuracy.
Combining these top-tier features, Gamo Swarm Magnum 10x Gen3i Gas-piston Break-barrel Air Rifle provides both recreational shooters and serious marksmen alike with an exceptional tool of modernity that simply cannot be rivaled by conventional firearms.
The Gamo Swarm Magnum 10x Gen3i is the ideal choice for any outdoors enthusiast, hunter, or air rifle shooter.
With its Whisper Fusion technology and CAT Trigger, you get the perfect combination of silence and precision.
The Whisper Fusion technology utilizes a double-integrated sound moderator to make it the quietest air rifle in Gamo’s line of products. As you fire off shots, the pellet travels through two different chambers, compressing and preventing any noise expansion.
With its independent adjustable 1st and 2nd stages, the CAT Trigger allows you to tailor your trigger to how you want it – giving you complete control over your shot.
Thanks to its Recoil Reducing Rail and All-Weather Thumbhole Synthetic Stock, you get recoil reduction that’s almost 100%, plus lightweight construction that provides steady and reliable performance in any weather.
The Gamo Swarm Magnum 10X Gen3i features a two-piece aluminum construction rail separated by dual polymer struts to absorb shock waves produced by the recoil.
The size and shape of the stock have been carefully crafted to fit most shooters, providing a perfect alignment with your scope for optimal accuracy.
Not only does it look impressive, but this lightweight, the tough design allows for all-weather shooting when outdoors – so you can enjoy shooting no matter the weather!
Features:
10X GEN 2 Quick-Shot inertia-fed magazine
Max velocity: 1300 fps with alloy, 975 fps with lead
What’s more? The Rekord trigger shortens the learning curving curve by a lot.
With 820 fps in .177 caliber and 650 fps in .22 caliber, you can enjoy endless plinking and target practice.
Designed and manufactured in Germany using the latest sporting arms technology by a company with decades of experience and an eye for detail, this air rifle is perfect for all types of leisure and sporting use.
It is easy to handle yet packs a powerful punch thanks to its solid construction and reliable piston spring. Its excellent accuracy ensures that you’ll be able to hit your target every time when you pull the trigger.
This well-crafted weapon features an automatic safety, match-type trigger “Rekord” for enhanced accuracy and power, tunnel front sight with interchangeable inserts for clear target acquisition, and micrometer sight adjustable for windage and elevation with four different notches for personalized shooting.
The beechwood ambidextrous stock is both accomplished in its style and comfortable to hold, featuring a long and handy forearm and cheekpiece on both sides as well as checkering on the pistol grip and forearm for secure handling even in adverse conditions.
Features
Single-shot
24 lbs. cocking effort
Checkered beech stock with raised cheekpiece
2-stage adjustable Rekord trigger
Globe front sight accepts inserts (included)
Adjustable rear sight
Steel barrel & receiver
Rubber buttpad
Incl. front sight inserts
Accuracy
Calibers
Pellets
Distances
Groups
.22
H&N Baracuda Hunter Extreme 18.5 gr
20 yards
1/2"
.177
H&N Field Target Trophy 8.64 Gr
10 meters
dime size
.177
H&N Excite Spike Pointed 8.64 Gr
25 yards
0.5"
.177
Predator Polymag 8 Gr
15 meters
dime size
.22
Crosman Hollow Point 14.3 gr
25 yards
0.5"
.177
JBS Exact
25 yards
5/16"
.177
Crosman Premier 7.9gr
10 yards
one hole
.177
H&N Field Target Trophy 8.64 Gr
35 yards
dime size
.177
JSB Match Diabolo Exact 8.44 Gr
10 yards
0.16"
.177
H&N Field Target Trophy 8.64 Gr
30 yards
1/4"
.177
RWS Superdomes 8.3gr
25 yards
0.5"
Chrony tests
Calibers
Pellets
FPS
FPE
.177
RWS Hobby 7 Gr
864
11.61
.177
H&N Excite Spike Pointed 8.64 Gr
765
11.23
.177
Predator Polymag 8 Gr
775
10.67
.177
Crosman Premier 7.9gr
765
10.27
.22
Crosman Premiers 14.3 gr
610
11.80
.177
H&N Field Target Trophy 8.64 Gr
754
10.91
.22
RWS Superdome 14.5 gr
630
12.78
.22
H&N Field Target Trophy 14.66 Gr
616
12.36
.177
JSB Exact 8.4 gr
775
11.21
.177
RWS Super Point 6.9 Gr
815
10.18
.22
RWS Hobby 11.9 gr
650
11.17
.177
Crosman Premier 7.9 gr
770
10.4
.177
JSB Exact heavies 10.5 gr
660
10.16
.177
Crosman Premier 7.9 Gr
769
10.38
Recommended uses:
Target shooting/backyard plinking
Pest control: crows, iguanas, rats.
Pros and Cons
Pros
Cons
Lightweight and compact
Beautiful stock and excellent HW barrel
Not very hold sensitive
Accurate with open sights
The rear sight has three different notches (different widths) and a V-notch
The Beeman R7 Air Rifle will be useful if your aim is backyard plinking.
You’ll produce less than 70dB – with .177 pellets shooting at 700 fps and 7 FPE.
This customized version of Weihrauch’s HW30 offers superior comfort and fit with a North American-style stock as well as availability in a .20 caliber option in addition to the traditional .177 version marketed by Weihrauch.
Crafted for ultimate function and form, the Beeman R7 features metal surfaces of superior quality exhibiting a high level of machining and polishing.
Fitted with the renowned Rekord trigger, this two-stage adjustable unit offers no creep and a smooth let-off – allowing you to get on target faster and remain there longer than ever before.
Beeman offers their renowned R7 in a unique .20 caliber, giving shooters access to exclusive models.
However, when it comes down to cost and pellet options the classic .177 caliber is unbeatable; we recommend light pellets between 7-8 grains for optimal performance from your R7 – such as Beeman Silver Bear or HW/RWS Match Pellets.
Features:
Spring-Piston
Break barrel
2-stage adjustable Rekord trigger
Rubberized buttpad
18 lbs of cocking effort
11mm Dovetail rail
Adjustable rear sight and globe front sight
Automatic safety
Accuracy
Calibers
Pellets
Distances
Groups
.177
FX Air Rifle 8.4 Gr
25 yards
one hole
.177
JSB Match Diabolo Exact 8.44 Gr
25 yards
1/4"
.177
Crosman Premier Hollow Point 7.9 gr
50 feet
dime size
.177
Crosman Premier Hollow Point 7.9 gr
20 yards
quarter size
.177
JSB Exact RS 7.33 gr
22 yards
one hole
.177
RWS Hobby 7 gr
10 yards
one hole
.177
JSB Match Diabolo Exact 8.4 Gr
20 yards
dime size
.177
H&N Field Target Trophy Cal, 8.64 Gr
25 yards
0.5"
.177
JSB Match Exact Express Diabolo 7.87 Gr
27 meters
3/8"
.177
RWS Hobby 7 gr
27 meters
0.5"
.177
Beeman Hollow Point Coated 7.2 gr
15 yards
.323"
.177
RWS Superdome 8.3 Gr
15 yards
.323"
.177
Crosman Premier Hollow Point 7.9 gr
15 yards
.573"
.177
Air Arms Diabolo Field 8.44 Gr
15 yards
.198"
.177
Air Arms Falcon 7.33 Gr
15 yards
.448"
.177
Beeman Hollow Point Coated 7.2 gr
20 yards
.698"
.177
RWS Superdomes 8.3 gr
20 yards
.698"
.177
Crosman Premier Hollow Point 7.9 gr
20 yards
.823"
.177
Air Arms Diabolo Field 8.44 Gr
20 yards
.448"
.177
Air Arms Falcon 7.33 Gr
20 yards
.511"
.177
Beeman Hollow Point Coated 7.2 gr
25 yards
.761"
.177
RWS Superdome 8.3 Gr
25 yards
.948"
.177
Crosman Premier Hollow Point 7.9 gr
25 yards
.823"
.177
Air Arms Diabolo Field 8.44 Gr
25 yards
.636"
.177
Air Arms Falcon 7.33 Gr
25 yards
.573"
.177
Beeman Silver Bear 7.1 gr
40 yards
5/8"
Chrony tests
Calibers
Pellets
FPS
FPE
.177
Crosman Premier Hollow Point 7.9 gr
745
9.74
.177
JSB Exact RS 7.33 gr
679
7.51
.177
H&N Field Target Trophy 8.64 Gr
555
5.91
.177
RWS Hobby 7 gr
649
6.55
.177
RWS R10 Light 7 gr
660
6.77
.177
Beeman Silver Bear 7.1 gr
637
6.4
.177
RWS Super-H-Point 6.9 gr
637
6.22
.177
Napier ProHunter 7.69gr
611
6.38
.177
JSB Match Exact Express Diabolo 7.87 Gr
623
6.78
.177
Crosman Premier Light 7.9 Gr
592
6.15
.177
Predator Polymag 8.0 gr
618
6.79
.177
H&N Match Heavy 8.18 Gr
611
6.78
.177
RWS Superdome 8.3 gr
563
5.84
.177
RWS Superpoint 8.2 gr
556
5.63
.177
RWS-R-10 Match Heavy 8.2 Gr
575
6.02
.177
RWS Meisterkugeln 8.2 Gr
586
6.25
.177
H&N Field Target Trophy 8.64 Gr
624
7.47
.177
Beeman Silver Sting 8.64 Gr
615
7.26
.177
Beeman FTS Double Gold 8.64 Gr
607
7.07
.177
H&N Crow Magnum 8.80 Gr
568
6.31
.177
RWS SUPERMAG 9.3 gr
478
4.72
.177
JSB Diabolo Exact Heavy 10.34 Gr
527
6.38
.177
Crosman Premier Heavy 10.5 Gr
470
5.15
.177
Beeman Kodiak Match 10.65 gr
514
6.25
.177
Beeman Kodiak Double Gold 10.65 Gr
502
5.96
.177
Beeman Silver Arrow 11.57 gr
446
5.11
.20
Beeman Silver Bear 9.88 Gr
546
6.54
.20
Beeman Silver Sting 12.81 Gr
505
7.26
.20
H&N Spitzkugel 10.96 Gr
551
7.39
.20
Beeman Field Target Specials 11.42 Gr
496
6.24
.20
H&N Field Target Trophy 11.42 Gr
527
7.04
.20
Beeman FTS Double Gold 11.42 Gr
463
5.44
.20
H&N Baracuda Match 13.58 gr
527
8.38
.20
H&N Crow Magnum 12.81gr
451
5.79
.20
Beeman Kodiak Extra Heavy 13.27 gr
417
5.13
.20
JSB Exact 13.73 gr
417
5.3
.20
Predator Polymag 13.89 gr
411
5.21
Recommended uses:
Target shooting/backyard plinking
Pest control: crows, snakes, rats.
Pros and Cons
Pros
Cons
Made in Germany
Compact and lightweight
High-quality fit and finish
Quiet and accurate
Easy to shoot
Not hold sensitive
Great Rekord trigger
Easy to cock
Great for pest control up to 25 yards
Great gift for introducing your kids to get into shooting sports
One major way to categorize them is through the type of power plant they use.
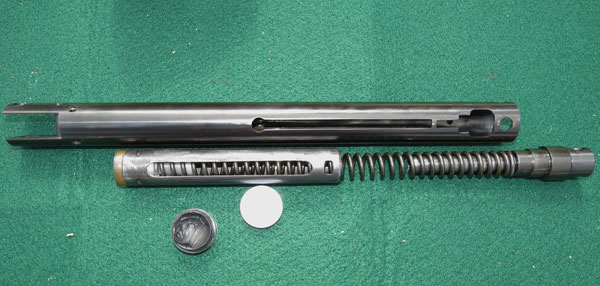
Some of the most popular power plants for air rifles include CO2, Pre Charged Pneumatics (PCPs), coiled metal springs, Gas pistons (including Nitro Piston), and multi-pump.
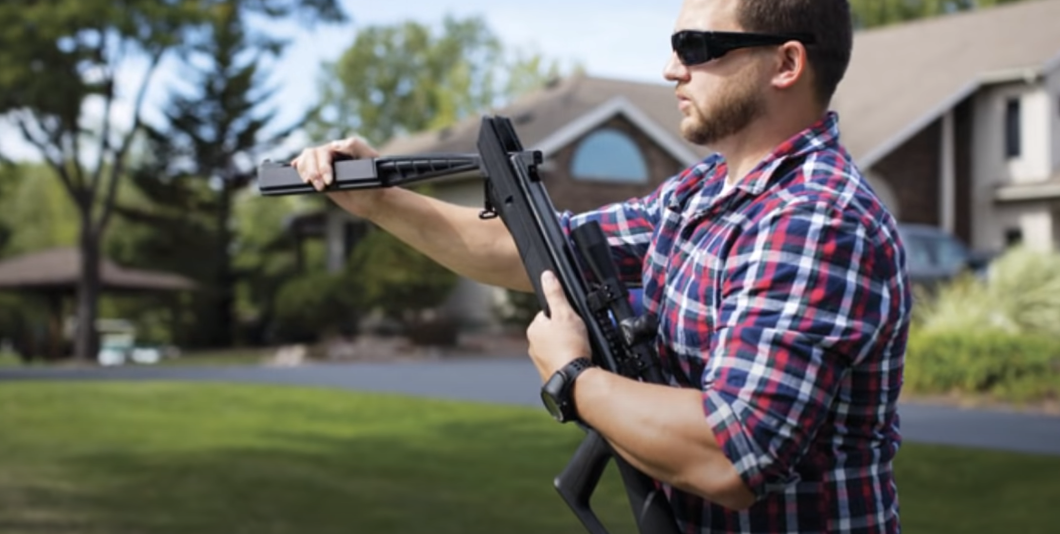
For air rifles with coiled metal springs and gas pistons, cocking involves breaking the barrel down, loading the pellet, and then breaking the barrel up.
That act of swinging the barrel on a hinge back and forth is what led them to be called break barrel air rifles.
2. Are break barrel air rifles good?
Break barrel air rifles are some of the most popular air rifles in the shooting world.
They are advantageous over PCPs and CO2 air rifles in more ways than one:
They are fully self-contained – no need for additional cartridges and pumping devices
They are generally budget friendly and easy to operate
They have more recoil, which enhances your shooting skills
They are easy to tweak for improved performance
Break barrels are the easiest air rifles to load since you fully expose the breech when you break down the barrel
By the fact that springers don’t need a separate cocking mechanism, they tend to be lighter than sidelever or underlever airguns
Springers are easier to repair than the other airgun types – their shooting mechanism is less complicated
The ability to break the barrel makes it easy to clean the break barrel airguns
In your effort to make more accurate shots, the break barrel air rifle will help you learn how to hold and use an air rifle properly, more than the PCPs and Co2 airguns can
3. Are break barrel air rifles accurate?
The accuracy of airguns is subjective.
That’s why the accuracy ratings are always accompanied by the range at which the tests were performed.
An airgun may be fairly accurate at 10 yards but quite inaccurate at 100 yards.
That is because other forces like wind drafts and gravity come to play as the pellet moves farther away from the shooter.
So, generally speaking, there are break barrel air rifles with accuracy as high as 1” groupings at 50 yards.
Others surpass this accuracy level, while others come short of it.
To break the barrel is essentially swinging the barrel on its hinge.
This is done for three main reasons:
To load the pellet – usually, you need to swing the barrel on its hinge from the aligned position so as to access the port for loading the pellets
To cock the gun – By swinging back the barrel to its aligned position, you actually compress the metal spring powerplant in readiness for the next shot.
To uncock the gun – You are advised not to leave the gun cocked for long periods of time when not in use.
The metal spring may lose its strength. So break down the barrel before hanging up your gun
5. How to clean a break barrel air rifle?
It is not that necessary to clean the air rifle barrel.
Experience shows that the bore of the barrel is self-cleaning.
Oil from the metal spring can find its way into the barrel bore, and thus attract all forms of dirt.
Lead particles from fast-flying pellets can also be deposited within the bore of the barrel.
However, every pellet shot carries with it some portion of the accumulated dirt.
In the long run, the bore remains fairly clean.
But if you really have to clean it, run a number of clean patches through the bore.
Remember not to use any solvents – lest you damage the bore.
Also, dry the bore when you are done cleaning.
If you intend to store the airgun for long, apply a light film of good gun oil.
Load the specially made felt cleaning pellet and fire the airgun as normal.
You may wish to soak the pellet in your favorite gun cleaning solution.
About 6 pellets are enough to scrub most of the accumulated lead and dirt.
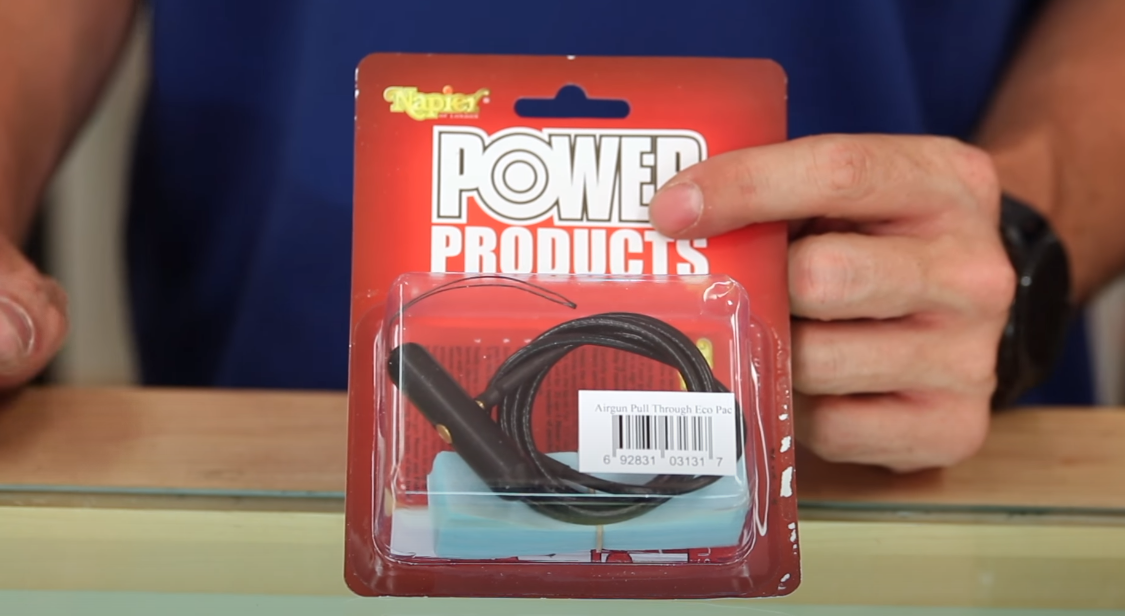
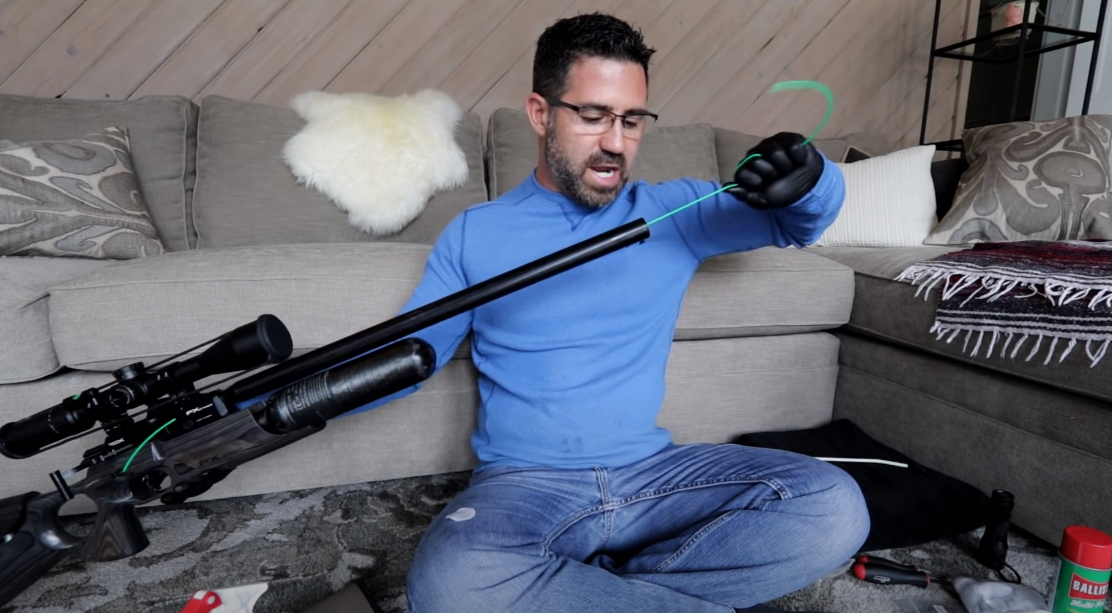
ii) Pull-through method
This entails cleaning the bore of the barrel by inserting a cleaning shaft on the muzzle end of the rifle and then pulling it out.
The patch is usually attached to a long loop to help you pull it out with ease.
Choose the right cleaning patch to match your air rifle caliber.
iii) Using the BoreSnake
This works more or less like the pull-through shaft – only that the entire body of the snake does the cleaning job – as opposed to a shaft on one end of the loop.
As such, you expect the cleaning job to proceed faster due to the large surface area of contact
iv) Using a cleaning rod
Be careful with this method lest you damage the bore.
The rod comes with jags and brushes attached to one of its ends.
This is the end you insert into the rear end of the bore.
Drive the rod until the jag comes out through the muzzle end.
v) Using bore paste
Bore paste contains grinding particles that remove dirt as well as tiny imperfections within the barrel of the bore.
You can use the bore paste with the cleaning rod or pull-through method.
To prevent the rusting of metallic parts of your air rifle, use popular gun oils such as the Ballistol Lube.
The same can as well be used to maintain wooden air rifle stocks – especially if your airgun is frequently exposed to high levels of humidity.
6. Is it necessary to break in your barrel?
The short answer is no!
Breaking in refers to the process of seasoning your brand new break barrel air rifle after purchase.
You see, the bore of the barrel may have tiny burrs and imperfections that are thought to slightly compromise the performance of new airguns.
By shooting good quality pellets on a regular basis, the seasoning happens almost naturally without you even realizing what you are doing.
I guess that works for me, and multitudes of others.
But if you feel philanthropic enough and have the time, inquire with the manufacturer about an appropriate break-in procedure specific to your air rifle model and brand.
Share your findings in the comment section below. We would be glad to know how it went.
7. Best scope for break barrel air rifle?
With break barrel air rifles, you don’t want to simply choose the cheapest scope on the market or any other decent option used with other airgun types like the PCPs.
Two crucial factors make break barrel air rifles different when it comes to the choice of the scope:
The vibrations resulting from the recoil effect with every fired shot – this can damage the scope
The fact that you have to break the barrel down and up with virtually every pellet you fire – this tends to throw the scope out of sight, thus affecting accuracy
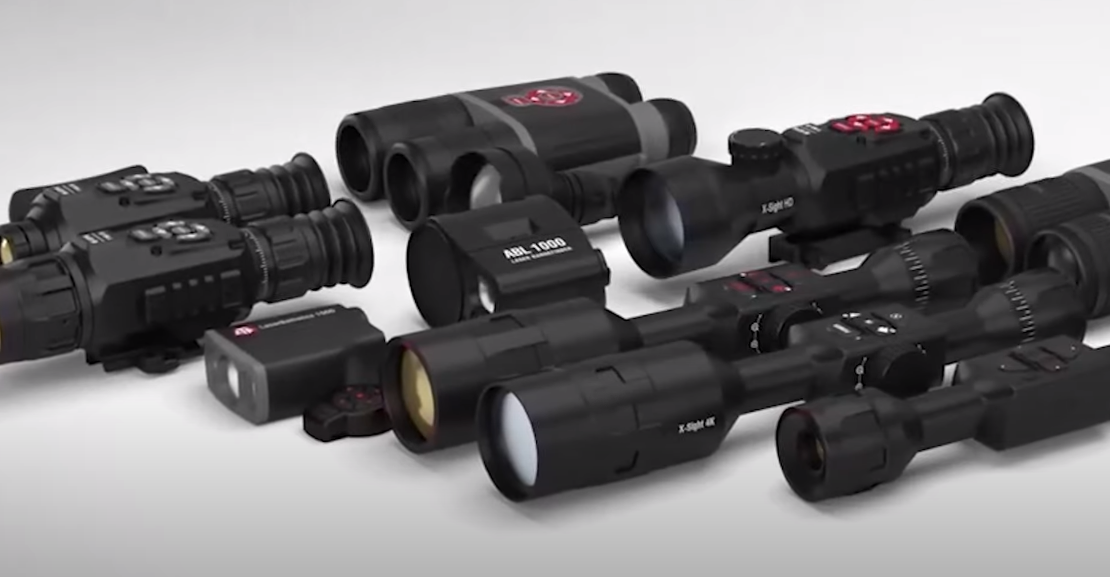
With that in mind, the following two are the most popular scopes for break barrel air rifles:
Trinity hunting optics sight scope
Simmons rifle scope
Don’t be tempted to use any firearm scope – justifying yourself that firearms also have huge recoil.
Also, firearm scopes are designed for long-range shooting – and in the real sense, you’ll never use your air rifle to shoot a target more than 100 yards away.
8. Best scope mount for break barrel air rifle?
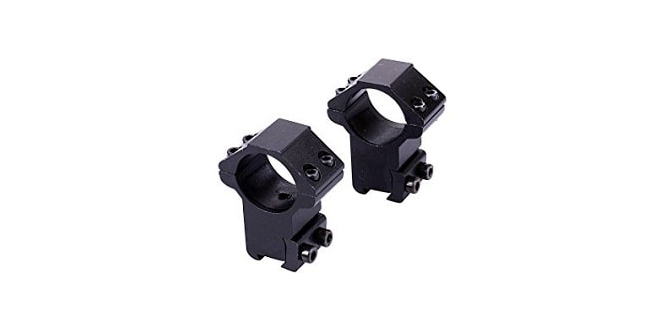
Most people go for the two-piece scope rings because they are cheaper.
While they do their work most times, the stability may be compromised for the very powerful break barrel air rifles or those with much recoil.
In this case, opt for the single-piece scope mount.
9. Best oil for a break barrel air rifle?
We just mentioned the Ballistol Lube in Question No. 7 above.
It is very popular among air rifle enthusiasts because:
It is fully compatible with all metals
Its alkaline nature helps dissolve corrosive ammo residue
It beautifies air rifle stocks
It prevents air rifle stocks from drying
It never gums up or hardens, no matter how long you store it
It is smokeless
It protects against corrosion
It seals the pores in wooden stocks – thus preventing the absorption of moisture which causes thickening and warping of the stock.
Watch how the legendary Tom Gaylord lubricates his spring-piston airgun:
10. Best bipod for a break barrel air rifle?
For CO2 and PCP air rifles, using a bi-pod is not that complicated.
However, springers complicate the use of bi-pods because of the huge recoil they usually generate.
The recoil pushes the airgun to and fro – thus randomly changing the balance point of the air rifle.
The random nature of the to and fro movements makes it quite hard to find the perfect balance point for optimum accuracy.
I advise you to practice the “artillery hold” until you are comfortable shooting the gun without the use of a bipod.
This fits virtually all air rifles without the need for swivels.
One end slips over the barrel, the other end over the buttpad.
13. Will mounting attachments on a break-barrel barrel affect accuracy?
It depends on where exactly you mount the attachments.
If you are using the Picatinny rails or Weaver mounts, there should be no problem at all.
But for any attachment that mounts directly on the barrel, take care.
One guy attached a Bisley swivel nearly halfway up the barrel.
Every moment he carried the gun, the barrel twisted slightly.
In such a case, the accuracy of the air rifle is definitely affected.
14. How long can you leave a break barrel air gun cocked?
Numbers don’t lie. Although I haven’t tried it personally, the well known Tom Gaylord cocked these springs for one whole month – or if you like, 735 hours
R1 spring
Beeman laser spring
Venom spring
Maccari custom spring
The Beeman laser spring was the most affected, though it lost only 6.75 % of its power.
That means if the initial muzzle energy was 20 FPE, the new muzzle energy would be 18.65 FPE.
In my assessment, that is not as much loss as usually portrayed by many break barrel air gunners.
So feel free to leave your gun cocked for an hour or two as you wait for that perfect shot.
15. Does leaving an air rifle cocked weaken the spring?
It depends on the quality of the spring and the duration you leave it cocked.
R1 spring – Lost 6.11% of its strength – slightly bent
Beeman laser spring – Lost 6.75 % of its strength – perfectly straight
Venom spring – Lost 3.07% of its strength – was slightly bent – started vibrating
Maccari custom spring – Lost 5.35% of its strength – perfectly straight
I suggest you do a similar experiment with some Chinese springs and share the findings.
16. How long can you leave a nitro piston pellet gun cocked?
Oh, forever! Without the slightest thought of Spring fatigue either.
That is one big advantage of the nitro piston over the coiled metal springs.
17. Can you dry fire a break barrel air rifle?
Yes, you can.
Sometimes it happens accidentally – then you have no control.
But sometimes you can do it out of curiosity – as The Dollar Sportsman did back in 2019.
The guy performed accuracy tests with his GAMO Raptor Whisper and obtained fairly tight groupings.
After dry-firing the air rifle 50 times, he did the second accuracy test.
You’d be surprised that the accuracy was as great as it was at first.
As a matter of fact, the Gamo airguns manufacturer states on their website that their rifles are designed to dry fire 10,000 times with no issue at all.
But for safety’s sake, don’t assume your airgun is a Gamo. Get the facts first.
18. Can you shoot BBs in a break barrel pellet gun?
Yes, that’s possible – but the issue is, what happens after you shoot the BB?
If the BB is the same caliber as the pellets, the shot will proceed as normal, though the BB may jet out with a “squirreling” motion.
If the BB caliber is smaller than the bore, there is some likelihood of it damaging the internal mechanisms of the air rifle.
It may even fail to come out through the muzzle, leaving you with the additional headache of dislodging it.
The SilencerCo ASR Muzzle Brake is a game-changer! Although there are some folks who are not much into muzzle brakes for personal reasons, they are still not a bad idea.
I’ve used quite a few SilencerCo ASR muzzle devices, and I can say for a fact that they are an awesome choice. To start with, they are solid and also great for reducing recoil and muzzle rise. They are built from high-quality materials that can withstand the heat and pressure of regular use. In addition, this muzzle brake is pretty easy it is to install. So if you are in doubt, this is the muzzle brake for you. To find out about other brakes and firearms, read up more on our website.
Table of Contents
Construction
I’m not sure exactly what kind of steel this muzzle brake is made of. But it’s strong.
We actually got an ASR Flash Hider hot enough to melt it. A customer blasted like 20 mags of full auto through a SilencerCo suppressor.
This one got way too hot. It still works, though.
The muzzle device got hot enough that the metal got soft and blistered. We straightened it out and let it cool down. And the muzzle device still works on that full-auto rifle today. It didn’t get brittle. And even the black nitride finish held up to some extent.
That makes me pretty certain that the SilencerCo ASR Muzzle Brake will hold up through all sorts of hard use, since most of us don’t have full-auto rifles.
Also, the machining on this muzzle brake is super clean. All the corners are beveled slightly to remove any harsh edges. Even the internal edges of the ports are beveled slightly.
Lastly, the threads on the ASR mount are incredibly clean. But I’ll talk about the ASR mount later on.
But, even without mentioning the ASR mount, the construction and attention to detail on this muzzle brake is obviously top notch.
Fit and Finish
There’s some good and some bad here.
First, the black nitride finish is incredible. As I mentioned earlier, the black nitride finish on the ASR Flash Hider that we melted held up somewhat. It wasn’t perfect. But I wouldn’t expect any finish to hold up through being melted without any damage.
But it’s evidence that the finish is incredibly strong.
And the finish resists carbon fouling pretty well. It seems that this muzzle brake collects less carbon than many other muzzle devices I’ve used.
It takes quite a bit of suppressed shooting—and even more unsuppressed shooting—to get any significant carbon buildup on the muzzle device. So the nitride finish certainly seems to do its job.
The next aspect of the fit and finish that I noticed is the threading for mounting the muzzle brake to your barrel. The threading is incredibly smooth and well finished. This muzzle device threaded on super smoothly and easily.
My only complaint about the fit is the shims.
I don’t know if shims are a requirement for muzzle brakes. But I prefer crush washers. I find it much easier to time a muzzle device with a crush washer. And I’ve never had a muzzle device that’s mounted with a crush washer come loose.
If it’s necessary to use shims for a muzzle brake, so be it. You can use a crush washer for a compensator, though. And that must be timed. So why not use crush washers for muzzle brakes?
But I digress. My problem with this muzzle brake is that I’ve occasionally found it difficult to time the muzzle brake with the included shims. Either the shims were too thick or too thin. And I ended up having to pretty much overtorque the muzzle brake to get it properly timed.
It’s not a huge deal. I just used a bigger wrench. And this hasn’t been an issue with every ASR muzzle brake I’ve installed. It might just be a slight mismatch between the threading on the brake and the threading on certain barrels.
But you don’t have these sorts of issues with a crush washer. That’s all I’m saying.
Either way, my one complaint about the fit is pretty minor. Timing muzzle devices with shims is always kind of a pain. So I might have this complaint about any other muzzle brake.
Putting my minor gripe aside, the fit and finish on this muzzle brake is outstanding. It installed (mostly) flawlessly. And it requires very little cleaning and maintenance. That’s about as much as you can ask for from a muzzle brake.
It might be tough to see. But that shim is SMASHED.
Suppressor Mount
Obviously, the primary feature of this muzzle brake is the ASR suppressor mount.
Here’s my one sentence opinion of the ASR mount: it’s one of the best—if not the best—suppressor mounting system on the market right now.
Just look at those clean, sharp threads.
It’s super simple and easy to use. It’s absolutely secure. And it’s nearly impossible to get a false positive with the locking mechanism.
Also, referring again to the ASR Flash Hider we melted, we melted an ASR muzzle device. And the ASR mount still works! We didn’t even have an issue removing the suppressor after getting it hot enough to melt the muzzle device.
I know that this is a sample size of one.
But we use a lot of SilencerCo suppressors on rental guns at the range. And the operation is almost always flawless, despite how badly we beat them up and how often we burn them down on full-auto guns.
They very rarely even get carbon locked. That’s not to say that it can’t happen. But it takes a lot of abusive shooting to lock up the ASR mount.
So, in short, I’m convinced that the ASR suppressor mount is an amazing mounting system.
Obviously, you can only use SilencerCo suppressors with the ASR system (there may be other manufacturers that produce ASR compatible suppressors. But I’m not aware of them).
However, SilencerCo makes awesome suppressors. Being restricted to using SilencerCo suppressors isn’t really a limitation. No matter what you want to do with your suppressor, SilencerCo makes one that will fit the bill.
All in all, the ASR mount gets two thumbs up from me.
Muzzle Brake Performance
My observations here are pretty straightforward.
In terms of recoil reduction, this is a good muzzle brake. However, there are dedicated muzzle brakes that perform better.
I will say this, though: the only muzzle brakes that offer better recoil reduction are dedicated muzzle brakes. The other muzzle brakes with suppressor mounts feel about the same, or even slightly worse.
For a muzzle brake with a suppressor mount, this muzzle brake is outstanding. But, if your primary concern is recoil reduction—and you don’t need the suppressor mount—you’d be better served with a dedicated muzzle brake.
Allow me to make this recommendation, though:
Use this muzzle brake, even if you don’t have a suppressor right now and you just want recoil reduction.
Why?
This muzzle brake offers plenty of recoil reduction for typical AR-15 rounds. It might not be the very best. But it’s good. You’ll get a very controllable rifle. And, it saves you a bit of money if you decide to get a suppressor down the road.
Additionally, using a muzzle brake with a suppressor mount is especially valuable if you need to pin and weld your muzzle device.
It’s good enough that I pretty much use some variation of the SilencerCo ASR Muzzle Brake on all my rifles, at this point. That way I can slap one of my SilencerCo suppressors on any rifle I have. And I have very little need—if any need—to swap muzzle devices in the future.
That’s my two cents on why using an ASR muzzle brake is a great idea.
But, in fairness, here’s a counterpoint:
You may want to forego this muzzle brake if the muzzle blast is a significant concern for you. The muzzle blast from this muzzle brake is relatively mild. But it’s still a muzzle brake.
If that’s your situation, allow me to recommend the SilencerCo ASR Flash Hider. That way you can still get a suppressor down the road, if you change your mind.
That’s all I have to say about that.
Braking Things Down
As you may have guessed, I think the ASR muzzle brake is an amazing muzzle device.
It performs well as a dedicated muzzle brake. And you can pop a suppressor on it, if you need to muzzle the muzzle blast.
The only thing to watch out for is timing it with the shims. You may need a pretty sturdy upper receiver vice block to get this muzzle brake properly timed. But that may just have been a product of the barrel I mounted this SilencerCo ASR Muzzle Brake on.
In the end, I think that you’d be hard pressed to find a more versatile muzzle brake that offered better recoil reduction than the ASR muzzle brake. It could easily be the only muzzle device you need.
The deadly tactic of back-trolling earned its stripes in the early 1960s when walleye anglers learned from fishing pioneers like Al and Ron Lindner, Spence Petros, Carl Malz and regular contributors to Fishing Facts. It was an era when anglers were creating and perfecting the techniques of fishing nightcrawlers and leeches with tools like bottom bouncers and the then newly invented Lindy Rig.
The challenge was to troll slow enough to keep those baited rigs in contact with bottom structure or nearly touching weedlines that followed highly irregular shapes—a favorite haunt of walleyes. Trolling forward in a 16-foot V-bottom aluminum boat, even with a 10-hp motor, was too fast for these light rigs. However, if an angler put the motor in reverse and trolled backward, the blunt face of the transom slowed the boat enough for an effective presentation.
Back-trolling seemed a perfect solution until it was necessary to troll into the wind, which caused waves to break over the transom, filling a boat with water. Of course, this was before bailers were popular, as these were low-tech aluminum fishing boats. Anglers found it difficult to hold a rod, steer the motor backward and use a bucket to bail water out of the boat. But walleye anglers, being a creative bunch, soon fashioned transom-mounted splashguards to keep out the water. Soon in those days there were almost as many articles on how to make your own guards as there were on back-trolling. Some were made of aluminum, Plexiglas and thick sheets of rubber. Then some were bolted on while some were clamped to the transom.
“Now, we even put backsplash guards on our bass boats to keep waves from washing over the transom when we must use a launch ramp that faces the wind,” Al Lindner said.
Today, anglers and writers don’t mention the back-trolling tactic as often. But according to Lindner, it is still “the absolute, most precise way to keep a lure on structure and in the strike zone.”
Still wondering about the popularity of back-trolling today, we contacted professional guide Tony Roach. According to him, back-trolling is alive and well, even graduating to big-water boats in the 18- to 20-foot range.
“I have a 20-foot Lund Pro-V with a 200-hp tiller-steering motor,” Roach said. “With the SmartCraft feature, I can run the motor as low as 500 RPMs, which is fine for trolling at 1 to 1.5 mph.”
His engine has a standard shaft length, but he runs a four-blade prop instead of a three-blade model, believing it moves a more appropriate amount of water. Roach has two Minn Kota trolling motors. The bow-mount unit can self-deploy with a remote control while the transom-mounted unit has tiller steering.
Even with today’s battery- and trolling-motor technology, wind and waves can be too much for the strongest 36-volt motors to keep a boat on structure for very long.
So why is back-trolling so effective?
“The bow swings too much for precision trolling forward,” Roach says.
He also says the flat part of the transom allows an angler much more boat control.
“It also allows you to hold yourself better in the current (for river fishing).”
Even salmon anglers who fish rivers have created their version of back-trolling while using the tactic to slip downstream and bounce crankbaits off the bottom. However, they point the boat upstream and row just fast enough to let the boat slowly slide downstream.
Conventional back-trollers are in luck—they no longer have to design and build their own backsplash guards. There are at least two manufacturers who build backsplash units specifically for your chosen boat and model including Wave-Wackers and Whitecap Splashguard. Stock models are available from Ve-Ve Incorporated.
While back-trolling may not be an all-encompassing panacea, it is alive and well. However, it has been kept in the background for a reason.
Sighting an adjustable three-pin archery sight on a compound bow will ensure success on early-season hunts. The windage and elevation are covered, as well as adjusting the sight for longer ranges in the field for longer shots. Pin gaping will also be explored to ensure the best results for a three-pin sight.
In this article, we’ll walk you through the process of sighting in a bow with three pins. We’ll explain how it works, and then take you through a detailed step-by-step process.
How Does Sighting in a Bow with 3 Pins Work?
The three-pin archery sight takes the guesswork out of the arc an arrow flies after leaving the bow. The bow sight pins’ distances are set at exact distances, letting the hunter concentrate on technique while drawing and releasing the arrow.
By sighting the pins in the archery sight during the off-season, target acquisition is faster and more accurate for the hunter. Sighting the three pins on a bow takes time, patience, and practice, but the payoff is a successful hunting season.
How to Sight in a Bow With 3 Pin Bow Sight Distance: Step-by-step solution
Step 1: New three-pin bow sight
If this is a new three-pin bow sight, mount it to your bow. Check your attachments and hardware if you already have the three-pin sight mounted. When the three-pin bow sight is mounted, it is time to go to the practice range.
When you mount the three-pin bow sight to your bow, you must expose it to various conditions so the bolts stay tight. After your mount it on the first day, leave the bow in the garage overnight, then tighten the bolts if needed. The next day leave it in the house, and so on until the bolts do not back off their tension.
Step 2 : Set up your own range
It is best to set up your own range, if possible to sight in the three-pin bow sight. You are going to spend many hours and multiple visits to get the three-pin bow sight squared away. Start your sighting at the ten-yard line. Before you set the pin height, you need to get the windage set correctly.
Step 3: Aim at the target
Aim at the target, but leave the bowstring in place. Point the arrow shaft directly at the center of the target, sight along the arrow for this part. Look at the end of the three pins in the sight. The end of the pins must be aligned with the arrow’s shaft. If the end of the three pins is off the midline of the arrow shaft, the shot will go right or left accordingly.
Adjust the bolt to move the pins left or right until they align perfectly with the arrow shaft.
Step 4
Now, it’s time to shoot. Pull the bowstring back, sight with the top pin end in the center of the target, and let it fly. At this time, do not worry about the elevation; you are making sure the windage, the left and right are correct.
This is the part where patience will be your best tool. Since this is not a bench rest rifle, you must shoot this target at this range twenty times. You will see if the arrows are grouped in the correct windage or not.
If you have to move the three-pin bow sight to adjust the windage, always remember if the arrow is shooting left, move the three-pin sights to the left. The same goes for arrows shooting to the right.
Step 5 : Set the bow sight pins distance
Once the windage is dialed in, it is time to set the bow sight pins distance.
Step back to the 20-yard line. This is the standard three-pin bow sight distance for the top pin. Take an initial sighting, and make sure the three-pin bow sight distance will not shoot over the target.
Place the end of the pin right in the middle of the target, and let loose. If the arrow hits a little high or low, that may be the shooter. Take a short rest, let the muscle fatigue relax, then take another 20 shots.
When the 20 shots are finished, you will know the average grouping of arrows, and the three-pin bow sight distance can be adjusted.
Step 6
When you get the top pin of the three-pin bow sight distance at 20 yards and all of the arrows land in the bullseye to your best ability, it is time to move back to the 30-yard line.
The middle pin is the one you use now to square away the three-pin bow sight distance at 30 yards. The yardage is automatically adjusted for the arrows arc by the manufacturer of the three-pin bow sight.
Again, shoot the twenty shots into the target; after twenty shots, you will know the three-pin bow sight distance at 30 yards is dialed in.
Step 7
Now back up to the 40-yard line. This is the same drill as the other two distances, so I will not repeat it. The 40-yard pin is the bottom pin, which is a bit different. The sighting is the same, but the bottom pin is the only pin in the three-pin bow sight distance used when adjusting the sight in the field for a longer shot.
If your three-pin bow sight can adjust, the sight will have a scale along the mounting plate. The three-pin bow sight will adjust downwards, the scale will show the new distance; this distance is only good for the bottom pin.
The top and middle pin for the three-pin bow sight distance use is gone when moved from the original set point. To use the top and bottom pin again, return the sight to home and you are good to go.
Pin Gap
This is not a true pin or aiming point in the three-pin bow sight, it is the “pin gap.” This means you use the gap between the pins of the three-pin bow sight for a distance shot of, say, 25 yards. Since the top and middle pins are set for 20 and 30 yards, put the target right between the two, and let the arrow fly.
Pin gap shooting will take even more practice than sighting in the pins, but you don’t want to miss the target due to lack of practice.
FAQs
Conclusion
In this article, we walked you through a detailed step-by-step guide explaining how to sight in a bow with three pins.
When you use a three-pin bow, sight distance will become less of a hurdle, so you can focus on other archery hunting skills, like stalking, calling, and camouflage.
Sighting in a three-pin bow sight will take many trips to the range, and long days of practice, but it will pay off in the end.
Diamond Archery has some really popular bows in their line-up, and the two that are most often compared are probably the Diamond Infinite Edge (their most popular model), and the Diamond Edge SB-1 (the model that came right after it).
No products found.
VS
In this post, we’ll take a close look at these two bows, how they compare, and which might be the right option for you.
Let’s Compare the Stats…
This is a good place to start. Both bows are made for recreational shooting and bowhunting, but there are plenty of differences to look at. We’ll ping-pong back and forth between bows, and we’ll start off looking at the…
Draw Length:
Infinite Edge: 13 to 31 Inches. The Infinite Edge is Diamond’s go-to “mass market” bow, and when they designed it, they wanted it to be usable by as many people as possible. That range in draw length is good for everyone to very young archers, all the way up to very tall archers (the draw length of 31 inches can fit someone who’s up to about 6-and-a-half feet tall).
SB-1: 15 to 30 inches. The SB-1 has a shorter draw length range (but still pretty large, in the grand scheme of things). That draw length of 30 inches is suitable for folks up to 6-foot-3-inches tall, and if you’re taller than that, the Infinite Edge comes out on top.
Verdict: For most people, this would be a tie. The Infinite Edge is probably a better pick for very young archers, and for folks taller than 6-foot-3-inches.
Draw Weight:
Infinite Edge: 5 to 70 Pounds. This is, at present, the largest draw weight range on a Diamond bow. 5 to 70 pounds should be suitable for just about anyone, but keep in mind that…
SB-1: 7 to 70 Pounds. This ain’t so bad either. Even very small kids should be able to pull 7 pounds (and that’s before we consider the let-off, which we’ll discuss in a second). 70 pounds is pretty high—you can find higher, but that’s up there—and it’s powerful enough to hunt just about all North American large game.
Verdict: A tie, really, but the Infinite Edge has a lower bottom measurement.
Mass Weight:
Infinite Edge: 3.2 Pounds. For a bow in this range, 3.2 pounds is pretty decent, and it’s better than…
SB-1: 3.6 Pounds. This isn’t terrible, but it’s definitely heavier.
Verdict: Infinite Edge gets the prize. That lower mass weight isn’t a big deal if you shoot here and there, but if you engage in hours-long practice sessions, or if you’re a dedicated bowhunter and need to aim for minutes at a time, that lower weight can be important.
Brace Height:
Infinite Edge: 7 Inches. This is a pretty common brace height, and good for hunting bows, because it provides both arrow speed and a liiiiittle forgiveness in your shot. It’s the same as the…
SB-1: 7 Inches. This is one of those measurements that ultimately becomes a matter of preference. 7 inches is reasonable, though, for sure.
Verdict: Tie.
Axle-to-Axle:
Infinite Edge: 31 Inches. Same as the…
SB-1: 31 Inches. What’s fascinating is that these two measurements—the brace height and the axle-to-axle length—make this a very similar bow. And we’ll talk more about that below.
Verdict: Tie.
IBO Speed:
Infinite Edge: 310 FPS. For a mid-range bow like the Infinite Edge, 310 feet-per-second is pretty good, and that’s why we’ve recommended it to new bowhunters. There are bows that will proper arrow with greater speed, but they tend to high-end bows (or crossbows!). 310 FPS is very good. But, obviously, not as good as…
SB-1: 318 FPS. Diamond upped their game with the 318 FPS, and while those 8 feet may not sound like much, the faster you get, the harder it is to increase that measurement. 318 is excellent for a mid-range bow.
Verdict: The SB-1 takes this one, and if you’re bowhunting, those 8 feet per second can make a big difference—game is quick!
Next up in our Diamond Edge SB1 vs the Infinite Edge Pro face-off…
Let-Off:
Infinite Edge: 80%. This is above-average for a bow in this range, and very good for mass-market bow. And that’s why it’s a little surprising that the let-off on the SB-1 is…
SB-1: 80%. We were a little surprised when we found that the SB-1 has a let-off 80%. We thought, because the SB-1 is technically a more advanced bow, the let-off would be greater, but… no.
Verdict: Tie. Don’t get us wrong—80% is still very good, and if you’re going to jack up your draw weight to 50 / 60 / 70 pounds, 80% can provide you with a lot of comfort and ease to aim. But it is surprising that both of these bows have the same let-off.
So it would seem that these two bows are almost identical, right? The specs all seem the same. They even look very similar:
No products found.
They’re not the same, though—there are actually some important differences between the two, so now…
Let’s Compare the “Hidden” Features
It really does seem like these two bows have a whole lot in common. Even the features that are different aren’t really *that* much different. So what gives?
We’ve written… goodness gracious, at this point we’ve written hundreds of bow reviews, and we’ve found the following: 1) people get really obsessed with feet-per-second and let-off and other numbers-based details, but they…
2) frequently overlook the “non-spec” aspects of a bow—and that’s a shame, because those “non-spec” aspects of a bow are often the most important things to look at. And that’s the case here.
There are two main differences between these two bows that won’t show up in a spec list. They are:
The Ease of Adjustability
The Diamond Infinite Edge was a great success for Diamond, and because of its incredible adjustability, it was a great option for both beginners and intermediates. You can make the draw weight light, and then increase it as you gain strength, and you could even buy the bow as a younger person and use it as you got older by extending the draw length. The only problem was…
It wasn’t *really* that easy to adjust. It wasn’t! In many cases, people had to bring it to the pro shop to get it adjusted (and we advised many people to do so).
And that’s one of the real advantages of the SB-1: it’s easier to adjust—and designed to be easier to adjust. Diamond made a lot of effort to make adjustability easier, and they even put videos on YouTube to show people how to do it:
So that’s Big Difference #1, and it’s a big one—especially if you’re new to archery, or getting the bow for a younger person.
The second big difference is…
The Cam System
These two bows have very different cam sets, and if you take a close look, you can see the difference: the cams on the SB-1 are more aggressive and ovoid, whereas the cams on the Infinite Edge are a little rounded. Not only does that aggressive shape of the cams on the SB-1 contribute to the higher FPS measurement, but it also makes for a smoother draw cycle.
Cams are designed to do a lot of things—pulling on the bow string to propel the arrow forward being the main one—but they need to reliable, and the Bowtech Synchronized Binary Cam system—which is on the SB-1 but not on the Infinite Edge—is designed for reliability. It’s manufactured to keep the cams moving as mirror images to each other, so that the nock—the part of the bow string that holds your arrow in place—travels forward in as flat a flat trajectory as possible.
So that’s Big Difference #2: the cam system. Another big difference.
The Diamond Edge SB1 vs the Infinite Edge Pro: Our Verdict
Of these two bows, the SB-1 comes out on top—and that’s by design: it’s *supposed* to be the better bow—but honestly, there’s more in common here than not. Here’s how we’d express it:
> Both are great bows, and both are good for recreational shooting and bowhunting by people of all ages. From a performance angle, they’re very similar, and we’ve been pleased with both—but at the end of the day, the draw cycle is a little smoother on the SB-1 because of the Bowtech Synchronized Binary Cam system.
> If you want a bow that you, yourself, can adjust so that it meets your draw weight and draw length specifications, the SB-1 is probably the better bet. It’s easier to tune for beginners, and there are some really helpful guides on YouTube put up by Diamond.
> If you don’t want to fiddle with the bow, and are fine taking it to a pro shop for tuning, the Diamond Infinite Edge will do you just fine. Have the pro shop rep adjust it to your specifications, and go from there. It’s a solid bow, and we’ve used our model for years.
However, while researching this product, I see lots of discrepancies in product descriptions between Amazon.com, manufacturer websites, and other e-commerce sites.
To make it worse, even Amazon itself has inconsistent information in the product specifications.
And they still have not fixed it at the time this review was written.
Hey, who says Amazon never makes a mistake, hah?
Gun Type
The Crosman 760 Pumpmaster is a pump pneumatic rifle.
With a BB repeater gun, you don’t have to open up and reload or cock every time you want to shoot BBs.
Each time you shoot, a new BB is reloaded automatically.
This air rifle is not only a BB gun but also a single-shot pellet gun.
Moreover, having the ability to shoot both BB and pellet, this Crosman 760 gives you an awesome option to switch to pellet in case you get bored with shooting BB.
Besides, you can teach your kids how to operate a BB gun and a pellet gun at the same time without having to buy two types of guns separately.