Venison is not only popular in the UK and the US, but also in other parts of the world like Spain and New Zealand. It is high in protein and has fewer calories than other types of red meat. But can you enjoy it raw or rare?
Raw or undercooked venison is not safe. It is recommended to cook venison to a safe internal temperature of 145 °F (62.8 °C) for roasts and steaks, 160 °F (71.1 °C) for ground venison and sausages, and 165 °F (73.9 °C) for others.
Moreover, the meat shouldn’t come from a deer shot in the wild.
How can you prepare and store venison safely, and how should you order it at restaurants? All the answers are detailed below.
According to research, eating raw or undercooked venison may not be safe because of pathogenic contamination, which is discussed in the next section. Venison that came from antlered animals like deer that are shot in the wild is also unsafe.
A study was conducted to examine 30 carcasses drawn from whitetail deer shot by hunters with guns loaded with lead bullets. The carcasses showed extensive metal fragment dispersion. Of the 30 carcasses turned into ground meat, 80% of them contained lead.
The researchers conducted another study and fed the venison to pigs. The pigs’ blood results showed significant amounts of bioavailable lead (source: Lead Bullet Fragments in Venison from Rifle-Killed Deer: Potential for Human Dietary Exposure).
Furthermore, the organs of these antlered animals, such as the liver, kidneys, brain, and gizzard are not to be consumed, since lead accumulates in the organs. They can contain other metals too, as well as chemicals.
Chemicals used in many manufacturing and industrial plants could infiltrate and persist in the environment where the animals live. These chemicals can accumulate in the animals’ bodies.
Some of these chemicals and metals include:
Dioxins
Polychlorinated biphenyls
(PCBS)
Per- and polyfluoroalklyl substances (PFAS)
Cadmium
Mercury
So, what could happen if you ingest these?
These compounds and metals are may result in the development of diabetes and cancer, depreciated immune and thyroid functions, issues with fertility, and strained brain development in children (source: The Michigan Department of Health and Human Services).
Lead can negatively affect neurological, cardiovascular, renal, skeletal, hematopoietic, and reproductive functions when it accumulates in the body (source: Journal of Hazardous Materials Advances).
Therefore, whether rare or cooked, it is best to avoid venison that was shot in the wild.
While it’s true that some meats can be eaten raw safely, it is crucial to consider the safety of consuming raw venison. Venison tartare may also be unsafe, as found in many research studies discussed below.
Can Raw Venison Make You Sick? Does it Have to be Cooked?
Undercooked venison has been in the limelight for being linked to toxoplasmosis.
According to a 2017 study, a retreat was held wherein never-frozen purposely undercooked venison was served to the attendees. Nine out of the eleven attendees who consumed the venison had to seek help.
They experienced myalgia, body aches, fatigue, fever, sweats, arthralgias, lymphadenopathy, chest pain, shortness of breath, blurred vision, and more.
It was discovered that the Toxoplasma gondii that caused their infection came from contaminated undercooked venison (source: Clinical Infectious Diseases).
A study in 2019 published the possible first encounter and report of food poisoning caused by Sarcocystis truncata. The incident took place in Japan, where a 67-year-old man consumed raw venison.
Sarcocystis infection can lead to intestinal sarcocystosis with symptoms of fever, diarrhea, vomiting, and nausea (source: Internal Medicine).
Also in Japan back in 2004, researchers found out that eating raw venison can result in hepatitis E virus (HEV) infection (source: Journal of Medical Virology).
Raw venison can also be a vehicle for Mycobacterium bovis, which can cause infection in the gut and lungs, as well as symptoms of fever, night sweats, chest pain, abdominal pain, weight loss, and if untreated, death (source: FDA).
When buying venison, make sure to purchase from a reliable seller or store. Do not buy the wild-caught type, or at least make sure the animal was not shot with lead bullets.
Make sure to clean all utensils, tools, and surfaces that come into contact with the meat. This means cleaning them before and after handling the venison. You can use 1 teaspoon of kitchen bleach in every quart of water for a simple disinfectant.
Chill venison at no more than 40°F (4.4°C). For longer storage, you can freeze it. In the fridge, it will keep for 1-2 days, and in the freezer for up to 1 year. Ground venison meat can keep for 6-9 months (source: Utah State University: Preserve the Harvest Extension).
Have you ever wondered how long venison can remain cold in the fridge or on ice? Proper handling and storage are crucial to maintain its quality. Familiarizing yourself with the guidelines for storing venison correctly is valuable. It helps preserve freshness and enhances the optimal flavor.
Because venison is a lean meat, cooking it for too long will dry it out. But to keep it safe, you will need to cook venison steaks and roasts to a minimum internal temperature of 145 °F (62.8 °C).
Ground venison or venison sausage should be at 160 °F (71.1 °C), while soups stews, stews, casseroles, and leftovers should be at 165 °F (73.9 °C).
To achieve these cooking temperatures, it is best to use a food thermometer (source: University of Minnesota Extension: Cooking venison for flavor and safety).
Can You Eat Pink Deer Meat?
Venison steak cooked at this temperature is medium rare and still pink inside. And because it is still rare, we recommend cooking or having it cooked at least medium well to make it safer.
When ordering at a restaurant, make sure the venison isn’t wild-caught. Burgers and sausages made from venison have to be cooked at a minimum of 160 °F (71.1 °C). At this temperature, the meat will be well-done and won’t probably have any pinkish tint.
Venison is a great source of high-quality protein and also provides essential amino acids, iron, niacin, thiamine, riboflavin, and zinc. Just make sure to prepare it safely for you, your family, or your friends.
Are you curious about the potential side effects of consuming deer meat, commonly known as venison? Check out my guide to learn about the various ways it can affect our bodies.
Need landscaping idea for your duck pen? These sturdy and non-toxic perennials for duck runs are great ones for adding shade, beauty, and even food to your ducks’ environment!
This article contains affiliate links. Click here to learn more.
Landscaping a duck pen is tricky. Just like with chickens, a fenced-in grassy area is soon reduced to bare dirt, once you add ducks!
But it’s completely possible to add wonderful foliage to your duck run – it just has to be sturdy enough to withstand quite a lot of nibbling, dibbling, and trampling. These non-toxic perennials are some of my favorites, and they hold up very well to lots of attention from our ducks.
Whenever you transplant something new into your duck pen, I highly recommend placing some sizeable rocks around the base, so that the roots can’t be unearthed. You’ll eventually be able to remove the rocks, once the plant’s roots take hold, and the earth settles and firms up. Ducks do love to dibble in soft, newly-turned dirt, and mine think that any kind of gardening is group play time!
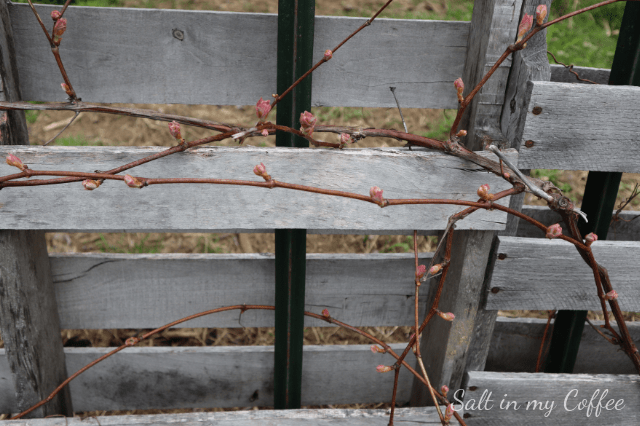
Grapes might seem an odd choice, since ducks will clearly eat any grapes within reach, and it might feel like a waste of a good grape harvest. If you grow plenty of grapes for your family in areas the ducks can’t reach, though, it will give you nothing but joy to watch the ducks enjoying their own harvest in the fall.
Grapevines are sturdy, and if you train them on a trellis above the run, they can also be a wonderful source of shade!
Mulberries
Mulberries are a bit notorious for being messy – but in a duck pen, there’s nothing wrong with that! Mulberries are safe for ducks, and your feathered pets will adore gobbling them up as they fall.
Mint
Mint is so incredibly sturdy, and spreads readily. I actually hadn’t intentionally planted it in the duck yard, but it spread there from the other side of the fence and continues to thrive. The ducks enjoy nibbling at it, and it’s a very healthful herb for them. Thankfully, it’s so robust that they never decimate it.
Blackberries & Raspberries
Bramble berries are another wonderful source of food for ducks, and they’re not easily damaged. My ducks seem especially drawn to hanging out among the canes, and watching them stretch to reach the berries once they ripen is just adorably comical!
Comfrey
Comfrey is one of those plants that’s SO sturdy, it can be invasive. Sometimes it seems that the more it’s disturbed, the more it explodes with renewed vigorous growth. These are all wonderful qualities in a duck run! The comfrey in the photo above is small and just begin to grow for the season, but by mid-summer its leaves are so large it can actually serve as a source of shade for the ducks.
Blueberry bushes
Blueberry bushes can be a good addition to a duck run, once they get established. They’re much more delicate starting out, than blackberries, raspberries, or mulberries, so you’ll want to put a protective cage around them to keep them from being decimated before they really take hold. Once they’re sizeable, they can hold their own quite well.
Daylilies
It’s very important to note that there’s a big difference between daylilies and true lilies. Daylilies are edible for humans and ducks. Lilies are toxic. (This post has photos of both and will help you tell the difference. )
I’ve had daylilies in our duck run since we first built it, and they’ve not only survived, but spread. You can see that the plant above has been trampled and nibbled – but it’s doing just fine. Daylilies also provide a wonderful splash of color in the summer when they bloom, which is a joy!
Hostas
Hostas are safe to eat for both humans and ducks, and in my experience, they’re sturdy enough to hold up to the attentions of a flock of ducks. I’ve heard of other duck-keepers, however, that have had their hostas completely wiped out by their ducks.
I think it’s worth giving them a try, knowing that even if they do get eaten, they’re not toxic. That said – you won’t want to plant your only piece of great-grandma’s special hosta in your duck pen, just in case!
Rugosa roses
While any variety of roses are safe for ducks, I really recommend rugosas as being particularly hardy and standing up especially well to heavy duck traffic. While ducks will gobble down any blossom petals within reach, rugosa roses generally grow tall enough that many blossoms with thrive out of reach. Another benefit of roses is that rose hips are edible, and ducks really enjoy them!
This is the list I always send people, when they ask what I recommend for sturdy perennials for duck runs. How about you? What do you have planted in your duck run that works well? I’d love to hear, and hope you’ll let us know in the comments below!
If you liked this post, you may enjoy:✦ How long do ducklings take to hatch?✦ How many drakes can I have in my flock?✦ Hatching duck eggs with high hatch rates✦ How to raise friendly ducks✦ 11 types of poultry for homesteads and farms
Should you age your venison before butchering? If so, how long? Under what conditions? Why might aging venison matter? Let’s explore every aspect of hanging your whitetail before taking knife to meat.
It’s the symbol of a successful hunt, and a harbinger of great eating to come: A whitetail on the meatpole.
Whether I’m hunting out of some farmhouse on the prairie, a northwoods deer camp, a motel room in farm country or the familiar comfort of my own home, nothing warms my heart like stepping out into the starry night or my chilly garage and taking one more look at a whitetail I was lucky enough to bag that day.
But questions always arise as I stroke the thick, pepper-gray fur of an autumn or winter whitetail: What are the benefits of waiting to cut up the meat, versus finishing the job as soon as possible? Why do these factors matter to meat quality? How long should l let this deer hang? And if I’m going to let the meat age, what are the proper and safe conditions under which to it?
If you’ve pondered these important topics, all of which have a direct effect on the quality of the venison that reaches your table, here are some answers.
Aging Actions
After a deer dies, its muscles quickly enter a state of rigor mortis, defined literally from Latin as stiffness in death. The reason is really pretty simple: without oxygen feeding the muscle tissue anymore, the proteins present can no longer perform their maintenance work, and the muscles contract.
Rigor mortis has nothing to do with aging meat. It is just a natural process that sets in a couple hours after death. Within 12 to 24 hours though, the process will complete itself and the muscles (meat) will relax again. That’s when aging starts … and you should have that deer carcass cooled down when it happens.
Butchering and freezing a deer while it is in a state of rigor mortis is not a good idea because the contracted meat will stay that way: tough and taut. But what happens to meat when it ages?
Photo by David Gilane.
There’s a little more science involved with aging meat and why it can be beneficial to the texture and taste of your final output. After rigor mortis has ended, enzymes begin to work break down those complex proteins present in the venison. Most important to break down are the proteins in the connective tissue – known as collagen – that is present between the meat fibers. This is a natural process that tenderizes meat.
Given the right conditions, which we will discuss, letting a deer age for some period of time will result in meat that is tenderer and should have better flavor.
It’s important to note that aging is not rotting. It takes bacteria to begin and carry out the deterioration process; given the cool conditions needed for proper aging, bacteria can’t live or begin to go to work.
Proper Conditions
If you’re going to age your venison, the process must take place under the proper conditions.
Temperature is the number one consideration. If your deer is hanging outside in temperatures below freezing, it is not aging. It is frozen. You will have to thaw it before butchering. You are better off not putting that meat through a freeze-thaw freeze cycle, though. Strive to hang your deer where it is cool, not cold.
The ideal temperature range for aging a deer is 36 to 40 F. The lower the temperature, the longer the deer can age. Many butchers recommend 36 F. Surroundings between 32 and 36 do the aging job pretty well, too, but slower.
If outdoor conditions match those temperature ranges (32 to 40 F or so), you are in good luck. But that’s often a lot to ask during deer seasons that range from sultry September to frigid December and January.
When conditions are too warm to hang your deer outside, there’s an easy way to age your deer that doesn’t involve finding a meat locker in which to hang the entire carcass.
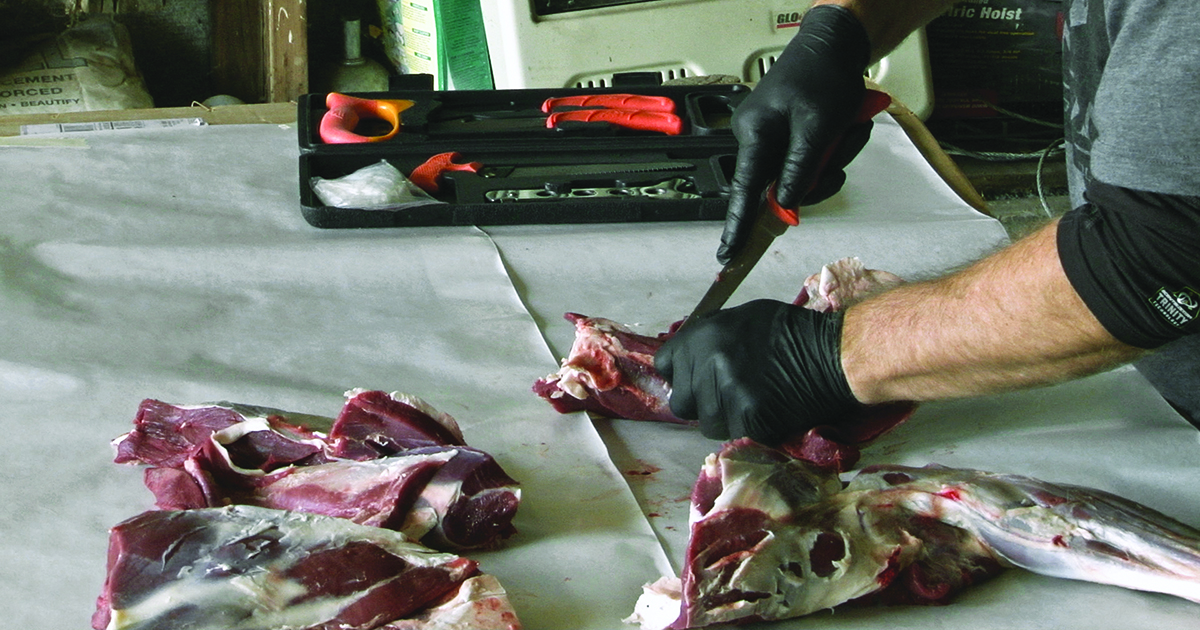
To start, skin the deer and chunk it up into seven parts:
Two hind quarters
Two front quarters
Two loins
Bag of other trim meat you pull off
Then place the meat in a spare refrigerator set to 36 F for aging. This plan works just as well as hanging a whole carcass. To prevent the meat from drying out, wrap it in plastic wrap or place it in plastic bags. Note that this is also a great meat-aging when a carcass would freeze hanging outside, or even in your garage or a shed.
Speaking of hanging carcasses, here are a few important concepts to understand.
If the deer has had a chance to cool, hanging it with the skin on is desirable because the skin holds moisture in and the meat won’t dry out.
A deer is best hung by the gambrels (back legs). This also happens to be ideal positioning for skinning a deer later, and pulling off the meat too, for that matter.
If you do skin the deer to give the meat a better chance to initially cool, place the carcass or quarters in cheesecloth bags for hanging. This will protect the meat from flies, and give it an extra measure of protection once a crust forms over the meat.
Here’s the bottom line for temperature considerations regarding aging. If that carcass is going to rise to a temperature above 40F for any portion of the day, you are giving bacteria the opportunity to go to work.
Next, consider how long to age the meat.
Timing Considerations
Every hunter seems to have their own opinion on how long to age a deer … or if it should even be aged at all! Certainly, delicious venison is processed each year from both ends of the length-of-aging spectrum. Here are a couple examples from my own experience.
Quite a few Novembers ago now, the gun season in southern Wisconsin was exceedingly warm, with daytime temperatures topping in the upper 50s. Our little hunting group that year consisted of me, my friend Ron, brother Larry, and my Dad.
The first day of the season was slow – hunters and deer just weren’t moving in the “heat.” So on the second day we went to work, doing some little pushes through brushy creekbottoms and shady north-facing sidehills. We moved whitetails, our aim was true, and at day’s end we had a pleasant quandary to deal with in the warm weather: Three whitetails down.
We skinned them by lantern light in my Dad’s backyard as the November night cooled temperatures into the thirties. The next morning, rigor mortis was done, so we butchered the deer in an assembly line, before the day got too warm. Maybe those deer would have been better with some aging, but we didn’t have too many options, as we all had to go our own separate ways in the afternoon. The venison was just fine, too.
On the other hand, quite a few Novembers ago now, I shot a nice young buck in Minnesota’s gun season. I didn’t have time to butcher the five-pointer before leaving for another hunt, so I took the deer to a trusted butcher.
I had a little trepidation when they said their main cooling room was full and they were going to store that deer in a refrigerated semi-trailer in their back lot. My concern wasn’t the surroundings: The trailer was clean as a whistle, refrigerated perfectly, and we hung the deer to boot.
But mine was the first one in. And it looked to me like first one in meant last one out.
I returned from Nebraska five days later, got busy with kids and work and life, and finally remembered to call the butcher on day 10 to pick up my meat. “We’re just getting to that one tomorrow,” was the reply.
Do you know what? That was the best deer I ever ate, bar none. Now it certainly didn’t hurt that the animal was a roly poly yearling. But the venison would literally melt in your mouth. While 11 days is a little longer than usually recommended for aging, I can’t argue with the results.
So how long should you age a deer? The answer is, it all depends. But here are some guidelines.
First off, older deer usually require more aging than younger deer, to get them to a tender state. The reason: Younger deer haven’t accumulated as much collagen in their muscles.
To a point, the longer you age a deer, the more tender it will get, as with my 11-day buck. Three to four days is about be the ideal amount of aging time that most butchers recommend, but seven days is fine and some meat cutters swear by ten. But remember, conditions must be ideal – in that 36 to 40 F range.
What if your schedule doesn’t allow you to wait that long? Maybe conditions are too warm outside, or life is going to get real busy, real fast, and you have to do the job when you have the time. In that case, at the very least, you should wait for the meat to cool down and rigor mortis to end.
If you have a deer that you’re going to completely grind for sausage, jerky, brats and other processed venison products, aging time is not as much a factor. While aging is fine on meat intended for these purposes, the physical act of grinding will take care of the tenderization work. But if you’re saving out delicious loins for boneless chops, and some chunks of prime cuts from back legs for steaks and roasts, age them in a refrigerator or cooler (see sidebar) for a few days before making the final cuts and freezing.
Conclusion
Given the right conditions – 36 to 40 F in a dry and clean environment – aging your venison for three to four days will improve the quality of the meat markedly. You can age a deer longer than that, but don’t let the meat dry out or you will lose tenderness and flavor. You can butcher your deer without aging if you want or need to, but make sure the carcass is cool and rigor mortis has ended.
Try Dan Schmidt’s magic marinade recipe!
Aging Venison in a Cooler
Do you hunt early seasons when it’s too warm to hang and age a deer? Coolers make great options for aging venison. Under the tightly closed lid of a good cooler, ice keeps venison at an almost ideal temperature for aging. Here are a few guidelines for making sure your meat ages properly.
Chunk up the deer. Quarter the deer into front shoulders, rear quarters, loins, and a bag of any trim.
Place ice in the bottom of the cooler. Don’t mix meat and ice. Place meat on top of the ice.
Keep the meat dry. If you let the meat soak in ice water, all the juices that make venison taste great will leach out. Instead, place the meat in plastic bags. Or, at least, place plastic over the ice in the bottom of the cooler so that meat and water can’t come in contact.
Drain water regularly. Drain out water daily, and add ice as you need to.
Flip the pieces. Every day, rearrange the meat so that a different part is in contact with the cold surface of the ice. This will help the meat age at the same rate.
You can age a venison in a cooler as well as you can a spare refrigerator. The cooler route just takes a little more work to keep the meat dry, the water drained, and the ice replenished.
Cooler aging is also great if you’re camping and hunting: Your meat will keep, and it’s aging at the same time. Getting ice may be the only issue. Plan ahead and know which town to run to for more ice.
Cooler aging can also work in frigid weather to keep extreme cold away from the meat so it doesn’t freeze. If a carcass hung outside is in danger of freezing, chunk out the deer and put in coolers without ice. Place coolers in a garage or shed where they’re not fully exposed to the elements.
D+DH In-Depth is our premium, comprehensive corner on America’s No. 1 game animal. In this graduate-level course, we’ll teach you about deer biology, behavior, and ultimately, how to become a better hunter. Want to be the first to get our premium content? Become a D+DH Insider for FREE!
Looking for the perfect hunting air rifle? Look no further! Discover our high-performance air rifles with impressive FPS (feet per second) rates. Whether you’re a seasoned hunter or a beginner, our selection offers accuracy, power, and reliability. Explore our range now and elevate your hunting experience to new heights.
hunting air rifle fps
When it comes to hunting with an air rifle, the FPS (feet per second) of the rifle plays a crucial role. The FPS determines the velocity at which the pellets are propelled, and this directly affects the impact and effectiveness of your shots. For hunting purposes, it is important to choose an air rifle with a higher FPS as it ensures greater accuracy and power.
A high FPS allows for a flatter trajectory, meaning that your shots will maintain their accuracy over longer distances. This is particularly advantageous when hunting small game or varmints that require precise aiming. Additionally, a higher FPS provides more kinetic energy upon impact, delivering sufficient force to effectively take down your target.
However, it’s important to note that each state or country may have specific regulations regarding the maximum FPS allowed for hunting purposes. It is crucial to familiarize yourself with these regulations before purchasing an air rifle for hunting. By selecting an appropriate air rifle with the right FPS within legal limits, you can ensure a successful and ethical hunting experience.
In conclusion, when it comes to choosing a hunting air rifle, the FPS (Feet Per Second) is an important factor to consider. A higher FPS can provide greater accuracy and velocity, resulting in more effective shots. However, it’s crucial to find the right balance between power and safety regulations. Ultimately, selecting a hunting air rifle with an appropriate FPS will enhance your shooting experience and improve your chances of success in the field.
Our Favorite Compound Bow Stabilizers from Mathews, Limbsaver, TRUGLO & More
Look at you, smart feller, searching for the next piece of the archery puzzle. Savvy hunters like you need the skinny on 2024’s best compound bow stabilizers for your hunting rig, and, by George, you’ve come to the right place. With hunting season fast approaching, get your bow dialed in now and not the week before the season starts.
Some sports, like football and golf, are a game of inches. The sport of hunting can be a game of millimeters. One smidge to the left, you hit the shoulder, wound your game, and it’s never to be seen again. Or, if shooter panic sets in and you float your pin too high, you may miss the vitals completely.
Situations like this are heartbreaking, which is why you need a good stabilizer to help steady your shot, increase accuracy, and extend your range. To help you find the best solution, I created this guide with 2024’s top options, from the best vibration dampening front stabs to the world’s elite front, back, and sidebars for increased balance.
The products on this list encompass a wide range from the who’s who of stabilizer brands like BeeStinger, Limbsaver, Mathews, CBE, Dead Center, and more. I’ve also included some friendly, affordable options for those hunting on a budget.
No matter what you’re looking for, you’ll find something tailor-made for you on this list of 2024’s best compound bow stabilizers. Buckle up, and let’s get this show on the road.
Target archers have been using stabilizer bars to fine-tune their shots for a long time; I’m talking about the long and fancy contraptions you see extending as much as 30 inches from their bows. On the other hand, you’ve likely also seen shorter stabilizers on the front of hunting bows.
So, what’s the difference? In short, longer stabilizers are more focused on balancing your compound bow, which creates less pin float, and short stabilizers that come standard on hunting bows are more for vibration reduction than for balance.
You may wonder, why do I need a stabilizer when hunting? Why are some people using longer stabilizers and more complex front, back, and sidebars when hunting? Which type of stabilizer is going to work best for me?
If you’re asking these questions and are a bit newer to the sport, here are some important concepts you need to understand before purchasing a stabilizer:
Standard Front Stabilizers for Compound Bows
Best Overall Bee Stinger MicroHex
Lengths: 6″, 8″, 10″, 12″ Materials: Lightweight counterveil carbon Weights: Three 1 oz weights included
“No games, no gimmicks.” That’s how Bee Stinger promotes their stabs. They’ve tapped into the minds of their customers and learned one valuable lesson that second-rate pretenders never seem to understand: hunters want their archery gear to function as advertised.
The MicroHex line is their most popular stabilizer to date because it has everything a hunter needs to customize their setup to their specific needs and style. The weights stay snug where you want them to and can be adjusted easily to balance your shot.
I like BeeStinger’s MicroHex for two main reasons. First, they make their rods with cutting-edge materials with counter-veil anti-vibration carbon used in fighter jets. Second, their mounting studs have teeth that forcefully clamp down when screwed to your compound bow. A solid fit prevents slop and creates a rigid and seamless energy distribution throughout your shot.
Best High-End Mathews Flatline
Lengths: 6″, 8″, 10″, 12″ Materials: High modulus carbon fiber, stainless steel machined weights Weights: Comes with one 1-oz weight, but you can purchase more here
If you’re shooting a flagship bow, and want maximum performance during the process, grab this top-notch stabilizer from Mathews. Many users claim there’s no better tech on the market.
The Flatline is made from ultralightweight carbon fiber that utilizes the industry’s top anti-vibration and noise-dampening technology. When you combine this feature with Mathews’ patented harmonic dampener — which spools extra energy during your shot and then releases it at the perfect moment of inertia — you’ve got one Steady Eddie on your hands.
Mathews markets this professional tool for any type of shooter, whether experienced, novice, or somewhere in between. It’s compatible with a v-bar bracket and can customize weights for your exact needs. The different ways you can mod this stabilizer to your setup are endless, and if it’s in your budget, you should consider it seriously.
Top-Notch New Product for 2024 Axcel Archery Antler Ridge
Lengths: 6″, 8″, 10″, 12″ Materials: Ultra-high carbon, cutting-edge flax material Weights: Four 1 oz weights included + 1 oz dampener on the end
Stabilizers are only as good as the materials they’re made from. Axcel Archery’s newest line is made from the latest and greatest technology and is designed meticulously to set itself apart in an otherwise flooded marketplace.
The Antler Ridge is the only stab on the market to feature Axcel Archery’s all-new Flax material, which has never been seen in the world of stabilizers. Flax is one of the most anti-vibration-friendly materials in the world and plays perfectly with its rigid and lightweight design.
The cool graphics and personalized color options have nothing to do with performance, but they do let you know one thing: Axcel Archery created a product that stands out in every possible way, from its technology to its aesthetic.
Best for the Money Limbsaver LS Hunter Micro Lite
Lengths: 8″ Materials: Small diameter carbon Weights: 5.6 oz + ability to add more weight as needed
At around 90 bucks, the Limbsaver LS Hunter Micro Lite isn’t the cheapest stab on this list. I do believe it offers the best value you’ll find, however, in that it lands at an approachable price point without sacrificing high-end features.
This streamlined, wind-resistant, small-diameter eight-inch carbon bar is designed specifically for hunters and will handle all the rugged demands of the backcountry while helping you maneuver through the tightest situations. Whether in a treestand, blind, or even a mountain hunter traversing over craggy rocks, you’ll find its compact, forward-thinking design very useful.
Its superb balancing comes from heavier-than-usual front weights that tip the scales at around 5.6 ounces. You can add or subtract weights as needed to create a more dialed-in feel. The Limbsaver LS Hunter Micro Lite will work for anyone who wants a no-fuss solution for their next hunt.
Affordable but High-Tech Option TRUGLO Cadence
Lengths: 8″ Materials: CNC Aluminum Weights: 8.5 oz
From bow releases to bow stabilizers, TRUGLO is an industry leader in high-quality archery equipment. When it comes to stabilizers, they’ve truly outdone themselves by engineering the Cadence stabilizing bar with the average bowhunter in mind. TRUGLO talks the talk and walks the walk.
Since I’m on a budget this year, I will pull the trigger and grab myself one of these bad boys for the upcoming archery season. It has a rigid bar made from CNC aluminum that doesn’t have any give during your shot and is treated with a quiet, soft-touch coating, making it perfect for spot-and-stalk hunters that want to eliminate noise.
Much like the Mathews Flatline, the TRUGLO Cadence has a vibration dampener that reduces noise and play in your shot. As a matter of fact, it has two dampeners, and what’s even more incredible is that it costs one-third of the price of the Flatline.
Too many hunters and “ethical” outdoorsmen clown on people for asking about budget hunting gear. I can’t count the times I’ve heard in forums and Facebook groups, “Why would you buy X when Y is so much better?” I’ll tell you why: not everyone has a Mathews budget.
Regular folks have lives, kids, jobs, and priorities that take precedence over high-priced and top-end gadgets. However, just because they’re trying to save money doesn’t mean they lack the desire to be prepared and have a stable shot.
Luckily, if you’re on a budget, you can still have your cake and eat it too. SAS’s CNC stab is one of the highest-rated and most affordable stabilizers on the market and comes in various sizes and colors. Most importantly, it does precisely what you’ll need it to: stabilize your shot by reducing vibration and balancing the weight of your compound bow.
Made in the USA Viper SX Aluminum
Lengths: 6″, 8″, 10″, 12″ Materials: Aircraft grade aluminum Weights: 4 oz + ability to customize in 1/2 oz increments
Made right here in the good ol’ US of A, the Viper SX sits up near the top in terms of performance and lands at a very attractive price point. It boasts rigid strength thanks to its aluminum end caps and wind-resistant, lightweight rod that keeps the overall weight at a minimum.
Viper SX does utilize some serious balancing weights, however, as it’s equipped with one four-ounce weight at the end of the shaft. The combination of its lightweight bar and well-placed steel weights gives it superior balance by placing the weight where you need it most.
Furthermore, you can remove the end weight and add a variety of configurations that Viper offers. It comes in four lengths and is easy to make into a front and back bar kit using a v-bar bracket. Considering all its versatility comes at a lower cost than its higher-priced counterparts, what’s not to love?
Bow Stabilizer Kits (Front and Back Bars)
Best Overall Kit Dead Center Dead Level Verge V2
Lengths: 6-8″, 8-10″ Materials: Vibration dampening carbon Weights: Some with six 1 oz weights; you can purchase more here
Gone are the days of your stabilizer bars vibrating loose. With this v-bar setup from Dead Center, you can rest assured that your stabilizers will be rock solid when that shot of a lifetime presents itself.
If you want the most steady shot possible, join the ranks of archers who shoot with an added back bar. They’re increasing in popularity, and what was usually more mainstream among target shooters is becoming commonplace in the field. (For what it’s worth, I only rock a front stabilizer, but I don’t shoot with a quiver attached or have issues with pin float.)
If you want to join the bandwagon and aren’t out here taking any chances, look no further than the Dead Center Dead Level Verge 2. It’ll come perfectly tuned with the right amount of weight straight out of the box, and its light bars will hold steady against your bow. With a kit like this, you’ll be able to take long-range shots with a high degree of confidence.
distribution
Best High-End Kit Bee Stinger Sport Hunter
Lengths: 6-8″, 8-10″ Materials: SRX Carbon Rods Weights: Two 2oz weights on each side
Here we go again with Bee Stinger. Some hunters may say I’m a bit of a fanboy, but I have zero shame plugging their stellar products. My job is to pair my readers with products that won’t let them down on their 2022 hunt, after all.
The Bee Stinger Sport Hunter is tailor-made for the craft of chasing game, as its features are cleverly designed to accommodate hunters. It has a low profile to help you get through sticky situations and can be easily adjusted in a variety of scenarios.
The Sport Hunter has everything you could ask for from a stabilizer kit: maneuverability, ease of use, quick disconnect brackets, and an adjustable weight system. Now all you need is for some critters to show up so you can show them how steady your shot is.
Best Mid-Range Kit CBE Torx
Lengths: 7.5 – 11″ Materials: High mod lightweight carbon Weights: Two 2 oz weights on each bar; if you want more customization, grab a few more here
Next time you’re at the range, check out what types of stabs other archers are rocking. I kept a close eye on other shooters my last time out and saw loads of them using the CBE Torx. When I asked one guy why he was using this kit, they responded that it’s simple to use and easily adjustable to his bow.
The rods on CBE Torx are made from lightweight carbon, and their interchangeable weights are placed towards the end of the bar with precision. This customization makes for a great balancing act when shooting from any position.
If you want a set-it-and-forget-it stab that doesn’t rattle loose when climbing in your tree stand or crawling through some thick oak scrub, look closely at the CBE Torx. It has many of the same features and weight distribution as others on this list but will cost you a little bit less dinero for the entire kit.
Editors Choice Stabilizer Kit Trophy Ridge Hitman
Lengths: 6-8″, 8-10″, 10-12″ Materials: Durable target carbon Weights: Two 2 oz weights per bar; you can find more here
Would you get a load of the Hitman stabilizer kit? It’s right up there with the best in terms of research and development but with a much more approachable price tag. Trophy-Ridge really stands out in this class of stabilizers in form, function, and cost. They’re out here playing chess while everyone else is playing checkers.
The Hitman’s standout features include a unique design that allows for effortless energy transfer through its carbon rod and two cleverly placed dampener rings. It’s lightweight, compact, won’t be affected much by the wind, and comes standard with a top-notch v-bar bracket that the user can easily adjust for a custom feel.
Why is this the editor’s choice stabilizing kit, you ask? Well, in my opinion, it leads the pack in quality, performance, and consistency. In a sport where every millimeter matters, the Hitman series of stabilizers won’t let you down. If, at this point, you’re still confused about which stabilizer kit to go with, snatch this one up. You can thank me later.
Best All-in-One Stabilizer Bar Bee Stinger Counterslide MicroHex
Lengths: 10″, 12″, 15″ Materials: Five 1 oz weights; need more? Grab them here Weights:
If you want both a front and back bar stabilizer, go with a v-bar setup like the Bee Stinger Counterslide MicroHex. It’s more of a sidebar than a stabilizer kit, but many hunters prefer it since it keeps their weight down while still allowing them to have reliable balance in their shot.
Here’s my issue with this setup: unlike a v-bar setup in which you can move in centimeter increments at an angle, the Counterslide can’t be adjusted away from your bow. It stays in a straight line. That said, some hunters swear by this style, and if you’re one of them, the Bee Stinger Counterslide is as good as it gets.
This system is useful since it allows you to move your bar forward or back with a dovetail mount, meaning you can make adjustments in the field without adding or subtracting weight. Bee Stinger Counterslide’s single bar is also effective for those that shoot with their quiver attached, as it’s pretty remarkable at counterbalancing the side torque caused by an arrow holder.
Foul-weather hunting can bring the best opportunities when other hunters are staying home
There are many obligations in my life that distract me more than I’d like from hunting and fishing. Work, farm life and family all pull my attention out of the woods. Yes, there are days when I just can’t justify spending all day in the duck blind or tree stand. But as many excuses as there are to keep me out of the woods, I never allow weather to be one of them. As the saying goes, “a smooth sea never made a skilled sailor.”
Why you shouldn’t be a fair-weather hunter
A fair-weather hunter is someone who is only found hunting or fishing when it’s a blue bird day and the sun is shining high and bright. It seems as though precipitation has the power to stop most folks from even entering the woods. Most people will consider this a “lost day.” Don’t be most people. Time and again I have found myself completely alone in areas that are usually littered with hunters or anglers, all because a low-pressure system is threatening to dump a few inches of snow or rain. I have experienced some of the best hunting and fishing during these rare moments of respite. These days are essential for accessing areas without alerting animals to your presence, determining what sign is the freshest, what specific food sources are being targeted, and overall, broadening your understanding of the game you are pursuing. Animals also tend to be a little more one-track-minded on such days, seeking food and shelter usually in conjunction with each other. Coupled with the lack of human presence, it’s sometimes hard for me to settle on a place to hunt.
As the climate patterns continue to shift across the globe, extreme weather events become the norm. Hunters must adapt to these effects to successfully take advantage of the hunting seasons. The grow season in the foothills of the White Mountains of New Hampshire is typically mid-May to mid-September. Lately, however, we have been experiencing more snowstorms throughout the early spring compared to late fall and early winter. This climatic shift has also led to prolonged periods of drought throughout the summer and a much wetter fall season. This means more chance for snow during our spring turkey season and a higher probability of heavy rainstorms during waterfowl and deer seasons. But, if you are determined enough to make every effort to get into the woods regardless of the forecast, then you can capitalize on opportunities you, and many others, otherwise would have missed.
While rain and snow tends to put a damper on most human activities, fish, birds, and most game have no choice but to continue life regardless of significant weather events. This seems especially true when it comes to waterfowl. I have shot more ducks and geese in driving rain, sleet, fog and snow than I have on clear, sunny, warm days. Most rainy day duck hunts I’ve been on were fast in-your-face shoots, ending almost as quickly as they began with a limit of dabblers. Sure, you may be soaked from boots to barrel, but there is nothing better than successfully executing a hunt in less than desirable conditions and coming out the other side, all the wiser and more grateful for the roof above your head and the food on your table.
In 2017, the year was punctuated by major flooding events, one of which completely obliterated a local NHFG fish hatchery along the Baker River. Heavy rains at the end of October led to massive flooding along the Pemigewasset River and its tributaries. Jumping on the opportunity, my brother and I spent the earlier part of the storm scouting groups of ducks and geese in some of our favorite spots. With more rain in the forecast and rivers already breaching their high water marks, we figured half our spots would be inaccessible because most of the routes in would be inundated. We adjusted our strategy and scoured the local agriculture that parallels the rivers.
In the contour of an extinct oxbow, long cut off from the river and since cultivated for years, we happened upon several hundred mallards and black ducks piling into a newly flooded cornfield. In the adjacent block of oaks and beech we could hear wood ducks whistling, and somewhere on the far side of the field, a hundred geese were trumpeting. If there’s a waterfowl hunting heaven, this is what it must look like. We silently sat and watched the geese loaf along the back of the flooded oxbow and feed across the hillside. Strings of mallards worked their way through the submerged corn stubble, like feathered vacuums, devouring the left over crop.
The next morning with a loose plan in hand, we let the river dictate our access and setup beneath overhanging pine bows overlooking a transition between the timber and the corn. With limited time available before work we quickly threw out a string of floaters in front of us with a few full-bodies making their way up the corn. As dawn quietly approached, the torrent of the river was interrupted by a flurry of wings and whistles. The wood ducks were the first to arrive. They left as quickly as they came, albeit fewer in their ranks. After several agonizingly long minutes, the mallards graced us with their presence, settling amongst our spread. A few volleys and a couple handfuls of ducks later, we marched out of that flooded field soaked and grinning. We spent the next three days hunting that spot and hit our limits two out of three days. A week later there was a foot of snow and the river was frozen.
Tips for making the most of foul weather hunting
Hunting on short notice, over a new feeding ground, in an area that birds can’t typically access via water usually leads to grumbling and a dose of ibuprofen. To pull off a hunt in driving rain and in close proximity to a swollen river takes both luck and skill. The luck is finding the birds; the skill is in beguiling them. It’s through quiet observation that I’ve learned where and how to hunt. I don’t advise chasing divers in open waters when the water is choppy and the wind is howling, unless you like constantly chasing decoys and bilging water out of your waders or boat. During storms, time is better spent hammering the backwater with plenty of cover, while freshly flooded cornfields almost always make for great puddle duck and goose hunts. Of course, finding the X is always first and foremost, especially when the forecast is set to change.
With seasons as short as they are and limits constantly subjected to changes in population size, today’s hunters should seize any opportunity to get outdoors in order to succeed. If time is taken to properly scout and understand the behavior patterns of the animals you intend to pursue, your success rates will climb. Utilize every rare, solitary moment in the woods to sharpen your hunting skills, especially when most people are still relaxing at home, out of the woods and out of the mire.
Duck Blind Quick Tips and Hacks
The Origins of Retrievers: Hunting Dog Confidential Episode #8
A Introduction to Jump Shooting Ducks on Upland Hunts
Anyone who’s ever tried Chesapeake Bay Fishing has almost certainly stumbled into a tackle store to grab some lures at one time or another, and struggled to pick which colors to go with. With a million different variations from white to nuclear chicken, picking out which colors to keep stocked in your box is no easy task and there is no magic color that will work in all conditions. So, let’s cover all the basic necessities as well as when each has its place. Regardless of what species you are fishing for, the same rules apply.
In relatively clear water, white is always a good starting point when it comes to choosing lure color.
First let’s talk about how the time of day and water clarity play a role in color selection. Think of clarity as a spectrum with two main categories: clear and muddy. For clear water, natural patterns will work the best since the fish have the ability to really focus on the bait. Green pumpkin is a good natural color to imitate bluegill and crawfish. White is a good color to imitate shad and bunker. Transparent and ghost patterns also work well in clear water. For muddy water, fluorescent and dark colors stand out the best. Another effective tactic particularly for muddy water is adding contrast by using a different color skirt or dipping the tail of your baits in scented dyes. Using scents such as Pro-Cure or choosing abladed lure that sends out vibrations can also be to your advantage in the muddy water because it can help fish find your lure.
In off-colored water, lures with blades that create vibrations will add to the appeal.
“Match the hatch” is a term you have likely heard before, and it simply means picking a lure that is similar in shape, size, and color to what the fish are feeding on. The best way to figure out what fish are feeding on is to take into account what baitfish and crustaceans live in the body of water you’re fishing, as well as paying close attention to the fish you catch. Sometimes fish will regurgitate their stomach contents when caught, which is an easy indicator of what the fish are eating. You may also notice things like bluegill tails or crawfish antennae sticking out of a fish’s gut. The majority of the time, however, it is just guesswork until you find a pattern.
The basic rule of thumb is to pick colors that best match what’s abundant in the watershed you are fishing. For instance, a pond with lots of bluegill will mean that green pumpkin and bluegill patterns will work best when targeting bass, and a lake with lots of shad will result in white patterns working well. One final note about matching the hatch: the forage fish will shift throughout the seasons as abundance changes.
When fishing in low light conditions and at night, resort to black, blue, and purple because they will be the most visible. (Bonus tip: when fishing in low light conditions use baits that give off lots of vibration and sound to help fish key in on them).
Fishing tip: tying on a tandem rig allows you to experiment with two different color lures at the very same time.
The exception to the previous rules is when trying to trigger a reaction strike from fish on beds or fish protecting fry. When bed fishing for bass or snakehead, you want your bait to aggravate the fish and make it strike out of aggression. The two best patterns for this are bluegill shades, because bluegill often get chased off beds for trying to eat eggs or fry, and solid white baits because they are good for sight fishing when trying to maintain contact with a bed.
When it comes to stocking your tackle box, the best way to make sure you are prepared for any condition is to keep a few simple patterns at all times. For bass and snakehead baits try and keep a more natural pattern like green pumpkin or white and a dark pattern of each of your favorite baits. That is the bare minimum, so feel free to snag any of your personal favorite color schemes as well. For saltwater soft plastics, especially on the Bay, the majority of baitfish can be imitated using white lures. So, try and keep a white pattern for clear and stained water and a chartreuse pattern for green water. For saltwater hard-baits you can keep it simple with a few chrome lures, white, and if you are into night fishing, some black or dark purple.
Finally, always remember that feeding patterns and environmental conditions are constantly changing so although a specific color may work one day, it may not be the ticket a few weeks later. Don’t be afraid to play around with colors until you find something that works.
Bonus Tip: Match the Patch
An easy rule of thumb to remember is to match lure color with water color. Simply look out at a patch of water, and choose accordingly. In clear water, white’s a good pick; in green water, chartreuse works well; in muddy water, root beer is a good option. Match the patch, and you have a solid starting point to work from.
Bonus Tip: Depth Charge
Remember that depth affects lure color, because colors fade as you go deeper into the water column. Reds begin to disappear just a few feet down, take on a whitish hue, and are completely gone at 15 feet. Oranges and yellows disappear next, followed by greens, and then finally blues. So an orange and red plastic with a white skirt may offer great color contrast when you hold it in your hand, but if you’re letting it sink to 20 feet then bouncing bottom, the contrast level is near zero.
The world of air pistols is as diverse as any other precision sport out there. And there are many factors that need to be considered when selecting your first air pistol. Rather than simply picking out any old air pistol or the most expensive one on the market.
In this article, you will learn all about the best air pistols, Co2 pistols, and other pellet pistols that are currently on the market. Not only that, but you’ll learn about the differences between them. So you can find exactly what you are looking for when entering the world of air pistols.
The following reviews will cover the best air pistols that are currently available. With an easy-to-read format and a breakdown of pros and cons. With this knowledge, you’ll be well on your way to choosing the perfect air pistol for your needs.
So, let’s get going with a quick comparison table of the models covered in this review.
Founded in 1924, Crosman Corporation manufactures and supplies all types of shooting products for sports such as archery, as well as, CO2 guns, airsoft guns, and pellet guns.
Product Description
The Crosman Benjamin Marauder is a pre-charged air pistol that shoots.22 caliber pellets. At full charge, the pellets reach speeds up to 700 fps (feet per second). It is made from synthetic plastic, keeping it light. The barrel is rifled and is made from steel with a matte coating to keep it from scratching.
The magazine holds up to 8 pellets and sits in a rotary-style magazine on top of the pistol. To reload, you use the bolt action on the back (like that of a sniper rifle), and it will reload a new pellet into the barrel.
Safety first…
For safety, the Crosman Benjamin Marauder has cross-bolt safety, which is very important for all shooting sports.
There are no iron sights included with the product, but there are rails on the top of the pistols for you attach any preferred optic, whether it be a red dot or a scope. However, you would have to use air pistol mounts to attach a scope as they are smaller than standard Picatinny rails.
Product Specification
For its size, it looks like it would be quite heavy, but in fact, it is surprisingly light weighing only 2.70 pounds unloaded. The weight reduction is mostly due to the synthetic material used, which allows the air pistol to be both lightweight and also durable.
For some, trigger pull can a big issue, so you’ll be pleased to know that the trigger on the Crosman Benjamin Marauder is very light at only 1.7 pounds.
Pros
Cons
Lightweight
Carbine option.
Pre-charged.
Rotary Magazine.
Light trigger.
Only eight rounds
Air pistol top rail, not a standard Picatinny.
No iron-sights.
2.Daisy Powerline 415 Pistol Air Gun Kit
Next up, we have a CO2 (Carbon dioxide) powered air pistol. This operates by compression, which comes from a cylinder that is inserted at the bottom of the grip and screwed in place.
Product Description
The Powerline 415 has a familiar-looking shape and build. The grip is comfortable, and firing accurately will take little practice, as will getting used to the functions of the pistol.
To insert the CO2 capsule, you remove the lower half of the pistol grip. Inserting the capsule is very easy, and screwing it in doesn’t take much effort either. The pressure from the Co2 is capable of firing the BBs at 500 fps and claims to reach a max distance of 240 yards.
An unusual design…
However, the magazine isn’t where you normally find it in the pistol grip but is on the top slide of the pistol. Reloading is, therefore, a little slow as you can only insert a single bullet at a time. The slide holds 21 round bullets.
There are iron sights that are built into the slide. These are plain black, so they might be hard to see if you are shooting in low-light situations.
As in the name, this is a kit, so you will get more than just a pistol. You will also get some .177 caliber or 4.5mm BBs, a pair of eye protection glasses, three Co2 capsules, and some oil to keep the O-rings from drying out.
Product Specification
Built mostly from polymer, the pistol is light and durable enough to handle the pressure of the CO2. However, using the pistol in rough situations will probably reduce its longevity. The only metal on the pistol is the trigger and the magazine spring.
The barrel measures around 8 inches and is a smoothbore, which means there is no rifling and no hop-up to create backspin on the BBs. Backspin is important for range and accuracy, but it seems to be lacking on the Powerline 415.
Measuring 8.6 inches, the pistol fits comfortably in your palm, and it feels like you’re firing a regular pistol. However, the biggest difference is in weight. The Powerline is made mostly out of plastic, so weighs only 0.98 pounds, which is very light.
Pros
Cons
Lightweight
21-round magazine
No recoil.
Attachment rail under the slide.
Co2 will have FPS drop.
Blacked-out iron sights.
No backspin on the BBs.
3.Beeman P3 Air Pistol
The Beeman P3 is a pump-action air pistol. This means that you have to pump the air into the compression tube before you can fire a shot. It does not have a reservoir like others that use a tank or a capsule to propel the pellet.
Product Description
As mentioned, the P3 needs to be pre-charged before firing. To pump the air, you will have to unlatch the “hammer” on the rear of the slide. In this case, the slide is not functional and is used as a lever instead. Once unlatched, the top half of the slide will open up, revealing the piston and the air tube. By lifting the lever forward and pushing it back into place, you pump the air into the compression tank.
The P3 doesn’t use a magazine to hold the pellets, so every time you pump the pistol, you have to insert the pellet into the barrel before snapping it shut.
Great for low light conditions…
Not only does the slide act as the air pump, but it also supports the iron sights. On the P3, you have the luxury of bright hi-vis fiber optic iron sights. The front sight is a single red dot, whereas the back is two yellow dots. High visibility iron-rights are good for shooting in low-light or dark backgrounds. They also aid in lining up the pistol to a target as your eye catches the sight a lot faster.
One thing worth mentioning is that the P3 has an automatic safety feature. This safety will lock the trigger as soon as you pump the pistol, which should avoid any injuries.
The barrel on the P3 is rifled, so you should get accurate shots. Other than that, the pistol is pretty simple. The grip allows you to comfortably hold the pistol, and the trigger is light and easy to pull. If you wish, you could also adjust the trigger pull, but the factory settings are already very good.
Product Specification
Made mostly from plastic, the P3 is very lightweight and easy to hold for long periods. However, all the moving parts, i.e., the piston, compression tube, trigger, and hammer latch, are made of metal to ensure longevity.
With a single pump, the pistol will fire a 0.177 caliber pellet at a max speed of 410 Fps. As there is no blowback from the slide, the shots are nearly silent when the trigger is pulled.
The P3 uses a charging system, so most of the effort goes into pushing the lever back into the locked position. It takes around 22 pounds of force to push the lever back so you will tire after shooting multiple shots.
Pros
Cons
Pre-charged.
Automatic safety.
High-visibility fiber adjustable optic iron sights.
Near silent when shooting.
Adjustable trigger.
Interchangeable rifled barrel.
The moving parts are metal.
No magazine.
Slow reloading.
4.Umarex TDP 45
Umarex is a popular German outdoor brand that supplies air pistols and recreation shooting products.
Product Description
The TDP 45 is a C02-powered semi-automatic air pistol. Like most C02-powered air pistols, the capsule is inserted in the pistol grip. For the TDP 45, there is a flip-up lever on the backstrap of the grip. Once opened, the Co2 can be placed in the slot and screwed in place.
The magazine holds 19 steel 0.177 or 4.5mm BBs and is shaped more like a stick mag than the regular full mags. To release the magazine, there is a magazine release located on the right thumb rest. Underneath the slide, there is also some rail space for accessories like red dot sight mounts or flashlights and lasers.
Dead on target…
The CO2-powered air pistol has no blowback and no functioning slide, but that is to be expected. On top of the slide, there are reflective iron sights. The white dots on both the front and rear sights aid in acquiring the sights and lining them up with the target.
Other than that, the trigger is standard and has a smooth and light pull. The safety is not located on the left side as standard pistols, so you’ll have to use your right index finger to access it rather than your thumb.
Product Specification
The TDP 45 is made mostly of a polymer. Not only does this reduce the cost but also keeps the pistol light, weighing only 0.80 pounds. All the moving parts of the TDP 45 are made of metal, such as the trigger, barrel, CO2 screw, nozzle, and magazine.
The barrel on the TDP 45 is a smoothbore allowing it to guide the BBs with as much accuracy as possible. However, most BB guns have a hop-up for backspin, but there is none on the TDP 45.
The C02 capsules that come with the pistol are 12 grams, and it is not recommended to use higher power capsules as they may damage the pistol. The 12-gram capsules propel the BBs at a maximum velocity of 410 fps measured with 4.5mm bbs.
Pros
Cons
16-round magazine.
Clear sights.
Smooth trigger-pull.
No blowback.
Accessory rail.
Polymer pistol.
Not a replica and lacks realism.
Fixed sights.
Screw-in capsules.
5.Gamo 611138054 P-25 Blowback CO2
Gamo is a Spanish brand that manufactures in Japan and is well-known for its quality products. With over 60 years of experience in manufacturing, they provide excellence in their bullets, rifles, and BB guns. Over the years, they have had significant growth and now supply and distribute in more than 90 countries.
Product Description
The Gamo P-25 is a C02-powered air pistol with a blowback feature as well as a single and double action trigger. By cocking the slide, you set the hammer into position, but the pellet isn’t loaded into the barrel. This happens when you pull the trigger, about halfway, and then the pellet is loaded into the rifled barrel.
With the final stroke, you release the gas and send the pellet to its target. The slide will then cock the hammer again and can keep firing.
Easy capsule install…
The P-25 has its CO2 capsule hidden in the pistol grip. To load the capsule, you’ll have to pull half of the grip off. This is a well-designed pistol and separates so cleanly that it is hard to tell where the two pieces meet. Once removed, you can insert the capsule into the slot. Before putting the pistol grip together, you screw the CO2 capsule in from the bottom and then put the grip back together.
The magazine is a double-sided, rotary magazine that holds eight pellets per side. Once one side is empty, you hit the magazine release and flip the magazine around, and the other eight pellets are ready to go. The magazine is well constructed and is made from alloy material and will stand the pressure of the CO2.
The safety can be found on the right side of the frame and is easy enough to access single-handedly but isn’t so easy that you can accidentally flip the safety into firing mode. On the top, you have reflective fixed iron sights that are easy to use to acquire targets.
Product Specification
The P-25 has a working slide made of metal, which gives it a very realistic feeling. The frame is made of plastic but also has metal moving parts. It weighs around 2 pounds.
The P-25 is said to be able to shoot 0.177 pellets as well as 4.5 BBs, but with the rifling, it is better to use pellets instead of round BBs. As usual, the CO2 is 12 grams and will propel the ammunition of choice at max speeds of 410 fps in warmer climates.
For one CO2 capsule, you will get around three full magazines used before having to change it. It is possible to get four magazines to use, but you will have to wait for the CO2 capsule to warm up a bit before shooting.
Pros
Cons
Blowback pistol.
16-round magazine.
Reflective sights.
Working hammer.
Metal slide.
Manual safety.
Rifled barrel.
Not CO2 efficient.
Not a replica.
No bolt catch or slide release.
No accessory rail.
6.Umarex Legends M712 Blowback Automatic
Umarex Legends line features some of the finest craftsmanship of any replica. The Umarex Legends M712 is a replica of the C96 Mouser and looks and feels exactly like the ones used and made popular during WW1.
Product Description
The M712 is a blowback semi and automatic C02 air pistol that stores its CO2 capsule in the magazine along with 18 single-stacked BBs. To insert the capsule, you first press the magazine release that is on the right side of the frame. Once the magazine is removed, you unscrew the lid. Once open, you just pop the CO2 capsule in and screw the lid back on to puncture the CO2.
Most of the controls are on the left side, such as the safety and the selector switch. The selector switch is the lever on the left side, which you access with your right thumb. There are two modes; single fire and rapid fire. To switch modes, you’ll have to press the button and then slide it up or down to select your firing option.
The safety is on the back next to the hammer and is pulled in the same way as the hammer to lock the trigger.
Take aim…
The trigger is smooth and doesn’t have a long trigger pull. On the top, there is no slide but, instead, a working bolt. This is where you’ll find the aiming post, which looks like that of an AK rifle, and a reflective dot on the front iron sight. The rear sight can be adjusted for elevation and range but not for windage. This isn’t a big deal, though, as it is a pistol, so most shots will be fired at close range.
The grip is one of the most iconic features of the pistol and is easily recognizable. The broomstick pistol grip swells out like a light bulb and fits comfortably in the hand. This, however, puts most of the weight on top of the hand, and compared to modern-day pistols, this is considered as a bad design. However, in its time, it was a masterpiece.
Product Specification
The pistol is a replica, so it is almost identical to its real firearm counterpart. The M712 is made entirely out of metal, and the only plastic part is the imitation wood on the pistol grip. This does make it fairly heavy, but that’s understandable, as its goal is to be as close to the real C96 as possible.
The barrel is a 6-inch smoothbore barrel and will fire all 4.5-gram bbs. The maximum fps with the 12-gram CO2 capsule is around 390 to 410 fps depending on temperature and BB weight. This pistol will, however, consume a lot of CO2 as the blowback needs to be powerful enough to cock the hammer back.
Pros
Cons
C96 replica.
Blowback.
Full metal construction.
Semi and automatic fire.
Heavy.
Uses quite a lot of CO2.
7.Crosman Vigilante CO2 Caliber .177 Pellet & BB Revolver
Next up, we have another great Crosman product, the Vigilante. This air pistol is very versatile and can be used with both pellets and BBs. You might notice that it looks fairly similar to the Colt Python 357, that’s because the Vigilante is a replica of that exact model.
Product Description
The Crosman Vigilante is a CO2-powered 10-round/pellet single and double-action revolver. Starting with the magazine, the rotary magazine fits ten rounds or pellets, but it does not pop out.
To load the magazine, there is a pressure point on the top that you push down to unlock the barrel assembly. Once that is unlocked, the barrel will flip down, revealing the circular magazine. From there, you simply take it out and load it then reverse the steps.
The CO2 capsule is placed inside the pistol grip and is fairly simple to install. All you have to do is remove the plastic caps that make up the pistol grip, and you’ll find the metal housing for the CO2. A simple install and screw twist will puncture the capsule, and you’ll be ready to go.
Never forget about safety…
The safety on the Vigilante is a cross-bolt style safety. This means it is a simple bar that crosses the bolt preventing the hammer from contacting the gas valve. On the top, you have blacked-out fixed iron sights, but they perform well under daylight firing. There is also a rail space for all duck tail attachments like red dots or optics.
The 6-inch inner barrel is metal and rifled for improved accuracy, but it does protrude the outer barrel. This is good for both accuracy and max fps, but many shooters will not like the look.
Product Specification
The Vigilante is part metal and part plastic and has a fair bit of weight to it. The pistol weighs around 1.70 pounds (without pellets). The metal parts are where they matter most like the frame, trigger, CO2 screw, barrel lock, safety, and hammer. The plastic parts are the outer barrel, the magazine, and the pistol grip.
For the best performance, Crosman recommends using 0.177 lead pellets or 4.5mm BBs. The CO2 capsule is 12 grams and will result in 435 maximum fps. There is no blowback on this pistol, so it will lack realism, but it will save on CO2 consumption as well as improve on accuracy.
Pros
Cons
Colt Python 357 replica.
10-round BBs/pellet magazine.
Rifled 6-inch barrel.
Metal frame.
CO2 efficient.
Blacked-out iron sights.
The magazine doesn’t pop out.
Plastic outer barrel.
The grip could have been rubberized.
8.Colt Defender
The Colt Defender is another Umarex product. However, this model is unlike any other in this top air pistol review.
Product Description
The Colt Defender is a replica of the actual Colt Defender 45 auto and is a single-piece pistol. This means that there are no removable parts, and everything is built into the pistol. It is a Co2 powered, and it is installed in the pistol grip. To install the CO2, you push the button where the magazine release would be. Instead, it opens the pistol grip caps and exposes the Co2 slot, where there is a screw at the bottom to puncture the capsule.
On the opposite side of the CO2 capsule, is the BB slot. To load the built-in magazine, you simply slide the spring down and feed the BBs into the slot. The magazine fits 18 rounds and shoots in single fire or semi-auto.
Lots of realistic details…
There are nice markings on the slide and some authentic warnings and serial numbers. On the top, you have fixed iron sights with a white reflective dot on the front sight and blacked-out iron sights on the rear. However, the slide will not move as the Colt Defender is non-blowback.
Underneath the barrel, there is a handy rail for your accessories. The pistol looks identical to the Colt Defender 45 auto, but there are no actual moving parts. The hammer, thumb safety, and slide catch are all part of the frame and don’t actually move.
There is working safety on the right side of the frame, and it is easy to operate single-handedly. To put the pistol into firing mode, you simply press the button and slide it back to the fire and push again and slide forward to put it in safe mode.
Product Specification
Made in Taiwan, the Colt Defender is made mostly of metal, apart from the plastic pistol grip. There is a 4-inch barrel installed and a double-action-only trigger. The pistol weighs around 1.70 pounds and shoots 4.5mm BBs and max speeds of 440 fps with 12-gram CO2 capsules.
Pros
Cons
Colt Defender 45 auto replica.
Full metal.
No removable parts.
CO2 efficient.
Rear iron sight is blacked out.
Ejection port is a sticker.
Molded hammer, slide safety, and bolt catch.
Long trigger-pull.
Lacks realism in terms of function.
9. Crosman American Classic Pump Pellet Pistol
And now, it’s time for yet another Crosman product. Most of the best air pistols in this review have been pre-charged or CO2, but this pistol uses a pumping action to compress the air.
Product Description
The Crosman American Classic is a single-shot, bolt action pistol with a pneumatic pump. This means that there is no magazine or compartment for you to store air. Much like the Beeman P3, it is slow to reload but has good fps.
The pistol can be pumped up to 10 times to get maximum fps and has enough power for close-range, small-game hunting. On the top, you have an adjustable rear sight for windage and elevation, and on the front, you have a fixed post. Both sights, however, are blacked out but still do a decent job.
The Crosman American Classic features a cross-bolt safety that will unlock the trigger whenever you wish to fire. The trigger has a fairly short and light trigger pull, but that is due to the high fps.
Product Specification
Made in the USA, the pistol is made of metal with only the pistol grip and handguard being made of plastic. However, if you get the buttstock accessory, that will also be made of plastic. You can pump the pistol up to ten times to get a maximum fps of 460 with .22 caliber pellets.
The inner barrel is also made of metal and measures around 8-inches with rifling making it fairly decent for accuracy and range. The pumping action is quite heavy and uses around 22 pounds of force to get the maximum fps, but you can pump the pistol as little as three times for target shooting and backyard plinking.
Pros
Cons
Full metal build.
Accurate.
Adjustable power.
Rifled barrel.
Adjustable rear sight.
Fairly light trigger.
Many modifications available.
Blacked-out sights.
Tough pumping action.
Plastic grip and handguard.
Best Air Pistols Buyers Guide
There are a few important considerations when it comes to choosing an air pistol. In this buyer’s guide, you will learn about them and why they are important.
First is the propellant, there are three popular types used in most of the best air pistols currently available. CO2 is one of the most popular because it is simple to install, and CO2 capsules are relatively cheap.
Next is the pre-charged air type. This type of propellant requires an external tank filled will compressed air. This can be pricy, but the temperature doesn’t affect the PCA types as much as it does the CO2-powered pistols.
The final less popular option are the pump-action pistols. These don’t require any external propellant, and you get higher fps. However, you will only get to shoot one shot at a time, and it takes longer to prepare for the next round.
The second factor to be considered is the type of ammunition. First, we have pellets, which are good for hunting and have higher accuracy as they benefit from a rifled barrel. The second are BBs, which are good for plinking and target practice as you get more realism.
Best Air Pistols Accessory Guide
Most pistols that come out of the box are fairly decent, but there are still a few things that you can add to your pistol to improve your shooting experience.
The first option is an optic or a scope, depending on your configuration. This will help you improve your accuracy. Secondly, you’ll want to modify your trigger to get a smooth and light trigger pull. This also improves accuracy. Thirdly, you might want to get some illumination, maybe a flashlight or a laser, to help you shoot in different situations.
Another great accessory would be a holster for your pistol or a strap if you have a buttstock configured on to your pistol. This helps in carrying the pistol around more comfortably.
If possible, try to buy some extra magazines so you can shoot without having to stop and reload. More magazines mean more fun!
So, What Are The Best Air Pistols?
There are many reasons to buy an air pistol, perhaps you enjoy small game hunting or have a pest problem. Or maybe you are someone that enjoys realism and likes to practice drills. Or maybe you just like to enjoy the afternoon shooting at cans and bottles. Whatever the reason, there is an air pistol that is excellent for each purpose.
The first up is for the hunting category. For this, the obvious winner is the…
Crosman Benjamin Marauder
This air pistol has the power and accuracy to take down small games. And it can be easily modified for stability and to add a scope. It is true that the Crosman American classic can indeed do the same, but it doesn’t have the magazine capacity and follow up shot speed that the Marauder has.
Next up is for how accurate the air pistol is in terms of realism and replication. This one is pretty tough, as many of the pistols that are replicas are pretty accurate. However the Umarex Legend M712 wins in this category. The realism is unmistakable, and the controls and pistol manipulation are mirrored to that of the C96 Mouser.
You should now know more than enough to make a great decision about which is the perfect air pistol for your needs. So stay safe and happy shooting with whichever one you choose!
When laser rangefinders hit the market, they did more than just replace the shoddy rangefinders of the past.
With advanced technology and innovative features put into the mix, laser rangefinders came with greater durability, longer range, and better performance.
There’s no doubt the better features such as built-in pressure sensors, wind calculators, and ballistic drop corrections are what make laser rangefinders a must-have in the field.
But the one feature that’s highly underestimated and no hunter should go without ever again, is Rangefinder Angle Compensation.
When you’re in your tree blind, out in the canyon, or in mountainous terrain, you’ll need a laser rangefinder to make sure you get the right distances to your target. Trying to eyeball a distance can be risky. You could end up with a misplaced shot.
Now, trying to eyeball a distance while on an incline or a decline can end up being a disaster of a shot. But if you have an angle compensating rangefinder that can do the math and the measuring for you, you’ve just improved your chances of taking home your prey. Make way now for Angle Compensation.
Angle Compensating Rangefinder: To Have or Not to Have?
Every long distance shooter, whether it’s the bow or rifle you prefer, knows that gravity is like the third wheel that you just can’t get rid of. So you make room for it, and every shot you make in the field, you compensate for its effects. There’s two distances that need defining if you want to get an accurate shot.
Line of Sight: the actual measured distance between you and the target
True Horizontal Distance: the distance which gravity will act over; the distance you’ll need to aim for
Of course, if you’ve got the perfectly flat terrain with the broad side of that elk facing you from about 40 yards, then the line of sight distance is going to be the same as the true horizontal distance.
Gravity won’t have much of an effect to affect either the bow or the bullet. Some people decide to forgo the angle compensation feature, saying it just makes a rangefinder more expensive than it needs to be since you can get by without it. “It’s only a few yard difference” says the skeptic.
However, no matter how ideal the perfectly flat terrain can be or how good your distance estimating skills are, hunting can take you to high-angle areas that just might show you how much of a difference those five yards can make.
Errors between 20 to 25 percent can make all the difference. For the bow hunter, that could be a complete miss. For the rifle shooter, a 20 percent error at 200 yards is a 40 yard difference. That could also be a complete miss or worse, a wounded animal.
“But why would shooting at a target on an incline or decline make a difference?”
Have you ever played one of those carnival fair games where you have to toss a ball into a bucket from about 10 feet away? In your mind’s eye, you know you have to toss a little higher to create an arc for the ball to land into the bucket.
Easy right? Well, take that bucket and put it on the top of the Ferris wheel, still only 10 yards away. Thinking your imagined trajectory path may need some tweaking now?
The rangefinder angle compensation feature can take into consideration the angle shot and the actual distance to give you a corrected value as accurately as it can, even to -/+.5 of a yard. The only thing left for you to do is to adjust your sights to match what the rangefinder calculated.
Since most optics are zeroed in on flat ground, you might want to consider a rangefinder that has further ballistic calculating capabilities where you know how many “clicks” you need to make to adjust for angle degrees.
Let’s take a look at a scenario…
You’re up in a tree blind and you spot an elk stroll into your ranging spread. Your line of sight distance to the elk is 70 yards, but the elk is only 23 yards away from the base of your tree stand.
What’s the actual distance you should aim for? On top of that, for the bow hunter, what’s the angle you should launch your arrow for? How many degrees do you adjust your scope for? For the rifle hunter, how far will your bullet get before a complete drop takes place due to the effects of air resistance and gravity?
Do these kinds of distances matter on trajectory anyway? Anyone have an electronic level or a protractor on hand? Anyone know what the acceleration rate of gravity is? Wait a minute, you didn’t sign up to be in math class right?
As the above scenario illustrates, calculating the correct distance to make an accurate shot from either an incline or decline to your target can be quite the math challenge. To make it simpler, a rangefinder with angle compensation can do all the hard work for you.
Your rangefinder should tell you the line of sight distance is 70 yards to the elk, but your true horizontal distance is 23 yards.
For the Bow Hunter…
If you’re an archer, these distances are going to be very important to distinguish between which ones are important for your shot. The line of sight distance tells you that although the elk is further away to your eye, you should use the horizontal distance and aim as if it’s 23 yards away because gravity only acts over a horizontal arrow path.
If you aim for anywhere near 70 yards, you’re going to miss and lose that arrow. That’s because you overcompensated the trajectory path by 47 yards which is a 70 percent error rate. That’s a big difference when 15 percent is considered accurate.
For the rifle shooter…
For the firearm user, these distances won’t make a difference, nor would it be a problem. But if the distances were more extreme, and the angles were steeper, you’d need better math skills or you’d need to get yourself a rangefinder with angle compensation. If you had a line of sight distance of 400 yards to your target at a 40 degree incline, you’re going to want to aim low and use the horizontal distance of 335 yards.
Rangefinders with ballistic calculators can tell you what your bullet drop holdover will be according to your rifle’s zero and the type of ammunition being used. Gravity acts over a horizontal path, so the bullet is only going to drop the more parallel your rifle is to the ground.
It’s important to remember that there is going to be less of a bullet drop whether you’re aiming up or down, and to always aim low.
Where to Use Angle Compensation
Both rifle shooters and bow hunters alike can benefit from using rangefinders with angle compensation. Situations that they could prove helpful for include:
Rifle hunters with extreme distances
Archers in a tree blind
Mountain goat hunting in canyons
Ranging in mountainous areas
Ranging in unknown territory
With this in mind, check out 6 of our most recommended angle compensating laser rangefinders in the table below.
6 Best Angle Compensating Rangefinders
Laser rangefinders with angle compensation have made it possible to be done with the days of carrying around bullet drop cards with you, and having to tediously do the math before every shot.
Even if you don’t know that you’d need angle compensation for any of your hunts, it’s better to be prepared than to be without.
Images Source: https://www.bushnell.com/
Further Reading
HANDS ON: Sig Sauer Kilo1600BDX Review (6x22mm Rangefinder)
How Do Laser Rangefinders Work? (Everything You Need To Know)
Leupold RX-Fulldraw 4 Rangefinder Review
Vortex Fury HD 5000 AB Rangefinding Binoculars Review
Sig Sauer Kilo 3000 BDX 10×42 Rangefinder Binoculars Review
Need to catch dinner in the wilderness? Go set a deadfall trap.
Trapping is one of the oldest ways to get food in the wild. People have been using traps to catch small to medium-sized game in between major hunts. Learning how to set a few good traps in ideal locations can cut your chances of starving significantly.
Primitive traps like the deadfall are especially popular among survivalists and bushcraft enthusiasts because they’re straightforward and relatively easy to construct. They also come in different variations that can fit your individual situation and skill level.
Need to brush up on your primitive trapping skills? Read on for easy-to-follow tutorials and tips:
Any prepper or bushcrafter worth his salt should know how to trap animals for food, fur, and other purposes. Actively hunting for game is always best for fresh meat, but trapping can save you a lot of time and energy, especially if you find yourself in a survival situation with little to no modern tools.
Before we look into the ins and outs of making deadfall trap configurations, here’s a quick refresher on the basics of trapping:
What are you trapping?
Your trap depends on the size and species of animal. As a trapper, you have to know what type of animals frequent the area. Watch out for tracks and pawprints, disturbed vegetation, and droppings to identify the critters.
Deadfall traps, in particular, are great for catching small to medium animals like rodents, squirrels, and prairie dogs.
Finding the perfect location to set your trap
Location is crucial when setting traps. Once you’ve identified the kind of animal you want to capture, you can now zero in on where to put your trap. Construct it near the animal’s habitat (outside its burrow or hiding place), or in places where it usually gets food and water.
Set the trap to make it look as natural as possible by covering it with soil or leaves. Unlike humans, animals have a very keen sense of smell, so remove or mask any human trace by wearing gloves and handling the trap as little as possible.
Skills needed in trapping
As mentioned earlier, you have to know what type of animals live in the area, so a sharp set of tracking skills will come in handy when making traps. Trapping requires other bushcraft basics like whittling, making cordage, and tying effective knots, as in the case of most deadfall traps. And, of course, field dressing and bushcraft cooking skills will ultimately come in handy when it’s time to eat.
What’s the best type of bait to use in trapping?
Not all baits are created equal. Use one that will attract your target animal. Most small mammals like rats and squirrels love to munch on nuts, seeds, and fruit, so use those when baiting your deadfall trap.
Safety precautions to follow
Constructing deadfall traps can seriously hurt you if you’re not careful. When setting one up, put a temporary support rock to hold up the deadfall weight. This way, you don’t accidentally activate the trap and crush your fingers.
Local trapping regulations
Some areas regulate or prohibit trapping animals for food or other purposes, so check local regulations before setting out traps.
A Closer Look at the Deadfall Trap
People have been using the deadfall trap since the dawn of civilization to catch a meal—and it remains one of the best primitive traps to this day.
The reason?
Deadfall traps simply work.
This primitive trapping mechanism uses a heavy rock or logs propped up by sticks to capture prey. Once the animal takes the bait, the sticks collapse, and the animal gets instantly crushed beneath the weight. It’s an effective and straightforward way to catch a meal, especially if you don’t have modern supplies at your disposal.
Types of Deadfall Traps
There are three main types of deadfall traps, namely the Paiute, Figure 4, and Split Stick. You’ll find detailed tutorials of these variations below:
Paiute Deadfall Trap
The Paiute deadfall trap is believed to have been invented by the Native American tribe of the same name. It’s also arguably the most popular among the deadfall trap varieties since it’s easy to set up and has a very sensitive trigger that allows you to catch prey in a snap.
The Paiute deadfall trap uses a total of 4 wood components:
One long diagonal stick to support the deadfall weight
One shorter vertical stick that holds up the diagonal portion
One small twig that serves as a trigger stick
A small piece of wood that will act as a toggle
What sets it apart from other configurations is that it uses cordage to hold these components together. You can use any available cordage, including dry fibers from plants like milkweed or stinging nettle.
In the video above, you’ll see a detailed tutorial on how to build an effective Paiute deadfall trap using primitive materials and methods.
Traps like these usually take a bit of trial and error before you get it right. Consider vital factors like the angle of the rock, the height of the trap, or the placement of the bait. Adjusting any of these can significantly improve your chances of catching the target animal.
Figure 4 Deadfall Trap
It’s pretty safe to say that the Figure 4 deadfall trap is the Paiute’s less trigger-sensitive cousin. Many find the Figure 4 quite challenging since it needs a sharp set of carving and whittling skills. It also needs some time to master and doesn’t deploy as quickly as the Paiute.
Still, when made correctly, it does a decent enough job, so knowing how to make an effective Figure 4 should still be part of your skills arsenal.
To construct a Figure 4 deadfall trap, you need three sticks:
1 long diagonal stick that holds up the deadfall weight
1 horizontal stick that goes near the base
1 shorter vertical stick that holds everything together and acts as the trigger
All three sticks should be straight and of roughly the same diameter.
Notice that instead of cordage, the Figure 4 deadfall trap uses notches carved into the sticks to hold the entire structure together.
This is the tricky part: each notch should be carved just right and must fit well with each other to support the trap. It’s like making your own puzzle pieces. Carving notches takes considerable skill, so if it’s your first time making this trap, be patient.
The Figure also needs a balance between strength and sensitivity. The trigger, located at the base of the trap, should be strong enough to support the trap’s weight but sensitive enough to deploy quickly.
Because the Figure 4 deadfall trap doesn’t deploy as easily as the Paiute, it’s important to create as many traps as possible to increase your chances of catching food.
Split Stick Deadfall Trap
The split-stick deadfall trap is basically a cross between the Paiute and the Figure 4. It’s got a very sensitive trigger like the Paiute but, similar to the Figure 4, it doesn’t use any cordage.
The principle behind this trap is quite simple.
Take a long stick and cut it roughly in half. Next, carve notches on their meeting points so they loosely fit together. Make a larger notch in one of the sticks to make the trap more sensitive. Then put a small, thin stick in between these two components. This will serve as your trigger mechanism. Once the target animal takes the bait, the entire structure collapses, and the animal gets crushed beneath the deadfall weight.
It’s as easy as that.
Perhaps the only disadvantage to the split stick deadfall trap is that it could easily collapse due to other factors, like the wind. Nonetheless, it’s a good way to practice your bushcraft trapping skills and also catch an animal in the process.
Quick Facts About Deadfall Traps
To sum things up, here are the things you should know about deadfall traps:
Deadfall traps are ideal for small- to medium-sized animals such as rabbits and squirrels.
The three main types of deadfall traps are the Paiute, Figure 4, and Split Stick traps.
Depending on where you live, rigging up a deadfall trap may be illegal, so check local regulations first.
Be careful when you’re setting up a deadfall trap. It can seriously harm your hands if you accidentally trigger it.
Final Thoughts
People have been trapping since the beginning of civilization. Although most modern traps are now manufactured, nothing beats knowing how to make primitive traps for prepping and survival.
These traps will be indispensable when you find yourself in a survival situation with little to no modern tools at your disposal.
Deadfall traps require no more than some sticks and a flat slab of rock to make. The Paiute, Figure 4, and Bait Stick deadfall traps are relatively easy to construct and are effective in catching small to medium-sized animals. They’re a good fail-safe in case you can’t catch a meal when hunting or fishing.
Continue practicing your deadfall trap-making skills and you’ll be able to catch small game for dinner in no time.
Wyatt Earp has said:
Fast is fine, but accuracy is everything
And I just thought how many airgunners are obsessed with muzzle velocity and muzzle energy,...
")
")
")
")
")