
Home Blog Page 9

7.62 NATO vs. .308: Is There a Difference?

0

By Wayne van Zwoll

The idea for a short-action cartridge rivaling .30-06 performance has been around since before the Depression. But once the M1 Garand carried us through World War II, military circles took up the short-.30 banner with an experimental infantry round.

The T65 was essentially a .30-06 with a shorter 51mm rather than 63mm case. In a fit of brilliance, Winchester snatched the design for its hunting roster and in 1952 dubbed it the .308. Two years later the U.S. Army adopted the 7.62×51 cartridge and urged its acceptance by NATO, which complied in 1957.
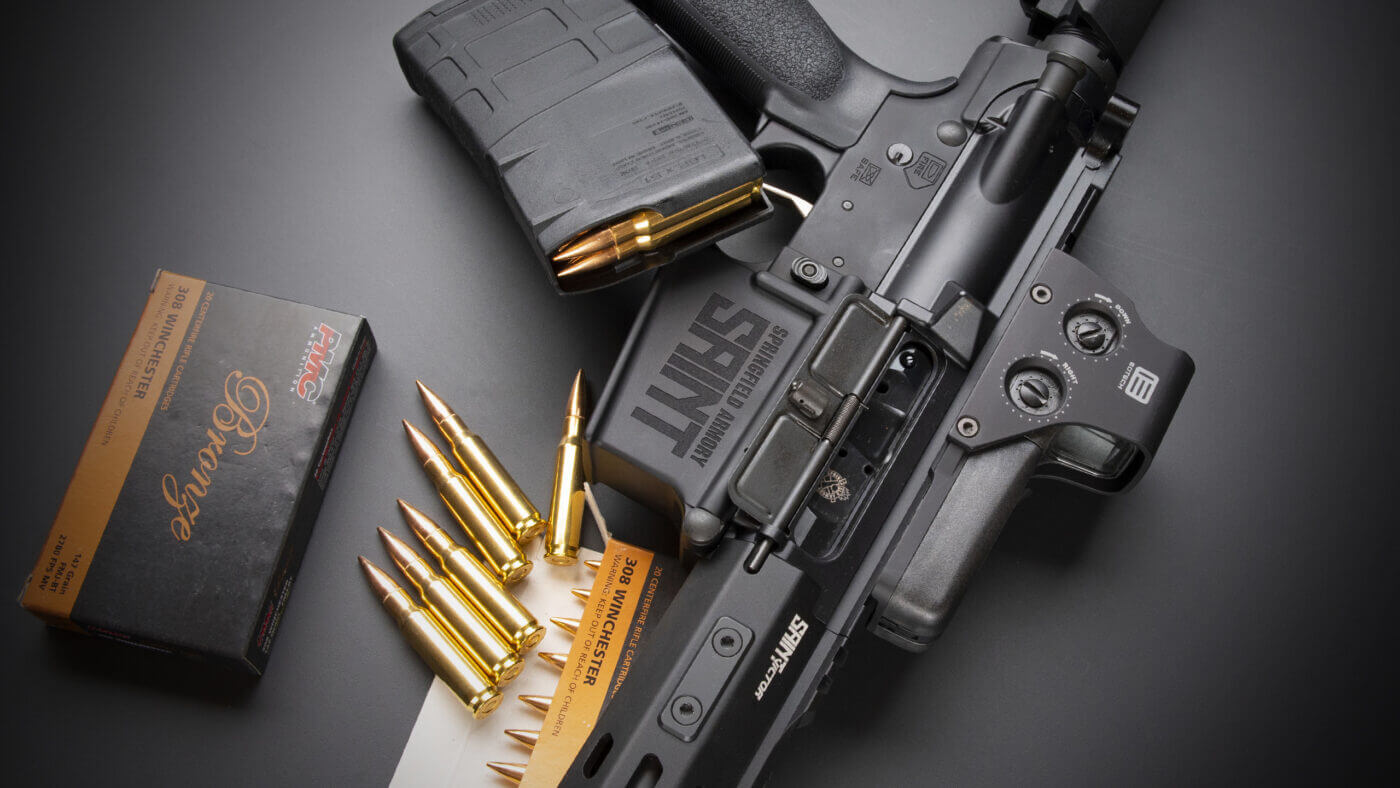
Are 7.62 NATO and .308 Win the same cartridge?
Should you shoot .308 or 7.62 NATO in your rifle? Is there a difference?

Its debut in our M14 infantry arm, then in rifles and machine guns abroad, ensured a future for the 7.62×51 NATO. When the M16 replaced the M14 in the Vietnam War during the 1960s (read my article comparing 5.56 NATO vs. .223 here), production of 7.62x51mm ammunition continued.

National Match loads fueled by 41.7 grains IMR 4895 kicked 174-gr. BTHP bullets to 2,548 fps. Tracer, frangible, armor-piercing and grenade-launching loads followed.
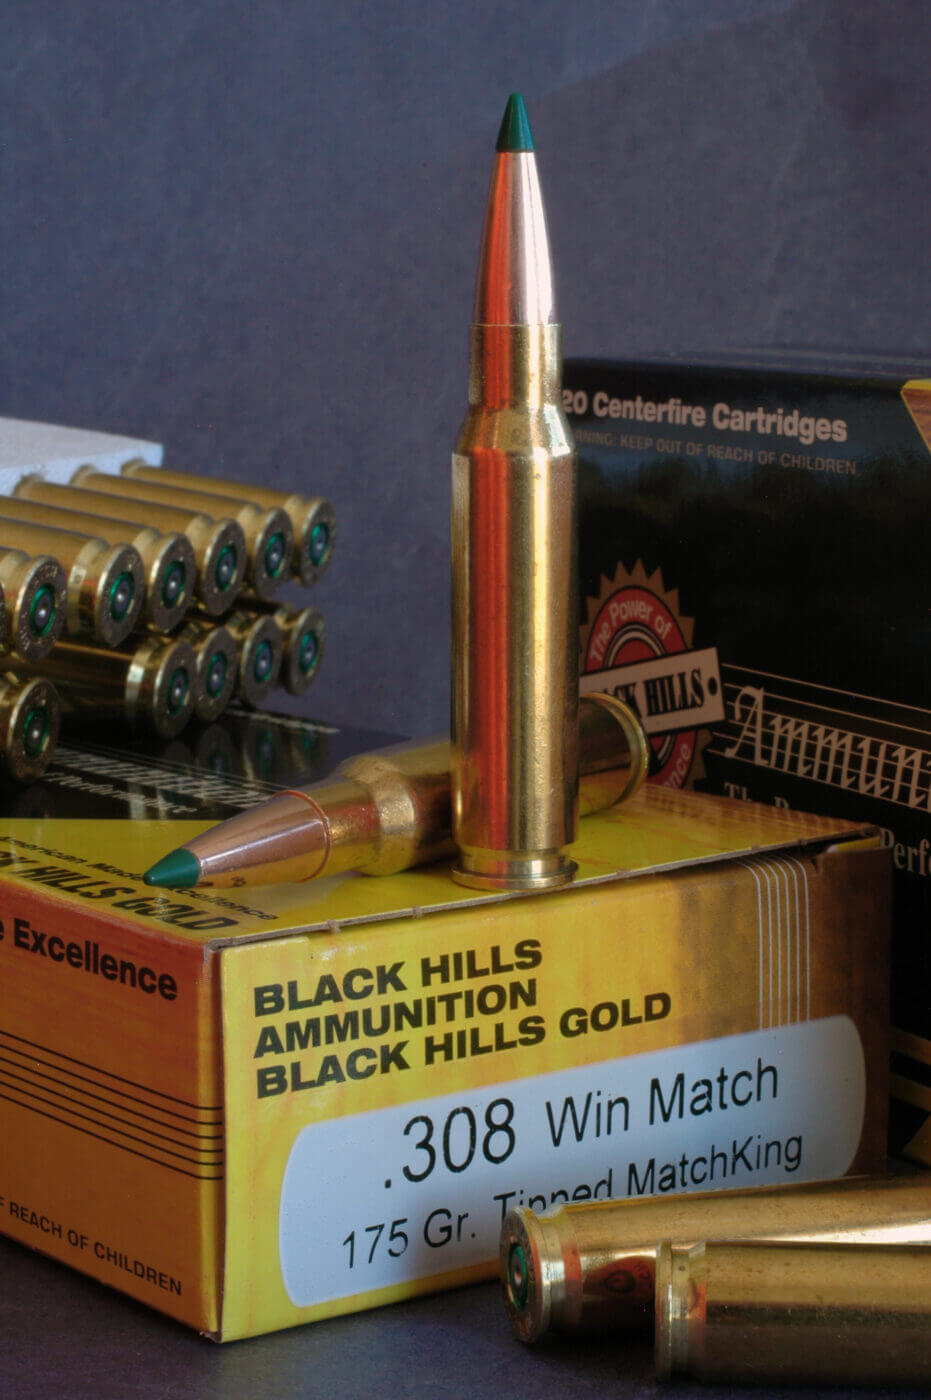
Black Hills .308 MatchKing
The .308 arrived first, as a sporting cartridge, in 1952. The 7.62 NATO, same dimensions, came in ’57.

To hunters, infantry cartridges have all the cachet of beige filing cabinets. While the .308’s short stature, light weight, low case cost and function in self-loading guns initially served military interests, sportsmen of that day were more seduced by new belted magnums. Utility, like wisdom, can be an acquired taste.
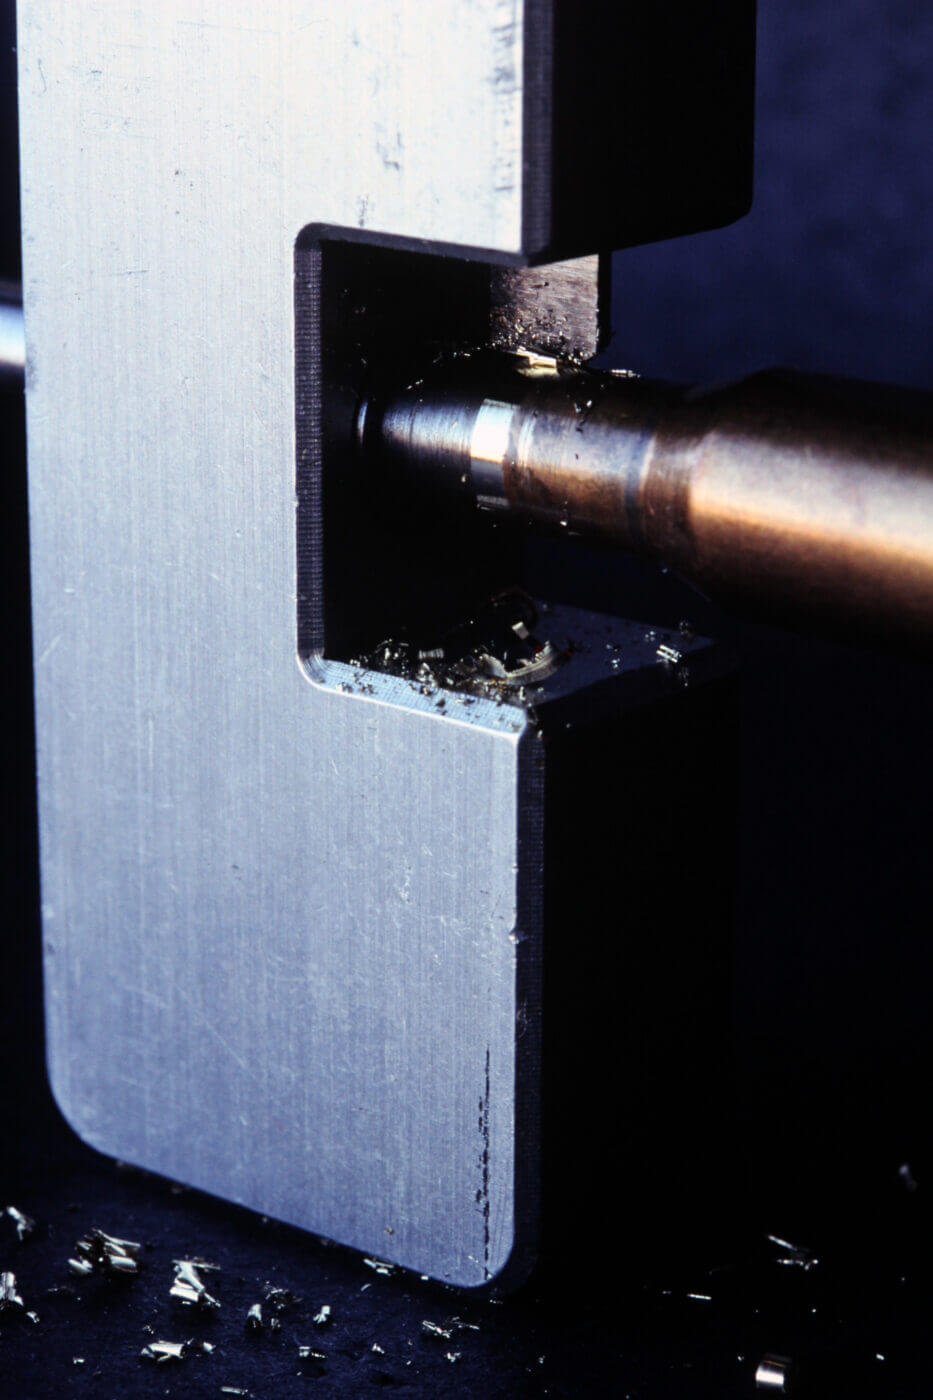
Military 7.62 brass is thicker than .308
Early military brass was thicker and not as uniform as commercial. Neck turning can improve accuracy.

A Second Look

But the .308 soon earned plaudits afield. Commercial makers began to chamber bolt-action, lever-action, pump-action and autoloaders in the round.

The .308 case holds 20 percent less powder than a .30-06, and about 40 percent more than a .30-30. It has roughly half the capacity of a .300 Weatherby Magnum.

Traditional loads sent 150-gr. softpoints at 2,820 fps, 90 fps shy of listed speed for those bullets in a .30-06 but 190 fps faster than their exit from the old .300 Savage round.

Seth Swerzcek at Hornady tells me its top-selling .308 load is still the 150-gr. SST, albeit Superformance ammo with 165-gr. InterBonds at 2,840 fps brings more muscle.
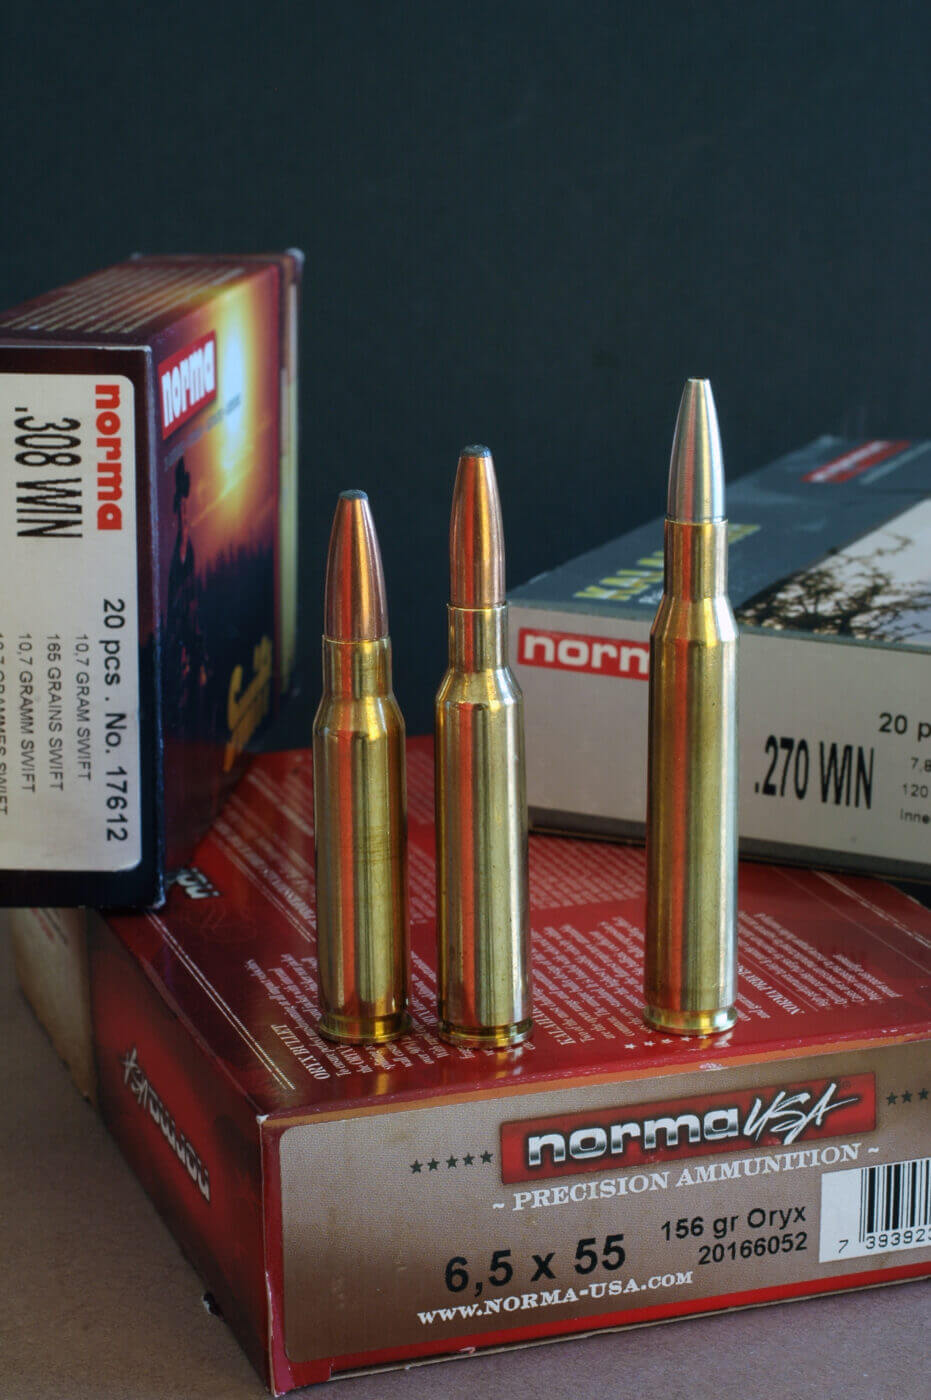
Comparing the .308 with .270 and 6.5x55
The .308 (left, shown with .270 and 6.5×55) is a true short-action cartridge.

Bench Rest shooters embraced the .308. With it, Dave Hall drilled a .4612 knot to win the Sporter class at the 1967 National Matches. In ‘68, Ferris Pindell won with a .3594 group from his .308.

Meanwhile, the round was proving itself in military circles internationally as the 7.62×51 NATO.
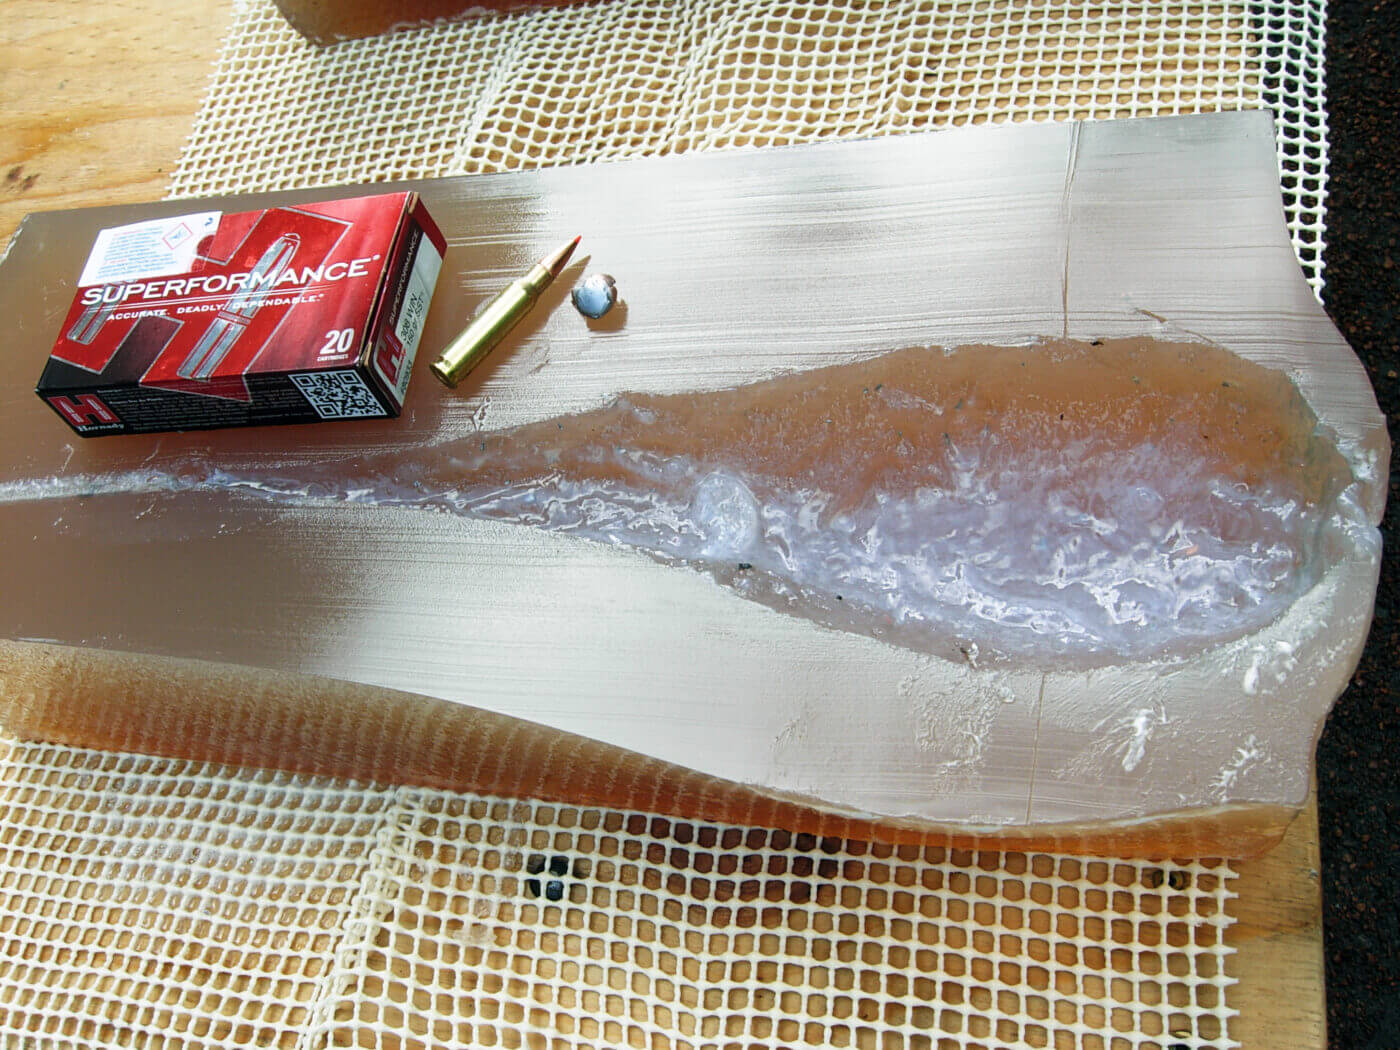
Testing the in .308 ballistic gel
This gelatin cavity shows terrific damage inflicted by a 150-gr. Hornady Superformance .308 load.

What’s the Difference?

One of the biggest questions when comparing the 7.62 vs. 308 is “what’s the difference?”

The cases are identical — same 2.015 length, 20-degree shoulder, .473 rim. Body and neck are the same. Cartridges are loaded to the same 2.800 overall length.

Of course, loads can differ. Military units and LE agencies may specify bullets of limited use to hunters, and port pressures to operate service rifles.

“We use the same brass and primers for commercial and service-contract ammo,” says Swerzcek. “Typically, Hornady recommends loads for a contract. Officials approve or tweak specs. We hew to them.”

Standards of both rounds are governed by SAAMI and its European equivalent, CIP.

“Wait!” you howl. Maximum average breech pressures differ, with the .308 having the higher range. Gunsmithing instructor Fred Zeglin notes different measuring methods can yield such disparities. Swerzcek agrees.

“The first 7.62×51 NATO pressures were retrieved by copper crusher. Current piezo-electric reads on .308 ammo are more precise and repeatable, often higher.”
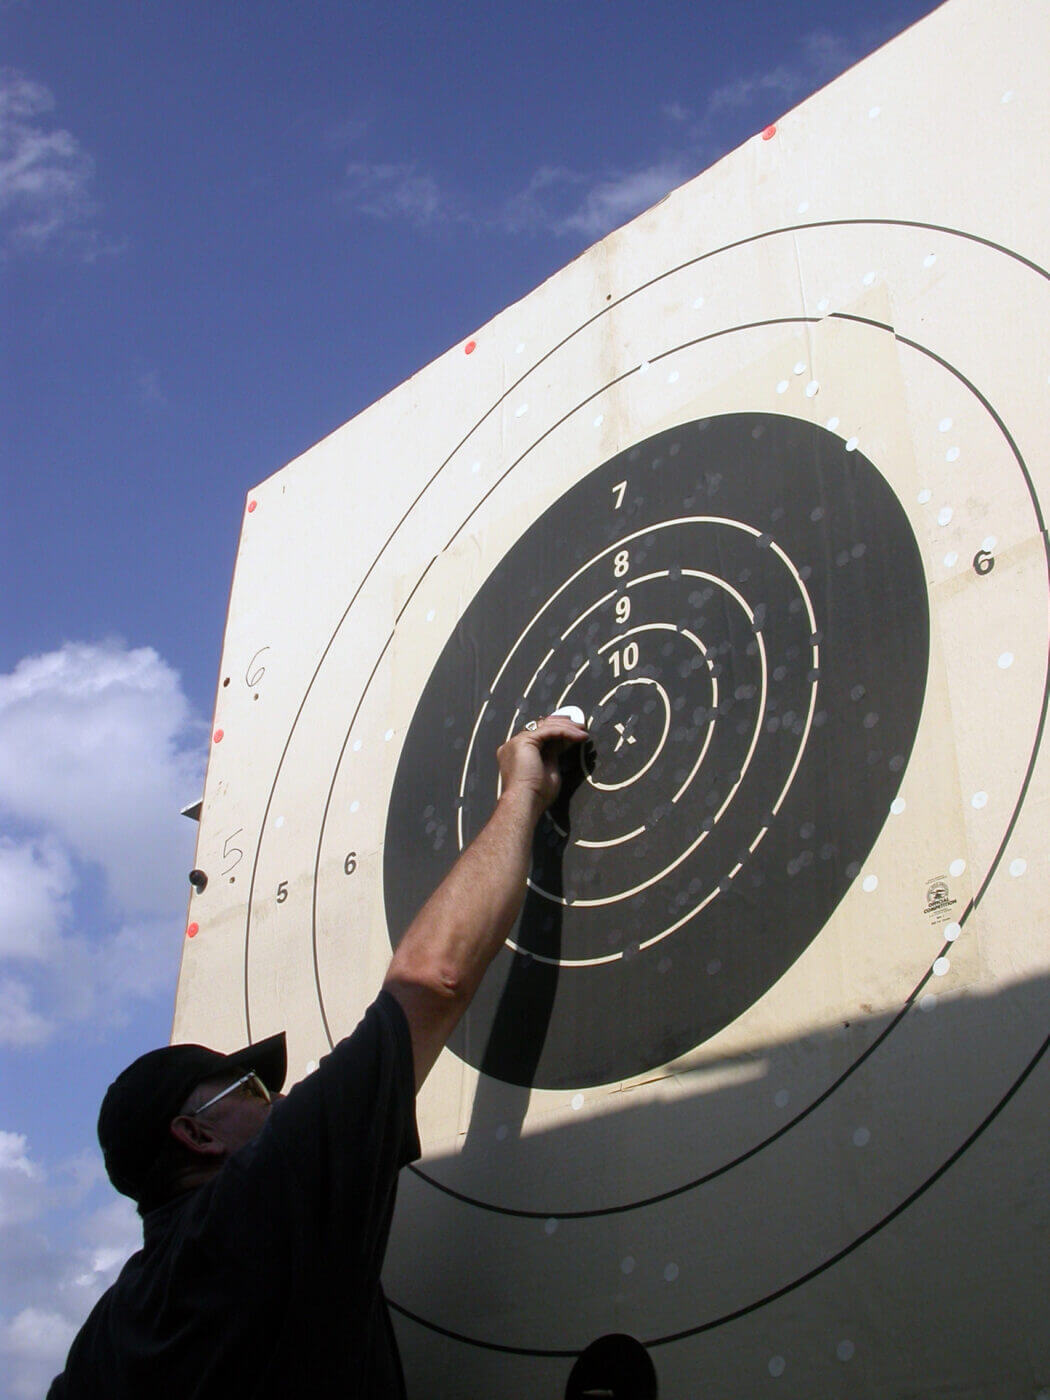
Range target practice with 7.62 NATO
Popular in National Match competition, the .308 yields about 4½ inches to 10-mph wind at 600 yards.

Jeff Hoffman at Black Hills Ammunition notes differences in measurement location. “Pressures for the 7.62×51 NATO may be taken at the case mouth instead of mid-case. We check production at both places, commonly seeing slightly lower values at the mouth.”

He also says velocities for the 7.62×51 NATO are often taken 78 feet from the muzzle, not SAAMI’s standard 15. “A small difference, but important if you’re loading thousands of rounds to exacting standards.”

Ballistic gel testing .308 vs 7.62
Black Hills Ammunition loads both commercial and military ammo. Here: gelatin test of a 175-gr. Tipped MatchKing bullet.

What about maximum horizontal range? It’s listed at 4,500 yards for the .308, and 5,500 for the 7.62×51. “Different bullets in the trials,” say ballisticians. At extreme range, ballistic coefficient rules.

SAAMI diagrams show a headspace measure of 1.630 to 1.640 for the .308. A Frankfurt Arsenal diagram indicates a range of 1.628 to 1.634 for the 7.62×51 NATO cartridge case, while JGS reamers are held to 1.630-.640 for the .308 and 7.62×51 NATO. Barrel-maker John Krieger tells me even his reamers with special-order throats hew to SAAMI headspace specs.
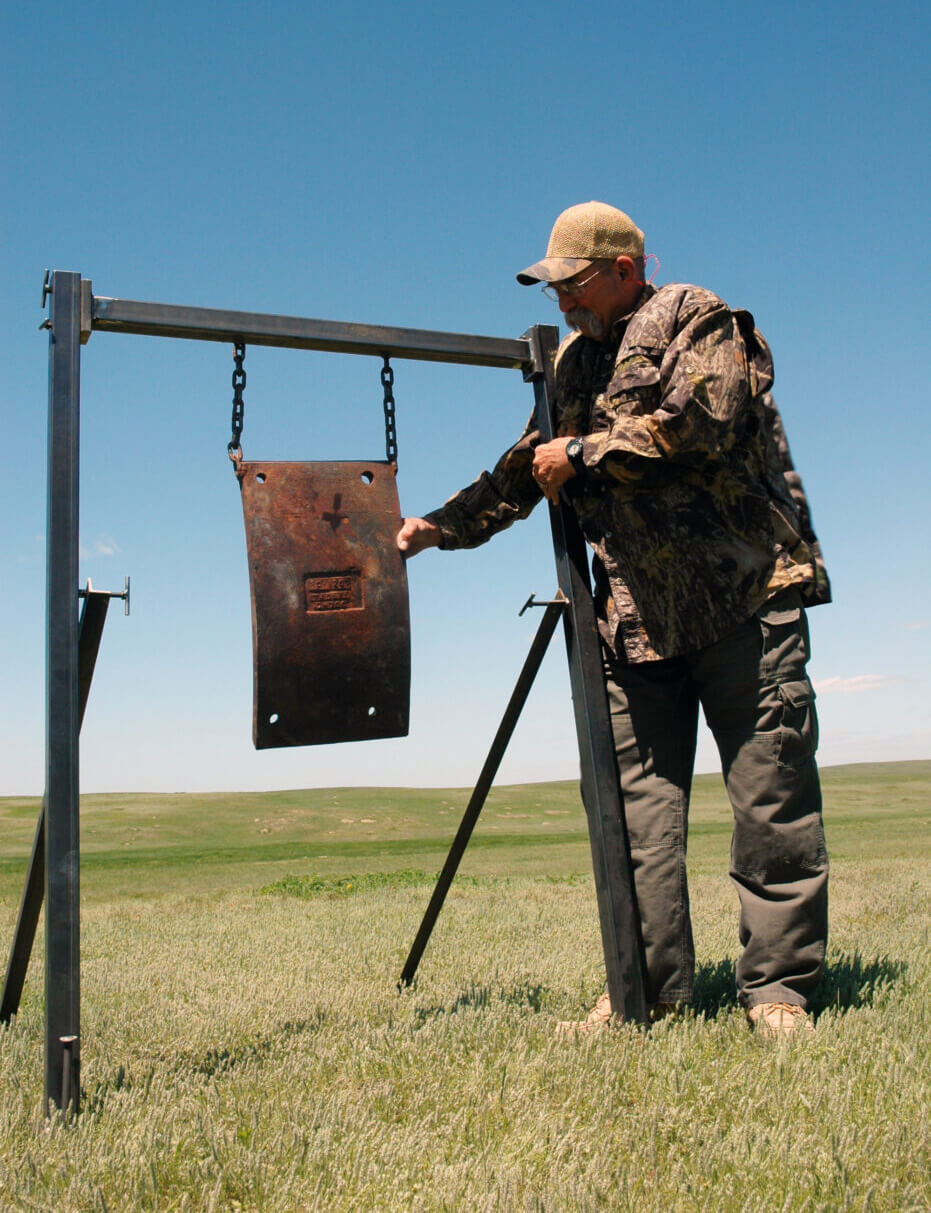
Long range shooting of .308 and 7.62
Long bullets for long shots prompt sharper rifling twist, but 1-in-12 still works for almost all bullets.

Freebore and leade angle are where .308 and 7.62×51 NATO chambers seem to differ. For .308s, JGS shows .900 freebore of .3100 diameter, with a 1-45 leade angle. Chambers in 7.62×51 NATO are cut with 1.355 of 3.095 freebore, a 5-40 leade angle. Government diagrams confirm that steep leade.

A New Twist?

A common twist for both cartridges is the original 1-in-12. For the leggy bullets popular now, faster spin is common. Krieger uses and has rifled barrels 1-in-11 for high-power competition, with bullets as heavy (long) as 220-gr. MatchKings.

Dave Tooley’s Bench Rest experience nudges him toward modest spin rates. Having chambered more than 7,000 barrels, he likes 1-in-12 twist even for long-range bullets. “An exceptional 1-in-14 Hart barrel held half-minute accuracy with flat-base 187s at 1,000 yards.”
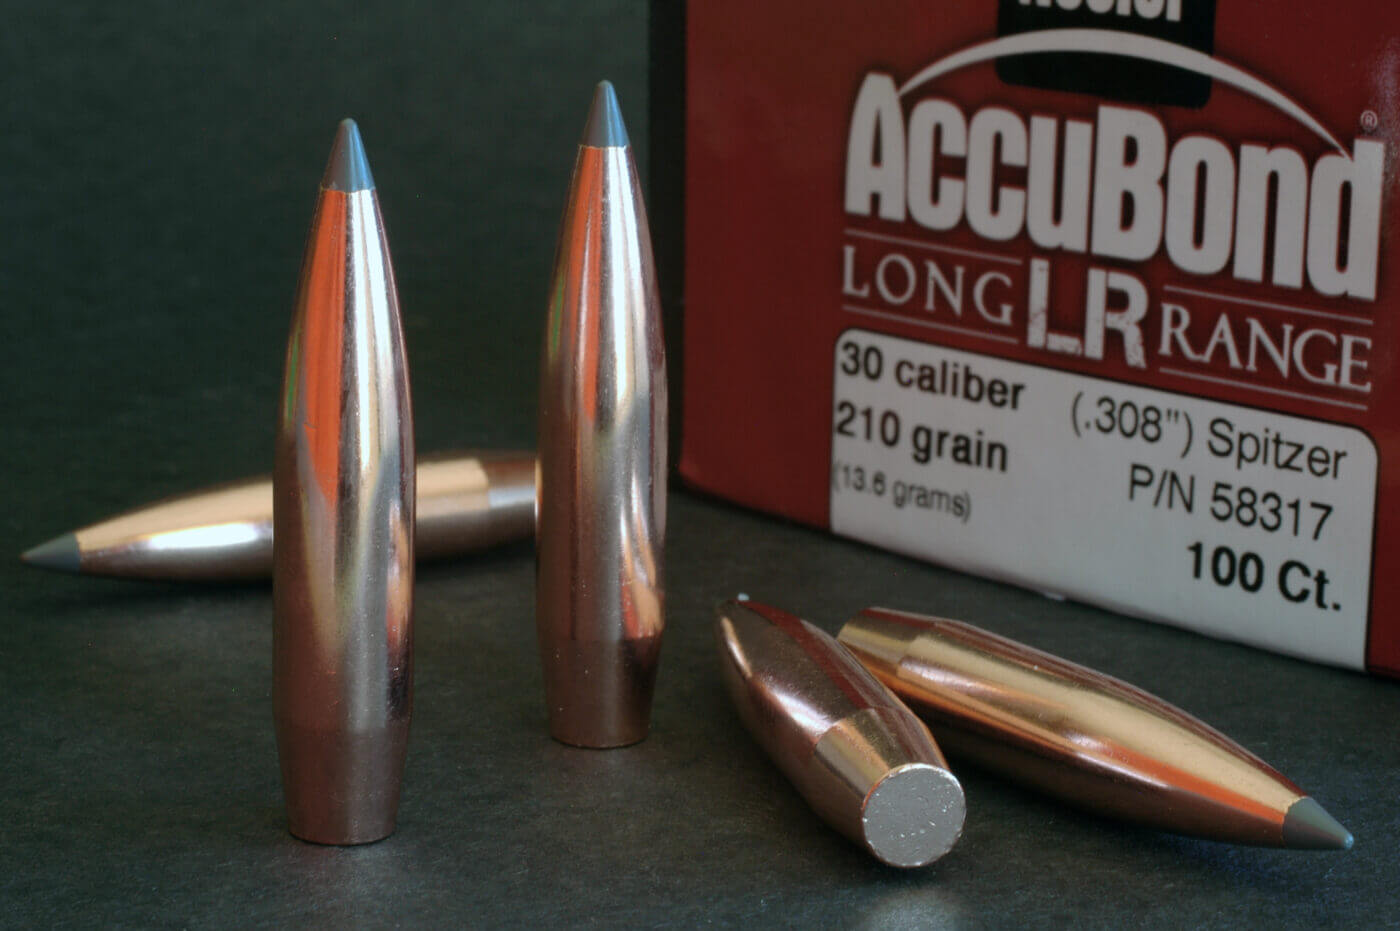
.308 caliber bullets work in both 7.62x51 and .308 Win loads
Commercial loads for the .308 generally feature bullets of 110 to 185 grains. Handloaders have heavier options.

Hornady ballistician Scott Javins agrees with Tooley that targets tell the story. But he understands shooters choosing sharper spin.

“They heed caveats from bullet-makers, and gyroscopic stability values.” GS, he explains, responds dramatically to higher spin rates. “A 168-gr. ELD Match at 2,546 fps from a .308 barrel with 1-in-11¼ rifling spins at 162,960 rpm. GS: 2.08. The same bullet sent at 2,528 fps from a 1-in-8 bore spins at 223,830 rpm. GS: 4.11.”

He adds that GS disparities may not show up on targets or game at ordinary ranges.

Bench testing the 7.62 round
The M1A rifle (shown) from Springfield Armory is a semi-auto rifle inspired by the 7.62 NATO M14 rifle.

Which Is Better: 7.62 or .308?

While the 7.62×51 NATO designation remains common in military circles and abroad, it’s all but gone from commercial loads stateside with just a few offerings here and there. The .308, however, dominates ammo rosters, with 79 loads from five U.S. ammo makers. Federal catalogs 24 loads, Hornady 17. Even Norma of Sweden has seven loads, more than for any other cartridge in its line. No centerfire round is chambered in more rifles worldwide.

What’s the Bottom Line?

All modern .308 rifles can chamber and shoot modern .308 and 7.62 NATO ammunition without any problems, such as the SAINT Victor .308 rifles. The 7.62 NATO M1A can also safely fire both rounds.

If you plan on using a surplus rifle chambered in either .308 Win or 7.62 NATO, you should have the gun’s headspace checked by a professional to ensure you can safely shoot .308 ammunition. You can also check this on your own with quality Go-NoGo headspace gauges.

Editor’s Note: Please be sure to check out The Armory Life Forum, where you can comment about our daily articles, as well as just talk guns and gear. Click the “Go To Forum Thread” link below to jump in and discuss this article and much more!

Join the Discussion

Go to forum thread

Featured in this article

The best dry fire training systems to save on ammo

0

When we tested the Mantis Blackbeard Trigger Reset System, it was a high-performing item for anyone looking to get more rifle practice without spending a ton of money. A system that replaces the bolt carrier group and magazine of most AR-15 rifles, the Blackbeard allows the user to not alter the trigger pull of their weapon, and have visual feedback of where the “round” goes. The system consists of the bolt carrier replacement, which can house an adjustable laser and which also contains a motor that resets your trigger, as well as a battery pack that fits into the magazine well of the rifle like a normal magazine. To complement this, the Blackbeard can be used with the Mantis Laser Academy app, which allows for virtual target scoring for drills and games. Overall, for rifle training, it’s hard to outdo the Mantis Blackbeard, especially for indoor close-quarter training situations.

The Mantis Blackbeard excels in close-quarters rifle training, operating as a simple drop-in kit to give you realistic trigger reset. The biggest advantage to this is that it’s totally safe, due to making your rifle completely inoperable when properly installed, which means that you can theoretically use this for force-on-force or live hostage rescue. It’s also totally platform agnostic as long as you use an AR platform rifle, meaning you can use it with a Smith & Wesson M&P 15 or a military issue M4 with no extra steps. The biggest advantage, however, is that it lets you keep your trigger pull, meaning that if you’re like my friend, you can drop this into your super-expensive Radian Model 1 or LMT MARS (he has both) and appreciate the improved trigger pull that both bring with dry fire and with live fire. In my own testing, the Blackbeard greatly assisted with trigger control training, getting into a good rhythm of pressing and releasing the trigger, preventing short stroking.

The Blackbeard has no recoil or force feedback, and basically just functions as a trigger reset device and laser projector. This isn’t like the CoolFire on our list that actually provides force feedback, or the SIRT pistol, so you won’t get that simulated recoil impulse. Another thing is that even if you do use the app, it doesn’t track things like weapon or trigger control, so you won’t get the same input that you get with the Mantis X on this list. Finally, the app that you need to get training metrics from, Mantis Laser Academy, is extremely temperamental. It costs a fair chunk of money, doesn’t work in daylight, requires a tripod to use, and needs extensive setup to work properly, making this a decidedly indoor dry fire training system.

The Mantis Blackbeard is a laser trainer and trigger reset system that converts any rifle into a training rifle, and for those purposes, it’s nearly perfect. Allowing shooters to conduct dry fire training with their actual trigger pull, and without requiring them to manually reset the hammer, is extremely helpful, and the issues with not tracking motion and trigger control can be solved by adding a Mantis X device to the rifle to work in conjunction, although that lowers the value proposition significantly.

Baked buffalo fish recipe

0

Baked buffalo fish is juicy and flaky with wonderfully crispy skin. Flavorful cajun-seasoned fish is stuffed with parsley and topped with a lemon garlic butter sauce. This simple whole buffalo fish recipe looks impressive and serves as a wonderful light and delicious main dish!

whole buffalo fish baked in the oven

Cooking a whole fish can seem intimidating but it’s actually very easy. This recipe will walk you through how to bake a whole fish so that it’s juicy and perfectly tender. Starting with a fish that is already gutted and scaled all you have to do is cover it in your favorite seasonings and then bake!

If you have never heard of buffalo fish before you might be thinking of buffalo chicken wings but using fish instead. But despite its name, buffalo fish is a type of freshwater fish.

Instead of covering it with a creamy buffalo sauce, in this easy recipe, a whole buffalo fish is stuffed with fresh parsley and lemon and then covered in a buttery cajun garlic sauce and lemon slices. It’s an impressive baked fish dinner that everyone will enjoy!

raw whole fish on the white cutting board
raw buffalo fish

Recipe ingredients

Whole buffalo fish. Fresh fish is incredibly flavorful and it has a wonderful texture. If you can’t get your hands on fresh, make sure to completely thaw before using.

Cajun seasoning. This bold, smoky, and flavorful spice blend is added to the butter sauce.

Lemon. Adds a bright citrus flavor to the fish. Lemon juice is poured over the fish and lemon slices are cooked on top.

Garlic cloves. Minced and added to the sauce to give the fish a bolder garlic flavor and aroma. It complements lemon and seafood very well.

A fresh sprig of thyme. Cooked on top of the fish.

Butter. Melted to create the cajun lemon garlic sauce and helps the skin become extra crispy.

Fresh parsley. Stuffed inside the fish cavity to flavor the inside.

How to make baked buffalo fish recipe

Its best to use fresh fish for this recipe. If you have a frozen buffalo fish, thaw it first. Its best to leave the fish in the refrigerator overnight or until thawed completely. You can also leave the fish on the counter for couples hours.

Remove scales and clean whole buffalo fish. Rinse very well with cold running water and place on the parchment paper lined baking tray. Preheat the oven to 400 degrees Fahrenheit.

Meanwhile prepare your seasoning mix. Melt butter and mix it with Cajun spices, minced or finely chopped garlic and half of the lemon, juiced. Make slits in the fish and cover it with the butter mixture.

Add some inside the fish as well. Place parsley in the fish cavity along with leftover lemon slices. Place slices on top of the fish with thyme springs(optionally).

Bake for 30 minutes or more, depending on the size of the fish. The internal temperature of fully cooked fish should be at least 145 degrees.

preparing whole fish with garlic butter

What kind of fish is it

Buffalo fish or bigmouth buffalo is a type of fish and not only a cooking style. This freshwater fish is native to the rivers and streams of North America.

It is a large bottom-dwelling fish with greyish/brownish colored skin. Because of its size and shape buffalo fish is often confused with the common carp, but these are two different fish varieties.

While buffalo fish is not as common as other types of fish, it is a tasty whitefish known for its sweet flavor that’s both delicate and flavorful without being fishy tasting.

Because of its slightly firm texture, this fish holds up really well when grilled, baked, or stir-fried.

roasted baked buffalo fish with lemons

Substitutions

Buffalo fish. Catfish is a good substitute for buffalo fish.

Seasoning. Creole seasoning or Old Bay seasoning. You could also simply use a blend of cayenne pepper, smoked or regular paprika, black pepper, onion powder, and garlic powder.

Fresh herbs. Use whatever herbs you love! Sprigs of fresh rosemary, oregano, cilantro, or tarragon would taste amazing in this baked buffalo fish recipe.

Variations

If you want to make actual buffalo-style buffalo fish, cover fish fillets with buffalo sauce then bake until tender.

Roast with baby gold potatoes, fingerling potatoes, cherry tomatoes, asparagus, or onions to make a richly flavored and easy side dish.

baked whole fish with spices

Frequently asked questions

a piece of white fish on the fork

Side dishes

  • You can add zucchinis and cherry tomatoes to the baking tray to cook together with the fish. They will turn out lovely. If feeding a crowd cook some white or brown rice or potatoes. It could be roasted potatoes, mashed or scalloped. Or simply boiled with dill and butter- my favorite!
  • Make a fresh spring salad with romaine lettuce or arugula, kale, cherry tomatoes, onion and cucumbers. Drizzle olive oil and a little bit of balsamic vinegar and enjoy your healthy dinner!
  • Another great side dishes for white fish are broccoli, Brussels sprouts or asparagus. Perfect for late dinners and very healthy!

Leftovers

Store baked buffalo fish leftovers in the air tight container in the fridge for up to 5 days. Reheat in the microwave for about 1 minutes. Don’t overheat or it will overcook the fish and it may become dry. You can also reheat buffalo fish in the oven. It will take about 5 minutes to reheat with the temperature on 400 degrees Fahrenheit.

Or use you oven broiler! No time needed to preheat, just pop it in the oven and broil for couple minutes. Watch closely, it may burn fast.

More seafood recipes

  • Ninja Foodi cod recipe
  • Argentinian shrimp recipe
  • Air fryer haddock
  • Air fryer stuffed salmon
  • Cuttlefish recipe
  • Whole catfish recipe
  • Air fryer frozen cod
  • Ninja Foodi frozen salmon
  • Baked shrimp oreganata
  • John Dory recipe

Hope you will like this Baked Buffalo fish recipe as much as we do. Rate the recipe if you like it and leave a comment below if you have any questions or suggestions.

Nighttime Wildlife Watching: Why Night Vision Goggles Are a Must-Have for Campers

0

For outdoor enthusiasts, nighttime wildlife watching can be an unforgettable experience. It offers them unique insights into the world of nocturnal creatures. To make the most of these adventures, having the right gear is crucial – and night vision goggles are a must-have!

Here are ten compelling reasons why investing in night vision goggles is a crucial for thrill-seeking individuals who want to enhance their nighttime wildlife watching experience:

Enhanced visibility

Night vision goggles amplify the available light. They make it easier to see in low-light conditions. This improved visibility is crucial for spotting nocturnal animals that might remain hidden.

Safety 

Exploring the great outdoors at night can be risky. This is especially true if you are unfamiliar with the terrain. Night vision goggles help you navigate your surroundings more confidently, reducing the likelihood of accidents or getting lost in the dark.

See unique animal behavior

Many species are more active at night, and they showcase interesting behaviors that aren’t visible during the day. With night vision goggles, you will have the chance to witness these fascinating nocturnal activities up close.

Minimal disturbance

Unlike flashlights or headlamps, night vision goggles don’t emit bright light that could scare off animals. Using goggles allows you to observe wildlife in a more natural setting without disturbing them.

Extended observation time

Equipped with night vision goggles, you can continue your wildlife watching well into the evening. This increases your chances of encountering a wider variety of species.

Better photography and videography

If you’re passionate about capturing wildlife through your camera lens, night vision goggles can help you achieve amazing results. They make spotting and tracking animals in low-light conditions a lot easier. This gives you more opportunities for unique and captivating shots.

Educational insights

Night vision goggles can deepen your understanding of the natural world. With this, you will learn more about the habits and behaviors of nocturnal animals. This knowledge can be particularly valuable for students, educators, or anyone passionate about wildlife.

Versatile equipment

Night vision goggles are useful for outdoor activities beyond wildlife watching, such as hiking, fishing, or stargazing.

Tips for Choosing the Perfect Night Vision Goggles

To achieve the best possible experience while observing nocturnal wildlife, it’s important to invest in the proper night vision goggles.

The following are some tips on how to find the perfect pair:

  1. Determine the generation – night vision goggles come in different generations, each offering varying performance levels. While Generation 1 devices are more affordable, they provide lower image quality than their Generation 2 and 3 counterparts. Take into account your needs and budget when deciding.
  2. Check the image quality – look for goggles that provide a clear, sharp image with good resolution and minimal distortion. High-quality optics are essential for a satisfying wildlife watching experience.
  3. Assess the field of view – a wider field of view allows you to see more of your surroundings, making it easier to spot and track animals. Consider goggles with a larger field of view for a more immersive experience.
  4. Evaluate the battery life – longer life means more time spent enjoying the nocturnal world without interruption. Look for night vision goggles with an efficient power source and replaceable batteries.
  5. Examine durability and weather resistance – the great outdoors can be unpredictable, so choosing goggles that can withstand the elements is important. Opt for a durable, weather-resistant design to ensure your goggles perform well in various conditions.
  6. Read review – before purchasing, read reviews from other users to understand the product’s performance and reliability better – look for testimonials from people who have used the goggles for nighttime wildlife watching to ensure they meet your needs.
  7. Compare prices – night vision goggles can vary significantly, so finding a pair that offers the best value for your budget is important. Research and compare models and brands to find the best deals.
  8. Consult experts – if you need help deciding which night vision goggles to choose, seek advice from knowledgeable sources. This can include professionals in the field, experienced wildlife watchers, or customer service representatives from reputable companies like https://nightflightconcepts.com/.

Bonus: 5 Quick Tips for Successful Nighttime Wildlife Watching with Night Vision Goggles

As a bonus, we’ve compiled a list of five handy tips to ensure a successful nighttime wildlife watching experience with your night vision goggles.

These quick pointers will help you make the most of your nocturnal adventures:

  1. Familiarize yourself with your goggles – understand the features and settings of your night vision goggles to ensure a smooth wildlife watching experience.
  2. Plan around the moon and weather – schedule your outings during darker moon phases and be mindful of weather conditions that may affect animal behavior.
  3. Research local wildlife – study the animals native to the area you’re exploring to know their habitats, behaviors, and unique features.
  4. Practice patience and stealth – wait quietly for the perfect moment to observe animals, and move silently to avoid disturbing them or their environment.
  5. Utilize all your senses – listen carefully for sounds that can provide clues about nearby wildlife, and rely on your sense of touch and smell to navigate and detect changes in your surroundings.

Final Thoughts

Night vision goggles are invaluable for campers seeking to experience the fascinating world of nocturnal wildlife. By investing in a quality pair of goggles and following the tips, you will be well-prepared to embark on unforgettable nighttime adventures.

So, gear up, venture into the night, and discover the hidden wonders of wildlife that come alive after the sun sets. Happy wildlife watching!

Smooth, Bump Bump, To The Pump

0

YOU ARE OPERATING INSIDE A fire building when suddenly you discover that you are lost, disoriented, and separated from your crew. As you attempt to locate a wall or a window, you come in contact with a hoseline. Which way is out? If you locate the coupling, you can determine which direction leads to the exit. Or can you?

The procedure for following the hoseline to safety in Essentials of Fire Fighting states, “Follow the hoseline out if possible (the male coupling is the closest to the exit; the female is the closest to the fire).”1

Yet time and again during training, when firefighters find the hoseline and follow it to the coupling, they become hesitant and indecisive: Which coupling leads out? I have seen firefighters attempt to uncouple a hoseline to determine which coupling has the swivel. I have seen too many firefighters turn toward the fire and wind up at the nozzle when they could have been out of the building had they gone in the opposite direction. When members are questioned about the problems encountered at the coupling, many times the response is that they just didn’t remember or fully understand the way it was explained in the text.

1. Photos by author. Click here to enlarge image

If the firefighter does remember to follow the male coupling out, there may still be confusion once the coupling is located. If the firefighter is at the midpoint of the hose between couplings, the first coupling he will encounter on the way toward the exit will be the female. The firefighter understood that he was to follow the male end to the exit, so that firefighter turns in the other direction and heads toward the male end, toward the fire. Many have stated that they have a good grasp of the concept until their face piece is obscured.

2. Click here to enlarge image

Here’s a simple memory aid I learned and have shared that seems to have helped firefighters remember the proper direction toward the exit: Bumps to the pumps. If the firefighter finds the hoseline and follows it to the coupling, the bumps (lugs) lead to the pumps (engine on the exterior) (photos 1, 2). It’s easy to remember and understand and reduces or eliminates the confusion and hesitation at the coupling. When a firefighter is low on air, disoriented and alone, the time spent at the coupling may be more time than he can afford to be able to get out safely. It also reduces the anxiety of being unable to determine the proper way out. This translates into better air management for the firefighter in distress.

Of course, this method is not a cure-all for every situation and every circumstance. It works best with threaded couplings that have rocker lugs. The male coupling has lugs on the shank. The female coupling has a smooth shank with lugs on the swivel (photo 3). The firefighter can feel the rocker lugs with a gloved hand under zero visibility conditions and determine the proper direction to the exit.

3. Click here to enlarge image

Some may ask about a situation in which the hose is advanced into a structure with the female end first. If this is the situation, the firefighter will have to identify this situation prior to entering the building. Some departments may use attack hose with storz-type couplings. In this situation, there will be no male or female couplings (photo 4). In this case, it will be difficult to determine the direction of the exit. However, devices that indicate the way toward the exit are commercially available. For example, one such device that can be slipped over a hose has a raised arrow marking a firefighter can feel to determine the direction of the exit. This may be a good alternative for your situation.

4. Click here to enlarge image

A quick drill on this technique involves using a single length of hose and a firefighter wearing gloves. Connect the couplings to create a continuous loop (photo 5). Place the firefighter at the midpoint of the hoseline, and have him follow the hose to the coupling. When the member reaches the coupling, ask him to determine, without looking at the coupling, whether he is headed in the direction of the exit.

5. Click here to enlarge image

As with all other firefighter survival techniques, this method needs to be practiced to develop and maintain a high level of proficiency. A thorough knowledge of your department’s equipment and procedures is important. Being familiar with any mutual-aid department’s equipment is equally important.

• • •

Perhaps you have heard of this method before. Perhaps you do not like it or feel more comfortable with your own. I’ve found that this works for me and has helped those who have had problems during training evolutions. What is most important is that if things go wrong, you are able to determine which way is out. ■

Endnote

1. Essentials of Fire Fighting, fourth edition. Stillwater, OK: Fire Protection Publications, 1998, 108.

ABOUT THE AUTHOR- ■ MICHAEL ALLORA is a lieutenant and a 10-year veteran with the Clifton (NJ) Fire Department. He is a Level 2 fire instructor at the Passaic and Sussex counties’ public safety academies. Allora has an associate’s degree in fire science from Passaic County Community College.

ORIGINAL POST: http://www.fireengineering.com/articles/print/volume-159/issue-2/departments/training-notebook/following-hose-couplings.html

Shock as Mating Pythons Crash Through Ceiling in Footage Seen 34M Times

0

A shocking video of mating pythons crashing through a ceiling in Malaysia, in Southeast Asia, has stunned people online.

The appearance of any snake in someone’s home would likely shock most people, but this particular case would test even the most hardened person.

In a viral video shared by the TikTok account baju_skoda, members of the Pertahanan Awam, the Malaysia Civil Defense Department, can be seen attempting to coax a long snake from a gap in the ceiling.

Another worker uses a pole with a hook on the end to make a hole in the ceiling in a bid to get the snake out.

Stock image of a python. The snakes crashed through the ceiling. Getty

The ceiling came crashing down following a few more pokes at the hole, revealing an entangled group of three giant snakes.

Malaysian news outlet Sinar Harian said two of the reticulated pythons were believed to have been mating and that another was also found.

Civil Defense Officer Azizah Hussain, who works for the Bentong district, just northeast of the capital Kuala Lumpur, said the mating snakes weighed about 70.5 pounds each and were about 16 feet 4 inches long.

Another python, weighing 55.1 pounds and measuring 13 feet 1 inch long, was also found at the home.

Hussain told Sinar Harian the snakes were captured, adding that the two mating snakes would be released in a safe place.

“We also want to advise the public to be careful because summer is almost here, causing snakes to look for cooler places,” Hussain said.

According to Zoo Atlanta, the reticulated python is one of the largest snakes in the world and has been recorded to grow as long as 20 feet, although they regularly grow to 16 feet.

The zoo said about the snakes’ reproduction: “These snakes may reach ages beyond 20 years. Sexual maturity is reached within two to four years but is dependent on size. Males breed once they’ve reached lengths of seven to nine feet, while females begin breeding once they attain a length of about 11 feet.

“Reticulated pythons are oviparous, with females laying 25 to 80 eggs that they incubate for about 80 to 90 days. During the incubation time, the mother goes through a fasting period and will produce muscular shivers to raise the temperature of the eggs during cooler periods.”

Since being shared on Monday, February 13, the video has been seen by some 34.2 million people and has been liked more than 21,700 times.

Many people who commented on the video were stunned by what they saw and claimed they would have left the home and never returned if it had happened where they live.

TikTok user Erasmus said: “And this is how I abandon my house and become homeless. The snakes can enjoy the house now.”

Gentlemarra added: “No sir. I would for sure sell this house, there could be more.”

Simply_V414 commented: “The way I screamed and threw my phone as if I was there when that ceiling came down.”

Gio Raphael posted: “Even though those snakes will be caught, I would definitely not live [in] that house forevermore.”

Newsweek has contacted baju_skoda for comment.

“);jQuery(this).remove()}) jQuery(‘.start-slider’).owlCarousel({loop:!1,margin:10,nav:!0,items:1}).on(‘changed.owl.carousel’,function(event){var currentItem=event.item.index;var totalItems=event.item.count;if(currentItem===0){jQuery(‘.owl-prev’).addClass(‘disabled’)}else{jQuery(‘.owl-prev’).removeClass(‘disabled’)} if(currentItem===totalItems-1){jQuery(‘.owl-next’).addClass(‘disabled’)}else{jQuery(‘.owl-next’).removeClass(‘disabled’)}})}})})

What is a Deer Head on the Wall Called?

0

“Unravel the humor behind a classic riddle: ‘What do you call a deer head on the wall?’ Delve into the amusing and unexpected answer that will leave you chuckling.”

1. Understanding the Terminology: What is a Deer Head on the Wall Called?

1. Understanding the Terminology: What is a Deer Head on the Wall Called?

A Common Practice among Hunters and Collectors

When referring to a deer head mounted on the wall, it is commonly known as a “mounted deer head” or simply a “trophy.” This practice of displaying animal heads as trophies is prevalent among hunters and collectors who take pride in showcasing their hunting achievements or appreciation for wildlife. The act of mounting these animal heads serves as a way to commemorate successful hunts or to display admiration for the beauty and majesty of these creatures.

Different Terminology for Different Animal Mounts

It’s important to note that the specific terminology used may vary depending on the type of animal being displayed. For example, if it were a bear head mounted on the wall, it would be referred to as a “bear mount.” Similarly, if only the skull is displayed without any taxidermy skin or other embellishments, it would be called a “European skull mount” or simply a “skull mount.” These distinctions help differentiate between various types of animal displays and provide clarity when discussing specific mounts.

Appreciating Taxidermy as Art

While opinions may differ on personal preferences regarding taxidermy displays, many people consider them to be works of art when done properly by talented taxidermists. Just like any form of artistic expression, taxidermy requires skill and attention to detail in order to create lifelike representations of animals. For those who appreciate the craftsmanship and aesthetic appeal of well-executed taxidermy, having multiple mounts in one’s home can be seen as an impressive collection that showcases both hunting prowess and an appreciation for nature’s beauty.

In conclusion, referring to a deer head mounted on the wall as a “mounted deer head” or “trophy” is common within the hunting and collecting community. The terminology may vary depending on the type of animal being displayed, with specific names such as “bear mount” or “skull mount” used to differentiate between different types of mounts. While personal opinions on taxidermy displays may vary, many view them as works of art if done skillfully by talented taxidermists.

2. Exploring Taxidermy: The Proper Name for a Deer Head Mount

2. Exploring Taxidermy: The Proper Name for a Deer Head Mount

The Different Names for a Deer Head Mount

When it comes to taxidermy, a deer head mounted on the wall is commonly referred to as a “mounted deer head” or simply a “trophy.” This practice is prevalent among hunters and collectors who wish to display their achievements or appreciate the beauty of these animals. However, it’s important to note that the terminology used may vary depending on the specific animal being mounted.

Understanding Various Types of Mounts

In taxidermy, there are different types of mounts depending on how the animal is preserved and displayed. For example, if it’s just the skull without any additional taxidermy work or skin, it is known as a European skull mount or simply a skull mount. This type of display showcases the intricate bone structure of the animal and is often favored by those who prefer a more minimalist approach.

On the other hand, if the entire animal is preserved and mounted, including its head and shoulders, it is referred to as a full shoulder mount. This type of mount aims to recreate the appearance of the animal in its natural habitat and requires skilled craftsmanship from a talented taxidermist.

An Appreciation for Taxidermy Artistry

While some may find these displays unconventional or even distasteful, others consider them works of art when executed properly by skilled taxidermists. The careful attention to detail in recreating lifelike poses and expressions can make these mounts truly awe-inspiring.

The author personally appreciates taxidermy artistry and proudly boasts an impressive collection in their own home. With 10 full shoulder mounts, 9 skull mounts, and numerous racks from various animals, they have created an environment that celebrates both nature’s beauty and the talent of taxidermists.

In conclusion, the proper name for a deer head mounted on a wall is a “mounted deer head” or simply a “trophy.” However, it’s important to understand that taxidermy encompasses various types of mounts, including skull mounts and full shoulder mounts. Regardless of personal opinions, when done skillfully, taxidermy can be seen as an art form that showcases the beauty of nature.

3. Unveiling the Artistry: Appreciating a Deer Head on the Wall

3. Unveiling the Artistry: Appreciating a Deer Head on the Wall

When it comes to interior design, opinions may vary greatly. Some may view a deer head on the wall as a symbol of hunting prowess or a collector’s passion, while others may see it as a questionable design choice. However, for those who appreciate taxidermy artistry and the beauty of nature, a well-executed deer mount can be truly captivating.

The Intricate Craftsmanship

A deer head on the wall is not just a mere decoration; it represents an intricate craft that requires skill and expertise. A talented taxidermist can transform a lifeless animal into a lifelike work of art, preserving its natural beauty and grace. Each mount is meticulously crafted, paying attention to every detail, from the positioning of the antlers to the expression in the eyes.

Not only does a deer mount showcase the craftsmanship of the taxidermist, but it also serves as a testament to the hunter’s dedication and respect for nature. It captures a moment frozen in time, immortalizing the memory of a successful hunt and allowing it to be cherished for years to come.

An Artistic Display

A well-placed deer head on the wall can add an element of elegance and intrigue to any space. It becomes a focal point that draws attention and sparks conversation. The juxtaposition between nature and human habitat creates an interesting dynamic that can enhance the overall aesthetic appeal.

Furthermore, when surrounded by other carefully selected pieces of taxidermy art, such as a taxidermied lynx along the sofa or various animal mounts strategically placed throughout the house, it creates an immersive experience akin to visiting a natural history museum. This curated collection showcases not only individual works but also tells a story of the collector’s passion for wildlife and their appreciation for the artistry involved.

Ultimately, whether one appreciates a deer head on the wall or not is subjective. However, it is important to recognize the skill and artistry that goes into creating these mounts. They represent more than just a hunting trophy; they embody the beauty of nature and serve as a testament to human creativity and admiration for the animal kingdom.

4. From Trophy to Art: The Significance of a Mounted Deer Head

4. From Trophy to Art: The Significance of a Mounted Deer Head

The Beauty of Taxidermy

One cannot deny the skill and artistry that goes into creating a mounted deer head or any other taxidermy piece. When done properly by a talented taxidermist, these creations can be truly breathtaking. The attention to detail, from the intricately preserved features to the lifelike positioning, transforms a simple trophy into a work of art. Each mount tells a story of the hunt and serves as a reminder of the beauty and majesty of nature.

A Display of Mastery

For hunters and collectors alike, displaying mounted animal heads is not just about showcasing their achievements or possessions. It is also a way to honor and appreciate the animals themselves. A well-executed mount demonstrates the mastery of the taxidermist in capturing the essence and character of the animal. It allows us to admire its grace and magnificence up close, frozen in time.

A Connection with Nature

Having multiple mounts in one’s house, like the author with their impressive collection, creates an immersive experience that connects individuals with nature. Each mount represents a unique encounter with wildlife, whether it be through hunting or other means. They serve as reminders of cherished memories and adventures in the great outdoors. These mounts also spark conversations and provide an opportunity for education about conservation efforts and responsible hunting practices.

Overall, mounted deer heads and other taxidermy pieces transcend being mere trophies; they become works of art that celebrate both nature’s beauty and human skill in preserving it. Whether appreciated for their aesthetic appeal or personal significance, these mounts hold a special place in many homes as symbols of admiration for wildlife and our connection to it.

5. The Beauty of Taxidermy: Identifying a Deer Head Mount

5. The Beauty of Taxidermy: Identifying a Deer Head Mount

Paragraph 1:

A deer head mount, also known as a mounted deer head or trophy, is a common practice among hunters and collectors. It involves preserving and displaying the head of a deer on a wall. This art form requires the skills of a talented taxidermist who carefully prepares and mounts the deer’s head to create a lifelike representation. When done properly, a deer head mount can be considered a work of art.

Paragraph 2:

In addition to deer heads, other animals can also be mounted in this manner. For example, if it were a bear instead of a deer, it would be called a bear mount. The term “mount” refers to the act of mounting and displaying an animal’s preserved body part for decorative purposes. In some cases, only the skull is displayed without the taxidermy skin and other elements, which is referred to as a European skull mount or simply skull mount.

List:

– Deer head mounts are commonly seen in hunting lodges and homes of hunters and collectors.
– A skilled taxidermist is required to properly prepare and mount the deer’s head.
– Other animals can also be mounted in this manner, such as bears or lynxes.
– The term “mount” refers to displaying an animal’s preserved body part for decorative purposes.
– A European skull mount refers to displaying only the skull without additional taxidermy elements.

Note: The provided content has been slightly modified for clarity and coherence.

6. Decorating with Wildlife: A Closer Look at Deer Head Wall Mounts

6. Decorating with Wildlife: A Closer Look at Deer Head Wall Mounts

The Art of Taxidermy

One popular way to decorate a room is by incorporating wildlife elements, such as deer head wall mounts. These mounts, also known as trophy displays, are created through the art of taxidermy. A skilled taxidermist carefully preserves and mounts the animal’s head, giving it a lifelike appearance. When done properly, these mounts can be considered works of art that showcase the beauty and majesty of nature.

A Variety of Options

Deer head wall mounts come in various styles and designs. The most common type is a full shoulder mount, where the entire head and neck of the deer are displayed on a plaque or directly attached to the wall. This type of mount creates a striking focal point in any room and adds a touch of rustic charm.

Additionally, there are skull mounts available for those who prefer a more minimalist look. Known as European skull mounts, these displays feature only the cleaned skull without any additional taxidermy work or skin. They offer a unique and modern aesthetic that can complement different interior design styles.

Personalizing Your Space

For avid hunters and collectors, displaying deer head wall mounts is not just about decoration but also a way to showcase their passion and achievements. Some individuals may have multiple shoulder mounts or even an extensive collection featuring various animals like bears or lynxes.

When done tastefully and thoughtfully, incorporating these wildlife displays into your home can create a sense of adventure and connection with nature. However, it’s important to consider the overall design scheme of your space to ensure that these mounts blend harmoniously with other elements in the room.

In conclusion, deer head wall mounts offer a unique way to decorate your space while celebrating nature’s beauty. Whether you opt for a full shoulder mount or a minimalist skull display, these mounts can add character and personality to your home. Just like any other form of art, it’s essential to choose and arrange them in a way that enhances the overall aesthetic appeal of your space.

In conclusion, a deer head on the wall is commonly referred to as a trophy mount. It serves as a decorative piece that represents hunting achievements and personal interests. However, ethical concerns have led to an increasing shift towards alternative forms of decor, promoting wildlife conservation and animal welfare.

The Milk House Buck

0

As the sportsmen and women in the state of Vermont looked to the beginning of a new decade in January 2010, none of them could imagine the event awaiting to unfold: a massive buck from Vermont’s past was about to overtake the top spot in the Vermont Big Game Trophy Club’s non-typical category. The groundwork was laid some 70 years prior in Vermont’s Northeast Kingdom by a man who was proud of his hunting heritage and the tradition of a family deer camp.

It was January 16, 2010, that I prepared to go to work at the 18th annual Yankee Sportsman’s Classic. I had decided that it would be an opportune time to bring in the rack from a buck that my great grandfather had harvested in Norton, Vermont, back in 1938. The timing couldn’t have been better, as I would be working at the Pelkey’s Archery booth directly across the aisle from the VBGTC. I planned to just drop it off in the morning and pick it up at the end of the day. This would be easy, or so I thought.

On my way into the facility I ran into Peter Porter, a measurer for the VBGTC. Porter’s eyes lit up like a kid at Christmas and he quickly stated, “I’m measuring this one!” It was 8:30 a.m. and he went right to work measuring and recording while I went back across the aisle to talk with show goers about the new 2010 bowhunting equipment. As I worked, I couldn’t help but notice there always seemed to be a group of onlookers around Porter and the rack. Interest from show participants was growing.

Towards the end of the measurement process Porter had determined that it was, at minimum, a Boone and Crockett-caliber buck. He came across the aisle to get me, and he had also called in Ron Boucher, a master measurer for the VBGTC, as well as an official measurer for the Boone and Crockett Club. As Boucher and Porter discreetly discussed the rack, at no point did either one of them mention any of the actual measurements from the big rack. Boucher examined the rack, reviewed Porter’s measurements, and then pulled me aside away from the crowd. “You’ve got something special here,” Boucher explained to me. “With your permission I’d like to take the rack to one of the side rooms away from all this commotion to measure it.” I willingly agreed to his request and as Boucher disappeared into the crowd with the rack, I couldn’t help thinking to myself, “Well, this is getting interesting. . . .”

AN UNLIKELY STATE RECORDWhile Boucher was away with the rack, I had a constant flow of people stopping by to ask if I had heard anything about the final score. I was amazed at all of the attention that this Vermont deer was getting. A couple of long hours later Boucher emerged with the rack, but still no news on the results. After another half hour or so of anxious wondering, I decided that I should head across the aisle and see what was going on. As I approached the VBGTC booth I was quickly greeted by Boucher with the words, “We’re close to being able to tell you, but we are going through the math one more time.”

As I went on my way, allowing the measurers more time, it had still never crossed my mind that my great grandfather could have harvested a potential Vermont state record. The day continued to tick by as I went about my business, occasionally pausing to wonder why I hadn’t heard anything from the VBGTC Measurers. It was nearly 2 p.m. – almost five and a half hours after Peter started measuring – when it happened: As I was talking to an outfitter about a potential future hunt, a friend came up to me and said, “The Foundation is looking for you!” My immediate response was, “The Foundation? What Foundation?” and he quickly explained that the guys from VBGTC were looking for me.

As my friend and I worked our way back through the crowd on our way to the booth, I quizzed him on what he knew. “They’re not telling anyone anything,” he said, “They are just asking to speak with you.” When I got to the booth Boucher pulled me aside and took the time to explain the entire process of what had just transpired, without any specific numbers. He then spoke the words that I will never forget: “I didn’t want anyone else to know until I talked to you, but your great grandfather’s buck is the new State of Vermont non-typical record. It scored 196 5/8.”

I was speechless. I was completely caught off guard, literally without words. I’m quite sure that I didn’t hear – and certainly can’t remember now – much of anything that people said to me after that point. I just kept thinking to myself, “Great grandpa shot a state-record buck hunting out of the family camp!”

THE MILK HOUSEThat day at the show people quickly began to call the deer “The Milk House Buck.” This stemmed from the fact that before the day the rack was entrusted to me it had been stored for years in an old milk house. I choose to call it “The Tice Buck” out of the respect I have for my great grandfather and the hunting tradition in our family. Deer hunting has always been important to the Tice family, a valued tradition and a great part of our family heritage. To think that an unassuming man participating in an annual ritual, a pursuit for which he contained such unrestrained passion, had yielded such a monumental trophy was simply overwhelming, and I couldn’t help but think about the man I’d heard so much about during my lifetime.

My great-grandfather, George Ira Tice, was born January 18, 1899. George was a lifelong resident of Holland, Vermont, a carpenter by trade, a devoted family man and the father of 10 children. George was also a fervent reader and relatives recall seeing George in the living room of his home with his foot up on the marble table reading for hours on end. Yet what people remember most about George is that he was a passionate outdoorsman, with an unquenchable thirst for hunting. He purchased his first hunting license in 1911 at the age of 12 and was so proud of that moment that he saved that license his entire life and is still in the family today.

George was not a man who was content sitting idly about, waiting for the next deer season. One of his more unique outdoor activities was “bee lining.” When I first heard the expression I was curious as to what this entailed. Bee lining is the practice of catching

wild honeybees and then following them back to their hive. Once the hive is found, it is marked and at the end of the summer the honey and the wax are harvested.

George was also an avid fisherman and enjoyed all types of fishing, his favorite style being brook fishing. The family camp is surrounded by pristine brooks that were then full of native Vermont brook trout. It’s safe to say that while George fished the brooks, he was always thinking about, scouting for and planning for the upcoming deer hunting season.

DEER CAMP TRADITIONThe Tice camp located in Norton, Vermont, started its useful life as a bunkhouse and office for logging crews. When the logging operation abandoned the building in the early 1900s, George turned the building into a hunting camp. In the mid 1940s he added a kitchen area to the camp and the camp has remained unchanged to this day. The Northeast Kingdom is a very rural portion of the state with large tracts of wooded land abundant with spruce and fir trees, cedar swamps, and high ridges of hardwood timber. Most hunters that call these woods home are trackers. The expansive woods and the low concentration of deer require an intimate knowledge of the woods and the deer’s habits. The ability to pick up a track and determine if it is a deer worth following is a crucial skill and a mark of pride.

George was so dedicated to his deer hunting that family members who had the privilege of knowing him cannot remember a time that he missed an entire hunting season at camp and can only recall twice when he left hunting camp before the season’s end. The first time was when he had sent his hunting boots back to L.L. Bean to get re-topped prior to deer season. The boots weren’t back when he left for camp, so part way through the season he had to leave to get his boots. The second time that he left hunting camp was for the birth of his youngest son, Earl.

George’s eldest son, Robert, recalls his father building a two-wheeled cart to pull supplies into camp, as getting to and from camp was not the easiest of chores. There was not always a graveled road that passed by the camp as there is today. Robert cannot remember a time that his father did not go to camp or into the woods without his favorite rifle, a Winchester Model 1907 .351 Self Loader. This is the very gun that George shot “The Tice Buck” with. Robert remembers that when George switched his cartridge loads over to smokeless powder that the gun began to malfunction and would no longer eject the casings. While the family did make an effort to get the rifle repaired, the attempt was unsuccessful and unfortunately this gun is no longer in the family.

FAMILY HEIRLOOMWhen George harvested the “The Tice Buck” in November of 1938 he was hunting with his friend and hunting partner, Burt Gray. Those who recall George telling the story of the hunt note that he always commented on how deep the snow was that year. George kept the buck’s rack in the living room on a wall between the wood stove and the entrance way and it remained on that wall for the remainder of George’s life, and after his death in 1965, his wife, Ethel, kept the rack in the very spot where George had hung it. When Ethel passed away in 1971, Robert and his wife, Joan, moved the rack to their house in Derby, Vermont. Robert and Joan kept the rack in their basement until lack of space and a repair project required that the rack be moved out of the basement and into the old milk house.

In 2005 while visiting Robert and Joan they bestowed on me one of the greatest honors of my life: they passed on the guardianship of the rack to me.

Over the past five years the rack has been a prominent fixture in my archery room. While working on bows I had often wondered what the rack would score but never could I imagine the recent events.

Robert, Joan, and I are all avid hunters and understand the importance of maintaining and preserving the antlers within the Tice family. Deer hunting is a longstanding tradition in our family and this trophy, a family heirloom, will be a constant reminder of the great hunters that came before us.

A VERMONT RECORDIn the end, the rack earned a gross score of 196 5/8 inches and a net score of 190 6/8 inches. The main beam lengths are 28 3/8 inches on the right and 27 4/8 inches on the left. It has an inside spread of 22 6/8 inches, an amazing outside spread of 29 0/8 inches, along with circumferences as high as 6 1/8 inches. This buck and my great-grandfather will now get the recognition that they both deserve. I have started the recording process for the Boone and Crockett Club, The Northeast Big Bucks Club, and the Vermont Big Game Trophy Club.

I can’t help but wonder how many hunters, in search of their own trophy buck, drove by this rack hanging in an old outbuilding next to a well-traveled state road? The fact that the rack remained unmarred hanging there in an outbuilding, that even the smallest of gnawing creatures might have acknowledged the majesty in the monarch’s crown, I think is remarkable, as is the idea that there were no rumors across the state of the rack and no one other than family and a few close friends even knew of its existence. When I think of these antlers in that little building, a Vermont State record, one word comes to mind: Astonishing!

What Does Squirrel Taste Like? (Quick Facts)

0

In recent years, there’s been a growing interest in sustainable and alternative meat sources, leading many culinary adventurers to ask an intriguing question: what does squirrel meat actually taste like? While the idea might raise eyebrows in some circles, squirrel has been a cherished protein source for centuries and is experiencing a renaissance in modern cuisine. Let’s dive deep into the fascinating world of squirrel meat, exploring its unique flavor profile, preparation methods, and why it might deserve a place on your dinner table.

The Unique Flavor Profile of Squirrel Meat

For those new to this woodland delicacy, squirrel meat offers a surprisingly sophisticated flavor profile. Most experienced consumers and chefs describe it as a delicate cross between rabbit and chicken, but with a distinctive twist that sets it apart from both. The meat carries a subtle sweetness and, perhaps unsurprisingly, a nutty undertone that’s believed to come from the squirrel’s natural diet of acorns and other nuts.

The meat itself is light in color and features a fine texture that, when properly prepared, can be remarkably tender. Unlike some game meats that can be overwhelmingly gamey, squirrel meat offers a milder, more approachable taste that many find pleasantly surprising. Some connoisseurs describe it as having a slightly “dusky” quality compared to rabbit, adding an extra layer of complexity to its flavor profile.

(For more on the best air rifle for squirrels, see this post)

Species Matters: Different Squirrels, Different Experiences

Not all squirrel meat is created equal, and experienced hunters and chefs know that the species can significantly impact both taste and texture. Grey and black squirrels are generally considered the premium choice, offering more tender meat that’s easier to prepare. Fox squirrels, while edible, tend to be tougher and require more careful preparation to achieve optimal results.

In the United Kingdom, where grey squirrels are abundant, they’re increasingly being recognized as both a sustainable food source and a way to help control an invasive species that threatens native red squirrels. This ecological angle adds an extra layer of appeal for environmentally conscious diners.

Nutritional Profile

For those interested in the nutritional aspects, squirrel meat offers some impressive benefits. It’s notably lean, making it an excellent option for health-conscious diners. The meat is rich in protein and provides essential nutrients including:

  • Vitamin B12
  • Vitamin B6
  • Niacin
  • Iron

However, it’s worth noting that squirrel meat is relatively high in cholesterol, something to consider for those monitoring their cholesterol intake. Despite this, its overall nutritional profile makes it a healthy alternative to many conventional meat options.

The Art of Preparation: Making the Most of Squirrel Meat

The key to enjoying squirrel meat lies largely in its preparation. Due to its lean nature, proper cooking techniques are essential to achieve the best results. Here are some proven methods:

Slow Cooking and Braising

The most foolproof method for preparing squirrel is slow cooking or braising. This approach helps break down the meat’s connective tissues, resulting in tender, flavorful results. A low-temperature braise (between 100ºC and 150ºC) for 4-8 hours typically yields excellent results.

Pressure Cooking

Pressure cooking offers a faster alternative to traditional slow cooking while achieving similar tenderness. This method is particularly useful for older squirrels that might be naturally tougher.

Parboiling and Frying

For those seeking a more traditional Southern approach, parboiling the meat before frying is a time-tested method. This technique helps tenderize the meat while preparing it for crispy, Southern-style preparations.

Roasting

While roasting is possible, it requires careful attention to prevent the lean meat from drying out. Frequent basting is essential, and many chefs recommend wrapping the meat in bacon or other fats to maintain moisture.

Young vs. Old: Age Matters

The age of the squirrel significantly impacts both taste and preparation requirements. Young squirrels, particularly those harvested in their first year, tend to be more tender and can often be cooked without parboiling. Their meat is generally sweeter and more delicate in flavor.

Older squirrels, while still perfectly edible, typically require longer cooking times and more careful preparation to achieve optimal tenderness. However, some argue that older squirrels offer a more complex, developed flavor profile that makes the extra effort worthwhile.

Cultural Significance and Modern Revival

Squirrel meat holds a special place in various culinary traditions, particularly in the American South, where it’s a key ingredient in classic dishes like Brunswick stew. This hearty dish, combining squirrel meat with vegetables like tomatoes, lima beans, and okra, has been a Southern staple since the 19th century.

In recent years, there’s been a revival of interest in squirrel meat among high-profile chefs and restaurants. Renowned culinary figures like Gordon Ramsay and Jamie Oliver have championed its use, and establishments from Hugh Fearnley-Whittingstall’s River Cottage to upscale urban restaurants have featured squirrel on their menus.

Complementary Flavors and Cooking Tips

To make the most of squirrel meat, consider pairing it with complementary flavors:

Herbs and Spices:

  • Rosemary
  • Sage
  • Thyme
  • Parsley
  • Cayenne
  • Paprika
  • Chili

Alcohols for Cooking:

  • Dry red wine (particularly Claret)
  • Cider
  • Ale

The meat works particularly well with nuts and berries, playing to its natural flavor profile. It also holds up admirably in both tomato-based sauces and creamy preparations.

Conclusion

While squirrel meat might not be the first protein that comes to mind for many modern diners, its unique flavor profile, nutritional benefits, and sustainability credentials make it worthy of consideration. The combination of chicken-like familiarity with subtle nutty undertones offers an accessible entry point into game meats for curious culinary explorers.

Whether slow-cooked in a traditional Brunswick stew, Southern-fried to crispy perfection, or prepared using modern culinary techniques, squirrel meat offers a unique and rewarding dining experience. As we continue to seek out sustainable and interesting food sources, this traditional protein may well see its popularity continue to rise in contemporary cuisine.

Benjamin Trail NP XL 1500 Review

0

The Benjamin Trail NP XL 1500 belongs to the beautiful NP XL airgun series .

It has the smallest caliber of all (.177, the others are .22 and .25) but also delivers the fastest velocity.

Although being made in .177, you will be surprised to learn that this rifle delivers more than enough knockdown power to deal with pesky pests in your garden.

(For more on the best air rifle for rabbits, see this post)

Gun Type

The Benjamin Trail XL 1500 features Nitro piston technology.

A nitro-piston gun (or gas-piston) works the same way as the spring gun does,

But it has a nitrogen-filled gas ram instead of a coiled spring as the power source. 

There is a nitrogen cylinder and a piston inside the chamber.

The nitrogen in the cylinder is already held under pressure and you apply more pressure to it when you cock the gun.

The pressurized air is kept under tension until you pull the trigger.

When you fire, the gas expands and propels the piston forward.

The piston comes swiftly after the air transfer port.

The compressed air has nowhere to go but behind the pellet, since the chamber is sealed completely.

As a result, the pellet is discharged from the barrel due to propellant force from compressed air.

(For more on How nitro piston technology can make your gun sport more exciting, see this post)

The caliber (the internal diameter of the bore, measured in inches) is .177 (4.5 millimeters).

(For more on the differences between .177 & .22 and which jobs they do best, see this post.)

It’s a single-shot, break-barrel which means that you can only shoot one shot at a time.

After the first shot, you have to break the barrel down to reload for the second shot.

Single-shot guns make you a disciplined shooter as you have to make your shot count.

The barrel is rifled steel with spiral grooves inside the bore to make bullet spin,

Which stabilizes pellets, improves accuracy, and enhances shooting range.

(For more on things you should know about air rifle barrels before buying, see this post.)

Stock

The stock is of handsome, hardwood stock so it can withstand shocks, impact, and abrasion in daily life.

Besides, hardwood can be refinished at any time so it has a very long lifespan.

(For more on the in-depth comparison between synthetic and wood stock, see this post.)

This stock is also ambidextrous: you can shoot it comfortably whether you are a left-handed or right handed-shooter.

There are dual raised cheekpieces located on both the left and right sides of the stock.

Raised cheek pieces ensure a solid foundation and stable position for your eyes, and allow consistent sight alignment and shot adjustment.

The stock has a textured grip and forearm to add friction when shooting, prevent sweat slippage, and increase stability in aiming.

Furthermore, it has a sling swivel stud already mounted so you can add a sling to carry the gun around any time you like.

This stock has a thumbhole stock that provides a more relaxed grip on your wrist.

By resting the stock on your wrist as opposed to holding it up with your hands.

Stocks with thumbholes are best for varmint shooters

And for target shooters who spend plenty of time in a shooting position, such as bench rest shooting.

Ammo

Benjamin Trail NP XL 1500 uses .177 pellets as its only source of ammo.

.177 pellets are cheap compared to .22 and .25 pellets and you can buy hundreds of them for just a few bucks .

So .177 is your best choice when it comes to long hours of target shooting and fun plinking.

(For more on how to choose the right air gun caliber for your game, see this post.)

Cocking and Loading

Cocking the gun:

First, put the gun ON SAFE, hold the gun by your side, the firmly tap the muzzle end to expose the breech.

Let the gun rest on your upper thigh and grasp the muzzle end.

Continue to pull the barrel down to its limitation to perform cocking action.

Loading the pellet:

With the breech opened after cocking, put the pellet (with the pellet’s nose lying forward) into the breech.

Then pull the barrel up to its original position until it locks and you are ready to fire.

Velocity, Accuracy and Power

The Benjamin Trail NP XL has a velocity of up to 1500 FPS with alloy pellet and 1250 FPS with lead pellet.

This is an extremely high velocity compared to other air guns on the market

And these speeds help the Benjamin Trail NP XL belong to the magnum class of air rifle.

Chrony tests on this nitro piston gun give the results as follows:

PelletFPSFPE
Crosman Premiere 10.5 grains 102224.36 
Crosman Premiere 7.9 gr1224 26.29 
Baracuda H&N Exact match 10.65 gr102024.61 
RWS Meisterkugeln rifle 8.2 gr1069 20.81 
RWS Meisterkuglen pistol 7.0 gr1129.519.83
RWS Superdome 8.3 gr111022.71 
RWS Super Mag 8.3 gr1036 19.79 
RWS super point 8.2 gr108621.48 
Air Arms Diabolo Field 8.44 gr101319.24
JSB Match Diabolo Exact 8.4 gr1041 20.22 
Daisy Precision Match 7.8 gr980.716.66 
Crosman Premier Hollow Point 7.9 g1130 22.4 
Crosman Premier Ultra Mag 10.5 gr952 21.14 
Crosman Premier Super Match 7.9 gr110221.31 
Beeman Kodiak 10.2 gr96921.27 
Benjamin Discovery HP 10.5 gr943 20.74 
JSB Match Diabolo Exact 10.2 gr96321.01 

Those numbers are pretty close to the advertised velocity, and look at the muzzle energy of this gun:

With an average of 20 FPE, this gun produces more than enough power to deal with annoying pests in your backyard or take out a small animal in one quick shot.

Therefore, you can be confident taking this gun to the hunting field or using it to solve your backyard problem.

The power and velocity of this break barrel rifle are impressive, but how about the accuracy, you ask? 

Let’s take a look at the shooting groups of different shooters to see how the gun performs:

The common shooting groups are:

  • 2” at 50 yards,
  • 1.5” at 20 yards,
  • 1” at 10 yards,
  • same hole at 20 yards,
  • 1/4″ at 20 yards,
  • dime sized at 20 yards,
  • 1/2” at 20 yards,
  • 0.237” at 25 yards,
  • 0.578” at 50 yards,
  • dime size at 50 yards,
  • 3/4″ at 30 yards,
  • same hole at 10 yards,
  • 3/4″ at 42 feet,
  • 1/2″ at 15 yards,
  • 1.5” at 25 yards,
  • nickel size at 25 yards,
  • nickel group at 50 feet,
  • 3/4″ at 70 yards,
  • 1” at 30 yards,
  • 1 1/2″ at 25 yards,
  • 1” at 30 yards,1/2” at 30 yards and 2” at 50 yards.

As you can see, this gun is a tack driver with a shooting range of up to 50 yards.

Here is the quick highlight of this air rifle:

Sight

This gun doesn’t come with common iron sight: No front sight and no rear sight.

But it does come with a Center point 3-9×40 AO scope.

40 is the diameter of the front lens (the objective lens).

3-9 is the magnification ability of the scope: It magnifies the picture 3 to 9 times bigger than the image you see with your own eyes.

Moreover, this scope has an adjustable objective (AO) that will give you a clearer and sharper image of the target.

(For more on how many types of air gun sights are out there and which one is suitable for you, see this post.)

Noise

This is a very quiet gun: it has hundreds of customer reviews and not a single one of them complains about the noise.

But remember that sometimes the lightweight pellets break the sound barrier and produce a cracking sound that might upset your neighbors.

Shooting range and intended use

The effective shooting range is up to 50 yards.

You can use this gun for target shooting, plinking, pest control, and small-game hunting.

Accessories

This gun includes uncounted Centerpoint Optic 3-9×40 AO scope as its only accessory.

Maintenance

With its great craftsmanship, the Benjamin Trail NP XL 1500 requires very little maintenance:

Just make sure you tighten all stock fasteners, check the scope mount

And apply a drop of Crosman RMCOIL every few hundred shots to keep it functioning properly.

Warranty

As of this date, the Benjamin Trail NP XL has a one-year limited warranty from the date of purchase

Customer Reviews

There are lots of online reviews for this nitro piston rifle.

Positive reviews show that people love its magnum power, impressive velocity, high accuracy, beautiful stock, and advanced technology.

There are some negative reviews, most of the complaints about the terrible trigger and the dirty barrel.

For the trigger issue, if you are a picky shooter, you can replace it with an aftermarket trigger for about 30 bucks.

For the dirty barrel issue, as soon as you unbox this gun, make sure you clean it thoroughly

And run the bore brush through it to clean it again and you are ready to enjoy your new gun.

Specifications

  • Caliber: 0.177”
  • Velocity: 1500 FPS with alloy, 1250 FPS with lead.
  • Loudness 3- Medium
  • Barrel Length: 19.5 “
  • Overall Length: 48.25”
  • Shot Capacity: 1
  • Cocking Effort: 47 lbs
  • Barrel: rifled
  • Front Sight: None
  • Rear Sight: None
  • Scope Rail: Picatinny
  • Scope: 3×9-40 AO scope
  • Buttplate: Ventilated rubber
  • Suggested for : Target shooting/pest control/ small game hunting
  • Trigger Pull: 2.5 lbs
  • Action: Break barrel
  • Safety: Manual
  • Powerplant: Nitro-piston
  • Function: Single-shot
  • Body Type: rifle
  • Weight: 9.7 lbs

Price

The price for Benjamin Trail NP XL 1500 is about 250 dollars.

It’s a reasonable price if you consider the advanced technology, handsome stock, supersonic velocity, magnum power, and other features this gun brings.

Pros

  • Advanced nitro piston technology
  • Handsome hardwood stock
  • Beautiful craftsmanship
  • Magnum power
  • Supersonic velocity
  • Quiet
  • Recoilless
  • Easy to cock
  • Hefty and durable

Cons

  • Dirty barrel out of the box
  • The trigger can be a turn-off for some shooters.

Conclusion

This gun is a rare behemoth.

If you want to own a gun that you can brag about proudly with your friends, the Benjamin Trail NP XL 1500 is a good addition to your arsenal.

Best Air Rifle Deals

Popular Posts

Synthetic vs Wood Stock: The Final Showdown Between Brunette And Blonde

0
I understand that you’re here to get some quick facts on synthetic vs wood stocks Probably to guide your purchase.  Quick alert - the debate...

How to choose the right Air Gun Caliber for your game?

0
A story is told of three Native American hunters. Two are smart, the other somewhat ignorant. On the first day of the hunting season, one of...

Air Gun 101: What You Should Know about Air Rifle Barrels Before Buying

0
Have you ever heard the phrase: “Imitation is the sincerest form of flattery”? The Chinese must have been very sincere in emulating this proverb. I...