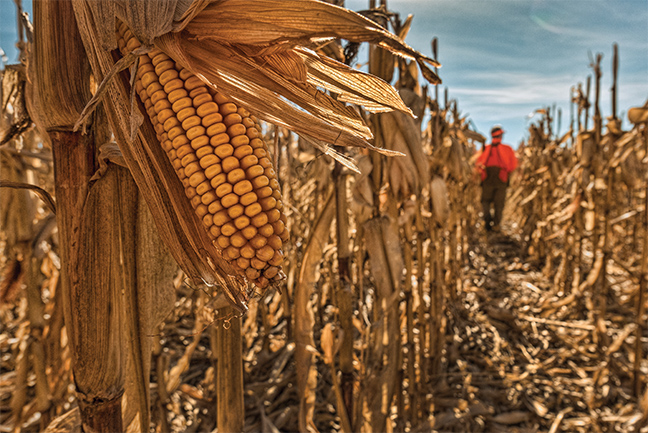
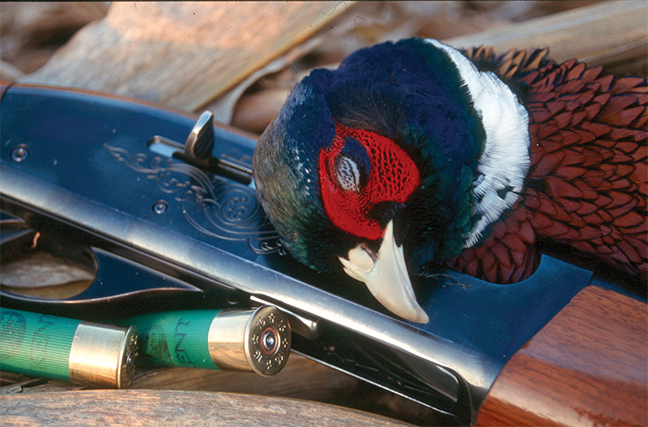
Pheasants flushed from cover outside corn can often be taken by hunters standing just inside the edge of the cornfield.
If a rooster pheasant were one of Batman’s archenemies, he’d be the Joker. The common denominator of both bird and Bad Guy? Neither of them plays fair, especially Mister Ringneck.
So how do you pin down such a slippery character? Well, for starters, you find out where he lives. Where he spends his time. And why he’s there. Next, you research his weaknesses — those habits than make him less than perfectly elusive. And finally, you develop tactics to exploit those weaknesses, using his shortcomings to your advantage.
Pheasants flushed from cover outside corn can often be taken by hunters standing just inside the edge of the cornfield.
It’s October, so let’s look closely at two of the ringneck’s preferred early season haunts — corn and cattails — and how best to attack this pair of perennial favorites.
CORN
In many areas where corn is planted as a large-scale crop, 95 percent or more of it will still be standing come the first week of October. And standing corn offers, at best, terrible hunting conditions.
Why? First, modern agricultural practices ensure little to no row-to-row cover in today’s 21st Century cornfields. No foxtail. No goldenrod. No reed canary grass. Just dirt sidewalks devoid of any weeds. Yields are maximized, but that doesn’t do much for pheasants and pheasant hunters.
Roosters do love standing corn, mainly for the overhead protection it provides; but again, overhead protection does little for the human predator. Second, standing corn is almost impossible for one or two hunters to work effectively. It’s noisy, and because it’s “clean” of weedy plants it allows pheasants to see us long before we see them.
Meanwhile, it can be difficult for hunting dogs and hunters to keep track of each other in standing corn. And finally, and with little exception, few farmers are going to grant permission to six guys asking to bulldoze through his corn. It’s simple economics there.
That’s the bad news about pheasants, October, and standing corn. The good news is corn is still an asset to the pheasant hunter; however, his approach to the crop needs to focus not on the crop itself, but whatever might be around it — that is, the more “huntable” cover immediately adjacent to it.
Even the largest cornfield has an edge, and as simple as it sounds, that’s where you want to focus your efforts. This will be a bit more challenging than merely walking through knee-high brome grass with standing corn off your left shoulder, and tagging a three-bird limit of roosters. Successfully hunting the edges along standing corn requires some strategy. And that means both tactics designed for you and, if you have one, your bird dog.
Gunning roosters along standing corn involves first understanding two variables — where, and when. Typically, pheasants won’t roost or spend the night in modern cornfields for the simple fact there’s no cover there. They will roost in adjoining cover, and will typically, as morning progresses, migrate toward the edge between corn and cover. Here, they have everything they need — the corn’s nearby overhead cover, bare dirt with grit, the ability to see predators, access to seeds and insects, and some 360-degree protection in the adjacent heavy grass.
What this means to the pheasant hunter is a return to the concept of strategy. If you hunt with a dog — ours were Labrador retrievers, both pointing and non-pointers — absolute control and obedience is paramount now. Pheasants are notoriously skittish; a dog that doesn’t stay extremely close, one that doesn’t obey non-verbal direction (i.e., low-volume whistle commands), won’t necessarily flush birds wild, but will send birds scurrying into the protection of the standing corn, where they will be almost impossible to roust.
The key here is to let the dogs hunt — let them to do their job — but keep them close and always under control.
Second, be quiet. Stealth certainly does play a role in successfully hunting standing corn. Quiet means no shouted commands to the dog. No yelling “Over here! Over here! Seeing anything!!??” back and forth to your hunting partner or partners.
No slamming car doors, shotgun actions, or thinking you can silently slip down to the end of the field between cornrows three and four. Pheasants, like the majority of wild game birds, can hear extremely well. And once they hear you, it’s off to the races — and they run faster than you can.
Finally, keep your numbers small and have a plan. Unless you’re in a group of 15 guns or more — which, granted, can at times be effective, albeit quite the logistical undertaking — a pair of hunters is plenty to work corn edges.
As for a plan, we’ll assume two guns here. Typically, rousted roosters will try to fly toward cover that is heavier than where they were originally flushed. Knowing this, one gun walks quietly at the edge of the standing corn; the second, and the one with the well-mannered and close-working dog, exacts a slow zigzag pattern parallel to and perhaps 30 to 50 yards off the shoulder of the first.
Ideally, birds that don’t go straight away from the man/dog team will make a beeline for the standing corn, and that’s where the silent solo gun waits. One-man pushes can also be tried. Ideally, the man/dog duo works into the wind toward a corner of the standing corn where an earlier quietly positioned hunter stands.
One last trick to try while hunting standing corn. Everywhere Daylight Savings Time takes effect in late October, dusk comes earlier in the day. And approaching dark means time for birds to come out of the corn where they’ve spent the day and head for overnight cover.
As close to the end of legal shooting time as possible watch for cockbirds that fly out of the corn, and mark their landing accurately. A quick but quiet approach just might put you into position for a flush and shot.
CATTAILS
Cattails are another phenomenal pheasant cover; however, like standing corn, they’re not without their challenges. One of the most significant is the water commonly associated with cattails. Pheasants don’t like to be wet. And second, cattails are tough enough to hunt when dry; add the water element, and cattails become almost impossible to work efficiently.
That said, pheasants love cattails for the protection they provide, so to ignore the cover is to ignore a good number of birds.
But how to hunt this impenetrable mass of vegetation? You could wait until the water freezes. This makes the cover much more accessible to both hunter and hunted; however, this is in many places a late-season tactic.
In the early season cattails still present a couple of different strategic options. Hunting the edges, as one does with standing corn, is one; the other is to search out those sections of marsh that are still dry following summer’s heat. As mentioned, pheasants dearly love these thick hideouts, and will pull out all the stops when it comes to self-preservation — running and burrowing into the mats, either before or after taking flight.
Cattails lend themselves perfectly to big, strong dogs. Our Labs liked nothing more than rooting roosters out of right-of-way stands of cattails. Still, such dogs need to be controlled and close-working — qualities which are often not a problem, thanks to the twisted web of broad-leafed marsh vegetation.
October, November, or January. Standing corn or cattail marsh. The calendar or the cover mean little to ringneck pheasants, who practice the art of evasion 365 days each year, and who will use either type of cover to full advantage. A quiet, stealthy, and well-thought plan of attack, however, can swing the odds a bit more in the hunter’s favor once opening day rolls ’round.
You certainly long to know more about your favorite airgun reviewer. Of course, I’m Sean Campbell by name. What else?
I was born in the Maverick County of Texas way back in 1983. One story by my dad during my early childhood years has always struck a chord with me
My dad and mum were cattle grazers. We didn’t own a ranch as such. Some of our neighbors did. All we had was about 50 heads of cattle. These fitted perfectly in our 10-acre piece of land.
My dad would never stop talking about Charles Goodnight, one of the richest cattle barons in Texas in the late 19th Century. Together with his friend Oliver Loving, they used to drive thousands of Texas Longhorns for hundreds of miles for sale. The paths they used came to be known as Goodnight-Loving Trail.
“Always work as hard as Charles Goodnight!” My dad would forever urge me.
That spiked my interest in the cowboys. On my 10th birthday, I successfully convinced my dad to buy me full cowboy regalia. On top of that, I got my first locally-made crossbow. If only I was of age, I would have acquired my first Winchester 1873. That was my dream rifle.
The weeks, months, and years that followed were a pure cult. Picture a gang of small boys fully dressed as cowboys and armed with ‘weapons of mass destruction’. Cattle grazing was never boring again. We would spend the day scouring through the shrubs and bushes for whatever tiny living thing we could pin down with our lethal arrows.
Education
For me, grazing and outdoor life seemed the main business of the day. Schooling was more of a part-time activity, though the major part of weekdays was spent in class. I schooled at Pete Gallego Elementary School in Elm Creek, and thereafter Eagle Pass High School.
Math was my favorite subject. Once it was introduced to me as a ‘game of numbers and symbols’, it captured my heart, soul, and mind. I would effortlessly practice solving math problems every other day. No need to reveal my grades, but be sure they were outstanding.
Throughout my school years, I was part of the scout group. For unknown reasons, I shunned other sports. Football never got into my blood. Nor did baseball, volleyball, and the like. By being a scout, at least I was assured of a camp in the woods once or twice a year. Boy Scouts of America mobilized us to be part of the Karankawa and Huisache camps.
It was during these camps that I improved my survival skills. Think of things like:
Finding and purifying water
Building wilderness survival shelters
Starting fires without a matchstick or lighter
Navigating in the wilderness to avoid getting lost
Signaling rescuers in case lost
Performing survival medical operations
Food acquisition to ward off starvation
Later on, I enrolled in the United States Naval Academy to study marine sciences. I strengthened my skills in seamanship, navigation, naval engineering, leadership, and naval electricity and electronics.
Work history
After several years of job searching, I landed a job with the United States Marine Corps, specifically the Marine Infantry division. FYI, the marine infantry units are responsible for locating, marooning, and destroying any enemy forces threatening the peace of our beloved nation.
One of my international combat tours was in 2010, where we actively participated in the Battle of Sangin in the Helmand Province of Afghanistan.
After all those years of weapon handling, it occurred to me that I could better spend my time making, selling, and repairing firearms. You’ve probably already realized that I’m such a hands-on guy. And I just can’t help it.
I joined the Georgia-based Ashworth College in 2011 for a self-paced diploma in gunsmithing. It took me 2 years since I was juggling my studies with other worthwhile life commitments.
In 2013, I got a job with the National Rifle Association (NRA) as a firearm instructor. That has kept me busy up to date.
Family
Outside my work hours, I spend my time hunting, practicing shooting, doing outdoor photography and repairing people’s rifles.
All these achievements would not have been possible without my dearest wife, Katie Anderson. We surprisingly met in high school – and not in college as most people do. Not that we started dating then. We were simply general acquaintances. Life’s mercies finally led us to tie the knot at a private function in the summer months of 2010. Whether I was late in marrying or earlier than expected, it doesn’t bother me.
What matters is that I love my wife and she loves me back. Our union was blessed with one kid, whom we named Larry, in honor of the world-renown American television and radio host Larry King.
Why do I hunt with air guns (and not crossbows or real rifles)?
I prefer air rifles to real rifles because of the following two factors:
Air rifles are less noisier than real rifles. For this reason, game animals tend to stand in place and decipher the origin of the noise after a shot from an air rifle. This allows for quick follow-up shots to ensure the animal doesn’t escape the wounded. Conversely, the loud noise produced by real rifles causes great alarm and panic to both game animals and people living or passing nearby.
Secondly, with air rifles, I can carry as many pellets as I wish to and never risk running short of ammo. That may not always be possible with real rifles as there are limitations on how many rounds and magazines one can carry. Being deep in the woods without ammo is risky as wild animals can turn on you anytime and harm you.
I also prefer air rifles to crossbows because of these two reasons:
Reloading a crossbow seems to take more time than reloading air rifles. When in the hunting field, I always need to act quickly and swiftly as possible. One second wasted in loading the ammo may mean losing a potential kill.
In the case of a mishit, a pellet lodged in an animal’s body is less disturbing and painful than an arrow lodged in the same animal. Thus when hunting with crossbows, I may be forced to track down animals that I fail to kill with the first shot, as hunting ethics dictate.
My favorite airguns
For the 2 decades I’ve actively handled firearms, I’ve owned and operated quite a several numbers of real firearms and air rifles. Here are my favorite airguns:
.45 Texan SS (330 FPE)
.308 Texan SS (196 FPE)
.25 Airforce Condor (60 FPE)
.22 Hatsan BullBoss (28 FPE)
.22 Gamo Urban (23 FPE)
.22 Benjamin Marauder (20 FPE)
Beeman R9
HW 90 and HW50S
Diana RWS 48, 350 and 460
As you can see, I have a varied collection of several calibers, both small and big. I mostly use the .177 and .22, and sometimes the .25 air rifles for rabbits, squirrels, and small game hunting. The .30 and .308 are specifically for deer hunting. My favorite hunting states are Michigan, Ohio, South Carolina, and Pennsylvania.
I often use the .45 Texan SS for deer hunting. My daily schedule at times gets tight, and so I prefer to spare the little time I get off work for hunting and other outdoor activities.
That’s pretty much all about me. If you’re reading this and you frequent the areas I’ve mentioned, I hope our paths soon cross. Otherwise, for all the rest, let’s keep interacting online.
Carp taste like tilapia, only cleaner and better! They are also much less fishy than whiting. I compare it to these fish because they can be bought in most supermarkets so many Americans have had them.
In fact carp are one of the most commonly eaten freshwater fish around the world. Everywhere except for the US that is…
I’m not entirely sure why we in the US don’t see carp as edible. It may be because we have such an abundance of red meat and chicken, or because we have easy access to salmon (which is pretty dang good).
I have spent a number of years living in Asian countries where I ate carp quite often. Honestly, it tastes really good. It’s comparable to any other white fish I have eaten such as tilapia. In fact I’d say carp taste cleaner than most farmed tilapia.
Why Carp is Good Eating
For one, carp are big fish with a lot of meat on them. Most carp caught in the US will average somewhere around 10 pounds. Some carp can grow to over 40 pounds!
If you have ever caught and eaten a trout, then you know that the ratio of meat to everything else is usually pretty small. An average trout of say 12 inches will only have enough meat for a few bites. But a small carp of 5 pounds can feed two or three people.
Carp eat a variety of things from vegetation to crawfish to mussels. The best tasting carp will be ones that have spent their life in clean water lakes with an abundance of crawfish and insects.
What Might Make Carp Bad Eating
Since common carp eat just about anything, they spend a lot of time sifting through the silted lake and river bottoms. This can effect the taste of the carp to have a slight muddy taste.
The best way to reduce the muddy taste in a carp is to bleed it or fillet it immediately after killing it. If you don’t do this, the blood will stay in the meat, giving it a muddy taste.
Another thing people don’t like about carp is how boney they are. A fillet of carp will still have a number of Y-bones in it. However, these are easy to remove after the fish is cooked.
Tasty Species of Carp
There are many species of carp around the world. However I’m going to give an overview of the most common carp in the US, and how they taste.
Eating Common Carp
The common carp is the one most people think of when they hear the word carp. They have dark olive/brown backs with beautiful golden sides.
Other than their color difference, they look pretty much the same as the Koi you might find in a garden pond.
Their mouth is on the underside of their head and eat mostly off the bottom. Their diet is made up of the widest range of foods as far as carp go.
Common carp may not be the best tasting carp, but they still taste great. Many people in the southern US, love to both catch and eat common carp.
These carp aren’t native to the US. In fact they were brought here as a food source by many early settlers. As the pioneers moved west, so did the common carp. So we originally brought them here for food, but somewhere along the way we stopped eating them and they became forgotten.
Eating Grass Carp
Grass carp (aka white amur) are often stocked on ponds and canals as a means of weed control. As their name suggests, grass carp eat mainly vegetation. They were brought to the US in the 1960s and stocked in ponds to keep down the grass, weeds, and algae.
If you live in an area with a large population of Asian immigrants then you might even be able to find grass carp for sale in the grocery stores.
Like the common carp (or any fish for that matter), the taste will greatly depend on the quality of the water they were harvested from. If they were raised in a muddy fish pond, then they’re probably going to taste a little muddy…
However, if they are caught in clean water, and raised on natural greens, then they will have a very clean taste.
Eating Big Head Carp
Big head carp are a little on the funny looking side if you ask me. They have big mouths on the front of their head like grass carp, but their eyes are located far down the sides of their heads and even below their mouth line.
Big head carp are filter feeders. They swim through the water with their mouths open filtering out plankton and other food.
These carp are actually one of the favorite menu items in Asia. The cheek meat in particular is considered a delicacy.
These carp can also be found for sale in Asian grocers and they taste amazing!
Eating Silver Carp
The silver carp is another Asian carp that was brought to the US in the mid 1900s. Since then, the silver carp have escaped and spread through Midwest rivers like a wild fire. They are probably the biggest nuisance fish in the US.
Silver fish have the terrible trait of jumping 5 to 10 feet out of the water when scared. This means that when a motor boat is driving up the river, silver carp will be jumping all around, sometimes landing in the boat, or smacking people in the face. It may sound funny, but that’s a 20 to 30 pound fish hitting you at 30+ mph!
Since these carp reproduce in such great numbers, they are popular with fish farms in Asia. Being that these carp are also filter feeders, they taste great as long as they weren’t farmed in a muddy fish pond.
How to Prepare Carp For Eating
Since it isn’t popular to eat carp in the US, you probably won’t find it in your grocery store. But if you have any Asian markets near you, you can try those.
For most people, the best way to get a carp for eating is to go fishing. Besides… fishing is the fun part!
If you want to learn how to catch a carp check out this page, How To Catch Carp!
1. Kill The Carp
You can kill carp by hitting them hard on the head with a rock or a fish bonker.
2. Bleed It
If you aren’t going to fillet the fish right away, then it’s important to bleed it out. If you don’t bleed it out, the blood will remain in the meat and give the fish a muddy taste.
To bleed a carp, cut out the gills and put it head down in a bucket of water for around 10 minutes.
3. Scale The Carp
Scaling the carp is optional. It depends on whether you want to eat the skin or not. If you don’t want to eat the skin, then don’t worry about scaling it. Just fillet the meat off the skin.
To scale the fish I like to use the back edge of my knife blade. Just scrape the scales off from the tail towards the head.
With the scales out of the way, it’s a little easier to fillet.
4. Fillet The Meat Off
There are many ways to cut up a carp. But to keep things simple, fillet it just the same as you would a trout.
Cut down right along the edge of the spine from the head towards the tail. Then cut right along the ribs from the back down to the belly, carefully separating the meat from off the rib bones.
I recommend watching a few YouTube videos about it. It’ll be much easier to understand by watching it.
And there is another video showing a more complex way of doing it, but at the same time you keep a lot more meat!
5. Cool The Fillets
Keep the fillets cool until it is time to cook them. You can put them in a cooler of ice, or straight into the fridge or freezer.
6. Cook The Carp
There are many recipes out there for carp. Most of the recipes will be from the Asian continent. So if you like Chinese food, then this is good news for you!
Here is a website I found that has a list of shared carp recipes. The website is CookPad.com
More on Carp
If you would like to learn more about carp and their history, then read on, or check out my other pages about what carp eat, how big carp get, or how to catch carp.
Having animals in your garden can be a nice thing, but you also want to know the possible drawbacks! When it comes to ducks, is their poop good fertilizer, or does it hurt your grass?
Duck poop is an excellent fertilizer for your garden. It doesn’t hurt your grass either. Duck poop provides good nutrients since it is high in phosphorus, potassium and nitrogen. Being a natural fertilizer, you don’t need to fear the consequences of it going into nearby water sources.
In this post, we will discuss all you need to know about duck fertilizer and its use in your garden, including the plants they are best for. You will also learn how to handle duck poop in ponds, which is a constant problem duck rearers face.
Duck poop is a great fertilizer and it doesn’t hurt your grass!
Duck poop is a fantastic natural fertilizer. It naturally contains a high concentration of the nutrients that practically all plants need to grow, namely nitrogen (N), potassium (P) and phosphorus (K). Together, these components are popularly called NPK.
Learn how to raise your own quail and have an unlimited supply of eggs and meat.
The NPK ratio in duck poop averages 2.8:2.3:1.7, making it one of the most nutrient-filled natural fertilizers. However, you should also know that having more than sufficient amounts of these materials can be harmful.
Some duck poops often contain exceedingly high contents of nitrogen, which experts have noted to be acidic. This acidity can increase the number of toxic elements such as manganese and aluminium in plants, making them harmful. Thankfully, mixing it with compost can reduce these levels (more below!).
However, you need to be careful! While young plants desire lots of nitrogen, an excess can poison them. For this reason, you need to do a lot of composting when applying duck poop to grass so that it regulates nitrogen levels.
Plants that use up nitrogen more than phosphorus and potassium will suffer from a lack of established roots. Too rapid and extensive growth without proper rooting will hurt your grass.
Duck poop is great for grass. Grass generally needs lots of nitrogen to achieve growth, especially in the growth phase between infancy and maturity. What’s more, the demand for nitrogen is highest during the spring and summer because they provide the perfect weather to sustain growth.
While chicken poop can scorch grass, you are usually safe from duck poop doing so. Duck poop is more liquid than chicken poop which means there are fewer chances of it scorching the grass and plants to which it is applied.
What Plants is it Best for?
Duck poop contains a high degree of nitrogen content, which is highly useful for plant growth. Nitrogen keeps plants hungry and helps to facilitate faster growth for plants at earlier stages. This enables the plants to become established in the soil quickly.
Then, as they establish roots, these plants can grow out other parts, including fruit and foliage.
However, you may want to know if the poop applies to all plants. Duck poop is great for almost all plants, without any tangible exceptions. In fact, experts have proven that it is better than the manure you get from chicken poop.
While duck poop can do amazing work across all classes of plants, there are certain types of plants for which it is best suited. Applying duck poop to these plants will yield potentially bountiful outcomes:
Young and tender plants
Aquatic plants
Vegetables
Aquatic Plants
One of the habitats that ducks desire is the water environment. Unsurprisingly, a symbiotic relationship exists between the water ecosystem and the ducks that play around them. For example, the nitrogen in duck poops helps such aquatic plants as seaweeds and algae achieve faster growth in short periods.
Vegetables
By nature, vegetables are a class of plants that need to grow rapidly and develop lots of leaves. When this is the case, we can say the vegetable grows healthily.
The nitrogen that duck poop offers helps to achieve this. Also, vegetables belong to that class of tender plants, which typically do well with duck poop.
Is the Poop of all Breeds Good Fertilizer?
The poop of all duck breeds should do a good job of providing quality manure. Of course, this also applies to ducks reared for meat and egg purposes. What actually affects the poop more than the breed includes:
The duck’s feeding
Diseases and general health
Age
If these are in order, then the duck poop should be a healthy fertilizer for your garden and plants. You may have issues if you fail to raise the ducks properly through good feeding and appropriate health management.
How does the feed affect poop quality?
Just as with humans, the quality of food the duck consumes will affect everything about it, including the poop it releases.
To ensure that your duck maintains top-quality poop, feed them with feeds and supplements high in fibre and vitamin A.
Poor nutrition on the part of the duck can lead to an insufficient supply of the right nutrients needed in the duck poop. Also, badly planned diets may facilitate the excessive build-up of some nutrients over the others, leading to oversupply, which can harm plants in the garden.
To ensure that your duck maintains top-quality poop, feed them with feeds and supplements high in fibre and vitamin A.
Can You Mix Duck Poop with Compost?
Yes, you can. In fact, it is best to mix your duck poop with other materials to form compost. Above, we mentioned that duck poop can be very acidic, and mixing it with compost can lower the acidity of the poop, making it better for your garden!
Duck poop tends to produce high concentrations of nitrogen, which can be harmful. To balance the nutrient content, mix them with other materials such as dry hay, vegetable trimmings, eggshells, decaying fruit, and general non-animal food wastes.
Does Duck Poop Hurt the Water of a Pond? Can You Use that for Watering Plants?
Ducks love to play around in watery surroundings, including ponds. Unfortunately, they often release poop into the stagnant reservoir in the process.
The duck poop will provide the water with lots of nutrients. However, if there is a high quantity of poop, you can have issues with too much density of components like nitrogen.
You can use the water from the pond for watering plants, as the liquid will have diluted the nutrients a bit. However, you should add other materials such as decaying leaves and plant parts, fruits, and eggshells for ideal results. Ensure they dilute in the water.
What are the Best Ways to Collect Duck Poop to Use in the Desired Area?
Now that you know the benefits of duck poop, the next thing is to collect them and start applying them to your garden.
If the ducks are free to move around the garden
This can be a bit more stressful, but it is doable. Simply put on only gloves, grab a shovel and walk the garden’s perimeter looking for droppings.
Anywhere you find them, use your shovel to scoop them and pour them into a container, avoiding as much soil as possible.
If they are in their pens
This is better. You can grab scraping material to gather the duck poop into a container. Then, you can compost it and apply it to the garden.
Conclusion
Duck poop is a great yet cheap manure source for your garden or farm.
But you need to be careful! It is best to mix other materials with the duck poop in the form of compost to avoid the downsides of nitrogen concentration.
The U.S. Army is on the verge of updating its howitzer fleet to double the shooting range. The M109A7 Paladin and M777 howitzers are likely to see a serious increase in the distance at which they can support friendly forces while staying out of the range fans of Russian and Chinese-made artillery.
One part of this upgrade: a gun barrel nearly as long as a telephone pole.
A Work of Art(illery)
Field artillery is back in vogue. The U.S, has spent the past two decade in infantry-intensive wars in places like Iraq and Afghanistan, but the shift back to big-power potential warfare against enemies like Russia and China has turned attention back to the artillery branch. Howitzers and rocket launchers are the primary means of fire support for ground forces in conventional battle and can strike targets miles behind enemy lines.
The U.S. Army has some very good artillery weapons, including the M109A7 Paladin self-propelled howitzer (above) and the M777 towed howitzer. Long-distance shooting really isn’t their strong suit, though. Both guns can fire to a range of 14 miles with conventional shells and 18.6 miles with rocket-assisted shells, or RAPs, which give each shell some extra oomph but at a cost of less explosive filler and slightly less accuracy.
The problem is that Russian guns can shoot even farther. Russia’s older self-propelled howitzer, the Msta, can shoot to ranges of 24 miles while the new Koalitsiya howitzer has a range of 43 miles. That means that U.S. howitzers must operate within range of Russian guns, and the Koalitsiya could bombard U.S. artillery forces at maximum range without U.S. guns being able to shoot back.
Winning the Range Game
The Extended Range Cannon Artillery program is an attempt to buy more distance versus Russian artillery by improving existing American guns. In the short term, as Breaking Defense points out, that includes a new RAP round, the XM113, which will push existing guns to 24 miles. The XM113 will start hitting the field in 2 to 3 years. A combination of RAP shell, new propellants and a new, super-long howitzer barrel should push Army howitzers to 43 miles.
The new howitzer barrel, recently tested at Yuma Proving Ground and shown above, is 58 calibers long. In cannon and howitzer terminology, the caliber of the barrel is not the barrel diameter, but the length. In this case, the gun is 58 times the diameter of the barrel. To determine the length of a 155mm/58 caliber howitzer, multiply 155 by 58. That’s 8,990 millimeters long, or 29.49 feet. That’s six feet longer than the existing gun on the M109 howitzer.
Longer barrels allow the explosive gasses produced by burning propellant to act longer on the shell, so it gives the barrel at greater velocities. Greater velocity equals greater range. A short-barreled rifle, for example, will have a slower muzzle velocity and shorter range than a rifle with a longer barrel.
In addition to the ERCA upgrades, the Army could end up fielding the new Nammo ramjet artillery shell. Nammo, a Norwegian company and contractor in the XM113 program, claims its ramjet shell can reach ranges of 60 miles or more. Powered by a ramjet, the round uses the surrounding air as fuel, reducing the need for fuel on board the shell itself.
The Army’s new cannon tech should keep U.S. artillery competitive with Russian artillery, at least while the Army is busy buying a replacement for the M2 Bradley infantry fighting vehicle and M1 Abrams main battle tank. The long barrels make travel a bit awkward, especially through forests and urban areas, but the benefit to Army artillery will be significant and at minimal cost.
Whether you’re new to archery or a seasoned pro of the sport, you’ll likely be aware that your bow string being in good condition is crucial to being able to fire off a shot properly. If you don’t have a lot of experience in bow and string maintenance, you might find yourself wondering how long your bow string is likely to last before you need to replace it.
In short, the longevity of your bow string will depend on a number of factors, including the kinds of wear and tear that you subject it to, as well as how you look after it. Read on for our comprehensive look at how long bow strings last, and how to keep them in better shape, for longer.
Also don’t forget to check our roundup of the best recurve bow strings and the best bow string waxes.
A common ballpark figure for the lifespan of your average bow string is anywhere from three to five years. However, in reality, this can vary pretty widely, depending on how often you shoot your bow and how well you maintain the bow string itself.
There’s no major difference to the longevity of bow strings for compound vs. recurve bows. Generally, the main factors that determine how long your bow string lasts is the amount of use that it gets, as well as the draw weight a given bow has. A higher draw weight means the bow string is exposed to more force, which, in turn, causes it to wear out faster.
Another question worth asking is how often or how frequently you should generally replace your bow strings. Even if your bow string isn’t completely falling to pieces, that doesn’t mean you can still use it safely.
There’s no real consensus as to how often you need to replace bow strings. Most bow manufacturers recommend that you replace your bow string every year if it’s on a target bow, or every second year for a hunting bow. However, some manufacturers recommend that you replace your bow strings every two to three years, depending on the type of bow you’re shooting with.
Ultimately, the more often you shoot your bow, the more frequently you’ll need to restring it. And, it’s crucial that you don’t keep shooting with a bow that has a string in dire need of replacing. Worn out strings can cause serious injury if they snap when shot, for example.
Even if you wouldn’t expect to need to replace your bow string just yet, it’s wise to keep an eye on the kind of condition it’s in. We’d generally recommend that you inspect your bow string before each use. Depending on the poundage and wear and tear you subject your bow to, you may need to replace it sooner than anticipated.
One sign you might like to keep an eye out for is fraying of the string. Keep in mind that dryness of the bow string can also occur, and you can usually remedy this by waxing the string. However, if the bow string or serving is actually starting to fray, you’ll likely need to replace the string, or at the very least get it repaired.
Subtle changes in the tuning or performance of your bow may also be a sign that you need a new bow string. As bow strings stretch with use, they can feel less responsive and their timing can start to feel ‘off.’ If you notice this happening to your bow, then your best bet will generally be to get it inspected by a bow technician.
So, we’ve established the importance of properly maintaining your bow string if you want to extend its longevity. But, if you don’t have a lot of experience in bow maintenance, you might be wondering how to best take care of your bow string.
Easily the most important aspect of bow maintenance when it comes to your bow string will be waxing it regularly. The main purpose of waxing your bow string is to stop it from drying out. Waxing the bow string should also provide some form of protection from the elements in the case of harsh wind or sunlight, for example.
It’s also important that you store your bow in an environment with a stable climate. If you were to keep your bow in a room without much insulation, your bow would likely be subject to fluctuating temperatures. These changes in the temperature of the environment can disturb the tension in the bow string. You’ll want to be careful not to expose your bow to intense heat in particular.
If you shoot with recurves or longbows, then another great way to extend your bow string’s lifespan is by unstringing your bow when it’s not in use. This limits the amount of tension that your bow string is subject to and can help to dramatically extend its lifespan.
Given how important the bow string is in archery, it’s only natural that so many new archers worry about the implications of replacing and maintaining their bow strings. However, with proper maintenance, you should expect your bow string to last at least three years or so, though certain manufacturers will recommend that you replace the bow string before then.
If reading ain’t your thing you can check out the video version of this article here!
Coyotes have a knack for getting up and running off after what appeared to be a solid impact. Practice on the trigger is the best remedy for this issue, but using the right target goes a long way to extend the value of your time at the range and ammo expended.
That’s why I collaborated with South Dakota’s veteran coyote killer, Ken Nordstrom, when we created our new . These reactive, full-size coyote silhouette targets show you exactly what you’re doing right at the range, and more importantly, what you may be doing wrong. Because they’re anatomically correct, these new targets not only help you increase your accuracy through practice, but they quickly show you whether or not your aiming method works at various ranges. I am thoroughly convinced that they’re the best steel coyote targets on the market.
Before the introduction of these new targets, our coyote targets measure 12×24 inches, simply because that’s what fit in a Postal Service Flat Rate Box. Ken, quick to see the value in a life size target, offered us a great deal of information he’s gathered over his 40 years spent hunting coyotes.
“My brother Steve and I started coyote hunting in the 80s, and eventually got into tournament hunting,” said Nordstrom. “We’ve placed 7th in the Midwest Coyote Calling Tournament and 12th in the National Coyote Calling Tournament. Over the years, we realized that if we failed to retrieve a coyote that we’d shot, it was because we weren’t taking into account just how small their vital zone is.”
Nordstrom explains that because of the small size, speed, tenacity and color of a coyote, if they’re not stone dead upon impact, they’re generally never recovered, so it’s extremely critical to hit them in the vitals. Beyond that, there’s a great deal more fur on winter coyotes than most hunters are aware of. For those simply looking to control predators, a gut shot or a neck shot is likely to take the animal out of the gene pool, but for hunters looking to harvest hides or compete, coyotes need to fall in their tracks.
Let’s get lethal
“As soon as we wised up to this issue, Steve and I started measuring every coyote we killed,” explained Nordstrom. “We measured them with fur on and fur off. Taking the dimensions we collected over the years – literally thousands of dogs – we determined the average size of an adult coyote. We even went one step beyond that. We recorded where the instantly fatal impact occurred on the body of the coyote.”
The numbers told an interesting story. 18 inches seemed to be a magical number. Coyotes, on average, measure 18 inches from the point of the shoulder to the back of the rump. From the bottom of the chest to the top of the ears when the dog is looking at you is also 18 inches. Do you want to take a guess what the height of an average coyote is from the ground to the shoulder? If you guessed 18 inches, you’d be correct. Sometimes 20 inches, if it’s a mature male in full winter plume, but close enough.
So there are three ways to measure a coyote, all of which yields about 18 inches. Back in the ‘80s and ‘90s, before the fancy laser rangefinders we have today, that was extremely important. It’s still important today, especially in situations when a dog is coming into a call quickly, or if you have coyotes at different ranges and you don’t have time to use a rangefinder. It’s also great if you’re hunting with a thermal without an integrated range finder. Knowing the size of a coyote allows you to use your riflescope’s reticle to range the animal, or at the very least, helps you estimate distances simply by becoming acquainted with how big a coyote looks in your scope at a given range.
But here’s the catch; when looking at a broadside coyote, a good winter coyote is going to have about 11 inches of fur and non-vital impact zone, split between the top of his back and hanging down below his ribcage. When you skin out the coyote, you’ll find that you really only have about 7 inches of vertical kill zone behind his shoulder. The width, or horizontal measurement of that kill zone is roughly the same, 7 inches. These animals look big with their fur on, but once you skin them and see how small the margin of error is on an adult coyote, it’s easy to see how so many hunters lose coyotes every year.
With Ken’s help, I these numbers to steel. The new coyote targets, and the reactive steel flappers, are extremely true to the shape and size of an adult coyote. You’ll notice that, when looking at the broadside target, the flapper is not located center-of-mass. That’s because, on a live coyote, there’s more fur below the kill zone than above it.
The same holds true with a coyote facing the hunter; there’s more fur and non-vital area facing you than there is kill zone. The kill zone on a front-facing coyote is between 3 and 3.5 inches. A dog that takes a bullet in the shoulder can run off on three legs. The neck, even though it looks like a good target, measures only 2 to 2.5 inches in width, and even less of that is spine. Ken has even seen coyotes take a round through the windpipe, only to jump up and run off a few seconds later. The arteries or the backbone are the only vital components in the neck. As a result, our front-facing coyote target features a realistic vital zone-sized flapper and discounts the neck.
Setting up the rifle
There are a lot of different approaches to setting up a coyote rifle, but Ken prefers a method he’s used for many years. Knowing the drop on his 22 Creedmoor, he zeroes his rifle an inch and a half high at 100 yards.
“I do this because if a coyote comes in quickly, head on, and I know that the center of the vital zone is about three inches above the ‘armpit,’ I can put the crosshair right on his armpit, the bullet will impact inside the vital zone at 100 yards. At the same time, if I have a broadside coyote at roughly 300 yards, I can just put the crosshair on the center of fur behind the shoulder and I’ll make a good vital zone shot.”
Simply put, Ken finds that a 1.5 inch high zero at 100 yards is the most practical scope setting for the coyote hunting he does most often.
Target testing
Ken’s first experience shooting at the newly designed targets quickly showed the value of the anatomically correct silhouettes and vital zone flappers. His first shot, at 140 yards, impacted the vital zone flapper of the broadside coyote target, though just a touch high. Dead coyote.
His second shot at the same range was on the forward-facing coyote target. Impact landed on the vital zone flapper. Dead coyote.
His third shot, at 214 yards, was on a broadside coyote target. His impact was on steel but below the vital zone. It became clear that the bullet likely would have touched nothing but fur. Ken thinks he pulled the shot. Live coyote, and one that won’t come back to the call for a very long time.
His fourth shot, on a broadside coyote standing at 300, was a dead center impact of the vital zone flapper. Dead coyote.
Field application
Ken had an opportunity to try his zero and aiming method on an anatomically correct, reactive target that showed how accurate his entire setup was. The beauty of the new is that A) you can practice on life size targets to become better acquainted with how a real coyote looks in your scope at a given range and B) no matter your zero and aiming method, the target doesn’t lie. Whether your round impacts the vital zone or not is blatantly obvious.
This article is one of many from our Aoudad Prep Series
Can you eat Aoudad?
You’re damn right you can. Is it the easiest game meat to prepare? No. However, it really isn’t that much different than other “tough” species like Mountain Goat or Ibex. The name of the game is to fight the texture via slow cooking, cutting thin pieces of meat and/or grinding the meat.
I personally believe the bias against eating big Aoudad rams is more cultural than anything else. Folks say “they smell like hell” or “my dog won’t even eat that rank meat”. Yes, a big ram does stink but so does a slammer big horn sheep or a bull elk who has spent the past two weeks of the rut pissing all over his belly and front legs. Be careful how you take care of the animal in the field, and aoudad meat smells just like other game meats. When I have prepared it, most folks describe the taste as mild, almost lean beef-like.
Cliff and Amy’s Aoudad Tacos Recipe
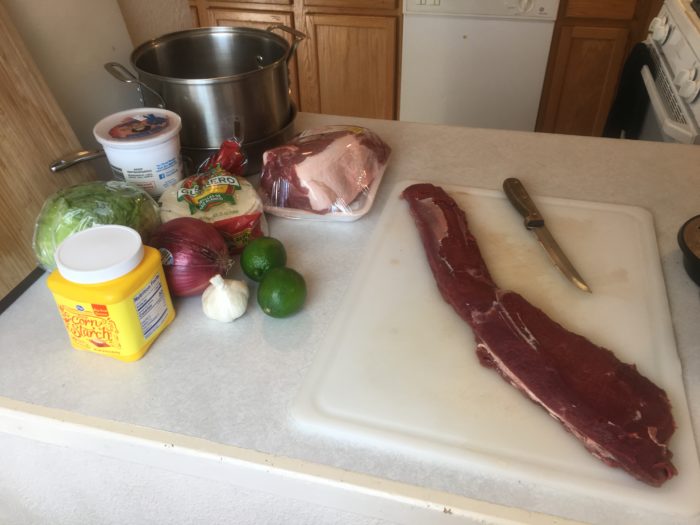
This recipe throws in the three important components to any Mountain Goat, Ibex or Aoudad preparation: 1) Physical Texture – We slice the meat thin. 2) Lean – We add a little pork fat for taste and extra fat. 3) Cooking Texture – We slow cook the meat for about 1 hr. This taco recipe is basic and doesn’t include any specific amounts or exact cooking times. Make it to your taste.
Ingredients
Purple Onion
Cornstarch
Limes
Fresh Garlic
Corn Tortillas
Red Chili – I use Blue Ribbon Medium Hot
Fatty Pork Cut – I use shoulder roast
Aoudad Back Strap
Butter
Salt and Pepper
You will need a deep stock pot and a large skillet.
Step 1 – Prepare the Meat
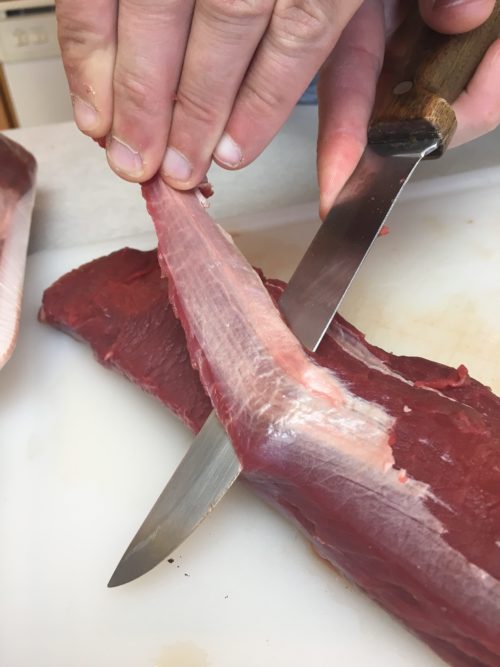
One of the most important components of preparing game meat is to remove all the silver skin, hair, dirt, etc… A lot of this can be done in the field, but tidy it all up before cooking.
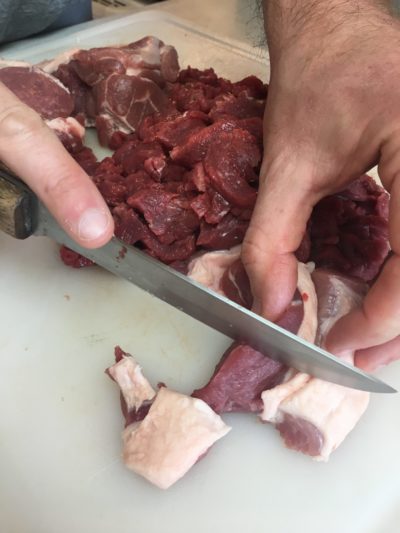
Separate the muscle groups on the backstrap and slice into 6-12″ pieces so you can better remove everything except the red meat.
Next, cut thin slices across the grain of the backstrap. Shooting for slices 1/4″ thick is a good target.
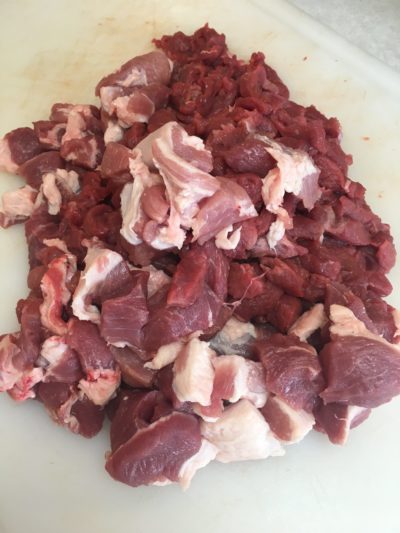
Once you have all the slices done, push them together in batches and cut across the meat. The result is best described as “diced”.
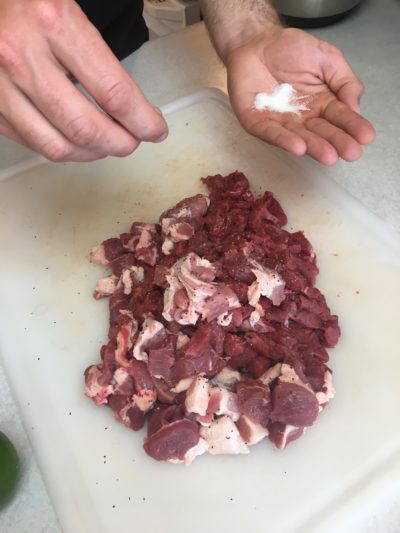
When I add any domestic meat/fat to wild game meat, I try to use as little as possible so I retain most the healthy aspects of the game meat. For this preparation, using a well trimmed yet fatty pork shoulder, I used roughly 1/6th the amount of the shoulder relative to aoudad meat. Unlike the aoudad, I cut the pork shoulder into larger chunks around 1×1 inch squares. Mix the pork with the aoudad and season with salt and pepper.
Step 2 – Brown the Meat
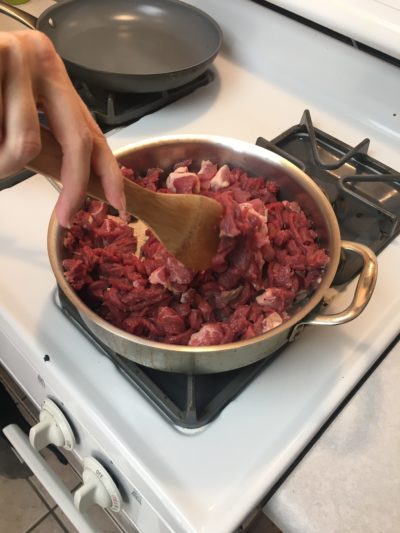
Start off by cutting some fresh garlic and adding it to a hot pan with an ample amount of butter. Don’t skimp on that butter! Next, slowly add the meat. As the meat cooks on high heat, periodically stir. You want the meat to brown with a golden color before turning the heat off. The meat should be completely cooked on the outside, but retain it’s “juicyness”.
Step 3 – Slow Cook in Chili
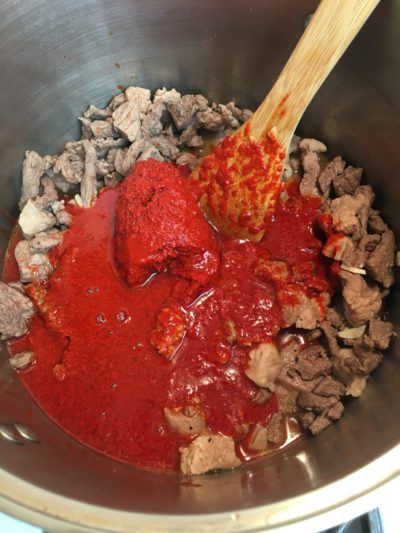
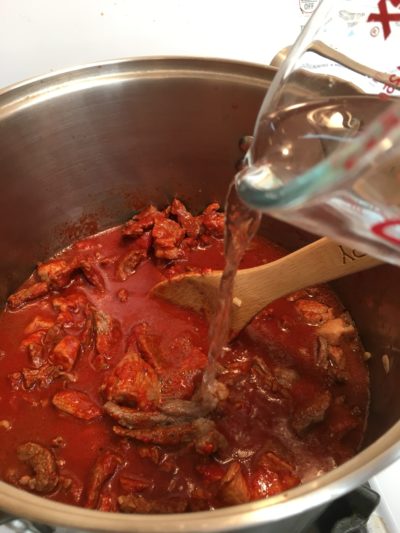
This is where it starts to get fun. First, move the browned meat into a deep stock pot. Next, add the Blue Ribbon red chili with a cup of water. As we slowly cook the meat in the chili over low heat, we will get a reduction in the chili. The water mitigates some of the natural thickening and keeps all the meat covered while cooking with the chili. Stir occasionally and cook on low heat for 1-1.5 hrs.
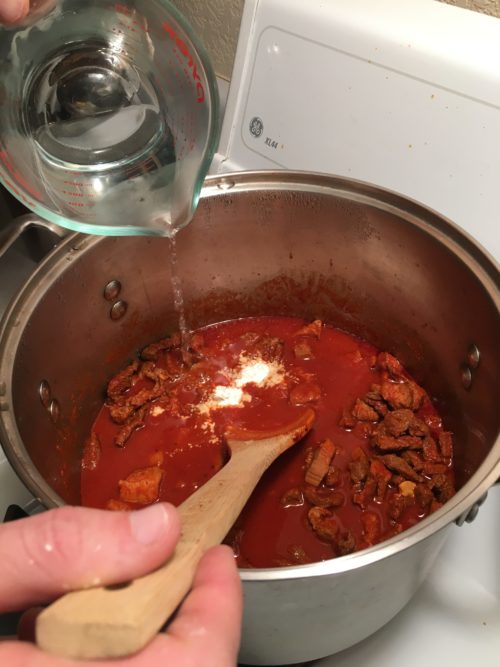
As you get close to being done cooking the meat, use small amounts of cornstarch and water to thicken/thin the chili sauce to the consistency you prefer. For making tacos, you need the sauce to be close to syrup thickness. When using cornstarch, never quit stirring or it will ball-up into little gross dumplings.
Step 4 – Serve
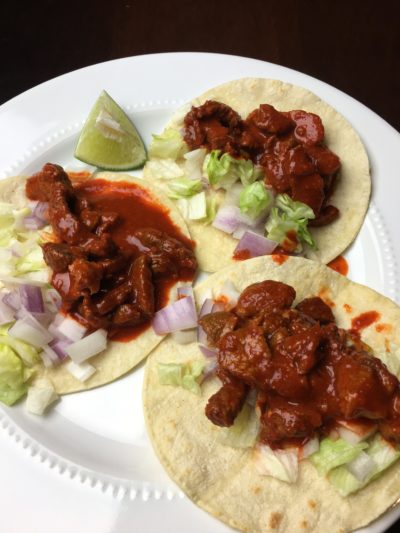
This is all up to personal preference. We chop up some fresh onion and lettuce, warm up corn tortillas, cut limes, and serve with cilantro. Enjoy!
Best all terrain tires for snow: In the world of all-terrain tires, navigating through the plethora of options can be a daunting task, especially when it comes to finding the perfect set for snow. Two common classifications of tires that you may come across are the M+S (Mud and Snow) and the 3-Peak Mountain Snowflake (3PMSF) certified tires. But how do you know which one will provide the best performance in snowy conditions? In this article, we will focus on the top 3-Peak Mountain Snowflake certified all-terrain tires, as they have been proven to deliver superior traction and safety in snow compared to their M+S counterparts.
M+S tires are designed to offer improved traction in muddy and light snow conditions, but they do not undergo the same rigorous testing as 3PMSF certified tires. The 3-Peak Mountain Snowflake symbol signifies that a tire has met or exceeded stringent industry standards for severe snow performance, making them the optimal choice for those who frequently drive in heavy snow or icy conditions. So, without further ado, let’s delve into the world of 3-Peak Mountain Snowflake all-terrain tires and discover the best options for conquering the snowy terrain.
Off road segmentation
When it comes to a pick up truck, the main segmentation of tires comes in the form of on/off road terrain groups. However in this class of tires, there is an even further distribution as below:
SegmentOff roadOn road
All terrain road (ATR) is a relatively new segment mainly driven by the R117 regulation over in Europe to ensure tires meet a maximum threshold of noise level as determined by regulation. Due to the relationship between pattern void volume and noise, this forces the industry to shift towards a lower void design to meet the noise requirements. Hence this spurred the creation of this new segment which has 70% on road & 30% off road focus.
All terrain (AT) is a well known segmentation whereby users do tend to enjoy the fair share of off road activities. Most of the pick up trucks who want to explore the off road activities on a monthly basis do tend to choose this segmentation. The AT segment has a 50% on road & 50% off road focus. There is however an even higher off road segmentation called mud terrain (MT) which has 70% off road and 30% on road. Recently most ATR segment tires.
All season 3 peak mountain
All season tires have always been the go to tires for the American market and this segment has been well established across the years. There are 2 types of all season tires, one with 3 peak mountain & one with only M+S. We have covered these 2 types of tire head to head with Michelin’s Defender T+H (M+S) vs Cross Climate 2 (3 peak mountain) and the M+S all season tires usually are worst in winter performances but excel much better in mileage.
If you are in an area which snows quite heavily, 3 peak mountain all season tires would be definitely a good choice. Below are the best all terrain tires for snow rank based on a compilation of test results.
All terrain road (ATR) with 3 peak mountain
1. BFGoodrich Trail-Terrain T/A
When it comes to off-road tires, no brand is as well known as BFGoodrich. Many consider them as the “God” of all/mud terrain tires and have made their name true countless tire wins in the Baja competitions. BFGoodrich launched its latest foray into the ATR segment with the product called “Trail-Terrain T/A” in 2021. Based on the test results, Trail-Terrain T/A had a big advantage in snow & ice performances while having a low wet & dry performance. The main trade off is between winter against summer performance in this case. If you need a winter performance tire, Trail-Terrain T/A would be definitely a good choice for you.
BFGoodrich Trail-Terrain T/A
Launch: 2021
Press test wins: 0/1
Strength: Excellent snow.
Check out our head to head comparison of Trail-Terrain T/A against its competitors.
BFGoodrich Trail-Terrain T/A vs
Falken WildPeak A/T Trail
Price
265/60R18 : $244
PS: Updated snow results
BFGoodrich Trail-Terrain T/A vs Yokohama Geolandar A/T G015 vs Falken WildPeak A/T Trail winter results.
The BFGoodrich Trail-Terrain T/A demonstrates superior snow and ice performance compared to its competitors, the Falken WildPeak A/T Trail and the Yokohama Geolandar A/T G015. In snow braking, acceleration, and handling (both subjective and lap time), the Trail-Terrain T/A consistently outperforming the WildPeak A/T Trail and closely matching the Geolandar in certain aspects. Furthermore, on ice braking, the Trail-Terrain T/A still held its top position with a score of 100%, whereas both the WildPeak A/T Trail and Geolandar A/T G015 lagged behind by up to -20%. In summary, for snow and ice conditions, the BFGoodrich Trail-Terrain T/A is the clear front-runner.
2. Yokohama Geolandar A/T G015
Introduced in 2016, the Yokohama Geolandar A/T G015 has quickly become a popular choice for drivers seeking a versatile all-terrain tire with impressive snow performance. While it came in just slightly behind the BFGoodrich Trail-Terrain T/A in Tire Rack’s testing, the Geolandar A/T G015 still offers excellent traction and handling on snow-covered roads. Combining Yokohama’s advanced tire technology with a focus on durability and comfort, the Geolandar A/T G015 has proven itself to be a reliable option for those who face a variety of terrains and weather conditions.
Geolandar A/T G015
Launch: 2016
Press test wins: 0/3
Strength: Snow & ice
Check out our head to head comparison of Geolandar A/T G015 against its competitors.
Geolandar A/T G015 vs
Falken WildPeak A/T Trail
Price
265/60R18 : $239
3. Falken WildPeak A/T Trail
The Falken WildPeak A/T Trail is renowned for its outstanding performance on both wet and dry terrains. It consistently delivers impressive traction and stability during rainy seasons and on dry roads, making it a top choice for those in predominantly wet or summer climates. However, when it comes to snow and ice, the WildPeak A/T Trail shows some limitations, especially when compared to the Trail-Terrain T/A which excels in winter conditions. For those prioritizing snow and ice performance, the Trail-Terrain T/A stands out. But for those in milder winter conditions and dominant summer weather, the WildPeak A/T Trail is hard to beat.
WildPeak A/T Trail
Launch: 2019
Press test wins: 0/1
Strength: Wet & dry
Check out our head to head comparison of WildPeak A/T Trail against its competitors.
WildPeak A/T Trail vs
Nitto Nomad Grappler
Yokohama Geolandar A/T G015
BFGoodrich Trail-Terrain T/A
Price
235/60R18 : $209
4. Cooper Discoverer AT3 4S
Launched in 2018, Cooper’s Discoverer AT3 4S has quickly made a name for itself in the world of all-terrain tires. With outstanding snow performance as verified by Tire Rack’s comprehensive tests, this tire has proven to be an exceptional choice for those who need reliable traction and safety in snowy conditions. The Discoverer AT3 4S combines innovative technology and Cooper’s years of experience to deliver a tire that excels in both on-road comfort and off-road capability, making it a top pick for drivers looking to conquer any terrain.
Cooper Discoverer AT3 4S
Launch: 2021
Press test wins: 2/4
Strength: Excellent in wet & snow
Check out our head to head comparison of Cooper Discoverer AT3 4S against its competitors.
Cooper Discoverer AT3 4Svs
Kumho Road Venture AT52
General Grabber APT
Continental TerrainContact A/T
Price
265/60R18 : $264
5. Firestone Destination A/T2
The Firestone Destination A/T2 is a noteworthy contender in the all-terrain tire market, having achieved reasonable snow performance results in Tire Rack’s testing. This tire not only offers a dependable grip on snowy surfaces but also excels in various other conditions. Adding to its list of accolades, the Destination A/T2 recently emerged as the best tire in the highly popular 2022 Tyre Reviews All Terrain Tyre Test. With a well-rounded performance across different terrains and a growing reputation for reliability, the Firestone Destination A/T2 is undoubtedly a solid choice for drivers seeking a versatile and high-performing all-terrain tire.
Destination A/T2
Launch: 2019
Press test wins: 1/3
Strength: Dry
Check out our head to head comparison of Destination A/T2 against its competitors.
Destination A/T2 vs
Continental TerrainContact A/T
Price
265/60R18 : $259
All terrain (AT) with 3 peak mountain
1. Mickey Thompson Baja Boss A/T
Mickey Thompson Baja Boss A/T: A Legacy of Dominance
Mickey Thompson’s Baja Boss A/T is not just another tire in the market; it stands tall on a legacy of tire-making excellence. Combining aggressive aesthetics with unparalleled on-road handling and performance, this extreme hybrid all-terrain tire symbolizes the very essence of Mickey Thompson’s commitment to quality. The asymmetrical tread design ensures reduced noise and superior all-weather performance, while its Extreme Sidebiters® offer an extraordinary look and exceptional off-road traction. Enhanced with the Powerply™ XD and a Silica-Reinforced Compound, it guarantees puncture resistance, quicker steering response, and improved wet handling. And with a 50,000-mile tread wear warranty, the Baja Boss A/T doesn’t just talk the talk but walks the walk.
Winter Performances: Defining Snow Mastery
When pitched against its close competitors, the Falken WildPeak A/T3W and the Toyo Open Country A/T III, the Baja Boss A/T showcases distinctive prowess in snow conditions. Let’s dissect the numbers:
AT snow results
Snow Braking: With 60.30 feet, the Baja Boss A/T stops more abruptly than both the WildPeak A/T3W and the Open Country A/T III, requiring 82.20 and 80.60 feet respectively.
Snow Acceleration: This metric is where Baja Boss A/T shines brightly. At just 13.60 feet (0-12 Mph), it accelerates significantly faster in snowy conditions than the WildPeak A/T3W and the Open Country A/T III, which require 19.10 and 19.40 feet respectively.
Snow Handling (Subjective): Scoring 4.92 out of 10, the Baja Boss A/T is ahead of the WildPeak A/T3W’s 3.83, though slightly trailing the Open Country A/T III’s 4.67.
Ice Braking: On icy terrains, the three tires are closely matched, with the Baja Boss A/T stopping at 57.50 feet, slightly ahead of the others.
In conclusion, the Baja Boss A/T by Mickey Thompson doesn’t merely ride on its legacy but establishes itself as a leader, particularly in snowy conditions. The numbers are clear: for those prioritizing winter performance, the Baja Boss A/T stands out as the best snow tire in the market.
Baja Boss A/T
Launch: 2021
Press test wins: 0/1
Strength: Excellent snow !
Check out our head to head comparison of Baja Boss A/T against its competitors.
Baja Boss A/T vs
Falken WildPeak A/T3W
Toyo Open Country A/T III
Price
265/60R18 : $291
2. Toyo Open Country A/T III
The Toyo Open Country A/T III is an embodiment of technological advancement in the realm of all-terrain tires. Designed to cater to the needs of light trucks, SUVs, and crossovers, it stands as a testament to Toyo’s commitment to revolutionize the tire industry. Following the footsteps of its predecessor, the Toyo Open Country A/T II, this latest iteration introduces a more aggressive tread pattern, advanced rubber compounds, and numerous features that enhance its grip and durability. Among these, its new tread compound ensures enhanced wet braking, improved handling, and resists cut-and-chip, making it a reliable companion for both off-road adventures and city drives. The tire’s evenly distributed void area improves traction, both on and off the road, and ensures stable handling. Its staggered shoulder lugs offer impressive off-road traction, while the increased lateral grooves magnify its prowess on varied terrains, including snow. The 3D multi-wave sipes not only improve wet and snow traction but also diminish irregular wear. Lastly, the stone-ejecting blocks ensure that the tire remains undamaged, maintaining its performance in tough conditions.
Diving into its winter performance and comparing it to its peers like the Mickey Thompson Baja Boss A/T and the Falken WildPeak A/T3W, the Toyo Open Country A/T III showcases notable strengths. In snow braking, it demands only 80.60 feet to come to a halt, closely tailing the Baja Boss A/T but surpassing the WildPeak A/T3W. When we assess snow acceleration, the Open Country A/T III registers a commendable performance, requiring just 19.40 feet from 0-12 Mph, which is almost at par with the WildPeak A/T3W. As for snow handling, it scores an impressive 4.67 out of 10, beating the WildPeak A/T3W and just slightly behind the Baja Boss A/T. However, its true dominance is evident in ice braking, where it halts at a mere 54.80 feet, outperforming both of its competitors.
Open Country A/T III
Launch: 2020
Press test wins: 0/1
Strength: Great snow handling !
Check out our head to head comparison of Open Country A/T III against its competitors.
Open Country A/T III vs
Falken WildPeak A/T3W
Mickey Thompson Baja Boss A/T
Price
265/60R18 : $283
3. Falken WildPeak A/T3W
When it comes to exceptional winter performance in all-terrain tires, the Falken WildPeak A/T3W undoubtedly stands out. Specifically crafted for those who seek unmatched performance without compromising on safety and durability, this tire is a testament to Falken’s dedication to innovation and quality. Its advanced engineering ensures that the tire not only grips the road seamlessly in harsh snowy conditions but also offers longevity and reliability.
Looking at its winter performance metrics and juxtaposing it with competitors such as the Mickey Thompson Baja Boss A/T and the Toyo Open Country A/T III, the WildPeak A/T3W showcases its merits. In the snow braking test, it requires 82.20 feet to stop, which is slightly longer than both the Baja Boss A/T and the Open Country A/T III. However, it’s in the snow acceleration where the WildPeak A/T3W weakness was shown, registering an 19.10 feet from 0-12 Mph, placing last in the group. While its subjective snow handling score of 3.83 out of 10 trails the other two tires, it’s essential to note that this is a subjective measure, and preferences can vary based on individual experience. But where the WildPeak A/T3W genuinely shines is in ice braking. Stopping at just 55.80 feet, it surpasses the Baja Boss A/T and is incredibly close to the leading Toyo Open Country A/T III.
WildPeak A/T3W
Launch: 2013
Press test wins: 0/4
Strength: Good ice braking
Check out our head to head comparison of WildPeak A/T3W against its competitors.
WildPeak A/T3W vs
Mickey Thompson Baja Boss A/T
Toyo Open Country A/T III
Bridgestone Dueler A/T Revo 3
Price
265/60R18 : $275
4. Goodyear Wrangler Workhorse AT
Goodyear’s Wrangler Workhorse AT was launched in 2021 with an all season focus and it is specific only for the American market. Based on the head to head comparison below, Wrangler Workhorse AT was good in dry, noise & objective ice/snow but was weak in wet and subjective snow performances.
Wrangler Workhorse AT
Launch: 2021
Press test wins: 0/1
Strength: Dry. noise & objective ice/snow
Check out our head to head comparison of Wrangler Workhorse AT against its competitors.
Wrangler Workhorse AT vs
Cooper Discoverer Rugged Trek
Price
265/60R18 : $251
5. Cooper Discoverer Rugged Trek
Cooper’s Discoverer Rugged Trek was launched in 2021 and has been developed specifically for the North American market. Based on the head to head comparison below, Discoverer Rugged Trek was strong in wet and subjective snow performances while lacking behind dry, noise & objective ice/snow.
Discoverer Rugged Trek
Launch: 2021
Press test wins: 0/1
Strength: wet & subjective snow
Check out our head to head comparison of Discoverer Rugged Trek against its competitors.
Discoverer Rugged Trek vs
Goodyear Wrangler Workhorse
Price
265/60R18 : $275
Summary
In conclusion, selecting the right all-terrain tire for snow is crucial for ensuring optimal performance, safety, and driving comfort. Among the top contenders, the 3-Peak Mountain Snowflake certified tires stand out for their superior traction and handling in snowy conditions. Each tire mentioned in this article offers its unique set of strengths, making it essential for drivers to weigh their specific needs and preferences. Whether it’s the Cooper’s Discoverer AT3 4S, Yokohama Geolandar A/T G015, Firestone Destination A/T2, Mickey Thompson Baja Boss A/T, or Toyo Open Country A/T III, all of these options have proven their worth in the all-terrain tire market. By carefully considering the features and performance aspects of each tire, you can make an informed decision and confidently conquer the snow and various terrains that lie ahead.
Self-defense is a crucial skill that everyone should possess. In today’s world, it’s important to be prepared for any situation, especially when it comes to protecting oneself. One way to do this is by carrying a self-defense tool, such as a flashlight. But how many lumens are needed to temporarily blind an attacker?
While there is no exact answer to this question, it’s important to understand the basics of how a flashlight can be used for self-defense.
The bright light emitted from a flashlight can baffle an attacker, giving the victim time to escape or defend themselves. However, not all flashlights are created equal, and the number of lumens needed to blind an attacker can vary based on several factors.
What are Lumens?
Lumens are a measure of the total amount of light that a bulb or flashlight emits. It is a unit of measurement for the brightness of a light source. The higher the number of lumens, the brighter the light will be.
Remember that,
Lumens are not the same as watts, which measure the energy a light source uses. A higher wattage bulb does not necessarily mean a brighter light. Lumens are a more accurate measure of brightness.
For self-defense purposes, the number of lumens in a flashlight is important. A flashlight with a high number of lumens can temporarily blind an intruder, giving you time to escape or defend yourself.
However, it is important to note that a high number of lumens does not necessarily mean a better flashlight for self-defense. There are other factors to consider, such as the size and weight of the flashlight, the battery life, and the beam distance.
Using a flashlight with the appropriate number of lumens for your intended purpose is also important. A flashlight with too few lumens may not provide enough light to see in a dark environment, while a flashlight with too many lumens may be too bright and cause temporary blindness to yourself or others.
When choosing a flashlight for self-defense, it is recommended to select one with at least 1000 lumens. This is enough to temporarily blind an attacker and give you time to escape or defend yourself. However, it is also important to consider the other factors mentioned above.
Factors That Affect the Blinding Effect of Lumens
The blinding effect of a flashlight depends on several factors, including the brightness of the light, the distance between the light and the attacker, and the angle at which the light hits the attacker’s eyes.
Generally, the closer the attacker is to the light source, the fewer lumens you need to achieve the blinding effect. However, if the attacker is too close, the light may also be too bright for you, making it difficult to see and aim.
The angle at which the light hits the attacker’s eyes is also important. If the light is shining directly into the attacker’s eyes, it will be more effective than if it is shining at an angle.
How Many Lumens Can Temporarily Blind an Attacker?
The answer depends on the situation, but most experts recommend using a flashlight with at least 300 lumens.
This brightness level is typically enough to cause temporary blindness, especially if the attacker is within a few feet of the light source. However, it’s important to remember that the blinding effect may not work on all attackers, especially those under the influence of drugs or alcohol.
It’s also worth noting that a flashlight with too many lumens can be just as ineffective as one with too few. If the light is too bright, it can cause glare and reflection, making it difficult to see and aim.
Overall, a flashlight with around 300 lumens is a good starting point for self-defense. However, it’s also important to consider other factors, such as the size and weight of the flashlight, its battery life, and durability.
Remember, a bright flashlight can be a valuable tool in self-defense, but it’s important to use it responsibly and effectively.
Proper Use of Flashlights for Self-Defense
When using a flashlight for self-defense, it’s important to understand how to use it to maximize its effectiveness properly. Here are a few tips:
Hold the flashlight in your non-dominant hand so your dominant hand is free to defend yourself if needed.
Use a flashlight with a strobe setting to disorient an attacker.
Shine the light directly into the attacker’s eyes to temporarily blind them.
Be aware of your surroundings and use the flashlight to scan the area for potential threats.
Remember, a flashlight is not a weapon and should only be used for self-defense as a last resort. Always try to de-escalate a situation and avoid confrontation if possible.
Relevant: Strobe flashlight vs. regular flashlight.
Alternative Self-Defense Tools
While flashlights can be an effective self-defense tool, there are other options to consider as well. Here are a few alternative self-defense tools:
ToolsDescriptions
It’s important to research and understand the proper use of any self-defense tool before relying on it in a dangerous situation. Remember, the goal of self-defense is to protect yourself and escape unharmed, not to cause harm to others.
By staying aware of your surroundings and being prepared for potential threats, you can increase your chances of staying safe in dangerous situations.
Is 1000 Lumens Too Bright for Home Defense?
When it comes to self-defense, having a bright flashlight can be an effective tool to disorient an attacker and give you time to escape or defend yourself. But how bright is too bright?
First, let’s define what a lumen is. A lumen is a unit of measurement for the amount of light emitted by a source. The higher the number of lumens, the brighter the light. A typical flashlight may have around 100-300 lumens, while some tactical flashlights can have up to 1000 lumens or more.
1000 Lumens for Home Defense: Too Bright or Not?
It depends on the situation. In a small, enclosed space like a bedroom or hallway, a flashlight with 1000 lumens may be too bright and could potentially blind you as well as the attacker.
However, in a larger space like a backyard or parking lot, a brighter flashlight could be more effective in disorienting an attacker and giving you time to react. It’s also important to consider the beam pattern of the flashlight.
A flashlight with a narrow beam may be more effective in blinding an attacker, while a wider beam may be better for illuminating a larger area.
In conclusion, while 1000 lumens may be too bright for some situations, it can be effective in self-defense when used appropriately. It’s important to choose a flashlight that fits your needs and preferences and practice using it in different scenarios to ensure you are prepared in an emergency.
How many lumens can permanently blind you?
The human eye can only handle a certain amount of light before it becomes damaged. According to the American National Standards Institute (ANSI), the maximum permissible exposure (MPE) for a flashlight is 2,500 lumens for a duration of 0.25 seconds. Anything above this level can cause permanent eye damage.
Note that:
MPE is based on a single exposure and does not consider repeated exposure over time. This means that even a flashlight with a lower lumen output can cause permanent eye damage if it is repeatedly shone directly into someone’s eyes.
In addition to the lumen output, the beam pattern of the flashlight can also play a role in causing permanent eye damage. A flashlight with a narrow beam pattern can focus the light into a smaller area, increasing the intensity of the light and potentially causing more damage.
In conclusion, use it responsibly and be aware of the potential for permanent eye damage. Always aim the flashlight away from someone’s face and use it only when necessary.
"Unlock the Perfect Shot: Discover the Best Scope for Break Barrel Air Rifles. Enhance your shooting experience with precision and accuracy, as we delve...