Alaskan moose is one of the largest moose among the deer family. Their height often exceeds 7 feet. The largest recorded moose height is about 7 feet 7 inches high which is an inch taller than the world’s tallest NBA players.
Did you know that the average height of a human male is about 1.77 m tall, while the average height for moose ranges from 1.4 to 2.1 m?
This article covers the size of moose compared to humans and much more!
How Big Is a Full-Grown Moose?
From hoof to shoulder, moose have an average height of six feet, i.e. 1.8 meters. The height range is from 5 to 6.5 feet at the shoulders.
The size of the head and the body of a moose ranges from 7 feet 10 inches to 10 feet 2 inches. Their vestigial tail is between 5 to 12 cm long.
Male moose are larger than female moose, with a weight of 380 to 700 kg (838 to 1,543 lbs). On the other hand, the weight of females ranges from 200 to 490 kg (441 to 1,080 lbs). ~ Source
How Big Is the Largest Moose in the World?
As we already know that the Alaskan moose are the largest subspecies of moose. So, the largest moose ever recorded was also from the Alaskan subspecies.
The largest recorded moose weighed nearly 1808 pounds and was 7 feet 8 inches tall. This moose was shot in September 1897. ~ Source
However, there have been reports of other larger moose, for instance, a male who weighed 2299 lbs and was shot in 2004.
Another male moose that was shot later in the 2000s weighed nearly 2601 lbs.
Note: There are no authentic sources to confirm these records.
Moose Size Comparison According to The Types of Moose
Moose sizes vary depending on the subspecies of the animal. The difference is mainly attributed to adaptation to local conditions. North America is home to four subspecies of moose.
Here is a comparison of the size of moose based on their subspecies:
Alaska Yukon Moose:
This is the biggest subspecies of moose in terms of size. The heaviest weight ever recorded among the moose family is nearly 1808 pounds. ~ A-Z Animals
Even Alaskan moose antlers measure about 80 inches across.
East Siberian Elk
Moose based in Eurasia are among the biggest species of moose on the planet.
There is a very small difference in the sizes between Alaskan moose and East Siberian Elk. these moose weigh more than 1600 pounds.
Yellowstone Moose:
Yellowstone moose inhabit North America. They are the smallest subspecies of moose, weighing just 1000 pounds!
Moose Subspecies in Amur:
Amur is situated near the border of Russia and China. This region is known for being home to the smallest subspecies of moose. These animals are almost 6 feet tall.
How Big Are Moose Compared to Humans?
Moose is the tallest creature compared to other members of the deer family. Fully-grown moose are way taller than the world’s tallest humans.
The average height of a moose is nearly 6.5 feet, while the height of a male human being is just 5 feet 7 inches.
The height of the Alaskan moose crosses 7 feet at the shoulder.
Overall height crosses 10 feet when the antlers and the head of the moose are added. This is massive, even if compared to the world’s tallest human, with a height of 8 feet 11.5 inches.
How Big Are Moose Compared to Horses?
Horses are measured to the ridge located between their shoulder blades. The average height of a horse is 5 feet 4 inches. Considering the height of a moose, it has been observed that a moose is a foot and a half taller than a horse.
The height of horses is also variable just like the heights of different subspecies of moose. The tallest horse ever recorded had a height of 82.75 inches which is just an inch shorter than 7 inches.
So, the world’s tallest horse is about as tall as a male Alaskan moose. Yet, the world’s tallest moose is 9 inches taller than the world’s tallest horse.
Although moose are bigger than horses in size, moose tend to have a lower body weight than horses.
Horses’ weight ranges from 120 to 2200 pounds, while the weight of a full-grown moose is about 1600 pounds.
How Big Is a Moose Compared to a Bison?
Bison is another mighty herbivore that can compete with a moose in terms of size.
This animal measures 6.5 feet tall at the shoulder, which is almost as tall as a cervid found in Yellowstone.
The adult male bison weighs 2000 pounds, meaning it is much heavier than a moose. A bison weighs twice as much as a Yellowstone moose.
How Strong Is a Moose?
Moose are heavy-bodied creatures with a very strong pair of front and hind legs. They use their sharp hooves to stomp people or animals to death.
Did you know? Moose are responsible for nearly 1500 road accidents in Canada, Alaska, and New England. These animals can cause serious injuries and even death which shows how strong they are. ~ A-Z Animals
Bull moose are specially equipped to fight and ward off other moose, especially at the time of mating. They have huge shoulders and their neck muscles double in size during the rut.
Bull moose have very thick forehead skin, which protects their skull from injuries during the rut.
Thanks to their fast-running speed, they can easily knock down a human being and possibly even injure them seriously. They use their strong legs to kick predators and run from them.
What Is the Size of a Baby Moose?
Newborn moose weighs approximately 30 pounds. Baby moose tend to eat a lot.
Estimates have shown that baby moose eat a lot to gain weight. Calves consume more food in summer than in the winter to prepare themselves for the long winter months when food is scarce.
Research has also shown that baby moose gain a pound of weight on a daily basis and might even put on 4 pounds daily in the spring and summer months.
FAQs
What do you call a baby moose?
A baby moose is called a moose, while male moose are known as bulls and female moose are called cows.
How much does a moose weigh at birth?
When calves are born, they weigh 25 to 35 pounds and are reddish brown in color.
Conclusion
Changes in the temperature of the earth affect all creatures living in the Northern hemisphere, including moose. Hunting is also a major life threat to these unique animals.
Action needs to be taken to protect these creatures as their population numbers decline. This article helped answer your question regarding the size of moose.
Well, its conception must have begun nearly 100 years ago
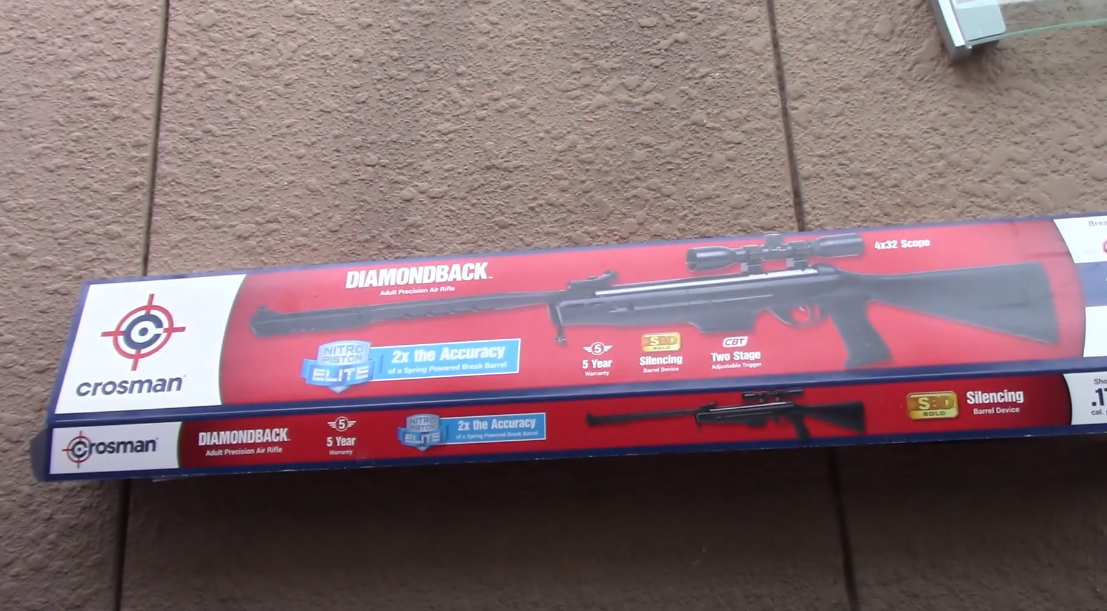
When the Crosman Brothers set out to produce pellets and airguns after one William McLean requested them to do so .
In the years that followed, the duly formed Crosman Rifle Company would move on to revolutionize the airgun industry through ingenious innovations – including the revered nitro piston technology.
Some of the top products by this New York-based air rifle company include:
As of now, about 15,822,000 firearms are in Civilian possession.
Note that in Germany, any air rifle with more than 5 FPE is counted as a firearm.
And you can be sure that Weihrauch plays a big part in supplying Germans with firearms.
The company is currently headquartered in Mellrichstadt, Germany.
Their large team of experienced airgun experts works tirelessly to ensure the production of sports, hunting, and hobby airguns with excellent performance and long service life.
John Wayne 1911 CO2 BB Pistol / Duke Colt Peacemaker Series
V10 Competition Target Pistol
Though started in 2010 – meaning just over 10 years in operation now – they have worked closely with the more experienced air rifle brands to ensure that all American air gun shooters get the products they long for.
5. Seneca
Seneca is a line of air rifles produced by Air Venturi – the airgun company we just discussed above.
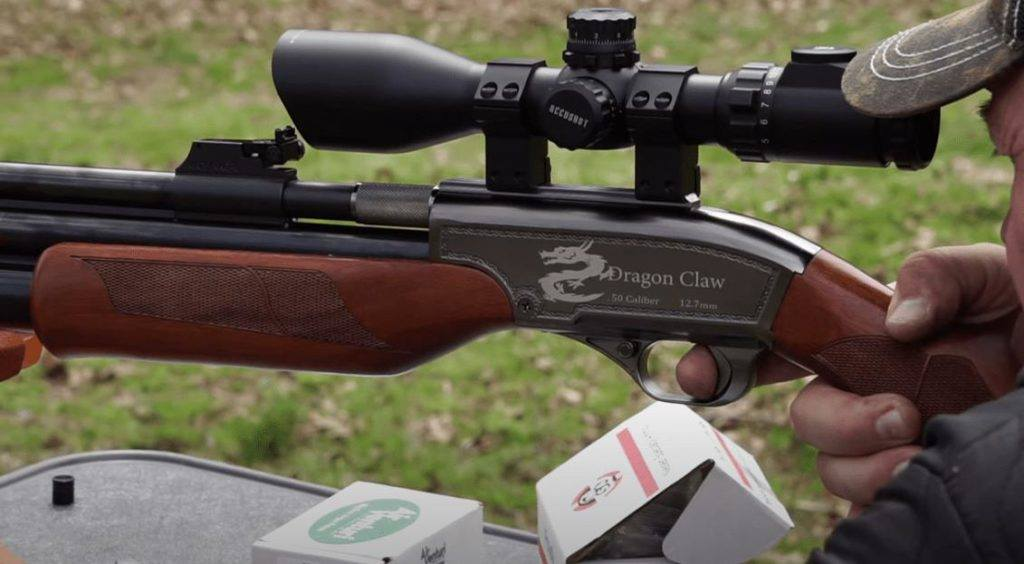
Mention ‘Seneca’, and the greenest airgunners will complete the phrase with ‘Dragon Claw’.
That’s how popular the Seneca Dragon Claw has become.
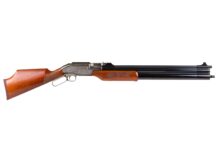
Otherwise, what do you expect with a beast that spits a fiery 230 FPE knockdown power in its .50 caliber?
Other popular Seneca air rifles include:
Seneca recluse Dual Tank .357 cal
Seneca Sumatra
Seneca Big Bore 909 Light Hunter .45 cal
Seneca Wing Shot MKII
Seneca Eagle Claw
Seneca Aspen .25 cal
Seneca Double Shot
Seneca pellets have also mesmerized hunters, shooters, and hobbyists alike.
And so you expect their airguns to be that amazing.
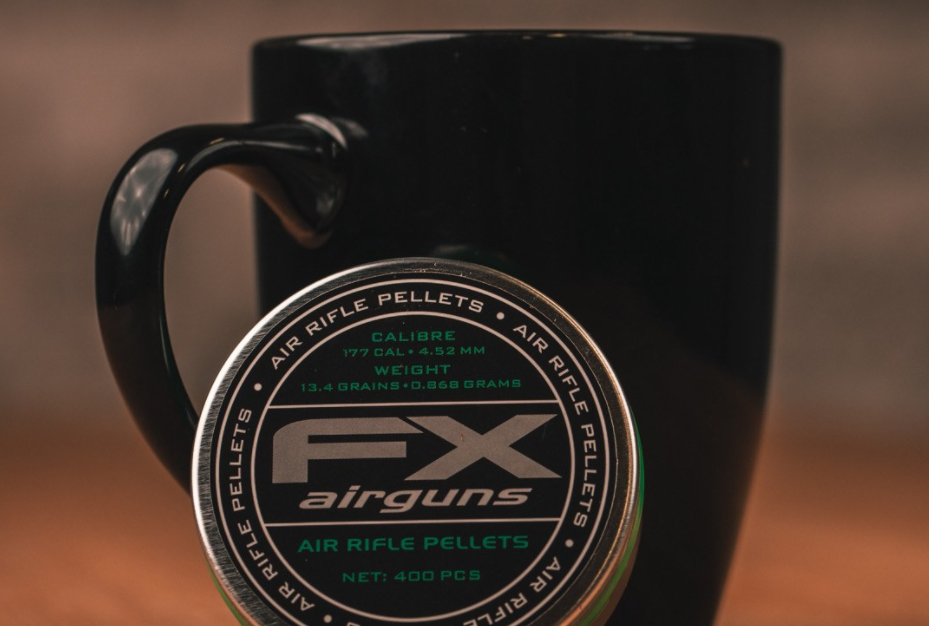
FX Airguns is the brainchild of Fredrik Axelsson, who set out in 1999 to design and manufacture the best airgun in the world.
20 years later, the company now boasts of recognizable brands like:
The Crown MKII GRS Green Mountain Laminate
The FX Maverick Sniper
FX Wildcat MKIII
FX Dreamline Classic
FX Biathlon II
FX Bobcat
FX Boss
FX Royale 500
7. Evanix
Over to South Korea now.
And before bewilderment overtakes you, let’s be sure you are not confusing it with Kim Jong-un’s North Korea.
The current president here is Moon Jae-in.
Evanix is so far the only Asian manufacturer of air rifles on our list. That deserves a thumb-up!
Perhaps you are most familiar with their Evanix Rainstorm II .357 PCP Air Rifle that delivers a crazy 155 FPE enough to knock down the toughest of animals.
The company also became famous for top-of-the-range air rifles like:
Evanix Air Speed
Evanix Hunting Master AR-K6
Evanix Air Max
Evanix Sniper X2
Evanix Rex
Evanix Windy City
Evanix Blizzard S10
8. Umarex
When you buy an air rifle, there is always that inner desire for it to operate like well-known firearms.
Umarex read your mind way before – and that’s exactly what they do.
They ensure they are licensed to build replicas of these firearms to avoid any legal tussles.
Having done this since 1972, be confident that these top products of theirs are worth your time and money:
With now, over 20 years in the Industry, the Tennessee-based company lives its vow of being the world’s number-one producer of the most powerful PCP air rifles.
You really need an AirForce airgun if your aim is big game hunting.
As they say, serious air gun sport starts with AirForce.
2. Hatsan Arms Company
Heading over to Izmir, Turkey, you find the Hatsan Arms Company tucked away in the western end of Anatolia.
Some of its patented technologies that have set new standards in the air gun world include:
Quattro trigger
Shock absorber system – popularly abbreviated as SaS
TruGlo Fiber Optics
Quiet Energy
XRS Recoil Reduction System
Triopad Butt System for reduced recoil effects
Vortex gas piston
Escort semi-auto technologies
Various combinations of the above hi-tech systems have birthed popular air rifles like:
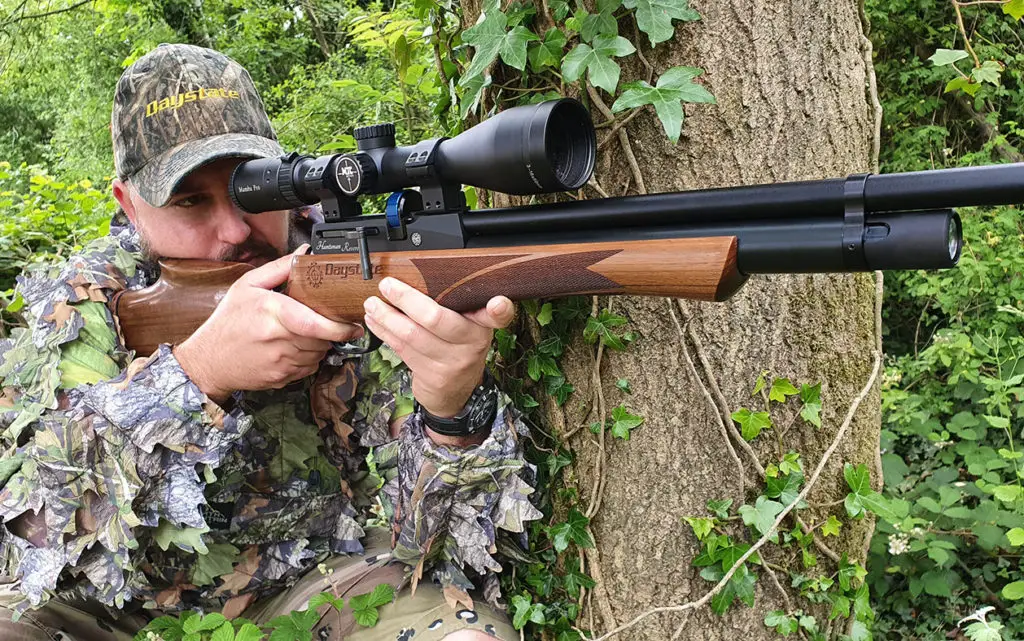
Daystate is a pioneering manufacturer that was the very first to develop pre-charged pneumatic air rifles and had models that date back to the 70s. Their first was an early pest control model called the Air Ranger. In 1980, they were commissioned by the firm Rentokil to produce a rifle for the same purpose. This rifle, the Huntsman, was such a good design, and so popular, that it is still in production today.
Since then they have had a reputation for innovating with original ideas in the airgun field. Today, they are based in Eccleshall, Staffordshire, and produce world-beating guns for a variety of uses including sport, pest control, and competition.
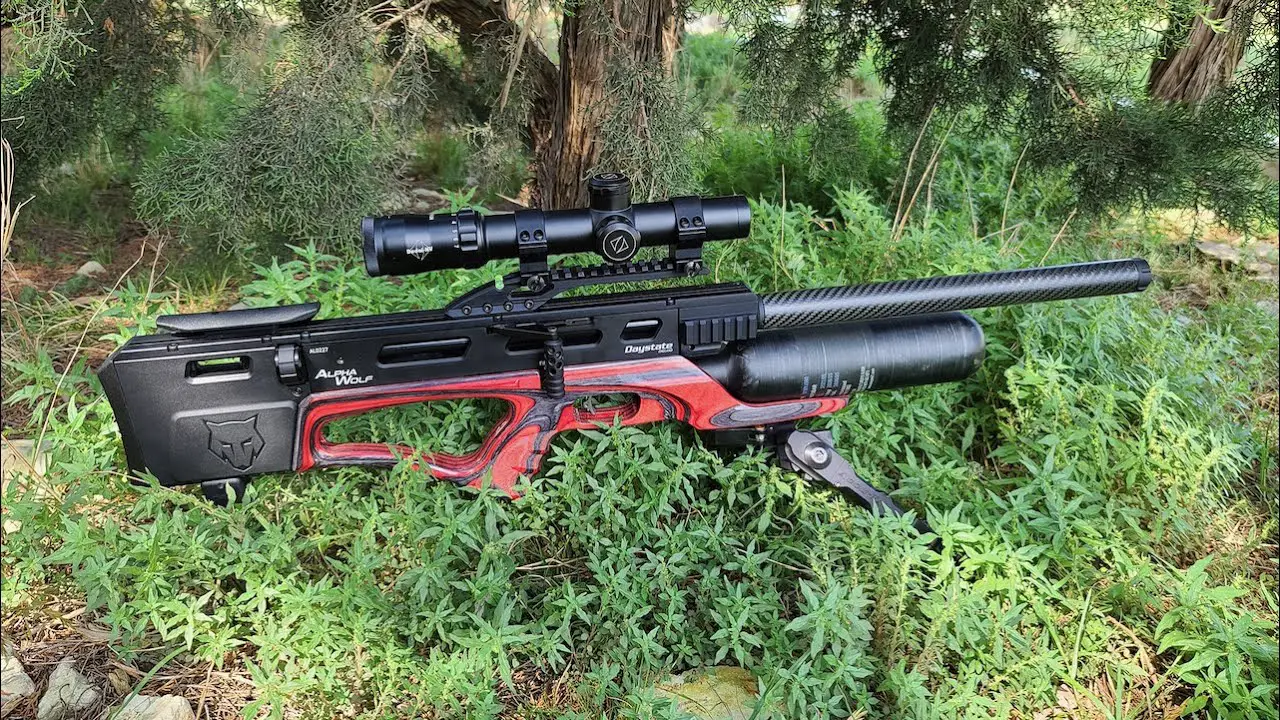
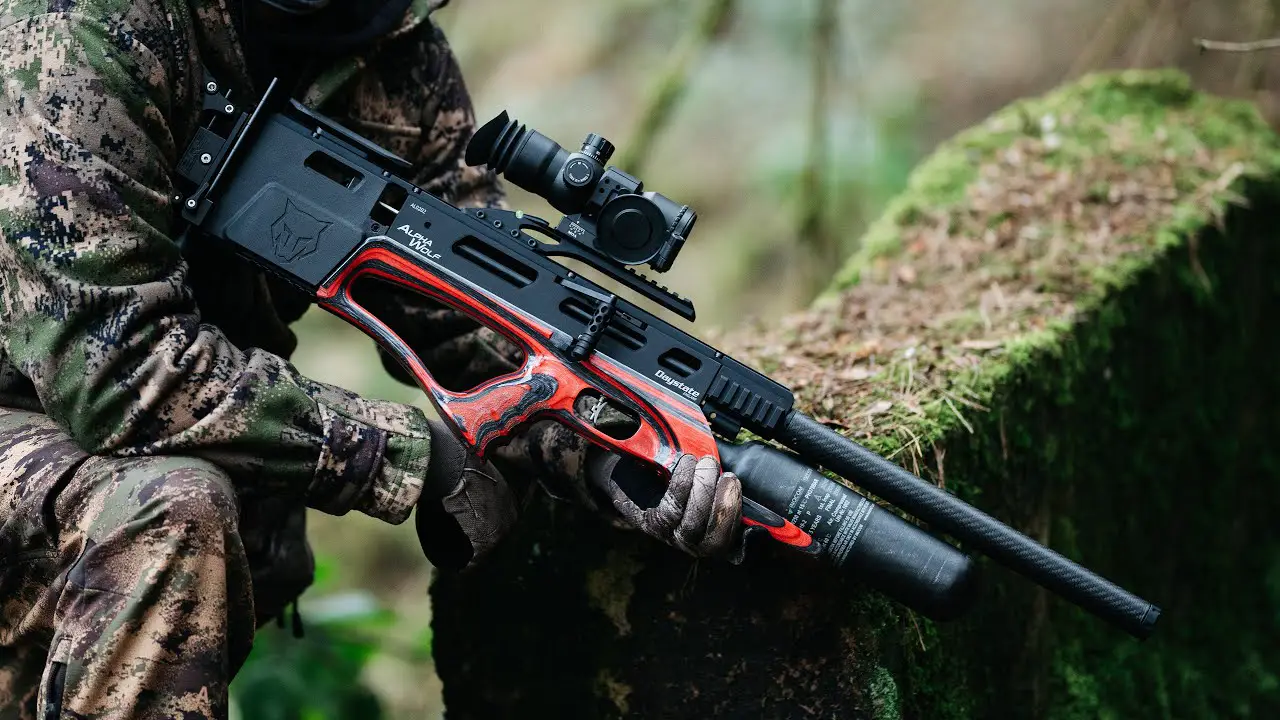
Models like the Daystate Air Ranger, AirWolf, Huntsman, Pulsar, and Daystate Wolverine are some of the most prized among airgun enthusiasts, professionals, and sportspeople.
Their rifles have been recommended by a variety of airgun journalists, including Terry Doe, editor of Airgun World, hunting author and journalist Mat Manning, and Nigel Allen of Airgun Magazine.
Since 2006, Hammerli’s Partnership with Walther of Umarex has led to the production of even more world-class air rifles, thanks to their experience that dates back to the Middle Ages.
Their Hammerli 850 Air Magnum .22 CO2 rifle tops their product list. Airgunners worldwide respect it as the most powerful CO2 air rifle.
Clay has been a Top Ten finisher in the WORLD CHAMPIONSHIP COYOTE CALLING CONTEST® (WCCCC) the last two years running. He has hunted coyotes all over the US. In this podcast, Clay talks in detail about coyote calling techniques in different areas of the US, how to call them, how to set up, and the advantages of using FoxPro electronic calls vs. mouth calls.
Coyote Hunting Basics by Clay Owens
This how to call coyotes video by Clay Owens will give you the basics and have you well on your way to successfully hunting coyotes. Clay Owens is coyote calling Champion and FoxPro field staffer.
Learn how you can go on a predator hunt with Clay for some one-on-one hunting experience. (coming soon)
Why do we hunt predators?
To control their numbers to protect livestock and game.
For their fur.
Because it is fun.
Stand Strategies:
Hunt where the coyotes are. Scout just as you would for deer hunting. Landowners are usually willing to help. Your success will decrease drastically if you are just doing cold sets.
It is very important to have a good vantage point where you can see 360 degrees if possible.
Set up with the wind in your face, or at the very least a crosswind. Make sure you can see downwind however. Coyotes have exceptional senses. They have great eyesight and hearing, but their nose is something you’re never going to beat. 90% of coyotes will try to work the wind and get in behind you.
In some cases, calling with a buddy is critical.
Three things drive coyotes to come in to a call:
Food: Rabbit distress, fawn distress and mouse squeaks are the go-to calls you need in your arsenal. Hear Clay demonstrate in the video.
Fighting: Howling is more difficult. If you’re a rookie, Clay suggests you get yourself an electronic call. Listen to Clay do a location howl on the video. Clay also demonstrates the Female Challenge Howl and a pup distress call with a diaphragm call. Clay also shows us how to use the CS24 FoxPro Electronic call.
Sex
How to call coyotes depending on the season:
Fall: In the fall, pups are receptive to distress calls. The pups are still young, undispersed and hungry.
Winter: In the winter, Clay still starts with distress sounds.
Spring: Spring is when coyotes start to pair up for breeding season. This is when howling becomes more critical. You are appealing to a single male looking for some love, or trying to pick a fight. Sometimes Clay also uses a Pair Howl. Distress calls still work well in the Spring as well.
Clay leaves the coyotes alone in the summer to raise their pups.
Other coyote hunting tips:
Start your calling sequence softly, stepping up the volume gradually.
If you call a coyote to within 100 yards, SHOOT!
Often, they come as a pair or even a pack. After the shot, be quick to get on the pup in distress call to get them to stop.
Clay thinks that there is a big difference in hunting mountain coyotes and plains coyotes. Mountain coyotes are more difficult, in his opinion. He thinks it’s because mountain coyotes have more predators such as mountain lions, wolves, and even golden eagles to contend with, so they are more cautious.
Western vs. Eastern coyotes. Eastern coyotes are a bit bigger, because they have more food available, but Clay doesn’t think that there is much difference in hunting them.
Coyotes come to fight, breed or find food. Learn how to appeal to those needs, and you’ll a successful predator hunter.
Three things you need to master in order to be a successful predator hunter:
1) Good woodsmanship;
2) Learn the behaviour of coyotes and how to handle them as they’re approaching;
3) Practice your shooting.
Clay scouts 75% of the time, and only spends 25% of his time actually hunting. Scouting is super important, as it doesn’t do any good to hunt where there aren’t any dogs. While he is scouting, Clay is in “stealth mode”, and usually in the dark. He likes to run up and down backroads looking for tracks and scat piles. He also likes to stop every once in awhile and howl, patterning an area where they live, and also learning the pack dynamics i.e., is there a dominant male in the area, or a bunch of pups in a big group?…hunting each will be different. While he’s scouting, he is quiet, and tries not to be seen or winded as you looks for sign and vantage points that will make good calling setups. He also takes notes of what direction the wind needs to be blowing from in order to hunt that setup and waits until the conditions are right before hunting it.
If you find a dead cow, or a road kill deer, you know they won’t be more than a mile away from that free meal, so that’s a bonus. When he finds that situation, he calls there “pretty soon”. Coyotes will travel a long way to feed on a dead cow, so take advantage of the opportunity. You may get the chance to hunt coyotes that don’t even live in the area while they’re getting a free meal.
Clay almost exclusively uses FoxPro electronic predator calls. With their calls, you can replicate almost any type of call you need to.
Pack dynamics will dictate your hunting strategy.
If you’re dealing with a family group, he uses more vocalizations as opposed to distress sounds (excluding pup distress). Males will circle to get the wind, and females will charge right in.
Breeding season is late winter, through early spring (January, through early March). They will start pairing up in January, so you’ll start using more vocalizations. Family howling sequences; female single howls; male challenge howls; and female challenge howls. He will often just howl one single time, and then wait ten minutes for them to come.
Calling to an entire pack can sometimes be pretty easy, when you hear them howling. Clay will often just make a “desperate” distress sound for about five seconds, and then wait. If they’re within a few hundred yards, they could be in range in under a minute. If they don’t come, you might try it a few more times.
Clay’s go-to sounds are howling (all variations); rabbit distress; deer fawn distress; any kind of bird distress sound; rodent distress; and one of his favorites is an antelope fawn distress sound.
Don’t start out too loudly. Start with a 30 to 60 second sequence of a super low rabbit or rodent distress calls. Then wait two minutes before starting the next sequence.
Then he will go into two, one minute sequences of mid-volume rabbit distress a minute each, with a two minute break between each sequence.
If nothing has shown up, he might throw in some howling.
The entire setup will last 15 to 25 minutes. Mountain coyotes however, are more cautious, and sometimes take 30 to 40 minutes to come in.
Discover why thousands of people have trusted us with their adventures.
When I first got introduced to the world of rifles, I often thought that a bigger caliber meant better performance.
So, I thought that when it came to choosing an air rifle, I should probably go for the bigger caliber
However, as I learned more about air rifles, I realized that it’s simply not the case! There are various other factors that affect the performance of the rifle.
Keeping this in mind, I started comparing different calibers of air rifles, such as the .22 vs .25 air rifles.
These air rifles are quite popular in the market right now which is why many gunners are confused about choosing either one.
To help you out of this patch confusion, I will be comparing them and their performance. So, read on to find out which one suits your requirements better!
.22 vs .25 Air Rifle: Comparison Table
Field
.22 Air Rifle
.25 Air Rifle
Accuracy
Quite accurate
Somewhat less accurate than other big calibers for long-range
Cost
Cheaper than a .25 air rifle
More on the expensive side
Hunting Performance
Excellent for rabbits, squirrels, pests, like rats
Excellent for killing bigger animals – turkeys, raccoons, and sometimes coyotes too. Also good for squirrels.
Training
An excellent option for training.
Not cost-effective for training.
Power
Less powerful compared to a .25 air rifle
Two times more powerful
Availability of Options
A lot of options are available
Fewer options available
Noise
Slightly less than .25 air rifle
Slightly more in comparison to other small calibers
The .22 Air Rifle: Packed With Performance
The .22 air rifle may sound like a ‘weak deal’ due to its lower caliber when compared to guns with bigger calibers. But, did you know that this .22 air rifle is one of the most commonly bought rifles today? Well, it could be because of various reasons.
For instance, a .22 air rifle can pack quite a performance as it allows you to hold 10 shots in the case of a Gauntlet. Moreover, you can also expect quite consistent shots that are not typically seen in other caliber air rifles. Accuracy-wise too, the .22 air rifle is spot on.
If you’re on a budget, then a .22 is a pretty good option as it comes at an affordable rate compared to heavier caliber air rifles.
Additionally, as this type of rifle usually doesn’t have any sound or recoil, you can also use it for training purposes. This is because you can focus on other important aspects such as targeting, gun handling, and trigger control.
Talking about accuracy, a .22 air rifle can be accurate up to 150 yards or meters.
Lastly, when it comes to hunting, the .22 air rifle can be used for hunting big game. But, as it is illegal, make sure you steer clear of hunting bigger animals. On the other hand, the .22 air rifle works extremely well for hunting rabbits, squirrels, rats, etc.
The one major drawback to the .22 air rifle is that you cannot use it for self-defense.
So, overall, I can say that the .22 air rifle performs extremely well for hunting smaller animals as well as for training purposes and cost-effectiveness.
Pros of .22 Air Rifle:
If you’re planning to buy a .22 air rifle you get plenty of benefits like:
Lighter and easy to handle
Very cost-effective
Excellent for training purposes
Minimal noise
A variety of choices are available in rifles and pellets for .22 caliber
Cons of .22 Air Rifle:
You may face certain limitations if you go for a .22 air rifle like:
Less impact or power compared to a higher caliber rifle
Not efficient for self-defense or protection
It may not be the best for long-distance hunting
The .25 Air Rifle: Packed With Power
On the other hand, if you’re looking for a straight and more power-packed air rifle, then the .25 air rifle is the perfect match for you.
These air rifles give you more power than standard-sized caliber rifles. They’re also lighter than the bigger caliber rifles which are also on the expensive end. Hence, with a .25 air rifle, you’ll get to have a powerful rifle without having to deal with the heaviness.
The best benefit of this air rifle is its stopping power due to the power it packs within. It also offers a flat trajectory.
As for hunting performance, a .25 air rifle has more than enough power for rabbits or squirrels. Besides, it could perform excellently for bigger animals, like a raccoon or even a turkey. It may even work out for coyotes if you’re skilled enough.
The drawback to these air rifles is mostly the lack of variety. For .25 rifles, you may not find many options. Additionally, even if you do, they are more on the expensive side compared to the standard caliber rifles, like .177 and .22.
They may also not be as accurate as other bigger caliber ones at longer distances.
Pros of .25 Air Rifle:
Very powerful with excellent stopping power
Suitable for hunting bigger animals
Somewhat suitable for protection purposes
Less expensive and lighter compared to bigger caliber guns
Cons of .25 Air Rifle:
Not suitable for hunting small animals like rabbits
It may get a bit more expensive compared to standard-caliber guns
Not very accurate at long distances
.22 vs .25 Air Rifle: Which One Is Better?
Now, moving on to the final part which is a .22 or .25 caliber gun, which one is better suited for you? Both of these air rifles have their specific pros and cons as discussed above. Additionally, they are also good for certain tasks. So, to gauge their performance, let’s consider certain factors that will help you make an effective decision.
Accuracy
First of all, let’s talk about the accuracy when it comes to .22 and .25 air rifles. Both of these guns have somewhat similar accuracy when shot at a target.
The only difference between these two is that the .25 air pellets look slightly bigger (due to their increased diameter) on the target. Contrarily, the .22 air pellets leave a smaller mark compared to .25.
Talking about hunting, both .22 and .25 air rifles are well-suited for specific targets. For instance, the .22 air rifle is excellent at targeting and hunting rabbits and squirrels. You can also use it for killing pests like rats easily. Hence, it is useful for small hunting games in comparison to a .25 air rifle.
On the other hand, as .25 air rifles are on the heavier and more powerful side, these rifles are better for targeting bigger animals, such as raccoons and turkeys. You may use them for hunting squirrels too.
If you have no option, you can also use these rifles for protection and self-defense purposes.
Power
You may already know by now that a .25 air rifle packs a more powerful shot. In fact, it is almost two times more powerful and impactful compared to a .22 air rifle.
According to a test conducted, the maximum muzzle velocity delivered from a .22 Gauntlet was around 22.2 Ft/lbs whereas that of a .25 was around 45.81 Ft/lbs.
So, if you’re solely focused on getting a more powerful air rifle for hunting, then the .25 is an ideal choice .
Noise
The shooting noise from the .22 and .25 air rifles is quite similar and not very loud for backyards. However, keep in mind that a .25 air rifle may make a louder noise compared to a .22 air rifle. This could be because of high-pressure air observed in .25 air rifles.
Along with the caliber, the type of PCP is also a factor to consider when it comes to noise. If you have a powerful PCP with a .22 caliber, it may produce a louder sound.
Variety of Options
The .22 air rifle has been popular from time immemorial. Due to this reason, you will find an array of options for this caliber.
Contrarily, the .25 is not as popular as the .22 air rifle. Hence, there are limited options available in the market for this type of rifle.
Price
If I compare the prices of both .22 air rifles and .25 air rifles, then you’ll find that .25 air rifles are definitely more expensive. According to the prices compared, the pellets of .22 air rifles cost nearly about 4 cents whereas, for .25 air rifles, it is 5.3 cents.
Additionally, most of the .25 air rifles cost more than $300, so if you want anything below it, it is better to go for a .22 air rifle.
Frequently Asked Questions:
Which Is Better For Squirrel Hunting: .22 Air Rifle Vs .25 Air Rifle?
Both work well for squirrel hunting. However, due to its higher power, a .25 air rifle can knock out a squirrel immediately whereas a .22 one may take time. You can check out a video here for a better understanding.
Which Is More Efficient At 100 Yards Test: .22 Vs .25?
At the 100-yard test, you may think that .25 might have a higher BC or ballistic coefficient. However, it is noted that .22 drops less and has a higher BC.
A higher BC helps in deflecting the air resistance and reducing the drag. So, the bullet speeds through the air faster and further. Hence, you may say that a .22 is more efficient in a 100 yards test against a .25 rifle gun.
Final Verdict: Which One To Choose .22 Air Rifle vs .25 Air Rifle?
To conclude, let’s see which caliber rifle is more suitable for you.
You can go for a .22 air rifle if:
You want an inexpensive option.
You want it for training purposes.
You have a small hunt game, like hunting squirrels, rabbits, etc.
Contrarily, you can go for a .25 air rifle if:
You can spend over $300 (approx.)
You want to hunt bigger animals like raccoons.
You want a more power-packed gun rather than overall performance.
Hence, depending on these criteria, choose between .22 vs .25 pellet guns. I’m sure once you understand your requirements and compare them with this guide, you’ll get a better understanding of what to buy.
The freshwater drum (Aplodinotus grunniens) is a common fish found across much of the United States as well as parts of Canada and Central America. Also known as “sheephead,” this fish is unfortunately derided as a “rough” or even “trash fish” by some. Yet the freshwater drum is an eager biter that can put up a good fight when caught on rod and reel.
Drum get their name from the croaking or drumming sound they make. Drum species that dwell in saltwater like the red drum are very popular fish. Red drum are widely sought after for both sport and table fare. While those drum are popular game fish, the freshwater drum is mostly ignored. Since the fish are similar in so many ways, I don’t really have an explanation for that.
An average freshwater drum
In the early stages of life, immature freshwater drum are a food fish for many predators. As they grow they can take on enough size to put them out of range for all but the largest of predators. In most of their range freshwater drum commonly reach weights of 1 to 5 pounds (0.5-2.26kg). They can also get much larger than that. The world record freshwater drum weighing 54 pounds 8 ounces (24.7 kg) was caught in Tennessee’s Nickajack Lake back in 1972. Freshwater drum can live quite a while too. Some drum in the upper midwest have made it passed 70 years of age.
I’ve caught a lot of freshwater drum from Pennsylvania to Kentucky. Most were under five pounds, though a select few were much bigger than that. They were usually incidental catches that come when I am fishing for another species or no species in particular. I’m never disappointed to catch a freshwater drum in any case. Some of the larger drum I’ve hooked into were actually quite memorable.
How to find and identify the Freshwater Drum
Freshwater drum are deep bodied fish. They vary in color from a bright silver to a deep bronze reminiscent of smallmouth bass. They have a rounded snout and a long dorsal fin that stretches almost all the way back to the tail. The freshwater drum resembles the red drum in some ways, but the freshwater drum has a much deeper body and lacks spots.
The freshwater drum has a wide range that may not have been accurately defined yet. For example, the state record freshwater drum in Virginia was caught in Buggs Island Lake (also known as John H Kerr Reservoir) in 2018. That body of water down on the North Carolina border is well out of the range shown on most of the freshwater drum range maps I’ve been able to find.
Freshwater drum can be found from Canada down to Guatemala. The fish live at least as far east as Vermont and as far west as Montana. They’re common throughout much of the Mississippi River watershed and several great lakes including Lake Erie, Lake Huron, Lake Ontario, and Lake Michigan. They’re abundant in rivers like the Green, Ohio, Monongahela and Wabash. They are also common in a lot of smaller streams like Redstone Creek, Ten Mile Creek, and Pike Run in Pennsylvania.
Sheepshead will often come in shallow to feed and reveal themselves. You can also see them in some slower moving clear rivers and streams. So freshwater drum are usually not difficult to locate; and you can even sight fish for them at times. Yet they can also be present yet out of view. It’s pretty common to catch these fish when going for other species like catfish in muddy waters.
How to catch Freshwater Drum
Before I tell you about catching these fish, I want to let you know that I may earn commission when you make purchases through links on this page. This commission helps support my website, but it does not influence what I write. I only recommend products that I have found to be effective.
Freshwater drum are opportunist feeders. They will eat everything from small aquatic nymphs to minnows and crayfish. They can be caught on everything from flies like the San Juan Worm to lures like the Original Floating Rapala.
This big drum took a nightcrawler
That said, live bait is undoubtedly the most effective if you are looking to catch freshwater drum specifically. Most of the freshwater drum I’ve caught over the years took red worms or nightcrawlers. The bait was either drifting naturally with the current or held on the bottom with a sinker. Based on my experience with these fish, I am doubtful that anything would work better. Minnows can work, but drum seem to key in more on easily available worms.
Of course other things do catch freshwater drum. When it comes to flies they seem to be especially partial to the Clouser Minnow which they likely mistake for a crayfish. I’ve also seen them go after small nymphs tied competition style on jig hooks.
Freshwater drum will also attack small jigs like Lindy Little Nippers and Road Runners fished on spinning gear. Especially if they are tipped with maggots or wax worms. As any carp angler can tell you, freshwater drum will also eat doughball too.
Lures that look like Freshwater Drum
As I mentioned above, a lot of fish dine on young freshwater drum. Some very large predators may even attack larger drum later in life. Where legal, some anglers cut freshwater drums into strips and fish the meat as cutbait. This can work well for blue catfish and large channel cats. For most other predator species a lure that looks like a freshwater drum would be more effective.
I don’t know of any lures that are made to look exactly like a young drum. Yet there are many lures available that resemble small freshwater drum in one way or another. Lures with deep bodies, silver or bronze colors, and rattles come close to the real thing. Those are the lures I would look to if I found predator fish keyed in on immature drum.
The Carp RT Jackall Gantarel Jr resembles a freshwater drum
Both the Silver Rapala Rap-V and Chartreuse Olive Spro Little John Crankbait look enough like young drum to fool predator fish. They both put off sounds too, which could resemble the croaking noises that freshwater drum actually make. In any case both of these lures catch fish. Of course there’s no way to be sure what the fish think these lures are when they grab them. It may very well be that they are simply acting out of predatory instinct, though some colors absolutely outfish others at times.
If you’re looking to really replicate a freshwater drum you might want to consider the Jackall Gantarel Jr swimbait in “Carp RT” color. I haven’t fished with this lure yet, but it looks more like a freshwater drum than any other I have ever seen. I don’t think they were meant to resemble drum at all, but in terms of overall shape and even shade these things are right on the money. I wouldn’t hesitate to try one out anywhere I knew that fish were feasting on young freshwater drum.
Kanawha Falls offers anglers a chance to catch different kinds of fish and plenty of them.
That’s according to Mark Scott, assistant chief fisheries biologist in Charleston, urges anglers to head for Kanawha Falls at Glen Ferris near Gauley Bridge.
“The New and the Gauley rivers come together to form the Kanawha River,” he says. “The falls serve as a barrier to the upstream movement of fish species. It’s a very productive section. Water quality is excellent.
“The fish come up and congregate at the base of the falls, where there’s a good food supply and excellent forage, including numerous minnows and crawfish and other aquatic insects.
“Some of the largest records and trophy fish come from this area.” The fisheries biologist adds proudly, “We recently measured a walleye that was 33-and-one-quarter inches long and weighed 16 pounds. The existing state record was caught at Kanawha Falls in 1976. We have a length record and a weight record was taken from there.”
In addition, Scott says, striped bass and hybrid striped bass records both came from the Kanawha Falls.
The falls area has produced some nice muskies in the 40-inch class. “We stock the area with fingerling musky too on an annual basis,” Scott says.
Here are some other popular area waters for fishing:
Tailwaters of the Bluestone Dam, including the area below the dam extending down to the State Route 3 bridge. “It’s a popular area for wading and using small Jon boats,” Scott explains.
“The water is shallow. Wading along the banks of the river is productive, and bank fishing is good. There’s access for small boats too.”
The tailwaters are popular for smallmouth, flathead catfish, channel catfish, panfish (rock bass and bluegills), and it also produces large carp, according to Scott.
The DNR fisheries biologist also recommends that anglers try a canoe float trip on the Greenbrier River from Caldwell near Lewisburg downstream to Ronceverte.
“It provides exciting fishing for smallmouth bass and rock bass,” Scott says.
Another spot that is teeming with fish is Hawks Nest Lake, a 250-acre impoundment on the New River.
“It produces excellent fishing for smallmouth bass, spotted bass, crappie, panfish, channel cats, flathead cats, and striped bass hybrids,” Scott says emphatically.
Popular artificial baits for Hawks Nest include various color jigs, crankbaits, and spinners, but all species seemingly are attracted hellgrammites, large creek chubs, minnows, lizards (salamanders), earthworms and nightcrawlers.
And if you are looking for thrilling trout-fishing adventures this fall, chances are you will not have to travel far to find them.
They are waiting for you in the cool limestone waters of southeastern West Virginia. In fact, some of the most famous trout waters in the Eastern U.S. are limestone streams. And they extend all the way from upstate New York to West Virginia.
Folks in the Mountain State can take a measure of pride in knowing that sinking spring creeks of the Greenbrier River Valley contain water quality, aquatic insects, and well-oxygenated chilly water like the larger limestone streams found in the Northeastern U.S.
These limestone streams run underground. When streams do suddenly appear, they provide a mystical experience for anglers—especially those who pursue their prey under catch-and-release, fly-fishing only regulations.
“If you’re in the area and plan to go fishing, you owe it to yourself to try one of these ghost streams,” said Scott. “They’re cool, limestone-enriched underground waterways that create ideal habitat for trout.”
Hatcher, meanwhile, has other ideas when it comes to fishing. He has caught more than one hundred trophy-size channel catfish on chicken livers during the past 15 years.
He has nailed forty smallmouth and largemouth bass citations during the past five years at Stephens Lake, Sandstone Falls and Summersville Lake.
The resolute angler caught twenty of the citation-size bass last season.
Hatcher’s philosophy of fishing is simple: “Stay at it. You cannot catch them if you are on the couch.”
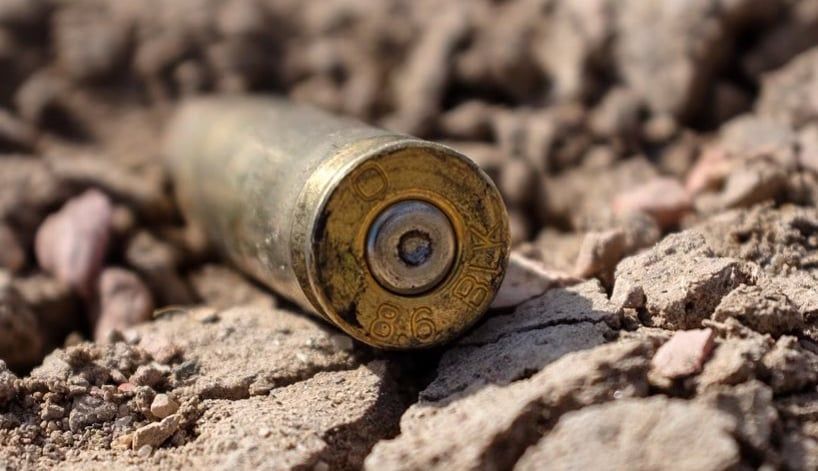
We recently sat down with Q’s Kevin Brittingham to get an update on the highly anticipated launch of 300 Blackout’s “bigger brother” – the 8.6 Blackout. Our last update on the round was in February 2020, just before the pandemic. While we recently released the full audio of the conversation, we wanted to pull the highlights of that recording as it pertains specifically to 8.6 Blackout, and where it stands as we enter the summer of 2021.
EDITOR’S NOTE – Our January 2022 Update on the status of 8.6 Blackout with Kevin is now live on ARBuildJunkie.com.
Kevin Brittingham, Q – It would be in production if it were not for the whole ammo crisis. We have production brass now. We are making millions of shells and now it’s a matter of loading time at Hornady, and some others. Primers and powders are also becoming a problem. But we have the cartridge squared away. It’s going to cost about what a 6.5 Creedmoor costs…before COVID, that was $1.10 to $1.20 a round.
8.6 is still a 6.5 Creedmoor shortened case, blown out for a .338 bullet…For supersonic, the lightest bullet is going to be between 150 and 160-grain. Out of a 12″ barrel, we’ll be able to get somewhere close to 2,400 feet a second with that. We’ll have subsonic up to about 360 grain.
One of the first two offerings of this for supersonic is going to be a Barnes 210-grain bullet. It’s about 2,000 feet per second out of a 12″ barrel. It’s a 1-3 twist, so we’ve settled on the twist. We’re using some of the energy that is wasted, converting that to kinetic energy now by spinning the bullet faster. So in supersonic, it is more kinetic energy on target by spinning the bullet fast.
Discreet Ballistics did a great video that did a split screen where the only difference is that one is a 1:7 twist and the other is a 1:3 shooting gelatin. You can see that the 1:3 is two to three times the initial wound cavity…same muzzle velocity, same barrel length. Everything was exactly the same.
Fast twist also gives you the big, long, slow subsonic bullet. It gives you several things. The first being better accuracy because when the bullet is long and slow, you need to spin it faster. For expanding subsonic bullets…it is more reliable expansion at lower velocities, which is great for hunting with subsonic. This is going to be the first subsonic, sub-MOA cartridge, and that’s due to the fast twist. You’ll be able to shoot groups at 300 meters that are sub-3″ with the subsonic…the first offering in subsonic will be a 300-grain Sierra Match King 338 bullet, loaded to 1,050 feet per second out of a 12.5″ barrel.
After that will be the target supersonic and the expanding subsonic. It will go from there, and you’ll see other manufacturers as capacity opens up…Basically, the way to describe (8.6 Blackout) is that it is double what 300 Blackout is. It’s double the range. So, if you are comfortable with shooting a deer at 150 yards with a Honey Badger, you can shoot at 300 yards with a 12.5″ 8.6. It’s super quiet in subsonic as well. We’ll offer two silencer lengths, a short one for hunting and a full-sized one as well.
Another advantage of the lower velocity supersonic is it’s incredibly quiet as a supersonic when the bullet is going 2,000 to 2,400 feet per second, compared to something shooting 3,500 feet per second or something like that.
Q: My brother built a .338 Federal AR for hog hunting and he raves about it. Can you address to readers who might ask why not simply choose .338 Federal?
Kevin Brittingham, Q – Let me use .260 Remington vs. 6.5 Creedmoor as an example. .260 Remington is a great cartridge, and it really spawned 6.5 Creedmoor, which everyone knows is incredibly popular. The reason .260 didn’t become popular and 6.5 did is because the .260 case is too long. .260 was originally a 110 or 120-grain bullet. If you load a 140 or 150-grain bullet, it doesn’t fit into a magazine or into a short action if you seat the bullet correctly.
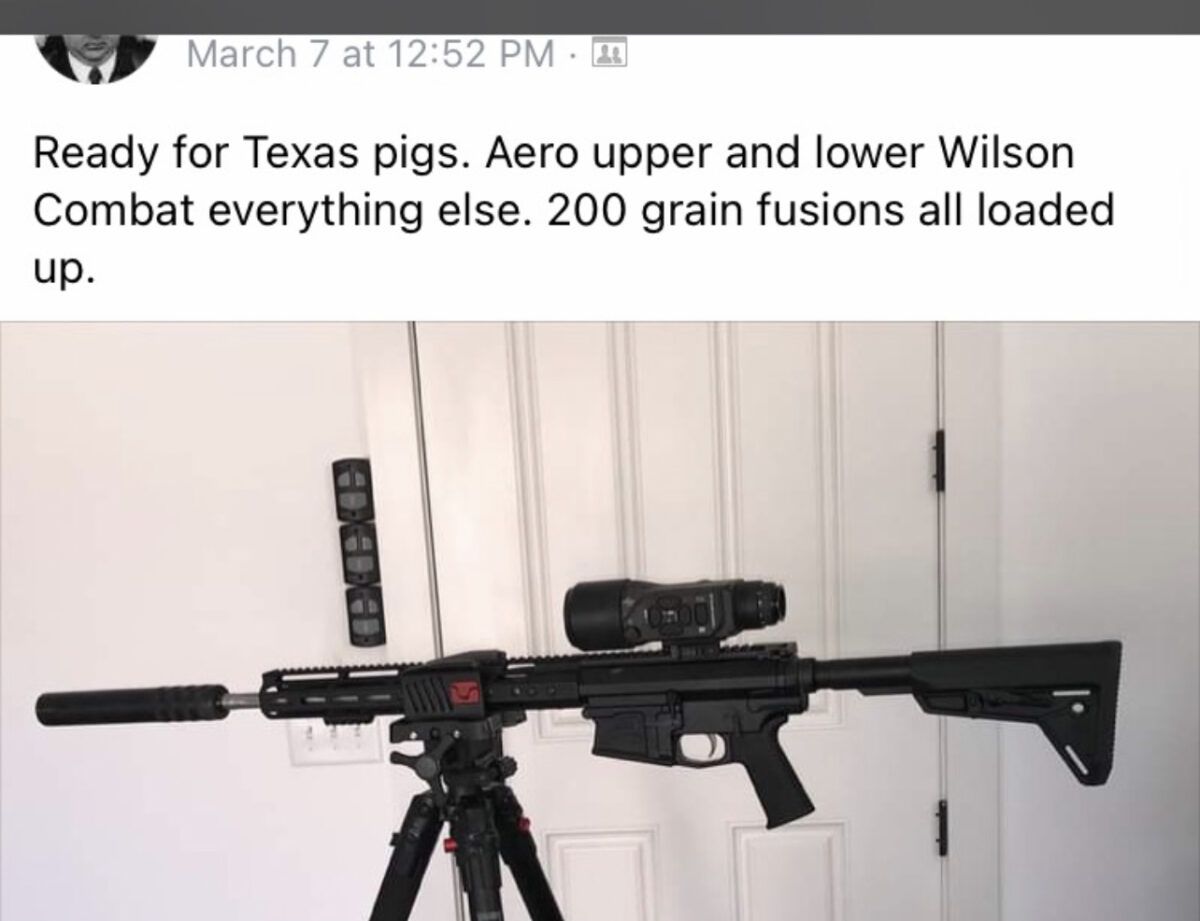
.338 Federal AR built by author’s brother for hogs. VERY effective…
So, they shortened up the case, used different powders, a different shoulder, made it more efficient, and you can get almost everything out of a 6.5 Creedmoor that you can get out of a .260, and with a big, long bullet, you can seat it correctly in the throat, and you can get full performance. You can’t do that with a .260. The case is too long.
After we did 300 Blackout, Ethan and I did a few guns in .338 Federal, Model 7s…The problem with that is if I want to load a 300-grain subsonic bullet and seat it correctly…you don’t get all the efficiency. So, you’re limited on your subsonic and your big, supersonic bullets.
With that being said, .338 Federal, inside 300 meters is superior to .308. It’s an incredible cartridge. But if you want subsonic capability, and you want to load big, long bullets supersonic and subsonic, and you want to fit them into a magazine, you have got to shorten the case. So, we didn’t do it to be different. We wanted to start with .338 Federal, but you can’t get everything out of it – have full mag capacity, long bullets, have it cycle in a gas gun, and fit into a short action.
People ask about 375 Raptor…it does not work full mag capacity in a gas gun super and subsonic. You can’t feed it in an AR reliably. It may be enough for people who tinker or are not serious about it, but it could never be a military cartridge. We’re trying to cover as much as we can with this.
Q: Where do we stand on an 8.6 gas gun currently? I recall a mention of using a POF-USA Revolution as a start, or something similar?
Kevin Brittingham, Q – Since we spoke, the owner of POF was killed. So, that’s kind of dead in the water. I do need to reach out to them. We’re going to get some of those guns and do it ourselves…8.6 in a 9″ is way more effective than 300 Blackout. We can build a 9″ gas on their Revolution or Rogue or whatever they call their gun, that weighs almost what our Sugar Weasel weighs…and you’d have twice the capability.
So, we’re not currently working on it, but we have prototype guns. The very first one that we did was a Noveske. It cycled at full mag capacity super and subsonic, and locked open on the last round.
This isn’t just a bolt gun cartridge, or a subsonic cartridge, and it’s not just a super. It’s all of it, just like 300 Blackout, barrel change only.
But, yeah, there will be gas guns. That was a huge consideration in the development of this. The first things you’ll see are probably barrels offered, or we’ll build The Fix in a 12.5″ as a pistol or SBR. Eventually, we’ll have 16″ barrels available as well for our rifle. Whether it’s SAAMI-approved or not, we’ll share the chamber drawings and everything where people can build barrels for Remington 700s and also Stoner-based guns (AR-10s and SR-25s)
We may also have a gas gun that is available in it as well. Initially, we’ll partner and support companies like Noveske, LWRC…Todd Huey of Lone Star Boars has a 12.5″ LWRC. He’s a good testimony to the Barnes 210-grain. He called me and said he shot a pig with it and he had never seen what he saw. He described it as basically he hit this pig, and it did a flip.
The very first animal I shot was a white-tailed doe in south Texas. I shot it at about 50 yards with The Fix with a 12.5″ barrel and the Barnes 210, she was broadside, and it also did a flip. I could send you a picture of the wound. It’s horrific.
Q: Let’s wrap up with timing…
Kevin Brittingham, Q – I have no idea. I’ll say we’ll be getting the first million shells in here pretty soon. We got the first production run of shells here last month. Powder and primers are the problem.
So, the first 100,000 rounds and maybe the first million will be utilized for marketing, and this year, you’ll see ammo available. There are loading dies available through Hornady now. You’ll see shells, brass available. We stopped at a 1:3 twist so you can use current Barnes .338 bullets. All the bonded bullets that we’ve tested so far…a non-bonded bullet will come apart out of the muzzle with a 1:3 twist, but bonded and solid coppers that we’ve tested stay together out of the muzzle. We’re going to put out load data, chamber drawings, all of that stuff.
As production capacity becomes available with Hornady, Discreet Ballistics, Gorilla, and some of the other companies, you’ll start to see ammo available. This year, we’ll also have barrels for the Fix available, and we’ll also have gas gun barrels available, or you’ll see drawings and us partnering with those gas gun companies, and they’ll be able to do it. But, considering the state of ammo in the industry right now, what you’ll probably see is people that who are into it will probably have to load most of their own ammo.
The Tennessee turkey hunting season is almost approaching, and hunters are preparing for an exciting and fulfilling day in nature. The Tennessee Fish and Wildlife Commission changed the season, so hunters must be informed of the new rules if they want to help protect the wild turkey population in the state. The modifications include a later start date, a smaller bag limit, and limitations on when birds may be collected. Despite these modifications, hunters can still anticipate a thrilling season filled with chances to put their abilities to the test and forge relationships with the natural world. This article will examine the seasons, permits, bag restrictions, and other rules for a productive turkey hunting season.
Tennessee Turkey Season 2024
A few changes will be made to Tennessee’s next spring turkey shooting season in 2024 to help the state’s wild turkey population. The season will begin two weeks later than in prior years, and the bag limit has been decreased from three to two birds. The fact that just one of such birds may be captured during the first seven days of the season should also be noted by hunters. The regular season will start the next month and last until the month after the Young Sportsman Hunt, which will take place statewide in that month. With these changes, hunters will be able to enjoy the thrill of turkey hunting while also helping protect the state’s wild turkey population.
TN Spring Turkey Season
Spring Turkey SeasonStart DateEnd Date Young Sportsman8-Apr-239-Apr-23 Shotgun/Archery15-Apr28-May-23
TN Fall Turkey Season
Fall Turkey SeasonStart DateEnd Date Archery24-Sep28-Oct Archery31-Oct4-Nov Shotgun/Archery15-Oct28-Oct
Bag Limits
TN Turkey SeasonBag Limit Spring1 bearded turkey per day Fall1 bearded turkey per county
Bag Restrictions
Spring Turkey: Hunters may take one bearded turkey every day during the spring turkey season, with two bearded turkeys taken throughout the whole hunting period. Only one of the two turkeys, however, can be a Jake. (a male turkey with a beard shorter than 6 inches). The presence of white banding on the wing feathers, tail feathers the same length, a beard longer than 6 inches, or spurs that are at least 1/2 inch long are indicators of an adult gobbler that is legal to harvest. It’s crucial to remember that every turkey taken during the Young Sportsman Hunt counts against the two-turkey quota for the spring season.
Fall Season: In the counties of Bledsoe, Bradley, Crockett, Dyer, Giles, Haywood, Lake, Lauderdale, Lawrence, Lincoln, Loudon, McMinn, Monroe, Polk, Shelby, Tipton, Unicoi, and Wayne, hunting for turkeys in the fall is not permitted.
Turkey Licenses
In Tennessee, you must possess a Sportsman or Hunting and Fishing Combination license and a supplementary license, which varies depending on the hunting gear you use. The complete list of turkey hunting permits is available on the tn.gov website.
Hunting Regulations
Tennessee’s spring statewide turkey season allows shotguns with No. 4 shot or smaller, longbows, recurve bows, compound bows, and crossbows. Night vision, infrared, and other artificial light equipment are restricted; however, scopes are permitted. During the season, hunters may utilize Airbows to fire arrows.
Hunting is only permitted from 30 minutes before dawn until legal dusk.
Turkey’s hunting prohibits rifles, pistols, electronic calls, live decoys, and ammunition bigger than No. 4 shot. Baiting is prohibited. Dyer, Haywood, Lauderdale, Obion, Shelby, and Tipton restrict boat-based turkey hunting. The General Regulations list forbidden activities.
Tennessee spring turkey hunting has these restrictions. A licensed hunter may help a permit holder but cannot have turkey hunting firearms. A 21-year-old non-hunting adult must accompany young Sportsman Hunt participants. Public land-hunted turkeys count against statewide bag limits and must be intact until tagged and turned in. WMAs prohibit turkey farming.
Some Wildlife Management Areas (WMAs) limit turkey hunting dates or quotas. All WMAs restrict turkey calling from March 1 until spring turkey hunts.
An adult gobbler must have one of these: a beard longer than 6 inches, equal-length tail feathers, a spur at least 1/2 inch long, or wing feathers with white barring to the tip.
It seems that the wood duck’s survival strategies include behaving far differently than typical dabblers, thereby eluding hunters who cling to conventional tactics. Woodies show far greater ambivalence toward decoy spreads, they’re less tolerant of habitats near civilization, and their haphazard use of creeks and river systems complicates scouting efforts. However, with the right plan, ample opportunities exist to bag these strikingly handsome, challenging ducks. Here are five tricks.
Scout Covertly The best places to find wood ducks include beaver ponds, sloughs, forested backwaters and oak-lined portions of creeks. In the southern United States, flooded timber and swamps along river systems are especially productive.
Your goal is not only to find the birds, but to avoid detection. Wood ducks are known to vanish when disturbed, even if not by gunfire. So, approach suspected haunts with caution and use your ears. Woodies tend to be especially vocal on the water, and their contented squeals and chuckles are all the confirmation you need to plan a hunt. Their preferred habitats provide an advantage in this regard, as the surrounding trees allow you to creep along creeks and swamps while remaining hidden.
Tailor the Spread Finding the ‘X’ is critical, as decoying passing wood ducks (i.e. running traffic) can prove a frustrating endeavor. Wood ducks will decoy, but they’re not wont to do so well outside the vicinities of their intended destinations. Set up where the woodies want to be, and use your decoys to fine-tune their approach.
A small spread of about a dozen decoys is typically all that’s required. Don’t bother with a traditional ‘U’ or ‘J’ formation, as woodies frequently buzz the decoys without circling or regard to wind direction.
However, do ensure your spread consists mostly or entirely of wood duck decoys. While most dabblers will decoy to mallards, wood ducks much prefer to flock to their own species. I like to place a dozen woodie decoys upwind of the blind, with a spinning-wing decoy or small jerk rig in between. Motion is critical, both for visibility’s sake and because decoys amidst slack water scream fraudulence to wood ducks.
As a final touch, I position wood duck decoys closer to cover than I do mallards. I believe it’s a more natural setup, but it’s a fine line, as decoys hugging the shoreline are less visible.
Call ’Em In (Yes, you can) Rarely I’ve witnessed fairly distant wood ducks turn and coast in on cupped wings to calling. Far more often they maintain course, but if one time out of 50 calling wood ducks works, why wouldn’t you keep a dedicated squeal call on your lanyard?
Ideally, of course, you are where the wood ducks want to be. In that event, crisp chatter simply lets the wood ducks know where you are.
There is one time, however, that wood ducks respond to calling better than mallards: when they’re on the water. Woodies frequently paddle in like aquatic turkeys to squeals and chuckles. Once they’re lured in range, just stand and flush them from the water for a sporting shot.
Jump-Shoot Midday Wood ducks are among the most susceptible species to jump-shooting, particularly at midday as they loaf along forested creeks. Quietly walk or canoe the creek, readying yourself at every bend for unseen birds.
If you have a partner, all the better. Position him or her downstream, as wood ducks tend to follow the water as they flee an approaching hunter, thereby providing superb pass shooting.
Limit Pressure For whatever reason, many hunters like to invite several buddies for early season wood duck hunts. If your goal is shooting a few wood ducks and moving on to mallards for the remainder of autumn, by all means take advantage of the opportunity. However, know your spot won’t likely produce thereafter. Wood ducks are extremely sensitive to pressure.
The smarter approach is inviting one buddy, shooting a couple drakes and sneaking out. Thus your honeyhole is preserved and you aren’t back to square one.
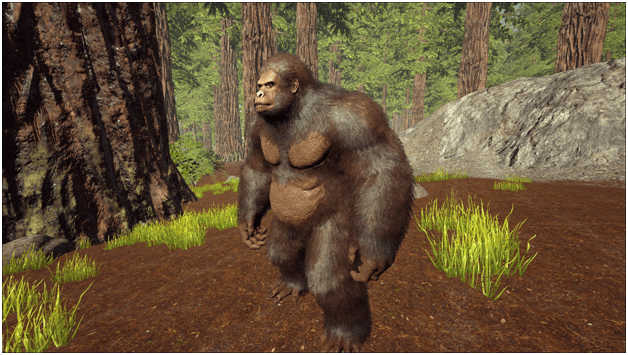
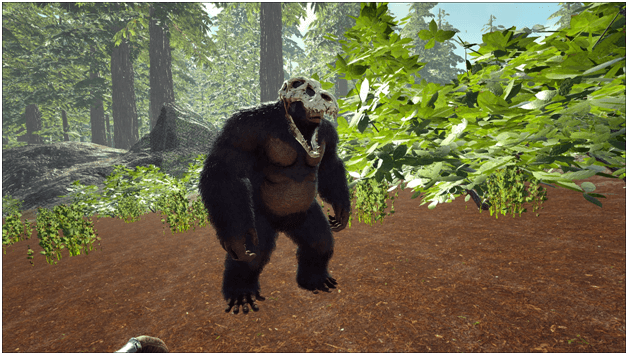
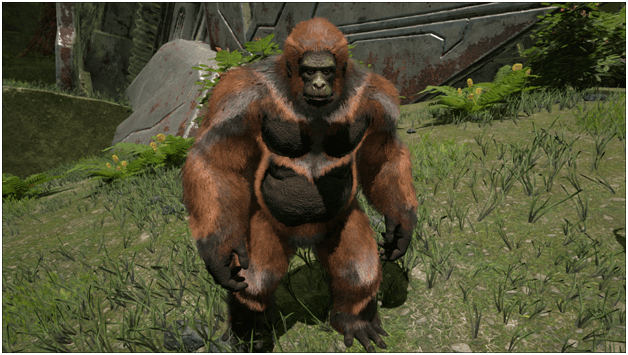
The Gigantopithecus Fibrartor is a territorial herbivore that appeared in the Pleistocene epoch.
It can be mistaken as another human due to it walking upright, it is usually seen roaming about foraging for berries to eat.
Territorial in nature, this beast will aggressively attack humans that invade its personal space.
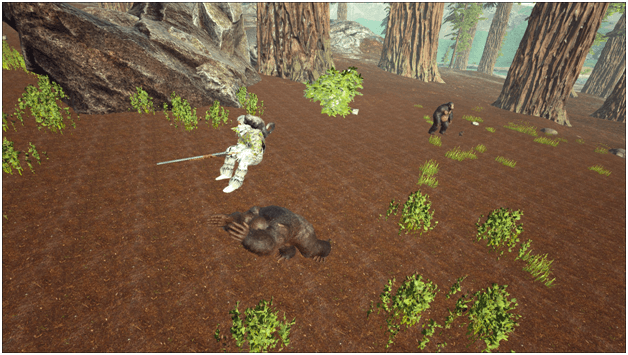
It can give an advantage to its rider by crossing obstacles or by throwing them across and even up cliffs or walls.
Dossier
Dossier Summary
The Gigantopithecus while being observed is docile and just forages berries all day, but when approached, it is extremely territorial and will attack relentlessly those who invade its space.
While Gigantopithecus are adept at picking berries, they can also be taught by their masters to harvest fibers from bushes as it enjoys picking from plants and bushes over most activities.
One of the advantages of having a Gigantopithecus is its ability to toss survivors which can be used strategically to get to hard to reach places.
Check Out Our Other Creature Guides
Shinehorn
Yutyrannus
Megatherium
Mesopithecus
Abilities
Throw Rider
The Gigantopithecus can throw its rider or small dinos great distances or heights.
Throw RiderDefault Controls:
RMB (for PC)
LT (for Xbox)
L2 (for PS4)
Throw Carried DinosDefault Controls:
Press Hold C (for PC)
Right Stick (for Xbox)
Right Stick (for PS4)
Uses
Resource Harvesting
Being adept at harvesting from bushes and plants, the Gigantopithecus can gather a good amount of berries and even fiber.
Defender
Being able to wear helmets, these creatures have a good amount of defense and their base damage is good enough to damage attacker as well as the knockback from their attacks can push away threats.
Damage Dealer
The Gigantopithecus can deal a lot of damage to enemies due to their fast attacks as well as their ability to catch up to enemies.
Transportation
As a multipurpose mount, the Gigantopithecus can carry a rider and act like an extension of the rider, to assist in swimming, running and even fending off even the largest dino’s.
How to Tame Gigantopithecus?
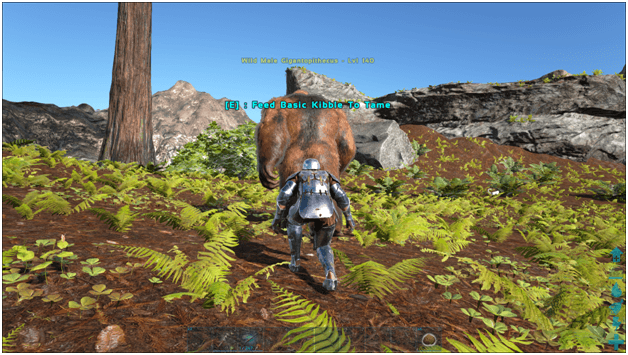
Gigantopithecus are passively tamed which means you need to carry a food item that it eats in your last inventory slot..
Approaching behind the Gigantopithecus is the best route to feed it because If sensed, the Gigantopithecus may attack and it will prolong the taming process or even end up with you getting killed.
Wearing the Ghillie Armor to mask your presence will give the opportunity to feed the Gigantopithecus safely which you need to repeat until the taming bar is filled.
Food
Kibble
Regular Kibble
Other Food
Vegetables
Mejo berries
Other Berries
Saddle
The Gigantopithecus does not need a saddle to be ridden and there are none to be crafted for it but it is possible for it to wear a helmet.
Breeding
Baby
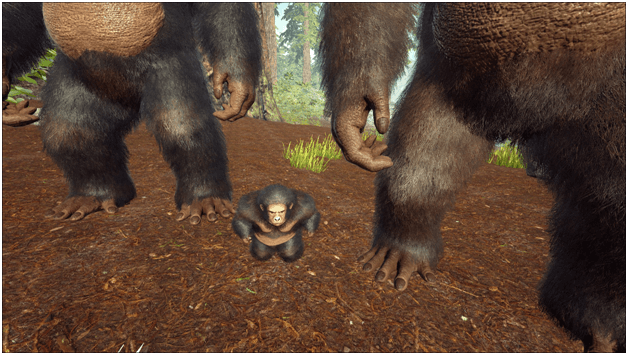
After mating the female Gigantopithecus will gestate and birth a baby Gigantopithecus.
Drops
Resources Harvested From Gigantopithecus Body
Raw Meat
Hide
Variants
Aberrant Gigantopithecus
Aberrant Gigantopithecus can be found in the Aberration map.
Location
Gigantopithecus is usually found in the redwood forests in secluded areas where it can forage in peace.
Maps where there are Gigantopithecus:
The Island
The Center
Ragnarok
Valguero
Gigantopithecus Spawn Location:
The following are spawn maps where the Gigantopithecus can be found
The Island: https://ark.gamepedia.com/Spawn_Map_(The_Island)
The Center: https://ark.gamepedia.com/Spawn_Map_(The_Center)
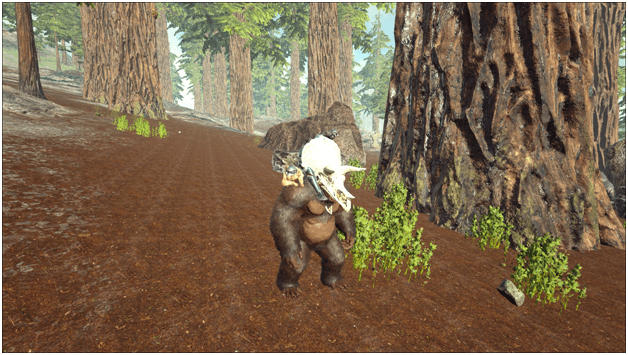
The Gigantopithecus is a peculiar mount capable of carrying a shoulder mount, a rider and the rider’s shoulder mount, it can chuck the rider and its shoulder mount high walls, assisting in infiltrating bases.
Giving the feeling of wearing a monkey suit when mounted on the Gigantopithecus, owners feel like they are a powerful creature, capable of pushing even larger creatures around.
You can also use the Gigantopithecus in a rousing game of pass the dodo with your tribe or allies to pass the time.
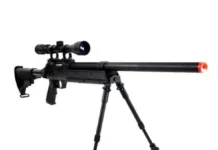
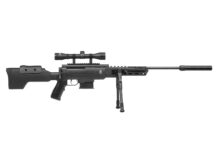
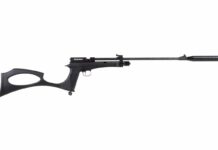
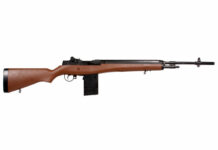
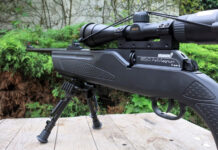
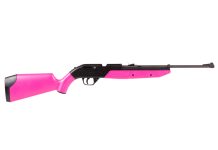
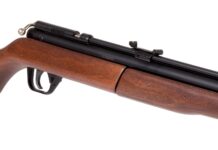
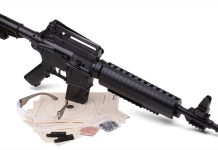
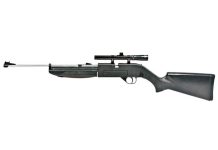
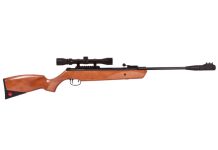
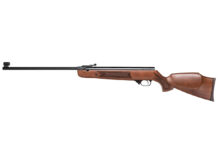
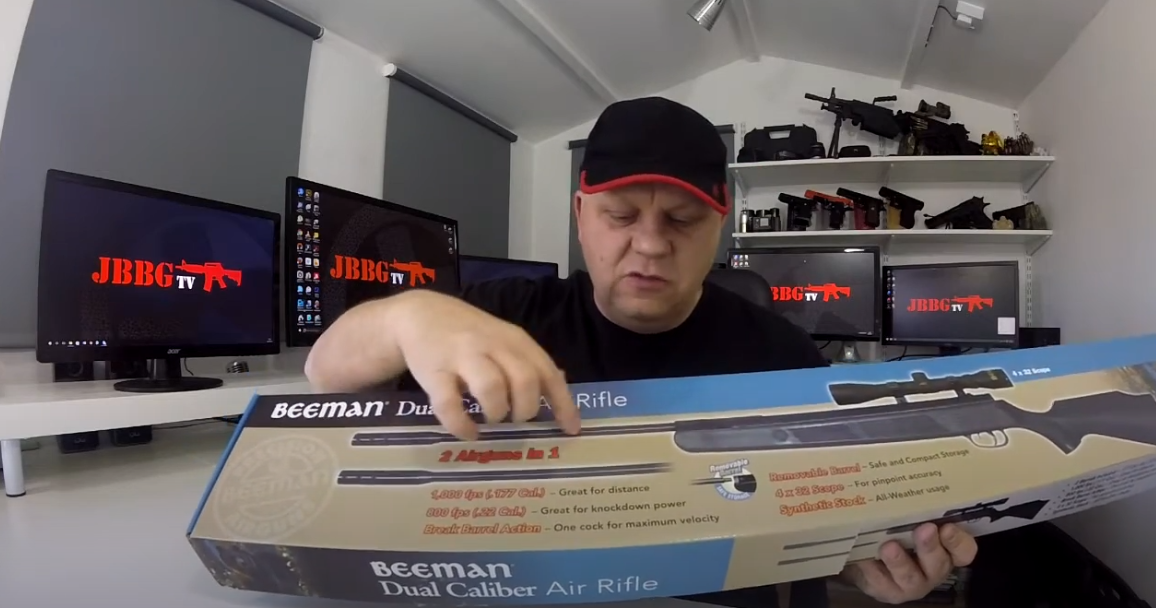
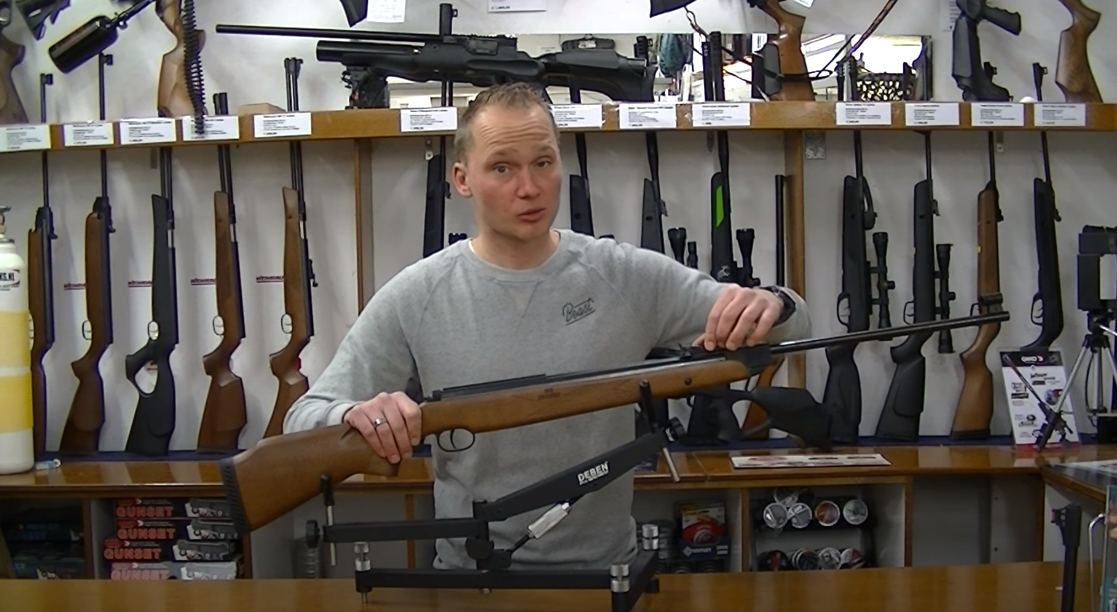
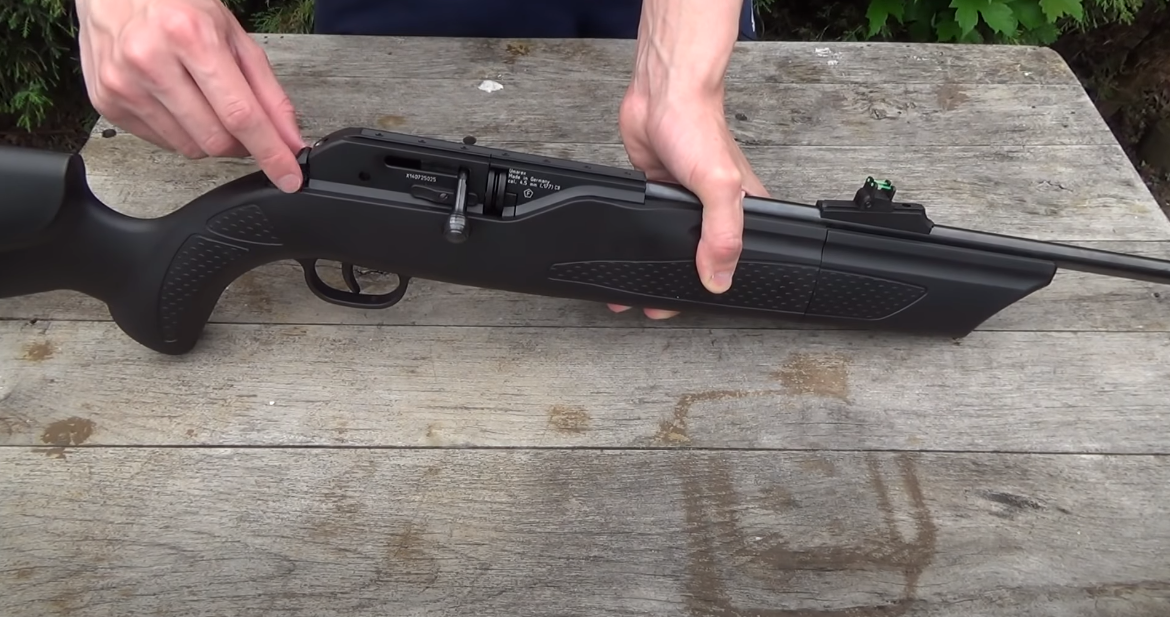
"Unleash the Power: Mastering Break Barrel Air Rifles for Maximum Performance. Discover expert tips and techniques to enhance the power and precision of your...
















 , fawn distress and mouse squeaks are the go-to calls you need in your arsenal. Hear Clay demonstrate in the video.
 An average freshwater drum
 This big drum took a nightcrawler
 The Carp RT Jackall Gantarel Jr resembles a freshwater drum