
Cast iron cookware has been popular for hundreds of years, in both the kitchen and the woods. The material is very forgiving of mistakes and will even help keep your food warm after cooking. Lodge Cast Iron does a solid job of producing cost competive, made in the USA products such as skillets and dutch ovens. However, one feature that is missing from this newer cast iron cookware is a machined smooth cooking surface. Skipping this polishing step keeps the cost down significantly, but there are folks who shop for antique pans or pay five times more for the hand finished modern competitors. We are going to turn an inexpensive Lodge skillet into a polished and seasoned masterpiece that would make your grandmother proud with a few hours of work.

The cooked on factory soybean oil seasoning needs to be removed and then the rough surface that comes from sand casting the molten iron needs to be polished. We do not have to achieve a mirror finish in order to turn this pan into the nonstick wonder of days gone by. Smooth to the touch is a reasonable target as everything beyond that becomes dimishing returns for the effort involved. To knock this project out quickly we will be using an electric drill first with a Quick-Strip Disc and then a Sanding Disc Kit. These are available from Amazon, Home Depot, Lowe’s, etc.
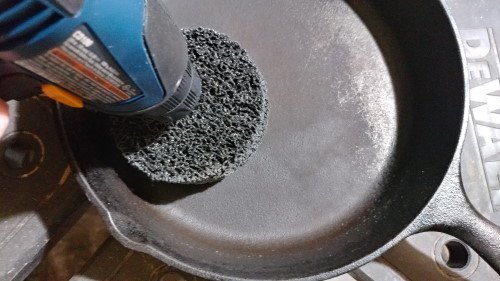
Once the drill is charged up and a suitably flat work surface has been found in the backyard, we are ready to go. The Quick-Strip disc will remove the factory finish or any other burned on material. Our goal is to get down to the shiny metal. Use the drill at a relatively slow speed to make overlapping circles, as if you were polishing a car. This is a hard step to mess up as long as the tool keeps moving and stays flat with the bottom of the pan. This is to avoid digging the disc’s edge into the metal.
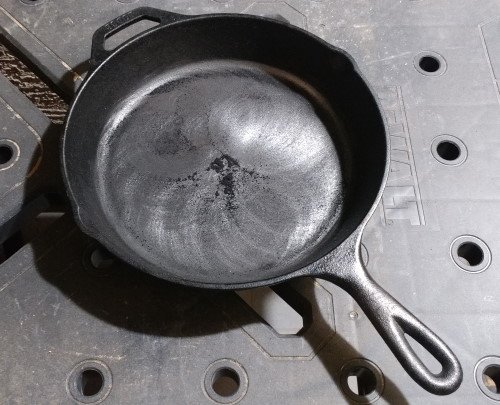
A shiny spiral pattern of overlapping circles will develop rather quickly as the surface finish get scrubbed away. Stop a few times to dump out the black powder that is getting scrubbed off. It will wipe right out with a rag, but I like to use a few paper towels for this project as the fine black powder is a mess waiting to happen. Your pan will likely have a few minor casting divots which are low spots that will not polish away. This is normal and they can safely be ignored. We are going for 95% shiny or better as being totally acceptable.
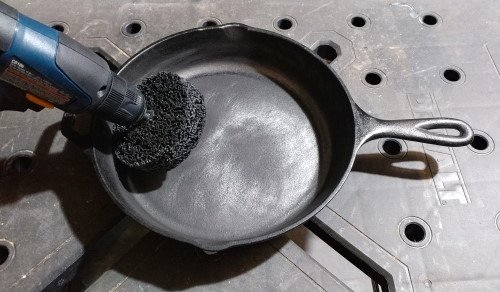
Once the bottom of the pan is all shined up, go over the inside corner and then the sides of the pan. Turning the Quick-Strip disc at an angle will make short work of the inside corner. Just make sure the keep the tool moving on the pan so as to not grind in any low spots. The outer edge of the disc will clean up the inner sides of the pan.

When the black finish is adaquately removed, switch tools to the sanding disc. Start with a 40 grit disc. We are going through the same process as the Quick-Strip all over again. First sand the bottom of the pan, then the inside corner and finally the sides. Just take your time, keep the tool moving and watch the edges. After two or three polishing cycles, the pan should feel noticable smoother. Switch out to an 80 grit disc for the final cast iron polishing pass.
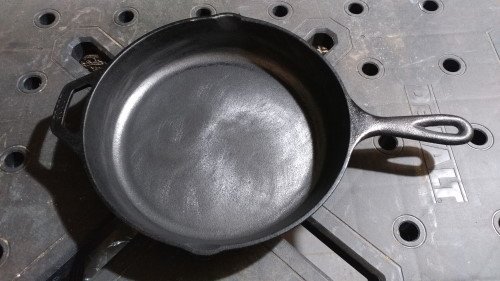
Once the inside of the pan is all smoothed up, take it back to the kichen sink for a good wash and dry. Then grab some paper towels and a bottle of grapeseed oil. Do not try to cut corners here and use coconut oil, vegtable oil, peanut oil or olive oil if you can help it. I have tried them all and grapeseed oil works noticably better. My bottle lives next to the stove for wiping down cast iron after every use. To season our shiny new surface, first preheat the oven to 350°F. Then put the pan on the stove at medium heat and let it get too hot to touch. Pour a good size dab of grapeseed oil into the hot pan and spread it all over with a folded paper towel. Our goal is to get a really thin layer of oil everywhere, so wipe it down well. The heat coming off of the pan should be a constant reminder not to touch it. While the pan is still hot, put in the oven upside down for thirty minutes. When the timer goes off, turn off the oven but leave the pan inside to soak in the heat for another thirty minutes. Then, warm the cast iron back up on the stove, wipe it down with grapeseed oil again and do one more oven heat cycle at 350, followed by a third oil and heat cycle at 400 degrees.
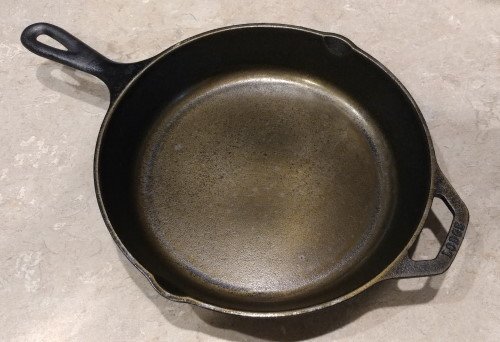
The finished product should have a noticably smoother interior finish that is a light gold color. It will get darker with use. Now is a good time to thow in a quarter stick of butter and fry up some survival hashbrowns on the rocket stove, just to see how much easier cooking and cleanup has become. After every use make sure to warm the skillet back up on the stovetop or in the campfire and then wipe the inside down with grapeseed oil before putting the iron away to help maintain the seasoned finish. With a little care, this skillet can cook just as well as any expensive vintage pan. It could be an heirloom that might be passed down through the family, as the only way that someone will get this perfect piece of cast iron is from your cold, dead hands.


