Home Blog Page 88

The Best Dogs for Grouse Hunting

0
The Best Dogs for Grouse Hunting
The enthusiasm Labs have for retrieving is one of their strengths as grouse dogs.

I posed the following, seemingly simple question to the members of my Upland Journal Forums, and to hardcore bird hunters, weekend warriors, dog trainers, upland guides, field trialers, breeders, and sporting lodge owners: What is your chosen ruffed grouse hunting dog breed, what is it that you most like about them, and why have you stuck with them?

Grouse Hunting Lab

The answers were anything but simple. The truth is there is no best single breed of dog for hunting ruffed grouse. This has become clear to me after four decades of hunting grouse over most of the flushing and pointing breeds.

Unless someone is irrevocably breed blind, most bird dog people will readily agree. I was pleasantly surprised at how gracious those who contributed to my research were when discussing hunting dogs, even dog breeds that were not the ones they chose to run. Dog guys like dogs.

One thing that is completely agreed upon is that good breeding and diligent training are essential, but those characteristics can only go so far in developing the dog as a grouse dog.

Serious grouse hunters believe that bird contacts are paramount to developing a grouse dog, particularly in breeds that point. The grouse themselves teach the dogs how to handle grouse. Dogs just have to see a load of ruffed grouse — hundreds of them — before graduating from a bird dog to a “legit grouse dog.” Some dogs never get to wear the cap and tassel, some become good, and very few become great.

Why is that the case? Because ruffed grouse are arguably the hardest game bird for any dog to handle, and without question one of the most challenging for the wing shooter. There are a tremendous number of variables and preferences and expectations that impact the choosing and settling on a breed for ruffed grouse hunting.

Not all of the variables have to do with grouse. Some are directly related to a particular dog owner’s personality, or where they reside, or the time they have to hunt, and the type of grouse cover they typically hunt.

Will the dog be hunting small micro covers, or huge expansive cutovers? Will it be trained for field trials as well as hunting? Will it stay in the house and sleep on the bed? Will it perform double duty as a waterfowl dog? Will it shed like the dickens? The list is endless.

For some it’s basically the breed dear old dad always had, or a breed a person read about, or hunted over, or in many instances just plain liked the looks of.

In this article I’ll concentrate on two popular flushing breeds and three pointing breeds, and why people prefer these dogs for hunting ruffed grouse. This is in no way a poor reflection on other breeds. Remember what I said: There is no best grouse dog breed.

ENGLISH COCKERS: Big Hunt In A Small Package

There is little doubt that Field Bred English Cocker Spaniels or FBECS’s have experienced an upsurge in popularity for upland bird hunting. These little bird-seeking missiles are not to be confused with American Cocker Spaniels, which are bred for looks and as pets. And FBECS’s are not just small field-bred English Springer Spaniels (the springer, by the way, is my personal breed of choice). Do not make the mistake of muttering such a thing in a room of spaniel enthusiasts. They may have been separated by size centuries ago, but have developed their own unique personalities, yet retained all the best characteristics.

This flushing dog weighs in as small as 20 pounds and upwards of 35 pounds for a large male, and come in a variety of colors. I spoke to the owner of a guiding operation in northern Maine, who runs both FBEC’s and English Pointers, and he described them as having the heart of a big dog and the cuddle of a lapdog.

He not only uses them for hunting ruffed grouse, but also as non-slip retrievers with his pointers, where they flush and retrieve ahead of a point. Another friend of mine owns a well known Orvis-endorsed hunting and fishing operation in Maine. His personal dogs, which he hunts and guides with, are FBEC’s. Most of his guides run pointing breeds. Pointing dogs are traditional for grouse so most clients request hunting over them. But according to him, at the end of the day when the bragging begins, the cockers do as well if not better in finding birds and providing shots on grouse.

Owners of FBECS’s gush over their little charges. They love the dogs’ temperaments, house manners, trainability, and their remarkably manageable size.

That’s all well and good but can they handle and produce ruffed grouse for the average bird hunter? You bet they can. The consensus from those I spoke with is they are the right dog to hunt in poor scenting conditions, such as hot and windy days — situations that can compromise other dogs. They burrow intro the thick of cover, work close, roust out grouse to the gun, and retrieve crisply to hand. They are just plain fun to be around, and they can sit on your lap and lick your face on the drive home. What more can a bird hunter ask of a grouse dog?

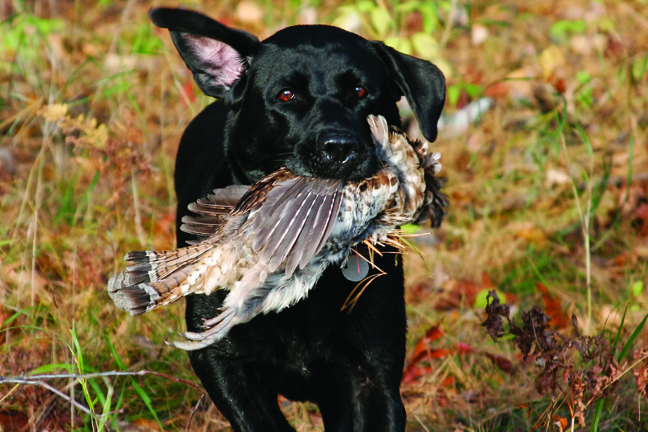
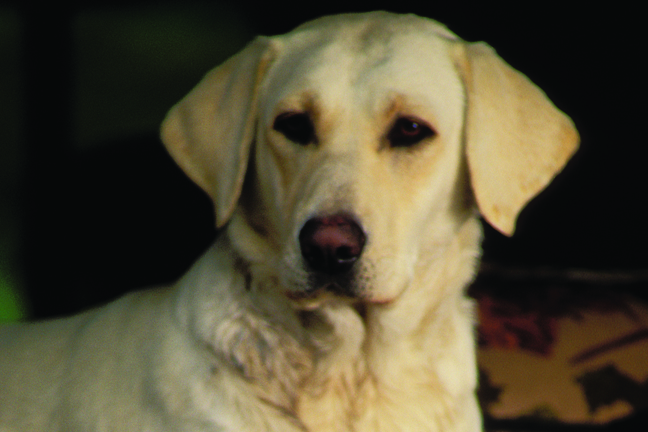
LABRADOR RETRIEVERS: A Model For Every Grouse Hunter

Labrador Retrievers remind me of the venerable 12-gauge shotgun. They can do it all. The Lab has really made its mark in the ruffed grouse woods, and those running them never feel under gunned.

The enthusiasm Labs have for retrieving is one of their strengths as grouse dogs.

Although there are breed lines of pointing Labs, I’m focusing on flushing retrievers. They are hard to beat when you include their perpetually positive attitude and enthusiasm. These workhorses come in variety of sizes, depending on the breeding — from huge, block-headed, otter-tailed, cattail busters to smaller, more agile, and athletic dogs — which are increasingly popular with grouse hunters. They are black, chocolate or yellow and despite some opinions, all can make great hunters. Their wonderful personalities have made them a choice as pets for non-hunters, so always seek out a hunting line of Labs if you want one to team up with you to hunt grouse.

If properly trained they simply produce bird after bird for the gun and, being the consummate retriever, are unmatched in finding cripples and bringing any bird to hand.

Lab owners are extremely loyal to their breed, like their dogs are to them. They point out the unparalleled trust and teamwork they experience while hunting with their Labs. A particularly successful grouse hunter from Michigan I spoke with, who champions the smaller, more agile 50-pound Labs for grouse, expressed that a well bred Labrador is smart, easy to train, and can bounce back from training mistakes. Known for their overall durability, they can hunt in all conditions and cover types. When these grouse hunters empty the birds from their vests at the end of a hunt, the reason for running their labs for ruffed grouse is plain to see.

ENGLISH SETTERS: Grace And Beauty In The Woods

There is no question the English Setter is the quintessential and traditional grouse hunting dog. The sheer volume of responses I received from ES lovers proved that point.

This breed has gotten a load of ink in most classic grouse hunting literature, and is well represented in sporting art, for good reason. For a pointing dog they are the whole package of beauty, elegance, temperament and — best of all — they work on ruffed grouse.

Both pointing dogs and flushing dogs can be great on grouse.

Setters generally come in two types: Ryman and Llewellyn. The Ryman being a larger, closer working, and more methodical birddog that foot hunters prefer. Llewellyn’s are a smaller, faster bird-finding machine that hardcore hunters and field trailers gravitate to.

Regardless of type, they all share a gentle nature and picture perfect looks, as well as a good nose. Some of my Setter friends and contacts readily admit they prefer a slightly slower-moving dog that they can see and enjoy as it weaves through a fall cover, with the tinkling of a bell only adding to the experience. They live for the feathery classic point, and shooting at a bird is an afterthought.

Others want a firecracker that sizzles through the woods, reaching way out in search of birds, with the distant staccato beep from a collar signaling a point. After a location is found on the GPS receiver, they head into the cover and like to be rewarded with an opportunity for a shot. This is a breed that can fit differing personalities.

I’ve heard more legends of English Setters being good or great grouse dogs than any other breed. That might be a product of their popularity, or it might be why they are so popular. It doesn’t matter: they are a proven breed for grouse hunting and look damn stylish doing it. I heard from a fair share of earnest grouse hunters who experimented with a lot of dog breeds until they found their nirvana with English Setters.

GERMAN SHORTHAIRED POINTER: Bulletproof And Versatile

I have many friends and acquaintances who run GSP’s. That should say something about their popularity and effectiveness on grouse, given we live smack dab in ruffed grouse country.

And I had the pleasure of hunting over a particularly good one. I was impressed by this dog’s no-nonsense, workmanlike hunting style. He knew how to handle and point the skittish, if not schizoid, ruffed grouse found in mid-Maine, without a lot of showing off or fanfare. I think this is true of most dogs of this versatile breed.

Tough, relentless and no-nonsense: The German Shorthair makes a great grouse dog.

That dog is over the rainbow bridge but the owner is now feeding two more GSP’s. I asked him why he sticks with them. He made the analogy that GSP’s are the Toyota Tacoma of the grouse hunting breeds. They are tough, dependable, and rarely break down. GSP owners relish the strength and durability and easy maintenance of their dogs, along with their ability to chill out in the house, but turn it on in the woods. Being a short-haired breed, little if any time needs to be wasted combing out burrs on the tailgate, leaving more time to hit the next cover.

I received input from a gentleman who runs a popular birddog website who hunts his shorthairs in a multiple of states and Canadian provinces. He expressed how his dogs consistently hunt at a comfortable range for the foot hunter, are staunch on a pinned grouse, but naturally relocate until they crack into a solid point when they hit the scent cone. A plus is they are largely natural retrievers, so few birds are lost. Versatile is the operative word; when not pointing grouse they can take on part-time work in a boat or blind retrieving waterfowl, and are handsome to boot.

BRITTANYS: The Whole Package In A Compact Size

These medium-sized, hard-working pointing dogs are rumored to have originated as poachers’ dogs, and are termed by some as “meat dogs.”

There’s nothing derogatory about that as far as I’m concerned, since despite all the aesthetics prevalent in grouse hunting lore, ultimately we are trying to add protein to our game vest.

This breed was originally dubbed a spaniel but the “spaniel” was officially removed in 1982. You have two choices of field stock Britts: American or French Brittany. Generally the American Britt is larger, lankier, and a bigger runner by design. The French Britt is more compact and generally a tighter worker. But despite “spaniel” being dropped from their name, both types have the merry, exuberant and biddable personality of a spaniel, with the point and the retrieve built in.

Britt owners I spoke with were a pragmatic group who weren’t enamored with classic high-tailed points (which is a good thing since Britts tails are docked). Britt owners appreciated the work ethic, nose and tenacity of their dogs.

A very good friend of mine who passed away a few years back adored his Brittanys, and I’ve never seen a closer bond than he had with his dogs. I had the privilege of grouse hunting with him in the states and in Canada. He was a solitary fellow, and when we met back at the truck, there was always a gleam in his eye, a grouse or two in hand, and of course a Britt by his side. If I get a pointing dog to add to my arsenal, it would likely be a Brittany.

You can’t go wrong with any of the breeds covered here if the dog is well bred, trained to your needs and expectations, and you put the dog on a load of grouse. Finding your breed for hunting ruffed grouse is like finding a spouse. There are matches made in heaven, but also mismatches. The trick is to date and play the field until you fall in love, and know when to throw in the towel and try another breed that fits you best.

Ultimately, at the end of the hunt, the measure of a grouse dog could be as simple as whether you enjoyed hunting with it, not how high a pile of feathers you’ve built by the end of a season.

10 Orange Mushroom Species

0

Did you find unknown orange mushrooms in your yard, in the wood, or growing on tree trunks? We made a list of 10 species of orange mushrooms to help you recognize them.

The diversity of mushrooms is impressive. Not only do they look different from species to species, but they also impress with their color variety. We can find species ranging from white to red shades to even green and blue.

In this article, we will talk mainly about several species of fungi that develop predominantly orange fruiting bodies.

Keep in mind that it’s not a good idea to try identifying mushrooms based solely on their colors. Some species may have variable colors depending on the different stages of their lives. Some may be white initially, then turn yellowish, later orange, and even reddish close to the end of their life cycle. Therefore, we recommend you pay great attention when classifying them.

IMPORTANT: The toxicity of each species of mushroom included in this article was obtained from several sources. This data and display photos may or may NOT be entirely accurate. The purpose of this article is NOT to advise whether these species of mushrooms are edible or not, but it’s intended to present fascinating facts about the numerous types of orange fungi.

Never consume any wild mushrooms unless you are 100% sure they are edible! Just because a mushroom species is labeled as “Non-Toxic” or “Non-Poisonous” in this article doesn’t necessarily mean it is edible and safe for consumption.

1. Orange Mycena (Mycena Leaiana)

Scientific NameCommon NameFamilyToxicity

Mycena leaiana is a species of mushrooms with origins in North America, but there is a related variety (Mycena leaiana var. australis) that can be seen in the woodlands of New Zealand and Australia. Other common names for mycena leaiana include the orange mycena or Lea’s mycena.

This mushroom species is usually easily distinguished by its bright orange cap with a smooth and sticky surface. Its cap is no greater than 1.5 inches (4 cm) in diameter, has a bright orange color, but this may fade as the mushroom matures. Initially, it has a bell shape but becomes convex with age and frequently forms a depression in the center.

On the underside of the cap, it has crowded orange gills with reddish-orange margins. These are almost free from the stem.

The cap is supported by long and thin stipes, also orange and covered in fine hairs.

Mycena leaiana is a saprobic species. It feeds on dead and rotting wood, leaves, and other organic matter found in the forests. Another particularity of these mushrooms is the fact that they usually grow in dense clusters on deciduous logs.

Although it is oftentimes labeled as non-poisonous, the edibility of Mycena leaiana is unknown. In the absence of any convincing studies concerning these species of mushrooms, it is not recommended their consumption.

2. Orange Peel Fungus (Aleuria Aurantia)

Scientific NameCommon NameFamilyToxicity

Aleuria aurantia is a species of fungus seen throughout Europe, South and North America, parts of Asia, Australia, and New Zealand.

This fungus develops an orange, thin fruiting body similar to a cup, or a husk, hence its popular name, “the orange peel.” When maturing, it can take on a flat or irregular shape and can reach sizes up to 4 inches (10 cm) in diameter under favorable conditions. The underside of the cap may be fuzzy, lighter in color than the top, or even whitish when the mushroom is young.

It doesn’t have a stem. It attaches directly to the ground through a thickening in the center of the cap.

Aleuria aurantia usually appears in late summer to autumn (or even in winter in warmer climates) and grows in clusters on the soil’s surface. It is frequently spotted in urban landscaped areas with disturbed soils, clays, roadside, or covered with wood chip mulches.

Aleuria aurantia is generally considered a non-toxic species and edible if cooked. However, it does not excel in flavor, and many say that it is almost tasteless. It is also quite difficult to pick because it is fragile and breaks into small fragments when touched.

Also keep in mind that there are several poisonous European species that look similar to these mushrooms, such as Caloscypha fulgens or Sarcoscypha coccinea.

3. Jack-O-Lantern (Omphalotus Illudens)

Scientific NameCommon NameFamilyToxicity

Omphalotus Illudens is a species of orange mushrooms distributed mainly in eastern North America and parts of Europe. These mushrooms are largely known as “jack-o’lantern mushrooms” due to their pumpkin-orange color and bioluminescent properties (thought to glow in the dark due to a chemical reaction, but some say that this is just a myth).

Although luminescence is not very common among mushrooms, according to PlantSnap, there are over 80 species of bioluminescent mushrooms. Through the weak light emitted in the dark, these species of fungi attract certain insects that spread their spores, hence, helping their multiplication.

Omphalotus Illudens is a saprobic fungus that feeds with dead organic matter from the forests, such as decaying stumps or dry fallen branches. It usually grows in clusters and is frequently spotted at the base of hardwood trees.

These fungi can reach fairly large sizes, especially at the group level. They are distinguished by a yellow-to-orange cap that initially has an umbrella shape which later flattens. The underside holds true non-forking gills, the same color as the cap, that run down the stem. The cap’s margins are initially curled inward but later can turn upward.

The stalk is long, has a smooth surface with a bright yellowish-orange color, darkening towards the base.

The Jack-O-Lantern mushrooms are toxic and should never be consumed raw or cooked. Unhappily, they are easily confused with edible species such as the golden chanterelle.

4. Goblet Waxcap (Hygrocybe Cantharellus)

Scientific NameCommon NameFamilyToxicity

Hygrocybe cantharellus is a species of small mushrooms found largely in the grasslands and woodlands of eastern North America, Europe, and parts of Australia. It belongs to the genus Hygrocybe (waxcaps), the family Hygrophoraceae and it’s popularly known as the Goblet Waxcap.

It has a small-size cap with a dry surface whose color can vary from light orange to reddish-orange. It does not usually exceed a few centimeters in width, initially has a convex shape, then flattens out and forms a slight depression in the center.

The cap’s edges are usually twisted inwards, slightly lighter in color, and become scalloped when aging. On the underside, it features sharp-edged pale yellow gills that run down the stem.

The stem is thin but relatively long compared to the mushroom’s size, orange in color, but pales toward the bottom.

Goblet Waxcap is considered by many to be a saprobic fungus because it sometimes grows on wood or decaying roots of plants but also thrives in areas covered with moss. It can grow both in small groups and alone.

Depending on the climate, they usually appear from late summer to late autumn.

Hygrocybe cantharellus is generally considered a non-toxic mushroom, but there is limited data on the edibility of this species to be considered entirely safe for consumption. Its reduced size can also be a downside.

5. Lobster Mushroom (Hypomyces Lactifluorum)

Scientific NameCommon NameFamilyToxicity

Hypomyces Lactifluorum, or the Lobster mushroom as it’s commonly known, is a species of parasitic fungus that develops on top of several species of mushrooms. Although it is believed to be distributed mainly in North America, there are numerous records of the existence of this fungus on several other continents.

It is popularly called the “lobster mushroom” because it has the appearance of the outer shell of a cooked lobster and a reddish-orange color.

At maturity, hypomyces lactifluorum contains its host entirely, making the original species impossible to identify visually. Studies also point that this fungus not only changes the look of its host but can also alter its chemical composition.

Among the species of mushrooms that Hypomyces Lactifluorum prefers are those of the genus Russula, Lactifluus, and Lactarius.

This fungus is usually found in hardwood and coniferous forests, places where the host mushrooms mentioned above are regularly found.

It doesn’t have always the same shape. While at times mimics the form of the mushroom species it attacks, other times, it can exercise a pretty irregular shape. The orange color and the lobster shell look covered with tiny pimples may be the best indicators to recognize the lobster mushrooms.

Lobster mushrooms are non-toxic and also edible. They are even sold in certain markets. Still, many argue that there may be situations when these parasitic fungi might become inedible.

Although they are known to only parasite particular non-poisonous species, some say that might be always a slim chance for them to infect a poisonous variety. In this case, it raises the possibility to carry on the host’s toxins.

Unfortunately, I was not able to find any solid study to confirm or disprove this fact, nor any reports of poisonings linked to hypomyces lactifluorum consumption. Therefore, I would recommend you to be cautious, and only consume these when you know the host species.

6. Woolly Chanterelle (Turbinellus Floccosus)

Scientific NameCommon NameFamilyToxicity

Turbinellus floccosus is a species of fungi growing especially in coniferous woodlands across Asia and North America. It has several popular names such as the woolly chanterelle, scaly vase, scaly chanterelle, shaggy chanterelle, and more.

Although the popular name of turbinellus floccosus often includes the term “chanterelle,” and even has some similarities in shape with mushrooms in the genus Cantharellus, they are not related.

Turbinellus floccosus appears especially in late summer and autumn and prefers humid regions with heavy rains. They can grow both individually and in small groups.

These mushrooms are mainly distinguishable through their trumpet or vase-like shape and a central depression that gets deeper when aging. The cap’s top color usually alternates depending on humidity and age and can vary from yellowish orange to a dark reddish-orange.

Instead of gills, turbinellus floccosus possess irregular pale yellow-to-cream wrinkled ridges that go down the whole stem. There is no clear separation between the cap and the stem. Sometimes, multiple fruit bodies may grow from one stipe.

Turbinellus floccosus is generally considered inedible as it is known to cause gastrointestinal problems such as nausea, vomiting, or diarrhea. However, some sources assert that the geographical region in which these mushrooms grow may determine whether or not they are edible. Apparently, those growing in the Pacific Northwest and British Columbia are toxic, while the ones from central Mexico and India are considered edible.

7. Jackson’s Slender Amanita (Amanita Jacksonii)

Scientific NameCommon NameFamilyToxicity

Amanita jacksonii is a species of mushrooms native to North America. It belongs to the family Amanitaceae, which is famous for including some of the most poisonous mushrooms, but also varieties appreciated for their flavor.

The appearance of this mushroom and its color vary depending on its maturity stage. At first, it looks like a white oval egg that rises above the ground. Later, it opens up, forming an orange or reddish-orange hemispherical cap that becomes convex and eventually flat, usually with a small cavity in the middle.

Its pigment concentrates in a central orange or reddish ring at maturity, fading to yellow toward the margins, with orange streaks on the edges.

The underneath has moderately crowded to crowded yellow to yellow-orange gills, free from the stem or slightly attached. It also presents subtruncate to truncate short gills.

A long and slim yellow stem supports the cap, often sprinkled with orange spots at the surface. At the base, you can often see white remnants of the original coating.

Amanita jacksonii is non-toxic and even labeled as edible by various sources. However, there are several deadly Amanita species similar to them. Hence, there is a significant risk of misidentifying this mushroom and ending up consuming a poisonous one.

8. Eyelash Cup (Scutellinia Scutellata)

Scientific NameCommon NameFamilyToxicity

Scutellinia scutellata is a saprobic fungus species found in many regions of the world. It is, in fact, one of the most widespread fungi in the world.

Besides the scientific name, it is also known as the Eyelash cup, Molly eye-winker, or the Common eyelash fungus.

It produces a small fruiting body which is generally seen growing in small groups on rotting wood or on soggy soil. It thrives in swampy environments where there is humidity constantly.

Scutellinia scutellata is easily recognizable due to its oily wet look, bright orange or reddish color, cup shape or flattened, and margins covered with stiff hairs, similar to an eyelash.

Depending on the climate, it can be noticed from late spring to late fall, and sometimes even in winter or spring.

We did not find data regarding the toxicity of Scutellinia scutellata, but most sources seem to indicate that it is not edible.

9. The Orange Bonnet (Mycena Acicula)

Scientific NameCommon NameFamilyToxicity

Mycena acicula, ordinarily known as the coral spring Mycena or orange bonnet, is a species of miniature mushrooms found throughout Asia, Europe, North America, and the Caribbean.

This species of fungus is mainly identified by the small size of its fruiting body, along with several particularities.

The orange bonnet has the classic mushroom look, with an orange-red cap that presents gills underneath and which is supported by a leg. Even at maturity, the cap rarely grows more than 0.4 inches (1cm).

Initially, the cap is hemispherical, later gets a bell shape, and eventually becomes convex. Its surface becomes smooth with the age and shows streaks leading to the edges.

The stem is relatively long compared to the overall size and does not usually exceed 2-2.5 inches (5-6 cm) in length.

These tiny mushrooms grow solitary in wet environments. Are often found on hardwood and conifer twigs or buried under the top layer of the leaf litter. They usually make their presence from late autumn to mid-winter and usually in spring in mountainous regions.

It is not known exactly if these mushrooms contain any toxic chemicals, but they are considered inedible due to their small size.

10. The Golden Trumpet (Xeromphalina Campanella)

Scientific NameCommon NameFamilyToxicity

Xeromphalina campanella is a saprobic species of mushrooms native to North America. It is known by several names such as the golden trumpet, Omphalina bell, or fuzzy foot.

The mushroom is observed in coniferous forests, usually growing in dense clusters on rotting logs and stumps. It is a small mushroom, but it cannot easily go unnoticed due to the fact that it almost always grows in large groups.

The cap of xeromphalina campanella has an umbrella shape when young, then its margins widen and rise, forming a central depression. Its color ranges from brownish yellow to orange. On the underside, it has well-spaced gills that run down the stem. These range in color from pale yellow to orange.

The stalk is thin, light orange near the cap, and brownish to yellow towards the base, which is covered with fine yellow or brown hairs, hence its common name “fuzzy foot.”

Although it is generally considered non-toxic, most sources label Xeromphalina campanella as inedible.

Final Word

This is just a tiny selection of the orange mushrooms that you can observe throughout various regions of the world. Because of their orange color, they are often easily observable in the green grass, growing on trees’ trunks, on decaying wood stumps, on the forest floor, or even in your yard or garden.

We hope you found this list helpful and assist you in identifying mushrooms with this particularity.

Several other species of fungi that produce orange fruiting bodies are:

  • Cantharellus cinnabarinus
  • Cystodermella cinnabarina
  • Entoloma quadratum
  • Gliophorus perplexus
  • Gymnopilus sapineus
  • Gymnosporangium juniperi-virginianae
  • Pycnoporellus fulgens
  • Pycnoporus cinnabarinus
  • Tylopilus balloui
  • Laetiporus cincinnatus

Since you have reached the end of the article, you may also be interested in our selection of 10 yellow mushroom species or 10 red mushroom species.

Please do not eat any species of mushrooms based only on the information presented in this article! Always consult a specialist before determining whether a mushroom is safe for consumption or not.

Weatherby Vanguard High Country Bolt-Action Rifle: Full Review

0
Weatherby Vanguard High Country Bolt-Action Rifle: Full Review

Roy Weatherby was a visionary in the firearms industry. From his early experiments with ultra-velocity rounds to the development of his supremely safe action and his early adoption of polymer stocks, Weatherby was always at the leading edge of hunting rifle innovation. He was also a brilliant marketer. I still recall the images of a tree blown into so many matchsticks by a single .300 Wby. round and Roy palling around with famous actors like John Wayne and Roy Rogers.

Dressed in fancy Monte Carlo stocks and chambered for hard-hitting magnums, the Weatherby Mark V became the “it” hunting rifle of the mid-20th century. But all that fancy walnut came at a price, one many hunters simply couldn’t afford.

Roy Weatherby understood the need for a workingman’s Mark V, and in 1970 the company announced the Vanguard. Vanguard rifles were—and are—built on Japanese Howa push-feed actions. At the time of their inception, they rivaled popular rifles like the Remington 700 and Winchester Model 70, and Vanguard guns remain a popular option for big game hunters.

Weatherby
Vanguard High Country rifles are equipped with Weatherby’s removable Accubrake ST, which significantly reduces felt recoil.

Recently, the bolt-action rifle market has been flooded with inexpensive, sometimes coarsely built, budget rifles that provide good accuracy but lackluster aesthetics. But Vanguard rifles have always been a step above those basic entry-level guns, combining solid construction with modern good looks at a price that the working hunter can afford.

As of this writing, there are 19 different Vanguard models currently available, ranging from .22-250 to .375 H&H Mag. There are Vanguards for smaller-statured shooters on up to rifles meant for dangerous game. There are Vanguards with wood stocks and synthetic stocks and package deals that include a Leupold 3-9x40mm scope. Suggested retail prices range from the mid-$500 mark up to $1,149.

“While originally launched in only a few configurations, the Weatherby Vanguard now boasts value-added features such as Cerakoting, barrel fluting, custom stock painting, barrel threading and custom floorplates,” said Adam Weatherby, Roy’s grandson and Weatherby’s current CEO. “Although the barreled action is still manufactured in Japan, these new features are all applied at our new facility in Sheridan, Wyoming.”

Over the years I’ve tested or hunted with seven different Vanguard models and have been impressed with every one of them. Vanguard rifles feature sub-m.o.a. accuracy and are backed with an accuracy guarantee—one of the first rifles at this price point to offer such a guarantee. A Vanguard Backcountry in .257 Wby. Mag. I once tested produced average groups around a half-inch with two different Weatherby loads, and I regret not buying that gun when I had the chance.

Weatherby Vanguard High Country Bolt-Action Rifle: Review
The Vanguard’s machined bolt features three gas ports. The flat dark earth Cerakote on the barreled action is nicely complemented by a green and tan stock.

The newest member of the Vanguard family is the High Country model. As the name suggests, the High Country is designed to be light enough to carry on big game hunts at high elevations where the oxygen is thin and every ounce of rifle weight is a burden. The High Country I tested in 6.5 Creedmoor weighed just 7.15 pounds with its 24-inch fluted barrel.

The cold-hammer-forged barrel is finished in flat dark earth Cerakote for corrosion resistance, and it’s threaded 1/2×28. It comes with Weatherby’s Accubrake ST muzzle brake, which adds two inches to the barrel, as well as a seamless thread protector. The barreled action is free-floated and incorporates an integral recoil lug.

The synthetic stock features Weatherby’s trademark Monte Carlo comb. It’s black with green and tan sponge-paint accents, and the stock is equipped with textured grip panels and a right-hand palm swell. I’m a fan of the grip angle, which puts my shooting hand in the correct position.

High Country rifles are available in nine chamberings—five standard rounds and four magnums. Standard cartridges, including the 6.5 PRC, have 24-inch barrels while magnum chamberings sport 26-inch barrels and weigh a couple ounces more. The Vanguard High Country rifle carries a suggested retail price of $949, which places it in competition with Browning’s X-Bolt Composite Stalker ($910) and Bergara’s B-14 Wilderness Ridge ($975).

All Vanguard guns share the same push-feed bolt action with a small claw extractor and plunger ejector. Like the Mark V, the Vanguard rifles come with three gas ports in the one-piece machined bolt, as well as a fully enclosed bolt shroud, to help prevent injury in the event of a case failure. The bolt body is fluted to shave weight.

Weatherby Vanguard High Country Bolt-Action Rifle: Review
Most Vanguard rifles, including the new High Country, come with internal box magazines and hinged floorplates. Capacity for standard cartridges is 4+1.

The Vanguard High Country is easy to top-load through the generous ejection port. Unlike some bolt-action hunting rifles that are finicky about loading and feeding, the Vanguard isn’t. A floorplate release is recessed into the front of the trigger guard. The release on my gun was a bit tight, but that’s not a bad thing, as the odds of an inadvertent mag dump are exceedingly low.

All current Vanguard rifles are equipped with a two-stage trigger. That has resulted in some shooters mistakenly calling Vanguard triggers “creepy,” but the take-up is intentional and acts as a safety mechanism without employing a blade. Initial take-up is smooth and light, and after that it it requires minimal finger pressure to drop the sear.

Weatherby Vanguard triggers average between two and four pounds, and they are user adjustable. The one on my sample averaged 3.4 pounds for 10 pulls on a Wheeler gauge.

The three-position safety is the rocker-type design and is easy to manipulate. In the rearward position the trigger is deactivated and the bolt is locked. In the middle position the bolt can be manipulated with the safety engaged. Pressing the safety rocker forward allows the gun to be fired.

I like three-position safeties because the bolt can be locked when walking so that brush and limbs don’t inadvertently open the action and the rifle can be loaded and unloaded with the safety engaged. Weatherby safeties can also be manipulated silently so if you suddenly find yourself close to game, the metallic “snick” of the rifle’s safety won’t catch the animal’s attention.

The bolt stop is located on the left rear side of the receiver, and it’s easy to operate. A small cocking indicator tab that extends under the rear bolt shroud lets you know the gun’s condition.

Weatherby Vanguard High Country Bolt-Action Rifle: Review
The test rifle managed to print sub-m.o.a. groups with all three loads, including this 0.44-inch cluster with Winchester’s Deer Season XP.

The High Country is drilled and tapped to accept Weatherby Vanguard/Remington 700 bases, which simplifies scope mounting. I topped the High Country with a Crimson Trace 4-16×42 Brushline Pro riflescope with BDC reticle. The Monte Carlo stock placed my eye in correct position behind the optic.

4-16×42 Brushline Pro: Check Price & Buy Now

I tested the High Country at the range with three different 6.5 Creedmoor loads. All three produced at least one three-shot group under an inch at 100 yards, and the best group of the day measured just 0.44 inch. A tack-driver, in other words, and well in line with the rifle’s guarantee for sub-m.o.a. accuracy.

The 6.5 Creedmoor produces mild recoil, which is one of its benefits, but having the removable Accubrake ST is a nice touch—and will be very much appreciated on the .300 Wby. Mag. version of the gun. This relatively new brake from Weatherby promises recoil reduction of up to 53 percent. All Vanguard rifles handle recoil well, and the dense black Vanguard recoil pad does a good job of absorbing kick.

In addition to range testing, I also got to use the Vanguard while hunting hogs and deer at a field-to-table event in Texas, and the High Country had no issues gathering meat. My first shot came when an old, heavy whitetail buck followed a group of does out of the oaks during late afternoon. A doe at the edge of the oaks caught the old buck’s attention, and he trotted away from the harem into the cover of the trees.

At any moment the buck might disappear from view, and since it’s difficult to have a field-to-table event without meat, I decided to try to make a shot on the deer before he vanished into the deep woods. There was a narrow window between two oak trunks through which I would have to weave the bullet, but I had confidence in the High Country rifle and took the shot. The buck was quartering away, and after the rifle cracked, I heard the thwop of the 129-grain Hornady bullet. The buck dropped.

Weatherby Vanguard High Country Bolt-Action Rifle: Review

The next shot came the following morning when I spooked a group of hogs at a feeder. My guide Ray and I had crept into a position on a hill overlooking the feeders and the hogs scattered. Because we wanted a pig for the table, I chose a small sow, and as she ran through the broken brush I led her by a half-body length and touched off the Weatherby. The same distinct bullet slap echoed up the canyon, and we found the hog 30 yards from where she had been when the bullet struck her shoulder.

The modern crop of affordable sub-m.o.a. hunting rifles means more challengers for Weatherby’s Vanguard guns. But the Vanguard has something that few of its competitors can boast about: five decades of experience redefining the affordable bolt-action hunting rifle segment.

“My grandfather first introduced the Vanguard as a lower-cost alternative to the Mark V rifle,” Adam Weatherby said. “From its hammer-forged barrel to consistent tight tolerances and an accuracy guarantee, it grew to become a wildly successful project that is now its 50th year of existence.”

There are guns less expensive than the Vanguard, and a few of them carry an accuracy guarantee that matches Weatherby’s. But very, very few guns offer the combination of high build quality, consistent accuracy and bang-for-your-buck value that Vanguard rifles promise. That was the case five decades ago when this model made its debut, and it remains so today.

Weatherby Vanguard High Country Rifle Specifications

  • Type: bolt-action centerfire
  • Caliber: .257 Wby. Mag., 6.5 Creedmoor (tested), 6.5 PRC, 6.5-300 Wby. Mag., .270 Win, .308 Win., .30-06, .300 Win. Mag., .300 Wby. Mag.
  • Capacity: 4+1
  • Barrel: 24 in.; threaded 1/2×28; Accubrake ST muzzle brake
  • Overall Length: 46 in.
  • Weight: 7 lb., 3 oz.
  • Stock: black synthetic with tan/green sponge paint
  • Finish: flat dark earth Cerakote
  • Trigger: 3.4 lb. pull (measured)
  • Sights: none; drilled and tapped
  • Price: $949
  • Manufacturer: Weatherby, weatherby.com

Why Do Air Rifle Shooters Wear Suits?

0

When you see someone participating in an air rifle shooting competition, you may notice that they are wearing a particular type of clothing. This clothing is not just for show – it serves a specific purpose that helps the shooter to be successful. In this blog post, we’ll take a closer look at why air rifle shooters wear suits and how it helps them to improve their performance.

What’s with the funny outfits in the Olympic shooting?

why-do-air-rifle-shooters-wear-suits

The first reason why air rifle shooters wear suits is for support. The jacket and pants are usually made from a stiff material, such as canvas, which helps to support the shooter’s body and minimize movement.

This is important because small body movements can have a significant impact on the accuracy of the shot. The shooting jacket and pants also have rough material on contact points, such as the elbows and shoulders. This helps keep the muscles from getting tense while holding the gun.

Another reason why air rifle shooters wear suits is for consistency and accuracy. The shoes that shooters wear have very stiff, flat, oversized soles, which keep the feet from moving.

Lastly, the gloves that shooters wear help to protect their hands from getting blisters or calluses from holding the gun tightly for an extended period of time.

Rear more >>> What is the fastest FPS air rifle?

You can listen to Gold medalist Ginny Thrasher explaining more here:

Choosing the Perfect Grain for Hunting White Tail Deer with a .30-06 Bullet

0

Discover the ultimate choice: the best grain for your 30.06 bullet when hunting white-tail deer. Unveil the ideal combination of power and precision, ensuring a successful hunt every time. Explore our expert recommendations to maximize your shooting performance and achieve unparalleled results in the field.

Choosing the Perfect Grain for Hunting White-Tailed Deer with a.30-06 Bullet

Choosing the Perfect Grain for Hunting White-Tailed Deer with a.30-06 Bullet

When it comes to hunting white-tailed deer with a.30-06 bullet, choosing the perfect grain can make all the difference. The.30-06 Springfield cartridge has a long history of being a popular choice among hunters, and its versatility allows for different grain options depending on your specific needs.

The Importance of Grain Weight

One of the key factors to consider when selecting a bullet for hunting white-tailed deer is the grain weight. The grain weight refers to the mass of the bullet, and it directly affects its trajectory, accuracy, and terminal performance.

For lighter game like white-tailed deer, a lighter grain weight such as 150 grains is often preferred. These bullets are known for their flatter trajectory and higher velocity, making them ideal for longer shots or open field hunting situations.

On the other hand, if you are hunting in thicker cover or at closer ranges, a heavier grain weight like 180 grains may be more suitable. These bullets offer greater stopping power and better penetration, which can be advantageous when dealing with larger-bodied deer.

Considerations for Shot Placement

Another important factor to consider when choosing the perfect grain for hunting white-tailed deer is shot placement. While shot placement should always be precise regardless of bullet selection, different grain weights can affect how forgiving or unforgiving certain shots may be.

Lighter grain bullets tend to have less recoil and muzzle blast, allowing for quicker follow-up shots if needed. This can be beneficial in situations where you may need to take multiple shots at a moving target or in dense vegetation where visibility is limited.

Heavier grain bullets, on the other hand, may deliver more energy upon impact and provide better terminal performance if shot placement is less than ideal. However, they also tend to have more recoil, which can affect accuracy and follow-up shot capability.

Final Thoughts

Ultimately, the perfect grain for hunting white-tailed deer with a.30-06 bullet will depend on your personal preferences, shooting abilities, and hunting conditions. It is important to consider factors such as range, shot placement, and the specific characteristics of the game you are targeting.

Experimenting with different grain weights during practice sessions can help you determine which option works best for you. Remember to always prioritize ethical hunting practices and select a bullet that ensures a clean and humane kill.

In conclusion, the.30-06 Springfield cartridge offers hunters a wide range of grain options for hunting white-tailed deer. Whether you choose a lighter 150-grain bullet for flat trajectory or a heavier 180-grain bullet for increased stopping power, the versatility of the.30-06 allows you to tailor your ammunition choice to your specific needs.

Optimal Grain Weight for Successful White-Tailed Deer Hunting with a.30-06

Optimal Grain Weight for Successful White-Tailed Deer Hunting with a.30-06

White-tailed deer hunting with a.30-06 is a popular choice among hunters due to the versatility and effectiveness of this cartridge. When selecting the optimal grain weight for your.30-06 ammunition, there are a few factors to consider.

1. Bullet Performance

The performance of the bullet is crucial in determining the optimal grain weight for white-tailed deer hunting. It is recommended to choose a bullet that expands reliably and retains enough weight to penetrate deeply, ensuring an ethical and effective kill.

2. Distance and Shot Placement

Consider the typical distances at which you will be hunting white-tailed deer. If you anticipate shots at longer ranges, opting for a heavier grain weight can help maintain trajectory and energy downrange. However, if most of your shots will be within closer distances, a lighter grain weight may provide flatter trajectory and greater accuracy.

3. Personal Preference

Personal preference also plays a role in selecting the optimal grain weight for white-tailed deer hunting with a.30-06. Some hunters prefer heavier bullets for their increased penetration capabilities, while others prioritize flatter trajectories offered by lighter bullets.

Here are some commonly used grain weights and their suitability for white-tailed deer hunting with a.30-06:

– 150-grain: This is often considered an all-purpose load for white-tailed deer hunting with excellent accuracy and flat trajectory. It provides sufficient power for ethical kills on medium-sized game.
– 165-grain: A compromise between the 150-grain and 180-grain loads, this grain weight offers good performance on white-tailed deer at various distances. It strikes a balance between trajectory and energy transfer.
– 180-grain: With its heavier weight, this load is ideal for hunters targeting larger white-tailed deer or hunting in areas with dense vegetation. It provides deep penetration and is suitable for shots at longer ranges.

Remember, shot placement and bullet performance are paramount when hunting white-tailed deer. Regardless of the grain weight you choose, practice shooting with your selected ammunition to ensure accuracy and familiarity with your rifle’s performance.

In conclusion, the.30-06 cartridge offers a wide range of grain weights suitable for white-tailed deer hunting. Consider factors such as bullet performance, distance, and personal preference when selecting the optimal grain weight for your specific hunting needs.

Finding the Ideal Bullet Grain for Bagging White-Tailed Deer with a.30-06

When it comes to hunting white-tailed deer with a.30-06 rifle, choosing the right bullet grain is crucial for a successful hunt. The.30-06 cartridge has been a popular choice among hunters for many years due to its versatility and power. However, selecting the ideal bullet grain can greatly impact your accuracy and effectiveness in bringing down your target.

Considerations for Bullet Grain Selection

1. Range: One of the key factors to consider when choosing the ideal bullet grain is the range at which you will be hunting. Different bullet grains have varying ballistic characteristics, including trajectory and energy retention. For close-range hunting, such as in dense cover, a heavier bullet grain like 180 grains may provide better penetration and stopping power.

2. Flat Trajectory: If you are planning on taking longer shots or hunting in more open areas, opting for a lighter bullet grain like 150 grains can help maintain a flatter trajectory. This means that the bullet will drop less over distance, allowing for more accurate shots at varying ranges.

3. Game Size: Another important consideration is the size of the game you will be pursuing. While white-tailed deer are not particularly large animals, using a heavier bullet grain can provide added assurance when it comes to delivering an ethical shot and ensuring quick kills. A 180-grain bullet can offer sufficient energy transfer for larger deer or if you anticipate encountering other big game species like elk or moose.

4. Bullet Performance: It’s essential to choose bullets that are designed specifically for hunting purposes and offer reliable expansion upon impact. Modern bullets have come a long way in terms of performance, with controlled expansion and high weight retention being desirable qualities. Consider premium bullets from reputable manufacturers that are known for their consistent performance.

5. Personal Preference: Ultimately, the choice of bullet grain may also come down to personal preference and what you feel most confident using. Some hunters swear by a specific bullet weight based on their past experiences and success rates. It’s important to find a balance between what works well for you and what is appropriate for the game you are pursuing.

In conclusion, finding the ideal bullet grain for bagging white-tailed deer with a.30-06 involves considering factors such as range, trajectory, game size, bullet performance, and personal preference. Whether you opt for a heavier 180-grain bullet for larger game or a lighter 150-grain bullet for flatter trajectories, selecting the right ammunition can greatly enhance your hunting experience and increase your chances of success.

The Best Grain Weight for Effective White-Tailed Deer Hunting Using a.30-06

When it comes to hunting white-tailed deer with a.30-06 rifle, choosing the right grain weight for your bullet is crucial. The.30-06 cartridge offers a wide range of bullet options, from 150-grain to 180-grain and even heavier. Each grain weight has its own advantages and considerations for deer hunting.

150-Grain Bullet:

A 150-grain bullet is a popular choice for deer hunting with a.30-06. It offers a flatter trajectory and higher velocity compared to heavier bullets, making it ideal for shots at longer distances. This grain weight provides excellent accuracy and sufficient energy transfer for ethical kills on deer. It is particularly well-suited for smaller-bodied deer species or when shooting in open terrain where longer shots may be necessary.

165-Grain Bullet:

The 165-grain bullet is often considered a versatile choice for white-tailed deer hunting with a.30-06. It strikes a balance between the flatter trajectory of the lighter bullets and the increased energy of the heavier ones. This grain weight offers good penetration and expansion, making it effective on medium-sized game like white-tailed deer. It provides adequate stopping power while still maintaining manageable recoil.

180-Grain Bullet:

For hunters targeting larger-bodied white-tailed deer or seeking maximum energy transfer, the 180-grain bullet can be an excellent option. This heavier bullet weight delivers greater knockdown power and deeper penetration, making it suitable for shots at close range or when encountering larger bucks. However, it may have a slightly more pronounced trajectory arc compared to lighter bullets, so adjustments in aiming may be necessary at longer distances.

In conclusion, selecting the best grain weight for effective white-tailed deer hunting using a.30-06 depends on various factors such as the size of the deer, shooting distance, and personal preference. The 150-grain bullet offers flatter trajectory and higher velocity for longer shots, while the 165-grain bullet strikes a balance between trajectory and energy transfer. The 180-grain bullet provides maximum stopping power for larger game or close-range encounters. Ultimately, it is important to choose a grain weight that suits your specific hunting situation and ensures ethical kills.

Maximizing Success: Selecting the Right Grain for White-Tailed Deer Hunting with a.30-06

Maximizing Success: Selecting the Right Grain for White-Tailed Deer Hunting with a.30-06

White-tailed deer hunting is a popular pursuit for many hunters, and the.30-06 Springfield cartridge is a versatile choice for this game. When it comes to selecting the right grain bullet for white-tailed deer hunting with a.30-06, there are several factors to consider.

1. Bullet Weight

The weight of the bullet plays a crucial role in determining its performance on white-tailed deer. For lighter game like deer, bullet weights ranging from 150 to 180 grains are commonly used with the.30-06. These bullet weights offer an excellent balance between flat trajectory and sufficient energy transfer upon impact.

2. Trajectory

Having a flat trajectory is important when hunting white-tailed deer, as it allows for more precise shot placement at varying distances. A flatter-shooting bullet, such as a 150-grain option, can help maximize accuracy and increase the likelihood of a clean kill.

3. Energy Transfer

When choosing a bullet for white-tailed deer hunting, it’s essential to ensure that it delivers enough energy upon impact to effectively take down the animal. Bullets in the 150 to 180-grain range provide ample energy transfer, resulting in quick and ethical kills.

4. Consider Shot Placement

Shot placement is crucial when hunting any game species, including white-tailed deer. Regardless of the bullet weight chosen, it’s important to aim for vital areas such as the heart or lungs to ensure a humane kill.

In conclusion, when selecting the right grain for white-tailed deer hunting with a.30-06 Springfield cartridge, opt for bullets in the range of 150 to 180 grains. Consider factors such as trajectory, energy transfer, and shot placement to maximize your success in the field.

Unlocking the Potential: Discovering the Optimum Grain Weight for Harvesting White-Tailed Deer with a.30-06

Unlocking the Potential: Discovering the Optimum Grain Weight for Harvesting White-Tailed Deer with a.30-06

White-tailed deer hunting is a popular pursuit among hunters, and choosing the right ammunition is crucial for a successful harvest. The.30-06 Springfield cartridge has long been favored by hunters for its versatility and effectiveness on various game species, including white-tailed deer.

When it comes to selecting the optimum grain weight for harvesting white-tailed deer with a.30-06, there are several factors to consider. The weight of the bullet plays a significant role in determining its trajectory, energy transfer, and terminal performance upon impact.

For many years, the default choice for hunters using the.30-06 was the 180-grain bullet. This weight provided adequate power and penetration for larger game such as elk, black bear, and moose. However, with advancements in bullet technology, hunters now have more options to choose from.

The flatter-shooting 150-grain bullet has gained popularity among hunters targeting deer due to its ability to maintain a relatively flat trajectory over longer distances. This weight is suitable for most deer hunting scenarios and offers excellent performance on medium-sized game.

For those seeking a compromise between flat trajectory and game-stopping power, the 165-grain bullet is an excellent choice. It strikes a balance between velocity and bullet weight, making it versatile enough to handle various hunting situations effectively.

It’s important to note that shot placement plays a crucial role in harvesting white-tailed deer ethically. Regardless of the grain weight chosen, accurate shot placement will ensure quick and humane kills.

In conclusion, when selecting the optimum grain weight for harvesting white-tailed deer with a.30-06 Springfield cartridge, hunters have multiple options available. The 150-grain bullet offers flat trajectory and is well-suited for most deer hunting scenarios. The 165-grain bullet provides a compromise between trajectory and stopping power, while the 180-grain bullet remains a reliable choice for larger game. Ultimately, the choice depends on the hunter’s preference and the specific hunting situation.

In conclusion, the best grain for a 30.06 bullet when hunting white-tail deer depends on various factors such as distance, shooting skills, and preferred results. It is recommended to consult with experienced hunters or professionals to determine the ideal grain weight that suits individual needs and offers optimal performance in taking down these game animals effectively.

Walther Terrus air rifle: Part 1

0

by Tom Gaylord Writing as B.B. Pelletier

Part 2 Part 3 Part 4

Walther’s Terrus rifle with synthetic stock.

This report covers:

  • Quick notes
  • The Terrus
  • The rifle
  • Sights
  • Trigger
  • Stock
  • A threaded muzzle!
  • Overall impression

Quick notes

Thank you for being patient in April. It was a busy month for me!

Now that the last event is over, I’ll get back to accuracy tests for both the Benjamin Bulldog and the Hatsan BT-65. I now have additional bullets for the Bulldog and additional pellets for the Hatsan, so this should be good. I hope to get to the range later this week with both of those rifles.

I finally got my HW 35 at the Malvern airgun show, and it came with a big surprise. The rifle has been tuned! From the feel of it, the tune was a good one; but, of course, I need to test it thoroughly to know for sure. I had plans for tuning the rifle after my basic test, but now those plans will hinge on how well the rifle is already shooting. I may leave it as it is. I hope it’s also accurate.

The Terrus

Today, I am reporting on the Walther Terrus breakbarrel air rifle because Rick Eutsler bragged about it so much when we were filming American Airgunner 2 weeks ago. I shot his Terrus, which has a wood stock, and found it to be very pleasant. It didn’t vibrate, the cocking was easy, the trigger was nice and it seemed to be accurate, though I didn’t have a chance to test it like I’m going to test this one!

One thing I really liked about Rick’s rifle was the thin forearm on the wood stock. It made the rifle feel nice and sleek in my hand — sort of like a Beeman R7, but more powerful — yet not as big and heavy as a Beeman R9. This is the kind of airgun I’ve wanted for many years, and perhaps it has finally been built.

The rifle I’m testing for you today has a black synthetic stock whose forearm is swollen like a pregnant whale. I do not like the feeling, though it’s possible to hold it near the triggerguard, where it’s slender. I wish the designers had left the stock thin when they made the molds. But at least now you know there’s a difference between the wood and synthetic stocks.

From underneath you can see how the forearm swells in the middle.

If you like a full beavertail forearm, get the synthetic stock. If you like a slim forearm, get the wood one.

Rick’s rifle, a .22 caliber, was also calm when it fired. This one I’m testing has a slight buzz. It’s not even as much as the FWB Sport, but it’s there. I’m just saying.

Rick’s rifle was easy to cock and so is the one I’m testing. His trigger was very nice and so is the one I’m testing. If the rifle I’m testing is also accurate, this will be the best market value in a breakbarrel spring gun. At $230, it will be an absolute killer of a deal.

The test rifle is also in .22 caliber. It does come in .177, as well. The test gun’s serial number is LG004249; but if it’s accurate, I plan on buying it and tuning it for you.

Here’s the deal — Umarex, are you listening? I had high hopes for the FWB Sport and was very disappointed when the rifle I tested failed to live up to its rich history — meaning the FWB 124. Suddenly, the Walther Terrus bursts on the scene with most of what I was looking for in the FWB. And the price is fantastic! If this rifle is accurate, then I can overlook the very slight buzz in the powerplant until I have the time to tune it out.

In other words, Umarex, the Terrus may be the very spring rifle I have been looking for. All it has to be now is accurate.

The rifle

The Terrus is a medium-sized breakbarrel spring rifle. It’s smaller than an R9 but seems to deliver similar power. It weighs 7.5 lbs. with the synthetic stock and is 44.25 inches long. It’s rated at 800 f.p.s. in .22, and you know I’ll test that for you. I don’t care if it launches medium-weight .22-caliber pellets at 700 f.,p.s., as long as they all go to the same place.

Sights

The Terrus has open sights! Yes, Walther saw fit to put adjustable open sights on this rifle — even at this low price point. They’re fiberoptic; but when I complained about fiberoptic sights in a Round Table session on American Airgunner, I found I was alone in my opinion. The other 3 guys seem to like them. Of course, I shoot more at targets than they do, and they use airguns for more practical things such as hunting, so I think that’s the difference. Anyhow, the Terrus has sights, and the rear sight adjusts crisply in both directions.

There are grooves in the front ramp for a hood, but no hood came with the rifle. That red fiberoptic tube is very unprotected.

There are 11mm scope grooves cut into the spring tube. And there’s a single hole for a vertical scope stop pin. So, the Terrus is ready for whatever kind of shooting you intend doing.

Trigger

The trigger is 2-stage and crisp! Thank you, Walther. There’s an adjustment for the length of the first stage travel, but that’s all — and that’s all you need. This trigger is crisp and delightful. No, it’s not a Rekord trigger, but it’s way more precise and crisper than any trigger found on similarly priced airguns. Only the now-discontinued Bronco trigger was as good.

The one trigger adjustment controls the length of the first stage.

The trigger blade is very wide and straight, which will please most shooters. But the blade is plastic, and that will invite some criticism. Actually, this kind of trigger blade isn’t part of the sear mechanism and can be made of plastic without a problem, but the traditionalists will complain.

Stock

The synthetic stock has a rough finish in a matte black. It is SOLID! No need for foam. Walther listened to their customers. Both the forearm and pistol grip have generous ares of aggressive stippling that really grips your hand. And, with the safety located in the top center of the pistol grip behind the receiver — shotgun style — this stock and rifle are 100 percent ambidextrous.

The pull is 14.25 inches, which fits most adults. The solid buttpad is a grippy black rubber with a rough surface to grab your shoulder.

A threaded muzzle!

The muzzle has a knurled steel cap that protects 1/2″ x 20 threads for a European silencer. Of course, an airgun like this is already super quiet, so a silencer won’t have much to do. But this is a feature that will play well in the UK, where the Terrus’ over 12 foot-pound power puts it into the firearms certificate (FAC) category.

There it is under the cap — a threaded muzzle. Dream of silent airguns! And, yes, it does look like the front sight comes off for use with a scope.

Overall impression

Can you tell I like this rifle? It’s more than just like — I am thrilled Walther got it so right on the first try. It’s not a gun they’ll make a lot of money with, but it’ll be one that I can get a lot of new shooters to buy because of the price. Most of the features I want are there. There are more of them in this rifle than in any other at this price. I hope it’s accurate! If it is — watch out!

The 7 Best Rimfire Scopes for .22LR in 2024

0

Shooting a rimfire rifle is a favorite pastime of mine. But beyond just plinking for fun, there’s hunting and a competitive rimfire field.

The type of shooting you do with your Ruger 10/22, M&P 15-22, or Henry AR-7 will determine which is the best rimfire scope for your 22LR.

Since the .22LR is a plinking, hunting, and competition round, there’s a lot that it can do, but it also has its limitations.

With that said, I consider scope features that address parallax, close ranges, reticle type, focal plane, and of course, cost.

Let’s dig in!

The Best Rimfire Scopes for 22LR in 2024

1. Vortex Crossfire II 2-7×32 Rimfire – Best Overall

One of the most popular scopes rated by the masses is the Vortex Crossfire II. This particular model is the 2-7×32 Rimfire scope with the V-Plex (MOA) reticle. Simple, affordable, and accurate. It’s why it’s a heavy hitter in the rimfire scope market.

Pros:

  • Cost
  • V-Plex reticle
  • SFP reticle
  • Resettable turrets
  • Fog/waterproof

Cons:

  • No illumination

Not having illumination isn’t necessarily a bad thing, but come low light or dark targets in shaded areas (think squirrels), having a red aiming dot can be a great boon. The only reticle available in the Rimfire model for this configuration is the V-Plex.

Now the V-Plex is a great and simple hunting reticle. Whether you’re popping off cans or nailing jack rabbits, the V-Plex is easy to employ. The posts are 0.57 MOA in size with the center crosshairs 0.17 MOA in size. So, they’re small enough not to cover up vitals on rodents. With the reticle located in the second focal plane, you’ll always have a full-size view of the crosshairs even at minimum 2x magnification.

Having been outfitted for the rimfire cartridge, the parallax setting is fixed at 50 yards. This will be perfect for close quarter shots as well as some reach out to 100 yards.

With 0.25 MOA adjustments, resettable to zero turrets, and caps to set-‘em-and-forget-‘em, the Crossfire is accurate and couldn’t be simpler to sight-in and employ right away.

At under $150 street price (approx.), the Crossfire II riflescope is a quality buy for plinkers and hunters. With its high ratings across the board, the masses have spoken.

2. Maven CRS.1 3-12×40 – Best for Hunting

The Maven CRS.1 was made for hunters by hunters. It’s an excellent rifle scope that I mounted to a Ruger 10/22 just because I could. It meets cost, reticle, and magnification requirements I have for a hunting scope on a .22LR rifle.

Pros:

  • Excellent glass
  • 4x zoom magnification
  • Fixed parallax
  • 0.25 MOA adjustments
  • CSHR SFP reticle

Cons:

  • Clarity at 25 yards

The CRS.1 has fixed parallax at 100 yards, and the .22LR round can and will go that far. However, at 25 yards, the clarity is just shy of sharp – it’s marginally soft. Obviously, it’s strengths are at 50+ yards, but I also think it’s just fine for 25-50 yards too.

As a C-series optic, it has excellent glass quality – it’s something Maven is pretty good at. I wouldn’t hesitate to use this as a hunting scope on my .22 or elk rifles. During field-testing, I did just that by mounting it to my Ruger 10/22 and .270. I also put it on my AR-15. Just so you know, the bundle package includes rings!

CRS1 Mounted on Ruger Rifle
Ruger 10/22
CRS1 Mounted on S&W 270
S&W .270 iBolt
Images by Tina Fa’apoi (Own Work) for Target Tamers

The CRS.1 riflescope has 0.25 MOA adjustments, it tracks excellently, and I was extremely happy with my groupings and 100-yard zero.

The CSHR reticle is a simplified version of the SHR reticle. This one is made of wire, is bold and visible, and is in the second focal plane. This is something that hunters like because it’s highly visible at every magnification. Holdover values are 5, 10, and 20 MOA at 12x magnification.

If you wanted to put this scope on a different rifle, there’s nothing stopping you from doing so. The build quality is solid. The warranty is proven. The CRS.1 would be a high-quality scope for a .22LR.

3. Burris FastFire 3 – Best Pistol Sight for .22LR

Compact, fast, and convenient. The Burris FastFire 3 is a micro red dot sight ideal for the pistol in .22LR. Even though it mounts to handgun slides, it also comes with a Picatinny base in the box for mounting to a rifle rail.

Pros:

  • 8 MOA dot
  • Dynamic illumination
  • Manual illumination
  • Sunshade cover
  • Picatinny rail mount

Cons:

  • Battery compartment lid

First time shooting with the Burris FF3, I had an oopsie kind of moment. I didn’t secure the battery compartment lid properly, and it came off when I shot a round. That was an epic user fail in my books, and fortunately, I’m more aware of that now.

Burris FF3 with cover
Cover attached & mounted to Sig P320 X Carry
Burris FF3 Sensor VS Low illumination
Sensor VS Low manual illumination
Burris FF3 box opening
What’s in the Box?
Images by Tina Fa’apoi (Own Work) for Target Tamers

I really like the compact size of the pistol sight. It’s around 1.9” in length and weighs a mere 1.5 oz. Though it’s tiny, it’s built like a tank. I racked the slide multiple times against a wooden bench leaving the Burris FastFire sight no worse for wear.

It has an 8 MOA dot powered by a CR1632 battery, defaults to dynamic (ambient) illumination, but it does have a manual 3-setting illumination override.

Range testing Burris FF3 mounted to MP1522
Battery compartment of the Sig Sauer Romeo 5
Mounted to 15/22 via included Pic mount – Images by Tina Fa’apoi (Own Work) for Target Tamers

What makes this great for both .22 pistols and rifles is that it also comes with a Pic rail in the box. Yes, I’ve mounted it to a .22 rifle and had a blast. The large dot makes it easy to see and acquire in the field.

When it comes to cost, it’s cheaper than the field-tested Leupold DeltaPoint Pro (check out our comparison of the Fastfire 3 and the Deltapoint Pro here) and other alternatives from Trijicon and Sig Sauer. As a versatile red dot sight with no perceivable parallax issues, and it’s ideal for close-range work, it’s a winner.

4. Sig Sauer Romeo 5 – Best Red Dot Sight for .22LR

The Sig Sauer Romeo 5 is one of the most highly-rated and popular red dot sights in the market. It’s affordable, has MOTAC, and it’s just as good for the .22LR round as it is for the 5.56mm and more.

Pros:

  • Price
  • Red dot sight
  • 2 MOA dot
  • Multi-height mounting system
  • Long battery life

Cons:

  • Non-adjustable MOTAC

Since it’s a red dot sight, the Romeo 5 is often shot from my AR-15 rifles. It’s seen a lot of action on top a S&W M&P 15-22. My most recent complaint is that it somehow got stuck to my 5.56mm rifle rail. Long story short – a screw extractor set was necessary. So, don’t over-torque the tension!

What makes the Romeo 5 so popular is its motion-sensor feature, MOTAC. It automatically goes into stand-by mode after 120 seconds of non-use. When motion is detected, the illumination kicks on and the dot is ready and waiting for use by the time you get rifle to shoulder.

Viewing through the Romeo 5 LEFT Cow RIGHT Rabbit
CR2032 battery
The 7 Best Rimfire Scopes for .22LR in 2024
R5 on cow & rabbit
Images by Tina Fa’apoi (Own Work) for Target Tamers

It has a 2 MOA dot which is great for close-range work as well as stretching the distance to say 175 yards for long shots with the .22LR round.

With a CR2032 battery powering the Sig sight, it has a 40,000+ hour battery runtime. After well over a year, I still haven’t changed it out yet.

Considering its low price point under $150, it’s one of the top red dot sights for the money. How could it not be a great pairing for a .22LR rifle?

5. Simmons .22 MAG 3-9×32 – Best Budget Scope

If you’re looking for a quality scope under $50 for a rimfire rifle, you must consider the Simmons .22 MAG 3-9×32. It’s about as basic as it gets as evident from its Truplex (duplex style) reticle to its fully coated lenses. But it’s a cheap scope that’s worth buying when the budget is limited.

Pros:

  • Truplex reticle
  • Rings included
  • QTA eyepiece
  • Lightweight
  • Fog/waterproof

Cons:

  • Included scope rings

It’s nice for a manufacturer to attempt to include all the components needed to get shooting out of the box, but unfortunately, it seems the included rings require a little work. This usually means some shimming or lapping them. Most people end up buying different rings.

With that out of the way, the .22 MAG scope is obviously made for rimfire rifles. Even with its 3-9×32 configuration, it’s one of the lightest riflescopes in this lot at 10 oz (approx.).

The 0.25 MOA turrets are finger adjustable and capped. There is a total of 60 MOA in adjustment travel for both the elevation and windage turrets.

Simmons highlights the QTA (Quick Target Acquisition) eyepiece that seems to be comparable to a quick focus eyepiece. Though you can adjust for your vision, the optics only have a fully coated treatment, so brightness and resolution will just be acceptable – not exquisite. However, I really like that it has a HydroShield lens coating for as cheap as this scope is.

The 7 Best Rimfire Scopes for .22LR in 2024
Shooting @ 25 yards
The 7 Best Rimfire Scopes for .22LR in 2024
Shooting @ 200 yards
Images Credit: SGT Johnny USMC

Though you might hear of the .22 MAG scope having an AO or adjustable parallax feature – it does not! It has a fixed parallax setting for 50 yards.

Based on the optics and overall quality, it will be a standard performer for recreational applications. I’d say the Simmons scope will be a reasonable optic for plinking and maybe some small game hunting. For 50 bucks, it really can’t be beat.

6. Vortex Diamondback 2-7×35 Rimfire – Best for Close-Range

The Diamondback 2-7×35 Rimfire scope mightn’t seem like a far stretch from the Crossfire II 2-7×32 Rimfire. However, there are differences that could justify the jump up in price for the Diamondback.

Pros:

  • Cost
  • V-Plex reticle
  • SFP reticle
  • Resettable turrets
  • Fog/waterproof

Cons:

  • No illumination

As you can tell, the pros and cons are the same between the Diamondback and Crossfire II riflescopes. However, the differences are in the details. The Diamondback has a larger objective lens, wider FOV, and more adjustment travel with no consequence to size and weight. The real consequence is the increase in cost for these upgrades.

Like the Crossfire II, the Rimfire model has the V-Plex reticle. However, the Diamondback V-Plex Rimfire reticle is excellent in drawing the eye to the center with 1 MOA size posts and even thinner 0.3 MOA center crosshairs. This V-Plex is thicker than the Crossfire II V-Plex!

This is great especially for those with aging vision. However, without an option for illumination, there’s only so much you can do in low-light and against dark, shaded terrains.

For most people, this is not always an issue. The benefits of having a simple reticle, resettable to zero turrets, finger adjustments, and a Vortex-tough build are worth it. Focus should not be an issue from 0-100 yards as parallax is set to 50 yards – the perfect middle-ground for all things rimfire.

With the famous VIP warranty to back the scope, there’s little to dislike about the Vortex rimfire scope.

7. Leupold VX-Freedom 3-9×40 Rimfire MOA – Best for Long-Range

The Leupold VX-Freedom series is a well-known and affordable line of scopes from Leupold. The 3-9×40 model incorporates a traditional configuration but adds a unique touch with the Rimfire MOA reticle to hit long-range targets with 3x zoom.

Pros:

  • Rimfire MOA reticle
  • Finger-click adjustments
  • 0.25 MOA adjustments
  • 60-yard fixed parallax
  • Fog/waterproof

Cons:

  • No illumination

The bold lines of the reticle are 1 MOA while the hashmarks are 0.25 MOA in size. This is good for minimal subtension on targets, and should be easy for old eyes to see – even in low light though it lacks illumination.

Apparently, the VX-Freedom series of riflescopes are designed, machined, and assembled in the USA. Short way of saying it, it’s made in the USA. It’s fog, shock, and waterproof, and although it’s going to be excellent for the 22LR, it’ll certainly handle recoil from sitting on a centerfire rifle.

The 7 Best Rimfire Scopes for .22LR in 2024
Rimfire MOA reticle (right) – Image Credit: OzzieReviews

What makes it perfect for the .22 is the unique Rimfire MOA reticle. Sitting in the second focal plane, subtension is only accurate at max 9x power. The 3:1 ratio zoom (3X) provides 3-9x variable magnification that used to be the standard for most applications. Now, the 4x 3-12x configuration is replacing the one-time standard. I’d consider the 3-9x a traditional platform that has proven its worth time and time again.

Though simple in design and application, the VX Freedom scope has finger-click adjustments in 0.25 MOA increments. It has fixed parallax of 60 yards which is a great setting considering the average distance shots for a .22.

Made to be ideal for the .22 in reticle, focus, and ease of use, the Leupold VX-Freedom could be a top scope for competition and long-range shots.

A Guide to Choosing the Best Rimfire Scope for 22LR

Cost

On average, any riflescope can be used on a rimfire rifle. Rimfire scope features include reticle type, close-range focus, and usually an overall theme of simplicity. This generally results in a scope that is affordable with low to mid-range magnification, and fixed parallax of 50 or 60 yards.

ProductKey FeatureConfigurationPrice Range
Rimfire Scope Feature, Configuration & Price Range Comparisons

Scope Type for 22LR

Overall, there is a plethora of .22LR firearms from handguns to carbine pistols, flat-top ARs, and bolt and lever action rifles. This provides a wide variety of optic options to mount to a firearm with the .22LR cartridge.

The nice thing about these types of scopes is that they can be used on 17 HMR to even some or all centerfire cartridge firearms too (depending on quality and application of course).

Some of the best types of optics to mount to your 22 may depend on the firearm. For example, a red dot sight could be best for an AR-15 while a scope would be fantastic for the bolt-action rifle.

ProductOptic TypeMounting Type
Rimfire Scopes Optic & Mounting Type Comparisons

Reticle

In general, most shooters are not concerned with bullet drop and may just hold over for distances that they’ve memorized. Most scopes designed for the rimfire cartridge will have a simple, duplex reticle. More complex rimfire reticles offer BDC features for drop and wind holdovers.

The BDC (Bullet Drop Compensation) reticles are nice to have for those that are taking long shots out to 200 yards or sometimes more.

Additionally, most scopes are set in the SFP (Second Focal Plane). The reticle and crosshairs remain at full size throughout the entire magnification range.

For more info on reticle types, check out our reticles guide. For more info on FFP VS SFP, we have a guide on focal planes too!

ProductReticleReticle TypeFocal Plane
Rimfire Scopes Reticle, Reticle Type & Focal Plane Comparisons

Focus/Parallax

Many centerfire riflescopes that have fixed parallax will have the focus set at around 100-150 yards. Since this is usually the max distance when shooting .22LR rounds, this can make it slightly inconvenient when shooting inside 100 yards and as close as 10 yards.

As a result, most rimfire scopes have a parallax setting of between 10-100 yards with the average at 50 and 60 yards. This provides clarity throughout the entire magnification range and minimizes the effects of parallax.

Of course, you can always practice a consistent cheekweld to peer down the optical axis of the scope to eliminate parallax completely, but you can read more about that in this scope parallax guide.

ProductParallax/Focus Setting
Rimfire Scope Parallax Setting Comparison

Warranty

Not all riflescope warranties are equal. Some manufacturers have a warranty that precedes them for their unconditional coverage while others have limitations that can prevent cost-free repairs or resale. Regardless of how much is spent on a riflescope, a good warranty is always worth looking into.

ProductWarrantyKey Features
Rimfire Scope Warranty Comparisons

FAQ’s

Top Rimfire .22LR Scope: Which is Best?

There are a lot of rimfire scopes that are perfect for the .22 LR. Setting the budget would help to narrow down the list, and from there, other features can be determined to be suitable and appropriate or unnecessary.

The takeaway is that a rimfire scope has features suited to a rimfire firearm. Sure, you can put a Vortex Razor or NightForce ATACR on there, but I’d say it’s overkill.

Usually, the best scope for a .22 is the one that will get used, maximizes fun in the field or at the range, and doesn’t cost you an arm and a leg.

Further Reading

  • Ozark Armament Rhino 4x Prism Sight Review (Range Tested)
  • Ozark Armament Rhino Red Dot Sight Review (Range Tested)
  • How to Measure Scope Ring Height (With Pics & Calculations)
  • How to Adjust a Rifle Scope: 6 Scope Adjustments Explained!
  • How to Level a Scope on a Rifle [Step-by-Step With Pics]

10 Pheasant Hunting Tips

0
Patience and persistence can lead to great rewards.

Keep these 10 pheasant hunting tips in mind to get more pheasants in your sights.

From hot, dry weather early in the season to crowded conditions at state wildlife areas where birds are released, pheasant hunting can be a challenge. Yet veteran hunters have learned to use weather, heavy hunting pressure and wary birds to their advantage and shoot bag limits of roosters each fall.

Here are 10 tips from some of the best pheasant hunters around -hunting guides, state wildlife area managers and hunting club owners -on how to find more birds on public and private lands through the West.

1. USE A GOOD BIRD DOG

Each fall, many hunters are successful by walking through cover and flushing birds without a dog. But the most successful hunters are those with a good bird dog, be it a Lab or a pointer. Not only will a dog help you find more pheasants and other upland birds, but can also track down pheasants after they are shot.

“I’ve noticed that really good bird dogs are a huge advantage,” says Vince Oredson, a state wildlife area manager in Oregon. “I’ve seen fields get hunted over and over throughout the day. And then someone with a dog with a good nose will go in and find birds right away.”

Some hunters prefer Labs, which are excellent at flushing pheasants from heavy cover and also unmatched when it comes to tracking down birds after they are shot.

Others like a pointer, which will locate pheasants hiding in grass and brush and let their owner know exactly where they are.

“A flushing dog that can get into the heavy cattails and other cover can be an advantage in the middle of the day,” Oredson says.

“The pointer dogs work better in the shorter grass where the birds will be early in the morning.”

Burt Holzhauser owns the Rising Sun Hunting Preserve in California, one of the West’s best private-land pheasant hunting areas. He utilizes both Labs and English setters at his ranch.

“You have to have a dog,” Holzhauser says. “You lose too many birds because you knock them down and won’t be able to find them without a dog.”

Some private hunting clubs provide dogs and handlers for an additional charge.

2. LEARN TO DRIVE BIRDS

Jeremy Eubank is a very successful hunting and fishing guide from eastern Washington. He likes to drive pheasants early in the season when hot, dry weather limits success for many hunters.

Eubank’s technique works with or without dogs, although his Lab helps him bag even more birds. He will have one or more hunters take position at the top of a hill or ridge and wait. Then he pushes the birds to them by walking a slow zigzag pattern through brush and other cover.

Pheasants will often retreat uphill, running through the cover and then fly once the cover ends. That’s where the other hunter should be stationed.

Eubank cautions hunters to avoid pushing pheasants downhill. They will often take off flying before they near the hunters waiting to ambush them.

3. HUNT NEAR WATER

Oredson, the manager of Denman Wildlife Area in southern Oregon, and Holzhauser – whose Siskiyou County, Calif., ranch is rated as one of the best pheasant hunting destinations anywhere – get chances to see pheasants under all types of weather conditions. Early in the season and during dry weather patterns, pheasants will often hang out in areas with lots of water.

“They are going to be closer to the water holes,” Holzhauser says of birds in dry weather. “They are going to be in the good cover.”

Oredson agrees: “The birds will gravitate to streams and water holes during hot weather.”

Also look for birds near other water sources, aside from with streams and ponds – such as faucets, irrigation canals, livestock watering containers, pump houses and irrigation equipment.

4. PRACTICE MAKES PERFECT

Private hunting clubs are gaining popularity with hunters as places to train their dogs before hunting pheasants on public-land areas. Hunting clubs and preserves often open before the general pheasant season and are great places to give bird dogs exposure to pheasant hunting.

Break out your rain gear and waterproof boots after the first big storm of fall for some of the best opportunities of bagging a pheasant.

“I have quite a few people who start young dogs here,” Holzhauser says. “I can flag the birds or tell the hunter exactly where they are. You know your dog is on a bird and not a rabbit or something else.”

Hunting clubs also often have a variety of types of cover to expose flushing and pointing dogs to differing terrains, vegetation types and hunting situations.

“I like to mix it up,” Holzhauser says of training new dogs. “I put them through everything from grain fields to tall wheat grass to sagebrush.”

It’s also a good idea to get reacquainted with your shotgun before the season starts – instead of when your dog points to or flushes the first rooster of the season.

“Practice shooting some clay pigeons before the season,” Oredson suggests. “Go out to the gun range and make sure your gun is functioning right. Pattern your shotgun. Make sure you are shooting a good pattern.”

Just as deer hunters scout before rifle season opens, good pheasant hunters will make a trip to their favorite hunting area before upland bird season begin. Watching where the birds are without hunters around will reveal locations to keep an eye on early in the mornings and late in the afternoons. Scouting for pheasants will also reveal cover types to be aware of once hunting opens.

5. SELECT THE RIGHT SHOT

While many hunters prefer 20-gauge shotguns for pheasant hunting, some like a 16-gauge. And the ever-popular 12-gauge, also used for duck and goose hunting, will suffice.

At Holzhauser’s ranch, lead shot is allowed. “I like No. 5 lead shot,” Holzhauser says.

“Something comparable to 4 and 6s. A heavy load, because the birds are tough enough that 7 1/2 isn’t going to knock them down.”

Holzhauser has seen hunters shoot birds with 7 1/2 shot. Despite being hit, the birds will often survive the blast and live.

If using steel shot, go with a bigger size than if you were using lead. On public lands, lead shot often cannot be used. Instead, size-4 steel shot is a good choice.

“Four seems to be the most popular size shot,” Oredson says. “You have a little less range with steel. If you keep them under 50 yards, you should do fine,” he says of shot range.

6. TIME YOUR HUNTS

Just like most hunting and fishing, pheasant hunting tends to be at its best early in the morning and again in the evening.

Mornings are best because the birds are often found in grasses or other light cover, searching for food. Once hunters and dogs arrive, the birds will retreat to heavier cover until pressure eases. They will then begin searching for food again.

At private hunting clubs, however, hunting is good throughout the day, as birds are often released several minutes to a few hours before hunters begin their hunt. Hunters can tell hunting club managers what type of hunt they want, from beginner to more challenging and if they want the birds disoriented or not.

On public grounds later in the day, the birds will come out again when hunting pressure drops off.

7. FIND PHEASANT SIGNS

When hunting new areas, Holzhauser says there are several giveaways – including tracks and crowing – to indicate if there are birds in the area.

“You will see them crossing the road,” said Holzhauser. “You’ll hear the roosters crowing.”

Late in the evening, pheasants will come out and feed before bedding down. You can often see them at dusk, which is a good time to scout for pheasants.

When scouting a new pheasant hunting area, Oredson suggests you look for birds where corn is growing.

“Corn seems to be a magnet for pheasants,” Oredson says. “They like the shade, they like the green cover and they like the corn itself. Pheasants also like thick cattails. Marshy areas hold a lot of birds, but they are a little harder to hunt.”

8. BE PATIENT

Many hunters become frustrated when they don’t bag a rooster within the first half hour of hunting.

Be patient, says Oredson. “If things aren’t working, take a break, sit down, eat a sandwich.” he says.

“Things change all the time. Another hunter can push birds into our area. Don’t get too frustrated. Sometimes you have to let the birds come to you.”

If you know birds are in an area but have hunkered down, slowly work the area with your dog. Break down the entire area and methodically going through all the cover with your dog.

9. HUNT THE COLD

The first really cold spell of the year can produce some of the best pheasant hunting of the season.

“The advantage of cold, wet weather is it’s easier on the dogs, and it makes the scenting conditions better for the dogs,” Oredson says.

Break out your rain gear and waterproof boots after the first big storm of fall for some of the best opportunities of bagging a pheasant.

Pheasants can also be easy to track on muddy or snow-covered ground.

10. KNOW THE REGS

Study the hunting regulations in your state before hunting. Regulation books will often include public-land release sites for pheasants.

Some Western states hold paid pheasant hunts, where hunters can harvest roosters on public land for a fee of about $10 a bird. There also are junior or youth pheasant hunts in many states.

California, Oregon and Washington all have information about the youth and adult state wildlife area pheasant hunts on their Web sites and in their regulation books.

Hunters must also be aware of tag and recording requirements. In Oregon, for example, you can be fined for bagging a pheasant and not recording it on your tag, just like keeping a salmon without recording it on your fishing license.

Also be aware of any hunter orange requirements, load or firearm restrictions or hunter education requirements for your state.

IT ALL STARTED HERE

Although the Plains States have a reputation for top-quality pheasant hunting, pheasants were first introduced to the U.S. in the Pacific Northwest.

After ring-necked pheasants were brought in from China in 1882, Oregon’s Willamette Valley was the first place in the U.S. to sustain wild populations of the birds.

Pheasants were also introduced to the Longview, Wash., area at the same time. The newly introduced birds thrived, and their populations quickly grew into the tens of thousands.

Eastern Oregon, eastern Washington and northeastern California still have good numbers of wild pheasants, although the birds are not as plentiful as they once were because of changes in the agricultural industries.

Pheasants thrive in farming areas of each state, but also are found in state wildlife areas where they are raised and released for hunters.

There also are private hunting clubs in each state where hunters can pay for each bird they want released.

Caliber Comparison: Understanding the Difference Between 308 and 5.56

0

308 vs 556

The .308 Winchester (.308 Win) and 5.56 NATO rounds are two of the most popular centerfire rifle cartridges in the United States and across North America. Both cartridges are battle-proven and currently in service with the U.S. Military and its NATO allies.

The 308 vs 556 debate has been raging between civilian marksman, law enforcement, and military shooters for well over 60 years and is akin to a clash of heavyweight titans nothing short of Ali vs Frasier.

Sufficed to say, it is unlikely that we will be able to crown a victor in the context of this article.

However, get ready for an absolute knock-down, drag-out, slugfest between two of the most popular and iconic cartridges in shooting!

A Quick Note on Nomenclature

In the context of this article, .308 Winchester (308 Win) and 7.62x51mm NATO (762 NATO) will be used interchangeably. The same can be said for .223 Remington (223 Rem) and 5.56x45mm NATO (556 NATO).

However, please understand that rifles chambered in 308 and 223 are different than those chambered in their NATO spec equivalents, 762 and 556, respectively.

It’s important to note that NATO spec ammunition should ONLY be fired from rifles chambered to NATO specifications.

You should experience zero issues shooting .223 Rem ammo in your 5.56 rifle, but not vice versa. The same is true for .308 in a 7.62 rifle. This is due to chamber pressure differences between the .223 vs 5.56 and .308 vs 7.62 rounds.

Bottom line: Know what round your rifle is chambered in (it’s typically engraved on the barrel or receiver of your rifle).

What is .308 Win?

Following the end of the Korean War, the U.S. Military started developing a replacement for the storied M1 Garand. Although the M1 Garand had served the U.S. Armed Forces valiantly through World War II and Korea, the military wanted a more modern service rifle with select-fire capability and detachable magazines similar to the Stg-44 and AK-47.

The M1 Garand was chambered in the 30-06 Springfield cartridge, 7.62x63mm NATO designation, a round that has been credited with taking down every North American large game animal, including the great bears.

With advancements in rifle powder technology and case design in the 1950s, the new 7.62x51mm NATO rifle round was able to achieve neatly identical ballistic performance as the 30-06 Springfield with a shorter cartridge case length and lower overall weight.

The US Army officially adopted the 7.62x51mm NATO round and the new M14 battle rifle in 1958. The M14 featured a 20-round detachable magazine and select fire capability (semi-auto and full auto).

The M14 saw its first action in the Vietnam War before being quickly being replaced by the M16 in 1964.

762 has also been utilized in multiple machine guns fielded by the U.S. Military, including the M60, M240B, and GAU-17/A minigun.

Seeing the potential of the 762 in the civilian market, Winchester was quick to adapt the new rifle round to its Model 70 bolt action rifle. The civilian version of the 7.62 was named the .308 Winchester.

Other major firearms manufacturers followed suit and the 308 Winchester quickly became available in multiple bolt action, pump, and semi-automatic rifle platforms.

Other popular 308 Winchester bolt action rifles include:

  • Savage 11/110
  • Remington 700
  • Ruger M77 Hawkeye
  • Browning X-Bolt
  • Weatherby Vanguard

The 308 Winchester has since become the most popular big game hunting round in the world with bullet weights typically ranging between 120 to 180 grains.

With astounding accuracy, stopping power, and an effective range out to 1,000 yards (with appropriate loadings), the 308 is a staple in deer hunting camps and in marksmanship competitions across the globe.

What is 5.56 NATO?

308 vs 5.56 dimension chart

The 5.56x45mm NATO cartridge was derived from the .223 Remington (which itself descended from the .222 Remington). Development of the 223 Rem rifle round began in 1957 and the final design was submitted by Remington Arms to the Sporting Arms and Ammunition Manufacturers’ Institute (SAAMI) in 1962.

The development of the 223 Remington cartridge was a joint operation organized by the U.S. Continental Army Command between Fairchild Industries, Remington Arms, and Eugene Stoner of Armalite.

Eugene Stone was the primary inventor of the AR-10 rifle (chambered in 7.62), which he was invited to scale down to accommodate the new .223 Rem cartridge.

The resulting rifle was the AR-15, which has become the most popular sporting rifle design in the United States. The military adopted a select-fire version of the AR-15, designating it the M16 in 1964.

FN Herstal developed the 5.56x45mm round beginning in 1970 using the 223 as a parent case. The 5.56 and .223 cases are identical in case dimensions.

However, the primary difference between the two cartridges is the maximum pressure allowance for the rifle rounds.

SAAMI specifications for the .223 Rem indicate that a maximum allowable chamber pressure of 55,000 psi. However, the 5.56 case was designed to handle pressures up to around 61,000 psi.

This is why you should NEVER fire 5.56 from a firearm chambered in .223 Rem, as the chamber a rifle chambered in 223 Remington is not rated to handle the pressure of a 5.56 round.

The 223 was quickly adopted to both AR platform and bolt action rifles from all major firearm manufacturers. Its low recoil impulse and flatter trajectory makes it ideal for marksmanship trials and varmint hunters.

As the .223 Remington ammo can be purchased in a variety of bullet weights for a variety of different applications, but the most common bullet weights that you’ll find in most all gun shops and sporting goods stores are 55, 62, and 69 grain.

.308 Win vs 5.56 NATO – The Contest Begins

Now that you have a clearer understanding of where each round came from, it’s time to ring the bell and let these two heavyweight sluggers throw hands! We’ve got 8 rounds (categories) for these two NATO pugilists to contend in.

Let’s get it on!

Round #1 – Recoil

Winner – 5.56 NATO

The 223 and 556 rounds were developed in response to the military’s need for a lower recoil battle rifle/carbine.

Although the 308 Winchester cartridge is a capable rifle round, it has almost double the case capacity and fires much heavier bullets. All of this adds up to considerably more felt recoil when shooting a 308.

The lower recoil of the 556 allows for higher accuracy and faster follow-up shots when engaging targets in semi-automatic or fully automatic fire.

Round #2 – Weight

Winner – 5.56 NATO

This is perhaps one of the biggest advantages of the 223 over the 308. The 308 Winchester is considerably heavier than its 223 Remington counterpart and soldiers can carry considerably more 223 into battle.

This was one of the main reasons for the development of the 556. Assuming a 22-pound ammo loadout, a soldier can carry approximately 660 rounds of 223 vs only 280 rounds of 308.

Round #3 – Effective Range

Winner – 7.62 NATO

7.62 was developed to have outstanding accuracy at longer ranges. Standard 308 Win loadings can still be combat effective out to 1,000 yards.

By comparison, the 5.56 is typically only considered effective out to about 500 yards.

When shooting out past 500 yards, wind drift becomes a major issue. With a heavier bullet, the 308 is going to be less affected by wind conditions than the lighter weight 5.56 rifle round.

Military and Law Enforcement snipers have long favored the more powerful 308 Winchester round for its accuracy and effective range.

Round #4 – Barrier Penetration

Winner – 7.62 NATO

Barrier penetration, or lack thereof, has been one of the biggest critiques of the 5.56 since its inception.

The 223 is faster but lighter in weight, and is therefore much more susceptible to deflection and tumbling when it encounters an obstacle when compared to the much heavier 308.

This was a major issue during the Vietnam War and why many veterans of that war are somewhat sour on the M16 rifle.

The newer 5.56 round has somewhat better barrier penetration when compared to the initial design of the 223 Rem, however neither compares to the raw penetrating power of a 147 grain bullet fired from a 308 Winchester chambered rifle.

Round #5 – Self Defense

Winner – 5.56 NATO by a tiny margin

Both the 5.56 and the 7.62 are going to be extremely effective during a self-defense situation.

Both cartridges are combat-proven and lethal within self-defense ranges.

The only caveat is that the 308 will be more prone to over penetration in a home defense situation, which is why I have to give a slight edge to 5.56.

Round #6 – Accuracy

Winner – Wash

Both the 308 and 223 are extremely accurate and reliable. Under 500 yards it is unlikely a shooter will be able to detect any noticeable difference in accuracy between the two rounds.

Round #7 – Stopping Power

Winner – 7.62 NATO

With its heavier bullet, the 762 has almost double the energy (ft-lb) at the muzzle when compared to the 5.56 round. We will cover more of the ballistic data below, however there’s no denying the sheer power and force of the 308 Winchester, which is why it is the ideal choice for big game hunting as well.

Round #8 – Reloading

Winner – Wash

Both the 223 Remington and the 308 Winchester are a dream to reload.

With a plethora of suitable powders, different bullets to choose from, and plenty of brass cartridges available on the secondary market, it makes reloading 223 and 308 a fun and enjoyable experience.

The average hand loader can easily produce match-grade ammo that is tailored to their rifle without the cost of purchasing match ammunition.

Crowning a Champion in the 308 vs 556 Title Fight

Honestly, this one is simply too close to call and we’re going to have to go to the judge’s scorecards to make a final determination.

But that judge isn’t me, it’s YOU!

The real difference between these two calibers is what your intended purpose is.

Looking to take down North American large game starting at deer and going up thorough Elk? Then look no further to the 308 Winchester with a box of hunting soft points to get the job done!

Maybe you’re looking to get into long range shooting out past 500 yards? 7.62 get’s the nod here as well with some high quality match grade full metal jacket (FMJ) ammo.

Maybe you’ve got a lot of varmints around your ranch and you need something light weight with fast follow up shots? Then an AR-15 or bolt action 223 Remington rifle will serve you well harvesting small game as your hunting rifle of choice.

Or perhaps you just want to get out to the range and have a good time plinking or target shooting with some cheap FMJ ammo? 5.56 takes this tile as well.

And then, of course, maybe you just want to enjoy your 2nd Amendment Rights and enjoy the freedoms our Forefather’s fought for? Then get both and see the benefits and limitations of both 223 and 308.

No matter which caliber you chose as the winner of this heavyweight bout, pick something that you enjoy shooting and get out to the range and see how tight you can make those 100-yard groupings!

And remember, buying in bulk is always smart, make sure to check out our stock of bulk 308 ammo and 5.56 bulk ammo.

308 vs 5.56 Ballistics

For all my readers who love the numbers, we have made an outstanding ballistics table comparing both .308 and 5.56.

We’ve compared velocity in feet per second (FPS), energy in foot-pounds (ft-lb), and bullet drop at various combat yardages to help you pick the best caliber for your intended purpose.

308 Winchester Ballistics: Chart of Average 308 Winchester Ballistics

Note: This information comes from the manufacturer and is for informational purposes only. The actual ballistics obtained with your firearm can vary considerably from the advertised ballistics. Also, ballistics can vary from lot to lot with the same brand and type load.

5.56x45mm Ballistics: Chart of Average 5.56x45mm Ballistics

Note: This information comes from the manufacturer and is for informational purposes only. The actual ballistics obtained with your firearm can vary considerably from the advertised ballistics. Also, ballistics can vary from lot to lot with the same brand and type load.

Hands-On Mountain Man History Lesson: DIY Tanning Beaver Tails

0

A few weeks ago, my landlord came knocking at my door on a Tuesday morning. When I answered, he said, “I’ve got a dead beaver out here. You want it?”

What are you supposed to say to that?

“Sure, I’ll take it!”

The words fell out of my mouth well before I realized I didn’t have any idea what the hell to do with a dead 37-pound beaver or how to process it even if I did. But I knew I wanted to make like a guy from the 18th century and take a shot at tanning the animal’s tail with nothing but a throwback attitude and the breadth of collective internet knowledge.

It soon became apparent that I did not have the skills to tan an entire beaver pelt, but the tail — I thought I could manage to tan the tail. Maybe. Sort of. And while figuring it out, I would get a glimpse into the rich history of trapping and part of how they processed the beavers they took, first hand.

Smell the Butt, Eat the Beaver Tails

The beaver-trapping business is an old one; its zenith came in the 18th and 19th centuries, mainly due to the fashion industry in the US and especially overseas. Beaver fur was all the rage, and the fur’s excellent ability to repel water made it an especially sought-after material for hats and other garments.

But what about the tail? After processing, beaver tails were extremely useful for making a number of high-quality leather goods. Plenty of folks have also been known to eat beaver tail — no not the Canadian treat made of deep-fried dough topped with cinnamon sugar and whipped cream with the same name — folks do eat actual beaver tails, especially trappers.

There are a number of ways to prepare what was once thought of as a mountain man’s delicacy. There’s no real amount of meat to be had from the tail, but it’s where a beaver stores most of its body fat.

When you skin a beaver, you’re not going to find a lot of subcutaneous fat like you would on a raccoon, because it’s all in the tail. If you were living in the backcountry for months on end, trapping and purely living off the land, that readily available source of good, pure fat would have been most welcome and perhaps necessary for survival and maintaining reasonable health. In a modern context, you can cook the tail, remove the fat, render it, and have a supply of high-quality cooking fat that can be used for all sorts of things.

In the old days, you’d encase the tail in clay and cook it on some hot coals, and then cut through the charred leather and the inner membrane to get to that pure fat. If your landlord ever drops a fresh beaver on your stoop and you’re brave enough, you can do the same by wrapping it in tin foil and throwing it on the grill.

Surprisingly, folks who have eaten that fat report that it’s basically tasteless. It can also be rendered and used like lard to cook other things.

The tails are pretty damn useful when still attached to the beaver, too. Beavers can slap that large, flat tail on the water surface to issue a danger warning, and it works extremely well as a rudder when they swim. On land, the sturdy tail, which is typically a foot long and 2 inches wide, is useful as another leg to help beavers reach branches and to stabilize their bodies when going to work on a tree trunk.

The animals also use their tail as a lever when dragging bulky and heavy branches into position for dam building. Some people think beavers also use their tails to pack mud into their dams, but they actually use their front feet.

Now, about the smell. You may have heard somewhere that beaver tails smell like vanilla. That’s sort of true. Beavers have castor sacs, a scent gland that creates a chemical compound in the form of a thick yellowish goop, called castoreum, which they use to mark their territory. The glands are actually located under the tail, so it’s the beaver’s ass that smells like vanilla, not the tail itself.

Castoreum smells and tastes so much like vanilla that it’s been used as a food flavoring and in perfumes — but these days, most vanilla scents are synthetic and castoreum is rarely used in vanilla extract (but it’s still on the FDA’s list of approved food ingredients, so you never know).

Because of their fur, skin, tails, and sweet, sweet ass-stink sacs, beavers were hunted and trapped nearly to extinction on two continents. There were only 1,300 Eurasian beavers in the wild at the beginning of the 1900s.

The North American beaver was also nearly hunted out of existence for their pelts and vanilla ass juice. There were an estimated 100 to 200 million beavers on the continent. By the early 1800s, there were hardly any.

But time marched on, and so did the fashions that required an abundance of beaver pelts. Demand declined and trappers moved on to other quarries and professions as the American Frontier dwindled.

Since then, reintroduction efforts in the US, Mexico, and Canada have been successful and their populations are once again abundant.

The Eurasian beaver population has also made a comeback, though not as dramatic, thanks to reintroduction efforts in France, Germany, Poland, and in parts of Scandinavia and Russia.

RELATED – Wildlife Scientists Lead the Charge in Montana’s Cwd ‘Zombie Deer’ Fight

Beaver Trapping in the 21st Century

Today, very few people make a living by trapping beavers. Instead, most are hobbyists and amateurs.

Beavers are amazing creatures, but they can wreak havoc on the local landscape, which is exactly what was happening on my landlord’s property. They were felling trees with tremendous speed and building dams that were causing flooding and cutting off the water supply to a large pond in a state-managed wildlife refuge that butts up against the property. That pond eventually empties into a nearly 700-mile-long river. So, with the blessing of the government officials in charge of the refuge, my landlord began setting traps and dispatching beavers. And that’s how I wound up playing 21st-century mountain man.

Tanning Beaver Tails

Before I got to tanning, I hit GoWild, a social media community geared toward the outdoors, and a bunch of users chimed in with their own experiences, best practices, and words of encouragement. I used what seemed like a couple of solid YouTube tutorials as guides, a few meager cutting implements, and just jumped into it. Fair warning: If you aren’t a patient person, you might want to tap out about now.

Lesson 1: Don’t Cut to the Tip on Beaver Tails

The first task, obviously, was to remove the tail, which was accomplished with a pocket knife and little difficulty.

Then, I cut the tail in half along the edges and began removing the outer skin. Most of this process was really easy, but as you get closer to the tip, the tail gets really thin. I made a couple of wrong moves that an experienced hand would not have made, and put some small holes in the tail leather.

I also discovered that any injury the beaver sustained to its tail that had healed over created really tough scar tissue was all but impossible to separate from the thin outer layer of the tail, resulting in a few more small tears.

Actually pulling the tail apart was more difficult. The interior fat is incredibly slimy and slippery, so I clamped the tailbone in a small bench vise and then got a good solid grip and started pulling the two halves away from the bone. The tactic worked, and they came apart relatively easily.

beaver tails
After cutting up both sides of the tail, the author clamped the tail bone in a vise, pulled the tail apart. While fleshing the tail with a skinning knife, he removed a bit too much in some places and not enough in others. A proper fleshing knife would have helped. T. Logan Metesh/Free Range American

Later on, I learned that you don’t have to try to split the tail all the way to the tip. Just get as close as you can without feeling like you’re going to risk poking through. If you get to this point, then the tail is usually thin enough to separate itself cleanly into two pieces just by pulling it apart.

RELATED – Sporting Dog Restrictions Fail in NH, Falter in MD, Progress Elsewhere

Lesson 2: Use the Right Knife

Next, all the fat and other tissue must be removed from the soon-to-be leather. I learned quickly that having a proper fleshing knife for the task, which I did not, would have made this step a lot easier. I made due with my sharp skinning knife, but the blade’s contours weren’t right for the task and it took a lot longer than it should have, and the results weren’t as clean or thorough as they should have been.

Lesson 3: Tendons Are Tough

I also learned that all of the tendons in the tail closest to the spine are incredibly tough. Given the power that a beaver’s tail has, this makes complete sense, but those sinewy little fibers were abnormally strong and definitely gave even my sharpest knife a run for its money.

With as much of the flesh removed as possible, I was set to start the actual tanning process. It wasn’t difficult, but it was time-consuming.

RELATED – Shed Hunting Tips From Connor Clark: How to Rule the West

Salt and Wait, Acid and Wait, Base and Wait, Wash

First, I thoroughly salted the flesh side of the tail halves with regular table salt and let them sit for 24 hours to dry out. After that, the tail was pretty dry and stiff.

Then, the halves went into a bucket of warm water for another 24 hours to rehydrate.

With the tail thoroughly salted and rehydrated, it then needs to be washed with dish soap to remove any remaining salt and beaver grease.

With the prep work finally done, I decided to go with the alum tanning process (aluminum sulfate and salt) because it seemed easiest and I could get the granulated alum at the grocery store.

I added the tails, granulated alum, and salt into a bucket of clean water with a 1-to-2 ratio of alum to salt. Then it soaked for 72 hours. Told you — lots of waiting.

At this point, I was three days in and the tail pieces were beginning to firm up and feel like leather, but I noticed the edges were starting to develop a slight curl.

Next, the acidic alum has to be neutralized with a base. Borax works well. I dumped the bucket, filled it with some more water, added the tail and the Borax, and stepped away to wait for another 24 hours.

That was it for the tanning process and the pieces were ready for their final drying stage.

adding borax
The tanning alum is an acid, so it had to be neutralized with a strong base once the process was complete. T. Logan Metesh/Free Range American

RELATED – Wild Hunting Tactics: How 7 Apex Predators Do What They Do Best

The Final Results

I set them on some paper towels and then left for a week to visit family out of state, which wasn’t the best idea. When I got back, the pieces were definitely dry, but the result wasn’t what I was expecting — they were rock hard and severely curled at the edges. Plus, little puddles of beaver grease had accumulated in places.

too dry
The author let the tail pieces dry for a week unattended, and they took on some severe curls and had grease pools in the thicker spots. It was a rookie mistake, but a good lesson learned. T. Logan Metesh/Free Range American

I wiped up the grease and worked the pieces back and forth in my hands and over the edge of a counter to try and loosen them up into something close to pliable. The edges were rock hard and there was no way to remove the curl they’d acquired. I tried some leather conditioner to add some moisture back in.

The endeavor, I’d say, was a partial success — but I learned a hell of a lot going through the process.

Next time, I will certainly do a few things differently. I’ll be sure to use more appropriate knives and clean the inside of the tail more evenly. Leaving it to dry unattended for a week was also a bad idea. I also want to consider taking this guy’s advice, do some better knife work, and leave the skin as one piece when filleting the tail, so it can lay flat. His method for removing the tail bone by cutting it out looks easier than the vise method, so I’ll try that, too.

I might also sandwich the leather between some iron mesh during the last step and see if that can prevent any curling that might occur.

For now, the pieces of beaver leather are sitting on top of my gun safe, occasionally driving one of my dogs crazy when she catches the scent. Hopefully, the results of my next attempt will be more than just a learning experience and can be made into something useful.

If you come into the possession of a few beaver tails and, like me, have no tanning knowledge and don’t want to risk ruining the leather, you can trim it up according to the directions on the Specialty Leather Productions site, freeze it, and mail it to them. They’ll tan it and send you back perfect beaver leather for $6.50 per half.

READ NEXT – Wolves in Northern Minnesota Helping Moose, Eating Beavers

Best Air Rifle Deals

Popular Posts

Air Gun 101: What You Should Know about Air Rifle Barrels Before Buying

0
Have you ever heard the phrase: “Imitation is the sincerest form of flattery”? The Chinese must have been very sincere in emulating this proverb. I...

What Is An Air Rifle?

0
If you have stumbled upon this article, chances are that you probably have a pest problem at your house. This is a very common...

Air Gun 101: How many types of Air Gun Sights are there and which...

0
The former American president, Joe Biden, was recently quoted saying: If you need more than ten rounds to hunt, you better stop that business and...

Air gun 101: Everything you need to know about air rifle accuracy

0
Wyatt Earp has said: Fast is fine, but accuracy is everything And I just thought how many airgunners are obsessed with muzzle velocity and muzzle energy,...

Can a 22 air rifle kill a deer?

0
"Debate over whether a 22 air rifle can effectively take down a deer has sparked curiosity among hunting enthusiasts. With its lower muzzle velocity...