Home Blog Page 69

Best Camo for Deer Hunting: What the Science Says

0

In our previous post, we talked about the intricacies of deer vision, focusing on their perception of color, sensitivity to light, ability to detect movement, and their response to blue-spectrum and UV light. With that foundation, it’s time to delve into choosing the best camo for deer hunting in different hunting environments and seasons.

In this follow-up post, we’ll discuss what the science says about deer vision and camouflage and how to use them to enhance your concealment and help you choose the right camouflage for hunting deer.

Selecting the Right Camouflage to Beat Deer Vision

Choosing the right camouflage can make all the difference in a successful deer hunt. Deer have exceptional vision, and hunters need to be aware of how they perceive colors and movement to avoid detection. In this section, we’ll look at the science behind deer vision and how it relates to camouflage.

  1. Match your environment: Choose a camouflage pattern that blends well with the dominant colors, patterns, and textures of your hunting environment.
  2. Adapt to the season: Select camouflage that reflects the changing foliage and vegetation throughout the hunting season. Early-season hunts may require more green elements, while late-season hunts call for patterns with more browns and grays. Snowy environments or winter hunts may necessitate snow camouflage patterns.
  3. Consider deer’s unique color perception: Deer perceive reds, oranges, and some tans and grays as shades of green or gray. Be cautious when selecting camouflage patterns, as they may appear effective to human eyes but stand out to deer due to their unique color perception.
  4. Minimize blue-spectrum and UV visibility: Since deer are sensitive to blue-spectrum and UV light, avoid clothing and gear treated with brighteners, which can make them more visible to deer. Use UV-free detergents for washing your hunting gear and consider using UV-blocking sprays on your clothing and equipment to minimize the chances of being detected by deer.

READ: Deer Vision 101: How Deer See Color, Light, and Movement

Bow hunting in tree and matching camo

Why Mimicry Camo Might Not Be the Best Camo

Mimicry camo, which uses pictures or photos of sticks, leaves, bark, trees, etc. to mimic the environment, is the most common type of hunting camouflage. These patterns can look incredibly realistic to the human eye and provide a sense of satisfaction to the hunter wearing them.

As research into deer vision and behavior has advanced, it has become clear that mimicry camo may not be the most effective option for hunting. While these patterns may look highly detailed to the human eye, deer perceive them as blurry blobs of color. Instead, patterns that use disruptive shapes and colors to break up the hunter’s outline have been shown to be more effective at fooling the eyes of whitetail deer.

While mimicry camo may look great to human eyes, it may not always be the most effective choice when hunting deer. By understanding the limitations of deer vision and the importance of breaking up your outline, you can make an informed decision when choosing your hunting apparel and give yourself the best possible chance of success.

The Effectiveness of Computer-Generated “Disruption” Camo Patterns

In recent years, computer-generated “disruption-style” camo patterns have become increasingly popular among hunters. With advancements in technology, it’s easier than ever to create intricate designs and patterns that are meant to mimic natural surroundings. But are these patterns actually effective? In this section, we’ll take a closer look at the effectiveness of computer-generated camo patterns and compare them to traditional, nature-based mimicry patterns.

Disruption camo is designed to break up the outline of the hunter and create the illusion of depth using different-sized patterns. This method tricks the animal’s eyes into not recognizing the subject as one single object, which makes it harder for them to identify the threat. In essence, disruption camo is designed to trick the animal’s eyes into not seeing anything at all.

Best camo for deer hunting: what the science says
This picture shows how closely macro and micro camo from companies like Sitka and Huntworth look the same by following the same principles of how deer see.
  1. Kuiu, Sitka, Huntworth, and Forloh: These companies have developed advanced camouflage patterns using computer algorithms and digital technologies to create intricate designs that blend effectively with different types of terrains and vegetation. Their patterns can be quite effective for bow hunters, as they help to break up the human silhouette and blend seamlessly with the environment.
  2. Asio Gear’s owl-inspired camo: Asio Gear has developed a camouflage pattern specifically for bow hunters, inspired by the natural plumage of owls. This unique pattern is designed to mimic the disruptive coloration and patterning found in owl feathers, which help owls remain concealed from their prey. The effectiveness of this pattern for deer hunting will depend on the specific environment in which you are hunting and how well the colors and patterns match the local vegetation and terrain.

Modern hunting gear companies like the ones detailed above have developed innovative, computer-generated camouflage patterns designed to provide better concealment in various hunting environments. These patterns are often based on detailed studies of natural environments and animal vision, with the aim of increasing their effectiveness in fooling the keen eyes of deer and other game animals.

Deep Cover Camo by Forloh for close range camouflage
Forloh’s Deep Cover camo was specifically designed for deer vision for bow hunter camouflage at 40 yards or less. It was not made for the human eye.

READ: Bow Hunting Clothes: Optimizing Camo, Scent, and Stealth

Mastering the Art of Concealment

Effective camouflage is just one piece of the puzzle when it comes to successful bow hunting. In addition to choosing the right gear, it’s important to master the art of concealment. This means staying motionless, scent-free, and taking advantage of natural cover to blend into the environment. In this section, we’ll explore the key strategies and techniques for concealing yourself effectively while bow hunting.

  1. Blend with the environment: Choose a camouflage that closely resembles the natural patterns and contrasts in your hunting area, helping you to blend in seamlessly.
  2. Minimize movement: Deer are highly sensitive to movement, so remain as still and quiet as possible when waiting for the perfect shot.
  3. Maintain awareness: Stay vigilant and keep an eye on your surroundings. Deer have a wide field of view, and their heightened senses can detect even the slightest disturbances.
  4. Camouflage vs. solid colors: While it’s possible to hunt deer without wearing camouflage, using camo can improve your chances of remaining concealed and undetected. For bow hunters, who need to get closer to their quarry, being able to break up your outline and blend into your environment is critical to your success. However, it’s crucial to combine camo with other hunting strategies and choose the appropriate pattern for your hunting environment and season.

It’s also important to consider other gear that can reduce visibility, such as face masks, gloves, and boots. These items should also match the camo pattern of the clothing.

Buck sniffing the air looking into the wind while looking for predators.

The Best Camo for Deer Hunting

When it comes to deer hunting, camouflage isn’t just a fashion statement – it’s a crucial tool for success. Understanding deer vision and visual processes is key to creating effective camouflage that works in two ways. First, it must break up the hunter’s 3-dimensional shape and avoid stimulating the ambient system. This is achieved through an effective macro pattern.

Second, if the hunter is detected, the camouflage must prevent or delay recognition by making the hunter appear to have a completely different texture, which is where the micro pattern comes into play. Camouflage gives hunters an extra edge in the difficult pursuit of hunting by enhancing their concealment and increasing their chances of a successful hunt.

Many hunting clothing companies offer camouflage patterns that incorporate both macro and micro patterns to effectively break up the hunter’s shape and texture.

Some examples of such camo patterns include:

  • Sitka Optifade Subalpine and Elevated II (and all the other variations they have)
  • Kuiu Valo, Verde, and Vias
  • First Lite Specter
  • Huntworth Disruption
  • True Timber Strata
  • Under Armour Ridge Reaper Barren

These patterns use a combination of larger and smaller shapes, colors, and textures to create a highly effective camouflage that can help hunters remain hidden from deer.

There isn’t a single combination of colors that works optimally to beat deer vision, but generally speaking, camo patterns that incorporate shades of brown, green, and gray are the most effective. These colors match the natural environment, work against what a deer can see best, and reduce the silhouette of the hunter, making them less detectable.

It’s also important to choose a camo pattern that matches the specific environment and season you’ll be hunting in, as this can vary greatly depending on the location and time of year. Ultimately, the best combination of colors will depend on the individual hunting situation and environment you are in.

*Does mimicry camo work for deer hunting? Of course, it does. Deer have limited ability to see fine details, making mimicry camo effective, especially in environments where the camo closely matches the surroundings. However, based on my experience, I choose disruption-style camo 90% of the time. Disruption-style camo is designed to break up the human outline and create visual confusion, providing reliable concealment in various environments. While mimicry camo excels in perfectly matched environments, disruption-style camo offers versatility and effectiveness even when the colors and patterns may not perfectly align. This is why disruption-style camo has become my preferred choice for its all-around performance.

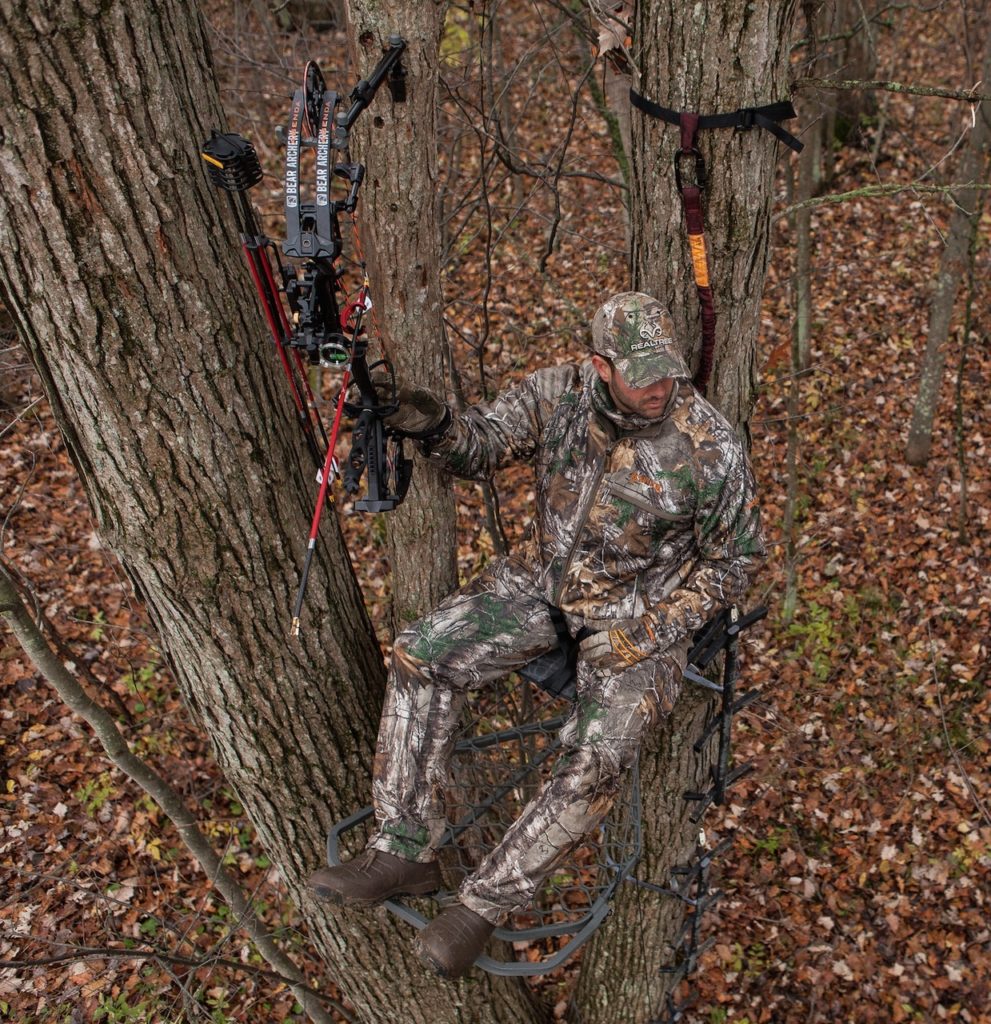
The Best Camo Patterns for Bow Hunters in Treestands

For bow hunters who hunt from treestands or elevated positions, there are disruption-style camo patterns specifically designed to blend into the vertical lines of trees. Sitka’s Elevated II and Kuiu’s Vias Camo are examples of camo patterns that utilize a mix of grays and greens to break up the human silhouette against the vertical lines of trees.

When hunting from a treestand, it’s important to consider the angle at which deer are likely to approach. Camouflage that blends in well with the vertical lines of trees can be particularly effective when deer are approaching from below, as it helps to break up the hunter’s outline and prevent them from being spotted.

Some of the best camos for deer hunting from a tree stand are:

  • Sitka’s Elevated II
  • Kuiu’s Verde (Early season)
  • Kuiu Valo (Mid-season)
  • Asio Gear’s Raptor Camo (See my mid-season gear review here)
  • True Timber Strata
  • Huntworth Disruption (or Tarnen)
Asio Gear Raptor Camo

What Deer Science Says

Understanding the science behind deer vision and camouflage is crucial for any serious bow hunter. As hunters, we want to reduce our visibility to deer and increase our chances of a successful hunt. Thanks to a number of scientific studies, we now have a better understanding of what camo patterns work best and why.

There are a number of scientific studies that support the effectiveness (or lack of) of camo patterns that mimic the environment. For example, a study conducted by the University of Georgia found that hunters wearing naturalistic camouflage patterns (mimicry) were less visible to deer than those wearing non-naturalistic patterns or solid colors.

Here are some additional resources and studies that can provide more scientific insight into deer vision and how it relates to the camouflage you wear when hunting:

  • New York Times
  • The Free Library
  • The Deer Laboratory
  • North Country Whitetails
  • The Outdoor Channel
  • Desolve Camouflage Camo Science

Conclusion

By applying your understanding of deer vision to your choice of camouflage, you’ll be better prepared to blend into your hunting environment and stay concealed from the keen eyes of whitetail deer. Remember to select a pattern that closely matches the natural colors, patterns, and textures of your hunting area, and adapt your camouflage according to the season.

Additionally, bear in mind that deer rely on other senses, such as hearing and smell. Thus, it’s essential to minimize noise, control your scent, and remain aware of wind direction while hunting. By combining all these elements, you’ll become a more proficient and effective whitetail deer bow hunter.

Understanding how deer see and process information is essential when trying to find the best camo for deer hunting. While many camouflage patterns use mimicry to blend in with natural environments, ungulates (deer) do not perceive fine detail the same way humans do. Instead, breaking up your outline is the key to effective camouflage, using different-sized patterns to create the illusion of depth and disrupt the animal’s ability to recognize one single object. This is where disruptive camouflage patterns can be more effective than mimicry patterns. By focusing on our outline, removing contrast to the environment we are hunting in, and using effective camouflage, we can reduce our visibility and increase our chances of a successful hunt.

While I didn’t list every deer hunting camouflage that meets the criteria in this post, you can now take this information and make an informed decision on what to buy the next time you are shopping for bow hunting clothes.

FIRST LOOK: Ruger’s Electronics-Free Ready Dot Optic

0

A reflex sight that doesn’t run on batteries or solar power? Ruger says, “Yes!” with its new, low-profile Ready Dot.

by Rob Reaser

There is no question that red dots are “the thing” for a growing number of pistol shooters and EDC adherents. As such, there are many red dots on the market to choose from for full-size handguns to the micro-compact variety. The latter pistols, by virtue of their small size, favor a more minimalist approach in red dot optics — reflex versus enclosed emitter, diminutive lens, “always on” or “shake-to-wake” activation instead of on/off buttons, and a low profile for use with the factory open sights when backup is needed.

There are many good miniature red dots available, but as far as we know and have tested, all micro reflex red dots are battery-powered…except one.

FIRST LOOK: Ruger’s Electronics-Free Ready Dot Optic

Ruger just released the Ruger Ready Dot. It looks like a conventional micro red dot and pretty much acts like one except that it doesn’t require batteries to operate.

FIRST LOOK: Ruger’s Electronics-Free Ready Dot Optic

Instead, the Ready Dot incorporates a simple fiber optic system to gather ambient light and display it onto a 12 mm multi-layer coated lens. Since there are no batteries to maintain and no switches to turn on and off, the Ready Dot is, well, always ready. Of course, since the system requires ambient light to be gathered and reflected off the lens, the Ready Dot does not function in darkness or in low light levels.

Think of it as the crystal radio version of today’s advanced electronic red dots; it works as designed, but with limitations.

Construction, as you can see, is about as simple as it gets. The housing is black polymer fitted with an impact-resistant, optical-grade polymer lens. The fiber-optic light-gathering coil sits where the battery would be on an electronic red dot, with the output end of the coil permanently affixed in the emitter position.

Although Ruger engineered the Ready Dot for use with the company’s Max-9 micro 9mm and thus uses the Shield RMSc mounting pattern, the unit will work with most handguns that feature the RMSc footprint.

FIRST LOOK: Ruger’s Electronics-Free Ready Dot Optic

For testing, I pulled out my Sig P365 since it came from the factory with the slide cut for RMSc-pattern optics. The downside to choosing this handgun to host the Ready Dot was that I would lose the factory rear sight. That did not end up being a deal-breaker, though, as I will explain shortly.

FIRST LOOK: Ruger’s Electronics-Free Ready Dot Optic

Installing the Ready Dot onto my P365 began by removing the two screws securing the rear sight to the slide. These buggers were on TIGHT and threatened to round out the hex slots when I applied torque. Rather that risk having the screws permanently lodged in the slide because of damaged screw heads, I pooled a few drops of Kroil on them and let it work its magic for a few hours. That was enough to allow the screws to be safely backed out of the slide.

FIRST LOOK: Ruger’s Electronics-Free Ready Dot Optic

With the rear sight screws removed, the sight is freed of the slide.

FIRST LOOK: Ruger’s Electronics-Free Ready Dot Optic

Next, the slide cover was removed.

FIRST LOOK: Ruger’s Electronics-Free Ready Dot Optic

The Ready Dot dropped expertly into place with no alignment issues.

FIRST LOOK: Ruger’s Electronics-Free Ready Dot Optic

While the Ready Dot comes with two M4x0.7 8mm screws for installing the sight onto the Ruger Max-7, those screws will not fit the Sig P365 bushings. Variations in screw type, slide cuts, and adaptor plates among assorted handgun models means the Ready Dot may not work on all micro handguns even if they feature the RMSc footprint, so check with the gun manufacturer before you buy. For my P365 installation, M3x0.5×10.6 screws got the job done and the Ready Dot chassis fit perfectly into the slide cut.

FIRST LOOK: Ruger’s Electronics-Free Ready Dot Optic

Here is the non-enhanced, non-altered image of the Ready Dot. Boasting a whopping 15 MOA diameter, the red dot is big, bold, and quick to acquire. It is also crisp, with a parallax-free distance of 10 yards.

Of course, the vibrancy and visibility of the dot is wholly dependent upon the ambient light. The more light gathered by the fiber-optic, the brighter the image, and vice versa. Part of my testing included a heavily overcast day — so dark it seemed more like dusk than mid-afternoon. Still the Ready Dot made itself quite evident. Inside of the house, visibility varied considerably when transitioning between dim and well-lit rooms.

Background lighting also figures prominently in the red dot’s visibility. If you’re standing in a dark room and aiming into a lighted room, the dot is difficult to pick up. When outside, though, the red dot stands ready.

I mentioned earlier about the Ready Dot requiring me to eliminate the factory rear sight on the Sig. Given the practical effective range of this and most micro-compact pistols, and the relatively short distance of most self-defense encounters, the lack of a rear sight is not a huge drawback. The tritium dot on my factory front sight is clearly visible through the Ready Dot lens, and placing the bottom of the dot at the bottom of the Ready Dot lens corresponds to the same sight alignment as if the rear sight were present — the exception being any left or right shift. To keep that under control, the Ready Dot chassis has a ramped, U-shaped cut-out to help with sight alignment when the red dot is not visible.

The one thing I was curious about before I installed the Ready Dot was its co-witness with the factory front sight because there is no ability to make windage or elevation adjustments. As it turned out, the red dot corresponded with the factory sight just fine, so there were no issues with point-of-aim, point-of-impact performance. Will that be the case for every handgun that hosts the Ready Dot? I can’t say. But then again, we’re talking about micro-compact pistols with a typically short engagement distance.

FIRST LOOK: Ruger’s Electronics-Free Ready Dot Optic

Although the Ruger Ready Dot will not give the 24/7 aiming solution of a battery-powered red dot, it is not trying to compete with those models. This is for the shooter who prefers a hands-off, zero-maintenance, always ready red dot suitable for most situations. And with an MSRP of $99.95, this is an easy buy for anyone with a handgun featuring an RMSc optic cut slide who wants to try their hand at a red dot.

303 British vs 30-06 [Which One Is Better]

0

You know what is the most confusing decision if you are a shooter? It is when you have a beautiful rifle and you need to choose the perfect cartridges for it.

So, what are you choosing between 303 british vs 30-06?

Per round of .303 British will cost you $2.50 and .30-06 Springfield will cost $1.90. So, .30-06 is quite cheaper. 30-06 has a velocity of 890 m/s and .303 British has 844 m/s. .30-06 Springfield is more available. But .303 British damages more to the target because of its lower energy than 30-06.

So, let’s get into the article to find the perfect cartridge for you.

A Quick Comparison Between 303 British and 30-06

The 303 British and the 30-06 basically mean .303 British ammo and .30-06 Springfield ammo. Both of the ammo is very popular among shooters. They have some impressive aspects that made them popular among the users.

Now let’s have a quick look into the basic differences between these ammos. For your comfort, I’ve taken the cartridges with the same mass (10g).

Factors.303 British (10g).30-06 Springfield (10g)Velocity844 m/s890 m/sEnergy3,463 J3,820 JMas Pressure (SAAMI)49,000 psi60,200 psiOverall length3.075 in3.34 inAvailablityGoodBetterPrice $2.50/rd$1.90/rd

Though you can compare the cartridges by their aspects the effectiveness also depends on the rifle. So, it is really necessary to have a good rifle to get the best performance from the cartridges.

If there is any defect in your rifle then it can also affect the performance of the cartridge. So make sure your rifle works properly and doesn’t have any defects in it.

Remember there are also differences between 303 enfield vs 303 british.

In-Depth Comparison between 303 British and 30-06

Let’s assume you have a nice rifle and it works perfectly. Then comes the confusion of having cartridges. Because while choosing the perfect cartridges you need to examine so many different aspects.

Now let’s talk about the 303 rifle bullet and 30-06 deeply. So that it will be easier to you to choose the best one for your rifle.

Velocity

Velocity is the most important aspect when you are going to choose the perfect cartridge for you. This shows how your bullet is going to reach the target. And obviously when you’ll shoot you’ll definitely want to reach close to the target as much as possible.

The .303 British (10g) has a velocity of 844 m/s. Which is kind of impressive for many of the users. And this velocity is enough to make a good hit on the target.

On the other hand, the .30-06 Springfield (10g) has a velocity of 890 m/s. Which is 46 m/s more than the .303 British (10g). As this cartridge has more velocity then you can say that it will be more accurate than .303 British (10g).

Winner: As .30-06 Springfield (10g) has more velocity so it wins this segment.

Energy

The impact of a bullet is described in terms of momentum and kinetic energy. The more pressing concern is how much of the energy will reach the goal. If the bullet goes through, a little amount of the projectile’s energy may be transferred to the target.

The majority of the energy may be transferred if the bullet deforms or mushrooms. A slow bullet that transfers all of its energy to the target. Which is more deadly than a quick one that goes through the target.

So, we can see that .303 British (10g) creates 3,463 J of energy. Which is very impressive. And it will create good damage to the target.

Then if you take a look at the .30-06 Springfield (10g) it creates 3,820 J of energy. Which is almost 400 J more than .303 British (10g)’s energy.

You have already got slow bullets or bullets with less energy damage more than the fast ones. So generally .303 British (10g) will damage more than the .30-06 Springfield (10g).

Winner: As .303 British (10g) will damage more that’s why it wins this segment.

Availability

Availablity is one of the most concerning issues while choosing cartridges for your rifle. Suppose you are planning for a long adventure tour. Then you will definitely want to have some extra cartridges with you.

Then again you will be more satisfied with the availability in every place. It will be better if you can get your cartridges in ruler and remote areas right!

So, you will get more availability with .30-06 Springfield (10g). These bullets are very commonly available all around.

You will also get.303 British (10g) in most of the city or town areas. But it won’t be that much available in rular and remote areas.

Winner: For being more available .30-06 Springfield wins this segment.

Price

Price of the cartridges should be the main concern like velocity when choosing bullets right! Because bullets are something that needs continuous investments.

So it is really important to have some cartridges with reasonable price points.

The .303 British (10g) will cost around $2.50 per round. Which is kind of a costly cartridge.

Then the .30-06 Springfield will cost around $1.90 per round. Which is 60 cents less than the .303 British (10g). This may not be seen as a big difference but it will become large when you’ll buy a bulky quantity.

Winner: For being more reasonable .30-06 Springfield wins this segment.

Which One You Should Choose!

As you can see .30-06 Springfield has more velocity and availability with a lower price point. Which makes this cartridge more attractive to the shooters.

But if you want to have less shoot and more damage to the target then.303 British can be your choice. And don’t forget it is also a popular cartridge among shooters.

So, now you can choose as per your preference.

Don’t forget to take safety precautions before shooting. Let me suggest to you some stuff that will keep you safe while shooting.

  • YINSHOME Shooting Ear Protection Earmuffs, Gun Safety Glasses, Earplugs, Protective Case
  • TRADESMART Shooting Ear Protection – Hearing Protection with NRR38 Earplugs, Safety Glasses & Hard Carrying Case

These protection tools will help you to save your ears and eyes while shooting.

FAQs

What is a 303 British comparable to?

303 British, necked down to fire a. 257 projectile, developed in Australia. Which was in the 1940s as a sporterized rifle cartridge. Notably for the Lee-Enfield action; comparable variants also emerged in Canada at the same time.

How accurate is a British 303?

Accuracy may vary depending on the rifle you are using. Most 303s are 60 to 100 years old, so keep that in mind. To 250-300 yards, a competent rifle should have a minute of deer accuracy. Though 303 British has a good velocity to hit accurately.

Is 303 British a good caliber?

Yes, in most cases it is a good caliber. The.303 British cartridge is ideal for hunting whitetail deer and black bears and is good for all medium-sized wildlife. It was a favorite moose and deer cartridge in Canada when military surplus rifles were plentiful and inexpensive.

Conclusion

I hope by now you have got a perfect idea about 303 british vs 30-06. I want to recommend the one as per your needs.

If there are any more queries, please drop them in the comment section.

Be safe while shooting. Take care.

300 Blackout Ammo Buyer’s Guide

0

300 Blackout Ammo has a lot going for it, right up to the point at which you try to take advantage of its subsonic prowess for tasks other than punching paper. Common subsonic loads, even if tipped with a fragile match bullet such as the ubiquitous 220-grain Sierra Matchking, plow 0.30-inch diameter holes straight through fleshy targets and keep on truckin’ right into the next inconveniently located piece of real estate.

We’ve tried bullets that in other applications are positively explosive. Hornady’s 208-grain A-Max, for example, fragments violently when shoved out the muzzle at even .308 Win velocities, but from a Blackout you might as well be using a DeWalt. Getting a .30-cal to expand reliably at around 1,000 feet per second requires a specialized projectile, and they’re not exactly inexpensive.

Being cheap bastards, in times past we experimented by cutting back the jacket tip on an SMK and then boring out the meplat, thinking that this would be enough to induce expansion. Great theory, sucks in practice. Gel testing confirmed that it performs no better than an unaltered bullet, so why waste the effort? Cutting to the chase, we rounded up a small selection of expanding subs.

Note there are a few more companies who offer bullets for you to roll your own (Cutting Edge, for example), but as work has displaced gentle-paced pursuits like reloading, we’d often rather pay in money than time.

If you decide that a subsonic 300 Blackout Ammo fills your requirements for a stealthy hog slayer, or you’ve settled on that caliber for home defense duties, then you might want to avail yourself of our buyer’s guide below.

300 blackout ammo chart

300 blackout ammo in boxes

300 Blackout Ammo Testing Protocol

All loads were tested for velocity using both 16- and 9-inch barreled weapons. A Remington 700, equipped with a Nightforce ATACR 4-16×42 and SilencerCo Omega was employed as our longer rifle, and it was this combo that we also used for accuracy and gel testing. Five-shot groups were shot at 50, rather than 100, yards as we felt this was a realistic distance for subsonic use. The shorty gun was our budget hog hammer — a franken AR built on a Gibbz side charging upper and equipped with a Maxim Defense PDW pistol brace. Note that all loads except the Fort Scott and Gorilla offerings were supersonic from the 16-inch barrel.

remington 300 blackoutcaldwell chronograph

Velocity readings were taken using a Caldwell G2 chronograph, which has the useful ability to store data on your phone via Bluetooth. Chrono was set up 10 feet from the muzzle, ambient temp was 69 degrees at 2,100 feet elevation, and gel testing was performed using two, 16-inch Clear Ballistics gel blocks, placed end to end.

ballistic testing gel

Fort Scott 190-grain SCS Brush Hog

fort scott 300 blackout

Ever heard of these guys? Neither had we, until we walked into a gun store near San Antonio, Texas, where the counter jockeys assured us they were well regarded by local hog hunters. Intrigued, we bought a couple of boxes for testing. Unlike the rest of the projectiles in this test, these are non-expanding, relying for their wounding abilities on becoming unstable in media more dense than air. Gasp! The fabled M16 tumbling bullet!

Despite a healthy dose of skepticism, they turned in a decent performance, coming to rest after 180 degrees of flippage and 15.5 inches of penetration in bare gel, with the bullet’s base just barely under the back end of the block. Fort Scott seems to be using a set of dies that diverges from industry norms, which resulted in a misfire rate of around 50 percent in our bolt gun — the only sample to do so. On examining the case shoulder (which, in 300 Blackout, is even less significant than Chuck Schumer’s dick) it would appear that it’s both steeper and shorter than competitive brands, allowing the case just enough room to shift forward under firing pin impact. It ran fine in our AR, though.

Gorilla Ammo 205-Grain Silverback

gorilla ammo 300 blackout

Gorilla’s monolithic projectile features a gaping hollow point, which initiates pretty healthy expansion after about 3 inches of penetration in gel. One of the two loads achieving subsonic velocities from our 16-inch bolt gun, it’s mouse-fart quiet even in longer barrels. Not only did it retain all its weight after impact, but petals on the copper bullet remained sharp enough to nick careless fingers when pulling it from the gel block. Accuracy was plenty good for dispatching critters at subsonic ranges.

Hornady 190-grain Sub-X

hornady 300 blackout

Announced in December 2017 and released for sale three months later, Hornady added an expanding subsonic bullet to its existing five 300 Blackout ammo offerings. Built to their usual standards, the bullet features a red polymer tip to initiate expansion, a detail no doubt familiar to users of their Critical Duty line of pistol ammo. In our test rifle, it proved to be an accurate and consistent performer, and if a lone flyer were discounted, would’ve turned in a 0.36-inch group. Of the conventional jacket-and-core projectiles in this test, it was the only one not to separate. Note, however, that some polymer mags may have problems in presenting the blunt tip high enough to make it up the feed ramp in your favorite semi auto. Either use regular old GI versions or Magpul’s 300 BLK-specific offering.

hornady.com

Lehigh Defense 194-Grain Maximum Expansion

lehigh defense 300 blackout

Lehigh’s wicked-looking solid copper bullets turned in an admirable performance, expanding as advertised and growing sharp, symmetrical talons when shot into gel. When dug out, they showed evidence that the fast twist barrels of our test guns would’ve caused additional tissue damage, as they screwed their way through the medium — in this case making three complete revolutions before coming to rest after shedding a petal. Those wanting additional penetration should consider Lehigh’s loading; it exceeds the FBI protocol, but if you encounter bigger hogs it affords a margin of safety on quartering shots.

Noveske / Nosler 220-Grain Ballistic Tip

nosler 300 blackout

Averaging 20-fps faster than the otherwise similar SSA load, this collaboration between two of Oregon’s most respected gun companies is unmistakable with its ominously dark finish. Accuracy was good enough for the task at hand, and the bullet core achieved 17 inches of penetration, after parting company with the remaining jacket around the 15-inch mark. About 30-grains worth of ballistic payload was shed in total, leaving a smoky-looking trail through our gel block as it threw off particles of lead and copper.

SSA 220-grain Ballistic Tip

ssa 300 blackout

Silver State Ammo was acquired by Nosler in 2013, and we suspect that both this load and the Noveske/Nosler above use the same bullet, with a different polymer tip and coating. Group size was almost identical to the Nosler load, and both bullets separated from their remaining jackets after 12 to 14 inches of penetration in bare gel. As this meets the FBI requirements, we don’t see this as a negative for defensive use, because both resulting fragments penetrate sufficiently to reach vital organs.

ballistic gel

Photos by Kenda Lenseigne

More on 300 Blackout

  • The Curious Origin Story of 300 Blackout
  • New in 2021: Magpul’s 300 Blackout 20-round PMags.
  • Radical Firearms Integrally Suppressed 300 Blackout SBR at SOFIC.
  • 300 Blackout Buyer’s Guide.
  • 300 Blackout vs 556: More than a Matter of Distance.

How to get started with bird hunting

0
Photo by John Holyoke

Loving the outdoors, wanting to put some food on the table and maybe spending some quality time with friends. These are just some of the reasons people get started with bird hunting.

Upland birds are game birds that including quail, pheasant, grouse, woodcock, prairie chicken or partridge.

Learn from those who know

For first time bird hunters, getting started is as easy as finding a local class covering hunting safety and regulations.

“I always encourage anyone looking to start bird hunting to not pass go,” said Wes Siler, Montana-based outdoorsman, adventure traveler and author of Outside Magazine’s column IndefinitelyWild. “Enroll in a hunters’ education course where you will get the best information on all the hunting basics and safety.”

Many states, Siler said, require successful completion of a hunter safety course before issuing a hunting license. The laws and seasons associated with upland bird hunting vary state to state. Always check with your state’s fish and game commission to know the latest in laws and what is in season.

“Typically this is a one-day class taught by volunteers [and] is equivalent to the drivers ed course you took in high school,” Siler wrote in a recent column. “Even if you’re already familiar with firearms and the outdoors, hunter’s ed is a fantastic refresher in all the nitty-gritty details of remaining legal and safe in the field.

In some states, the course is required to obtain a hunting licence, but even where it’s not mandatory it’s recommended to take one. The course will also answer a number of beginner questions including what are the best types of guns to use and what kind of ammunition works best for specific game birds.

Getting out into the field

Hunter education course certificate and hunting license in hand, it’s time to get out into the field.

“The nice thing about bird hunting is you can find groups of people to hunt with,” Silas said. “Either an informal hunting party of friends or a paid guide can take you out and you can start to put what you learned in [hunter’s ed] into practice.”

Unlike guided big game hunts for animals like deer, bear, moose or elk which Silas said can cost in the thousands of dollars, a guided bird hunt will usually run around $100.

“Having a guide or someone with real experience with you helps you get out for an authentic and fun hunting experience,” Siler said. “A guided bird hunt is really the easiest possible entry point into the sport of hunting.”

What equipment and gear do I need to get started with bird hunting?

BDN File Photo

As for what to bring on the first hunts? Siler, who’s been hunting since he was a young boy, recommends the basics — a shotgun, ammunition and patience.

“If the weather is good, all you need to wear are jeans, a t-shirt and tennis shoes,” he said.

Silas is a fan of the 12-gauge shotgun for bird hunting that has been outfitted with a “choke-tube.” A choke tube is a tapered attachment for the front of a shotgun barrel, it can be set to shoot the shot from a shell in a narrow to wide, scattered path.

By mixing and matching the type of shot used in individuals shells and the set-path for that shot Siler said you can custom-configure the shotgun to specific birds and terrain, making it a very versatile weapon.

“You can open the choke tube up for a wider spread of shot if your target is close in,” he said. “Or you can set it so the shot’s path is narrow and goes a greater distance.”

John Holyoke, longtime Maine outdoorsman, staff writer and writer of the outdoors column Out There for The Bangor Daily News,and Julie Harris, fellow columnist at the Bangor Daily News with It’s a Bird Dog’s Life, both hunt with .20-gauge shotguns. They recommend wearing at least a blaze orange hat or vest so you are visible in the woods.

Siler agrees wearing either a hat or vest that has blaze orange on it, making you visible to other hunters who are in your group or in the area, is a very good idea.

Harris likes to also wear a vest with pockets into which she can place a whistle, ammunition, a compass and anything else she may need for a day in the woods. Vests can also have a larger pocket in the back to place dressed out birds from a successful hunt.

“I always make sure to have good rubber boots,” she said. “The terrain can get mucky at times.”

Go where the birds are

If bird hunting is the best entry point to hunting, as far as Siler is concerned, grouse are the gateway birds.

“Let’s face it, grouse are pretty stupid,” he said with a laugh. “Their defense when frightened is to stand still and freeze, which makes them a good target for hunting.”

To successfully start hunting upland birds, you first need to find them. And once you understand bird habitat, you are well on your way to spotting the game.

According to Holyoke, successful bird hunters know that upland birds prefer to hang around in good cover made up of scrubby brush and new growth associated with old pastures that are going back to trees.

“These are called ‘successive forestland,’” Holyoke said. “It’s the kind of spot that provides everything the [upland] birds need in terms of habitat.”

When a cover area grows up to the point it no longer meets the needs of the birds, Holyoke said the birds move on to a new spot, so where birds congregate changes over time.

“These covers age-out over time and even more than a favorite fishing spot, the location of active cover area is closely guarded by bird hunters.”

Walking through forestland that has been cut within five or so years, or on old pasture is a good way to come across bird cover and the birds themselves.

Because the birds will likely see you before you spot them, they may not freeze in place. They may attempt to quickly fly away, meaning you have “flushed” it from the cover.

Some hunters, Holyoke said, will only shoot at a bird if it is flying, or “on the wing.” Other hunters, he said, will fire at a bird that is walking or just sitting on the ground.

A bird hunter’s best friend has four paws and a great nose

Photo by Linda Coan O’Kresik

The single best piece of equipment a bird hunter can have is a good dog, Siler said. For someone starting out, that is often not possible given the time and expense associated with obtaining and training a good bird dog.

“I hunt with friends who have bird dogs,” Siler said, adding his three large rescue dogs love to go on hunts but are far more interested in catching game for themselves. “It’s one reason that when you start out, it’s a good idea to contract with a guide, especially if he or she hunts with dogs.”

Some bird hunters hunt with dogs, who can help locate birds, flush them out and retrieve them. But not all dogs do the same work.

There are “flushing dogs” like the cocker spaniel Holyoke uses, who flush the birds out of cover and into the open.

Then there are the “pointing dogs” like the Brittney Spaniels used by Harris. Her dogs sneak up on the birds, stand still and use their nose and one leg to point out the hidden bird.

Harris said the first step in deciding what kind of dog you want along on a hunt is deciding what you want that dog to do.

Then she said it really comes down to breed preference, Harris said. Though she did add the smaller dogs like the Cocker Spaniels tend to make better indoor pets for those who want their hunting dogs to be part of the family inside and out.

“After you choose what kind of dog you want, make sure you do your homework and research breeders,” she said. “Most have websites and many can be seen and talked to at hunting events and sports shows.”

A bird in the pot

Maybe the best part of bird hunting, after the thrill of the hunt itself, is feasting on the day’s bounty, Siler said.

As far as dressing out those birds — cleaning them after they are shot — Holyoke recommends turning to the internet and checking out the myriad of online videos devoted to that subject.

Then, it’s time to get cooking.

In Maine, Holyoke said, it’s common to simply saute the breast of a grouse or woodcock in butter with a bit of garlic. Others like to parboil and cook the breast meat in a batch of baked beans. Soups and stews are also popular.

Regardless of cooking methods, newcomers to hunting and eating game birds will notice a difference in flavor.

Siler recommends checking the internet for recipes on cooking wild birds.

Over the years, Siler has filled coolers with cheap champagne and brined the birds in it overnight, smoked entire birds, deep fried whole birds in peanut oil and roasted breasts. He’s even prepared a pheasant-au-vin.

“Judging by the amount of people who have tried their first game meat at my house and then asked how they could get started, I’ve done a pretty good job,” he said of his culinary and hunting skills, and adding he tells them, “Becoming a hunters is easier and more fun than you think.”

It’s homesteading skills month on Hello Homestead! Every weekday this month, we’ll be highlighting a skill for living a self-sufficient life. Make sure you LIKE our page on Facebook, FOLLOW on Twitter, FOLLOW us on Instagram and/or sign up for our newsletter so you don’t miss a single one!

Air Gun 101: How many types of Air Gun Sights are there and which one is suitable for you?

0

The former American president, Joe Biden, was recently quoted saying:

If you need more than ten rounds to hunt, you better stop that business and get to something else

Many people claim that they use many rounds.

If you can’t eliminate the deer in 3 shots, you are one great embarrassment.”

Well, regardless of your political standing, that’s food for thought.

I suppose one factor that affects the prowess of hunters is their mastery of the airgun sights.

After all, you must accurately sight what you are hunting to increase your chances of hitting the target. 

Having the best hunting air rifle is not enough to bag that choice.

So let’s explore some common airgun sights and get to know their advantages and disadvantages.

The role of airgun sights

Surfing through Pyramyd Air, I recently saw a scope priced at 1099.99 USD.

To be precise, I’m referring to the Falcon Optical Systems 10-50×60, X50 Field Target Riflescope.

On the other end of the divide is the Crosman 0410 Targetfinder Rifle Scope priced at an incredible 11 USD.

Such a difference in prices! But be sure, whether you spend a thousand bucks or ten bucks on a scope, the principle remains the same.

The airgun sight basically allows you to point the barrel of your air rifle in a specific direction

So that the pellet flies through the air in a trajectory that increases your chances of hitting the target.

That’s the basic scope knowledge for dummies right there.     

Types of air rifle sights

1. Open Sights

I bet it helps to know that the very first guns never had sighted.

They weren’t even referred to as guns.

Their name then was hand cannons.

These were not that accurate.

Aiming at one man standing some 10 meters away was in fact a problem.

The weapons could miss quite obvious targets many times over.

Technology advanced and our ancestors saw the need to add sights to the guns.

The first one was of course the open sights.

You can call them iron sights if you wish.

These are further classified into two: foresight and rear sights. 

The first guns had only the foresight, which is fixed near the front end of the barrel.

The rear sight is installed near the eye of the shooter.

The sights usually have a V-shaped or rectangular cutout.

The idea is to align a small post or bead at the front end of the barrel inside the cutout.

This way, the air rifle points directly towards the target and the ammo is more likely to hit the target.

Pros of open sights

  • Can prove very accurate if you take the time to master their use
  • Budget-friendly
  • Comes included in most air rifles
  • Little to no maintenance required

Cons of open sights

  • Takes some time to aim for beginners
  • Looks quite simple for the sophisticated nature of most humans
  • Does not favor shooters with eyesight problems
  • Difficult to use in poor light environments.

2. Aperture sights

Note that the principle of airgun sights remains the same.

The aperture sights are very similar to the open sights.

The only difference is that the aperture sight uses a fully enclosed element for the rear sight whereas the open sight uses a notch. 

Other airgunners refer to it as the diopter sight.

Designers have tried to make use of human nature by combining a circular front sight with a circular rear aperture sight.

It becomes easy for most hunters to fit a circle within a bigger circle.  

3. Optic sights

These can also be referred to as telescopic sights or simply, ‘tele’.

They are also more popularly known as scopes.

The name tells you its operation closely resembles that of a real telescope.

As such, it consists of two lenses, the front, and the rear.

The front lens, also known as the objective lens, allows light into the scope.

The rear lens, also known as the ocular lens, is the one into which the shooter looks. 

Conventionally, both the front and rear ends of the scope are widened to house the lenses.

The two lenses are connected through a narrowed cylinder referred to as the tube of the scope. 

Scope tubes are mostly designed to be 25 mm or 30 mm in diameter.

The 1-inch tube dominated the market for decades until manufacturers saw the need for a larger tube to accommodate bigger lenses which are better.

Some have even gone a step further and made scopes with a 34 mm scope tube – e.g. the Discovery HD 3-18X50 FFP SS. 

The scope tube houses reticles.

Perhaps a more familiar term is the crosshairs.

Again, there are quite a variety of reticles to choose from.

It all depends on how you are wired. 

a. Fine crosshair

This must be the simplest of all, in that it comprises two thin lines intersecting at the center of the field of view.

With this, you can view a larger part of the target without obstruction. 

The only downside is that the thin crosshairs may be difficult to view when the target is somewhat dark.

However, they work well in high contrast backgrounds – think of bright targets like a yellow metal plate or a bright green soda can.

To solve the problem of sighting against dark backgrounds, some manufacturers illuminate the reticles with battery power to bright colors such as red, green, or blue.

You can then comfortably switch to the color you see best against the current background. 

b. Duplex crosshair

Considering the disadvantages of the fine crosshairs, designers thought of thickening the hairs along the periphery of the field of view and leaving the hairs thin around the intersection.

This can be more easily seen in dark backgrounds.

c. Mil-dot

This is a modification of the duplex crosshair.

Small dots are added to the thin hairs towards the intersection, simply to boost visibility against dark backgrounds.

Ted’s HoldOver shows you how to use the mil-dot reticle to determine the distance to your target here:

d. Target dot

This is a modification of the fine crosshairs with a dot added at the center.

The center dot is meant to rest at the center of the target.

This improves the fine crosshairs but it may not prove useful where the target is very small, as the dot is likely to cover the entire target.

c. Circle

Instead of the center dot described above, this comprises a full circle around the intersection of the crosshairs.

This is meant to improve visibility but has the unexpected effect of cluttering the target.

Pros of optic sights

  • Perfect for long-range hunting
  • Perfect for tiny targets
  • Comes in fixed and variable varieties
  • Hundreds of options to choose from
  • Easy to use

Cons of optic sights

  • Can prove difficult to use if the target keeps moving
  • Adjustment settings change quickly with every turn of the several knobs

Other variations

From the basic optic sights with front and rear lens and reticles, designers have added a whole battalion of features to scopes to enhance the hunter’s experience.

Let us look at some of these.

Lasers

These basically project a beam with the aim to assist in rangefinding.

A rangefinder calculates the exact distance between you and the target and additionally presents a crystal-clear image of the target

So that you are not left guessing what you are aiming at.

It enables you to pull the trigger with a high degree of surety. 

Pros

  • Great for situations where you are likely to be jerked out of the shooting position
  • Gives you a perfect aim at the target in the shortest time possible 

Cons

  • Makes new shooters poor at aiming
  • Visibility problems arise when the sun shines too brightly    

Red dot sight

A red dot sight likewise allows the hunter to view a holographic sight picture of the target within the optic.

It becomes quite easy to place the red dot right on the target. 

One important feature of red dot sights is the magnification power.

Depending on the model, you are able to enlarge the target up to sixteen times, or even eighty times for more advanced scopes.

All this does is provide a clearer picture of the target – you see the stomach, head, shoulders, legs, back, etc.

You then narrow down to the specific part you are interested in and pull the trigger with higher chance of hitting the intended part. 

To adjust the magnification power, you simply need to rotate the power ring to the desired magnification level.

You will mostly find the power ring at the rear end of the scope near your eye. 

Additionally, most scopes with magnification ability come with the ocular focus ring.

This is used to ensure the reticle is in focus, however far or near the target is.

And now to the two variations of scopes in regards to magnification ability:

  1. Variable scopes – This is what we just discussed. You can alter the magnification power to a value of your choice, basically by rotating an adjustment knob.
  2. Fixed scopes – These do not allow you to change the magnification. For this reason, you better use them for targets that are not too far away – preferably for plinking and target shooting practice. If used for hunting, ensure that the prey is at close range. 

As much as they seem limited, fixed scopes have the one advantage of requiring no adjustment once they are mounted.  

Pros of Red Dot sights

  • Can be used for varying light conditions
  • The prey can’t view the red dot and so will never know it’s being aimed at.

Cons of red dot sights

  • With hundreds of brands and models to choose from, you feel confused right away
  • Can prove a bit pricey if you fancy more advanced features

Fiber optic sights

The crosshairs for this sight are made of an optical fiber that is transparent and flexible, usually of a diameter next to that of human hair.

The optical fiber allows light to pass through it, thus enhancing the visibility of the target. 

It is interesting how optical fibers interact with light.

They’re usually made from an inner core and outer covering.

Both the inner and outer components have a low refractive index, implying that they do not bend light. 

However, the outer covering has high reflectivity, so it reflects light along its entire length.

Even in conditions of poor light, the optical fiber is able to pick up the little light and transmit it along the full length of the cable.

This makes it ideal for foresight.

You can place the well-lit fiber on the target without much problem. 

As such, they find great use in low-light settings.

Better still, they come in two main colors – red and green.

Which one strikes a chord with you? Go for it!

In case your eyes are not that good, consider purchasing a fiber-optic sight with a bigger circumference.

At least you won’t strain a lot.

Here is a list of some popular air rifles that come bundled with fiber optic sights: 

Pros

  • Works great for quick shooting
  • Great for beginner shooters who are just starting out
  • Very useful in poor light conditions
  • Budget-friendly
  • Have easy-to-change rods

Cons

  • Some are fragile – you can easily break the glass tubes 
  • Fiber optic rods may be affected by a number of cleaning solutions – with some like acetone bleaching the rod

Understanding scope models

You can get easily confused by the numerous numerical numbers you see on different scope models.

Take the example of the CenterPoint 6-20X50 AO Rifle Scope.

The numbers 6-20 mean that you can magnify the target 6-20 times, while the number 50 points to the size of the objective lens in mm. 

The larger the objective lens, the larger the objective bell.

You need this information before you make the purchase so that you can ensure the scope will fit onto the mounting rails of your air rifle. 

In addition to that, the bigger the lens, the stronger the magnification.

Go for the largest objective lens if you intend to go hunting at dusk or dawn.

Lastly, AO means Adjustable Objective, implying that the adjustment feature for parallax is fitted onto the objective bell of the scope.

You will also find some scopes with the suffix AOE – lightly meaning Around the Objective End.

Other terms you may come across in scopes include:

  • IR – Illuminated reticle
  • SF – Side Focus – the turret for adjustment of parallax is mounted on one side of the scope tube.
  • HD – High Definition
  • MOA – Minute of angle – refers to the accuracy of groupings at a particular range. MOA is actually 1/60th of a degree. 1 MOA implies groupings of 1” at 100 yards. 
  • SWAT – Special weapons and tactics  

Air rifle scopes vs firearm scopes

It would seem an incredible hack to simply mount your old firearm scope onto your new air rifle.

Don’t! Air rifle scopes are specially designed to counteract the unique vibration and double recoil of airguns.

As a matter of fact, spring-powered airguns require especially rated air rifles that can withstand the sometimes high recoil.

Springers are known to easily damage other scopes.

Frequently Asked Questions        

1. What is a 6 o’clock sight picture?        

There are quite a number of sight pictures that shooters use to improve their shooting accuracy.

This is especially so if you are working with open sights.

Sight pictures are obtained by aligning the rear and front sights in a specific relationship with the target.

The best one is that which allows you to have the smallest groupings.

Some of the popular sight pictures are elaborated below:

  1. Center hold – this involves placing the front sight directly in the center of the target. 
  2. 6 O’clock – this involves placing the front sight at the lower part of the aiming black. 
  3. Sub 6 – this favors those shooters who experience difficulties with the 6 O’clock hold by including a small white line between the front sight and the aiming black. 
  4. Frame hold – this involves placing the front sight at the center of the rear sight. In case there is no distinct aiming point, the front sight can be adjusted to the 6 or 12 O’clock position. This works quite well in low-light settings.

2. Why should you aim with your dominant eye?

Think of it this way – you are either left-handed or right-handed.

If left-handed, your dominant hand is the left one, with which you easily handle many tasks.

The opposite is true for right-handed persons.

This concept also applies to the eyes. 

FYI, One of your eyes is stronger than the other.

In most cases, right-handed persons have the right eye as the dominant one

But there are instances where the dominant eye can be the opposite of the dominant hand. 

To know your dominant eye, Hunter-Ed proposes the 5 steps below:

  1. Use your four fingers and the thumb to create a triangular opening.
  2. Extend the arms away from your eyes.
  3. Try looking at a far object through the opening with both eyes open.
  4. Gradually pull the arms towards your eyes, ensuring your focus on the object does not waver.
    • The opening will naturally land on your dominant eye.
  5. You may also try closing one eye at a time.
    • The dominant eye tends to remain focused on the object while the other eye sees the back of your hands.  

To keep your shooting as accurate as possible, always use the dominant eye.

I am right-handed and my right eye is dominant. What about you?      

3.  What is proper sight alignment?

Sight alignment is basically the link between the front and rear sights.

You ideally peep through the rear sight with the intention of seeing the front sight right at the center. 

On the other hand, the sight picture refers to the link between the aligned sights and the aiming bull on the target, which may be in the form of a post or bead. 

Before I sign off, I’ll add yet another term for your keeps – eye relief. This refers to the distance between your eye and the rear sight.

You should master keeping a relatively constant distance between your eye and the sight.

You don’t want to bump the sight with your eye or place it very far away.

As a rule of thumb, aim at a minimum of 2 inches, and don’t go beyond 5 inches. 

BSA Air Rifles in USA – The Ultimate Guide

0

“BSA Air Rifles: Enhance your shooting experience with precision and power. Discover the top-quality air rifles from BSA, available in the USA. Explore innovative features, exceptional craftsmanship, and unrivaled performance for both hunting and target shooting. Elevate your shooting skills with BSA Air Rifles today!”

bsa air rifles usa

bsa air rifles usa

BSA Air Rifles USA: The Perfect Choice for Shooting Enthusiasts

When it comes to high-quality air rifles, BSA is a name that stands out. With decades of experience in crafting precision firearms, BSA offers a wide range of air rifles that are specifically designed for the American market. These air rifles are known for their exceptional accuracy, power, and reliability, making them the perfect choice for shooting enthusiasts in the USA.

Whether you are a seasoned hunter or a target shooter, BSA air rifles provide unparalleled performance. Their advanced technology ensures consistent and precise shots every time. With various models available, you can choose the perfect rifle to suit your needs and preferences. From lightweight and compact designs for easy maneuverability to powerful options for long-range shooting, BSA has something to offer every shooter in the USA.

In conclusion, BSA air rifles have established a strong presence in the USA with their exceptional quality and performance. Offering accuracy, power, and durability, these rifles are highly sought after by both beginners and experienced shooters. With a wide range of models to choose from, BSA continues to be a top choice for enthusiasts looking for reliable air rifles in the USA market.

Late Season Deer Hunting Strategy for Pennsylvania Bucks

0

The first day of deer rifle season is a tradition in Pennsylvania. Whether you enjoy archery or muzzleloader hunting, everyone marks the opening day of Pennsylvania’s rifle season on their calendar. All that hype, anticipation, and year-long excitement is over in one short day. Prepared, and lucky, hunters, will have one hanging at the end of the first day but many more will have to re-evaluate and adapt their deer hunting strategy if they want to harvest a late season buck in the Keystone State.

Late Season Deer Hunting Opportunities in Pennsylvania

Deer hunting the late season starts the beginning of the second week of rifle season and runs all the way to the conclusion of deer hunting in Pennsylvania, which is the last day of flintlock season.

Deer Hunting Season in Pennsylvania

Deer firearms season: November 26 – December 8.

  • Wildlife Management Units (WMUs) 2B, 5C and 5D both antlered and antlerless deer can be harvested with each required license.
  • WMUs 1A, 1B, 2A, 2C, 2D, 2E, 2F, 2G, 2H, 3A, 3B, 3C, 3D, 4A, 4B, 4C, 4D, 4E, 5A and 5B are antlered harvest only November 26 – November 30 except for those hunters having a DMAP antlerless permit, who can harvest an antlerless deer in a DMAP zone. From December 1 – December 8, both antlered and antlerless deer can be harvested.

Deer flintlock and archery after Christmas season: December 26 – January 12.

  • One antlered or antlerless deer can be harvested with a buck tag and additional antlerless deer can be harvested with each additional doe tag.

All Pennsylvania deer hunting season and bag limit regulations.

Late season deer hunting in Pennsylvania can be split into two distinct phases. The first is the second week of the deer firearms season. Deer hunting on public land in Pennsylvania has been overloaded with hunters the first week of rifle season and now hunting pressure is slowly decreasing. These last few days of rifle season can be productive if you know how to hunt deer.

The second phase of the late season is the after Christmas flintlock and archery season. Roughly 3 weeks after the end of the rifle season, late season flintlock and archery season provide hunters one last chance at Pennsylvania deer hunting. Hunters are restricted to using traditional flintlock muzzleloaders or archery setups during this season. It takes a completely different deer hunting strategy during these weeks, however, to score a last minute buck.

Deer Hunting Strategy for the Last Week of Rifle Season

If you are not seeing any deer while hunting the second week of rifle season, it may be time to adapt your deer hunting tactics. Here are four tips to up your deer hunting strategy in the second week.

  1. Still-hunt bad weather days – The rifle season only lasts for two weeks in most WMUs in the state so you have to hunt when you can. This includes bad weather days. Still-hunt along ridges and on old logging roads where you can stop and glass often. The weather (rain, snow or wind) will allow you to sneak quietly and possibly make something happen and spot an unsuspecting buck. A good deer rifle scope goes a long way here if you have to take a long shot at a buck.
  2. Re-visit your opening day plan – A buck that has been pushed from his core area on opening day will come back as pressure subsides in the second week. Go back to your opening deer hunting strategy and wait for him to come back.
  3. Use any hunting pressure to your advantage – Some more mature bucks will go nocturnal during rifle season. The only way they will move in daylight hours is by getting bumped. Don’t be afraid to hunt where others are hunting. Let them move around and spook up a buck to your position.
  4. Try some rut tactics – In some areas, bucks will still be in rut mode. Either late estrous does or second rut action can be found in the second week. It is not a bad idea to have your grunt call, doe bleat and even rattling horns with you. Be cautious, however, as rattling and blowing a grunt call in areas with a lot of hunting pressure may yield unwanted hunters to your area.

How to See More Deer While Hunting after Christmas

Some of the same deer hunting tips used in the second week of rifle season can also be effective in the after Christmas flintlock season. Although, deer are now back into predictable patterns, particularly their winter patterns. This deer hunting season in Pennsylvania requires more attention to basic deer needs and less around hunting pressure. Consider these three deer hunting tips and strategies when hunting the flintlock season.

  1. Hunt mid-day – Winter will be in full force and even the deer will notice the cold temperatures. With reduced hunting pressure, bucks will move more during mid-day when temperatures warm. You want to be hunting when the sun is the highest and bucks are taking advantage of the few extra degrees of warmth.
  2. Focus on late season food sources – Deer will be back into feeding mode trying to recover from the rut and maintain themselves during the cold. Groups of deer will usually gather around remaining food sources like mast producing ridges and remaining agricultural fields with leftover crops. Both of these locations are ideal ambush spots for late season deer hunting. Having quality hunting clothing will help you sit over these areas in the evening as temperatures drop.
  3. Key in on deer sign – Deer sign is probably more important now than any other time of the year besides the peak rut. In winter deer are not traveling great distances. They are going from bedding areas to feeding areas and back again on a fairly consistent pattern. Areas with fresh deer sign mean deer are in the area and will be back through at some point. Hunt fresh sign and hope one of the tracks or pile of scat you find belongs to a leftover buck.

Don’t get discouraged if you have not filled your buck tag yet. There are many more days left for deer hunting in Pennsylvania besides the first day of buck season. Focus and adapt your deer hunting strategy during the second week of rifle season and during flintlock season to tag out a late season buck.

How to Dehydrate Morel Mushrooms

0

Dehydrating morel mushrooms is a common practice among individuals who harvest a large amount during mushroom season (lucky you!)

The dehydration process is the number one method that allows you to savor the taste of these even during the off-season, as they do not freeze well (though it is possible).

Horizontal image of morel mushrooms with a rock in the background.

Some say the best location to hunt for morels is in the Midwest, but you can find them all over the US, Europe, and beyond. This area seems to have the best vegetation and temperature to grow these tasty morsels. Look for them sprouting from mid-April to mid-June.

They usually appear after a series of spring showers, prior to the heat of summer setting in. Morels often reappear in the same spot year after year, and many hunters keep their “spots” a well guarded secret.

These fungi (yes – they are fungi) seem to prefer hillsides with plenty of rotting logs, but they may appear in unexpected spots as well. You may not find them where you’d expect – this is one reason why this variety isn’t commercially farmed.

Three basic processes exist for dehydrating morels. The first involves the use of a dehydrator. Here’s what you need to do:

1. First, wash the specimens in cool water to remove any debris.

2. Pat dry with a paper towel. Trim the stems if necessary.

3. Slice them in half, from the tip through the base of the stem.

4. Place in a single layer on each level of the dehydrator. Follow the manufacturer’s instructions for proper drying times, or check out our ultimate guide to food dehydration – it has a bunch of helpful drying times listed at the bottom.

For those individuals without a dehydrator, you can also use your oven to prepare the mushrooms.

1. Wash, dry, and cut the same way as previously outlined.

2. Cover the bottom of a cookie sheet with parchment paper. Lay out sliced mushrooms in a single layer. It is alright to have the sides touching, but they should not overlap.

3. Bake at 250°F for approximately 6 hours. During the baking process, crack open the oven door a slight amount. This allows the moisture to escape during the drying process.

Finally, the oldest known way to dry morels is to string them up and dry them in the sun.

1. Wash and prepare the individual pieces as before.

2. Cut a piece of cotton packaging string (kitchen string) that’s approximately six feet long. Thread a large-eyed needle, and insert through the center of a morel slice. Slide the mushroom along the cotton string until it’s within 12 inches of the opposite end.

3. Repeat the process with the remaining pieces, making sure they do not touch one another.

4. Hang the string in a sunny location. If you hang the string outside, be sure to bring it in at night to prevent dew from setting on it, which could introduce mold. Allow to dry in the sun for a minimum of two days.

The trick to drying morels is to make sure they are completely dry. Here’s how to test the mushrooms periodically during the drying process:

Break a small portion from the main body. It should snap when broken. If it is mushy or spongy, then moisture still exists within the cap.

Place the dehydrated specimens in a glass jar with a lid or in a resealable plastic bag. These will keep for up to six months if prepared correctly. You can further extend this by using vacuum sealing, placing them in the freezer after they’re dried (though this isn’t always recommended, as it can introduce moisture) or adding some oxygen absorbers to the sealed packaging.

Dehydrated morel mushrooms may be reconstituted by soaking them in enough cool, salted water to cover for 30 minutes, or by boiling them for 10 minutes at a low boil.

Be sure to reserve this water for cooking, as it is full of antioxidants. It makes a great addition to soups and sauces. Just let the sediment settle before adding the liquid on top to dishes.

And if you need a bit more info on the prep process, read our article on how to properly clean your mushrooms.

What’s your favorite way to dry the season’s bounty? Let us know in the comments!

Ham Radio Buyer’s Guide: How to Choose the Best Ham Radio

0

Ham radio is an amateur radio system with a long and exciting history. There are well over 600,000 ham radio operators in the U.S. and 2 ½ million around the world. Despite its name, Ham radio is much more than a hobby. Ham operators have advanced the science of radio and electronics, provided emergency communications during countless disasters, and even worked with NASA. If you’re interested in Ham radio, you can begin with a modest setup and increase your investment of time and resources as your interest grows. There is more than enough going on in the field to keep your attention for a lifetime. This guide will explain just what being a ham operator entails, what you need to know about radios and antennas, how to get started, and where to find resources for education and licensing.

The Early Days Of Amateur Radio Operators

At the very beginning of the 20th century, people began building “wireless” radio sets from plans published in magazines and books. Interestingly, teenagers were among the earliest fans of the new technology. Not only was radio communication a novelty, but it was also easy for young people to get involved because of the low cost of building a basic radio.

Those early amateur radios were used mostly for entertainment. Being able to chat back and forth with someone in the next town or even one state over was exciting. Before the advent of amateur radio, telegraph offices were the only way to communicate over distances, and they charged by the word. Ham radio let people communicate for free from the comfort of home; however, on the earliest Ham radio sets Morse Code was the only available type of communication.

More advanced radio technology that made voice communication possible arrived just a few years later. The number of amateur radio operators grew, and eventually, problems arose with interference. At this point, the Federal Communications Commission stepped in and began requiring licensing to operate an amateur radio. They also restricted amateur radios to certain frequency ranges and introduced call signs to give each operator a unique identity on the air.

The Different Types of Ham Radio

types of ham radios chartThere are three basic types of ham radio, each with its own strengths and drawbacks.

Handheld Radios

Handheld radios are easily portable and resemble large walkie-talkies. They have a short, rubber-covered antenna known as a “stubby” or “rubber ducky”. Handhelds are common at large public events, or in emergency situations when amateur radio service is needed for communication. Disaster situations wreak havoc on cell phone networks, either because everyone is trying to use their phone at once, or because power loss takes down the service. Because they run on batteries, handheld radios are ideal for emergency services. Even though the small antenna provides a limited range, the lower frequencies allow the signal to propagate further than other radios could.

Mobile Radios

Mobile ham radios are the nearest equivalent to CB radios. These book-sized units are typically mounted under a dashboard in a vehicle. Their control interface is designed to be simple enough for beginning radio operators, and most importantly, for drivers. Mobile radios use handheld push-to-talk microphones and often operate specifically in the 10-meter band, where they’re tailored for use on the road. They all have standard antenna jacks, and a variety of antennas can be used with them. This gives them a significantly longer range than other popular types of mobile radio. Mobile ham radios can transmit with up to 200 watts of power across the high-frequency band.

Base Stations

Base station radios are considerably larger than mobile radios, are installed in a stationary location, and are more complex to use. They provide communication in multiple ham bands and can handle both analog and digital modes; they may be combined with computers for digital communication. Base station radios are often connected to more than one antenna to accommodate both the VHF and UHF bands. Some of those antennas are quite large and are usually mounted to small towers.

Base stations are a lot of fun once you know what you’re doing. Using these amateur stations, operators can talk around the world by bouncing radio waves off either the ionosphere or satellites. They present an endless set of challenges and opportunities for operators. Unsurprisingly, the most technically-inclined ham operators often use base station radios. They have the additional training and experience needed to get the best performance out of the equipment.

How To Choose A Ham Radio

Once you decide to become a ham radio operator, you’ll be shopping for equipment. The features you choose for your radio will depend on how you plan to use your new license. Because ham radio has a learning curve, it doesn’t make sense to buy a more advanced radio than you’ll need at the beginning.

If you’re not sure about your level of interest, handheld radios are the least expensive option and make a great point of entry. Because of their limited range and somewhat specialized use, handheld models will only connect over short distances. If your main interest is contributing to emergency services, a handheld radio is ideal. If you want to communicate over a wider range, a mobile radio might be a better choice. Mobile radios are a cost-effective option because you can disconnect the radio from your vehicle antenna and use the radio at home as a base station, connected to a larger antenna. It’s important to make sure that any mobile radio you purchase has a built-in antenna tuner.

At Stryker Radios, we’ve streamlined the user interface on our mobile radios to make them easier and safer to use in a vehicle. Stryker also makes antenna selection easy, with radio antennas and accessories ideal for mobile ham radios.

Experienced ham radio operators may want to set up a base station so they can transit over long distances. However, true base station radio sets can be quite expensive. They are also more complicated to use, and using them improperly can cause problems for other operators. The features and capabilities of base station radios are beyond the scope of a single article; if you’re just starting out as a ham radio hobbyist, a base station is probably not the best choice.

Ham Radio Licensing

In order to use a ham radio, amateur radio operators are now required by the Federal Communications Commission (FCC) to obtain a ham radio license. There are three levels of licensing for ham operators. The introductory level is known as a technician license. The 35-question license exam is easy for most people to pass with a little studying, especially since they removed the requirement to learn Morse Code. Once you pass the test, your ham radio license is mailed to you, along with your amateur radio call sign.

The three amateur radio licenses have increasingly difficult qualifications:

  • Technician Class: an entry-level license that grants transmitting privileges on the VHF and UHF bands used for local communication, and limited Ham bands for global transmissions
  • General Class: expands transmitting privileges to long-distance, international communication via signal propagation, and increased voice operation on Ham bands
  • Extra Class: provides access to the full range of Ham bands allocated to the Amateur Radio Service

Many beginners never feel the need to apply for a higher-level license because they enjoy operating a ham radio station with a technician’s license alone. For example, a growing number of people are moving from CB radios to 10-meter mobile radios in their vehicles. While CB radios have long been a mainstay for long-haul truckers, they are limited to a range of about seven miles. A Ham operator in the 10-meter band has more power and a range of 30 miles; having a technician’s license allows CB radio operators to use Ham radio as well.

Best Air Rifle Deals

Popular Posts

What can you kill with a 177 air rifle?

0
"Unleash Your Precision: Discover the Power of a .177 Air Rifle to Take Down Targets with Accuracy. Explore the Versatility and Potential of this...

What Is An Air Rifle?

0
If you have stumbled upon this article, chances are that you probably have a pest problem at your house. This is a very common...

How Do Break Barrel Air Rifles Work?

0
A break barrel air rifle is a type of airgun where the barrel breaks open at a hinge point just above the breech. This...

Air Rifle Scope vs. Rifle Scope – Which One Fits Your Shooting Needs?

0
"Air Rifle Scope vs Rifle Scope: Unveiling the Ultimate Precision Optics. Discover the essential differences and benefits of these two optical devices, empowering shooters...

How to choose the right Air Gun Caliber for your game?

0
A story is told of three Native American hunters. Two are smart, the other somewhat ignorant. On the first day of the hunting season, one of...