")
")
")
")
")


UPDATED 03 NOVEMBER 2024
by Robert Ceran
Many anglers have a hard time telling saugeye apart from walleye, due to their very close resemblance.
However, it’s important to be able to tell the difference between walleye and saugeye, since the two species have different limits in most fisheries.
So if you don’t know what fish you’re holding in your hand, you can’t be sure if you’re allowed to keep it or not.
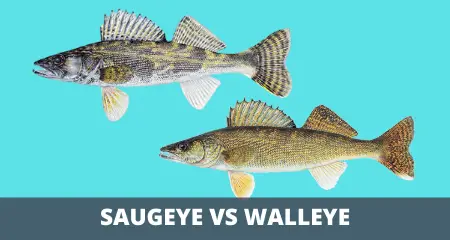
That’s why we put together this detailed guide on the primary differences between saugeye and walleye, to help you identify them easily on your next fishing trip.
Table of Contents
What is a saugeye?
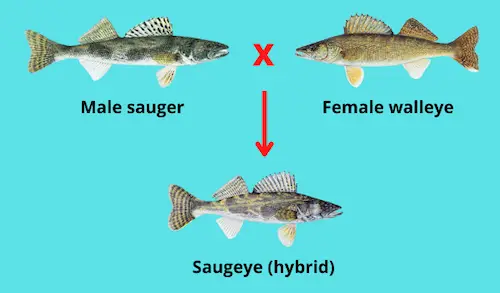
A saugeye is a hybrid resulting from a cross between a male sauger (Sander canadensis) and a female walleye (Sander vitreus). Saugeye closely resemble walleye, which can make it hard to identify them as hybrid walleye.
A study conducted in the Illinois River in 1995 showed that 4% of fish belonging to the genus Sander (ie., walleye, sauger, and saugeye) were saugeye. This suggests that hybridization between walleye and sauger happens quite frequently in the wild.
Saugeye occur naturally in many lakes and rivers in North America that have breeding populations of both walleye and sauger.
In addition to naturally occurring in these locations, saugeye are also stocked in increasing numbers of reservoirs in several states of the midwest, including Ohio and Kansas.
A key difference in biology between walleye and saugeye is that saugeye can thrive in reservoirs with turbid water, whereas walleye only thrive in clear water bodies.
Walleye vs saugeye identification guide
Saugeye have the same basic body shape as walleye, and can be hard to tell apart from walleye, especially if it’s not possible to compare both fish species side by side.
However, with a little practice, telling walleye apart from saugeye can become fairly easy.
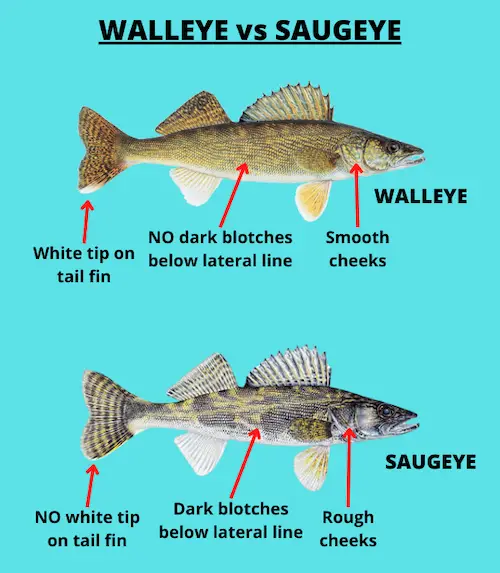
The primary difference between saugeye and walleye is that saugeye have distinct dark blotches on their flanks, which extend well below the lateral line, while the dark blotches on the flanks of walleye are less distinct, and don’t extend below the lateral line.
In fact, the dark body markings of saugeye are actually more similar to those of sauger than walleye (more on that below).
A second difference between walleye and saugeye is that walleye have smooth cheeks with few scales on them, while saugeye have rough cheeks with many scales.
Finally, another difference is that walleye come with a white patch at the bottom of their tail fin, and saugeye usually don’t have this white patch on their caudal fin.
However, this difference is less reliable than the other two, as some saugeye do have a white patch on their tail fin that looks pretty similar to that of walleye.
How do you tell the difference between a saugeye and a sauger?

Next, let’s talk about the difference between saugeye and sauger (Sander canadensis), since you also need to be able to tell these two species apart in any water body where saugeye, walleye, and sauger co-occur.
Overall, sauger tend to be smaller and have a more slender body shape than saugeye. Also the body color of saugeye is generally of a lighter color than the body color of sauger.
The best way to tell sauger and saugeye apart is by examining their spiny dorsal fins (the first dorsal fin). While saugeye have a dark blotch at the base of their spiny dorsal fin, sauger do not.
In addition to this, sauger also have more distinct round dark spots covering the whole dorsal fin, while saugeye have less distinct black dots that are confined to the bottom part of the dorsal fin.
Key saugeye facts
Now let’s talk about the most important saugeye facts that are good to know.
Can saugeye reproduce?
Scientists originally thought that saugeye can’t reproduce (since most hybrid species are sterile). However, a study conducted in Tennessee in 2011 showed that saugeye can indeed reproduce with both saugeye and walleye.
Due to this revelation, saugeye are no longer stocked in bodies of water that have either native walleye or sauger populations, in order to avoid affecting the gene pool of the native species.
Instead, they are now only introduced into reservoirs where there is a minimal chance of mixing with either walleye or sauger populations.
Finally, even though saugeye are capable of reproducing, their reproductive success is not high enough to maintain a strong population without regular stocking efforts (due to a low survival rate of their offspring).
How big do saugeye get?
Saugeye can get as big as 30 inches long and reach a maximum weight of 14 pounds. However, fish this big are very rare, and their average size is much smaller.
Saugeye have an average length of 14 to 22 inches, and their average weight is 2 to 4 pounds. In other words, they generally tend to be smaller than walleye, but larger than sauger.
In some fisheries, it’s very rare to catch saugeye over 5 pounds, while double digit walleye are relatively common in most lakes where they occur.
What do saugeye eat?
Adult saugeye are predatory fish that feed primarily on smaller freshwater fish, including yellow perch, shad, and minnows. Similar to sauger and walleye, they also feed on invertebrates, including worms, leeches, and crayfish.
And while the diet of saugeye is very similar to that of walleye, saugeye tend to be more aggressive in their feeding behavior, which makes them easier to catch.
Where can you find saugeye?
Saugeye can be found in any lake or river that has breeding populations of both sauger and walleye.

The map above shows the distribution of saugeye in North America. They are mostly found in water bodies of the northern midwest.
In addition to naturally occurring in these locations, saugeye are also stocked in an increasing number of reservoirs in the midwest, especially in reservoirs where walleye stocking has been unsuccessful.
Why are saugeye stocked in some lakes?
Saugeye are stocked in reservoirs where walleye stocking has been unsuccessful. Walleye generally require a high degree of water clarity, and don’t do well in stained or turbid water bodies.
Saugeye, on the other hand, thrive in turbid waters, and have done very well in many of the water bodies into which they were introduced.
In addition to this, saugeye also feed much more aggressively than walleye, which makes them easier to catch. Saugeye also often feed in more shallow waters than walleye, which means you can readily catch them from shore.
Due to their advantages for sportfishing, saugeye have become increasingly popular among fishermen, and some anglers now prefer targeting saugeye over walleye. This has led to greater saugeye stocking efforts by several state authorities in the midwest.
Are saugeye good eating fish?
Yes, saugeye are very popular eating fish, and taste delicious. However, similar to other types of freshwater fish, the taste of saugeye can be negatively affected by its environment if it lives in a polluted water body.
What does saugeye taste like?
Saugeye has a delicate flavor that is similar to walleye, but slightly milder. Saugeye meat has a flaky consistency and comes with a mild flavor that has almost no fishy taste to it.
A great way to cook saugeye is by frying it, though baked and deep fried saugeye also tastes delicious.
Saugeye vs walleye taste compared
There are two camps on this topic: While many anglers claim that saugeye taste better than walleye, others say that both fish taste the same.
A friend of mine once did a blind taste test where he asked a group of his friends to taste both saugeye and walleye that had been caught in the same lake, and that were freshly prepared. The guests did not know which was which.
Most of his friends expressed a preference for saugeye over walleye, which would suggest that under the right circumstances, saugeye can indeed taste better than walleye.
Saugeye fishing tips
In general, most methods that work for walleye fishing also work for saugeye. However, since they feed more aggressively than walleye, saugeye fishing is generally easier than targeting walleye.
That means you can catch saugeye with many different artificial lures or natural baits, and with a wide variety of fishing tactics. And since saugeye are less finicky than walleye, you’ll need to spend less time worrying about finesse applications to entice shy fish to bite.
Personally, I like to fish for saugeye with jigs, soft plastics, or live bait rigged with a slip bobber. In the most productive fisheries, it’s not uncommon for anglers to catch bags of more than 20 saugeye per day.
When fishing for saugeye, keep in mind that they stay very close to the bottom, and don’t suspend higher in the water column (which walleye like to do sometimes).
If you find a productive saugeye location, mark it with a waypoint, as you’ll probably be able to find saugeye there again on your next fishing trip.
What is the best time to catch saugeye?
Since saugeye are most active around dusk and dawn, these are the best times to catch them. However, saugeye also feed intermittently throughout the whole day, which means you can get lucky at other times as well.
During spring and summer, saugeye often hunt in very shallow water, and can be caught just a few feet away from the bank in 2 or 3 feet of water. This distinguishes them from walleye, which generally prefer deeper water.


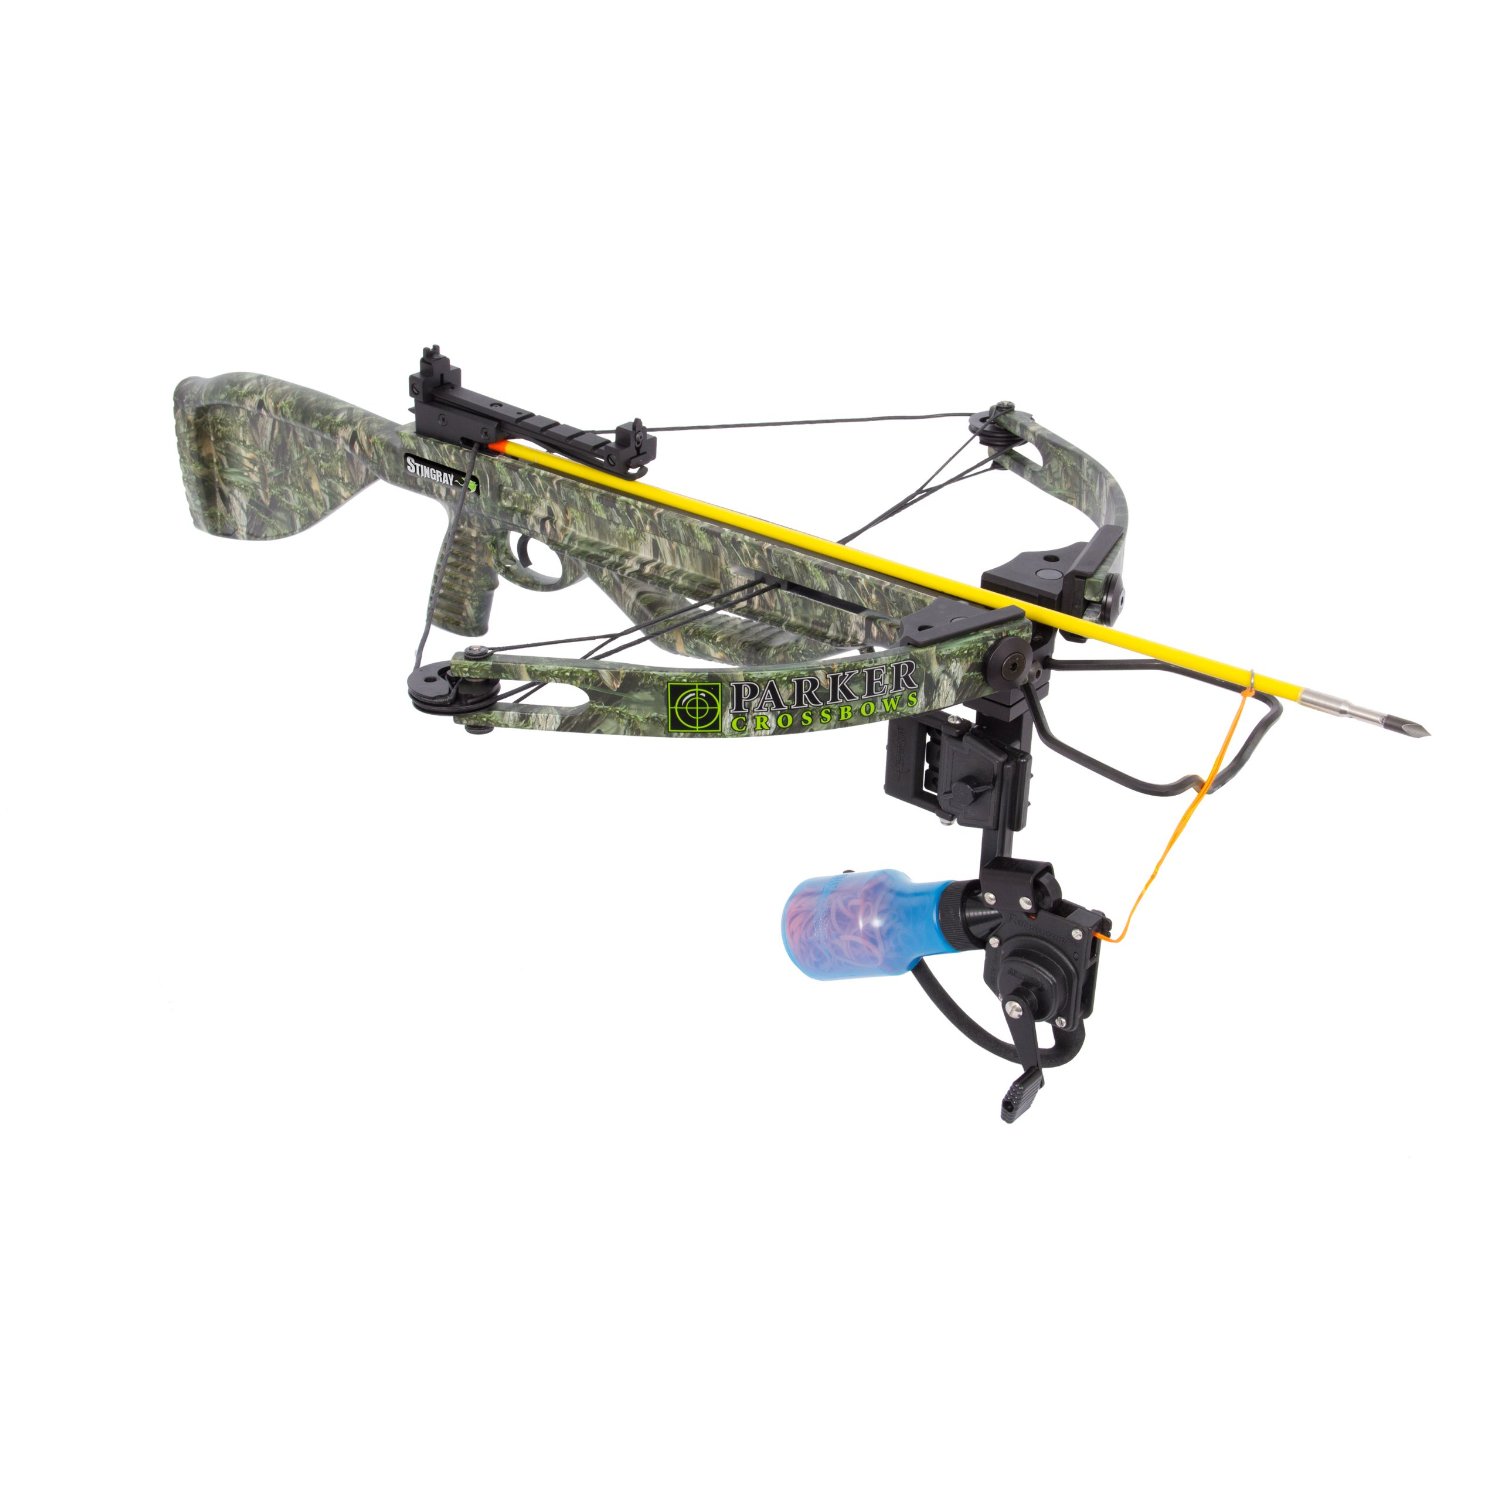 Putting the StingRay together is amazingly simple for such a complex hunting package. The riser, or what Parker calls the front-end assembly, attaches to the stock once you’ve installed the cable slide. If your Stingray comes with a scope, it will be premounted for you, so there is no work to be done to get the scope onto the crossbow. Once you’ve attached the riser to the stock, you attach the AMS Retriever Pro Bowfishing Reel, which includes an integrated arrow quiver for storing your bowfishing arrow.