Wild hogs may not be as revered as venison, but with the right recipes and the right cuts of meat, I’d argue that wild hog is just as good as venison.
By far, the best cut of meat from wild hog is tenderloin, but there are many more cuts worth knowing.
6 Best Cuts of Meat From a Wild Hog
In essence, most cuts of meat from a wild hog are good, which makes it difficult to pick the best.
Much of the decision comes down to what you want to eat. The flavor profile is the same through most cuts, and it’s primarily textural differences that make one cut stand out above another.
Some cuts are more suited to specific tasks, like a backstrap is most suitable for jager schnitzel.
However, if I could only choose 6 cuts, these would be my choices:
Tenderloin
The tenderloin is the king of all cuts across a range of large animals, and this is no different for wild hogs.
Arguably the only cut better than the tenderloin is the fillet mignon, which of course, is actually part of the tenderloin.
However, for wild boar, I like to use the whole tenderloin.
Wild boar tenderloins are not very large but what the lack in size they make up for in texture and taste.
They are a very versatile cut of meat that can be roasted, grilled, fried, or smoked.
My favorite recipes with wild hog tenderloin are stirfry and roasted.
Because the tenderloins are not very large and extremely tender, they cook fast.
Backstrap/Loin
If the tenderloin is the best cut of meat from a wild hog, the backstrap has to be the second best.
The backstrap or loin is the long muscle that runs along the top of the back.
If you were to divide the top of a wild hog into four, it would go top of the head, blade, shoulder, loin, then leg.
The loin would be second on the scale of tenderness, only second to the tenderloin.
However, unlike venison backstrap, wild boar loin tends to be a little drier, which also makes it a little more challenging to cook.
For this reason, I recommend using a good brine if you are baking or roasting.
If you are confident in your cooking skills you can also use a marinade to add flavor and tenderize the meat a little more.
There are a plethora of dishes that you can make with wild boar loin, which is why it is on our list of best cuts.
One of my favorite dishes is a simple German dish, wild boar Jagerschnitzel.
This dish is simple to make, the meat does not dry out, and it’s tasty.
Ribs
This may be an unpopular opinion simply because of the work involved, but if you are not afraid of a little work to get some of the best flavors any wild game has to offer, then you could easily move wild boar ribs to the top of the list.
Earlier I said most cuts of wild boar meat taste the same, and the main difference is the texture and versatility; well, ribs change all that.
They are only moderately versatile but probably the most flavorful cut of meat from wild hogs.
The downside is there is a lot of work in preparing them, and there is not much meat.
Unlike your regular pork ribs, wild hog ribs have much more membrane, which is also tougher, and a lot of silver skin to contend with.
I like to treat them similarly to shanks; I sear them on the grill to get a nice char, after which I continue with whatever recipe, such as smoking, barbecuing, or simply baking.
Shank
Yet another controversial cut, the shank, makes it to the top of my list. Just like the ribs, most people aren’t willing to put in the effort for shanks, which is a shame because they really are one of the best cuts of meat.
Like the ribs, the shanks are very flavorful. Also, like the ribs, they are covered in silver skin and membrane.
The shank is an extremely tough cut of meat, but with the right approach can be turned into very tender meat.
A classic shank dish is osso buco, which is not traditionally made with wild boar, but forgive me if I say I prefer it to venison osso buco.
Another way to get fall-apart tender meat is in the pressure cooker, and you could use my venison recipe to make pulled shank tacos.
Whatever you choose to make, give it time, and you will not regret eating wild boar shanks.
Boston Butt
Another choice cut of wild hog that may not get as much love as it should is the Boston butt.
The name may be confusing because this cut of meat comes from the shoulder.
The Boston butt is from the higher part of the shoulder, above the picnic shoulder.
This is one of the best cuts for pulled wild hog. The Boston butt is typically well-marbled and tender due to its limited activity.
This cut can be used in many different ways. I have sliced and grilled it, made sausages and burgers, and made pulled pork from it.
One thing worth remembering is that it is a little on the fatty side, and most people find the taste of pork fat unpleasant.
In pulled pork, the taste may be unnoticeable, but for other dishes, you may want to cut the fat out unless you have a smaller hog.
Ham
This list wouldn’t be complete without mentioning ham. Wild hog ham is just as good if not better than pork ham.
I know this may be hard to believe, given that pork ham has all that juicy fat to add flavor.
The difference is when it comes to smoking. The flavor of wild hog works so much better with smoking than pork.
With a simple wet brine and your favorite wood for smoking, you can turn a wild hog ham into a masterpiece that will impress the fussiest of your friends.
Final Thoughts
Like most people, it’s difficult for me to choose my favorite one of anything. I’d rather have them all.
Choosing the best cut depends greatly on your skill level and what cooking methods you have access to.
If I had to choose one cut from the list as my favorite, I would probably opt for the ribs. They have so much flavor, better than any beef or pork ribs you have ever tried.
Hunting coyotes has long been a controversial activity, but understanding what is done with dead coyotes can help shed some light on the truth behind the hunt. Coyotes are wild animals and it is important to understand the implications of hunting them and the ways in which we can both benefit and be harmed by the practice. In this article, we will uncover the truth behind hunting coyotes and explore the different uses of dead coyotes, as well as the ethical debate surrounding the activity.
We will look at fur and body parts, predator control and the benefits and disadvantages of hunting coyotes. In the end, we will summarize the different uses for dead coyotes, as well as the ethical debate around hunting them.
What is a Coyote?
A coyote is a canine animal found in North and Central America. It is a member of the canine family and is similar in size to a small wolf. Coyotes are omnivorous and have adapted to live in a variety of environments, including urban and suburban areas.
They are generally active during the night and have a keen sense of hearing and smell.
Coyotes are known to be resourceful, intelligent and highly adaptive. In the United States, coyotes are hunted for their fur and body parts.
Hunting is regulated by state and federal laws and often requires a hunting license. Hunting allows humans to take advantage of the coyote’s adaptability and natural curiosity. Killing coyotes is also sometimes used as a way to reduce their population and prevent them from competing with other predators for resources.
It is important to note that hunting coyotes is a controversial topic. Proponents argue that it helps protect livestock and prevent overpopulation of coyotes, while opponents contend that hunting is cruel and inhumane, and should be avoided.
It is also important to remember that hunting should be done responsibly, with safety and caution in mind, and not just for sport. Hunting should be done with respect for the animal and its environment.
Overview of the Topic
Hunting coyotes can be a controversial issue but understanding what hunters do with dead coyotes helps shed some light on the matter. Coyotes can be hunted for their fur, body parts, and for predator control.
The fur of a coyote is often used for coats, gloves, and hats, while parts of the coyote like the teeth and claws may be used for jewelry or other decorations. Hunters may also use coyote carcasses to control the population of other predators, such as wolves and bears, that may compete with humans for game.
The ethical debate surrounding coyote hunting still remains. On the one hand, hunting coyotes can help protect livestock and game.
Hunting has caused a decline in the coyote population, which could lead to a decrease in biodiversity in the area. It is up to each individual to decide if they believe hunting coyotes is morally right or not. Understanding all of the possible uses for dead coyotes and the potential consequences of hunting can help inform one’s decision.
What Do Hunters Do With Dead Coyotes?
Hunting coyotes is a controversial issue, with passionate opinions on both sides. Hunters may use dead coyotes for several different purposes, including utilizing their fur and body parts, as well as controlling the coyote population.
Knowing how hunters use dead coyotes can help you make an educated decision on how you feel about the topic. When it comes to utilizing the fur and body parts of coyotes, some hunters do so for commercial purposes such as selling their products, while others use them for their own personal use.
Predator control is another purpose for which hunters use dead coyotes. By controlling the coyote population, hunters reduce competition for food and minimize the chances of coyotes killing livestock. Despite the potential benefits of hunting coyotes, there are several ethical considerations to take into account before making a decision. Taking into consideration the different views of the issue and researching the facts can help you make an informed decision on the contentious topic of hunting coyotes.
Fur and Body Parts
Hunting coyotes for their fur and body parts is a controversial activity. While some people argue that hunting coyotes is necessary for their population management, others believe it is unethical and not necessary. If you are considering hunting coyotes for their fur and body parts, it is important to consider the ethical implications of your actions.
It is important to be aware of the laws and regulations surrounding coyote hunting. Some states require hunters to obtain permits before hunting coyotes, while other states prohibit it outright.
It is also important to practice safety and ethical hunting practices. If you are unsure about the regulations in your area, it is best to check with your local hunting and fish agency.
When hunting coyotes for their fur and body parts, it is essential to use humane trapping and killing methods.
Coyote trapping must be done in a way that does not cause the animal undue stress or pain. There are a variety of humane methods of killing coyotes. The best way to ensure a humane kill is to use a single, swift shot to the head or heart. It is important to always be respectful of the animal you are hunting and to use the appropriate methods to ensure a humane, painless death.
Predator Control
When it comes to a coyote population, hunting can be a great way to keep their numbers down and help protect both their and our safety. Predators like coyotes can cause a lot of damage to livestock, property, and even humans, so it’s important to take active steps to protect ourselves and our communities.
Hunters can help with this by using their catch for predator control, a practice that has been around for centuries. Using hunted coyotes for predator control is a great way to manage the population and ensure that an area is safe. Hunters can use their dead coyotes to scare away other coyotes, helping to keep the animal’s population in check.
They can also be an effective tool for discouraging coyotes from eating livestock and other domesticated animals. Hunting coyotes is an effective way to protect the safety of both humans and animals alike.
Controversy Surrounding Coyotes and Hunting
Hunting coyotes can be controversial, and it’s important to understand why. On one hand, it can be beneficial for a variety of reasons, such as controlling the coyote population, reducing the risk of diseases, and preserving native species.
Hunting coyotes can be detrimental to the environment, can disrupt the coyote’s natural habitat, and can be seen as unethical by some. When making the decision to hunt coyotes, it’s important to do so responsibly.
Make sure you’re aware of the local laws and regulations that come with hunting, and make sure you’re not putting yourself, other hunters, and the environment at risk. It’s also essential to ensure that you’re using the right equipment and that you’re taking the necessary safety precautions.
It’s important to be educated and responsible when hunting coyotes. Do your research and make sure that you’re making the best decision for the environment and for the coyotes. Keep in mind that, while coyote hunting can be beneficial in some cases, it’s important to make sure you’re doing it responsibly and ethically.
Benefits of Hunting Coyotes
Hunting coyotes can be beneficial for various reasons. It is a way to manage the population of these wild animals in order to protect livestock, crops, and other wildlife. Coyote hunting can generate revenue from the sale of their fur and body parts, providing a financial incentive for hunters.
Hunting coyotes can also provide entertainment for some people, who find joy in the challenge of the hunt.
Coyotes are generally perceived as pests in many areas, and hunting them can help to control their numbers. This can help landowners and farmers, as well as other wildlife, who may find themselves competing with coyotes for food or resources. Hunting coyotes can also help to keep their population in check, preventing overcrowding, which can lead to an increase in diseases and a decrease in their overall health.
Hunting coyotes can be beneficial in many ways, from providing a financial incentive, to controlling their population and protecting other wildlife. It’s important to be aware of the potential ethical issues around hunting coyotes and to ensure that any hunting is done in a safe and responsible manner. With the right approach, hunting coyotes can be a beneficial activity for all involved.
Disadvantages of Hunting Coyotes
Hunting coyotes is not without its disadvantages, both for the coyote population and the environment. Coyotes are an essential part of the ecosystem, so if the population of coyotes is reduced, other species may suffer.
Coyotes also help to keep the populations of small mammals and rodents in check. If hunting is overdone, then other species may suffer from having too many of their natural predators removed from their environment. Hunting coyotes can disrupt the natural balance of their habitat and can cause other animals to move away from their natural home.
Overhunting can also have negative economic impacts, as it can lead to decreased tourism and the loss of potential revenue from hunters and wildlife enthusiasts.
Hunting coyotes also has an ethical dimension, as the animals are sentient beings which may suffer. If hunters are not mindful of the stress that hunting can cause, then coyotes may experience fear, pain, and trauma as a result. Hunting regulations should be carefully enforced to ensure that hunting is done responsibly and safely, and that the animals are treated humanely. Hunters should be aware of the potential impacts that their actions may have on the environment and the coyote population, and should take steps to mitigate any potential negative consequences.
Summary
Hunting coyotes is a controversial activity and understanding what hunters do with dead coyotes is essential to understanding the ethical debate that surrounds it. While some hunters use the fur and body parts of coyotes for a variety of reasons, the most common use is for predator control – to limit the number of coyotes in an area.
There are both benefits and disadvantages to hunting coyotes, and it is important to consider both sides of the argument in order to make an informed decision. On one hand, hunting coyotes can lead to healthier natural ecosystems, as they can reduce the amount of native prey animals taken by coyotes. It can also help to reduce the risk of diseases like rabies that are spread by wild coyotes.
Hunting coyotes can lead to a decrease in the overall population of coyotes, which could have a negative impact on the local environment. In the end, it is important to remember that the decision to hunt coyotes is a personal one and should be made with careful consideration. By understanding the different uses for dead coyotes and the ethical implications of hunting them, it is possible to make an informed decision about whether or not to engage in this activity.
The Different Uses for Dead Coyotes
Hunters have been using dead coyotes for different purposes for centuries. The most common use of dead coyotes is for their fur and body parts.
The fur from a dead coyote can be used to make coats, hats, and even blankets. The meat from coyotes is also used for food and can be processed into jerky.
The organs of dead coyotes are often used for medicinal purposes. Coyote hunting is also used as a form of predator control. By hunting coyotes, ranchers can protect their livestock from being attacked by the wild predators.
Coyote hunting helps to protect other animal species from becoming overpopulated. Though coyote hunting has its benefits, it has also faced criticism due to its unethical nature.
Animal rights activists argue that coyote hunting is cruel and unnecessary. The debate around hunting coyotes has been ongoing, but it is clear that both sides must take into consideration the needs of the environment and the animals before deciding on a course of action.
The Ethical Debate Around Hunting Coyotes
Hunting coyotes can be an ethical debate because they have important roles in the environment, such as controlling rodent populations and helping to maintain the balance of ecosystems. Although coyotes can be a nuisance to livestock and wildlife, they also provide a valuable service to the environment by preying on smaller animals and pests.
Some people may argue that hunting coyotes may be necessary to control their populations and protect livestock and wildlife. It is up to the individual to decide what is best for them and their environment.
When deciding if hunting coyotes is ethical, one should consider the coyote’s important role in the environment, as well as the potential risks associated with over-hunting them. It is important to take into account the potential harm done to other animals and the environment when considering the morality of hunting coyotes. Educating oneself on the importance of coyote management and making a conscious effort to be an ethical hunter are important steps in making sure that this ethical debate is resolved in the right direction.
Conclusion
Hunters have traditionally used dead coyotes for their fur and other body parts, as well as for predator control. Although hunting coyotes can have benefits, it is important to consider the ethical implications of hunting such animals. It is important to remember that even if hunting coyotes is done for conservation, the animal still dies.
It is important for hunters to take into account the animal’s overall welfare and not just their own interests when deciding to hunt coyotes. It is up to the hunter to decide whether hunting coyotes is the right thing to do.
If a hunter does decide to hunt coyotes, they should do so responsibly and with respect for the animal. This means ensuring that the animal is killed quickly and humanely, and that their remains are disposed of in a respectful manner. Taking the time to ensure that coyotes are not treated inhumanely is essential in order to ensure that hunting remains a responsible activity.
If there’s one animal that truly captures the essence of Africa, it is the lion. Lions are one of Africa’s most iconic animals. Admired throughout history, these large cats serve as a symbol of bravery and strength.
Lions have powerful bodies. They are the second largest cat species, after tigers.
In addition to their large size and sheer strength, the lion population is also renowned for its impressive eyesight. This is an advantage for their predominantly nocturnal hunting.
There are several reasons for the lion’s excellent vision. Below are ten interesting facts about lion eyes – one of their greatest hunting tools.
Lion Eyes Close Up: 10 Roarsome Facts
Much like crocodile eyes, a lion’s eyes serve as an exceptional piece of equipment.
A lion’s eyes help them hunt, especially at night.
Let’s take a deeper look into the eye of the lion.
1. Inside a lion’s eyes
Lions have significantly more rod cells than cone cells in the retina of their eyes, especially when compared to humans. Lions have around 25 rods to each cone, while humans have about 4 rods to each cone.
The rods aid the reflection of more light into the eye, while cones are for color vision. This is what contributes most to the lion’s impressive nocturnal vision. These large cats can see 6 to 8 times better than humans in low light conditions.
Regarding cones, there are three types – namely blue, yellow, and red. Lions, like all cats, only possess the cones for short waved light (blue), and medium waved light (yellow). They cannot distinguish red colors.
2. Lions’ eyes shine
If you’ve gone game viewing at night, you may have noticed some glowing eyes looking back at you.
Lions, like most nocturnal animals, have something inside their eye known as tapetum lucidum. This is a reflective layer of cells behind the retina which acts as a mirror.
The rod and cone cells absorb light entering the eye. The tapetum lucidum reflects the light which passes through the retina and photoreceptor cells.
This gives the lion’s brain two chances to absorb the light waves and refine the image. This significantly improves the animal’s night vision.
3. Outside a lion’s eye
The outside characteristics of a lion’s face play a significant role in its incredible night vision.
The white stripe under its eyes helps reflect faint light into the eyes, making it easier to see under low light conditions.
It also helps in mottled lighting, common in dense, bushy areas.
This unique feature is a good indication that lions are nocturnal.
If you look at a cheetah, you will notice they have black tear-like markings. This reduces glare, which is ideal as these quick, spotted cats tend to hunt during daylight.
4. Lions have a second eyelid
Lions have a second eyelid known as a nictitating membrane. This serves as an extra layer of protection for the cornea.
It also moistens the eye while maintaining vision.
The nictitating membrane acts as a windshield wiper, removing dust and anything else blown into the lion’s eye.
5. Lions have round pupils
Most felines have vertical slits instead of round pupils. This is to maximize the capacity of recognizing the depth of a field.
Smaller cats need to crouch to get close to their prey before pouncing. Vertical slits are important as they help these cats measure shorter distances precisely.
Larger felines, like lions and tigers, have round pupils.
As they have longer legs, their eyes are at a greater distance above the ground. They are also a lot more powerful and can jump much further.
Lions do not need to get too close to their prey before pouncing and do not require a vertical pupil.
The round pupils possessed by larger felines are also known to allow more light to filter into the eye, giving them better night vision.
6. What color are lions’ eyes?
Lions’ eye colors are typically brown or amber. Even white lions, whose fur lacks the typical lion’s pigment, have a pale amber eye color (NB: some white lions have blue eyes).
As previously discussed, the anatomical structure of a lion’s eye is responsible for the eye shine we often see when game viewing at night.
The typical color of this eye shine is a red or gold hue. This can vary depending on the angle at which one views the lion.
7. Baby lion eyes
Baby lions, referred to as “cubs,” are born blind. They do not begin to open their eyes for the first 3 to 4 days after being born. Even after opening their eyes, they cannot see very well and need extra care from their mums.
Their eyes start out blue-grey and begin turning brown or amber around the 2- to 3-month mark.
8. Lion eyes and hunting
Given their impressive night vision capabilities, lions generally hunt at night. By using their vision, lions hone in on their target, coordinating their attack based on where they see their prey moving.
In a hunt and evasion scenario, sight is the most crucial factor. Lions’ prey also possess strong senses such as sight and smell, which helps them escape.
Dodging obstacles and handbrake-turning past members of a lion pride makes certain prey tougher to catch.
The key to a lion’s hunting success lies in having the conditions skewed in their favor. This is most commonly at night, long after the sun has set, and when everything has become completely dark.
Lions also hunt well during storms as the noise and wind make it harder for their prey to hear or see them.
9. The full moon can hinder a lion’s vision
As examined earlier, the darker it is, the better it is for lions. A full moon makes it easier for prey to detect and escape predators.
During a full moon, lions will often put off hunting while the moon is at its peak. They will much rather wait until the moon begins to dip over the horizon or until clouds have covered it.
10. Lion eyes positioning
Unlike much of their prey, lions have binocular vision. This suggests that their eyes point forward, allowing them to judge depth more effectively. While this is a great advantage, their eyes cannot move from side to side very quickly.
Lions have to move their entire heads from side to side to see in different directions. On the other hand, their prey has eyes on the sides of their head.
This provides their prey with a wider range of vision. It also hinders their ability to resolve single objects after dark.
For this reason, when night starts closing in, these animals move out into open clearings for increased visibility and room to move if need be.
More Incredible Lion Facts
In addition to their unique eyes, lions have many other characteristics and traits that are sure to impress you.
Below are a few mind-blowing facts about one of Africa’s largest cats.
Lions can get their water from plants
Lions are highly adaptable and can survive in very dry areas. In places like the Kalahari desert, they get most of their water from their prey and plants such as the tsamma melon.
Lions are big eaters
These large felines can consume up to 40 kg of meat in one meal, which is generally a quarter of their body weight.
To assist them in scraping flesh off the bones of their prey, they have tongues with sharp, pointed rasps, papillae.
Here is more information on what lions eat.
Lions roar together
Unlike other cat species, lions roar together, often to mark their territory.
A calling typically goes on for about 40 seconds.
The entire pride joins in, including the younger cubs with their tiny mews.
Lions are quick and powerful
These large cats can run short distances at 80 km/h and leap as far as 11 meters.
This, coupled with their impressive vision, makes them one of the top predators of Africa.
Lions love sleep
Lions enjoy lazing around. These big cats spend 16 – 20 hours sleeping each day. They have few sweat glands and conserve their energy during the day.
They are much more active at night when it’s cooler. This is also when they hunt.
For more on these magnificent animals, check out these 10 interesting facts about lions.
What Are Your Thoughts on the Lion Eye?
Lion eyes are an incredible tool and are largely why lions have a relatively good hunting success rate. In sheer darkness, where most of us would find ourselves lost without being able to see a thing, lions move with ease.
While their eyes are highly functional, they are also beautiful with their brown-amber color.
For your next game ride, consider heading out after sunset. It is then when these large cats are most active.
It is also when you will notice their shining eyes.
Just hope that they aren’t angry lion eyes.
If you wish to see these large cats up close, be sure to check out these amazing African safari deals.
The 1998-99 deer season will probably be remembered for many things. The weather was scorching hot and bone dry throughout most of the season, white oaks were barren in many places where the deer season normally revolves around white oak acorns, and most hunters reported an absent, insignificant or off-schedule rut. Who would have guessed that such a season will also be remembered for a Telfair County buck that might be the best killed in Georgia in 25 years, maybe even a new state record?
Billy Joe Padgett, 23, of Jacksonville, Ga., killed the buck on Thanksgiving morning, Nov. 26. The non-typical rack has 36 scoreable points on what is a very high and wide 8-point frame, but it is the mass that is most striking. The circumference measurements at the base of each beam is in the neighborhood of 10 inches. The smallest of eight circumference measurements is greater than 6 inches.
These facts are leading experienced scorers who have looked at the rack to estimate that the deer, when officially scored, will approach or even surpass the current state record of 240 5/8 non-typical inches, which is the Hatton buck, killed by John L. Hatton Jr. in Monroe County in 1973.
The 60 days that must pass before the rack can be officially scored are slipping away fast, and we’ll know soon whether we have a new state record or not. And in case you are a Week 10 Truck-Buck entrant, here’s the answer to your burning question: Billy Joe is a GON subscriber, and yes, his buck is a Week 10 entrant.
Billy Joe killed the buck on the White Oak Plantation Sportman’s Club, an 8,800-acre tract on the Ocmulgee River in Telfair County that has been under quality deer management since it was established five years ago. Billy Joe’s father, Ernest Padgett, was a founding member of the club and helped develop a cooperative agreement among neighboring clubs that has resulted in quality management on more than 14,000 contiguous acres.
This summer, Ernest and his sons were posting and installing locks on a new 800-acre addition to the White Oak club when they came across some very impressive rubs from the previous season. Needless to say, Ernest and Billy Joe had a good idea where they would start hunting when the season came in.
On Oct. 27, the first Tuesday of gun season, Billy Joe got a look at the buck that was probably responsible for the rubs. Watching the buck walk across a field of young planted pines, Billy Joe thought that the deer must still be in velvet: the rack just seemed too big, heavy and dark. The buck crossed Billy Joe’s entrance path and began running for cover, and Billy Joe got one clear shot at 75 yards. He took it and missed clean.
Billy Joe and his dad began hunting the buck as often as they dared, hoping the pressure would not make the buck leave the area. In early November, Ernest got a look at the buck moving at a brisk walk at 175 yards. He shot and immediately saw dust bloom under the buck’s neck. Once again, not a hair was to be found.
Early in the week of Thanksgiving, Ernest heard a buck chasing a doe in a pine thicket, and a loud, deep, steady grin sounded convincingly like a mature buck. Ernest grunted in response, but the deer never appeared.
On Thanksgiving morning, Ernest would not be hunting, so he told his son how to get to the stand where he had heard the grunting buck.
Daylight had barely arrived when Billy Joe finished a short series on his grunt call and looked up to see the huge buck they had been hunting. At 50 yards, Billy Joe was given a broadside shot. When he fired, the buck raised its tail and bolted, and Billy Joe, like any of us would have been, was unable to sit still for a second. He scaled quickly down from the stand, leaped over the last few steps and ran to where the buck had been standing. Forty yards from that spot, Billy Joe began to breathe again when he located the first blood.
Moments later, he topped a small rise and found himself looking at the buck, which was lying on the ground, head up, watching him. The deer began to rise, and Billy Joe snapped of a shot at its neck. As the buck disappeared at a run into planted pines, he fired a third time, then ran after it.
Billy Joe lost sight of the buck right away, but ahead he could see pine sapling swaying in the buck’s wake, and he followed at a sprint. It was not far before he saw the buck again, now its massive rack of antlers had been caught up in a pine sapling. As it struggled to run, Billy Joe charged up and grabbed the left beam in his hand. With the rifle in the other hand, he fired point-blank into the buck’s chest, then turned loose just as the buck freed itself and disappeared again.
Once again, Billy Joe was running after it, but the chase ended only a few yards farther on when the buck piled up, and a fifth and final shot was placed. Fifteen minutes passed between the first and the last shot. Four of the shots had connected.
The rack must dry for a minimum of 60 days before it can be scored by an official Boone & Crockett measurer. Because the scoring of this unusual rack will be difficult and time consuming, and because the final score will be highly anticipated, no green score will be taken, and coming up with an eyeball estimate for a rack like this one is guesswork at best.
Just last season, Blake Voltz, of Columbus, came within 9 inches of matching the Hatton Buck with his Musgoee County non-typical buck that scored 231 2/8 inches. Will Billy Joe’s buck fall short as well or will the state record whitetail have a new name by February?
Editor’s Note: Kim Adams of the White Oak Sportsman’s Club contributed to this report.
Choosing the right air source for your PCP gun can be tricky.
There are several ways to fill your PCP gun and each will have its advantages and disadvantages.
It’s best to take a step back to consider your options so that you end up with the best method for you.
In order to help you navigate this, we will take a look at the three most popular ways to fill your gun:
The hand pump
Scuba tank
And carbon fiber tank.
Hand pump
A hand pump is generally the same as a bicycle pump.
Instead of pumping bike tires, a hand pump will connect to the air reservoir of a PCP gun.
A modern hand pump can get to 3,000 psi (pounds per square inch).
When you start to pump, the beginning is easy and you can even pump with one hand to get to 1,000 psi.
However, you’ll most likely encounter more resistance once you hit 2,500 psi.
At this point, it’s best to leverage your body weight to pump the remainder.
It’s recommended that you do not pump for more than five minutes
And to let the pump cool down 15 minutes between pumping sessions to prevent overheating.
Pros
Cons
Small and easy to store
Doesn’t need any technical testing
Cheaper price compared to carbon fiber tanks
No need to refill so it doesn’t cost any money on the refilling process like air tank
Does not break easily, hand pump is generally durable and can last for years
Never run out of air power
Can be repaired and serviced easily
Hand pump is highly cost effective. You buy it once and there is little money to spend for its maintenance
Gives you ultimate control over the pressure level. You can pump the gun and stop at any pressure point that you want. This characteristic alone makes some air gun experts prefer a hand pump over air tanks for their PCP rifles
Takes some physical strength and effort to use the pump though it could be your work out for that day
Not fast in term of filling speed
Requires understanding of a hand pump to operate it successfully
Some pumps don’t have the moisture filter so they might put water into the gun and cause damage in the long run. This issue can be handled by using the pump in a climate controlled environment where the moisture level is low
Scuba tank
Scuba tanks are also called diving cylinders.
They are usually made of steel or aluminum and often have a pressure of 3,000 psi.
It’s required to perform hydrostatic testing on scuba tanks every five years.
Pros
Cons
Take very little effort to use
Fast filling speed: scuba tank will fill your PCP gun in seconds
Filled with filtered and dried air. Therefore, it won’t put any moisture into your gun and doesn’t cause any rusting problem.
Needs to be tested every 5 years
Costs money to refill
Takes significant space to store
Hard to stop exactly where you want because the pressure rises so fast.
Finding a place to refill a scuba tank could be a problem
Hard to fill completely to over 3000 psi PCP gun
Carbon fiber tank
A carbon fiber tank has the same look as a scuba tank but it is much smaller.
It uses carbon fiber so the tank material is much lighter than a scuba tank.
A carbon fiber tank can get up to a pressure of 4,500 psi and gets more fills than both a hand pump and scuba tank.
Pros
Cons
Fills the gun in seconds
Available in different sizes
Compact and smaller than a diving cylinder
High pressure level, up to 4500 psi
Compact ,smaller and lighter than a scuba tank
Convenient to carry along to travel or to the shooting range
More expensive than a scuba tank or hand pump
Finding a place to refill the tank could be a problem
Costs money to refill the tank when it drops out in pressure
Air gun compressor
The final method is with a specialized 3,000+PSI compressor.
Disadvantages – they can be loud and expensive, although prices have come down a bit in the last couple of years.
Tyler, a Pyramyd Air expert, shows us how to fill your PCP airgun using the most popular methods here:
Conclusion
Of the four air sources reviewed here, it’s easy to see how one air source may be more convenient than another.
So far, we have seen that a hand pump, scuba tank and carbon fiber tank each have their merits.
If you want a more effective method of filling your rifle, then you might want to consider a scuba tank or a carbon fiber tank.
Depending on the level of preparation you are able to provide, like if you are able to go into a store to fill your scuba or carbon fiber tank, then you might have to choose an option that is simpler.
If you’re willing to spend more money to save time on the fill-up, then choosing a scuba tank or carbon fiber tank will be best.
Make sure to research if there are scuba tank or carbon fiber tank refill locations in your area before purchasing either of these items.
If there aren’t, this may limit when you would be able to refill your tanks.
If you’d rather your air source be filled automatically or without manual effort, then a scuba tank or carbon fiber tank is a great way to go.
If you are a regular member of a local shooting range, a carbon fiber tank could be your best friend because of its lightweight and portability .
Therefore, you should think about your specific situation before making a buying decision.
If you are an occasional shooter and you don’t mind some extra work, then a hand pump will give you total control over the power of your PCP gun.
When you’re fishing, you need to use the right equipment to make sure you have the best chance of catching a fish. One important piece of equipment is the swivel. Swivels allow your line to spin freely, which helps reduce tangles and keeps your bait from getting twisted up. In this article, we will discuss the different types of fishing swivels and how to choose the right one for your needs!
What Is A Fishing Swivel?
A fishing swivel is a small metal device consisting of a pivoting joint in the middle, and two metal rings attached at the ends. The metal rings are connected to the joint with an anchor inserting into the joint, which allows them to rotate freely in any direction.
The main advantage of fishing swivels is that they prevent line twist when you’re fishing with a lure or a rig that tends to rotate in the water. The most common examples of this would be inline spinners and metal spoons, which rapidly rotate during retrieval, and thus quickly end up twisting your fishing line if you use them without a swivel.
A second advantage provided by fishing swivels is that they often come with a snap attached to one end, which makes it very convenient to switch out your lure or leader line quickly while fishing.
Because of these key advantages, fishing swivels are present in most fishing rigs used by anglers. Now let’s take a closer look at the different types of fishing swivels, and how to choose the right one.
What Are The Main Types Of Fishing Swivels?
The 5 main types of fishing swivels are:
Barrel swivels
Ball-bearing swivels
Snap swivels
Three-way swivels
Finesse swivels
Together, these 5 swivel types cover more than 90% of all fishing applications where fishing swivels are used, and so are plenty to get you started. Let’s take a closer look at each of them below.
Barrel Swivel
The barrel swivel is the original fishing swivel, and simply consists of a pivoting joint with two rings attached to either end. The joint in the middle is usually round, or sometimes a small barrel.
While barrel swivels are very cheap and easy to use, they don’t prevent line twist very effectively, since their rings don’t rotate as efficiently as those of a ball-bearing swivel.
See Barrel Swivels On Amazon | See On Walmart
Ball-bearing Swivel
A ball-bearing swivel is an improved version of the barrel swivel, and comes with a ball bearing inside the pivoting joint. Due to this ball bearing, the rings of the swivel rotate much more freely than those of a standard barrel swivel, and thus prevent line twist more effectively.
The main downside of ball-bearing swivels is that they are considerably more expensive than barrel swivels. Because of this, one option is to use them only when you’re fishing with a lure type that generates a lot of line twist.
See Ball-bearing swivels On Amazon | See On Walmart
Snap Swivel
A snap swivel is an improved version of the barrel swivel that comes with a snap attached to one end, instead of the regular ring. The most common way to use a snap swivel is to tie your main fishing line to the ring of the swivel, and then use the snap to attach to the ring of a lure.
The great thing about using a snap swivel is that you can easily exchange the lure for another one at any time, which is much faster and easier than retying the line every time you want to change your lure.
See Snap Swivels On Amazon | See On Walmart
Three-way Swivel
As its name suggests, a three-way swivel consists of a pivoting joint that has three rings attached to it instead of two. The advantage of this setup is that you can add a separate leader line to one of the rings with a weight attached to the end of it.
The leader line used to attach the weight is usually weaker than the main line, which means that if the weight gets snagged on the bottom, it’s fairly easy to break it off without losing the rest of your tackle.
Three-way swivels are most commonly used for trolling rigs, since they allow you to troll a heavy weight close to the bottom without worrying too much about getting snagged.
Finesse Swivel
The finesse swivel is a relatively new swivel type that’s used for fishing with a drop shot rig. It consists of a hook that is directly attached to the swivel, and can rotate around the axis of the swivel.
While one end of the finesse swivel looks like a regular swivel ring (which is where you attach your main line), the other end looks like the clip-on ring of a drop shot weight.
The great thing about the finesse swivel is that you can use it to attach a drop shot weight via a leader line that is not directly tied to the swivel, but is instead clipped into it.
In case your weight gets snagged on the bottom, this design allows you to pull the line attached to the weight off the swivel, so you’ll only lose the weight, but not the rest of your rigging.
Swivel Sizes
Fishing swivel sizes are classified with an aught scale similar to fishing hooks, with the smallest size starting at 12, and gradually increasing as the numbers go down to size 1. After reaching size 1, swivel sizes switch to 1/0, and go up to size 12/0, which is the largest swivel size.
In general, it’s best to choose the smallest swivel size that you can get away with, since that won’t spook fish as much as an oversized swivel. For example, when fishing for trout, a size 12 swivel is most often the best choice.
However, when fishing for bigger fish with heavy lines, it’s necessary to increase the size of your swivel, since that also increases the amount of weight that the swivel can bear without breaking.
Snap Swivel Size Chart
Barrel Swivel Size Chart
What Is The Difference Between A Barrel Swivel And A Crane Swivel?
A crane swivel is an intermediate form between a barrel swivel and a ball-bearing swivel. It comes with highly polished metal parts that enable its rings to rotate better than those of a barrel swivel, but not as well as those of a ball-bearing swivel.
When in doubt, it’s usually best to opt for a ball-bearing swivel, since that guarantees the best performance. This is especially important when fishing with rotating lures, such as inline spinners and spoons.
How Do You Choose A Swivel For Fishing?
Choosing the right swivel depends on what fishing technique and what fishing lure you want to use. If you’re fishing with lures that have a heavy rotating action, it’s essential to use the best swivel you can find, which would be a ball-bearing swivel.
On the other hand, if you’re fishing with lures that don’t rotate, or with fishing rigs that don’t don’t twist up the line, you can opt for a simple barrel swivel. Also, if you want to have the flexibility of changing up your lure or presentation at any time, it makes sense to use a snap swivel, which you can use to attach a different lure or leader line very quickly.
Do Swivels Spook Fish?
In most cases, fishing swivels don’t spook fish, and you can attach them directly to your lure without any problems.
However, if you’re dealing with finicky fish, a swivel may spook them. This is most often the case when fishing in heavily pressured fisheries, where the fish have learned to avoid anything that comes with a fishing line and/or terminal tackle attached to it.
Another scenario where swivels may spook fish is when fishing in crystal clear waters, such as trout streams. And obviously the most challenging situation is when dealing with pressured fish in very clear waters.
If you find yourself in any of the situations above, you can still use a swivel, but shouldn’t attach it directly to your lure. Instead, tie a 2 to 3 foot fluorocarbon or monofilament leader between the swivel and the lure. That way, you still get the benefit of the swivel, but without spooking the fish.
When To Use a Snap Without a Swivel
Instead of using a snap swivel you can opt to use a snap without a swivel attached to it. This is a good option if your lure or rig doesn’t really generate line twist, and if you’re dealing with heavily pressure fish that spook easily (especially when fishing in very clear water).
Never been to South Dakota pheasant hunting? You might not know what you are missing.
That was the case with me. Having hunted only in Minnesota and Iowa from 1979-1999 I enjoyed the pheasant hunting that the land afforded me and my hunting partners for years.
Being passionate about habitat and wanting to really affect my hunting outcomes and experiences I began looking for pheasant hunting land to purchase, develop and enjoy. I started in Iowa and through several contacts came across a realtor in Iowa who had some land for sale in Iowa but also South Dakota. I had never hunted pheasants in South Dakota but always assumed it was about as good as Iowa (which was way better than Minnesota at the time). After some discussion and persuasion by the realtor I figured I’d have to be stupid not to go out and at least look at the property.
Just driving out there, which was in the springtime, I could tell by how many birds were hanging around the roads that the bird numbers were good. Long story short is I ended up buying the acreage there and hunting/developing the property for pheasants, deer and turkey since 1999. Every opening weekend we harvest between 30-60 birds per day. I also heard stories around the state of parties of 20 hunters getting their 60 bird limit in as little as ½ hour. That’s more chaos than hunting I would venture but just the same – that’s what South Dakota wild pheasant hunting is capable of producing.
Pheasant Capital of the World? I think most hunters would agree. If you read most pheasant hunting outlooks and forecasts, such as Pheasants Forever or Outdoor News, you’ll find that the statistics again and again point to the South Dakota bird and harvest numbers as the reigning leader.
As recently as 2005, the pheasant population approached 10 million birds (1 40-year record). Number of birds harvested that year was nearly 2 million roosters (11.2 birds per hunter. 2 birds per person per day).
This quote from the Pheasants Forever website on the 2005 season sums it up:
“Overview: The 2005 pheasant hunting season was a year to remember across the upper Midwest. South Dakota maintained its hold as the “Pheasant Capital” with an estimated harvest of over 1.9 million roosters, a 40-year high. Iowa, North Dakota and Kansas all checked in with big 800,000 bird totals.”
South Dakota boasted a rooster harvest over twice as large as the next nearest competitors.
In addition to the native resource, South Dakota also reigns champ in the offerings of public hunting, free walk-in access to private land and a host of commercial fee hunting opportunities. In fact, it could possibly be that since South Dakota’s commercial pheasant hunting is so strong and established that Cabela’s in Mitchell can attract hunters from all 50 states in the union on South Dakota’s annual opening pheasant weekend.
Today the passionate upland bird hunter, thanks to the internet, has excellent access to whatever quality pheasant hunting package they desire. If it’s a pheasant hunting trip of a lifetime you desire, look no further than South Dakota. Whether you’re a budget minded do-it-yourselfer looking for the best public land hunt or Bo Jackson looking for that $5000/day experience you can find it. You’ll have to do a little research. But it’s time well spent.
What ever you do, get to South Dakota soon and experience “The State of Pheasant Hunting”.
Check Availability of UGUIDE South Dakota Pheasant Hunting Camps Here
Run Cost Scenarios of your groups pheasant hunting package here with our Trip Cost Calculator
Building a DIY deer stand is an excellent way for avid hunters to enhance their hunting experience. Learn how to build homemade deer stands with these 25 free DIY deer blind plans to build a safe and comfortable hunting spot easily. These free deer blind plans designed for everyone, from beginners to seasoned builders.
These DIY deer blind plans include step-by-step instructions, detailed guidelines, and PDF downloads, making the process as easy as possible. Incorporate homemade deer stands into your next hunting adventure or nature observation to improve your experience.
Our collection of DIY deer blind plans features a wide range of styles and designs, such as elevated hunting blinds, mobile deer blinds, homemade tree stand blinds, and box blinds. These plans cater to various preferences and uses, such as bow hunting, rifle shooting, or wildlife photography. Choose between using scrap wood, pallets, or new materials to make the perfect deer blind, depending on your budget and preferences.
So, gather your tools and materials, and embark on your DIY deer blind project today! With our 25 free DIY deer blind plans, you’ll have plenty of options to choose from and make a custom and practical hunting blind that will enhance your outdoor experiences. Don’t wait any longer – start building your very own DIY deer blind today!
1. DIY Elevated Deer Hunting Blind Under $500
Revamp your hunting experience with a custom-built, elevated DIY deer blind designed for optimal visibility and protection against weather elements. This innovative project requires basic tools and materials, easily sourced from any home improvement store. Remarkably budget-friendly, you can erect this stand on a weekend with a spending limit of approximately $500.
This deer blind, fashioned from common lumber, blends functionality with portability. It conveniently fits into the bed of a standard full-size pickup, specifically designed with the dimensions of an F-150 in mind.
Despite its compact design, it comfortably accommodates two people and is sturdy enough to withstand harsh weather conditions, proving its worth during below-freezing pre-dawn hunts. Elevate your deer hunting experience and embrace the rugged appeal of this hunting blind today! outdoorlife
2. How to Make Deer Blind From Pallets
Transform your hunting experiences with a budget-friendly DIY box blind! Rising prices of building materials don’t need to hinder your plans. This practical guide demonstrates how simple materials like pallets, 4x4s or 2x4s, exterior grade screws, and a tarp can be repurposed into a sturdy, modular hunting blind.
Designed to be accessible, the structure requires basic tools like a drill, sawzall, and tape measure. This encourages family participation, offering a fun outlet for your kids to sketch out the plan.
From gathering materials to setting up the structure, this guide provides a step-by-step process, ensuring that anyone with some initiative can set up their box blind. It’s a rewarding project that enhances your hunting experience and brings family bonding time. Get started today and make lasting memories with your loved ones. themeateater
3. How to Build a Mobile Deer Blind
Unleash your inner craftsman with a DIY mobile deer blind on a running gear project! This intriguing endeavor starts with affordable farm running gear and involves the construction of a 4×4 frame, 2×6 floor, and 3/4″ plywood floor. It offers a blend of green-treated and standard materials, with unique features like angled corner walls, bow windows, and sliding horizontal windows for an optimal viewing experience.
Unique elements include a cost-effective door with a combo handle for security and noise-damping acoustic foam panels. You can personalize your mobile deer blind with creativity, akin to the joy of painting happy little trees on its exterior.
The result? A functional, transportable deer blind offering an exceptional view from inside, further enhanced with magnetic window screens and a blackout curtain. Get ready to build this fantastic piece, engaging adults and kids in a fun-filled, hands-on activity. Perfect for all DIY enthusiasts out there! bowhunting
4. Homemade Tree Stand Blind
If you love hunting, you’ll love these DIY deer blind plans that will help you build your own deer blind that is comfortable and effective. Envelop yourself in nature with this comprehensive guide to constructing a DIY deer stand blind. Made to provide an elevated and sheltered view for deer watching, this 6′ x 6′ structure is an immersive outdoor project that ensures a cost-effective and rewarding experience. Materials include treated timber, decking boards, plywood panels, corrugated red asphalt roof panels, metal brackets, PVC pipes, and assorted hardware.
Not to forget, several cans of camouflage spray paint blend your blind with the surroundings seamlessly. The building process is a meticulous blend of planning, assembling, and finishing, focusing on stability and longevity. From crafting the platform and frame to installing a sturdy ladder and comfortable seating, each step is outlined clearly, ensuring a smooth construction journey.
Enjoy the tranquility of nature in your deer stand blind, a unique and purposeful addition to your outdoor space. So go ahead, gather your tools, and embark on this nature-oriented project to witness the harmony and allure of the wild from the comfort of your deer stand blind. instructables
5. Building Your Own Platform Deer Stand
Enjoy the captivating view of your rural surroundings with your DIY deer stand, built to withstand the elements and provide a unique vantage point for observing wildlife. With the help of a cordless hammer drill and impact driver combo kit, this project uses sturdy dimensional lumber to construct a safe and secure platform. Explore your property’s wildlife, from colorful birds to majestic deer, all from your homemade perch.
Building a deer stand starts with a solid foundation of 2×6 pressure-treated lumber, precisely structured for balance and strength. The framework is further fortified with Timberlake screws, made effortless by the robust tools from the Milwaukee M18 FUEL line.
The project proves to be an exciting endeavor, not just as a means of observing wildlife but also as a functional structure for seasonal hunting. Before embarking on this project, comply with local zoning laws and building codes for safety. So gear up, engage with the outdoors, and make an enduring symbol of your love for nature with your deer stand. homefixated
6. Inexpensive DIY Hunting Blind
Learn the art of building effective DIY hunting blinds. These blinds hide hunters from their prey, allowing for a more successful hunting season. This project covers three unique designs – the box stand, the hay bale blind, and the natural blind. With each design explained in detail, you’ll understand the cost, materials required, and step-by-step instructions for construction.
The box stand is an elaborate structure that can comfortably accommodate two people. It requires treated lumber, plywood, and corrugated tin sheets for a $100-$300 budget. The hay bale blind is simpler, leveraging existing hay bales in a field to camouflage the hunter, requiring a minimal budget of about $100.
Lastly, the natural blind is a cost-free structure built using surrounding vegetation. Building hunting blinds brings utility and helps make a stronger bond with nature. This cost-effective guide helps you maintain the age-old hunting tradition while ensuring safety and comfort. whitetailproperties
7. Making Your Own 5×5 Deer Blind
Breathe new life into your hunting experience with a DIY 5×5 deer blind project. This unique project utilizes sturdy 2x4s for framing and painted OSB for walls, topped with lightweight steel roofing, making a durable yet affordable deer blind. Its total construction cost rings up at just around $300. This project is easy in difficulty level, inviting everyone to try. The result? A durable, functional, and cost-efficient deer blind that’s perfect for your next hunting adventure. Embark on this project and showcase your skills while benefiting from the functionality of a custom-made deer blind. howtospecialist
8. How to Make a Deer Stand at Home
Prepare for deer season with this comprehensive guide to building your elevated DIY deer stand! This hands-on project provides an exceptional view 17 feet up and includes optional elements for comfort and concealment, such as a blind and roof.
You’ll work with common materials like 16-footer 2x4s and a nail gun to assemble the ladder and frame, ensuring your stand is secure and practical. With careful measurements, cutting, and assembly, you’ll attach the ladder to the frame, strengthen the structure, and add the roof and side panels.
Additionally, the stand offers two design options: a simpler single deer stand or a slightly more complex double deer stand, catering to your specific hunting needs. Harness your craftsmanship to make this innovative deer stand and elevate your hunting experience! diytyler
9. Free Wooden Deer Stand Plan
A deer blind is a must-have for any hunter. Learn how to make your own with these DIY deer blind plans that are easy and inexpensive. Immerse yourself in the thrill of the hunt with the ultimate homemade box deer hunting stand! Expertly built with an emphasis on stability, portability, and affordability, this DIY hunting stand offers optimal concealment and protection from the elements as you pursue your game. Constructed primarily from 2×4 pieces, this stand includes a 4’x4′ platform approximately 6 feet off the ground, complete with a roof for added shelter.
Customize your stand with as many shooting windows as required at your preferred height. The beauty of this project is its transportability – the components fit snugly into the back of a pickup truck, enabling fast assembly on-site with just a single ratchet wrench.
If you’ve multiple hunting locations on your property, this cost-effective solution, estimated at around $150, offers the ideal alternative to expensive commercial options. Now it’s time to gather your tools, source your materials, and build your perfect hunting vantage point! freedeerstandplans
10. How to Make a Deer Stand
Transform your hunting experience with this practical and moveable DIY deer stand. This detailed guide will lead you through making a sturdy, weather-resistant deer stand using basic materials such as cedar, pine, or redwood lumber and plywood. The design includes a floor, sides, a front face, a back face, and a roof, ensuring a comfortable and secure perch for your hunting expeditions.
Follow the step-by-step instructions to accurately measure, cut, and assemble each component. Remember the importance of drilling pilot holes for a tighter lock and right-angled corners for a professional result.
The structure can be easily disassembled and relocated according to your hunting needs. The highlight of this deer stand is its portability, enabling you to adjust to changing wildlife patterns. Enhance your outdoor experience with our free deer stand plans today. myoutdoorplans
11. 8 X 8 Hexagonal Bow Deer Blind Building Plans
Make a spacious hunting hideaway with this simple DIY blind construction guide! The aim is to make a blind that comfortably fits a family and can be assembled in a garage and transported for assembly. You’ll need 2x4s, 4x4s, 1/2″ plywood, gate hinges, blind windows, paint, and blind platform brackets.
Begin by assembling an 8’x8′ base using the platform brackets. Build individual panels for the front and sides, attach them to the platform, and secure them to each other. Build an “L” shaped frame for the rear wall and ceiling joists. Cut out the door, attach the roof, add shingles, and paint. This versatile blind will add a practical and enjoyable feature to hunting trips. reckonill
12. How to Make Your Own 4×6 Elevated Deer Blind
Revamp your outdoor experience with a DIY 4×6 elevated deer blind! This fun family project is practical and rewarding, perfect for enthusiastic nature lovers. Using common tools, such as a hammer, saw, and drill, you’ll work together to construct a sturdy structure elevated for an optimized view.
The process incorporates materials like Plexiglass for windows, enhancing visibility while maintaining the shelter. This unique design also features window dividers on each 6′ side, catering to your personalized viewing needs.
Building this deer blind offers a fun, engaging activity that brings families closer while honing woodworking skills. Plus, the end product provides an ideal spot for wildlife observation, capturing those elusive deer moments like never before. So, get your tools ready and embrace the adventure of building today! myoutdoorplans
13. Build a Ladder Stand for Deer Hunting
Delve into the craft of building a DIY ladder stand for deer hunting. Constructing your own provides cost savings, customization, and a unique perspective for a successful hunt. This guide takes you through six key steps, from choosing the perfect tree to testing the final setup. Materials needed include 2×4 inch treated lumber or cedar beams, plywood for the seat, and an array of tools.
It emphasizes that a ladder stand is not just an impressive feat but a vital tool for hunting, offering a bird’s eye view of the area and excellent camouflage. But remember, safety is paramount; always use a safety harness and routinely inspect your tree for stability. This guide gets you closer to a fulfilling hunting experience. deerproject
14. Small Deer Stand Design
Make your hunting experience even more memorable with the perfect DIY small deer stand design! This woodworking task can be completed in three days at approximately $250. All the necessary supplies can easily be procured, marking it an easy-level task.
The resulting deer stand is an impressive testament to your craftsmanship, showcasing your skills to the world. Not only does it offer a practical application for nature enthusiasts, but it also provides a satisfying creative outlet.
The project plan, available on the provided link, makes the process manageable and enjoyable. Build your deer stand today and immerse in the thrill of DIY woodworking! howtospecialist
15. Build Your Own Deer Stand
A deer blind can improve your hunting experience and success. Find out how to make your own with these DIY deer blind plans that are detailed and practical. Embark on a self-sustainable journey with a DIY elevated deer stand that will bring a fun and practical addition to your homesteading adventure. This tutorial demonstrates how to build a 4×8 elevated deer stand or hunting blind, proving functional and engaging. Anyone can enhance their woodland spaces with minimal equipment and a do-it-yourself spirit.
As they utilize their 18-acre land, they inspire others to embrace simple and sustainable lifestyles, turning dreams into reality. Every step in their process, from suburban life to rural homesteading, brims with useful insights and wholesome experiences.
This tutorial doesn’t just guide you in making a deer stand; it fosters a deeper connection with nature and stirs the innate human desire for simplicity and sustainability. Build your deer stand today and start your adventure!
16. DIY Gaint Deer Hunting Blind With Scrap Wood
Venture into the world of DIY wildlife ventures with a comprehensive guide on building a deer hunting blind using scrap wood. This project is an ideal opportunity for outdoors enthusiasts, promoting resourcefulness, creativity, and eco-friendly practices.
You’ll require basic tools and equipment, such as a hammer, saw, screws, and scrap wood. Preparation involves sourcing your materials and selecting an optimal location for your hunting blind. Following step-by-step instructions, you’ll build a sturdy and practical hunting blind, enhancing your hunting experience.
This innovative project utilizes waste materials and fosters a deeper connection with nature. The scrap wood serves as the main ingredient in this exciting project. Relevant to those interested in hunting, DIY projects, and sustainable practices, this giant homemade deer hunting blind promises an engaging, informative, and rewarding experience.
17. Homemade 7×7 Deer Stand
Gear up for a hands-on experience with this detailed guide on crafting your 7×7 deer stand! This unique project adds to your hunting skills and provides a practical and comfortable shooting box blind designed for effective deer hunting.
With this DIY guide, you’ll gain insights into building a sturdy 7×7 blind on top of a deer stand platform, all accomplished within an impressive 3-day timeline.
Learn how to enhance your outdoor adventures and foster your passion for hunting through this well-explained DIY deer stand walkthrough. It’s time to boost your hunting efficiency and enjoy an elevated perspective of your hunting terrain!
18. DIY 2×4 Deer Stand With Box Blind
Building your own deer blind can be a rewarding and fun project. Follow these DIY deer blind plans that will guide you step by step. Craft your hunting hideout with this DIY 2×4 deer stand and box blind – the perfect way to get close to wildlife! Perched 17′ high, this DIY stand offers a wide viewpoint and conceals you comfortably as you wait for whitetails.
Its construction materials include Ondura Premium Panels, which provide added concealment, with various tools like Counter Sink Bit, Better Vue Screen, and Kreg Forman, to mention a few.
The process is straightforward, and the end product serves the purpose effectively. Furthermore, the stand incorporates an optional blind and roof to enhance your hunting experience. Build your deer stand now and get ready for a productive deer season.
19. Cheap DIY Deer Stand in 10 Easy Steps
Boost your hunting experience with an economical yet effective DIY deer stand built by your hands! Understand the essence of constructing a sturdy, scent-free deer stand through a simple and concise 10-step process. The guide is designed to be customizable, fitting your precise requirements without the need to overspend on brands.
You can craft your hunting tower by incorporating resources like durable wood, common tools, and insightful tips. Appreciate the thrill of deer hunting from a vantage point crafted by you, adding an extra layer of satisfaction to your outdoor adventures.
The process will save you money and arm you with a skill useful for many hunting seasons. Build your affordable deer stand today and experience hunting like never before!
20. Simple DIY Deer Blind on a Budget
The perfect solution for the outdoorsman on a budget, build your DIY deer blind and get ready to make memories! With careful planning and a budget of around $500, you can build a robust 6×6 blind with a 7′ roof, elevated 6 feet off the ground, boasting a unique trap door entry.
It’s the perfect solution for those facing high wood costs but wanting to experience the benefits of a quality deer blind. This project results in a sturdy structure that fits the financial plan and meets the creator’s vision and satisfaction.
Look forward to detailed plans, available for free download soon that will guide you through the build process, offering clear instructions for an even more optimized design in the coming season. Make sure to follow the progress and start preparing for your own elevated box blind project.
21. DIY Custom Deer Blind
Take your hunting experience to another level with an insane custom DIY deer blind build, complete with a 32″ TV and 10,000 BTU Heater! This unique project brings comfort and convenience to your hunting activities, providing you with the ultimate hunting hub in the wilderness.
The materials needed include a ProCom MG10TBF 10,000 BTU Heater, a 32″ TV, an assortment of screws, an air fan, a flush mount, and more. With the right preparation, you’ll build a deer blind that provides an optimal vantage point and keeps you comfortable during long waits.
This project blends the thrill of hunting with the luxuries of home, making it a unique approach to outdoor pursuits. The step-by-step guide to building this great deer blind is straightforward and rewarding, giving you an elevated hunting experience. Transform your hunting activities today with this ultimate project!
22. Build Your Own Shooting House
Unleash your creativity in building a low-cost box blind for deer hunting with an insightful DIY guide that provides an efficient solution in preparing for the hunting season. This simple yet highly effective structure is built from readily available materials, making it a budget-friendly option.
The build requires a few tools and a dash of handiwork but promises excellent results in the form of a sturdy, practical shooting house.
Despite its uncomplicated design, it offers comfort and convenience for hunting enthusiasts, underlining its effectiveness as a significant asset for a successful deer season. Make the most of your hunting experience by building this user-friendly, cost-effective box blind today.
23. Building a 6×8 Octagonal Elevated Box Deer Blind
Gear up to take your hunting game to a new level with a 6×8 octagonal elevated DIY box blind. Designed to accommodate two adults, this spacious blind offers strategic visibility and comfort. With sheet goods optimization in mind, its dimensions have been tweaked to 5’10” x 7’10”, facilitating material utilization and cost-effectiveness.
It uniquely features a trap door entry for a discreet approach. Though you might not see significant savings from this optimization in a single build, multiple constructions will benefit. Embrace the thrill of the hunt in this well-designed and crafted blind. Start building today to enhance your outdoor adventures!
24. Portable DIY Hunting Blind
Explore the intriguing process of constructing a portable deer blind on a truck bed trailer, as depicted in a comprehensive DIY tutorial. This simple yet effective blind design aims to exchange ideas, spark creativity, and generate discussions among individuals eager to build their mobile blinds.
The guide also outlines potential custom additions, such as camouflage mesh curtains, gun racks, heater mounts, shelves, and hooks, that can be integrated into the design to enhance its functionality.
This cost-effective project offers an exciting DIY challenge and a practical application for outdoor enthusiasts. Embrace the joy of building your portable deer blind and make your hunting experiences more convenient and enjoyable.
25. Easy DIY Deer Blind Under $500
Intensify your hunting adventures with a functional DIY deer blind built for under $500! This shooting house is both cost-efficient and easy to construct, raising the bar of your hunting experience. With accessible supplies such as lumber, screws, and roofing materials, you’ll build a sturdy, reliable structure.
Preparations are simple: measure, cut, and organize your materials beforehand. You’ll follow a systematic construction guide that ensures your deer blind stands strong and true. Imagine peering out from your elevated perch, blending seamlessly into the environment, waiting for the perfect shot.
This deer blind is remarkable for its practicality, enhancing your hunting skills while providing a comfortable shelter. Build your deer blind today and elevate your hunting game to unseen heights. It’s informative, helpful, and engaging – a worthwhile project!
Conclusion:
In conclusion, these 25 free DIY deer blind plans offer various options for constructing deer blinds and stands to suit various preferences and budgets. Ranging from pallet-based designs to elevated options and even mobile blinds, these DIY deer blind plans cater to hunters at different skill levels. Utilizing homemade DIY deer stand plans coupled with creativity and resourcefulness, anyone can build a cost-effective and functional deer blind. So, gear up, pick a plan, and start making your very own customized deer hunting experience.
What does rabbit taste like? Some people say that rabbit tastes like chicken, while others say that it has a unique flavor all its own. In this blog post, we’ll explore the different opinions on rabbit flavor and give you our thoughts on this delicate topic. Whether you’re considering getting a pet rabbit or are simply curious about what these animals taste like, read on for more information.
What Is Rabbit & Rabbit Meat?
Rabbit is a type of game meat that comes from the hare family. These animals are farmed for their meat, fur, and even their pelts, which are used to make clothing and other items. Rabbit meat is considered to be a healthy option since it’s lean and low in calories, fat, and cholesterol. It’s also a good source of protein, vitamin B12, niacin, and phosphorus.
What Does Rabbit Taste Like? Does Rabbit Taste Good (Like Chicken)?
Rabbit meat tastes a lot like chicken due to the fact that both are white meat. The biggest difference between the two is the texture. Rabbits have less fat compared to chickens, so they’re drier.
The taste of rabbit meat will depend on the age of the rabbit. The general consensus is that the younger the rabbit, the better it tastes. Older rabbits, especially wild rabbits, tend to develop a strong smell, making them hard to eat if cooked wrong.
Rabbit meat is comparable to chicken and would take on whatever spices you put on it (spicy, curry, savory, etc.).
Nutritional Benefits of Rabbit Meat:
Rabbit meat is an excellent source of animal protein and essential nutrients. It’s low in calories and fat but high in healthy Omega-3 fatty acids. Rabbit meat is also a good source of B vitamins, iron, zinc, and selenium.
If you’re looking for a healthy alternative to red meat, rabbit is a great option.
What is the History of Rabbit Meat?
Rabbit has been eaten as a food source for centuries. The first recorded instance of rabbit consumption dates back to the 4th century BC in Greece. Rabbit was a popular dish among the wealthy since it was considered luxurious meat.
Today, you can find rabbit meat at some specialty butcher shops and online retailers. You can also purchase whole rabbits or live rabbits for slaughtering.
Besides, if you want to eat rabbit meat, you might have to hunt for the wild ones.
The term for Rabbit meat is ‘Coniglio’ in Italian, ‘Lapin’ in French, ‘Conejo’ in Spanish, and ‘Hasenfleisch’ in German. In Chinese, it is called ‘tuzhu yanzhi’. In English, it does not have a special name like pork, beef, veal, or venison. It is just called rabbit meat.
How To Cook Rabbit?
Rabbit is a very versatile meat, so there are many different ways to cook it. Rabbit can be roasted, grilled, stewed, stir-fried, or even made into sausage. The key to cooking a rabbit is not to overcook it, as this will make the meat tough.
Here are some tips on how to cook rabbit:
-If you’re roasting a rabbit, make sure to stuff the cavity with herbs and vegetables to keep the meat moist.
-To grill a rabbit, marinate it in your favorite sauce for at least an hour before cooking.
-For stewed rabbit, brown the meat in a pan before adding it to the stew pot.
-If you’re stir-frying rabbit, cut the meat into small pieces so it cooks evenly.
Regardless of how you cook rabbit, it’s important to remember not to overcook it. Rabbit is best cooked until it’s slightly pink in the middle.
1. In a large resealable bag, combine the rabbit pieces, hot sauce, olive oil, vinegar, paprika, garlic powder, and cumin. Seal the bag and shake it to coat the rabbit.
2. Let the rabbit marinate in the fridge for at least an hour (overnight is even better).
3. Preheat your grill to medium-high heat.
4. Grill the rabbit pieces for 10-12 minutes, or until cooked through. Serve immediately.
FAQs
How do you cook rabbit so it doesn’t taste gamey?
The key to cooking rabbit so it doesn’t taste gamey is to not overcook it. Rabbit is best cooked until it’s slightly pink in the middle. This will ensure that the meat is moist and tender. Another tip is to marinate the rabbit in your favorite sauce for at least an hour before cooking. This will help to tenderize the meat and give it flavor.
What does wild rabbit meat taste like?
Wild rabbit meat tends to have a strong smell, making it hard to eat if cooked wrong. The best way to cook wild rabbit is to marinate it in your favorite sauce for at least an hour before cooking. This will help to tenderize the meat and give it flavor. Another tip is to not overcook the rabbit, as this will make the meat tough. Wild rabbit is best cooked until it’s slightly pink in the middle.
Is wild rabbit meat better than domestic rabbit meat?
The taste of wild rabbit meat will depend on the age of the rabbit. The general consensus is that the younger the rabbit, the better it tastes. Older rabbits, especially wild rabbits, tend to develop a strong smell, making them hard to eat if cooked wrong. Wild rabbit is best cooked until it’s slightly pink in the middle.
How do you make rabbit sausage?
Rabbit sausage can be made by grinding up raw rabbit meat and mixing it with spices and herbs. The sausage can then be formed into patties or links and grilled, roasted, or fried. Rabbit sausage is best cooked until it’s slightly pink in the middle.
Why is Rabbit Meat Not Popular?
There are a few reasons why rabbit meat is not as popular as other meats. One reason is that rabbits are often considered to be pets, so people may not want to eat them. Another reason is that rabbit meat can be difficult to cook if you don’t know how to do it correctly. Rabbit meat is best cooked until it’s slightly pink in the middle. If it’s overcooked, the meat can be tough and have a strong taste.
Do Different Cuts of Rabbit Taste Different?
Different cuts of rabbits can taste different depending on how they’re cooked. For example, the loin is a leaner cut of meat that is best cooked quickly so it doesn’t dry out. The leg is a tougher cut of meat that benefits from being cooked slowly so it becomes tender. Rabbit meat is best cooked until it’s slightly pink in the middle.
How Should I Store Rabbit Meat?
Rabbit meat should be stored in the fridge and used within 2-3 days. If you’re not going to use the rabbit meat within that time frame, it can be frozen for up to 3 months. When storing rabbit meat, make sure to wrap it tightly so air doesn’t get to it. Rabbit meat is best cooked until it’s slightly pink in the middle.
What Flavors Go Well with Rabbit?
Rabbit goes well with a variety of flavors, such as spicy, curry, savory, and sweet. Rabbit can be cooked in many different ways, such as roasting, grilling, stewing, stir-frying, or even made into sausage. The key to cooking a rabbit is not to overcook it, as this will make the meat tough.
Conclusion
Whether you’re considering getting a pet rabbit or are simply curious about what these animals taste like, we hope this blog post has been helpful. Rabbit meat is healthy and tastes similar to chicken, making it a great option for those looking for a leaner protein source. When cooking rabbit, be sure not to overcook it as this will make the meat tough. There are many different ways to cook rabbits, so experiment with different methods and find the one that you like best.
Training a German Shorthaired Pointer to hunt can be a rewarding experience for both the dog and the owner. These dogs are natural hunters and have been bred for generations to excel in the field. However, proper training is essential to ensure the dog is safe, obedient, and effective in the hunt.
One of the first steps in training a German Shorthaired Pointer to hunt is establishing a solid foundation of obedience. This includes basic commands such as sit, stay, come, and heel. The dog should also be trained to respond to hand signals and whistle commands, which will be important in the field. Establishing a hierarchy with the dog is essential, making it clear that the owner is the pack leader.
Once a strong foundation of obedience has been established, the dog can begin training in specific hunting skills. This includes teaching the dog to track and locate the game, to point and flush birds, and to retrieve the downed game. Consistency, patience, and positive reinforcement are essential to successful training. A German Shorthaired Pointer can become a skilled and reliable hunting companion with proper training.
Understanding German Shorthaired Pointers
History of German Shorthaired Pointers
German Shorthaired Pointers (GSP) is a versatile breed first developed in Germany in the late 19th century. According to the American Kennel Club (AKC), the breed was created by crossing various breeds, including the Spanish Pointer, Foxhound, and English Pointers. The goal was to create a dog that could do it all – hunt, retrieve, and track – and the GSP was the result.
Characteristics of German Shorthaired Pointers
GSPs are medium to large dogs with a distinctive liver and white or black and white coat pattern. They are known for their athleticism, intelligence, and loyalty. These dogs are highly trainable but have a lot of energy and require regular exercise and mental stimulation. GSPs are excellent hunting dogs and have a strong prey drive. They are versatile and can hunt various games, including birds, rabbits, and deer. They are also excellent retrievers and can retrieve both on land and in water. In addition to their hunting abilities, GSPs are also great family dogs. They are affectionate and love to be around people. They are good with children and other pets but have a strong prey drive, so caution should be taken when introducing them to smaller animals. Overall, GSPs are a breed that requires an experienced owner who can provide them with the exercise, training, and mental stimulation they need to thrive. With the proper care and attention, they make excellent hunting companions and loyal family pets.
Preparing for Training
Before beginning training, it is essential to prepare both the dog and the trainer. This section will cover the physical and mental preparation needed for successful training and the required equipment.
Physical Preparation
Training a German Shorthaired Pointer to hunt requires a certain level of physical fitness. The dog and the trainer should be in good health and able to withstand long periods of activity. It is recommended to start with short training sessions and gradually increase the duration as the dog and trainer build endurance.
Additionally, it is essential to ensure the dog is up to date on all necessary vaccinations and has received a clean bill of health from a veterinarian. This will help prevent any potential health issues from interfering with training.
Mental Preparation
Training a German Shorthaired Pointer to hunt also requires mental preparation. The dog should have a strong foundation in basic obedience commands, such as sit, stay, come, and heel. It is recommended to work on these commands before beginning hunting training.
The trainer should also clearly understand the training process and be patient and consistent in their approach. It is essential to remain calm and avoid becoming frustrated or angry with the dog during training sessions.
Equipment Needed
Several pieces of equipment are needed for training a German Shorthaired Pointer to hunt. The following is a list of some of the essential items:
Hunting vest
Training collar
Leash
Whistle
Bird launcher
Birds for training
The hunting vest should have pockets for storing training equipment and birds. The training collar should be fitted appropriately and used with positive reinforcement techniques. The leash should be sturdy and long enough to allow the dog to move freely while maintaining control.
The whistle is used for recall training and should be consistently used during training sessions. The bird launcher is used to simulate the experience of a bird taking flight and should be used in conjunction with live birds for training purposes.
Basic Training
Before a German Shorthaired Pointer can become an effective hunting dog, it must undergo basic training. This training is essential to develop the dog’s obedience, socialization, and hunting skills. Basic training is divided into three sub-sections: obedience training, socialization training, and introduction to hunting.
Obedience Training
Obedience training is the foundation of all dog training. It teaches the dog to follow commands and behave appropriately in different situations. The training should start as early as possible, preferably when the dog is a puppy. The dog should be taught basic commands such as sit, stay, come, and heel. These commands are essential for controlling the dog during a hunt.
The training should be positive and reward-based. The dog should be praised and rewarded for following commands. Punishment should be avoided as it can lead to fear and aggression. The training should be consistent, and the dog should be trained in different environments to ensure it can follow commands.
Socialization Training
Socialization training ensures the dog is comfortable around people and other animals. The training should start as early as possible, preferably when the dog is a puppy. To ensure comfort, the dog should be exposed to different people, animals, and environments.
The training should be positive and reward-based. The dog should be praised and rewarded for good behavior. The training should be consistent, and the dog should be exposed to different situations to ensure comfort.
Introduction to Hunting
The introduction to hunting should start after the dog has undergone obedience and socialization training. The training should begin with basic exercises such as retrieving and pointing. The dog should be taught to retrieve objects such as balls and dummies.
The dog should also be taught to point at birds and other games. The training should be positive and reward-based. The dog should be praised and rewarded for good behavior. The training should be consistent, and the dog should be exposed to different hunting situations to ensure it can perform in any hunting situation.
Basic training is essential to develop a German Shorthaired Pointer’s obedience, socialization, and hunting skills. The training should be positive and reward-based, and the dog should be exposed to different situations to ensure it can perform.
Advanced Training
After your German Shorthaired Pointer has mastered the basics of obedience and hunting, it’s time to move on to more advanced training. This will help your dog become a more skilled and versatile hunting partner.
Hunting Techniques
Advanced hunting techniques involve teaching your dog to work with you to locate and flush out the game. This can include preparing your dog to follow hand signals or whistle commands to stay within range and perform a specific area. It can also involve teaching your dog to work with other dogs to cover a larger size and flush out more games.
Another important skill to teach your dog is how to track wounded games. This involves teaching your dog to follow a blood trail and locate the animal. This can be a challenging skill to teach, but it can make a big difference in your success as a hunter.
Retrieving Training
In addition to flushing out the game, your German Shorthaired Pointer should also be skilled in a retrieving match that has been shot. This involves teaching your dog to retrieve birds, other small game, and larger animals like deer.
Retrieving training should start with simple exercises, such as retrieving a dummy or toy. Gradually increase the difficulty by adding distractions, such as other dogs or people. It’s important to teach your dog to retrieve gently, not damage the game, and to release the game on command.
Water Training
Many hunting situations involve water, so teaching your German Shorthaired Pointer to be comfortable and skilled in the water is essential. This can include teaching your dog to swim, retrieve game from water, and work in marshy or swampy areas.
Water training should start with simple exercises in shallow water and gradually progress to deeper water and more challenging conditions. Using positive reinforcement and making the training fun for your dog is essential.
Maintaining Your German Shorthaired Pointer’s Skills
After training your German Shorthaired Pointer to hunt, it is essential to maintain their skills. Consistency in training, regular exercise, and proper nutrition are critical factors in keeping your GSP in top hunting condition.
Consistency in Training
Consistency is crucial in maintaining your GSP’s hunting skills. Training your dog at least once weekly is recommended to keep their skills sharp. Using the same commands and techniques during initial training is essential to avoid confusion. Consistency in training will help your GSP maintain their hunting abilities and improve their overall performance in the field.
Regular Exercise
Regular exercise is vital for keeping your GSP in top physical condition. Hunting requires a lot of energy, so providing your dog with enough exercise is essential to maintain its stamina. Daily walks or runs, swimming, and playing fetch are great ways to keep your GSP active and healthy. A well-exercised dog is likelier to perform better in the field and have a more enjoyable hunting experience.
Proper Nutrition
Proper nutrition is essential for maintaining your GSP’s hunting skills. A well-balanced diet that includes protein, carbohydrates, and healthy fats will give your dog the energy they need to perform at its best. It is recommended to feed your GSP high-quality dog food that is specifically formulated for active dogs. Additionally, providing your dog with fresh water at all times is crucial to its overall health and performance.
Maintaining your German Shorthaired Pointer’s hunting skills requires Consistency in training, regular exercise, and proper nutrition. Following these guidelines ensures your GSP is in top physical and mental condition for their next hunting trip.
Conclusion
Training a German Shorthaired Pointer to hunt can be a fun and rewarding experience for both the dog and the owner. It requires patience, Consistency, and dedication. The key is training the dog at a young age and maintaining a consistent training schedule.
It is important to remember that every dog is different and may require different training methods. Owners should be willing to adapt and modify their training techniques to suit their dog’s individual needs.
Some essential tips to keep in mind when training a German Shorthaired Pointer to hunt include:
Starting training at a young age
Using positive reinforcement techniques
Maintaining a consistent training schedule
Gradually increasing the difficulty of training exercises
Providing plenty of exercise and mental stimulation outside of training sessions
Owners should also be aware of the potential risks and dangers associated with hunting, such as exposure to wildlife, harsh weather conditions, and possible injury. It is important to take necessary precautions to ensure the safety of both the dog and the owner.
Overall, training a German Shorthaired Pointer to hunt can be a challenging but rewarding experience. With patience, dedication, and a willingness to adapt, owners can help their dogs reach their full potential as skilled and reliable hunting companions.




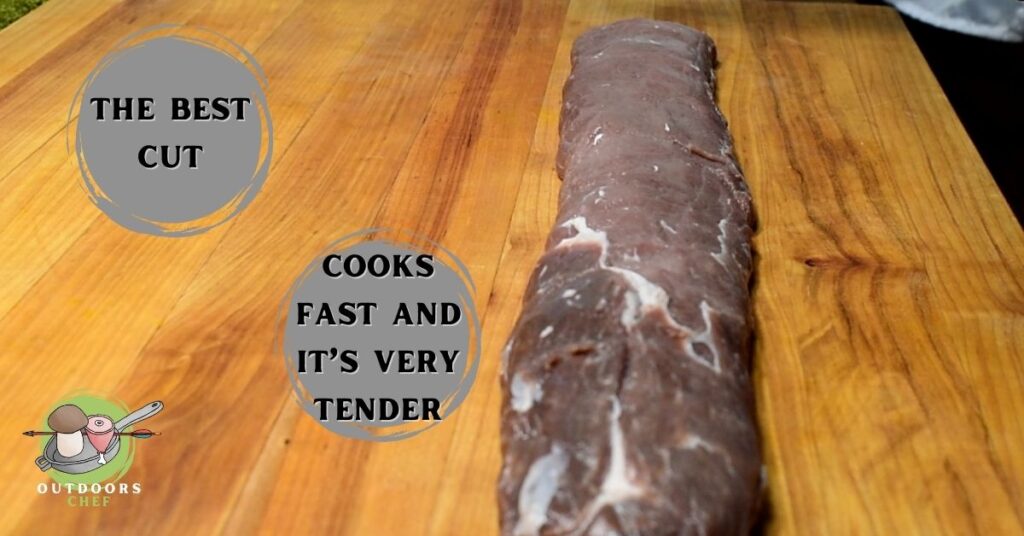


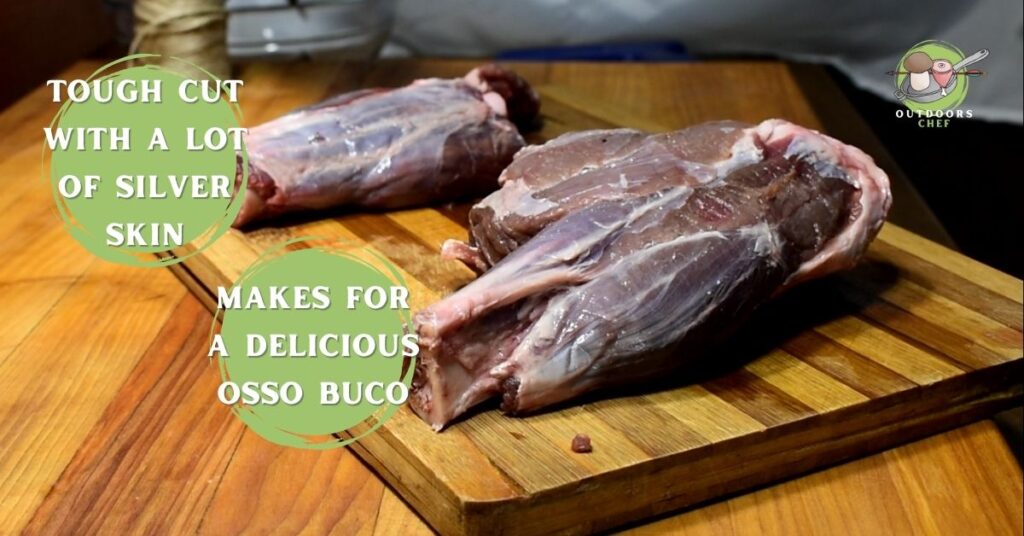
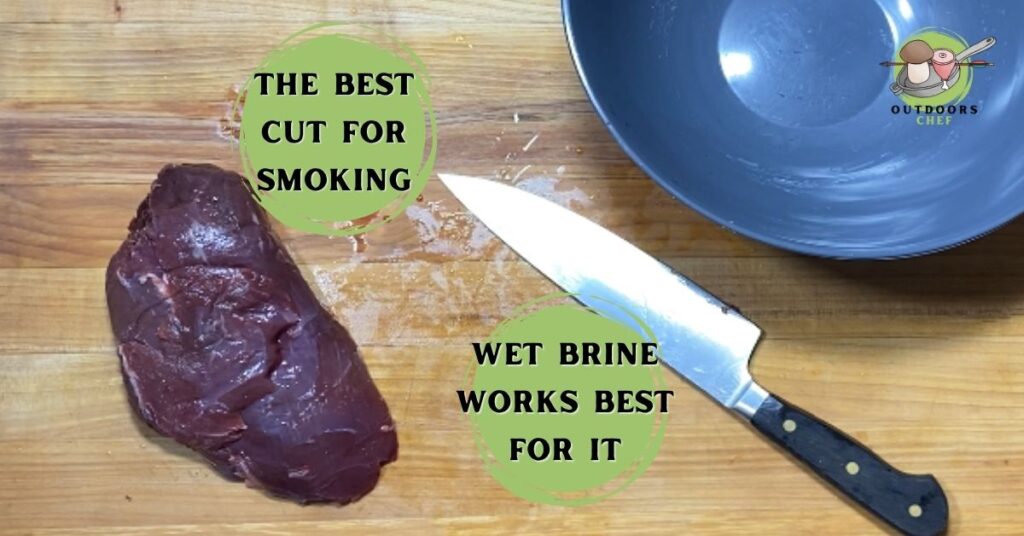
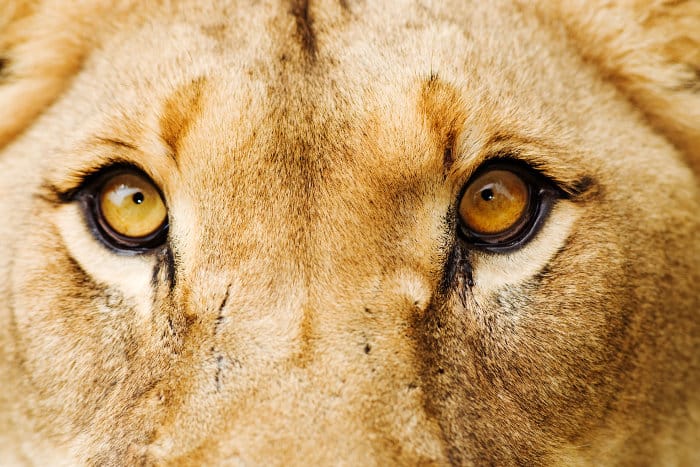
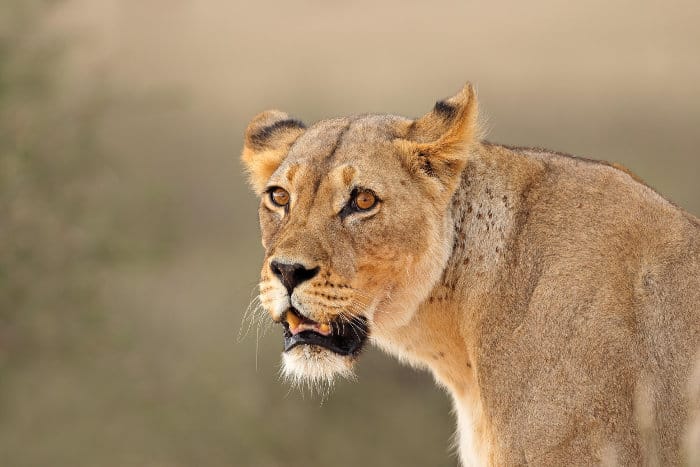
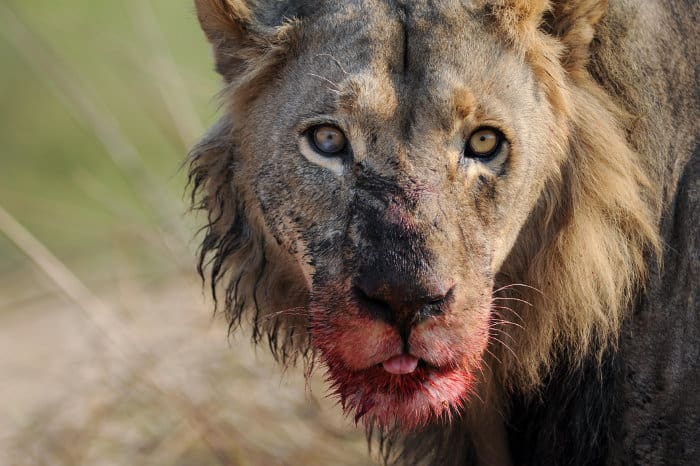
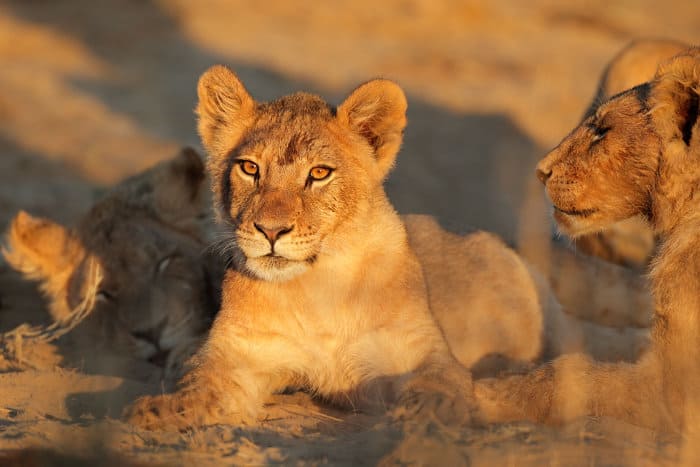
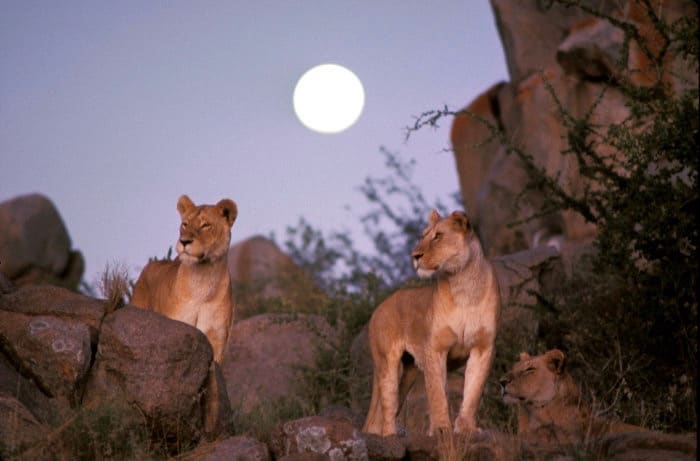

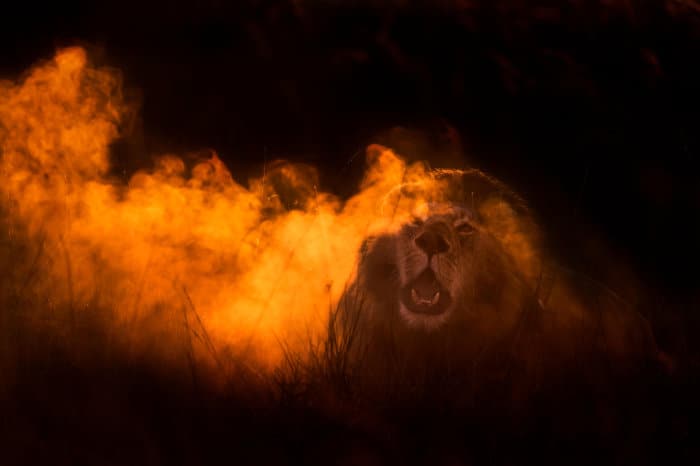
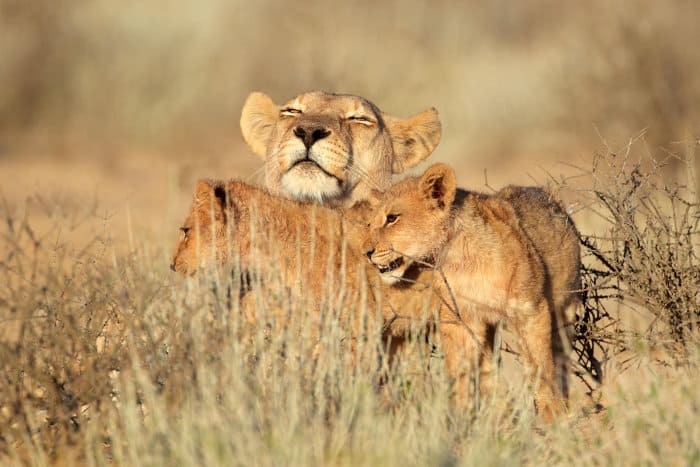
 The 60 days that must pass before the rack can be officially scored are slipping away fast, and we’ll know soon whether we have a new state record or not. And in case you are a Week 10 Truck-Buck entrant, here’s the answer to your burning question: Billy Joe is a GON subscriber, and yes, his buck is a Week 10 entrant.





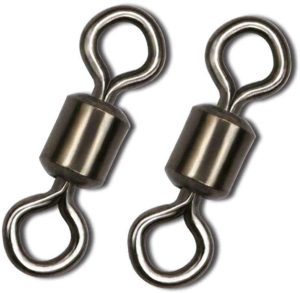 The barrel swivel is the original fishing swivel, and simply consists of a pivoting joint with two rings attached to either end. The joint in the middle is usually round, or sometimes a small barrel.
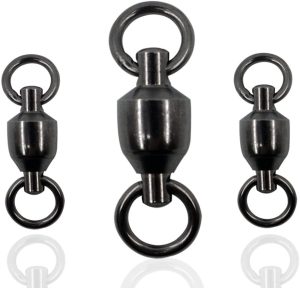 A ball-bearing swivel is an improved version of the barrel swivel, and comes with a ball bearing inside the pivoting joint. Due to this ball bearing, the rings of the swivel rotate much more freely than those of a standard barrel swivel, and thus prevent line twist more effectively.
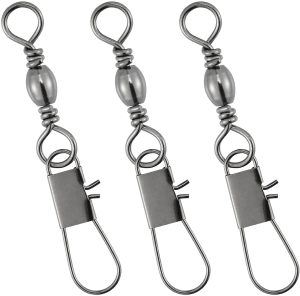 A snap swivel is an improved version of the barrel swivel that comes with a snap attached to one end, instead of the regular ring. The most common way to use a snap swivel is to tie your main fishing line to the ring of the swivel, and then use the snap to attach to the ring of a lure.
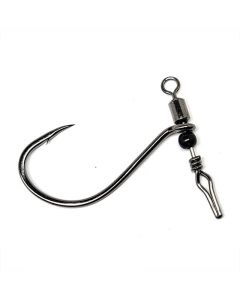 The finesse swivel is a relatively new swivel type that’s used for fishing with a drop shot rig. It consists of a hook that is directly attached to the swivel, and can rotate around the axis of the swivel.


