Home Blog Page 49

Best Axes for Camping, Off-Roading, and Overlanding

0

Axes are ancient tools that come in very handy for the modern explorer. To the uninitiated, axes may all seem the same. In fact, there are several types and various constructions, some of which are better suited for off-roading, overlanding, and camping.

In this article, we’ll cover the best axes for camping and overlanding, how to choose one, and why you might need one. If you are simply looking for a quick recommendation, the Gerber Bushcraft Axe is a good choice for a durable, all-around backcountry axe.

Our Recommendations for Best Axes

Gerber is well-known for making quality tools for backcountry adventures. In recent years, as they’ve worked to appeal to a larger market, they’ve managed to bring down the price of their once-expensive knives, multi-tools, and other equipment.

The Gerber Bushcraft Axe hits a sweet spot between affordability and function and is a great all-around axe for camping and vehicle-based outdoor adventure. The axe is great for cutting rounds of wood and kindling and is sturdy enough for clearing thick tree branches. The hammer on the back of the axe comes in handy for hammering in tent pegs and other camp tasks. This is the heavy axe on our list, but offers the widest functionality. The axe comes with a sheath that covers the head. It comes with Gerber’s limited lifetime warranty.

Here’s my video review of the Gerber axe:

The Council Tool Boy’s Axe is a great size for camping and on-the-fly trail work. The 2.25-pound head is Dayton style and the handle is made of hickory. These aren’t as fancy as the high-end Nordic-made axes, but they are solid, unpretentious utility axes that get the job done.

Gränsfors Bruk is one of the premier Swiss axe makers, and it’s worth highlighting several of their models. These axes are a premium product and don’t come cheap. That said, they are the kind of tool you lovingly pass down to future generations.

Their Small Forest Axe has a narrow head that’s great for cutting through trunks and branches. You can certainly still use this for splitting wood, but it will be more difficult given the narrow axe head and lack of a metal collar on the top of the handle. It comes with a leather sheath. The back of the axe head can be used as a hammer.

Here’s a video about the company and its manufacturing process:

The German company, Helko Werk has been making axes since 1844 and is one of the oldest axe makers still operating in Europe. Their Journeyman Pack axe is designed to be lightweight, compact, and easy to carry while trekking through the wilderness. Comfortable to use one or two-handed, the Journeyman is a versatile tool for cutting kindling, removing limb branches, building shelters, and other light splitting or cutting work.

The Gränsfors Bruk Outdoor Axe is much shorter than the other axes on this list, making it easier to stow and carry. Its head is thin enough for felling trees and chopping limbs, but still has enough taper to be used for splitting and the handle has a protective steel collar near the head so that the axe can be used for light wood splitting tasks. Like the Helko Werk axe noted above, this is an axe that you can easily put into a backpack. It comes with a leather sheath. The back of the axe head can be used as a hammer.

Named for the US park ranger who developed this axe design, Pulaski-style axes, also known as cutter matlock, combine a felling axe head with an adze (narrow hoe-like tool) that can be used for digging in hard ground or chipping away at bark.

While they aren’t as good as the other axes at chopping and cutting wood, they are highly versatile. The adze can come in handy if you need to trench a latrine or break through ice. The Barebones Pulaski axe is a beast, with a high-carbon steel head and a steel core running through the handle. It’s on the heavy side at 5.55 pounds, but the weight gives you momentum for breaking though tough wood and ground.

How to Choose the Best Axe

An axe is a must for chopping firewood when camping. A hatchet is great for chopping small kindling, but larger rounds are much easier to split with a larger axe. They are also clutch for clearing trail obstructions when overlanding and off-roading. In heavily wooded areas, it’s not uncommon to come across tree limbs blocking in the trail, in which case an axe will help you to quickly clear the way and carry on.

Some axes, such as the Pulaski style axe discussed below, integrate additional functionality that can come in handy for breaking hard ground when you need to dig a hole and for other tasks. Combined with an off-road shovel, an axe can help solve many problems on the trail.

There are several factors to keep in mind when choosing an ax, including the axe’s construction, style, size, and cost.

Some of the most sought-after axes on the market are made in Scandinavian countries that boast a long history of axe craftsmanship — think Vikings and big axes. That said, a number of American companies make quality axes that are well worth considering.

Axe Construction

Most axe heads are made from various types of steel, with the most expensive being hand-forged versus cast. Forged steel is widely considered to result in a stronger product compared to casting, where molten metal is poured into a mold to harden. In the old days, this hammering was done manually, with a hammer, but companies that produce large quantities of axes nowadays typically use an automatic press that does the hammering. Some smaller, boutique axe manufacturers still bang out axe heads by hand.

For light use, the difference between forging and casting may never be an issue, while the difference in cost is significant. High-quality axe heads are typically made from a steel alloy that is high in carbon, which allows the head to be sharpened and hold an edge longer.

One thing you’ll see is the shape of an axes head as either Dayton style or Hudson style, particularly for axes made in America. The Dayton-style heads are more square, and good for general outdoor jobs. The Hudson-style heads fan out from the handle to form a wide cutting surface.

Axe handles are typically made of wood (hickory is a good choice) or a fiberglass or plastic composite. Sometimes the handle will incorporate a metal core to provide strength and balance the handle and the head.

Wooden handles axes will typically require more maintenance than those with composite handles. This is particularly true in desert regions where extremely dry air can cause wood to crack. However, they are also typically easier to repair than a composite handle, and the provenance of composite handles can be a bit difficult to discern sometimes (a.k.a., the head may be forged in the US or Europe, but the handle may be mass-produced in China).

Axe Length

A full-sized axe used by lumberjacks is around 36-inches long, but that’s unnecessarily large for off-roading and camping. Something smaller, around 24-inches long, will be more versatile and easier to transport. There are also axes, like the Gränsfors Outdoor Axe mentioned below, which fall somewhere between a hatchet and a full-size axe. This gives you a nice mix of compact size with a bit more swinging power than a hatchet.

Axe Style

Axes can be divided into three broad categories: splitting axes, felling axes and generalist axes used for a variety of tasks.

How to choose?

The style of axes that is best for you depends to a large extent on how you anticipate using it most. If you’ll mostly be chopping wood in camp, you’ll probably lean more towards a splitting axe. If you’ll be clearing a lot of trees off of trails, a felling axe will come in handy. If you anticipate needing to break hard ground as well as deal with wood, the Pulaski axe will provide you with that versatility.

While they may are designed towards a specific use, most axes can be used for splitting and felling. So don’t get too hung up on what style you buy — with axes such as splitting mauls that have a very specific purpose being the exception. Generally speaking, for camping and overlanding it’s a good idea to choose a relatively compact and lightweight axe that can withstand the elements.

As a word of caution, as with many products, there are many cheap knockoffs on the market nowadays. The old saying, you get what you pay for, doesn’t even hold up with some of these products. Sometimes you get far less than you pay for. The axes we highlight below are high-quality products from reputable manufacturers.

All Recommended Axes

Kawasaki Prairie 650 Specs and Review

0

Disclosure: We may get commissions for purchases made through links in this post.

Among the strongest and most reliable ATVs ever produced is the Kawasaki Prairie 650. This mean machine, launched in 2002, dominated the off-roading scene and introduced many firsts to the public – defining the sport-utility sub-segment in the process. It was one of the most successful off-road vehicles of its time, earning the “Design and Engineering Award” in Popular Mechanics and being highly regarded by ATV magazines and publications.

The Kawasaki Prairie 650 goes down in ATV history as the world’s first mass-produced quad to sport a V-Twin power mill. Apart from its monstrous 633-cm3 engine, this award-winning 4×4 boasts a variable limited-slip front differential, impressive powerband, and industry-leading features.

One of Team Green’s breakthrough machines, the Kawasaki Prairie 650, started a whole new era of high-standard behemoths – its massive torque making it a force to be reckoned with (literally!). No wonder it has inspired the creation of other iconic Kawasaki quads. Read on and learn more about the capabilities and evolution of this off-road legend.

Quad Bikes in the Desert

The King of Firsts

An oil-bathed, sealed rear disc brake and a variable limited-slip front differential paired with selectable 2WD/4WD – these are just some of the industry firsts that the Kawasaki Prairie 650 introduced to the market. These features may be puny for some (in today’s standards). But two decades ago, only a handful of well-engineered ORVs had these luxuries – and the lime-green wheeler was one of them.

Initially conceptualized as a utility quad, the Prairie soon morphed into a sport-utility four-wheeler to cater to the increasing number of riders gravitating toward dual-purpose, big-bore machines.

Launched as a 650-class ATV, the Kawasaki Prairie 650 soon upgraded to a 697-cm3 power mill in 2004. The Prairie left the Brute Force lineup to carry on the slightly smaller engine displacement for a little while – as the said series eventually released the Kawasaki Brute Force 750 4x4i five years after.

Whether it be the 650- or 700-class trim, both big-bore machines had dual carbs and shared almost similar vehicle dimensions. Undoubtedly, this uncanny resemblance between the two is why most consumers confuse one with the other.

Performance

This high-performance wheeler is unquestionably bulletproof. However, tight wooded trails and rough terrain are not the most suitable for this big-bore machine. The topography adversely affects the performance of its suspension system. In these environments, the Prairie falls behind its counterparts in soaking up bumps and ripples. Owners can always equip their 4x4s with Rear Shocks.

But since the front suspension is non-adjustable, it would be challenging for the quad’s suspension system to be fully optimized.

Conversely, the four-wheeler can soar through straight-line acceleration on grass tracks and straightaways. Steep engine-draining trails and mountains also become playgrounds for this beast – thanks to its differential lock, twin-carburetor setup, and unrelenting power.

In truth, the Kawasaki Prairie 650 can slice through these settings’ most technical portions with ease – but in the hands of a highly-skilled driver.

Kawasaki Prairie 650 Specs & Features

Engine

Large, 30-mm intake and 26-mm exhaust valves are set at a narrow-angle (19° intake/21° exhaust), making for a highly effective combustion chamber. A high-quality foam air filter and dual Keihin CVKR-D32 downdraft carburetors lend to the vehicle’s fuel efficiency and smooth throttle responsiveness. (TIP: When cleaning the fuel tank, never use gasoline or low flash-point solvents to avoid potential dangers of fire or explosion.)

Drivetrain

A dual-range automatic KAPS (Kawasaki Automatic Powerdrive System) CVT transmission, inclusive of the Kawasaki Engine Brake Control system and a reverse, handle the shifting. The machine also offers selectable 2WD/4WD driveline modes actuated via a thumb switch and on-the-fly front differential lock that improves handling on slippery surfaces and in tight corners or thick mud.

Ignition

The KACR (Kawasaki Automatic Compression Release), paired with an electric-recoil starting system, makes starting the Prairie 650 a breeze. A cigarette-style DC outlet at the handlebar base and a trailer-type connector at the rear provide quick, accessible power for electronic accessories.

At some point, you would need to swap out stock batteries. If so, a Kepworth KP14-BS 12V LiFePO4 Battery (view on Amazon) would be a good replacement – it is leak-proof and has a low self-discharge rate.

Tires & Brakes

Dual front hydraulic disc brakes fitted with dual-piston calipers and enclosed oil-bathed multi-disc rear disc brakes provide stopping power. This brake system mates to a Kawasaki-exclusive Engine Brake Control system that electronically observes ground speed and uses engine compression to slow the quad down.

Suspension

Minimal differences can be observed between the Prairie 360 and this machine’s suspension components since the former is an exact carbon-copy of the latter. The caster angle and rear suspension wheel travel were improved a bit, while the rest remained unchanged.

Dimensions

While the Prairie 650 weighs the same as its smaller-displacement sibling, this 4×4 has a larger trailer weight and carrier capacity. The curb weight is 294.06 Kg/648.3 lbs – merely 5.0 lbs more than the Brute Force 650.

Exterior

Unlike Team Green’s 300-class four-wheelers, the Prairie 650 did not fall short on instrumentation. A multi-function meter comes standard across all trims and year models. Adjustable footpegs atop full footboards make long trail rides enjoyable. The saddle comfortably sits taller riders. Plus, the machine’s tubular space frame allows owners to personalize their wheelers with aftermarket Kawasaki Prairie 650 parts and accessories.

K-EBC™ (Kawasaki Engine Brake Control)

The K-EBC™ system enhances the quad’s brake systems with the engine’s additional braking force. Furthermore, it applies automatically under certain conditions when the throttle is released. This feature is ideal for use when descending steep declines, becoming an added safety measure that keeps the speed of the Prairie safe regardless of the type of terrain, rider skill level, or operating conditions.

However, note that the K-EBC™ is best as a supplemental braking system at low speeds (between 3-20 km/h) and does not work in reverse.

Kawasaki Prairie 650 Pricing

The table below shows the list price of all Kawasaki Prairie 650- and 700-cc models and trims released from 2002 to 2006 (Source: Nada Guides):

Surprisingly, auction listings are slightly higher than retail pricing and range from $775 to $4,510. Resale units are mostly 2002-2003 models – vehicle conditions vary depending on the year, trim, and upkeep done by the previous owner. Typically, pre-loved Prairies have 8,000 miles, 430 to < 1,900 hours, and with no title.

Rare finds, on the other hand, are freshly overhauled and come with a recovery winch like Mile Marker 77-53120W Premium Sealed Electric Winch (view on Amazon) or aftermarket wheels/tires. If you want to be guaranteed a Prairie in near-mint condition, be prepared to spend at least $2,800 for a secondhand unit.

Known Issues of the Prairie 650

The Kawasaki Prairie 650 4×4’s service manual contains troubleshooting steps that would solve most of its common problems. But for more persistent challenges, you need to visit forums and other Kawie community sites to get specifics on how to resolve them. Here are some of the machine’s more prevalent issues and their corresponding fixes:

Cold-starting Hiccups

If the Kawasaki Prairie 650 quads had one major setback, that would be a specific functionality of its monstrous V-Twin engine. This powerplant retards the vehicle’s ignition until it reaches a certain RPM, leading to a difficult engine startup – particularly on a cold February morning.

If you are a long-time Prairie owner, you would know that the choke is used more frequently during cold weather. Otherwise, you may want to check if the under-seat valve is turned on or if there is any obstruction in the petcock valve, causing possible fuel starvation.

Faulty K-EBC™ and 2WD/4WD Actuators

The engine brake system and driveline actuators of the Prairie 650 are quite an upset for Kawie riders, as they are not known for their durability. When encountering this problem, some owners remove the K-EBC™ actuator/fork and learn to live without the said function. Others choose to remove the 2WD/4WD actuator, modifying it to have a choke cable setup to run manually.

However, addressing the issue entails more than just pinning the blame on the actuator/controller alone. Defective electrical components could also cause the problem, such as:

  • Shorted/Open speed sensor
  • Forward/Reverse gear detecting a shorted/open sensor
  • Controller (10 Amp) fuse blown
  • Disconnected battery

Leaking Oil Seals

Engine and front/rear differential oil seals on the Kawasaki Prairie 650 tend to leak. Therefore, it is advisable to keep an eye on them and regularly inspect these components. Oil seal lips that are misshapen, discolored, or hardened indicate rubber deterioration and warrant immediate replacement. The same goes for oil seals that are visibly damaged or dried out.

Veteran owners do not recommend jumping while in 4WD, as this also aggravates the leaking problem. It would also be wise to check other things like degraded valve gaskets, damaged driveshaft/axles, and oxidation on the shaft and other metal surfaces. Quads that have sat for a while are also more likely to have this problem than those frequently used and properly maintained.

Weak Choke Springs

First-year Prairie 650 carburetors had flimsy choke springs that caused gasoline to fill the engine when not in use. Similarly, post-2002 models had sticky choke plungers that resulted in poor idling. The permanent fix for this issue was to replace the stock choke springs with a later-model-year variant.

Turning off the petcock valve when the quad is not in use also helps, especially before trailering or storage (and for extended periods). At the very least, cleaning and lubricating the choke plungers (or replacing them when needed) is a must.

Other Problems

  • MacPherson Strut springs are too soft for fast-paced riding.
  • Airbox snorkel and CDI are too restrictive.
  • Swingarm bearings and rear secondary clutch wear out prematurely.
  • The fuse box connections are prone to corrosion.
  • The stock radiator fan breaker (a.k.a. buss connector) tends to malfunction.
  • Mounting bolts on the rocker arm shaft tend to loosen, potentially causing catastrophic damage to the motor’s top-end.

Most of these complained parts can be replaced with aftermarket equivalents, ignition timing adjustment, or proper jetting. Others are resolved or prevented through religious upkeep of the machine and avoiding over-the-top activities.

Do not worry – sport racing, serious mudding, and ripping through the dunes are not prohibited. But please, do these in moderation. And remember to clean your four-wheeler thoroughly after every ride.

About Kawasaki

Kawasaki Heavy Industries, Ltd. is a prominent institution in the ATV landscape and maker of industry-leading vehicles like the Kawasaki Prairie 650. The Japanese firm was founded in 1878 and traces its humble beginnings to being a part supplier for shipping businesses.

Since then, this world-renowned manufacturer has ventured into other transport industries and grown into massive production of transit, aerospace and energy systems, hydraulic machinery, motorcycles, off-road vehicles, side x sides, and personal watercraft.

Conclusion – Kawasaki Prairie 650 Review

One thing often overlooked about high-performance quads like the Kawasaki Prairie 650 is that they require a certain level of maintenance and care. What all riders must realize is top-caliber 4x4s are usually the most finicky. Therefore, flimsy parts or factory-assembly flaws are not always responsible for wear and tear. Driving conditions and not rider behavior have more of an adverse impact on the longevity of our vehicle.

All in all, this highly-acclaimed trail beast is a dream to ride. Its smooth but monstrous power delivery, low-range torque, well-designed chassis, and other best-engineered mechanisms only prove why present-day off-road icons took inspiration from this big-bore machine. If you want a four-wheeler that can conquer slow-crawling sections as well as high-altitude areas, then look no further than the hardworking and timeless Kawasaki Prairie 650.

The Ultimate Hunting Trip Prep: Mistakes to Avoid for a Stress-Free Experience

0

Are you gearing up for your next hunting trip? There’s no question that hunting trips provide a unique and exciting opportunity to escape the everyday grind, but they also carry their fair share of pressure. Spending an extended amount of time away from home can be daunting — especially if you have poor planning skills! Before heading out into the wild, make sure to plan ahead and avoid some common mistakes so you can enjoy every second without stressing over things like supplies or accommodations. In this blog post, we’ll walk you through everything from pre-planning logistics to field experience tactics in The Ultimate Hunting Trip Prep: Mistakes to Avoid for a Stress-Free Experience. Get ready for success!

Do your research.

When it comes to preparing for a hunting trip, there are a few key things to keep in mind. Firstly, you’ll want to make sure you do your research ahead of time. This means reading up on the gear you’ll need, so that you’re fully prepared out in the field. For this reason, it would be smart to take a look at this guide to buying hunting boots and other gear, for example, so you know what kind of shoes to wear. Additionally, it’s important to be aware of any hunting regulations in the area where you’ll be hunting. Regulations and requirements can vary by region, so it’s worth checking out the relevant information before you set out. Lastly, it’s essential to keep safety front of mind. This means ensuring that you’re aware of any particular risks associated with your type of hunt, and knowing how to minimize them as much as possible. With a bit of careful planning and preparation, you’ll be able to enjoy your hunting trip to the fullest.

Pack a variety of clothing and gear

As any experienced hunter will tell you, it’s crucial to be prepared for whatever the weather may throw your way. Packing a variety of clothing and gear that will keep you warm and dry is absolutely essential if you want to be comfortable and focused while out hunting. From waterproof jackets to insulated boots, there are a variety of products on the market that can help ensure that you stay comfortable and protected, no matter what the conditions are like outside. So if you’re planning an upcoming hunting trip, be sure to invest in some high-quality gear that will keep you nice and toasty along the way!

Pack your weapons correctly

Ensuring that your firearms are stored safely and correctly is not only a legal obligation but also an ethical responsibility. Before taking off on your hunting trip, ensure your weapons are unloaded and stored in a case or container that is secure and protective. While accidentally accessing a loaded weapon during transportation may seem improbable, the repercussions could be life-changing. Failure to pack your weapons correctly can have not only legal consequences but also endanger you and others around you, making it essential to secure and handle them with care.

Don’t forget a first aid kit

When setting out on a hunting trip, there are certain essentials that you always remember to pack – your firearm, ammunition, binoculars, and perhaps your trusty hunting dog. But one item that should never be overlooked is a well-stocked first aid kit. Accidents can happen in the blink of an eye, and when you’re out in the wilderness, medical attention may be miles away. The basic supplies you need to include in your kit are bandages, antiseptic cream, and tweezers. However, it’s also important to consider the specific risks of your chosen hunt. For example, if you’re hunting in an area with a high risk of snake bites, then packing snakebite treatment could be a life-saver. So, before you hit the trail, make sure you’ve got a good-quality first aid kit and have stocked it with all the necessary items to keep you safe and healthy on your hunting adventure.

In conclusion, with the right preparations and considerations, a successful hunting trip is achievable. Taking into account the tips outlined in this post will ensure a stress-free experience and that you won’t forget any important supplies when setting out on your adventure. Especially important is to do your research – finding out about hunting regulations in the area, packing correctly for inclement weather conditions, preparing meals ahead of time, ensuring weapons are securely stored away, and restraining from taking unnecessary risks while hunting – will all contribute to an unforgettable time in nature. Lastly, but importantly too, make sure you double-check the necessary permits and documents needed before your journey starts. Even if you’re an experienced hunter eager to take on new challenges on your next hunt – following even these basics of hunting hunt preparation will give you some peace of mind as you wander off on an unpredictable adventure.

Review: HEX Dragonfly Red Dot

0

By Paul Carlson

I’m probably not telling you anything that you don’t already know, but shooting handguns is fun. Do you want to take that fun to the next level? Then shooting them with slide-mounted red dot optics is the answer, and the reason is simple — it’s easier to get hits.

Today, I’m reviewing the new HEX Dragonfly optic that can make shooting easier than using traditional “notch and post” sighting systems. Regardless of your stance on the red dot vs. iron sights argument, we know that getting hits is the key to really enjoying a shooting session.

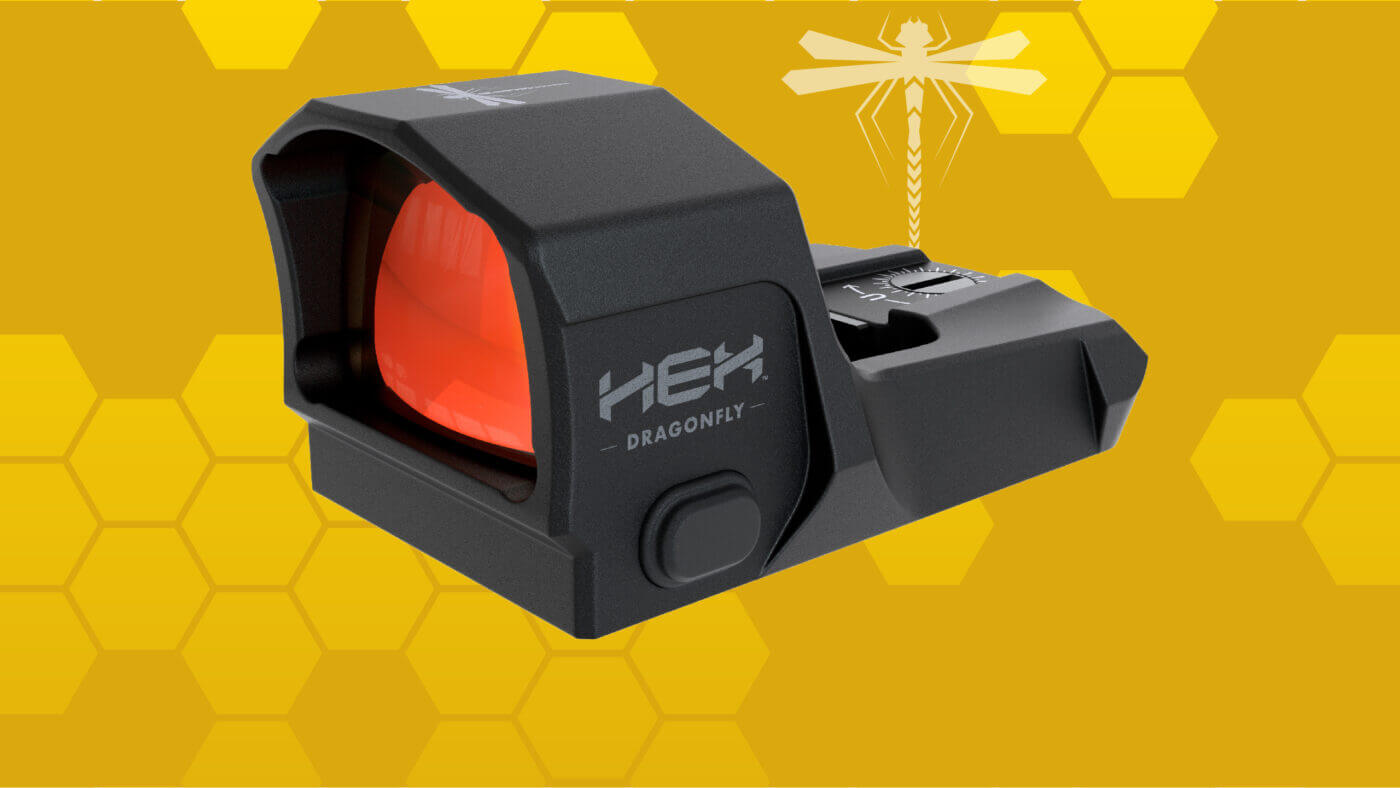
HEX Dragonfly red dot optic
The HEX Dragonfly is designed to offer premium-grade features and durability at a price that won’t break the bank.

The popularity of slide-mounted red dots isn’t just some random phenomenon. Instead, it has been based on a consistent improvement in technology and innovation over the years, as well as an understanding of the shooting issues people may face. As a result, it seems that dots are everywhere these days, and there are some very good reasons why. In this article, we are going to be looking at the Dragonfly. But first, let’s consider why you might need a red dot optic.

The Why

Regardless of the sight radius of your gun, using a red dot on your pistol can help you shoot with more precision and accuracy, especially at distance. A moderately sized dot, say around 3.5 MOA, allows you to refine your aiming point and repeatedly put rounds on a small area of the target. At the same time, you are provided with feedback on the movement of your gun by the dot on the optic’s window before you even press the trigger. That feedback generates a faster learning curve when it comes to getting hits at distance.

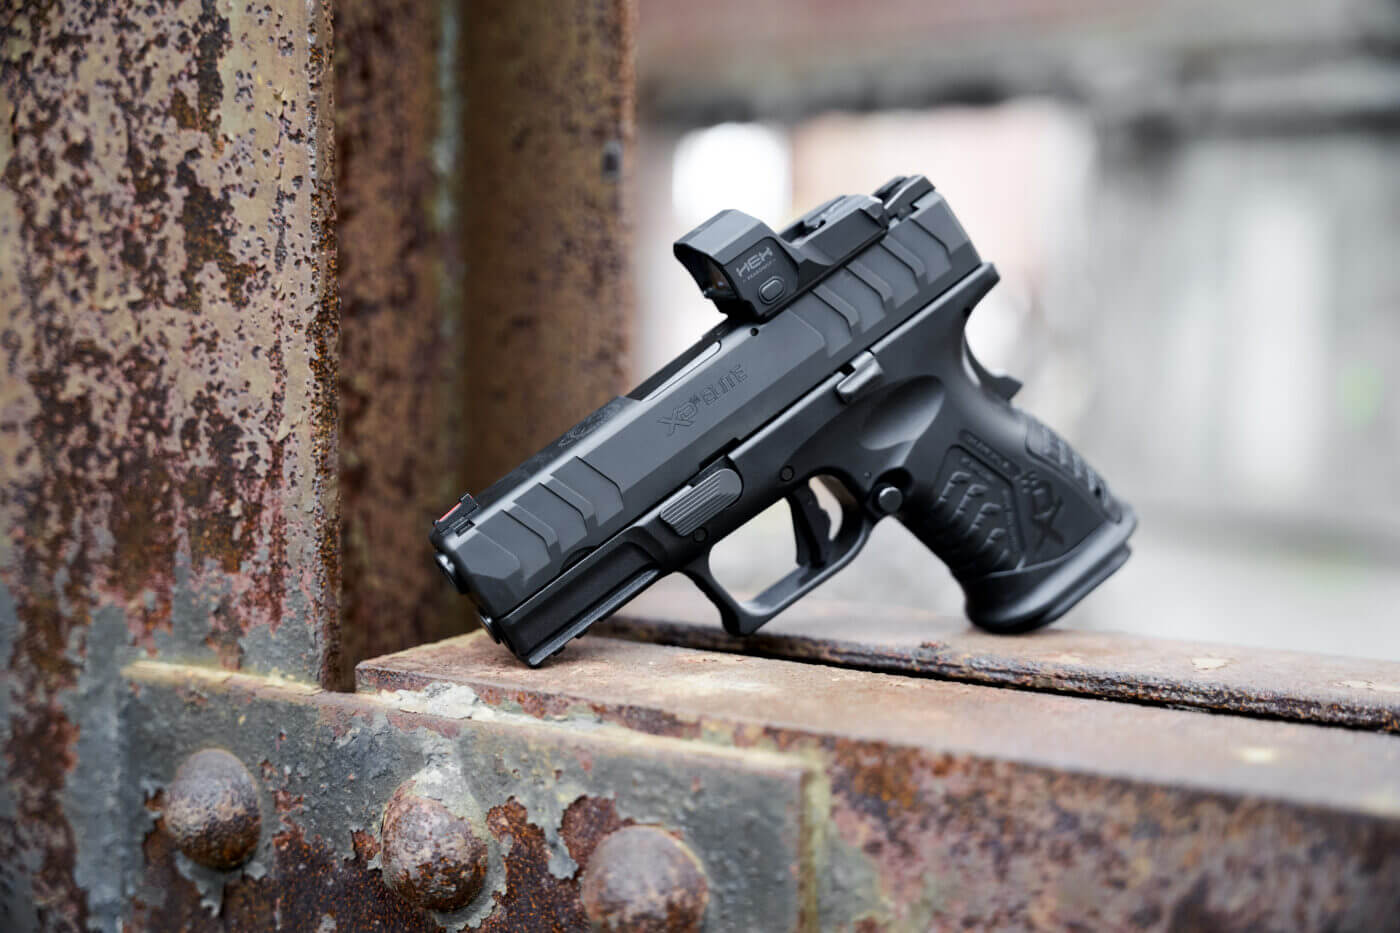
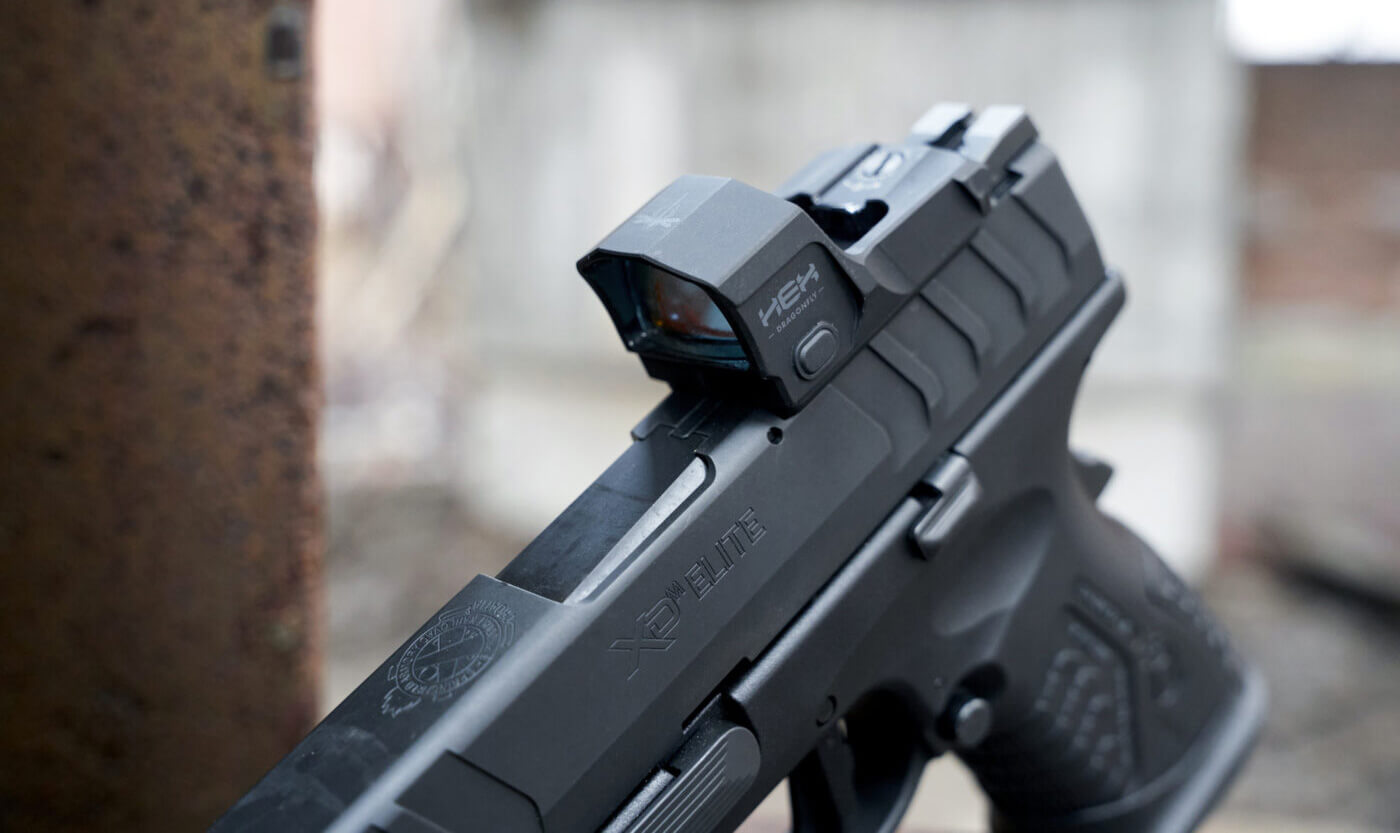
HEX Dragonfly mounted on XD-M Elite Compact pistol
The Springfield Armory XD-M Elite 3.8″ Compact OSP and the HEX Dragonfly make for a great combination.

And when it comes to getting hits, being able to use a refined aiming point is always an advantage. But, depending on lighting conditions, sometimes it can be hard to pick up your iron sights. That’s not the case with an electronic red dot optic. Red dots, especially either with manual brightness settings for fine-tuning or auto-adjusting ones that react to ambient light on their own, make it easier to aim regardless of the lighting conditions.

Another major advantage of a red dot is the ability to “target focus,” which allows you to focus on your target rather than your sights. The principle is simple enough. The sight’s emitter projects a dot onto a glass lens that’s right on top of your handgun slide. Despite the fact that the projected dot is just a couple of feet away from your eyes, your brain imagines that the dot is at the same distance as your target.

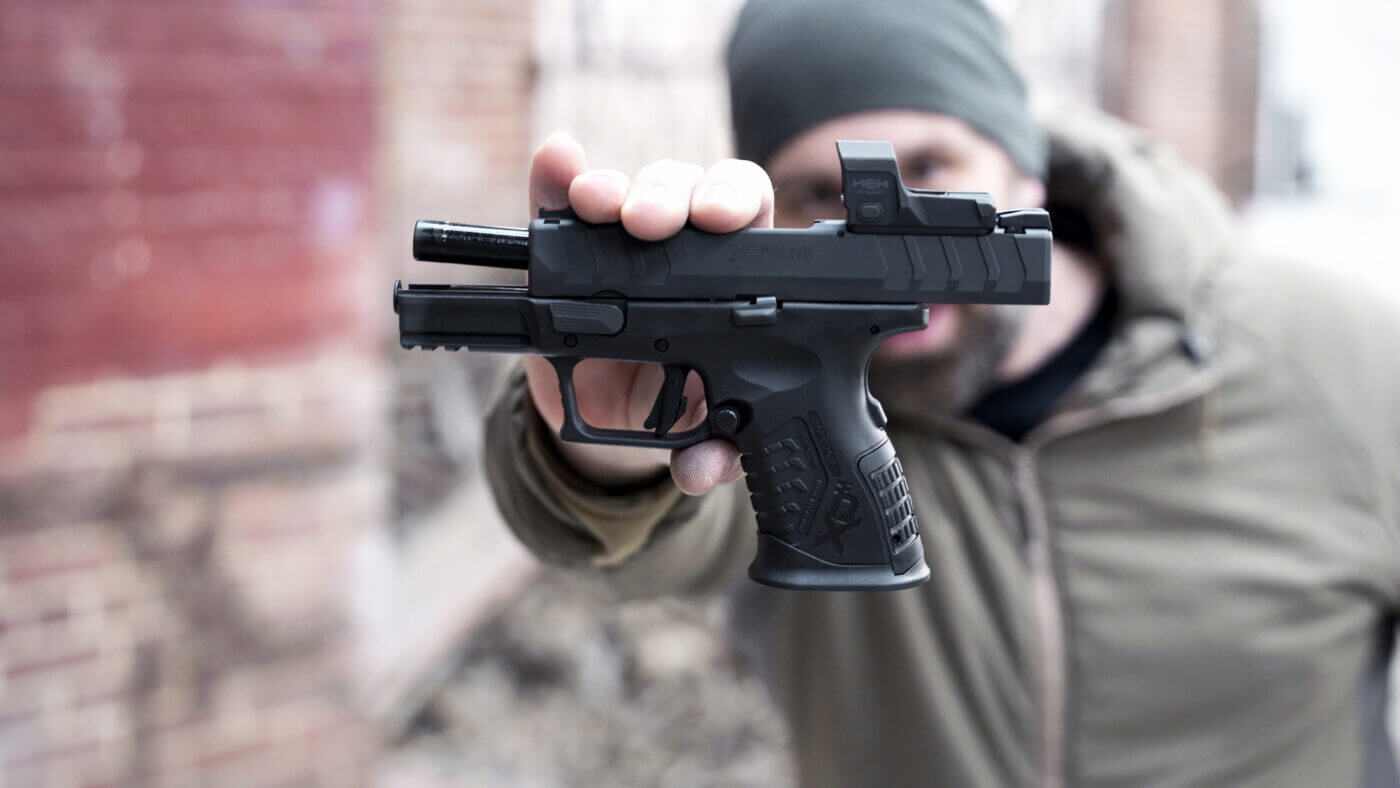
HEX Dragonfly on Springfield Armory pistol
Turning the Dragonfly on is a simple endeavor. Just press the button on the left side of the housing. The dot comes on at the lowest of eight brightness settings.

With a red dot, you never have to shift your focus from the sight to the target, or conversely from the target to the sight. Just look at your target, and the dot will be superimposed right where you need it. This applies to the red dot both on a pistol as noted, or also on a long gun.

All the Buzz?

So, let’s get back to that HEX optic I mentioned. The red dot is the HEX Dragonfly, and it’s a standard-sized red dot electronic optic designed with full-sized handguns as well as long guns in mind. Featuring the “Springfield Standard” footprint shared with the Vortex Venom and Burris FastFire, the Dragonfly is designed with durability and ease of use in mind.

HEX Dragonfly red dot optic
The windage and elevation adjustment clicks are both tactile and audible, making the zeroing process simple.

Frankly, when I think of what’s important for an optic, reliability is at the top of the list. Life and death situations require solutions that are dependable, and the Dragonfly is designed with dependability in mind. The Dragonfly features a beefy housing that is machined from 6061 T6 aluminum, and it is thick. Topped off with Hardcoat anodizing, this optic is built to withstand the abuse of recoil and a whole host of hardships. And within this rugged housing is a scratch-resistant, anti-glare-coated glass lens for the 3.5 MOA red dot. Springfield’s choice of durable materials and coatings set the stage for the duty-ready nature of the Dragonfly.

Simple Choices

When it comes to ease of use, the Dragonfly has everything you need. The red dot ships with a Picatinny mount for attaching the optic to a long gun, and as mentioned uses the Springfield Standard footprint for mounting to handgun slides. To mount onto a pistol like the XD-M Elite, you simply mount a Springfield #1 plate to the pistol along with the included sealing plate and then mount the optic. Easy. Oh, and matching up with the optic’s durability is an IPX7 waterproof rating, meaning the optic can be submerged in water up to one meter for 30 minutes.

HEX Dragonfly red dot optic on a pistol
The Dragonfly’s scratch-resistant, anti-glare-coated glass lens is protected by the robust housing. A hood protrudes in front of the lens to provide protection from impacts.

When it comes to using up the Dragonfly, it’s an easy process as well. The Dragonfly depends on a single button to control the emitter. One press turns the dot on to the lowest brightness setting. Each push cycles the dot’s brightness up through the eight different settings, and one more push turns the optic off.

All the functions are on a single button. It doesn’t get any easier than that.

The Dragonfly runs off of a single, bottom-loading CR2032 button battery that is included with the red dot. It’s a common cell, easy to find at your local store, and it lasts. The single battery will run for more than 100,000 hours (or three years according to the HEX website). To improve power consumption, the optic cycles off after 16 hours. When you turn your optic on, you select the brightness level. The Dragonfly remains at the brightness you chose until you change it or the optic turns off.

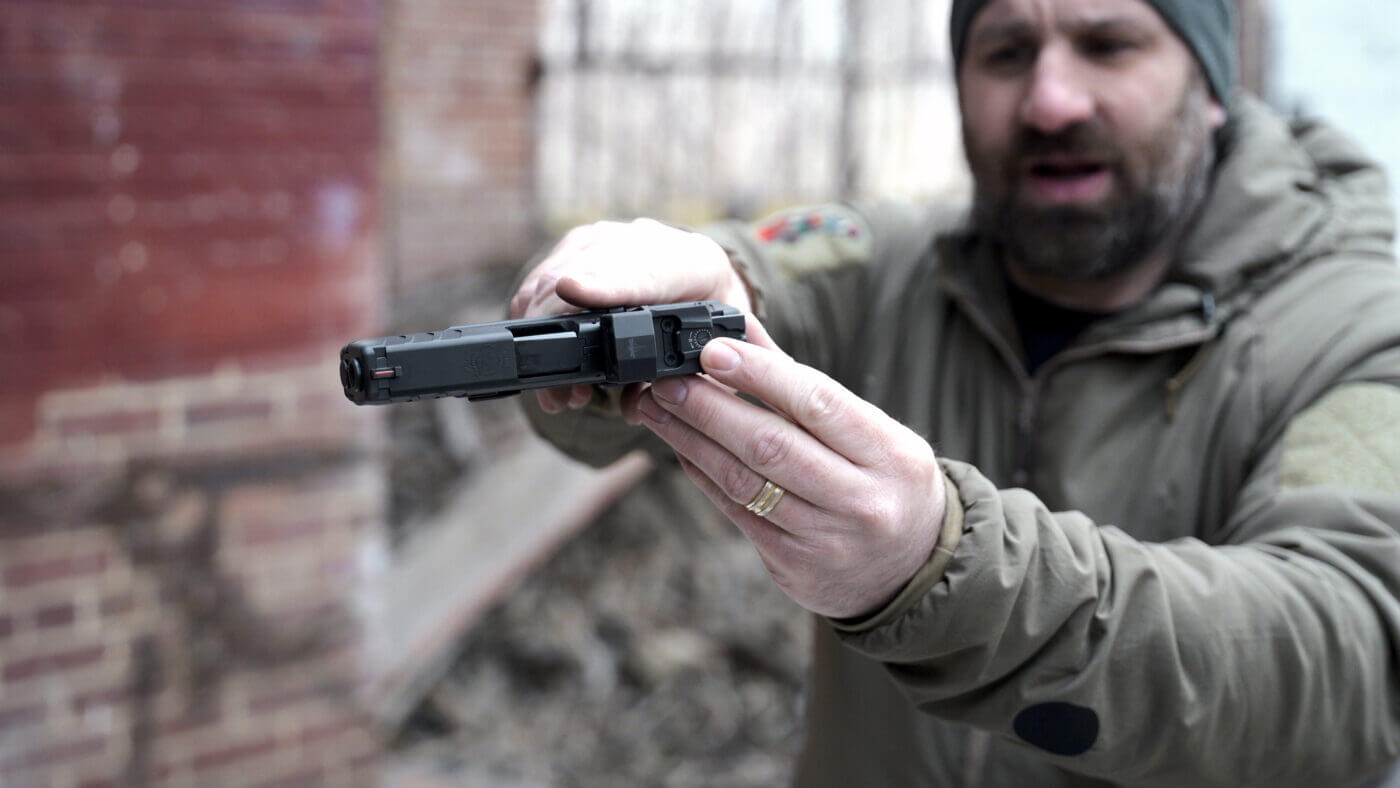
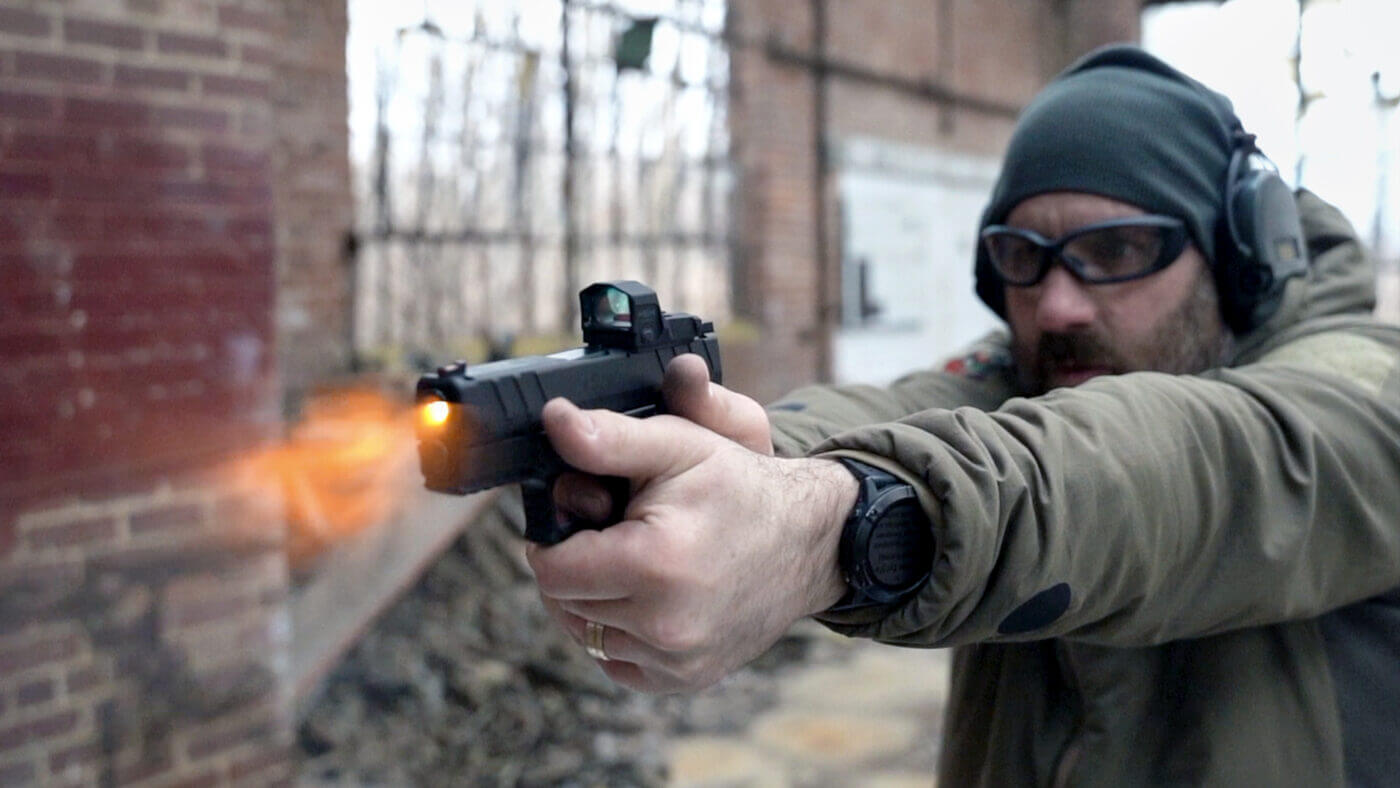
Shooting pistol with HEX Dragonfly red dot optic
The author conducted durability testing with the HEX Dragonfly. He found the red dot optic performed well with different firearms and a broad range of loads.

The Dragonfly’s housing features a hood that extends out in front of the glass lens. This serves as a shield to protect the glass from impacts and adds further protection for the lens if the optic’s face were to come into contact with anything. Finally, the rear of the housing is serrated to help reduce the glare, which helps the shooter focus on the dot.

Clearly, the HEX Dragonfly has an impressive feature set, especially when you consider that its MSRP is just $249.

HEX Dragonfly Specifications

Optic TypeDot SizeMagnificationWeightDimensionsBodyLensOperationBattery/LifeMSRP

Range Time

I had a chance to get some range time with the Dragonfly mounted on top of a Springfield Armory XD-M Elite Tactical OSP 4.5” 9mm as well as an XD-M Elite 3.8” Compact OSP 9mm, and it shot great on both. The Dragonfly was easy to track. On presentation, all it took was some intentional pressure from my pinkies, and the dot dropped into the window right where I wanted it. With each trigger press, the 3.5 MOA dot would lift and then drop right back to the point of aim.

Testing HEX Dragonfly red dot on range
The author was able to get accurate shots on target quickly using the HEX Dragonfly optic.

Regarding adjustments, that single button is really the way to go when it comes to setting the brightness. No complicated button press combinations to remember to lock the brightness in. Simply set it and forget it.

Also, the Dragonfly has plenty of adjustments when it comes to windage and elevation. The sight features 160 MOA windage and elevation adjustments. I especially like that the clicks are audible and tactile, and they can be easily made with a 9mm case. I had the Dragonfly zeroed in no time, and it has remained zeroed since. Check out Gunspot’s article on how to sight in a red dot for a quick way to sight in your optic.

Conclusion

While there are plenty of red dot sights out there from which to choose, Springfield Armory’s HEX stands out. The Dragonfly is a very reasonably priced optic, but with premium build quality and features. I have no doubt that the Dragonfly will serve you well, whether you are mounting it on a handgun or a long gun. It can handle all the hard knocks you can throw at it on the range, at the match or in the field. If you have been wondering if a red dot belongs on your gun, the HEX Dragonfly certainly deserves a look.

Editor’s Note: Be sure to check out The Armory Life Forum, where you can comment about our daily articles, as well as just talk guns and gear. Click the “Go To Forum Thread” link below to jump in!

Join the Discussion

Go to forum thread

Featured in this video

The Best Kerosene Heaters of 2024

0

<?xml encoding=”utf-8″>

Creating a backyard space takes planning and effort, so it’s a shame that you can’t use it as often when temperatures drop. If you’re tired of letting winter’s icy grasp drive you inside, a kerosene heater could be a solution. A kerosene heater on a patio or deck can keep you and your family warm so you can enjoy the great outdoors. These cold weather wonders are available in different types, sizes, and capacities. Learn why the following models are considered among the best kerosene heaters on the market.

  1. BEST OVERALL: DuraHeat Portable Convection Kerosene Heater
  2. RUNNER-UP: Sengoku Kerosene Heater, White
  3. BEST BANG FOR THE BUCK: Sengoku HeatMate 10,000-BTU Indoor/Outdoor Kerosene
  4. UPGRADE PICK: Dyna-Glo Delux KFA80DGD Kerosene Forced air Heater
  5. BEST MIDSIZE: Mr. Heater MH75KTR kerosene heater

How We Chose the Best Kerosene Heaters

Since there are multiple types of kerosene heaters on the market, we provide a list of recommendations that covers as many options as possible. Our top picks include a selection of the best forced-air, radiant, and portable kerosene heaters for shoppers to choose from. Depending on what you’re looking for, our list can provide solutions for smaller areas, all the way up to a powerful 80,000 BTU heater that can heat up areas of up to 1,900 square feet.

During our research, we made sure to only include top brands that use the highest quality materials. Most importantly, we ensure that each of our top recommendations include common safety features such as tip-over and high-temperature shutoff.

Our Top Picks

Kerosene heaters aren’t new technology, but some improvements have been made to safety and efficiency, so keep the considerations detailed above in mind while comparing products. This list of some of the best kerosene heaters on the market helps streamline the shopping process.

Jump to Our Top Picks

What to Consider When Choosing the Best Kerosene Heater

Kerosene heaters produce plenty of heat, which can make them ideal for outdoor applications. Kerosene is a relatively inexpensive fuel, so burning a kerosene heater on “high” in an outdoor space may be more affordable than using another type of heater. When shopping for a kerosene heater, keep in mind their specifications, such as tank size, heat type, and the all-important safety features.

Type

Kerosene heaters are available in various models, each of which produces a different type of heat. Some are more suitable for specific applications than others. Note: All kerosene heaters run on a liquid fuel, which can be messy. If that’s not a task you want to undertake, other non-electric heaters use propane, natural gas, and easier-to-manage fuels.

  • Convective kerosene heaters use convection to heat a space. They produce warm air that rises and pushes cold air down toward the heater. The heater then draws in the cold air and heats it, which rises and pushes colder air down again. This produces a very even heat within a space, and they run quietly.
  • Radiant kerosene heaters produce localized heat, essentially warming the objects in front of them. They don’t do a particularly good job at heating a larger space evenly, but they’re ideal for targeting a specific area, such as a table or sitting area.
  • Forced air kerosene heaters (also known as torpedo heaters and salamanders) heat air and force it into the area, much like a furnace. They’re suitable for heating large outdoor tents and gazebos, but they can be quite loud.
  • Portable kerosene heaters come in both convection, forced air, and radiant models, though the latter type is the most common. These heaters are small and easy to transport. Take it outside to refill the fuel tank, which helps minimize potential mess or dangerous accidents.

Tank Size

Kerosene is a liquid fuel, so tank sizes are measured in gallons or liters. The ideal tank size is relative, so consider these factors:

  • Heat output: Large heaters burn more fuel, so they need a larger tank.
  • Portability: Smaller heaters need to be light and portable, so they have a smaller tank.
  • Fixed vs. removable: Fixed tanks are usually larger, while removable tanks must be small and manageable.

In general, larger wheeled kerosene heaters have fuel tanks that hold up to 15 gallons (roughly 56 liters) of fuel, while smaller models may hold only 1 or 2 two gallons (about 7 to 8 liters).

Heating Capacity

Kerosene heaters also come in a variety of outputs, which are measured in BTUs (British Thermal Units). The higher the number of BTUs, the more heat a heater can produce.

Smaller heaters that produce heat within the 10,000 to 25,000 BTU range are ideal for smaller rooms, patios, or porches. Depending on the model, they can heat between 300 and 1,000 square feet. Midsize heaters (roughly 50,000 to 75,000 BTUs) warm spaces between 1,000 and 2,000 square feet.

Larger models—typically forced hot air—can pump a lot of hot air throughout a space. These heaters, which sometimes produce more than 150,000 BTUs, work well for large backyard parties and semi-enclosed tents.

Efficiency

Anytime energy is a factor, efficiency must be considered when choosing the product. Since kerosene heaters burn fossil fuels, make sure the model you choose is efficient and wastes as little fuel as possible.

Many kerosene heater manufacturers list their products’ efficiency rating, describing it in percentages. The best kerosene heaters burn around 99 percent of the fuel, passing less unburnt fuel through the exhaust.

But for a heater to work efficiently, it must be the correct size for the space. A 10,000-BTU heater may never heat a large garage, for example, which means fuel is wasted. Heating a small patio might not require a 135,000-BTU heater, as it will burn more fuel than necessary to keep the space comfortable.

Run Time

Run time is directly related to the size of the fuel tank, the heater’s output, and its efficiency, the most important of which is tank size. The larger the tank, the more fuel it uses, so the longer the heater will run. A heater that runs for several hours without refueling is a convenience worth shopping for, but manufacturers aren’t always forthcoming with this information.

Some of the best kerosene heaters can provide heat on a low setting for up to 12 hours before running out of fuel.

Safety Features

Kerosene heaters have the potential to be dangerous. If left unattended or used incorrectly, they can start a fire or cause burns. Many heaters have an overheat switch that shuts down the unit if it gets too hot. Also, compact kerosene heaters can tip over quite easily if inadvertently bumped. An anti-tip switch shuts off the heater if it tips over.

Moreover, any machine that burns fuel—kerosene, gasoline, wood, or any other type—also produces carbon monoxide. The best kerosene heaters are extremely efficient and designed to emit very little carbon monoxide, which makes them safe even for indoor use. However, when used indoors, it’s a good idea to install a functioning carbon monoxide detector as a safety precaution.

FAQs

If you have concerns about running a fossil fuel-burning heater in an enclosed space or want more info about kerosene heaters, check out the answers to the common questions below.

Q. How big of a kerosene heater do I need?

This depends on the space you’re heating. In most cases, a 50,000-BTU heater is effective at heating a small porch, while a 100,000-plus-BTU unit might be necessary for a large open space such as a wedding tent or barn.

Q. How many square feet will a kerosene heater heat?

The amount of space a kerosene heater heats depends on BTU output. Low-output heaters, in the 25,000-BTU range, may heat 1,000 square foot spaces, while 135,000-BTU units can heat over 3,000 square feet.

Q. Do kerosene heaters give off carbon monoxide?

Yes, carbon monoxide is a by-product of the combustion process. Generally speaking, these heaters produce levels considered safe, but users should have a functioning carbon monoxide detector when running a heater indoors.

Q. Is it safe to run a kerosene heater all night?

Kerosene heaters are not as safe as a furnace or boiler, but they could be the only heat source in a power outage. While these heaters may be considered safer than sleeping without heat in subzero temperatures, you should never leave a kerosene heater unattended.

Why Trust Bob Vila

Bob Vila has been America’s Handyman since 1979. As the host of beloved and groundbreaking TV series, including This Old House and Bob Vila’s Home Again, he popularized and became synonymous with “do it yourself” home improvement.

Over the course of his decades-long career, Bob Vila has helped millions of people build, renovate, repair, and live better each day—a tradition that continues today with expert yet accessible home advice. The Bob Vila team distills need-to-know information into project tutorials, maintenance guides, tool 101s, and more. These home and garden experts then thoroughly research, vet, and recommend products that support homeowners, renters, DIYers, and professionals in their to-do lists.

7 Kickass Booby Traps That Keep Intruders On Their Toes

0

If you want to protect your home from threats, you can’t just rely on security cameras and all those fancy-schmancy security systems.

What if the grid goes down?

They’ll be nothing more than decorations.

So to defend your fortress and your survival supplies when things go south, one thing you need to do is put together some booby traps.

Here’s what you need to know about them:

Important Things to Consider Before Rigging Your Booby Traps

man thinking of booby traps to rig

Booby traps are devices designed to catch animals or people by surprise. Some can seriously injure or even kill a victim, while others are way tamer.

You can’t just make them for the heck of it. There are a couple of things you need to ask yourself first before you go and set traps all over your backyard:

Is It Legal?

Booby traps have a reputation for being vicious devices used in wars. With the injuries they can inflict, it’s no surprise that it’s illegal to make most of them.

Don’t try building punji stakes or toe poppers or any of those dangerous traps.

You’ll get into major trouble with the law and probably land in the slammer, and that’s the last thing you want when you’re prepping for SHTF.

Is It Safe to Set Up?

While something may be legal, that still doesn’t mean it’s safe. Setting up booby traps may put you in a sticky situation. There’s nothing worse than being taken out by the very things that were meant to protect you.

Think about your family, too. Will you be able to live with yourself if your significant other or kids get harmed?

If you have younger kids, then maybe it’s better for you to go with non-lethal self-defense weapons instead. You can keep these out of their reach but you can’t exactly do the same with tripwires.

Is It Easy to Spot?

Your booby traps should blend in with their environment. If not, it won’t take long for an intruder to discover and bypass them.

You’ll need to learn how to camouflage your traps well. That includes using certain wires instead of others and figuring out what colors to use to trick even the most seasoned thieves.

Also, it will be harder to trick enemies if your traps involve too many bells and whistles. Keep them small and simple.

Now that you know what to keep in mind, here are some booby traps you can make:

What Are the Perfect DIY Booby Traps for Home Defense?

Booby traps don’t need to be deadly to be effective.

All the projects listed below will surprise intruders more than harm them, but they make great deterrents. And if you’re really careful, they’re safe to construct.

Check them out:

Tripwires

A tripwire is a classic booby trap. It involves a wire that extends tautly across a pathway, like in between trees or a doorframe.

Folks usually use braided fishing lines for tripwires because they’re thin enough to be nearly invisible to the naked eye and they also won’t split when a person walks through them.

The line or wire is connected to an alarm that goes off as soon as someone activates the tripwire. There are several types of tripwires that use different alarm systems.

Here are some that you can make at home:

Mousetrap Tripwire

Believe it or not, mousetraps don’t only help you catch the mice that have been stealing your food.

With a mousetrap, a few ring caps, and a fishing line, you can make an effective tripwire alarm. This article shows you how.

Just watch your fingers when you’re working on it — the mousetrap might snap on them. A sturdy pair of gloves should provide you with the protection you need.

Tin Can Alarm

Who says you need a high-tech perimeter alarm to safeguard your territory?

With a few tin cans, paracord/fishing line, and some sticks, you can create one that’s loud enough to surprise intruders and alert you to their presence.

What you need to do is tie at least three tin cans together using a paracord or fishing line. Then, look for two trees that are close enough to one another. Use the paracord to secure a loop around their trunks.

There should be a space in between the trunks. This is where you should hang your cans. After that, you have to make a loose loop under the cans.

That’s all you need to create the alarm.

The next things to do include making the trigger using 3 different-sized sticks, determining your perimeter, and then setting up the trap. These steps are explained in further detail here.

Keychain Alarm Tripwire

If your DIY skills aren’t the greatest, this trap is for you. There are only two things you need: a keychain alarm (which you can easily find online) and a fishing line.

The keychain you pick should have a hole on the reverse side. This is where you tie the line that will attach it to a tree, a door, or a table leg.

Air Horn Tripwire

Hate how obnoxious an air horn sounds?

Well, so will intruders when it disrupts their sneaky infiltration into your property.

To whip up this trap, you’ll need to build a deadfall trap above your air horn.

Choose a flat rock and prop it up on some sticks. Let the trigger stick stay on top of the horn. The trigger stick should be attached to the line. Secure the other end of the line to a nearby tree.

When a trespasser’s leg gets caught on the tripwire, a domino effect happens…

The trigger stick will give out from beneath the rock.

The rock will fall on the horn.

The horn will make a deafening sound that wakes even the deepest sleepers.

The enemy will crap their pants in shock and try to make a run for it.

Pit Traps

shovel digging a hole

There’s probably no booby trap more straightforward than a pit trap. It’s really just a big hole in the ground.

Before you dig the pit, look for a strategic location. Once you secure a spot, use an entrenching tool to do the digging. Keep shoveling until it’s deep enough to prevent an average-sized person from climbing their way out.

When you’re through making the pit, put a net on top of it and disguise it with leaves, rocks, and other debris.

Also, remember the exact place you excavated the trap. You don’t want to faceplant into a hole while you’re in the middle of trimming and pruning your plants.

Dye Device

In a bank robbery, you know how robbers give bank tellers their demands? They normally command them to shove hundreds of thousands of dollars in a bag.

The tellers may seem like they’re giving in to the robbers’ whims, but they actually have a trick up their sleeves — the dye pack. This nifty gizmo stains the cash a bright color, letting everyone know that it’s stolen.

You can take inspiration from the dye pack and apply it to your home defense.

Just fill an automatic spray bottle with semi-permanent dye. You can set this up as soon as you see folks trespassing on your property.

They won’t just get surprised; they’ll be so doused in dye that they’ll look like cheap knockoffs of the creatures from the Avatar movie.

Talking Booby Trap

Most thieves are on edge when they turn up at a mark’s home. They don’t wanna get caught.

So in the unlikely scenario that they breach past your defenses and enter your home, a talking booby trap can scare the living daylights out of them.

This little device involves recording a special message or sound effect meant for home invaders. You’re supposed to hide it somewhere clever, where the bad guys can activate it unknowingly.

Once the gizmo is triggered, they’ll hear the present you left for them loud and clear — they messed with the wrong home.

For complete instructions on how to make a talking booby trap, take a look at this article.

Final Thoughts

Booby traps make a perfect addition to a home defense plan — when you take the law, your family’s safety, and common sense into consideration.

Along with learning self-defense and making key security upgrades to your home, the booby traps we featured will help you win against the bad guys and keep your precious stockpile safe.

Just don’t be too obvious when you build these traps to avoid getting unwanted attention from the neighbors.

We hope you learned something from this! But if you wanna learn even more about home defense or making a foolproof SHTF plan, you should check out our other articles.

Highest FPS Air Rifle Without Needing a License

0

“Unleash your shooting potential with the ultimate high-performance air rifle! Discover the highest FPS air rifle on the market that requires no license. Experience unrivaled power and precision in a compact package, perfect for both beginners and seasoned shooters. Elevate your shooting experience without any legal hassles – get ready to dominate the target range like never before!”

highest fps air rifle without a license

highest fps air rifle without a license

When it comes to air rifles, enthusiasts are always on the lookout for the highest FPS (feet per second) models that do not require a license. These powerful air rifles offer an exceptional shooting experience without the need for any additional paperwork or permits. Whether you are a seasoned shooter or a beginner looking to explore the world of air rifle shooting, finding the highest FPS air rifle without a license can provide you with an exhilarating and satisfying shooting experience.

One of the top contenders in this category is the Benjamin Bulldog.357. With its impressive 800 FPS muzzle velocity, this air rifle delivers unparalleled power and accuracy. It is capable of taking down small game with ease and has become a favorite among hunters and target shooters alike. Another noteworthy option is the Gamo Swarm Magnum, which boasts an impressive velocity of up to 1650 FPS. This break barrel air rifle offers incredible precision and speed, making it suitable for both hunting and competitive shooting.

It’s important to note that regulations regarding air rifles vary from country to country, so it is crucial to familiarize yourself with local laws before purchasing or using any high-powered air rifle. While these models may not require a license in certain regions, it is always best to ensure compliance with legal requirements. By selecting the highest FPS air rifle without a license that aligns with your needs and adheres to local regulations, you can enjoy the thrill of shooting while staying within legal boundaries.

In conclusion, owning the highest FPS air rifle without a license comes with its pros and cons. While it offers power and accuracy for recreational purposes, it also raises concerns over safety and legal implications. It is crucial for individuals to adhere to local laws, regulations, and safety precautions when considering such firearms.

5 Best Fall Smallmouth Fishing Tactics

0

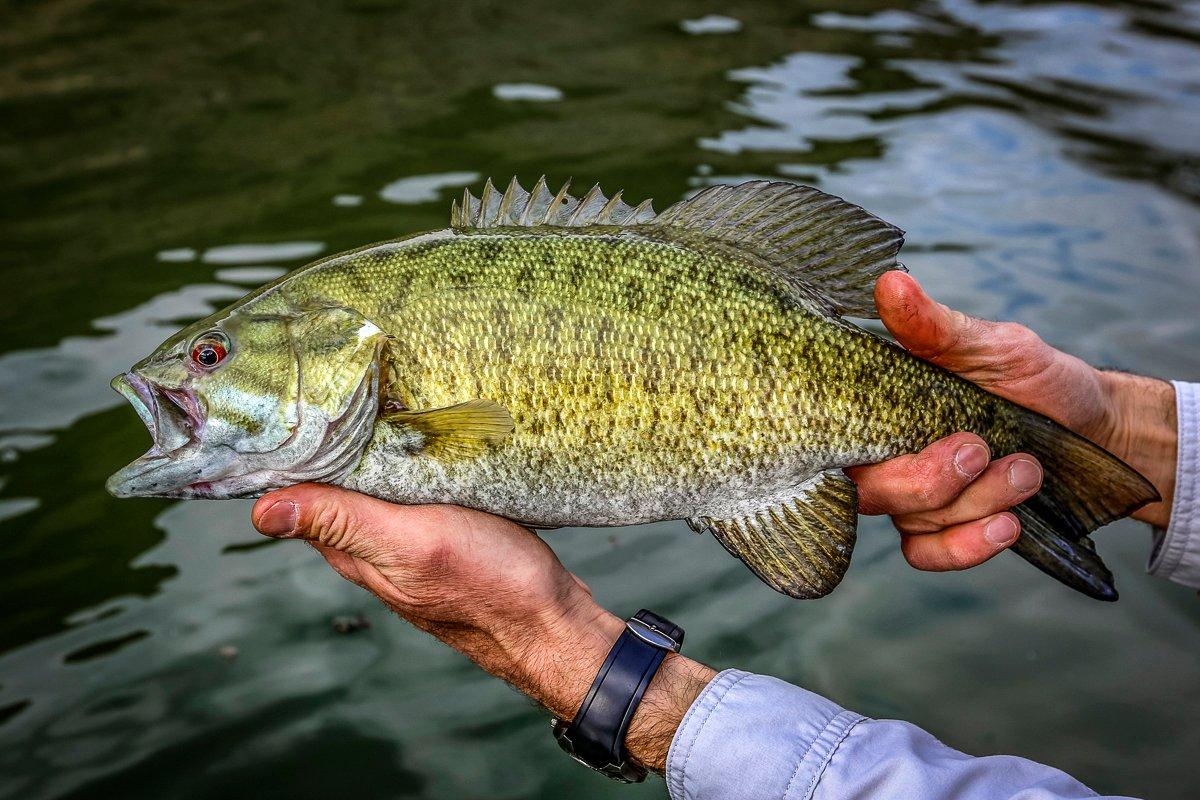
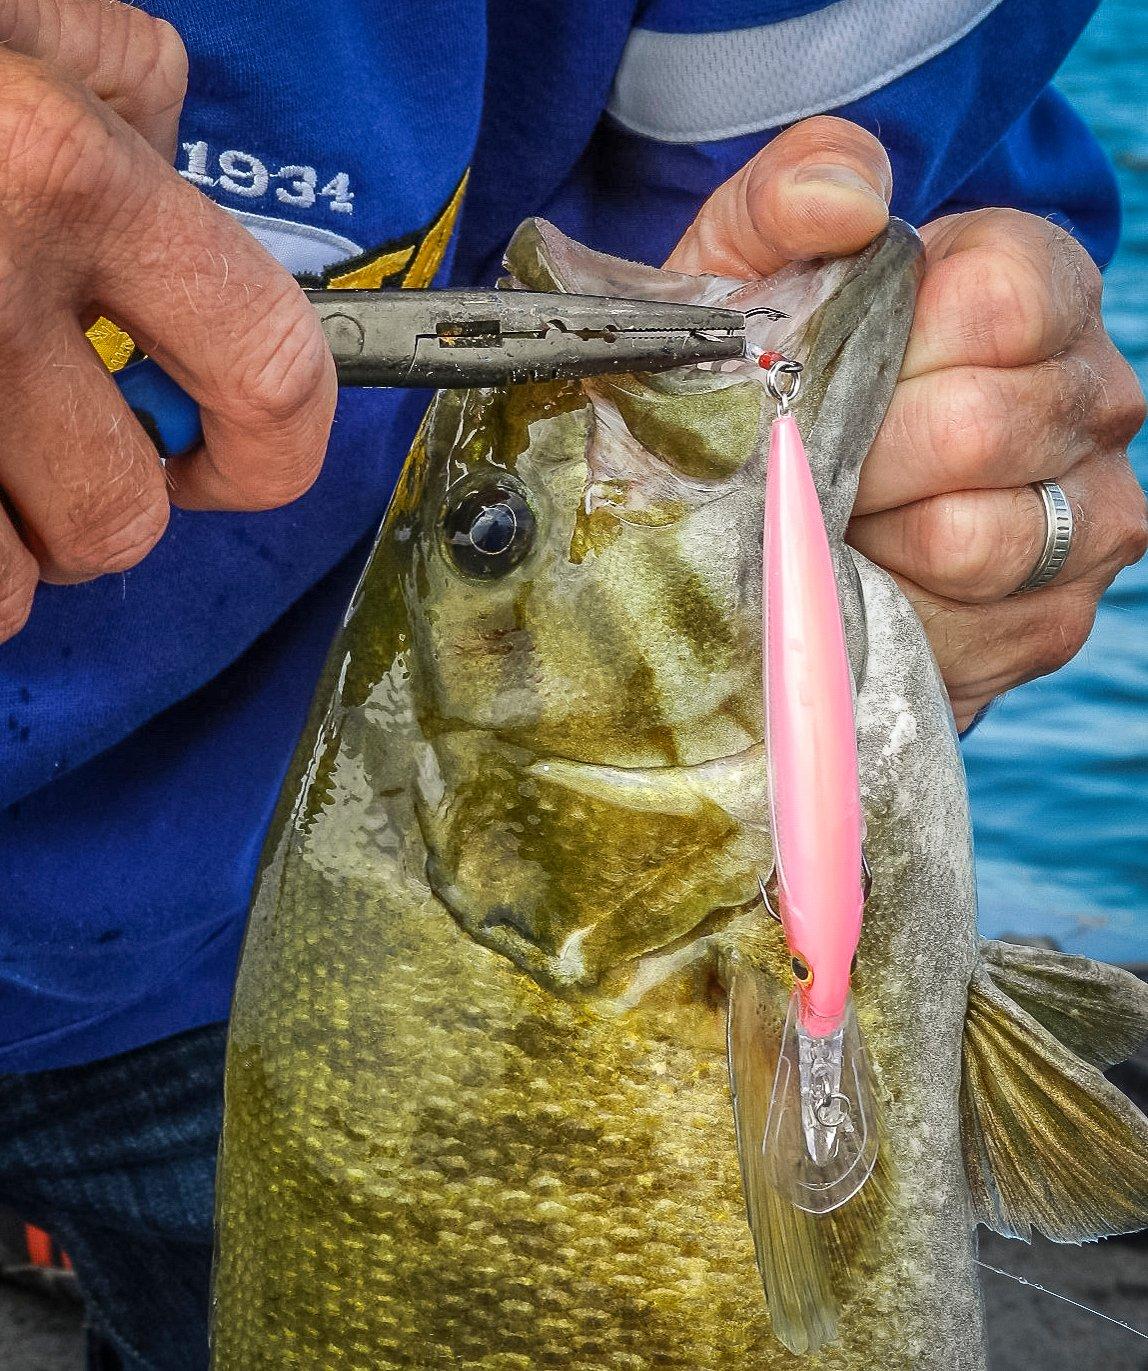
Fall, specifically October, is arguably the best time to catch a smallmouth bass. Here's why. Image by Shutterstock / S Nafzger

As a kid, we fished for largemouth bass in the summer. We’d catch the lion’s share of them around weed beds and shady docks. But every now and then I’d wake up early enough to tag along with the grownups to go smallmouth fishing. In the summer, our resident brown bass didn’t make many appearances after 8 a.m. But I can remember the sage advice from my mentors back then. Just wait until October, they’d say. That’s when the smallmouths really move in.

And they were right. Fall smallmouth trips were special times.

And they were right. Fall smallmouth trips were special times. Much of fishing remains a mystery to a youngster, and it’s the unknown factor that makes a great selling point. Now, as a more seasoned angler, I realize the smallmouth were there all along — just not in areas where we’d cross paths.

(Don’t Miss: The 3 Biggest Catfish Ever Caught)

But I also still believe in the power of autumn. I’ve fished for smallmouths all across the country and have found one solid rule: the colder it gets in the fall, the better they bite. Whether it’s water temps dropping to the 50s in Tennessee or ice forming on the Great Lakes, the decline in water temperature triggers a feeding spree among smallmouth bass.

Winter can be tough, and to survive and thrive, bass must put on as much weight as possible beforehand. In fact, studies have found that successful springtime spawns within smallmouth populations are often dependent on the previous fall’s feed.

Regardless, the fish are ready to eat, and we’re ready to be a part of that. We just need to get in the right areas.

(Don’t Miss: Is It OK to Eat Bass?)

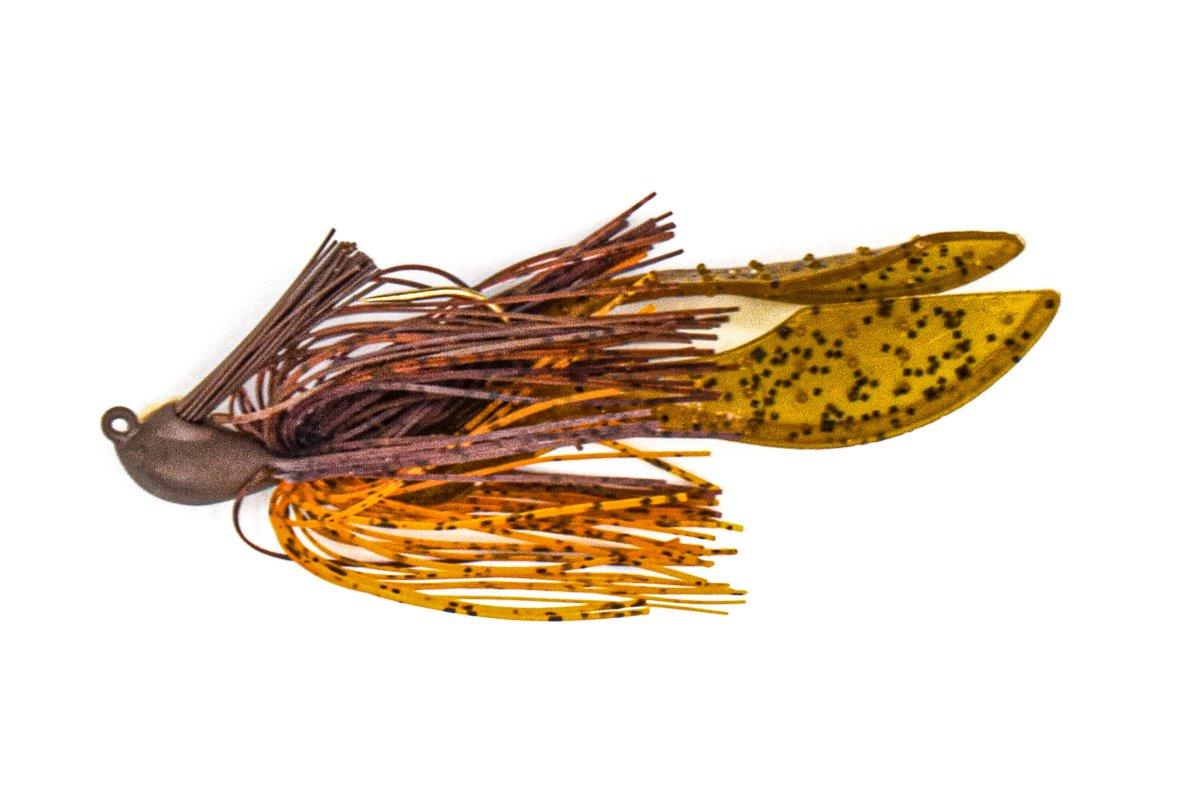
A black or brown jig can work wonders along shallow rocks, or transitions, like where rocks meet sand or sand meets grass. Image by Joe Balog

Tactic One: Shallow Rocks

Let’s start with the easiest and most obvious. Around much of the North, especially on bodies of water with a mix of rocks and vegetation, smallmouth bass are drawn to specific hard structures. Water temperatures are dropping, grass beds are dying off, and the remaining rocky areas attract solid food items like crawfish and perch. At times, a single large rock may hold a bruiser worthy of personal-best status. One of my largest bass, a fish eclipsing 7 pounds, came in this very scenario on a cold November day on New York’s Chautauqua Lake.

Here, it’s imperative to find the sweet spot. Big smallmouths are masters of their domain, and they know the best hunting grounds. Transitions, like where rocks meet sand or sand meets grass, are always best. Side-imaging depth-finders help, but many of these spots can be seen with a good pair of sunglasses on a nice day. Line up and make accurate casts, and repeat them — exactly – once fish are located.

It’s tough to beat a jig and plastic in this scenario. The best smallmouth options are a little lighter (around ¼ ounce) and more streamlined than a standard flipping jig. Stick to blacks and browns, and fish them on a long rod and 12-pound fluorocarbon. On particularly cold days, afternoons are best, once the rocks warm surrounding waters.

(Buy Alert: Gray Bass Long Sleeve Tee)

Deep-water smallmouths can be caught by using cranks, jerkbaits, grubs and drop-shots. Image by Joe Balog

Tactic Two: Long Points

Across the Southeast, everything revolves around baitfish. Large shad schools tighten up and begin migrating to major creek arms on the country’s biggest reservoirs. Not surprisingly, bass follow. While largemouth bass have a reputation for getting in the skinniest of water, smallmouths in the same system usually remain in mid-depth, main lake areas. More comfortable as pack feeders than lone ambushers, smallmouths prefer to work schools of baitfish in groups.

Large points are great places to find these roving bands of bass. They key here is to first locate baitfish. Location will depend on the stage of the game: main lake in early fall, large creeks later on. Regardless, find the bait and you’ll find the bass. Look for large points with vast flats on top, and fish there early in the day with topwater baits. Nothing beats a walking bait for smallmouths. As the day progresses, bass will often move off the sides of points, especially if a creek channel intersects. If rocky or wood structure coincides, all the better. Deeper fish can be caught on cranks, jerkbaits, grubs and drop-shots. Occasionally, the topwater bite lasts all day. Remember to stay by the bait.

(Don’t Miss: Why You Suck at Throwing a Baitcaster)

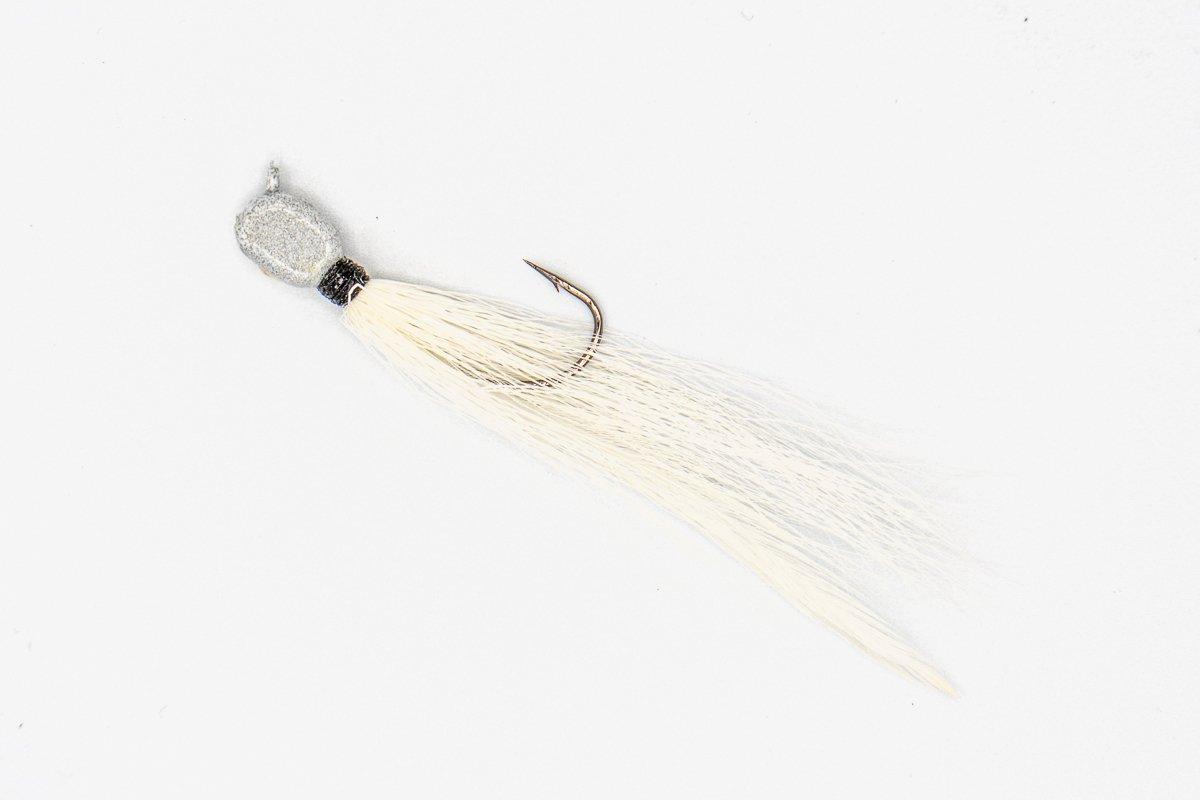
A hair jig works well for shallow-water fishing. Image by Joe Balog

Tactic Three: Bluff Banks

Our third strategy mimics the second. However, here, we want to find a place where schools of bass can pin baitfish. This is an incredible fishing opportunity when it presents itself. On many lakes with steep, bluff shorelines, smallmouths will hold on small shelves and rock piles waiting for baitfish to blow in. When that happens, the bass go berserk and massacre the minnows right up against the wall.

Again, it’s imperative to first find the baitfish, then find areas where wind or current will blow them against the bank. Even areas with strong winds producing noticeable waves against a bluff bank are still in play. Occasionally, a large sea-wall or the face of a dam will suffice. In any case, we’re looking for places where baitfish are being disoriented and facing a large object.

These spots are often snaggy, so a cast-and-retrieve bait is better than a bottom-bouncer. Swimbaits on a heavy jighead are great. Big bladed spinnerbaits come on strong once the water clouds up from wave action. At times, a Rat-L-Trap is all you need. Remember, this is an all-or-nothing method, so you’ll know right away if it’s working.

(Buy Alert: Red Fish Long Sleeve Tee)

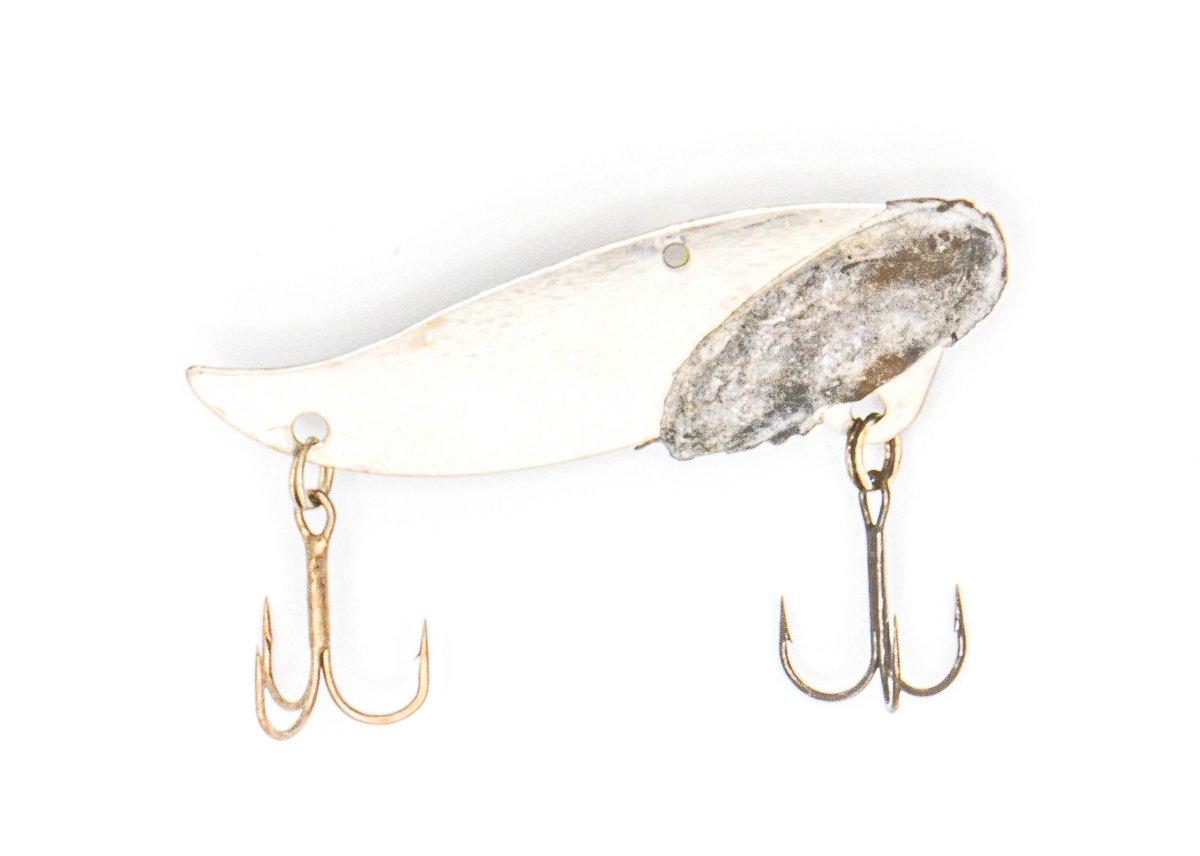
Sometimes a good bladed bait is all you need to trigger the bite. Image by Joe Balog

Tactic Four: Great Lakes Basins

The big brown bass of the Great Lakes are a different breed. Sure, some come shallow in fall, but most stay deep and move deeper. In twenty-plus years of fishing the big waters, autumn was never underrated. Start your search where the best summer fishing occurred, and move deeper. Bass from adjacent structures will eventually meet up in one special area. Years ago, I coined these places Basin Zones, where the outside edges of summer structure meet vast, open water basins. On Lake St. Clair, this is often 18 feet of water; on Ontario is may be 50.

What we’re looking for here is the last piece of structure before the bottom drops to never-never land. Don’t begin casting until you mark significant numbers of fish. We’re looking for the motherlode here. The best presentations will be efficient deep-water methods. Drop-shot plastics remain number one, followed by metal blade baits and spoons. Underspins are becoming popular, as are solid-body swimbaits on jigheads weighing 3/4 ounce. The key is to get a bait down, even in the rough seas associated with fall fishing up north. Once you find them, the fish will do the rest.

(Don’t Miss: The Best Postspawn Crappie Fishing Tactics)

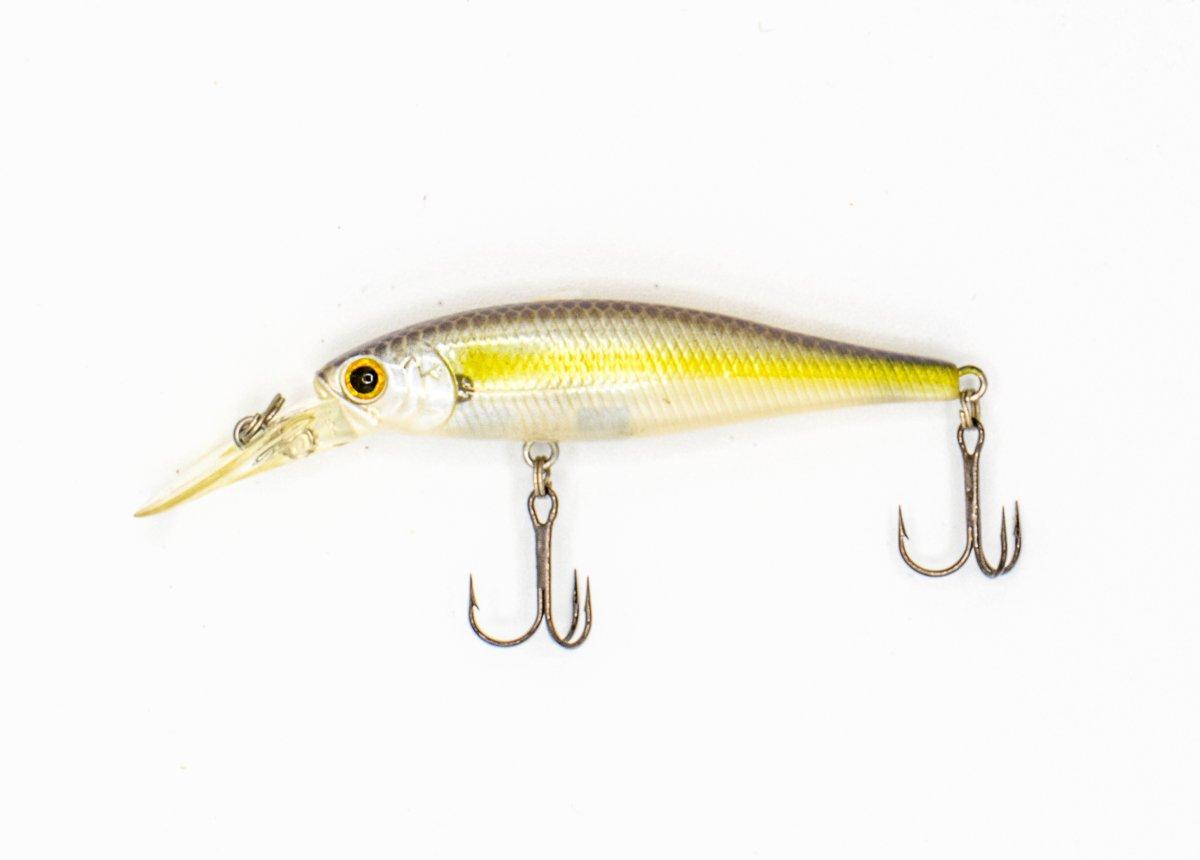
Use a jerkbait with a brisk, aggressive retrieve. Image by Joe Balog

Tactic Five: Flats in the Desert

A quick review of recent smallmouth action reveals new fisheries in the West are coming on strong. Lakes like Havasu and Mead are producing eye-opening catches. Here, tactics mimic those of other parts of the country, with a desert twist. Clear waters and large striper populations put baitfish on high alert. When looking for smallmouths, sometimes the best play is to first find the stripers.

Striped bass are efficient open-water predators, likely due to their saltwater roots. Other species, notably largemouth and smallmouth bass, often feed in and around schools of stripers. Picking up the scraps can make for a good life.

Look for feeding action around shallow points and rocky flats. There, fish jerk baits and topwaters with a brisk, aggressive retrieve. If your catch includes nothing but stripers, slow down with a white hair jig fished in and around the school. Mike Guerra — an old friend living and fishing in Vegas — jigs a white hair jig around striper schools until temps cool to jacket weather, and he has some of his best smallmouth days when everyone thinks he’s striper fishing.

Sorry to let the cat out of the bag, Mike.

(Don’t Miss: Hundreds of Sharks Congregate in West Florida Canals)

Get your gear at the Realtree store.

Beaver Trapping Sets

0

There have been many different beaver trapping sets used throughout the years that work really well.

Most are simple and straight forward since beaver are rarely trap-shy.

Four types of traps are commonly used for trapping beavers.

They are the #3 or #4 long spring, coil springs like the Bridger #5 or the MB-750, the 330 conibear and the snare.

When setting leg holds for beaver, try to place them in the water.

Look for a spot where the beaver enters or exits, and set the trap about six inches or so deep under the water.

You may miss a few beavers setting this deep, but you will have fewer sprung traps and fewer front leg pull-outs or twist-off’s than setting just below the surface.

When a beaver swims up to the shore, many times its chest will spring a trap that’s been set too shallow.

If you set it deeper, you can get a good solid rear foot catch.

A conibear trap should be set and braced solidly so it won’t be accidentally knocked over instead of making a catch.

Guide sticks are usually a good idea to funnel the beaver through the trap.

Snares can be set under water or on dry land.

I prefer dry land sets since they always seem to get pushed out of position when I put them in the water.

On dry land a 10”-12” loop set 2” or 3” off the ground will catch most beaver.

One drawback to snares is hide damage.

I haven’t seen one yet that doesn’t leave a ring mark on the hide when you skin it.

Some fur buyers don’t seem to care but I know at least one of mine docked me for that mark.

Anchoring Your Traps

Beavers can twist off a front foot just like a muskrat, so you don’t want to stake a beaver trap down on dry land.

If you have the time and resources, you can put in a drowning wire so the beaver slides down the wire into deep water to drown.

An “L” shaped lock will keep the trap from sliding back up the line.

Use heavy gauged wire or cable that’s staked down near your set location.

Attach the other end to a heavy weight or sack of rocks.

A cement block works really well, the only disadvantage is carrying the heavy weight with you on the trapline.

Instead of cable you can also use a drowning rod which is basically a 10 foot long piece of metal rod that’s driven into the deep water on one end and staked down with a T stake on the other end near your set location.

The trap slides on the bar just like it would on the wire but the drowning rod has a few advantages.

First, you don’t have to carry the heavy cement block with you through the woods and second the rods won’t kink like the wire will, allowing you to use it time and time again.

A disadvantage would be carrying the 10 foot long piece of steel rod with you through the swamp.

Another option is to wire a leg hold to a large log that the beaver can move, kind of like using a drag in coyote trapping.

You might think the beaver would chew through the log and escape but they are usually drowned in deep water or tangled up nearby.

I have lost exactly one trap in all the years I have trapped like this.

Conibears should be wired to something solid, just in case the dying throes of the beaver move it to deep water where you wouldn’t be able to find it.

Den Sets – Beaver Trapping Sets

The simplest of all is the den set.

Simply set a conibear in the den entrance (where legal) and you will most likely connect.

Most lodges in open water will have 2 entrances.

Some lodges built partially on land may only have one entrance. Place a 330 conibear at each entrance.

Beavers can den up in a river bank like muskrats or more commonly build a hut or lodge out in the pond they create.

Many huts will have areas that show where the beavers come out of the water and sit on the hut.

This is another good set location especially if you can’t locate the den entrance for some reason.

You will have a higher chance of catching kits in this type of set, but I have caught kits almost 100 yards from huts before.

Castor Mound Set – Beaver Trapping Sets

The castor mound set or scent mound set is a productive springtime set.

In the spring beavers are in a mating mood and they will scoop up mud, twigs and leaves from the bottom of the pond to build a small mound on the bank and then put their scent on it to try to attract a mate.

It should be pretty obvious where the beaver are traveling to and from these little mounds.

If the conditions are right, you can put a conibear in a run or usually set a leg hold in the slide where they exit the water.

Dam Run Sets – Beaver Trapping Sets

I have read of other beaver trappers cautioning about setting dam runs for various reasons. Setting the dam run is my favorite set location.

Where I trap, this is a sure-fire place the beavers will be traveling from one pond to another.

In my area, any active beaver pond will have a well worn trail over the dam heading down into the outlet stream.

A leg hold set in the pond side water leading up to the trail is a good set. A snare suspended half way down is another.

If you can legally set a conibear on dry land, this trail is a wonderful place for it.

Any other run or trail that looks like the beaver are using is a good place for a set, either on dry ground or runs in the water.

Baited Sets – Beaver Trapping Sets

If you have a difficult time finding a good natural set location you can try baiting the beaver into your set.

A small pile of fresh partially peeled sticks from the trees the beaver are using for food may draw them into your set.

This beaver trapping set works best when food is on the scarce side or right before freeze up when the beavers are trying to stash their winter supply of food.

Overall – Beaver Trapping Sets

You can get fancy and experiment with your beaver trapping sets or you can stick with the basics and just keep it simple.

For me, the easy to construct sets listed above have worked great in a variety of different locations.

Whether you choose to use one set or try them all, I hope you enjoy beaver trapping as much as I do.

6 Best .308/7.62 Semi-Auto Rifles: Battle Ready

0

I want to preface what I’m about to say by making one thing clear…I love all firearms.

Big ones, small ones, common, rare, old, new, whatever — if it goes bang, it has a place in my heart.

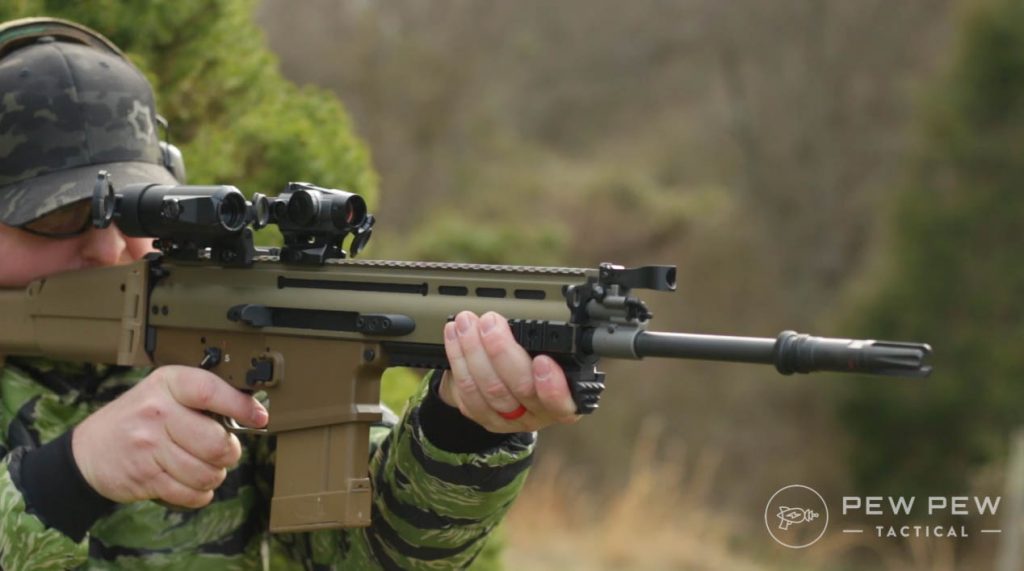
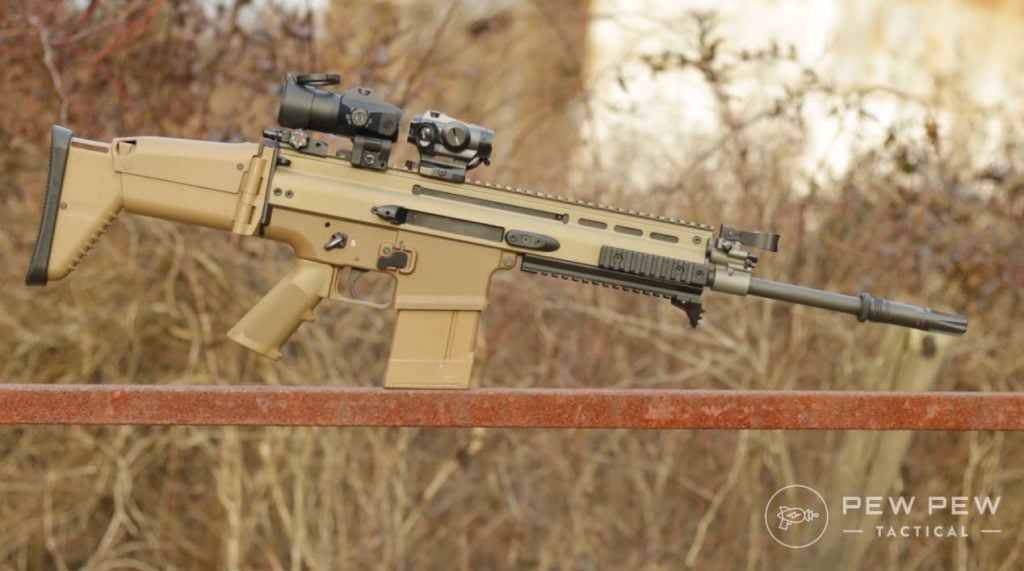
FN SCAR 17S Shooting
There is nothing like slinging some heavy .308 at a decent rate of fire.

But the mostspecial place in my heart will always be held by the majesty that is the “battle rifle” — which usually means a semi-automatic chambered in .308 Winchester/7.62×51 NATO.

Why .308?

I’ve talked before about how much I love the .308 cartridge and how perfect it is for my needs and those of most shooters and hunters.

It’s good out to 800-yards, no sweat, and with quality match ammo, it will probably be more accurate than most shooters.

So while I love things like the 6.5 Creedmoor and .224 Valkyrie, I can’t get away from good ol’ .308.

If you are a fan of .308 and on the hunt for a new battle rifle, you might have noticed there are a few options on the market. So which is best?

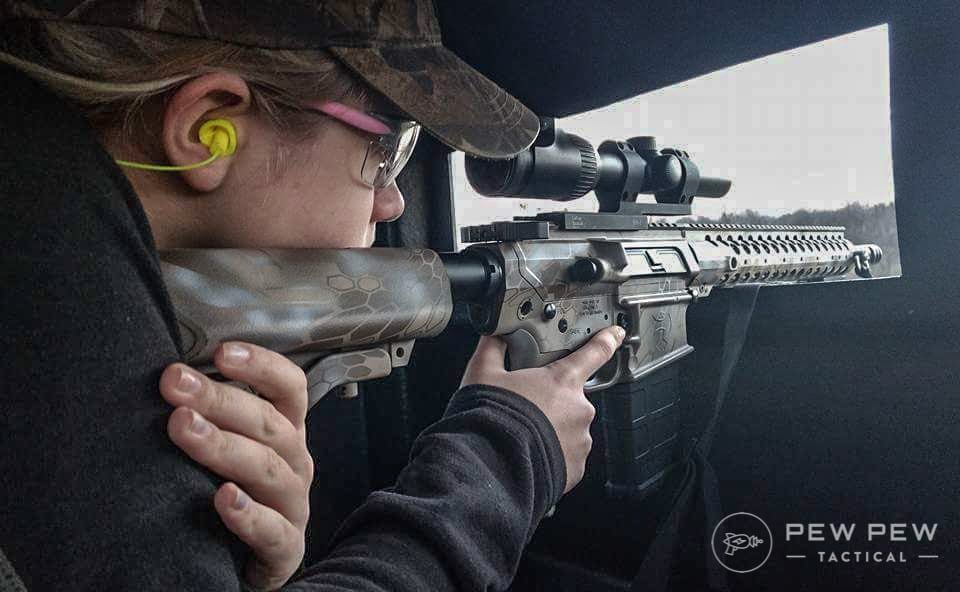
Grace running an AR-10 in .308 Win on a deer hunt at the age of twelve.
.308 AR-10 on a deer hunt.

I’m going to walk you through some of the Pew Pew Tactical team’s favorite battle rifles. We’ll examine some pros of each and discuss what makes them worthy of your attention.

So without further ado…let’s dive in.

THE QUICK LIST

Best .308/7.62 Semi-Auto Rifles

1. AR-10

When the words “.308” and “semi-auto” are uttered in the same breath, most people’s minds probably go to the AR-10.

The AR-10 is the starting point not only for most modern battle rifles but for most Western semi-auto rifles in general.

Original AR-10
The original AR-10. You can see the similarities between it and its modern counterparts.

It would go on to spawn the AR-15 and all of its variants, making it the progenitor of arguably the most popular firearm family in the world.

You can read more about the history of these rifles in our AR-10 vs. AR-15 article.

Originally developed by Eugene Stoner to replace the aging M1 Garand for the U.S. military, the AR-10 has had a long and successful life.

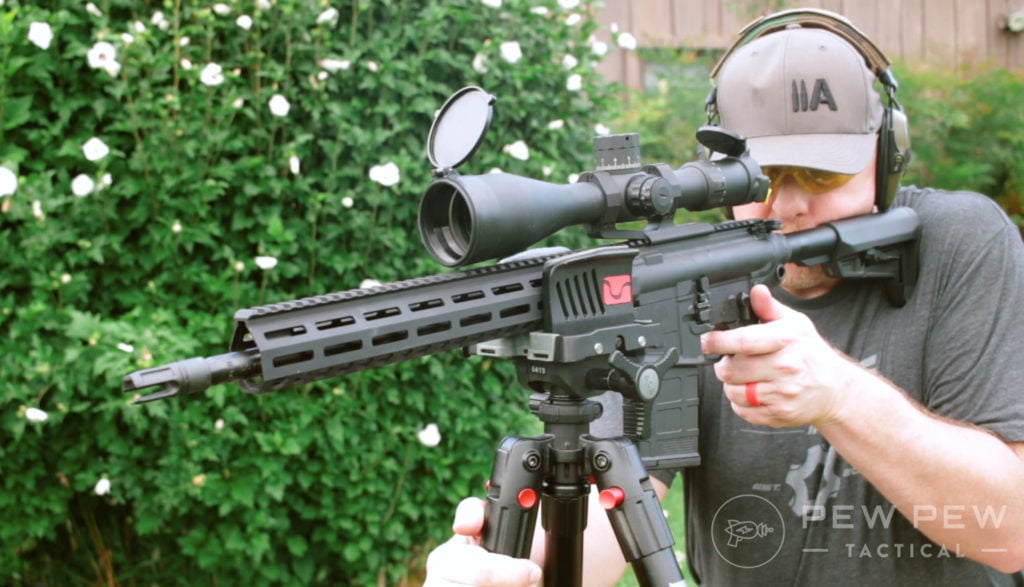
Sig Sauer 716i Tread AR-10 sniper johnny shooting
Sig Sauer 716i Tread AR-10

In that time, it has remained in use globally, though these days mostly in specialized circumstances or in the hands of civilians.

That said, it’s still an incredibly robust platform, and modern refinements have only made it better.

Aero Precision M5E1

The Aero M5E1 is the gold standard for people that want a customizable AR-10 without breaking the bank — though you’ll have to piece it together yourself.

Coming in somewhere between $1,200 and $2,000 depending on options, the M5E1 is an excellent choice for those who want a solid rifle that can be made great with a few small upgrades.

You can read our full review here.

Palmetto State Armory PA10

PSA is a budget firearms enthusiast’s dream come true. I’m not sure exactly how they do it, but they have everything from ammo to AR-10s at rock-bottom prices.

Best of all, their PSA-branded uppers, lowers, and complete rifles are all very cheap compared to the competition. Their fit and finish are nothing to drool over, but they go bang every time, and they’re more accurate than the price would lead you to believe.

If you’re looking for an entry model AR-10 or semi-auto .308 in general, the PA-10 from PSA is available in multiple configurations. They start at about $700 and top out at around $1100.

You can check out our reviews of the .308 and 6.5 Creedmoor versions and peep our video review of the .308 version below.

Other AR-10 Info

Simply put, the AR-10 is the king of battle rifles. They are inherently accurate, reliable, and modular. Aside from the models we listed, there are plenty of great options out there Sig 716I and higher-end options like LMT MARS-H and POF Revolution.

Be sure to check out our AR-10 vs. AR-15 and 8Best AR-10s articles if you would like to know more.

DSA FAL Full Look

2. PTR-91

The PTR-91 is a modern variant of a gun first manufactured over half a century ago, the Heckler and Koch G3 — one of the most revered battle rifles ever produced.

Galil ACE Gen 2 Shooting
PTR-91 With Welded Top Picatinny Rail (Photo: Gununiversity)

What would go on to become the H&K G3 was first produced in 1958. Primarily designed by German engineers working for the Spanish CETME development group, the CETME-C was a roller-delayed 7.62×51 rifle.

This legendary rifle would go on to inspire a number of similar rifles (and quite a few blatant copies) and be used by just about every country with a military.

Galil ACE Gen 1 and 2
The G3 has been and still is widely in service around the world. (Photo: Military Times)

The PTR 91 is an American-made G3 clone that uses tooling references from the original H&K G3 to be as accurate as possible to that original design, but with all the advancements and improvements of a modern manufacturing complex.

It also features the iconic H&K diopter sights (the little rotating drum you probably recognize most from the MP5) and a standard 5/28 threaded barrel making it ready for suppressors out of the box.

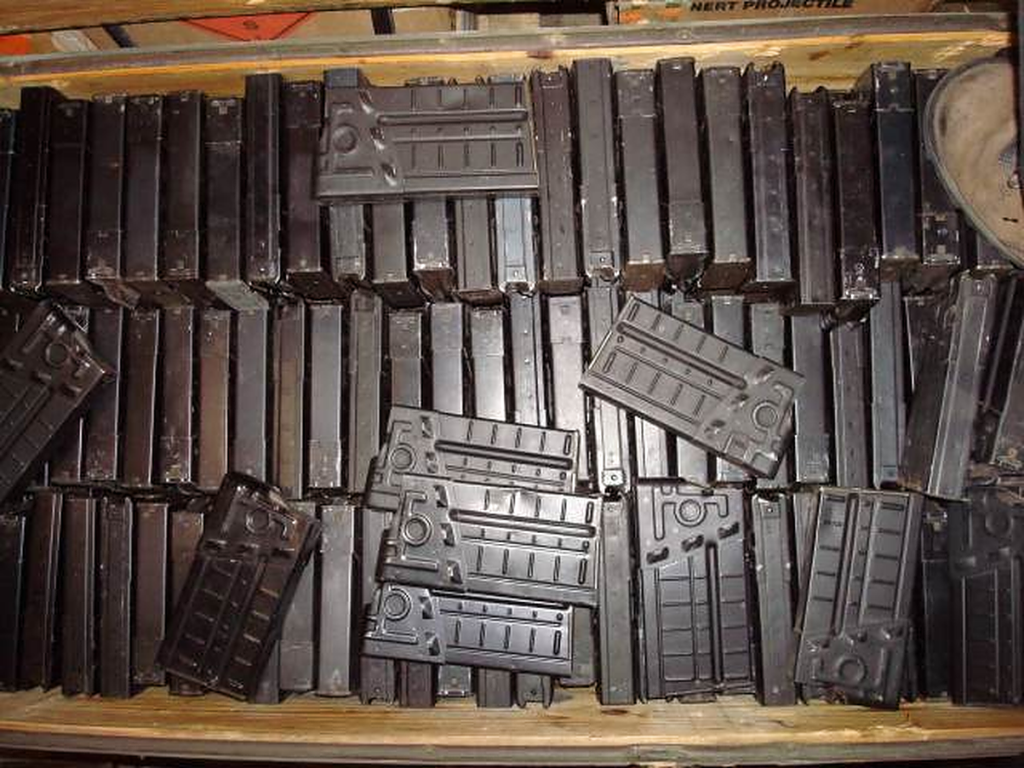
A nice bonus about these guns is the widespread availability of dirt-cheap magazines. You can find surplus magazines for $5 to $10, and new magazines can be had for as little as $10 to $15.

Galil ACE Gen 2
It’s not uncommon to run across a crate full of surplus G3 magazines at your local gun show. These things are everywhere. (Photo: kyimports)

This is a battle rifle. It’s got a stamped and welded receiver just like an AK, and the trigger does double duty as a medieval torture device. Beware, these things absolutely chew up brass; so if you are planning on reloading, this gun will literally put a dent in your plans.

I’d be comfortable calling the base model a 2 MOA gun with mid-range ammo. Stepping up to their FR model with the match-grade bull barrel is an option for those looking to squeeze a bit more accuracy out of the platform.

There are several variations of the PTR-91, but they typically run from about $1,000 to $1,400.

For a battle rifle that’ll handle anything, it’s certainly not bad at all, and I’d feel good about having one to rely on in anything from a home invasion to an alien invasion.

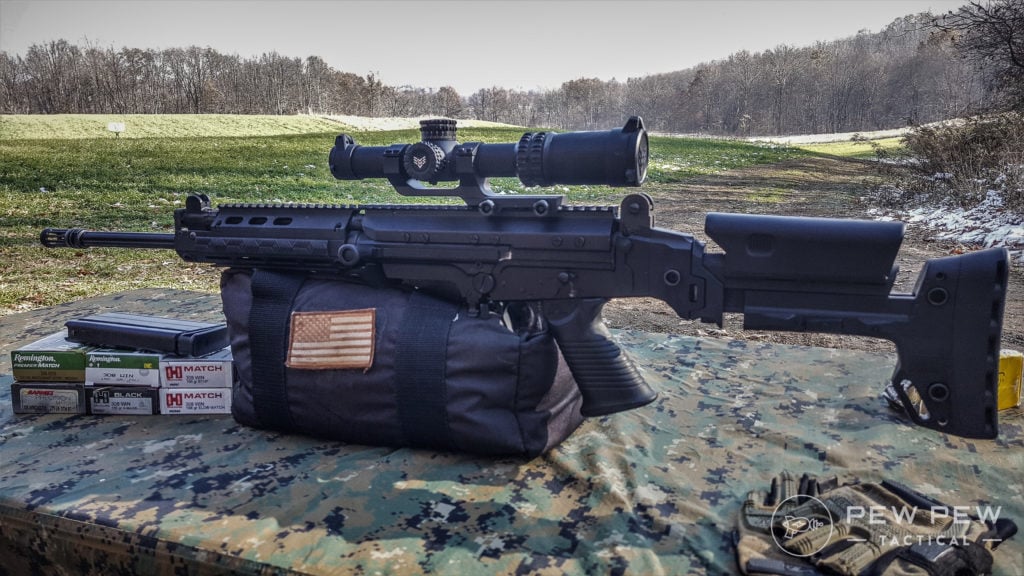
3. DS Arms SA58 FAL

FN Herstal developed the Fusil Automatique Léger (Light Automatic Rifle) in the 1940s and saw it completed in 1953. During the Cold War, many NATO countries adopted it as their primary battle rifle, where it earned its nickname “the right arm of the free world.”

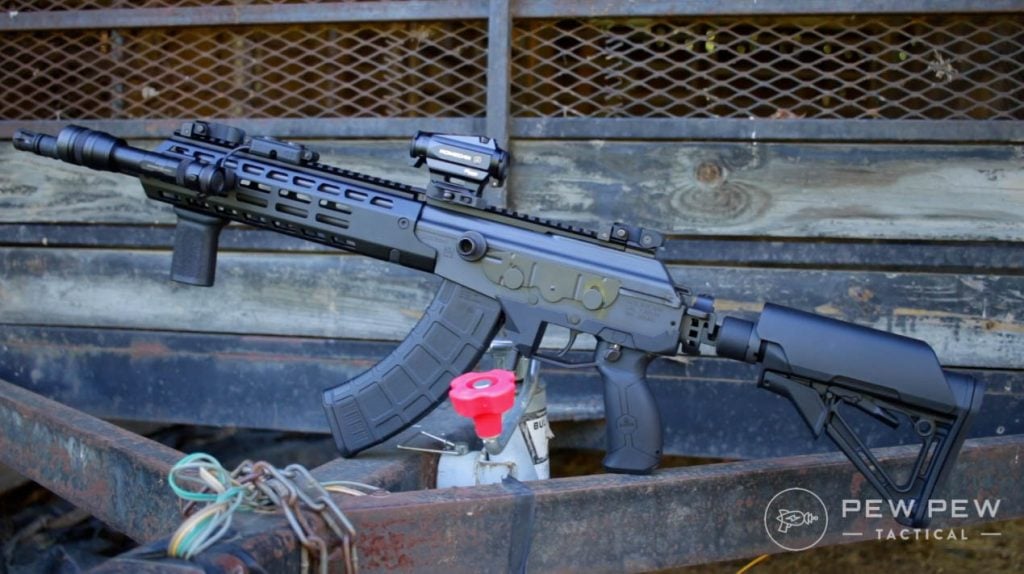
FN SCAR 17S
DSA FAL, Improved Battle Carbine Version

It uses a fantastic short-stroke, spring-assisted piston action that was very modern at the time. The system is still relevant today, allowing the FAL to stand shoulder-to-shoulder with much newer firearms.

The FAL is one of the most battle-tested rifles on the planet, and usually, the trigger is considerably better than most of the G3 options out there, which may lead to better practical accuracy.

FN SCAR 17S Shooting
The FAL has been fielded by over 90 countries worldwide. (Photo: Warfarehistorynetwork)

I love the FAL, and it’s one of those guns I think anyone looking to build a serious gun collection should have. For me, it sits slightly above the AK and slightly below the AR-10/15 in the pantheon of shoulderable small arms.

Of course, if you want one, you’ll have to talk to an importer and get a civilian one. For that, I recommend DSA SA58 lineup. DS Arms is one of few companies producing parts and accessories for the FAL, including complete rifles.

The SA58 is a solid recreation of the FAL that holds its own against the other non-AR .308s we’ve talked about in the accuracy department. Although modern versions of these guns tend to be pricier, hovering between $1,500 to $2,500, they are fun and steeped in rich history.

Check out our review of one of DSA’s modernized FAL variants here.

4. Springfield Armory M1A

Next up is the Springfield M1A. This is the civilian version of the iconic M14 — the rifle that trounced the AR-10 and FN FAL to become the U.S. Army’s primary battle rifle back in 1959 (however arguable those test results may be).

Springfield Armory M1As

The M14 is, of course, a fully automatic military rifle, but the Springfield M1A is a semi-automatic, civilian version sold by Springfield Armory in various configurations.

You can get everything from the short-barreled SOCOM version to 21-inch barreled sniper configurations designed to get as much accuracy as possible out of the gun.

Some would say that M1A isn’t a great rifle, but I would disagree. Much of the accuracy of these guns is derived from a quality barrel and the mating of the action to the stock. This means that repeated detail strips of the gun can affect accuracy, especially on the base models.

6 Best .308/7.62 Semi-Auto Rifles: Battle Ready
Springfield M1A with a Vortex Rifle Scope

Stepping up to the Loaded model that comes with the national match barrel is a good step in the right direction if you want those tighter groups. Fiberglass bedding between the action and stock will really let show you what a properly set up M1A can do accuracy-wise.

I own one in 6.5 Creedmoor, and I couldn’t be happier, but holy moly, do I want a .308 version. I just can’t quite justify the price for a second one, given that they run anywhere from $1,299 to $2,700, depending on trim level.

These rifles are a frequent sight on the field of competition, especially in service-rifle competitions. With classic ergonomics and excellent iron sights, the M1A lends itself well to shooting without optics.

The M14 is still used in a mostly honorary capacity by the U.S. military, with one or two exceptions — an especially notable one being its use by a number of competitive rifle teams from various branches.

While it may not be the best combat rifle or the cheapest battle rifle option these days, what it lacks, it makes up for in pure soul and fun. And if you aren’t sure which model is right for you, check out our ultimate guide to the best M1A models.

5. IWI Galil ACE Gen 2

Here comes the dark horse in the competition — the Galil ACE Gen 2 in 7.62×51 NATO. The first-generation Galil ACE was launched in 2008 but hasn’t been featured as heavily in the U.S. market, or video games for that matter, which kept it off many people’s radar.

6 Best .308/7.62 Semi-Auto Rifles: Battle Ready
Galil ACE Gen 2 Shooting

So what is it, you ask? In a nutshell, the Galil ACE is the ultimate refinement of the AK-47 platform. It uses the same long-stroke piston and rotating bolt design as the Kalashnikov and even sports a similar pop-off dust cover.

What does all that mean? It means you get the robust and proven durability of the AK platform, combined with the hearty build quality that IWI is known for. Sprinkle in a version chambered for 7.62 NATO, and you have a hell of a battle rifle.

6 Best .308/7.62 Semi-Auto Rifles: Battle Ready
Galil ACE Gen 1 and 2

IWI recently introduced the Gen 2 version of the ACE. Updates include an M-LOK handguard, AR-style buffer tube for use with your favorite stocks, improved 2-stage trigger, and improved ergonomics.

By virtue of using a long-stroke piston, the ACE is able to have a folding stock and fire when folded. It also sports a non-reciprocating charging handle on the left side. Additionally, its cold hammer forged barrel ensures good accuracy and long service life.

6 Best .308/7.62 Semi-Auto Rifles: Battle Ready
Galil ACE Gen 2

Although a bit heavier than the SCAR-17S or the average AR-10, the ACE is still manageable at 8.6 pounds. The ACE also benefits from using standard SR-25/AR-10 magazines.

These rifles are a bit pricier, around $1,700 to $2,000, but are far from the most expensive on this list. If you are looking for something modern that isn’t an AR-10, the ACE might be your ticket.

Want to know more about the platform? Check out our full review of the 7.62×39 Galil ACE or watch Johnny B’s video below.

6. FN SCAR-17S

We’ve already given a spot on this list to the FN FAL, but I’d be remiss if I left out one of the most popular modern .308 battle rifles around.

6 Best .308/7.62 Semi-Auto Rifles: Battle Ready
FN SCAR 17S

The FN SCAR-H is a 7.62x51mm monster of a gun designed to be as modular as possible and to serve a variety of uses. From being a CQB weapon for various door-kickers and SF units to a scout sniper and sniper support platform, the SCAR-H can do it all.

A SCAR-H is a fully-automatic battle rifle capable of laying down 600 rounds a minute while also reaching out to the utmost limits of what the .308 cartridge is capable of.

6 Best .308/7.62 Semi-Auto Rifles: Battle Ready

Meanwhile, the SCAR-17S is the civilian version that goes bang as fast as your trigger finger can manage to go back and forth, and that’s plenty fast enough for me.

This is as solid of a rifle as you can get. The civilian version ships with a 16.5-inch barrel, but you can swap them out by removing just a few screws, allowing you to slot in any number of aftermarket barrels, from 13 to 20 inches, depending on your needs.

It uses a modern version of the short-stroke piston FN developed for the FAL, and it is currently in service in 24 countries around the world in one capacity or another.

For the civilian shooter like you and me, we get something that’s as military-tested as any rifle can be and is as close to military spec (aside from the lack of select-fire capability) as we can get.

The trigger is…not perfect, but certainly better than the FAL. The good news is that there are a considerable amount of aftermarket trigger options. If you’re going to slap a 20-inch barrel on there and stretch the SCAR out to 800 yards or more, you might consider swapping the trigger out.

All in all, it’s one of the best modern battle rifles out there and is pretty perfect if you’re looking for a heavy-duty semi-auto. The price is steep, but hey, you are getting a modern military-grade firearm, and that doesn’t always come cheap.

Be sure to check out our review of the SCAR-17S or watch the full video review below and let us know your take.

Final Thoughts

That was a look at some of the awesome semi-automatic .308 battle rifles out there. I certainly enjoyed writing it, and I hope some of this was helpful. If you haven’t found your next purchase, then hopefully, you at least learned something interesting.

6 Best .308/7.62 Semi-Auto Rifles: Battle Ready
Choices Choices

What do you think of these rifles? Which one is your favorite? Thinking about getting one? Be sure to check out what to feed these beasts with our article on the Best .308 Ammo for Target Shooting, Plinking, & Hunting.

Best Air Rifle Deals

Popular Posts

How Far Can a .22 Air Rifle Pellet Travel?

0
"Unveiling the Power: Exploring the Distance Capabilities of a 22 Air Rifle Pellet. Discover the fascinating journey of a 22 air rifle pellet as...

Can a Felon Legally Possess an Air Rifle in Tennessee?

0
"Understanding the Legalities: Felon Ownership of Air Rifles in Tennessee" can a felon own an air rifle in tennessee? In the state of Tennessee, the ownership...

How Do Break Barrel Air Rifles Work?

0
A break barrel air rifle is a type of airgun where the barrel breaks open at a hinge point just above the breech. This...

5 Types of Air Guns You Need to Know Before Buying

0
Have you ever wondered how many types of air rifles are out there? Is your head spinning around with various powerplants and you don’t know...

Air Gun 101: How many types of Air Gun Sights are there and which...

0
The former American president, Joe Biden, was recently quoted saying: If you need more than ten rounds to hunt, you better stop that business and...