“Nothing shoots flatter, hits harder,” said Alaskan Master Guide Coke Wallace nonchalantly, though with a slight grin. Without missing a beat, I added, “Or is more accurate.” Many riflemen can just as easily recite Weatherby’s immensely successful marketing motto; however, atop a ridgeline in the 49th state’s rugged interior, and nearly a quarter mile from a downed mountain monarch, that message rang especially true. And, on the cusp of Weatherby’s 70th anniversary, it couldn’t have been conveyed any better than with Roy Weatherby’s original magnum big-game chambering—the .270 Wby. Mag. 
The BeginningsSimilar to that of bullet pioneer John A. Nosler, Roy Weatherby’s quest for “something better” had its origins in a failure in the hunting fields; in this case, it was a wounded—and ultimately lost—Utah mule deer buck in 1942. Reflecting on the unpleasant escapade, Weatherby pondered the virtues of high-velocity impacts; specifically, he theorized that total disintegration of the projectile maximized “shock,” even on less-than-ideal hits, and thus the result would be rapid expiration of the animal. Additionally, flatter trajectories and reduced time of flight reduced errors due to range misestimation and wind-driven bullet deflection, respectively. Weatherby’s thoughts on the matter first appeared in a rebuttal to a Sports Afield article entitled “Mania for Speed,” which was penned by Maj. Charles Askins. The result? A large portion of the magazine’s readers agreed with Weatherby’s beliefs, and some of them became his very first customers.
So began the Weatherby story.
According to Weatherby: The Man. The Gun. The Legend. by Grits and Tom Gresham, “By the time he started in business [1945], Roy had developed the .220 Rocket (based on the .220 Swift cartridge, with a changed taper and shoulder), the .257, .270, and .300 Weatherby Magnums.” Given the popularity of the .270 Win. at the time (and even now), it’s little wonder that the first of his proprietary magnum cartridges—developed in 1943—was a .270, too; however, his creation was a radical departure from normalcy. Weatherby first shortened the belted, .300 H&H Mag. case and greatly reduced its taper, thereby amassing additional space for propellant. Nosler Reloading Guide No. 7 reveals that the .270 Weatherby Magnum’s case capacity is approximately 82.0 grs. of water, which is about 17.4 grs. more than that of the Winchester cartridge. Next, he gave it an unusual, double-radius Venturi shoulder design, which, according to weatherby.com, “Increases the velocity of escaping gases without increasing the pressure within the cartridge, [and thus] results in higher velocity within standard pressure ranges.” Interestingly, whereas the .270 Winchester’s SAAMI-assigned maximum average pressure (MAP) is 65,000 p.s.i., once “adopted” in 1994, the .270 Weatherby Magnum’s MAP was set at 62,500 p.s.i.
Delving deeper, the .270 Win. has a maximum case length of 2.540″, so the .270 Wby. Mag. at 2.549″ is ever so slightly longer. Moreover, while the .270 Win.’s cartridge overall length (COL) is 3.340″, its Weatherby counterpart is a shorter 3.295″. The COL alone was instrumental in Weatherby’s initial success, as it was a relatively simple procedure to re-chamber an existing .270 Win.-chambered rifle for his brainchild; in fact, the process only required re-reaming the chamber and altering the bolt face diameter (0.473″ to 0.532″) and the magazine. Weatherby offered similar conversions from .300 H&H Mag. to his potent .300 Wby. Mag.
The aforementioned case characteristics all contributed to Weatherby achieving his vision, as when loaded with identical bullets, the .270 Wby. Mag.’s velocities bettered those of the Winchester by 150 f.p.s. to 400 f.p.s., depending on the projectile’s weight. The cartridge design alone was insufficient to achieve said velocities, however; Weatherby also had to extend the rifling-free “throat,” or “free bore,” considerably, thereby enabling greater velocity potential without excessive pressure. Currently, weatherby.com lists the freebore length of .270 Wby. Mag.-chambered Mark V rifles as measuring 0.378″. Additionally, typical barrel lengths were 26″ or longer, which permitted better consumption (or a more complete burn) of the propellant.
As previously mentioned, Weatherby desired “total disintegration” of the bullet. As cited in Gresham, in a letter to gun writer Sam Fadala, Weatherby wrote, “I am one who wants that bullet to completely disintegrate inside an animal’s body. It seems to do more damage, by far, than just normal expansion.” Given the standard “cup-and-core” construction of the majority of the projectiles available at that time (and even today), significant weight loss, if not outright disintegration, was relatively easily achieved at velocities approaching 3000 f.p.s.; however, Weatherby’s hotrod .270 eclipsed that number by a significant margin. For example, factory numbers reveal that most of Weatherby’s 130-gr., .270 Wby. Mag. loads typically attain in excess of 3300 f.p.s. In comparison, bullets of identical weight fired from a .270 Win. achieve around 3100 f.p.s.
Weatherby’s views on high-velocity impacts and the .270 Wby. Mag. weren’t based on conjecture either, but rather on experience. For example, as detailed in Gresham, on June 14, 1948, Weatherby wrote, “Doctor shot his waterbuck, a fine one, too, with my .270 Magnum, about 150 yards. The waterbuck went down with a shoulder shot. When we skinned this fellow out, one could hardly imagine an animal being able to move after being shot the way he was with that .270 Magnum—he was torn up inside terribly.” Furthermore, on June 21, 1948, Weatherby reflected, “One thing is sure and that is—the bullet must be traveling at a certain velocity when it hits the animal in order to kill it by shock, no matter where it hits. I must find out at what distance or the velocity the bullet must hit the animal so that the shock instantly kills it. The .270 Magnum with the 150-grain Core-Lokt is not it—at least it has not proven to be so far. I am convinced at this point the 130-grain .270 bullet is superior at almost any point.” Ultimately, Weatherby concluded, “Of course, velocity means greater killing energy at greater distances—it also means more shock and greater destruction, but there is no substitute for the right spot … .” 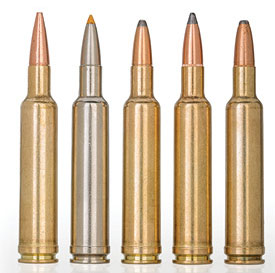
Closing The DistanceFrom 1945 until 2002, when Winchester introduced the .270 Winchester Short Magnum (WSM), the .270 Wby. Mag. had reigned supreme in the realm of commercially available .270 chamberings—though it was considered proprietary until adopted by SAAMI in 1994. Following on the heels of its .30-cal. sibling, the .300 WSM, which was unveiled in 2001, the .270 WSM features a short, 2.100″-long non-belted case that, when loaded to a maximum COL of 2.860″, enables it to be chambered in lighter, short-action rifles. Despite its squat appearance, the case has minimal taper—from 0.555″ at the web to 0.538″ at the start of the shoulder—and a sharp, 35-degree shoulder that maximizes capacity. In Nosler Reloading Manual No. 7, the company lists its capacity as being about 73 grs. of water, which is approximately 9 grs. less than that of the .270 Wby. Mag. Because of its 65,000-p.s.i. MAP, though, the .270 WSM’s achievable velocities with most bullet weights are relatively close to those of Weatherby’s .270; the difference is usually within 125 f.p.s. or less. One must realize, though, that whereas the .270 Wby. Mag. is typically tested with a 26″ barrel, the .270 WSM is clocked from a 24″ tube, so direct comparisons are somewhat apples-to-oranges affairs. Is this enough to account for the velocity difference? Perhaps.
Really “muddying the waters,” if you will, concerning .270 supremacy, was Hornady’s introduction of Superformance ammunition. Through the formulization of highly progressive propellants, the company was able to achieve velocity increases upward of 200 f.p.s. from standard chamberings. The .270 Win. was among them; in fact, the 130-gr. loads attain 3200 f.p.s., which is 150-f.p.s. faster than SAAMI spec for “standard” loads and within 75 f.p.s. of .270 WSM loads using the same bullet weight. Interestingly, this is recorded from 24″ barrels in both chamberings, so it is a just comparison. Moreover, given that the .270 Win. has 9 grs. less case capacity, that is quite a remarkable feat. Since then, Remington has introduced its own “higher-than-normal-velocity” ammunition called “HyperSonic,” so the trend is building.
Taking the aforementioned into account, where does the .270 Wby. Mag. stand? There’s no doubt that, among the commercially available .270 chamberings, the Weatherby Magnum is still the fastest. That being said, the margin by which it’s ahead isn’t nearly as great as in the past; many .270 Win. and .270 WSM offerings are less than 100-f.p.s. slower than comparable .270 Wby. Mag. offerings. But, the growth of “long-range” hunting and shooting and leadless bullets gives the edge to the .270 Wby. Mag. Specialty “long-range” and long-for-weight lead-free projectiles occupy considerably more usable propellant space than their standard counterparts, which plays to the .270 Wby. Mag.’s voluminous case. Take the Nosler 150-gr. AccuBond Long Range (ABLR) for example, which measures an impressive 1.425″. Despite the bullet’s incredible length, the .270 Wby. Mag.’s case still has ample space for the propellant needed to achieve high velocities—an important factor in reducing drop and wind deflection (less time to target means less exposure to environmental conditions). Higher retained velocity also yields increased on-target energy. Remember, outside of long-range-specific bullets, most big-game bullets’ lower velocity limit for reliable expansion is 1800 f.p.s., so any increase is appreciated.
The .270 Weatherby Magnum’s ForteIn May 2013, I learned that I would be fortunate enough to hunt Dall sheep with Midnight Sun Safaris the following August. Although selecting the appropriate pack, boots and clothing would prove to be challenging, choosing the caliber, rifle and optic did not. Given the arduous climbing that would take place daily, cutting kit (and personal) weight was essential, as every ounce counts. Moreover, what better way to celebrate the upcoming 70th anniversary of Weatherby, Inc., than to use the Mark V Ultra Lightweight in Roy Weatherby’s first magnum chambering? The .270 Wby. Mag. is, after all, perhaps the best-suited option for sheep in the entire line. In discussions with Justin Moore, internet marketing manager for Weatherby, Inc., however, he suggested that I use the company’s valued-priced (soft-point), spitzer load (see sidebar p. 53). A flat-base “cup-and-core” bullet for sheep? To say I was surprised would be an understatement. “Trust me,” said Moore. Lastly, a Trijicon 3-9X 40 mm AccuPoint in Leupold rings and bases topped the rig.
After two days in transit, including a magnificent train ride from Anchorage to Denali National Park, our group was picked up at the train station by Coke Wallace, and the subsequent morning we were ferried via a single-prop airplane to “Moody International,” which is what Wallace named base camp. After confirming the scopes’ zeroes, we were prepared (or so we thought) for what lay ahead; boy, were we wrong. The next day proved to be the most difficult that I had ever encountered. During the 10-plus-hour arduous ascent toward a large band of rams, more than once I appreciated my choice of rifle. Despite our full effort, the rams evaded us, which lead to a long, tiresome and wet walk back to the horses; however, with it approaching 1:30 a.m. the next day, physically and mentally exhausted, drenched to the bone, and still about a half-mile from the horses, we decided to stop and start a fire to warm up and rest. It was the coldest night I’ve ever experienced. Welcome to sheep hunting!
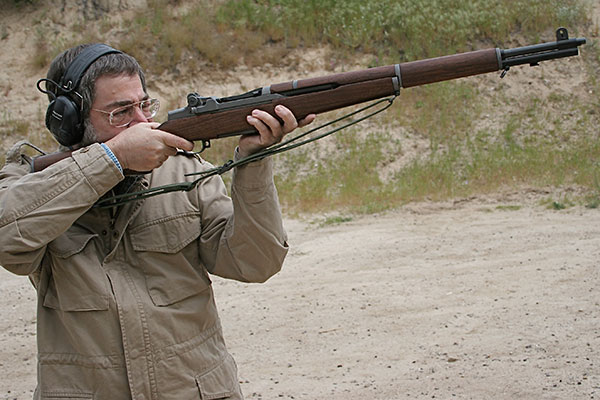
 After reaching the horses midmorning on day two (in a pouring rain no less), we headed for base camp, where we regrouped for the subsequent morning’s hunt. On day three, shortly after arriving in an unexplored drainage, Wallace and fellow guide Justin Cox spotted five rams near the top of a distant ridgeline. A Swarovski spotting scope confirmed that one ram met the stringent criteria for being legal to shoot. With cartridges in the magazine, but not chambered, Wallace, Cox, Moore and I began an ascent that, because of the rams’ vantage point, forced us to alternate approaches on several occasions. After more than an hour of climbing, we were finally within striking distance. Careful not to skyline ourselves, Cox and I crawled in advance of the others to reach a predetermined location for the shot. Just prior to exposing myself to their excellent eyesight, I chambered a round and deployed the Harris bipod. As I did so, Cox confirmed that the rams were 375 yds. away; however, because a younger (non-legal) ram stood nearby the elder one, I would have to wait for a shot. Finally, the immature animal moved a safe distance to the right, enabling me to take a shot. Having memorized the “drops” and drift at various distances, and with a 10-m.p.h. full-value crosswind, I applied the correct dope and pressed the trigger. At the shot, the ram bounded forward and stood motionless. Thinking that I had missed, I cycled the bolt and sent another soft point downrange, at which point the ram dropped and began an uncontrollable fall into what would prove to be a difficult-to-reach crevasse.
After reaching the animal more than an hour later, it was revealed that the first shot entered about 6″ behind the right shoulder and exited about 2″ behind the other, while the second shot entered about 2″ behind the right shoulder and exited through the left shoulder; in other words, both were lethal hits. Inside, there was considerable damage to both the lungs and the heart. I couldn’t have asked for better performance from a bullet at any price point. In addition to getting a beautiful trophy, the ram provided the finest meat that I’ve ever eaten, all thanks to Roy Weatherby’s .270—his original magnum and still among the best for long-range hunting.
Weatherby 130-gr. Spitzer Ammunition 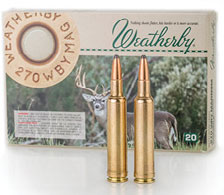 High-quality ammunition generally carries an equally premium price tag, and that reality is among the most difficult things for non-handloaders and the less-well-heeled to overcome in shooting Weatherby cartridges. Fortunately, a few years ago the company began offering an economical line of soft-point ammunition. Much of the cost of Weatherby ammunition comes from Norma purchasing premium, American-made bullets, having them shipped to Sweden, loading them and then transporting the ammunition back to America. While the Norma plant waits for said bullets to arrive, there can be down times in production. But, because the company also manufactures bullets, the decision was made to load its standard, cup-and-core spitzer bullets into Weatherby cartridges. And, because no purchasing or shipping costs (to the facility) are incurred, the savings can be passed on to the consumer. In fact, the loads (available in .240 Wby. Mag., .257 Wby. Mag., 270 Wby. Mag. and .300 Wby. Mag.) retail for $43 per 20 rounds, though I’ve seen them on midwayusa.com for $38. That is about half the price of the company’s premium offerings. As for the .270, the bullet, which has a .359 ballistic coefficient, is rated as reaching 3280 f.p.s. Given its non-bonded construction and the fact that there’s no built-in “mechanical lock,” considerable expansion is assured. For game up to and including caribou, these value-priced bullets are a good option. They certainly worked well for my once-in-a-lifetime shot on a Dall sheep.—Aaron Carter
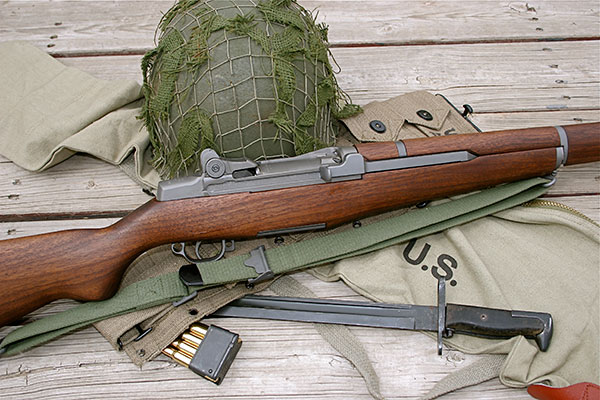
.270 Wby. Mag.-Chambered RiflesAlthough there have been various rifles chambered for .270 Wby. Mag. through the years, including the Winchester Model 70 and Ruger No. 1, today, most are found within the American-made Weatherby Mark V line. Though the cartridge has yet to be released in the economical, Japanese-manufactured Vanguard Series II rifles, I am hopeful that will soon change. Mark V-series rifles chambered in .270 Wby. Mag. are: Ultra Lightweight and RC, Accumark, Deluxe, Lasermark, Sporter, Fibermark Composite, Euromark, Accumark RC, and Terramark RC. Among the newest is the Ultra Lightweight RC, which made its debut in 2014 and has a hand-laminated, raised comb Monte Carlo-style stock, 26″ free-floated stainless barrel with target crown, CNC-machined 6061 T-6 aluminum bedding plate, and six- or nine-lug fluted body bolt, depending on the chambering selected. 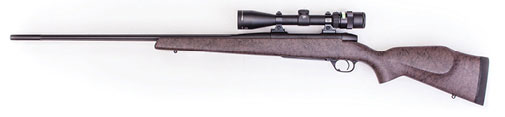
After the hunt, I spent considerable time at the range to wring out the aforementioned rifle; in total, I expended more than 200 rounds in meeting the American Rifleman accuracy protocol and function-testing. Of the four loads tested—Weatherby 130-gr. TSX, 130-gr. Spitzer and 150-gr. Partition, and Norma USA 150-gr. Oryx—the most accurate proved to be the 150-gr. Partition, which averaged 1.07″ for five consecutive, five-shot groups. The other loads averaged 1.22″ (130-gr. TSX), 1.40″ (130-gr. Spitzer) and 1.57″ (150-gr. Oryx). Recorded by an Oehler Model 36 chronograph at 13 ft., the velocities were: 3103 f.p.s., 3419 f.p.s., 3339 f.p.s., and 3160 f.p.s., respectively. The Mark V Ultra Lightweight RC retails for $2,400. The least-costly Mark V is the Fibermark, which retails for $1,400. Outside of Weatherby, Inc., .270 Wby. Mag.-chambered rifles can also be had in the E.R. Shaw Mark VII. Assuredly other custom builders will offer the chambering as well; however, they may, or may not, include Weatherby’s lengthy freebore. That is worth inquiring about.—Aaron Carter
")
")
")
")
")