So, you’ve decided to hunt squirrels with a 22 rimfire rifle, and are now searching for the best scope for 22lr squirrel hunting? Listed below you will find my top 8 scope suggestions for a .22 caliber squirrel rifle.
However, like most anything these days, there is a wide range of opinions online about which rifle scopes are ideal or the best for squirrel hunting. I bet if you asked ten different squirrel hunters to name their favorite rifle scope for squirrel hunting, you’d hear ten different answers.
I’m no different than anyone else in terms of having an opinion, except that I’m an avid squirrel hunter myself. While I enjoy all types of hunting, squirrel hunting with a rimfire rifle is still one of my absolute favorite types of hunting, and I try to go as much as my schedule allows.
Because of my love of squirrel hunting, some of the scope suggestions that I make may not be the same as what you may see online as I’m basing those suggestions on real-life experience.
While the 22LR is still my favorite squirrel hunting round, I also occasionally hunt squirrels with other calibers, including a 17 HMR and a 17 Mach II. As I prefer to hunt with a suppressed rifle, most of my squirrel hunting is done with a suppressed .22LR. While I have suppressed 17 HMR rifles and suppressed 17 Mach 2 rifles, the old fashion .22 is still the quietest to shoot.
When it comes to small game hunting, few species are as popular as the squirrel. Squirrels are plentiful, not as complicated to hunt as some big game species, and make for a challenging quarry due to their size and erratic movements.
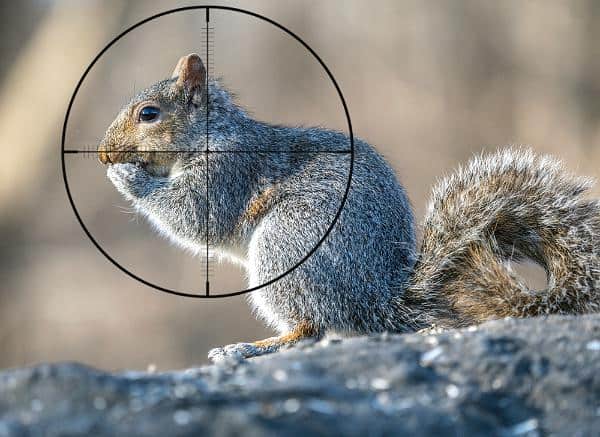
Some people would argue that squirrels don’t pose much of a hunting challenge, but I’m not talking about the semi-tame squirrels that inhabit the local city parks. I’m talking about hunting wild squirrels that are wary of any predator. Squirrels have above-average eyesight (for a game species), outstanding hearing, and will flee or hide at the slightest hint of danger.
The venerable 22LR rifle is still the go-to rimfire caliber for squirrel hunting based on the following factors:
- The overall popularity of the 22LR caliber
- The availability of decent 22LR ammunition
- The accuracy potential of the caliber
- The availability of rifles chambered in the 22 LR caliber
Each scope that I’ve suggested as a possible 22 caliber squirrel hunting scope has both pros and cons. Let’s get into why I think each of the rifle scope models below is a good option for a squirrel hunting 22LR rifle, and then I’ll go over what to look for in a 22LR squirrel rifle scope in the buyer’s guide down below.
Leupold FX-3 6X
No list of top recommended squirrel hunting scopes would be complete without mentioning a fixed power scope model, and this Leupold FX-3 scope in 6X power fits the bill.
The big selling point with fixed power scopes is simplicity. There are no power dials to turn, no parallax to adjust, no setting to change. You look through the scope viewfinder, put the crosshairs on the squirrel, and pull the trigger.
Sure, there are less expensive fixed power scopes on the market, but this Leupold scope features something those other models don’t have, and that’s outstanding glass. The optical quality of this scope is exceptional for a fixed power model, which is a significant selling point.
Also, like most fixed power scopes, the FX-3 is lightweight at 13.6 ounces, and compact with a length of 13.2 inches.
Most fixed power scopes also offer a wide Field of View (FOV) compared to their adjustable power counterparts, and the FX-3 is no different, offering a staggering 17.3 feet of viewing area at 100 yards.
But like any scope, the FX-3 has the following pros and cons:
Pros Cons Excellent optical clarity and brightness
Is backed by Leupold’s fantastic warranty program
The glass quality makes it excellent for low light shooting at dusk and dawn
Pricey for a fixed power scope (but worth the cost in my book)
This scope features a non-adjustable focus that is factory set at 150 yards.
The FX-3 series is only available with one reticle option, which is a duplex. Other reticle options would be helpful.
Here are the best sales and deals I could find on the Leupold FX-3 scope:
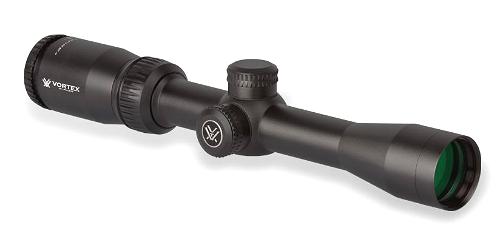
Vortex Crossfire II 2-7×32 Rimfire
If you’re searching for a lightweight and compact variable powered scope for squirrel hunting, then the Vortex Crossfire II 2-7×32 Rimfire scope might be worth a look. The 2-7 power range offers sufficient magnification to comfortably take shots at squirrels at distances up to 50 yards.
Built on a 1-inch tube and weighing in at 14.3 ounces with a length of 10.7 inches, the Crossfire II Rimfire model is specifically marketed as a compact scope built for the .22LR.
This scope is only available in Vortex’s V-Plex reticle and features a fixed 50-yard parallax setting. While I prefer a parallax or focus that will adjust down below the 50-yard mark, I can make do with a fixed 50-yard parallax in this power range.
I like the V-Plex reticle but would also prefer that Vortex offered this scope in a version with the Deadhold BDC reticle as that would potentially provide the shooter the ability to push shots out past the 50-yard mark using the BDC function.
Here are a few pros and cons for the Crossfire II 2-7×32 Rimfire scope:
Pros Cons Lightweight but very durable
Covered under Vortex’s excellent warranty program
The 2-7 magnification range offers enough magnification for the typical shooting distances seen in squirrel hunting.
A very budget-friendly scope option
Fixed 50-yard parallax (I’d prefer an adjustable parallax that would focus down to 25 yards)
Limited to 1 reticle option, and I’d love to see this scope with the DeadHold BDC reticle.
Here are the best deals I could find on the Vortex Crossfire II 2-7 scopes:
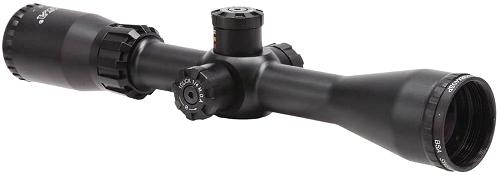
BSA Sweet 22 3-9×40
If you’re in the market for a 22LR scope that offers integrated BDC (Bullet Drop Compensator) functionality, then the BSA Sweet 22 in a 3-9×40 configuration might be worth checking out. All the BSA Sweet 22 scope models feature integrated BDC functionality for the 22LR based on the bullet weight.
This scope comes with a multi-grain turret that works with the more popular 22LR bullet weights. Once you sight the scope in using the turret settings that match your bullet weight, you can use the BDC function to shoot out to a maximum distance of 200 yards. Now, I’m not advocating that you try a shot at that distance on a squirrel, but this scope can undoubtedly get you shooting at squirrels accurately out past 75 yards or so.
BSA is typically known as offering entry-level or budget-friendly scopes, so this Sweet 22 model won’t hammer your wallet. Built with multicoated optics, the optical quality is about what you would expect of a rifle scope in this price range.
One of the features that I like about this scope is the side focus that will focus down to 8 yards, which is a beneficial feature in the squirrel woods.
However, the BSA Sweet 22 scope isn’t perfect so here are the things I like and don’t like:
Pros Cons Built-in BDC for the most popular 22LR bullet weights
Side focus that focuses down to 8 yards
An affordable option for the squirrel woods
The optical quality is average at best
Comes with a minimal warranty
Listed below are the best deals and specials I could find on this BSA scope:
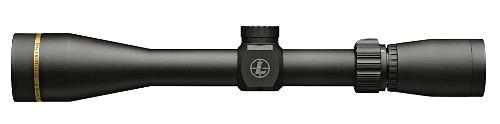
Leupold VX-Freedom Rimfire 3-9×40
If the Leupold FX-3 fixed power scope I mentioned above is too pricey for your wallet, but you still are interested in buying a Leupold, then have a look at the Leupold VX-Freedom Rimfire model. This scope is a 3-9×40 scope that is made specifically for a 22LR rimfire rifle.
The VX-Freedom series of scopes feature bright and clear glass, along with the durability that is expected of a Leupold.
With a weight of 12.5 ounces and a length of 12.3 inches, the VX-Freedom Rimfire scope is an ideal option for squirrel hunting with a 22 rifle. This scope is equipped with a 60-yard fixed parallax, coupled with Leupold’s Rimfire MOA reticle.
I’m also a fan of the Leupold VX Freedom EFR 3-9×40 scope for squirrel hunting, but it costs twice as much as the Rimfire version. The EFR model features an adjustable focus that will go down to 10 yards, but I’m not sure that feature is worth a 2X price tag.
Here are a few pros and cons with the VX Freedom 3-9×40 Rimfire scope:
Pros Cons Excellent optical quality for a scope in this price range
Dedicated Rimfire reticle with built-in holdover points
Well-built and covered by the Leupold warranty
Fixed 60-yard parallax (I’d prefer an adjustable parallax that will at least focus under 50 yards).
Features an eye relief that is under the 3″ mark, making it a dedicated rimfire scope only.
While the Rimfire MOA reticle features holdover marks, the shooter has to invest the time to learn the holdover points on his or her own.
Listed below are the best prices and deals I could find on the Leupold VX-Freedom Rimfire 3-9×40 scope:
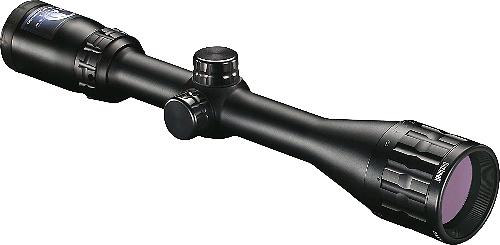
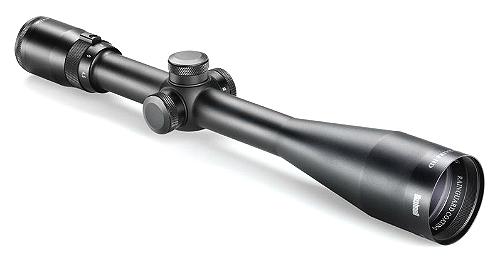
Bushnell Banner Rimfire 4-12×40 Riflescope
The Banner series of rifle scopes from Bushnell was is explicitly built for rimfire shooters and offers excellent value in terms of price and performance. The 4-12×40 Banner Rimfire model features fully coated lenses for clarity and brightness, blended into a compact optic.
Built on a 1-inch tube, the Banner Rimfire also features an adjustable objective that that will adjust down to 10 yards. The adjustable objective, paired with Bushnell’s Multi-X crosshair reticle, makes this scope ideal for hunting bushy tails.
Like most Bushnell scopes, the Banner Rimfire model offers an excellent Field of View of 29 feet at 4X power and 11.5 feet on 12X power.
Here are a few pros and cons associated with this scope model:
Pros Cons The adjustable objective will focus down to 10 yards, which is very handy when a squirrel pops up on the tree beside you.
This scope offers an excellent performance to cost ratio as its budget-friendly
The optical quality is about what you would expect for a scope in this price range.
While the AO parallax is a plus, I wish Bushnell would offer this model with side focus.
This scope is more of a dedicated rimfire scope as it’s not really built to withstand the long-term recoil of a centerfire rifle.
Here are a few locations I found some good prices on this Bushell Banner Rimfire scope:
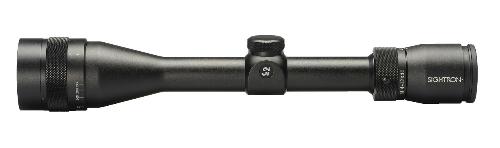
Sightron SIH 4-12X40
I’ve always considered the Sightron line of rifle scopes to be a sleeper brand in the scope industry as they don’t do a ton of marketing and are not usually sold in big box outdoor brands (think Cabela’s, Bass Pro, etc.). As such, I’m betting that you won’t see Sightron mentioned very much in any other lists of recommended squirrel hunting scopes.
The Sightron S1H Field and Target line of scopes is a lower-tiered series within the Sightron line that is made for target and hunting uses. The S1H 4-12×40 scope is built on a 1-inch tube and features an adjustable objective that will focus down to 8 yards.
The scope offers fully multicoated lenses, is shockproof and waterproof. Sightron purges this model with Nitrogen to eliminate any internal fogging or condensation.
My two favorite S1H 4-12×40 models are the duplex reticle version and the mil-dot reticle version. While most squirrel hunters opt for the duplex reticle, I prefer the mil-dot reticle because I can use it as a duplex or use the mil-dots as holder over points for longer range shots.
Pros Cons This series is available in 4 different reticles, which means there is a reticle for almost every squirrel hunter.
This model holds zero exceptionally well even with heavy use.
The 4-12 power range is ideal for squirrel hunting in early or late season conditions.
Weighing in at nearly 18 ounces, this scope is a bit heavy for a 4-12.
It comes with the cheapest flip-up lens covers I’ve ever seen.
Here’s a list of the best deals and specials I found for the Sightron S1H 4-12×40 scope models:
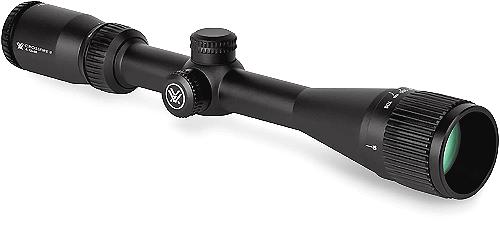
Vortex Crossfire II 4-12×40
 The Crossfire II series of scopes is one of Vortex’s workhorse series that is built for performance on an entry-level budget. The Crossfire II scopes come in a variety of configurations, but the 4-12×40 is one of my favorites for a 22LR squirrel rifle.
Like all the Crossfire II scope models, the 4-12×40 is equipped with multicoated lenses to enhance the light transmission and fast-focus eyepiece.
This scope is built on a 1-inch tube and features an adjustable objective that will focus down to 10 yards. In addition to the 40mm version of this scope, Vortex also offers a 4-12×50 model as well.
The 4-12×40 model is available in two reticle configurations: the popular DeadHold BDC reticle, and the V-Plex reticle. Both work just fine for squirrel hunting, although I’m partial to the Deadhold BDC reticle as I like its versatility. The Deadhold BDC can be configured to work with most any .22LR round and can potentially extend your shooting distances on squirrels.
No scope is perfect so here are some pros and cons of the Crossfire II 4-12×40:
Pros Cons This scope is built like a tank for durability
The AO will focus down to 10 yards
The BDC reticle can be configured to work with a .22LR.
Weighing nearly 20 ounces, this scope is a bit on the heavy side for a 4-12.
The V-Plex reticle option can be hard to find.
If you’re shipping for a Vortex Crossfire II 4-12×40, then here are a few decent deals I located:
Bushnell Engage 3-12×42
The Engage series is a mid-range line of scopes made by Bushnell. While the Engage is offered in a variety of different power magnifications, the 3-12×42 model is an ideal choice for squirrel hunting with a rimfire.
The Engage scopes come with multicoated lenses for optimum light transmission and clarity, coupled with Bushnell’s patented EXO Barrier lens coating for advanced protection.
This model features side focus with the ability to focus down to 10 yards. Unlike most of the other scopes on this list, the Engage is built on a larger 30mm tube so that it will require 30mm scope rings.
This scope is only available with Bushnell’s Deploy MOA reticle, which works fine for squirrels, but might be a bit confusing at first if you are accustomed to a standard duplex reticle.
Here are a few other pros and cons of this Engage scope:
Pros Cons Side focus down to 10 yards
Good quality glass for the money
While I like 30mm scopes, they add weight as this model weighs in at nearly 20 ounces.
This scope is limited to only one reticle choice. I wish Bushnell would add a few more reticle options to the Engage scope line.
Here’s a list of the best deals and offers I could find for the Bushnell Engage 3-12×42 scope:
Honorable Mentions
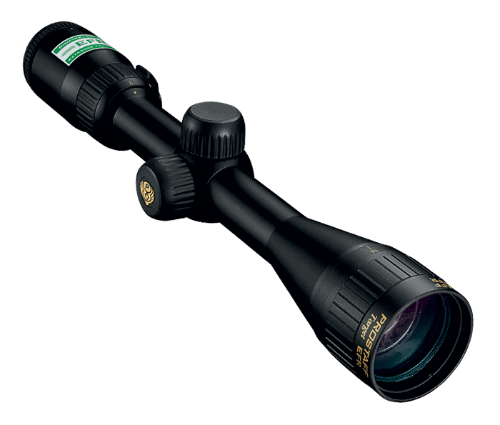
Nikon Prostaff EFR Target Rimfire 3-9×40

The Nikon Prostaff EFR Target Rimfire was designed for rimfire rifles, so it was an ideal option for a squirrel rifle.
The EFR acronym stood for Extended Focus Range and was Nikon’s designation for any scope that would focus down below the standard 50-yard mark. While most Nikon scopes have a default parallax setting of 50 yards, the EFR model featured an adjustable objective that would focus all the down to 10 yards.
The EFR Target Rimfire became a very popular scope for squirrel hunters thanks to its adjustable parallax, excellent optics, and NikoPlex reticle.
This scope is listed as an honorable mention as Nikon is out of the rifle business, and the EFR Target Rimfire scope was discontinued.
This model is tough to find these days with one showing up here and there online.
Here are the only Nikon EFR 3-9X40 models I was able to locate:
Bushnell Legend Ultra HD Rifle Scope 4.5-14x 44mm
This scope was part of the Legend Ultra HD series from Bushnell and was an absolute sleeper of a scope. While it was available in a few different configurations, my favorite was the 4-14×44 with either a duplex reticle or mil-dots (which is my personal favorite).
This scope featured Bushnell’s ED Prime lenses, which were amazingly clear and bright for a scope in this price range. This scope also featured a side focus that would focus down to 10 yards and top-notch adjustments that could withstand a beating.
I liked this scope so much that I ended up buying more than one, and still have a few on different squirrel rifle set-ups.
Unfortunately, Bushnell opted to discontinue the entire Legend Ultra HD line, which is why this model is listed as an honorable mention.
This scope is very tough to find these days as they became even more popular after they were phased out.
Here are the only ones I was currently able to locate for sale:
Buyer’s Guide for 22LR Squirrel Hunting Scopes
Here is a guide that offers some advice about what to look for when choosing a scope for a 22LR squirrel hunting rifle. Keep in mind that these are just suggestions, and your best bet is to tailor these recommendations to your own needs.
The Best Scope Magnification for Squirrel Hunting
When you start researching the best scope power range for squirrel hunting, or the ideal scope magnification for squirrel hunting, you’re going to see a wide variety of suggestions and recommendations. Those suggestions will most likely include some fixed power scopes, some 2-7 scopes, quite a few 3-9 scopes, and some power ranges that are in the 4-12 to 4-16 power range.
The best answer is this one: The ideal scope magnification for squirrel hunting is the one that best suits the type of squirrel hunting that you do, and the scope power range that is most effective for you. The truth is, there is no one-size-fits scope magnification range that works equally well for every squirrel hunter out there.
The most common power range suggested for squirrel hunting is most definitely a 3-9 power for two reasons:
- The 3-9 power range is the most common and most popular power range that is currently on the market.
- For many squirrel hunters, the 3-9 power range of magnification offers sufficient magnification to meet “most” squirrel hunting needs
Does that mean that a 3-9 scope is the best bet for you? That’s hard to answer without knowing more details about the type of squirrel hunting you do, what type of shots you usually take, etc.
Let’s take me, for example. I prefer to still hunt for squirrels by picking a location and sitting for long periods. With that approach, I don’t tend to move all that much and am comfortable taking shots at distances over 50 yards. I also have terrible vision, with my dominant eye being much weaker than my non-shooting eye. So, when I close my right eye to shoot through a scope, my vision goes from a corrected 20/20, down to about 20/80 in my shooting eye.
Couple the lousy vision with my desire to try for only headshots to preserve the meat, and you’ve got the ideal recipe for a whole bunch of misses on my part. For those two reasons, I’ve always gravitated towards higher-powered scopes for my squirrel rifles. As I’ve gotten older, I’ve moved away from all 3-9 rifle scopes because they just don’t enough power for my not-so-great vision.
I’m perfectly comfortably shooting a 4-14 or higher power scope on a 22LR squirrel rifle as I’m shooting for a head at distances out to about 75 yards.
Obviously, my situation is unique, but that story illustrates my point that you should use whatever power scope meets your needs, your budget, and is most effective for you.
Parallax or Side Focus for a Squirrel Hunting Scope
To me, scope parallax is one of the most misunderstood and misused terms in the rifle scope industry. The simplest way to define scope parallax is when the target and the reticle are on different planes within the scope. This situation results in the scope reticle appearing to move around the target.
Parallax also plays a role in focusing the target within the scope based on the distance to the target.
Most rifle scopes have one of two parallax or focusing configurations:
- A fixed parallax that is non-adjustable and factory set for a specific distance. With most fixed parallax scopes, the factory preset distance is 100 yards.
- An adjustable parallax scope where the parallax can be adjusted using either the objective (which is commonly called an adjustable objective) or via a side focus configuration.
With adjustable parallax scopes, the parallax settings have a minimum distance in yards, and then most also have a maximum parallax distance of infinity. So, when you see a scope with an adjustable objective that goes from 25 yards to infinity, this means the parallax on that scope will only focus down to a maximum of 25 yards but will focus up to infinity.
So, what does all this talk of parallax or side focus have to do with a squirrel hunting scope?
Good question, and here’s why this is relevant to squirrel hunting:
Compared to big game hunting, most shots taken at squirrels are relatively short range, with the average distance being 25 yards to 45 yards. If you are using a scope with a parallax that bottoms out at 50 yards, and you’re trying to shoot a squirrel at 25 yards, the image of the squirrel in the scope won’t be crisp and clear. It will most likely be a little bit blurry and out of focus. And the higher the magnification on the scope, the blurrier that the target will become.
That’s why I prefer to use a scope with a focus/parallax that will adjust down to at least 25 yards or so. That way, the target squirrel in the scope is clear and identifiable.
Now, does that mean that you shouldn’t buy a scope for squirrel hunting that won’t parallax down past 50 yards?
Not necessarily as the parallax focus distance is only really a problem at higher magnification. So, if you had a 2-7 power scope with a fixed 50-yard parallax, you would barely notice the slightly out-of-focus squirrel in the crosshairs as the distortion would be minimal. However, if you’re trying to shoot that same 25-yard squirrel with a 4-14 powered scope with a fixed 50-yard parallax powered up to 14X, then you’ll notice the image distortion.
Sighting in a .22 for Squirrel Hunting
The process for sighting in a 22 for squirrel hunting is about the same as sighting in any rifle or shotgun. The only real difference is the sight-in distance, and opinions vary on the “ideal” distance to sight in a .22 for squirrel hunting. Some say 35 yards is the best distance, while others suggest 40 yards, and some say 50 yards is the perfect sight-in distance for a .22LR.
I prefer to use 50 yards as my sight-in distance on a .22 rifle for squirrel hunting. I like that sight-in distance as I know that I’m dead on at 50, about ½ an inch low between 49 and 35 yards, and 1 inch or so low at 34 to 20 yards. For anything under 20 yards, I need to hold about an inch high. Again, I’m not saying that’s the best sight-in distance for you; it is just what I find works best for me.
If you find that the bulk of your shots at squirrels occurs at a shorter distance, like 25 yards, then maybe it makes sense to sight your 22 rifle in for maybe 35 yards versus 50 yards.
What’s the Best rimfire scope for squirrel hunting?
I am asked this question at my day job reasonably often, but it’s a hard question to answer because, while most people use the word “rimfire” to mean a .22, the rimfire category includes several other calibers besides the .22.

Technically, a rimfire cartridge includes the following calibers:
- .22 LR
- 17 HMR
- 17 HM2
- 17 PMC
- 22 TCM
- 5mm
- 17 WSM
Some of those calibers, like the 17 HMR and 17 WSM, offer entirely different ballistics compared to the .22 LR and will shoot much farther and flatter. Due to the improved ballistic performance of those calibers, they are better served with a higher magnification scope versus what is suggested above for the .22.
While I also hunt squirrels with a 17 HMR and 17 HM2, those rifles are scoped with a minimum power magnification of 4-20 or up.
So, it’s tough to suggest a single best scope model for a rimfire caliber as those calibers feature a wide range of ballistic performance.
FAQS
Here are some frequently asked questions that I see and hear ay my day job regarding the best scope for squirrel hunting:
What’s the best Leupold scope for squirrel hunting?
I like many different Leupold scopes for squirrel hunting, but, for a .22LR, take a look at the Leupold scopes I suggested above.
The one suggestion that I’ll make about Leupold scopes when it comes to squirrel hunting is looking for a Leupold model with either a fixed focus around the 50-yard mark or one of their EFR models that will focus down to 25 yards or so.
Do I need an illuminated scope for squirrel hunting?
An illuminated scope is not mandatory for squirrel hunting, but it can be helpful in low light hunting situations. And, if you think about when squirrels are most active, it’s first light and near dusk, which are both low light scenarios.
I have both illuminated and non-illuminated scopes on squirrel rifles and regularly hunt with both. While I like the illuminated reticle option, most of the rifle scopes on my squirrel hunting rifles are non-illuminated.
What about a scope vs red dot for squirrel hunting?
For starters, if you’re thinking about using a red dot on your 22 rifle for squirrel hunting, I’d strongly suggest that you check your state and local hunting rules and regulations as not every state will allow the use a red dot for hunting purposes.
I tried hunting squirrels with a red dot scope mounted on a 22 rifle once and just did not care for it. The red dot did not offer enough magnification for my needs and made precise shots nearly impossible at any distance over 25 yards.
If you’re choosing between a red dot or a scope for squirrel hunting, I would recommend a rifle scope as a much better option.
What about a fixed power scope for squirrel hunting?
When I first started squirrel hunting as a teenager, I used a fixed power scope, and have fond memories of those squirrel hunting experiences.
Fixed power scopes make excellent scope options for squirrel hunting, as they are easy to operate, easy to understand, and very effective.
If you prefer a fixed power scope over an adjustable scope for your squirrel rifle, I encourage you to take that path. There are several well-made fixed four power or fixed six power scopes on the market that are excellent options for a 22LR squirrel hunting rifle. One of my favorites is the six power Leupold scope that I mentioned above.
As I come across other questions that are related to squirrel hunting rifle scopes, I’ll try to keep this page updated.
")
")
")
")
")


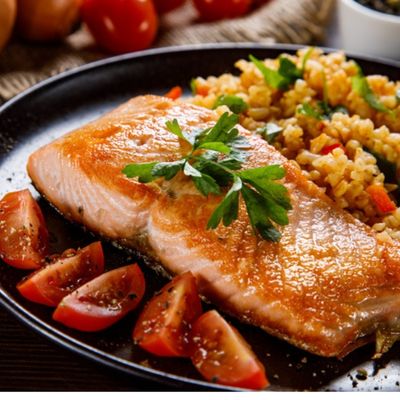 Salmon is a well-known fish among many fish lovers. Salmon may be cooked in many ways and is actually one of the fish types you can find easily no matter where you are.
 The well-liked freshwater fish, trout, is easy to prepare and has a delicious flavor.
 Another really tasty freshwater fish to cross off your list is the pike. Due to their preference for chilly water, they are more prevalent in northern states and regions.
 Bluegill can be an exquisite choice if it is obtained in the proper environment. Bluegills are known for being some of the best tasting warm water fish species, but they taste can differ based on environment quite a bit. Bluegill in cold water vs hot water, in a lake, vs a pond, vs a river can all have some different flavors. This can make for some fun variation and experimenting.
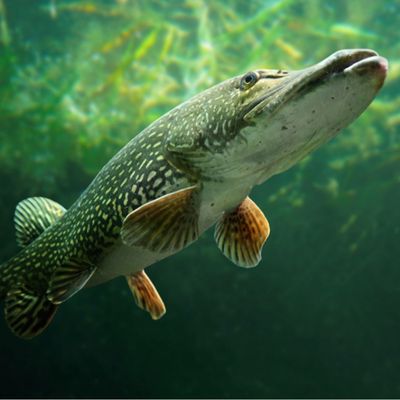 People who just love spending time fishing in the nearby river or pond frequently catch this species of fish. They are considered one of the easiest fish species to catch, which makes them a great fish to target for beginners or family.
 Catfish is an extremely common and delicious freshwater fish to eat.


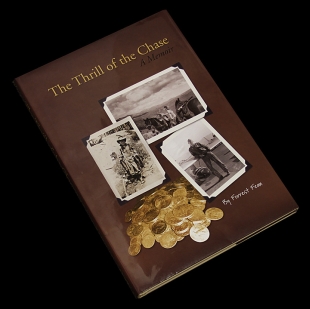


 For the record, I didn’t contact Fenn for this story. What would he have said to me anyway? At best he would have complemented my sleuthing. More likely he would have just silently shrugged, smiled at me with his quick eyes, and walked away. I figure he’s done what he wanted to do and, whether or not he enjoys the attention he’s created, I’d make my own choice and leave him alone.


