Here are four ways to try controlling scent on your hunting clothes this season, and two that maybe you should avoid.
Whether you are trying to get the human scent off of your deer hunting clothes, or trying to add some that could change the game, we all know one thing when it comes to our favorite quarry: their noses rule and we have to try and beat them!
Deer will see you, hear you and smell your human odor before you ever know that they are there. Turn the tide with some of these tried-and-true, but not very well-known methods of adding scent to your clothes.
They just might fool that big whitetail into thinking you’re something else.
1. Pack it in the pines
First, get over to the dollar store and pick up some of those small, drawstring, linen jewelry pouches. Next, get yourself outside and find the nearest set of pine trees.
Now, fill the bags with green needles and pack them in every inch of your hunting clothes. You really can’t overdo it too much, as pine scent is so very prevalent in most wooded areas. Pack everything in a new garbage bag and let it simmer.
Once you take your clothes out and start hunting, leave the pouches in the bag and put your clothes back in to store for the next hunt.
2. Add some smoke and ash
Like baking soda, ash is a great odor remover, and you can basically use it in the same way. You can bag it the same way, but you’ll have to be more careful working with it. You’ll want to start outside at the fire pit, and since you’re there, start a fire!
Bring some of your other items that you want to get ready for your hunt and let them get some of that smoke “flavor” as well. Deer aren’t spooked by smoke and it’s a great cover-up. I know people that swear by smoking little cigars when they hunt, so why not the natural stuff?
3. Put some oak fruit on it
I hunt the oaks. There’s an oak bottom swamp I’ve been hunting for the last 10 years that has deer trails running in and out of it like an eight-cylinder piston with acorns everywhere.
I’ve learned that above and beyond making my clothes scent-free, adding a little acorn scent is like cooking a steak on the grill to us. Use the garbage bag method and toss in some cotton balls that have been dressed with one dip of the bottle of acorn scent. Too much can be a bad thing with this as you don’t want to stink like an acorn factory.
4. Have it there waiting for you
What smells more like your hunting area than… your hunting area? It needs to be done after a frost or in colder weather. It is best in the more northern climates as insect penetration can happen if you’re not careful.
You’ll need to check the weather to determine just how long you could leave it out there. I’ll leave my coat and bibs out overnight at least as they’re the last thing I’ll put on anyway.
Now, here are two ways that I used for years that I do not recommend for obvious reasons. Ticks carrying Lyme disease present a real danger nowadays, and it’s no longer feasible to try these methods, but to each their own.
Since it’s not easy for most to take their clothes out into the woods to get that natural smell that we all want, you might try this at your own risk.
5. Put it on the wood pile
Again, wait for the first real frost. I always liked to put it on there in a way that I could leave it for days at a time. There’s nothing I like more than fresh oak or ash logs split and ready to burn except when they’re leaving their scent on my hunting clothes.
6. Bury it in the leaves
Leaf litter is everywhere. It might be the most natural smelling thing you could use to make your outerwear the stuff that will bend that big buck’s nose the other way while you’re right in front of him.
I used to put my clothes on the wood pile andthen bury it with leaves! Since your yard is probably full of them and you’re sick of raking it all, try putting it to good use.
Given that we’re all looking for an edge, maybe one of these methods will help you to get a little closer to your buck. After all, success is what we’re all chasing out there and maybe this will help!
All photos by Craig Raleigh
NEXT:11 THINGS THAT EVERY DEER HUNTER DIDN’T KNOW THEY NEEDED
Air rifles have been a part of the Olympic games since they were first introduced as a sport in the early 1900s. Over the years, there have been many different types of air rifles used in competition. Here is a brief overview of some of the most popular types of air rifles used in the Olympics.
Spring-Piston Air Rifles
Spring-piston air rifles are some of the most popular types of air rifles used in competition shooting. They are known for their accuracy and precision, making them a favorite among Olympic shooters. Spring-piston air rifles use a spring-loaded piston to compress air in order to fire the pellet. These types of air rifles are typically very reliable and easy to maintain.
Pre-charged Pneumatic (PCP) Air Rifles
Pre-chargedPneumatic air rifles use compressed air to fire the pellet. These types of air rifles are often used in Olympic competition because they are very accurate and easy to control. PCP air rifles typically have a higher rate of fire than other types of air rifles, making them well suited for rapid fire events.
CO2 air rifles use a small canister of carbon dioxide to propel the pellet. CO2 air rifles are typically less expensive than other types of air rifles, making them a good choice for beginner shooters. CO2 air rifles are also relatively easy to maintain and can be easily transported from one location to another. CO2 cartridges can sometimes be difficult to find, so it is important to make sure that you have a few on hand if you plan on using this type of rifle for competition shooting.
Conclusion
There are many different types of air rifles that can be used for competition shooting, but some are more popular than others. Spring-piston and pneumatic air rifles are two of the most common types used in Olympic competition shooting because they are known for their accuracy and precision. CO2 air rifles are also sometimes used in competition shooting, although they are not as accurate as spring-piston or pneumatic air rifles.
The best fixed blade broadheads are ones that have razor-sharp blades, fly like field points from your bow, and inflict maximum damage. We all want that short blood trail to the buck of our dreams.
In this article, we look at what we feel are the 9 best fixed-blade broadheads on the market in 2024. These are broadheads we have tried and tested and wouldn’t hesitate to screw onto the ends of our own arrows this fall.
I’ll give my usual caveat here: while we have our favorite broadheads for various game and situations, there is truly no one ‘best’ option. Also keep in mind that broadheads for crossbows often have different requirements, so we have a whole other article for those.
Which broadhead works best for you will depend on a variety of factors, including your bow setup, arrow selection, ability to tune your bow, and a little bit of personal preference.
Our Top Picks
Everything We Recommend
What are Fixed Blade Broadheads?
As the name implies, fixed blade broadheads have no moving parts. The blades are fixed in position. In some cases, fixed blade broadheads are machined from one piece of steel, so the blades and the ferrule are formed together. That is the case with the G5 Montec broadheads featured above.
Most fixed blade broadheads, however, have replaceable blades that attache to the ferrule in various ways. This is a great feature, because if a blade or blades become dull or damaged, you can simply replace the blade without having to try to sharpen it or replace the entire broadhead.
Pros and Cons of Fixed Blade Broadheads
Features to Consider
Broadhead Weight
Most fixed blade broadheads are going to come in either 85, 100, 125 or 150 grains, with 100 grains being the most common. Any of these will work effectively. It’s really a matter of your overall arrow or bolt setup as to which weight you choose. If you’re just going with a standard mid-weight arrow setup, then I’d recommend sticking with a 100 grain broadhead because they are readily available and will get the job done. However, if you’re like me and prefer a heavier arrow setup with a little higher FOC, then a 125 or even a 150 grain may be your best bet.
The past two seasons I’ve shot 150 grain broadheads on my compound bow setup, and I’ve been extremely happy with the results. This year I may go with the 125 grain Slick Trick Magnum broadheads, which should still work fine. I can always add another 25 grain weight to my insert if I wanted to keep the overall weight the same, but I really don’t think that will be necessary.
Blade Thickness
Blade thickness is an important factor when choosing the best fixed blade broadhead for your setup. It’s going to determine how well your broadheads hold up when they make contact with an animal — especially if they come in contact with any bone. Blade thickness is especially important if you’re shooting a one-piece broadhead with blades that will require sharpening.
If you’re shooting a broadhead with replaceable blades, blade thickness isn’t quite as critical, but you still don’t want the broadhead coming apart as it passes through the chest cavity of a mature buck.
Number of Blades
In your quest to find the best fixed blade broadhead, you may wonder if you should you shoot a two, three, or four-blade broadhead? First off, let me say that any of those three options will get the job done. Like most things in life, there’s tradeoffs to each option. A two-blade broadhead is going to have less resistance, so it will be more likely to pass thru an animal. The tradeoff to that reduced resistance and increased penetration is less overall tissue damage and a smaller blood trail.
Three and four-blade broadheads, on the other hand, should produce a larger wound channel and better blood trail. And while they will have more resistance than a two-blade, as long as you’re shooting a heavy enough arrow setup, penetration shouldn’t be an issue.
Cutting Diameter
Cutting diameter is another important factor when choosing a fixed blade broadhead. Similar to the discussion above about the number of blades a broadhead should have, cutting diameter will impact penetration and the subsequent blood trail. A smaller cutting diameter will have less resistance and will be more likely to pass through, but it will also create a smaller wound channel. That smaller hole will me less overall tissue damage and a smaller blood trail.
That leaves you having to strike a balance between getting a solid pass-thru shot and still inflicting as much damage as possible for a good, short blood trail. Other factors in that decision will be your bow setup and overall arrow setup. If you shoot a lower poundage, short draw length, or a light arrow setup, then you will want to err on the side of smaller cutting diameter to ensure a pass-thru shot.
My preference is a 1 1/4 to 1 1/2-inch cutting diameter from a fixed blade broadhead.
Replaceable Blades vs One-Piece Design
This is another personal preference decision you’ll need to make when choosing the best fixed blade broadhead for your setup. What it really boils down to is, are you comfortable sharpening your broadhead blades? If not, then you need a broadhead with replaceable blades. That way, after you’ve dulled a broadhead from practice shooting or in a hunting situation, you can simply toss the dull blades and install new, razor-sharp ones.
If you are comfortable sharpening your blades, then a one-piece design may be the way to go. A one-piece broadhead is typically going to be tougher and more durable than one with replaceable blades. There are certainly exceptions to that statement but as a rule, it’s true.
Solid vs Vented Blade Design
This is one I see debated at times, but in my mind is a non-issue. The biggest concern I’ve seen discussed with vented broadhead blades is the whistling noise they can make in flight. I’ve seen bowhunters concerned that the noise can alert deer and result in them “jumping the string.” I’ve shot plenty of vented blade broadheads and have never witnessed any issues that I felt were the result of broadhead noise.
The one valid argument for using a solid blade design over a vented blade is that the solid blade is going to be a little stronger and less likely to bend or break. The downside to a solid blade design is that it could result in increased planing in flight, which could result in erratic flight from bows that aren’t perfectly tuned.
Final Thoughts
Choosing the best fixed blade broadhead is not easy. There are tons of options on the market today, and all of them will kill a deer with proper shot placement. That’s not to say, however, that some options aren’t much better than others. To narrow down your choice, use the factors outlined above, and you should find one or more great options from our list above.
Ultimately, you won’t go wrong with any of the broadheads listed above, but hopefully this article will help you find the best fixed blade broadhead for your specific needs.
“Unleash Your Precision: Discover the Power of a .177 Air Rifle to Take Down Targets with Accuracy. Explore the Versatility and Potential of this Incredible Weapon for Hunting, Pest Control, and Competitive Shooting.”
what can you kill with a 177 air rifle
A 177 air rifle, also known as a.177 caliber air rifle, is a popular choice among many hunters and shooting enthusiasts. Despite its relatively small size, this type of air rifle can still be used to effectively kill various types of animals and pests. However, it is important to note that the effectiveness of a 177 air rifle largely depends on factors such as accuracy, velocity, and shot placement.
When it comes to small game hunting, a 177 air rifle can be highly effective. It is capable of taking down animals such as rabbits, squirrels, pigeons, and rats. The high velocity and accuracy of the.177 caliber pellets make it suitable for these types of targets. With proper shot placement to the vital areas such as head or chest, a well-tuned 177 air rifle can deliver enough power to quickly dispatch these smaller creatures.
Additionally, a 177 air rifle can also be used for pest control purposes. It is particularly effective in eliminating pests such as mice, rats, and nuisance birds like starlings or sparrows. The advantage of using a.177 caliber air rifle for pest control lies in its lower noise level compared to firearms. This allows for discreet elimination of pests without causing unnecessary disturbance or alerting others nearby.
In conclusion, a.177 air rifle can be an effective tool for hunting small game and pests, offering accuracy and versatility. However, it is crucial to adhere to local laws and regulations, prioritize safety, and practice ethical hunting practices to ensure responsible use of this weapon.
Imagine a calm evening in the woods captured by your cellular game camera. As the sun sets, a mysterious presence appears on the screen. Is it a magnificent deer or a cunning coyote?
You’re left wondering about the secret lives of these mysterious forest inhabitants and wanting to witness them remotely. This is where you’ll need only thebest cellular game camerato help you monitor wildlife even when you’re not close to it.
Unsure which one to choose? I’m here to help you navigate the options and find the best cellular game camerabased on my first-hand experience with the best models in 2024. Without any delay, let’s start exploring:
Best Cellular Game Cameras Reviewed
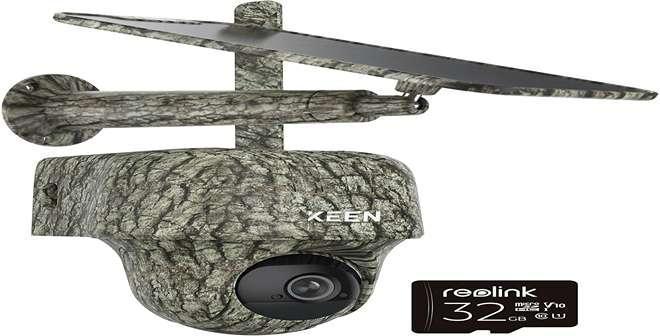
REOLINK KEEN Ranger PT Cellular Trail Camera – Best for panoramic coverage and remote monitoring.
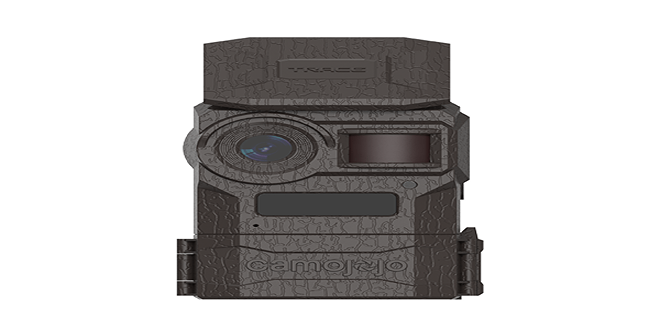
Camojojo HD Live Cellular Trail Cam – Ideal for capturing swift wildlife action with its 0.2s trigger speed
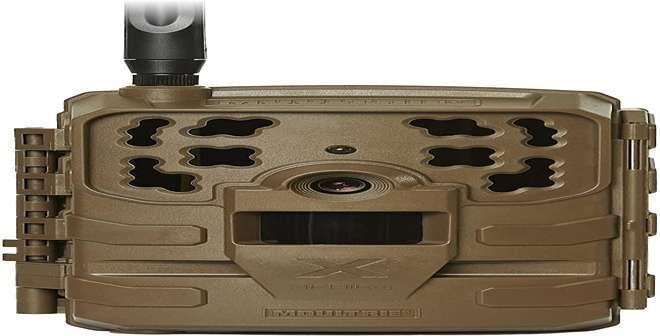
Moultrie Mobile Delta Base Cellular Trail Camera – Best for economical cellular trail monitoring.
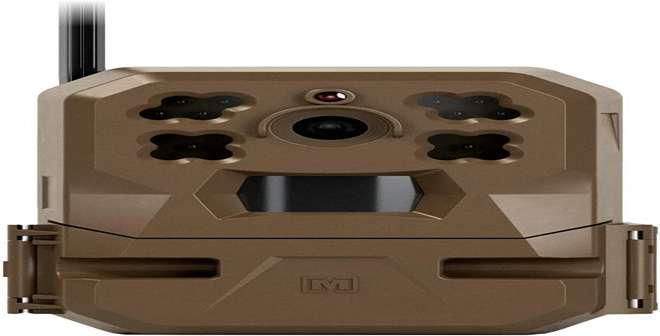
Moultrie Mobile Edge Cellular Trail Camera – Best for enhanced battery life and data management.
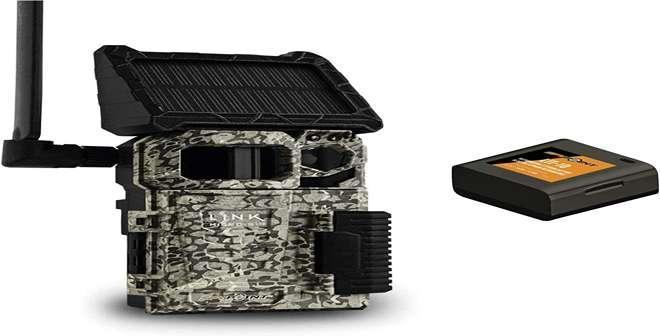
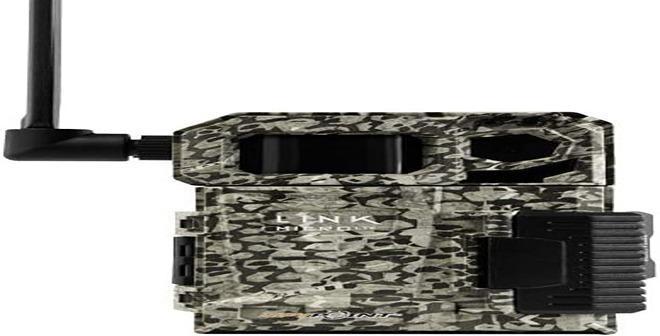
SPYPOINT Link-Micro-S-LTE Trail Camera Cellular – Best for small games and extended battery life.
Muddy Outdoor Manifest 2.0 Cellular Trail Camera – Best for high-resolution images and video quality.
SPYPOINT LINK-MICRO-LTE Cellular Trail Camera – Best for compact design and low-impact scouting.
TACTACAM outdoor Reveal XB Cellular Trail Camera – Best for quick setup and versatile options.
SPYPOINT LINK-MICRO-LTE-V Cellular Trail Camera – Best for fast trigger speed and affordable value.
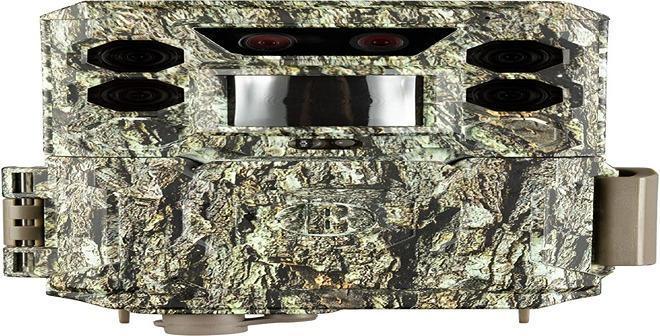
Bushnell 30MP CORE Trail Camera – Best for dual-sensor technology and reliable day/night performance.
1. REOLINK KEEN Ranger PT Cellular Trail Camera
After experiencing this top-tier cellular game camera, I can confidently recommend it to outdoor enthusiasts and hunters alike. What I specifically loved about this camera was its exceptional panoramic coverage and remote monitoring capabilities.
But that’s certainly not all it has to offer! Speaking of which, here are some other key features that make REOLINK KEEN my top choice when considering the best cellular game cameras:
Reliable Connectivity: This LTE 4G cellular game camera is powered by a solar panel, making it perfect for off-grid locations.
Exceptional Image Quality: A true 2K 360° view offers a native 4MP resolution, ensuring crystal-clear images and videos day and night.
Real-time Alerts: The camera’s intelligent algorithms and PIR sensor reduce false alarms, sending timely notifications with attached images directly to your phone.
Cost-Effective: This camera includes a 32GB microSD card (expandable to 128GB) and free Cloud service, offering flexible storage options.
User-Friendly: It’s remarkably easy to use, with simple access and customization through the Client, Reolink App, and even Alexa.
Weather-Resistant: Its robust and waterproof design ensures it can withstand various weather conditions, making it perfect for outdoor use.
Pros
Comes with an efficient solar panel for continuous use.
User-friendly app for easy management.
Accurate motion detection with customizable settings.
High-quality imaging for clear visuals.
Cons
Inconsistent video and live stream performance.
Absence of effective customer service support.
2. Camojojo HD Live Cellular Trail Cam
Next up is Camojojo’s trail camera. My experience with Camojojo’s trail camera has been nothing short of remarkable, largely attributed to its lightning-fast 0.2-second trigger speed that flawlessly captures dynamic wildlife images.
Here are additional standout features that, in my opinion, elevate Camojojo as the premier cellular game camera and a noteworthy inclusion on this list:
0.2-Second Trigger Speed: Captures swift movements with a rapid 0.2-second trigger speed and a detection range of up to 20 meters (65 feet) for precision.
Real-Time Live Streaming: As one of the best cellular game cameras for hunting, Camojojo offers clear and uninterrupted live video streaming. Hence, you can access up-to-the-minute hunting insights.
Real-time Alerts: Precise PIR sensors and smart algorithms significantly reduce false alarms. Get timely notifications on your phone with attached images.
Cost-Effective: Camojojo includes a 32GB microSD card (expandable to 128GB) and free Cloud service, ensuring flexible storage without extra costs.
User-Friendly: The camera offers a smooth usage experience with convenient access and customization via the Client, Reolink App, and Alexa for a seamless experience.
Weather-Resistant: Designed to withstand various weather conditions, this camera is ideal for outdoor settings in different environments.
Pros
Convenient mounting bracket for easy adjustments.
Superior video quality for capturing even the fine details.
Immediate video results, excluding the need to wait for long.
Wide coverage and reliable signal.
No need for memory cards, as content is stored internally.
Cons
Night picture and video quality don’t match daytime clarity.
Intermittent issues with the live stream on the app.
3. Moultrie Mobile Delta Base Cellular Trail Camera
After using this cellular game camera, I was thoroughly impressed. The standout feature that caught my attention was its remarkable 24MP image resolution for photos and videos. But that’s not all of what it had to offer. Instead, I also came across the following features during my experience of using the camera:
High Image Quality: Boasting 24MP resolution for photos and videos, it captures detailed images day and night, thanks to 36 invisible IR LEDs providing excellent night vision.
Fast and Reliable Connectivity: Operating as an LTE 4G cellular game camera, this camera ensures a robust and dependable connection, whether you’re in remote or urban areas.
Smart App Control: The Moultrie Mobile app simplifies camera setup and control, allowing you to easily view images on your smartphone.
AI-Powered Image Scanning: Images are scanned with artificial intelligence to identify subjects like bucks, does, turkeys, people, and vehicles. Receive alerts for specific image types, catering to wildlife enthusiasts and hunters.
Cloud-Based Storage: All images are uploaded to a cloud-based server, providing 24/7 access even after canceling your subscription, ensuring safe and cost-free access to your images.
Weather Resistant: The camera’s impact and weather-resistant casing ensures it can withstand various outdoor conditions, providing longevity and reliability in the field.
Pros
Great image resolution (24MP) for clear photos and videos.
Efficient battery usage with proper settings.
Easy setup and quick network connection.
Simple and user-friendly mobile app.
Long-lasting battery life, thanks to the solar panel that comes along.
Option to manually trigger a snapshot in the app.
Cons
Oversensitive motion detection may capture distant objects.
The wide-angle lens may not capture taller objects effectively.
Inconsistent performance in different settings.
4. Moultrie Mobile Edge Cellular Trail Camera
Based on my experience, the Moultrie Mobile Edge Cellular Trail Camera is an excellent choice for budget-conscious enthusiasts looking for cost-effective cellular game camera optionswith top-notch hunting and wildlife monitoring features. Here’s what sets this camera apart:
Effortless Connectivity: The camera’s Auto Connect technology seamlessly links to the strongest signal across multiple networks, ensuring I stay connected even in remote locations.
Streamlined Memory and Storage: With built-in and unlimited cloud storage, I bid farewell to the hassle of SD cards. It automatically clears space for new shots, providing ultimate convenience.
Stunning Image Quality: It offers stunning game shots, capturing detailed 33MP photos and HD 720p videos day and night with exceptional clarity.
Night Vision Brilliance: In low-light conditions, this cellular game camera with night vision features an enhanced IR LED setup that shines up to 80 feet. This allows you to enjoy clear and vivid night captures.
Flexible Power Options: I appreciate the flexibility in power options, as the Edge can run on either 8 or 16 AA batteries, and it’s compatible with the Moultrie Mobile Solar Power Pack (sold separately).
User-Friendly Setup: Setting it up is a breeze – just scan the QR code, and you’re ready to go. No more complicated instructions or time-consuming setups.
Pros
Seamlessly connects to the strongest signal.
Built-in unlimited cloud storage.
Captures detailed 33MP photos and HD 720p videos.
Enhanced IR LED setup for clear night captures.
It can run on AA batteries or a solar pack.
Cons
Slow to capture and take pictures.
Notifications may take time to show.
Requires frequent resets and reconnections.
5. SPYPOINT Link-Micro-S-LTE Trail Camera Cellular
The SPYPOINT Link-Micro-S-LTE Trail Camera is one of the top cellular game cameras in 2024 for its integrated solar panel technology, reliable connectivity, reduced environmental impact, and advanced mobile scouting tools. Besides this, I also like this camera for its:
Effortless Charging: The integrated solar panel charges the included LIT-10 rechargeable lithium battery pack, eliminating frequent battery changes and saving time and money.
Minimal Environmental Impact: Cellular capabilities reduce the need for frequent site visits, minimizing human pressure on wildlife and supporting environmental conservation.
Comprehensive Mobile Scouting: SPYPOINT offers advanced scouting tools to analyze data, identify patterns, and plan successful hunting strategies, providing a complete mobile scouting solution.
User-Friendly Design: The LINK-MICRO-S-LTE seamlessly merges advanced cellular technology with an intuitive and straightforward platform, catering to the needs of seasoned tech-savvy hunters and newcomers to cellular trail camera technology.
Pros
Effortless setup.
Regular picture transmission.
Cost-effective.
No need for frequent battery replacement with solar charging
Cons
Slow shutter speed.
Limited maximum SD card size (32GB).
Reliability issues in staying connected to the cell tower.
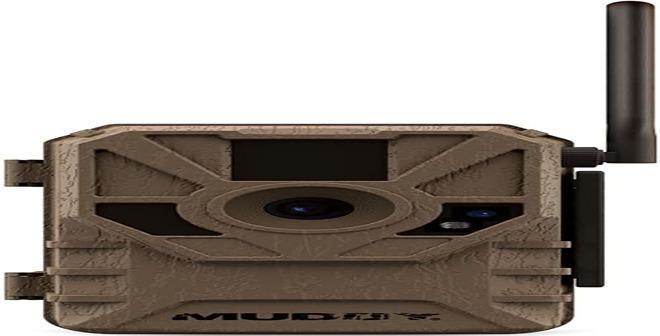
6. Muddy Outdoor Manifest 2.0 Cellular Trail Camera
Another notable camera on our list is the Muddy Outdoor Manifest. It’s renowned for its exceptional high-resolution image and video quality. An excellent choice for wildlife enthusiasts. Besides this, this is the best cellular game camera due to the following features.
Fast LTE 4G Connectivity: This cellular game camera keeps you connected even in remote areas, so you never miss a moment of wildlife activity.
Crisp 16-Megapixel Images: With a rapid 0.8-second trigger speed, this trail camera captures every detail, providing clear and detailed photos of your outdoor adventures.
Easy Remote Access: The Muddy COMMAND app offers seamless control from Android and iOS devices, giving you convenient access to your camera’s settings and captured media.
Tough, Weatherproof Build: It’s designed to withstand harsh weather conditions and outdoor wear for long-lasting durability, making it reliable in various environmental scenarios.
Effortless Setup: Mounting is simple, ensuring optimal performance without complicated installation procedures.
Consistent High-Resolution Images: Its high-resolution image-capturing capability makes it one of the best cellular game cameras for hunting and outdoor photography, delivering consistent, high-quality images every time you use it.
Pros
Fast 4G Photo Upload
Good Picture Quality
Durable Build
Efficient Battery Life
Cons
Complicated Photo Sharing/Deletion
It isn’t easy to use
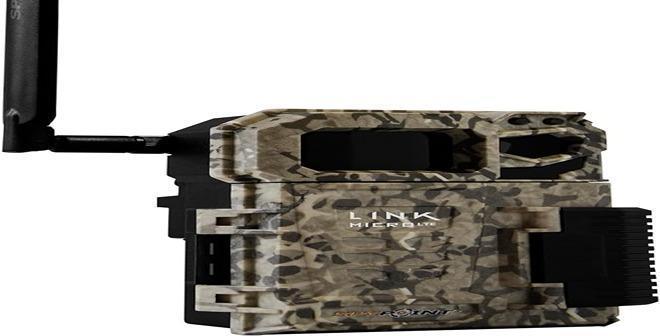
7. SPYPOINT LINK-MICRO-LTE Cellular Trail Camera
The SPYPOINT LINK-MICRO-LTE ranked at number seven on my list. This camera is considered the best LTE 4G cellular game camera due to its compact design and low-impact scouting. Its standout features also include exceptional battery life and efficient motion detection.
Effortless Connectivity: As another LTE 4G cellular game camera,this SPYPOINT camera offers a reliable and seamless connection, even in remote areas, ensuring you stay connected throughout your adventures.
Impressive Night Vision: Equipped with a 4 LED infrared flash, this camera detects motion up to 80 feet away, delivering outstanding performance in low-light conditions.
Ultra-Compact Design: Its stealthy, compact build ensures discreet placement, reducing the chances of startling the wildlife you aim to capture.
Minimized Human Impact: Transitioning to a cellular trail camera like the LINK-MICRO-LTE reduces your physical presence in hunting areas, minimizing stress on local wildlife and benefiting you and the animals.
Advanced Scouting Tools: SPYPOINT provides a comprehensive mobile scouting solution with advanced tools for data analysis, pattern tracking, and successful hunting strategies, keeping you well-informed and ahead of the game.
Pros
Conveniently access pictures remotely from up to 60 miles away.
Quick transmission.
Accessible photo storage plans.
Easy setup and use.
Runs well on lithium AA batteries.
Cons
Potential language barrier with customer service.
Connectivity issues after battery change.
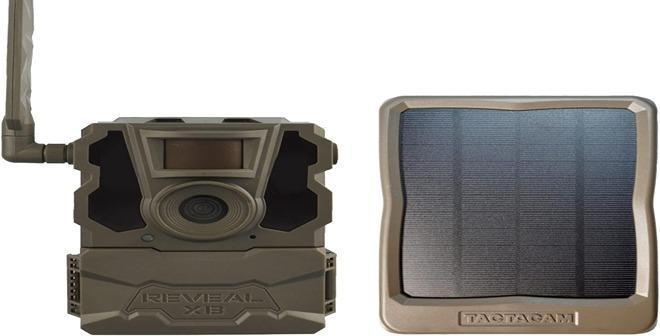
8. TACTACAM Outdoor Reveal XB Cellular Trail Camera
What made me add the TACTACAM Reveal XB Cellular Trail Camera to this list of the top 10 best cellular game cameras is its quick setup and versatile options. Besides that, this camera also provides high-resolution images and video quality, making it an excellent choice for wildlife enthusiasts.
Seamless Connectivity: This camera operates on AT&T and Verizon’s LTE/4G networks, ensuring continuous connectivity even in remote areas. On-board Wi-Fi simplifies setup and offers live view options with an LED signal strength indicator.
Ultimate Remote Scouting Tool: Ideal for areas with limited access or proper monitoring, the Reveal XB Camera provides real-time wildlife observation, even from a distance.
Robust and Weatherproof: Compact and rugged, the Reveal XB Camera thrives in extreme outdoor conditions, guaranteeing reliability in various weather scenarios.
Camera Features: With multi-carrier compatibility, it offers photo resolutions from 8MP to 24MP. HD photo and video requests via the app provide high-quality media capture. Its no-glow IR technology excels in nighttime operations, and its PIR sensor detects motion up to 80 feet away.
Advanced Technology: Equipped with integrated GPS for location tracking and an external port for a solar panel, the Reveal XB Camera ensures uninterrupted operation. Its IP66 waterproof certification enhances durability.
Pros
Ideal for all weather conditions.
Remote control convenience.
Efficient cellular capability.
Lightning-fast trigger speed.
Dual sensors for day and night clarity.
User-friendly interface.
Cons
Lack of included camera power supply.
Inconsistent results when using a solar panel.
9. SPYPOINT LINK-MICRO-LTE-V Cellular Trail Camera
As I delved into some of the best cellular game cameras of 2024, the SPYPOINT LINK-MICRO-LTE-V instantly stood out for several compelling reasons, making it an excellent choice for wildlife enthusiasts.
Its fast trigger speed and affordable value are complemented by high-resolution image quality, ensuring you capture every moment with clarity.
Top-Notch Performance: It has an impressive 0.5-second trigger speed and sharp 10MP image resolution. This feature ensures that you precisely capture wildlife activity without any delay.
Compact and Covert: Its ultra-compact design excels in remaining discreet, a valuable asset in wildlife cameras. This feature enhances your chances of unnoticed wildlife documentation.
Wildlife-Friendly: This cellular camera helps reduce human interference by enabling fewer visits to hunting areas. Wildlife can behave more naturally, offering a win-win scenario for both observers and animals.
Tech-Savvy Scouting: SPYPOINT packed this camera with advanced scouting tools, simplifying data analysis and pattern tracking. Stay one step ahead in planning your hunting strategies.
Pros
Quick and straightforward app configuration.
Swift notification upon motion detection.
Accessible and friendly tech support.
Unlimited transmissions in the first month.
Cons
Limited photo downloads without extra payment.
Occasional long customer service wait times.
Shorter battery life than expected.
10. Bushnell 30MP CORE Trail Camera
Last but not least, I can’t end this list of the top 10 best cellular game cameraswithout mentioning the Bushnell 30MP CORE 1080p Trail Camera. What impressed me about this camera was its dual-sensor technology and reliable day/night performance, ensuring you capture wildlife activity around the clock with exceptional clarity.
High-Quality Images & Video: Captures 30MP photos and records 1080p videos at 60fps for top-notch image quality.
Exceptional Night Vision: Boasts an 80-foot no-glow infrared night range, ideal for low-light conditions and nocturnal wildlife.
Lightning-Fast Trigger: Offers a rapid 0.2-second trigger speed and 0.6-second recovery rate for swift wildlife capture.
Dual Sensor Technology: Utilizes dual sensors for sharp daytime images and consistent nighttime illumination, ensuring 24/7 clear and well-illuminated images for better wildlife tracking and hunting planning.
Pros
Easy to set and use
Effective for garden and pest surveillance.
Efficient detection circuit (100-foot).
True no-glow feature for stealthy monitoring.
Cons
Occasional difficulty while turning it on.
Delays in photo+video mode.
Adds a logo in the corner of all images and videos.
Summing Up
Cellular game cameras have revolutionized how we approach surveillance, wildlife monitoring, and hunting. They offer immediate insights into the activity on your property and are invaluable tools for hunters seeking to capture game movements near their feeders.
Each of the 10 cellular game cameras mentioned above represents cutting-edge wireless trail camera technology, whether it’s REOLINK KEEN’s remote monitoring capabilities, Camojojo’s rapid trigger speed, or the rugged durability of Muddy Outdoor Manifest 2.0.
So whether you want to keep an eye on your land or enhance your hunting strategy, these distinctive cellular game cameras stand out as the top cellular game cameras in 2024.
FAQs
Are cellular game cameras worth it?
Yes, cellular game cameras are worth it, especially if you enjoy monitoring wildlife remotely. They enable remote image and video viewing via your phone, enhancing convenience, especially for scent-conscious deer hunters with cameras in distant or remote locations.
What is the difference between WIFI and cellular game cameras?
The distinction between WIFI and cellular game cameras lies in their connectivity. Wireless cameras utilize Wi-Fi for image transmission, while cellular cameras rely on 4G cellular networks and data plans.
Do game cameras require the internet?
No, game cameras don’t require internet. They work independently, recording wildlife images and videos stored on memory cards.
Thermal scopes are excellent tools that have become game-changers for shooters, especially those who love to hunt.
But since thermals don’t rely on light to work, you might’ve wondered at one point: can you use a thermal scope during the day?
Well, we already know the answer when it comes to using night vision scopes. But with thermal scopes, the extra light isn’t a problem. In fact, not only can you use thermal scopes during the day, but there are many fantastic advantages to doing so!
The Advantages of Using Thermal Scopes During Daylight Hours
There are several good reasons why you might want to consider making your thermal scope your go-to scope.
Day and Night
One of the most significant advantages of using thermal scopes is that you can use the same scope under all conditions. Since thermal scopes pick up heat signatures, the amount of light has no impact on their targeting efficiency.
The only thing that matters is temperature, so unless you’re hunting on an active volcano or an environment where objects trap lots of heat, then a bit of sunshine should have little impact on the quality of the imaging of a high-quality thermal scope such as the ATN ThOR 4. (1)
Improved Target Identification
While night vision scopes have more defined target detail, many hunters prefer using thermal scopes because of their adept target acquisition abilities that reign over obtaining a more detailed “facial recognition” of their targets.
However, that’s been changing. As thermal technology has improved, it’s made target identification much more accurate. And with this accuracy, it’ll allow you to more assuredly protect fellow hunters and friendly creatures such as pets and livestock.
Price
Thermal scopes used to be priced out of the range most hunters are willing to spend on optics. However, in recent years, several more affordable budget options have hit the market with improving quality and performance, such as the ATN Thor LT Ultra Light.
When looking at a thermal scope’s price tag, one thing to remember is the incredible value it can bring to your hunts. Saving time, ammo, and possibly your life and others are factors worth considering before making your decision.
Possible Daytime Uses for Thermal Scopes
Bushes and Brush
One thing that can make hunting less fun is spending hours waiting for a glimpse of your quarry. However, with regular and night vision scopes, your game can often hide behind cover such as thick brush and bushes, and you’ll never see them.
This is where thermal scopes shine brightest. Since these scopes pick up heat signatures, any object trying to hide behind foliage will become instantly visible, allowing you to take shots you would never have been able to take using regular or night vision scopes.
Body parts such as a deer’s antlers, which are filled with blood when growing, will light up like a Christmas tree.
Blood Trails
You’ve probably seen those movies and shows where hunters who are expert trackers do wacky things like tasting dirt and examining broken leaves to find their wounded quarry. In the real world, it’s not that easy, even if your target has left a blood trail.
Animals like deer are very durable, and unless you score a headshot or shot to the heart, they can run for miles in many different directions, making it tough to keep on their trail. However, with thermal scopes, you can pick up fresh blood trails much faster and catch sight of your quarry before it escapes.
Cold-Blooded Creatures
One disadvantage thermal scopes have is that they do not pick up cold-blooded creatures nearly as well. However, with most thermal scopes, you should still be able to make out their outline, which, all things considered, is better than what you would get with unpowered optics or night vision.
Better Scouting
Scouting isn’t just crucial for locating the game and identifying possible threats. Thermal scopes are great tools anyone who enjoys the outdoors should have on them, especially in areas with dangerous wildlife such as bears and mountain lions (or anywhere in Australia).
It’s also well-known that certain predators, such as polar bears, have been known to stalk humans, surprising them in ambush attacks. One can only imagine how many hunters could have been saved from tragedy with this technology. (2)
When Do You Use Thermal Optics?
If you’re curious as to exactly all of the times thermal optics are a good option, check out our article on when do you use thermal optics. We cover exactly when, where and how to use thermal scopes property.
Frequently Asked Questions
Does sunlight damage thermal scopes?
No, sunlight does not damage thermal scopes. A thermal scope isn’t light-sensitive since it only reads thermal energy, which isn’t visible on the light spectrum. So you can freely use your thermal scope during the day the same as you would at night without concern.
References
Outdoor Life, Four Reasons to Own a Thermal Vision Scope, retrieved from https://www.outdoorlife.com/reasons-to-own-thermal-vision-scope/
Business Insider, A Retired Navy SEAL Explains How to Survive A Bear Attack, retrieved from https://www.businessinsider.com/clint-emerson-navy-seal-survive-bear-attack-2016-12
This post has been carried over from our forum which has since been removed from the site. We’ve pulled over the top 10 forum conversations that were not specific to future content areas which we will be posting.
piedipers Hi,
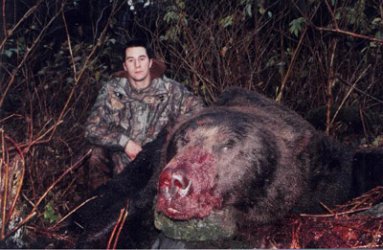
I recently received an email from my wifes’ work regarding a supposed grizzly bear attack in Alaska. Where upon a 14 foot grizzly bear was shot to death by a ranger out deer hunting. It came with three photographs, 1] displaying overall size of grizzly and hunter together, 2] displaying size of paw and 3] graphic portrayal of hiker practically eaten.
forgive my morbidity on this, but can anyone verify this story, which l have pasted below:
Many regards piedipers The following (first two) pictures are of a guy who works for the US Forest Service in Alaska and his trophy bear. He was out deer hunting last week when a large grizzly bear charged him from about 50 yards away. The guy unloaded his 7mm Mag Semi-automatic rifle into the bear and it dropped a few feet from him. The big bear was still alive so he reloaded and shot it several times in the head. The bear was just over one thousand six hundred pounds. It stood 12′ 6″ high at the shoulder, 14′ to the top of his head. It’s the largest grizzly bear ever recorded in the world. Of course, the Alaska Fish and Wildlife Commission did not let him keep it as a trophy, but the bear will be stuffed and mounted, and placed on display at the Anchorage airport (to remind tourist’s of the risks involved when in the wild).
Based on the contents of the bears stomach, the Fish and Wildlife Commission established the bear had killed at least two humans in the past 72 hours. His last meal was the unlucky nature buff in the third picture below. The US Forest Service, backtracking from where the bear had originated, found the hiker’s 38-caliber pistol emptied.
Not far from the pistol was the remains of the hiker. Although the hiker fired six shots and managed to hit the grizzly with four shots (they ultimately found four 38 caliber slugs along with twelve 7mm slugs inside the bear’s dead body) it only wounded the bear – and probably angered it. The other body has not been found. The bear killed the hiker an estimated two days prior to the bear’s own death by the gun of the Forest Service worker.
Think about this – If you are an average size man; You would be level with the bear’s belly button when he stood upright, the bear would look you in the eye when it walked on all fours! To give additional perspective, consider that this particular bear, standing on its hind legs, could walk up to an average single story house and look over the roof, or walk up to a two story house and look in the bedroom windows.
Fitter I’ll dig up the info for you but the story has been quite twisted as its been around for quite some time.
MamaEagle I remember that one too. I think there was a little truth and a little tale to that one.
Here are some info and photos but as I mentioned take it for what its worth.
The first two photos are legitimate images of a giant grizzly brought down by a hunter in Alaska. However, the accompanying story is about another hunter and another bear.
On October 14, 2001, U.S. Air Force Airman Theodore Winnen was deer-hunting on Hinchinbrook Island, Prince William Sound when he and his hunting buddy, Staff Sgt. James Urban. spotted the bear. Effectively cloaked by their camouflage hunting gear, the pair had plenty of time to take their shot. The first bullet from Winnen’s 338 Winchester pierced the brain, but it took five more in the chest to bring him down. The first two photos above were taken by Urban and were posted on several hunting boards and shared among hunting enthusiasts. The bear was 10 1/2 feet long and weighed more than half a ton – Big, but not a record.
Six months later, Sigfredo Casiano, was hiking in Alaska and had a similar experience with a large bear. Casiano claims he found himself about 10 feet from the animal when the beast started moving toward him. His first shot brought the bear down, but he fired several more shots, probably to make sure. In this case, the bear was a brown bear, not a grizzly, and between eight and nine feet tall.
Because of the temporal closeness of these two accounts, the two stories became confused. Eventually, the picture of Winnen became associated with the story of Casiano. The confusion was frustrated by National Forest Service officials who mistakenly identified the photos to be from Casiano’s story.
If that weren’t bad enough, some joker along the line decided to embellish the story with a gruesome prologue, complete with photographic evidence. While the origins of the third picture remain unknown, we do know that it has nothing to do with either Winnen’s or Casiano’s bear encounters. It was added nearly a year after the most popular version of this story began circulating. In fact, there is no evidence in either case that the bears had ever attacked humans.
MamaEagle For what it is worth, I remember that third photo was circulated on a website and that the site claimed it to be the result of a dog attack.
piedipers Hi again,
Thanks for this and the reply. Admittedly l have to be honest l thought that there might be a hint of truth in some portion somewhere, but thought that in another area it wasn’t quite right.
I looked into the animal attacks archives here on this site and came up with the Alaskan Hiker Killed by Bear
ANCHORAGE, Alaska (AP) — A man on a day hike in a rural area was killed when a bear bit his head, Alaska State Troopers said Wednesday.
Kenneth Cates, 53, was found Wednesday morning on a horse trail in a heavily wooded area of the Kenai National Wildlife Refuge near his hometown of Soldotna.
Seeing as this stated a ‘hiker’ being killed and thought, here we go this is something.
Out of curiousity, what is the record for the biggest grizzly, and how big is the actual grizzly bear in the two legit photos?
Fitter The bear in the picture is supposedly as you mentioned: The bear was over one thousand six hundred pounds. It stood 12′ 6″ high at the shoulder, 14′ to the top of his head. It’s the largest grizzly bear ever recorded in the world.
MamaEagle I had to go check this out at the truth or fiction site goto when wondering about some emails i recieve. This is what I found attached to this same story and pictures.
******** THE TRUTH Thanks to our readers, the truth about these pictures has been found. The facts are a little different from the original eRumor, but the pictures do record the results of a true hunt and are real.
The original pictures lacked the label linking them with hunting-pictures, but that is where the pictures reside. They were posted by a hunter who used the nickname Dalliwacker but who is, according to published articles, Jim Urban. He says that the bear was actually ten feet high and weighed between 1,000 and 1,200 pounds. He says the bear did not stand up then drop down and charge. It showed no aggression at all. He also says the bear was not shot on Hitchenbrook Island but, like all good hunters, he won’t be specific about where he got it .*************
The version of the eRumor that claims the bear was a killer and was shot by a forest service employee are false.
Fitter Heres an update on the Worlds Largest Bear for all who continue to follow and seek the truth behind this story.
I recently watched a special on National Geographic and a portion of the show was dedicated to this very same bear and the actual hunter. The hunter himself, pictured above, appeared on the show and offered some insight from his home. And yes, the famed bear he shot was mounted on the wall in the interview. Here are some transcipts from the show in exact format.
Narrator: In October 2001, a hunter legally shot a bear on Hinchinbrook Island off Alaska’s southern coast. He emailed photos of himself posing with the bear to friends. The photos became an internet sensation and soon, stories appeared along with the images. Blogs and websites claimed the Hinchinbrook Island bear stood 12 1/2 feet tall on it’s hind legs. A super bear as big as any ever seen.
Ray Massey – Forest Service Spokesman Alaska Region: If the bear sat down in a room with you, and was flat on his behind on the floor, and tipped it’s nose up, his head would be through a normal ceiling by about a foot or two. If this bear stood up, as reported in the web, it could be watching you take a shower on the second floor of your home.
Narrator: And there was more. A photograph of gnawed human remains. According to the internet, the last man eaten by the giant bear, shot on Hinchinbrook Island. This story of a monster man-eating bear astonished web surfers around the world. Especially the hunter who shot the bear. He doesnt know how the bear he killed got to be the worlds biggest bear in cyberspace. It was big. But not that big.
Actual Hunter: In relation to the world record he wound up only being short by 2 inches and uh 2/16ths of an inch which put him at the rank of 145 out of the 347 of the largest, worlds largest bears ever taken. Ya know I got to get that straight. He’s still a record he’s just not the world record.
Narrator: But what about that other photo claiming to show the Hinchinbrook bears last meal?
Actual Hunter: Thats another picture that gets associated with my bear. That has nothing to do with my bear. As far as I know this bear didnt, ya know, kill nobody or maul nobody.
Narrator: So where did the photo come from? Bear experts took a closer look and discovered that, wherever this man died, it probably wasn’t anywhere near Alaska.
Dr. Tom Smith – Research Wildlife Biologist USGS Alaska Science Center: If you look at the vegetation in there it’s not quite tropical but it certainly is not Alaskan. It appeared to be the victim of a tiger attack from the Indian sub-continent.
Narrator: The super-size Hinchinbrook bear is a myth from cyberspace.
For many years the .380 ACP wasn’t a hugely popular cartridge for concealed carry or home defense, but times are a-changing.
Looking to buy your first .380?
Have one and need to know what to feed it? Let’s take a look at some of my favorite ammunition choices and break down the important facts of ammo selection.
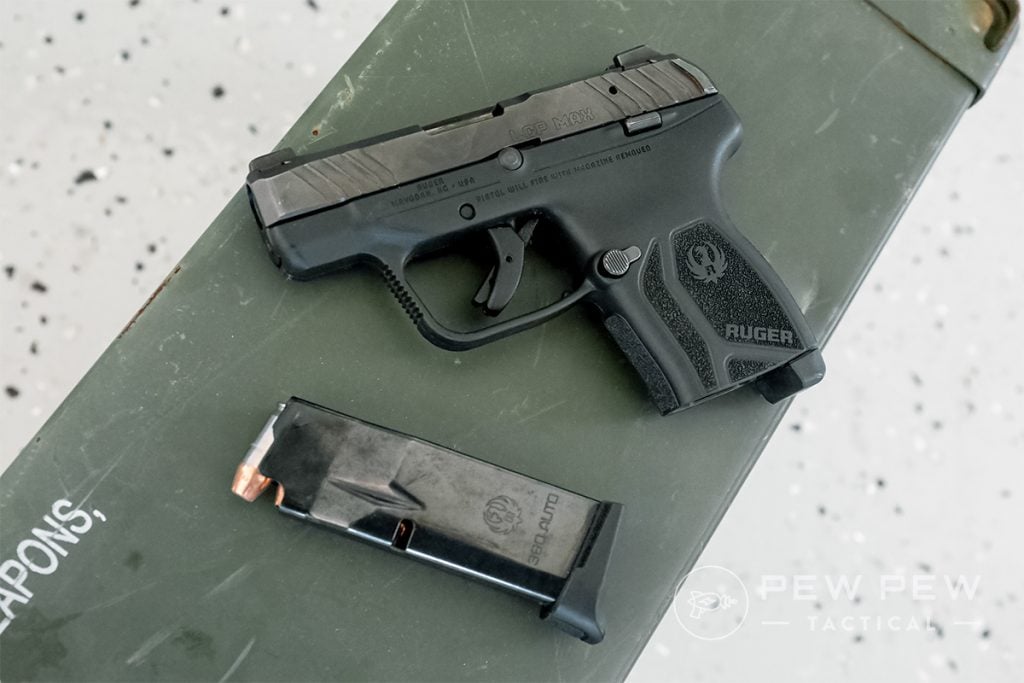
LCP Max with Mag
The problem with this is that with so many types of .380 ACP ammo on the market, how do you know which is the best defensive ammunition for you?
We’ve got you covered!
Here’s the current in-stock options:
THE QUICK LIST
Why Should You Trust Us
Travis Pike is an NRA-certified instructor and concealed carry trainer. Drawing on his experience as a Marine infantryman, he uses his knowledge to test and review guns, gear, and ammo for Pew Pew Tactical.
Doing what Travis does best.
With countless hours behind pistols of all sizes, he knows what ammo works best and which ones are best for concealed carry, plinking, and training.
How to Choose Defensive Ammo
Here are the most important factors to consider when choosing .380 defensive ammunition.
Penetration
Penetration refers to the ability of a projectile to travel through the body, determined by its composition, weight, velocity, and projectile type.
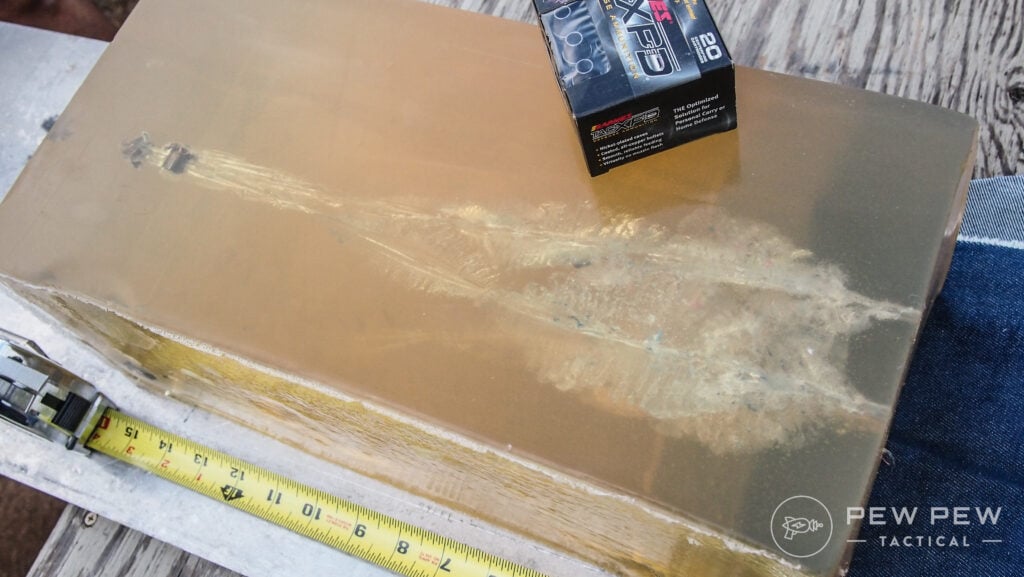
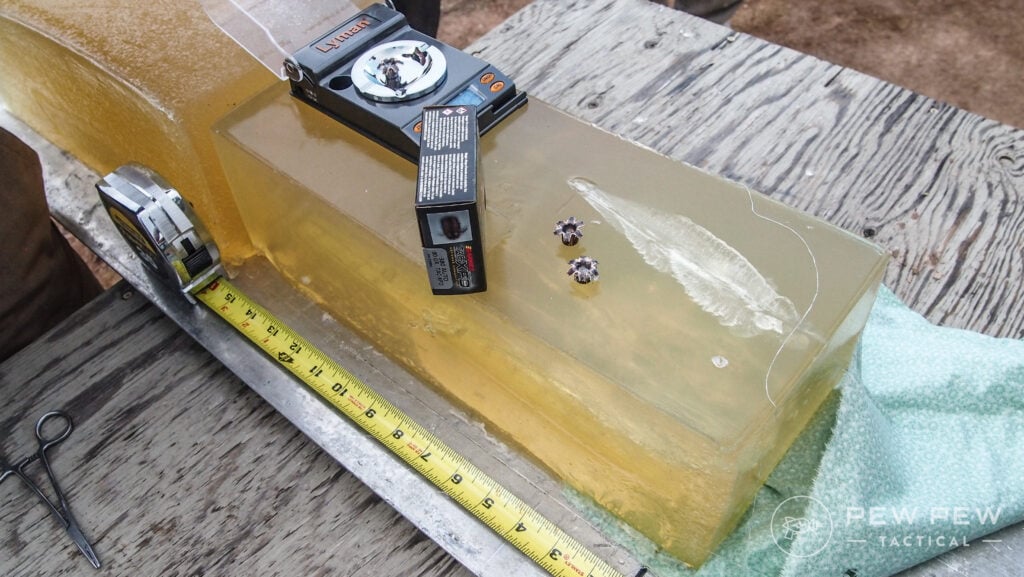
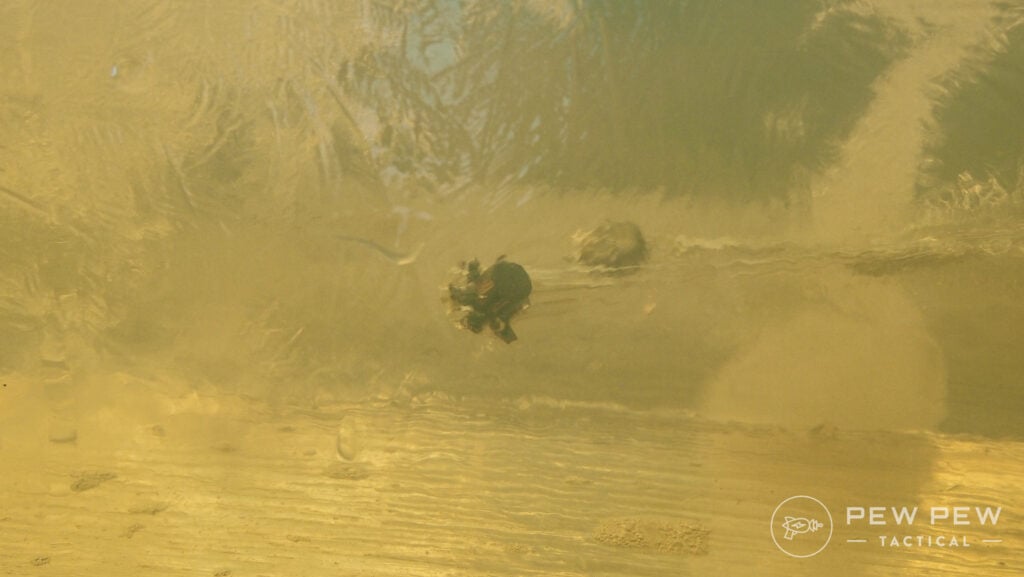
Measuring penetration with ballistic gel
A lead projectile will often bend, break and deform before penetrating deep enough to cause serious harm. The same goes for a round that is too light and too slow.
Ideally, you want a round that can penetrate 12- to 18-inches of 10% ballistic gel.
Expansion
The expansion of projectiles is critical for blood loss and even pain compliance.
The larger a round can expand, the more damage it will do.
When researching expansion for a certain load, know that bigger is always better, but expansion comes second to penetration.
If possible, find how the round expands through ballistic gel after being shot through denim. Denim can cause some rounds to fail at proper expansion.
Reliability
Reliability refers to the round’s ability to expand and penetrate…reliably.
During research, if you see tests where only three out of five rounds penetrate at least 12-inches or fail to expand…that brand might be so reliable.
You want something that always has your back…err gun.
The reliability factor also applies to the round’s ability to consistently ignite and fire.
Most defensive ammo is high quality, and you’re unlikely to find an established company producing ammo that doesn’t go boom. But stuff happens.
Projectile Type
One of the biggest factors that determine how a round will penetrate and expand is the type of projectile.
The classic bonded jacketed hollow point ammunition has long been a solid performer in both penetration and expansion.
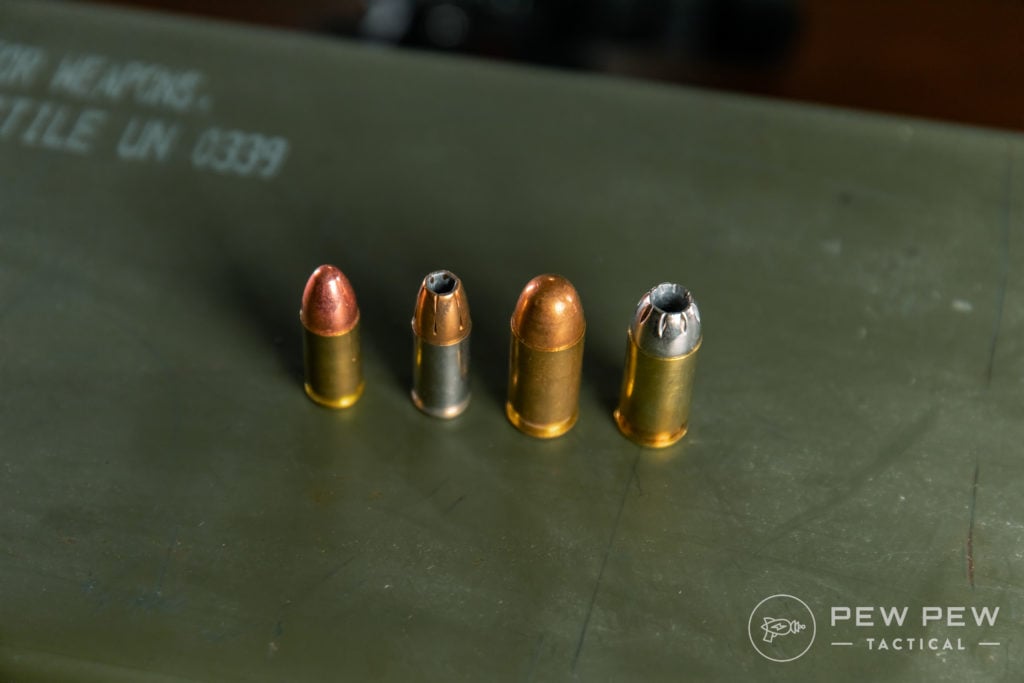
FMJ vs. Hollowpoints (9mm and .45 ACP)
Stay away from FMJ rounds since they do penetrate, but often penetrate way too much. I also advise staying away from gimmick projectiles that look cool but function poorly.
Weight Retention
A projectile’s ability to retain weight after expansion and penetration is a good measure of the round’s ability to deal damage to a vital part of the body.
The more weight retention, the better.
Bullets are measured in grains, so when researching ammunition, look at what the projectile weighs before and after the test.
Barrel Length, Velocity, and Weight
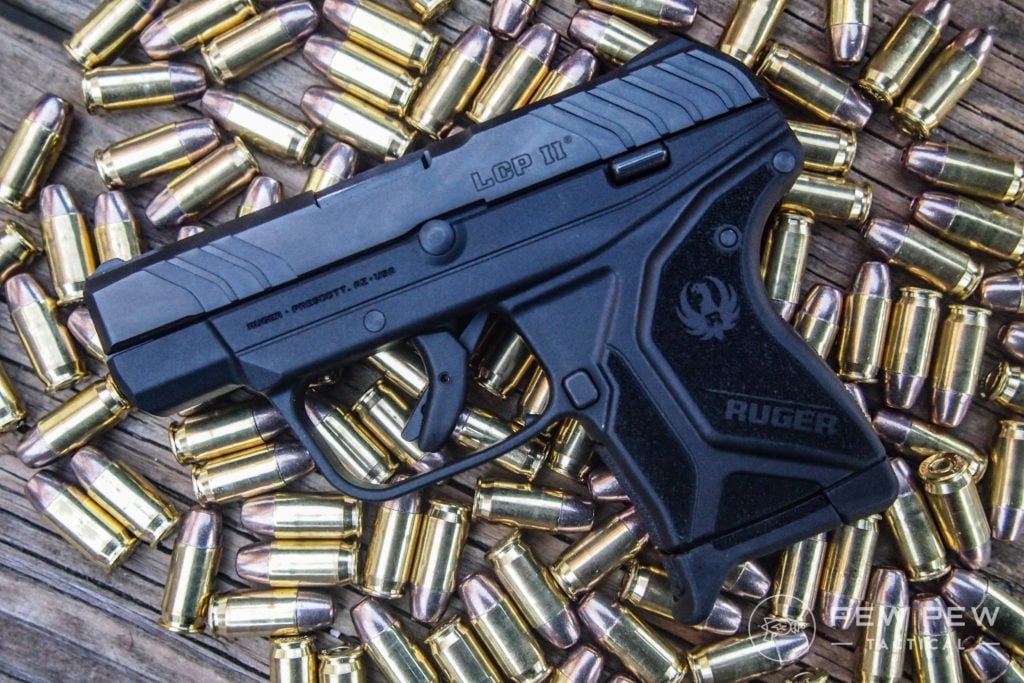
Most .380 ACP handguns are what we call pocket pistols — very small with short barrels. Commonly, these pocket pistols will have a barrel under 3 inches.
This affects the velocity of a projectile, as does the projectile’s weight.
Ruger LCP II
When searching for the best .380 defensive ammo, you need to find a compromise between barrel length, projectile weight, and the round’s velocity. For a pocket pistol, a 90-grain projectile seems to be the heaviest round that penetrates deep enough to strike something critical. These rounds also meet a high enough velocity to expand.
Again you want enough oomph to penetrate ballistic gel.
Lighter 77-grain and even 50-grain rounds are fast but often fail to penetrate.
Heavier 102-grain rounds are better suited for handguns with barrels longer than 3.5-inches like the Beretta Cheetah and CZ 83.
Best .380 Ammo for Self Defense
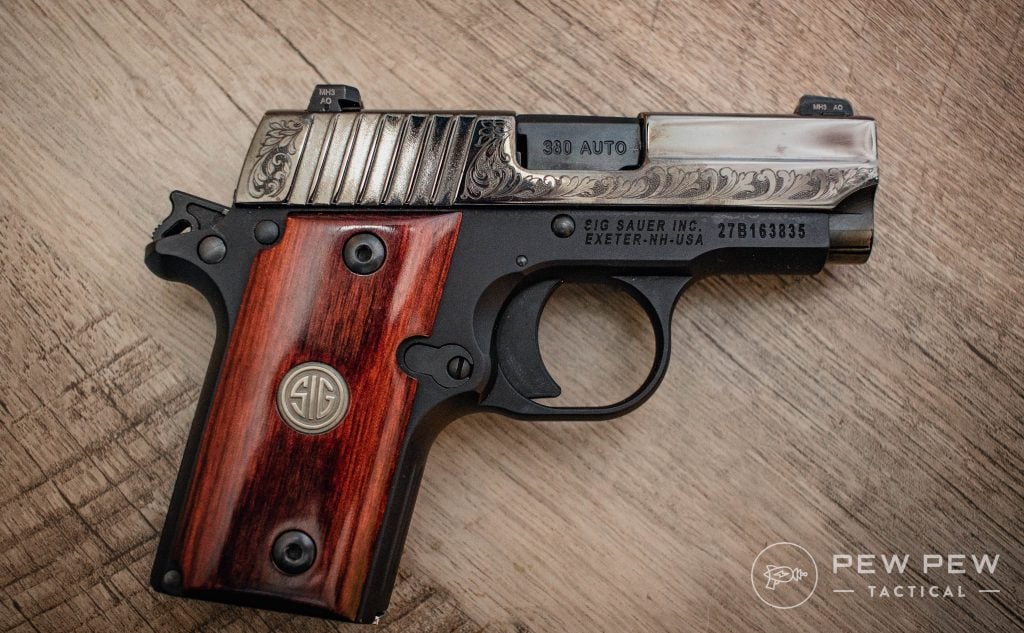
While I won’t name one brand to rule them all, I can make some suggestions based on my personal research into an effective round for my Sig Sauer P238.
For reference, this weapon sports a 2.7-inch barrel.
Our Editor-in-Chief’s Sig Sauer P238.
1. Hornady American Gunner Ammunition 90 Grain .380 ACP
The Hornady American Gunner .380 ACP features the XTP projectile and penetrates very well.
This projectile is really the key to this ammunition’s success.
It offers controlled expansion to allow the round to expand gradually as it travels through the body. This ammo isn’t too expensive and is pretty common.
What’s your take on Hornady’s defensive .380 round? Rate it below!
2. Remington 88 Grain HTP
I’m not going to lie…the biggest reason I was attracted to the HTP loads was the price.
These High Terminal Performance loads come in boxes of 50 and are priced pretty competitively.
The round is a solid performer that penetrates and even expands to an impressive degree.
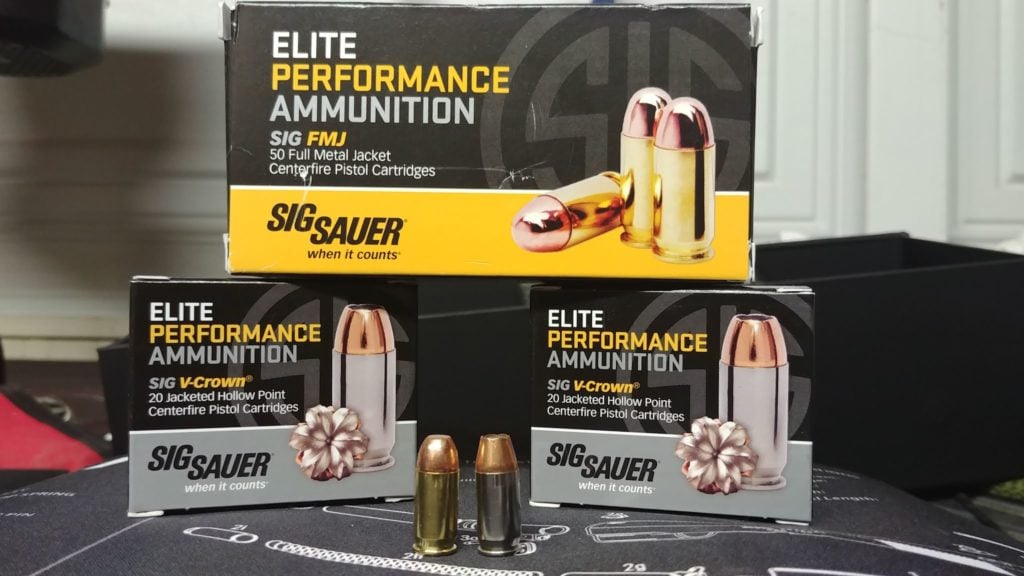
3. Sig Sauer 90 Grain .380 V-Crown JHP
Testing done by Chris Baker at Lucky Gunner has shown this round to be incredibly effective in both penetration and expansion.
The round has no issue reaching that 12-inch mark and also expands up to half an inch in size.
Sig’s V-Crown ammunition is well-built and surprisingly affordable.
4. Liberty Defense 50 Grain
If you are recoil sensitive, then the Liberty Defense 50-grain rounds are a good choice.
So, if you struggle with the recoil from a traditional round, these bad boys are better than nothing.
Best .380 Ammo for Target Practice & Plinking
5. Prvi Partizan 94 Grain FMJ
Prvi Partizan makes a huge range of ammo, and much of it is odd calibers or calibers that just aren’t in production anymore.
That is how I first started using them with their .303 Brit ammo. Since then, I’ve come to know and respect many of their calibers, and they have become one of my go-to picks for range ammo.
6. Fiocchi 95 Grain FMJ
I’ve never had a problem with Fiocchi; everyround has gone bang as it should. However, it’s some of the dirtiest ammo I’ve used.
After 200 rounds of their 9mm, my slide starts to stick. After 300, I need to clean it if I want to keep things running smoothly.
It is still one of the main brands I use for range ammo.
7. PMC Bronze 90 Grain FMJ
If you are looking for reliable ammo that runs relatively clean, PMC Bronze is a great option.
In the current market, PMC ammo has been fairly available while remaining competitively priced.
This is great for those who are looking to plink with solid ammo at a solid price.
8. Sellier & Bellot
Another favorite of the PPT team for range use is Sellier & Bellot.
It’s not built for self-defense purposes, obviously, since it’s FMJ…
But it works well when you want to get some training done at the range.
The Goal of Defensive Ammo
Defensive ammunition is purpose-built. As a civilian concealed carrier or home defender, your goal in any defensive situation is to end the threat.
So, your ammunition should match that goal.
Bullets stop threats in a number of ways.
The first and most unreliable is fear. It relies on criminals thinking, “he has a gun, and he can shoot me.” It doesn’t matter what kind of bullet it is since the very thought of the bullet is enough to end the threat.
Next, we have pain compliance. Pain is subjective to the person being shot. Pain tolerance, the location of the gunshot wound, and the presence of drugs and alcohol in the body all factor into this compliance.
Blood loss can also be an effective means to stop an attacker, depending on where the bullet is placed and the size of the projectile.
Now, when I say the projectile size, I don’t mean the size of the actual bullet before it’s fired. The difference between a .380 ACP and .40 S&W is literally a millimeter in projectile size.
In this case, the projectile size that matters is the size of the round after it expands in the body. Blood loss can take several seconds to several minutes, so it’s not the quickest means to end a threat.
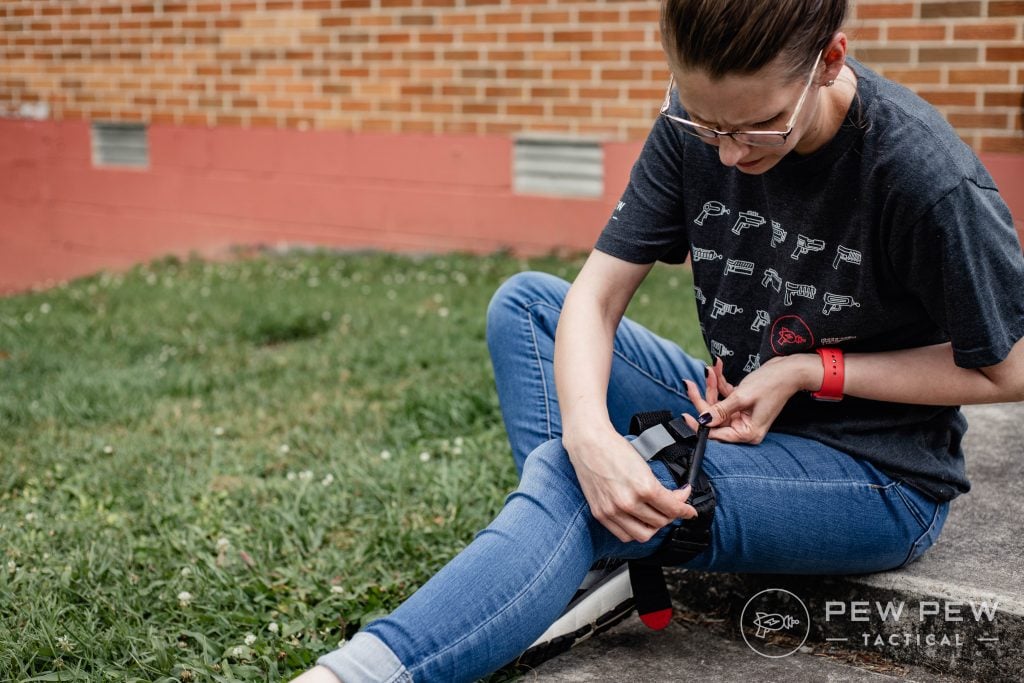
How do we stop excessive blood loss to extremities, friends? Tourniquets.
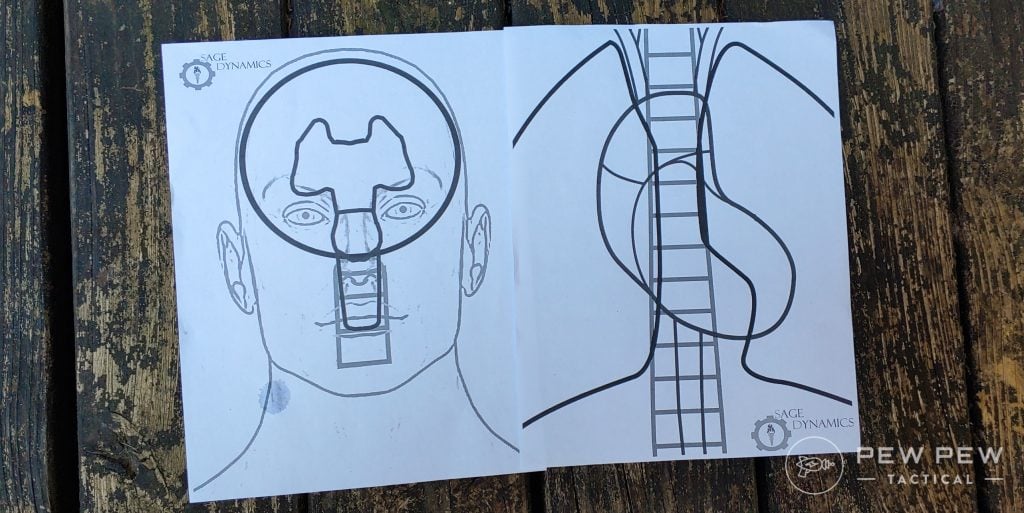
Lastly, trauma to the central nervous system will typically result in the death of an attacker, as well as near-instant incapacitation. This kind of trauma requires a shot to or near the spine, brain, and/or brain stem.
Remember that just because this is the most effective means of stopping an attacker does not mean it is always appropriate or legal to use this level of force.
Make sure you know your state’s laws regarding self-defense.
The round you choose must be able to accomplish these tasks to incapacitate an attacker. A .380 ACP is a lower-powered round, so ammunition selection is even more critical.
Legends and Myths
There are a lot of myths and legends regarding pistol ammunition.
People who believe these myths will often use them to discourage the use of .380 ACP and even 9mm.
To help you sort through the mess, let’s go over the biggest two myths.
Stopping or Knockdown Power
The stopping power myth is so widespread that it has seeped into gun culture. I cringe when I hear someone bring up stopping power because there’s simply no such thing.
The ability of a round to stop an opponent hinges on the shooter’s ability to strike a vital portion of the body and for the round to penetrate deep enough to hit something to incapacitate.
It all comes down to your skills.
Shot placement and penetration are the keys to stopping an attacker.
A miss with a .45 is still a miss. The heart, lungs, and brain do not know the difference between a .45 and a .380.
Hydrostatic Shock
Hydrostatic shock is a thing, but it’s not something that really occurs with handguns. To achieve hydrostatic shock damage, a projectile has to move at over 2,000 feet per second.
Very few handguns can achieve this speed, and .380 ACP rounds certainly can’t.
Final Thoughts
The .380 round is one some choose for self-defense or just for some fun on the range. Regardless of what you use it for, the right ammo will only help you reach your goals.
We’ve listed out some of our favorite .380 ammo brands to get you started and hopefully set you down the right path.
What’s your favorite .380 ammo brand? Tell us in the comments below. Don’t have one yet? Check out our article on the Best .380 Pistols: Pocket Rocketsfor some recommendations.
Farm-Fresh Eggs are in high demand right now with store prices skyrocketing. People are turning to their chicken-keeping neighbors for food instead of choosing the convenience of the grocery store. This is a great thing! However, many people struggle to eat fresh eggs because they have been led to believe that these eggs are not safe for consumption. So today, we will dig into the question- “Are Farm-Fresh Eggs Safe to Eat?”
Are Farm-Fresh Eggs Safe to Eat?
Short answer- yes!
Longer answer- It can depend on a few different variables that hinge on the specific chicken keeper.
Let’s talk about these variables and the differences between farm-fresh and store-bought eggs.
Farm-Fresh Eggs are Different than Store-Bought Eggs
What makes eggs straight from the farm different than the eggs that you can purchase at the grocery store?
1. Age
The eggs that you find sitting in a grocery store refrigerator are between 6 weeks and 2 months old. While eggs sold by your local farmer can last that long (even longer when stored properly), he/she usually won’t sell them at that age.
2.NutrientContent
Farm-fresh eggs have been shown to contain less cholesterol, more vitamins & nutrients, and much more Omega 3 fatty acids than typical store-bought eggs. The nutritional value of an egg is related to the diet of the bird (think solely pellet-fed vs. homemade feed vs. free-range) so this factor can vary from one farm to the next.
3. Protective Coating
Most eggs sold straight from the farm still have the bloom intact. Bloom is a protective coating that the hen covers her egg in before she lays it. Eggs sold in grocery store refrigerators have had this bloom removed so bacteria can freely enter through the pores in the shell.
Factors that Affect Egg Safety
Eggs from backyard chickens are safe to eat when the birds are healthy, the coop is clean, the eggs have an intact bloom, and they are handled properly. It is a good idea to get to know the farmer/homesteader you buy eggs from (and use good practices if you are selling eggs).
Be aware that many chicken owners do not allow on-site tours of their coops due to biosecurity issues. However, they should be willing to tell you about their practices.
Flock Living Conditions & Health
The condition of the coop, run, feed, and water are all related to egg safety. The flock should have access to:
A dry, clean, and draft-free coop
Clean nest boxes-1 box per 4 chickens is recommended
Fresh and clean water (The water may get dirty throughout the day, but should be changed as needed.)
Flock health is very important as well because a sick flock could equal sick (or lower quality) eggs. Sick birds should be quarantined and treated separately from healthy chickens.
Egg Handling Practices
Eggs should be collected daily and multiple times per day during extreme heat and cold.
Farm-fresh eggs can be left unwashed and out on the counter at room temperature OR they can be washed and placed in the refrigerator. Unwashed eggs are usually the better option (we will talk about why in a minute).
The oldest eggs should be used/sold first. Using an egg organizer like an egg skelter is a good way to keep the oldest eggs moving out first.
Egg cartons CAN safely be reused
Broken and cracked eggs should be discarded.
Intact Bloom
An egg is laid with a porous shell. This means that bacteria and other small particles can move in and out of the shell. To protect the egg’s contents, the hen produces a protective layer called bloom.
The bloom is a protective coating that a hen places on her eggs before she lays them. This coating protects the egg by sealing the eggshell pores, preventing bacteria from permeating the shell. This is why most backyard chicken keepers advocate for selling unwashed eggs.
With the protective bloom intact, eggs can be stored at room temperature for 2 weeks (sometimes up to a month). Once the egg is washed, however, the bloom is removed and the egg can no longer be safely stored at room temp. Washed eggs must be refrigerated to keep bacteria from growing in and on them.
When Should Eggs Be Washed?
If you have a clean coop with clean nesting boxes, then typically your eggs will be clean. However, that is not always the case. When it is rainy outside, the birds can bring mud in on their feet & bottoms which transfers to the egg shells.
This isn’t an issue since the bloom is still intact, but if you are selling eggs, your customers may prefer dirty eggs to be washed. Otherwise, there is no need to wash farm-fresh eggs until just before you plan to eat them.
Eggs should be washed in warm water, slightly warmer (by about 20 degrees F) than the shell. This helps to keep bacteria from moving back into the egg through the shell. Using cold water can create a vacuum that pulls bacteria into the egg.
How to Store Fresh Eggs Safely
Storing fresh eggs is just a bit different than storing eggs from the grocery store. This is because of the difference in egg age and the presence of the bloom. There are several ways to preserve and extend the shelf life of eggs such as by freezing, dehydrating, water glassing, and freeze-drying.
Shelf Life of Fresh Eggs
Washed fresh eggs in the refrigerator: 6-8 weeks
Unwashed fresh eggs in the refrigerator: 3-6 months
Unwashed fresh eggs at room temperature: 2-3 weeks.
Shelf Life of Store-Bought Eggs
Store-bought eggs are washed and must be stored in the refrigerator (this is at least true in the United States). They are usually good for 3-4 weeks after the packing date. The packing date is listed as a Julian date on each egg carton. Do not confuse this with the “best by” date.
How to Recognize Bad Eggs
If you want to test your eggs before cracking them, you can use a few different methods:
Egg Float Test
The float test is a little bit controversial. Some people swear by it and some say that it is unreliable. Place an egg in a bowl of water. If the egg floats it is bad, if it sinks it is good. The idea is that a bad egg will float because the air cell inside has grown large enough to make it buoyant.
Candling
Candling is the process of shining a light through the egg to view the contents- almost like an x-ray. You can use this method to see if a chick has begun to develop (if it has been with the hens for several days) or to see if there are dark spots that may indicate a rotten egg.
Shake Test
You can shake an egg close to your ear to listen for a sloshing sound. The idea with this test is that as the egg ages, the air pocket grows and the contents shrink so there is more room for the yolk and white to slosh around.
Crack into another bowl
You can also simply crack your eggs one at a time in a separate bowl. This keeps one bad egg from ruining the entire batch that you are cooking with. Just note that if you do crack a bad egg, you may smell it for a while.
With proper flock management and egg handling, you can lay the question, “Are farm-fresh eggs safe?” to rest!
Raising Backyard Chickens
Keep reading to learn even more about the joys of raising backyard chickens on the homestead!
Unveiling the truth behind dry firing a Gamo air rifle, this intriguing headline delves into the possibility of safely practicing without ammunition. Join us...
"Unleash the Power: Mastering Break Barrel Air Rifles for Maximum Performance. Discover expert tips and techniques to enhance the power and precision of your...
Unlock the Perfect Shot: Discover the Best Scope for Break Barrel Air Rifles. Enhance your shooting experience with precision and accuracy, as we delve...