Home Blog Page 185

Here’s Every State That Offers Sandhill Crane Hunting

0

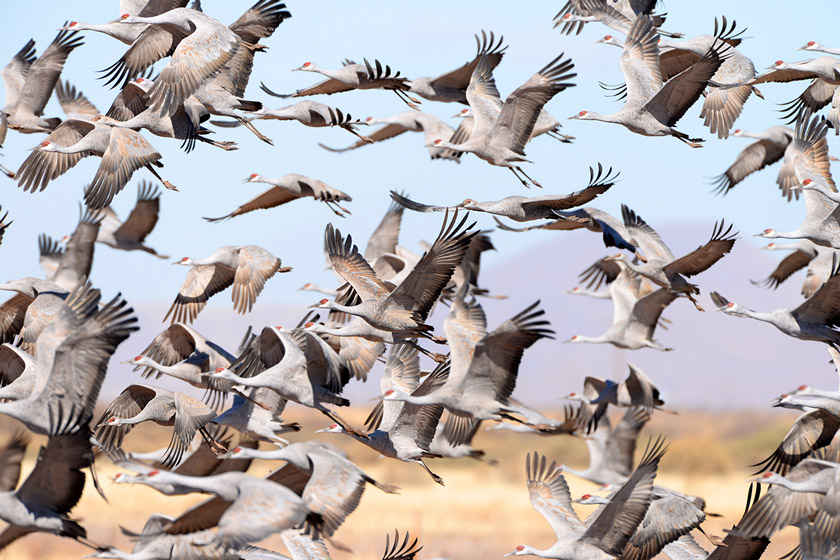
Sandhill crane hunting is more popular than ever, with hunters drawn to the challenge and reward of “The Rib Eye of the Sky.” In North America, there are six subspecies of sandhill cranes. Three are non-migratory, staying in one area year-round. The other three are migratory and travel from Northern Canada to Mexico. Seventeen U.S. states are sandhill crane hunting states. Still, federal regulations set the stage for anyone who wants to pursue them. There are some requirements and a critical program with which to register. After that, it’s up to you to decide where you want to go hunting.

Federal Laws for Sandhill Crane Hunting

Sandhill crane hunting is subject to most federal waterfowl regulations. These rules include using shotguns to take with a maximum capacity of three shells and only using a nontoxic shot. The federal government also prohibits using live decoys, hunting from vehicles, or using bait to draw in sandhill cranes.

All sandhill crane hunters must register in the Harvest Information Program (HIP) for migratory game birds. You can do this through the state’s wildlife department you plan to hunt in. Although it is a federal program, some states require you to register with them.

Suppose you have been duck or goose hunting before. In that case, you know about the Federal Migratory Bird Hunting and Conservation Stamp, commonly referred to as the Federal Duck Stamp. Some state regulations do not require the Duck Stamp for sandhill cranes.

In contrast, others explicitly say it is necessary. Defer to the state wildlife department you plan to hunt in to make sure. Now that the countrywide rules have been made clear, it’s time to list the states that allow sandhill crane hunting within their borders.

Alabama

If you’re looking for sandhill cranes in Alabama, you better go north into the Tennessee River Valley or the Weiss Reservoir on the Coosa River. Alabama offers sandhill crane hunting for Alabama residents in the northern part of the state through an annual draw. The season bag limit is three.

Licenses Required:

  • Alabama hunting license
  • Annual State Duck Stamp or Lifetime Duck Stamp
  • Alabama Sandhill Crane permit
  • Sandhill Crane Identification certification

Alaska

Most sandhill cranes in Alaska migrate through the Copper River Delta or the Tanana Valley near Delta Junction-Georgia Lake. As many as 50,000 cranes fly through this Alaskan funnel daily, many from Siberia. Sandhill cranes are subject to fall/winter hunting season dates based on the specific Alaskan Unit you are hunting in. All units have a daily bag limit of two.

Licenses Required:

  • Alaskan hunting license

Arizona

Sandhill cranes go way back in Arizonan history. People still find ancient petroglyphs of these birds etched into stones along the Gila River. Arizona offers sandhill crane hunting in select areas through an annual draw. The Grand Canyon State issued a total of 580 tags for the 2021-22 season, with a season bag limit of three.

Licenses Required:

  • Arizona Migratory Bird Stamp
  • Arizona Sandhill Crane permit

Colorado

Colorado offers an open sandhill crane hunting season. Sandhills are the only species of crane found in the Rocky Mountain State. Before the first hunting trip of the season, hunters must call 1-877-COLOHIP or register at ColoHIP.com and obtain permit numbers. All areas east of the Continental Divide except North Park and the San Luis Valley are available for sandhill crane hunting from Oct. 1 – Nov. 27, 2022, with a daily bag limit of three.

Licenses Required:

  • Colorado Small Game license
  • Colorado Sandhill Crane permit

Idaho

Idaho’s vast plains and valleys are a significant stop along the sandhill crane migratory route. The state holds sandhill crane hunting seasons in the eastern part through an annual draw. In 2021, the state of Idaho issued 610 sandhill crane tags with seasons running throughout September. The daily and season limit is two cranes.

Licenses Required:

  • Idaho hunting license
  • Idaho Sandhill Crane tag

Kansas

Sandhill crane hunting is available in the central and western Kansas zones during the fall and winter months. The daily bag limit for sandhill cranes in Kansas is three. The Kansas crane hunting season dates have the same start and duration from year to year.

The Western Zone Season begins on the third Saturday in October and continues for 58 days, including the opening day. The Central Zone Season will commence on the Wednesday after the first Saturday in November and shall continue for 58 days, including the opening day.

Licenses Required:

  • Kansas Sandhill Crane permit

Kentucky

There is an annual draw for Kentucky sandhill crane permits, with applications opening and closing in September. The season runs through December and January with a daily bag limit of two.

Licenses Required:

  • Kentucky hunting license
  • Kentucky Sandhill Crane permit

Minnesota

Sandhill cranes used to thrive in the Great Lakes region until humans settled down there. There are two separate populations in Minnesota today. Minnesota offers an open sandhill crane hunting season in the northwest portion of the state. The sandhill crane season runs from Sept. 18 – Oct. 24, with a daily bag limit of two.

Licenses Required:

  • Minnesota small game license
  • Minnesota Sandhill Crane permit

Montana

Montana has sandhill crane hunting in select areas through permits issued in an annual draw. The Montana season runs from Sept. 1 – Oct. 30, with a bag limit of either one or two depending on the specific area the permit is issued for.

Licenses Required:

  • MT Migratory License
  • Conservation License
  • Base Hunting License

New Mexico

New Mexico offers Free Regular Season Eastern Sandhill Crane permits and a Draw-Season Sandhill Crane permit. In 2021, New Mexico issued 540 Draw-Season sandhill crane permits. The daily bag limit is three.

License Requirements:

  • Harvest Information Program (HIP) registration
  • Game Hunting License or Game Hunting & Fishing License
  • Sandhill Crane Permit

North Dakota

North Dakota has an open sandhill crane hunting season beginning in September 2022. The daily bag limit for Unit 1 is three, and the daily bag limit for Unit 2 is two.

Resident License Requirements:

  • Harvest Information Program (HIP) registration
  • Fishing, Hunting, and Furbearer Certificate
  • Small Game License
  • General Game and Habitat License or Combination License
  • Sandhill Crane Permit

Nonresident License Requirements:

  • Fishing, Hunting, and Furbearer Certificate
  • General Game and Habitat License
  • Valid Nonresident Small Game License or Valid Nonresident Waterfowl License
  • Sandhill Crane Permit

Oklahoma

sandhill crane hunting states

Western Oklahomans know the call of a sandhill crane. The state is a thoroughfare on their migratory pattern. Sandhill crane hunting is available in the state of Oklahoma. Contact your local Oklahoma Department of Wildlife Conservation office for specific season dates and limits.

License Requirements:

  • Valid Oklahoma Hunting License
  • Federal Sandhill Crane Permit

South Dakota

South Dakota offers an open sandhill crane hunting season from Sept. 24 – Nov. 20, 2022. The daily bag limit is three.

Licenses Required:

  • Residents: Combination or Small Game hunting license
  • Nonresidents: Nonresident Small Game or Nonresident Waterfowl license.
  • South Dakota Migratory Bird Certification.

Tennessee

Tennessee offers sandhill crane hunting in select areas through an annual draw.

Licenses Required:

  • Tennessee Sandhill Crane Tag
  • Sandhill Crane Identification Test

Texas

192 of 254 Texas counties have sandhill crane seasons from October through January. Texas requires a “Federal Sandhill Crane Hunting Permit,” but this appears to be a state requirement and is only available through the Texas Parks and Wildlife.

Licenses Required:

  • Valid Texas Hunting license
  • Texas Migratory Game Bird Stamp Endorsement
  • Federal Sandhill Crane Hunting Permit

Utah

Utah offers sandhill crane hunting in select areas through an annual draw. If you don’t plan on hunting for grouse or cranes this year, Utah has a yearly preference point application that will improve your chances of winning a draw if you decide to apply the following year.

Licenses Required:

  • Utah combination hunting license or Utah small game license
  • Utah Sandhill Crane permit

Wyoming

Wyoming offers an open season for lesser sandhill cranes and a permit quota season for greater sandhill cranes. The daily bag limit for the general sandhill crane permit is three, and the season bag limit for the quota sandhill crane permit is one.

Licenses Required:

  • Residents: resident game bird or game bird/small game hunting license
  • Non Residents: nonresident game bird/small game hunting license
  • Hunter Safety Certificate
  • Wyoming Conservation Stamp
  • Wyoming Sandhill Crane permit

Regulations change annually, so check with the local wildlife department before the season starts to get up-to-date information on rules and permits. Participating in a sandhill crane hunt is both a challenging and rewarding experience, but luckily, there are many options regarding where to do it.

This article was originally published on May 17, 2022.

READ MORE: ALL THE UPLAND GAME BIRDS YOU CAN HUNT IN AMERICA

What Makes a Good Fish Fillet Knife?

0

Stainless Steel fillet knife with hollow handle next to a plate of uncooked fish and sliced lemon

Crusader Series 6.5″ Fillet Knife – NSF Certified

  • Material — Pick a blade that won’t rust easily, and can last you forever.
  • Thin, Flexible Blades — Slice through the fillet with ease, and make precise cuts.
  • Sharp-Edged Blades — Pierce the fish and remove the fish bones intricately.
  • Blade Length — The optimal blade length for a fillet knife varies by fish. Check out the table below.
  • Handle Type—Choosing a handle that comfortably fits into your hand is essential. It allows for a firm grip.

Skinny fillet knife with its blade resting on a large. uncooked red fish

Gladiator Series 7″ Flexible Fillet Knife

Let me preface this by saying I’ve only gotten into fish in the last 6 years or so (I’m 33 at the time of writing this). Now, before you rush to judgement, I remind you I live in a country that is globally known for its meat and people here will prefer beef over just about anything. Sad, right? But those are the facts.

That’s why, when I first attempted to cook my first fish at home, I was disappointed at the fact that I did not own the proper tools to process it. Longer story short, I ended up cooking the entire fish but it felt like cheating, in a way. I couldn’t help but feel that something was missing so, after a quick online research process, I went ahead and ordered myself a fillet knife.

Filleting, for those of you who don’t know, is basically separating the flesh of the fish from the bone. This is achieved by making smooth, precise cuts along the fish’s backbone, from the tail to the head. Initially, it might sound like a daunting task but a fillet knife can make the job way easier thanks to its flexible yet robust blade, giving you more control over the entire processing endeavor.

And while its raison d’etre might be filleting fish, the fillet knife should also be your go-to tool for the earlier stages of the fish preparation process, aka de-skinning and deboning. Other culinary tasks such as whipping up poultry fillets, producing ultra-thin slices of carpaccio meat, and even deveining shrimp are also among the things a filleting knife can excel at.

So, you see, when you invest in a quality fillet knife, you’re actually investing in a highly versatile tool that will greatly enhance your entire cooking process.

But enough of the chit-chat, let’s get down to business. Here’s everything you need to know about what makes a good fish fillet knife.

  1. What makes a good fish fillet knife?
  2. What is the best knife for filleting fish?
  3. What is a filleting knife used for?
  4. What is the difference between a fillet knife and a boning knife?
  5. What kind of knife do you use to cut fish?
  6. Dalstrong Film – The Fishmonger & The Sea

1. What makes a good fish fillet knife?

Small fillet knife resting on an uncooked fish that is laying on a small wooden cutting board

Shogun Series 6” Fillet Knife

There are several aspects that you want to look out for in a good fish fillet knife. These include:

  • Material — Pick a blade that won’t rust easily, and can last you forever.
  • Thin, Flexible Blades — Slice through the fillet with ease, and make precise cuts.
  • Sharp-Edged Blades — Pierce the fish and remove the fish bones intricately
  • Blade Length — A cheaper blade might be good for small-fry but you want something that can handle all manner of catches.
  • Handle Type—Choosing a handle that comfortably fits into your hand is essential. It allows for a firm grip.

Material

You may only be using your knife at home, but a key thing to remember is: fillet knives are also likely to be used on a fishing expedition. This means they’re going to be exposed to saltwater.

You might be wondering how that’s relevant?

All fillet knives should be corrosion-resistant because of this. A high-carbon stainless steel blade ensures that your knife remains in prime condition, even if it gets wet.

Cheaper knives do sell themselves as being made out of stainless steel, but you’ll find they’re less brittle and lacking the high-carbon the higher end knives offer. These will rust more quickly and lose their sharp-edge.

It’s one of the first aspects you should look for in picking a good knife.

Thin, Flexible Blades

The keyword here is control, and this is something often overlooked. Your knife needs to be thin and flexible, so you can make clean precision cuts.

Imagine trying to do that with a cheap and thick knife.

You’ll likely tear the flesh, and snap the fish’s bones as you make the cut — in turn, that makes it more liable those bones will get lost and end up on your plate!

Sharp-Edged Blades

You’ve found the perfect blade. It’s made of the highest carbon steel, it’s thinner than a piece of string, yet when you go to make your cut, it hardly leaves a mark on the fish!

That’s because you need a sharp-edged blade.

It says that an ideal fillet knife’s edge will have an angle of 12-17 degrees. It’s one of the finer bevels.

A fillet knife needs to be sharp so you can make a smooth cut, just like butter!

It also helps with the fish bones, too. If you spot an elusive bone inside your fish, you wouldn’t want to tear at it with a blunt blade. That could ruin the entire filleting process.

You want to get underneath the bone with a fine point and get it out with ease.

That’s why you need a sharp knife.

Blade Length

It’s easy to overlook the blade length.

You pick up a knife and assume it’s good for the job. 9 times out of 10, it probably is.

However, with a fillet knife, you may be making your life more difficult.

While smaller sized knives allow for more flexibility, when filleting large fish you need a longer blade.

We’ve made a handy guide to help you:

Knife Length Fish Type 4-6” inch blade. Perch Trout Walleye Pan Fish Mackerel 7-8” inch blade. Pink Salmon Salmon 8”-9.5” inch blade. Codfish Tuna Catfish Halibut

Having two or three blade sizes available is a brilliant idea, as you’ll always be prepared — no matter what type of fish you plan to cook!

Knife Handle

Similar to the length, another aspect often overlooked is the handle. Luckily, however, this one is a matter of preference!

Choosing a handle that comfortably fits into your hand is essential. It allows for a firm grip.

Remember: A firm grip means better control. Better control means a better cut.

These are the main three different types of handles available on the market:

  • Wood — Comfortable to hold and very sturdy. Slippery when wet.
  • Rubber — Better grip than wood, easier to clean. Not as sturdy as wood.
  • Plastic — Better grip than wood, easier to clean. Not as sturdy as wood.

2. What Is the Best Knife for Filleting Fish?

As you might’ve inferred from my lengthy preamble, the best knife for filleting fish is, wait for it, the fillet knife. Featuring a lightweight blade that gently curves from the handle to the tip, the fillet knife is the best suited knife to turn a whole fish into a series of longitudinal strips of flesh also known as, yes, you’ve guessed it, fillets.

With a blade length ranging from 6 to 11 inches, this member of the boning knife family is pretty much the only tool you’ll need to de-skin, debone, and filet your freshly caught fish like an actual pro.

In terms of variety, there are two main types of fillet knives out there that you can easily find on any online retailer:

  • Japanese-style fillet knives, usually called deba, which are less flexible but extremely sharp thanks to their single-beveled blade (it’s only sharpened on one side).
  • On the other hand, Scandinavian (also known as German) fillet knives are also popular, featuring a double-beveled blade with a heftier feel.

At the end of the day, there is no right or wrong when choosing between these two varieties. It all comes down to preference—Japanese fillet knives offer more precision at a granular level but Scandinavian fillet knives are sturdier and therefore better suited for outdoor activities.

If you’ve made it this far, we assume that you might’ve done some research on your end, trying to determine which fillet knife to finally purchase. You might’ve read about Bubba Blade or Rapala, known for their state-of-the-art folding fillet knives and fishing knives. And while we encourage you to follow your heart, we’re not here to tell you what you already know.

We take it for granted that you wouldn’t be reading this article if you weren’t looking for something different, something that could both spice up your kitchen and accompany you on all of your trips and excursions. A unique fillet knife that looks good and, most importantly, feels good.

For that reason, we handpicked a few items from Dalstrong’s wide assortment of fillet knives to offer you a couple of forward-thinking solutions to your current filleting dilemma.

Let’s get started!

1. Filet Knife 6″ | Shadow Black Series | | NSF Certified

Filet Knife 6

There’s no denying it, the Shadow Black Series 6” Filet Knife is one mean-looking knife. Its pitch-black titanium coating makes it look like something Batman would use on his fishing trips. Skin, bone, sinew—nothing stands a chance against its 7CR17MOV-X vacuum-treated steel blade, painstakingly hand sharpened to 16-18° per side for optimal performance.

Pros:

  • Peerless design.
  • Black, non-reflective titanium-nitride coating for corrosion-resistant, non-stick properties.
  • Features an ergonomic handle for maximum comfort.

Cons:

  • At 6”, it might not be the best option for working with larger fish.
  • Its unique looks might not be for everyone.

2. Curved Fillet Knife 6″ | Gladiator Series

Curved Fillet Knife 6

The Gladiator Series’ 6” Curved Fillet Knife is a true all-around performer. From filleting fish and poultry to finely mincing onions and shallots, the versatility of this excellent knife knows no boundaries. Forged from a single piece of high-carbon German ThyssenKrupp steel, its blade is designed for laser-sharp precision.

Pros:

  • Beautiful hand-polished finish.
  • Excellent edge retention.
  • Comes with a PerfectFit Dalstrong Sheath.

Cons:

  • Its design is a bit more conservative than other knives on this list.
  • Some cooks might prefer a thinner fillet knife blade.

3. Fillet Knife 6″ | Delta Wolf Series

Fillet Knife 6

Don’t be fooled by its size, the Delta Wolf Series 6” Fillet Knife is one ruthless performer. Inspired by the Special Operations Force of the same name, it features a high-carbon 9CR18MOV steel blade with a narrow tip that will allow you to filet, trim, de-bone, de-skin, and butterfly with minimal effort. Whether in your kitchen or in the great outdoors, this stunner of a knife is sure to turn heads wherever you go.

Pros:

  • Edge is painstakingly hand sharpened to 8-12° for optimal performance.
  • The triple-riveted G10 camo handle is designed to withstand the most extreme conditions.
  • Comes with a gorgeous PU Leather Sheath.

Cons:

  • Some outdoorsy cooks will prefer a slightly longer knife to work with large fish.
  • Its stealthy looks might not be everyone’s cup of tea.

4. Shogun Series 6″ Fillet Knife

Shogun Series 6

A part of Dalstrong’s very own Shogun Series, this 6” fillet knife marries centuries of Japanese knife making knowledge with modern technology to superb results. With a blend of Japanese high-carbon AUS-10V steel and 66-alternating layers of SUS410 damascus, its blade offers the perfect balance between maneuverability and strength.

Pros:

  • Stunning Tsunami Rose pattern on the blade.
  • Nitrogen cooled for enhanced harness, flexibility and corrosion resistance.
  • G-10 Garolite handle adorned with a classy copper mosaic pin.

Cons:

  • Its price point might be a little high for casual home cooks.
  • Believe it or not, more conservative chefs will prefer a clean stainless steel finish as opposed to the Damascus steel’s distinctive pattern.

5. Fillet Knife 6.5″ | Crusader Series | NSF Certified

Fillet Knife 6.5

Last but not least, we have the Crusader Series’ 6.5” Fillet Knife. Sporting a minimalist design inspired by medieval swords, this knife will become a trusted ally in your kitchen for all things filleting. Built from a single piece of German-made ThyssenKrupp stainless steel painstakingly sharpened at 16-18 degrees per side, the Crusader is one stellar piece of craftsmanship that will stand the test of time.

Pros:

  • Full tang blade for strength and robustness.
  • Its seamless transition from the blade to the handle makes it super hygienic and easy to clean.
  • Comes with a handcrafted Acacia wood magnetic sheath to keep your knife secured and in place.

Cons:

  • Some folks prefer the feel of a traditional wooden handle.
  • Its modern looks might be a turnoff for more conservative chefs.

3. What Is a Filleting Knife Used For?

Uncooked fish on a wooden cutting board beside a black fillet knife with a light blue surface
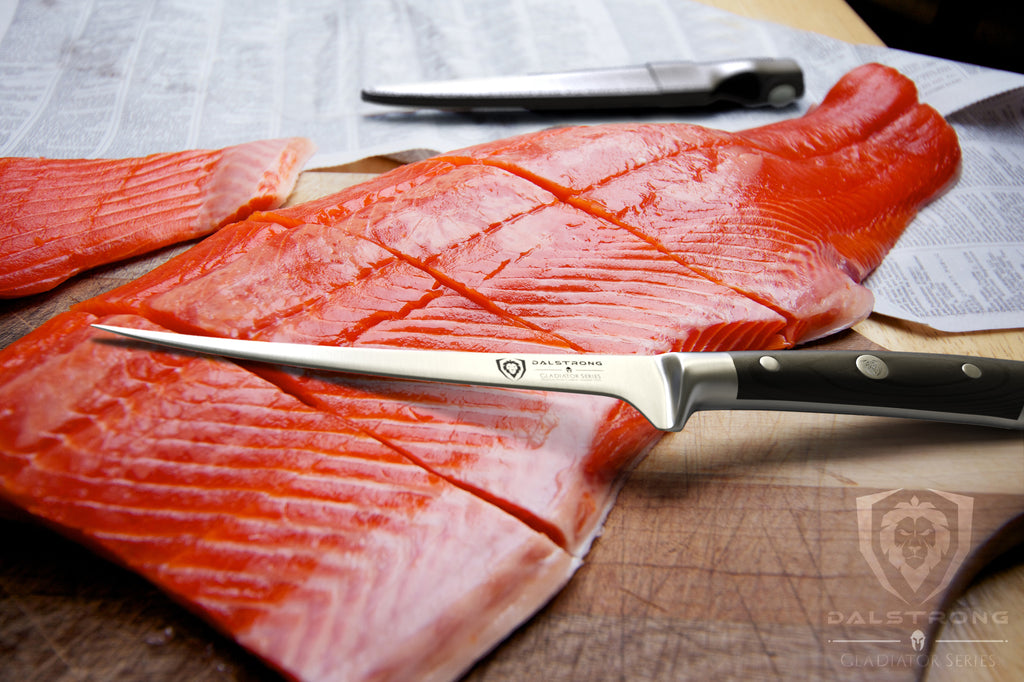
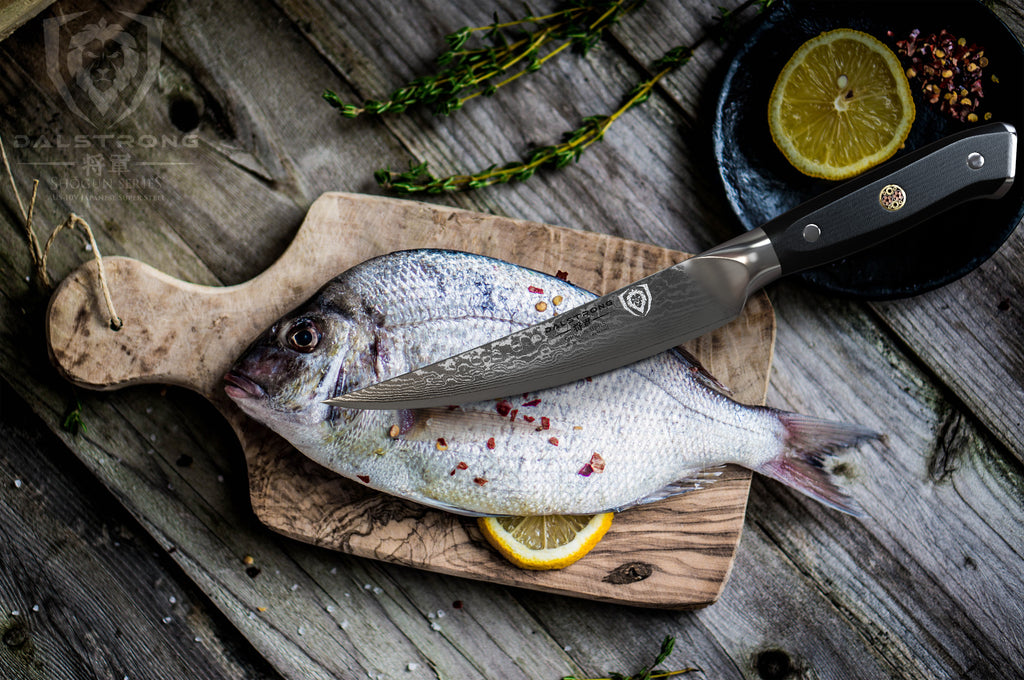
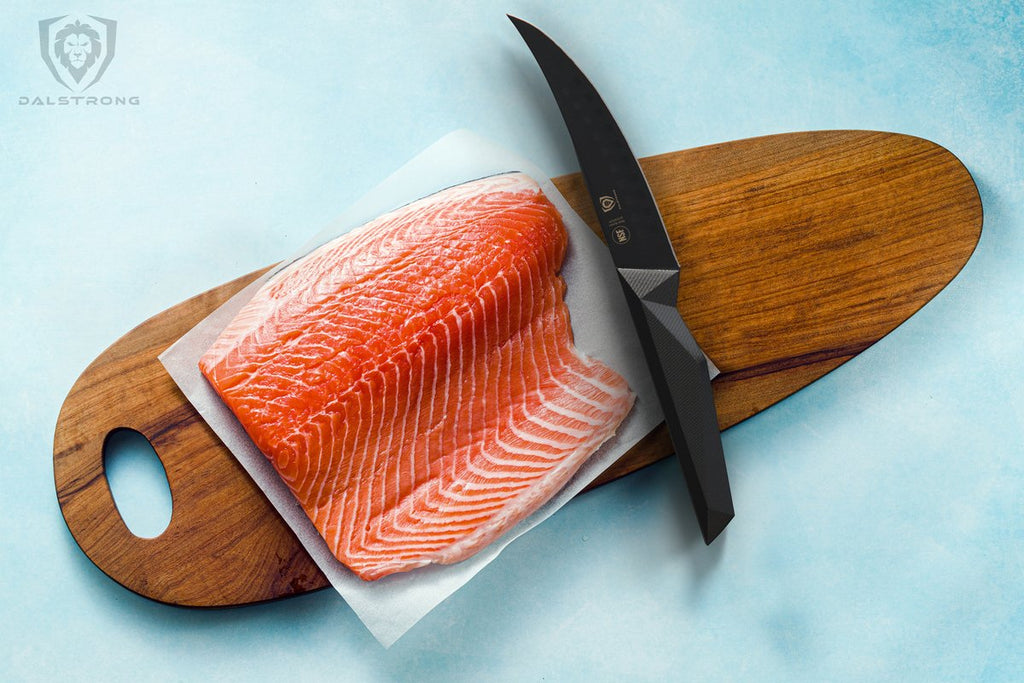
Fillet Knife 6″ | Shadow Black Series

Like we established before, a fillet knife’s main purpose is to produce thin strips of flesh from an entire fish known as fillets. Due to its flexible blade, the fillet knife can cut around the contour of the bones, joints, and skin, making sure nothing goes to waste.

But far from being a one-trick pony, the fillet knife has many aces up its sleeve. Some of the things you can also do with a filet knife include:

  • De-bone, filet, and remove the fat from a whole chicken.
  • If you don’t own a meat slicer, the fillet knife can act as a decent substitute to get ultra-thin slices of beef.
  • Since this type of knife is specially designed to work with fish, it can also come in handy when removing the scales and removing all of the internal organs. This process is also known as cleaning.
  • Cut, slice, and peel fruits and vegetables.
  • Create sophisticated garnishes for your salads and cocktails.

Pro tip: If you want to look cool while filleting fish for a fancy dinner at home, check out our collection of aprons.

4. What Is the Difference Between a Fillet Knife and a Boning Knife?

While there might be some overlap between these two, the truth is that they serve two entirely different purposes.

Let’s start with the specs:

Boning Knives

  • Designed to separate bones from meat and fish.
  • Average blade length: between 5 and 7 inches.
  • Type of blade: usually flat with a straight and slightly curved tip.
  • Removes meat from heavy bones or tiny bones from fish.
  • Slightly thicker than fillet knives.

Fillet Knives

  • Thinner and more flexible than most other knives.
  • Average blade length: between 6 and 11 inches
  • Type of blade: features a gentle upward curve that ends in a sharp curved tip.
  • Perfect for removing scales from a fish without damaging the meat.
  • Can’t handle excessive force like a chef’s knife—it’s mostly meant to perform delicate tasks.

To sum it up, fillet knives are a part of the boning knife family but are generally designed to work solely with fish. Their fillet blade is thinner and more flexible than most boning knives, allowing for a greater degree of control. Like we’ve mentioned before, a fillet knife can perform many other tasks but an irresponsible use can dramatically reduce its lifespan and damage the sharp blade.

Boning knives, on the other hand, are a bit sturdier and can easily process larger pieces of beef and game. While they’re considered more versatile than fillet knives, boning knives are not as flexible and will not perform as well with delicate meats such as fish. This requires a level of flexibility and finesse that only the fillet knife possesses.

Pro tip: What’s your sharpening go-to method? Whetstone? Sharpening steel? Regardless of your weapon of choice, this nifty sharpening tutorial covers pretty much all you need to know about keeping your knife blade’s sharp edge.

5. What Kind of Knife Do You Use to Cut Fish?

A black fillet knife next to a raw fish by water

6” Fillet Knife | Delta Wolf Series | Dalstrong ©

There’s just no way around it. Processing fish requires a high quality fillet knife. Your average kitchen knife or chef’s knife just won’t do.

If you want to step up your fish-processing game, you need a fillet knife with corrosion-resistant properties. This is a must, since prepping fish means you’ll be working mostly in wet environments. Most modern high-carbon stainless steel blades will do just fine.

Also, when working with fish, hardness is not so much of a concern. What you need is a thin and flexible blade that can breeze through the fish’s fragile bones and skin without leaving a full-on carnage on your cutting board. A good fillet knife can transform an entire fish into precisely cut fillets with surgical precision.

Note: There are also electric fillet knives that can work just as well as a fixed blade. That said, they’re generally larger, heavier, and more expensive. Now, that wouldn’t be a problem if you were only using it in your kitchen but think about your fishing trips: would you wanna carry around a power source wherever you go? We didn’t think so either.

Frequently Asked Questions

What is the best quality fillet knife?

The best quality fillet knife can vary depending on personal preferences and needs. Factors to consider include the knife’s blade material, sharpness, flexibility, and handle comfort. Brands like Wusthof, Victorinox, and Bubba offer reliable options. An electric fillet knife, like those from Rapala or American Angler, can also be a good choice for efficient filleting. A comfortable handle with a nonslip grip enhances safety and control.

6. Dalstrong Film – The Fishmonger & The Sea

SHOP FILLET KNIVES TODAY

You can also check in with our Expert Knife Finder Quiz and get specific recommendations based on your needs.

Dalstrong Expert Knife Finder

Written by Pablo Perez

When he’s not adding way too much butter to his recipes, Pablo likes to write about knives, music, food, cinema, and all of the other things that make life worth living.

Compound Bow vs Longbow: Who Really Wins the Fight?

0

Compound bows are becoming increasingly popular nowadays. With the advancement of modern technology, compound bows are becoming more robust, flexible, and accurate.

However, a large portion of bowhunters still uses traditional longbows for archery and hunting. Now the question is, why? What is the difference between these two? And how to distinguish which one is an ideal piercing weapon?

That’s what we’re going to discuss today in our “compound bow vs longbow” guide. We’ll explore the key difference between these 2 bow types, and help you choose the best one for you.

Compound bows use a pulley system to store potential energy, resulting in high-velocity (up to 370 ft/sec), and high-powered arrows whereas traditional longbows feature a traditional outlook, are low-maintenance and are easy to carry around. Which one you’ll end up choosing depend largely on your preference.

Let’s explore more in our in-depth “Compound Bow vs Longbow” comparison:

A Brief History

Longbow vs Compound Bow

The traditional, good-old longbow comprises a bowstring that’s tied to a bowed implement. Usually, the tool is a single unit from top to bottom. To lurch your arrow far, you need to pull the bowstring back significantly.

This action requires a lot of energy and concentration. Therefore, you have to lug your entire weight backward. Besides, you need to stay upright for improved accuracy. If you have less weight, however, this action is awkward.

It’s even more difficult if your hands are unsteady. Therefore, a better contraption has replaced this mechanism in a modern-day compound bow.

Here, a pulley (cam) is introduced to recoil the strings. And to improve the versatility and reinforcement at the center, a thicker and more robust member is fitted.

Therefore, the entire length comprises a short truncated upper recurve segment, and a lower one coupled together with a much stronger middle unit.

The advantage of this new design is that it allowed for a more significant backward movement without the bow breaking apart.

What’s more? the archer now needs to spend less energy, and yet, the accuracy of the arrow has significantly improved.

Compound Bow vs Longbow: Key Differences

1. Origins

Bows have been in existence for millennia. A 17,000-year-old arrow discovered in South Africa proved that bow hunting existed even during the stone-age era.

It’s believed that the Egyptians are the ones who invented the bows and arrows. Many pieces of evidence indicate bows were in use around 2,300 BC.

During this period, the preferred construction materials were sticks from hardwood timber such as ash and oak. The string was made of sheep intestine.

Obviously, so many changes have taken place since then. From the rudimentary and inaccurate weapon, you now have an extremely lightweight and powerful tool.

Compound bow

A compound bow is an improvement upon the longbow. It’s fairly intricate. Holless Allen gets credit for the development of the compound bow.

He modified a longbow into the much stronger compound bow we see and love today. He did this by initiating several improvements to the longbow and showcasing it through a patent he applied for in 1966 and received in 1969.

The new compound made its debut in the US National Archery Competition in the 1970s.

Longbow

Bowhunting enthusiasts Baer, Hiyt, and Mathews refined the longbow using new and modern materials. They transformed the hitherto wood frame and sheep intestines elements previously used for these longbows.

But even before the new revolution in the manufacture of the longbow, a previous one had already occurred.

The most advanced modernization of medieval archery goes to the Welsh. It appears that they manufactured the longbow into a tactical offensive weapon.

Their archers managed to withhold a large regime of British soldiers in the Battle of Waterloo in 1066. But the first recorded use of a longbow was during the battle of AD 633 during the war between the Welsh and Mercians.

Since then, this particular longbow earned the name of the British longbow. It’s been used in numerous battles with the French both on land and in the sea.

2. Design

The design of a longbow varies from that of a compound bow. Let’s see what our “compound bow vs longbow” comparison guide points out about the design differences between these two types of bows:

Compound bow

The high-quality compound bows are sophisticated. They have two sewn recurve ends fitted with pulleys at the end (limb). Either or both cams feature one or more cables attached to the opposite limb.

These cams provide the pivot needed when you pull back the bowstring. This action (let off) enhances the accuracy of the arrow while giving a more natural aiming response.

The center of the compound bow (riser) pivots the limbs, bow sights, bow stabilizers, and quivers. This section required greater flexibility to transfer as much of the stored energy from the bow to the arrow as possible.

This segment curves out towards the target, making it exert more force, which is subsequently transferred to the arrow.

Newer models of compound bows have cables and cable slides as well as a higher brace height. This is the length between a grip throat and the bowstring.

Longbow

The longbow, on the other hand, comprises a long weapon measuring about four feet long. Its stave was from a D-shaped section of a hardwood branch.

It has a singular and long limb. Typically, it’s made from a single material. There is no reinforcement or clamping along the entire stretch.

Even if the bowstring structure is the same as in a compound bow, the longbow still shoots slower and requires more force.

As a result, the arching process is also more strenuous than the former. This is due to the lack of a bow curve, the absence of cams as well as a more prolonged and weaker limb.

3. Material

The elements that make the longbow and compound bow affect how these two tools perform. Let’s look and the material composition of compound bow vs longbow.

Compound bow

Previously, compound bows comprised plastic-coated steel. However, due to lower tensile strength and flexibility – that decreased the arrow’s overall accuracy, – they now feature more suitable materials.

The more prominent material currently is the high-modulus polyethylene compound. It offers higher tensile strength as well as maximum energy transfer.

Longbow

The ancient longbows were constructed mostly from yew. However, hazel and elms were occasionally used. It was then coated with resin, wax, or excellent tallow to improve its tensile strength.

Currently, however, composite materials of laminated fiberglass and tampered wood are now used to make recreational longbows.

4. Uses and Benefits

Long ago, bows and arrows were used for hunting and conquering. But presently, they are used primarily in sports hunting and bow shooting competitions. Archery has grown as a favorite pastime as well as a game in all major tournaments.

Compound bow

A compound bow has a more significant benefit due to its design. The robust cams allow for a higher energy reserve. You only draw a portion of the energy and the rest remains at the front where it’s needed most when shooting.

The horizontal limbs also reduce the vibration and recoil intensity before shooting the compound bow, improving the accuracy of the shot as a result.

Further, modern compound bows have sighting devices to improve aim, as well as mechanical release to retain shot consistencies. Therefore, you are likely to shoot accurately using less effort.

Longbow

Longbow proved challenging to use since it required an inertia of over 65 lbs to deliver the necessary projectile power. This posture is also more strenuous since you’ll have to arch significantly back to convert sufficient energy needed by the arrow.

Different types of longbows were used for assorted arrows. There existed fight arrows, with chisel arrows. Other bows accommodated hunting arrows. Even within them, they also vary between animal and bird hunting types.

When you compare a longbow vs. a compound bow, you find that a longbow is lighter and quicker to shoot. Besides, it’s also quieter.

Additionally, the longbow is easy to make since it needs just one or two tree branches.

5. Draw Length

In archery, you need to be sure about a bow’s draw length. Typically, a draw length has a close correlation with your overall body size.

Take the distance from the tip of a nocked arrow to the tip of your draw-out hands. Divide this distance by 2.5, and you’ll get your draw length,

Compound bow

For a compound bow draw length, measuring the arrow tip should ideally be around two feet beyond the riser at full draw. When you hold this position and measure the arrow length, you get the draw length by adding one foot to the computed distance.

Longbow

The draw length of a longbow is usually more than five feet. Many of the early models had their measures reaching up to 12 feet. But they commonly averaged six-and-a-half feet long.

6. Limitations

Even the best-functioning longbows or compound bows have their drawbacks. Below are some of the shortfalls that are apparent in both the compound bow and the longbow.

Compound bow

By design, compound bows have many moving parts. This structure makes them susceptible to breakages and parts malfunctions. Further, having many elements make compound bow maintenance and handling a bit expensive.

Replacement is also intensive. It requires special tools to replace and repair damaged parts or strings of the compound bow.

Longbow

The longbow stretches more slowly and unsteadily. When you draw it backward, your arms move with the full energy you are exerting. You need more power to hold back your hands firmly.

At the same time, during the process of drawing your bow, less energy is available at the point where the bowstring meets the arrow.

This has the dual effects of releasing less punch directly to the arrow, as well as exacerbating your unstable hold. Hence when you release the arrow, it first, only moves a short distance and is less linear in its movement.

Further, it’s more likely to miss its target due to a weak trajectory caused by less force.

7. Care and Maintenance Requirements

Proper care for your bow is vital. You appreciate that owning a modern compound bow may cost you up to $1,000. Even with the composite material, they have many parts and accessories that need tender care.

Compound bow

Compound bows have sights, pulleys, limbs, cables, and cams. All these are made of different materials. Further, their assembly is delicate. Hence you ought to maintain each component individually:

  • Cables: Waxing protects your cables when not in use. Do this once a month or after every exposure to the elements.
  • Limbs: Laminated limbs are susceptible to cracking under various layers. Do a thorough inspection (by rubbing with cotton wool) to identify such defects.
  • Frame: This component suffers from a lot of tension. Inspect it routinely for cracks and twists.
  • Cams: Visually check on the cams before using your compound bow. To prevent corrosion and discoloration, wipe this part clean after every use.
  • Accessories like bow-sights rest and quivers also require regular maintenance. Accurately mount them to avoid any damage through colliding with other surfaces.

Longbow

Longbows are made from composite frames or laminated timber. Run periodic inspections to identify damages to the fame and the bowstring.

Apply remedial measures similar to those on frames and limbs and accessories in the compound bows. Don’t store limbs in a hot compartment. Keep your longbow in a cool dry place. Better still, afford similar treatment to bolts and nuts.

Are Compound Bows Better Than Longbows: Which One to Get?

Compound bows and longbows have been used for centuries in hunting and archery. Now, you might be thinking Is a compound bow better than a longbow, or is it the other way around?

That’s a question that has been debated by hunters, archers, and outdoor enthusiasts for many years. Let’s find out which is the better option for you.

When a Compound Bow Is Better

Compound bows are becoming increasingly popular due to their superior accuracy and power compared to traditional longbows. While some people will always prefer the classic look of a longbow, it’s hard to deny the benefits of a compound bow.

Compound bows have several advantages over longbows. They are capable of higher draw weights than traditional longbows, allowing for greater accuracy, longer range, and more penetrating power.

The cams on a compound bow also make it easier to shoot with a consistent draw length, which can be very helpful for novice archers.

Additionally, compound bows are usually easier to maintain and tune than longbows. This can be a big plus for people who aren’t as experienced with bow maintenance and tuning.

When a Long Bow Is Better

Longbows have several advantages over their modern counterpart that make them attractive to traditionalists.

Their simpler design makes them lighter and easier to carry, making them a popular choice for hunters who must traverse long distances.

Longbows can also be more durable than compound bows since they are less complicated and require fewer parts. They don’t usually require as much maintenance or tuning either, which can be a plus for those with limited technical skills.

Finally, traditional longbows are often more aesthetically pleasing than compound bows, which can be a plus for those who prioritize looks.

Longbow vs Compound Bow: Which One You Should Get

The choice of whether to get a compound bow or a longbow is up to the individual archer or hunter. Both have their advantages and disadvantages, so it’s important to weigh all of the factors before making a decision.

Some archers may prefer the classic look and feel of a longbow, while others may be drawn to the power and accuracy of a compound bow.

Ultimately, the choice is yours, so do your research and find the option that best fits your needs. Good luck!

Conclusion

And with that, we’re at the endgame of our in-depth “compound bow vs longbow” comparison. Let’s do a quick recap.

You understand that compound bows offer better performance than longbows. However, you may still come across diehard fans of traditional bowing techniques.

To them, using both a compound bow and a longbow propel the arrow to the ordinary distance of 22 feet. But the inclusion of modern technology into bowing has made significant strides that you can’t ignore.

In fact, the new construction and materials have made bow hunting a more comfortable sport for everyone.

So, whether you aspire to hunt elks, deers, or any other small-medium game animal; or win a trophy at an archery completion, you have to start by learning how to use, differentiate and care for your bows and arrows.

Either way, you still need to practice consistently to perfect your pull, nock, aim, and shoot.

FAQs

Which Type of Bow Is More Accurate: Longbow or Compound?

Compound bows are generally considered to be more accurate than longbows as they feature a system of pulleys that help create consistent draw weight throughout the shot.

Is It Easier to Shoot a Longbow or Compound Bow?

In most cases, compound bows are easier to shoot than longbows since they feature a system of pulleys that help make the draw weight consistent throughout the shot. Compound bows also tend to be less affected by wind speeds, giving them an extra accuracy boost.

How Much Draw Weight Should I Use With Each Type of Bow?

Generally speaking, recurve bows require more draw weight than compound bows, with 40-50 lbs being the standard range for recurves and 25-45 lbs being the usual range for compounds.

For safety reasons, it is important to never exceed the maximum recommended draw weight for either type of bow.

What Sasquatch Eats

0

Last month, Sasquatch The Legend explored the topic of Where Sasquatch Sleeps. This month, it’s what exactly this mysterious creature sustains itself on that is the focus.

Dinner plate, homemade pie (author photos)

Roots? Berries? Fish? Elk? Even…humans? Every living thing must eat in order to sustain itself, but what exactly does the being we call Bigfoot or Sasquatch consume? Sasquatch The Legend turned to a few of our favorite Bigfoot/Sasquatch reference books for answers.

Kathy Moscowitz Strain’s Giants, Cannibals & Monsters: Bigfoot in Native Culture (2008) is an excellent source of historic tales originally sourced from the oral traditions of native peoples of the the Americas.

Within Strain’s book, some of the oldest references to the giant beings we now know as Bigfoot or Sasquatch depict them as cannibalistic monsters capable of carrying away innocent men, women and children to consume at their leisure.

“There was a great Giant who lived in the north. His name was Oo-wel’lin, and he was as big as a pine tree. When he saw the country full of people he said they looked good to eat, and came and carried them off and ate them. He could catch ten men at a time and hold them between his fingers, and put more in a net on his back, and carry them off,” begins one story from the Miwok Indian people of California, quoted by Strain (p. 29).

Stories of cannibal Bigfoot-like beings are not limited to California, but are echoed in the oral histories of native peoples throughout the Western United States and Canada (see Tom Sewid’s artwork below, depicting the Dzoonakwa stealing children.)

Bigfoot-like creature capturing children (artwork and photo: Tom Sewid)

In another story, “Che-ha-lum-che comes out only at night and wanders around seeking Mewuk (people) to eat. He prefers women; of these he catches and carries off all he can find. Sometimes he makes a crying noise, hoo-oo’-oo, like a baby, to lure them. If they come he seizes them and tosses them into his big pack basket and carries them to his cave, where he eats them. In the basket is a long spike which pierces their bodies when they are thrown in, so they can not escape. In his caves are the remains of his victims—horns of deer and bones of people and different kinds of animals” (Strain, p. 35).

(Thankfully, these accounts are from the distant past, and Sasquatch The Legend is not aware of documented, modern accounts that suggest Bigfoot/Sasquatch is still eating human beings, at least not at the present time. However, as author David Paulides notes in his many books, there are countless human beings who have disappeared in the forests across North America under mysterious circumstances, so caution is always advised when in areas where Sasquatch have been seen.)

Early Bigfoot researcher and author, Ivan T. Sanderson, in Abominable Snowmen: Legend Come to Life (1960) includes many eyewitness stories about Sasquatch, some which include the beings eating. One story about a berry-eating Sasquatch near Chiliwack, British Columbia, Canada stands out:

Wild huckleberries, Alaska (author photo)

“Green Hicks suddenly stopped us and drew our attention to a large, light brown creature standing about 8 feet high, standing on its hind legs (standing upright) pulling at the berry bushes with one hand or paw toward him and putting berries in his mouth with the other hand, or paw. I stood still wondering, and McRae and Green Hicks were arguing. Hicks said, ‘It is a wild man’ and McRae said, ‘It is a bear.’ As far as I am concerned the strange creature looked more like a human being” (Sanderson, p. 77).

John Napier’s Bigfoot: The Yeti & Sasquatch in Myth and Reality (1972) recounts the tale of the kidnapping of Albert Ostman by a Sasquatch family. Ostman speaks of “grasses with sweet roots, spruce and hemlock tips and tubers” which the mother and son Sasquatch collect and bring back to the cave to eat (Napier, p. 74). Napier notes that “Grass and spruce tips, however rich they might be in protein, hardly seem an adequate diet” for a large Sasquatch being.

Meadow grasses and trees, Breckenridge, Colorado (author photo)

Napier also mentions the Chapman story, a tale from Canada in which a family living on a remote homestead was visited one day by an “8 foot high male creature which emerged from the woods,” left “gigantic footsteps”, and seemingly turned over (and presumably ate) a heavy barrel of salted fish (Napier, p. 76).

Bigfoot researcher John Green, in his book, Sasquatch The Apes Among Us (1978) very helpfully sorts and categorizes observed Sasquatch behaviors such as eating. Green notes that Sasquatch have been seen by humans while eating all of the following items: “roots, leaves, berries, grass stems, water weeds, small rodents, fish, raw bacon & eggs, garbage” and also have been seen carrying away, presumably to eat, such items as “deer, sheep, cattle, corn, chickens and rabbits” (Green, p. 447).

Homegrown corn (author photo)

A story from a 10-year-old boy in West Linn, Oregon, in Green’s book, tells of “a big hairy animal standing upright in the Detroit Reservoir, in Oregon.” Witnesses watched it “reach down and catch a fish, which it ate after biting off the head. When it noticed them it ran off and left 16-inch footprints in the mud” (Green, p. 434).

In J. Robert Alley’s Raincoast Sasquatch (2003), a book that is a treasure trove of eyewitness Sasquatch encounters, the author describes multiple accounts of Sasquatch beings being seen searching for food such as picking berries, digging for beach sand and piling up rocks, presumably in a search for crabs and clams, and carrying deer.

Sandy beach near Forks, Washington (author photo)

In one account from the 1960s in Alaska, a boater told of seeing “what looked like a manlike, dark, hairy creature, digging in the sand like he was digging for clams using a stick….digging with its right hand. The stick it had been digging with would have been about the size of a small baseball bat or halibut club. While digging, it would pick something up with its left hand and, it seemed like, would put something to its mouth” (Alley, pp. 84-85).

In another exciting encounter from Alley, a teenage boy describes walking with his friends on a road near Ketchikan, Alaska when “Suddenly we saw a deer come crashing out of the woods on the bluff above us, and right behind it came a big black thing. Both the deer and the creature passed within thirty feet of the nearest boy and it appeared to me to be about ten feet tall. The deer crossed the road at top speed but the thing saw us, seemed to stop for a second, and then took off right after the deer again. It was real big and ran on two legs, covered all over with black hair” (Alley, p. 91).

Deer, Olympic National Park, Washington (author photo)

Brushes with Bigfoot: Sasquatch Behaviors Reported in Close Encounters, Native and Non-native Perspectives (2021) a more recent book also by J. Robert Alley, contains a couple stories about eyewitnesses seeing Sasquatch in a search for food. One witness watched a Sasquatch on the Unuk River in Alaska “lifting rocks up with his hand and he scraped the crabs out with the other hand” (p. 105).

Another witness, one of a very few to actually see a Sasquatch eating, said that while he and a friend were out night fishing, he watched the big figure of a Sasquatch on the riverbank near them, consuming fish guts. “It moved on two legs but would bend over, backside to us, to scoop up the fish guts that we left. It was just shoveling them in at an enormous rate, ‘Mmow,’ like that…you could hear him sucking up the stuff, ‘Mowww,’ without even chewing—just huge slurping sounds when he’d lift it all up to his mouth. I couldn’t believe how much of the stuff he was just puttin’ away!” (pp. 126-127).

Jeff Meldrum, a professor of anatomy and anthropology at Idaho State University, in his work, Sasquatch: Legend Meets Science, (2006) notes that, “the menu of food items reported by eyewitnesses ranges from berries to elk” (p. 168) and that “the Sasquatch diet seems to span the wide spectrum of a generalized omnivore” (Meldrum, p. 188).

Elk on a hill, California (photo: Rachel Hebert)

Linda Coil Suchy’s Who’s Watching You? An exploration of the Bigfoot Phenomenon in the Pacific Northwest (2009) includes an interesting story about Suchy’s own grandmother, who lived in the Bellingham, Washington area in the 1960s and ‘70s and kept a huge vegetable and fruit garden.

Vegetable garden (author photo)

The grandmother saw that vegetables and fruits were being taken from her garden in amounts that seemed excessive for the usual visitors of deer and rabbits, and she saw extraordinarily large footprints in her garden, so one week she sat up late over several nights, waiting to see who exactly was visiting. She saw “a dark brown hairy beast, at least eight feet tall” and watched as it ate her “raspberries, tomatoes, squash and green beans” (Suchy, pp. 17-18).

Homegrown tomatoes and green beans (author photo)

Concluding that it was “just an unfortunate creature who’s hungry, that’s all” the grandmother decided to leave food for the visitor on her picnic table. She even began baking entire squash or pumpkin cakes for her visitor, leaving them on the table for him. In return, he would leave her tokens of appreciation, such as “an apple, a pine cone, a flower or a pretty rock.” (Suchy, pp. 18-20). Apparently this giving and taking relationship continued for several years. (Suchy even includes her grandmother’s recipe for Squash or Pumpkin Cake in her book, a particularly nice touch.)

In Nick Redfern’s The Bigfoot Book: The Encyclopedia of Sasquatch, Yeti and Cryptic Primates (2016), a letter from a woman in Florida complains that a Bigfoot-like being has been “taking apples that my daughter brought down from up north, off my back porch” (Redfern, p. 192). Redfern also relates a funny story from a female Chehalis tribal member in British Columbia, Canada, who said that “when her husband was returning from the hunt with a score or more of ducks he had shot, a Sasquatch stepped out of the bush and took the ducks from him—except one, which the giant stuffed into the shirt of the frightened Indian” (Redfern, pp. 67-68).

Honeycrisp apples (author photo)

Steve Isdahl’s recent book, The Day Sasquatch Became Real For Me (2020) while not always easy to read because its contents include hundreds of viewer letters transcribed just as written by the individual authors, is still a fantastic resource to draw upon due to the wealth of information that can be gleaned from its eyewitness accounts.

In Isdah’s book are several descriptions of Sasquatch beings being observed eating or seen taking animals away, presumably to eat them later. In one story, a hunter hears a pig “let out this blood-curdling scream” and then hears something stepping very close to him, so he raises his flashlight to see what it is. He sees something taking the pig, something ”8-foot-tall, light brown/gray…looked like a less hairy, pissed-off Chewbacca” (Isdahl, p. 50). A different hog-hunter, in Texas, describes seeing a Sasquatch capture a wild hog and “tear the head from its body” (Isdahl, p. 168).

Wild hogs with alligator, Florida (photo: Tom Corser, www.tomcorser.com)

In another story sent to Isdahl, this one from Florida, a boater spots a “6 foot creature, muscular, with reddish hair” standing up, holding a small alligator in its right hand and eating it (Isdahl, p. 190). In a tale from a trout fisherman, an 18-year-old young man describes having pebbles tossed at him while he was fishing, seeing something a “big creature…with reddish-brown hair” standing up and looking at him, and feeling that it “wasn’t really showing aggression but just letting me know, hey, you’re in my spot” (Isdahl, p. 234).

Trout fishing stream, Montana (author photo)

In still another story, a fisherman has huge, “cinder-block sized” rocks chucked at him from a massive being hidden in the trees. The next day, he returns to the site and finds “just-eaten” white tail deer (Isdahl, pp. 281-282). And in yet another story a group of elk hunters in Montana come across a “big bull elk, dead in the creek” with “its neck broken” but “still warm” and immediately after, encounter a huge Sasquatch, “standing, watching” (Isdahl, pp. 207-208).

As this array of accounts from various places and times suggests, Sasquatch seems to be an omnivore capable of and interested in eating many different types of foods, ranging from meats to fish and shellfish to plant matter such as roots, vegetables and fruits. (Surely we should also include homemade squash cakes in this list.)

This article could continue for many additional pages, detailing more foods that Sasquatch is said to have eaten, including everything from acorn meal to packaged luncheon meat to entire sticks of butter. It seems that the Sasquatch can and does eat many different foods, depending on what is available to it in its environment.

Perhaps in terms of its diet and those foods that appeal to it, Sasquatch is much more like us than we might have realized.

by Christina Hebert

For more great stories, check out our News & Views section, here.

6 Safe Heat Lamp Alternatives for the Homestead

0

New chicken owners are often quick to purchase heat lamps to keep their flock warm in the winter and to maintain warmth within the chick brooder. However, this heating method is not safe and there are MUCH better options available. Today we are going to discuss the best alternatives to heat lamps for chickens and other barnyard animals.

Choosing a Safe Heat Lamp Alternative

Heat lamps have been used for years to warm livestock during freezing temperatures. They are also used in brooders for young chicks. These lamps have contributed to hundreds upon hundreds of barn and house fires so I have sworn them off, but my animals still need to stay warm… so… what are my options?

What is the Purpose of a Heat Lamp

Before we discuss heat lamp alternatives, let’s talk about why livestock owners use heat lamps to begin with.

Heat Lamps in a Brooder

When baby chicks are purchased from a hatchery or if you hatch your own chicks, they don’t have a mother hen to sit under for warmth. Since they don’t have mama hen’s body heat and they can’t regulate their body temperature, there has to be an artificial heat source.

Day-old chicks need a temperature of 95 degrees F in the brooder. 2-week-old chicks need 90 degrees F and the temperature requirement continues to drop 5 degrees per week until they move out of the brooder.

Heat lamps are used to provide this heat for the chicks until they are ready to move outside.

Heat Lamps in the Coop

A heat lamp is also often used to warm a chicken coop during cold weather. This really isn’t necessary, but in some areas where the temperatures drop below freezing, the extra heat can be helpful.

Why You Shouldn’t Use Heat Lamps

Providing your animals with heat isn’t a bad thing, but using unsafe heating equipment is. There are a few reasons why you should avoid using heat lamps for your livestock so let’s jump into those.

1. They are a fire hazard

The number one reason to stay away from heat lamps is the high risk of fire. Heat lamp bulbs get very hot and the heat cannot be regulated. This heat is concentrated in one area and, if placed too close, can catch nearby materials on fire.

Traditional heat lamps are hung up with a metal clamp. These clamps are known to shift and release causing the lamp to fall. When a heat lamp falls, the heat is transferred directly to the surface that it falls on. If this surface is coop bedding, wood, or another combustible material then you almost certainly have a barn fire.

2. They shatter easily

Heat lamp bulbs are not shatterproof. This means that if a lamp falls, the bulb may shatter and spread glass shards all around the floor of the coop, barn, or brooder.

A hot bulb can also shatter if practically anything touches it while it is hot. Imagine your animals splashing a bit of water or a loose feather flying around… once that water or the feather hits the bulb, bam! You have glass everywhere and potentially a fire.

Even if the fallen heat lamp doesn’t catch anything on fire, the broken glass would still be a huge safety concern.

3. They don’t distribute heat evenly

The heat from a heat lamp does not distribute evenly… it concentrates in the center. This poses a fire risk and it can make it difficult for the chicks or other animals to find a spot with a comfortable temperature. Since heat lamps warm up the entire space, chicks (and other animals) have a difficult time if they get overheated.

4. They produce disruptive light

Heat lamps emit a bright light that animals can’t get away from. This light can disrupt their natural sleep patterns as well as their hormone production. If you are using a heat lamp for laying age birds, this additional light can cause them to continue to lay eggs even when their bodies want to rest.

5. Chickens can keep themselves warm

Adult birds don’t really need supplemental heat in the winter. As long as you provide a healthy environment with proper ventilation and a wind break, their feathers keep them warm. This is the same for most farm animals.

If you do need artificial heat for your animals, check out the safe heat lamp alternatives listed below.

6 Safe Alternatives to Heat Lamps for Chickens

Heat lamps are one of many options for keeping your animals warm. Let’s dig into safe alternative heat sources for your homestead.

1. Heat Plates

This is my go-to choice for a heat lamp alternative. Heating Plates serve the same purpose as heat lamps without the high risk of fire. There are horizontal heat plates that are made to be used with young chicks and there are vertical (stand-up) heat plates that can be used with older birds.

Horizontal heat plates provide heat to chicks using much less electricity than a heat lamp. The chicks gather under the plate just as they would gather under a mother hen. You can adjust the height of the plate easily as the birds grow.

A vertical heat plate can be used for ducklings and older birds as well as some other livestock. This is a plate that heats up to warm animals that are standing or laying down near it. Some plates switch from horizontal to vertical so you can use them throughout the lifetime of your chickens.

Heat plates allow the birds to choose if they want to be in the heated area or if they want to move to a cooler spot. In fact, these plates don’t even warm the air. They will only warm a solid object (like a chick) that passes through the radiant heat emitted from the plate. This is important because different chicks may be comfortable at different temperatures.

The surface of a heat plate doesn’t get hot, either. When you touch it, it should feel warm, but it won’t burn you or your animals.

Heat lamps put out continual light that can disrupt the animal’s natural sleep cycles, but heat plates produce no light so sleep patterns are undisturbed.

I use an Ecoglow brooder for young chicks and this heating plate for ducklings and older birds.

Advantages:

  • Less Electricity
  • Very Low Fire Risk
  • No Shatter Risk
  • Mimics Mother Hen
  • Radiant Heat
  • Low Surface Heat
  • No Artificial Light
  • Height Adjustable

2. Heat Pads

Electric heating pads are used as a heat lamp alternative for small animals (chicks, piglets, etc.), but they have to be protected from water. They can be placed under bedding, on the wall, or under a towel.

You can also make a faux heat plate by turning a small metal basket upside down and placing a heating pad on top. If you choose to use a heating pad, try to find one with a built-in thermostat.

Advantages:

  • Lower Electricity Usage
  • No Artificial Light
  • Low Burn Risk
  • No Shatter Risk

3. Hot Water Bottles

Bottles with hot water can be placed in with the animals that you are trying to warm. These bottles will need to be replaced frequently, but they can offer warmth temporarily. This is a safer alternative to a heat lamp that works well in an off-grid situation with no electricity, but it does require more labor on your part.

If you choose this method of heating, be sure to insulate the bottles with a rag or dish towel to keep the animals from burning themselves.

This won’t work for very young chicks that need high ambient temperatures (80-95 degrees F).

Advantages:

  • No Electricity Usage
  • No Fire Risk
  • No Shatter Risk

4. Ceramic Heat Emitter

Ceramic heat emitters are used in a similar fashion as heat lamps, but they provide heat without emitting light. No artificial light means that the animals’ natural sleep patterns are undisturbed. Since there is no glass bulb, they do not pose a shatter risk and the fire risk is much lower (but still present).

The surface temperature of the emitter can get very hot which can burn your animals if they touch it.

Advantages:

  • Less Electricity
  • Low Fire Risk
  • Low Shatter Risk
  • Radiant Heat Source
  • No Artificial Light

5. Deep Litter Method

During the winter, you can increase the heat inside your coop or shelter by layering new bedding down on top of old bedding. Piling the bedding up like this is called the deep litter method. This method will increase the temperature inside the shelter for your animals without a safety risk.

Advantages:

  • No Electricity Usage
  • Increase Ambient Heat Naturally
  • No Fire Risk
  • No Shatter Risk
  • No Artificial Light

6. Natural Warming

The best heat lamp alternative is no supplemental heat at all (except when it comes to baby chicks). Most animals are just fine in the winter without any artificial heat. Just be sure to provide your livestock with a shelter that has a windbreak and proper ventilation. This will keep them dry and out of the wind.

Advantages:

  • No Electricity Needed
  • Increase Ambient Heat Naturally
  • No Fire Risk
  • No Shatter Risk

Pin this post for later!

Which Compact Binoculars Are Best?

0

While a Western or open-country hunter wouldn’t be caught in the field without binoculars, that’s not the case everywhere. But are hunters who aren’t carrying binoculars missing something—even if their normal distances aren’t that great?

I often find myself asking that question while turkey hunting when a bird flies down in the first few minutes of legal shooting time, and I wish I had the added light-gathering power of binoculars. Or, it happens when I am sitting in a blind and a turkey appears 200 yards or more away. I also want more magnification then.

*This article was written without bias. Affiliate links were placed in this article after completion by the writer. If you liked this article and plan to buy one of these products – please support us by clicking the Amazon link on the product when purchasing. Thank you.

The idea of binoculars when turkey hunting doesn’t always fit in, though, since binoculars aren’t always lightweight to carry. Compact binoculars can fill that gap, however.

Testing Five Sets

I put five popular compact binoculars through two different testing protocols and looked at their overall product features.

To understand the comparisons between the products, it’s necessary to look at the inner workings of binoculars. The main types are porro prism and roof prism binoculars. It’s easy to tell which is which by looking at the construction. Porro prism is the original binocular design, with the objective lenses offset from the eyepieces. Roof prism binoculars have the objective lens in line with the eyepiece. The optical difference is the prism inside.

The other important distinction with binoculars is the size of the objective lens. Compact binoculars have objective lenses less than 32 millimeters in size. The larger the lens, generally the more light that gets let through. However, glass quality, coatings and prism quality also play a role.

To the Test

Which Compact Binoculars Are Best?
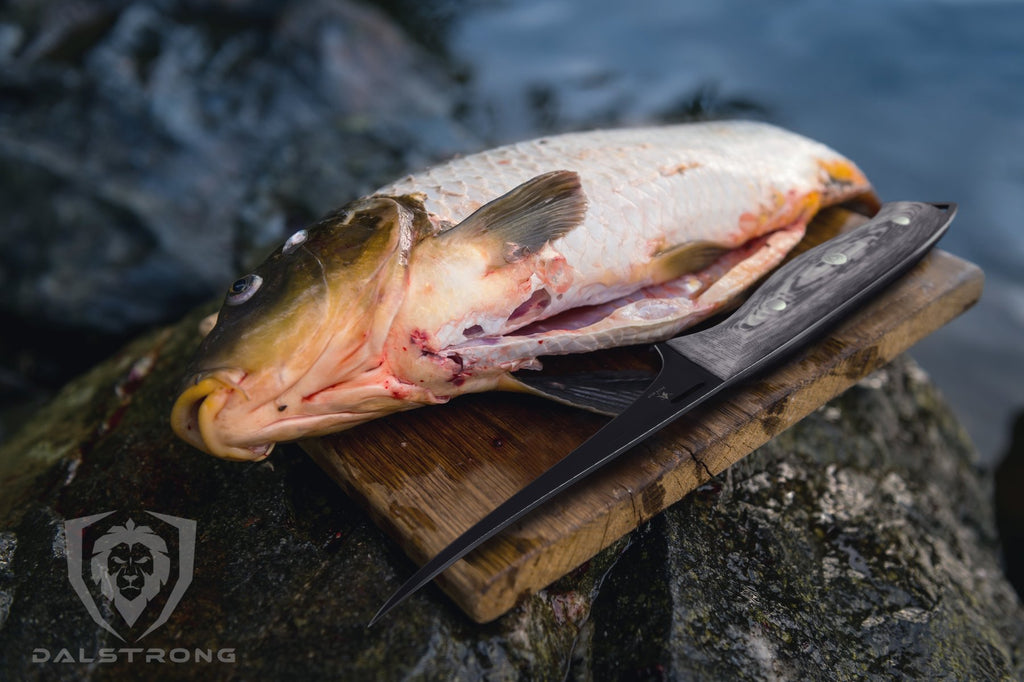
I tested the binoculars using a USAF 1951 1X target. These targets are often used with a formula to calculate the resolution of an imaging system. I printed these targets out on letter-sized paper and looked at the four rows of lines and numbers. My test was to try to read the numbers in the different systems. They were shown as -2, -1, 1, and 0. I tested them at 50, 100, and 200 yards.

All the binoculars in the main test were 10-power. To be fair, putting a 25-mm objective lens against a 32-mm objective lens is not a test of equals, but there were some surprising results. Smaller objective lenses aren’t expected to be as bright as larger objectives.

The secondary test was looking at a stop sign from a mile away, looking to see if I could read the letters at that distance.

Both tests were done on an overcast day. I figured this better simulated the twilight conditions when wildlife is most active.

Results

Best Under $50

Bushnell 10×25 H2O Waterproof – ($37.99 at Amazon)

Which Compact Binoculars Are Best?American optics company Bushnell gained a reputation for providing quality optics at a reasonable price. The company has really revamped its optic line to increase quality.

These lightweight binoculars have a non-slip grip and are waterproof to three feet for 30 minutes (IPX-7 waterproof). The folding roof prism design makes for one of the smallest of the binoculars I tested. They were also the lightest and are of aluminum construction. The lens caps aren’t attached.

In the USAF 1951 test, these binoculars could clearly read the -2 line at both 50 and 100 yards. The -1 numbers were legible, but barely. These binoculars were the darkest of those tested and had less contrast. The letters on the stop sign weren’t quite legible.

With their small size and waterproof construction, I thought these binoculars would be ideal for waterfowl hunting. I don’t normally take binoculars duck hunting, but handling these, I saw them as fitting that niche. They are tough but not expensive, since that can be a tough test on optics.

Price: $37.99 USD

Prism: Roof

Weight: 10.7 ounces

Length: 4.1 inches

Twist-up eyecups for those that wear glasses

Bushnell Prime 10 x 28 ($122.00 on Amazon)

Which Compact Binoculars Are Best?These binoculars have Bushnell’s EXO Barrier to repel water and dirt. They are waterproof to three feet (IPX 7 waterproof) for 30 minutes. The objective lens caps are fastened on the body and eyepiece caps will fasten to the strap. The body has a rubber coating with a non-slip grip.

The -2 numbers on the USAF test were visible at both 50 and 100 yards, with the -1 visible at 100 yards. In the stop sign test, the letters could be read. These binoculars were the third brightest of those tested. These binoculars are a great value for the money.

Price: $122 USD

Prism: Roof

Weight: 14.2 ounces

Length: 4.7 inches

Twist-up eyecups for glasses wearers

Best Overall

German Precision Optical (GPO) Passion ED 8 x 42 – ($469.99 at Amazon)

GPO is a company led by former major optic companies that had a vision to offer top- quality products at a more reasonable price.

The Passion ED binoculars boast an incredible 99.7% light transmission through each optical surface, for a combined total light transmission of 92%. These were the only binoculars tested with ED glass.

Which Compact Binoculars Are Best?Which Compact Binoculars Are Best?

The magnesium body has a two-part coating and a more intense grip on the portions where the hands fall. The lens caps are not attached to the body of the binoculars. These binoculars are waterproof, but there was no depth or rating given.

These were the brightest binoculars tested with the most contrast. In the optical testing, the -2 and -1 numbers could be easily read at 50 yards. The -1 could be read at 50 yards and the -1 was on the edge of legibility at 100 yards. Stop sign letters were an easy read at a mile.

Price: $469 USD

Prism: Roof

Weight: 3.8 pounds

Length: 3.7 inches

Twist-up eyecups for glasses wearers

Leupold BX-1 Rogue Waterproof 10 x 25 ($80.99 at Amazon)

Which Compact Binoculars Are Best?Leupold is the established source for North American optics, with more than a century’s experience in producing quality products.

The BX-1 Rogue features scratch- and smudge-proof lenses with Leupold’s legendary light transmission. The body is armor-coated and these binoculars were tested for waterproofness to 33 feet. The lens caps are not attached to the body. Although these were the second smallest physically, the ergonomic shape makes them seem smaller. The BX-1 rated fourth in brightness.

In testing, it was possible to read the -2 numbers at 50 and 100 yards and the -1 at 50. The stop sign could just be read at a mile.

Price: $81 USD

Prism: Inverted porro

Weight: 12.7 ounces

Length: 4.3 inches

No twist-up eyecups for glasses wearers

Best Value

Vortex Diamondback 10 x 28 ($169.99 on Amazon)

Vortex has a growing reputation for its high-quality optic products. The Diamondback 10 x 28 didn’t disappoint.

Sporting HD glass, the Diamondbacks have a rubber-coated body for a better grip. They also have grooves in the body to further enhance grip. There was no mention of the waterproof level of these in the company’s material. There are flip-down lens covers attached to the body. These were the second brightest of the binoculars tested.

The resolution of the HD glass paid dividends. It was possible to read the -2 and -1 numbers at both 50 and 100 yards. These were the clearest in that regard. It was no problem reading the letters on the stop sign at a mile.

Price: $169 USD

Prism: Roof

Weight: 13.3 ounces

Length: 4.6 inches

Twist-up eyecups for glasses wearers

Notes on Magnification

I also tested to see how much power was needed to read the 0 at 50 yards with the variable power on my most powerful optic, a Bushnell Forge spotting scope with 15-45 power. To read the 0, I needed 30 power.

Both Vortex and Bushnell provided 8-power samples for testing. The lesser power gives a better field of view. It was possible to read the -2 numbers at 50 and 100 yards. It was tougher to read the -1 than with 10 power but it was legible.

Overall Winner

Since brightness is somewhat of a subjective measure, my wife Karen accompanied me to confirm my results. Her pick for best overall binoculars were the GPO Passions. I was impressed with these, but I gave top marks to the Vortex Diamondbacks. Although they weren’t as bright, I preferred the clarity and flip-down lens caps.

The testing process was an eye-opener for me, showing me the value of compact binoculars. They will fit in the pocket of any hunting coat or are light enough to hang around your neck and be at the ready. With compact binoculars, there is really no excuse to leave your binoculars at home.

Read More: “A Game of Hide & Seek: 8 Tips for Spotting & Stalking Mule Deer”

Deer, Elk, Moose: What’s the Difference?

0

What is the difference between a deer, elk, and moose?

Many people are not sure, especially since they all look similar.

They are all classified under the cervid family, but there are some distinct differences between them.

When you are out hunting, it is important to be able to identify the difference between deer, elk, and moose.

This will help you determine what animal you are hunting and what type of weapon you should use.

In this blog post, we will discuss the key differences between these animals. We will also provide photos so that you can better familiarize yourself with them.

After reading this blog post, you will be able to accurately identify deer, elk, and moose when you see them in the wild.

Are they all deer?

The deer, elk, and moose all fall under the family of animals called cervids.

This family includes many animals that have antlers or horns, as well as four-legged mammals.

You may be familiar with other members of this family such as the reindeer, caribou, or mule deer.

All cervids are herbivores and eat mostly plants.

All deer are hoofed ruminant animals that fall into two categories: Cervinae and Capreolinae.

Cervinae:

This subfamily includes Tufted deer,  muntjac, Chital, and elk.

Capreolinae: This subfamily includes reindeer, roe deer, and moose.

Now that we know a little bit more about where these animals come from, let’s discuss the key differences between them.

Deer:

The easiest way to identify a deer is by its size.

Deer are the smallest of the three animals and can range from 2.5 feet to 3.5 feet at the shoulder.

Another way to identify a deer is by its antlers.

Both male and female deer have antlers, but the antlers on a male deer are much larger.

(What is a 10-point buck? See this post for more)

Male deer also have a large neck and chest, which makes them look heavier than they actually are. 

Mule deer are found in and around Estes Park and weigh between 120-330 pounds on average.

Where you’ll find deer:  Search for them feeding in open, shrub-filled areas between dusk and dawn.

What they eat: Deer are herbivores and their diet consists of plants, fruits, and nuts.

They will also eat acorns and other nuts that fall from trees.

(What Meat Is Venison? Find out here)

Elk:

Elk are larger than deer and can weigh up to 1000 pounds.

They have a long body and short legs, which makes them appear lanky.

Elk also have large antlers, but they are not as large as the antlers on a male moose.

Both male and female elk have antlers, but the antlers on a male elk are much larger.

Male elk also have a large neck and chest, which makes them look heavier than they actually are. 

They can range from 4 feet to 6 feet at the shoulder.

Elk also have antlers, but they are shorter and thinner than those of a deer.

Male elk also have a large neck and chest, but their body is not as bulky as a moose.

They are averaging between 710-730 pounds. 

Where you’ll find elk: Look for them in open areas such as meadows, valleys, and mountainsides. They are most active at dawn and dusk.

What they eat: Elk are herbivores and their diet consists of grasses, leaves, and twigs. They will also eat fruits and nuts when they are available.

Moose:

Moose are the largest of the three animals and can range from 6.5 feet to 7.5 feet at the shoulder.

They are weighing in at 840-1500 pounds on average.

Moose also have antlers, but they are longer and wider than those of a deer or elk.

In addition to their antlers, moose have a large hump on their back near their shoulders.

This hump is where they store fat for the winter months.

Male moose also have a large neck and chest, which makes them look even larger than they actually are.

Where you’ll find moose: Look for them in wet areas such as lakes, marshes, and swamps. They are most active at dawn and dusk.

What they eat: Moose are herbivores and their diet consists of aquatic plants, grasses, and leaves. They will also eat twigs, berries, and bark when they are available.

This video gives you a good idea of the size difference between Elk and Deer:

Tracks:

Deer:

The deer has small, delicate hooves that leave a dainty print.

The front prints are almost heart-shaped, while the back prints are more oval.

You will often see pairs of deer tracks together because they walk single file. Deer tracks typically measure between 1 and 3 inches long.

(Can Deer Swim? See this post for more)

Elk:

The elk has large, round hooves that leave a distinct print.

The front prints are larger than the back prints and are usually wider than they are long. Elk tracks typically measure between 4 and 6 inches long.

Moose:

The moose has large, wide hooves that leave a distinct print.

The front prints are larger than the back prints and are usually wider than they are long. Moose tracks typically measure between 6 and 8 inches long.

FAQs

Do all three animals have antlers?

Yes, all three animals have antlers. However, the size and shape of the antlers vary among the different species.

What is the best time of day to see deer, elk, or moose?

The best time of day to see deer, elk, or moose is at dawn or dusk. This is when they are most active.

What do deer, elk, and moose eat?

Deer, elk, and moose are all herbivores. Their diet consists of plants, fruits, nuts, and leaves.

(What Is A Baby Deer Called? See this post for more)

Where can I find deer, elk, and moose?

Deer can be found in open areas such as meadows, woods, and fields. Elk are typically found in open areas such as meadows and valleys. Moose are usually found in wet areas such as lakes, swamps, and marshes.

How are killer whales and Greenland sharks predators of moose?

Killer whales and Greenland sharks are both predators of moose. They hunt them for their meat. Killer whales will attack a moose from below and drag it underwater where they will drown it. Greenland sharks will eat a moose alive, starting with its head. It’s because moose frequently swim between the islands off the northwest coast of America.

Are moose and elk endangered?

No, moose and elk are not endangered. In fact, they are doing quite well. The population of moose has been increasing in recent years, and the population of elk is stable.

Conclusion

Now that you know the difference between deer, elk, and moose, you can be sure to identify them correctly when you see them in the wild.

Remember, deer are the smallest of the three animals and have the smallest antlers.

Elk are the second largest animal and have antlers that can span up to 6 feet wide.

Moose are the largest animal and have antlers that can span up to 8 feet wide. If you ever have any questions about these animals, be sure to ask a ranger or other expert. Thanks for reading!

Maximize Your Harvest: Discover Creative Uses for Deer Hides

0

Discover the artistry of deer hide: Unleash your creativity and explore endless possibilities with this versatile material. From crafting exquisite leather goods to creating stunning home decor, learn the secrets of transforming a deer hide into unique pieces that reflect your personal style. Let your imagination run wild as you delve into the world of deer hide projects and unlock its true potential.

A Step-by-Step Guide: How to Tan and Use a Deer Hide

Tanning a deer hide is a rewarding skill that allows you to utilize every part of the animal and create high-quality leather for various projects. While it may take time and effort, the process is satisfying and worth learning. In this article, we will discuss the steps for tanning using a store-bought tanning solution.

To begin, you will need a tanning oil (such as NuTan) and several substances to adjust the pH of the hide throughout the tanning process. These include white vinegar, salt, baking soda, hydrated lime or lye, and a large plastic tub or bucket.

If you plan on tanning your hide right away, start by removing it from the deer without cutting into the skin. Trim any uneven edges or tough portions of the hide to ensure even tanning. If you need to save the hide for later, roll it up in a plastic bag and freeze it or salt it to prevent rotting.

The first step in tanning is fleshing the hide, which involves scraping off any bits of flesh or gristle. This can be messy and smelly, so protective clothing is recommended. Use a very dull blade or a fleshing knife to scrape off the flesh.

Next, remove the hair from the hide by submerging it in an alkaline solution called a “bucking” solution. You can use hydrated lime or lye to make this solution. Leave the hide submerged for a couple of days until you can easily pull out a small section of hair.

Once the hair has been removed, scrape off the grain layer underneath with firm pressure using your fleshing tool. Flip over the hide and repeat this process on the flesh side to remove any remaining bits of flesh or membrane.

After scraping, soak your hide in fresh water until it returns to a soft and flexible state. You can add ammonium sulfate to speed up this process. Once the hide is ready, prepare a pickling solution using white distilled vinegar, water, and salt. Submerge the hide in this solution for 2-3 days.

Remove the hide from the pickling solution and neutralize it by soaking it in a mixture of water and baking soda. Rinse thoroughly with fresh water and wring out any excess moisture.

Apply your tanning oil generously to both sides of the hide and let it soak in for 30 minutes. Fold the hide with the flesh side on the inside, wrap it in a tarp, and leave it overnight. The next day, wipe off any excess oil with a clean rag.

To keep the hide soft and flexible as it dries, stretch and work it every 5-10 minutes until completely dry. Hang it up or nail it to a sheet of plywood for this process.

Once dry, you will have a soft but strong piece of deer leather that can be used for various projects such as bags, gloves, tool straps, knife sheaths, and more.

Learning how to tan your own deer hides allows you to fully utilize your harvest and create unique items with your own two hands. While there are specialized tools available for tanning, you can start with basic equipment like a dull blade or hatchet. With practice and experience, you can refine your tanning skills and explore other tanning methods such as brain tanning or vegetable tanning.

Remember to always wear protective gear when working with chemicals or sharp tools during the tanning process.

Maximizing Your Harvest: Creative Uses for Deer Hides

Maximizing Your Harvest: Creative Uses for Deer Hides

Deer hunting is not just about filling the freezer with meat. It’s also an opportunity to learn new skills and make use of every part of the animal, including the hide. Learning how to tan your own deer hides can be a rewarding way to create high-quality material for various projects.

While there are services available for taxidermy or turning deer hides into wall hangings, many hunters enjoy being part of the process themselves. Tanning with a store-bought tanning solution is a great way to start, as it requires less specialized knowledge and materials compared to other methods like brain tanning or vegetable tanning.

To begin the tanning process, you will need a tanning oil (such as NuTan) and some common household items like white vinegar, salt, baking soda, hydrated lime or lye, and a large plastic tub or bucket. Specialized tools like a fleshing knife or fleshing beam can make the job easier but are not necessary.

The first step after a successful deer hunt is to skin the deer carefully. By hanging the deer and using gravity to pull the hide off, you can avoid cutting into it. Trim off any uneven edges or tough neck portions of the hide for even tanning.

If you plan to tan your hide right away, proceed with fleshing it. However, if you have other tasks to attend to first, you can preserve the hide by freezing it in a plastic bag or salting it until you’re ready.

Fleshing involves scraping off any bits of flesh and gristle from the hide’s surface. This step can be messy and smelly, so protective clothing is recommended. Any dull blade will work as a fleshing tool.

After fleshing, it’s time to remove the hair from the hide. This can be done by submerging the hide in an alkaline solution called a “bucking” solution. Hydrated lime or lye can be used to make the solution, but caution must be taken as these substances are caustic. Agitate the solution daily for a couple of days until the hair comes off easily.

Once the hair is removed, scrape off the grain layer underneath it using a fleshing tool. Flip the hide over and remove any remaining bits of flesh or membrane from the flesh side.

To return the hide to a neutral state, rinse it in fresh water and change the water regularly until it becomes soft and flexible again. Adding ammonium sulfate to the water can speed up this process.

Next, preserve the hide by submerging it in a pickling solution of vinegar and salt for 2-3 days. Then, neutralize the acidity by soaking it in a baking soda solution before rinsing thoroughly.

After wringing out excess water, apply tanning oil generously to both sides of the hide. Let it soak in overnight before wiping off any excess oil with a clean rag.

To keep the hide soft and flexible as it dries, stretch and work it every 5-10 minutes while hanging or nailed to a surface. This will open up the fibers and prevent stiffness.

Once completely dry, you’ll have a soft yet strong piece of deer leather that can be used for various projects like bags, gloves, tool straps, knife sheaths, or ax strops.

By learning how to tan your own deer hides, you can maximize your harvest and create unique items while honoring the animal you harvested.

From Field to Finished Product: Making the Most of Your Deer Hide

From Field to Finished Product: Making the Most of Your Deer Hide

When it comes to hunting, many hunters focus on filling their freezers with meat and overlook the potential of the deer hide. However, learning how to tan your own deer hides can be a rewarding skill that allows you to use every part of the animal and create beautiful, high-quality materials for various projects.

Tanning a deer hide using a store-bought tanning solution is a great starting point for beginners. You will need some common household items such as white vinegar, salt, baking soda, hydrated lime or lye, and a large plastic tub or bucket. Additionally, specialized tools like a fleshing beam and knife can make the process easier.

The first step is to remove the hide from the deer without cutting into it. Hanging the deer and using gravity to pull off the hide is recommended. Once you have the hide free, trim any uneven edges and tough neck portions for even tanning.

If you’re not planning to tan the hide immediately, you can either freeze it in a plastic bag or salt it to prevent rotting. Salting involves covering the flesh side with non-iodized salt and tightly rolling it with fur side out.

To start tanning, fleshing is necessary to scrape off any bits of flesh and gristle from the hide. This step can be messy and smelly, so protective clothing is recommended. Any dull blade or tool can be used for fleshing.

After fleshing, removing the hair from the hide is done by submerging it in an alkaline solution called “bucking.” Hydrated lime or lye can be used to make this solution. The hide should be fully submerged in the solution and agitated regularly until hair removal becomes easy.

Once all hair has been removed, scraping off the grain underneath is important for even tanning. Flip the hide over and use firm pressure with your fleshing tool to remove the grain. Rinse the hide thoroughly with fresh water.

The next step is pickling, where the hide is submerged in a solution of vinegar and salt for 2 to 3 days. This process preserves the hide. After pickling, neutralizing the acidity is necessary by soaking the hide in a baking soda solution.

After rinsing, wring out excess water and let the hide air dry until it is moist but no longer dripping. Apply tanning oil generously on both sides of the hide and let it sit overnight wrapped in a tarp. The next day, wipe off any excess oil with a clean rag.

To prevent stiffness during drying, move and stretch the hide every few minutes until it dries completely. This helps keep the fibers flexible and results in a soft but strong piece of deer leather.

Tanned deer hides can be used for various projects such as bags, gloves, tool straps, knife sheaths, and ax strops. By learning how to tan your own deer hides, you can fully utilize your harvest and create unique items with your own two hands.

Note: This information is provided as a general guide. It’s important to follow specific instructions provided by tanning solution manufacturers or seek guidance from experienced tanners for best results.

Unlocking the Potential: Practical and Unique Ways to Utilize a Deer Hide

Deer hunting is not just about filling the freezer with meat; it’s also an opportunity to learn new skills and make use of every part of the animal. One often overlooked part is the deer hide, which can be transformed into beautiful, high-quality leather for various projects. While there are services available for taxidermy or turning the hide into wall hangings, learning how to tan your own deer hides allows you to be a part of the process and provide for yourself with your own two hands.

Tanning using a store-bought tanning solution is a great starting point for beginners. You’ll need some common household items like white vinegar, salt, baking soda, hydrated lime or lye, and a large plastic tub or bucket. Specialized tools like a fleshing knife and fleshing beam can make the process easier but are not necessary.

The first step after a successful deer hunt is skinning the deer. It’s important to do this carefully to avoid cutting into the hide. Once you have the hide free, trim off any uneven edges and tough neck portions so that it tans evenly.

If you’re not planning on tanning right away, you can either freeze the hide or salt it to prevent rotting. Rolling it up in a plastic bag and labeling it before freezing is an easy option. Salting involves covering the flesh side of the hide with non-iodized salt and rolling tightly with fur side out. Store in an airtight container until ready for tanning.

The next step is fleshing the hide by scraping off any bits of flesh or gristle. This can be messy and smelly, so protective clothing is recommended. Any dull blade will work as a fleshing tool.

After fleshing, it’s time to remove the hair from the hide by soaking it in an alkaline solution called a “bucking” solution. Hydrated lime or lye can be used to make the solution, but caution should be taken as these are caustic substances. Agitating the hide in the solution for a couple of days will loosen the hair fibers, making it easier to remove.

Once the hair is removed, the hide needs to be neutralized and rinsed. This involves soaking it in fresh water until it returns to a soft and flexible state. Adding ammonium sulfate can speed up this process.

To preserve the hide, it needs to be pickled in an acid and salt solution. White distilled vinegar and salt are commonly used for this step. After pickling, the hide is neutralized again with a baking soda solution and thoroughly rinsed.

Finally, tanning oil is applied to the hide to preserve and soften it. The hide is folded with the flesh side on the inside and left overnight for the oil to soak in. Excess oil is wiped off, and then the hide is stretched and worked while drying to keep it soft and flexible.

Tanned deer hides can be used for various projects like bags, gloves, tool straps, knife sheaths, or ax strops due to their toughness and flexibility. By utilizing every part of the deer you harvest, you not only gain valuable skills but also feel a sense of satisfaction knowing that nothing goes to waste.

Preserving Memories: Transforming a Deer Hide into Meaningful Keepsakes

Preserving Memories: Transforming a Deer Hide into Meaningful Keepsakes

One of the first steps after a successful deer hunt is skinning your deer, but often the skin itself becomes an afterthought as you focus on processing the meat. However, learning how to tan your own deer hides can be a rewarding way to use every part of the animal and create beautiful, high-quality material for various projects.

Tanning with a store-bought tanning solution is a great starting point for beginners. You will need some common household items like white vinegar, salt, baking soda, hydrated lime or lye, and a large plastic tub or bucket. Specialized tools like a fleshing beam and knife can make the process easier but are not necessary.

The first step is to remove the hide from the deer without cutting into it. Once you have the hide free, trim off any uneven edges and tough portions so it tans evenly. If you’re not tanning right away, you can freeze the hide or salt it to preserve it.

To tan the hide, start by fleshing it to remove bits of flesh and gristle. This can be messy and smelly, so protective clothing is recommended. Next, use a “bucking” solution with an alkaline substance like hydrated lime or lye to remove the hair from the hide easily.

After scraping off all the hair and grain from both sides of the hide, return it to a neutral state by soaking it in fresh water. You can add ammonium sulfate as a deliming agent to speed up this process. Once neutralized, pickle the hide in an acidic solution of vinegar and salt for 2-3 days.

After pickling, neutralize the hide again with baking soda solution and rinse thoroughly. Wring out excess water and apply tanning oil generously on both sides of the hide. Let it sit overnight before wiping off any excess oil.

To dry the hide, stretch and work it regularly to keep the fibers flexible. Hang it up or nail it to a surface and continue stretching and working it until completely dry. Once dry, you will have a soft yet strong piece of deer leather that can be used for various projects.

Tanning your own deer hides allows you to be part of the process and create meaningful keepsakes from your hunts. From bags and gloves to tool straps and knife sheaths, tanned deerskin can be used for a wide range of applications. So embrace the opportunity to learn this skill and make the most of your harvest.

The Art of Tanning: Discover the Rewards of Processing Your Own Deer Hide

The Art of Tanning: Discover the Rewards of Processing Your Own Deer Hide
The art of tanning your own deer hide is a rewarding and fulfilling process that allows you to utilize every part of the animal. While many hunters may send their hides to be taxidermied or turned into wall hangings, there is something special about being able to make something with your own two hands. Learning how to tan your own deer hides not only allows you to use every part of the animal but also results in a beautiful, high-quality material that can be used for various projects.

Tanning with a store-bought tanning solution is considered the perfect “gateway” tanning process as it requires less specialized knowledge, time, and material gathering compared to other methods such as brain tanning or vegetable tanning. You can easily purchase a tanning solution online or at hunting gear stores.

In addition to the tanning oil, you will need several substances to alter the pH of your hide throughout the tanning process. These include white vinegar, salt, baking soda, hydrated lime or lye, and a large plastic tub or bucket. While there are specialized tools available for tanning, such as a fleshing beam and fleshing knife, you can use alternatives like a sawhorse and dull blade if needed.

The first step in tanning your deer hide is removing it from the deer without cutting into the hide itself. Hanging the deer and using gravity to pull off the hide is recommended. Once removed, trim any uneven edges and tough neck portions for even thickness during tanning.

If you plan on tanning immediately, proceed with fleshing the hide by scraping off any bits of flesh and gristle. This step can be messy and smelly, so protective clothing is advised. If you have other tasks to attend to before tanning, you can either freeze the hide in a plastic bag or salt it to prevent rotting until you’re ready.

After fleshing, it’s time to remove the hair from the hide. This can be done by placing the hide in an alkaline solution, known as a “bucking” solution, which causes the hair fibers to slide out easily. Hydrated lime or lye can be used to make the solution alkaline. The hide should be fully submerged and agitated regularly for a couple of days until the hair comes out easily when tested.

Once the hair is removed, you will need to scrape off the grain underneath using a fleshing knife or alternative tool. Flip the hide over and remove any remaining bits of flesh or membrane from the flesh side. Afterward, soak the hide in fresh water until it returns to a soft and flexible state.

To preserve the hide, it needs to be pickled by submerging it in an acidic and salt solution. White distilled vinegar mixed with water and salt is commonly used for this step. Leave the hide in the pickling solution for 2-3 days before neutralizing it with a baking soda solution and rinsing thoroughly.

Finally, apply your tanning oil to both sides of the hide and let it soak in overnight. Remove any excess oil with a clean rag before drying your hide while stretching and working it periodically to keep it soft and flexible.

Once completely dry, your deer hide will be ready for use in various projects such as bags, gloves, tool straps, knife sheaths, or ax strops. The process may take time and effort but knowing that you have utilized every part of your harvest is incredibly satisfying.

In conclusion, there are several options for what to do with a deer hide. It can be tanned and turned into various useful products such as clothing, bags, or rugs. Alternatively, it can be donated to organizations that use animal hides for educational purposes or conservation efforts. Whatever the choice may be, recycling and repurposing deer hides helps ensure that no part of the animal goes to waste.

How & What to Do with Different Cuts of Deer Venison Meat

0

(Last Updated On: November 5, 2024)

Since I was hunting and harvesting meat in my teens, I was trying to come up with ideas on how to honor and add extra value to the meat I worked for in the wild.

Now 20 or so years later, I still use a lot of wild venison meat cuts for many projects, and often for meat curing and salami making.

I wanted to provide some information about what I cook and use with the various cuts of venison meat. It’s a little different in New Zealand, where I do most of my hunting with an abundance of wild deer and many are semi-farmed also.

I’ve eaten/butchered farmed venison and been able to contrast the differences.

This article relates to both with some generic aspects due to the slight variation in the deer species (ie. fat vs lean meat). In New Zealand we have about 6 species of deer.

We aren’t required by hunting regulations to remove the whole carcass hunting public land, often we are semi-burying the meat or just leaving it for the scavengers.

The most common cuts to harvest and use are the loin along each side of the spine “back steaks” as well as back legs (hind leg). Since this is where the majority of the meat from the animal is.

If you think about most cuts and edible aspects of the deer, here is the framework.

Many cuts and areas of the deer can be used for slow cooking to tenderize. Whilst other cuts like the loin and tenderloin are best for fast cooking methods. The deer’s heart and liver are the best parts for cooking first after the animal is killed whilst the offal is fresh.

I assume you have a basic idea of butchering a deer, since this is about what you can do with the deer meat, including all the major muscle groups and subprime muscle groups.

Most hunters I know will look at mincing a good percentage of the meat they harvest. The other aspect is cubing or dicing the meat for dishes like stews and curries.

How To Use Different Cuts of Deer or Venison Meat

There are so many ways you can look at the muscles and edible parts, to make it simple, the basic categories for how you cook the venison are slow or fast. Then after this, I will look at it from the sections or different areas of the deer/venison animal with some added thoughts.

  • Slow Cooking Venison= Often Cooked in a liquid
  • Fast Cooking Venison = Often Cooked under Direct Heat until rare to medium done

Slow Cooking Venison

  • Neck
  • Shank
  • Ribs
  • Any Meat of the Deer
  • Bones for Marrow
  • Trotter/Hoof

For slow cooking, I like braising methods, but I’ve always found the ribs hard work since many deer in New Zealand are so lean.

I hunt with just a knife often, I don’t have a bone saw to take bone on shanks or neck cuts. Unless the hunt is on friendly farmers land, where we can drive a 4wd or quad motorbike to retrieve the whole carcass.

Unless the deer is small, often isn’t the case where we hunt locally.

The main deer across wide aspects of New Zealand is the red deer, which is often a large-bodied animal.

If you simmer or slow cook any aspect of the meat, you can break down the muscle fibers with a stew or other liquid-based broth. I’ve found this just takes time and patience. Depending on the deer species and toughness of the meat, after 3-4 hours this can be achieved.

Since there is a lack of collagen or sinew in the loin or tenderloin. These cuts of meat aren’t very successful when slow cooked I have found.

Browning slow cook cuts of the meat will bring the natural sugars to the surface and helps the overall flavor a lot I’ve found.

Fast Cooking Venison

  • Heart
  • Liver
  • Back Steak
  • Tenderloin
  • Aged Rump (Hind Leg)
  • Aged Sirloin (Hind leg)

If you are harvesting a deer, heart and liver are the first and most logical things to eat, as long as they are fresh and not overcooked. They are rich in minerals and can be sliced and fried or cooked on an open fire very easily with a stick.

TIP – Overcooking is easily done with offal, so keep a close eye on it whilst frying!

The tenderloin would be the next option for me, then it would depend on the age and type of deer whether the loin could or would be used, normally aged.

Cooking or Frying a loin until rare done-ness is another way of making it pleasant to eat without aging.

Aging other cuts of the hind leg are often necessary to make it enjoyable and break down the toughness.

Edible Parts of a Deer in Detail

Now I will look at the deer areas and meat sections of the venison/deer.

  • Loin (Backsteak)
  • Tenderloin
  • Hind Quarter (Back Leg)
  • Forequarter (Front Leg)
  • Neck Cuts
  • Offal & Organs
  • Ribs

For each of these above categories, I will go into detail based on what I know and what I have used to make food or wish to try in the near future.

If you dry age or wet age different subprime cuts of the front or back legs, you can ‘technically’ get more fast frying or cooking cuts.

Loin (Backsteak)

Options for Venison Loin

  • Steak Cuts
  • Salt Cured and Hot Smoked
  • Dry Cured (Lonza, Lonzino, braesola but with venison)
  • Italian Style Biltong Dried (or Cold Smoked)

Lean meat from the area adjacent to the spine.

Depending on the species of the deer, this could be short or long. The diameter may vary somewhat as well. The cut goes from in front of the back leg muscles, right up until the upper neck.

In a fine dining restaurant I was associated with in Scotland, the head chef showed me the technique they used for aged cuts, submerge in extra virgin olive oil with fresh rosemary sprigs and juniper. It was left in the fridge and cooked when needed.

Because the oil protected the meat from oxidation, it was able to be kept for up to 2 weeks and cooked when needed.

Traditional most harvesters and hunters of meat will use this cut for steak. However, it can be used for many salted then possibly cold or hot smoked recipes.

Venison Loin Recipe Links

  • Venison Loin with Red Peppers
  • Venison Steak Diane

If you need some tips on wet aging steak cuts of venison in your fridge – here is an article I wrote on how.

Tenderloin

Options for Tenderloin Venison

  • Fast frying – oil, salt, pepper
  • BBQing – direct heat and hot
  • Roasting

Very soft meat from a deer, some love it. Some find it lacks flavor, it’s one of the cuts that could be used straight after harvesting to some extent I’ve found. I treat it very similar to the loin, in terms of cooking.

Personally, I like to add some spices and flavor, such as juniper berries, rosemary, pepper, or other hard green herbs.

This a fast fry cut, soft and cooked fast. The muscle isn’t used a lot by the animal, so it tends to have soft intramuscular aspect to it.

Really very similar to the loin or back steak in some ways, maybe some folks can taste the difference.

I do eat sugar and saturated fat, however, they are often used as shortcuts to flavor, in my opinion, I see many recipes where bacon is wrapped around or criss-crossed lean meats. Sure this works, however, cooking rare is my personal preference to taste quality meat instead.

Tenderloin Recipe Links:

  • Venison Tenderloin in Blueberry Sauce
  • Roasted Tenderloin

Hind Quarter (Back Leg)

  • Rump
  • Top Side
  • Bottom Round
  • Eye of Round
  • Sirloin Tip
  • Tri-Tip
  • Shank
  • Hind Leg Bone

Here is a very informative article on deboning a hind leg of venison I found online.

Rump, Top Side, Bottom Round, Eye of Round, Sirloin Tip, Tri-Tip
  • Roast
  • Indirect Hot Smoked
  • Aged and Sliced for Steak
  • Wet Pickled/Brined and Pastrami Style (Acidic Brine)
  • Cube or Mince Meat
  • Dry Curing any of these Cuts
  • Jerky or Biltong

Either slow or fast cooking can be done with many of these venison hind leg muscles.

Once you have removed the sinew binding between the different muscle groups, there are so many options!

Venison Pastrami has been amazing! I have used a simple portable smoker, as well as a pellet grill smoker for this.

Hot Smoking Indirect, otherwise known as Low and Slow Smoking coined the Modern term, developed from German and Czech-Slovakia early American immigrants. Basically, heat on one side and passing or surrounding meat at temperatures of approximately 200-250°F (with either charcoal/wood or pure offset wood chunks)

I love to make slow cooker stews or many different types of masala-based curry with venison also.

Any venison makes great mince/ground meat. I even did a blind tasting with a bolognese I made with beef mince and venison mince. Since my partner was reluctant to eat venison I harvested when I met her.

Guess what?

She could not taste the difference! Although, I know that based on the time of the year, diet, and species of deer there are a milder or more intense game meats.

The easiest ways to age the rump meat is, ideally hanging the entire hind leg in a chiller or fridge environment for 7-12 days.

Often I don’t have the use of a chiller fridge.

Here is an article I wrote on wet aging venison meat, or another simple technique is to vacpac the cuts, for 1-3 weeks in your fridge (although I don’t like the single-use plastic aspect of this, there are environmentally friendly vacpac bags available).

Summary of Aging Venison

We take the subprime cuts like sirloin, rump, and loin (back steak or backstrap), place them on a non-reactive grill to create distance, then onto a baking tray. It then is wrapped with cling film / cling wrap (which again I am not fond of). The goal here is to have it aging in the normal kitchen fridge.

However, not sitting in the blood or juices that comes off the meat is what ‘spoils’ meat quickly. From what I have learned, the temperature being barely above freezing will also mean the unwanted bacteria growth will be minimal.

Unwanted bacteria on meat is exponential as the temperature increases. This is why from harvesting venison through to any type of cooking or dry curing/salami making. Keeping the temperature as cold as possible is very important.

7-10 days with this method, which we have been using for many years.

Another method that uses too much plastic in my opinion, is vac packing this fast cooking cuts for 2-3 weeks in the back of the kitchen fridge. You can also marinate at the same time using this method as well.

I have also been reviewing a dry aging and dry curing cabinet fridge from the USA. Here is a link to the article I wrote on it, this could be use for dry aging venison.

Main Hind Leg Recipes

  • Venison Roast
  • Simple Slow Cooker Venison Recipe
  • My Biltong and Jerky Article
  • Whole Venison Leg Roast Recipe
Shank

One of the toughest parts of the deer, long slow cooking in liquid is the key here.

Definitely slow cooking in liquid is needed for this tough area which is lean and has a lot of connective tissue, the collagen-rich aspects will create a wonderful broth with a few herbs, spices, and vegetables.

It is also one of my favorite parts of the deer!

Hind Leg Bone

Ideal for stock, or a wonderful treat for a dog. On the farm, we would freeze bones, and give the dog a treat every now and then. A frozen bone will give a dog a longer level of enjoyment!

Forequarter (Front Leg)

  • Shoulder
  • Chuck
  • Shank

Options for Forequarter Meat

  • Minced Meat
  • Cubed Meat
  • Deboned, Wet Brined, and Smoked/Cooked
  • Dry Cured

Most of the time when we are processing the front leg of the deer, it’s extra labor and takes time to remove a lot of the sinew. If you are hunting the venison, often you have to work around the hole from the bullet (or arrow/bolt).

There is a fair amount of meat, but it takes that extra time to get the tough sinew off from a wild animal.

Once trimmed of sinew, blood clotting, etc, the meat is often in the diced or minced pile. I will highlight below some of my favorite recipes around this.

I haven’t aged any front leg muscles, but I am sure with patience you could get a tender fast cooking chunk or muscle. Generally, I have always cubed or minced the meat from the front leg.

Shank of Forequarter

Same as Hind/Back Leg, slow cooking in liquid is best! The bone can be utilised in the same way, I’ve read that as humans we weren’t really hunter/gathers so much as scavengers who would brake bones for the marrow, tens of thousands of years ago!

Front Leg Recipe List & Links

Any red meat cubed or minced recipe could be used for this meat. It would literally be 10,000s of recipes, just use google.

Same as Hind Leg in some ways, expect more sinew, however.

Neck Cuts

Options for Neck Cuts

You need a bone saw to work through the bone/meat section of the neck, there is meat but of course a lot of bone and connective tissue. This is definitely long slow cooking, again ideally in liquid in my option.

Venison Neck Recipes

  • Osso Bucco (shank or neck could be used)
  • Neck Braised
  • Pressure Cooker

Flank

Options for Venison Flank

  • Tenderized and Crumbed (Schnitzel)

A thin cut of meat, often I am not focused on.

Has potential, if you are willing to take the time to extract and trim the flank properly.

Here is a guy on u tube way more interested in flank than me.

Organs and Offal

  • Heart
  • Liver

Options for Heart and Liver

  • Fast frying, Sauteed
  • Terrine or set in aspic (using collagen to gelatine to create a jelly structure)
  • Crumbed and deep fried
  • Liver Pate

Sliced and Fast frying is my favorite method since these are the best fresh and soon after harvesting.

It’s often forgotten about, the offal carries so many minerals and vitamins. The issue is, if it is a wild animal, often there is a penetrating, expanded bullet going through this region.

Now let’s move on to the ground or minced venison in more detail with some more ideas.

What To Do With Ground Venison

  • Fresh Sausage
  • Hot Smoked Salami
  • Dry Cured Salami
  • Minced Jerky
  • Cottage Pie
  • Burger Patties
  • Tartar (raw option, Hungarian Style)

Minced meat is a beneficial thing, however when you have minced pork, beef, or other farmed animals of the red meat type. For any sausage or salami, you have to use a minimum of 20% pork fat (because it’s neutral in flavor), I focus on 28-30% pork fat for nearly all my fresh sausage links and salami.

It can be embedded with fat generally speaking, red meat like venison from the wild isn’t. The farmed venison I’ve come across has a minimal amount of fat, apart from the odd animal.

Fat from some certain deer in America, I’ve heard doesn’t taste too nice. I’ve never experienced that though in New Zealand where I hunt.

Pork fat is the neutral flavored fat that is used generally speaking, for sausage, salami, or even burger patties.

Venison meat is lean, but I’ve found cooking with it, basically it is the same as cooking with beef mince, unless you overcook it to the point of complete dryness or if you have cooked it would some kind of liquid to keep the cooking environment wet.

My favorite uses for minced venison is to use it for, sausages, salami, lasagne, cottage pie and many other dishes/recipes.

In some ways minced and cubed venison meat is the most versatile for cooking or making smallgoods like sausages or salami. I often cube the meat and freeze it if I am going to make dry cured salami.

Minced Venison Meat Recipes

  • Venison Salami Recipes
  • Venison Sausage Recipes
  • Minced Jerky Recipe
  • Basic Pemmican (Fat, Dried Fruit, Meat)
  • Venison Patties Recipe

Biltong

For venison, many different cuts can be used for this basic type of cured and dried product. Unlike jerky, this meat-based snack is preserved, whilst also having a lot of flavor!

I am a big fan of Biltong made from venison, I often used many of the subprime cuts in the hind leg.

I am using salt and often malt vinegar to ‘cure’ the meat, using the salt to inhibit the unwanted bacteria that spoils it. The other preserving ingredient is vinegar, I have used red wine or malt vinegar mainly. Vinegar creates a more acidic environment which the unwanted spoiling bacteria don’t like very much.

The vinegar also has the same effect as cooking, called ‘denaturing’ the proteins. I can’t explain the exact science. It definitely works though!

Here is something I wrote about biltong.

Pickling and Preserving Venison Meat

Canning or preserving venison cubes in a jar are other ways of preserving the meat without refrigeration.

I haven’t tried these methods yet, but have been reading and researching them. Here is some detailed information about it.

You have 2 options, either pressured sterilization with a pressure cooker.

For pressure cooking, there is hot or raw packing, here is an article with a lot more info on this.

Sous Vide

The key to sous vide is all about cooking in a water bath at a precise temperature with little variation. Also, often it’s placed into a vac-packed sealed bag to seal in all the flavor.

I’ve eaten sous vide venison, and you can truly get the precise rare vs cooked aspect you desire. Although, it’s in a way a lot more work, and often using single-use plastic vac seal bags, which I try to avoid.

I have found reusable sous vide bags, they do last for multiple cooks.

Difference Between Wild Deer and Farmed Deer

Most wild deer I have come across are lean, I have heard of deer across USA and Europe that have fat. From my experience fat is more likely with farmed deer, it can also add flavor. I think it goes back to the saying, it is what it eats.

Some of the finest deer I have eaten have been wild animals, with access from the forest onto fertile grass farmland. Which creates more fat development for the red or fallow deer, and the fat was very mild.

Survival Hunting and Trapping

0
Alaskan guide Rudy Martin is an expert survival hunting and trapping guide.
Alaskan guide Rudy Martin is an expert at both hunting and trapping.

This is my main page for survival hunting and trapping. These are links to proven ways you can hunt, trap and snare animals in a survival situation.

Please understand that I hate killing things. I do it because if I don’t kill and eat something, I die. And I kinda like staying alive. So, I kill things. But I do it with as much respect to the animal as I can.

Here’s a list of things that I follow as closely as possible when it comes to hunting and trapping. And these apply to survival situations as well as for sport.

Make a Clean Kill

First of all, make a clean kill. The faster the animal dies and the less suffering, the better. Learn where the kill zones are when hunting.

If you’re trapping, set traps that kill right away, either on impact or by drowning the animal quickly. Use leg holds and traps that constrict an animal’s movement only when nothing else will work. I can tell you from experience that it’s pretty sickening to find a leg and nothing else in a trap. Learn from my mistakes.

When survival hunting and trapping, be sure your sets make quick kills.
Drowning traps for muskrats keep the animal from suffering and ensures it doesn’t escape.

Same thing with snares. Set them so they kill the animal right away. You don’t want to be responsible for maiming an animal and make it suffer. This is especially true when setting survival snares with primitive gear. You don’t want to assume that what works with a wire snare will work with twisted fiber, it often doesn’t.

Use the Animal Wisely

Use as much as you can from any animal you kill. You’ll certainly want to take all the meat and edible internal organs. You can also cook the bones, eat the meat off them, and grind them into a nutritious paste. Take anything else you can use like the stomach, tendons and esophagus.

But… and this is where I disagree with well-intentioned laws in some areas, sometimes you want to leave a little food behind for the natural predators in an area. That’s especially true if you aren’t in a survival situation.

You are taking the food source of the coyotes, badgers, foxes, hawks, owls and mountain lions. All those predators will scavenge anything you leave behind, providing them with at least some of a meal they might have gotten all of if it wasn’t for you.

Clay Hayes turkey hunting with a traditional selfbow.
Traditional bowhunter Clay Hayes turkey hunting with his Osage orange selfbow.

Don’t Hunt or Trap Unless You Have Water

Also, remember that if you don’t have plenty of water, you don’t want to eat anything at all, especially meat. It takes a lot of water to digest protein. If you are eating meat but aren’t drinking enough water, your body will suck the water right out of your cells to digest the meat. And that will dehydrate you even more.

In some of the instruction here I use modern ways to acquire game. In other cases it’s pure primitive where you are going out with nothing but a knife.

Wherever I can, I make videos to go along with the articles and pictures. It takes a tremendous amount of work, but I know you guys appreciate it.

Survival Hunting And Trapping Links

Survival snaring with modern snares Here are the topics that are coming in this section on survival hunting and trapping: Survival hunting – making an atlatl Survival hunting – throwing sticks traditional archery and how to make a selfbow. Survival trapping with modern traps Survival trapping with primitive traps Survival snaring with primitive snares

Best Air Rifle Deals

Popular Posts

Can a 22 air rifle kill a deer?

0
"Debate over whether a 22 air rifle can effectively take down a deer has sparked curiosity among hunting enthusiasts. With its lower muzzle velocity...

How Does an Air Rifle Work?

0
Discover the inner workings of an air rifle with our comprehensive guide! From the mechanics behind its powerful shots to the intricate process of...

How to choose the right Air Gun Caliber for your game?

0
A story is told of three Native American hunters. Two are smart, the other somewhat ignorant. On the first day of the hunting season, one of...

.22 vs .25 Air Rifle: The Ultimate Comparison Guide

0
When I first got introduced to the world of rifles, I often thought that a bigger caliber meant better performance. So, I thought that...

Best Air Rifle Brands – Who Makes the Best Pellet Gun?

0
In Jeff Bezos’ own words: "A brand for a company is like a reputation for a person. You earn reputation by trying to do hard...