Home Blog Page 120

Catching Lunker Bass With Nightcrawlers

0
Catching Lunker Bass With Nightcrawlers

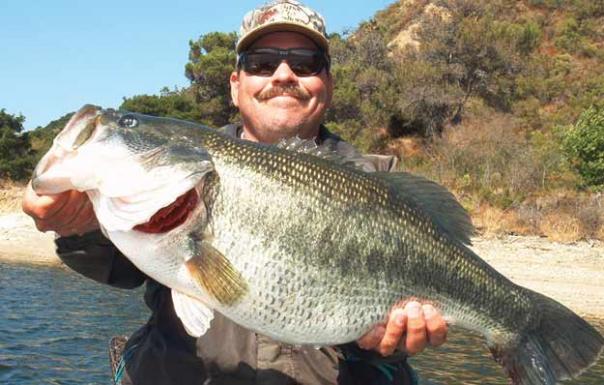
I’m always amused when an angler comments, “You caught that bass on a nightcrawler?” The guy probably has used imitations for years but doubts the appeal of the real thing. More cartons of worms than any other livebait likely are sold to novices and occasional anglers. So I often wonder where along the line experienced anglers forgot how great catching bass with nightcrawlers can be.

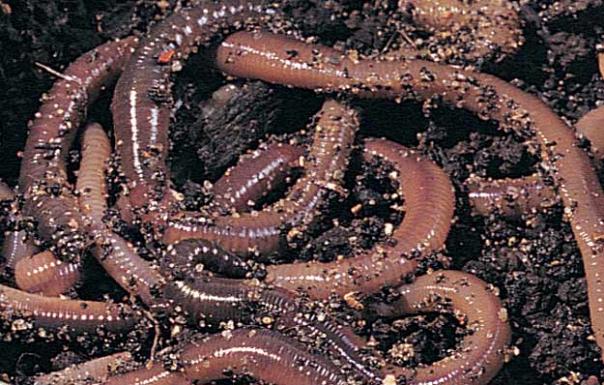
Virtually all fish species relish live worms. That’s reasonable since worms are high in protein; easy to swallow; lack sharp spines, bones, or claws; and are easily caught. Today, nightcrawlers are the most overlooked bait by serious anglers and trophy-bass hunters.

Fishing Crawlers

Rigging: When I’m fishing for big bass, I generally hook nightcrawlers once right through the head end. They also can be hooked through the tip of the tail, allowing a natural crawling motion. You can watch your line inch away along the bottom when crawlers are rigged this way. The only drawback to tail hooking is that the worm tends to break off on the cast, sometimes even breaking off as they try to escape.

Crawlers are best fished slowly with a short stitching motion, retrieving 3 to 12 inches per stitch, or using short slow drags with pauses of several seconds in between. A cast of about 30 feet may take several minutes to retrieve, so it’s far from a search technique. If you’re fishing an area known to hold fish, let the worm make any and all movements on its own.

Recently, I’ve “discovered” an unusual rigging tactic for tricking giant bass. Actually, the technique I now call the Wad-O-Crawlers was described by a noted big-bass expert in Bart Crabb’s book, Quest for the World Record Bass. I was amazed to read that this angler used up to a dozen crawlers at a time. Sounded unnatural and basically ridiculous. I told a fishing buddy about it and we had a good laugh.

Two years ago, however, I spotted the shadow of what looked like a big catfish, and I flipped out the live crawfish I had rigged. No reaction. I hooked up four or five sickly crawlers and cast to the fish. The line jumped and I landed a 4 1/2-pound bass.

I still didn’t embrace the Wad-O-Crawlers technique until just over a year ago when I rigged with a gob to target big channel cats at San Pablo Dam. Casting to an 18-foot drop, I was soon bitten and battling a big one, but the battle didn’t quite feel like a big kitty—short hard runs, quick turns, slugs. When it ran for the surface and leapt clear, the deal was sealed—a giant largemouth of 13 pounds.

Today I often hook three or four large crawlers into a wad. I use a fluorocarbon leader and braided line, since the leader keeps the lively worms from tying the supple braid in knots. Since this is a bulky bait, don’t pack the worms into the gap of the hook. Instead, skewer each worm once through the head end, leaving the rest to squirm. Fresh worms sometimes tie themselves in knots. Untangle them for best action and a surer hookset.

In the California reservoirs I fish, I generally fish crawler wads with no weight, or sometimes a small split shot to hold the leader on the bottom. If you must add more weight for fishing deep water, in wind or current or when drifting, use a light Carolina rig. I use a 1/8- to 1/4-ounce slipsinker with a small shot a foot or so above the hook to keep the weight from sliding down to the bait.

I prefer Gamakatsu Octopus hooks for crawler fishing, matching hook size to my gear. I usually use #6 or #4 on my microlight gear, upsizing to a #2 or #1 on medium-power spinning tackle.

Continued – click on page link below.

Location: Crawlers can be fished anywhere, but they tend to draw more attention and snag less often on bottoms with sparse cover. Crawlers aren’t a good search bait because they’re fragile and also not nearly as effective when fished fast. They’re best in areas that you already know hold good numbers of bass, or a giant. They’re effective at the mouth of feeder creeks, especially after a rain, when fish move into the area, expecting a fresh food supply.

Timing: In California reservoirs, a squirming worm will produce bass every month of the year. They work best in spring, however, when big bass are actively feeding in shallow water. Crawlers also shine during the Postspawn Period when bass linger in the shallows but become reluctant to bite typical reaction baits. In our lakes, we typically observe giant submarines lazily cruising shallow flats but refusing to strike lures.

Whenever bites are extremely hard to come by, break out the crawlers. I’ve often sighted bass that wouldn’t touch a live crawdad or various artificials, but could be coaxed into picking up a live worm.

Crawler Tackle

Crawlers can be fished on tackle as heavy as a medium-heavy spinning rod with 10- or 12-pound mono, but micro-light gear in the 1- to 6-pound class is ideal for presenting these light baits naturally. When targeting trophy-size bass (over 10 pounds) near hazardous cover, I use 30-pound-test braided line on medium-power spinning tackle. But in most situations, microlight is best.

In crawler fishing, it’s critical to cast 25 to 40 feet with little or no weight. My favorite combo is a 6-foot G-Loomis SR720 rated for 1- to 4-pound line. I match that with an Abu Garcia Cardinal 300 reel that weighs 6.3 ounces or a similar-size Pinnacle model. A velvet-smooth drag is essential. I favor Tuff-Line Plus micro-braid rated at 12-pound test but with the diameter of 2-pound mono. Of course, if that spider web-like braid hits a sharp rock, it’s back to 2-pound test.

Braid casts like a dream and matches my rod and reel perfectly. I use a Seaguar fluorocarbon leader 3 to 4 feet long of 8- or 10-pound test, attached to my main line with a blood knot. The leader not only increases abrasion resistance near the bait, but also decreases visibility and keeps the crawler in line. With my heavier combos, I use a 15- or 20-pound-test fluorocarbon leader on 30-pound braid.

When anglers ask if that rig is tough enough to deal with a 10- to 15-pound bass, I tell them of the day on Clear Lake when a buddy and I landed 935 pounds of channel cats, 70 pounds of brown bullheads and white cats, plus around 500 pounds of carp on microlight rigs.

Crawler Care

Worms should be kept fresh and lively—they need to be cool during storage and while fishing. At home, the crisper in your fridge works great. North Country anglers might get away with a cool basement or garage, but beware of hot spells. For transportation and while fishing, a cooler or special crawler carrier works fine.

Similarly, hooked crawlers stay lively much longer in cool water. If a crawler becomes limp, replace it with a fresh one. If it’s still alive, place it in a separate container. After several days in good worm bedding, worms usually are good to go for another round of fishing.

Many anglers won’t break down and use livebait, particularly worms, which they perceive as not being the coolest way to catch fish. Crawlers are for novices, right? The more people who believe that, the better the odds will be for those who know better. I’ve always felt that catching the biggest fish in my waters, using whatever methods are legal and sporting, is the coolest and most logical choice.

*Fish Chris Wolfgram, Suisun City, California, is a dedicated chaser of all big fish, particularly California’s giant largemouths. Check his trophy bass Web site, www.trophybassonly.com.

Top 10 Reasons Why King Crabs Are So Expensive

0

You can find mouthwateringly delicious king crab at almost every top-rated seafood restaurant. Still, dishes containing king crab tend to cost $50 or more! But Alaskan king crabs populations are thriving, so why are king crabs so expensive?

Harvesting king crabs is dangerous, which is the primary reason why they’re expensive. Anglers who fish for king crabs tend to earn higher-than-average annual salaries due to the hazards of fishing for king crabs. Also, king crabs live in remote, cold waters. Reaching these areas can be costly.

Let’s explore the many reasons king crabs are more expensive than other types of seafood. When you’re familiar with the costs that influence a king crab’s price, you might have a new appreciation for the effort it takes to get this crab from the ocean to your plate.

Here Are the Top 10 Reasons Why King Crabs Are So Expensive:

  1. Harvesting king crabs is dangerous
  2. Some harvesting locations are more desirable
  3. King crabs live in remote environments
  4. All king crabs are wild
  5. Fresh king crab is only available during specific seasons
  6. Transporting fresh king crab is expensive
  7. King crab tastes like high-quality lobster
  8. Quotas prevent overfishing and limit supply
  9. People prefer large king crab legs
  10. There are several king crab dishes

10. There Are Several King Crab Dishes

King-Crab-Dishes

Unlike some types of expensive seafood, like high-cost sea urchins, king crab is used in various dishes.

Steamed king crab legs are a popular way to enjoy king crab. But king crab leg meat is also used to make crab cakes, crab rolls, and savory seafood soups.

Because king crab is used to create many tasty dishes, there’s a higher demand for king crab meat, raising prices. It’s also worth noting that king crab legs come in different sizes. And the bigger the portion, the higher the price.

9. People Prefer Large King Crab Legs

Large-King-Crab-Legs

Generally, king crab legs fall into one of several size categories:

  • Jumbo
  • Giant
  • Colossal
  • Super Colossal

The largest size, Super Colossal, is the most expensive. That’s because larger crab legs contain more meat!

So, while a pound of Jumbo king crab legs might cost about $20, a pound of Super Colossal legs typically retails for $100. Seafood lovers who enjoy steamed crab legs tend to gravitate toward the larger sizes, increasing the demand (and the price) for these heftier portions.

While king crabs aren’t endangered, the supply of fresh king crab is extremely limited. After all, many countries adhere to strict fishing quotas to prevent overfishing.

8. Quotas Prevent Overfishing and Limit Supply

The three countries with the highest king crab output are the United States, Norway, and Canada. These countries have strict harvesting quotas to prevent anglers from overfishing, keeping king crab population numbers high.

While this practice is an excellent way to ensure that wild king crab populations continue to thrive, it also means that demand for king crab always outpaces supply, resulting in higher prices.

Additionally, anglers cannot harvest king crabs below a specific weight limit. For example, legally harvested king crabs must weigh more than seven pounds. This rule keeps juvenile king crabs in the water, encouraging further population growth over time.

But diners love the savory taste of king crab legs. Their taste is often compared to the flavor of a high-quality lobster, making them a popular choice among seafood lovers around the world. This desirable flavor profile is another reason why king crabs are so expensive.

7. King Crab Tastes Like High-Quality Lobster

Tasting-King-Crab-Legs

Many of the world’s most expensive foods have outrageously high price tags because they’re delicious! King crab is no exception, with a complex flavor profile that can please even the most particular palates.

King crab legs are slightly sweet, so they feature a balance of natural saltiness and unique sugariness. They’re also full of tender, melt-in-your-mouth meat. As a result, these crab legs are often compared to the highest-quality lobster meats.

But while lobster populations suffer from overfishing, leading to severe shortages, king crabs are protected by several fishing regulations and laws. This difference in fishing practices has altered public opinion, leading to a higher demand for king crab and lower demand for lobster.

As the law of supply and demand dictates, any high-demand good will enjoy a price boost. But the increased call for king crab is just one of the many reasons this seafood is so pricey. Transportation issues also affect prices.

6. Transporting Fresh King Crab Is Expensive

Transporting-Fresh-King-Crab-in-box

The finest seafood restaurants only order live crustaceans and fresh fish. By avoiding frozen ingredients, world-class chefs can ensure that every meal that leaves their kitchen is of the best possible quality. But this need for fresh ingredients comes at a high cost.

Transporting live seafood can be exceptionally challenging. Not only do countries have strict rules about shipping and handling live animals, especially those from other regions of the world, but keeping aquatic creatures alive and healthy as they travel across the globe can be tricky.

A king crab needs a cold saltwater tank to survive. They also have high-maintenance diets, as adults are primarily carnivorous. Consequently, in-transit live king crabs need a regular diet of fish, clams, snails, or small crabs.

Keeping a king crab’s tank cold and clean during transit requires plenty of planning, a refrigeration unit, and extra care. These requirements significantly increase the price of a live king crab, especially during the off-peak seasons.

King crabs are only harvested during the fall and early winter months, and keeping them alive for an extended period during spring and summer can quickly add hundreds of dollars to a live crab’s price tag.

5. Fresh King Crab Is Only Available During Specific Seasons

Frozen king crab legs are slightly more affordable than fresh ones, but not by much. That’s because the annual haul of king crab is limited.

Anglers can only harvest these crustaceans during the fall and early winter. Whatever they catch during this time must last for the remainder of the off-peak season. This limited availability significantly affects the price of a king crab.

The best time of the year to invest in king crab legs is during the late winter and early spring season. In January and February, the harvest of king crabs is at its highest level and is incredibly fresh.

After this point, the supply begins to run low. As a result, prices tend to hit their highest point during the summer and fall, often increasing by 60%.

But, you may be wondering, “Why don’t aquaculturists build farms to keep the king crab supply constant throughout the year?” After all, there are plenty of seafood farms around the world, many of which produce fish, shellfish, and crustaceans all year long.

4. All King Crabs Are Wild

wild-king-crab

Unfortunately, you can’t farm king crabs. These creatures live in deep ocean environments and can take decades to reach a harvestable size. They also require plenty of space to roam around and reproduce.

Consequently, all king crabs that make it to the dinner table come from wild populations. As you might suspect, wild-caught seafood is almost always pricier than farmed versions.

King crabs will remain a wild-caught delicacy until fish farming techniques and technology improve. And because these crabs live in remote, freezing waters deep beneath the ocean’s surface, harvesting them is a constant challenge.

3. King Crabs Live in Remote Environments

Like some of the world’s most expensive mushrooms, king crabs live in remote environments that can be challenging to access. Anglers harvest Alaskan king crabs from the Gulf of Alaska, Bristol Bay, and Norton Sound. Ice floes are common in these areas, and they can destroy fishing vessels.

Fishing locations are often hundreds of miles away from the nearest coastline or shipyard. As a result, anglers working on fishing vessels may work 20-hour days and spend weeks or months harvesting crabs, with virtually no days off.

Additionally, Alaskan king crabs often live about 600 feet beneath the ocean’s surface. Reaching these areas requires advanced fishing equipment. If this equipment breaks while anglers are out on the water, crews might be unable to harvest any crabs for the season, raising the overall price for king crabs.

But traveling back to shore for a quick repair is out of the question. The time and energy it would take to sail into harvesting locations, return to land, and sail back out again would negatively impact a vessel’s haul.

Thanks to the restricted time limit allocated for harvesting these crabs, anglers are stuck in the remote environments where king crabs live until the end of the harvest season. The fishing vessels and equipment required to transport a crew to these faraway fishing spots are costly, and this expense is eventually added to the initial cost of a king crab.

While consumers could choose to purchase king crabs from other, less remote locations, the demand for Alaskan king crabs is far higher than the demand for Norwegian king crabs. For better or worse, some harvesting locations are more desirable than others.

2. Some Harvesting Locations Are More Desirable

The Gulf of Alaska may be the oldest known king crab habitat. While these crabs have proliferated in the Murmansk Fjord in Norway, they’ve only lived there since the 1960s. On the other hand, Alaskan king crabs have been thriving off the coast of Alaska for hundreds, potentially thousands of years.

They’re also the only domestic source of king crab in the United States. For these reasons, many diners prefer Alaskan king crabs over Norwegian king crabs. Besides, North American restaurants can spend slightly less on king crabs harvested from the ocean surrounding Alaska, which is a significant benefit.

However, because Alaskan king crabs are preferable, there’s a higher demand for them. And, as we’ve mentioned before, higher demand almost always means higher prices.

Still, fishing for Alaskan king crabs isn’t a walk in the park. Many people have died trying to harvest these delicious crustaceans. The inherent danger of harvesting king crabs might be the primary reason these crabs are so expensive.

1. Harvesting King Crabs Is Dangerous

Alaskan-King-Crab-Fishing

Though supply and demand are some of the most significant factors influencing king crab prices, harvesting challenges might be even more influential. In particular, anglers who harvest king crabs tend to face life-threatening hazards.

Remember, Alaskan king crabs, one of the most popular types of king crabs, live in freezing waters off the coast of remote areas. As a result, anglers who sail into these areas to harvest king crabs can suffer from hypothermia after prolonged exposure to icy winds and low temperatures.

Storms and strong winds can also make this job dangerous. For example, when ice-cold waves pound the decks of a fishing vessel, the anglers aboard the ship are often drenched to the bone.

If they cannot dry off and get warm quickly, their heart rate can slow to a dangerous level, potentially resulting in death.

These turbulent waves can also wash anglers overboard into deep, unforgiving waters. When visibility is poor, it’s almost impossible for crew members to rescue anglers. Sadly, drowning risks are quite high for those who decide to fish for king crabs.

But low temperatures and rough waves aren’t the only dangers anglers face when harvesting king crabs. Heavy equipment, falling ice, and capsized fishing vessels are also potentially fatal risks that anglers encounter.

Fortunately, these brave anglers are compensated for the dangers they face. The average annual salary of someone who fishes for Alaskan king crabs is more than $314,000. But this higher-than-average salary also means that consumers tend to pay higher prices for Alaskan king crabs.

How Much Do King Crabs Cost?

The price for a pound of king crab legs varies depending on harvesting location, leg size, and season. That said, the average cost for a pound of king crab legs ranges between $60 and $75.

Whole king crabs are far more expensive. A live Alaskan king crab can cost $675 for those living in the continental United States.

But they can cost $1,000 or more when transported to international destinations, making them one of the most expensive types of seafood.

Why Are King Crabs So Expensive?

So, why are king crabs so expensive? First, catching these hefty crustaceans is incredibly dangerous. King crab anglers often put their lives on the line to harvest them.

Of course, king crab anglers also enjoy exceptional salaries to compensate for the job hazards. Anglers who harvest Alaskan king crabs earn an average salary of about $314,000. Consumers help pay this salary each time they purchase expensive king crab legs.

Are you interested in learning more about the world’s most expensive foods? If so, check out these related articles now!

Beeman QB78 Review

0

Since the mid 20th century, there’s been an exciting tradition of shooting with QB series air rifles.

Model 160 and 165 series of CO2 rifles produced during the reign of Crossman was used for training by the US Air force,

Due to its simple design and lightweight features.

Although the Crossman 160 was upgraded, it didn’t become popular because of its higher price.

Spotting an opportunity, Chinese manufacturers began making air rifles at lower prices which became popular.

As Crossman rifles ceased production, the QB series took over the market thanks to its value for money.

Thus, there’s been something of an emotional connection between shooters and QB air rifles for decades now.

Taking this into consideration, the CO2 Bolt-action rifles of the QB series have become the first choice in the World of Airgunning.

The Beeman QB78 Air rifle is the best option for those who are searching for a classical look, exceptional accuracy, and an affordable price.

Experienced shooters know full well the worth of the 12g CO2 power air rifle.

Many more brands have emerged in the market offering more modern and equally high quality and accuracy options,

But they don’t have the same heart and soul that can be found with the QB air rifle.

(For more on the best air rifle brands, see this post)

If you are looking for an air rifle at the lowest possible price with extraordinary features and benefits,

Whether you are participating in the Olympics, shooting in your garden or backyard, or sending a gift to a youngster, the Beeman qb78 and Beeman qb78 deluxe are the options for you to choose between.

You can also take a look at the best air rifles in 2021.

Now, I’d like to go over the features of these, allowing you to judge which option, the QB Standard or Deluxe suits you the best.

Beeman QB78 – Anatomy Of The Gun

The essential requirement of the shooter is to have the best working weapon.

Reliability is of the utmost importance.

The bulk fill of 12g CO2 in the Beeman QB78 and Beeman QB78 Deluxe caters for an average of 60 back-to-back shots per fill, and 78 shots as a whole at .177 caliber.

The bulk fill of CO2 means the ability to shoot more with consistency across the FPS range, allowing the removal of the bottle.

When done with shooting, the gas should not be stored in this pressurized form as it can damage the gun, therefore you should really use all the CO2 while shooting.

The Beeman QB78 air rifle allows only a single shot at a time before reloading is required.

This takes a bit of time of course, but those who love the traditional concept of air gun rifles would like the Beeman QB78 or Beeman QB78 Deluxe.

As we’ve alluded to, there are two models in QB78 — Standard and Deluxe.

Both are available in .177 caliber and .22 caliber.

The QB78 Deluxe has the upgraded features of a 2 stage trigger, Truglo fiber optic, and brass hardware.

(For more on the differences between .177 & .22 and which jobs they do best, see this post.)

For better sight alignment, the Deluxe model features a Monte Carlo Style cheek piece when using a scope,

Making it clear that though the Beeman QB78 and Deluxe models are very simple, unique and accurate at service, these might not be something to gift after use.

The rifle is perfect to have around in your car and start having fun with it in your garden or backyard because the gun is reliable despite its low cost.

The $99 price tag is very appealing since not everyone has the means for a more expensive air rifle.

But don’t let that put you off in terms of quality – if someone buys and experiences the Beeman QB78 or Beeman QB78 Deluxe, they would surely recommend it to family and friends.

It’s an exciting and reliable gun at a very low cost.

See our list of top 5 air rifles under $100 for beginners.

European hardwood stock gives the air rifle the Unique Classical Look. The Beeman QB78 and Beeman QB78 Deluxe don’t look cheap in any way.

Moreover, the authenticity and accuracy make the air rifle more desirable.

Even if someone wishes to give a present to a child, the QB is the best option as it is affordable and undoubtedly much better than a toy gun.

The parts of the Beeman QB78 rifle are somewhat easy to remove and clean, which allows for better durability.

Stock

The Beeman QB78 air rifle stock comes with wood and metal, enhancing the classic look.

Moreover, the wood is not synthetic; it is real wood, which again makes the rifle look authentic and regal.

If you consider the price, this look is ultimate for the product at such a low rate.

The metalwork is done with bluing, helping to beautify the rifle.

It is notable that while restocking the action if you over-tighten the Strap Screw (2402) then it may result in breaking the Strap Assembly (2400).

The stock of the Beeman QB78 is made with European hardwood. Therefore, the finish is smooth and silky, as well as durable.

Even rough handling won’t affect it much. Considering the price, the material is quite impressive.

(For more on the in-depth comparison between synthetic and wood stock, see this post.)

The Beeman QB78 has a gold-bolt handle and trigger as well.

The finishing is beautiful as it is quite simple and smooth looking.

The barrel length is 21.5 inches, allowing for good-distance shooting.

Color

The Beeman QB78 comes in brown, while the Deluxe is a little lighter in shade.

Those who are in search of a Classical air rifle can have QB78, and the Beeman QB78 Deluxe would be the best option due to the attractive traditional brown color.

The bluing makes the rifle much more eye-catching too.

Shooting Ability

First of all, the BeemanQB78 air rifle is light.

It’s easy to carry and shoot.

With a typical 3 9*40 AO scope, it weighs 6.5 pounds.

Compared to other PCP rifles, there is low fill pressure, therefore it’s easy to reach optimum air pressure.

Even with little modifications and adjustments, the Beeman QB78 Deluxe’s performance can be enhanced greatly.

Moreover, experienced shooters know that CO2 gas-filled air rifles are much more suitable for shooting accuracy.

Trigger

The Beeman QB78 deluxe comes with a manual guide for the adjustable trigger.

Additionally, the trigger of the Beeman QB78 air rifle is finished beautifully with the gold-bolt handle.

The Beeman QB78 deluxe air rifle is able to be upgraded with a two-stage trigger.

There is also a lock for the trigger.

The trigger is smooth, and easy to handle because of its lightweight of around 6.5 pounds.

Therefore, a shooter can control the air rifle easily; the weight is pretty fair, even for a young shooter.

If you want to assemble the trigger components, the manufacturer does warn that pushing the valve assembly beyond the transfer port may tear the O-Ring.

The trigger is unpredictable as you cannot say what would happen after the changes you made.

It is clear that even while you can remove the trigger from the stock, it can create a bit of a mess.

Therefore, I would recommend going through the manual in detail before you take any such action.

That such a comprehensive manual has been provided is one of the main reasons that the Beeman QB78 is in such demand worldwide.

You can of course still make any changes you wish, if you know what you’re doing.

The main reason for the warning is that doing so undoes the factory settings,

And if you get a little stuck in the process it could be hard to undo your work and leave the rifle in an unworkable condition.

Sight

The Beeman QB78 air rifle has front and rear sights.

The Beeman QB78 and Beeman QB78 Deluxe come with the best type of sight i.e. Fiber Optic.

The most interesting point to note here is that the rear sight can be adjusted like any other high-quality air gun for windage and elevation.

Shooters tend to opt for guns with unobstructed sights, as accuracy is the very first priority.

For clear vision, they often go with a mounted scope.

The testing scope for QB78 is CenterPoint 3-9×32.

This was used because it was the closest and the most popular hunting scope.

And the results are again incredible. It can be said that the sight of the Beeman QB78 air rifle is exceptional.

(For more on how many types of air gun sights are out there and which one is suitable for you, see this post.)

If you wish to detach the rear sight, you may disconnect it, but while removing it is easy, it can be a little tricky to put on again.

If you have a manual and you are following the steps and have the confidence to reattach after, then feel free, but do take care.

Loudness

There’s no denying that this is a loud gun.

It might be ideal for backyard use if you have neighbors nearby, but at least it’s easy to carry if you go further afield.

It’s not so loud that it requires earplugs at least!

Weight And Length

The weight of the air rifle QB78 is 6.5 pounds with a length of 39.75 inches.

Any young person can handle it.

A lighter-weight rifle allows accuracy while shooting and ease of carrying of course.

Its length is more of a challenge, as it does take up some space and can seem a little ungainly if the user is small.

Barrel Length

The length of the barrel of the Beeman QB78 air rifle is 21.5 inches.

For the Barrel, it is prohibited not to twist the Barrel (2700) when installing it.

Twisting may damage the Barrel O-Rings (2700).

Accuracy, Velocity, And Trajectory

While testing the accuracy, we chose to shoot with .177 caliber ammo.

Besides, the rifle’s trigger is on the soft side, engages cleanly, and breaks lightly, making quick and accurate shooting quite easy.

In comparison to other low-cost rifles, the Beeman qb78 Deluxe is the perfect choice for the shooter.

(Check out this list for the best .177 air rifles.)

Here, you can see the performance of the Beeman QB78 Deluxe 0.22 caliber with fiber optic sights, Crossman premier HP 14.3gr pellets, and a slight elevation above the bore of 0.75 inches.

Range (yds)Trajectory (in)Velocity (fps)Energy (ft.lbs)
504947.7
70.24877.5
100.44787.2
130.454687
170.34566.6
2004476.4
23– 0.44386.1
25– 0.84336

The Deluxe is well capable of penetrating at 21 yards. Therefore, there’s no doubt that it is capable of killing birds inside 20 yards.

(For more on everything you need to know about air rifle accuracy, see this post)

MountainSport Airguns used the Beeman QB78 to take down a rabbit at 42 yards:

Mods

Beeman QB78 mods are highly regarded, from simple to full-on PCP conversion power upgrades.

Without any doubt, there is no fear of the shooter for any breakage during modifications.

Therefore, it is safe to modify the rifle. The Beeman qb78 air rifle is very simple to use.

Maintenance

The Beeman QB78 rifle does not require expensive tools for maintenance.

If the surface is in need of care, just get ahold of some grease and wipes to clean it up a little.

This air rifle is pretty low maintenance and should perform well for years.

To extend this even further, regularly lubricating the seals and O Rings will help a great deal.

There are many other options for maintaining the Beeman QB78 air rifle.

These steps can be beneficial.

Without wasting any time, I will discuss the steps you can take to improve the reliability of the rifle.

BreechYou can fit a 7” by 1 ½” strip to polish all the burns of the breech tube in a 7/16” dowel with emery paper. A drill motor would be used to spin the dowel and pass the strips 200 to 600.
Tube Here, 220 to 600 grits are used. Take emery paper strips of 7 ” x 1 ½” with 5/8” slotted dowel to spin.
Bolt
Take the Bolt and strip all of its parts. After that, polish the bolt with spin at low speed with 220 grit paper until all of its bluings goes away.
Barrel
Fine stone and Dermal are used to break the sharp edges of the “loading tray”. Emery paper of 200 to 600 is used to polish the stoned areas. You can test the smoothness of the barrel “crown” with a cotton Q tip.
Trigger Using the grit emery paper 600, first of all, remove the trigger and sear, and then polish the contacting surface.

Precautions

While you are handling the weapon, you should be very conscious of any adjustments you make.

This helps in the future, should you wish to reset something or make more changes.

Beeman QB78 Has Three Features In Trigger Adjustment

Trigger Force Or Tension

It is set to about 4 pounds.

If you want to reduce the trigger force, just turn the screw clockwise to reduce the tension.

It is necessary to note here that the tension force must not be below 2 pounds, otherwise, if the rifle is dropped there could be an accidental firing.

Backlash

It is set to be 0.25”.

The screw can be turned clockwise to reduce this.

Beware though, that if the screw is turned too far, it can prevent the rifle from firing.

Like any mechanism, it can be compromised if mishandled.

Engagement Of Sear

0.125 inches is the set value for the sear engagement, which can be reduced by turning the screw clockwise.

Reduced sear engagement can result in accidental discharge if you drop the rifle.

Accessories

Through accessories, the shooter can make little modifications to have better results or to fulfill the requirements.

The sight and scope can be replaced if you are not satisfied.

Specifications

  • Beeman QB78 is a single-shot air rifle
  • Beeman QB78 is filled with CO2 gas
  • Beeman QB78 has 2 stage trigger makes the gun safer and easy to use
  • European hardwood stock
  • Manufacturer is BEEMAN
  • Beeman QB78 Ammo type is Pellets
  • Beeman QB78 action is Bolt-action
  • Beeman QB78 barrel style is rifled
  • The fire mode of the Beeman QB78 is a single shot.
  • Beeman QB78 rifle weight is around 6 pounds
  • Shots per fill for Beeman QB78 are 70.
  • Beeman QB78 is used for plinking and target practice
  • The rear sight of the Beeman QB78 is Adjustable fiber optic
  • The mechanism used in the Beeman QB78 is CO2
  • For safety, there is a manual guide for the Beeman QB78
  • The warranty for the rifle is 30 Days limited
  • Loudness is two low-medium
  • Rail is 11mm Dovetail

Pros and Cons

ProsCons
  • Light weight
  • Affordable price
  • Classical look
  • Real wood material
  • Accuracy is an exceptional and high performance
  • Complete guideline and manual
  • Great finishing with bluing
  • Trigger lock system allows having safe usage
  • Maintenance is easy
  • Better adjustment options
  • Made in China
  • Sound is loud; it is not silent. Therefore, the target can move away
  • It requires more time because it is a single shot; therefore; it requires much effort for the next shot.
  • It wastes time until the target misses or moves away
  • According to customers, the firing disturbs after continuous shooting
  • Bigger in size than gun

Price

Pricing is the most exciting part of the Beeman QB78 air rifle – it costs a mere $99!

Undoubtedly, the features and the benefits you would get from the air rifle are unbeatable at this price.

If you wish to have an air gun with quality features and a classic look, but you aren’t made of money – then this one’s for you.

Customer Review

Around 80% of people are very much satisfied with the product as it has no rival at that price.

The Beeman QB78 standard and deluxe both come with quality features and benefits.

Moreover, the lightweight has been appreciated by air gun lovers.

A great air rifle at such a low price has been a godsend for many enthusiasts.

Shed Hunting Michigan: How to Find a Pile of Antlers in the Great Lakes State

0

Shed hunting Michigan is tough, but it can be done.

As I walked past my treestand over to the puddle of standing water in the forest, I glimpsed what looked like tines poking out of the standing water. As I came closer, it immediately became apparent from the milky white coloration and the layout that I was looking at a brow tine, G2, and G3 just barely breaking the surface. Had the water been any higher, I might have missed seeing the shed antler completely.

After using a stick to pull the small 4-point side out of the water, I stood up, glanced to the side, and immediately felt dumb. The matching side was also laying in the water only about six feet away, and I hadn’t spotted it until then.

The tines were sticking barely half an inch above the shallow water’s surface. It was my second matched set of the year.

It also just goes to show that looking for deer antlers in Michigan can be much harder than other parts of the country. These antlers easily could have been lost to time. As soon as the rains that accompany this time of year come, the antlers would be submerged completely, and quickly hidden by dead leaf litter in that swampy area.

After more than 25 years of looking for shed antlers in Michigan, I’ve discovered many of the tips and techniques that are good for other states don’t always translate to the Great Lakes State. Fortunately, I learned how to shed hunt this state the hard way. Now you won’t have to do the same. This is how I find shed antlers every year in Michigan.

When do bucks shed their antlers in Michigan?

In my experience, most Michigan bucks seem to start shedding their antlers around the second week of February. Many are completely shed out by March. The earliest in the year I’ve found a shed is mid-January. There are always outliers to these times though. I’ve gotten trail camera photos of bucks holding their antlers into late April here before. The factors that affect when deer shed their antlers are going to be different for each animal based on the animal’s health, testosterone levels, and other factors. Although it does seem like more bucks shed earlier the more severe the winter. As much as I hate long, lingering snows, those kinds of winters always leave me rubbing my palms together in anticipation. Mainly because it seems to concentrate where bucks shed their antlers more than a mild winter, but we’ll talk more about that later.

I should also note that you shouldn’t believe the myth that all antlers get completely chewed up if you don’t hurry. I’ve found shed antlers in Michigan in July and even September before. I will note that on private lands in Michigan, it helps a lot if you can hold off searching until March. On public lands that isn’t always an option because of the competition of course. In my experience, the less pressure on the deer the better, especially if you have exclusive rights to shed hunt a spot.

Think small when searching.

It’s easy to get excited scrolling through Instagram and seeing people piling up the big antlers in Iowa, Illinois, and other states of the Midwest. However, we need to temper expectations in Michigan a little.

Let’s be honest; our deer management is not great here. Most whitetail deer do not live to see their second birthday, especially the yearling bucks. You can thank our overly-long deer hunting seasons and bag limits that may be a little too generous. But I digress. The point is, if you go out looking for a sun-bleached 5-point side, odds are you’re not going to find it here in Michigan. Unfortunately, I think that’s why a lot of Michigan shed hunters get discouraged.

I finally found my first 5-point side this year and it took me nearly 25 years to do that. I’ve found antlers every year for the last decade, but it took that long to find a 5-point. It’s just not easy to find the big ones here.

Speaking of tempering expectations, you also shouldn’t expect to find a ton of antlers in Michigan, not without a ton of walking anyway. My record for a year is 11 and I’ve done that twice. Most years I’m finding around five at the most. They’re not easy to find in this state!

Finding sheds in Michigan requires more patience and persistence than it does in other states, and calls for a commitment to looking for smaller antlers. I’ve found more fork horns than any other type of antler.

There’s a lot to explain that we won’t get deep into, but it’s important to “train your eyes” to look for sheds. And once you do that, you need to commit to only looking for a tiny bit of antler at a time. I’m usually watching for only a few inches of bone. I probably spot more antlers by looking for the curvature of the main beam than anything else.

Unless you’re a natural, it takes time to train yourself to do this. For more detail on training and conditioning your eyes, check out this previous piece on the subject. Learn from those tips, and read on for more Michigan-specific pointers.

Where deer shed in Michigan.

If I had to estimate, I would guess I’ve found approximately 70% of my Michigan sheds in feeding areas or tall grass cover over the years, especially after a winter with snow that stays on the ground for weeks at a time. Winters like that help to concentrate the deer in one area and bucks will spend an inordinate amount of time restoring their fat reserves which were exhausted during the rut.

My second favorite spots to look are bedding areas, especially the ones on south-facing slopes. I should note that while I have found antlers while grid-searching bedding areas, they are not usually the areas that pan out best for me. This goes against a lot of the advice you’ll read in most shed hunting articles, but I cannot deny my own results favoring feeding and transition tall grass over bedding areas over the years.

Many Michigan hunters, including myself, spent years convinced that all bucks in this state drop their antlers in the thick cover where it’s hard to walk ten feet without bending over or brushing through thorns. I can count on one hand the number of sheds I’ve found in thickets like those. Not only is it hard to search, it’s also not usually the place bucks frequent during the winter months. Once the hunting season is over, they know the pressure is off, and they tend to let their guard down a little. They’ll start wandering closer to the food and in more open areas when the snows arrive.

Most hunters think because crop fields and food plots are usually more open, they can cover these areas quickly and move on. As a result, they walk right past antlers they should have found had they taken the time to slowly and properly grid-search the area. One of the worst pieces of shed antler hunting advice I ever read about was to use a four-wheeler to cover ground quickly. I did this for years without finding a single shed. I’m convinced now it’s because I was going much too fast. I shudder to think of how many antlers I’ve missed over the years due to improper search techniques.

Another prime area to search is the cover immediately surrounding food sources. Michigan deer are under a ridiculous amount of pressure during deer season. In some areas, the seasons stretch into January, well after the first snow and cold temperatures. At that point in late winter, most bucks are worn down after the rut and they just want to eat. However, they’re not stupid about it. They still like to stage up along the edges of these food sources and scope the food plot or field out before they head out.

I’ve also seen too many shed hunters in Michigan waste time randomly following heavy deer trails through the woods. I usually only start checking the trails closely when I’ve exhausted the bedding areas, feeding areas, and grassy cover.

Even then, one big thing I’ve noticed over the years is that the big bucks are rarely using the heaviest of trails. A lot of those tracks are does and fawns. Many bucks, especially the older ones, seem to take lighter trails running parallel to those, especially if there’s more cover.

Don’t forget about water. Last September I found a small three-pointer ten yards inside the woods off a public Lake Michigan beach in the Upper Peninsula. That find came after I found a 110-inch matched set from a big 7-point while kayaking a river in July. The 4-point side was what caught my eye when I spotted it laying on the bank. The 3-point match was sitting in the river itself right next to it. If there’s a pond or river running through the area you shed hunt, you owe it to yourself to check the shores of it closely. Don’t forget to look IN the water too. Case in point: my submerged pair mentioned earlier.

Other things to keep in mind.

The biggest thing I’ve learned about Michigan deer over the years is that they don’t behave like the majority of other deer. The animals here receive so much pressure from deer hunters that there is often little rhyme or reason to many of their behaviors. Many articles will tell you not to look for sheds in the same places where you had a sighting during deer season. However, Michigan deer usually don’t follow those rules. If an area provides food, water, and cover, many bucks are content to stick to the same area all season. This is especially true of areas that receive little hunting pressure.

Although you should also be aware many Michigan bucks will also sometimes roam a larger-than-normal area than other states. Case in point: I’ve found sheds from bucks I watched all season before, but I also sometimes find random sheds from deer I later learned were photographed most of year three to five miles away. You’re more likely to find those roamers during a mild winter when bucks aren’t stressed about finding food. Most hunters associate a buck’s wanderlust with seeking out does during the rut, but some will continue wandering well after the rut is over.

The bigger point is that sheds can be found almost everywhere in Michigan. If you’ve exhausted the obvious spots, it’s time to move to the less obvious ones. Think way outside the box. The biggest shed I’ve ever found was from an urban buck. I found that 65+ inch, four-point side in a tiny patch of woods behind a movie theater. The antler was laying less than thirty yards from a heavily-used bike path and forty yards from a road! Michigan bucks are extremely smart and will seek sanctuary wherever they can find it sometimes. Shed hunters who are successful here year in and year out know how to find these honey holes.

Most of all, I encourage anyone interested in shed hunting to not give up no matter where they’re searching. It takes time and patience to find antlers in Michigan. However, if I can pull it off year after year, I’m convinced anyone can at this point. Get out there and burn some boot leather, and you may be surprised at what you find.

For more outdoor content from Travis Smola, be sure to follow him on Twitter and Instagram For original videos, check out his Geocaching and Outdoors with Travis YouTube channels.

READ MORE: 7 SHED HUNTING TIPS FOR THOSE WHO JUST CAN’T SEEM TO FIND THEM

The 5 Most Common Edible Mushrooms in Michigan

0

Out of the roughly 2,500 wild mushroom species in Michigan, approximately 100 of them are edible. Morels, chanterelles, oysters, chicken of the woods, and truffles are the most popular edible species, but Michigan mushroom hunters know that there are more gems to discover.

5 Edible Mushrooms in Michigan

1. Morel (Morchella species)

Morels can be yellow, tan, black, or gray. They are most notably known for their unique cap. The pitted cap is oblong and veiny, almost resembling a crumpled-up honeycomb. If you look hard enough, you can find morel mushrooms in all 83 counties in Michigan.

The best time to harvest morels in Michigan is in May, even though this species fruits from April to June.

They can be found just about anywhere but prefer woodland areas with moist soil, old orchards, and dead or dying trees.

Morels have a meaty texture and an earthy, nutty taste. The darker morels tend to have a smoky flavor, also. Their flavor is something to be showcased.

They are great sauteed in butter but also work well as an ingredient. Think pasta, mushroom soup, sauces, or even morel game burgers.

I recommend the following recipe:

  • Morel game burger with charred scallion butter

Watch our video to learn all about how to find, forage, and identify morel mushrooms!

2. Chanterelle (Cantharellus species)

The golden chanterelle and the cinnabar red chanterelle are two popular species in Michigan. They are vase-shaped and have deep, false gills on the underside of the cap. Chanterelles are well-known for their fruity apricot scent.

You can find this species in the upper peninsula and the northern section of the lower peninsula. Because chanterelles are mycorrhizal, you will always find them near trees, especially beech, oak, and conifer oak trees.

July is the most bountiful month for harvesting these mushrooms.

These unique mushrooms have a slightly peppery and fruity flavor without the sweetness.Sauteed chanterelles are a great side dish, but you can also use them in risotto, on toast, in pasta, or to add a slight sweetness to meat dishes.

I recommend the following recipe:

  • Chanterelle toast

Watch our video on when and where to look for chanterelles.

3. Oyster (Pleurotus species)

Although this species is easily cultivated, foraging it yourself is much more exciting. The white-light brown cap of the mushroom is smooth and oyster-shaped. They have decurrent gills and grow in a shelf-like formation on wood, usually overlapping each other.

They grow on many hardwood trees, but most commonly on aspen trees. You can find oyster mushrooms year-round in Michigan, but they are most abundant in June.

Even though they have a strong anise/licorice scent, their flavor is subtle and earthy, with only a hint of anise.

Their texture is meaty yet soft, similar to shitake mushrooms. You can fry, bake or sauté oyster mushrooms, or even use them to make your own version of Korean barbecue.

I recommend the following recipe:

  • Korean barbecue crispy oyster mushrooms

4. Chicken of the Woods (Laetiporus species)

Chicken of the woods grows in shelves between two and ten inches wide. They range from a sulfur-yellow color to a bright orange color. The exterior is soft and smooth and releases a yellow liquid when pressed.

This species is usually found on Oak trees, but you can also find it on other trees, including the poisonous yew tree (do not eat the mushroom from this tree). It is a saprobic fungus and typically grows at the base of dead wood in the summer and fall.

Chicken of the woods can cause severe gastrointestinal discomfort if eaten raw. Once cooked, it is meaty and juicy. It tends to absorb the other flavors in a dish and could pass for chicken when mixed into a recipe.

You can use this wild mushroom to make sandwiches, fried “chicken,” teriyaki dishes, or boneless buffalo “wings.”

I recommend the following recipe:

  • Chichen fried chicken of the woods

5. Michigan Truffle (Tuber species)

This truffle is firm with a brick red exterior and small warts covering its surface. The interior is dark colored with off-white veins. It has a sweet but slightly musty odor.

You can usually find this species growing near pine and spruce trees. Most foragers enlist the help of a truffle dog to sniff them out.

The best time to harvest these truffles is between August and November. If the mushroom feels slimy, it is overly mature.

The flavor of the truffle is similar to the smell – sweet and musty. Truffles are mainly used as a garnish and are not usually cooked.

The Michigan truffle is an exquisite addition to many dishes, including pasta, potatoes, and soups.

4 Poisonous Mushrooms to Avoid in Michigan

1. False Morel (Gyromitra species)

False morels are different colors than true morels. They are usually red, purple, or brown.

Instead of having a honeycomb appearance with pits, the false morel has a cerebral appearance. It is wrinkled and has many folds.

Some people eat false morels without an issue. However, the toxins can build up in your body over time and cause severe future damage.

Eating these mushrooms can cause gastrointestinal problems, muscular coordination loss, and death.

2. Eastern Jack O’Lantern (Omphalotus species)

This species is a dangerous look-alike of the chanterelle mushroom. While both can have a bright orange color, rumor says that the jack o’ lantern glows in the dark.

Some of the most notable differences are that jack o’ lanterns grow on wood, usually in clusters, and have orange flesh.

This mushroom species is not known to cause death. However, it does cause nausea, headaches, vomiting, and diarrhea.

Check our video on the 7 most poisonous mushrooms growing in the US (mushroom details and ingestion symptoms included)!

3. Eastern Destroying Angel (Amanita species)

This mushroom is found in deciduous and coniferous forests. It has a smooth white cap, crowded gills not attached to the stalk, and a bulbous base. It usually grows along the edges of woodlands or in hardwood and oak forests.

You can touch this mushroom but not eat it. Initially, it causes vomiting, nausea, and diarrhea. As the toxins spread, it causes cellular necrosis, leading to liver failure and death.

4. Autumn Skullcap (Galerina species)

This small brown poisonous mushroom looks similar to multiple edible mushrooms. It has a smooth cap with brown gills and a rusty-colored spore print. What sets it apart is that it almost only grows on decaying conifer trees.

The autumn skullcap has deadly amatoxins that can cause vomiting, diarrhea, liver damage, hypothermia, and death.

Gyromitra esculenta
False morel (Gyromitra esculenta)
Omphalotus illudens
Eastern jack o’ lantern (Omphalotus illudens)
Amanita bisporigera
Eastern destroying angel (Amanita bisporigera)
Gallerina marginata
Autumn skullcap (Galerina marginata)

Magic Mushrooms in Michigan

Psilocybin mushrooms, also known as magic mushrooms or shrooms, are mushroom species with psychedelic properties. They cause hallucinations that affect the consumer’s auditory, visual, and emotional senses.

Some groups have used them in religious rituals for over 6,000 years. While some people consider them dangerous drugs, other researchers have discovered their medicinal use. Shrooms are a possible treatment for depression and anxiety.

A petition to decriminalize psychedelic substances has been making its rounds statewide. In the state of Michigan, there are at least twelve species of magic mushrooms.

In 2020, Ann Arbor was the first city to decriminalize these substances, followed by Hazel Park City and Detroit.

While it is still considered illegal, both federally and in the state, arrests and investigations are highly unlikely.

The most common magic mushrooms in Michigan include:

  • Amanita muscaria var guessowii, aka fly agaric
  • Gymnopilus luteus, aka yellow gym
  • Psilocybe caerulipes, aka blue foot
Amanita muscaria
Fly agaric (Amanita muscaria)
Gymnopilus luteus
Yellow gym (Gymnopilus luteus)
Blue foot (Psilocybe caerulipes)

Final Mushroom Foraging Tips

  • Bring the correct gear. At the very least, you should bring a basket, a knife, and a trowel. A mushroom identification guide is also handy.
  • Do not eat anything unless you are 100% sure of what it is.
  • Know precisely what you’re looking for and which season it grows in.
  • Only take what you will eat.
  • Learn how to take a spore print.
  • Cut the mushroom, don’t pull it up from the ground.


0

Montana Bighorn Sheep Hunting

Available Montana Rocky Mountain Bighorn Sheep Hunts – Search HF Aventures

When it comes to Rocky Mountain bighorn sheep hunting, Montana should be on everyone’s radar. To many, drawing a Missouri Breaks sheep tag in units 482, 622, or 680 is at the very top of their hunting bucket list. Last year, 5,300 non-resident sheep applicants applied for a ram tag in one of the three famed units of the Missouri Breaks. Only four of them were successful in drawing a tag. Unit 482 is still going to give you your best chance at a 180″+ ram. Half of the rams harvested here in 2022 are estimated to have broken that mark, followed by 25% in 680 and 10% in 622.

Go on More Hunts with Better Information, Join Huntin’ Fool Today!

Unfortunately, the bighorn sheep hunts in the Breaks are not quite what they were four or five years ago. Some of the better genetics, especially for mass, are starting to be shot out. The drought over the past three years and the apocalyptic grasshopper hatch that came with it have severely reduced the amount of quality feed these rams need to thrive. These conditions have also contributed to lower lamb production, forcing FWP to reduce the number of ewe tags available in each of the Breaks units. Additionally, ram tags were cut in unit 482 from 20 to 15 in 2022, limiting non-residents to only one permit on this hunt. It’s not all doom and gloom in the Breaks, however, as precipitation levels are off to a great start in 2024. There were also at least one or two mid to upper 80s rams that are known to have made it through the season in each of the three units. The Breaks units are still going to give a hunter the best shot at a 190″ ram, hunters will just need to be good at judging and passing up rams if their goal is taking home a book ram.

Those hoping for better odds of hitting on a Montana bighorn sheep tag will need to consider looking past the Breaks units and instead focus on other second tier units that are available for non-residents. Excluding the unlimited hunts last year, 2,035 non-residents applied for ram tags in units other than the Breaks and four were successful in drawing their tag. For 2024, hunts in units 100, 102, 250, 380, and 423 will each be available for non-residents. On each of these hunts, beginning in early November, most of the rams will come down from their summer range in search of ewes. As the rut takes place, these sheep will stay in highly visible areas and offer a hunter a physically easier lower elevation hunt. The exception to this is in unit 423. The area where most of the sheep stage for the rut can’t be accessed by road. It’s also worth noting that less than 20 total sheep permits are being proposed in region one in 2024. This would mean that only one non-resident permit will be available between units 100 and 102, and when one non-resident is drawn for either unit, the non-resident draw will be shut down in the other.

Montana is the only state that offers over-the-counter bighorn sheep tags. This year, hunters can choose from five units – 300, 303, 500, 501, and 502. The tags must be purchased or applied for by May 1st. The odds of harvesting a ram are typically around 2%, but every year, some lucky hunters take rams home. Last year, eight hunters harvested rams in the unlimited areas. See the “Unlimited Bighorn Sheep” section for more information on all of the units and hunts.

For 2024, Montana has once again shuffled the units that non-residents are able to apply for, so be sure to look over our bighorn sheep table as we have included all non-resident sheep hunts available this fall. If you are a Montana resident and you would like to talk about the other units available to you, give us a call. Despite the long draw odds, anyone who wants a chance to hunt giant rams someday has to be applying in Montana!

Our Memberships Include The Most Accurate Draw Odds Available, Join Now!

Self Guided DIY Montana Bighorn Sheep Hunts

Over the last 20+ years, we’ve collected hunting research and data, so join Huntin’ Fool today and access the best research tools for hunting bighorn sheep in Montana, including 3D Maps, Draw Odds, Consultations, and much more. Go on more hunts with better information!

Private Land, Semi-Guided, and Guided Bighorn Sheep Hunts

Search our database for Montana Bighorn Sheep opportunities.

M0tBbVFzVnFtakU90

Application Deadline

The Montana Bighorn Sheep application deadline is May 1, 2024.

Our magazine, which is available in print and online, has everything in one location – application info, draw details and odds, fees, hunter requirements, point structure, age restrictions, youth information, weapon restrictions, other tag opportunities, hunt planning, and much more. If you would like access to all of our research join today!

Consult with Hunters Who Have Hunted in Your Unit, Join Now!

2024 MONTANA NON-RESIDENT FEES Up-Front Fees Base Hunting License $15 Conservation License $10 Bonus Points (optional/per species) $20 Sheep, Moose, Goat, and Bison Application Fee $50 Post Draw License Fees (if successful) Bighorn Sheep Permit $1,250 Bow and Arrow License (required for all archery hunts) $10 *Fees do not include the additional 2.5% convenience fee.

MT Bighorn Hunting Articles from Huntin’ Fool Magazine

  • Not Your Typical Sheep Hunt by Pete Soverel
  • The Pinnacle by Jana Waller

The Best Kerosene Heaters of 2024

0

<?xml encoding=”utf-8″>

Creating a backyard space takes planning and effort, so it’s a shame that you can’t use it as often when temperatures drop. If you’re tired of letting winter’s icy grasp drive you inside, a kerosene heater could be a solution. A kerosene heater on a patio or deck can keep you and your family warm so you can enjoy the great outdoors. These cold weather wonders are available in different types, sizes, and capacities. Learn why the following models are considered among the best kerosene heaters on the market.

  1. BEST OVERALL: DuraHeat Portable Convection Kerosene Heater
  2. RUNNER-UP: Sengoku Kerosene Heater, White
  3. BEST BANG FOR THE BUCK: Sengoku HeatMate 10,000-BTU Indoor/Outdoor Kerosene
  4. UPGRADE PICK: Dyna-Glo Delux KFA80DGD Kerosene Forced air Heater
  5. BEST MIDSIZE: Mr. Heater MH75KTR kerosene heater

How We Chose the Best Kerosene Heaters

Since there are multiple types of kerosene heaters on the market, we provide a list of recommendations that covers as many options as possible. Our top picks include a selection of the best forced-air, radiant, and portable kerosene heaters for shoppers to choose from. Depending on what you’re looking for, our list can provide solutions for smaller areas, all the way up to a powerful 80,000 BTU heater that can heat up areas of up to 1,900 square feet.

During our research, we made sure to only include top brands that use the highest quality materials. Most importantly, we ensure that each of our top recommendations include common safety features such as tip-over and high-temperature shutoff.

Our Top Picks

Kerosene heaters aren’t new technology, but some improvements have been made to safety and efficiency, so keep the considerations detailed above in mind while comparing products. This list of some of the best kerosene heaters on the market helps streamline the shopping process.

Jump to Our Top Picks

What to Consider When Choosing the Best Kerosene Heater

Kerosene heaters produce plenty of heat, which can make them ideal for outdoor applications. Kerosene is a relatively inexpensive fuel, so burning a kerosene heater on “high” in an outdoor space may be more affordable than using another type of heater. When shopping for a kerosene heater, keep in mind their specifications, such as tank size, heat type, and the all-important safety features.

Type

Kerosene heaters are available in various models, each of which produces a different type of heat. Some are more suitable for specific applications than others. Note: All kerosene heaters run on a liquid fuel, which can be messy. If that’s not a task you want to undertake, other non-electric heaters use propane, natural gas, and easier-to-manage fuels.

  • Convective kerosene heaters use convection to heat a space. They produce warm air that rises and pushes cold air down toward the heater. The heater then draws in the cold air and heats it, which rises and pushes colder air down again. This produces a very even heat within a space, and they run quietly.
  • Radiant kerosene heaters produce localized heat, essentially warming the objects in front of them. They don’t do a particularly good job at heating a larger space evenly, but they’re ideal for targeting a specific area, such as a table or sitting area.
  • Forced air kerosene heaters (also known as torpedo heaters and salamanders) heat air and force it into the area, much like a furnace. They’re suitable for heating large outdoor tents and gazebos, but they can be quite loud.
  • Portable kerosene heaters come in both convection, forced air, and radiant models, though the latter type is the most common. These heaters are small and easy to transport. Take it outside to refill the fuel tank, which helps minimize potential mess or dangerous accidents.

Tank Size

Kerosene is a liquid fuel, so tank sizes are measured in gallons or liters. The ideal tank size is relative, so consider these factors:

  • Heat output: Large heaters burn more fuel, so they need a larger tank.
  • Portability: Smaller heaters need to be light and portable, so they have a smaller tank.
  • Fixed vs. removable: Fixed tanks are usually larger, while removable tanks must be small and manageable.

In general, larger wheeled kerosene heaters have fuel tanks that hold up to 15 gallons (roughly 56 liters) of fuel, while smaller models may hold only 1 or 2 two gallons (about 7 to 8 liters).

Heating Capacity

Kerosene heaters also come in a variety of outputs, which are measured in BTUs (British Thermal Units). The higher the number of BTUs, the more heat a heater can produce.

Smaller heaters that produce heat within the 10,000 to 25,000 BTU range are ideal for smaller rooms, patios, or porches. Depending on the model, they can heat between 300 and 1,000 square feet. Midsize heaters (roughly 50,000 to 75,000 BTUs) warm spaces between 1,000 and 2,000 square feet.

Larger models—typically forced hot air—can pump a lot of hot air throughout a space. These heaters, which sometimes produce more than 150,000 BTUs, work well for large backyard parties and semi-enclosed tents.

Efficiency

Anytime energy is a factor, efficiency must be considered when choosing the product. Since kerosene heaters burn fossil fuels, make sure the model you choose is efficient and wastes as little fuel as possible.

Many kerosene heater manufacturers list their products’ efficiency rating, describing it in percentages. The best kerosene heaters burn around 99 percent of the fuel, passing less unburnt fuel through the exhaust.

But for a heater to work efficiently, it must be the correct size for the space. A 10,000-BTU heater may never heat a large garage, for example, which means fuel is wasted. Heating a small patio might not require a 135,000-BTU heater, as it will burn more fuel than necessary to keep the space comfortable.

Run Time

Run time is directly related to the size of the fuel tank, the heater’s output, and its efficiency, the most important of which is tank size. The larger the tank, the more fuel it uses, so the longer the heater will run. A heater that runs for several hours without refueling is a convenience worth shopping for, but manufacturers aren’t always forthcoming with this information.

Some of the best kerosene heaters can provide heat on a low setting for up to 12 hours before running out of fuel.

Safety Features

Kerosene heaters have the potential to be dangerous. If left unattended or used incorrectly, they can start a fire or cause burns. Many heaters have an overheat switch that shuts down the unit if it gets too hot. Also, compact kerosene heaters can tip over quite easily if inadvertently bumped. An anti-tip switch shuts off the heater if it tips over.

Moreover, any machine that burns fuel—kerosene, gasoline, wood, or any other type—also produces carbon monoxide. The best kerosene heaters are extremely efficient and designed to emit very little carbon monoxide, which makes them safe even for indoor use. However, when used indoors, it’s a good idea to install a functioning carbon monoxide detector as a safety precaution.

FAQs

If you have concerns about running a fossil fuel-burning heater in an enclosed space or want more info about kerosene heaters, check out the answers to the common questions below.

Q. How big of a kerosene heater do I need?

This depends on the space you’re heating. In most cases, a 50,000-BTU heater is effective at heating a small porch, while a 100,000-plus-BTU unit might be necessary for a large open space such as a wedding tent or barn.

Q. How many square feet will a kerosene heater heat?

The amount of space a kerosene heater heats depends on BTU output. Low-output heaters, in the 25,000-BTU range, may heat 1,000 square foot spaces, while 135,000-BTU units can heat over 3,000 square feet.

Q. Do kerosene heaters give off carbon monoxide?

Yes, carbon monoxide is a by-product of the combustion process. Generally speaking, these heaters produce levels considered safe, but users should have a functioning carbon monoxide detector when running a heater indoors.

Q. Is it safe to run a kerosene heater all night?

Kerosene heaters are not as safe as a furnace or boiler, but they could be the only heat source in a power outage. While these heaters may be considered safer than sleeping without heat in subzero temperatures, you should never leave a kerosene heater unattended.

Why Trust Bob Vila

Bob Vila has been America’s Handyman since 1979. As the host of beloved and groundbreaking TV series, including This Old House and Bob Vila’s Home Again, he popularized and became synonymous with “do it yourself” home improvement.

Over the course of his decades-long career, Bob Vila has helped millions of people build, renovate, repair, and live better each day—a tradition that continues today with expert yet accessible home advice. The Bob Vila team distills need-to-know information into project tutorials, maintenance guides, tool 101s, and more. These home and garden experts then thoroughly research, vet, and recommend products that support homeowners, renters, DIYers, and professionals in their to-do lists.

What Do Coyotes Sound Like? – Audio & Video Examples

0

All wild animals make special sounds for communication or any other purpose. The coyote is also a wild animal that covers very vast territory from Alaska to Central America. They also make a lot of sounds like yips, howls, and barks. You may have been familiar with these sounds through literature, art, and films even if you have not experienced them in the wilderness. Generally, coyotes are not very vocal animals like human beings. They are considered very quiet wild animals. They do most of their daily communications with the help of eye contact, body language, and very subtle facial expressions.

Coyote sounds might not have any definite language but it is easily readable by other family members and those people who have spent some time listening to these sounds. The sound usually comes out in the form of an emotional outburst. Most of the time the vocalization of the coyote is related to the family’s internal affairs as coyotes have very intense family lives. It is also very much known that the coyote makes a lot of noise or special kinds of sounds at night.

In this article, we are going to explain in detail what do coyotes sound like under different circumstances.

What do coyotes sound like?

Coyote makes a lot of sounds. You can hear these wild animals both day and nighttime in the wilderness. Sometimes people also intermix their sounds with other animals like foxes, dogs, owls, and wolves. Coyotes mainly make sounds for the sake of communication. The most prominent sounds they make are yipping, barking, howling, yelping, woofing, etc. However, they prefer to utilize some silent means of communication as we have explained above. In the nighttime, they also make some strange sounds like they are howling.

Coyote sounds meaning

Coyote makes different sounds under different circumstances. It is important to understand their meaning so that we can get to know what coyote wants.

Sound of coyote Bark

Like other animals, coyote also barks as a warning of danger. They also make these sounds while fighting or if they want to grab the attention of others.

Sound of coyote Bark.

Howling

They howl under different situations. If they lone howl, it means to give intimation to the other members of the pack so that they can easily track each other in the wilderness. If they are making bark-howl then it is a warning sign for the intruders to go away. For socialization, they also make group howls or yip howls.

Coyote Howl: Back And Forth Social Coyote Communication.

Whining and yelping

Coyote pups or beta members usually make these sounds. They make these sounds while tucking their tail. Moreover, all the coyotes also whine if they are injured.

Coyote Growling sounds

This sound is almost the same as barking. It seems more dominant than barking. They make these sounds as a warning sign or if they have gained dominance or going to gain dominance on anything.

Coyote Growling sounds.

Huffing and woofing

These are disliking sounds. If there is some disagreement between the pack members, then they make huffing and woofing sounds. They also make these sounds if other animals like dogs or wolves have intruded into their territory.

Estrus chirps

These sounds are usually erupted by a female coyote who is in search of its mating partner. It is not a very well-known sound and only makes for calling in coyotes for the breeding season.

Coyote Yipping sounds

Coyote yips to express their painful feeling. It is actually an extreme form of whining. They usually make this sound if these animals are highly stressed or disturbed. It could be highly alarming for the other pack members if Coyote makes these sounds.

Coyote Yipping sounds.

Coyote Laughing sound

Sometime coyote makes a mixture of sounds. Various sounds like yipping, whining, and whistling when mixed together make a very strange laughing-like sound. They make these sounds if they are doing some celebrations in the nighttime or if they have got some big source of food.

Pack of Coyotes Laughing in an urban area.

Sounds of a coyote Screaming

It is one of the strangest noises you can hear from a coyote. These screams are almost the same as women are distressingly screaming somewhere. These are also called coyote distress sounds. These sounds might be extremely frightening for you and you must not go towards these places from where these noises are coming from. Usually, they make these sounds if their predator comes towards them. You may also consider these screams the same as the scream made by foxes, badgers, and bobcats.

Sounds of a coyote Screaming.

Coyote sound at night

Now, let me explain to you what does a coyote sound like at night. Coyotes make various kinds of sounds at nighttime. The howling sound is the most prominent among these. They make these sounds for communication purposes at night with their pack members. Moonlight also influences the coyote sounds. It means moonlight influences the coyote sounds. Coyote also makes a sound at night for an indication of their home territory as they don’t want an intruder to come near their home range or territory.

For this purpose, they make sounds like barking, howling, and whining. They also make howl for communication purposes while hunting at nighttime. They hunt as a team and also share the food they hunt. In this kind of hunt, communication is very necessary which they make by making howling sounds. They also make howling sounds at nighttime for keeping the predators away from their den for the safety of their pups.

Coyote Pack Sounds At Night

Coyote mating sounds

Coyote sounds are also very famous during breeding or mating seasons. The season usually starts between January and March. Coyote starts making sounds at the beginning of this season. Male coyote only makes howling while mating but this sound is mixed with the yipping, barking, and howling of female coyotes. Male coyotes also remain monogamous throughout their life until their partner dies. Sometimes you may also hear coyote mating calls which are intentionally done for attracting their mating partner towards them.

Decoding the howling sound of a coyote

Coyote makes howl when the sunset colors fade. Howling is the long but slow sound that usually breaks the calm of the forest. These are short howls that rise and fall as quickly as possible. You may also confuse this sound as the noises of a pack of animals but it is actually an illusion which is called the “beau geste” effect. The howling sound gradually distorts as it passes from one phase to another. These howls come in a variety of forms. Let’s have a look at all of these howling sounds made by individual coyotes or packs of coyotes.

Yip howl

These sounds are a mixture of sounds made by alpha coyotes along with female yips, barks, and howls. Beta coyotes and their pups may also join this sound. By hearing this sound, another alpha pair may also respond in the same manner and resultantly these yip howls may be heard from very far miles away.

Song dogs

Coyote sounds are also called song dogs due to their capability to travel very long distances. This type of song comes in two types.

Group yip howling

These yip howls are an indication of very strong bonding within the family. It is also a very strong message for territorial display that no one should cross this particular territory as it belongs to a specific coyote group. It is a very large auditory fence that no one should dare to cross.

Bark howling

This mixture of sounds is a warning sign which indicates agitation, disturbance, and threat. They usually make these sounds when big animals like wolves, or small animals like dogs or human beings intrude into their territory. If the tone of the howling sound is much higher then it means the coyote is highly disturbed and facing very high potential threat from the predators.

Coyote Bark-Howling sound.

Coyote sounds during Denning season

Coyote also makes sound while making dens for them. In this season, these animals are not very local. They just bark at the animals who come near their dens. These are also not very volume barks and usually make very low-volume barks or signals through body language.

Coyote sounds during the pup rearing season

Coyote pups become active very early and start coming out of their dens just after 35 days of their birth. The parents of coyotes take it to less risky places like open plains or grass fields for training about hunting and killing the prey. They usually don’t hunt very big or dangerous animals as it could be risky.

On this short hunting tour, they also leave their pup freely for making some independent hunt. They might be separate from each other but keep telling each about their location with the help of their special sounds. Female coyotes also indicate through sounds the time to return back. In this hunt training exercise, sometimes coyote pups also get lost in the wilderness.

Coyote pup sounds.

Coyote sound during pup dispersal season

After some months of nourishing and taking care, of coyote pups are left alone on their own. This usually happens in the month of September if the mating season has occurred at its time. At this age, these pups are trained enough that they can easily find and kill their prey. These young coyotes start finding out their own territory after leaving their parents. After that, they prepare themselves for the mating season.

During this time, you may also witness a lot of young and transient coyotes in search of their territory and mating partner. In this process, these animals may also do fighting with a lot of other animals as well as their own mates. They usually make howling and barking sounds after dispersal from their parents.

How to utilize sounds for catching a coyote

You may also use some sounds for catching coyotes or luring them close enough that you can easily see them properly. There are two ways to do this. First of all, is the electronic callers. It might be an expensive method but it works most of the time. You can make a lot of coyote sounds as well as other coyote prey sounds by using this electronic device.

Another method of luring coyotes towards you is with the help of closed-reed callers. It is not a very expensive method but you need to have some practice for practically applying it. It mainly makes sounds that seem like the certain coyote prey is in distress and the coyote must immediately go there and hunt it down.

Watch how to utilize sounds for catching a coyote.

Weird coyote sounds

Coyotes make a lot of different kinds of sounds. It is the wild animals that make the most strange and weird sounds throughout their lives under different circumstances. It is also the only North American mammal that could make this number of sounds. Generally, it is very normal to hear sounds like yip, bark, howl, and yelp from these animals. Sometimes they emit laughter sounds and sometimes distress sounds.

You cannot understand under what conditions they are making any particular sound. We have also heard coyote sounds like a woman screaming at night. These screaming sounds have also been made by other animals like bobcats and foxes.

Should you be concerned if you hear coyote sounds near you?

You may hear coyote sounds like yipping, howling, and barking at nighttime. People are usually very concerned or alarmed about these sounds especially if they are erupting in the nighttime. It is usually thought that coyote has made some hunting and now eating and making sounds. It is a wrong perception because coyotes can make a lot of sounds for various other reasons.

For instance, they make sounds for the purpose of communication between themselves. For this purpose, they yip and howl. They also make barking sounds while making their dens or safeguarding their territory. People also overestimate the number of coyotes from the sound they heard.

Once it was experimented on by the wildlife research institute of Texas. They play some recording sounds of a coyote howling and yipping. When people were asked to estimate the number of coyotes in the recording, they increased two times the number of coyotes they heard. Thus, there is nothing to worry about just coyote sounds unless these animals are showing aggression toward human beings or pets.

Frequently asked questions

Conclusion

In a nutshell, we have tried our best to cover all the possible coyote sounds that they can make in a very comprehensive manner. We have also covered their coyote calls at night, strange screaming sounds as well as their normal sounds. Most of the time they make sounds in the pack which might be difficult to decode but after reading this article you can easily differentiate between these sounds and what is the meaning of these sounds. I hope this article helps you a lot in understanding all the possible coyote vocalizations.

Can You Hunt Elk With A 300 Blackout?

0

Fact checked by Steven Lines, lifelong Hunter, and Outdoorsman.

If you plan to hunt elk, you need to get the right weapon. In this area, the .300 Blackout is a reasonably well-known name. But will it be powerful enough to kill an elk?

The .300 Blackout is powerful enough to kill an elk, as long as you are working within the right parameters. First, it has a limited range. You’ll have to be within 100 yards. You’ll also need to be confident of hitting the vitals, as it will struggle to get through the thick elk bones.

Before you head out to hunt an elk, you need to know what your weapons are capable of doing. This ensures that you will be able to deliver a kill shot. Keep reading to learn everything you need to know about using a .300 Blackout during your hunt.

Buy Ammo from Guns.com

Buy 300 Blackout Ammo from Palmetto State Armory

Performance of the .300 Blackout

Let’s start by looking at the performance of this cartridge. This will help determine how effective it will be when hunting for elk. It will also help you determine if it will be a good fit for your hunting style.

Accuracy

One of the most important elements to consider when you are planning for your hunt is how accurate the cartridge will be. The amount of drop you experience will often vary a little, depending on the grain that you are using. Typically, the heavier the grain, the more you can expect it to drop.

The good news is that this the .300 Blackout is designed to be very accurate. However, you should be aware that the bullet will start to drop fairly dramatically after the first 100 yards. How far it will drop will depend on a few factors, like the type of gun you are using and the amount of wind you are facing.

Here is roughly what you can expect when using a 110-grain bullet:

  • Minimal drop within the first 100 yards
  • Down 2.1 inches after 150 yards
  • A drop of 6.6 inches after 200 yards
  • After 250 yards you have lost 13.5 inches

Recoil

The next thing that you need to consider is the amount of recoil that you will experience. The good news is that this is one of the lowest-recoil bullets you can use, especially in the hunting realm. It will be a little more than the .308 Winchester. It’s on par with the .223.

This is a good choice for beginner hunters, as it isn’t going to throw you off-balance too much. It’s also ideal for people who have shoulder problems or hunters who are a little older.

Cost

Due to the popularity of the .300 Blackout, the costs associated with the ammunition will be fairly low. This will vary a little, depending on the type of grain you are purchasing. Generally, though, you can expect it to be between $45 to $60. This is a fairly good price.

Availability

It’s important to think about the type of gun you will be using when hunting. You need to make sure that the cartridge will be compatible with this weapon. The good news is that there is a wide range of rifles that you can shoot a .300 Blackout from. The AR-15 is the most common weapon used with the .300 Blackout. Primarily, it is used for military purposes. Because of this, the popularity you shouldn’t have any trouble finding ammunition.

Type of Grain

When you are thinking about the equipment you are taking hunting, it’s important to make sure that you are getting the right grain. This will ensure that you have enough power to kill an elk. This is where the popularity of the .300 Blackout comes into play.

They are available in a range of grains. They typically start at around 110 grains, but they can go all the way up to 220 grains. It might be best to stick with a heavier grain. These will allow you to penetrate more deeply. It can also help when you are dealing with thick elk bones.

It should be noted that, because they are used with the military, there is a wide range of available bullets. For example, some rounds are built to be subsonic. Others might be designed to work with silencers.

When you are hunting for elk, it’s best to use hollow point ammunition. They will be able to expand when it hits a target. This will do more damage, opening up a large blood trail.

Penetration

With any species, you need to make sure that you are doing enough damage to deliver a kill shot. This is more important than ever when you are dealing with a larger animal, like an elk. In this area, there are lots of variables that can affect the penetration, including:

  • Where you hit the animal
  • The amount of wind resistance
  • Distance from the elk
  • Grain of the bullet, which affects its weight

However, we can estimate how much force the bullet will impact will have by analyzing the ballistics. Often, the 110-grain will leave the bullet with a muzzle at 2,375 feet per second. If you hit the elk within the first 100 yards, you will be able to deliver 1,071 pounds of force.

Legality

Finally, you should always check your hunting rules before you begin. If you have the wrong set-up, you could be facing a major fine. The good news is that the.300 Blackout is legal in all states. You just need to make sure that you are using supersonic rounds. Though in some jurisdictions, subsonic varieties will be allowed.

What’s the Range of the .300 Blackout?

The .300 Blackout is a close-range weapon. It’s best to use this within a 100-yard range. Outside of this distance, the power starts to drop, so you might not have enough force to kill the elk.

The .300 Blackout is a popular choice when hunting for Whitetail deer. You can kill these animals from 200 yards away. Plus, they allow hunters to use AR-15, a weapon that most people will be familiar with and fairly comfortable shooting.

When you are working with any weapon, it’s important to think about the range. This is especially important when you are working with a large animal, like an elk. Too little power and you could be setting yourself up for a long blood chase as you work to track down and kill the injured animal.

The .300 Blackout has a limited amount of power, especially when compared to some of the larger hunting cartridges on the market. To ensure that you can penetrate deeply enough to kill the elk, you will need to move reasonably close before taking your shot. It’s usually best to be within 100-yards, though closer is usually best. If you can, try to get even closer. 40 or 50 yards will deliver the best results.

It should be noted that there are a few things that will affect the range of the weapon. These elements include:

  • Weather conditions. On a blowy day, you will face more wind resistance on the bullet. This can slow it down, reducing the penetrating force.
  • Accuracy. This is one of the most important elements to consider. If you can reliably land a shot to the vitals, you might be able to move a little further back. But you don’t want to go too far back, as you don’t want to risk not having enough penetrating force to kill the animal.
  • Species. If you are shooting a deer or hog, you can be further away. 200 yards for these species is a good option. But an elk is one of the largest hunting animals. Because of this, you will need to be closer.
  • Temperature and humidity. These might also affect the flight path of the bullet. Though this only starts to come into play when you are shooting from long distances.

Should You Shoot an Elk With a .300 Blackout?

The .300 Blackout is only effective at close ranges. It will also require you to have a clean shot and the accuracy required to hit your target. If these conditions don’t suit your hunting style or abilities, it’s best to try a different cartridge.

Now that we know a little more about this type of cartridge and how it performs, we have established that it can be to hunt elk effectively. But this doesn’t answer one of the most important questions. Is it a good choice for these larger species?

This is a contextual question, which will require you to answer a few important questions. These are:

  • How far away are you? This is one of the most important things for you to consider. As we mentioned, this will only be effective within 100-yards, it isn’t a good choice for hunters that prefer to shoot from a longer distance. But if you are presented a good opportunity, like an unexpected shot at a buck as you are stepping out of the car, it will be a good choice. You can shoot with an AR-15 within a few seconds, often with accuracy.
  • Can you hit the mark accurately? The next thing you need to consider is how confident you feel using the cartridge. The good news is that the .300 Blackout tends to be fairly user-friendly. It doesn’t have a lot of recoil and will fly fairly straight. But you should still have a few practice shots before the hunt to make sure you can hit the target.
  • What type of bullet are you using? This will determine the amount of damage you will be able to do. If you are using a heavier grain and have a hollow point, you should be able to kill the elk. Even if you don’t the wound will be deep enough to create a strong blood trail.
  • Are there any other options available? Finally, think about what other weapons you have at your disposal. If you have the choice, it might be better to pick a more long-range cartridge, like the Nosler Accubond. This has plenty of power, so you shouldn’t have any issues taking down the elk, even if you are around 200 yards away.

Once you know the answers to these questions, you will be able to determine whether you want to take the shot. There are a few circumstances where you can comfortably use the .300 Blackout. The elk will need within 100 yards. You’ll also need to have a pretty good shot, so you can be sure of putting it into the vitals and delivering the kill shot. You should be able to put the elk away.

Outside of this circumstance, it’s probably not a good idea to use the .300 Blackout. It will be a great option for smaller animals like deer or hogs. But when it comes to the bigger prey, like elk, it might struggle to get the job done.

What Else Can You Shoot With a .300 Blackout?

While elk might not be the best fit for the .300 Blackout, that doesn’t mean that you won’t be able to use it when hunting. It just means that you might need to adjust your target species a little. Here are some of the animals you can focus on:

  • Deer. This is the most common hunting application for this ammunition. In particular, you should focus on the whitetail. As we mentioned, it will be legal in all the States, so it has become a popular choice with deer hunters.
  • Hogs. These are other ideal target species. Like when hunting deer, you will be able to use this cartridge from a distance. You should be able to kill a hog from 200 yards away.
  • Bears. When on a camping trip, it can be a good idea to take an AR-15 with you, especially if you are going into bear country. If one of these animals breaks into your camp, it will allow you to defend yourself. If you need to, a close-range shot to the head should be enough to kill the bear. Often, though, the noise of the gun will be enough to deter them.
  • Smaller varmint. The .300 Blackout will offer more than enough power to stop smaller animals, plus it’s low-cost and accessibility makes getting replacement bullets easy.

Alternatives to Using a .300 Blackout

No cartridge will suit all hunters; you might need to experiment a little to find the one that suits you the most. The good news is that there are plenty of other options available for you to explore. These include:

  • Hornady. This is one of the most popular deer hunting cartridges on the market. It’s known for its accuracy and deep penetration. It should offer enough power to take on larger game, like elk.
  • .223. The .300 and .223 offer a similar shooting experience. The .223 will also be suitable for use with AR-15s.
  • .308 Winchester. This is another cartridge that is often compared to the .300 Blackout. However, this option is often best for shooting over longer distances.

It’s often a good idea to experiment with the type of ammunition you are using during the off-season. Go to your local range and try out different types of cartridges. This will make it easier to find one that you like to work with.

Tips For Hunting With a .300 Blackout

As we mentioned, the .300 Blackout can be a good choice for elk hunting. But you will need to be careful about the situations you are using it in. Here are some of the tips you can use to make sure that you get a kill shot on your next hunting trip:

  • Get close. Because of the limited range, you will need to get used to stalking the bulls. This takes a lot of skill.
  • Be patient. This cartridge might struggle to bust through the thick bones of the elk. Because of this, you will need to wait until they are in the right position before you take the shot. This gives you the best chance of hitting the vitals.
  • Be prepared to take a second shot. If you aren’t quite hitting the spot on your first attempt, you might need to make a follow-up shot. This is where the rapid-fire nature of the AR-15 shines. If you can get a second shot in quick enough you might be able to save yourself from having to follow a long blood trail.
  • Always be ready. You never know when you might get an opportunity to take a shot at the elk, especially if you are stalking them. Because of this, you need to get confident in your hunting ability. If you are offered a clean shot, within the target range, take it. You never know when you are going to get the next one.

As long as you apply these tips, you stand a good chance of being able to land an elk with a .300 Blackout.

Final Thoughts

Buy Ammo from Guns.com

Buy 300 Blackout Ammo from Palmetto State Armory

In the right hands, any weapon is capable of taking down an elk. The key is finding the one that best suits your hunting abilities. The .300 Blackout won’t be suited to those who like to shoot from long distances. But, if you like to get close to the action, stalking until you are within 100 yards, this cartridge is right for you.

Steven Lines is a hunter and outdoorsman from Safford, Arizona, USA. Since he was a child, he has been hunting and fishing and has over 20 years of outdoor experience. Steven works as a hunting guide in Arizona during his spare time and runs a Youtube channel dedicated to sharing his outdoor adventures with others.

Sources

  • https://www.80percentarms.com/blog/300-blackout-deer-hunting/
  • https://www.huntinggearguy.com/tips/300-blackout-vs-223/
  • https://americanarmamentco.com/300-blackout/

Bassin’ After Dark: How To Go Night Fishing 101

0

There are many benefits to night fishing for bass, especially during the summer months. Warm waters in evening hours make fish sluggish, so they are less skittish and more inclined to take your bait! Another great advantage to fishing at night is you usually have the water all to yourself—and after dark in high-summer is often the only time that is possible. While fishing at night may seem intimidating for those who haven’t done it before, it’s actually quite simple and easy to do. Ahead, get expert tips from angler extraordinaire Jerry Audet who shares important safety tips as well as secret tricks for the best success.

Why Go Fishing At Night?

Many fishermen are surprised to know that bass can be caught easily at night, but the truth is that bass really never stop feeding (provided water temperatures are adequate for their metabolism). They may be more or less aggressive based on a variety of factors, but they’re always looking for a meal—especially when the Sun goes down.

Bass have excellent senses that extend beyond vision, and the night actually gives them an ambush advantage, so they are more inclined to do their own fishing in the dark. In fact, even in the daylight, bass don’t rely on their sight as a primary sense. Instead, they detect vibrations and sounds to zero-in on their prey. Sight is reserved for the end of the hunt. They are great nocturnal hunters because they don’t have to see their prey to chase it down.

Safety Is Important

Safety is important—especially if you’re in a kayak or a boat. Make sure you use night fishing lights (called “running lights”), a loud horn or air can in case of an emergency, and a very bright light that you can flash at a boater who may not be paying attention. Fish in waters that you know well so you don’t get lost. (Don’t explore at night. Save that for during the day.). Also, always go out with a fishing buddy. Night fishing is really simple and easy once you get used to it. But if you’re nervous, we suggest fishing from shore first (which is far less complicated).

Any Special Gear?

No special gear is needed to fish at night, except a headlamp. Don’t use it while you’re fishing, only when you need to change a lure, tie a knot, or release a fish. Try to keep the light off the water, as it can spook fish. I like using a red headlight for this reason. Plus, it helps preserve your night vision. (White lights are blinding.)

How About Lures And Bait?

As far as lures go, many anglers think a glowing lure is important, so the bass can see it. But this simply isn’t true and may actually be a deterrent as it looks unnatural. Color matters a lot less at night, as the bass track your lures by sound and vibration.

Fish actually have an easier time seeing a dark colored lure at night, as the contrast with dark water or sky is easier for them to detect. The best nighttime colors vary based on what you are doing, how dark the night is, and how deep your lure is in the water. The higher up in the water column, the lighter your lure’s belly should be. This simulates nature.

Most fish and frogs have white bellies and bass are most likely looking up at the lure from beneath it. If you’re mid-column or down deep, use a dark green, black, or purple lure. However if you’re just starting out at night, white is a perfectly fine color. It’s easier for you to see and work with (in and out of the water), and it will catch bass the vast majority of the time (day and night).

At night, use lures that ride high in the water. Fish will slide into the shallows after dark looking for food (because they’re less afraid of being spotted by predators) and working those skinny waters means you are more likely to get a snag.

Using a lure that stays near the surface really helps prevent this. Something that throws a wake on the surface really draws the fish’s attention after dark. Some of the best night fishing lures include wake baits and slow-sink weightless soft-plastics (usually jerk-bait style), but subtle poppers, walk-the-dog lures, and shallow-running crank baits all work great. However, chances are that your favorite day-time lure will work great at night too. It’s just up to you to give it a shot!

Good luck night fishing!

Join The Discussion

Have you ever been fishing at night?

Had much success?

Share your experience with your community here in the comments below!

Related Articles

How To Catch Striped Bass From Shore

Kayak Fishing: How To Get Started

5 Tips For Fishing In The Rain

Best Air Rifle Deals

Popular Posts

Can a 22 air rifle kill a deer?

0
"Debate over whether a 22 air rifle can effectively take down a deer has sparked curiosity among hunting enthusiasts. With its lower muzzle velocity...

How far can an air rifle shoot accurately?

0
An air rifle's effective shooting range depends on various factors, including the type of rifle, the caliber, and the power source. Generally speaking, most...

Air Rifle Scope vs. Rifle Scope – Which One Fits Your Shooting Needs?

0
"Air Rifle Scope vs Rifle Scope: Unveiling the Ultimate Precision Optics. Discover the essential differences and benefits of these two optical devices, empowering shooters...

Best Air Rifle Brands – Who Makes the Best Pellet Gun?

0
In Jeff Bezos’ own words: "A brand for a company is like a reputation for a person. You earn reputation by trying to do hard...

Air gun 101: What is a PCP air rifle? Is PCP gun the best...

0
A PCP air gun is one of five types of air rifles in the market today. PCP air guns have become more and more...