Advances in fishing electronics have been moving forward by leaps and bounds in the past few decades. Keeping up with technological innovations is a challenge, even for a techno-junkie such as myself. Sonar, imaging, and GPS have given anglers unparalleled access to what is going on below the surface of the water. However, a decade spent selling fish finders in the retail business taught me a few things. One, many anglers struggle with understanding the different features of modern fishing electronics. Secondly, many anglers are paying for features they simply don’t need or use. If you are buying your first fish finder or looking to upgrade here is a quick course on the features you might look for.
How It Works: Sonar
The majority of anglers rely on sonar. Whether you spend the majority of your time trolling open water or hovering over structure you will find sonar useful. Sonar is useful for identifying your depth, locating fish quickly, identifying the depth of fish, and can provide information on the types of bottom substrate beneath your watercraft. Sonar works by generating a signal that travels outward from your transducer in a cone shape. The signal reflects off surfaces and travels back to the transducer. Your fish finder then translates those reflections into a visual representation. Harder surfaces, such as rock, will reflect more signals than soft surfaces, such as vegetation. The hardness of a surface reflection is often represented by a color gradient that you determine on your fish finder’s settings. Using the color and shape of the return an angler can interpret what the benthic or bottom structure of the lake or river they are fishing looks like. Sonar signals bounce strongly off of air which is why fish with large air bladders show up extremely well on fish finders.
Most modern fish finders broadcast in alternating low and high frequencies. Lower frequencies produce a narrower cone that better penetrates deeper water whereas higher frequencies produce a wider cone that is better at resolving fish and structure in shallow water. Many fish finders will automatically use the best frequency depending on your depth or will cycle back and forth to generate the best signal. However, anglers can select particular frequencies that best suit their fishery and may even opt to buy transducers specific to the types of fishing they do. However, sonar does have several weaknesses. First, due to the narrowness of the signal cone, it is very poor at detecting fish shallow and under your watercraft. Secondly, because it is compressing a three-dimensional cone into a single dimension it is very difficult to separate fish from structure or multiple fish or bait fish from each other. Lastly, learning to interpret sonar output takes time and can be especially challenging for color-blind individuals.
Anglers aren’t bound to just one or two technologies anymore, with modern fish finders displaying a wealth of information on a single screen.
How It Works: Down and Side Imaging
For those anglers that fish structure, whether that be brush piles, weed beds, or rocky reefs, you will find imaging useful. Imaging fills the gaps in sonar’s weaknesses. Unlike sonar, imaging is generated by your transducer generating a razor-thin high-frequency signal. These imaging frequencies can be directed downward, for down imaging, or out to the side, for side imaging. This data is then used to generate detailed and lifelike images of the structure below or off to the side of your watercraft. Unlike sonar images which can be very nebulous and confusing, especially around layered structure, imaging results are much easier to interpret. A tree looks like a tree and rocks look like rocks and so on. Additionally, fish can be separated from structure much more easily.
Imaging uses a high frequency and thus has limitations in deep water applications. In general, I find it most useful down or out to 100’. If you spend a lot of time targeting structure directly under your boat then you will find down imaging especially useful. Side imaging is useful in quickly locating structure off to the side of your watercraft and measured distances on your fish finder unit will allow you to cast at those targets. I’ve also found side imaging to be helpful in locating schools of suspended fish off to the sides of the kayak when trolling in open water.
There are plenty of mounting options for kayaks, though most elect to use one of the accessory tracks.
How It Works: GPS-Enabled Fish Finders
GPS-enabled fish finders provide a wealth of information to any angler. Coupled with bathymetric depth maps GPS allows you to identify and navigate to potential fish-holding areas. Waypoints and tracks of your movements can be saved for future reference as well. Additionally, many fish finders like the Humminbird Helix have advanced features such as Autochart Live that allow anglers to build custom detailed maps of their local body of water. For anglers that troll GPS units provide real-time troll speeds. Finally, GPS can assist in safe navigation to and from your favorite fishing spots.
Advanced Fish Finder Features to Look For
In just the past few years, even more advanced fish-finding features have emerged. These include Humminbird’s 360 imaging which gives you complete imaging all around the watercraft. Additionally, live sonar and live imaging are now available on many fish finders. Live sonar/imaging gives you real-time direction target separation and you can watch fish chase your lure or bait and in some instances you can identify fish species by shape. These advanced features require specialized transducers and cost more but when used correctly can help put more fish in the boat.
Although different places have different laws, anything you find on public land (national parks, for example) is off-limits. What you find on private land that you have permission to look for arrowheads on is legal. Different laws apply in different places, but that is the general rule.
If arrowheads are on the surface, can you pick them up on public land?
No. Even if you don’t dig for the arrowheads, picking up arrowheads on public land is not allowed. There is always a fine per artifact if you collect arrowheads on public land.
It is not usually a felony to take arrowheads illegally, but you should look for arrowheads respectfully and legally. Look for arrowheads on private land with the owner’s permission.
A large majority of the land in Texas and elsewhere is privately owned, and a large majority of arrowheads can be found on this land. You aren’t missing out on anything special if you don’t look for arrowheads on public land.
In most states, you can’t dig up an archeological site even on private land that you have permission to use. There are laws against digging up archeological sites.
However, it can be legal to dig for artifacts in Texas because of property rights. The property owner gets to decide what happens to an archeological site on their land.
Any of the following are public land:
National parks
National forests
Bureau of land management land
National monuments
There are privately owned lakes that the public is allowed to use, where you may find arrowheads. It is usually legal to find arrowheads at these locations.
Are public waterways off-limits?
It depends on what state you are in. For example, it is legal in Missouri but illegal in Florida. Riverbeds are a good place to find arrowheads, but make sure it is legal.
Often, anything you find in a river is the property of the state, so it may be illegal to take anything you find. It can be illegal to dive for arrowheads without a permit.
Trespassing laws usually do not cover rivers. If the river is big enough to take a canoe down easily, it is usually legal to use the river. Check the laws in your state.
Is it legal to dig for arrowheads?
It is not legal to dig up archeological sites. Digging for artifacts on Federal land or Indian reservations is illegal under the Archaeological Resources Protection Act of 1979.
The act is there to protect sites valuable to archeologists from being dug up by amateurs who will not learn valuable archeological information. The laws also protect native cultural heritage sites. It is considered looting to dig up a burial mound.
Oddly, the laws do not apply to natural artifacts, such as dinosaur fossils. You can dig for fossils on public land. Fossils are considered paleontological rather than archeological, so the act does not apply.
Digging up burial mounds is disrespectful and illegal. You cannot dig up an area where you find human remains or assume you are likely to find them even on your own property.
It is not necessary to illegally dig up burial sites to find good arrowheads. One of the best places to find arrowheads is near rivers, where it is usually legal to look for arrowheads.
You can also find arrowheads after a flood, even a small flood that does not damage any property. When a river floods, it disturbs the ground and can uncover artifacts.
The 1979 act does not apply to private land, so it is legal to dig for arrowheads. The owner of the property must be willing to let you dig, or else you could be charged with damaging their property. You cannot dig up human burial sites even on private property.
How do the laws in Texas compare to laws in other states?
In Texas, property owners decide what happens to artifacts on their land. This reinforces the legality of digging up sites without having an archeological permit.
If you find artifacts on someone else’s property and you have permission from the owner to keep what you find, you can take and sell the arrowheads. Texas property rights mean that the owner can decide to do what they want with archeological sites on their property.
Do a lot of people look for artifacts illegally?
Yes, some antique dealers illegally dig up sites on private property to find artifacts to sell. Some even hire people to dig up sites at night. This is illegal and unethical for many reasons, including because it damages the owner’s property.
Artifacts found by archeologists are taken out of the ground carefully while collecting as much information as possible. They take detailed notes and photograph everything as it is removed from the ground.
If someone digs up a burial mound without notes and photographs, it stops being possible to learn as much about the site as archeologists could have.
Campsites are not quite the same as burial mounds. It may be more ethical or legal to dig up campsites. The best place to find arrowheads is on or near the surface.
How old are the oldest arrowheads in Texas?
Projectile points as much as 16000 years old have been found in Texas. These spear or dart points are some of the oldest tools ever found in the Americas.
This surprised the discoverers, who did not expect to find anything that old in Texas. The points are more than 2000 years older than anything previously found in the area.
How long ago people came to the Americas is not known for sure. A conservative estimate is still only about 16000 years, roughly as old as the recent finds in Texas. Most archeologists believe 20,000 years is the best estimate.
However, evidence is building up in favor of much earlier dates. There may have been people in the Americas for about twice that long.
Even how people reached the Americas is disputed. Arguably, some people reached South America from Australia and Melanesia at a very early date. Many people came from Siberia to Alaska, but other people may have reached the Americans in other ways.
Discover the optimal range of a 20-gauge slug for deer hunting. Uncover the effective distance this ammunition can reach, ensuring accurate and ethical shots. Gain valuable insights to enhance your hunting experience and maximize success in bagging that prized deer.
Understanding the Effective Range of a 20 Gauge Slug for Deer Hunting
Understanding the Effective Range of a 20 Gauge Slug for Deer Hunting
The effective range of a 20 gauge slug for deer hunting depends on several factors, including the shooter’s skill, the type of ammunition used, and the firearm itself.
When using a smoothbore shotgun firing rifled slugs, it is generally recommended to not shoot at game beyond fifty yards. Beyond this distance, group sizes tend to get larger, increasing the risk of wounding or crippling an animal rather than making a clean kill.
On the other hand, if you have a shotgun with a rifled bore, rifled slug rounds can still group well enough at 100 yards for deer-sized game. However, it is important to note that newer saboted slugs should not be used in a smoothbore shotgun as they will not stabilize properly. These saboted slugs are designed to be used only in rifled bores and can extend your effective range past the old-style rifle slugs.
It is crucial to practice regularly with whatever combination of shotgun and ammunition you use so that you know your personal limits for taking game while hunting. Additionally, using a.22 rimfire gun for practice can be beneficial for improving sight picture and trigger control skills since its muzzle velocity and trajectory are similar to rifled slugs.
When it comes specifically to 20 gauge shotgun slugs for deer hunting, as a practical matter, their effective range is typically around 75 yards or meters. Slugs become increasingly inaccurate at distances beyond 100 yards and may lose about half their muzzle energy by that point. It is essential to prioritize quick and humane kills on deer-sized animals, so it is advisable not to take chances by shooting at longer ranges where accuracy may be compromised.
In some states, it may be legal to replace your smoothbore shotgun barrel with a rifled barrel during shotgun-only season. By using more aerodynamic sabot-slugs fired from a rifled barrel, you may achieve rifle-like accuracy and extend your effective range even further, potentially up to 150 yards.
However, it is important to exercise caution and not rely solely on the range of your shotgun slug. Shot placement and ensuring a clean kill should always be the top priority when hunting. Remember to always follow local hunting regulations and guidelines to ensure both safety and ethical hunting practices.
Exploring the Practical Limits of a 20 Gauge Slug for Deer Hunting
When it comes to using a 20 gauge slug for deer hunting, the effective range can vary depending on factors such as the shooter’s skill, the type of ammunition used, and the firearm itself. Generally, a smoothbore shotgun firing rifled slugs should not be used on game beyond fifty yards. Beyond this distance, group sizes tend to get larger, increasing the risk of wounding or crippling an animal without making a clean kill.
However, if you have a shotgun with a rifled bore, using rifled slug rounds can potentially extend your effective range to around 100 yards for deer-sized game. These rifled slug rounds are designed to group well at longer distances and offer better accuracy. It is important to note that newer saboted slugs should not be used in a smoothbore shotgun as they will not stabilize properly. These saboted slugs are best suited for use in rifled bores and can fly faster, extending your effective range beyond traditional rifle slugs.
To ensure success when hunting with a 20 gauge slug, it is crucial to practice regularly with your chosen combination of firearm and ammunition. This will help you become familiar with your personal shooting limits and improve your accuracy in different shooting scenarios. Additionally, practicing with other firearms such as.22 rimfire guns can also be beneficial for developing skills in sight picture and trigger control.
While the effective range of a 20 gauge slug for deer hunting may be around 75 yards as a practical matter, it is essential to prioritize safety and ethical hunting practices. Shots should be taken within distances where you are confident in making accurate and humane kills. Remember to always wear appropriate safety gear like eye and ear protection and ensure you have a safe backstop when shooting.
In some states, it may be legal to replace the smoothbore barrel of a shotgun with a rifled barrel, allowing for the use of more aerodynamic sabot-slugs. This can potentially increase the accuracy and effective range of the 20 gauge slug, achieving rifle-like performance out to distances of around 150 yards.
Ultimately, it is important to exercise caution and not take unnecessary risks when hunting with a 20 gauge slug. Understanding the limitations of your firearm and ammunition combination will help you make responsible decisions in the field and ensure the most ethical and effective hunting experience possible.
Determining the Maximum Range for a 20 Gauge Slug when Hunting Deer
Determining the maximum range for a 20 gauge slug when hunting deer can depend on various factors such as the shooter’s skill, the type of ammunition used, and the firearm itself.
In general, a smoothbore shotgun firing rifled slugs should not be used on game much farther than fifty yards. Beyond this distance, group sizes tend to get larger and there is a higher risk of wounding or crippling an animal rather than making a clean kill.
However, if the shotgun has a rifled bore, the rifled slug rounds may still group well enough at 100 yards for deer-sized game. It is important to note that newer saboted slugs should not be used in a smoothbore as they will not stabilize. These types of slugs are designed to be used only in rifled bores and can extend the effective range beyond that of old-style rifle slugs.
To determine your own personal limits for taking game while hunting with a 20 gauge slug, it is crucial to practice regularly with your chosen combination of firearm and ammunition. This will help you understand your shooting capabilities and ensure ethical and accurate shots.
It is also worth mentioning that using a.22 rimfire gun can be an excellent way to practice for sight picture and trigger control without spending too much on ammunition costs. The muzzle velocity and trajectory of a.22 rimfire are similar to rifled slugs, making it beneficial for improving trajectory skills.
When shooting with a 20 gauge shotgun slug, it is important to prioritize safety by wearing appropriate eye and ear protection and ensuring you have a safe backstop when shooting.
As for the effective range of a 20 gauge slug for deer, as a practical matter, it is generally considered to be about 75 yards or meters. Slugs become increasingly inaccurate beyond 100 yards and may lose significant muzzle energy by that distance. It is crucial to consider humane kills when hunting and not take chances by attempting shots beyond your effective range.
In some states, it is legal to replace a smoothbore shotgun barrel with a rifled barrel during shotgun-only seasons. This allows the use of more aerodynamic sabot-slugs, which can achieve rifle-like accuracy and extend the effective range to approximately 150 yards or so.
It is important to note that these ranges are general guidelines and individual shooting abilities may vary. It is always best to practice and become familiar with your specific firearm and ammunition combination to determine your own effective range for hunting deer.
The Importance of Knowing the Effective Range of a 20 Gauge Slug for Deer
The effective range of a 20 gauge slug for deer is an important factor to consider when hunting. It determines the maximum distance at which you can accurately and ethically take down a deer with a slug from your shotgun. Knowing the effective range helps ensure a quick and humane kill, as well as prevents unnecessary suffering or wounding of the animal.
It is mentioned that a smoothbore shotgun firing rifled slugs should not be used on game much farther than fifty yards. This is because group sizes tend to get larger at longer distances, increasing the likelihood of wounding or crippling the animal instead of making a clean kill. Therefore, it is recommended to keep shots within this range when using a smoothbore shotgun with rifled slugs.
On the other hand, if you have a shotgun with a rifled bore, the rifled slug rounds will likely still group well enough at 100 yards for deer-sized game. The newer saboted slugs should only be used in rifled bores as they fly faster and extend your effective range beyond the old style rifle slugs.
It is crucial to practice regularly with whatever combination you use so that you know your own personal limits for taking game. This includes understanding your firearm’s effective range and being proficient in shot placement.
While some hunters may claim that they can shoot accurately up to 150 yards with a 20 gauge slug, it is generally recommended to keep shots within about 75 yards (or meters) for practical purposes. Slugs become increasingly inaccurate beyond 100 yards, and by this distance, they may have lost about half their muzzle energy, potentially leading to ineffective or inhumane kills.
In some states, it may be legal to replace your smoothbore shotgun barrel with a rifled barrel during shotgun-only season. If you choose to do so and use more aerodynamic sabot-slugs fired from such a barrel, you may achieve rifle-like accuracy and extend your effective range to around 150 yards. However, it is crucial to familiarize yourself with local regulations and ensure that you are using the appropriate equipment for hunting.
In conclusion, understanding the effective range of a 20 gauge slug for deer is essential for ethical and successful hunting. It helps determine the maximum distance at which you can accurately and humanely take down a deer with your shotgun. By practicing regularly, knowing your firearm’s capabilities, and adhering to local regulations, you can ensure safe and responsible hunting practices.
Factors Affecting the Effective Range of a 20 Gauge Slug for Deer Hunting
Factors Affecting the Effective Range of a 20 Gauge Slug for Deer Hunting
The effective range of a 20 gauge slug for deer hunting can be influenced by several factors. One important factor is the type of barrel being used. A smoothbore shotgun firing rifled slugs should not be used on game much farther than fifty yards. This is because group sizes tend to get larger at longer distances, increasing the likelihood of wounding or crippling an animal.
On the other hand, a shotgun with a rifled bore can still provide good grouping with rifled slug rounds at 100 yards for deer-sized game. The newer saboted slugs, however, should not be used in a smoothbore as they will not stabilize. They are best suited for use in rifled bores and can extend the effective range past the old style rifle slugs.
Another factor that affects the effective range is the shooter’s skill and familiarity with their firearm and ammunition combination. Regular practice is necessary to understand one’s personal limits when taking shots at game. It is also recommended to practice with a.22 rimfire gun, which is cheaper to shoot and can help improve sight picture and trigger control skills.
Additionally, the lack of precision sights on a shotgun can present a challenge in achieving accurate target acquisition beyond 50 yards. While it may be possible to hold a 12 to 15 inch group at 100 yards with a bench rest using a 20 gauge shotgun slug, it is more practical to limit shots to within 25 to 35 yards, especially when hunting from tree stands or ground blinds in wooded areas.
As a practical matter, the effective range of a 20 gauge slug for deer hunting is about 75 yards (or meters). Slugs become increasingly inaccurate at distances beyond 100 yards and may lose significant muzzle energy by that point. It is important to consider ethical hunting practices and prioritize quick and humane kills on deer-sized animals.
In some states, it is legal to replace a smoothbore shotgun barrel with a rifled barrel and still hunt during shotgun-only season. Using more aerodynamic sabot-slugs fired from such a barrel can potentially achieve rifle-like accuracy out to 150 yards or so. However, it is always advisable to exercise caution and not take unnecessary risks when hunting.
Overall, understanding the effective range of a 20 gauge slug for deer hunting requires considering factors such as the type of barrel, ammunition used, shooter’s skill level, and ethical hunting practices. Regular practice and familiarity with one’s equipment are key to making accurate and ethical shots while hunting deer.
Achieving Accuracy and Precision: The Effective Range of a 20 Gauge Slug for Deer
Achieving Accuracy and Precision: The Effective Range of a 20 Gauge Slug for Deer
When it comes to the effective range of a 20 gauge slug for deer hunting, there are several factors to consider. The shooter’s skill level, the type of ammunition used, and the firearm itself all play a role in determining the maximum distance at which a slug can be accurately and ethically used.
A smoothbore shotgun firing rifled slugs should generally not be used on game beyond fifty yards. At longer distances, group sizes tend to increase, increasing the risk of wounding or crippling an animal rather than achieving a clean kill. However, with a rifled bore, the rifled slug rounds can still group well enough at 100 yards for deer-sized game.
It is important to note that newer saboted slugs should not be used in a smoothbore shotgun. These slugs require a rifled bore to stabilize properly and achieve optimal accuracy. Saboted slugs fly faster and extend the effective range beyond that of traditional rifle slugs.
To determine your own personal limits for taking game while hunting with a 20 gauge slug, regular practice is essential. Understanding your firearm’s capabilities and becoming proficient with your chosen combination of shotgun and ammunition will help you establish accurate shooting ranges.
For additional practice that is more cost-effective than using expensive slug rounds, consider using a.22 rimfire gun. This type of firearm provides excellent practice for sight picture and trigger control. The muzzle velocity and trajectory of.22 rimfire bullets are similar to rifled slugs, making it beneficial for developing trajectory skills.
Safety precautions should always be taken when shooting any firearm. It is crucial to wear proper eye and ear protection and ensure you have a safe backstop when shooting.
In conclusion, as a practical matter, the effective range of a 20 gauge slug for deer hunting is typically around 75 yards or meters. Slugs become increasingly inaccurate beyond 100 yards, and by that distance, they have lost a significant amount of muzzle energy. It is important to prioritize quick and humane kills when hunting, so it is recommended to keep shots within a distance where accuracy and lethality can be ensured.
In some states, it may be legal to replace the smoothbore shotgun barrel with a rifled barrel during shotgun-only seasons. By using more aerodynamic sabot-slugs in a rifled barrel, rifle-like accuracy can potentially be achieved out to distances of around 150 yards.
However, it is crucial not to take unnecessary risks or attempt shots beyond your personal skill level and firearm’s capabilities. Always prioritize safety and ethical hunting practices when determining the effective range for your 20 gauge slug.
In conclusion, the effective range of a 20 gauge slug for deer hunting typically falls within 75 to 100 yards. However, factors such as shooter proficiency and gun specifications can impact this range. It is crucial for hunters to practice and understand their specific firearm’s capabilities to ensure ethical and successful deer hunting experiences.
Oil lamps have become popular for their romantic ambiance and relaxing glow. But not all fuel sources are equal! There are two main types of fuel used for oil lamps: lamp oil vs. kerosene lamp oil. So, which one should you choose? Well, there are a few important factors to consider.
This guide we’lli explore the differences between lamp oil and kerosene lamps. Also, how to use each fuel type and any safety considerations to keep in mind.
Kerosene is a low-viscosity liquid that comes from petroleum. It contains hydrocarbons and has a clear to pale yellow flame color.
People use it as fuel for aviation, home heating, and cooking. Besides, kerosene is often used as a starting fluid for jet engines.
Also, Kerosene is one paraffin oil, and we use Paraffin oil in many industries. For example, the pharmaceutical, food processing, and cosmetics industries.
Further, we can use it as a lubricant and a cleaning agent. Despite their many uses, kerosene lanterns can be flammable, and you should handle them carefully.
Kerosene Candle Flame
Red Kerosene
Red kerosene is an industrial lubricant. We use it to power machines like engines and generators. Since it’s tax-free, you can’t use red kerosene for road vehicles like trucks. The dye in red kerosene helps identify trucking companies trying to avoid taxes using this type of kerosene.
K-1-rated kerosenes, such as red kerosene, can power lamps. But, the foul smell from burning dye in red kerosene will damage or clog your lamp’s wick.
We could not find any scientific evidence to corroborate the claim. But, some say red-dyed kerosene is dangerous when burned in lamps. To err on caution, we tell you against using it.
K-1 Kerosene
K-1 kerosene is the most available grade. You can find it in most major retail stores or filling stations. Also, you can use this type of kerosene in space heaters and lamps.
An upside to K-1 kerosene is that it’s very cheap. Besides, you can use it outdoors (e.g., with a portable stove). The scent of sulfur and other impurities from burning K-1 kerosene is less noticeable.
A kerosene lamp
What Is Lamp Oil?
Lamp oil is a type of fuel that comes from crude oil. It contains a mixture of hydrocarbons, molecules containing hydrogen and carbon atoms.
Unlike kerosene, lamp oil is odorless and has a clear appearance. Also, it is less refined than kerosene, so it contains higher levels of impurities, such as sulfur.
Additionally, it burns cleaner than kerosene, producing less soot and smoke. Finally, lamp oil leaks kerosene’s unpleasant smell, making it more pleasant to use indoors.
Alternative Types of Lamp Oil
Of course, you want to decrease the amount of sulfur and other impurities in the air. There are alternative types of lamp oil available on the market. These include:
Canola Oil
If you’re looking for a lamp oil substitute, look no further than rapeseed oil or canola oil. This semi-viscous liquid comes from the seeds of the rapeseed plant. Also, it burns much cleaner than kerosene.
In fact, it’s so clean-burning that it’s often used as a base oil for biodiesel production. It’s not quite as cheap as kerosene. But, it’s still a viable option to avoid using petroleum products in the home.
Canola oil
Castor Oil
Castor oil is a vegetable oil. People extract it from the seed of the castor plant (Ricinus communis). People have used the oil for centuries as a lubricant, fuel, and lighting oil.
Also, it contains triglycerides, which are molecules made up of three fatty acids. The unique structure gives castor oil its distinctive properties. For example, it is more viscous (thicker) than other oils and biodegrades more.
Castor oil produces a bright white light when burned in a lamp, making it an ideal choice for oil lamps.
Olive Oil
Olive oil comes from the fruit of the olive tree. It is renewable, odorless, non-toxic, and smokeless, making it a healthier option for indoor use. Also, it is much less likely to cause fires, making it a safer choice for home use, so people have used it for centuries as cooking oil, lamp oil, and medicine.
Olive oil
Fish Oil
Before people found out about kerosene and paraffin oils, they used whale oil for lamp fuels. Yet, whales are now endangered, so whale oil is scarce and not used.
Even though fish oil has some disadvantages, it is still a good option for lamp oil in some cases. The main advantages are that it is like whale oil and is still available in many places.
Also, it doesn’t burn as other oils do, making it difficult to see in low-light conditions. Additionally, fish oil can leave an unpleasant smell if used for too long. Also, it creates smoke if burned for extended periods.
Lamp Oil vs. Kerosene: What Sets Kerosene and Paraffin Oil Apart?
Odor
The smell is the first thing you should consider when picking a lamp’s fuel. If it gives off a rank byproduct, it’s not meant to be used inside.
While kerosene fumes can be dangerous and harmful, paraffin is better for indoor use. It doesn’t come with odor-inducing chemicals.
Burn Time/Length
Generally, paraffin will burn longer than kerosene because of its viscosity and purity.
Brightness
One of the main benefits kerosene has over lamp oil is that it burns much brighter. Although lamp oil may last longer, kerosene provides more light. Therefore, kerosene lamps are often used outdoors.
You can see them from further away and provide more light. Additionally, since they’re used outside, any fumes emitted aren’t as big of an issue.
Kerosene lamp with rays of light
Uses
Kerosene can power many types of industrial equipment. For example, you can use them for home generators, space heaters, and lamps. It’s popular because it works for so many purposes and is inexpensive. In contrast, paraffin lamp oil is only suitable for lamps.
Refining and distillation
Paraffin oils go through a more extensive distillation process. But kerosene goes through a less rigorous one.
Chemical differences
Paraffin is an alkane hydrocarbon with the formula CnH2n+2. But, Kerosene comes from petroleum oil, so it is a flammable hydrocarbon.
Lamp Oil vs. Kerosene: How Can I Maintain and Utilize My Oil Lamps?
Here are some tips on how to fill and use your lamps:
Unscrew the wick and collar from your lamp.
Fill your lamp with oil, making sure to follow all safety precautions.
Put the wick lamp back in and set it so that it’s above the wick holder—but not too much.
Light the flat wicks
Handmade Oil Lamps
Lamp Oil vs. Kerosene: How to Safely Fuel My Oil Lamp?
Always be sure to use the proper fuel for your oil lamp. Also, never use dangerous materials like mineral oil, rubbing alcohol, or pure gasoline. If these substances burn, they release harmful vapors and aromatics, which can cause serious respiratory illnesses.
Also, improper use of fuel can lead to fire or explosion. You should never fill your oil reservoir with ignitable substances, such as acetone, propane, turpentine, or household cleaners.
Lamp Oil vs. Kerosene: How to Dispose of Lamp Oil?
Now the last thing to consider is how to dispose of the fuel. Here are some tips to keep in mind:
Giving it to a Local Hazardous Waste Collection Site
For safe disposal, you can take your lamp oil to a local hazardous waste collection site. This way, they will recycle it instead of adding it to the landfill.
Also, some cities offer oil exchange programs. You can bring your used lamp oil and swap it for a new container.
Give It to Your Local Fire or Gas Station
You can check with your local fire or gas station to see if they accept used lamp oil. Most often, they are willing to take it and burn it off. Sometimes, you can even get a few cents back in exchange.
Donate It to a Recycling Company
You can search online for a local recycling company and drop off your used lamp oil. They will take it, filter it to remove any impurities, and re-use it in their products or machinery. Not only will you be helping the environment, but you can also get a tax incentive for donating it.
A Recycling Company
Donate It to Your Local Charity or Community Center
Sometimes you don’t have a recycling company nearby. So you can contact your local charity or community center to see if they will accept used lamp oil. Many of these organizations are always looking for donations, so it’s a great way to help and make an impact.
Give It to a Friend or Loved One
If you know someone who still uses oil lamps, consider giving them your used fuel. They appreciate the gesture. Also, a great way to reduce waste and keep resources out of landfills.
Use Your Leftover Lamp Oil Again
Finally, you can always use your leftover lamp oil again. Make sure to filter it first and follow all necessary safety precautions.
Burning kerosene lamp
FAQs
Can oil lamps be bad for my health?
Oil lamps are bad for your health if you don’t use the proper fuel. Always be sure to follow safety precautions. Also, never use flammable or hazardous materials for fuel.
For an oil lamp, what is the best type of oil I can use?
Olive oil is the best for an oil lamp. It has a high flash point and is non-toxic, making it a safe choice for indoor use.
Is it safe to use oil lamps inside my home?
They can be safely indoors if you use the right fuel and follow all safety precautions.
Heating oil vs. kerosene: which one is best for your furnace?
Heating oil is best for your furnace. It has a higher flash point than kerosene, which makes it safer and more efficient. Also, heating oil burns cleaner than kerosene and produces fewer byproducts.
Summary
Phew! You’ve mastered the ins and outs of oil lamps. Now you know how to fuel and dispose of your lamp. Always stay safe by following safety guidelines and using the proper fuel for your lamp.
We hope this article has been helpful, and you can now use your oil lamp with ease and enjoy the warmth and light it provides.
Requiring only a few parts, this simple and effective setup provides stable images for detailed views of the night sky.
“This is the best binocular mount I’ve ever used!” Those were the first words out of my mouth as I came indoors from testing my just-completed binocular rig.
It’s rare that I build something that actually works better than expected, but finally I’d come up with a binocular mount that provides steady views, is easy to use, very portable, and simple to build. It was a good night.
I’ve written many times about the virtues of mounted binoculars. Indeed, a good number of the objects I’ve observed over the years need steady views to be to be seen at all. I’ve used (and built) many binocular mounts, but most of them have been either expensive, bulky, or, to some extent, awkward to use. The mount shown here has none of those shortcomings and is ideally suited to observers like me who prefers to view the sky while seated or reclining in a deck chair.
The main components of my bino mount can be obtained at your local camera store, but if you’re a photographer, it’s likely you already own many of them. You’ll need a standard camera tripod with a pan/tilt head (the sturdier, the better), a ball head, and a monopod. I used an inexpensive monopod made by Slik and similar ones can be had for around $20. The ball head doesn’t need to be an expensive, heavy duty model unless your binoculars are particularly weighty. Mine is a Stroboframe FLM compact ball head, which typically retails in the $25 range. A nice feature of this unit is that a single knob locks all motions. You’ll also need a right-angle binocular-to-tripod adapter. Avoid the flimsy plastic ones that often come with budget binoculars.
The final component of my bino-mount assembly is the part you make: the bracket that mates the monopod to the tripod head. As ATM projects go, it doesn’t get much easier than this. Only a handful of hardware store parts are needed and none of the dimensions are especially critical.
Shown here are the various pieces of the tripod mounting bracket before assembly.
You’ll need to round up a 2½-inch by 5-inch length of ¾-inch plywood, a ¼-20 threaded insert (a T-nut will also work with a minor modification), a short length of flexible plastic tubing (automotive vacuum hose works well), and a U-bolt. The size of the U-bolt will depend on the diameter of the monopod section you’re going to clamp in the bracket. I recommend using the first segment that telescopes out of the monopod’s body, which measures ¾ inches with my Slik.
Begin construction by cutting a your length of plywood in half so that you have two 2½-inch square pieces — one will be used for the mounting block, the other will form a cradle for the monopod. In the center of one piece, drill a hole that corresponds to the diameter of the monopod section to be cradled. Next, cut that piece in half and set aside.
Turning to the second plywood part, mark the center and drill the hole to accommodate the threaded insert. Screw in the insert until it’s flush with the underside of the block. Next, drill two holes for the U-bolt. Make these a bit bigger than needed to avoid having the bolt’s threads bind on the wood block. You’ll also have to enlarge these holes on the underside so that the U-bolt nuts are recessed. You’ll also probably find that the threaded sections of the U-bolt will have to be shortened with a hacksaw so that they didn’t protrude beyond the surface of the plywood. Paul Oppenheim wrote in with a helpful tip, suggesting, “thread the nuts on first! After you’ve cut the legs, gently back the nuts off the legs, and you will have repaired any thread damage the hacksawing might have caused.”
Finally, slip a short length of tubing onto the U-bolt to prevent it from marring the finish of your monopod.
This view shows the underside of the bracket after assembly, but before painting. Note the recessed holes that accommodate the nuts for the U-bolt.
The remaining work basically consists of affixing (with wood screws and glue) the cradle halves to the mounting block, as shown in the photo above. Give the wood a waterproof finish to protect it from the elements, and let it dry. Now it’s time to assemble the mount. Begin by laying the monopod in the cradle so that the bottom of the thickest section abuts the top of the bracket. Next, slip on the U-bolt and tighten the nuts just enough that the monopod won’t rotate. Attach this to your tripod via the threaded insert, mount your binoculars, and you’re done . . . almost.
Here the mount is fully assembled before painting, just to make sure everything fits properly.
It’s likely the assembled mount will be considerably out of balance and that you’ll need to counter the weight of the binoculars. I made a counterweight from of a plastic peanut-butter jar filled with coins. I simply slide the foot of the monopod through a hole in the lid into a wooden disk in the bottom of the jar. The rubber foot of the monopod seats in a hole drilled part way through the wooden disk. A hose clamp attached to the monopod prevents the lid from sliding down. I filled the jar with all the loose change I had lying around (look under your sofa cushions if you’re a few ounces short), then screwed the jar onto the lid. The nifty thing about this counterweight is that you can adjust it by simply extending the monopod until the balance feels right.
The mount’s penny-ante counterweight (left) and (right) two important purchased items: a tripod ball head and right-angle binocular adapter.
After my original article describing this mount appeared in Sky&Telescope, Richard Frederick wrote to say that he’d found a way to make the mount without having to actually build anything. Instead of making a tripod-mounting bracket, he bought a Interfit tripod clamp. (Bogen also makes a similar unit.) So, if you’d rather spend $25 than the time it takes to make the part described above, you actually can put together my mount with off-the-shelf-parts.
To use the bino mount, leave the tripod head lightly clamped — once you’ve adjusted the counterweight, the binoculars won’t move on their own. Loosen the ball head and aim the binoculars freehand — as if they weren’t mounted at all. Once you’ve swept up your target, lock the ball head, and enjoy the view — the binoculars will seem to float in front of your eyes. And because the motions of the mount have so many degrees of freedom, you’ll find that you can comfortably view a huge swath of sky from one position. Indeed, on most nights, I never move my lounge chair at all. By adjusting my recliner, I can scan from the horizon to the zenith and a generous amount east and west. This really is the best mount I’ve used.
Soon after completing this project, I built a second mount that dispenses with the monopod and allows me to mount two binoculars simultaneously, one at either end of a length of aluminum tubing This way I can readily compare views in my 10×50s and 15×70s, for example. With this configuration, one binocular serves as the counterweight for the other. This two-headed contraption consists of a 48-inch-long piece of 1¼-diameter aluminum tubing in place of a monopod. Into either end of the tubing, I glued a short length of 1¹̷₈ -inch-diameter hardwood doweling with a ¼-20 anchor bolt screwed into it to serve as mounting stud for the ball head. In use this bino mount works the same way as the original monopod version.
With either binocular mount you’ll have the means to get steady views of the night sky, without the expense of a commercial unit or resorting to image-stabilized binoculars. Once you’ve tried using your binos this way, you may never use them unmounted again.
Did you find this article interesting or helpful? If so, consider using this link the next time you shop at Amazon.com. Better yet, bookmark it for future use. Thanks to Amazon’s associates program, doing so costs you nothing yet helps keep this site up and running. Thanks!
(This article is an updated and expanded version of one that appeared in the August 2010 issue of Sky&Telescope)
Initial Impression “Are we hiking or are we hunting?” is a refrain I hear all too often at elk camp, usually as I charge up a mountain to warm my frozen toes. But if I sit down, the snacks and crinkly wrappers come out. Then we’re really not hunting. Enter the fully-insulated Beartooth 200g boot from Schnee’s. I’ll finally be able to sit still for a few minutes this fall—and they’re damn good for hiking, too.
Break-In Like most hunters in the area, my list of places to explore burgeons faster than I can cross spots off. This summer, I made it a priority to start checking out my areas of interest, most of which were high-alpine basins—the kind frequented by big mule deer bucks. Lacing up my new boots, I figured I could knock out two birds with one stone: find some big ol’ bucks, and break in my Beartooths. After dozens of miles, I accomplished only the latter. The deer proved elusive, but my boots are comfortable as ever.
Now, when I slip on my leathers, it’s like sitting down for a home-cooked pot roast after a cold winter day in the woods. I almost want to let out a sigh of relief. They’re comfortable and familiar, the leather melded perfectly to the shape of my feet. They almost feel like an extension of my body. I’ve tried dozens of different styles over the years, and finding the Goldilocks boot is an eternal challenge. But thanks to the Beartooth, I’ve finally found my new go-to.
What I Like The thing I appreciate most about the Beartooth is the soft sole (a flex two rating, on Schnee’s four-point scale). There’s been a push amongst major boot brands lately to make lighter weight boots with extremely stiff soles. Essentially, adapting alpine sheep-hunting boots to elk hunting—which results in boots that are fine for steep, rocky terrain, but not ideal for long hikes. For high-mileage situations, softer soles are the key to comfy feet. Think about it: trail-running shoes and everyday hiking boots have a large amount of flex, but are rigid in a few key spots. Those features make them comfortable to hike or run long distances in, and give the shoes better ground contact. The Beartooth feel like a sturdier, insulated version of a summer hiking boot or trail runner, making them ideal for hiking long distances in rain, snow, or shine.
The other thing I’ve noticed is how Schnee’s cleverly avoided a common pinch point that forms on the front of most mid-calf hunting boots. Instead of a single piece of rigid leather along the heel (like most other brands), the Beartooth’s have an oval-shaped soft spot stitched into the back. When the boot flexes as I hike, the leather compresses in that spot, eliminating any kind of pinching on the front—pretty clever, Schnee’s!
A Quality Boot Finally, the overall build quality of these boots jumps out immediately. Not a single stitch is out of place, and the leather is top-quality. I’ve been rocking a pair of uninsulated Beartooths for three seasons now (with heavy use) and haven’t encountered a single issue. And, the longer I wear them, the comfier they get—to the point of dreading taking them off at the end of the day in camp. I know that the 200g version is going to perform similarly this fall, even on the coldest of days in the Montana high country or on the prairie.
The Leupold VX-R is a high-end scope with a mid-level price tag.
It’s durable, accurate, and lightweight. Plus, the Illuminated Ballistic Firedot reticle is excellent for rapid target acquisition.
In fact:
It’s one of my favorite hog gun scopes.
I expected quality from a Leupold scope, and I wasn’t disappointed. Here’s why…
Glass Clarity & Reticle
The glass is clear and produces a bright image.
The best part?
I can easily hunt in low light conditions (dawn or dusk). Here’s why:
Leupold applied their Index Matched Lens and Twilight Max management system. Combined, it allows for crazy bright views in dark conditions.
The VX-R uses one of my favorite red dot reticles:
The Ballistic Illuminated Firedot.
The dot is bright and draws the eye naturally to center without obscuring the target. This works especially well when I’m trying to take down running game.
The lines on the bottom post allow me to push my shots out beyond 200 yards and still maintain accuracy.
There are 8 brightness settings, and I was able to find the perfect settings for daylight and night shooting pretty quickly.
However, there was one thing I didn’t like about the VX-R:
The brightness button.
Instead of a dial, the VX-R uses a button to cycle between the light levels. And sometimes, it’ll get stuck. If this happens to you, simply unscrew the battery cap and put it back on, and the button should work fine again.
It’s not a deal-breaker, but I do wish they had a dial instead.
Speaking of dial, the VX-R uses a battery to power the illumination. It’s nice, crisp and equipped with an auto on/off feature.
This is literally a battery saver since I sometimes forget to turn off the illumination. Due to this, I didn’t need to change my battery for months now.
Eye Relief & Eye Box
The eye relief sits at a comfortable 3.7-4.2 inches.
I have mine right at 4 inches on my AR and it’s extremely easy and comfortable to line up with.
With that much eye relief, I could easily mount the VX-R on a higher recoiling rifle and not worry about scope bite.
Related: Best .300 Blackout Scopes and Optics
Eye box is generous and easy to settle into. I’ve found that it maintains field of view even when I zoom it all the way in.
Durability
The VX-R packs in all of the durability you’d expect from a Leupold scope.
The tube is machined from aircraft grade aluminum. This means that the tube is not only tough, but it’s also light, weighing in at 15.3 ounces.
The VX-R is waterproof up to a depth of thirty three feet. So if you accidentally drop your scope in water, it should still be fully functional.
It’s also fully fogproof and scratchproof – like the Leupold Rifleman 4-12×40 – so you can use it in all environments and conditions.
Elevation & Windage Knobs
The turrets are easy to use and turn with a solid, stiff click.
I was able to zero the scope to 200 yards very quickly and have had no issues with any drifting, even after months of shooting.
The turrets proved to be reliable.
Speaking of which, Leupold offers CDS (Custom Dial System) elevation turrets that you can order specific for your caliber and bullet load. I didn’t find this necessary, but it’s a great option to have.
The CDS is a custom elevation dial tuned to your exact load, velocity, and shooting conditions. This means all you have to do is range your target, set the dial, and fire away.
Parallax & Magnification
The VX-R gives you 3-9x variable magnification which is great for close to mid-range shooting.
The best part?
The reticle is set in the second focal plane. Which means, when magnification is changed, the reticle’s size remains the same.
I’ve had zero problems with the reticle obscuring the target, even when I dial the magnification all the way up.
In fact, the image remains clear, even at 9x. No fuzziness or distortion — just a crisp view.
In case you’re wondering about parallax, there is none…
Because the VX-R comes from the factory with parallax eliminated. So all you have to do is zero it in and go shoot.
Mounting & Rings
If you don’t have a mount, I recommend using the Mark AR 30mm mount. It fits like a glove and holds zero well.
Also, the VX-R ships with a scope cover to help keep your scope clean and protected when not in use.
However, I’d recommend some Butler Creek flip-up lens caps (size 02A)…
…and a 40mm Leupold Sunshade if you shoot in sunny conditions.
Is The Leupold VX-R For You?
Overall, the Leupold VX-R is a monster of a mid-range scope, especially when used with an AR or other tactical rifle, like the M1A.
Here’s why. It’s got:
Clear glass
3-9x magnification
Second focal plane
Auto-shutoff battery saver
Reliable, hand adjustable turrets
Ballistic Illuminated Firedot reticle
Extremely durable, waterproof, and fogproof
The VX-R brings all the quality and reliability that I would expect from a Leupold but at a reasonable price. If you want to start stepping up your glass game, then the Leupold VX-R is for you.
Plus, the Leupold Lifetime Warranty means that even if you somehow manage to damage the VX-R, you’re covered.
So if you’re ready to take the next step in quality riflescopes, give the Leupold VX-R a try.
I doubt you’ll regret it.
FAQ
If you own a VX-R riflescope or recently bought one, how do you like it so far? Let me know in the comments below. Also, I’ve written an in-depth guide on the best .22-250 scopes on the market.
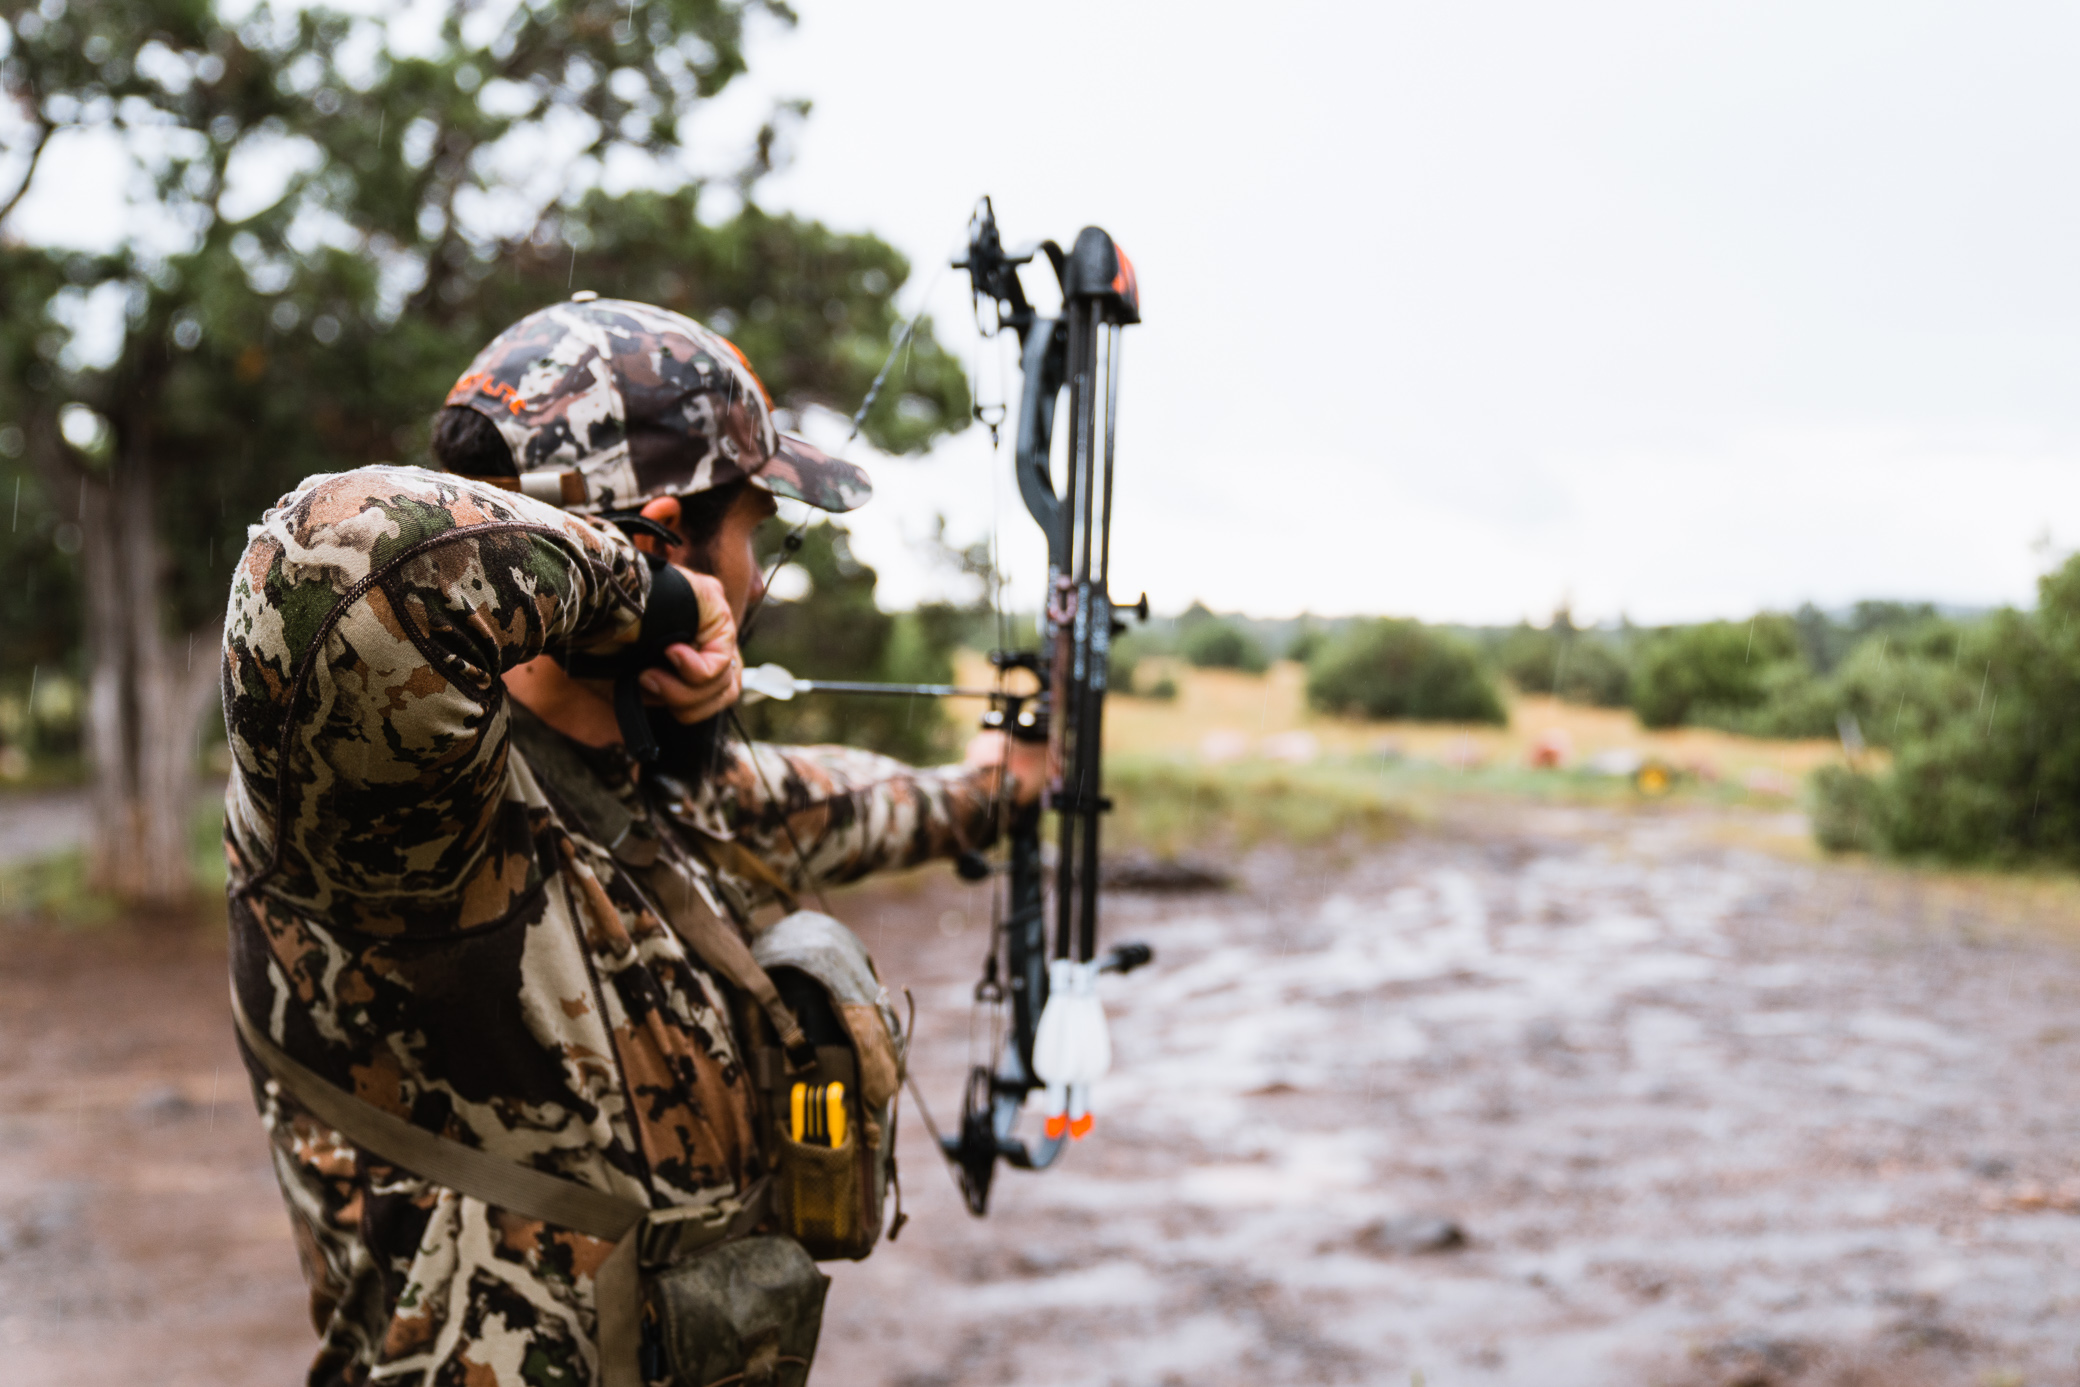
Throughout my childhood, my Dad would tell me old hunting stories from before I was around. At the time, I hadn’t really experienced much of the hunting life, so these stories sunk deep in my mind. One of those stories was of an archery deer hunt in upstate New York. It was just him and his bow. No rangefinder to speak of.
My Dad was sitting up in a tree and a lone buck came in beneath. He pulled his bow back, aimed, and let it loose thinking that deer steaks wouldn’t be far away. What really happened was he watched the arrow fly right over the buck’s back, followed by said buck running out of his life. “Should have aimed lower” my Dad said. It was my first lesson on shooting up or downhill with a bow.
Because of that story, I ALWAYS have an angle compensating rangefinder with me on archery hunts. It’s non-negotiable, because angles are a plenty in bowhunting. Whether it’s a 15 degree angle or a 40 degree one, your arrow will not hit where you want, if you don’t make the proper adjustments for the angle. Angle compensating rangefinders do just that for you.
Whether it’s uphill or downhill, yardage needs to be cut off in order to hit what you’re aiming at. The wordage in this article is referring to Vortex Optics Rangefinders.
Line of sight is the distance from you to your target, whether you are standing on an angle or not. This is how rangefinders read distance from the beginning until angle compensating versions came out. Still to this day though, most rangefinders seem to have a mode for Line of Sight. This article is about using angle compensation though right? So, why is Line of Sight important?
Before angle compensating rangefinders, archers would use cut charts to calculate the proper amount of yardage that they needed to cut off with angled shots. Without getting to deep into the math, they’d take the Line of Sight distance given from their rangefinder, pair that with data from an inclinometer to get the proper angle, and refer to their custom cut chart for their set up. Sounds complicated and takes some extra time I know. It was accurate though and that’s what mattered. In fact, there are still folks that use Line of Sight distance paired with a custom cut chart. In terms of precision, it may be splitting hairs, but this is the most precise way of being accurate on angles.
HCD(Horizontal Component Distance Mode) on Your Rangefinder
When shooting at angles the distance that we actually want to aim for is not Line of Sight, but it is the Horizontal Distance. This is literally the horizontal distance between you and the target. Whether you’re standing even, uphill, or downhill it is the horizontal distance that will put you in the X. And the horizontal distance is always shorter than the line of sight distance, which is why one needs to cut yardage rather than adding it. It can be difficult eyeballing this in the field though and going through the cut chart process takes away valuable time. This is where HCD mode comes in.
The Horizontal Component Distance Mode on your Vortex rangefinder makes the cut for you and it does it with one click of a button. Whatever range this mode spits out for you is the range that you want to aim for. Don’t take more yardage off of this calculation, because you’ll hit low.
In terms of accuracy and precision, I tested the Razor 4000 rangefinder up against a custom cut chart I had made for myself. The calculations were within a 10th of a yard between the two. I don’t know about you, but I’m not that good to tell the difference in a 10th of a yard with my shooting ability. With only a 10th of a yard difference, that arrow is going in the lungs come hunting time.
Here’s a Video Demonstration Using Line of Sight vs. HCD
Closing Thoughts
Back in the days of old, my Dad didn’t have a rangefinder, let alone one that had angle compensating abilities. If he did, that buck feeding beneath his treestand might have been on the wall of the house I grew up in rather than high tailing it through the forest. An opportunity lost.
The fact of the matter is, bowhunting is literally a game of inches. Every little thing matters and any ethical advantage we can put in our favor, it will put us that much closer to success. Angle compensating rangefinders are in our corner. They’ve served me extremely well through the years and I know they’ll do the same for you. That’s my angle and I’m sticking to it.
As an Amazon Associate, I earn from qualifying purchases
When you think of trophy whitetails, public land likely isn’t the first thought to pop into your head, and that’s understandable. However, monster bucks get taken off public tracts year after year, leaving us scratching our heads. Not all public lands are created equal, though. Some offer little resources to produce magazine-quality deer. Others are so highly pressured by hunters that you’ll likely see an orange vest before you see a buck. However, the Midwest has a reputation for its strictly managed public lands and vast agriculture that will make public land feel like whitetail heaven.
Ohio, in particular, is one of the best states in the nation for hunting public whitetails, with woods packed to the gills with the kind of trophy bucks you will be raving about for the rest of your life. Of course, Ohio is a big state, with numerous major cities and suburban areas, but it has quite a bit of public land available to deer hunters, much of which is home to big bucks. Here are some of the best public hunting tracts that every avid hunter needs to experience when coming to Ohio.
Check out the Ohio Department of Natural Resources (ODNR) for updated maps and info on Ohio hunting.
If you ask a few Ohioans to point you toward a good slab of public deer hunting land, few spots will come up in your conversations as often as the Woodbury Wildlife Area. Located in Coshocton County, about an hour-and-a-half drive northeast of Columbus, the Woodbury Wildlife Area covers some 20,000 acres and is overflowing with trophy bucks.
Woodbury and Coshocton are popular spots for hunters and other nature enthusiasts, so you may have to take the less traveled paths to find the prime deer areas. Still, Woodbury is a beautiful piece of Ohio public land, and the adventure is worth it.
Dillon Wildlife Area
If the wide-open expanses of Woodbury sound appealing, but the crowds turn you off, then the Dillon Wildlife Area is a similar whitetail deer hunting area that you might be interested in.
The deer in this area are under moderate pressure from hunters. Considering Ohio’s hunting reputation, public lands like Dillon and Woodbury are in high demand for destination hunters—but it’s not too tricky to find less-traveled spots and the deer herds that take refuge there. The Dillon Wildlife Area is located in Nashport, just a half-hour jog from Woodbury, so you can quickly try both out on the same trip.
Conesville Coal Lands
The northeast region of Ohio is a thriving deer habitat, loaded with great places to set up camp and hunt. If you are heading to Coshocton for the Woodbury or Dillon Wildlife areas, complete the hat trick with the Conesville Coal Lands.
The hunting pressure on this 12,000-acre piece of land is slightly lower than the Woodbury or Dillon areas, partially because you need a permit to hunt here. Don’t be scared away by that statement, though: permits are free and can be picked up at local bait shops or secured online.
Shawnee State Forest
If you want public hunting land in Ohio but need to get away from the northeast triangle, head to southwest Ohio for the Shawnee State Forest area. At 60,000 acres, Shawnee is the single most extensive public forest area in Ohio and is a prime deer hunting spot as a result. Many Boone & Crockett bucks have been taken off this public tract, and it’s easy to see why.
The woods are thick and scattered with overgrown trees and plants, but if you are game for a more rugged hunting experience, there is little doubt that you can be successful here, especially during the gun season at the tail end of the rut.
Eagle Creek Wildlife Area
The Eagle Creek Wildlife Area was newly established as a public hunting tract in 2018. Two thousand three hundred acres may not seem like much, but nestled in between agriculture and thick timber, located in the heart of the famed Brown County, this is a spot you don’t want to overlook.
What makes this piece so unique, as well as a honey hole for mature bucks, is that it is a controlled access property. Only 65 people are drawn annually, allowing each hunter to spread out and have a great chance at harvesting a trophy whitetail.
Need coyote removal in your hometown? We service over 500 USA locations! Click here to hire us in your town and check prices – updated for year 2020.
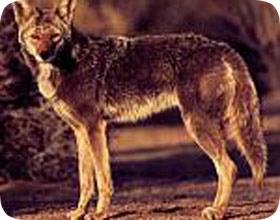
How To Trap A Coyote Coyotes are an amazing successful species that is to be found across the majority of North America, and they have adapted particularly well to living alongside people. They can cause a problem when they come into conflict with domestic pets such as dogs, and have been known to attack livestock and other domesticated animals such as chickens and ducks. Coyotes can also prove to be difficult to deter when they find a good location for scavenging through garbage and other refuse, which is why many people will turn to trapping to solve the problem.
What Traps Can Be Used To Catch A Coyote? There are a number of different live traps that can be used to catch a coyote, although the problem with dealing with the coyote after it has been captured is that it will often have to be euthanized. The most typical type of trap will be one that will take a firm grip of the paw of the coyote and will not be able to be removed until the trapper comes to loosen it. This can be problematic because dealing with a live coyote isn’t necessarily something that a novice trapper should want to do. Another option would be a cage trap, but this will often have a much lower success rate than the grip trap mentioned above. This is because the coyote will naturally be wary of a metal cage and won’t be particularly keen to go inside. Positioning and baiting of a cage trap is vital if it is to successfully trap a coyote. The alternative when trapping a coyote is to use a lethal trap. The most popular trap of this kind is a simply snare, although there are a wide range of commercially produced products and homemade solutions that are also available. The snare works by looping a cord around the coyote’s neck and choking the animal, and because a coyote will naturally struggle and pull away this will happen very quickly. Locating And Baiting A Coyote Trap The first question to deal with when trying to catch a coyote is where to place the trap. Snares and grip traps are quite small so will not need as much space as a cage trap. The best traps will be those that naturally lie in the paths that the coyote uses regularly, which can often be identified near fences or field boundaries by looking for tracks or coyote hair. Coyotes will prefer to crawl under a fence even though they can jump over quite high fences, so these are particularly good spots to locate the trap. In terms of the bait for a coyote, meat is usually the best option as it will often attract the coyote from a distance away. It is important in these instances to make sure that the trap is not in an area where it is likely to attract domestic animals, otherwise you may well end up with a traumatized dog if you’re using a live trap. Handling And Removing Coyotes The majority of states will have specific regulations about dealing with pests such as coyotes, and these can vary in different parts of the country. Some places will insist the animal is euthanized, while others will have specific locations the coyote can be taken to. For those who are handling a coyote, wearing thick clothing and protective gloves is an absolute minimum, and keeping handling to a minimum is vital. Coyotes are known to carry rabies and many other parasites and diseases, some of which are transmitted by bites and others can simply be transmitted by contact. Anyone who is nervous or unsure about handling a coyote should bring in a wildlife control expert rather than taking any risks with the animal. For more information about how to trap coyotes, go back to my main coyote removal page or read the about coyotes page.
"Master the art of precision shooting with dry firing air rifles. Enhance your aiming skills, trigger control, and muscle memory without using ammunition. Discover...
"Unlock the Perfect Shot: Discover the Best Scope for Break Barrel Air Rifles. Enhance your shooting experience with precision and accuracy, as we delve...
")
")
")
")
")


 compact ball head, which typically retails in the $25 range. A nice feature of this unit is that a single knob locks all motions. You’ll also need a right-angle binocular-to-tripod adapter. Avoid the flimsy plastic ones that often come with budget binoculars.
 . (Bogen also makes a similar unit
 .) So, if you’d rather spend $25 than the time it takes to make the part described above, you actually can put together my mount with off-the-shelf-parts.
 the next time you shop at Amazon.com. Better yet, bookmark it for future use. Thanks to Amazon’s associates program, doing so costs you nothing yet helps keep this site up and running. Thanks!


 How To Trap A Coyote Coyotes are an amazing successful species that is to be found across the majority of North America, and they have adapted particularly well to living alongside people. They can cause a problem when they come into conflict with domestic pets such as dogs, and have been known to attack livestock and other domesticated animals such as chickens and ducks. Coyotes can also prove to be difficult to deter when they find a good location for scavenging through garbage and other refuse, which is why many people will turn to trapping to solve the problem.
  Locating And Baiting A Coyote Trap The first question to deal with when trying to catch a coyote is where to place the trap. Snares and grip traps are quite small so will not need as much space as a cage trap. The best traps will be those that naturally lie in the paths that the coyote uses regularly, which can often be identified near fences or field boundaries by looking for tracks or coyote hair. Coyotes will prefer to crawl under a fence even though they can jump over quite high fences, so these are particularly good spots to locate the trap. In terms of the bait for a coyote, meat is usually the best option as it will often attract the coyote from a distance away. It is important in these instances to make sure that the trap is not in an area where it is likely to attract domestic animals, otherwise you may well end up with a traumatized dog if you’re using a live trap. Handling And Removing Coyotes The majority of states will have specific regulations about dealing with pests such as coyotes, and these can vary in different parts of the country. Some places will insist the animal is euthanized, while others will have specific locations the coyote can be taken to. For those who are handling a coyote, wearing thick clothing and protective gloves is an absolute minimum, and keeping handling to a minimum is vital. Coyotes are known to carry rabies and many other parasites and diseases, some of which are transmitted by bites and others can simply be transmitted by contact. Anyone who is nervous or unsure about handling a coyote should bring in a wildlife control expert rather than taking any risks with the animal. For more information about how to trap coyotes, go back to my main coyote removal page or read the about coyotes page.


