The best coyote light is going to play to the few disadvantages nature’s premier predator has. Coyotes have great eye sight, hearing, smell, and agility which makes it very difficult for coyote hunters to see them long enough to pull a shot off. Many times coyotes will come and go while the night hunter is not aware of their presence. It is important that your coyote hunting lights are designed to light up dogs before they’re senses tell them you’re in the area. Hunting lights for coyotes are few and far between, but some of the best coyote hunting lights can be the difference in getting busted or having a successful set while calling coyotes.
Coyote Hunting Light Discussion Topics
Coyote Weaknesses
5 Features Every Coyote Light Should Have
The Best Color Light for Coyote Hunting
Adjustable Hunting Light Intensity
Long Range Spot and Flood Combination
Mounting Versatility for all Hunting Vehicles
Strong & Non-Reflective Light Housing
Recommendation for the Best Coyote Hunting Light
Before we ask ourselves what the 5 must have features are of coyote hunting lights, let’s dive into a coyotes weak points. If you don’t want to read the background information on a coyotes weak points (to better understand the 5 features we choose), scroll down to the bottom to see the 5 Features Your Coyote Hunting Light Must Have.
Coyote Weaknesses
THEIR VISION
While it is true that coyotes have good vision, they have a hard time seeing higher wavelength colors. The approximate high end of the wavelength spectrum they can see is near 540 nm, which is very close to green in color. Red is near 660 nm wavelength, which is why coyotes have a very hard time seeing it. Separate from colorations, coyotes do have better night vision and sensitivity to movement compared to humans. We humans are able to level the playing field by utilizing our gadgets and accessories. To compare coyotes vision to human vision, SC Psychological LTD. has done a great job at putting together a color spectrum graph:As shown in the graph above, a coyote can see two primary colors: yellow and blue. This is common vision for deer, hogs, and other dichromate vision mammals as well, so it doesn’t just apply to coyote hunting lights. This is also one reason why it is best to not wear blue jeans when going deer hunting or coyote hunting as they tend to stick out like a sore thumb. If they are covered by a high rack or deer blind, of course then they are an ok option.While coyotes don’t have the greatest color vision, another weakness is that they are not able to see as far as most humans can. Humans (some cases require glasses or contacts) can see 20/20 vision. Coyotes vision is closer to 20/70 vision and some may have even worse vision. This basically means a coyote can see at 20 feet what a human can see at 70 feet. The one vision strength coyotes have over humans is their peripheral vision. This is what can make it very hard to sneak up on a coyote. A human has 180 degree peripheral vision while coyotes have 260 degree peripheral vision. This is due to the shape of their head and location of their eyes. This is ultimately why coyote hunters should stay as still as possible, because any small bit of movement can be detected fairly easily if a coyote is in range. Here’s more information about the science behind a coyote’s vision and how to determine what color coyote hunting light works best for night hunting.
THEY LET EVERYONE KNOW WHERE THEY ARE
If you’ve ever been in coyote territory at night, you’ve most likely heard their high pitched yipping and howling they make prior to going on their nightly hunt. If you’re calling in a dominant male coyote’s territory – you may hear the dominant male howling or even barking at you from a distance. These yips and howl have a variety of behavioral purposes, all of them are related to communicating to other coyotes in the surrounding area. One purpose is to call the pack back together after a period of individual hunting, which is behavior you may hear in the early hours of the morning.
Another purpose, which is commonly heard as the sun goes down, is to warn other coyotes in the surrounding area of their presence and to not trespass on their territorial boundaries. These coyote packs may sound like there are 10-20 coyotes howling together, but in most cases it is one male, one female, and their offspring. Most packs are sized in the range of 3-5 coyotes. The howling can make your skin crawl if it’s the first time you’ve been exposed to it, but the best coyote hunters are able to use this to their advantage. The coyotes are telling you exactly where they are, leaving it up to you to move in close and find them. A Utah State Professor conducted a study which sought out to understand the behavioral attributes of coyotes and ultimately determine the meaning behind different types of barks and howls. You can learn more about this in our article Callin’ all Coyotes: Proven Tips for a Successful Coyote Hunt Across the United States.
THEY LOOK BACK WHEN THEY RETREAT
If you’re a quick, sharp shooter – this can play to your advantage. They have a habit of always looking back when they retreat, which gives a coyote hunter eye shine to go off of in attempting to take a shot. Using your coyote hunting light to quickly scan your surroundings can give you the best opportunity at picking up a retreating coyote. If the coyote located you and you are the reason it was spooked, then it may be time to move on to a different hunting spot. However, if the coyote was uncomfortable or unknowingly spooked, you may be able to save your stand by changing spots (even if it’s only 50 ft away) and calling again using a different call. It’s important to be aware that spooked coyotes and pressured coyotes are both very difficult to bring in. If you know the coyotes around you are spooked or pressured, it’s best to keep your coyote hunting light on a dim setting to minimize the opportunity for them to pick up any small changes in their surroundings.Another common scenario we’ve seen is if you call in a double or a triple but you are only able to take one coyote down – don’t give up. After the first shot, say you are running on a rabbit distress, switch to a pup distress-like high pitch sound and sometimes a coyote who hasn’t been heavily pressured will turn around and come back. We’ve had success with this tactic on coyotes that haven’t been heavily pressured. If a coyote is heavily pressured, they may not return for a long time.
HEAVY SLEEPER
Coyotes are very heavy sleepers, which is why it’s not always a complete shock for someone to stumble upon a sleeping coyote in a field or pasture. The flip side is that they typically sleep during the day as they are more active at night.If you’re night hunting, you have pretty slim chances to come across a sleeping coyote. Coyotes are nocturnal animals and they will easily travel 5 miles in one night searching for food. On the flip side, if you happen to locate a sleeping coyote, that lets you know they are spending time on your property and are comfortable enough with it to stay there during the day time. This is one indicator that you should break out your coyote hunting light at night to see if you can call in the entire pack.
5 Features Every Coyote Light Should Have
We’ve managed to compile some of the coyote’s weak points, now how can we take advantage of these weak points when looking for a quality predator hunting light for coyotes?
The Best Color Lights for Coyote Hunting
Coyotes are color blind by nature and because of this, the best color light for coyote hunting is red. They have a hard time seeing green as well, but red is a better color because it is a higher wavelength and gives you some “buffer” from the cut off of what wavelength light their eyes are able to see. Put this to your advantage by utilizing red coyote hunting lights in your arsenal.
It is important to realize that red is a very difficult color for many manufacturers to perfect. Due to the nature of the color, the company you choose must be one capable of engineering a beam that can truly throw the high wavelength color down range. There are very few predator hunting lights we have seen that are capable of doing this, with the Predator Cannon Hunting Light being one of the best we have ever seen. It is very rare to have a coyote hunting light that can literally light up an entire field in red.
Adjustable Hunting Light Intensity
Take advantage of coyotes telling us where they are. You can sneak into their territory with your light dimmed down until you locate them, then turn up the heat!Coyotes have great peripheral vision and they are able to pick up on the smallest movements and even shadows coming from light beams. The best way to locate and keep tabs on a shy coyote is to be capable of adjusting the intensity of the coyote light prior to illuminating the coyote without spooking it. It’s always good practice to increase intensity of your coyote hunting light to full intensity right before you take the shot. This gives the coyote hunter the best opportunity at an accurate shot.If you have a hard time getting a coyote to stop for an accurate shot, we’ve found making a loud kissing sound with your lips will often cause them to halt in their place. This is referred to by some coyote hunters as the “kiss of death”. It is also commonly used if a coyote appears to be disinterested, because it can spark their attention and sometimes cause them to start coming towards you. If they are fast approaching, you can increase the intensity of your coyote hunting light and get ready to take a shot.
Long Range Spot and Flood Combination
Next time the coyote looks back after a missed shot, get redemption with a coyote hunting light that is still lighting them up while you’re reloading!A study once found that coyotes will circle their prey within a large area, in attempt to validate what is going on with all of their senses prior to committing to the prey. Predator hunters lure them in with calls, pretending to be the coyote’s prey. Thus, coyotes will do the same to predator hunters. When choosing hunting lights for coyotes, it is important to have a wide flood light capable of lighting up coyote eyes across a large area. It is equally important that your lights for coyote hunting have the ability to reach out long range to spotlight coyotes before they commit. There are very few lights capable of doing both of these features, and the Predator Cannon Hunting Light is one of the best coyote huntings lights there are at lighting up an entire field.
Mounting Versatility for all Hunting Vehicles
You may be tracking through fields on foot, riding your side by side through the woods, or hunting from the high rack on back of your truck. Regardless of where you are chasing coyotes, your light needs to be versatile for all of these scenarios. A quality light for coyote hunting must be capable of lighting up large areas, spotlighting down range, and have versatile mounting capabilities. These features are hard to find but essential. We’ve managed to design a coyote hunting light fully compatible with these qualities. The Predator Cannon Hunting Light comes with a variety of mounting choices. The standard option is the side-mounted brackets which are great for mounting the light to your side by side, high rack, car or truck. An added option is the bottom-mounted brackets which give you more flexibility to get creative with the hunting light and even mount it to your own tripod or hand grip. Over 200 watts of red coyote light illuminating an entire field in the grips of your hands is second to none.
Strong & Non-Reflective Light Housing
You’ve found a piece of land to hunt, located the coyote, made it to the right spot, set up your hunting rig, and the last thing you need to ruin your night of calling is moonlight reflecting off the housing of your scan light while hunting those pesky animals. Another common one I’ve heard of is dropping the light from a high rack which many times can end up breaking. Now you’ve got a gun that works but no way to see the coyotes.
I would recommend going with a flat black, strong aluminum housing such as what is on the Predator Cannon Hunting Light. A predator hunting light designed for these instances will not only give you more confidence in a successful trip, but it will hold up to the out of the ordinary accidents that seem to always happen at the most inconvenient times.
Recommendation for the Best Coyote Hunting Light
The Predator Cannon Hunting Light is one of the best lights for coyote hunting available on the market today. It easily mounts to high racks, ATVs, trucks, and more while discretely lighting up more area.
What makes it the best light for coyote hunting?
The high intensity, dimmable LEDs are engineered to maintain your night vision while also staying at the optimal wavelength for color blindness in coyotes. Unlike any other long range light, this coyote hunting light is capable of broadcasting a flood to illuminate an entire field while also providing a long range spot beam for locating coyotes in the distance. The more area you can see, the better your chances at seeing more coyotes.
Outrigger Outdoors is your trusted source for coyote hunting lights. To setup your hunting rig with lights made for coyote hunting, contact us today!
You’ve decided to hatch your own chickens, but there are hundreds of egg incubators to choose from. How do you pick the best one for you?!
I’ve been hatching chicken eggs for years and have used several different incubators along the way. I’ve had great successes and failures, both of which I’ve learned a lot from.
Choosing the best egg incubator for you is a make or break decision. When it comes to incubators, you really do get what you pay for. However, that doesn’t mean you need to go buy a professional-grade incubator for $3,000.
In this comprehensive article, I break down 8 of the best egg incubators in 2024 for backyard or homestead chicken keepers. I’ll also provide direct links to the product so that you don’t have to go searching around!
Let’s jump in!
*Disclosure: This post may contain affiliate links to products (including Amazon). I’ll earn a small commission if you make a purchase through my link, at no additional cost to you! Regardless, I only link to products that I personally use on our homestead or believe in.
Key Features of the Best Egg Incubators
Incubators come in a wide variety of options as far as size, style, features and price are concerned. It can be overwhelming just searching through them all. Let’s chat about the key features that I look for when shopping for the best egg incubators on the market.
Airflow
All incubators should have vents for air exchange (developing eggs are living and breathing!), but there are 2 types of airflow methods that are important to pay attention to: still-air and forced-air.
Still-Air Incubator: This is the most basic form that you’ll find in cheap incubators. It relies on simple gravity to naturally circulate the air with a concept similar to a still room with no vents. This often produces hot and cold spots throughout the incubator, resulting in a poor hatch with some chicks hatching early, and some hatching late.
Forced-Air Incubator: This type of incubator has a built-in fan to evenly distribute the warm, humid air. This results in all of your eggs developing similarly and often, a better overall hatch. Splurging for forced-air is worth every penny in my opinion.
Automated Temperature
This is absolutely critical. Just a 1 degree difference can impact your hatch.
If it runs 1 degree high, you’ll have an early hatch with chicks prone to splayed legs and trouble walking.
If it runs 1 degree low, you’ll have a late hatch with chicks prone to crooked toes, thin legs and unhealed navels.
Therefore, it’s helpful to have an incubator that automatically adjusts throughout the day to keep things stable. Such peace of mind! If your incubator has a manual turn dial for temperature and your room temperature goes up… your incubator temperature will also go up.
Tip #1: Verify that your incubator is forced-air or still-air. Forced-air incubators require a temperature of 99.5 degrees where still-air incubators require 102 degrees, however this is a general guideline and I would follow the instructions in your operating manual.
Tip #2: Make sure that you have several additional thermometers placed in your incubator (placed at the height of the top of the eggs) to confirm that your built-in thermometer is reading true. I like to use probe thermometers and poke them through a vent hole. It is common for cheap incubators to run hot or cold. I’ve definitely had my own share of hatch losses due to incorrectly calibrated thermometers!
Humidity Control
Humidity is one of the hardest things to get right, in my opinion. A lot of smaller egg incubators rely on manual addition of water to channels built into the bottom of the incubator. Not only is this easy to forget about and makes travel impossible, but it’s not very adjustable either. Plus, in most models, you need to open the incubator to make adjustments, which is not ideal during the hatch.
If you can find an incubator that automatically draws in and adjusts humidity based on your settings, it’s worth the extra cost. I’ve even gone on international vacations while my automatic incubators were running and could relax knowing they were taking care of it all for me 🙂
Thankfully, the success of the hatch weighs more heavily on overall humidity throughout the hatch and spikes aren’t as big of a deal. However, is important to get it right because:
If humidity runs too high, then the egg doesn’t lose enough moisture resulting in large chicks that can drown at hatching time.
If humidity runs too low, then the egg loses too much moisture resulting in “shrink-wrapped” chicks that fail to hatch.
I’ve found my hatch successes to vary even by adjusting the humidity by 3-5%! You’d never be able to achieve that precision with manual adjustments. To verify that your humidity setting is correct, I highly recommend buying TWO of these hygrometers (only $5!). The cheaper incubators are notorious for having poorly calibrated digital displays, so using these will make sure you’re on track.
Digital Display
This is a slick option so you can easily adjust the settings and quickly check the status of your incubator at any time. Most egg incubators today come with a digital display.
Egg Turner
In nature, a mother hen will periodically adjust her eggs and rotate them throughout the day. When incubating, this practice needs to be mimicked as much as possible because rotating allows the yolk to remain centered in the middle of the egg vs sticking to the side.
Chicken eggs need to be rotated from side-to-side a minimum of 3 times per day, every single day, for the first 18 days of the 21 day incubation period.
If this seems like too much for you, definitely invest in an incubator that has an automatic turner. I like this option because it means less opening of the incubator (resulting in temperature and humidity fluctuations), plus reduces the risk of accidental egg trauma.
Alarm
Some egg incubators feature an alarm that goes off anytime the temperature goes above or below your predetermined “safe zone.” This can alert you to intervene before things go south.
Capacity
There is no one right answer to this question; it all comes down to what is best for you. Incubators can be as small as holding just 5 eggs or they can hold hundreds!
Think about your goals and how many chicks you realistically want to hatch:
If you live in the city and can only have 5 hens, go for a small size. Keep in mind that roughly 50% will end up being roosters; plus, your hatch rate will likely be 50-80%. Therefore, if you want to end up with 5 hens, I’d plan to incubate 20 eggs to be safe.
If you live in the country and/or are thinking about routinely hatching chicks to sell them to your community as a side hobby, definitely go big! I started with a 28 egg incubator and rapidly outgrew that size.
My rule of thumb is to always go bigger than you think you need. Hatching is highly addicting and you’ll be expanding before you know it!
Ease of Cleaning
This is super important because hatching is messy and ensuring sanitary conditions for the next round is critical for its success. If your incubator doesn’t come apart easily, or if it is made of styrofoam (notorious for being hard to clean), then you’ll have trouble with this. Plastic is the best choice.
Viewing Window
This is not absolutely necessary, but it makes hatching so much more fun! When hatching starts, you’ll often find me with a chair pulled up and my nose pressed to the glass watching all of my new chicks hatch!
8 Best Egg Incubators in 2024
Now that you know what to look for, let’s get into some of the best egg incubators on the market! If you’re willing to purchase an incubator through my links below (at no additional cost to you!), I’ll make a small profit, which allows me to keep sharing content with you awesome people. Thank you!
8 Best Egg Incubators in 2024
Want more details about each of these incubators? No problem; I’ve got you covered!
#1 Brinsea Mini II EX
If your goal is to have a small backyard flock, look no further! Brinsea is my absolute favorite brand of incubator. All of their products are high quality, reliable, easy to clean and come with a 3 year warranty (as long as you register your product).
The Brinsea Mini II EX holds 7 eggs, so this is a great place to start. Brinsea has 3 lines for each incubator: Eco, Adv & EX. While the EX line is more expensive, it has fully automatic humidity control and is worth every penny in my opinion. I’ve gone on vacation with mine running and didn’t have to stress one bit!
#2 Brinsea Mini II Advance
While my favorite Brinsea incubator is the EX line, I know that not everyone wants to shell out hundreds of dollars on an incubator. Therefore, the Mini II Advance is another excellent option from this same dependable company. The reduction in price comes from the manual humidity control compared to the Mini II EX.
It still has automatic temperature control, an egg turner, a great viewing window and it’s easy to clean. You can even adjust the intervals that your eggs are turned from 15 to 180 minutes. This is a best-of-both-worlds option!
TIP: If you have plans to hatch duck eggs, look for a larger incubator. This one is a bit too small for ducklings.
#3 KEBONNIXS 12 Egg Incubator
Fertile eggs are often sold by the dozen, so the fact that this incubator holds 12 eggs is great! It has a digital display of humidity and temperature, however, I highly recommend verifying their accuracy by adding your own thermometer and hygrometer. While this model requires you to manually add water to control the humidity, it is nice that you can add water externally. No need to open the lid!
This model also features a built-in egg candler so you can watch your baby chicks develop. Plus, the egg turner automatically stops 3 days before the hatch so that you don’t have to remember to turn it off.
TIP: The flooring is slick and can result in the chicks slipping and injuring their legs, so consider adding a layer of traction material to the bottom.
#4 Brinsea Ovation 28 EX
The Brinsea Ovation 28 EX is my absolute favorite incubator.Hands down. I’ve been debating buying a second one just because I love it so much. It really is the perfect size and I’ve had excellent hatches every single time.
It is fully automatic so it’s a true “set it and forget it” kind of incubator. I’ve gone on international vacations with this thing running and I didn’t have to worry about it at all! All of the pieces come apart for easy cleaning and it has a big viewing window to watch the hatch.
The best part of this incubator is how accurate and precise it is. I’ve thrown multiple thermometers and hygrometers in there to cross-check and this incubator is calibrated perfectly. I love that I don’t have to fuss with it or worry that something is off.
TIP: Don’t feel like you need to buy fancy replacement humidity sponges from the supplier. I just cut up basic $2 kitchen sponges that I find at the grocery store and it works great!
#5 Manna Pro Nurture Right 360 Incubator
The Manna Pro Nurture Right 360 Incubator is a great budget pick if you want to hatch a decent number of eggs (it fits 22). It is fully automatic, with the exception of humidity control. You’ll need to manually add water yourself to keep it consistent. A nice feature is that it has a 21 day countdown and automatically stops turning the eggs 3 days before the hatch.
Based on the reviews, the negatives are that the turner tends to struggle to turn heavier eggs and it beeps loudly when the turner engages. The built-in egg candler is also pretty weak. Lastly, this incubator can be more challenging to clean.
TIP: Be careful when removing the lid. It can be easy for eggs or chicks to fall out because there is no lip on the edges.
#6 IncuView All-In-One Automatic Egg Incubator
This incubator provides an incredible hatching experience with its large viewing window. You won’t miss a thing!
While it doesn’t feature automatic humidity control like the Brinsea models, it does provide digital display of humidity. Based on the reviews, the humidity levels do seem to fluctuate widely and need daily tweaking to hit your goal. As I’ve mentioned before, don’t trust that number alone! Always add an extra hygrometer or two to make sure it’s properly calibrated.
#7 Brinsea Ovation 56 EX
This is the big brother to my favorite incubator the Brinsea Ovation 28 EX. It’s also fully automatic, but twice as big. If you’re really wanting to hatch lots of chicks, this is an excellent option if you have the space.
It is fully automatic so it’s a true “set it and forget it” kind of incubator. I’ve gone on international vacations with this thing running and I didn’t have to worry about it at all! All of the pieces come apart for easy cleaning and it has a big viewing window to watch the hatch.
The best part of this incubator is how accurate and precise it is. I’ve thrown multiple thermometers and hygrometers in there to cross-check and this incubator is calibrated perfectly. I love that I don’t have to fuss with it or worry that something is off.
TIP: Don’t feel like you need to buy fancy replacement humidity sponges from the supplier. I just cut up basic $2 kitchen sponges that I find at the grocery store and it works great!
#8 HovaBator Genesis 1588
This wouldn’t be a complete incubator list without the classic foam incubator. While I have a love-hate relationship with them, this is often where most of us begin our incubating journey! They can be finicky and definitely require multiple thermometers and hygrometers, but this is an inexpensive way to hatch a lot of eggs.
TIP: I highly recommend placing a minimum of TWO hygrometers and TWO external thermometers (reading at a height at the top of the eggs) to verify that everything is running as it should.
While there are a lot of foam incubators out there that look similar to the HovaBator Genesis 1588 (and are a bit cheaper), don’t get swayed by the other options. I know you saw that $50 one at Tractor Supply… don’t do it! Many of them are junk and there’s nothing more heartbreaking than losing an entire hatch. I spent some time digging into each one and this one really seems to be the best budget-friendly pick out of them all.
Other Articles You’ll Love:
Hatching Chicken Eggs: The Ultimate Beginner’s Guide
Candling Chicken Eggs: Day-By-Day Development
Brooding in Poultry: Everything You Need to Know!
How to Care for Chickens: A Beginner’s Guide
Summary
That was fun! I hope you found this helpful in picking the perfect incubator for you and your homestead. As you can see, egg incubators come in many different styles, features and price points and we only covered 7 of them! It’s a small investment, so definitely spend some time reflecting on my 8 best egg incubators table to really feel out which one seems like the right fit. You can’t go wrong with any of them, really!
Once your incubator arrives, read the instruction manual and let it run for a minimum of 24 hours. After 24 hours, make sure to double-check its accuracy by inserting additional thermometers and hygrometers. If your digital reading is off, adjust your settings as needed.
Are you curious how to actually go about incubating eggs? This article by Backyard Chickens is the exact one that I learned from years ago. Then, once your chicks hatch, you’ll definitely want to check out my best tips for Brooding in Poultry.
If you liked this article, you’ll definitely want to read my article Cooking a Rooster: The Basics for when you end up with extra roosters after hatching! It’s wonderful to keep a couple good roosters around, but keeping more than your flock can handle can lead to fights and stress on your hens.
Venison brisket can be one of the toughest cuts on the deer. Learn how to prepare it so that it comes out tender and juicy every time!
Sliced venison brisket on wooden cutting board
Smoking, like many other cooking technique, gets a bad rap. It is really a very forgiving way to cook. People tend to overcomplicate the process though. Keep reading and we’ll simplify it a bit.
You will just need some planning ahead of time to make sure it comes out perfect.
What is brisket?
The brisket of the deer is found on the chest (breast), above the front legs. It is a thinner cut of meat and has more connective tissue due to the fact that this muscle works harder than other muscles in the animal.
Most of the time it ends up in the grind pile for a lot of people. We have been saving them for years. When they are slow cooked. They are absolutely delicious. Tender and very flavorful.
Smoking low and slow is a perfect way to tenderize this meat. There is very little hands on time because the smoker does all of the work. The only thing you have to possess is patience. Don’t try to rush the process.
Beef or pork have fatty briskets and are a lot larger, so they take eons to smoke. Deer briskets will smoke in a fraction of that time. Because the deer is so lean, it doesn’t require the Texas crutch that beef requires, so it’s much easier.
Trimming the venison brisket
The first key step is to trim the brisket of all silver skin and any large pockets of fat that you can see.
Season the brisket
Next make a delicious rub so that the brisket will take on a great flavor and texture. Make sure you cover it with enough rub.
Ingredients you need
brown sugar – dark brown or light brown sugar will both work
granulated garlic – you can substitute garlic powder but granulated has a better flavor.
onion powder –
cumin
coriander
cayenne pepper – or chili powder, chipotle powder is good too.
Dutch cocoa powder – optional but this adds a fun mole negro type flavor.Pin
venison brisket
Venison brisket
How to make it
In a small bowl, mix ingredients for the rub. Generously season roast with kosher salt or sea salt and fresh cracked black pepper. Then season it generously with the rub.
If the rub doesn’t seem to be sticking well, drizzle a bit of olive oil on top and then rub it into the meat with your hands.
Cut a large piece of plastic wrap and tightly wrap roast. Place it on a rimmed baking sheet and put it in the refrigerator for 8-24 hours to marinate.
The next day, remove it from the fridge and allow it to come to room temperature. Set up and start your smoker heating to 225°F. Don’t go over this or it will cook too quickly. You could go down to 200°F but realize that it will take a bit longer.
Place the piece of meat on a rack in your smoker. spritz with a mixture of 1 part apple cider vinegar and 2 parts of olive oil or the oil of your choice in a clean, food safe spritzer. Close the lid or door and leave it but be careful tending the heat so it doesn’t get too hot.
Pro tip: We often cook a beef brisket at the same time. If you do this, place the venison under the beef so that the fat from the beef drips on it.
Spray the meat a couple times with the vinegar and oil mixture. If your smoker is equipped with temperature probe, insert it into the thickest part of the meat.
Smoke the brisket for 2-4 hours, depending on the size. This brisket was 2¼ pounds and took about 3 hours. The time will vary according to several factors. How many times you open the door and lose heat, how accurate the thermometer is, how much the meat weighs and the particular cut you use.
Check the internal temperature with an instant read thermometer. Stick a fork into the meat. Turn it a bit. The meat should be fork tender.
Different deer populations taste and cook differently, depending on diet, predators, and terrain. See our ultimate guide to cooking deer for more information.
What type of smoker to use
You can use a wood pellet grill or smoker, an electric smoker or a charcoal smoker to make this deer brisket.
Appetizer plate with brisket crostini.
How to warm leftovers
If frozen, thaw in the refrigerator.
Place slices or a whole chunk in a deep baking pan. Pour venison broth or chicken stock (beef is too overpowering for the mild venison flavor) in the bottom of the pan.
Cover tightly with aluminum foil.
Bake at 325°F about 20 minutes for slices. About 40 hour for larger chunks.
You can also warm it in the slow cooker on low for a couple of hours with some stock, BBQ sauce or other liquid.
What to serve with deer brisket
mashed potatoes
French fries
coleslaw
cornbread
fresh veggies, like corn on the cob
BBQ sauce
Appetizer plate with brisket crostini.
What to do with leftovers
Leftovers will last for about 4 days refrigerated. For longer storage, vacuum pack and store in freezer for about 6 months.
Venison brisket makes some great dishes with the leftovers.
Great tacos, quesadillas and the best fajitas
Great appetizers. Try a toasted crostini topped with cheddar cheese, brisket and grilled onions, like the ones we did in the photo below.
Make classic mac & cheese with brisket.
Warm some sliced brisket and make sandwiches or subs with cheese, grilled onions and BBQ sauce.
Frittatas
More smoking recipes
Smoked Beef Brisket
Chipotle Peppers
Smoked Spare Ribs
Steelhead Trout
Smoked Pulled Pork – Finish with Slow Cooker
Appetizer plate with brisket crostini.
Tools to use
smoker
meat thermometer
chef’s knife
This venison brisket is a delicious addition to your venison recipe book. Next year don’t grind it. You’ll be happy you didn’t!
Connect with us through our social media ages! Facebook, Instagram, Pinterest, Twitter.
If you have any questions or comments, please ask in the comment section below. We’d love to hear from you!
“Missouri’s Air Rifle Ownership Laws: Unveiling Rights for Felons? Understand the legal landscape surrounding felons and air rifle ownership in Missouri. Delve into the regulations, restrictions, and potential rights of felons to possess these firearms within the state.”
Can a felon own an air rifle in missouri?
In Missouri, the ownership of firearms by felons is heavily regulated. However, when it comes to air rifles, the laws are less strict. While felons are generally prohibited from owning firearms, they are allowed to possess and use air rifles in Missouri. This is because air rifles are not considered firearms under state law as they do not use gunpowder or explosive force to propel projectiles.
It is important to note that although felons can legally own and use air rifles in Missouri, there may still be certain restrictions and limitations imposed. For example, felons may be prohibited from possessing an air rifle if it has been modified to exceed certain power limits or if it is used for illegal purposes. Additionally, felons must still comply with other applicable laws such as those regarding hunting regulations and trespassing.
While the ownership of firearms by felons is generally restricted in Missouri, the possession of air rifles offers a potential avenue for them to engage in shooting sports or recreational activities. However, individuals with felony convictions should always consult with legal professionals or law enforcement agencies to ensure they fully understand their rights and any possible restrictions before purchasing or using an air rifle.
In conclusion, while felons in Missouri are restricted from owning firearms, they are legally permitted to possess and use air rifles. However, it is crucial for individuals to understand and abide by any additional regulations or restrictions set forth by local jurisdictions.
Being a Western guy, I have psychological issues with choosing the best caliber for just one species. Me, I want to be able to shoot anything from coyotes to moose with the durned thing.
So while it’s not short and fat and it’s not a fire-breathing magnum dragon, Winchester’s classic .270 gets it done on most anything, assuming shrewd projectile choice.
Whitetail hunting offers perhaps more variation in shot type and animal size than any other North American big game, so it behooves hunters to shoot a cartridge capable of making the most of any situation. Whether you’re threading a timbered needle-hole toward a massive Wisconsin corn-eater or driving a steeply raking shot into the hip of a 280-pound Saskatchewan monster, the .270 Winchester kills whitetails as well as any cartridge – and far better than most.
Importantly, it does so without beating up the shooter. Recoil generated by a .270 Winchester is just a shade past comfortable, but it’s not painful.
Some might argue that the .270 is more cartridge than one needs for whitetails. My condolences to those poor misguided souls. I hope that someday when they lay the crosshairs on a heavy-boned, densely muscled, rutted-up northern buck and its shaggy coat and testosterone-filled attitude, it will lead them to the light.
As for bullet, any good 130- to 150-grain bullet makes wonderful whitetail medicine, but I’d go with Nosler’s outstanding 140-grain AccuBond. It’s tough enough to hold together through shoulder bones, expands dramatically, wreaks havoc on vitals, and is fairly aerodynamic, enabling skillful hunters to reach way out there if need be.
Part of what makes it so great is that a hunter can walk into just about any country gas station and buy a box of .270 cartridges.
-Joseph von Benedikt
.257 Weatherby Magnum
It’s human nature to want the most bang for the buck, and few are satisfied with a cartridge that is ideally suited for just one job. Instead, they opt for a jack-of-all-trades cartridge. The good news is there are cartridges that will do decent work on everything from mice to moose, but the bad news is they don’t do any one thing particularly well.
The .270 Winchester fits into this category. It was my first rifle, and I killed a pile of game with it. I’ve learned since, when possible, to match the caliber to the game. Since many hunters hunt strictly whitetails, why not pick a cartridge that is the right tool for the job?
For me, the best whitetail cartridge is the .257 Weatherby Magnum. Invented by Roy Weatherby in 1944, it was his favorite cartridge as well. Why? Because it has low recoil and a laser-like trajectory, and it kills quicker than any cartridge has a right to. Spitting out a 100-grain bullet at 3,500 fps, no other commercially produced deer round has such a flat trajectory.
This means that without a lot of thinking, or confusing ballistic reticles, or scope adjustments, a hunter can place a bullet in the vitals from spitting distance all the way out past 400 yards simply by holding the crosshairs in the middle of the deer.
While there are factory loads featuring 87-grain pills up to 120-grainers, deer hunters will do well to stay in the middle of the spectrum at 100 grains. Smart money selects premium bullets because the cartridge’s high velocity tends to tear lesser bullets apart. Monolithic solids, Bear Claws, and Partitions all work great on deer and carry the magical 1,000 ft.-lbs. of energy out past 600 yards for true long-range performance.
So regardless of whether your whitetails are of the tiny Couse variety or great, swollen-necked Saskatchewan giants, the .257 Weatherby Magnum is the ideal cartridge bar none.
Looking for a rifle cartridge that delivers heavy hitting performance at long range to hunt with this fall? Here’s what you need to know about the 6.8 Western.
Browning and Winchester raised a few eyebrows when they announced the 6.8 Western to the world in early 2021. Many people were understandably very skeptical of what the new cartridge offered to hunters that they couldn’t get with a more established cartridge. The fact that they released the 6.8 Western in the middle of a global pandemic and a historically bad ammo shortage didn’t help with perceptions either.
I admit I was very skeptical at first as well and did not think a new caliber was really needed at the time. However, I eventually decided to take a look at the 6.8 Western with an open mind and I was pleasantly surprised by what I discovered.
In this article, I’m going to discuss the history as well as the strengths and weaknesses of the 6.8 Western in detail. I’ll also provide some information on how the 6.8 Western compares to the 6.5 PRC and .270 Winchester cartridges to give you an idea of what sort of performance you can expect from the cartridge and so you can decide if it best fits your needs as a hunter.
Before we get started, I have an administrative note:
Some of the links below are affiliate links. This means I will earn a small commission (at no extra cost to you) if you make a purchase. This helps support the blog and allows me to continue to create free content that’s useful to hunters like yourself. Thanks for your support.
6.8 Western History
The story of the 6.8 Western really begins with the .270 Winchester.
Formally released by Winchester all the way back in 1925, the .270 Winchester offered hunters blazing fast velocities and extremely flat trajectories compared to other cartridges in use at the time.
Designed by necking down a .30-06 case to use .277″ instead of .308″ bullets, the original .270 Winchester load shot a 130 grain bullet at approximately 3,140 feet per second (2,846 ft-lbs of energy). Originally released with the Winchester Model 54 rifle, the cartridge developed a well-deserved reputation for effectiveness on thin-skinned game over the years.
The cartridge understandably developed a large and devoted following during the course of the 20th Century and the .270 caliber became irrevocably linked to the Winchester brand. Well, Winchester decided to follow-up on their long running success with a new .270 caliber cartridge at the beginning of the 21st Century.
Winchester released the 270 Winchester Short Magnum (270 WSM) in 2002. That cartridge also fired a 277-caliber bullet, but used a shorter and fatter case. This gave the 270 WSM two advantages over the 270 Winchester: it had a significantly larger case capacity that could hold more powder and it would fit in a short action rifle instead of the longer standard or long action rifles the .270 Winchester is used in.
Indeed, the 270 WSM had an approximately 200-300fps velocity advantage over the .270 Winchester. This resulted in a slightly flatter trajectory, more resistance to wind drift, and more retained energy at all ranges.
However, while the 270 WSM was fairly commercially successful for Winchester, many felt like the cartridge didn’t live up to its full potential. Looking back on things, the 270 WSM suffered from the same limitations as the other short action magnum cartridges designed around that time, like the 7mm Remington Short Action Ultra Magnum (7mm SAUM) and 7mm Winchester Short Magnum (7mm WSM), in that it used a design focused solely on higher velocity instead of heavier and more aerodynamic bullets.
Specifically, the 270 WSM used the same 1:10″ rifling twist rate as the original .270 Winchester. This twist rate worked extremely well for the bullets in the 130gr-150gr weight range most popular for the two cartridges.
While those bullets are outstanding for many hunting applications, they don’t quite offer the sort of the extended performance more and more hunters and shooters are looking for these days. Shooters and hunters have started to place a much higher emphasis on long, heavy, and aerodynamic projectiles in recent years with the rise in popularity of long range shooting.
In response, the various ammunition manufacturers have worked to satisfy that demand with offerings using sleek, low drag bullets. The Nosler AccuBond and AccuBond Long Range, the Barnes LRX, the Hornady ELD-X, and the various Berger bullets are all great examples of extremely aerodynamic hunting projectiles that have really taken off in recent years, especially in 6.5mm, 7mm, and .30 caliber.
Unfortunately, those slower rifling twist rates used by the .270 Winchester and 270 WSM held back development of those long, heavy, low-drag bullets in .277″ caliber.
For instance, there are several different hunting bullet options available in 6.5mm, 7mm, and .30 caliber with a G1 ballistic coefficient over .600 like the 143gr ELD-X in 6.5mm (.625 BC), the 168gr VLD Hunting in 7mm (.618 BC), and the 210gr AccuBond Long Range in .30 caliber (.661 BC). Comparable bullets in .277″ caliber include the 145gr ELD-X (.536), 150gr VLD Hunting (.518 BC), and the 150gr AccuBond Long Range (.591 BC).
Yes, hunters using custom rifles with fast enough rifling twist rates can use some of the very heavy and extremely aerodynamic 277″ caliber bullets that are available these days like the 170gr Berger Extreme Outer Limits (EOL) with a .662 BC. Those heavy bullets simply weren’t an option for hunters who don’t handload and who use factory production rifles though.
That changed when Nosler rolled out their new 27 Nosler cartridge in 2020.
Designed from the beginning to use the new .277″ caliber 165gr AccuBond Long Range (.620 BC), 27 Nosler rifles used a faster 1:8.5″ rifling twist rate and took the performance of the .277″ caliber to the next level by allowing for the use of extremely high BC bullets in a .277″ caliber cartridge.
The Nosler cartridges are excellent performers that fire bullets with higher ballistic coefficients at very fast velocities, but they’re still fairly niche offerings and are primarily available in custom rifle builds (with a handful of exceptions). Even so, this development set things in motion for the next domino to fall.
That domino fell on 15 January 2021 when Browning and Winchester jointly announced the release of the new 6.8 Western cartridge. Also known as the 6.8 Winchester Western, the announcement of the new round took some by surprise.
Instead of just revamping an older cartridge to use heavier bullets, designers at Winchester and Browning decided from the very beginning to build a purpose built cartridge that will handily outperform the old .270 Winchester and 270 WSM.
Here’s what Winchester’s lead engineer for the 6.8 Western, Kyle Masinelli, had to say:
We wanted to get into the untapped potential of bullets above the .264 caliber. We only wanted bullets with G1 BCs above .600 and our goal was to beat the .300 Winchester Magnum’s 180-grain AccuBond’s energy delivery at 500 yards.
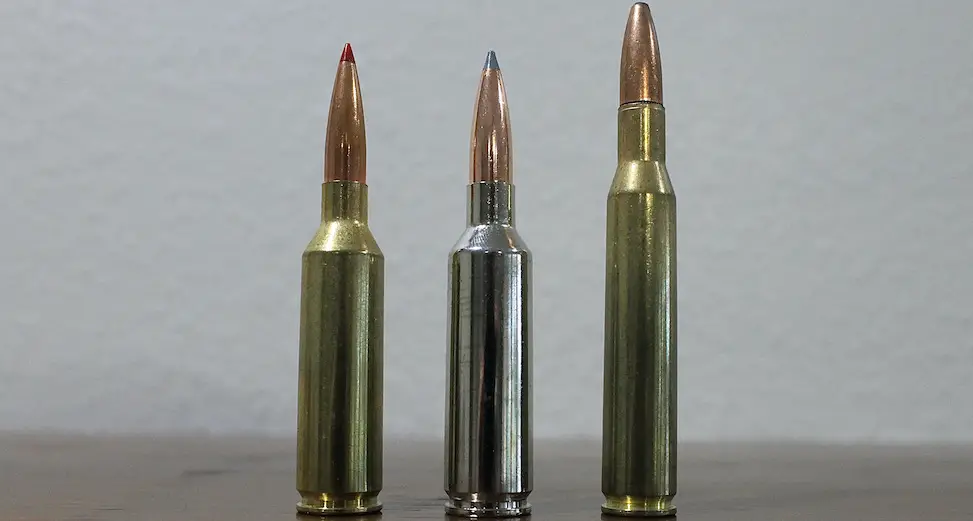
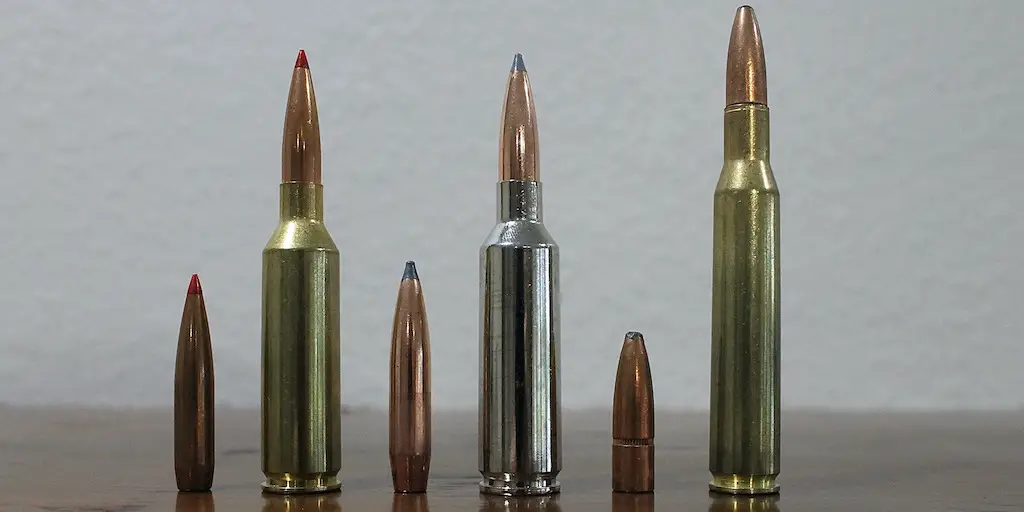
To that end, they borrowed a page out of the playbook used in other successful cartridge releases like the 6.5 PRC. Similar in appearance to the 270 WSM and 6.5 PRC, the 6.8 Western has an overall length of 2.955″ and uses a beltless case that’s 2.02″ long, .535″ in diameter at the base, and has a 35 degree shoulder.
Though the 270 WSM cartridge has an overall length of 2.86″ and fits neatly into the traditional definition of a short action cartridge, the 6.8 Western exceeds those standards by a hair with a maximum cartridge overall length (COAL) of 2.955″. Even so, the 6.8 Western will feed reliably from short action AICS-pattern box magazines that are so common with modern rifles.
In addition to lengthening the COAL of the 6.8 Western, designers at Winchester moved the cartridge shoulder back slightly and decreased the case length compared to the 270 WSM. Similar to what designers at Hornady did with the 300 PRC, this resulted in a little bit more space for the bullet outside the case (also known as head height).
This facilitated the use of long, heavy-for-caliber bullets without requiring them to be seated too deeply into the case that they intrude into the powder column.
Those longer bullets also required a faster rifling twist for proper stabilization in flight. So, they designed the 6.8 Western for use in rifles with a 1:7.5″ or 1:8″ rifling twist rate (1:8″ is SAAMI standard).
The end result is a short and handy .277 caliber cartridge that delivers impressive ballistics that compare very favorably to some noted long range-cartridges.
6.8 Western Ballistics
Typical 6.8 Western ballistics are a 165gr bullet at 2,970 fps (3,226 ft-lbs) or a 175gr bullet at 2,835 fps (3,124 ft-lbs) with a 24″ barrel. Those loads use very aerodynamic bullets that retain lots of kinetic energy and deliver excellent extended range performance on deer and elk-sized game.
As a point of comparison, the 165-175gr bullets used by the 6.8 Western are heavier than the 140-147gr bullets common with the 6.5 Creedmoor and 6.5 PRC, heavier than the 130-150gr bullets most common with the 270 Winchester and 270 WSM, and comparable to the heaviest 160-175gr bullets used by the 7mm Remington Magnum.
However, assuming similar bullet ogive profiles, the 6.8 Western bullets are a little more aerodynamic, have a higher sectional density (SD), and can be fired at a higher velocity than those used by the 7mm Remington Magnum in typical factory loads.
Sectional density (SD) is a measure of the ratio of the diameter of a projectile to its mass. All other things equal, a heavier projectile of a given caliber will be longer and therefore have a higher sectional density and consequently penetrate deeper than projectiles with a lower mass and sectional density.
For instance, Nosler offers a 7mm Remington Magnum load firing a 168gr AccuBond Long Range with a .616 BC, a sectional density of .298, and a muzzle velocity of 2,880fps. Winchester has an almost identical load for the 7mm Rem Mag firing the same 168gr AccuBond Long Range at 2,900fps. Compare those loads to Winchester’s 6.8 Western offering firing a 165-grain Nosler AccuBond Long Range with a .620 BC, a sectional density of .307, and a muzzle velocity of 2,970fps.
That works out to 2″ more bullet drop, .5″ more wind deflection, and 71 fewer ft-lbs (~4%) of energy remaining at 500 yards for the 7mm Rem Mag. That’s a very small edge to be sure, but it’s an advantage for the 6.8 Western over the 7mm Rem Mag nonetheless.
Finally, the cartridge accomplished Kyle Masinelli’s stated goal of delivering more energy at 500 yards than Nosler’s 300 Win Mag 180gr AccuBond loads with 1,862 ft-lbs of energy compared to 1,745 ft-lbs with the .300 Winchester Magnum. The 6.8 Western also a slight edge in terms of trajectory (the .300 Win Mag has 2″ more bullet drop and about 3.5″ more wind deflection at 500 yards) and about 10% less free recoil energy than the .300 Win Mag.
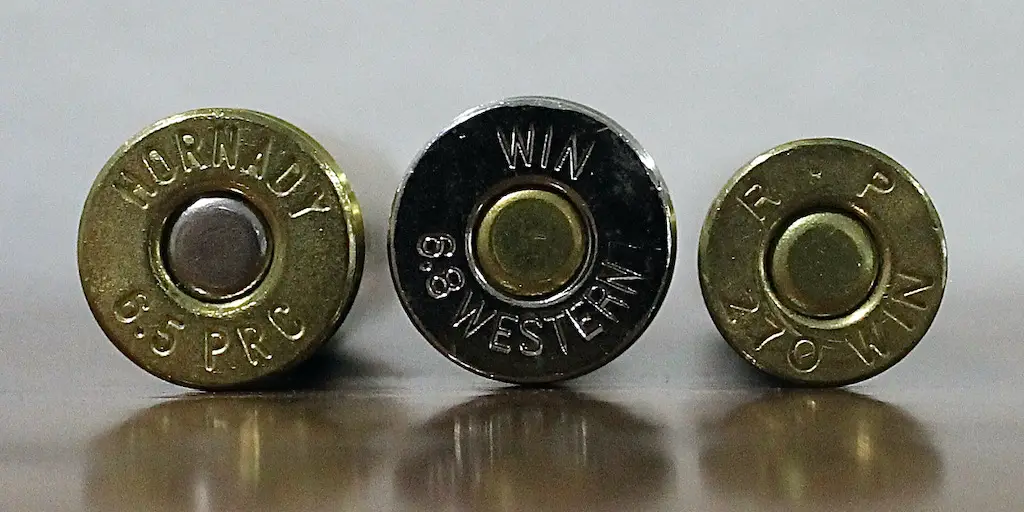
6.5 PRC vs 6.8 Western vs 270 Win
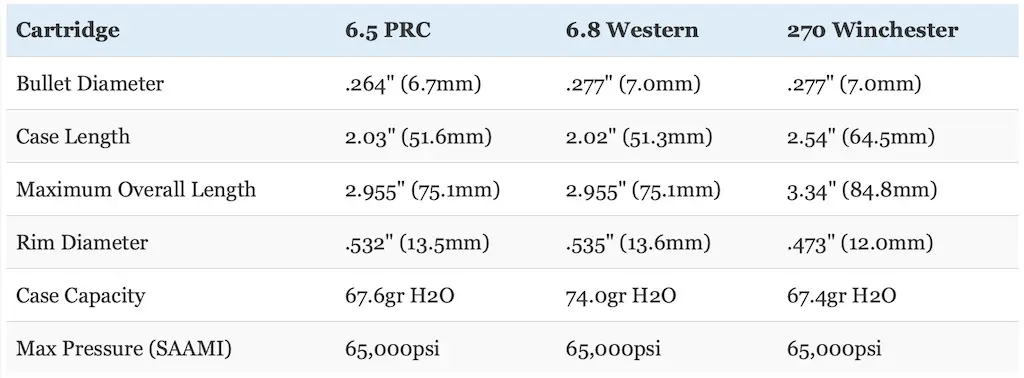
First, the 6.5 PRC uses .264″ bullets while the 6.8 Western and .270 Winchester use .277″ bullets.
Additionally, they all use different weight bullets.
While the 6.5 PRC can use lighter 120gr, 127gr, and 130gr bullets, it’s most commonly used with 140gr, 143gr, or 147gr bullets. The .270 Winchester most often uses bullets in the 110-150 grain range, with 130 grain bullet and 150 grain bullets being the most common.
Finally, the 6.8 Western can use the same lighter weight 130-grain and 150-grain bullets as the .270 Winchester (and fire them quite a bit faster), but it’s optimized for 165 grain, 170 grain, and 175 grain bullets.
The .270 Winchester has the longest maximum overall length (3.34″) and longest case length (2.54″). The 6.8 Western and 6.5 PRC have the same maximum overall lengths of 2.955″ and case lengths of 2.02″ and 2.03″ respectively.
This makes sense as the .270 Winchester is designed for use in standard or long actions rifles (same as the 30-06) while the 6.5 PRC and 6.8 Western are considered short action cartridges.
The .270 Winchester has a .473″ rim diameter while the 6.5 PRC and 6.8 Western have larger .532″ and .535″ rim diameters. Interestingly, the 6.8 Western has the largest case capacity of the three while the 6.5 PRC and .270 Winchester have very similar case capacities even though they use a dramatically different case design.
Finally, the 6.5 PRC, 6.8 Western, and .270 Winchester all have the same SAAMI maximum pressure of 65,000psi.
Those differences in the external dimensions of the 6.5 PRC, 6.8 Western, and .270 Winchester translate into some interesting differences in their ballistic performance.
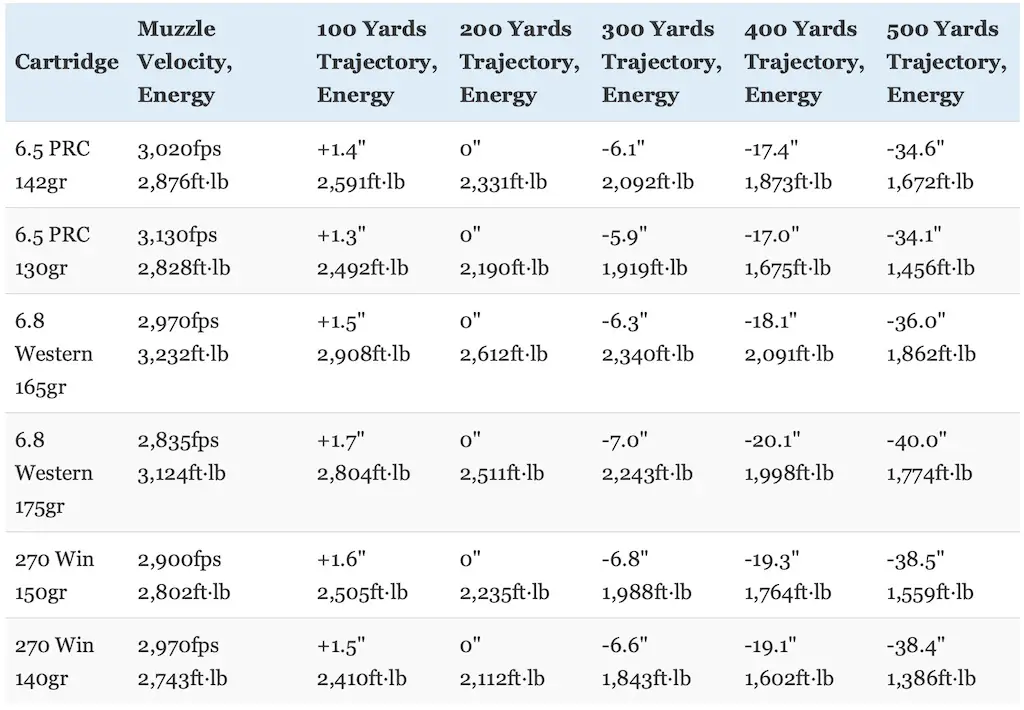
The table below compares Winchester Expedition Big Game Long Range and Browning Long Range Pro Hunter factory ammo in 6.5 PRC loaded with 142gr AccuBond Long Range (.625 BC) and 130gr Sierra Tipped GameChanger (.510 BC) bullets, in 6.8 Western loaded with 165gr AccuBond Long Range (.620 BC) and 175gr Sierra Tipped GameChanger (.617 BC), and in .270 Winchester loaded with 150gr AccuBond Long Range (.591 BC) and 140gr Sierra Tipped GameChanger (.508 BC) bullets.
Note: the Sierra Tipped GameChanger is sometimes referred to as the Sierra Tipped GameKing bullet or the Sierra TGK.
All six loads used a 200 yard zero.
With about 2-6″ less bullet drop than the 6.8 Western and about 4.5″ less bullet drop than the .270 Winchester at 500 yards, the 6.5 PRC has the flattest trajectory of the bunch. The 6.8 Western has about 2.5″ less bullet drop at 500 yards than the .270 Winchester with the Nosler bullet, but actually has about 1.5″ more drop with the Sierra bullet.
However, the 6.8 Western has an edge over the other two in terms of kinetic energy at all ranges.
The Nosler bullet used by the 6.5 PRC has a slightly higher BC than the Nosler bullet used by the 6.8 Western, but the situation is reversed with the Sierra bullets. So the ~12% advantage the 6.8 Western has with kinetic energy at the muzzle drops a tiny bit to ~11% at 500 yards with the Nosler bullet, but a ~10% advantage in muzzle energy turns into an ~22% advantage in kinetic energy with the Sierra bullet.
Both bullets used by the 6.8 Western are more aerodynamic than the bullets used by the .270 Winchester, especially the Sierra bullet. So, the 6.8 Western has an ~15% advantage in muzzle energy and an ~19% advantage in kinetic energy over the .270 Winchester at 500 yards with the Nosler bullet and an ~14% advantage in muzzle energy turns into an ~28% advantage in kinetic energy at 500 yards.
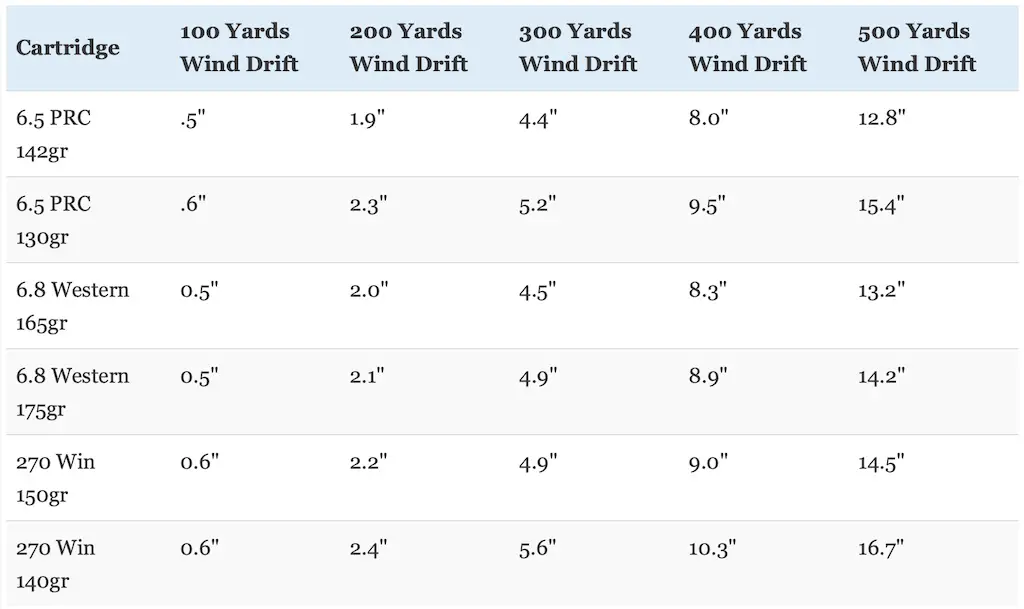
The chart below compares how much a 10 mile per hour crosswind impacts those same 6.5 PRC, 6.8 Western, and .270 Winchester loads out to 500 yards.
The same general trends hold true with regards to wind deflection as well.
The 6.5 PRC ABLR has the least wind deflection, followed by both 6.8 Western loads, the .270 Winchester ABLR, the 6.5 PRC Sierra, and finally the .270 Winchester Sierra. Just .4″ separates the 6.5 PRC and 6.8 Western Nosler loads and 1.3″ separates the 6.8 Western and .270 Winchester Nosler loads.
Once again, the 6.5 PRC and 6.8 Western are extremely similar, with a slight edge going to the 6.5 PRC. Likewise, the 6.8 Western has a slightly larger (though still not gigantic) advantage over the .270 Winchester out to 500 yards.
Now let’s talk about recoil.
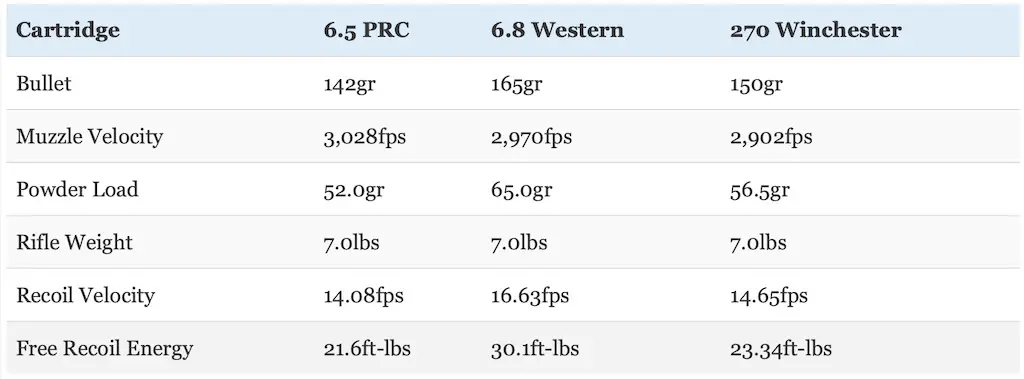
The table below compares the recoil produced by handloads that are very similar to the AccuBond Long Range loads compared above for the 6.5 PRC, 6.8 Western, and .270 Winchester when fired from identical rifles.
Felt recoil will vary from shooter to shooter and rifle to rifle, but free recoil energy is still a useful way to compare cartridges.
Interestingly, the 6.5 PRC and .270 Winchester have very similar amounts of free recoil energy, but the 6.8 Western has quite a bit more than both of them. Specifically, we’re looking at about 28-39% more recoil for the 6.8 Western.
While we’re not talking about ridiculous amounts of recoil here, 6.8 Western recoil has been described as “stout” or “noticeable” depending on the exact person in question. For reference, it does have a bit less recoil than typical .300 Win Mag loads and recoil very similar to (maybe a little more depending on the exact load) the 7mm Rem Mag.
This is the sort of recoil that many people can handle without a lot of trouble, especially when shooting a rifle that fits them well, that has a good recoil pad, or is equipped with a muzzle brake or suppressor. Even so, it’s still worth mentioning that the 6.8 Western does kick a lot more than either the 6.5 PRC or the .270 Winchester.
Don’t underestimate the impact that recoil has on the ability of a person to shoot accurately either. Some people do handle recoil better than others, but all other things being equal, they will absolutely shoot more accurately with a milder recoiling cartridge.
Additionally, there are a couple of other factors that are also worth discussing.
First, the 6.8 Western and .270 Winchester larger diameter bullets than the 6.5 PRC.
Specifically, the larger diameter .277″ bullets used by the 6.8 Western have about 10% more frontal surface area (also known as cross sectional area) than the 6.5 PRC (.0603 vs .0547 square inches). All other things being equal, a bigger bullet will make a bigger hole, cause more tissue damage, and result in more blood loss.
This is a definite, though not gigantic advantage in favor of the 6.8 Western.
Those new, heavy, and extremely aerodynamic .277″ caliber bullets used by the 6.8 Western also have a relatively high sectional density (SD).
Sectional density (SD) is a measure of the ratio of the diameter of a projectile to its mass. All other things equal, a heavier projectile of a given caliber will be longer and therefore have a higher sectional density and consequently penetrate deeper than projectiles with a lower mass and sectional density.
120 grain, 129 grain, 140 grain, and 143 grain .264″ bullets have sectional densities of .246, .264, .287, and .293.
130 grain, 150 grain, 165 grain, 170 grain, and 175 grain .277″ bullets have sectional densities of .242, .279, .307, .317, and .326 respectively.
As a point of comparison, 150 grain, 160 grain, and 175 grain .284″ bullets used by 7mm cartridges (like the .280 AI and 7mm Rem Mag) have sectional densities of .248, .266, .283, and .310 respectively.
There’s a little overlap there, but with the exception of the 175gr 7mm bullets compared to the 165gr .277″ bullets, those 165-175gr .277″ bullets the 6.8 Western is optimized for have a definite edge in sectional density over the heaviest 6.5mm and even 7mm bullets.
Especially when combined with the fact that the 6.8 Western carries more kinetic energy downrange than the 6.5 PRC, those heavier and larger diameter bullets with a higher sectional density are certainly helpful when hunting big game.
What about 6.5 PRC vs 6.8 Western vs 270 accuracy?
While external ballistics are extremely important, performance on paper doesn’t mean a darn thing if you can’t hit your target.
Well, Winchester implemented some design principles with the 6.8 Western to help optimize accuracy. Specifically, they built the cartridge with a tight freebore diameter.
Freebore is the smooth portion of a rifle barrel closest to the cartridge. Having a more snug freebore diameter means there’s less room for the bullet to yaw upon firing before engaging the rifling. This can also help enhance accuracy, especially with extremely long bullets.
So, the designers at Winchester built the 6.8 Western with a tight freebore diameter in a manner similar to what other designers did with the 6.5 Creedmoor and 6.5 PRC. Those cartridges each have just .0001″ clearance around bullets when they’re chambered.
Compare that to .0003″ with a .270 Winchester and .0016″ with the .30-06 Springfield.
In any case, the details will vary on the exact rifle, ammunition, and shooter in question. However, the 6.8 Western certainly has excellent potential for accuracy right up there with the 6.5 PRC.
6.5 PRC vs 6.8 Western vs 270 Win Availability
Finally, let’s talk about availability of rifles and ammunition.
Winchester raised a few eyebrows when they released the 6.8 Western in the middle of a nationwide (and worldwide) shortage of ammunition and firearms. More than a few hunters and shooters reacted to the announcement with anger and frustration that Winchester and Browning were both devoting resources to producing 6.8 Western rifles and ammo at the expense of other more popular cartridges that were in short supply.
I admit that I felt that way initially as well. My opinion has changed a bit since January of 2021 though.
Since it’s such a new cartridge, there is very little competition for 6.8 Western ammo and rifles right now. Indeed, the 6.8 Western is the only centerfire rifle cartridge I’ve personally had uninterrupted access to both rifles and ammunition for during the entirety of 2021.
My situation is not unique and I’m actually aware of several cases of hunters purchasing rifles chambered in 6.8 Western specifically because they could get ammo for it.
Availability likely varies from places to place and I have no doubt that there are areas where you can buy 6.8 Western ammo but not rifles and vice versa. Even so, it’s still one of the more readily available centerfire rifle cartridges in the United States at this time.
That does make more sense now that I think about it though.
I have no idea how much ammo Winchester and Browning have produced for the 6.8 Western in 2021. For the sake of argument though, let’s assume they made 50,000 rounds of amm0 (just a wild guess).
Unlike more widely adopted cartridges, the vast majority of that ammo is likely being purchased by people who actively intend to practice with and actually hunt with that ammo in the near future. The fact that the 6.8 Western is a more specialized cartridge also means it’s not something a casual or brand new hunter is likely to purchase either, which reduces demand for it somewhat.
This is in contrast to a lot of other cartridges where people are buying more than normal to have on hand “just in case.” The newer gun owners and hunters are also much more likely to be purchasing cartridges like the 6.5 Creedmoor, 308, 30-06, etc.
I’m just guessing here, but it appears that Browning and Winchester probably satisfied the 6.8 Western ammo needs of a larger number of hunters to this point with those 50,000 rounds of ammo than they would have by focusing that same production capacity on 270 Winchester or 30-06 ammo.
There’s no guarantee what the future may hold, but at least in the near term, the 6.8 Western seems to have benefited from the ammo shortage. At least as of mid-September 2021, the 6.8 Western is still one of the most widely available centerfire rifle cartridges in the United States.
Compared to the 6.5 PRC and .270 Winchester, it’s not even close: the 6.8 Western is a clear winner in terms of ammo availability at this instant.
So where do we stand overall with these cartridges?
6.8 Western vs 6.5 PRC
The 6.8 Western fires larger and heavier bullets at a slightly lower velocity than the 6.5 PRC. The 6.5 PRC has a slight edge in recoil, trajectory, and wind drift, but the 6.8 Western more kinetic energy at typical hunting ranges and is better for hunting bigger game.
Both cartridges have extremely similar trajectories and similar amounts of wind drift. In fact, both are excellent performers in that category overall when compared to commonly used centerfire hunting cartridges for those who want to squeeze all the performance they can out of a cartridge. The 6.8 Western does have more recoil though.
However, the 6.8 Western combines the flat trajectory and great resistance to wind drift of the 6.5 PRC with heavier and larger diameter bullets that have noticeably more kinetic energy at typical hunting ranges. That might not matter too much when hunting deer or pronghorn, but I’d definitely lean towards the 6.8 Western over the 6.5 PRC for game like bear, elk, or moose.
6.8 Western vs 270 Winchester
The 6.8 Western fires heavier and more aerodynamic 165-175gr bullets at velocities comparable to the 270 Winchester with lighter 130-150gr bullets. Therefore, the 6.8 Western has more recoil, but an edge with trajectory, wind drift, and kinetic energy. It’s also better on bigger game and at longer range.
The 6.8 Western has a definite ballistic advantage over the .270 Winchester in terms of external ballistics. The fact that it can use heavier and more aerodynamic bullets really catapults the 6.8 Western into the next level for work at extended range and/or for hunting bigger game like elk and moose.
That does come at the expense of more recoil though. If we’re being honest, not every hunter will need the extra capability the 6.8 Western provides compared to the .270 Winchester. However, it does provide some great capabilities for those who want or need that extra performance.
6.8 Western Ammo
There is a surprisingly good selection of factory loaded 6.8 Western ammunition these days. At this time, Browning and Winchester are the primary sources of factory 6.8 ammo, but it’s one of the easiest to find centerfire rifle cartridges in the United States as of late 2021.
Most of this ammunition is geared specifically for hunters who want to take advantage of the long range performance of the cartridge. This selection will likely continue to improve if the cartridge takes off with the general hunting public in the next few years.
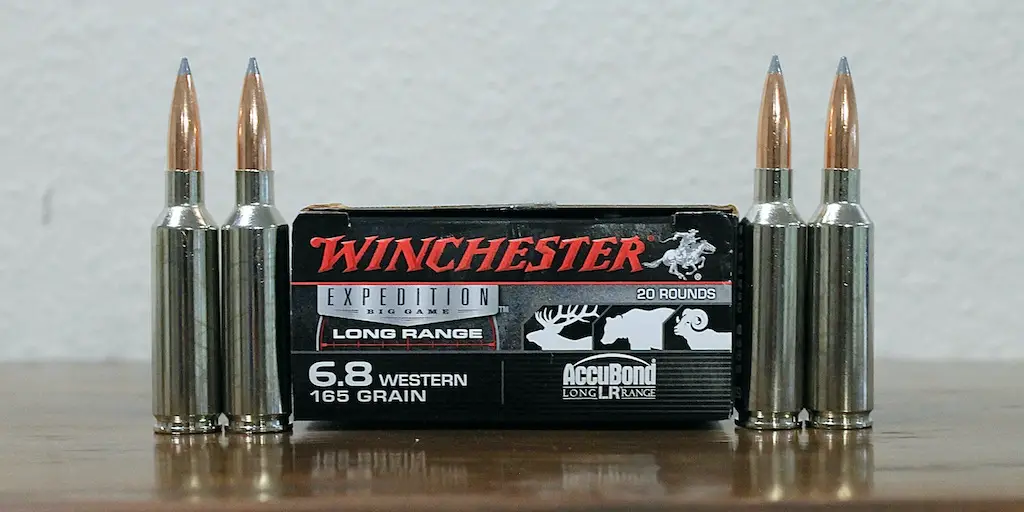
Specifically, the Browning Long Range Pro Hunter line loaded with 175gr Sierra GameChanger bullets, the Winchester Expedition Big Game Long Range line loaded with 165gr Nosler AccuBond Long Range bullets, the Winchester Ballistic SilverTip line loaded with 170gr Ballistic SilverTip bullets, Winchester Extreme Point Copper Impact line loaded with 162gr Copper Impact bullets, and Winchester Super X line loaded with 170gr Power Point Bullets are the only loaded ammo options I’m aware of for the cartridge.
The ammunition selection for the cartridge is decent online right now and the 6.8 Western isn’t nearly as difficult to find as some other cartridges during the ongoing 2020-2024 ammo shortage.
GET 6.8 WESTERN HUNTING AMMO HERE
GET MORE 6.8 WESTERN AMMO HERE
EVEN MORE 6.8 WESTERN HUNTING AMMO HERE
Best 6.8 Western Ammo For Hunting
Browning and Winchester both make factory 6.8 Western hunting ammo and both brands are available online from time to time. That could very well change in the future, but Winchester Ammunition in particular has done a very good job of continuing to get their ammunition for the cartridge to market in the ongoing ammunition shortage.
If you’d like to learn more about some of the various hunting ammunition choices for the 6.8 Western read this article:
Best 6.8 Western Ammo For Hunting Elk, Deer, & Bear
6.8 Western Rifles
Browning and Winchester both rolled out the 6.8 Western in a number of different rifle models from the start. At this instant, 6.8 Western rifles include 7 different versions of the Browning X-Bolt, 14 versions of the Winchester XPR, and 9 version of the Winchester Model 70 bolt action rifles.
In particular, the Browning X-Bolt Western Hunter and the Browning X-Bolt Max Long Range are both fantastic factory rifles for those who want outstanding long range capability in a hunting rifle.
The Max Long Range comes with a 26″ barrel and the Western Hunter uses a 24″ barrel. These rifles are definitely on the long side, but they have lots of reach and those long barrels help maximize the performance of the cartridge at extended range.
I’d personally lean towards the Western Hunter for a 6.8 Western rifle with plenty of reach that isn’t too big or bulky. On the other hand, the Max Long Range is idea for those who prioritize long range capability above all else.
BUY A BROWNING X-BOLT WESTERN HUNTER HERE
BUY A BROWNING X-BOLT MAX LONG RANGE HERE
SEE OTHER IN-STOCK 6.8 WESTERN RIFLES HERE
If you’d like to learn more about some of the various hunting rifle choices for the 6.8 Western read this article:
Best 6.8 Western Hunting Rifles
Final Thoughts On The 6.8 Western
It’s clear that the designers at Browning and Winchester put some serious energy into building a superb rifle cartridge with the 6.8 Western. The advantages offered by the 6.8 Western over the old .270 Winchester are more incremental than transformative, but the new cartridge does provide a noticeable benefit to hunters.
This is especially true for those hunting out west for bigger game like elk where distances can start to get pretty long. This rifle cartridge was designed specifically for hunters (as opposed to competition shooters) and delivers in the areas most important to that group of people.
Specifically, the cartridge is extremely flexible and offers an outstanding balance of a flat trajectory, great resistance to wind drift, and heavy hitting performance at long range without excessive recoil, muzzle blast, throat erosion, or extremely short barrel life. Oh and it does that while still fitting in a short action rifle.
I’m not endorsing using the 6.8 Western for extremely long-range shooting situation on a game animal at ridiculous range. However, I am saying I think it ranks up there with other great cartridges for hunting situations in open country like the 7mm Rem Mag and 300 Win Mag.
That said, the 6.8 Western is a very specialized cartridge that probably doesn’t offer serious advantages to the average eastern whitetail hunter. If you never shoot beyond 200 yards, then there’s no need for you to purchase a 6.8 Western unless you just want to.
However, a hunter looking for a good all-around cartridge for use on game ranging from deer and pronghorn up to elk at moose out west could absolutely make use of the advantages offered by the 6.8 Western though. The fact that the 6.8 Western is one of the more widely available centerfire rifle cartridges in the United States during the ongoing ammo shortage is also an advantage in favor of the cartridge.
There’s no guarantee what the future may hold, but if I were in the market for a new hunting rifle and wanted something with outstanding all-around capability that I could actually purchase a good rifle and ammo for right now, then I’d be very seriously considering getting a rifle in 6.8 Western.
It’s not a world changing cartridge or something with magical capabilities, but I think the 6.8 Western is an excellent cartridge that largely performs as advertised. If it sounds like an appealing choice for you, then get a good quality rifle, learn to shoot it accurately, and I’m sure you’ll be happy with how it performs for you afield.
Enjoy this article about the 6.8 Western? Please share it with your friends on Facebook and Twitter.
Browning and Winchester provided information for the history of 6.8 Western. The data used to compare the trajectory and recoil of the cartridges was obtained from Winchester. Maximum pressure and data to compare cartridge sizes for the 6.5 PRC, 6.8 Western, and .270 Winchester were obtained from SAAMI (p28, p85), here, and here). Case capacity information for the 6.5 PRC, 6.8 Western, and .270 Winchester was obtained from Chuck Hawks, The American Rifleman, and Rifle Shooter Magazine. Frontal surface area information was obtained from Chuck Hawks. I used Shooters Calculator to compare trajectories, wind drift, and recoil for the cartridges.
Make sure you follow The Big Game Hunting Blog on Facebook, Instagram, Twitter, and YouTube.
NEXT: BEST 6.5 CREEDMOOR AMMO FOR HUNTING ELK, DEER, AND OTHER BIG GAME
NEXT: 11 BEST HUNTING EAR PROTECTION OPTIONS FOR HUNTERS IN 2021
In times past, hunters found a hunting companion dog invaluable. The most popular small hunting dog breeds include the Beagle, French Brittany, American Water Spaniel, Brittany Spaniel, and Nova Scotia Duck Tolling Retriever. Not only did a hunting companion dog help to flush the game out of bushes, shrubs, trees, or even water, but the hunting companion dog would also retrieve much of the game for the hunter. In some cases, hunting companion dogs would assist in finding a felled game that had somehow gotten out of sight of the hunter. Prior to the hunt, these same dogs would help to track potential games.
I myself have witnessed hunting dogs in action and it is a pretty amazing sight. Hunting companion dogs make the activity a little more exciting, especially when they “tree” or “point” out a potential game. I listed 8 of the most common small hunting dog breeds including the facts about them below.
What are eight hunting dogs that are smaller in size?
There are eight hunting breeds that are considered small dog breeds. They include:
the Beagle
the French Brittany
the American Water Spaniel
the Brittany Spaniel
the Nova Scotia Duck Tolling Retriever
the Small Munsterlander
the Cocker Spaniel
the Boykin Spaniel
The Cocker Spaniel
Named after the bird that the breed was utilized most to hunt, the Cocker Spaniel is one of the best hunting dogs for many reasons.
Although the Cocker Spaniel is a small dog, they truly shine when they perceive prey is in the thickest of cover. They pounce with all the bravery their tiny bodies can contain, and they would flush out a game with great enthusiasm. They are great bird hunting dogs, also called a gun dog. When trained properly, a Cocker Spaniel can be a versatile hunting dog.
The Cocker Spaniel was chiefly utilized to hunt the woodcock. The Cocker Spaniel is a very energetic dog that loves to work. Plus, he’ll work all day if you provide him with the opportunity.
There are two variations of Cocker Spaniel—the English and the American. One can only tell a slight difference in the head shape of the Cocker Spaniel. However, American Cocker Spaniels tend to be friendlier than their English counterparts.
The Cocker Spaniel is considered one of the smallest hunting dog breeds today, but, typically, they are house pets rather than hunting companions. This breed is typically between 13.5 to 15.5 inches (this includes averages for both males and females; the male Cocker Spaniel will measure on the larger end of those numbers). The Cocker Spaniel will usually weigh between twenty to thirty pounds.
The American Water Spaniel
You might recognize the American Water Spaniel due to its curly hair. Aside from that, this dog breed is also known for its ability to flush game out of water. They are described as “flusher dogs” but they also retrieve fallen games, as such, they tend to work closely with their hunter handler.
The American Water Spaniel is considered quite versatile, but the breed is highly inclined to retrieve. Although athletic as well as enthusiastic, the American Water Spaniel can be somewhat stubborn as well as shy around new people.
I you are looking for a canine generally able to hunt, flush out, and retrieve waterfowls, The American Water Spaniel is a good candidate. They also have a highly dense and waterproof coat that makes them perfect for such work.
The American Water Spaniel is one of the most intelligent dog breeds I have encountered, that is full of energy as well as a tad bit of stubbornness. It is important to keep the breed active in order for the dog to be happy.
It is also important to begin training the American Water Spaniel as early as possible. Overall, the breed is obedient and friendly when trained properly.
The American Water Spaniel male is between thirty and forty-five pounds at adulthood; the female is much smaller, weighing twenty-five to forty pounds when fully grown. This breed typically stands between fifteen and eighteen inches at adulthood.
The Beagle
The Beagle is one of the most popular small hunting dog breeds—or even one of the most popular dog breeds, period. They are hounds at heart, so they love tracking scents and they enjoy flushing out prey. The Beagle is a highly diverse hunting dog as they are originally bred for hunting smaller game such as rabbits and foxes, but I’m quite impressed that they are also useful for hunting large games such as deers.
Another reason why the Beagle is highly popular is because of its happy-go-lucky attitude. I love how these pups are both fun and smart. They can be taught to retrieve even though it is not their chief inclination.
Did you know that the Beagle was first used to hunt rabbits, and the style of hunting used for this purpose was called “beagling”? They work well in pairs, and typically, they flush prey out of thick underbrush.
The Beagle is a gentle and friendly breed that loves to interact with its hunter handlers. Training the Beagle should begin when they are fairly young. As a hound breed, they can be stubborn, but consistent training should overcome any obstinate behavior on the part of the dog. Beagles are one of the small hunting dog breeds that love to interact with children, too.
Like other hunting dogs, the Beagle needs a certain amount of activity each day in order to remain happy and healthy.
The Nova Scotia Duck Tolling Retriever
Known as the “Toller”, the Nova Scotia Duck Tolling Retriever is one of the smallest retrieving dogs. Some will relate that the Nova Scotia Duck Tolling Retriever has a high-pitched “scream” that sets them apart from other hunting dogs.
The Nova Scotia Duck Tolling Retriever is especially attuned to hunting in cold weather, and their coat protects them from the harsh, cold water. These dogs are chiefly retrievers but they are good flushers too, and were named for the way in which they would assist their human hunting handler in “tolling” ducks.
These brilliant water dogs are best utilized for hunting waterfowl. However, they often worked to lure ducks in range of their human handler so that the hunter could get an accurate shot on the prey. They are especially useful for this job because they are very alert and an extremely intelligent breed. They are also highly patient. Like other retrieving dogs, they depend greatly on signals from their human hunting handlers.
The Nova Scotia Duck Tolling Retriever is quite active, and, if human handlers do not offer the Toller the best balance of activity, the Toller can become destructive. Remember, as natural hunters and retrievers, the Toller is happiest when he is busy—or very tired from a busy day.
Just a little reminder: the Toller can be less submissive than other retrieving dogs. They tend to be less friendly with strangers.
The Nova Scotia Duck Tolling Retriever stands anywhere from seventeen to twenty-one inches in height. Typically, regardless of whether the dog is male or female, the Duck Toller will weigh between thirty-five and fifty pounds.
The Boykin Spaniel
Although considered a small hunting dog, the Boykin Spaniel is in fact larger than the breeds on this list. Having a dense coat that protects their body as they swim in the water of varying temperatures make them resilient hunting canines.
The Boykin Spaniel is a great flusher of game. However, they are known for taking their sweet time before they actually flush the game out. They do not need their human handler to offer commands before taking action. They are extremely versatile dogs, being highly adept retrieving dogs as well.
Hunting both pheasants and quail is what the Boykin Spaniel is exceptional at, but they are also used for flushing out and retrieving waterfowl. I love how this breed utilizes both scent and sight for the tracking game.
Not only is the Boykin Spaniel a great hunting companion, but the breed is a wonderful family pet as well. The Boykin tends to get along well with all people, even strangers. The breed is very smart and they simply enjoy hard work. They are also great companion dogs outside the hunting field.
The Boykin Spaniel tends to be between fifteen inches to eighteen inches in height at adulthood, and weighs an average of twenty-five to forty pounds at adulthood.
The Small Munsterlander
The Small Musterlander is a dog of German origin; it is not related to the Munsterlander other than they come from the same area in Europe. This breed is known for its ability to do just about anything. You’d be glad to know that they can be easily trained to flush out, retrieve, and point prey. This is thanks to their natural attentiveness and being extremely intelligent.
These dogs are so versatile that they are equally adept hunters on both lands and in the water. The Small Munsterlander hunts just about any type of fowl a hunter can imagine. They are adept at hunting waterfowl, ducks, and the like, but they are also great for hunting upland birds.
The Small Munsterlander is typically twenty to twenty-one inches in height and normally weighs between forty and sixty pounds. I suggest doing a great deal of DIY dog grooming to maintain these dogs.
The French Brittany
The French Brittany is very similar to the American Brittany spaniel in its hunting style. They are known for their scent tracking abilities as well as their ability to point both upland birds and waterfowl.
Not only is the French Brittany versatile hunters—they are highly intelligent and friendly too. This makes them great family dogs as well as great competition hunting companions.
The French Brittany typically stands between seventeen and twenty inches and they weigh between thirty and forty-five pounds.
The Brittany
The Brittany Spaniel is a gundog whose initial purpose was as a hunting companion. Known for its penchant for pointing as well as being a flushing dog, this breed is versatile, strong, and highly intelligent.
I find it wonderful how they can be both great family dogs and highly adaptable hunting companions at the same time. Brittanies love to hunt a wide variety of games [1].
The American Brittany Spaniel is usually just over seventeen inches to just over twenty inches in height, and the average weight of a Brittany Spaniel is between thirty to forty pounds at adulthood.
FAQs
1. What is the smallest breed of dog used for hunting?
The Cocker Spaniel is one of the smallest breeds of dogs that were once utilized as hunting companions. However, the Cocker Spaniel of today is more of a companion animal than a hunting companion.
2. What is the smallest upland bird dog?
The Small Munsterlander, a German dog with a tendency to work as a pointer, is the smallest upland bird dog.
3. What is the easiest breed of hunting dog to train?
Golden Retrievers and Labrador Retrievers tend to be the easiest to train. Both breeds look to their handlers for directions and they work well with their human hunting companions.
4. What is a good hunting dog?
A good hunting dog is one that listens to commands, hunts enthusiastically, and is energetic on the hunting field.
The ongoing battle between 45-70 vs 30-06 is distinguished with slim margins considering they are both quality cartridges.
These two black powder cartridges were originally designed for war and are now mainly used as hunting calibers. We’ll look at the best performer between 45-70 vs 30-60 to help you decide which is best for your needs.
Here’s an overview of what you’ll learn in the following article:
The most powerful ammunition
Which bullet has a higher velocity
What are the most significant differences between 45-70 and 30-06
Dynamics of the two cartridges
Which is ideal for deer hunting
Let’s get into it!
A Quick Comparison Between 45-70 and 30-06
The 45-70 and 30-06 are powerful ammunition initially designed for the American civil war and are now popular among modern-day hunters.
Their unique attributes, especially their penetrative ability and velocity, are perhaps their most distinguishing features.
Let’s take a look at a quick comparison analysis:
The two bullets can perform ideally for most shooting purposes but go for the lighter recoil variation if you have a standard rifle.
Therefore, how lever action rifles in use handle recoil matters. Take this as a safety measure for those around you if you operate in hunting groups.
In-Depth Analysis Between 45 70 vs 30 06
You’ll be pleased to know that the two quality cartridges are ideal for big-game shooting and only have small differences. The differences are easily tracked to the cons of either cartridge, recoil being one of the major distinguishing factors.
Gascho et al., (2019), in their research, further investigates their differences in terms of their characteristics at different energy levels.
Which Cartridge has the Better Velocity?
The 30-06 is a popular cartridge for its velocity, where its maximum flow speed is at 2820 fps. When targeting moving objects, the hunting cartridge comes in handy, bringing down mobile prey accurately.
When using a 150-grain 30-06, it bolts at a full velocity of 1,030 fps and increases significantly after 300 yards by 1,193 fps. This variety is a typical 325-grain ammunition with an average of 2,050 fps of muzzle energy.
On the other hand, the 45-70 Government rounds travel at 1680 fps. It, however, covers up for the compromised flow speed with excellent energy.
From 150 yards, the 45-70 Government performs effectively as one of the centerfire rifle cartridges, but its kinetic energy goes low at about double the distance.
So, ballistic performance comparisons are best made within 150-300 yards. Within the distance, the 45-70 bullet travels at 1,225 mph, which means the 30-06 is nearly twice as fast. It is outshined due to its heavier projectile and less powder charge.
You are lucky if you use marlin rifles for target shooting or participate in other activities utilizing similar ranges.
Also, when using a quality lever action rifle, you can achieve relatively more velocity from good muzzle power.
Muzzle Energy Comparisons Between 45-70 vs 30-06
The 45-70 round is a powerful cartridge for lever action rifles and is readily accessible. It has a shorter case length and features a straight-walled design.
Additionally, it has a larger bullet diameter and is heavier than other rounds, giving it more stopping power.
According to Hrdlicka (2003), when comparing stopping power, it’s obvious the 45-70 version works in your favor. However, the 30-06 caliber energy leads the two with 127-foot pounds out of the muzzle than the Government bullet.
Because the heavier slug loses velocity rapidly, this competitive edge rises to 543 ft. lbs. after 100 yards.
Research from Sanchez et al. (2016) adds that, at 300 yards, the 30-06 Springfield moves 865 ft. pounds faster than the 45-70, which is a significant difference.
As a result, the shorter and narrower 30-06 outperforms the government variety with more than twice the pressure.
The Availability of the Bullets
We found out that the 45-70 ammunition requires more material and has a larger dimension. This explains why this cartridge is expensive.
Additionally, these loads were crafted for use with lever-action firearms. The Marlin guide gun, since 1895, is one of the best guide guns for the 45-70.
Meanwhile, the 30-06 cartridges give you additional sure variations to select from compared to the government version. The 30-06 were military options, making them reliable for most uses, and their lower price point is a plus.
Moreover, they offer better variety in bullet weight categories (100gr-220gr) for small to big games.
Which has Better Trajectory
The trajectory of a bullet as it travels downrange is quantified in inches of bullet drop, impacting your ability to hit a target.
Due to its energy drop, the heavy bullet, 45-70 variety fails to match up well on long distances, but it gives back exceptional performance over short ranges. Here is the reason why:
Because these projectile models are less aerodynamic than a boat-tail Spitzer characteristic, they hemorrhage muzzle velocity at an astonishing rate.
As the ammo loses speed in flight, the gravitational pull has more opportunity to pull them toward the ground.
At 200 yards, the smokeless powder Government drops 10.3 inches.
The light 30-06 vs 45 70 excels in this category, having a much flatter direction of travel than the 45-70. As a result, these versions are among the commonly used cartridges in lever action rifles for mid-to-long-range hunting worldwide.
Therefore, flatter shooting ammunition is preferred over long-distance shooting. This factor is so because it needs fewer adjustments to the shooter’s scopes to make up the difference for bullet drop. A flatter path also implies that a cartridge is more tolerant of ranging errors.
The Bullets’ Recoil
Regarding the level of impact in 45 70 vs 30 06, the former has more recoil and can catch you off-guard if you’re not prepared for the blast.
When using a rifle with a smokeless powder 45-70 at rest, they’ll still produce a heavy recoil, even if you’re utilizing shooting sleds or sandbags.
Also, you should expect a worse experience when firing from a standing position. Unprepared shooters are frequently knocked backward when they fire in this position.
If necessary, take a wider stance and prepare before squeezing the trigger on a 45-70.
A photo showcasing various shooting positions and stances
When comparing 45-70 vs 30 06, the former appears to be a lightweight, despite having a significant recoil. A 30-06 will also cause a shooter’s flinch, maybe not with more recoil as a 45-70.
The 30-06 has approximately 14 ft-lbs of recoil energy, whereas the 45-70 Government variety has nearly 64 ft-lbs of energy imparted into a gunman’s shoulder. That’s twice as much.
The felt recoil is often forgotten or unrealized when you have a big bull, Cape buffalo, or black bear in your sights.
Target shooting on the range lacks the adrenaline rush that the thrill of the hunt can provide.
The Most Versatile Bullet
The 45-70 is effective against large game animal hunting but is a great cartridge between 200 and 300 yards. The massive slug of the government provides stopping power to bring down whitetail deer, bears, moose, bison, and elk at a close range.
If you intend to shoot at distances greater than 300 yards, opt for the 30-06 Springfield in your bolt action rifle. The 45-70 is ideal for large game hunting because it frequently requires stalking and closing the distance.
Accuracy Features
Accuracy is contextual when comparing 45 70 vs 30 06, which is highly dependent on the shooter and the gun used. Both factory loads are excellent for big game hunting.
The 45-70 has bone-crushing power at a short range. It is low in accuracy over long ranges due to its low velocity and less ballistic coefficient, which produce a relatively steep trajectory.
The 30-06 is a definite winner in terms of accuracy in long-range hunting due to its flatter trajectory. While using a quality bolt action rifle and scope within 300 yards, it gives exceptional accuracy per single shot.
These quality loads can maintain hypersonic speeds in a flatter trajectory for slightly more than 1000 yards before gravity and sit resistance impact it and begin to affect accuracy.
However, the contrast will become more difficult to ignore as the range increases.
Perhaps the 30-06 has a further advantage as you’ll unlikely flinch with its less recoil, while the 45-70 has a higher chance of distracting your stability/stance.
The Ballistics’ Coefficiency and Sectional Density
Simply put, the ballistic coefficient indicates a bullet’s aerodynamics. The higher the proportion, the greater your cartridge will perform in windy conditions.
Unlike the previous features, the 45-70 has a slight advantage in this situation as it is more powerful. Despite doing exceptionally well in the close and mid-range, 45-70 bullets suffer slightly in the long range.
As observed, heavier bullets typically have a higher coefficient count, but 30-06, as a lighter version, still finds a way to impress. Its aerodynamic model allows it to dominate the ballistic coefficient count even at longer distances.
Also, the bullet design plays a role in the ballistic coefficient factor. For instance, a 160 gr 30-06 will have more BC than a 325 gr 45-70 ballistic.
Social Density: Best Penetrative Power for Big Game Purposes
An ammunition’s Sectional Density (SD) determines how well it penetrates a target. This factor is critical in big hunting events because you need a bullet penetrating thick hide and bone.
Therefore, penetration is measured by comparing the mass and diameter of the projectile. The greater the SD, the further the bullet will infiltrate the target.
Consider this a simplified explanation of penetration because other factors, such as bullet expansion and velocity, are also in the picture.
The 45-70 is well renowned for its penetration, as it has been used successfully to hunt big games for bigger targets such as brown bears.
Is the 45-70 overkill? Yes, it may, but it accomplishes the task, and many buffalo hunters have successfully utilized it since the late 1800s.
When properly aimed, a large buck can get away after being hit by a 45-70 round. On the other hand, a deer will fall almost immediately if you hit it in the chest.
With the 30-06, it relies on its high-velocity power to form its ideal social density. It is suitable for deer hunting, having the edge for mid and long distances.
The high velocity and barely any disintegration localizes the penetration in one area to influence a deeper penetration.
Price Variations: Which is the Most Affordable?
Most of our comparisons revealed a recognizable disparity between the two ammunition, and the price section follows suit. Ironically, the government cartridge seeming to perform poorly is the most pricey.
On a 45-70 ammunition, you’ll have to use around $2.75/round for regular training versions and $5/round or more for premium hunting versions.
Regular 30-06 will cost about $1.50/round, while the premium rounds cost you double that.
The Cartridges Size Differences
We have so far touched on how the bullets’ designs can impact their performance.
Their size also affects how they are chambered. As a heavier slug, the 45-70’s is normally chambered in heavy loads because its projectile diameter is 0.458 inches, compared to 30 06 at 0.308 inches.
The cartridge length for the Government variety is 2.105 inches, while the 2.494-inch 30 06 Springfield towers over it.
Although the 45-70 ammunition is heavier, it can be holstered in a lighter rifle.
Which is Better for Hunting Deer?
Without a doubt, the two cartridges are capable of taking down various targets during a hunt. So, which provides the better all-around performance for the deer hunting purpose?
The 30-06 deer rifle is superior to a deer rifle. It is far more accurate over long distances, does not leave a large hole in the target, and is easier to shoot.
On the other hand, a 45-70 with a lower velocity and more significant expansion isn’t a great option of the two, destroying much meat with a poorly placed shot.
Unlike its competition, when traveling at over 2500 feet per second, the 30-06 does not destroy much of the target’s meat.
The 30-06 is a clear winner regarding range, accuracy, less recoil, and ammunition cost.
Meanwhile, the 45-70 does the job but is more expensive and puts a little more strain on your shoulder from its heavier recoil.
Which of the Cartridges Would You Choose for Lever Action Rifles?
The answer varies from one shooter to the other.
For the 45-7, it is still relatively popular among big game hunters in heavy cover and black-powder silhouette shooters.
Having been utilized in the Spanish-American war, we clearly understand why these cartridges are still popular with users.
In justification of their higher price as a standard cartridge, the big game heavy loads deliver bone-crushing muzzle energy, capable of hitting any target within 300 yards. If you love its output while hunting and have no issues with its cost or impact, go for the 45-70 variety.
On the other hand, if you prefer long-range hunting, we recommend the compact 30-06 to go with your bolt action rifle. These popular cartridges stopping power and long-range prowess will make your shooting purpose more dynamic in various hunting scenarios.
Also, many modern rounds cannot compete with the 30-06’s prominence and raw stopping power. They can bring down every four-legged animal in the North American region.
The 30-06 bullets are affordable; they give the total value for your money and won’t let you down in major shooting events.
Finally, the 45-70 is excellent for close-to-mid-range shooting, while the 30-08 is ideal for long-range targeting.
FAQ
Conclusion
That’s all on our tropic, 45-60 vs 30-06, with the latter emerging clear winner in terms of its smooth operation. The heavier 45-60 cartridge should be supported as a quality rifle.
So, which bullet stands out, and you’d select it for your upcoming hunting event/plan?
Comment below with your thoughts on our topic, and suggest which varieties we should analyze next.
References
Sanchez, D. M., Epps, C. W., & Taylor, D. S. (2016). Estimating Lead Fragmentation from Ammunition for Muzzleloading and Black Powder Cartridge Rifles. Journal of Fish and Wildlife Management, 7(2), 467-479. https://doi.org/10.3996/092015-jfwm-086
Daryl Hrdlicka. (2003). How hard does it hit? A revised study of atlatl and dart ballistics. The Atlatl, 16(2), 15-18. http://www.thudscave.com/npaa/articles/howhard_10-04.pdf
Gascho, D., Zoelch, N., Richter, H., Buehlmann, A., Wyss, P., & Schaerli, S. (2019). Identification of Bullets Based on Their Metallic Components and X-Ray Attenuation Characteristics at Different Energy Levels on CT. American Journal of Roentgenology, 213(3), W105-W113. https://doi.org/10.2214/ajr.19.21229
30-30 vs 45-70 Which Lever Action Is Best For You? (2022, October 21). Big Game Hunting Blog. https://thebiggamehuntingblog.com/30-30-vs-45-70/
Herring, G., Eagles-Smith, C. A., Wolstenholme, R., Welch, A., West, C., & Rattner, B. A. (2022). Collateral damage: Anticoagulant rodenticides pose threats to California condors. Environmental Pollution, 311, 119925. https://doi.org/10.1016/j.envpol.2022.119925
Fishing for a trout has always seemed complicated, especially for those who are only planning to engage in this fun-filled recreational activity. However, it is not just all about fun. It is also a combination of knowledge, skills, determination, and mostly patience.Setting up fishing rigs and lines is the number one problem that can test an angler’s patience. There are a lot of variations of fishing lines and rigs that only a few can probably name.Regardless, we can always choose to make fishing a simple activity and not so complicated. That is why the internet can indeed be your ultimate best friend.This article will introduce to you the different steps to set up your trout rig and line.
Our Fishing Gears on Sale
Trout, What Is It?
A trout is a generic term used for several freshwater species. The trout is closely related to the Salmon family. Each trout can survive differently from one another. In line with that, variations of the trout can be found anywhere.
Some live in freshwater lakes and rivers, such as the lake trout. Others, notably the Rainbow Trout, can switch from living in the sea to inhabiting freshwaters. Due to the difference in habitat and environment, trouts also differ in their colors and patterns.
These colors are often acknowledged as camouflaging, in which a trout changes in color depending on the environment it is living in. What is impressive about the trout is that it changes colors if they migrate to a different place or environment.
It can be hard to determine the specific breed of trout based on their colors and look. Also, it can be challenging how to catch these trouts. Some trouts are rare to find, while some, on the other hand, can just be caught around the corners.
Before you can cast your line in the water and hang tight for a trout bite, there are many things that you ought to have as a primary concern as far as prior information. One of the prime things to know is the habitat and tendencies of the trout fish itself.
Keep in mind, your odds of winning a catch rely basically upon your capacity to pass judgment on trout behavior and afterward setting up a fishing rig and line in like manner.
Main Species Of Trout
There are three major species of trout that fishers catch, and each has its unique characteristics. These are the Brown, Brook, and RainbowTrout.
Apart from these three, the wildcard steelhead is also known to be the same as the rainbow trout. It lives in the ocean or lakes before it spawns in the freshwater or smaller tributaries.
Meanwhile, the rainbows produce a silvery color on them. This habit, also seen in salmon, makes them a must-have catch, especially among anglers.
Know Your Trout
Because of the trouts’ ability to survive across various water and current conditions vary in their shading and skin patterns. It is intriguing to realize that a wide range of trout types exist, depending upon the external conditions that they are opened to.
Below are some quick facts to help you with acquainting yourself with this exciting fish:
What do they look like? The appearance of the trout fish differs over the various species. Since these fish take after the salmon family, trout itself develops to huge sizes, ensuring an extraordinary attraction for fishers and anglers in the area.
Trout typically have moles like imprints and their bodies, whose size and color differ from species to species. Rainbow trout are generally touched with silver, while brown-colored trout are actually what their name proposes, but with reddish spots along their length.
Trout fish habitat: trout are normally found in freshwater bodies, for example, lakes, and rivers, with certain species having the option to withstand the high salt content of the ocean. Trout prefer moving waterways that are colder and choose to live in calmer, less frequented zones.
Eating patterns: trout are known to eat various bugs (mainly aquatic insects), crustaceans, worms, and leeches. Bigger-sized trout are likewise known to feed upon smaller fish!
Where Can You Find The Trout?
You can find the trout in moving and cold water. Trout can be found in the rivers and creeks, and they love to run up and down in these locations.Trout is one of the commonly stocked game species, and it can also be found in lakes (like another species, the Lake Trout). Indeed, trout can be dropped in ponds, streams, and anywhere.Trout can grow up to massive size and swim into the ocean. They sometimes feed smaller fish in the lake. Sometimes, they eat salmon spawn and raid their beds.Amazingly, trout is also one of the accessible food for wild animals. As such, you can see it in the woods, for they are considered the Bobcats, bears, and other animals’ food.The more remote the lake or river is, the more likely you can find a trout in the water. With this, trout fishing is considered one of the best activities for anglers and outdoor enthusiasts.
The Beauty Of Trout Fishing
Without a doubt, trouts are among the most magnificent freshwater creatures that have ever prevailed in bodies of water. There are four major species of trout that are often sought after by anglers.
The Brook trout, commonly referred to as the speckled trout, is considered the easiest to catch. Meanwhile, the Cutthroat Trout (“Cutthroat” because of red-orange slash marks on their throats) dominantly occupies the country’s western part. Finally, the Rainbow and Brown Trout are both found in rivers or streams.
Setting Up The Rig
Well, all you need to figure out is your trout rig and how to set up your line. If you are wondering what the term “Rig” stands for, it is relatively simple. A rig is a term used to define the combination or arrangement of equipment or things used for fishing. A rig may be attached to a rod, carried by hand, or mounted on a boat.
How To Set Up A Trout Rig And Line?
When you get an overall idea of what the trout fish resembles, your goal of getting a fine example effectively turns out to be a lot simpler. Your best course of action is to exhibit your knowledge and set up your fishing rig and fishing line.
There are many and numerous ways on how to set up a trout rig. But, the steps and ways following this are by far the best ones out there. It has been tested and proven to catch a satisfying number of trouts.
The Things Needed For Trout Rig Setup
A rig is a group of fishing gear needed for making a decent catch. Here is a quick rundown of things that you would need to set up your fishing things and permit the fishing to progress.
Fishing Rod and Reel – If you do not have one yet, you can start by purchasing an affordable pick at any fishing shop near you.
Fishing Line – Usually, if you buy yourself a pair of fishing rods and fishing reel, the fishing line already comes with. If there are none, provide yourself with some fishing line at about 5-10 lb test fishing line. Next, spool it in the fishing reel. Ensure that your fishing line is neat and all set for trout hunting for those who already have. Ensure that there are no tangles or flaws inside the reel, or else it would significantly affect your trout adventure.
A Set of Hooks – For trout fishing, the best hooks to use are sizes 4-12.
Bobbers – A basic bobber will do. Just make sure that the bobber is big enough to prevent the split shot and hook and bait from sinking into the water.
Sinkers – This is the exact opposite of the bobbers. The sinkers’ weight should be light enough. So, that if it is attached to the bobber, it will not drag the bobber down.
Bait -Freshly picked worms can already work well for what we are about to do. But, other options also include using crickets or Berkely trout worms.
The Steps In Setting Up The Trout Rig
Start with tying the fishing hook to the end of the fishing line. To this, you can use a basic knot to attach it to the line. It is best to use an Improved Clinch knot or Palomar Knot for better performance.
Next, insert a line from one end of the split shot going out to the other end. Make sure that it is at a distance of 10-15 cm above the hook.
The next thing to do is attach the bobber or float at the tip of the fishing line. This is quickly done by inserting the line through both the top and bottom metal hooks. Always remember that it is essential that the fishing line runs around the bobber or float. Moreover, both hooks should keep the bobber or float anchored or stationary.
There you have it. In only three easy steps, you have now set up an effective way for successful trout fishing.
Best Trout Fishing Rigs You Can Get To Know
1. Sinking Bait Trout Fishing Rig
A sinking bait rig is a ticket when trout plunges to the lake’s bottoms to look for the colder waters during warm days. All you require for a sinking bait rig is a slip sinker, swivel, hook, and bait.
What You Need:
slip sinker
swivel
hook
bait
How To Setup A Sinking Bait Trout Rig
First, rig a slip sinker and slide the eye of a slip sinker on the end of your fishing line. Next, tie a swivel to the end of the line to prevent losing the sinker. On the opposite end of the swivel, attach a 12-18″ piece of fishing line and attach your hook. Preferably a fishing line that is a somewhat lesser pound test than your mainline, that way, if your line breaks, it is just at the end of your rig.
With this arrangement, a trout will have the option to take the bait without feeling the sinker’s resistance. Likewise, you do not have a visual marker on the surface with this arrangement. Subsequently, it is ideal for saving a finger on the line to feel for any bites. You can likewise intently watch the fishing line to distinguish any movement.
2. Float Fishing Rig For Trout (Bobber Fishing Rig)
In case you have not tested it or might want a substantially more visual style of trout fishing, try the thrill of fishing for trout with a bobber. Nothing beats the excitement of watching your bobber start to move a lot over the water, then rapidly dive under the water’s surface by a trout.
While a slip bobber trout rig takes somewhat more work than a basic clip on a bobber, the slip bobber is a substantially more flexible and powerful rig for trout fishing. This is particularly obvious in deeper lakes. But, a clip-on bobber could be similarly useful in catching trout in a shallow stream or waterway.
What You Need:
slip bobber or clip-on bobber
bobber stop (for slip bobber)
swivel
Hook
How To Set Up A Bobber Rig For Trout
A slip-bobber rig works like the previously mentioned slip-sinker rig. To start, take a bobber stop that is incorporated with most slip bobbers available and string it onto the end of your fishing line. This will fill in as a movable point to stop your bobber.
By sliding this up and down the line, you can fish your lure suspended in the water, basically as deep as you need.
After the bobber stop, slide on your bobber and tie on a swivel to prevent it from sliding off your line. Much the same as the sinker arrangement, tie on a 12-18″ segment of fishing line and attach your hook.
At the point when you cast, you’ll just be managing your bobber and this short segment of the line, regardless of really fishing your lure a lot further to the point of your bobber stopping.
3. Lure Rig For Trout Fishing
This might be the easiest, and now and again, the best trout rig of all! It’s easy to set up as there are not close to the same number of segments to stress over compared with the bait fishing rig and bobber rig.
When using a lure to look for trout, you can keep it as easy as tying the lure right onto the end of your line if that is all you have. In any case, because of the lures spinning movement, this may place turns in your line that might decrease the breaking quality of the line or even cause a significant tangled wreck.
What You Need:
Variety of trout lures
Swivel (optional)
Leader line
How To Setup A Lure Fishing Trout Rig
The preferable strategy for connecting a trout fishing lure is to tie a clip swivel to your line’s furthest limit and attach your lure to that. Not exclusively, it will lessen line twists. Likewise, it will consider a more reasonable presentation and make it simpler to change out between lures. By rapidly rotating through lures, you can rapidly figure out what the trout will like to eat at that given time.
For Trolling, these jet divers are a Great Replacement for outriggers and heavy lead ball sinkers.
How To Setup A Fishing Line?
Since you now have an idea of setting up a trout fishing rig, your next job includes the crucial need to have a strong grasp on the most proficient method to set up a fishing line.
Same as with the trout rig, there are many selections to choose from when it comes to setting up your fishing line. Particularly for trout fishing. But, this article will show you one of the basic fishing line setups there is. Yet, even though it is basic, it is still the most effective and reliable way to set up a fishing line for trout fishing.
The Things Needed For Fishing Line Setup
Your fishing hooks and fishing line
The Steps In Setting Up The Fishing Line
Attach the hook to the fishing line. Tie the Hook onto the Fishing Line. To do so, grab the tip of your fishing line and loop it in the tiny hole on your hook. Upon grabbing the end of the fishing line, you have already entered the hook. Twist that end to the mainline about nine times.
Loopback. After you have twisted it about nine times, loop it in the tiny hole of the hook again. But, this time, on the opposite side of the hook’s hole from the first time, you have looped it in.
Tighten. Once you have looped the fishing line in, pull the mainline (the longer part) to snug the twists tightly.
Remove the excess line. Then, cut the extra hanging line on the other end of the fishing line closer to the hook.
Prepare the line. The next steps would be the same as the ones when you are setting up your trout rig. Insert the weight, followed by the bobber, and so and so forth.
There you have it! A simple yet effective way to ensure a fishing line for a good trout adventure. Before heading out to look for some trout, read some of the tips, we have for trout fishing.
Common Things Used When Trout Fishing
Rainbow trout grow up to 12 inches long, and you can use an ultralight tackle for this type of fish. You can use a spinning reel, light/ ultralight action rod, and a 4-8 lb test fluorocarbon line for standard trout fishing.
Always remember these two important rules when trout fishing:
Stocked trout needs power bait.
Trout that measures over one-foot long cut insects and flies from their diet. These will not break or make the bite, but they can affect the type of trout you hook unto it.
Powerbait such as trout marshmallows or any dough bait substitute to imitate fish pellets is not a good choice for the native type of trout. Stocked trouts that grew in hatcheries and farms are being fed with fish pellets. Dough baits and power baits are created to imitate the fish pellets’ scent, texture, and size. However, if you wish to catch native trouts, they will be clueless about the glob of dough that floats in front of them.
Sometimes, you may get a bite because the trouts can be curious. However, native trouts are not conditioned to eat the pellets.
If you wish to catch bigger trouts like the brooks, browns, and steelhead, make sure to avoid the mayfly and fly. Trouts may sometimes occasionally eat small insects like flies, but they eat worms, smaller fishes, and shrimps most of the time.
Now, if you wish to imitate those trout meals when fishing, follow these tips:
Tips To Remember When Trout Fishing
Learn the Rules. Before heading out to fish for some trouts, the first important tip is to be aware of your location’s rules and regulations. There are certain rules and regulations when it comes to fishing. Some rules from one state or place may be different from the other. So, to be sure, always remember to check the rules.
Have Your Equipment Ready. If you have no fishing equipment yet available, you can look for some affordable fishing gear at fishing shops. However, fishing equipment’s logic is that the pricier the gear is, the durable, reliable, and high-quality. Of course, you also need to weigh if the price is reasonable or not.
Know the Perfect Location. It is important to determine the location you are going to fish to. You cannot just choose some random lake and expect to catch your desired number of fish. To save your time and effort, it is best always to double-check the best places to fish.
Check for Weather Updates. This goes hand in hand when choosing the perfect location. Checking the weather forecast can save you time, money, and energy.
Baiting Your Hook Properly. One of the most common mistakes of anglers is the way they hook their baits. Some think that everything is set once the bait is hooked. As a matter of fact, the right way to hook your bait is to let the bait follow the hook’s shape. So, you have to fill in the bait body with the shape of the hook. This is to make sure that the fish never gets away.
Those who have a messy strategy of baiting their hook will unavoidably confront the more getting away from trout, alongside lost bait.
The ideal approach to hook is to ensure that the hook goes the entire body of the bait so the trout cannot swim away after detaching the untethered, floating bits of bait.
You can consider these little things that would permit you to meet with more prominent success as you set up a trout fishing rig and fishing line.
Common Lures For Trout Fishing
To lure the trouts into your baits, you must put a type of food they use to eat. If you are going trout fishing, be sure to have at least one of these lures:
Cranks
Crankbaits may not be every angler’s first choice when trout fishing. However, big trouts will hit crankbaits, especially those who are 1/3 or ½ of their size.
Trout has sharp teeth, and they don’t have any problem eating whole portions of big baits. They can tear it into pieces and swallow it.
Critters
Critters like beetles, grasshoppers, bugs, and crickets fall into the streams and rivers with trouts all the time. As such, trouts used to see these critters and eat them. If you try drowning grasshoppers or imitators in the current, surely the trouts will go after it.
Powerbait
Dough bait can be called power bait by any trout angler. If there are trouts anywhere in the area, you can have a few power bait colors to ball up, put into a hook, and give a go.
Salmon Eggs
Trouts are known as notorious scavengers—the raid on spawning beds of fishes to feed their eggs.
You can cut one belly open, put it into a size six hook, and trouts will feed on it.
Spinners
Rooster tails and spinners are some of the best lures for trouts all over the world. You can change it easily in and out on a swivel and get bit by trouts anywhere in the lake. Their flapping blades can be added to a river current.
Spoons
Flashy spoons and those tipped with feathers and wax worms are an effective lure for trouts throughout the year.
They live in colder weather when the bite slows down. Their flashiness entices into a bite and annoys the trouts.
Swimbaits
Bigger trouts love to eat smaller baitfish. One of the best techniques you can try is eating baitfish, paddle tail, a swimbait to disrupt the column.
Tubes
The tubes imitate zooplankton that fishes eat under the sea. They can be instrumental when trout fishing, so always keep them at your tackle box.
Worm Imitators
One of the most basic trout-catching lures is the worms. Live worms can get bit by every fish under the sea.
Some downsized and soft plastic worms can be a great option, too, for the trout. Make sure to choose bright color worms so trout can detect it underwater, even in rivers and lakes.
Important Notes
Always remember to enjoy your trout adventure. Some days will be bad, and other days will be amazingly worth it. Also, trout fishing is a matter of discovering your inner happiness. You are challenged in different ways that, sometimes, most of these tips will not save you from that scenario.Nonetheless, continue to learn and develop your skills when it comes to fishing. It is only a matter of dedication and passion to which one can truly bask in the glory of catching these aquatic species. I hope that these tips may work for you well, as it has worked for me.Keep in mind that knowledge and strategy go inseparably, and to appreciate more achievement, you should practice perfecting both!
The cold gripped my face, the only part of my body that was not insulated on this bitter December day in Western Kentucky. Hunting with Ironman Outdoors, a Christian men’s ministry, eight of us were scattered on different farms in hopes of getting a late-season muzzleloader buck in our sights.
This was my second hunt with the CVA Accura MR-X in .45 caliber, and I was anxious to test its merits on a quality buck.
The review will continue below but if you’re interested in purchasing the CVA Accura we are placing links for 3 options at a great price at the top for convenience.
Where to buy:
Bass Pro – CVA Accura MR-X Cerakote Sniper, no Sight – 209 Primer Ignition for $799
Scheel’s – CVA Accura MR-X 50 Caliber Muzzleloader With Sights for $579
As the morning progressed, the cold night faded into a colder day. When the sun rose, it pushed the colder air down, and that settled in my bones, making the day feel more like 2˚F weather. Sitting there, considering my sanity for hunting in such conditions, I noticed a slight movement to my right angling across the ridge. I was sitting on top, overlooking a steep drainage that had seen several does meander through earlier that morning. It was just past 9 a.m. The glint from the sun reflected off the long main beams of a buck moving a mere 18 yards to my right. Slowly moving my head to spot the big eight- pointer, I immediately knew that I wanted to try to take this buck.
My .45 Caliber CVA Accura MR-X was loaded with 77 grains by weight of Blackhorn .209 black powder substitute and a 285-grain Powerbelt ELR bullet. The buck stopped and looked in the direction of a doe feeding in front of me at 20 yards. He didn’t like what he saw and spooked, running away from me across the ridge. As he ran through the woods, I quickly shifted in the stand and got ready. He stopped behind a blown-down tree, quartering away, thus providing me a great view of his vitals. Cocking the hammer on the Accura, I settled the Vortex optics crosshairs on his shoulder and eased on the 1.8 lb. trigger. At the sound, the buck fell. As the smoke faded, I could see his antlers sticking up above the forest floor and I knew I had my buck.
In the world of muzzle loading rifles, one name stands above the rest when it comes to innovation, accuracy, and performance. With several models to choose from, I believe CVA is leading the pack in break-action inline muzzleloaders. In the CVA lineup, no other rifle is as accurate as the CVA Accura, in my view.
Accura MR-X, Sniper Gray.
The new Accura LRX and MRX are available in the traditional .50 caliber and also in the super performing .45 caliber. Tailored towards those who like to push the limits of long-range shooting, the LRX comes with a longer Nitride covered stainless steel fluted 30-inch barrel to help shooters achieve optimum performance at extreme long range. The MRX is standard with its 26-inch fluted stainless steel Bergara barrel. The LRX and MRX are identical except for barrel length. Both the LRX and the MRX come standard with a full synthetic stock that is noticeably absent of the traditional ramrod seen on most break-action muzzleloaders.
Tony Smotherman, CVA influencer relations manager and muzzle loading expert, says, “Removing the ramrod enabled us to get a full, free-floating barrel which allows us to get more accuracy out of this rifle.” To accommodate the missing ramrod on the barrel, CVA has a rifle and caliber-specific carbon fiber collapsible ramrod that arrives with each rifle. The collapsible ramrod is stored in a pouch that most hunters carry on their backpacks for quick follow-up shots when needed. But honestly, with the accurate performance of the CVA Accura MR-X, follow-up shots are seldom necessary.
After I unpacked my Accura when it arrived at my home, I did what I normally do—break out my Wheeler Engineering trigger scale and test the trigger right out of the box. The Wheeler Engineering trigger scale allows me to take averages. Placing the scale on the trigger, I pulled it 10 consecutive times and took an average. To my amazement, the factory trigger averaged
1.8 lbs. of force to fire. A second 10-shot average showed
1.7 lbs. and a third test averaged 1.8 lbs. To say I was impressed is an understatement. As a gun writer and avid shooter, the first thing I normally do on a new rifle is adjust the trigger to get the pull at a shade under 2 lbs. There was no need for this with the CVA Accura.
The next noticeable difference between this rifle and the Accura of old is the adjustable comb, or cheekpiece. A one-screw adjustment on the comb allows for the stock to be adjusted to fit the shooter and bigger optics.
Today’s shooters want bigger and bigger optics on their rifles. The standard 44 mm objective is not dimin- utive compared to many who have 50 and even 56 mm objective lenses on their rifles. To accommodate this, scopes are being mounted on taller bases and rings, which in turn cause shooters to lift their heads off the stock to see the target. The CVA Accura fixed this issue with the adjustable comb on its LRX and MRX Accura rifles.
Game-Changer Projectiles
“Making an accurate rifle is one thing, but if you don’t have good projectiles to send down the pipe, you will never achieve optimum performance,” CVA’s Smotherman says. To fix this, CVA’s sister company, Powerbelt, developed the ELR line of projectiles for their muzzleloading rifles. Available in .50, .45 and even .40 caliber, the ELR is changing the game for long-range shooting and performance in the muzzleloading world.
The Accura in .45 caliber has a 1/12 twist. These Bergara barrels send the .285 grain bullets down the tube at an astonishing 2069 per second with an astonishing 2661 ft. lbs. of energy at 100 yards.
CVA Accura with a SC buck.
While testing the .45 caliber CVA Accura MR-X at the Talladega Marksman course, I was able to consistently hit steel targets out to 600 yards with a .45 caliber muzzleloader! From my perspective, and coming in at under $700, no other muzzleloader in its price point on the market is as accurate as the CVA Accura.
To learn more about all the guns CVA offers, go to Accura Rifles – CVA




 As shown in the graph above, a coyote can see two primary colors: yellow and blue. This is common vision for deer, hogs, and other dichromate vision mammals as well, so it doesn’t just apply to coyote hunting lights. This is also one reason why it is best to not wear blue jeans when going deer hunting or coyote hunting as they tend to stick out like a sore thumb. If they are covered by a high rack or deer blind, of course then they are an ok option.While coyotes don’t have the greatest color vision, another weakness is that they are not able to see as far as most humans can. Humans (some cases require glasses or contacts) can see 20/20 vision. Coyotes vision is closer to 20/70 vision and some may have even worse vision. This basically means a coyote can see at 20 feet what a human can see at 70 feet. The one vision strength coyotes have over humans is their peripheral vision. This is what can make it very hard to sneak up on a coyote. A human has 180 degree peripheral vision while coyotes have 260 degree peripheral vision. This is due to the shape of their head and location of their eyes. This is ultimately why coyote hunters should stay as still as possible, because any small bit of movement can be detected fairly easily if a coyote is in range. Here’s more information about the science behind a coyote’s vision and how to determine what color coyote hunting light works best for night hunting.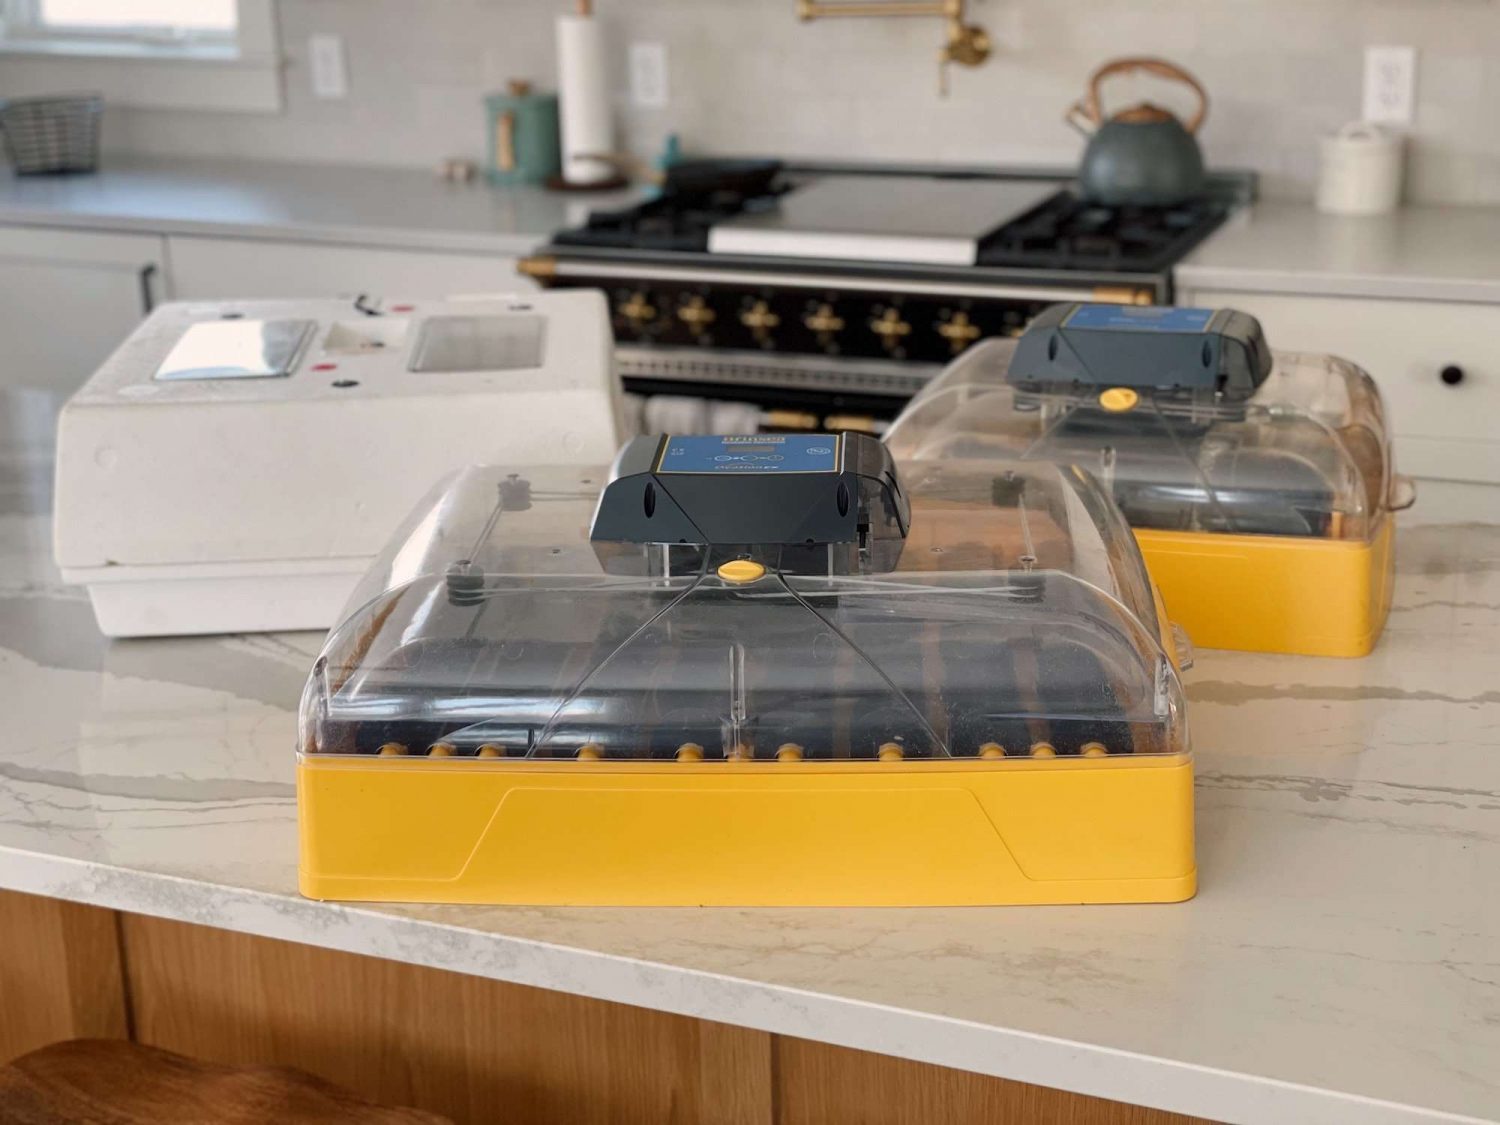
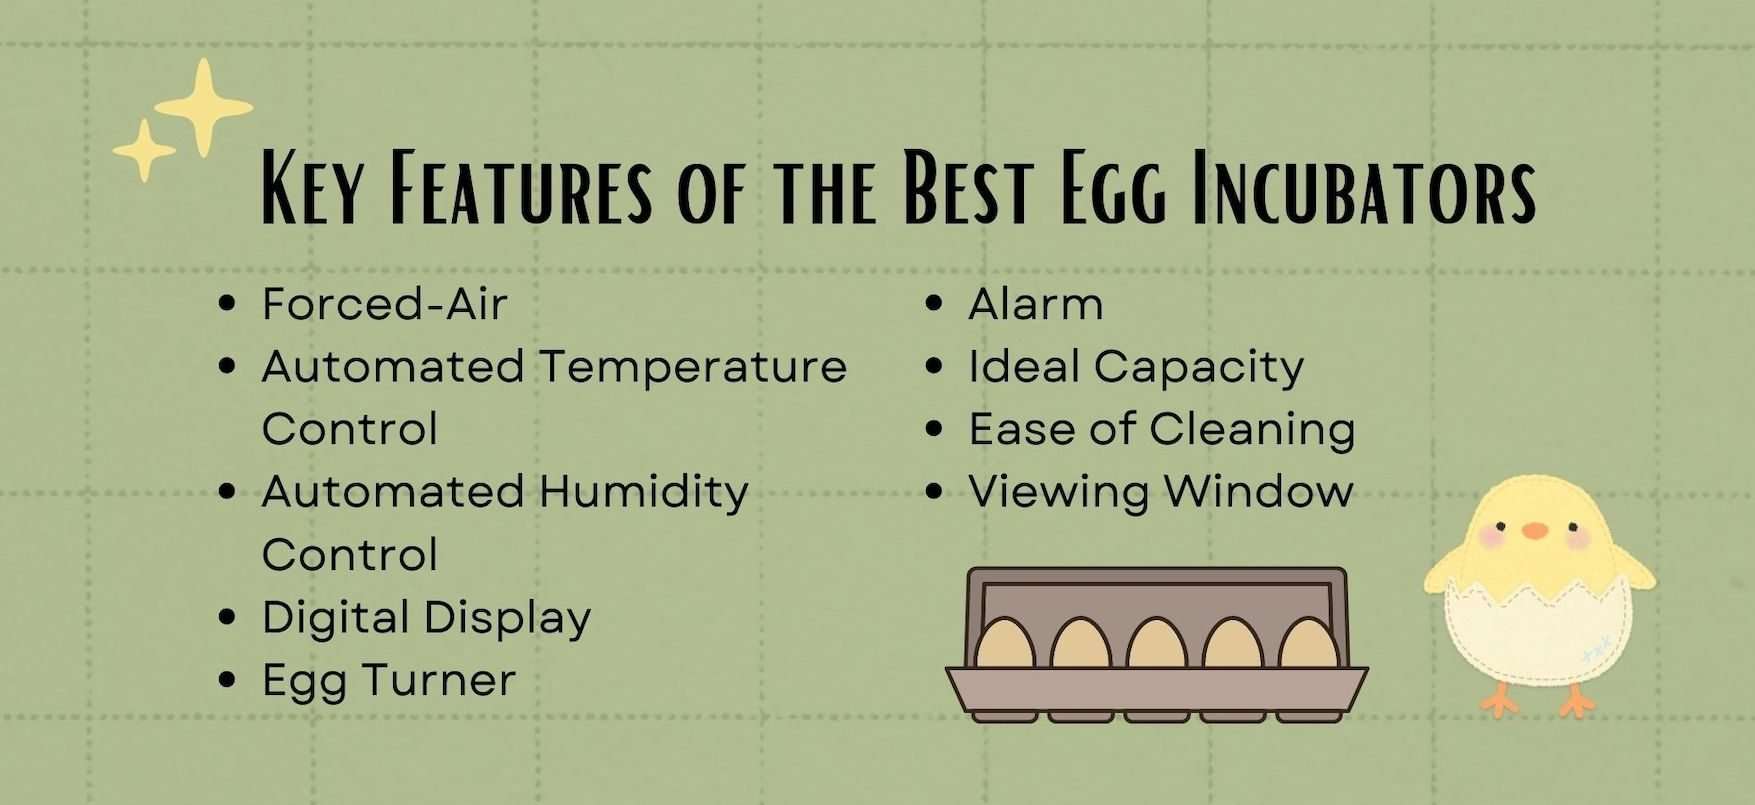
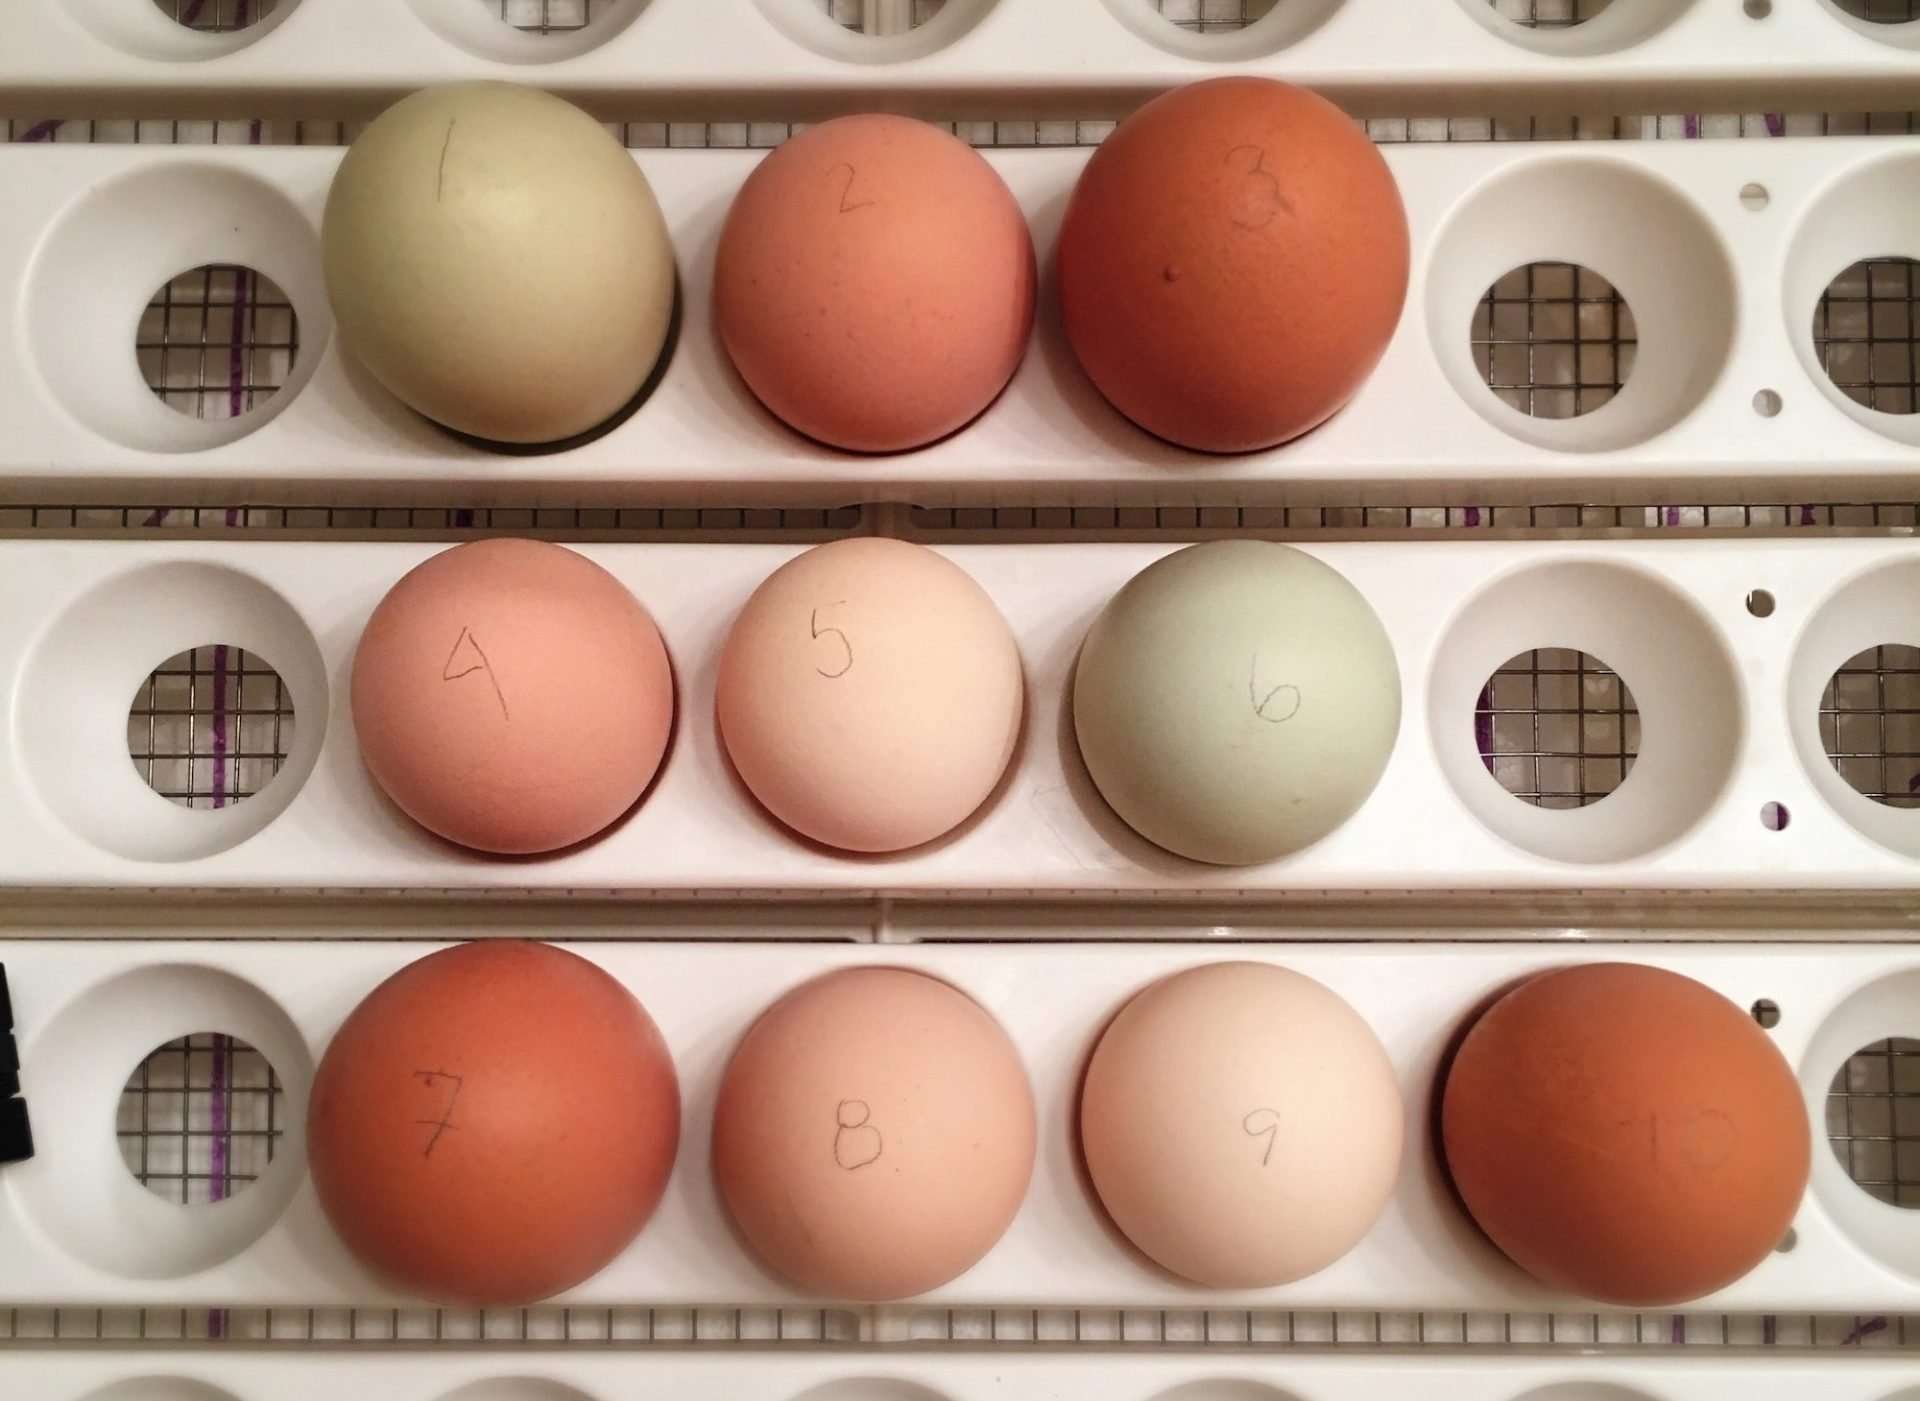
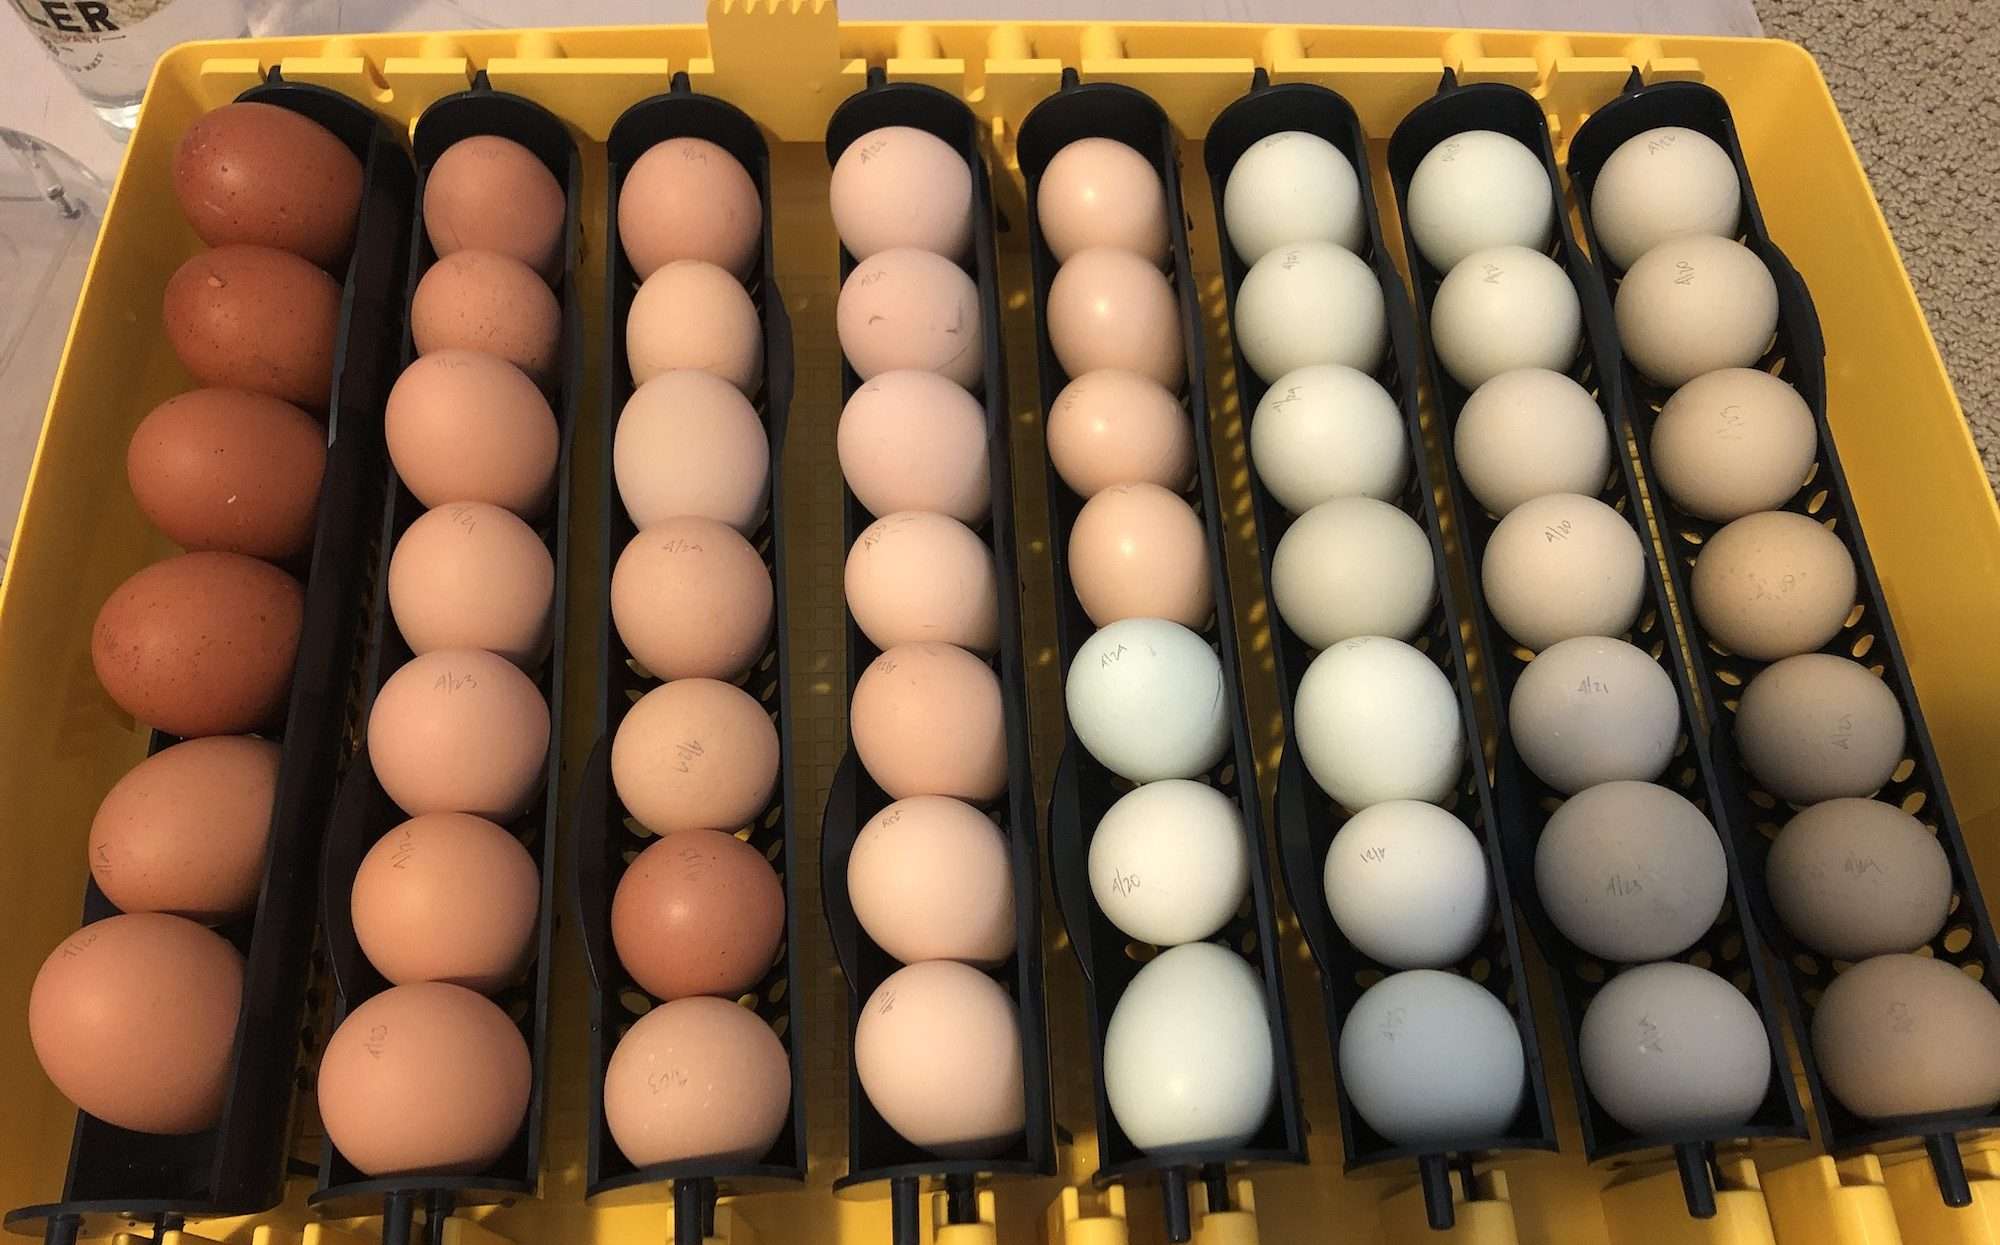
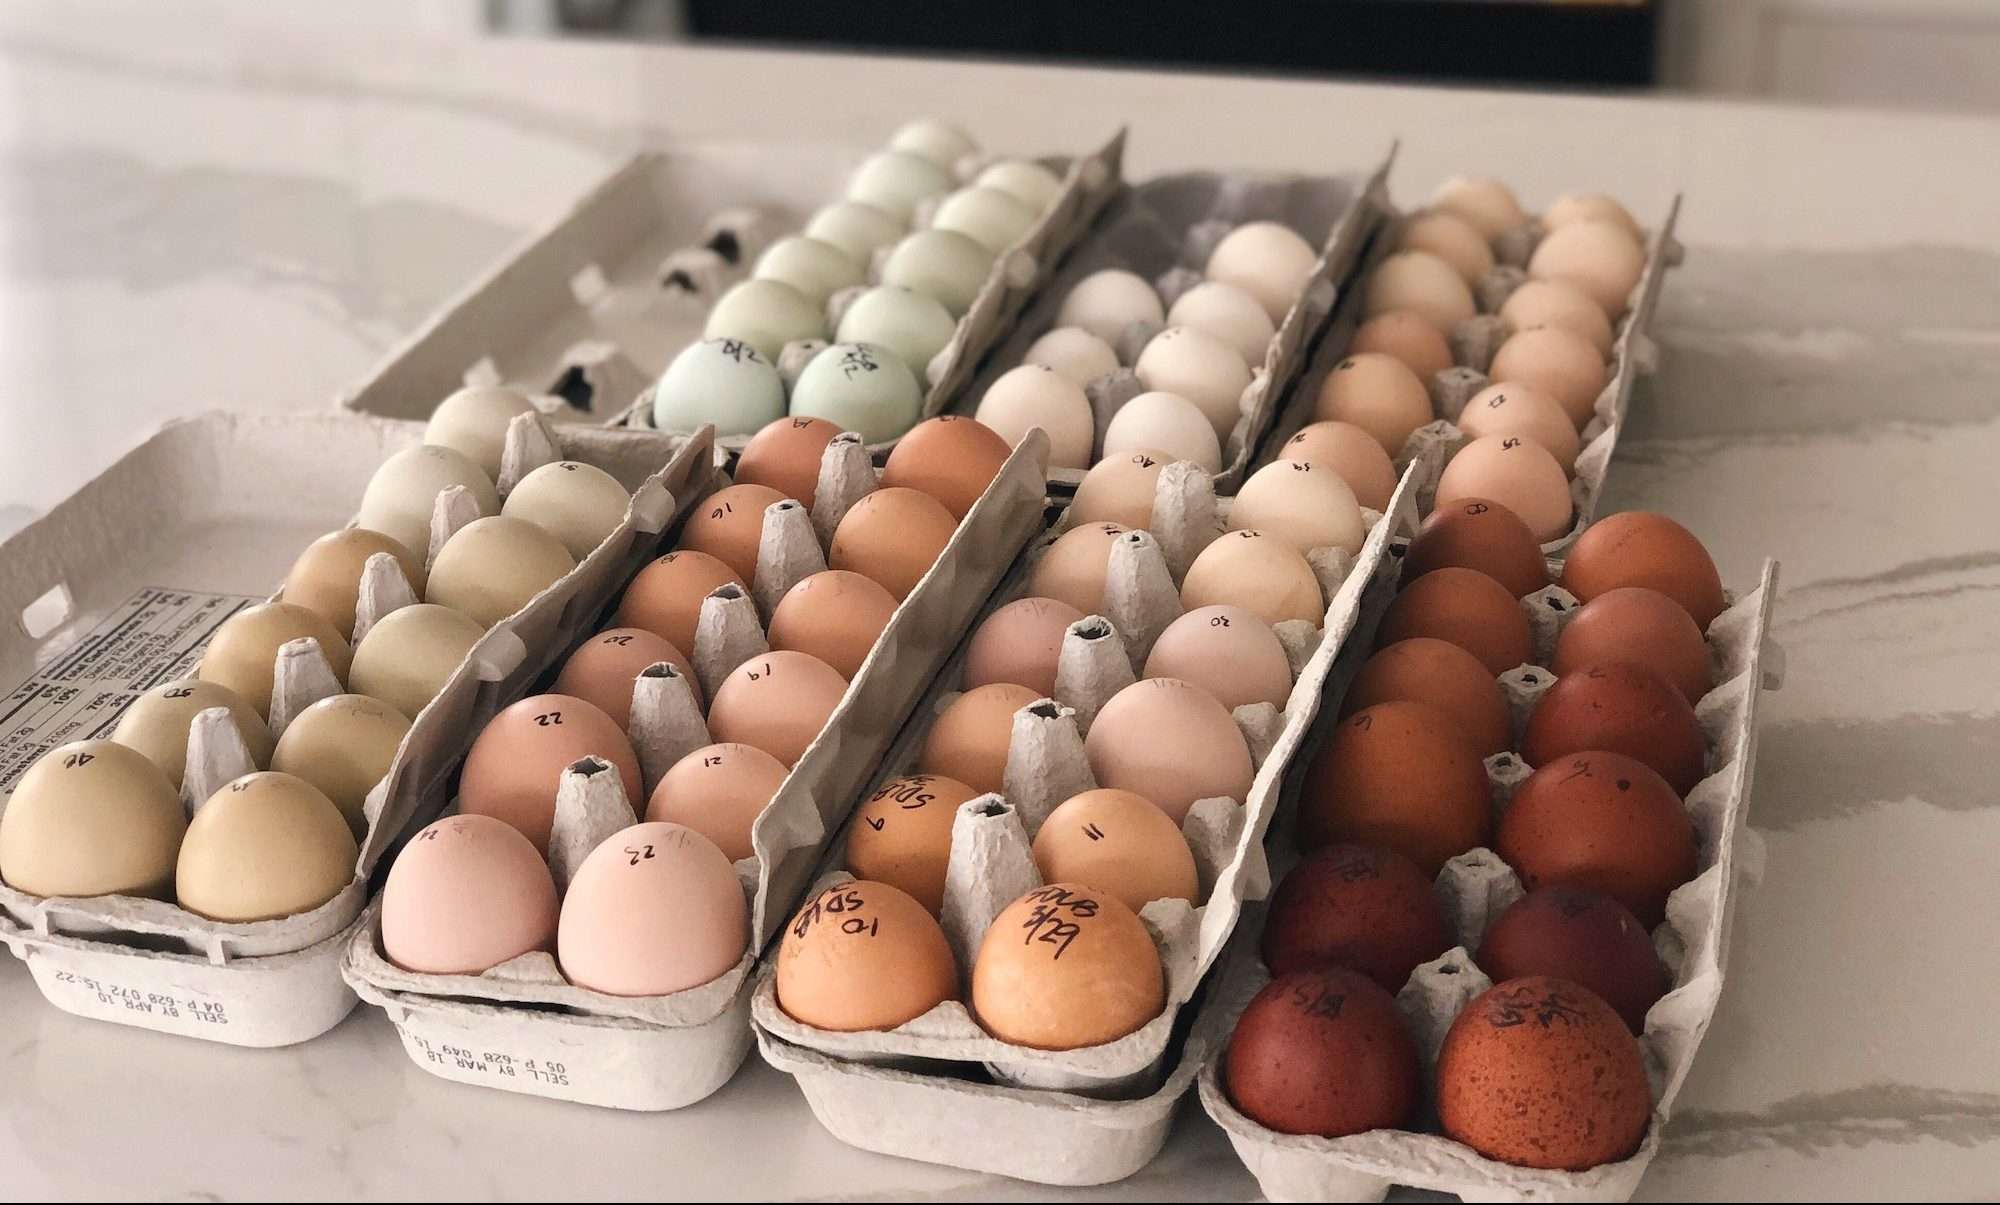
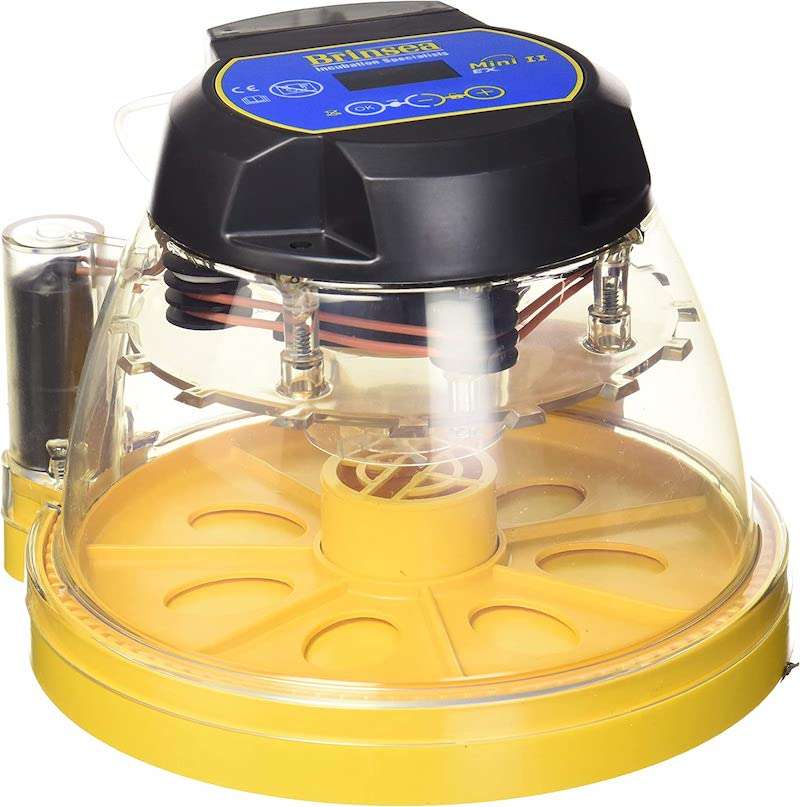
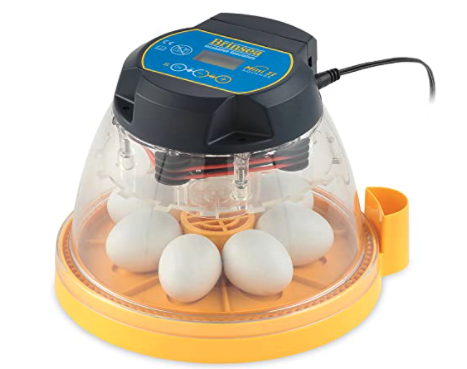
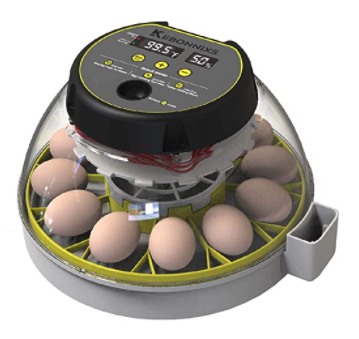
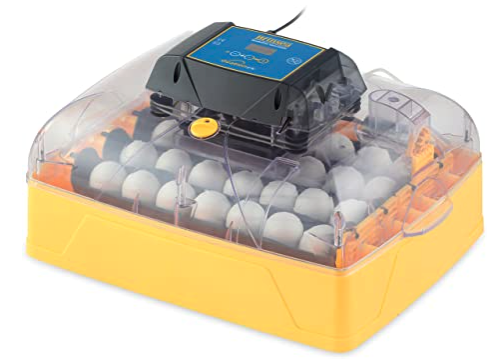
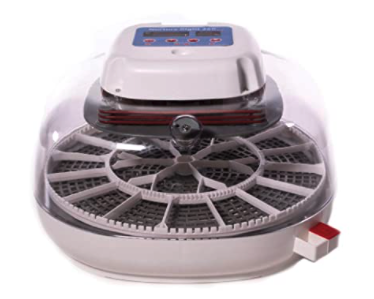
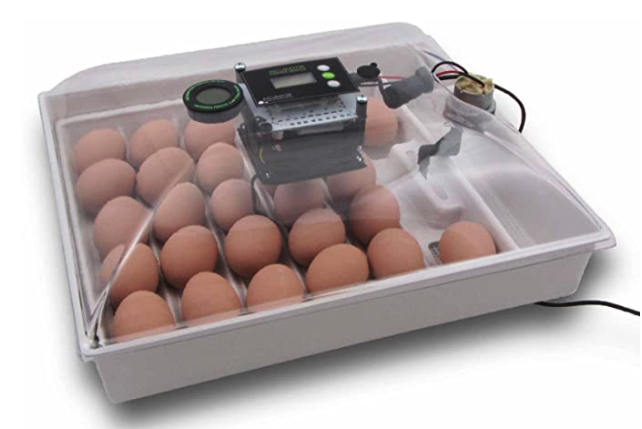
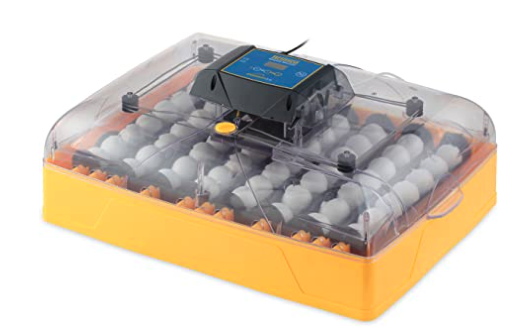
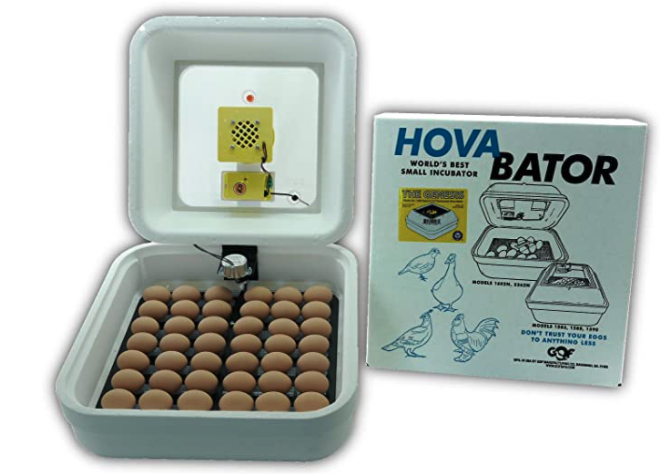
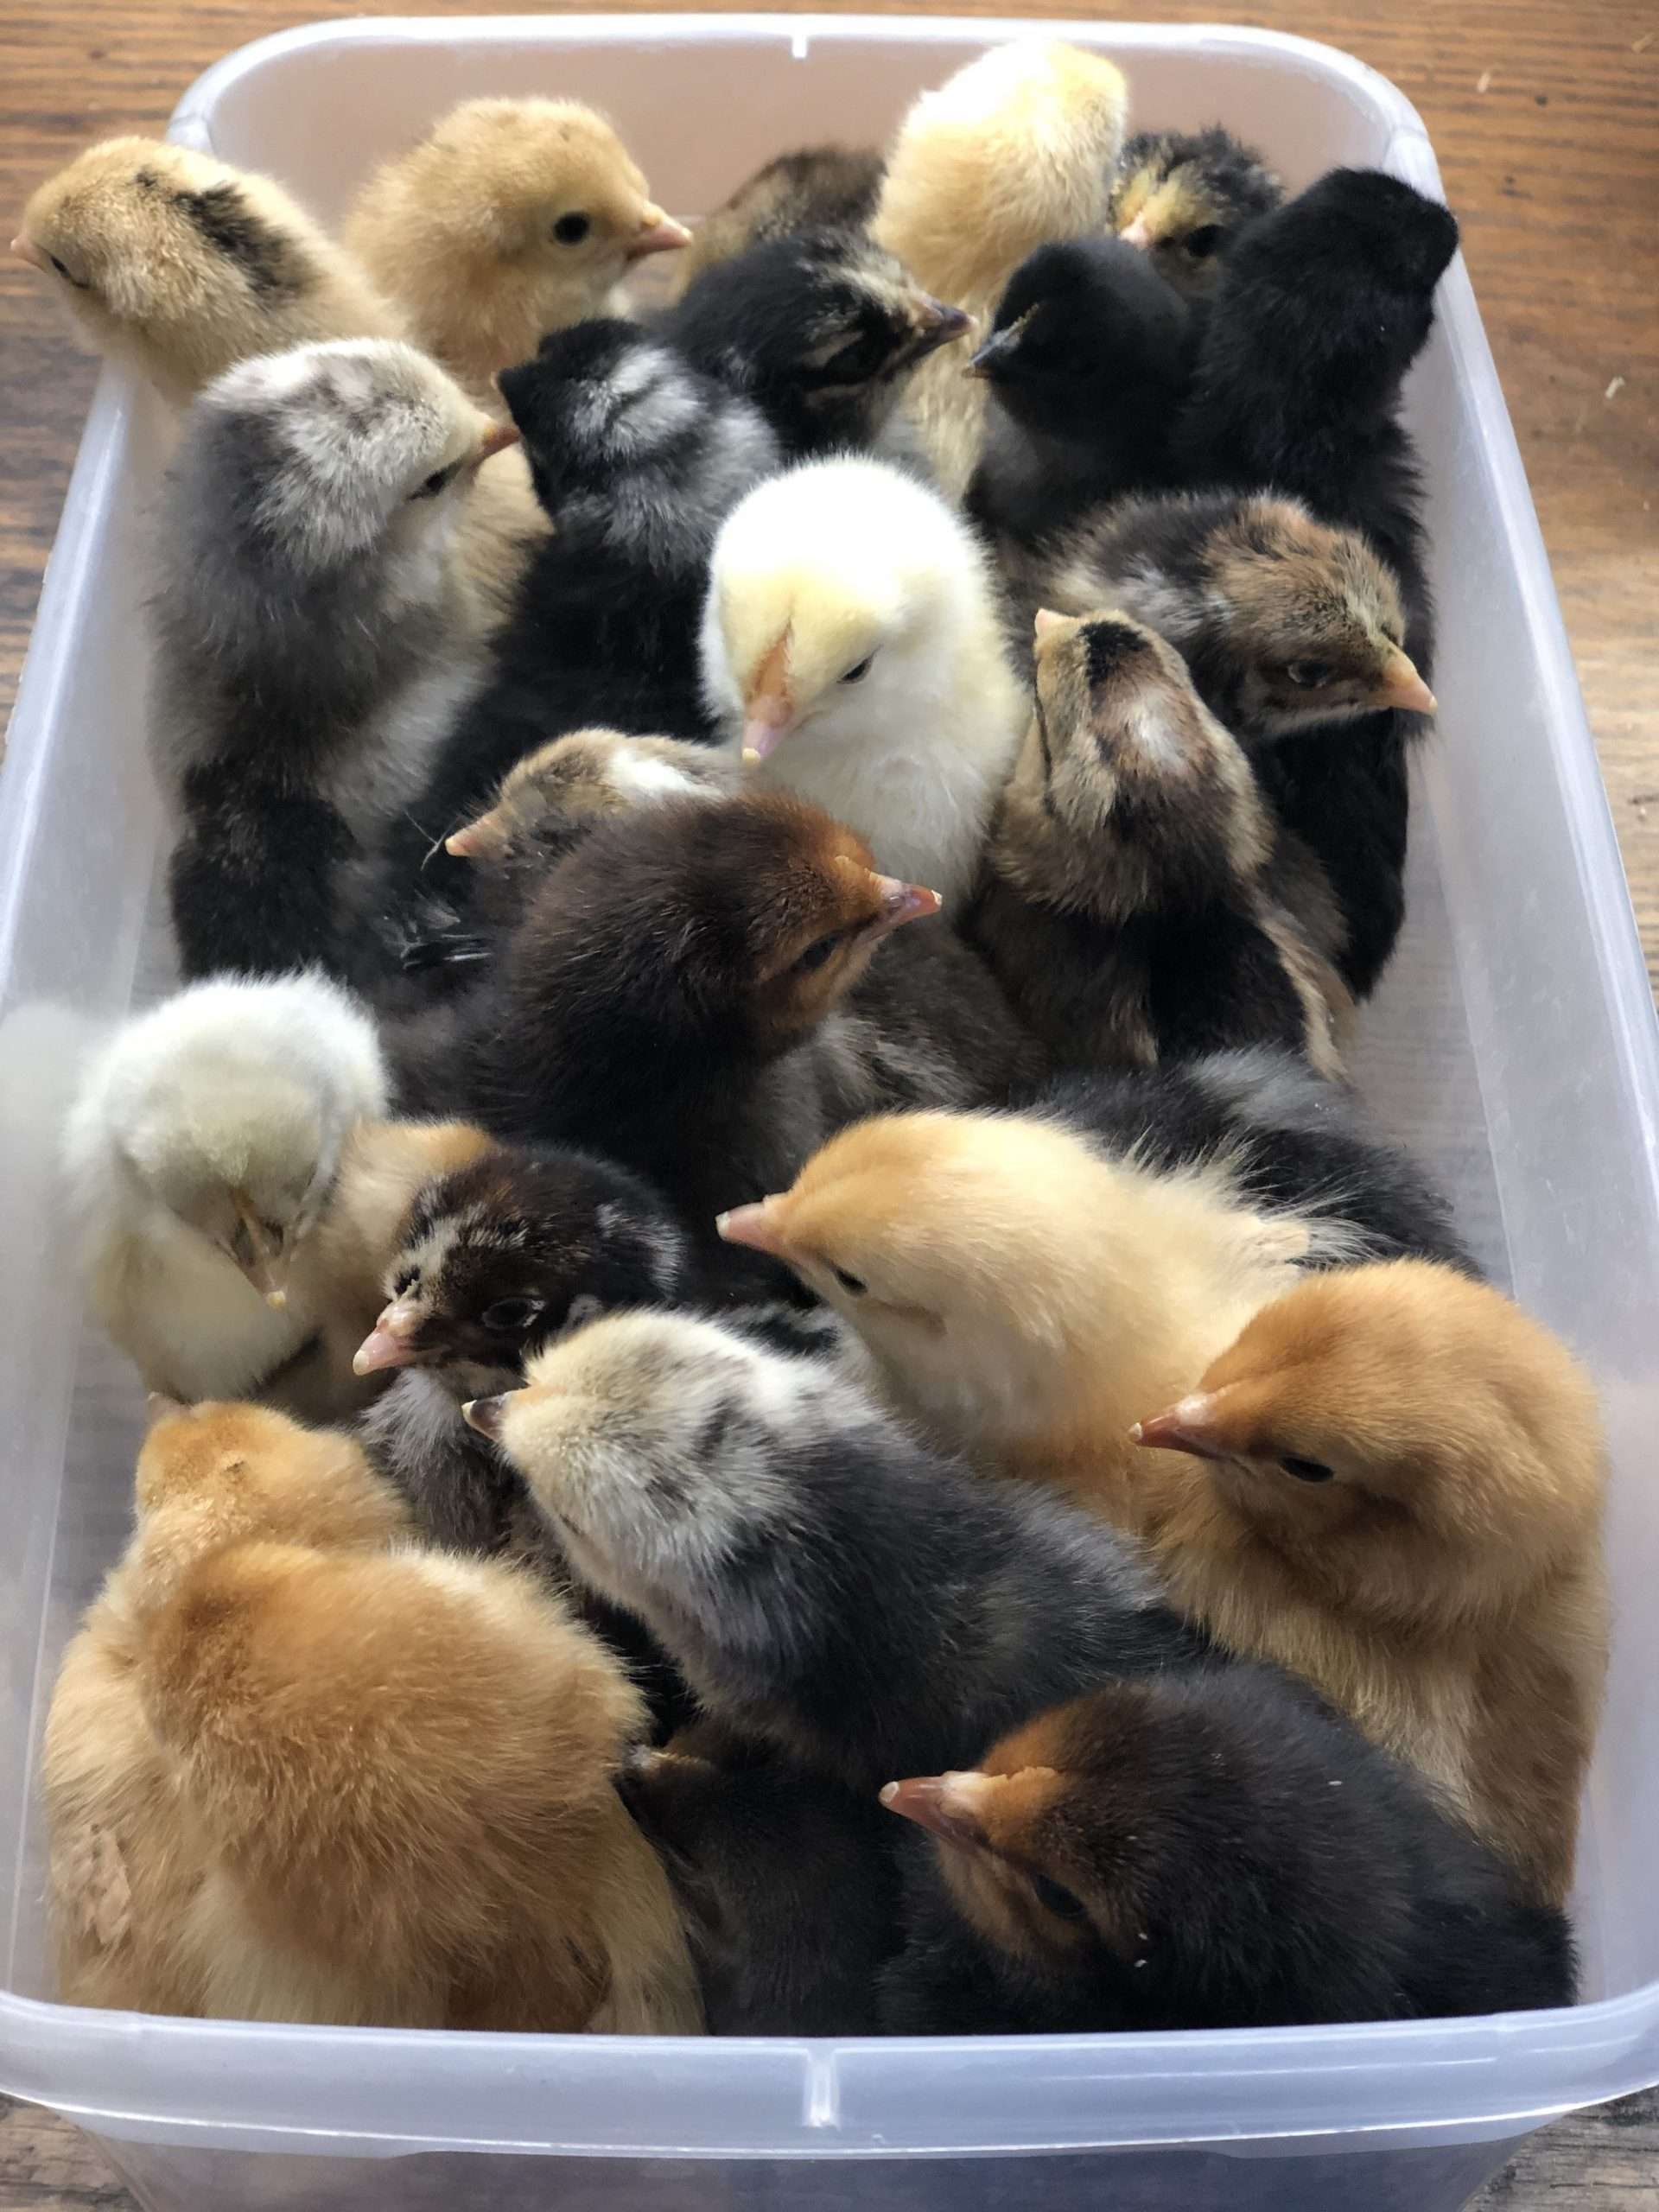


 Pin
Pin