")
")
")
")
")


A story is told of three Native American hunters.
Two are smart, the other somewhat ignorant.
On the first day of the hunting season, one of the smart ones sets out to hunt.
He comes back home with a dead deer.
The ignorant one asks, “How’d you do it?”
The one Indian replies, “I simply followed the deer tracks, shot the deer, and here it is.”
On Day 2, the other smart one goes hunting and comes home with a dead bear.
The ignorant one inquires once more, “How’d you do it?”
The smart one answers, “I followed the bear tracks, shot the bear, and here it is.”

Lastly, it is his own turn to go hunting.
After several hours without the ignorant Indian showing up home again, his two friends embark on a search.
They find him wounded and on the verge of death.
“What happened?” They ask in shock.
“Well, … I followed the… elephant tracks, shot… the elephant several times, bu- but it kept coming…”
And you can easily guess why the elephant was not perturbed.
Fighting such a monster with a small-caliber airgun is quite risky, if not insane.
Table of Contents
- So, what is caliber?
- .177 caliber
- .20 Caliber
- .22 Caliber
- .25 caliber
- Other calibers
- Frequently Asked Questions
- 1. What is the biggest caliber air rifle?
- 2. How many FPS does it take to kill a squirrel?
- 3. What caliber air gun is best for hunting?
- 9. What is the difference between a .177 caliber air gun and a .22 gun?
- 10. Which is better – .22 or .177 air rifle?
- 11. Can a .177 pellet kill a deer?
- 12. How loud is a .22 rifle?
- 16. What caliber air gun should I use for a survival weapon?
- 19. What is the most powerful air gun caliber?
- 20. How lethal is a .22 caliber air gun?
- Key Takeaways
So, what is caliber?
In a simple definition, caliber refers to the internal diameter or bore of a gun barrel.
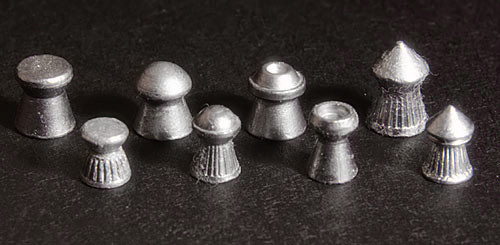
And it follows that the ammo used must snuggly fit inside the barrel.
Therefore, caliber also applies to the external diameter of pellets and BBs.
Having said that, the most popular caliber in the airgun world are .177, .20, .22, and .25.
FYI, the figures above are given in inches.
Simple conversion to metric units will help you visualize the size of ammo we are talking about.
| Caliber (Inches) | Caliber (mm) |
| .177 | 4.5 |
| .20 | 5 |
| .22 | 5.6 |
| .25 | 6.35 |
And so, let us delve deeper into each of these calibers.
.177 caliber
I bet the .177 is the most popular caliber among hunters and shooters alike.
Perhaps people like it for its budget-friendly nature.
Or maybe for the availability in almost every airgun store.
Others definitely love it since they will spend less on pellets and BBs for the rest of the airgun’s lifespan.
And even if the prices for a typical tin of .22 and .177 ammo are the same, be sure you will have more .177 pellets.
The .177 caliber is most popular with target shooters.
It also finds great use in small-game hunting.
You won’t go wrong with muzzle velocity while using the .177 caliber.
Most .177 caliber airguns boast muzzle velocities of more than 1,000 fps.
Others even exceed the speed of sound, which is roughly 1,100 fps.
(For more on the best .177 air rifles in 2021, see this post)
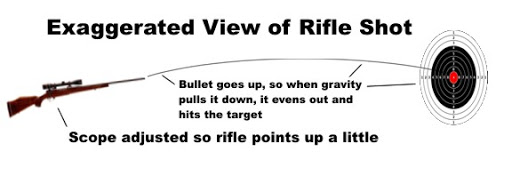
This has the advantage of yielding a perfectly straight trajectory from the airgun to the target.
At least it saves you the burden of figuring out how much under or over you should aim the airgun so as to take care of the curved trajectory.

One downside you may experience with the .177 ammo is air resistance.
You see, most .177 ammo weighs between 7.0 and 20.0 grains.
If it is windy at the time you are shooting, there is a high likelihood that the pellets will be swayed by the wind, which leads to you missing the target.
When it comes to shooting, the .177 caliber should purely be reserved for small games like rats, rabbits, squirrels, geese, quails, cranes, swans, etc.
The reason for this is the relatively low punching power, or rather muzzle energy, associated with the .177 ammo.
Recall this formula:
Muzzle Energy in FPE = [(Velocity in fps)2 X Pellet Weight] / 450,240
From the above, it follows that the heavier the pellet, the greater the muzzle energy, which is in essence the killing power.
And as previously stated, .177 pellets only go to a maximum of 20 grains.
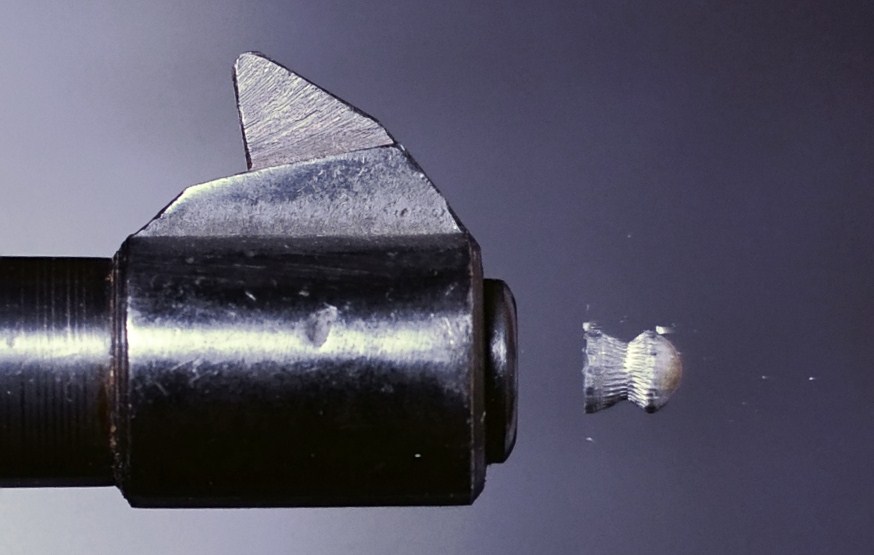
More so, .177 pellets have the tendency of penetrating the flesh of the prey from one end to the other without necessarily killing it .
That brings us to our next caliber, the .20.
.20 Caliber
Not so popular! Perhaps you don’t even know it exists.
And that’s it – it simply didn’t gain ground in many parts of the world.
As such, you have a limited number of air rifles made in this caliber.
Likewise, the choice of .20 pellets is somewhat limited.
Nevertheless, if you land your hands on one, you have all the reasons to boast.
You have something more powerful than the .177 but cheaper than the .22 and .25.
You can also expect the accuracy and range to be better than that of the .25 air rifles.
(Groundhog vs. Woodchuck: What’s the Difference? Find out here)
.22 Caliber
For almost 75 years before the 1950s, the .22 caliber was the most popular pellet in America.
On the contrary, most Europeans used the .177 caliber during this period.
And so the strong influence of the .177 rolled over to the US. But old will always be gold.
First and foremost, many hunters prefer the .22 for hunting.
This is for the basic reason just outlined above – killing power. .22 pellets are obviously heavier than the .177 pellets.
Plugging the larger pellet weight into the muzzle energy formula yields a bigger value.
.22 Pellets weigh between 12 and 30 grains.
And that is exactly what you need for hunting.
Remember no prey will freely accept being shot.
They will normally fight to the last of their strength.
Be humane and kill them with one blow of the ammo, rather than wound it several times as it scampers for dear life.
(For more on the best .22 air rifles in 2020, see this post)
What you will need to note with the .22 caliber is the reduced muzzle velocity.
While the .177 can easily achieve speeds of up to 1200 fps, the .22 can manage an average of 850 fps.
Again, the range for the .22 is obviously reduced compared to the .177 caliber.
(Do Raccoons Eat Cats? See this post for more)
.25 caliber
On to the .25 caliber.
For multiple decades, this was the largest caliber for air rifles.
With pellet weight ranging from 19.91 to 43 grains, you can be sure the impact at the target is increased with such air rifles.
But get this straight – an air rifle made for the .177 pellets may not be powerful enough to drive .25 pellets, even if the barrel is changed.
The need for a more powerful firing mechanism tells you the .25 airguns come with increased costs.
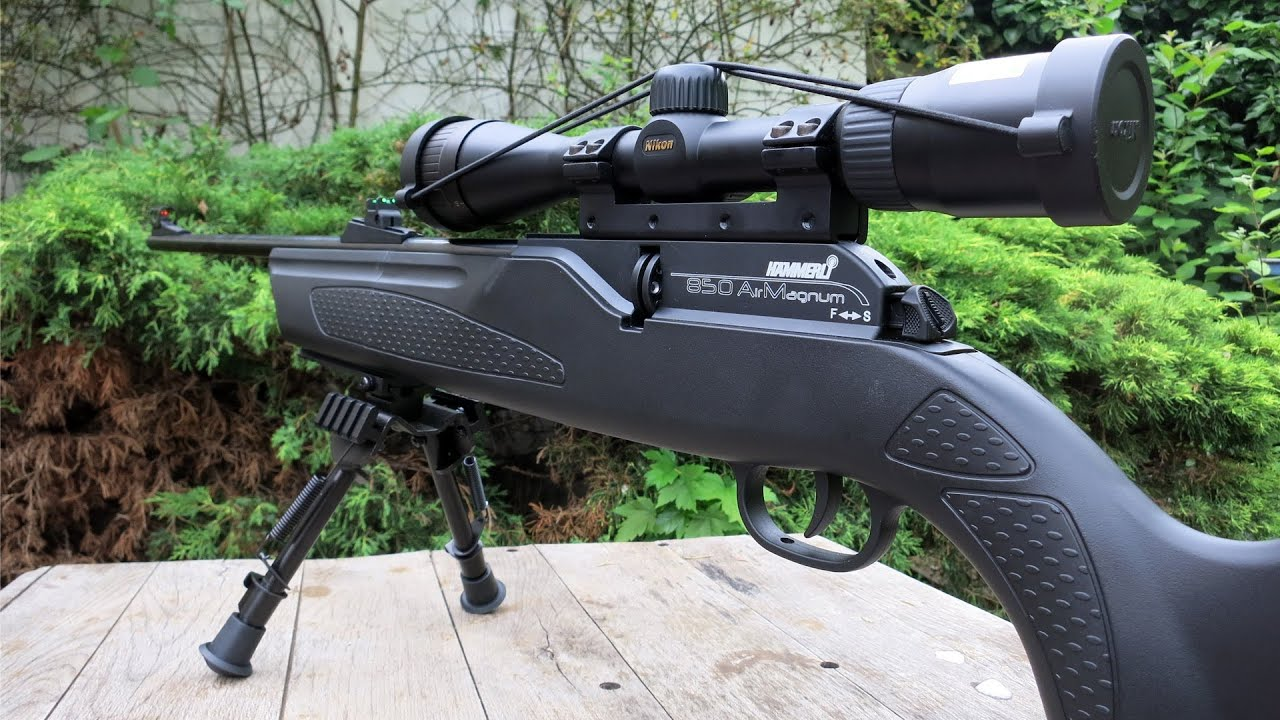
For instance, the popular Hammerli 850 AirMagnum, one of the most powerful CO2 air rifles on the market, comes only in the .177 and .22 models. (see this post for more)
So, can the CO2 power plant fire a .25?
Read on to the last section to find out.
Most .25 air rifles use either PCP, Spring, Nitro Piston, or Gas Piston firing mechanisms.
Additionally, .25 air rifles use up quite an amount of air to fire a single shot.
Take the example of the Air Arms S510 XS Xtra FAC Regulated air rifle.
The .177 model yields 60 shots per fill while the .25 model offers only 35 shots per fill.
So if you have the .25 for your hunting session, consider investing in the less tiresome scuba tank for refilling the air cylinders rather than a hand pump.
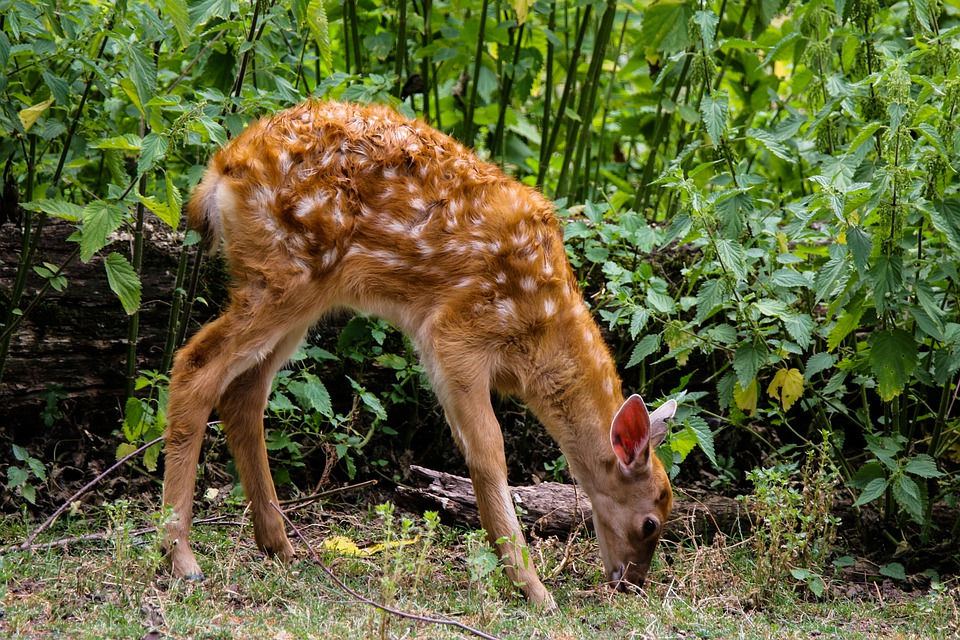
The .25 is your go-to air rifle if you are after medium-sized games such as deers, foxes, bobcats, coyotes, and pronghorns.
(Does Walmart Sell Hunting Licenses? – see this post for more)
For large games, the .25 may at times not be impactful enough to ethically kill the animal.
And that is the very reason for the existence of larger calibers, as we shall see below.
Other calibers
You’ve no doubt heard of big-bore air rifles.
Below are the calibers associated with these air rifles:
- .257
- .30
- .357
- .45
- .50
As airguns increased in popularity, manufacturers saw the need to produce air rifles that would humanely kill animals such as bison, buffalo, grizzly bear, polar bear, elk, moose, muskox, and cougar.
With the big bores, you expect unmatched punching power.
For instance, the Seneca Dragon Claw of .50 caliber yields 230 FPE.
Deadly indeed. The .357 model of the Airforce Texan Big Bore air rifle yields 300 ft/lbs
While the .50 model of the same air rifle yields 700 ft/lbs.
(For more on the best .50 air rifles, see this post)
These are of course PCPs – the technology that added incredible power to air rifles.
(Deer, Elk, Moose: What’s the Difference? See this post for more)
Frequently Asked Questions
1. What is the biggest caliber air rifle?
The biggest caliber air rifle produced is the .50.
One of the most popular big-bore air rifles is the Airforce Texan Big Bore Air Rifle (with .257, .30, .357, .45, and .50 models).
Other equally popular big-bore air guns include:
i) Seneca Dragon Claw – .50 caliber (see its review in this post)
ii) Benjamin Bulldog – .357 caliber
iii) Hatsan Hercules Bully – .45 caliber
iv) Umarex Hammer – .50 caliber
v) Winchester Model 70 – .45 caliber
2. How many FPS does it take to kill a squirrel?
I would say anything between 300 and 1200 FPS.
It’s quite a large range but there is a reason for that.
First of all, FPS alone is not a good measure of the killing power of a pellet or air rifle.
The punching power is better evaluated using the muzzle energy.
Here is the Muzzle Energy Formula again:
Muzzle Energy in FPE = [(Velocity in fps)2 X Pellet Weight] / 450,240
We can rightly deduce that the higher the FPS, the higher the killing power.
But don’t forget the pellet weight. .177 pellets are much lighter than .25 pellets.
While a .177 air rifle will yield higher muzzle velocity in fps, the muzzle energy will be way less than that of the .25 air rifle.
In this sense, a .25 air rifle with say 500 fps may have the same killing power as a .177 air rifle with 1100 fps.
In this regard, consider the following conventional muzzle energies required for different animals.
| Game | Minimum acceptable caliber | Minimum energy (FPE) |
| Small birds | .177+ | 5 |
| Medium birds | .177+ | 7 |
| Large Birds | .22+ | 11 |
| Squirrel-sized prey | .22+ | 9 |
| Rabbit-sized prey | .22+ | 9 |
| Raccoon-sized prey | .25+ | 25 |
| Possum-sized prey | .25+ | 25 |
| Fox-sized prey | .30+ | 35 |
| Coyote-sized prey | .30+ | 50 |
| Javelina-sized prey | .357+ | 90 |
| Small deer | .357+ | 100 |
| Medium deer | .40+ | 150 |
| Large deer | .45+ | 200 |
| Hog | .45+ | 200 |
=> Want to get rid of squirrels in your garden fast? Read Garden Rescue: best air rifles for squirrels
3. What caliber air gun is best for hunting?
I’ll be forced to add another question – Hunting what?
Squirrel or Buffalo?
These two are evidently worlds apart in terms of size and toughness of the skin.
And therefore we cannot generalize matters and settle on one good caliber for hunting.
As a simple guide, consider the following:
- .177 for small rodents like rats, and birds like pigeons, quails
- .22 for small game like rabbits and squirrels
- .25 for medium-sized games like the bobcats
- .30 medium-sized game like deer, coyote, foxes
- .357 for javelina
- .457 for large deer
- .50 for buffalo, grizzly bear
9. What is the difference between a .177 caliber air gun and a .22 gun?
In a nutshell, see the following major differences between the .22 and .177:
| Categories | .22 | .177 |
| Power | More powerful | Less powerful |
| Accuracy | Same for both calibers, depending on the quality of the barrel | |
| Use | Mostly for hunting | Mostly for target shooting |
| Cost | More expensive pellets | Less expensive pellets |
10. Which is better – .22 or .177 air rifle?
Having established the facts, it boils down to personal preference.
I’m largely a hunter, and so my favorite is the .22
Are you likewise a small game hunter? Emulate me.
But if your specialty is target shooting, go no further than the .177.
For more on the differences between .177 & .22 and which jobs they do best, see this post.
11. Can a .177 pellet kill a deer?
It sure can, but that is definitely not the route to take when it comes to the choice of an air rifle.
One hunter friend of mine shot a deer with his .177 Airforce Condor, which boasts a muzzle energy of about 40 FPE.
Note that this was straight into the head and at a close range of about 40 yards.
If by chance the shot had slightly missed the targeted spot, the deer would have probably fled, having been badly wounded.
Infections would later have led to its death, and that’s as sad as it sounds.
So, DON’T use the .177 for deer hunting.
Other unethical hunters suggest paralyzing the deer with the .177 through a well-placed shot on the back then strangling it using other means.
Why burden yourself with all this when there are better options?
Be smart and go for big-bore air rifles built for the job.
12. How loud is a .22 rifle?
Straight Shooters conducted loudness tests with a number of air rifles at different distances and came up with the following results:
| Zero meters | 9 meters | 23 meters | 46 meters | ||
| Air Rifles | Caliber | Decibels | Decibels | Decibels | Decibels |
| R7/HW3OS | .177 | 88 | 76 | 68 | 64 |
| RWS 34 | .22 | 90 | 80 | 71 | 69 |
| R11/HW98 | .177 | 90 | 83 | 71 | 66 |
| HW97 | .177 | 90 | 82 | 72 | 65 |
| Kodiak/Patriot | .25 | 91 | 82 | 80 | 70 |
| TX200 | .177 | 91 | 84 | 73 | 67 |
| R1/HW80 | .20 | 91 | 82 | 73 | 69 |
| RX-1/RX-2 | .177 | 91 | 82 | 72 | 68 |
| R9/HW95 | .177 | 91 | 83 | 71 | 68 |
| Kodiak/Patriot | .22 | 92 | 85 | 77 | 74 |
| R1 | .177 | 92 | 83 | 71 | 68 |
| RWS 48 | .22 | 93 | 83 | 74 | 68 |
| Pro Elite | .177 | 94 | 83 | 76 | 69 |
| RX-1/RX-2 | .20 | 94 | 84 | 74 | 69 |
Maybe this does not ring a bell in your ears as to how loud 140 dB is.
Let’s list a number of scenarios and the typical levels of sound produced.
| Noise | Average decibels (dB) |
| Leaves rustling, soft music, whisper, watch ticking | 30 |
| Average home noise, Quiet rural area | 40 |
| Quiet suburban area or nearby dishwasher | 50 |
| Normal conversation, background music | 60 |
| Office noise, inside a car at 60 mph | 70 |
| Vacuum cleaner, the average radio | 75 |
| Heavy traffic, window air conditioner, noisy restaurant, power lawnmower | 80-89 |
| Subway, shouted conversation | 90-95 |
| Boom box, ATV, motorcycle | 96-100 |
| School dance | 101-105 |
| Chainsaw, leaf blower, snowmobile | 106-115 |
| Night club with a band playing | 110 |
| Sports crowd, rock concert, loud symphony | 120-129 |
| Stock car races | 130 |
| Siren at 100 feet | 140 |
We can now place the average loudness of air rifles next to that of shouted conversation.
To put it better, all the above air rifles tested can be classified as medium-quiet airguns.
Any airgun producing more than 100 dB is considered loud.
But still, the 100 dB produced by air rifles is not as loud compared to that from other sources given that it is not sustained over some period of time.
It is always instantaneous, lasting just a couple of seconds.
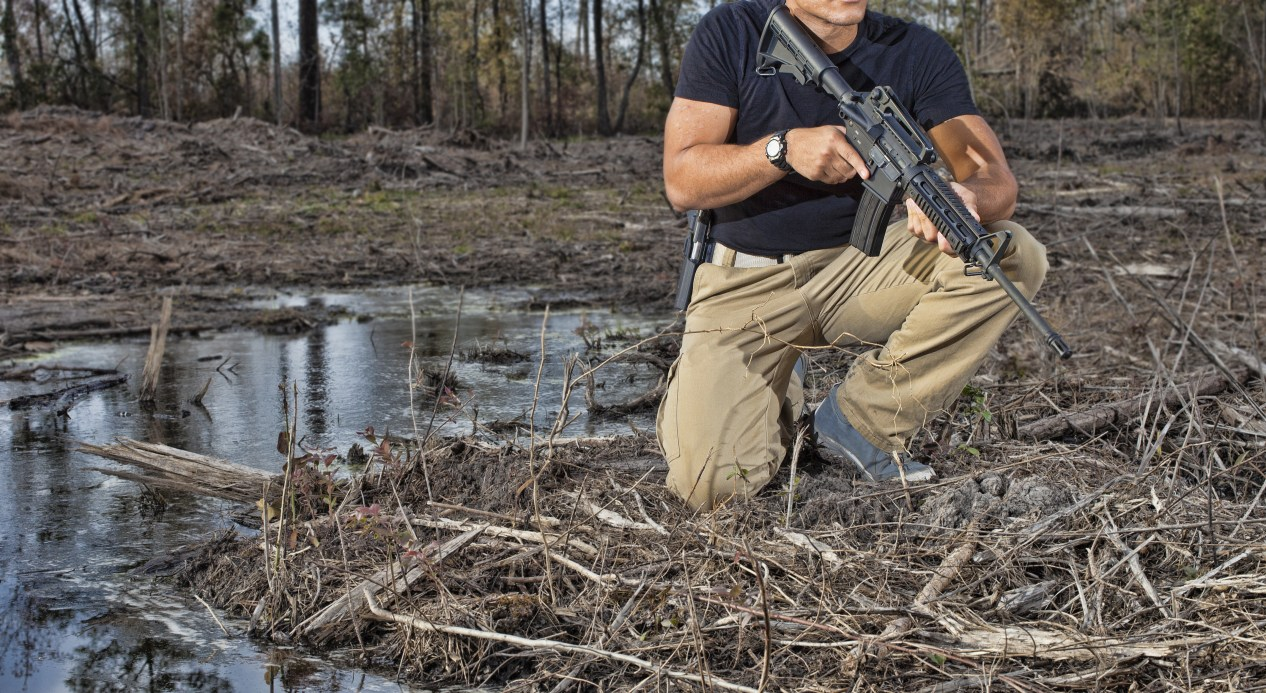
16. What caliber air gun should I use for a survival weapon?
I have personally not fallen into serious survival situations.
Perhaps a word from an expert in the same will do us good.
Creek of Willow Haven Outdoor upholds the .22 caliber air rifle as an excellent inclusion in his survival kit.
And the reasons are as follows:
- .22 air rifles are excellent for small game hunting, which is very necessary for eliminating hunger during such situations
- .22 ammo is very cheap. You can purchase a tin of 500 pellets for less than 40 bucks.
- That can last you months if you’re economical with your ammo.
- .22 air rifles are effectively silent to allow you to hunt for survival without drawing uncalled-for attention.
- .22 air rifles are available in the multi-pump and break-barrel models, which need air for operation, and the air is always there, free for all.
19. What is the most powerful air gun caliber?
The most lethal of all is the .50 caliber.
Remember the 700 FPE attained with the .50 Airforce Texan Big Bore?
20. How lethal is a .22 caliber air gun?
Very lethal! Always remember: guns are not toys.
Always treat air rifles as lethal weapons and engage all the safety precautions required in handling them.
Key Takeaways
Taking all things into account, you certainly need to consider the caliber in your choice of an airgun.
First, know the use you intend for the air rifle.
If it is target shooting, settle with the .177.
For small critters within your yard, a .177 will equally do you good.
For small-game hunting, advance to the .22, which assures you of a clean kill.
For raccoon-sized prey and above, go for the .25 caliber air rifles.
The big-bore air rifles may be quite powerful for most of your hunting needs unless your purpose is hunting big games like buffaloes, bears, and the like.
Even so, the caliber should not be considered in isolation.
Doing that would be like looking at the waist only when choosing a dress.
Who does that? There are a lot of other considerations to make like the color of the dress, material, style, quality of the dye, sleeve length, height above or below the knees, etc.
Likewise, for air rifles, consider aspects such as loudness, barrel length, weight, stock type, powering mechanism, shots per fill, included accessories, and the brand.