Spring is in the air here in Maine. Spring chic’s, piglets and turkeys are starting to be come available at local farm supply stores. I thought I would check in with Harris Turkey Farm to see what it takes to raise my own turkeys. Here’s what they had to say.
We buy our turkey poults at one day old. If you are looking to raise a few of your own turkeys here are a few things to keep in mind to grow a healthy flock.
You should buy poults from a flock that has been tested free of diseases. Ask if the hatchery or farm has been NPIP tested. This voluntary program helps ensure the flock is free of 2 types of Salmonella infections.
Keep them babies warm!!! We can’t stress this enough, the first week of life they need to be 95 degrees. If they are too cold, they will pile up together and suffocate. If you are using a heat lamp, make sure it is secure. Many house, barn, garage, and shed fires happen every year from heat lamps that are not secured properly. As they grow, you can decrease the heat by 5 degrees each week. Remember to check the temperature at their level.
Provide 24 hour access to food and water, and have enough space to all eat at once. If there isn’t enough space, the less aggressive birds will eat smaller amounts and not grow as well. Only use watering containers they CANNOT get into. Turkey poults don’t swim! If they get wet, they will be chilled and may die.
Not all food is created equal, turkeys need a high protein and energy food with balanced vitamins and minerals. As babies, do not feed them any food other than what is designed for them. No table scraps, no sunflower seeds, no scratch feed. You can supplement their diet when they get older. We use and recommend Blue Seal feeds.
When is the best time to get your poults? That depends on how big you want them. For Thanksgiving, we raise broad breasted whites for 13-15 weeks. The toms (males) will be 20 +/- pounds and the hens (females) will be around 13-16 pounds. If you want a larger turkey, plan to raise them for 16-18 weeks. A tom that is 22 weeks old, could be 40 pounds dressed at Thanksgiving!!! You had better plan for some left overs. Heritage breeds will take 5-6 months to reach 15 pounds.
The best dressed award goes to… You! You don’t have to process/butcher the birds yourself, but there aren’t too many places that offer turkey processing the week of Thanksgiving. We do not process turkeys for other people for biosecurity reasons, and our state licensing doesn’t allow us to do that.
Only allow poults to access the outdoors when they have primary and secondary feathers (usually 3 weeks.) Don’t kiss your poults, they can carry bacteria and viruses that don’t affect them, but can cause you to get sick. Be sure to wash your hands after handling them and filling their feeders and watering containers.
You need to provide 1-2 square feet/bird for young poults. As adults, if you choose to raise them in an enclosed building, they need 4-5 square feet per bird.
We are not veterinarians, but have plenty of experience. If you are unsure about something, send us an email and we will do our best to answer it or direct you to someone who can.
Which polymer-framed pistols have reigned supreme since the 1980s?
I don’t have to tell you; it’s Glock.
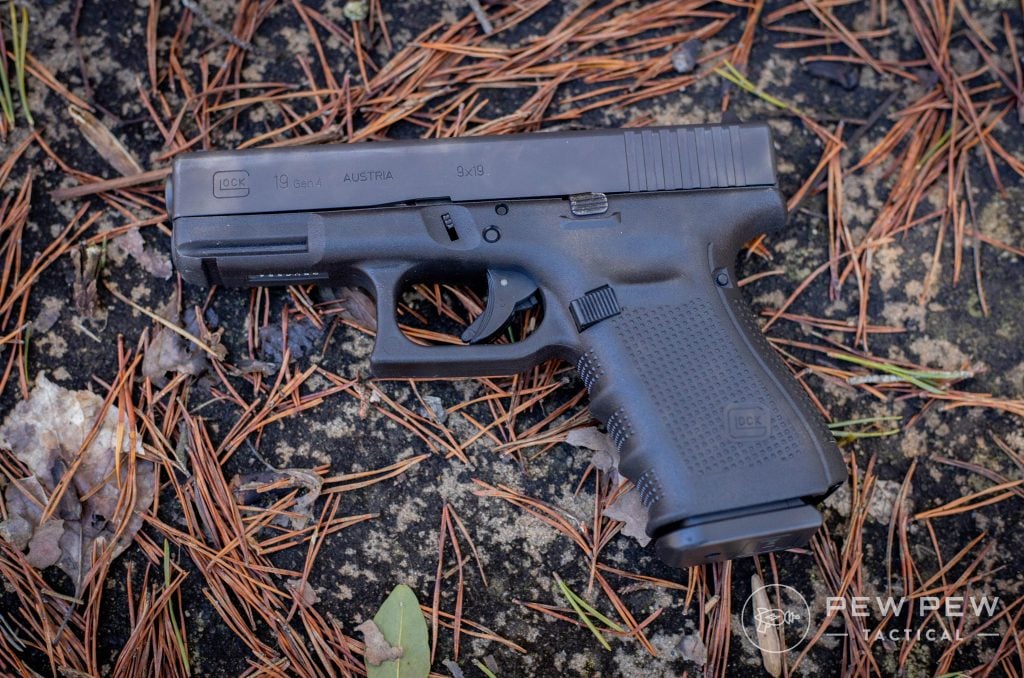
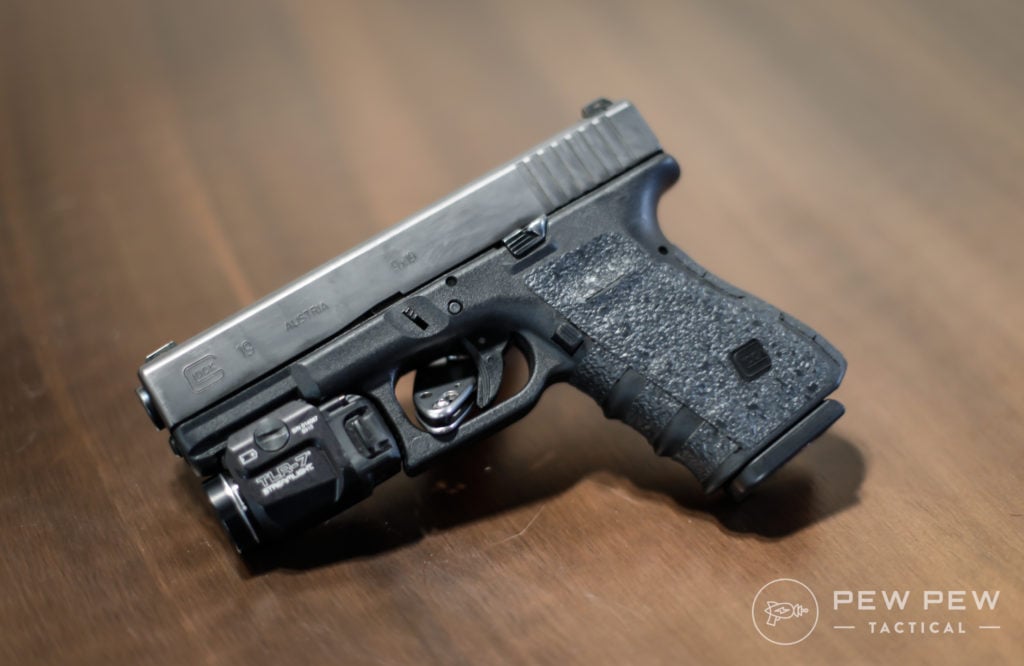
Glock G19 Gen 4
Over 60% of the American police force carry Glocks. SOCOM carries Glocks, and numerous international police and military forces all choose Glocks.
They are also extremely popular in the hands of concealed carriers, home defenders, and competition shooters.
But as Glocks grew in popularity, so did their aftermarket.
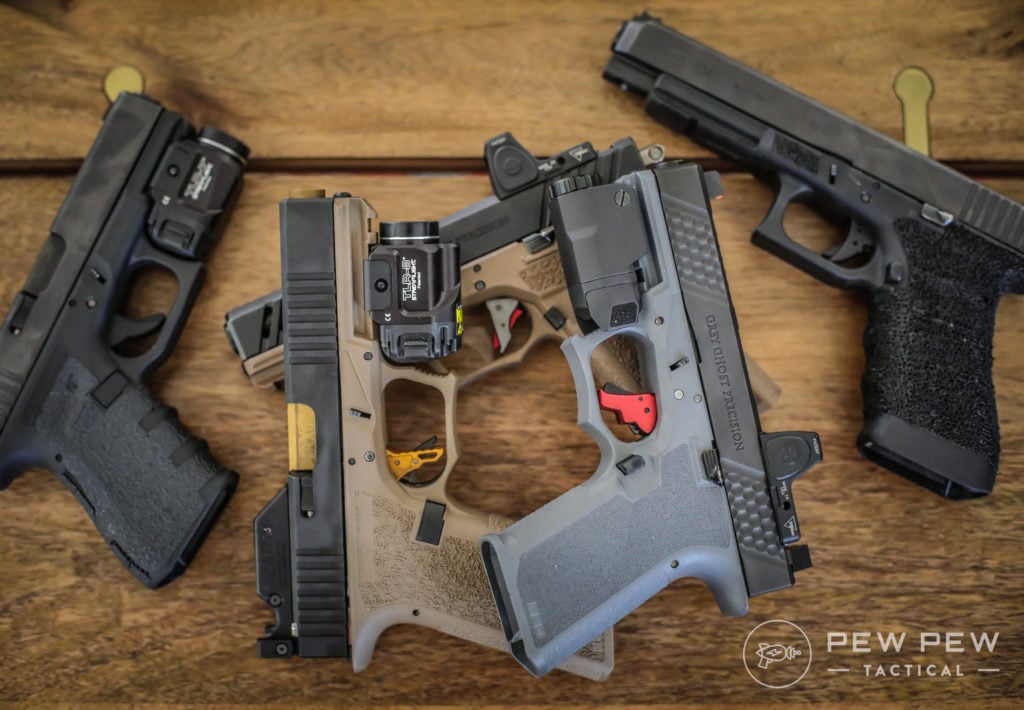
You can even build your own
Recently that same aftermarket has become so big and expansive that these same companies are now producing Glock clones.
Yep, the design has spread like wildfire, and Gaston’s plastic fantastics are no longer just made by Glock.
Gaston Glock — he doesn’t look too worried.
So, of course, we had to dive further into the clone phenomena.
We’ll run you through why you might want a Glock clone (or not) and also give you some recommendations on which ones are best if you’re in the mood to buy.
Keep reading to learn more.
THE QUICK LIST
Why a Glock Clone?
Glock clearly makes excellent pistols, so why would you ever want a clone?
Well, Glock is a behemoth of a company. And like behemoths, they are slow to move and adapt.
We saw the aftermarket continuously upgrade the Glock platform, pushing the design — from high-end race guns to perfected defensive firearms.
That Glock aftermarket is booming!
A Glock clone allows you to buy the Glock-style pistol with the features you want.
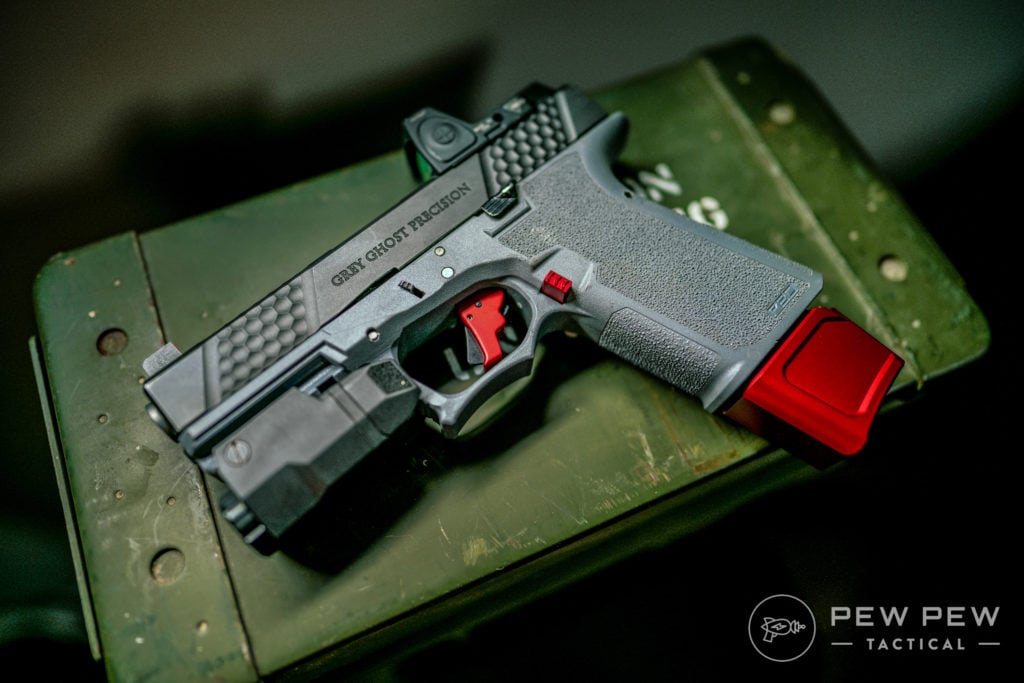
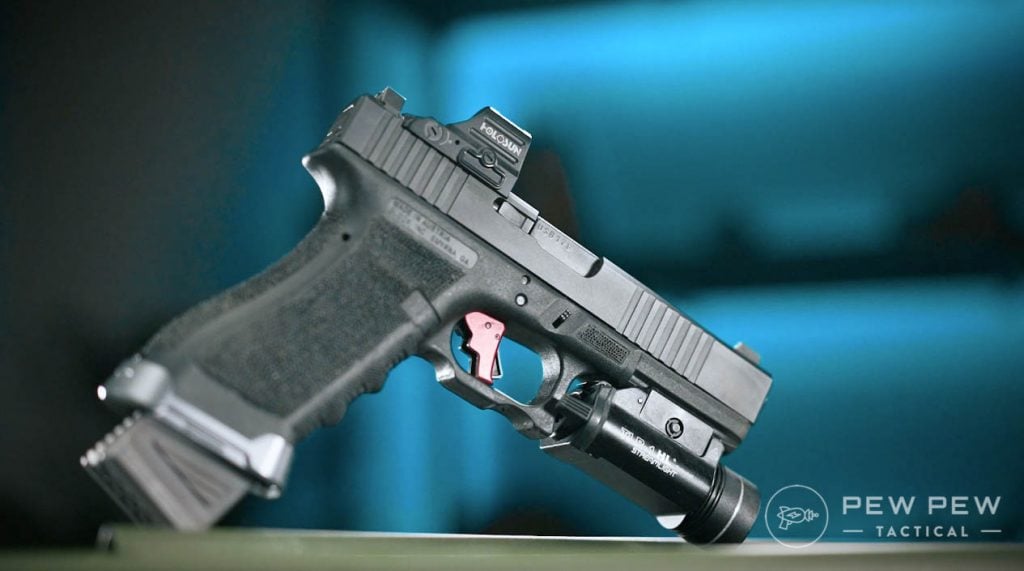
Instead of buying a Glock and then spending double the money to cut the slide for an optic, add suppressor height sights and a threaded barrel, drop in a nice trigger, tweak the magwell, etc., you can just…buy it the way you want.
Upgrade those triggers if you want!
Honestly, it’s cheaper to buy a fully customized Glock than to customize a stock Glock piece by piece.
When you start looking at clones, you’ll realize some people might not want a Glock but want the reliability, simplicity, and parts availability associated with the build.
As such, the Glock clone market gives you a not a Glock with Glock compatibility.
Clones allow for upgrades that Glock fans want that the company refuses to release.
A Glock Clone can give me a dedicated optic footprint not reliant on the less-than-stellar Glock MOS system.
Also, maybe you want a better grip angle, an undercut trigger guard, an enhanced beavertail, and the like…well, then a Glock clone is the only way to do that.
Cons
But nothing is without a downside, clones included. The biggest issue with a Glock clone is that it doesn’t have the factory support a standard Glock does.
If your OEM pistol breaks, Glock can easily fix the problem and ship it back.
This breaks? No prob, send it back to Glock.
With a clone, you’re at the mercy of smaller/boutique companies that can’t always match Glock’s lead times.
That and clones are often a generation or even two generations behind Glock OEM pistols.
This leads to Glock clones lacking the stock OEM features of the current Glock generation.
Best Glock Clones
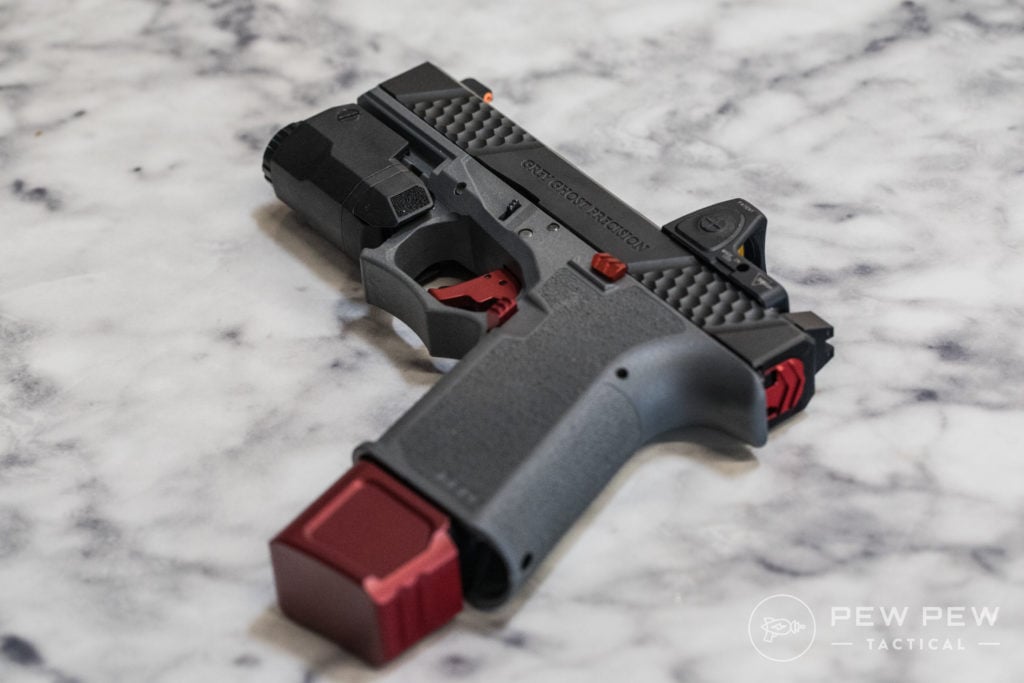
1. PSA Dagger
Palmetto State Armory entered the world of Glock clones in 2020 with the Dagger.
Essentially, it’s a Glock G19 Gen 3 but heavily modified and upgraded from the standard Glock format.
PSA Dagger
A compact build, it’s well-suited for both concealed carry and home defense.
The frame features a heavy-duty grip texture that’s beyond aggressive in its stippling, while the slide offers melted corners for more comfortable concealment.
It also sports front and rear slide serrations.
PSA improved the ergonomics of the Glock by including an undercut under the trigger guard, a more aggressive beavertail, and a massive magazine release.
They did all of this on a pistol they sell for a mere $300!
PSA’s Dagger provides an affordable Glock option full of features for a very low price point.
PSA Dagger with Glock extended mag
The biggest downside is that PSA seems continually sold out of these pistols – so it’s going to take some time before they are easy to find.
Want more info on the Dagger? Check out our full review.
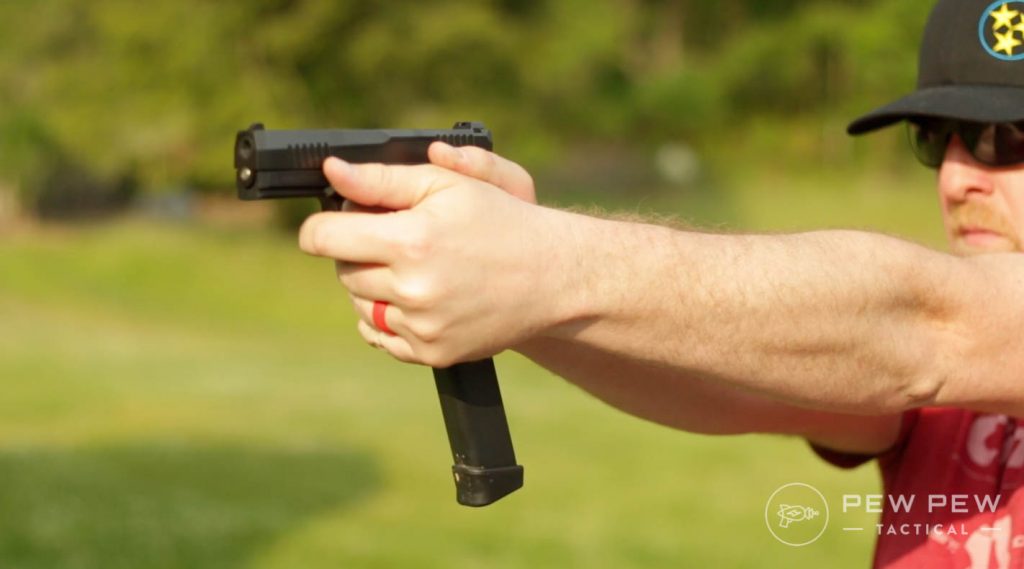
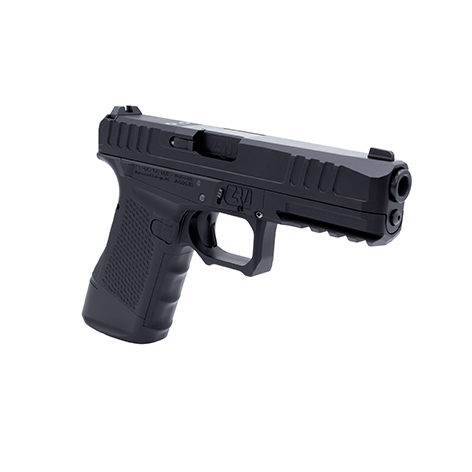
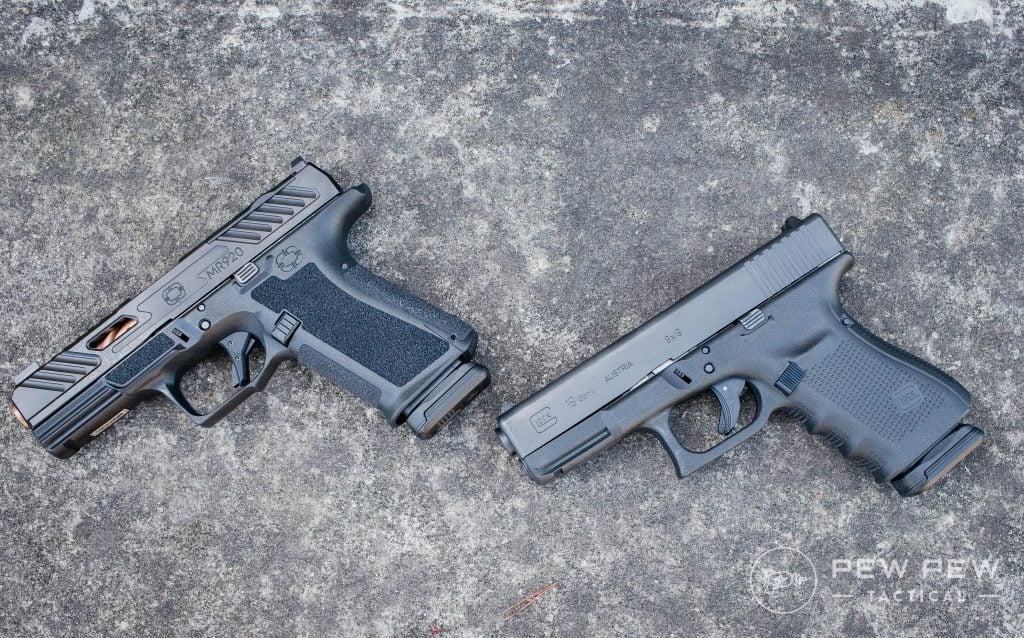
2. Shadow Systems MR920
Gucci Glocks have become one of the most common Glock configurations, and the Shadow Systems MR920 embraces that.
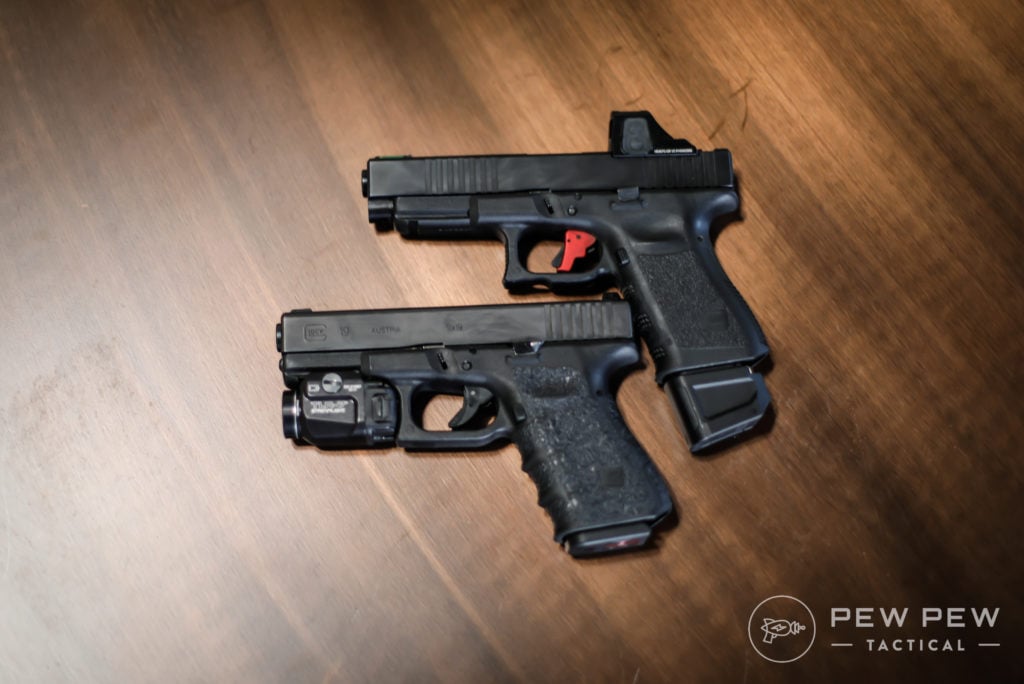
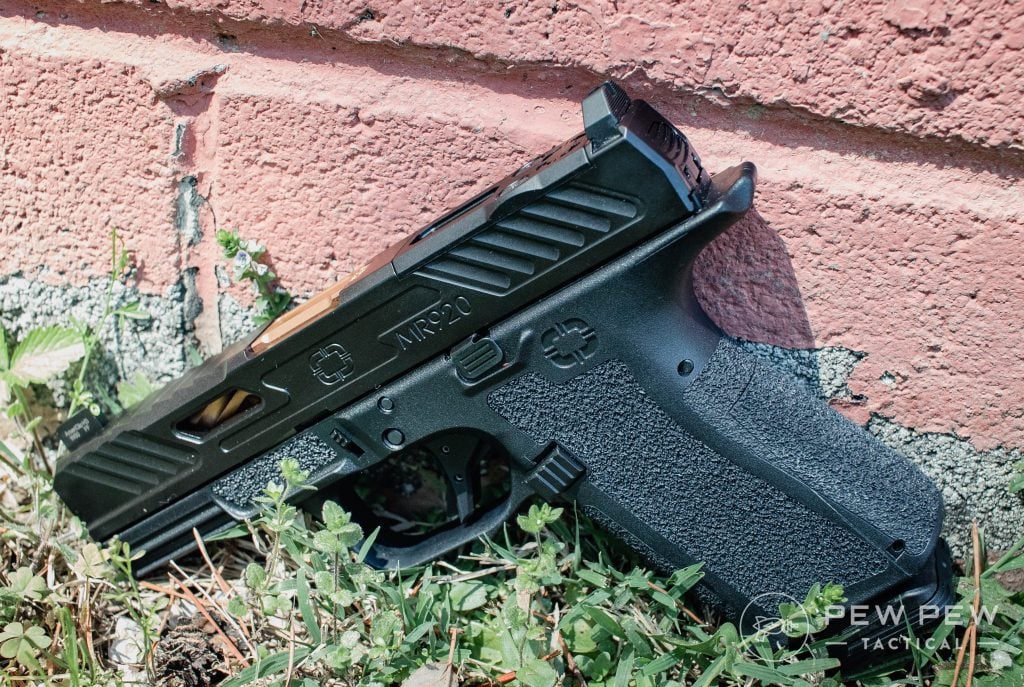
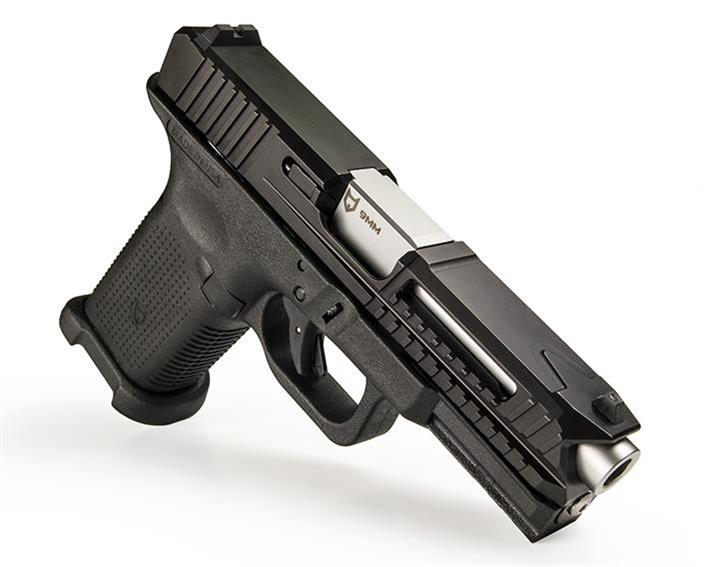
Shadow Systems’ MR920 ships with all the features and add-ons you could ever want. These pistols are Glock 19-sized and come factory ready for gettin’ Gucci.
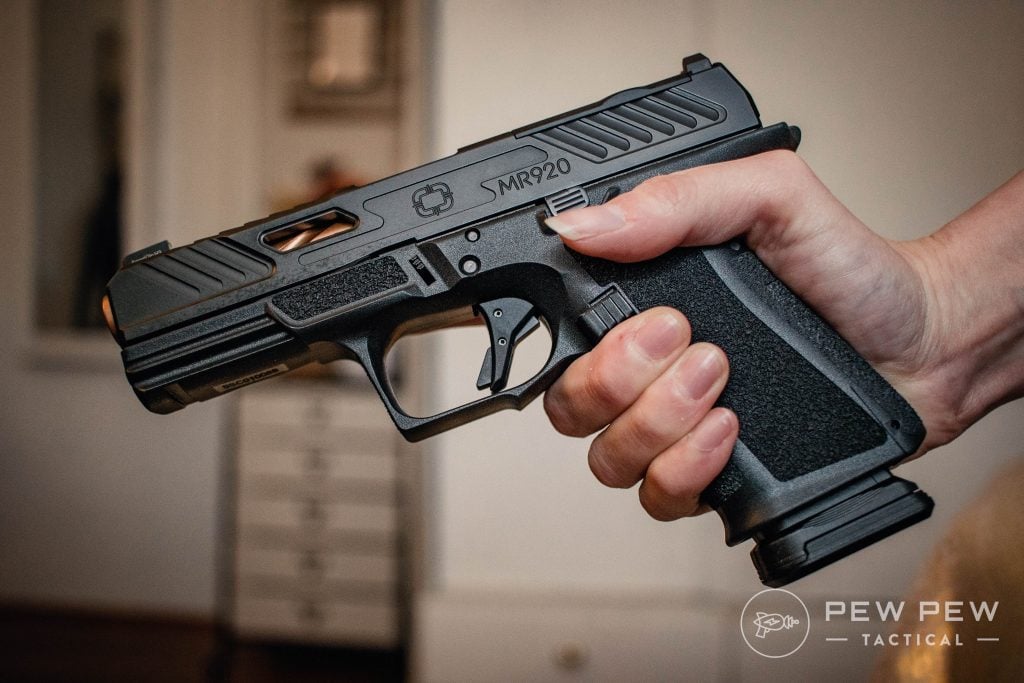
Shadow Systems MR920
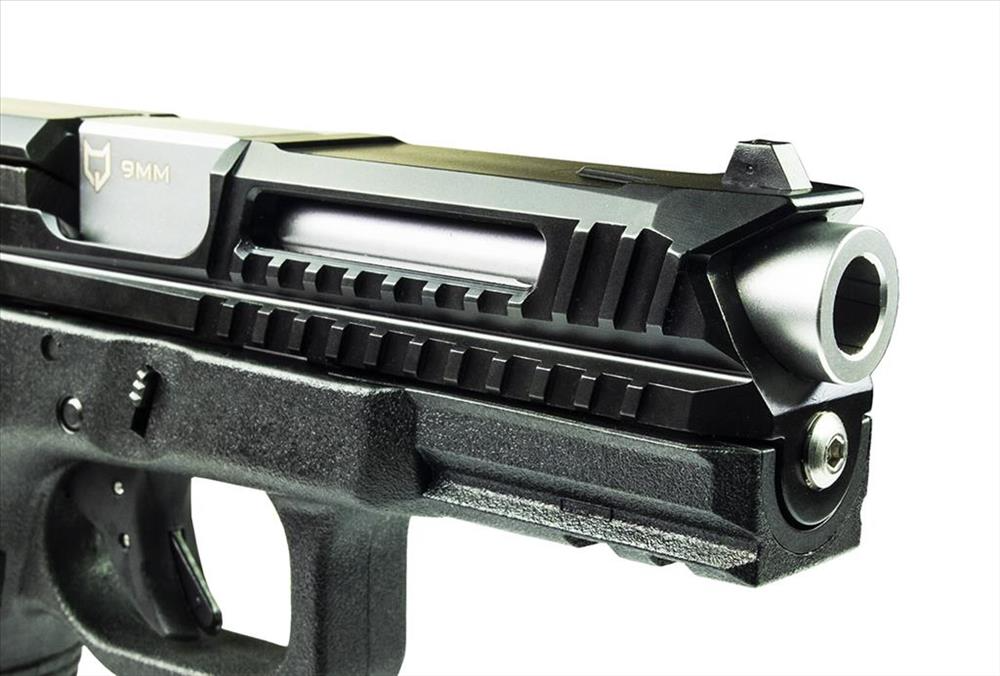
First, they offer an optics cut compatible with most major optic brands without the need for plates.
The optics cut is optional, but if you step into 2021, you can rock a Holosun, Trijicon, Vortex, or Leupold optics.
Its frame is built around user control with an aggressive beavertail, a dynamic trigger undercut, and a very aggressive grip texture.
Not to mention, the slide features its own serrations for easy racking and press checks.
Obviously, Glock’s crappy plastic sights are tossed — these guns wear Ameriglo sights instead.
The MR920 takes Glock mags, and to make shoving those mags faster into the gun Shadow Systems includes a massive magwell for speed reloads.
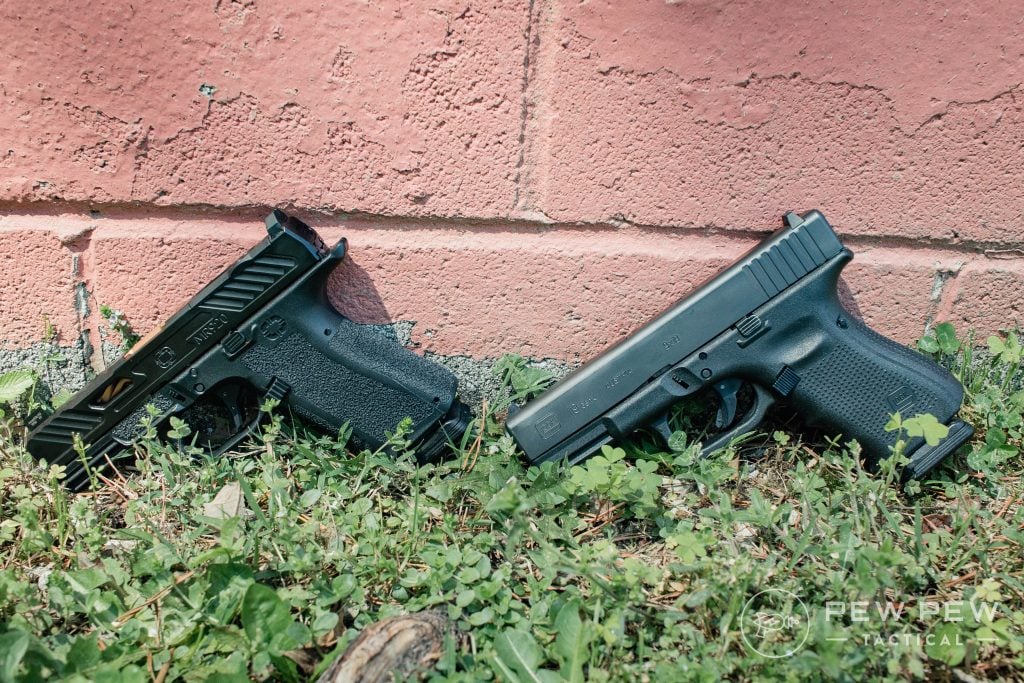
Shadow Systems MR920, left, and Glock G19, right.
From top to bottom, the Shadow Systems MR920 comes complete with all the Gucci features most Glock owners want, making it one of the best out-of-the-box Glock clones on the market.
If the standard MR920 isn’t your style, Shadow Systems has a plethora of other flavors that might work better. So check out our reviews on the MR920L, XR920, and DR920.
3. Lone Wolf LTD19 V2
Lone Wolf was one of the O.G.s of Glock aftermarket parts and pieces. So, it makes sense they would dive into Glock clones eventually.
The LTD19 V2 predictably uses the oh-so-famous Glock 19 frame and slide size to create a compact pistol.
Lone Wolf’s design goal was to make the pistol extremely lightweight and ergonomic, and the LTD19 V2 shaves off almost 5 ounces of Glock baggage. This ultimately creates a lighter, thinner pistol.
Does the Timberwolf frame look a little odd at first? That’s because it’s noticeably thinner than the original Glock 19 frame.
This reduction in bulk makes the pistol more ergonomic and is especially notable for those with smaller hands.
Don’t worry; the Lone Wolf LTD19 V2 features a generous undercut for a nice high grip to accommodate XL-sized hands and increase control.
An extended beavertail lets you choke up and not get slide bite. As a guy with big hands, Glocks also take a bite out of me.
The Lone Wolf LTD19 V2 comes with a low-profile magwell, an enlarged magazine release, and an enlarged slide stop.
It’s an ergonomic powerhouse from one of the oldest Glocksmiths.
If you want another option, check out our review of the previous generation — the LTD 19 V1.
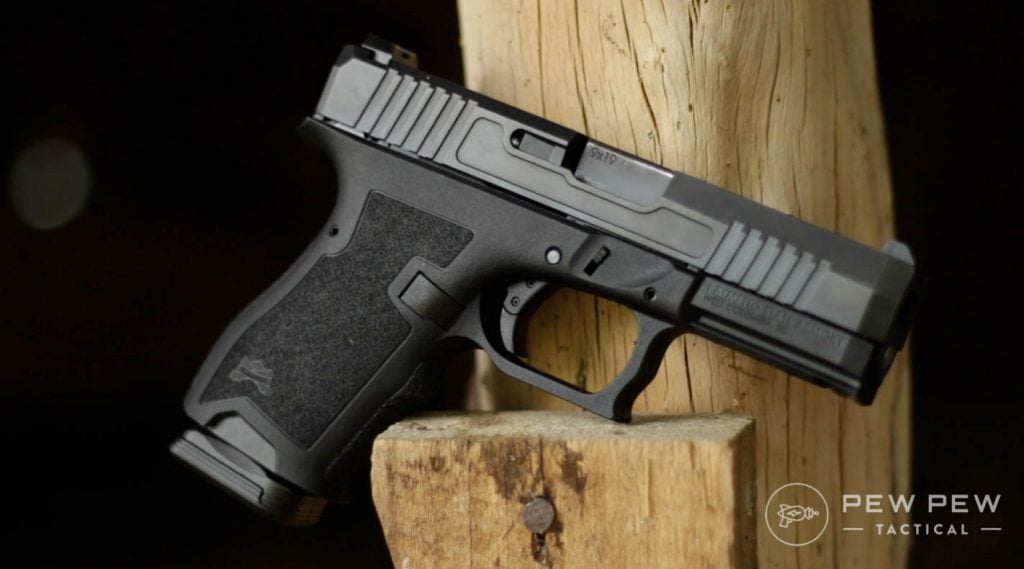
4. Polymer80 PFS9/PFC9
Polymer80 made its bones in the 80% lower market and turned heads with its Glock 80% frames.
And the company spun that into a successful line of complete pistols utilizing the famed P80 Glock frames.
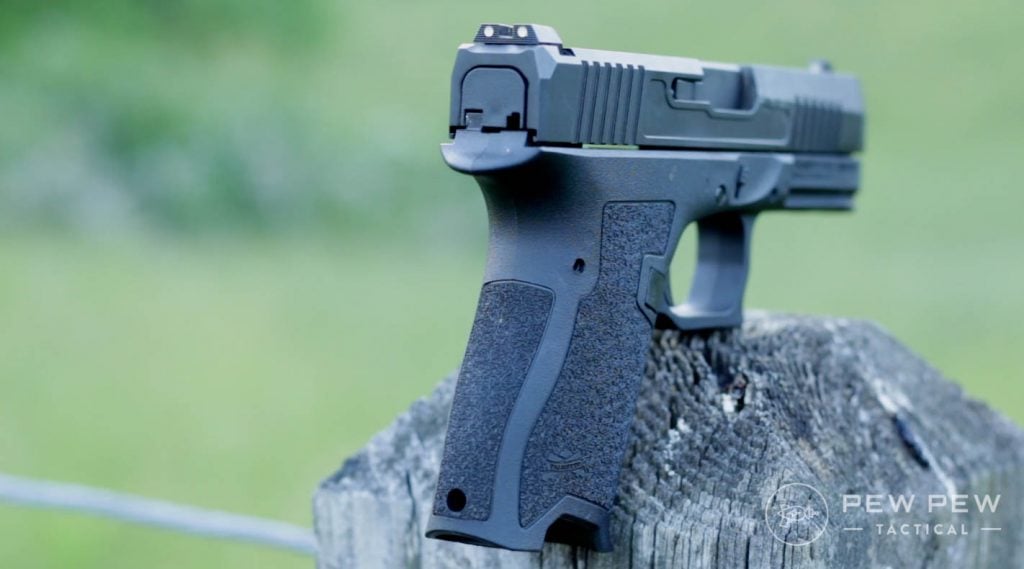
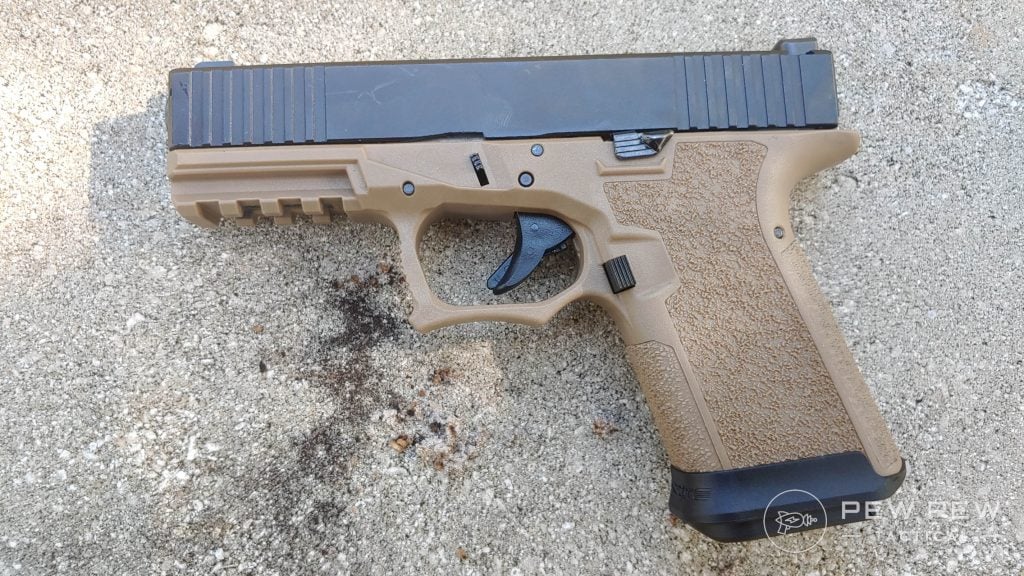
Polymer80 PFC9
The PFS9 and PFC9 represent the full-size and compactvariants, respectively.
Both opt for a P80 frame, notable for being more ergonomic than the stock Glock frame.
Its grip features a massive undercut in the trigger guard and aggressive beavertail to maximize control and improve comfort.
Also, the grip texture feels extremely aggressive with a scalloped magazine release for easier activation.
The frame also follows the same grip angle as a 1911 with a bit straighter frame design.
It’s personal preference, but many folks prefer that more ‘American’ angle on their pistols. (I’m one of them.)
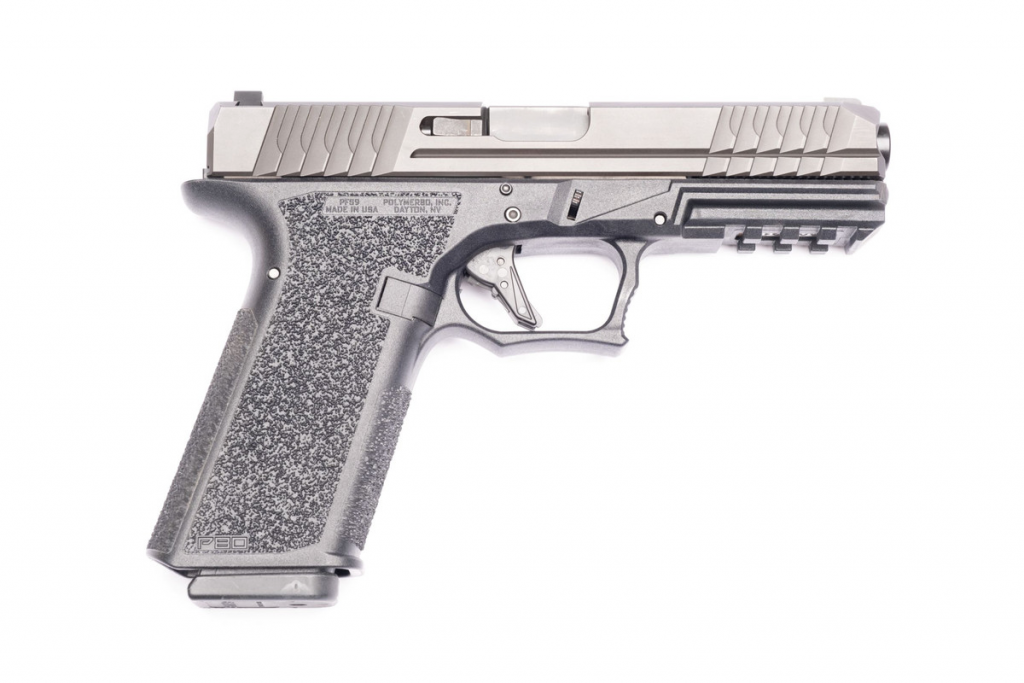
PFS9
The PFS9 and PFC9 also feature an actual Picatinny rail in spec and not Glock’s own weird OEM rail.
Internals are Gen 3 parts, and most are compatible with aftermarket Glock goodness. However, there isn’t much I’d change.
The flat-faced trigger is very nice, as are the steel rounded sights. At a relatively affordable price point of $550, the Polymer 80 pistols make a budget-friendly alternative to Gaston’s Glock.
Read our review of the PFC9 here!
5. Alpha Foxtrot AF-C Forged Pistol
The more things change, the more they stay the same.
Glock wasn’t the first polymer frame pistol, but they were the first successful polymer frame pistol.
Might not have been the first polymer pistol, but it’s one of the most memorable.
Somewhere along the way, people decided to hell with that and designed a metal frame Glock clone.
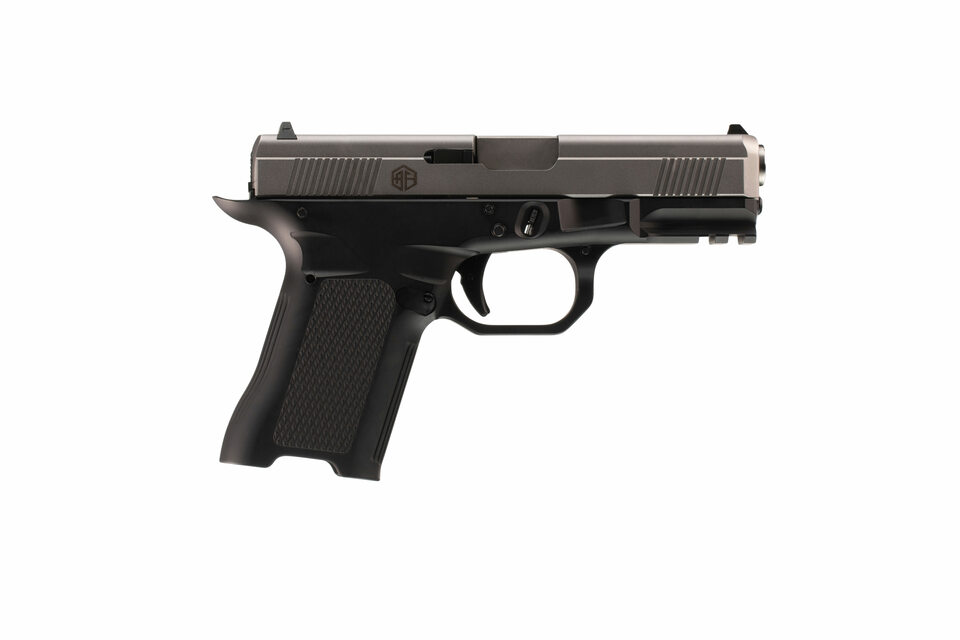
The Alpha Foxtrot AF-C Forged Pistol utilizes Alpha Foxtrot forged frame with their custom slide to create one interesting Glock design.
Alpha Foxtrot makes 1911s, and you can tell that by the styling of the AF-C.
The grip angle looks almost identical to a 1911, with an improved extended beavertail and retro-future vibe.
Alpha Foxtrot AF-C
Its frame also features gas pedals to reduce recoil and improve control.
Unlike a polymer frame, these gas pedals are more than just cuts but rather forged pedals allowing for more pressure and, therefore, more control.
On the outside, this is clearly a custom Glock. But, unlike other custom Glocks, it’s a bit more practical in its design.
No crazy lightening cuts, massive holes in the slide, or similar slots, notches, or tabs. It’s perfect for defensive use and more than capable in that role.
Adopting a Glock 19 size, it’s carry-friendly. However, expect more weight with the metal frame than the classic polymer frame.
Lots of people still like metal-framed pistols, but they want Glock reliability and parts compatibility.
If this sounds like you, then the Alpha Foxtrot AF-C might work for you.
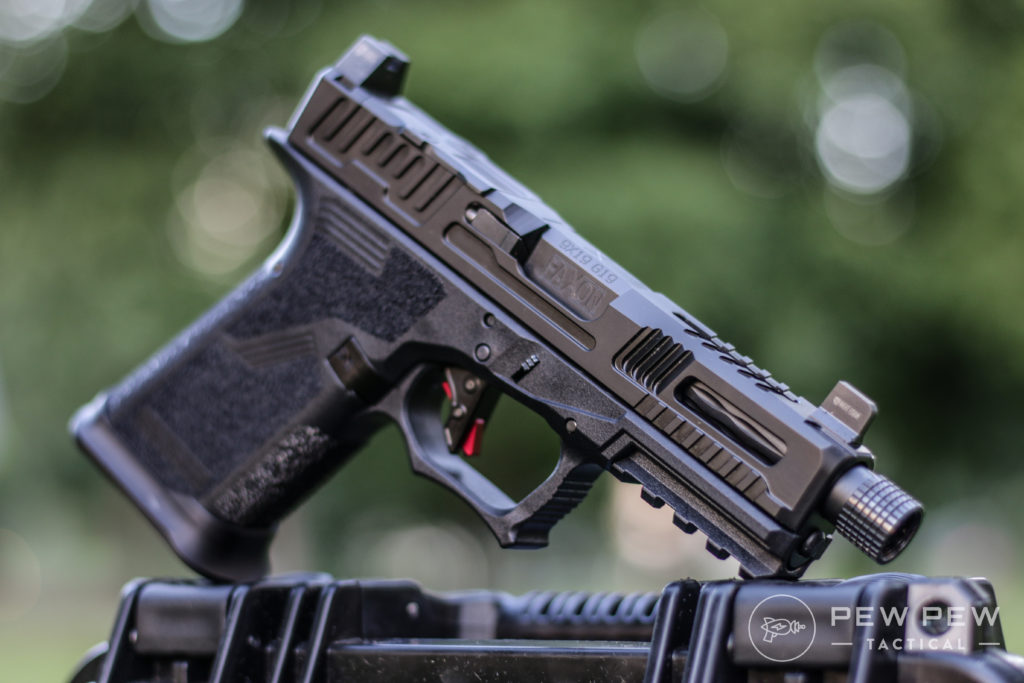
6. Faxon FX-19 HellFire Compact Pistol
Faxon is well known — mostly for the ARAK 21, awesome barrels – but go ahead and add the FX-19 to that list.
As you’d expect, the FX-19 is a Glock 19-sized clone, but it’s built from the ground up to embrace the Gucci Glock theme.
FX-19 Hellfire
The frame is a collaboration between Faxon and Polymer80 — a custom rig using a special PF940C frame.
Its grip texture feels aggressive, and the high undercut trigger guard allows for a high grip. All the while, the beavertail continues to reinforce that nice high grip.
You still get a Picatinny rail, making light and laser additions a bit easier.
The FX-19 HellFire Compact Pistol comes with a heavily customized slide featuring lightening cuts. These cuts reduce weight and recoil via mass reduction.
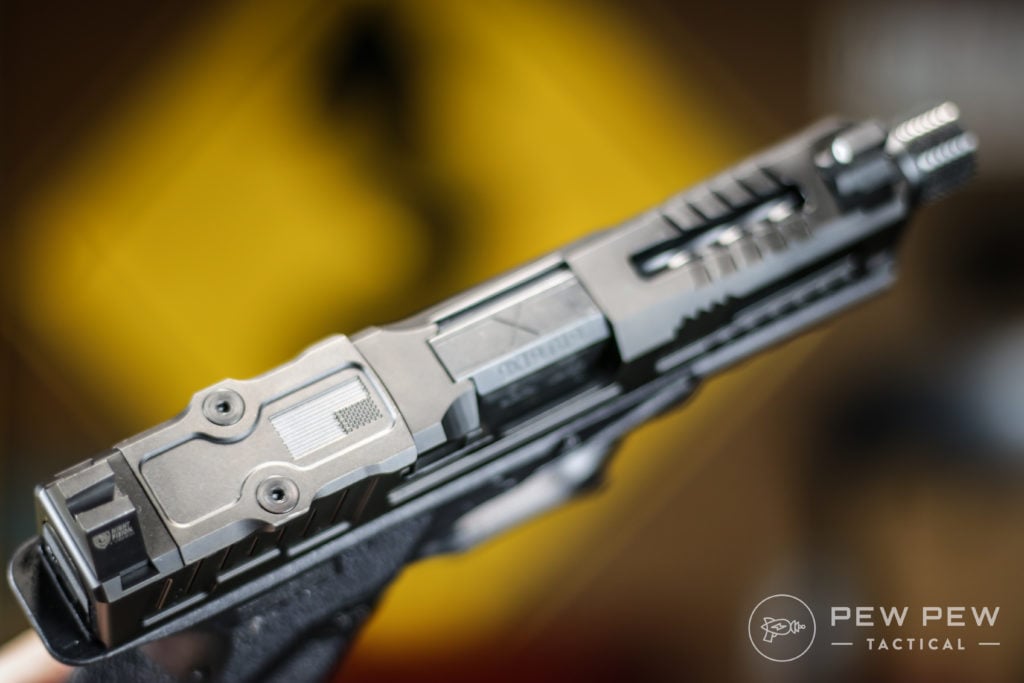
FX-19 Hellfire, top
Optics cuts come standard, and the mount fits the Trijicon RMR and similar optics.
To back that optic up, you get a set of suppressor height sights for easy co-witnessing.
Don’t forget the threaded barrel for compensators or cans. Rounding out the features, the Overwatch Precision trigger gives a light and smooth pull.
When you want a plug-and-play customized Glock clone, the FX-19 fills that gap.
No need to gather parts and play amateur gunsmith when Faxon can do it for you.
Check out our review of the Faxon FX-19 Hellfire here, or give it a rating below!
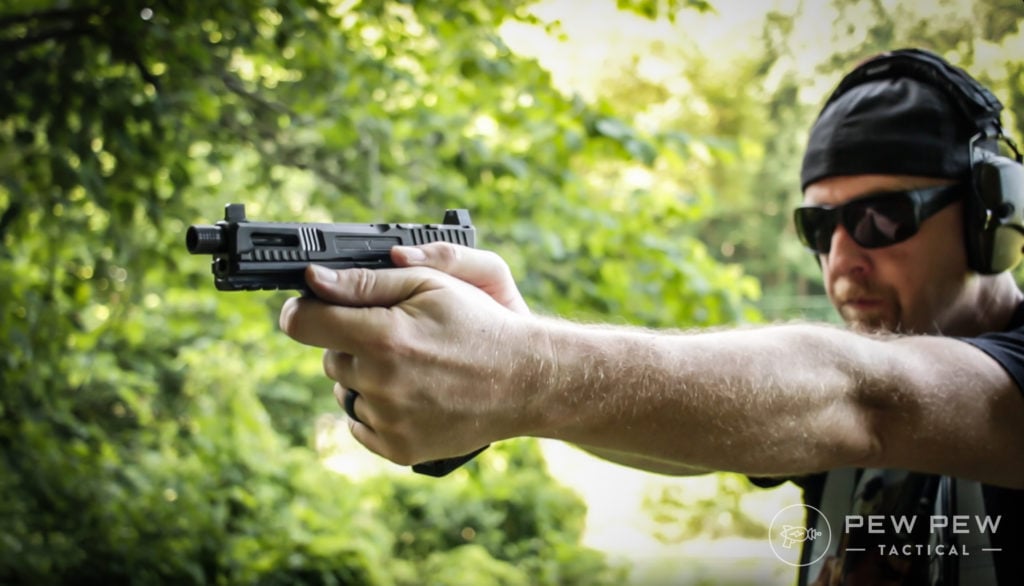
7. ZRO Delta One
What if you wanted a Glock for every occasion but also only wanted it to be one pistol?
Well, then the ZRO Delta One has you covered.
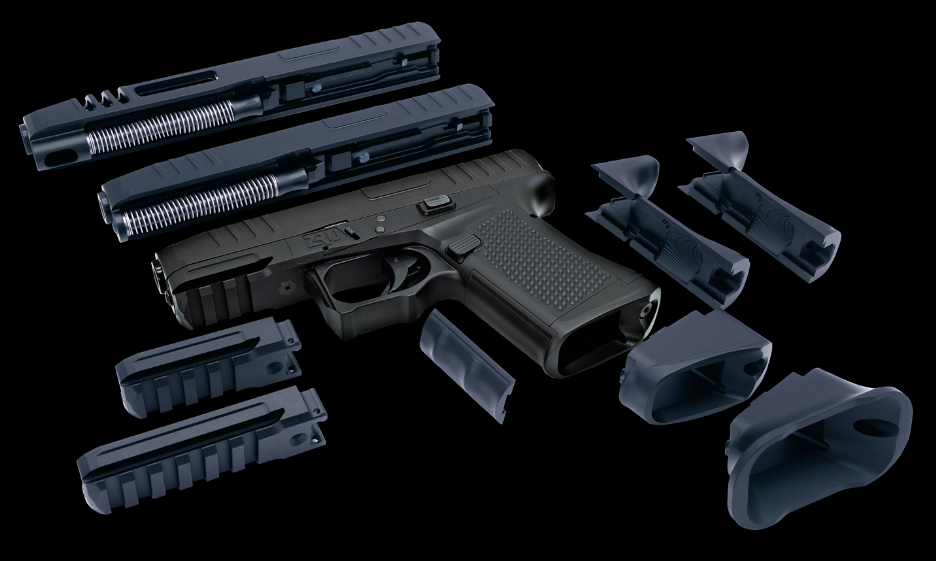
This engineering marvel starts as a compact Glock clone but can transform via ‘conversions’ to a Glock of any size and design.
ZRO Delta One
Like the Sig Sauer P320, the ZRO Delta One uses a fire control unit that acts as the firearm portion.
Shooters then customize their modulus to whatever they want it…and I mean whatever.
It’s not just swapping slides but swapping dustcovers, backstraps, magwells, and more.
The frame can grow from a Glock 19 to Glock 17 with a specific magwell or go full gamer with a massive magwell for the faster funnel of reloads.
We like options! (Photo: ZRO Delta)
You can even move from a Glock 19 size to Glock 34!
We get all the necessary upgrades, including an optics cut, an undercut trigger guard, a beavertail, steel sights, and so on.
Oh, did I mention the frame is also made from metal?
That said, this is a very expensive gun…a nice gun, but an expensive one.
While it’s not for everyone, it’s a truly beautiful and functional feat of engineering.
8. 80% Arms GST-9
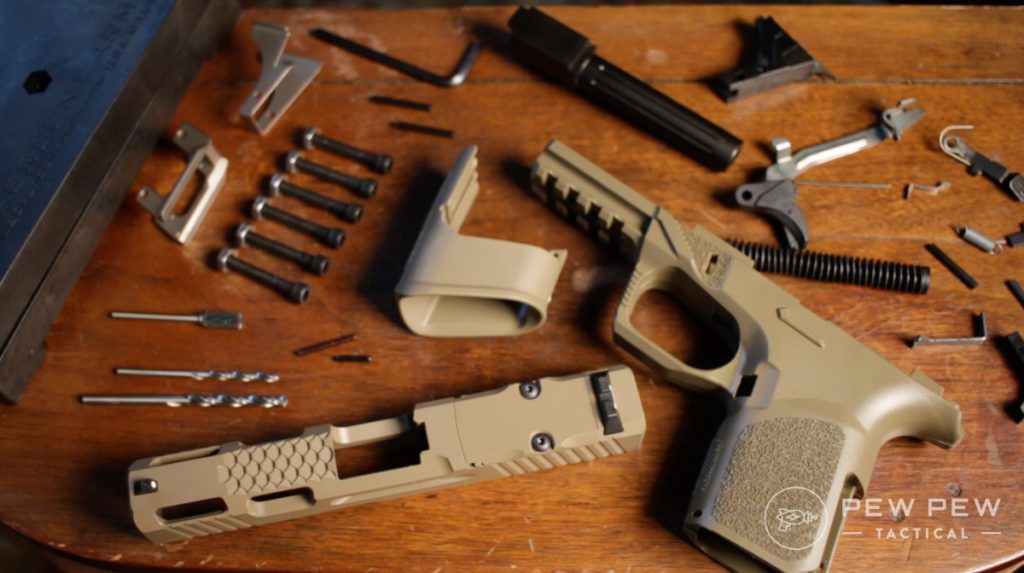
If you really want something custom built for you…by you…then you might want to pick up the 80% Arms GST-9.
GST-9 when completed
This is an 80% Glock build, meaning it’s not a fully functioning firearm, but with some know-how and some time, you actually build the gun yourself.
80% Arms offers lots of features and customizations, so you can fine-tune it how you want.
80% Arms GST-9 Parts
It might seem intimidating to DIY, but 80% Arms includes everything you need in the pistol build kit. We promise, it’s not as scary as it seems!
We’re sure you’re wondering…is this legal? In most parts of the U.S., it is, but definitely check your local lawsbefore buying.
Also worth noting, the ATF cracked down on these kits and no longer allows the jig — the part that helps you finish the gun — to be sold with the frame. So you will have to buy them in separate transactions.
Our very own Johnny B put one together and really enjoyed his time with it. You can read his review here!
Final Thoughts
Glock Clones are almost a dime a dozen these days. Every year it seems like more and more companies introduce new clones.
Shadow Systems MR920 and Glock G19
Let’s face it; Glock is clearly on the way to becoming the AR-15 of the handgun world, and why not?
They are reliable with a modern design, extremely simple to use, and easy to work on or fix. It’s unlikely we’ll see the world of Glock clones slow down anytime soon.
So, what’s your favorite Glock clone? Let us know below! If a clone won’t do and you need the real deal, check out our recommendations of the Best Glocks or customize your Glock with the Best Glock Upgrades.
8. Best Spring Piston Air Rifle for Pest Control: HW50S
The HW50S spring piston air rifle from Weihrauch Sport is a high-quality gun perfect for plinking and hunting small rodents. With a state-of-the-art German design and construction, this gun is built to last.
The HW50S features a precision rifled barrel, making it accurate and reliable. The rugged stock is made from durable hardwood, making it sturdy and stable.
The HW50S also has an adjustable trigger, so you can customize it to your specific needs. Whether you’re looking for a gun for plinking or hunting, the HW50S is a perfect choice.
10. Best Value Air Rifle for Pest Control: Air Venturi Avenger
With high-end features at an entry-level price, the Avenger sets a new standard for similarly priced PCPs to live up to.
Featuring an externally adjustable regulator and externally adjustable hammer spring, the Avenger provides the user with a seemingly infinite amount of performance adjustability never seen at this price point.
A smooth side lever action allows for quick follow-up shots, and the fully shrouded barrel keeps your shooting quiet. Available in .177, .22, and .25 caliber.
Features
Pre-Charged Pneumatic
Sidelever Cocking
Synthetic Stock
Externally Adjustable Regulator (Up to 3,000 PSI / 210 BAR)
Easily accessible Hammer Spring Adjustment Screw
Two-Stage Adjustable Trigger
Max Fill Pressure: 4,351 PSI (300 BAR)
Fully Shrouded Barrel
Picatinny Rail on Fore-end of stock
Holes in front and rear of stock for mounting swivel studs for a sling
Dual Gauges – Reg Pressure (RH Side) and Fill Pressure (LH Side)
With so many air rifles out there, it can be a bit confusing to keep up with all the information around.
But fear not! Just read the article according to the problem at hand.
Pests are sneaky little creatures that can destroy your backyard in no time.
More and more people are choosing to sell their firearms in exchange for air rifles because when no other method for pest control works, turning to air rifles is the best option for you.
Frequently Asked Questions
Can You Use an Air Rifle in Your Background for Pest Control?
Yes, you can use an air rifle to hunt for pests in your backyard.
But you will have to check the gun laws of your area before doing so.
In a lot of countries and cities, there are very strict laws regarding air rifles and their usage.
Additionally, you should be 18 or above to use air rifles.
Do check on your town’s laws and regulations before you use an air rifle.
How Much Air Rifle Power Is Needed for Pest Control?
This completely varies according to the pest situation.
However, one important factor to keep in mind is the FPE, also known as muzzle energy.
The muzzle energy is dependent mainly on FPS and the pellet weight.
Typically, you require an air rifle with 1000 FPS for pest control.
But, you also need to know how much energy is required to kill each pest in one clean shot.
You can also refer to the table above to get a better idea about the FPE required for each type of pest.
Do Chipmunks Bite?
Chipmunks are definitely not friendly as they are a house of deadly diseases.
But they bite in rare conditions such as when they are provoked unnecessarily.
Otherwise, they’ll probably run away if they sense the slightest danger.
Do Chipmunks Carry Rabies? What Disease Do Chipmunks Carry?
Small pests such as chipmunks have a relatively low chance of spreading rabies.
It’s almost equivalent to zero.
But chipmunks do carry diseases like plague, hantavirus, and salmonella which are harmful to both babies and adults.
How Can You Kill a Rat in a Humane Way?
Using an air rifle is the most humane way to kill a rat since the rat will die in a second.
Rat poison and rat traps are more cruel methods.
Which Animal Is More Dangerous, Possums or Raccoons?
Possums are docile animals who try to avoid confrontation as much as possible.
But if cornered or provoked, they can attack.
On the other hand, raccoons are aggressive creatures and would defend themselves in the first go.
They would try to bite you or attack you, sometimes even viciously.
Will a BB Gun Kill a Raccoon?
No, a BB gun will not kill a raccoon because it does not produce the kind of energy required to kill a raccoon.
It will only injure the raccoon which is inhumane as it will die a slow death.
Or it can become too aggressive and attack you.
Are Iguanas Poisonous?
Iguanas produce a venom that is generally harmless but they do have sharp teeth.
Although there have been a few cases where iguanas have bitten humans, this is rare.
Their bites can give serious injuries to your face, ankles, fingers, etc.
Do Iguanas Change Colors? What Causes an Iguana To Change Colors?
Iguanas often change colors but not like chameleons.
They turn orange during mating season and dark green as they age.
In low temperatures, they turn black or brown to absorb heat and in hot temperatures, they turn to pastel colors.
Is it legal to shoot a skunk with a pellet gun?
As we mentioned before, shooting any kind of pest has to be mandated by law.
If your district or town’s law states that you can shoot any pest with a pellet gun or air rifle, then you can do so. In a lot of places, it is legal to shoot pests like skunks in your backyard.
Can a .22 Kill a Coyote? What Size Air Rifle Can Kill a Coyote?
No, a .22 rifle will hardly injure the coyote, and so will a .177.
They will either just run off in a distance or towards you for hurting them.
You can go for a .25 air rifle which will impact them more.
With a good distance and muzzle energy, a .25 will definitely work for you.
How Many Times Can a Skunk Spray? Is Skunk Spray Toxic?
Skunks spray only in dire circumstances like when they feel threatened.
They can spray 6 times in succession.
Skunk spray is toxic for both dogs and humans, for the former it may cause diarrhea and vomit but for the latter, it will cause irritation.
What does Inguana taste like?
Iguana meat is often described as similar to chicken but more tender, with a mild flavor profile that some compare to frog legs. The white meat is high in protein and low in fat, and is typically prepared by stewing, grilling, or adding to soups and traditional dishes in parts of Mexico, Central America, and the Caribbean. Due to its taste and texture, iguana is sometimes called “chicken of the trees,” with the tail and legs being considered the prime cuts.
Having the ability to shoot both BBs and pellets, this Crosman 764 SB gives you an awesome option to switch to pellets in case you get bored with shooting BBs.
All in all, your kids could be both BB shooters and pellet gunners at the same time, how cool is that?
Stock
Now a very important part of the gun: the stock.
Crosman 764SB has a durable, all-weather synthetic stock.
While wooden stock is heavy and easily affected by moisture and temperature, synthetic stocks are lighter
And provide you with stable performance in any weather condition.
Furthermore, synthetic stocks are virtually maintenance-free and are the best choice for shooters who don’t want to waste time with stock preservation.
Turkey hunting is a popular activity among hunters in many regions of the world. Hunters must be able to spot evidence of turkeys in the vicinity to improve their chances of success. Turkey’s poop is one of the most reliable indicators. Understanding the appearance of turkey poop may assist hunters in identifying likely feeding and roosting locations as well as the size and gender of the bird. We’ll provide a brief overview of the physical characteristics of turkey poop in this post and discuss why turkey hunters must be able to recognize it.
What does turkey poop look like?
The internal anatomy of male and female turkeys differs, with males having a rudimentary internal sex organ that may influence the shape of their droppings. So, depending on the sex of the bird, the look of turkey poop might change. The poops of male turkeys are long and thin, only curving at one end, and include some uric acid on the surface. These excretions are about 2.93 inches long and 0.39 inches in diameter. On the other hand, female turkeys often make droppings that spiral into a wider and stretchy coil to contain eggs. In addition, turkey poop often has a “J” form and sometimes has blunt ends that curve in one direction.
Physical Characteristics of Turkey Poop
CharacteristicDescription ShapeBlunt ends, curls in one direction, shaped like a “J”, spiral. Differs as per gender. Colorgreenish or grayish brown in color TextureUsually firm and cylindrical, but can vary based on diet and hydration SizeGenerally larger than chicken feces, up to 1 inch in length
Identifying Turkey Sign
Recognizing turkey signs is crucial for hunters who wish to discover possible hunting grounds and raise their chances of success. The following are some pointers on how to spot turkey poop and other indications of activity nearby:
Identifying Turkey Poop: Turkey poop may be recognized by its compact, cylindrical shape and gritty texture. They often have a tapered end and stand out for their color and scent. It’s critical to identify them from other animal waste in the vicinity, such as that of deer or rabbits, which might resemble them in size and form but vary in texture and color.
Other Signs of Turkey Activity: Besides looking for bird droppings, hunters should search the area for further indications of turkey activity. Feathers, scratch marks on trees or the ground, footprints, and regions where turkeys roll around in the soil to dust themselves are a few examples. Hunters might use these indications to find prospective roosting and feeding locations.
To discover viable hunting grounds and improve their chances of success, hunters must be able to recognize turkey signs. Hunters may find and hunt turkeys more successfully by being acquainted with the physical qualities of bird droppings and other signals of turkey activity.
What Turkey Poop Can Tell Us: Size, Shape, and Gender Identification
Turkey droppings’ size and shape might provide information about the bird’s gender and size. A bigger bird often has larger droppings, while a smaller bird typically has smaller droppings. The form of the droppings may also determine the gender of the bird. Females often produce more spiral-shaped droppings, whereas males typically produce more J-shaped droppings.
GenderPoop Shape Male TurkeyLong and narrow, curls towards one end with white uric acid Female TurkeySwirls into a coil, spacious and stretchy to accommodate eggs
How Turkey Poop Can Reveal a Bird’s Diet and Health
Turkey poop’s color and texture may also inform the bird’s diet. For instance, if the droppings are greenish, the bird may have been consuming grass or other plants. Dark brown or black droppings might indicate that the bird has been consuming seeds or insects. The texture of its droppings may also determine the bird’s nutrition and state of hydration. Dehydration may be indicated by crumbly, dry droppings, while moist, flowing droppings may suggest more liquid diets.
Using Scratches and Droppings to Locate Roosting Spots
Turkey sign may also be used to find suitable roosting and feeding locations. Scratch marks may identify them at tree bases, bare ground areas, and droppings. For instance, many bird droppings in one spot can indicate that the birds are roosting nearby. There may have been bird feeding in that region if there were scratch marks on the ground.
Conclusion
In conclusion, turkey hunters must comprehend the physical properties of bird poop. Hunters can determine the size, gender, and diet of turkeys by analyzing the size, shape, color, and texture of their droppings. They may also use this information to pinpoint prospective roosting and feeding locations. Hunters might improve their chances of success in the field by being aware of these crucial hints. The next time you go turkey hunting, look out for and take advantage of bird poop. Happy searching!
Belly, swedge, choil, and bevel — what the heck do these things actually mean? In the context of pocket knives, unfortunately, the answers can be complicated. While some terms are nearly universal (“edge,” for instance, or “lock”), there are certain words and phrases that can vary slightly, either from the manufacturer or the “everyday carry” community at large.
But that’s why I’m here! In conjunction with my recent explainer on shopping for your first knife, I thought it might be helpful to explain some of the various parts and pieces you’ll see referenced in most of our reviews. Many of these are shared in the world of fixed blades, but for this guide, we’re going to focus mostly on folders.
Get ready for a vocabulary overload, and no small amount of quibbling. From grinds to blade shapes and tips, the terminology and debates are almost endless. But to join (or pass up) the discussion, here’s what you’ll need to know.
(Photo/Josh Wussow)
A Knife’s Blade and Parts
This is the natural place to start, as the shape and arrangement of the blade is likely to play the biggest role in your choice of pocket knife. Something we won’t be covering is the multitude of available steels.
If you’re looking for a deep dive into the best steel for your particular application, check out this separateexplainer from GearJunkie.
Grind
We’ll begin with the edge. That’s the sharp part that cuts things, right? True! But it’s a bit more complicated than that.
(Photo/Josh Wussow)
There are several ways a blade can be ground into sharpness. For pocket knives, the most common is the flat grind and the hollow grind.
The first of these is just as it sounds — the blade slopes down from the top (or spine) until the sides join at the cutting edge. Their angles usually taper once again near the very end, forming what we call a secondary bevel. That’s the shiny part that catches the sun.
A hollow grind has all of the same parts, except that the blade steel slopes inward as it descends toward the edge instead of plunging straight down at an angle. This creates a narrower, more slicing-friendly edge that’s wider at the top and thinner at the bottom. Knives like the Buck 110 are a classic example of this design.
Hollow grind on the Buck 110; (photo/Buck Knives)
There are other types, such as Scandi (short for Scandinavian) grind, which can be found on knives like the Cold Steel Finn Wolf. In this case, both sides of the blade descend straight down, until they angle inward to form a single, primary bevel/edge.
Cold Steel Finn Wolf; (photo/Cold Steel)
These are excellent for outdoor pursuits, specifically woodworking and bushcraft. Saber grinds are similar to Scandis, though they angle inward again to form a shorter, secondary bevel at the edge. Both of these are far more common on fixed blades as opposed to folders.
Tip to Belly
A knife’s belly is the part of the blade where the edge curves up toward the tip. Unlike human beings, the more belly your knife has, the better it is at sliding through things.
Some knives (like tantos) have no belly at all. These are better suited for scraping or piercing tasks. You may also see serrations near the backside of the edge (also called the heel), which are saw-like teeth best used for cutting fibrous materials like a rope.
Example of a “tanto” blade; (photo/Slideordies14)
This is also where makers potentially install a sharpening choil, which is a small (usually half-moon) shaped cutout that allows users to more easily sharpen the full length of the edge.
The Benchmade Bugout, for instance, has a large choil, while the Spyderco Delica has none.
Knife choil; (photo/Josh Wussow)
Proceeding upward from the tip, you’ll often see a narrowed stretch of metal along the top of the blade. This is called a swedge, and it helps taper the steel into a fine point.
There are an incredible number of tip styles and, to be frank, the labeling is incredibly nebulous: reverse tanto, sheepsfoot, Wharncliffe, drop point, and clip — makers tend to play fast and loose with their naming conventions. Just know that the narrower the tip, the more delicate it is.
Near the rear of the spine, many makers include a series of small, beveled cutouts known as jimping. These are designed to provide a natural landing spot for your thumb, lending additional texture and grip.
Opening, Locking Mechanisms
This is a big one, so I’m going to boil it down to basics. Thumb studs and finger holes are exactly what they sound like. They’re added or absent bits of metal along the upper rear of the blade, which allow you to push the knife open with your thumb.
A flipper tab does the same thing, though it’s positioned on the bottom side, near the heel. Many of these also serve double duty as a blade guard, keeping your finger away from the edge once the knife is open.
Front flippers are also a thing, though these require some practice. Nail nicks are most common on traditional knives, which utilize a backspring to keep the blade semi-locked in place.
However it opens, the blade will swing open on a pivot. And surrounding the pivot, you’re likely to find things like washers or bearings to help move the action along. You’ll also see reviewers discussing a knife’s detent.
As the folks at Knives and Tools so eloquently described, this is another small bearing that lines up with a hole cut out in the hidden portion of the blade.
“Because the detent ball falls into the hole when the knife is closed, the knife will stay closed.”
So when you see a reference to “detent,” folks are generally discussing the amount of force required to pop open a blade. Simple!
Locks are a different matter. For a discussion on these, I’m going to refer you to the experts at KnifeCenter. Frankly, this topic is vast enough to be an article in itself. But it’s hard to go wrong with the basics, like a back lock, frame lock, or liner lock.
Handle and Clip
You know what a broom handle is, right?
Well, knife handles are a lot like that, only they’re attached to sharpened steel instead of rough bristles. Basically, it’s the place where you put your hand. There are plenty of materials used here, but the most common are things like G-10, FRN, Micarta, and carbon fiber.
Example of a G10 handle with a lanyard hole; (photo/WE Knife Co.)
These are well-suited for most general use, though metals like titanium, steel, and aluminum are also popular. Heck, you can even find wood or bone pocket knives, if you’re going the traditional route.
Best for general use:G-10, FRN. Because of their water resistance and grippy nature, these materials are perfect for most everyday tasks. Micarta also fits into this category, but can garner stains from moisture.
Best for metal-heads: stainless steel, titanium. If you’re looking for a full-metal experience, both of these make for functional handles. However, stainless steel handles can become rather weighty. And though titanium is lighter, neither offer the in-hand warmth of other materials.
Best for fancy folks: carbon fiber, wood, bone. Carbon fiber is an excellent choice for lightweight handles. While formerly limited to high-priced knives, it’s now available on several budget-friendly models. Wood and bone are most often relegated to traditional knives, though there are exceptions from Helle and Opinel.
If you’re opting for a handle made with polymer or natural material, your knife will generally have liners. These bits of steel provide structural support and give your handle scales something to sit on. You’ll also find various posts and spacers along the back, which keep the scales from pinching down on the closed blade.
Sometimes, these are hollowed out to form a lanyard hole, allowing you to loop fabric through for decoration or added grip. This passes through both the flat side that usually bears the maker’s logo (the show side), and the opposite surface known as the clip side.
Types of Pocket Clips
And that brings us to one of the things that make pocket knives, well, pocketable. Pocket clips come in many forms, but the most popular terms you’ll see are these: deep carry, reversible, and tip up/tip down.
Deep carry fits its description. These clips allow the backend of the knife to rest near the top seam of your pocket, creating a more discrete appearance. But in general, most pocket clips allow at least a portion of the knife to be seen.
Reversible and tip up/tip down are different sides of the same coin (or knife). This means that the clip can be moved and repositioned, whether it be to suit a left-handed user or someone with a preference between having the knife’s stowed tip facing upward or downward in the pocket.
Here’s a hint for new knife folks: 99% of the time, tip up is significantly easier and safer, as the back of your pocket helps keep the blade closed.
Got all that? If not, there are plenty of ways to keep the terms fresh in your memory. One of the best is this visual aid from Knafs — a poster showing everything discussed here and more. And if all else fails, pull up reviews and discussions from YouTube.
But you don’t have to know any of this stuff in order to enjoy and use a pocket knife. The most important thing to keep in mind, as with all tools, is safety.
Know where your edge is pointing, what you intend to cut, and make sure your space is clear. And if you’re still unsure as to what you’re looking for in a blade, check out our guide on how to shop for your very first knife.
TYLER, Texas (KETK) – Lea Anne Powell, out of Lake Jackson, went out on a fishing trip with one of her fishing guide friends where she might’ve landed the world record for a largemouth bass in her line class.
Powell told KETK News that her fishing journey began after her parents passed away in 2015. She shared that her parents loved to fish and she found peace after a friend asked her to go fishing and then continued that tradition by diving into that world herself.
“I lost both of my parents in 2015 and I actually found peace within fishing. A friend of mine kept asking me to come fish and I had a natural knack for it and it just stuck,” said Powell.
Since then, Powell has been heavily involved in the tournament trails for the past 5 years but nothing prepared her for the fishing trip she took towards the end of February.
Powell said that her friend Dalton Smith, owner of Dalton Smith Guide Service and fishing guide at O.H. Ivie Lake near San Angelo, had a few days off and invited her out to go fishing. The evening of Feb. 27, the first day of their trip, Smith was using a tool called Livescope that serves as an underwater sonogram to help anglers see the fish and tell what’s big and what isn’t.
“They’re doing all this research and you can see the fish. You can tell what’s big and you can tell what’s small and we got into this area where [Smith] was seeing a bunch of big fish,” said Powell. “I casted out and I caught a 10.58 pound [fish].”
Powell said at the time that was her personal record for a fish, but then came the next morning.
The following morning, they went back out and Smith was telling her to cast out in the same area as him. At this point, Powell said she was still trying to figure out how to use the Livescope to locate the bigger fish.
“So he casted out about 50 feet from the boat and about 55 feet slightly to the left of where he was,” Powell said. “I was trying to learn this whole Livescope sonogram and I was like okay I think I have a follower.”
Smith didn’t believe her at first, but once she hooked the fish, they both realized they had a battle ahead of them to reel it in.
“Once I set the hook he was like, ‘oh my God, you caught a giant’. But what was crazy is we were both freaking out because it was hooked 45 feet from the boat and 15 feet down on 10-pound line with a spinning rod,” said Powell. “Which if anybody knows fishing at all, that’s a very hectic situation and anytime I would get her close to the boat, she would start taking off and kept nosing down so I was having to adjust the drag when she would take off running.”
Once the fish was in their net, they knew they had to quickly take it in to get weighed at the Elm Creek RV Park and Gas Station down the street from the lake where they have an International Game Fish Association (IGFA) certified scale.
“She was 12 pounds 3 ounces, the biggest fish ever! Before I went to O.H. Ivie with Dalton, I literally had only caught a 7 pound 8 ounce largemouth. And I was like, cool, if I get an 8 pounder I’m happy.” said Powell. “But I broke my personal best twice in under 17 hours.”
Powell shared that the IGFA has different line classes that include 4, 8, 12 and 16-pound line classes. Powell’s fish was caught on a 10-pound Seaguar Red Label line but Powell shared, “the way that line actually tests, it actually tests up to 12 pounds.”
She said that her application is still pending and shared what all goes into the judging of a fish for a record.
“It is still pending. You have to have witnesses, you have to have proof of what it was caught on, rod and reel make and then you also have to submit a line sample into IGFA,” Powell said. “Once it goes in to the IGFA they will actually go through and test the line and make sure it was legitimately up to 12 pounds and then it will go through a panel internationally and then once that’s done, I’ll know.”
Powell shared that she has been working closely with them and just last week they tested the line so she is still waiting anxiously on an official answer.
“I’ve been working with them really closely because I’m really anxious I’m like ‘I hope I get it’. So, fingers crossed. It is still pending but from what I was told it has been a very long time since they’ve had a nice fish like that go across their desk.”
The record that Powell said her fish is going for is “a female record for a 12 pound line class for largemouth [bass].”
Powell wanted to share some words to lady anglers out there that might feel like they don’t fit the mold of a traditional angler.
“I’ve had so much discouragement being a lady angler and I don’t let that stop me. For every no I’m getting told and every word of discouragement, it pushes me and drives me to go harder and go faster and deeper into my tournaments. You can’t make a record, you can’t catch a fish unless you have a line in the water and do what you can to not let any negativity get you down. Turn those negatives into positives and let them motivate you to get out there and fish and just catch ’em up!”
To keep up with Powell on all of her fishing adventures and check out other fish that she has already caught you can find her socials below:
Bear hunting with dogs brings a whole range of emotions to mind.
More specifically, the pretty controversial bear hounding.
However, there’s also another variant of bear hunting (which could actually be beneficial to wildlife).
But first, let’s explore bear hounding and why it often damages wildlife populations.
Some people disguise hounding as a service to society while others deem it a sick sport.
Even hunting advocates seem to turn their back on bear hounding because it’s not only unfair but damaging to wildlife1 and possibly their own dogs.
Bear hounding often orphans cubs
Being chased into trees incites incredible anxiety in the animals
Hounds are often hurt during encounters
Non-target animals are chased since controlling dogs over large distances is impossible
Hunters often trespass on private property, target endangered species, or chase bears onto busy roads
Why are bear cubs orphaned?
Because hunters don’t care to check or misidentify the gender.
Sometimes, they eliminate the threat on sight when encounters with their dogs ensue.
Other times, bears are chased over miles and robbed of their energy2 which may seal their fate, just for the hunters to notice the bear is off-limits due to age or gender.
But as mentioned, bear hounding is not the only way to hunt bears with dogs.
Below, I’ve listed all the breeds suitable for bear hunting.
A lot of breeds mentioned in other articles are absolutely not suitable for hunting bears in any way, shape, or form.
What Are Bear Hunting Dog Breeds Used For?
Hounding doesn’t necessarily only serve as a sport, instead bear hunting dogs are also used in some areas to control rising bear populations, but modern non-lethal methods include Karelian Bear Dogs to scare bears away.
As the polar ice melts, the number of bears roaming northern rural regions in Russia increases3.
Naturally, this creates a conflict between the inhabitants of small towns and these massive (and endangered) Polar Bears.
All parties involved will hopefully seek out a peaceful solution instead of allowing bear hunting with dogs, especially considering that it’s us humans who are destroying their natural habitat.
North America might soon face a similar problem and wildlife and law enforcement are seeking solutions.
Until now, bears who’ve gotten too used to people are either euthanized or put far away into another territory, both far from optimal solutions.
Hounding is partly allowed to serve as “population control” but all these (partly inhumane tactics) could be replaced by an altogether different method.
Organizations such as the Wind River Bear Institute created an actionable plan that includes dogs – but in a non-lethal way.
Dogs such as the Karelian Bear Dogs4 are used to scare bears away in the following steps:
Bears who get too close and/or too used to humans are identified
Bear hunting dogs are brought in to scare them (resembling Coyotes out and about to steal bear cubs)
Upon release, the dogs track the bear, bark, and nip at the bear’s heels until called back
If the bear has gotten used to a specific spot, they trap the animal and bring in the dogs to scare them and then release
Additional methods like firing rubber bullets can be utilized
Sadly, there’s not a lot of literature out there discussing this way of controlling bears.
Instead, most (outdated) research papers focus on traditional bear hounding and its efficacy.
Even though there aren’t a lot of resources, I’ve tried my best and compiled a list of breeds that were traditionally used and could be introduced in this more modern way below.
Any dog breed successfully working bears offers a huge upside to the old ways:
No known injuries to the dogs
Bears are not unnecessarily eliminated
No compromise in safety around campgrounds and National Parks for humans
Karelian Bears Dogs have been able to find evidence of poaching and save polar bear dens near oil or gas fields
However, not all areas (think residential) are suitable for this type of bear control.
Besides the labor to raise and train these dogs, controlling bears this way is more labor-intensive.
So now you know about hounding as well as non-lethal bear hunting with dogs, but which breeds are actually suitable?
9 Bear Hunting Dog Breeds
The best bear hunting dog breeds include the Karelian Bear Dog, Plotthound, Coonhound, Foxhound, as well as large game hunters such as the Dogo Argentino or Rhodesian Ridgeback.
Here’s the full list of dogs capable of hunting large game such as bears:
Karelian Bear Dog
Plotthound
Coonhound
American Foxhound
Bloodhound
German Shorthaired Pointer
German Wirehaired Pointer
Dogo Argentino
Rhodesian Ridgeback
Karelian Bear Dog
Among the top spots for dog breeds used to work bear is the Finnish black-and-white Karelian Bear Dog.
Early breed ambassadors have been recorded in other colors as well such as red-gray or pure red.
However, black-and-white emerged as the desired color since the breed standard was formulated in 1945.
The Karelian Bear Dog looks like a cross between Border Collie and Husky with some resemblance to breeds like the Samoyed or a more wolfish German Shepherd.
While working bear is their field of expertise, they can also compete in search and rescue or sled dog trials due to their sturdy double coat and endurance.
Plott Hound
Technically also among the Coonhounds, the Plott Hound has a different ancestor though.
Plott Hounds don’t descend from English Foxhounds but rather from “Hanover hounds” in Germany.
The German immigrant who brought these dogs to the US frequently hunted bears in the mountains with his dogs.
Coonhound
There are various types of Coonhounds such as the Redbone, Bluetick, Black and Tan, American English, and Treeing Walker Coonhound.
Treeing Walker Coonhounds are among the most loving of the Hounds and quite sensible hunters too.
Ever wondered where the word “treeing” comes from?
It’s because this Hound is known to trail smaller game until it climbs a tree with the dog waiting below and barking to signal the location to the hunter.
Walker comes from the breed’s creator.
This breed is also commonly used for traditional bear hunting where the dogs hunt outside the hunter’s control and often camp for quite a long time at the bottom of the tree.
American Foxhound
The American Foxhound’s robust yet sleek frame is complimented by their soft eyes.
The bark that makes bear hunters love the American Foxhound could prove detrimental to your neighbor’s ears.
So before considering one, beware of their fierce barking which can only be controlled through training and exercise to some degree.
Bloodhound
Bloodhounds are known to be among the dogs with the best sense of smell out there (that and their incredibly long ears).
Did you know that the sloppy ears are actually there to block out sound when they’re following trails?
German Shorthaired Pointer
The German Shorthaired Pointer is a versatile hunting dog.
While Pointers are usually trained to point at birds, they can theoretically be used for pursuing and barking at bears too.
German Wirehaired Pointer
German Wirehaired Pointers could be a good fit for hunting bears.
The German Wirehaired Pointer may sound and look similar to the GSP but they’re different breeds.
While their wiry coat places first on the GWPs identifiable traits, their very loving and quite independent character is a close second.
Make sure you have plenty of time and commitment to research since this is a very active breed.
Dogo Argentino
The Dogo Argentino is the first dog of the Mastiff type on this list (there are actually 22 Mastiffs in total).
Rhodesian Ridgeback
Rhodesian Ridgebacks are actually hunting lions in packs in their home country.
Contrary to popular belief, Ridgebacks don’t actually fight the lions, but they’re good at baying them.
What is the Best Bear Hunting Dog?
The best bear hunting dog is probably the Karelian Bear Dog with Hounds coming in a close second.
What the best bear hunting dog breed is also dependent upon the climate and geography in general.
In colder climates, the Siberian Laika was commonly used for hunting and/or baying bears while Hounds are more suitable and widely available in the USA.
In theory, many other dog breeds such as large game hunters or pointers could be trained to do parts of working bear but they’re not bred specifically for this purpose.
They are bred for a variety of work though and technically could be used for working bears in a non-lethal way.
Are Karelian Bear Dogs Rare?
Karelian Bear Dogs are rare as household pets in the US while they are consistently among the top 10 in their home country Finland5.
In Finland, there are over 1000 Finnish Hounds (i.e. Karelian Bear Dogs) registered each year which puts them at spot number 7 for the most popular breeds in 2019 and 20206.
At least 700 KBDs were registered in Finland for over a decade now.
That being said, there were 50,000 registrations in total so that puts the KBD only at about 2% of the total registrations.
As of July 2024, the database has not been updated with current registration numbers.
Everywhere else in the world, it’s safe to say that the KBD is pretty rare except for countries with increasing bear populations (even then, it’s not guaranteed).
Besides North America – where hunting is regulated by each state – and Northern Europe where the KBD is used for elks, Asia and Russia come to mind but there have been no reports of the KBD being common there.
The fact of the matter is that bear dogs may save lives. Look no further than what they did in Washington.7
Sources
Humane Society: Facts about bear hounding (…) ↩︎
ResearchGate, 2019: Behavioral and Physiological Responses of Scandinavian Brown Bears (Ursus arctos) to Dog Hunts (…) ↩︎
Phys.org, 2019: Weak Arctic ice sees 56 polar bears descend on Russian village ↩︎
Spokesman-Review (Washington newspaper), 2019: Washington’s first Karelian Bear Dogs, credited with busting poachers and saving kittens, die ↩︎
Disclaimer: This blog post does not substitute veterinary attention and does not intend to do so. I am not a veterinarian or pet nutritionist. If your dog shows any sign of illness, call your vet.
Catfish are one the most popular game fish on the North American continent and varieties of catfish can be caught world-wide. Catfish have always seemed something rather elusive to me growing up.
I know how to locate them and how to catch them. I’ve seen countless folks around me do it all the time. But I always seemed to have bad luck myself. Maybe I’ve been using the wrong bait.
How about worms? Surely they will catch plenty of catfish, right? I mean they work incredibly on bullheads. So I did some research for this article.
Can you catch catfish with worms? You can catch catfish using worms. Worms provide fish-attracting scent and enough natural action to draw in fish day or night. The effectiveness of worms makes them one of the most popular catfish baits.
While you may luck into a stringer full of catfish by haphazardly tossing worm-baited hooks into the abyss, there are specific ways to ensure bites and action using worms. Read on to learn how to maximize your catfish success.
I know this is a bit random, but if you ever wanted to go on a guided or chartered fishing trip in freshwater or saltwater, you should check out Fishing Booker. They are the leading database of certified and professional fishing guides at the guaranteed lowest prices.
They have countless listings for such dream destinations as the Florida Keys, Corpus Christi, Great Lakes, San Diego, Central America, Montana, and many more. Click here to visit Fishing Booker and book your trip of a lifetime at very affordable prices.
Worms: The Ideal Bait for Catfish
Worms are actually the perfect catfish bait for a variety of reasons. They are readily available everywhere and in every garden or bait shop.
They are free or very inexpensive depending on your means of acquiring them. They also offer great longevity and hardiness.
But we don’t care about all that. What we really care about is how to catfish like them. Catfish devour worms given the opportunity.
Sure there are plenty of bait options (cut bait, live bluegills, chicken liver, etc) that work really well under certain circumstances, but worms will catch catfish under universal circumstances.
Worms will catch catfish often times when other baits won’t.
Worms vs. Nightcrawlers for Catfish
When fishing for catfish, worms (red worms & earthworms) and nightcrawlers have their own advantages and disadvantages. I personally think worms are superior to nightcrawlers for catfish and I explain why.
First, worms are more lively and “flail” about on the worm more vigorously than nightcrawlers. Worms are more “twitchy” and reactive than their bigger, more docile cousins.
While you can usually get by only putting one single nightcrawler on the hook instead of multiple red worms, the resulting action just won’t be the same.
Perhaps even more critical a factor is the scent released by both forms of worm. Red worms are more aggressive feeders of decaying matter than nightcrawlers. This permeates into their body and out of their pores.
You may not be able to smell a difference in your hands, but catfish can detect a couple red worms more vividly from a few feet away easier than a single big nightcrawler.
If I had to choose, I’m going red worms.
Half-Worm vs. Full-Worm vs. Multiple Worms
There is a lot of nuance to this answer. This could vary from fishermen to fishermen. I’m going to go with multiple worms for catfish and I’ll explain why in a second.
Using half a worm is ideal for smaller-mouthed fish like bluegills and even small bullheads. This is because with fish like that, you want the piece of worm they grab to allow contain the point of the hook.
Their mouths are so small, you could just pull the worm off the hook and never come close to the hook itself.
If you we are talking about using a full worm, I’m assuming we are referring to a big nightcrawler. Like I mentioned earlier, I don’t love nightcrawlers as catfish bait.
I think their sluggishness and lack of scent makes them inferior as catfish bait to red worms. You can still catch catfish with them but my choice is clear.
I think you’ll have much better success with cats if you hook multiple red worms on your line than a single nightcrawler. I also believe using 1/2 a nightcrawler or worm simply is not enough meat to draw in a hungry cat.
You have to remember catfish hunt by touch and smell. The more of both those senses you can address with your bait, the easier fishing will be.
How About Plastic Worms for Catfish?
So we have clearly demonstrated that worms and nightcrawlers work very well for catfish. Let’s go a step further. Can you use plastic worms to catch catfish?
The answer is yes. It is possible to catch catfish using plastic worms. Catfish are naturally curious predators and rely heavily on their sense of touch and smell to locate food.
Bass fishermen occasionally hook into catfish when jigging soft plastic worms. This is especially true when using “Carolina-style” worm rigs.
“…I catch a catfish or two every once in a while. I know immediately once they take the bait, the pull is too steady to be a bass.” – unnamed South Carolina bass angler.
However, I would advise strongly against targeting catfish will these soft plastic baits. You’ll be wasting your time targeting catfish this way. Catfish are very smell-driven and plastic worms give on an unnatural but delicate odor.
Catfish are used to eating fishy and dying things. There’s a reason why many of the top catfish baits and attractants small awful. Catfish may eat a plastic worm on occasion but there are so many other baits that will be better for the average catfish angler. Just put a real worm on the line.
Day-Time vs. Nighttime
Nighttime. If you had to pick between day time and nighttime to throw worms at catfish, the easy answer is night. This because catfish are the most active during the summer at night.
They aggressively ascend and descend in the water column in search of prey: living and dead. At night, there’s a decent chance your bait won’t even reach the bottom before a hungry cat scoops it up.
Don’t get me wrong though, you can still catch a lot of catfish during the day, especially in the late afternoon. But if your wife is making you pick the time you’ll be out of the house, go with night.
For a complete gear and tackle recommendation for catfish, check out my recommended catfish gear list which will help you catch more and larger catfish than anyone else.
9 Tips: More Catfish Caught Using Worms
1. Multiple Rods/Multiple Distances
When fishing for catfish, especially from shore, cast your worms out to different distances. This will ensure each of your baits will settle on the floor at different depths.
Catfish are roaming characters but they will likely be grouped in similar depths depending on temperature, food sources, and other factors. Because of this, use your first few casts as “fish finders” to locate the distance from shore they are at.
2. Poke More Holes in Worms
Worms are jam-packed with nutrients and corresponding scents. A worm with just a single hole in it will release a fraction of the scent a worm with multiple “hookings” will. Yes, hookings is a real word because I just created it.
3. Fish Bottoms Only
There are times when catfish will feed higher in the water column like at night, but for 90% of your catfish outings, put your baits flat on the bottom of the river or lake.
I really like recommended bobber striker indicators but for catfish, I won’t. You want your worm on the bottom, not hovering off the bottom.
4. Break Out Flashlights
Nighttime is the right time for catfish. Ok, they can be caught at all times of the day but nighttime cats are especially voracious feeders.
Catfish are extremely reliant upon senses other than sight so they are perfectly at home hunting in darkness. Grab your flashlights, lanterns, and a jar of nightcrawlers and start casting.
5. Add Some Scent to Worms
Worms already come well-infused with natural attractive scent. Believe it or not though, it can be improved upon.
Some avid catfishermen will dip their worms in blood or even sauerkraut. Seems a little odd but it apparently works well for them.
6. Create a Burley
Most Americans likely don’t know what a burley is. From what I gather, it is a very popular and effective way of chumming in saltwater fish in New Zealand and Australia especially.
Create your own burley by tossing ground pieces of old fish or red meat. Cornmeal can work well too but will draw in bluegills that will steal your worms.
7. Avoid Vegetation
Catfish don’t discriminate when it comes to hunting grounds. They can hunt quite actively near vegetation. I’m recommending you avoid weeds for now because bluegills love weeds.
Bluegills are the single biggest (and smallest size-wise) threat to your bait. Bluegills will strip the worms off your hook before catfish can find it.
Fish muddy bottoms away from weeds and you can bet the only thing eating your worms will be large cats.
8. Use Long-Shanked or Circle Hooks
Catfish have a tendency to swallow worms completely. This can result in a gut-hooked fish which is difficult to release.
Instead, select a long-shanked hook which is harder to swallow and easier to remove. Better yet, spring a little extra money and buy some nice circle hooks.
Circle hooks are designed to hook in the corners of fish’s mouths nearly every time.
9. Rods with Backbone
This goes without saying when fishing live bait. Make sure your rod has the backbone to handle a 10+ pound catfish. If you hook into a 30-pound blue or flathead catfish, you’ll be wishing you had the rod to handle it.
There are a lot of great fishing rod & reel combos on the market for catfish. I personally recommend this 7’0″ rod and reel combo available on Amazon for most catfish angling you can do. It offers great casting ability, a ton of backbone power, and a more reliable rod for better catfish action.
Related Questions
Are worms a naturally occurring food source for catfish?
I don’t think so. Short of worms being washed into the water by heavy rain or a kid tossing a handful of worms in the water, I can’t imagine a scenario where a worm (a creature that drowns in water), is just crawling along the bottom of a lake.
Will bullheads also bite worms?
Yes, bullheads readily consume worms presented to them. You may be lucky enough to catch catfish and bullheads in the same section of water using this bait.




 Spring is in the air here in Maine. Spring chic’s, piglets and turkeys are starting to be come available at local farm supply stores. I thought I would check in with Harris Turkey Farm to see what it takes to raise my own turkeys. Here’s what they had to say.