Moving to Auburn, Alabama to begin graduate school last fall brought about quite a few changes in the way I hunt. It was the first year I was away from my family’s farm in North Carolina. While I was able to hunt the farm a couple of times during 2017, most of my hunting was done on public land around Auburn. This shift to public land came with a steep learning curve, but it taught me more about scouting and adapting to hunting pressure than any season before. I managed to harvest several deer and had what I would consider to be my best hunting season to date.
However, I had also moved far away from the deer processor I have used for most of my life. While I have always been satisfied with his work, I decided this would be the perfect time to begin processing deer for myself. Unlike the difficulty I encountered while trying to figure out public land, learning to process my own deer was actually pretty simple. I hope to share what I’ve learned, as deer processing is far more attainable for the average hunter than I would have ever imagined.
Why Process Your Own Meat?
The reasons to process your own venison are many. I certainly could have used one of the many processors around Auburn, but there are a couple of major reasons I decided to do it myself. The first is simple – saving money! After the minimal equipment costs are covered, it really pays to do it yourself. Most processors charge at least $60 per deer, and at that rate I was able to “pay” for the basic equipment I bought in one season. As a college student, I can certainly appreciate that savings.
Venison processing also allows you much more flexibility when the time to cook arrives. In the past, I never seemed to have the right amount of venison on hand. How much burger did I want? What serving size of roast would I be preparing? No longer is that a struggle. I can save whole cuts of meat to grind or cook later, or I have the choice to go ahead and cut steaks and package them based on the number of anticipated guests. The options are endless.
Finally, processing your own deer creates a much greater connection to the hunt. As QDM’ers, I am sure many of you have experienced the enjoyment that comes from harvesting a deer that benefitted from habitat management practices you implemented. This same satisfaction can come from the last step in the hunt, which is turning that animal into food to be consumed. It is a blessing we can have a hand in the whole process, from managing the vegetation the deer consumed, to harvesting it, to processing the meat, to cooking a meal for others to enjoy. And to think that most get their meat from a styrofoam tray in a supermarket!
It is a blessing we can have a hand in the whole process, from managing the vegetation the deer consumed, to harvesting it, to processing the meat, to cooking a meal for others to enjoy.
This connection to the hunt also brings up the perfect opportunity to mention hunter recruitment. To the outsider, it probably seems a little strange to go to the trouble of hunting an animal then paying someone else to turn it into table-ready cuts. The ability to do-it-yourself opens up a fantastic opportunity to show a new hunter the entire process. Harvesting free-ranging, natural meat is a common reason people are interested in hunting, and being connected to the hunt from start to finish can reinforce that drive.
Equipment Needs
Along with the time commitment (around three to five hours per deer as a beginner), probably the biggest reason more people don’t process their own deer lies in the thought that there is an expensive, up-front equipment cost. This is far from the case. Nearly everyone already has a fillet knife, a couple of bowls, a cooler, and a cutting board.
While a lot can be done with the above, I added a vacuum sealer, grinder and small digital scale to my arsenal. The vacuum sealer and grinder were the two costs that hurt the most, but I was able to get mine on sale from Cabela’s for less than $200. Better units cost more, and mine will probably need replacing at some point. However, they have already paid for themselves in the first season. I would buy the best units you can afford, but the starting processor also doesn’t really need large, commercial-grade equipment. You may already own a small kitchen grinder or a countertop appliance such as a mixer or food processor for which a grinder accessory is available. As for the vacuum sealer, these are nice to have, but plastic wrap followed by a layer of freezer paper also works fine for freezing venison.
Another common misconception regards the amount of space required to break down a deer. I live in a single bedroom apartment with a kitchen so narrow that I place my 70-quart cooler in the bathtub during processing to save space. If I can make it work with the space I have, anyone can! With just a small amount of counter space, a few hours, and around $200 worth of equipment or less, anyone can break into the home processing game.
Field Care
What happens after field-dressing is based on whether you have access to a place to hang the deer. It is certainly easier to skin and cut up a deer hanging, but I have also skinned and quartered a deer on the tailgate of my truck. If I have a place to hang the deer, I go ahead and skin it while hanging. Without a place to hang the deer, things get a little more complicated. I would highly recommend hanging the deer if possible. A number of portable devices are available for hanging and skinning deer, including tree-mounted and bumper-hitch mounted hoists.
Regardless of where I initially break down the deer, I follow a fairly simple system. First, I cut out the backstraps and tenderloins and put them in a cooler. Next, I’ll break down the hindquarters into cuts of meat while they are on the deer. I personally find it easier to cut up a ham while it’s still on the deer, but you can also detach the hindquarter meat from the bone in one mass and process it at the house if necessary. Finally, I cut off the shoulders whole along with any other meat that is destined for the grinder, including the neck. With this process, it will certainly help if you have an experienced friend to guide you the first time. There are also good videos available online, and the free e-book, QDMA’s Guide to Successful Deer Hunting, has an excellent chapter with much more details on field-to-table processing.
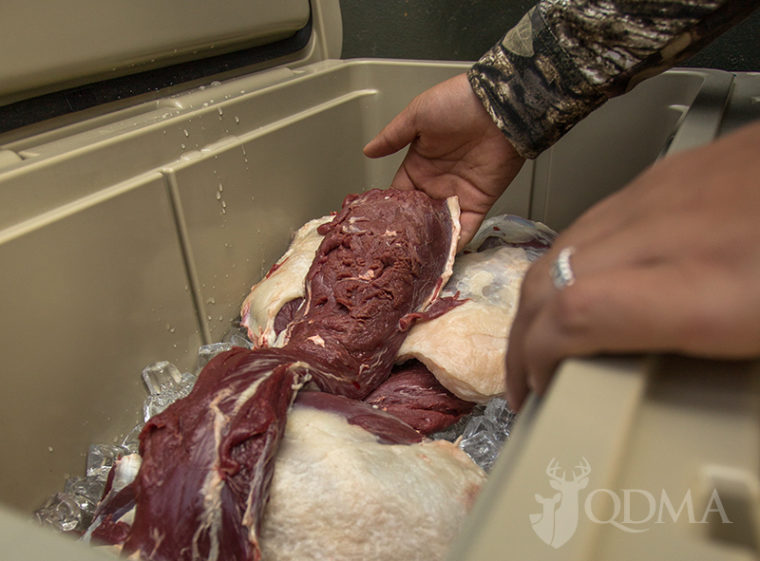
When icing down the meat, it’s a good idea to keep the meat on top of the ice and drain the cooler regularly to prevent the meat from sitting in melted water.
Now you have to figure out a way to get rid of the carcass. Some states allow them to be placed in the landfill, and some even allow them to be bagged and taken out with the trash. Regardless, this is a step to consider ahead of time. Whatever you do, follow the law and act ethically. Hunters don’t need bad press that comes from dumping carcasses in creeks or on roadsides. Also research state regulations concerning carcass movement to prevent the spread of CWD prions.
Processing
With the deer meat back home in a cooler, it will probably surprise you that the difficult part is over! The rest of the process is fairly intuitive. Personally, I like to keep things as simple as possible. This means packaging and freezing large cuts of meat whole then grinding the scraps into burger. It is certainly an option to cut steaks or smaller roasts at this time, but keeping things whole allows for more flexibility six months down the road when you decide to cook that hard-earned venison. The one exception I make is with backstraps and tenderloins. With these, I will often go ahead and package them based on an anticipated number of servings. While I can eat quite a bit of backstrap in a sitting, I prefer to save these cuts by only thawing what I need prior to a meal.
There are many videos online that show the cuts of meat on a deer. I would encourage any first timer to watch a few, then get to cutting. Every single cut I take off of a deer is clearly delineated, and many cuts are separated by connective tissue so that I am able to use my hands more than my knife to pull them apart. On the hindquarters, I save the top round, bottom round, ball roast, and eye-of-round. These are all very simple to remove and can be clearly seen. Simply look for the lines between the major muscle groups and begin cutting slowly to separate them. The top and bottom round are both great cuts for a variety of recipes. The ball roast has quite a few bits of silver skin, so I personally make crockpot barbecue out of it. The eye-of-round is one of the best cuts on a deer and can be treated like a tenderloin.
Aside from the backstraps, tenderloins, and previously mentioned cuts, I usually end up throwing everything else into the grinder. While there are roasts on the shoulder and neck, I personally eat much more burger annually than roasts. However, the great thing about home processing is that you can decide exactly what you want to do with your deer! These same decisions can be made prior to taking a deer to the processor, but it is infinitely more rewarding and fun to choose these cuts on your own.
Conclusion
Given the minimal cost, time commitment, and skill required to take a deer from the field to the table, I certainly regret not getting into the processing game way sooner in my hunting career. If you have never considered processing your own venison, I would highly encourage you to give it a try. There is probably nothing so uniquely satisfying as taking a deer from the field to the plate, and it will definitely lead to the best-tasting venison you’ve ever had!


