")
")
")
")
")


Traps to capture birds can come in as many forms and designs as types of techniques, but they all have the same origin source in that they were constructed to capture food. Trapping fowl of any type was as a whole, not regulated or tracked in any way.
When populations were depleted or the species started showing strains from being trapped, such as when songbirds where in fashion at court for their voices or native species were hunted only for their plumage, regulations and laws were put into place to protect the birds.
Table of Contents
Bird Haven
In the middle 1700’s, in the region of Ontario Canada, the native people were hit hard with diseases like TB (Tuberculosis) and Small Pox. The remaining people fled to more populated areas, leaving the land unpopulated and unhunted for about 75 years.
It just happens the opposite was occurring in the bird community, and a certain species had a big boom in growth. In this region of Canada, it was berry rich and predator sparse with a lack of competition for food, so a sweet haven that was perfect for birds to flourish.
Rise of the passenger pigeon
This bird was the passenger pigeon and some of its relatives like doves, and the population rivaled those of the buffalo on the plains of the west. Just one flock could swell to numbers of 2 billion birds. Due to this high number of birds, native peoples begin to move back to the prey rich lands.
This abundance in food with forests untouched by people served the native population quite well and several tribes of the Anishnaube moved into the area, with the strongest being the Ojibway.
In the Columbidae bird family there are about 42 breeds and 310 varieties. The stout bodied bird that has a short neck and slim bill many people think that dove and pigeon can be used for both. But dove is from the French for “peeping” and pigeon from the Germanic name for diving.
The larger types of this family are called pigeons, and the smaller ones are doves. But in common terms, the rock dove is what most people refer to as a pigeon and its subspecies are domesticated and the feral ones in the cities.
The passenger pigeon, at one time was thought to be one of the most numerous species on earth. One colony recorded in 1871 by ornithologist A. Wilson was reported to have over 100 million breeding birds.
Evolution of bird trapping
The type of bird and its habits help explain how the bird trap evolved to be most efficient at providing catch as a food source. In the thick Canadian forests not all traps are successful. Traps like the deadfall, spear based traps, or the scissors derivatives do not seems to be that effective for the environment.
The pole was meant for birds to serve as a perch. With birds such as grouse or grosbeaks they are more ground birds that fly straight up into the protective trees if startled to hide. As the passenger pigeons are perching birds, the Ojibwa bird pole snare was developed.
The Ojibwa Bird Pole Snare
Although a primitive trap, it has a design that is quite sophisticated in its elegance.
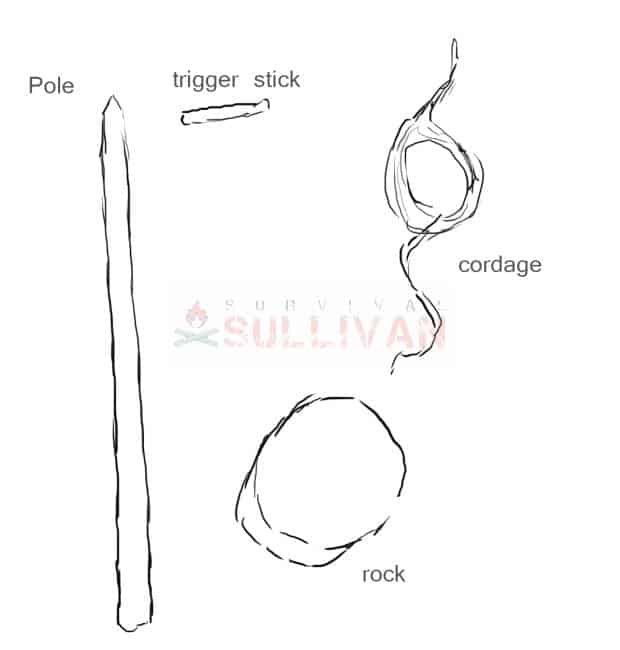
The basic set up consists of 4 main elements:
The Pole
The main piece is a tall pointed pole, about 4 feet in height that you drill a hole in. The hole is bored so there are no snagging pieces inside. You can use flint like the native people, or a hacksaw.
A cord or rope must go through smoothly and without any resistance. The method a lot of bush craft people use is contributed to Kochanski and it is cutting a hole with a long Bowie or hunting knife.
This method makes more of a conical bore on each side so the cord has a range of motion, you can drill the hole of course. Either method would be functional as long as the walls of the hole are smooth inside. You can use your knife to carve a point at the pole’s top. This will discourage birds from landing atop it, and aim them more towards the trigger stick for a seemingly better perching place.
The Triggering Stick
The next piece is a stick that is long enough and thick enough to let a bird perch on it, preferably non-resinous wood (so no pine or cedar). Think of the dowel rods used in bird cages to gauge the width. This triggering stick will fit into the hole as a plug, keeping the snare open by preventing it from sliding shut until it is activated by a bird’s weight on it.
When the bird lands and pressure is presented on the triggering stick, it will cause it to be released. This will allow it to close the snare and shut it.
The Snare
Through the ages many materials have been used from leather strips, natural twines, to wire. I don’t like wire as its too rigid for this type of snare trap and can get misshaped quite easily. After a few uses, it may not slide closed properly, allowing for your catch to escape, or can bend a few times then just snap right in two.
So the consensus is using cord is the best all around. I like the inner strands from paracord as they have a great tensile strength, will not rot or mildew like other natural cords, and slide pretty well allowing for the snare to shut. If you have no paracord, then most cords will do for a while.
The Weight
For this type of snare to work, the activation of the trigger will need to be countered with a weighting mechanism. There are 2 types of mechanisms that will work. A bent sapling to snap the snare closed when activated, or a rock for weight to pull the snare closed with gravity.
The rock method is the one employed by the Ojibwa as it can’t break or be affected by weather like a sapling. So during the long and harsh winter months, the rock won’t fail making it the best choice.
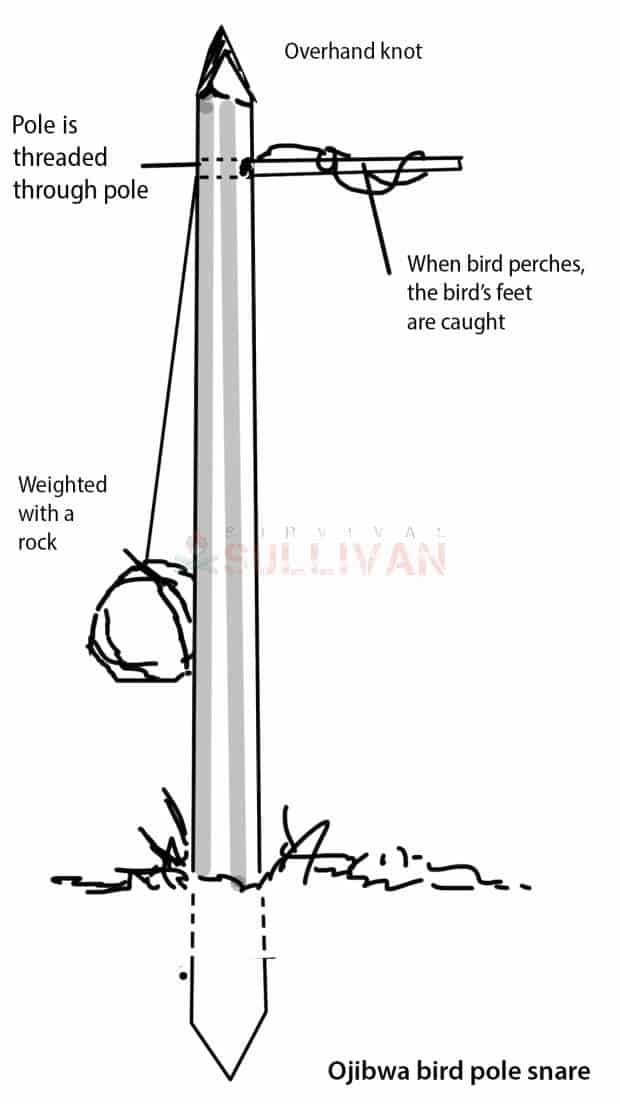
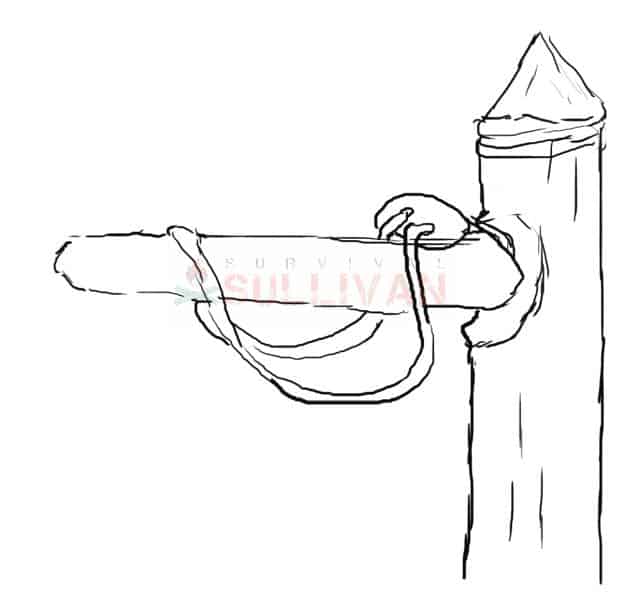
This is the finished Ojibwa bird pole snare:
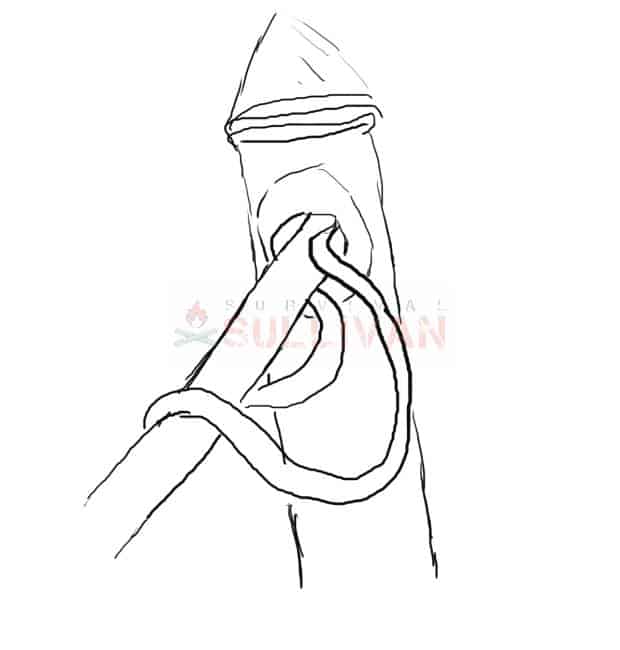
Here is a closer view of the trigger, and the way it fits into the pole with the snare set.
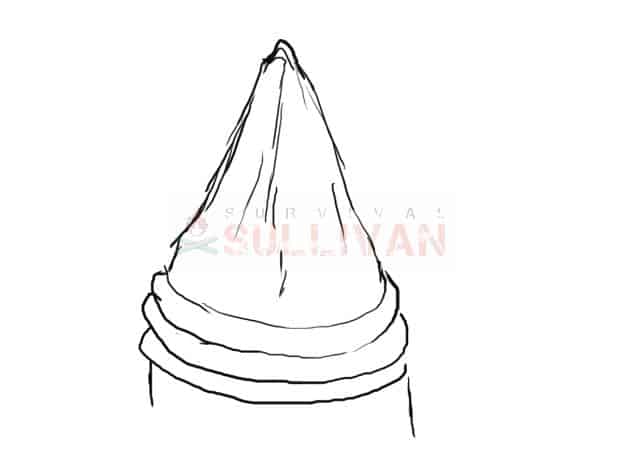
This is the properly sharpened tip of the pole, to insure the pigeon or any bird to choose the trigger branch as a landing spot for a safer grip.
One variation on the Ojibwa bird pole snare is to add a toggle clip to keep the bird off raised quite a way off the ground and some say its smoother and safer for the prey, but it is not needed. The Ojibwa people used the Ojibwa bird pole snare for many centuries and it is still a reliable trap to this day, so either way is fine.
Using a toggle does insure the birds legs don’t break when the snare is closed, so it is a more humane method. It also may mean the bird, depending on its type, may escape if a particularly strong breed.
Setting the Trap
It is a fairly simple set up. It would be better to practice a few times to make sure your snare line feeds smoothly and the trigger fits snug enough to not fall too soon, but loose enough to be triggered when needed.
A note: To stop the rock for pulling the snare by gravity alone, I have seen people put a knot in the snare close to the rock. This is not advised as it may prevent the snare cord from sliding correctly and let your bird loose.
If the trigger stick is snug enough, you will not need any knots or special ties to keep it from shutting before being triggered by the bird’s weight.
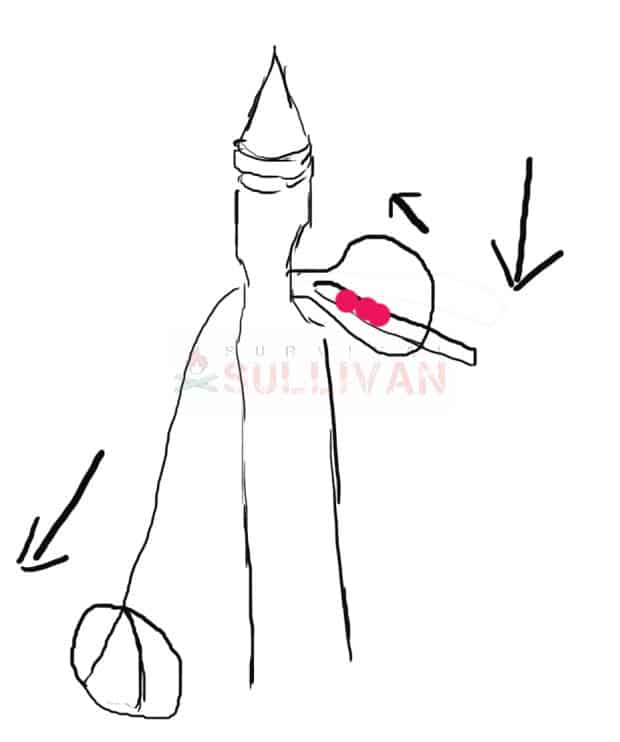
This is what the trap looks like when it is set properly:
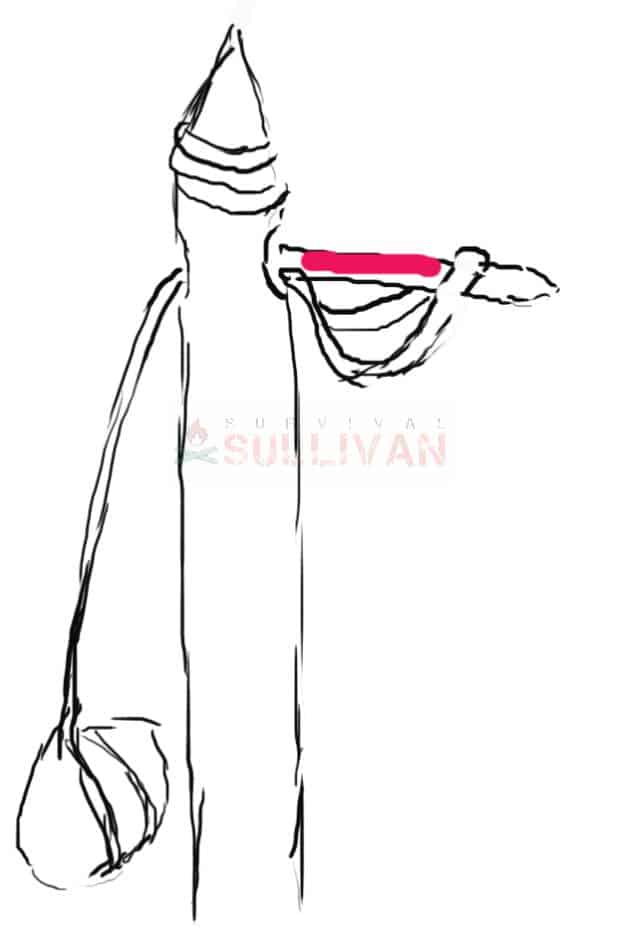
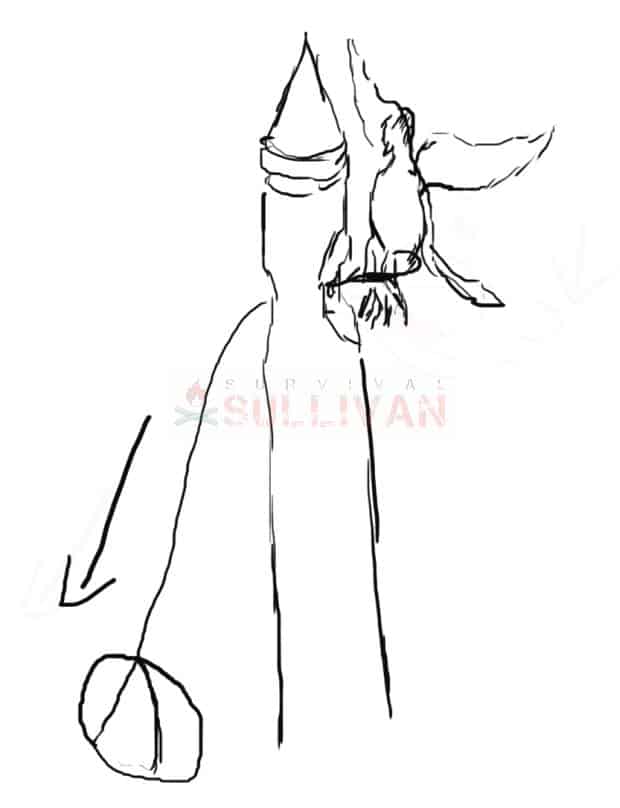
As the bird lands here (marked with red), the weight will offset the balance of the stick that has been placed in the pole’s burrowed hole, dislodging it, and letting the rock pull the snare shut as seen below.
One way to entice birds to land and perch is to scatter grains and berries around the stand, or place a leaf with seed in the snare hole. As they come in for landing they will perch first to survey the land for competition, or predator hiding spots.
Have your trap close enough to trees that the birds will fly down onto your perch, but not too close to the local foliage that they just go straight to the seed or bait that you have placed to lure them in.
As stated before pigeons and other migratory birds that perch will be a good prey for this type of snare. This trap was made to harvest the larger passenger pigeon, so it can catch a good sized bird. Rock doves and grouse can also be caught with this type and a few more birds quite effectively.
Final Thoughts
As laws and seasons can differ in many states, you will want to check with your local Wildlife and hunting Bureau for the legality side. For a post collapse situation, using a trap such as the Ojibwa snare can mean life or death in the rough terrain of places like Canada and Alaska.