 Let me make this clear to you.
This is the Only Guide on the Internet with full depth info about the best scopes for 22LR as of 2022. The field test results plus unbiased straightforward talk is what makes this list so popular. (jump to main section).
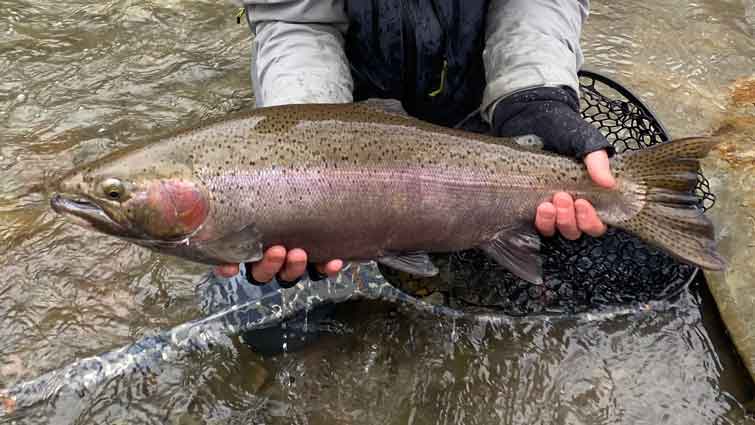
I love shooting, always have. Like most country folk do, I started off with a Daisy Air Gun which launched a brass BB like a jet off a Carrier – or at least I thought so.
As a kid, once I had proved to the old man that I had some sense for responsible gun ownership, I began plinking with my .22 Long Rifle in the dried-out riverbed behind the house.
Like most kids I got a hand-me-down. Dad’s old tube fed, Model 80 Marlin was true and sure but had a broken extractor, so after each shot, I had to pop out the spent brass with my trusty pen knife.
I loved the low recoil combined by the quiet pop of the rifle as I plinked beer cans and then advanced to popping the thousands of prairie dogs that had commandeered my neighbor’s pasture.
In my teens I was introduced to the 22 Mag, or more officially, the .22 Winchester Magnum Rimfire (WMR) cartridge, but I always fell back to the beauty and simplicity of my .22 Long Rifle for cheap and fun shooting.
To the date of the writing of this article, there is no gun comparable out there for putting down varmints from as small as rabbits to as big as coyotes. Especially when it comes to cost.
This simple, cheap, and wonderful round is produced in the billions each year and can yet become scarce when politicians start threating gun control.
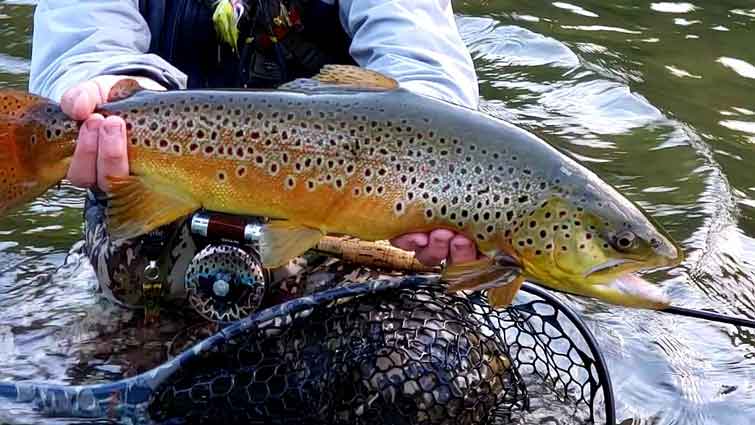
Now talking about hitting those targets or hunting squirrels and those small critters out there, you would need a scope regardless of the distance they’re at!
We know if we are target shooting (in competitions) or hunting small animals like squirrels and armadillos, all we need is precision and results!
So either way, if you’re an expert (perhaps you skipped the intro) or you’re someone just starting out, here are the best scopes for the 22LR rifle.
Comparison Table for the Best Scopes For 22LR:
Quality Scope for My .22, why Should I Care?
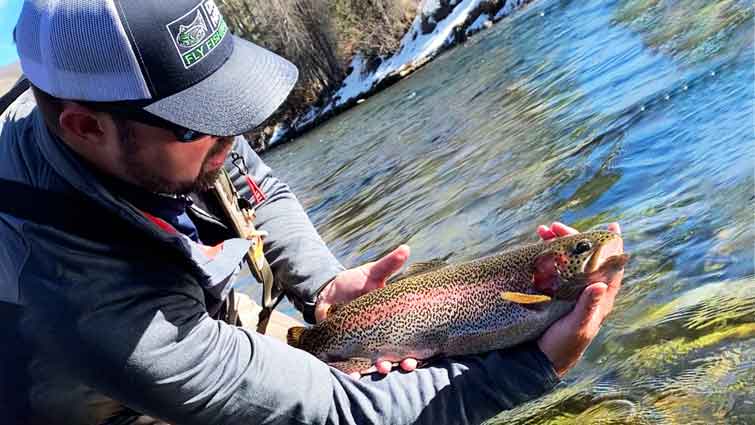
Back in those days, living on the plains of Eastern Colorado, we shot .22 rifles, peeping across iron sights at squirrels and such.
I could not afford a rifle scope, but any prairie dog inside of 50 yards was a goner when I was in the prone position.
These days, we rely on heavy duty and accurate optical sights to deliver an accurate crushing blow.
Where once we were looking through a rear and front sight now, we were looking through the glass of a scope mounted to our barrels.
At first, I bought the cheapest scope I could find. I wasn’t looking for high quality or multi coated or fog proof optics.
I made some good shots with the $30 scope but I sought out a better solution if not the best.
My .22 needed a companion scope that would bring out the best features in the chambering.
How Were the Scopes for the 22 Rimfire Chosen?
The list is built from scratch for the year 2022, so the 22LR scopes mentioned here have up to date information.
Here are things that I considered, researched, and tested while searching for the best .22 scopes:
I spend most of my time in the High Country of Colorado. The weather is unpredictable, and the terrain is abusive.
My scope requirements tend to fall more on durability, weatherproofing and weight. A broken or hazy scope is useless at 12,000 feet.
Test Bed:
Marlin Model 60 chambered in .22 LR, semi-automatic, with 18 round tube fed magazine.
This is a steady and reliable rifle and offers a standard platform with which to mount our test subjects.
The Marlin is a lightweight rifle and we wanted to keep it that way, thus scope weight played a significant factor.
Best 22LR Scopes for Squirrel Hunting and Target Shooting:
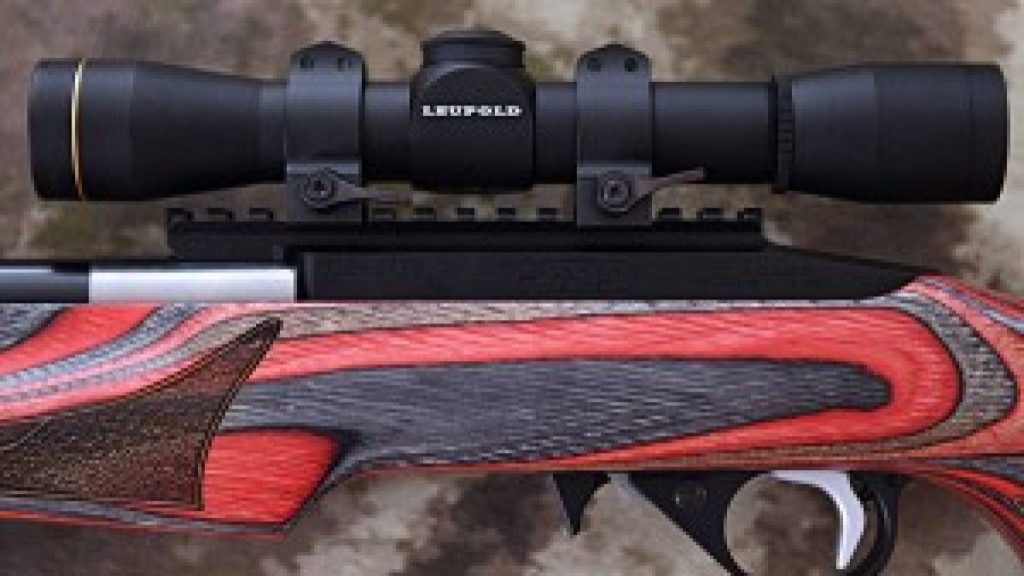
Leupold VX-Freedom 3-9x40mm Rimfire Riflescope
This Leupold VX-Freedom toughed it out with us on a late late-season, plains coyote hunt on the sagebrush and dog-hole dominated rolling hills of Arapahoe County, Colorado.
Out of the box, this high quality, fully coated, rifle scope had the look and feel of one of the best scopes offered on the market. It mounted seamlessly to my Marlin using provided scope rings.
The Power
This Leupold is a variable power scope that far exceeds the requirements of shooting the .22 LR. The 3-9×40 allows you to dial from 3 up to 9 magnification to suit your hunting needs. The 40mm objective lets in a ton of light during shooting hours. It was more power in a scope than I needed for shorter range “varmint hunting”.
I usually hunt inside 100 yards, so I shot the scope with a setting around 5 which is quite practical for most hunters. I found that any magnification over 9 just wasnt worth it in short range, small game hunting. A fixed scope would most likely be the best candidate for hunting small game at a short range. But to each their own.
The Objective Lens
This scope’s objective lens is a little larger than what is required for the .22 LR and offered a noticeably clear sight picture. It was clear and bright at 40mm and provided the best light transmission front to back as we shot from dusk to dawn.
I did shoot my rimfire in the evenings and found that the larger objective was far more gracious in letting in light as you approach dusk.
Fuzziness and blurriness were not a problem during our intense hunt. The scope’s optics performed in an outstanding fashion. I selected the simple duplex reticle for quick and easy range finding. I got on to several coyotes within the first several hours of hunting and wanted to lock on as quickly as possible. All ‘yotes inside of 100 yards went on to Valhalla and their furs to the taxidermist.
Rugged and Durable
Yes, this rifle scope performed well out of the box on our weekend coyote shoot in the snowbanks of Kiowa Creek in Eastern Colorado. There were quite a few creek crossings, climbing on our bellies and hauling scope mounted rifles into tree stands. We are rough on gear out here and the Leupold performed very well under the worst-case conditions.
Knobs and Dials
Both the Diopter adjustment and the magnification zoom, as well as the elevation and windage turrets functioned smoothly. Windage adjustments were smooth and reported a loud click to ensure accurate and confident shooting.
Affordability
You’re not going to get to get away with spending less than $400 for a Leupold scope. In this case, the scope cost more than the rifle, but it is what it is, and the shooting experience was exhilarating.
Leupold FX-1 4x28mm Rimfirescope
I really wanted to check out this no-nonsense scope, that had set magnification at 4x which is perfect for .22 LR shooting. It was also more streamlined and lighter than the other candidates we checked out and fitted very well to the Marlin with the extra purchase scope rings.
The Power

This one is a non-variable power scope. The 4x was more than appropriate for the max effective ranges of the .22 Mag, inside 100 yards, which allowed quicker target acquisition to kill on most targets.
Of the two other scopes, this one was the toughest to get the sight picture clear and there was some blurriness, but it was not that annoying. It may have been a manufacturing defect in that scope. I’m very used to peeping through Leupold scopes and my expectations are always very high that I will be looking though the finest, state-of-the-art optics.
The Objective Lens
The 28mm objective works simply fine for plinking, target shooting and hunting.
As I shot all day on the range, I noticed the glass was not as crisp and clear as the other contenders and as I continued to shoot till dusk and found out that it did not provide the same light transmission as the other scopes. With that being said, I was still able to keep all my shots inside a 2” ring out to 125 yards. Albeit, having to strain my eyes a bit more.
Rugged and Durable
Unfortunately, I was not able to take the FX-1 out into the field for a stress test to see it is the best .22 scope in this category – only the range. These Leupold scopes are some of the most durable scopes out there on the market. I do not take their word for it either. I’ve been shooting through their scopes for over 20 years. I frequently compare notes with my shooting buddies, and I’ve heard through the grapevine, from other shooting enthusiasts, that you get what you pay for, and these Leupold scopes are pretty tough hombres.
Knobs and Dials
I did not have any major complaints on scope adjustments. They were not near as smooth as the other tested scopes and windage and elevation turrets did not provide loud enough clicks for me to be sure of their adjustment.
Affordability
I got mine for $300, so it did not break the bank, but it was a bit pricy for a plinking scope. For varmint hunting it’s probably the way to go if you have a budget but don’t want to mount a scope of lesser quality.
Athlon Optics Midas TAC 6-24×50 First Focal Plane Riflescope:
A buddy of mine from Nebraska called me up to rid his fields of some pesky prairie dogs. I knew this would be a good opportunity to try out the professional grade Athlon Optics Midas TAC.
We’d be shooting out to 150+ yards, a long way for the 22 LR, and I wanted to see how this great looking scope would perform against its more affordable rivals.
I mounted one up on to my Marlin with Vortex Optics Tactical 30mm Riflescope Rings. The mounting was simple, and I was able to adjust the scope to my preferred eye relief distance of around 4 inches for the .22 – not much recoil to worry about and I really hate getting scope bitten.
My first peep down the scope gave me a look at The Christmas Tree MOA reticle. I could tell right off the bat that it was a little much for a simple 1,200 fps 30 grain round and was better suited for 30-06 or .308 caliber weapons.
All that was necessary for this shooter was a simple duplex reticle where I just put the crosshairs on the target and pull the trigger.
The Power
The 6-24×50 allows you to dial up some serious magnification – which gives you a workable field of vision down to 6 feet at prairie dog range. The scope gets all that is needed for short range shooting just right.
With this power I was able to set back away from the alert little rodents without scaring the little buggers back down into their holes, and I hit most of the prairie dogs I set my sights on.
Hunting outside the 100 yard range with a .22 LR, I shot the rifle with the scope set at 7 power. I am biased about short range varmint shooting and I’ve always considered a fixed magnification scope the best candidate for hunting small game at shorter ranges with a 22 LR.
The Objective Lens
This scope’s 50mm objective meets and exceeds all the requirements for plinking and target shooting; well beyond what is required for the standard .22 Long Rifle and its limited range.
The 50mm objective allowed plenty of light for my daytime prairie dog hunt but we had to pack it in late afternoon.
One thing for sure, the large objective barley fit my rifle using standard rings, and I was not able to set the scope far back enough to achieve my preferred eye-relief. This problem will probably vary from rifle to rifle.
Rugged and Durable
The Athlon Optics family has a reputation for meeting the most grueling weather and hunting conditions around the world.
Unfortunately, I did not get a change to introduce this scope to the rigors of Colorado hunting but I’m looking forward to taking to the limits this winter with a late season Muley hunt on the plains east of Denver – this time mounted to the top of my .270 Winchester.
Knobs and Dials
Very well engineered! Audible and reliable clicks on the windage and yardage turrets.
Affordability
With a price tag around $700, this is the least affordable of the rifle scopes tested, its performs very well for your basic rimfire, short range shooting activities and probably is a little much given this scope is designed for shooting high velocity magnum rounds out to 700 yards or greater.
Vortex Crossfire II 2-7×32 Rimfire
You can’t complete a list without having Vortex in it, can you? The only thing entry level about this scope is it’s price.
The successor of Crossfire, the Vortex Crossfire II is a versatile piece built specifically for rimfire rifles.
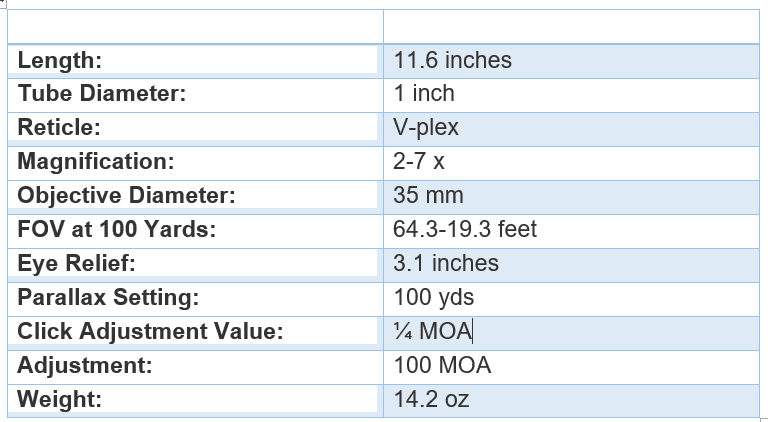
Specifications:
Clarity and Build:
The scope produces a clear, crisp picture and features multi-coated lenses, Fast-focus eyepiece and a V-Plex (MOA) reticle.
The efficient light transmission through the lens makes it a good choice for outdoor as well as indoor shooting.
The Vortex Crossfire II is built on a single-piece aircraft grade Aluminium, hence making it a robust piece and the O-ring seals make sure that no dust or moisture gets in.
The hard ArmorTrek coating protects the exterior lenses from scratches and oil.
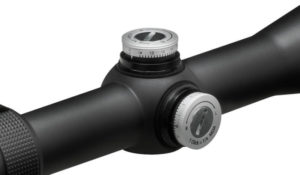
The capped zero reset turrets give a positive feel and can be tracked easily.
Accuracy:
While testing it, we found it to be clear at 25, 50 and 100 yards.
The scope was mounted on a Smith & Wesson M&P 15-22 shooting various ammo. After sighting in, the rifle shot 1/2 inch groups at 50 yards.
We got 4 inch groups on an average with rests in place at 100 yards and 1 inch groups at 25 yards indoors respectively.
The Crossfire II provided generous eye relief and held zero perfectly throughout the test.
Tested On (Rifles and Recommended Mounts):
If you’ve Ruger 10/22, the medium rings like Leupold Std Medium Rings will do good and if you’re looking for quick detachable rings then Weaver Quad-Lock Rings work well.
For Marlin 795-LTR Redfield .22 See-Thru Dovetail Rings work well.
At low power, we were able to shoot with both eyes open and the view never got black regardless of the head movements.
Pros:
Cons:
Vortex Diamondback 2-7×35 Rimfire Scope:
If you liked the Crossfire II, then you’ll love the Diamondback!
This beautiful beast is carved out of a single piece of aircraft grade aluminum hence making it resistant to shocks and magnum recoils.
Specifications:
Clarity:
Talking about clarity, as usual, the quality is exceptional, the pictures are sharp, vivid and bright; all credit goes to the multi-coated lenses which increase light transmission up to 91%.
You’re simply getting clarity that matches up to the scopes being sold at higher prices.
The turrets are super good, give a positive feel and in no way, they’re soft or mushy.
The low profiled capped turrets prevent any sort of damage to them and yes, the Diamondback features the zero-reset turrets.
The glass etched V-plex reticle is super helpful in various hunting applications.
Furthermore, the scope tube is Argon purged hence making it fog proof and the O-ring seals make sure that the scope remains waterproof and dustproof.
Accuracy:
We mounted the scope on a CZ 452 22LR shooting CCI stingers.
It took us 6 rounds to zero at 50 yards. We shot first two rounds for checking and fine tuning. The rest of the 20 rounds were dead on.
Pros:
Conclusion:
So that’s the thought process of my findings and the results of the field testing that I came up with to select the best .22 LR Scope. At the end of the day, I love standing on that pile of rimfire shells on the range.
I’ll wipe down the rifle and scope and write down some more notes on what I think is the best 22 Scope for a rimfire.
After shooting over 1,000 rounds behind these scopes, I found the Leupold VX Freedom Rimfire Rifle scope outperformed its competitor scopes in every aspect that I considered essential, except price. It is the best 22 scope solution for my rimfire. And, as of today, it is still mounted to my semi-auto rimfire.
- Provided tight groups at 100 yards and respectable at 125 yards
- The multi coated optics stayed clear and fog-proof during the worst weather conditions
- The eye relief was most forgiving, allowing me to quickly acquire my target
- Scope adjustments were easy to use, clicks were audible and the adjustments smooth
- It certainly is the best of the best scopes out there for varmint shooting with the scrappy little .22 LR
I’ll be straightforward here.
Choose either Leupold VX-Freedom or Vortex Crossfire II, these are currently the best scopes for 22LR. There isn’t much difference in clarity or features. I’m a Leupold guy so I’ll go Leupold VX-Freedom, if you love Vortex, then choose the Crossfire II.
Both of these scopes are a great choice for competitions, plinking and small game hunting.
Both of these scopes are beasts in themselves and can give a tough fight to scopes available in higher price.
Choose any of the shortlisted scope and you’re good to go.
Thank me later!
How to Choose a Scope for 22LR?
How much Magnification for a 22LR Scope?
If we talk on the basis of the usual range, effective distance, and bullet drop then hunters shooting 22LRs generally don’t go beyond 100 yards. I’ve seen most of my friends plinking or hunting squirrels at no more than 75 yards.
Considering the average distance and the size of animals or pests, you wouldn’t be needing anything more than 9x magnification.
If you’re considering a 22LR scope for long range hunting, then keep reading.
Where Should I Buy the Scope From?
Amazon. Don’t need to explain much here.
The customer service, quick delivery and easy returns make Amazon my preferred marketplace to buy 22LR scopes. I’ve had very negative experiences with many other websites but Amazon has always been good for me. The scopes are generally available at a discount and the customer ratings help a lot too.
Long Range Hunting & Shooting with 22LR:
As mentioned in my earlier post, 22LR drops like a rainbow after 100 yards.
Personally, having shot the Savage Mark II out to 300 yards with subsonic ammo, I can tell you it isn’t easy to hit with accuracy.
Still there are some amazing people out there doing the impossible and making the 22LR work way beyond its limits.
Guess what? It’s all about how good you are!
Though the scopes on my list are capable of hunting at long distances but distances like 700 yards are just extreme and aren’t a practical effective range for hunting and plinking.
")
")
")
")
")