Home Blog Page 83

How To Read Topo Maps: The First Step to Become a Better Deer Hunter in Hill Country

0

Topo maps have a variety of applications, but when talked about in the hunting community it’s generally related to scouting where folks are using them to identify key terrain features. Whether you’re a new hunter or you have a few seasons under your belt, topo maps can seem a bit more intimidating than satellite imagery. However, if you want to hunt whitetail deer in hill country being able to read topo maps is a necessity. Once the very basics are understood it actually becomes quite easy to pick apart key topo features and really get solid visuals of what the real-life ground actually looks like. Once you can visualize, your digital scouting efforts will become much more cohesive with time spent burning boot leather.

Map basics

One of the very basics to reading any map is orientation. This topic is fairly controversial amongst my peer group and has caused more than it fair share of needless miles. Personally, I like to keep my North orientation on all maps facing up. It’s just the way I was taught as a kid, what I’ve seen most often throughout my career in construction, surveying, and has just been the norm throughout my circle of influence. This “North” orientation concept comes from the invention of the compass and understanding of magnetic north from early Europeans. Keeping a North orientation is probably most common but truth be told, there’s really no wrong or right. Whatever orientation used just needs to be consistent amongst communication.

So what is a topo map? A topographic map or sometimes referred to as an elevation map is simply a detailed two-dimensional representation of the Earth’s surface shown as a series of contour lines with each line having a different elevation. The association of elevation with the contour lines allows the reader to interpret the three-dimensional lay and vertical scale of the land.

Contour lines show elevation change and are used to measure the steepness/grade of terrain. Contour lines also signify key terrain features which will always be represented in a consistent manner. Understanding some steadfast rules of contour lines can help you become very efficient at digital scouting topo maps and provide insightful knowledge on how an animal may traverse the topography.

10 Rules of Contour Lines

  • Every specific point on a contour line has the same EXACT elevation.
  • Contour lines separate downhill from uphill.
  • Contour lines do not touch EXCEPT at a vertical edge or cliff. Because each line carries a different elevation it is impossible to have two lines at one elevation.
  • Every 5th line is darker in color and/or thicker. This is known as an INDEX line. Also, INDEX lines will usually carry an elevation number.
  • Contour lines get closer together in steep terrain and farther apart on flat terrain. This is specifically important when looking for bench-type features in the hill country.
  • Contour lines that close or form circles represent a hilltop or a depression.
  • Closed depressions with no outlet have HACHURE marks on the downhill sides of the contour lines.
  • Contour lines will make a V shape when crossing a valley or drainage. The V will always point uphill.
  • Contour lines will make a V or U shape when coming off a ridge top. The V or U will always point downhill. Often times creating a what people refer to as a point and/or spur.
  • Contour lines on the opposite sides of a ridge or valley occur in pairs.

Key Topo Features

You’ll find that the contour line rules above are related to some type of key terrain feature or features. To take those rules a step further lets put some correlation and context around whitetail hunting and show some visuals examples.

Ridge Tops

Tops are fairly easy to identify by either referencing index lines, closed circle, and/or parallel contour lines. Ridge tops are exactly what you’d think….the very top of a ridge. While ridge tops might not offer the most favorable hunting locations, there will typically be a sign there. From my experience, most of that is laid down during night time hours which shifts this feature into a scouting location for both boots on the ground and trail camera sets.

Ridge tops become extremely useful for access routes to and from stand locations. While understanding the big picture of the area (bedding structure, feeding locations, predominant wind directions, travel routes, etc) tops allow you clean access by keeping your scent cone blowing in nondeer areas.

Bottoms

Bottoms or valleys can be identified in the same way ridge tops are but with one addition, traditionally bottoms will have some type of water feature. Bottoms are a great place to look for a sign but again generally speaking most of it will be laid down during night hours. We generally look at these areas for general trail camera locations for the sole purpose of gathering an inventory of the local deer.

Bottoms can be extremely difficult to hunt due to swirling winds and thermal pools however it’s not entirely impossible. Given a zero wind day with high or rising barometric pressure they can be hunted with caution. Bottoms can also offer great access routes because you are able to visually and audibly keep yourself hidden.

Drainages

Drainages are exactly what they sound like….a drainage ditch coming off the hillside and are found in a variety of depths, steepness, and width. Drainages can be spotted on the topo as bends in the majority of the contour lines on the hill said. As the stated rule says above, this will create a V or U shape with the point leading uphill. Wider drainages will look more like a U and narrower drainages will look more like a V. Often times folks may refer to larger drainages as “draws”.

Drainages are one of my favorite features to mark on my map and then go scout. They can provide excellent hunting opportunities pending the sign is there. They not only create a barrier for animals to navigate but double as a pinch point as often you’ll find animals hug the very top of the drainage. They also offer great potential access to stand locations and thermal advantages for evening hunts.

The image above shows 3 different drainages obviously labeled as A,B, and C; each of which have distinct characteristics and advantages. Drainage A is your typical larger drainage that some might refer to as a draw. This might be an area to scout for the potential nighttime sign. Drainage B is smaller in relative profile yet much shorter/steeper than drainage A. This may bode well for access pending there is a sign there to hunt. Drainage C is actually several drainages in close proximity that creates a “bowl” in the hillside. This type of feature is important as the actual drainages and ridgetop reduces potential areas of animal travel creating several pinch points to scout.

Saddles

To whitetail hunters, a saddle is simply a low spot on a ridge top. Generally, it can be identified when contour lines are making a V or U shape off a ridge top that is pointing towards one another from two separate directions. This feature is important because it often provides the path of least resistance for animals to travel and creates a valuable pinch point.

In my opinion, nearly all saddles are at least worth taking a look at. What I’ve found over the last 5 years of hunting public land is that most majorly defined saddles like shown in the photo below will draw human attention, so don’t be afraid to look at saddles that are less subtle.

Points and Spurs

While the verbiage may differ from hunter to hunter, the importance of points/spurs remain the same. Points/Spurs are secondary ridges, usually short in relative length, that stem from the main ridge and are identified by a V or U shape pointing downhill.

For Whitetail hunters points/spurs are key features for a multitude of reasons. The first is that they often provide bedding opportunity for whitetails. These are also great areas to scout for deer trails and rub lines as whitetails will often travel vertical pending the steepness of the point. One advantage to hunting points or spurs is that the wind will generally be consistent once you understand the wind/air currents in the area.

Benches

Image example of a Bench on a topo map

If you’re unfamiliar with this term, a bench is just a relatively flat spot on a hillside. Benches are the hardest of these key features to identify consistently. The more easily seen benches are really just shown by contour lines spread out further in a specific area or elevations compared to the other contour lines of the hillside. With 20′ contour lines a bench can be less than 20′ wide without varying the distance between lines. These subtle benches can often be dynamite spots as they are typically overlooked but the downside is you will likely have to spend some time walking some of these prospected areas.

Benches allow deer to easily navigate hillsides without having to sidehill and also give whitetails a flat area to scrape on. Both great reasons to scout and run trail cameras on benches.

While this article should provide a plethora of knowledge and insight for folks of every map reading ability, don’t feel intimidated if some of this sounds foreign. Everyone has to have a starting point, but hopefully having resources like this and tools like OnX Hunt moves you along that learning curve a tad bit faster. For more helpful content on trail cameras, and hunting strategies be sure to check out the Exodus YouTube Channel and The Exodus Podcast.

Author: Chad Sylvester, Exodus Outdoor Gear Co-Founder/Owner
Frogs — The Bait Bass Can’t Ignore

0

Frogs - The Bait Bass Can't Ignore

Among bass anglers, there’s a major misconception about fishing frog patterns. Many anglers believe that there must be frogs living in the reservoir, natural lake or pond for a frog-style bait to be effective. Others think you need to have mats, weeds or moss to fish a frog.

None of those are true.

“When you put a frog on the mat, bass don’t know if it’s a mouse, a baitfish flipping around or a black bird. A lot of times, the frog imitates a number of things, not just a frog,” says professional bass angler Gary Dobyns, the all-time leading money winner in the West. “I’ve seen water snakes eaten when they are on top of a mat. Bass are ferocious predators. They just eat whatever moves on top of that mat and figure out what it is later. Half the time they don’t know what it is. Twice, I’ve seen bass try to eat full-grown coots. They didn’t get them, but they sure tried.”

Depending on weather and water temperature, frogs can be effective all year. May, however, is the traditional start of the frog season. Frogs can be effective from May through the fall in most waters in the western United States. Regardless of the water’s structure, most lakes, reservoirs, ponds, sloughs, backwaters, natural lakes and rivers in the West harbor a place for frog fishing. In fact, there isn’t a place in the West where a properly fished frog bait won’t catch bass.

“You can throw frogs on any lake, period, and they’ll catch fish,” says Dobyns. “I’ve caught my frog fish in Lake Mead, Lake Powell, Lake Oroville and in the Columbia River – places where you don’t have grass. You can catch frog fish anywhere.”

POLLEN LINESEvery serious bass angler knows that frogs can be effective anywhere grass is found. But Dobyns’ biggest secret is fishing frogs in areas devoid of greenery. For example, while few anglers fish pollen slicks with frogs, Dobyns wins tournaments by targeting them.

Floating pollen is common in most Western waters. Dobyns looks for areas where a breeze pushes pollen into a pocket or along the shoreline.

“Fishing frogs on a pollen line is my best-kept secret,” he said, fully knowing his words would soon be printed. “If you fish a frog on top of the pollen scum line, you can catch a boatload of bass. The bass hardly ever see frogs, so they are easy to fool. They’re sitting right underneath the scum line of pollen. It’s like a mat. They get right underneath it. There’s shade and no light penetration, so you always have bass there.”

And because no one else knows those fish are there, Dobyns is busy catching fish other anglers simply overlook. “It’s a secret. No one does it.”

Many bass pros seek out specific water to throw frogs, but Dobyns is a little more flexible. He commonly casts frogs into open water where most folks wouldn’t think of fishing them. “You can throw a frog in some places that you can’t throw anything else. A frog won’t snag, so you can throw it anywhere,” says Dobyns, who tosses frogs on 65-pound Power Pro. “Braided line is very important. You don’t want any stretch. With braid, you get good, solid hookups. You want to be able to power the fish out of the mat.”

GRASSLESS FISHING

Mats aren’t the only place where frogs are effective. Anglers can find success pitching frogs into debris pockets of wood, grass, pollen slicks, tules and any heavy-matted vegetation. On the contrary, many pros have made a living pitching frogs in open water.

“I like throwing them to the bank,” says Art Berry, former Bassmaster champion. “You need to be able to cast the frog to where the water meets the bank. The key is getting the frog as shallow as possible. Everybody knows that frogs live close to the shore. The bass pin them against the bank. You want to throw to the bank, whether there are trees, grass, moss or overhanging branches on the bank.”

The point is that you don’t have to find grass to enjoy success.

“Most of the frog-fish I catch are not caught underneath the mat. They’re caught around brush, trees and in open water around grass,” Berry said. “They’ll probably eat the frog in the spot where you didn’t think you would ever get bit.”

On the other hand, time of day can affect results. Weather can also be a determining factor in frog-fishing success. Many anglers see catch rates increase toward midday and late afternoon. This is because typically, the water is warmer during this time and bass are in covered areas. Dobyns finds the best action with frogs occurs on hot, clear, calm days.

“I think the hot is a given. It makes the fish get in the shade, which most of the time is going to be underneath the mats. Clear is because it will put them in specific spots. If it’s an overcast day they don’t need the cover, but if it’s bright and sunny they need to hunt any cover they can over the top of their heads,” added Dobyns. “Calm – well, I’ve always believed that topwater baits drive fish crazy in calm water. I like fishing frogs in calm water. I’ll throw them in wind, but ask what my perfect situation is, and it’s flat.”

HOW TO FISH A FROG

Knowing how to fish a frog is a science, not something that comes overnight. As with all techniques, the more you employ it, the more confidence you’ll have when fishing it.

“People wonder why a bass short-strikes a frog. It’s because often the angler isn’t fishing it right or the frog isn’t swimming right,” Berry added. “You need to get the frog to be able to walk. Most guys don’t know how to walk a frog and they don’t have the right gear when they fish them.”

By “gear,” Berry means line, rod and reel.

“You don’t want to go have an out-of-the-package frog tied on mono line,” he said.

However, you do want to learn how to train a frog to glide flawlessly through the water. Simply skirting a frog along the surface will generate strikes, but if you make sure the frog swims to its potential, you’ll increase strikes. Berry points his rod tip down, rather than up, and employs short strokes, perhaps four to five inches.

“I just imagine that there’s a needle on the end of my rod and there’s a balloon. I don’t want to pop the balloon. When I move the tip of the rod, I do so just enough to touch the balloon, but not pop it. It’s just like if you were working a Zara Spook,” he explained. “You don’t want to pull and pull the frog through the water because it won’t

swim right. You want the frog to stay in one spot as long as you can. You have to make the frog walk on slack line.”

Easier said than done! But with practice, the technique can be perfected. By not pulling the frog, you’re allowing it to remain in the strike zone for longer periods of time, thus giving bass more time to grab it.

BIG BASS, LITTLE BASS

Many anglers perceive frogs as big-fish baits. However, they’re often surprised when barely legal bass grab half-ounce frogs, proving that bass of all ages and sizes are keen on eating frogs.

“I’ve caught non-keepers that eat frogs, but usually you catch at least keepers,” Dobyns said, pointing out that Kent Brown once caught a five-fish limit of 5-pound bass on frogs while fishing the Sacramento/San Joaquin Delta.

On the contrary, a frog can be one of the most effective big-fish baits. “I think a frog is by far the best big-fish bait that’s ever been made, other than fishing a swimbait,” Dobyns said. “You’ll catch way more fish on frogs than swimbaits. I’ve won more money on a frog than any other bait.”

Choosing a frog can be a chore. Aisles at sporting good stores and tackle shops offer dozens of brands of frogs. Nevertheless, many that appeal to the eye aren’t effective in the water. Some anglers say that it’s a personal preference as to which frog they fish with. Others pay attention to the chemistry and construction of the frog.

SELECTING FROG BAITS

“It boils down to your personal favorite with some frogs. The thing that I want a frog to do is, I want a frog to be able to walk,” Dobyns said. “I want to be able to work my rod tip and get the frog to walk side to side, like you would a Zara Spook. I want to be able to work it across the mat, and when I hit open water, I want to be able to walk it to another mat. Many times I fish frogs in open water. I think I probably catch 75 percent of my frog-fish in open water.”

Nearly every major bass tackle manufacturer designs frogs. Some are more effective than others, however.

“What do I think the best frog on the market is? I think the best is Dean Rojas’ Spro frog. What makes this frog the best is, it’s very easy to walk. And the hook position on the bait enables you to catch almost 100 percent of the fish that strike,” says Dobyns, who casts frogs with a Powell 735C Frog Rod and a Daiwa TDA high-speed reel. “With some of the frogs out there, you may only catch 20 percent of the fish that bite because the hook is too far down on the body. This is because they just have a poor design. But with the Spro frog, the hook is in the perfect position and it’s 100 percent weedless.”

Having the frog glide fluently in the water is vital, but there are other factors to consider, too. Frogs come in several sizes, ranging from a quarter-ounce to nearly an ounce.

“I throw one size and that’s it,” says Dobyns, who throws only half-ounce frogs. “I think it’s a perfect size. It’s not too big to catch smaller fish, but big enough to catch big fish.”

SPLITTING HAIRS

Berry takes frog fishing to another level, though, and goes so far as to actually count the strands of rubber used to create each leg. He believes that there are very few quality frogs on the market. “The biggest thing for someone new to frog fishing is that they need to know that most frogs you buy at the store aren’t worth a damn,” Berry said. “There are no good out-of-the-package frogs, no frog that you can buy that will work great out of the package.”

Berry says frogs come standard with 20 strands of rubber in each leg. But for an imitation frog to swim properly, he says it can only have 10 to 12 strands of rubber on each side. “What I do is cut the strands off the frog so there are only 10 to 12. You want to cut the legs up near the base. You want to leave just a hair, maybe a quarter-inch before they go to the base of the frog,” he says.

ADD SOME COLOR

Berry isn’t done yet. Next, he takes a hand file and files the round weight in the rear of the frog, saying it’s imperative to file it completely flat.

“You can’t use a power tool to file it down because the lead gets too hot and you melt the plastic on the frog, which can cause the weight to fall out. You want to make sure the weight is flat so it’s paper-thin,” he added.

Berry then moves to step three, which consists of taking two Sharpie pens and drawing roughly 20 to 25 small dots on the bellies and the sides of the frog. Berry recommends laying it down on cardboard and putting its legs together. Then he adds a varied pattern of colored dots every quarter-inch, using combinations of white, black, green and yellow.

“When you use a Sharpie pen on the frog, the frog will look really pretty right off the bat. But the ink bleeds into the rubber after a couple of days, and the tiny dots become bigger and bigger,” Berry said. “That’s OK, this is what you want it to do. The key is coloring the rubber itself. Any frogs you see in water will have lots of dots on their bellies.”

LET’S GET REAL

Berry also colors the weight black and the eyelid (where your line ties to) black as well.

“It can only be black. You want your line to be black because black doesn’t show up as good in the water and it doesn’t come off your line. If you use a frog that has a shiny eyelid and a fish sees that, they aren’t going to eat it. Come on! They know that’s not a real frog,” added Berry.

“There are key things that a lot of people miss out on. Most of the frogs that are on the shelves don’t look real and by doing these little things, you can make your frog look real and ensure that it’ll swim like a frog.”

Berry credits Andre Moore, owner of Reaction Innovations, for most of his frog-fishing secrets.

“I feel like my frog will out-fish any frog on the market because of these adjustments,” Berry said. “A lot of people get mad at me because I give all my secrets away, but this is something that anyone can do. I’m into promoting the sport of bass fishing, and if people follow these simple things we’ve discussed, they’ll catch more fish. It’s taken my whole life to learn this. An average guy can go into the tackle store and do this. You can make the frog look real.”

What seems odd though, is that if this method works so well, why hasn’t a company made a frog that has all these qualities? “Because I haven’t told anybody yet,” Berry said. “There are a few people that do this already, but most guys don’t know about this.”

They do now!

Dobyns and Berry use Power Pro braided line religiously. They both go as far as saying that if you aren’t using 65-pound braided line, you shouldn’t fish frog baits at all. Neither uses monofilament line when fishing frogs. “There’s no stretch and the abrasion resistance is incredible. The key thing is the distance you can cast with a frog on braid. You can catch it a country mile,” Berry sai

d.

Maine’s Red Hot Dogs, and The New England Frankfurt Roll

0
Other Sections
  • About The Frankfurt or New England Roll
  • Recipe

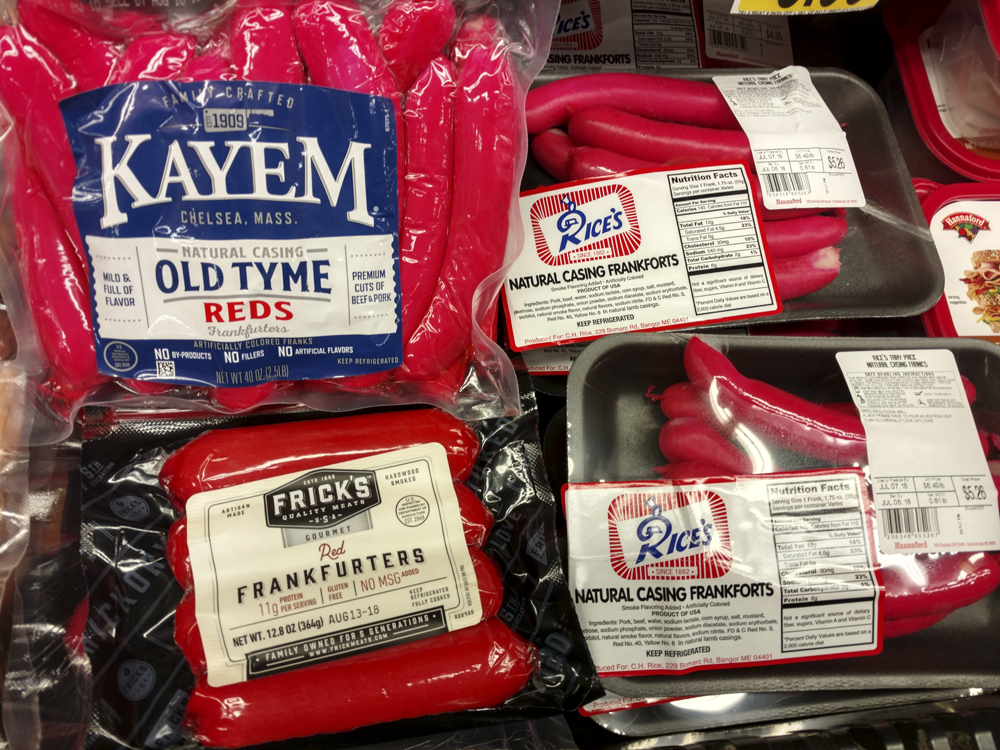
Maine’s Red Hot Dogs, and The New England Frankfurt Roll Red frankfurters in a grocery case in Lewiston, Maine. Local and regional traditions are important in many ways, and can be informational, historical, or even humorous in nature. For example, some of the oddest hot dogs I’ve seen are the red frankfurters of Maine. I was curious when I saw these in the grocery store so I asked a manager if they were hot or somehow spicy. “No, they’re not.” How are they different from other natural casing frankfurters from the same meatpackers? “They taste the same” was the answer. Then why are they red? “I really don’t know, that’s always confused me, too.”
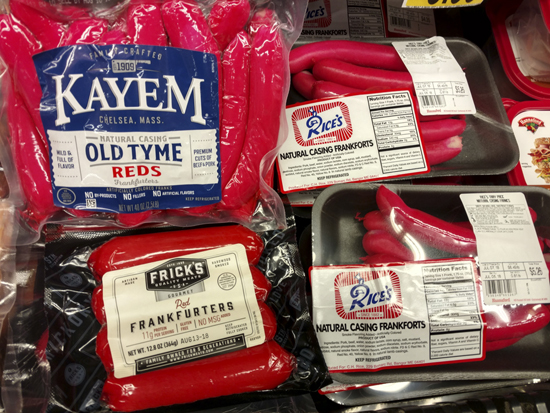
Maine’s Red Hot Dogs, and The New England Frankfurt Roll Red frankfurters are served in what are called Frankfurter or Frankfort Rolls.

Curious, I flipped over one of the packages of red frankfurters:

Ingredients: Beef and pork, water, corn syrup, contains 2% or less of salt, potassium lactate, flavorings (including extractives of paprika), dextrose, sodium diacetate, ascorbic acid (vitamin C), sodium nitrate, FD&C red #40 and red #3, in a natural lamb casing.

Searching the case I found some meatpackers also throw in FD&C Yellow #6.

I then located the Natural Casing Frankfurters from the same meatpacker:

Ingredients: Beef and pork, water, corn syrup, contains 2% or less of salt, potassium lactate, flavorings (including extractives of paprika), dextrose, sodium diacetate, ascorbic acid (vitamin C), sodium nitrate, in a natural lamb casing.

The only obvious difference is the red coloring. The amounts of the other ingredients may have differed, but it wasn’t likely. From a food manufacturing standpoint, I imagined the process would put the completed natural casing frankfurters through a vat of dye prior to packaging.

None of it made any sense at all.

Maine’s Red Hot Dogs, and The New England Frankfurt Roll Prepping the red hot dogs and buns in an electric skillet. The buns are buttered before grilling.

Local media in Maine reports on this from time-to-time, noting not only the popularity but also versions of the reason behind the red coloring:

“W.A. Bean & Sons … has been making the natural casing treats since 1918 … ‘We are the only makers of the red hot dogs left in the state of Maine,’ [Sean Smith, director of marketing and sales development] said … W.A. Bean produces an estimated 400,000 pounds of snappers each year, both under its own name and the Rice’s label that the family began producing nearly a decade ago, after negotiating a deal with its former owner and former competitor.

Smith said the company used to have a large U.S. map on display, with push pins marking everywhere their snappers were shipped, sometimes in orders as large as 10 pounds at a time. Over time, the map became so crowded that maintaining it was no longer feasible … Maine exiles also snatch them up while visiting ‘home’ to bring back to share with their families and friends, Smith said, noting that one W.A. Bean fan from North Carolina drives north every three or four weeks to get a fix of his favorite dog.

It isn’t entirely clear why the red coloring was introduced. One legend has it that the coloring historically was added by the original European makers of frankfurters to mask less-than-premium ingredients … Smith, however, speculated that W.A. Bean added its signature coloring as a way of making its frankfurters stand out amid a sea of competitors. ‘And it took off.’” [Gagnon, 2012]

It’s the perception of the red vs. natural colorings that is odd, that not only do people prefer it but that they’ll go to great lengths to make sure that’s what they eat, even though there are no flavor differences.

I also know of one sixth grader in 2018 who will only eat the red ones because, as his mom laughingly told me on social media, “My son won’t eat the brown. Says they taste weird.” Another acquaintance had this to say:

“Red hot dogs are popular in Hawaii too. When I was signing the papers to close on the house, the mortgage guy was telling us all about a trip he just took to NY, but he ended up staying in the room because he got sick and he thought it was the ‘brown hot dogs’, his colleague said, disgustedly, ‘YOU eat BROWN hotdogs?!’ The rest of us died laughing.”

The cuisinologist in me had to discover the true origin, and as it turns out, it does exist. The London-based Newcomen Society “exists to encourage study of the history of engineering and technology from ancient times to the present day.” The former American arm of the Society, founded in 1939 and disbanded in 2007, held their “1992 Maine Meeting” in Portland. Joseph “Chet” Jordan, grandson of the local meatpacker Jordan’s Meats founder and Chairman of the company at the time, was the Guest Of Honor. He gave the address “Jordan’s Meats: A Thriving Business in Its Third Generation-built Primarily on ‘hot Dogs’” on October 9th. The Society subsequently published the text of his address in 1993 as a 24-page pamphlet with historical photos from Jordan’s Meats. Mr. Jordan’s address specifically addressed the history of Maine’s red frankfurters.

“… Charles and Richard Schonland … were sons of German immigrants, and their father ran the leading sausage business in Lawrence [Massachusetts]. In 1891, the brothers had decided to found their own company and ‘investigated several cities’ before deciding on Portland. Schonlands began operations in a leased building … but later built their own building … Schonlands introduced the so called ‘red franks’ to Maine, and their distribution was Portland, Lewiston, Auburn, Biddeford, Saco and Sanford. This is why the ‘red franks’ today are still popular in those areas. They colored their hot dogs red to differentiate their product from the competition … Pa worked at Schonland Brothers, where he learned much and planned for the day when he could start his own company … [I]n 1927, the year I was born, my parents founded Jordan’s Ready-To-Eat-Meats … In 1935 a major benchmark was reached when Pa purchased Schonland Brothers, his former employers … [T]he red hot dogs that so many people associate with Jordan’s are only one of our many products. As I mentioned before this was a kind of trademark for Schonland Brothers which was continued by Jordan’s after the purchase. In fact, it was Jordan’s who introduced the red franks to Aroostook County in the mid-1930s. The ingredients of the red frank are identical to those in our uncolored franks, but demand for the red frank is still traditional in many parts of the state.” [Jordan, 1993: 8, 10, 12, 13, 14]

The tradition of Maine’s red hot dogs has relocated since Chet Jordan’s address. Jordan’s Meats had bought C.H. Rice Co. in Bangor back in 1962. [Jordan 1993: 19] The Iowa Beef Co. subsequently purchased Jordan’s in 2001, which Tyson Foods then bought in 2003. Tyson then closed Jordan’s Augusta plant, where Rice’s red frankforts were made, in 2004. Later that year, the Rice family bought its name back from Tyson Foods and formed a partnership with Bangor sausagemaker W.A. Bean to begin making the Rice version of the red hot dog again. [Associated Press, 2004] In 2008 Kayem Foods of Chelsea, Massachusetts, announced they had purchased the Jordan’s Meats brand from Tyson Foods, along with six other local brands. [Kayem Foods, 2008] Tyson Foods had closed the Jordan’s Meats plant in Portland in 2005, which then burned on May 6, 2010. [Hoey, 2010] As of the time of this writing, W.A. Bean is still producing both their own and the C.H. Rice versions of Maine’s red hot dog in Bangor and is the only in-state manufacturer of the product. [Gagnon, 2012]

Frankfurt or New England Rolls

Maine’s Red Hot Dogs, and The New England Frankfurt Roll Hot dog buns next to Frankfurt Rolls at a Hannaford store in Maine. A “Frankfurt Roll” or “Frankfurter Roll” in New England and New York state is a top-split bun with flat sides that’s either buttered and grilled for use with New England hot dogs or seafood rolls, or steamed for use with coney dogs or frankfurters.

The traditional story of the Frankfurt or Frankfurter Roll used with Maine’s red hot dogs, as well as other preparations such as the Lobster Roll, is that sometime in the 1940s the Howard Johnson’s chain commissioned the J.J. Nissen baking company in Maine to create the roll for their fried clam sandwich. USA Pan® is also credited with developing the pan to create the roll. [Tucker, 2020]

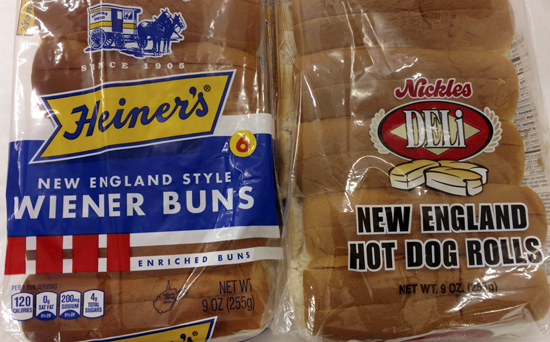
Maine’s Red Hot Dogs, and The New England Frankfurt Roll The same style of bun is marketed in other parts of the country as a “coney” or “New England” roll. These are two brands available at a grocery store in Ohio. Wonder also offers a New England roll, available in various parts of the U.S.

Images provided by Food Historian Dr. Eleanor Bartlett of the University of Cambridge (@historyeats) indicated that evidence from Europe strongly suggests this really wasn’t a new development in any manner. The soft French roll, a light bread dough rolled out thinly then rolled into a tight cylinder before baking closely to one another, had been included in paintings as far back as the early 17th century. Visually almost identical to the roll developed by J.J. Nissen, it appears the only real differences are the addition of the top slice for insertion of the meat or seafood components, and the buttering and grilling of the sides of the rolls.

Maine’s Red Hot Dogs, and The New England Frankfurt Roll Left: Kitchen interior with a maid preparing meat and gentlemen drinking at a table beyond, by Jeremias van Winghe, 1613; Right: The Baker, Job Adriaenszoon Berckheyde, 1681.
A Frankfurt Roll as made by Country Kitchen, a commercial bakery in Lewiston, Maine.

Another issue with the traditional story of the New England roll pan is that, according to their web site, USA Pan® wasn’t founded until 2009. It’s a subsidiary of Bundy Baking Solutions, makers of factory baking pans and equipment. According to the USA Pan site Bundy Baking was founded in 1959, while the Bundy Baking Solutions site indicates 1964. Both of these facts discredit the supposed J.J. Nissen/USA Pan® connection in the 1940s described in [Tucker, 2020].

Other sources provide a seemingly more accurate history. In the Boston Globe Holly Jennings wrote “J. J. Nissen knew it would need a special pan for an automated production line. Industrial baking-pan manufacturer Ekco Products designed the first commercial pan for the bakery.” [Jennings, 2013] As Ekco had been founded as a manufacturer of non-electric houseware in 1888, this origin makes more sense. Ekco became a subsidiary of American Home Products in 1965. Bundy Baking Solutions founder Russell T. Bundy had begun his career at Ekco. Chicago Metallic had acquired Ekco in 1996, and Bundy Baking Solutions then acquired Chicago Metallic in 2005.

Some of the verbal history in [Jennings, 2013] appears to be a bit of marketing though. One of the interviewees stated “The hinged and side-sliced hamburger and hot dog buns used in most regions of the country today … did not come until later, sometime in the mid-’50s, with the invention of the mechanical side slicer.” This is disproven in U.S. Patent 2,059,108, “Frankfurter Roll Slitting Machine”,assigned to Laurence G. Hobbs and Knut J. Cederholm of Fitchburg, Massachussetts, on October 27, 1936.

Download (PDF, 499KB)

Maine’s Red Hot Dogs, and The New England Frankfurt RollTo bake the buns properly, USA Pan® offers a retail ten-bun New England Hot Dog Bun pan for use with any recipe for the buns, which is the pan I’ll use here. Why 10, and not 8? I’m guessing that’s because the end buns only have one side that’s flat and grillable. This pan shows up in the catalog for Bundy subsidiary Chicago Metallic.
For retail New England bun production, Bundy Solutions’ industrial New England pan, with capacities such as six 12-bun loaves, is considered a custom baking pan having various available options and configurations for industrial bakery use. It’s from the Hot Dog, Sub & Hoagie Bun Pan collection from their American Pan subsidiary.

One issue with this pan is that it’s not very tall, at 1-5/16″, so buns made with it are really too short to fill very well. The technique described in many recipes for it mention inverting a baking sheet over the pan, weighted by a piece of cast iron. As the buns cook upside down, this ensures the bottoms of the buns are flat. Photos then show the bottoms of the buns even with the top of the pan.

The real trick is to find a recipe that rises enough to become taller than the New England Hot Dog Bun pan. I needed to find one that gives the buns an extra 3/4″ to grow, to just over 2″ tall.

Many commercial Frankfurt or New England rolls are made of a simple bread dough. The recipe USA® Pan offers for use with their pan includes milk, butter, and potato flakes. It also describes the dough as being stretched and placed in the pan as a whole before the second proofing instead of the rolls being individually formed. This is clearly how the commercial buns are made that are available in New England groceries, and would be the most authentic. Unlike many other recipes it calls for instant yeast vs. active yeast.

To get the buttery sweetness of a good New England classic, you could use one of the better recipes for a Parker House Roll, such as this recipe from the James Beard Foundation. Originally developed at Boston’s venerable Parker House Hotel, the roll is not only still served there, its recipe has been printed in countless cookbooks since Fannie Farmer’s first Boston Cooking School Cook Book in 1896.

Other available recipes available include butter, and either milk or milk flakes, minus the potato flakes, making for a fluffier roll with less density. A version from The Flavor Blender illustrates forming the buns individually. King Arthur Flour has posted this recipe for a version which also includes potato flour or flakes. In the King Arthur version the buns are formed in the pan as a flat layer, which is then cut into the individual rolls after baking.

The following recipe is a modification of the recipe for the pan itself from USA Pan®. Modifications include using more water to get a fluffier bun that can grow more, and not using a sheet pan and weight to flatten the dough as it bakes as suggested in other recipes for the pan. This allows the buns to grow past the hight of the pan, giving them more room for fillings.

Notes On This Recipe
  • The New England Hot Dog Bun Pan is available from USA Pan® at: https://www.usapan.com/new-england-hot-dog-bun-pan-1190ne
  • The New England Hot Dog Bun Pan from USA Pan® has a silicone coating that doesn’t respond well to non-stick sprays or metal utensils. It’s best not to use either with it. However, it it makes you feel better, greasing and flouring the pan is alright, although it’s not necessary.
  • In some ovens, particularly smaller convection ovens, the tops of the buns won’t be quite browned. About 9 minutes into the bake time, remove the buns from the oven and flip them out to check the tops. If they haven’t started browning, set the baked bun mass right-side-up on a baking sheet and bake the remaining 9 minutes until the tops are golden brown.

Bibliography

  • Associated Press, October 27, 2004. A dog-meet-dog world – Longtime Bangor competitors combine their frankfurter forces. seacoastonline.com.
  • Gagnon, Dawn, August 17, 2012. Bangor company’s “red snapper” hot dogs are a beloved taste of Maine. Bangor, Maine: Bangor Daily News.
  • Hoey, Dennis, May 7, 2010. Fire tears through Jordan’s Meats site. Portland, Maine: Portland Press Herald.
  • Jennings, Holly, July 2, 2013. New England-style bun, from HoJo’s to homemade: Boston Globe.
  • Jordan, Joseph, 1993. Jordan’s Meats: A Thriving Business in its Third Generation-Built Primarily on ‘Hot Dogs’. Portland, Maine: The Newcomen Society Of The United States.
  • Kayem Foods, May 20, 2008. Kayem Foods Acquires Jordan’s, Deutschmacher, Kirschner and Essem Brands From Tyson Foods. Chelsea, Massachusetts: Kayem Foods Press Release.
  • Tucker, Aimee, May 6, 2015. The New England Hot Dog Bun. Dublin, New Hampshire: New England Today

Best Spotting Scope Under $500: We Review the Top Mid Range Spotters in 2024

0

This article contains affiliate links. We may earn a small commission if you purchase via these links.

If this is your budget, you need to do some serious digging before handing over any cash.

$500 is still a hefty chunk of change, but with brands like Vortex, Leupold, Vanguard, and Bushnell, you’ve got variety and quality on your side.

Let’s take a look and see which brand has the best spotting scope under $500.

Top Spotting Scopes Under $500 (Comparison)

When it comes to spotting scopes, often manufacturers either do it well or they don’t. Many of our top brands that are hunters’ go-to companies had some disappointing hits and misses – mostly misses – in this price range.

Because of this, when putting together the line-up for the $300-500 price range, it was tough to come up with the top three. So, you’ll have to forgive us if we throw in an option that slightly bends the rules – it’s just going to have to do.

We took into account the grade quality of the glass, any special coatings, and ability to see groupings clearly in the 200-400 yard range. Let’s take a look at what we came up with.

The 6 Best Spotting Scopes Under $500

1. Leupold SX-2 Alpine 20-60×80 – Best Overall

The SX-2 Alpine spotting scope is capable of providing clear and sharp resolution throughout all hours of the day and across its entire magnification range. It has a drawback or two, but it’s easily one of the best spotting scopes for its price point.

Pros:

  • HD Optics
  • Oversized eyepiece
  • Rugged construction
  • Fog/waterproof
  • Lifetime guarantee

Cons:

  • ED glass confusion

The SX-2 Alpine has Leupold’s Advanced Optical System with HD quality. Leupold lacks mentioning any ED elements, but the glass was made with calcium-fluoride (much like ED glass, right?) that helps to reduce the dispersion of lightwaves at the objective lens. So yes, while there will be some chromatic aberration, it might only be visible on the higher powers and in difficult light conditions that most spotting scopes struggle with too.

Helping to keep you longer behind the eyepiece by reducing fatigue and compensating for less-than-perfect eye alignment is the oversized 59.94mm eyepiece and the 19-18mm of eye relief. All-day glassing, big game hunts, and long-range spotting of groupings are tasks the Alpine HD is well suited to.

Build quality is covered with an impressively balanced speed-to-precision helical focus, fogproof and waterproof body, and it’s been tested to perform in extreme climate conditions from -40 to 160-degrees Fahrenheit.

If the name is any indication, you may have to put in for a hunting unit where you can test it to its limit. High mountain hunts for black bears, whitetails, mules, elk, and bighorn sheep are more productive when you have glass that can keep up with the harsh alpine conditions.

2. Athlon Argos HD 20-60×85 – Best Value

The Argos HD mustn’t be compared to more expensive scopes as it’s one of the cheapest in this price range. To get a colossal 85mm spotter for under $400, it’s a budget buy with value.

Pros:

  • 85mm aperture
  • Advanced FMC coatings
  • Helical focus
  • Fog/waterproof
  • Extendable sunshade

Cons:

  • Optical quality vs marketing

It may be harsh to be so blunt about the optical quality of the Argos HD, but the marketing implies that it has a couple things that it, in fact, lacks. It does not have ED glass or additional elements that can be confirmed to provide high-definition optics. Athlon says the scope has “phase coated Porro prisms” but Porro prisms are inherently unaffected by beam splitting that occurs in roof prisms.

The gist of it is, Porro prisms are great at maintaining contrast and resolution and will perform better than roof prisms that lack PC coatings. As such, the Argos does well for its price point with or without the supposed PC coatings. It struggles with light loss past 40x and off-axis sharpness as do all spotting scopes at comparable price points.

Looking past the marketing gumbo, it has laudable resolution in lowlight conditions. It’s adequate for hunting, range use, wildlife observation, and amateur lunar observation.

The adjustable features of the spotter, i.e., magnification ring, multi-position eyecup, and extendable sunshade offer smooth responsiveness. The focus knob is touchy at max power, so for instant gratification for birdwatching when seconds count, the Argos might not work for you. For focusing in long-range in the field or the shooting range, you have time to be light-handed here.

For the average range shooter, causal outdoorsman, and spot and stalk hunter, the Argos offers big specs with better-than-average performance for its price point. Now that’s value.

3. Vortex Diamondback HD 20-60×85 – Best for Hunting

Overall, the Vortex Diamondback HD isn’t perfect, but for the money, it offers a lot more than the old series. The VIP warranty can’t be beat, so there’s no fear in taking it into wild country for the hunt. The bottom line is that it performs, it’s under $500, and it’s highly recommended.

Pros:

  • ArmorTek coating
  • Dual focus
  • Long eye relief
  • Argon gas
  • Arca-Swiss compatible

Cons:

  • Chromatic aberration

The Diamondback HD spotting scopes have an HD Optical System, but Vortex did not disclose any ED elements. It suffers from color fringing and can be distracting for birdwatching and lunar observation/digiscoping.

The optics will not hold a candle to the Viper HD let alone the Razor HD. But as the entry-level spotting scope line, the glass quality is more than acceptably functional for wildlife observation, range use out to 1000 yards, and Western deer hunting.

The Diamondback HD is rubber armored, waterproof, and has been purged with Argon gas that is usually seen in the high-end range. It has long eye relief of 20.3-18.3mm, has an adjustable eyecup and sunshade, and a rotating tripod ring.

A new feature is the dual focus for course and fine adjustments with the helical focus collar. It’s compatible with Arca-Swiss tripods without needing additional plates and can be mounted to standard ¼-20 tripods.

The HD models gained weight and the objective got larger. This model weighs 60.9oz, and it’s not a bad thing. The extra weight will help to stabilize the setup especially when you’re in the high mountains and big country where windy conditions are the norm.

The glass isn’t perfect and that’s okay. You can always spend more to get better, but for this price point, the Diamondback HD is a performer.

4. Vanguard Endeavor HD 82 Scope

Remember how we said we were going to bend the rules a little bit? This is where we show you how. The Endeavor is just above the $500 mark, but when it’s on sale, you can get it within this price range. We had to do a little tweaking because we only want to offer you the most reliable and high-performing spotting scopes there are. There’s no point in recommending a dud.

The Endeavor has a beast of an objective lens that can provide ultimate brightness and light collection. To take maximum advantage of the 82 mm lens, it’s been made with extra-low dispersion glass elements, been fully multi-coated, and has BaK4 prism glass. There’s more yet to spill about the Vanguard Endeavor, so keep your eyes peeled for the full review!

5. Visionking 30-90X100SS Spotting Scope

This spotting scope is huge, so it’s no joke to assume this thing will be the king of faraway vision. With extreme, high magnification and a huge 100 mm aperture, no distance will be out of your reach.

Pros:

  • Price
  • Extreme high magnification
  • Huge aperture
  • Dual focus
  • Weatherproof

Cons:

  • Heavy

If you think you can have these spotting scope specs without some serious poundage, you’re kidding yourself. With almost 6 pounds to tote and set up, this is a beast of an optic that you want to use with a quality tripod that can support its weight.

So, what’s the point of such extreme specs? To see more of course! The 100 mm aperture will allow in as much ambient light as possible throughout different times of the day whether it’s bird and wildlife watching or star gazing. With such high magnification, you’ll want to make use of the 2-speed dual focus dials to get the sharpest and clearest image possible.

The BaK4 prism glass is fully multi-coated, but there’s no mention of any phase/prism coatings or extra-low dispersion glass elements. The lack of these additional glass features is surprising for such a high powered scope, and it may mean clarity might not be the best as it reaches max magnification.

Even for a generic, off-brand spotter, it still covered its bases when it comes to durability. It has RainGuard HD water-repellent lens coating (sound familiar? Bushnell tech?), it’s O-ring sealed, nitrogen-purged, and 100% waterproof.

If you’re the type of spotter that likes to get set up and stay stationary, the Visionking scope will work for you. A tripod is included in the buy so you won’t have to immediately fork out for one.

6. Kowa TSN-601 Angled 60mm Spotting Scope

Kowa, a prestigious Japanese brand known worldwide for their quality optics, and we have a spotting scope that just barely fits this price range. Owning a Kowa for 500 bucks just might be the best bargain deal of the day.

Pros:

  • Price
  • Interchangeable eyepiece system
  • Made in Japan
  • Weatherproof
  • 10-year warranty

Cons:

  • Scope body only

Typically, you won’t see spotting scopes sold by eyepiece and scope body separately until you’re spending over two grand. This is indicative of premium quality to ensure you’re purchasing the most appropriate eyepiece system for your spotting application. Want variety? You can buy and use an eyepiece with a different power range.

With the interchangeable eyepiece system, you also have access to see if Kowa compatible digiscoping accessories can work for photography, recording, and capturing rare once-in-a-lifetime moments that you won’t ever be able to duplicate.

Still, if you’re spending only 500 buckaroos on the scope body, you’ve got to wonder how much it costs to get the eyepiece. Expect to add at least a few hundred bucks to your budget.

The Kowa spotter is made in Japan, and they’re usually an excellent source of glass and quality when it comes to optics. When you buy this scope from an authorized dealership, you’ll get their lifetime warranty on it.

It’s nitrogen-purged and O-ring sealed for both fog and waterproof protection. It’s made with polycarbonate materials to keep weight to a minimum without compromising build quality.

What more is there to say? You’re getting a Kowa for 500 bucks!

What to Look for in a Spotting Scope in This Price Range

Spotting scopes in this price range should have a few premium perks thrown in – we’re talking about $500, it’s got to be worth it. However, you’ve got to be brand-specific to ensure you’re getting the best of what you can afford.

If you’re going with a high-powered and heavy scope, you’re going to want to add additional costs for quality, strong, and solid tripods and mounting systems. Just keep that in mind when you plan on spending every penny. Here’s what else you need to look for.

Glass & Coatings

Overall, we should start to see some ED (Extra-low Dispersion) enter the market. Some spotting scopes might have “HD quality” but it doesn’t guarantee ED elements. When it comes to coatings, we should see FMC and extra lens coating formulas to enhance light transmission and protect the lens.

ProductGlassCoatings
Spotting Scope Glass & Coating Comparisons

Magnification & Objective Lens (Configuration)

On average, there will be a lot of 20-60×80 configurations at this price point. Considering the glass quality, this is a good configuration to stay within since more magnification will demand more performance from the glass.

Though most spotting scopes under $500 will have the eyepiece included with the scope, you may see some interchangeable eyepiece scopes available. Though rare to see it at this price point, it can happen.

ProductMagnificationObjective LensInterchangeable Eyepieces
Spotting Scope Magnification, Objective Lens & Interchangeable Eyepieces Comparisons

Eye Relief & FOV

Eye relief will tell you how comfortable the eyepiece will be to use and if you can keep your glasses on or not. I would say that 15 mm is the minimal amount of acceptable eye relief if you wear glasses, but it’s better to have at least 19-20 mm on the long side as it does get shorter at max power.

The field of view can indicate what applications the spotting scope could be good for. Though high magnification narrows the FOV, it can provide close-ups of the target that is good for long-range seeing. On the other hand, a wide FOV is good for watching moving targets while hunting or bird watching.

ProductEye ReliefField of View (@ 100 Yards)
Spotting Scope Eye Relief & FOV Comparisons

Size & Weight

In general, weight and size can be a limiting factor of a spotting scope. They are obviously larger than binoculars, but they offer high and variable magnification with a huge objective lens. Compact scopes would be best for hiking, some hunting, and for fast glassing.

Full-size scopes are excellent performers when tripod-mounted for bird watching, wildlife observation, and amateur astronomy like lunar observation.

You should also consider overall weight, that is, combined weight with a tripod and any counterweights if needed.

ProductLengthWeight
Spotting Scope Length & Weight Comparisons

Durability

Overall, you should expect good glass and solid performance out of a $500 spotting scope. They should be fog and waterproof at this point and come with a warranty that you can rely on in case the unexpected happens.

ProductWaterproofFogproofWarranty
Spotting Scope Waterproof, Fogproof & Warranty Comparisons

We Put The Best Under $500 Through the Ringer!

If you have the chance to shop in person, put your scope through the ringer to really see if it’ll work for you. If one promising purchase ends up being a dud, it’s one purchase too many.

Buying online eliminates the chance to give the spotting scope a test run before you buy, but that’s where counting on our expertise comes into play. If the masses are impressed, you just might be too. Since we’ve put ’em all through the ringer for you, you can rest assured that your money is well placed. It’s called buying confidence – you’re welcome!

Further Reading

  • Zeiss Victory Harpia Spotting Scope Review – 85mm Angled with Dual Speed Focus System
  • Zeiss Dialyt 18-45x65mm Spotting Scope Review (A True Hunters Tool)
  • Zeiss Conquest Gavia 85 T Spotting Scope Review (Ideal for Birders)
  • Vortex Viper HD 20-60×85 Angled Spotting Scope Review (Helical Focus)
  • Vortex Viper HD 15-45×65 Spotting Scope Review (Straight)

How to Hunt Geese on a Budget

0
How to Hunt Geese on a Budget

Most of us that read waterfowl articles in magazines dream of the wild hunts on massive grain fields teeming with thousands of geese and ducks. But what about the guy or gal that does not have a trailer full of high-end decoys, access to thousand-acre fields, and cannot afford expensive calls? There are plenty of hunters out there itching to call in their own birds, and see wobbling gray and black bombers with feet down, and hear the grunt of the honkers as they cruise within range with cupped wings. All of us want to yell, “Take em!” as we bust out of our layouts, dropping geese.

The good news is that any of us can live that dream with some planning and effort, even without access to big feeds and hundreds of decoys. In fact, fields less than 100 acres that are located in a daily flight pattern near water are killer locations, particularly later in the season. Throw in two-dozen decoys, a flag and a few layouts and you are in business.

Lighting the Flame

A few seasons ago my daughter and I were trying to do a little duck hunting on a tributary of our local river in Virginia. A farmer granted us access to a makeshift boat ramp at the end of the fields. Our duck hunting was a bust due to lack of birds, but we noticed a few small flocks of geese regularly passing over the scattered 50-acre grain fields that we dragged our boat through each morning going to and from the water.

When we stopped to pay the boat ramp access fee to the farmer, I left a “thank you” note commenting about how we noticed Canada geese flying over the fields, and how none of those birds came near our blind or the part of the creek we hunted.

A week later when we were leaving the same property the farmer stopped us and asked if we wanted to try to put a dent in the flock of geese to help save the crops. We could hardly contain our excitement, and promised to not tear up the fields—and insisted on continuing to pay the access fee.

Location Is Paramount

Since we lucked into that field to hunt, we have since started gaining access to other small, but similar fields. When looking for productive fields, we start scouting in the fall when geese filter in from the north. We use an online topo/satellite map and our online GIS maps for our local counties to locate farm fields near water sources around the Chesapeake Bay watersheds. These can be large swamps, ponds, large creeks, rivers or small bays. Smart hunters know Canada geese will roost on the water and then feed after the sun gets up.

Once we locate potential properties near where we live, we try to scout them before approaching the farmer. Binoculars are helpful. We watch for flight patterns to determine which properties the birds tend to fly over on a regular basis when going to feed and roost. Again, we focus on small fields under 100 acres that geese have flown over on a regular basis. They don’t necessarily have to feed in the small fields, but there should be some beans or grain of some sort for them to eat if they did land in the field.

While other hunters are hitting the large fields and putting in a lot of effort and time with dozens, or even hundreds of decoys, we are going light with two-dozen or less decoys and pulling down our limits right along with the big shots with all their equipment.

Hiding Is Everything

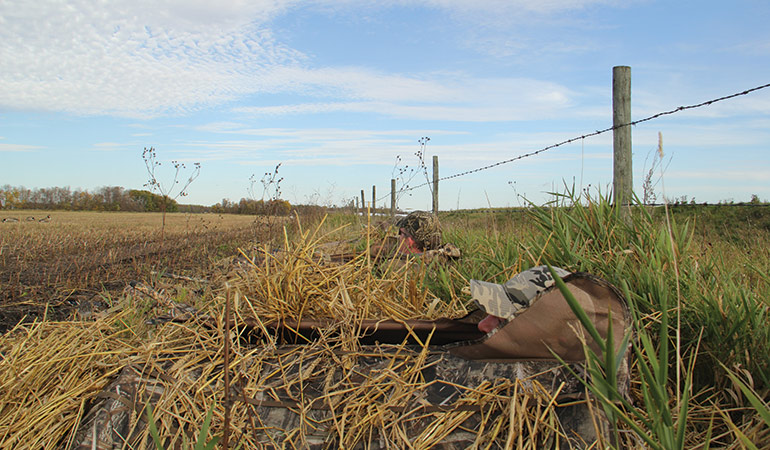
Since we are on a budget, we carefully select two-dozen field decoys of various poses, a few layout blinds from a box store retailer and a flag for motion. While it would be nice to get the top-of-the-line gear, we make do with what we can afford and make a point to take care of it to make it last. One of the things we do with our layouts is gather up stubble from the fields we are hunting a few days before and very thoroughly brush our layouts. We also take a few trashbags and rake up stubble from the ends of the fields and use it the day of our hunt to “feather out” the profile of our blinds and our dog blind too. It is critical to blend the blinds in as much as possible.

Steve Purks, a friend and self-taught goose hunter, explained how critical this was to us.

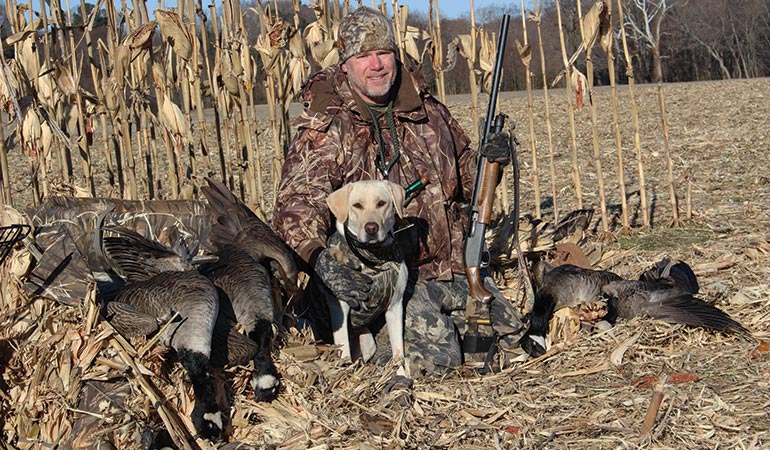
goose hunter with yellow lab

Geese that arrive in Virginia or Maryland after Thanksgiving when our season opens are wary and have been called to and shot at.

When we place our decoys in the field, we face a majority of them into the wind while leaving a hole for the birds to land in our kill zone; another trick we learned from Purks. We watch how the birds react to our set up and make changes as necessary. Sometimes we need to open the hole if the birds seem hesitant or sometimes we change the direction the decoys are facing if the wind shifts. Purks is always checking conditions and analyzing his spreads when we hunt with him and I keep a close eye on what he is doing and ask a lot of questions to learn as much as I can.

Next, we use the terrain to our advantage. A few rows of corn were left standing in one of the fields we hunted last season. We backed our blinds up to that hard edge and made them all but disappear. While the geese did not want to land right on our blinds, they did come in close enough for us to get our shots. We have also placed our blinds in spots that were slightly lower than the rest of the field. Doing so helps the layouts disappear and we have our decoys all around the layouts to blend in. Fencerows or hedgerows are great for this if the wind is correct for the setup of decoys. Birds won’t land if the wind is blowing towards the hedgerow; it leaves too little time for the birds to get down in the decoys. Hunters need the wind blowing away from the hedgerow for a good setup.

Last, we use inexpensive calls, but they work. We use them sparingly, mostly for getting the attention of the geese from a distance and a little grunting as they pass over. We flag the birds when they are coming off the water and heading to the bigger fields nearby. By being in the flight path, we get their first looks and then work hard to peel off birds and get them curious before they even make it to the larger fields. All it takes is a few to commit and come on down for us to get our shots and watch the dog work!

One last tip is to be in place early whether it is a morning or afternoon hunt. When the birds go to feed you want to be in place when they start flying or they will see birds landing a half-mile away and keep following them. Be at the front of the flock when they come over and work those birds.

Small Investment, Big Rewards

Hunting small fields on a shoestring works for several reasons. First, the geese sometimes get wary of the larger fields and large spreads of decoys and they begin to look for something different, something a bit more secure. Sometimes the group of birds will peel off the big flock looking for food. Being in the flight path, carefully positioning our decoys and layouts by using and considering the terrain in the field, and calling sparingly but using a flag to attract their attention, really makes a difference for us. We don’t need to purchase a trailer load of high-end decoys or spend hundreds of dollars on a lease and expensive calls to get our limits. It works, and we spend far less money and time setting up to have our fun.

Sounds and Noises That Snakes Make (With Videos)

0

If you have ever met a snake before, chances are you’re familiar with their adrenaline-spiking hissing sound.

But did you know snakes can make a variety of sounds?

Yes, snakes have no vocal codes like humans. But they have evolved to produce several sounds and noises that play a vital role in their survival.

In this post, we will dive into the captivating world of snake sounds and noises, uncovering their purpose and significance.

So, join us on this wild, exciting journey!

Types of Snakes That Produce Sounds and Noises

What comes to your mind when you think of snake sounds? Venomous (poisonous) snakes, right?

It’s true that venomous snake species, like cobras and rattlesnakes, produce a range of sounds as a defense measure.

However, non-venomous species like bull snakes can also create different sounds and noises.

But why do they produce these sounds? Well, continue to the next section for the answer.

Purpose of the Snake’s Sounds and Noises

Snake vocalizations are not just random wild noises; they have a purpose, including:

  • Communication: Perhaps the primary reason snakes produce distinct sounds and noises is for communication. But here’s something interesting: Snakes don’t use their unique auditory cues for communicating with other snakes. These sounds are meant for potential snake predators. As a fact, the frequency of snake sounds like hissing is too high for other snakes to hear. That means, a snake cannot hear another snaking hissing.
  • Defense Mechanism: Snake sounds can also act as a defense mechanism. By hissing or producing growls or spine-tingling rattles, the snake can warn predators to stay away.
  • To Show Aggression: The “sssssss” snake sound could also show aggression, especially in ball pythons. If provoked, snakes might hiss and flicker their tongue quickly to defend themselves.
  • Territorial Display: Snake sounds can also help them define their territory. A snake might hiss at humans and animals who encroach on their space to ward them off. The sound act as a deterrent, effectively telling intruders to back off.

Types of Noises and Sounds Snakes Make

1. Hissing

A snake’s hiss is unmistakable and super terrifying. Like a dog’s growl, the hiss warns invaders, prey, and predators.

However, wild snakes usually hiss more than snakes in cages. The reason is that the former is exposed to dangers more frequently than the latter. So, they often react to danger or uncertain situations by hissing?

How Does a Snake Produce the Hissing Sound?

Have you ever tried hissing before?

It’s easy! Place your tongue behind your teeth and force air between the opening.

However, that’s not how hissing works in snakes.

These creatures can’t make a lot of different shapes with their mother. As a result, they can produce a lot of different noises.

But they have a secret weapon: the glottis. This is a little hole right underneath the snake’s tongue that connects to the windpipe.

The glottis allows the animal to breathe when swallowing its meal. It also helps the snake produce the sound of a hiss, thanks to a small piece of cartilage inside it.

When a snake exhales through the glottis, the cartilage vibrates, creating a hissing sound. It also gives the hissing extra volume.

Even interesting:

Some snake species like the bullsnake can change their hiss to mimic a rattle. Because the snake is non-venomous, the rattling noise helps them intimidate predators.

While hissing, snakes also poke out their tongues to smell the predator and take the safest route to escape.

When Do Pet Snakes Hiss?

  • When Startled: If you catch a pet snake off guard, it might hiss out of fear. It’s normal for baby snakes to hiss more because they are still getting used to the environment and human owners. To prevent this, first touch the snake softly to alert it you are about to pick it up.
  • When Annoyed: Sometimes, snakes want to enjoy their peace undisturbed. If you try to pick one up, it might hiss back at you to express displeasure. So, leave it alone until it’s in a merry mood.
  • When Digesting Food: Experts recommend allowing the snake to relax after ingesting a large meal. This can take 3 to 5 days, depending on the snake’s size and amount of food. If you lift the snake after the meal, it will probably hiss to express dissatisfaction.
  • When It’s About to Shade: Snakes shed their skin about four times annually. So, leave it alone during this time to avoid upsetting it. If you attempt to touch or pick it up during the shedding process, it may feel nervous and hiss to express itself.

2. Rattling

You can identify rattlesnakes by their distinctive rattle sound, particularly the Western Diamondback Rattlesnake.

But did you know rattlesnakes are not the only snakes that shake their tails?

We have other dangerous snakes, including:

  • Cottonmouths
  • Copperheads
  • Terciopelos
  • Cantills
  • Bushmasters (These snakes even have spine-like scales at the tip of their tails for a louder sound)

Here’s a list of non-venomous snake species that also shake their tails:

  • Corn snakes
  • Gopher snakes
  • Rat snakes
  • Kingsnakes

These snakes produce rattling sounds by shaking their tails, which consist of interlocking segments made from keratin. Yes! The stuff that makes up your finger and toenails.

These interlocking segments are loosely attached. As a result, they move back and forth when the snake shakes its tail, producing a rattle.

As the snake grows and sheds its skin, a new segment forms and is added to the rattle, causing it to lengthen over time. But a long rattle doesn’t necessarily mean a loud sound. That would be the speed and intensity of the tail vibration.

For venomous snakes, the tail shaking serves as a warning to predators. It also serves as a diversion, directing the attacker’s attention to the tail. This can lead to confusion and prevent an attack.

As for non-poisonous snakes, tail vibrations help them mimic dangerous snake species and shield themselves from predators. This is what is called Batesian mimicry.

3. Bellowing

The bull, gopher, and pine snake can produce bellows when threatened or attacked by a predator. Unlike hisses, bellows are distinctively loud and can leave you frozen in your tracks.

These snakes bellow by forcing air via the larynx. Within the larynx is the laryngeal septum (vocal coder), which vibrates to produce the spine-chilling bellowing sound.

Usually, this sound has a short period of high amplitude (loud noise) followed by a long period of low amplitude (quieter noise).

4. Growling

You would think a bellow is the most unique snake vocalization. But wait till you learn that some species have evolved to growl when agitated. One such snake is the king of cobra.

The king cobra is considered one of the largest venomous snake species in the world. While it might look intimidating, it’s usually timid unless it feels threatened.

When a king cobra spots a threat, it might slither to safer areas. It might also inflate its hood, which comprises several air sacs to look bigger and intimidate the attacker.

Additionally, it may produce a scary growl that sounds like it belongs to a lion or dog instead of a snake.

Additional Snakes Sounds and Noises

Besides the vocalizations mentioned above, here are some creepy snake sounds worth checking out:

  • Puffing: It is no surprise to hear your pet snake puff and huff at night or when feeding. This rings true for snake species, like boas and carpet pythons. The puffs and huffs could also show the snake’s frustration.
  • Shrieking: Snakes that bellow like the pine snake can also produce a shriek in response to danger. All thanks to its distinctive vocal cord.
  • Whistling: Some snakes like Russel vipers and corn snakes whistle.
  • Rasping: Some snakes produce rasping sounds by rubbing their scale together. For example, saw-scaled vipers (native to Africa and Asia), will assume an “S” shape and rub their scale together to make a noise similar to a hiss. The purpose of the sound is to scare away predators.

What To Do During a Snake Encounter

What To Do During a Snake Encounter

Snakes are typically timid and avoid human contact and confrontation whenever possible. So, if you encounter one on your property, it is more likely the snake is scared of you than you are of it.

Below, we’ve provided you with the best ways to deal with a hissing snake and ensure the safety of both parties.

  • Stay Calm: Panicking only increases the likelihood of sudden movements. This can disturb or frighten the slithering creature. As a defense response, the snake might hiss or even attack you.
  • Note the Sound: Snake species make sounds, such as hissing, rattling, or growling. Identify the type of sound and, if possible, try to identify the snake and the threat level. This information might guide your next actions.
  • Allow the Snake Some Space: Snakes frequently make sounds as a defensive mechanism, signaling a threat. Respect the snake’s personal space and avoid approaching or handling it. Maintain a safe distance to prevent snake bites and lower the risk of escalating aggression.
  • Back Away: If you encounter a snake and it makes noises, it’s best to back away from the scene. Also, maintain eye contact with the snake, as it will be aware of your movements. Create distance by retreating slowly and smoothly while avoiding sudden or threatening gestures.
  • Seek Professional Help: In certain situations, it’s wise to call your local animal control or professional snake removal service. These experts possess the skills and equipment to handle and relocate the snake, safely.

Closing Thoughts

Snakes have a fearsome reputation. But surprisingly, these creatures are typically shy and often avoid human interactions. They naturally keep their distance when they sense human or predator presence.

However, when threatened or cornered, they can produce a lot of different sounds to warn, intimidate or divert the attention of invaders or predators.

Most individuals are familiar with the snake’s hiss. But these animals can also growl, buzz, rattle, shriek, whistle, and rasp. This shows the remarkable diversity of snake vocalizations.

Overall, learning about snake sounds and noises helps you better appreciate their communication methods. This way, you can prevent dangerous encounters, especially with venomous species.

Thank you for stopping by! If you have any questions, inform us in the comment section.

Sharing is caring!

8 Superior Trolling Motors for Kayaks

0

Kayak Trolling Motors

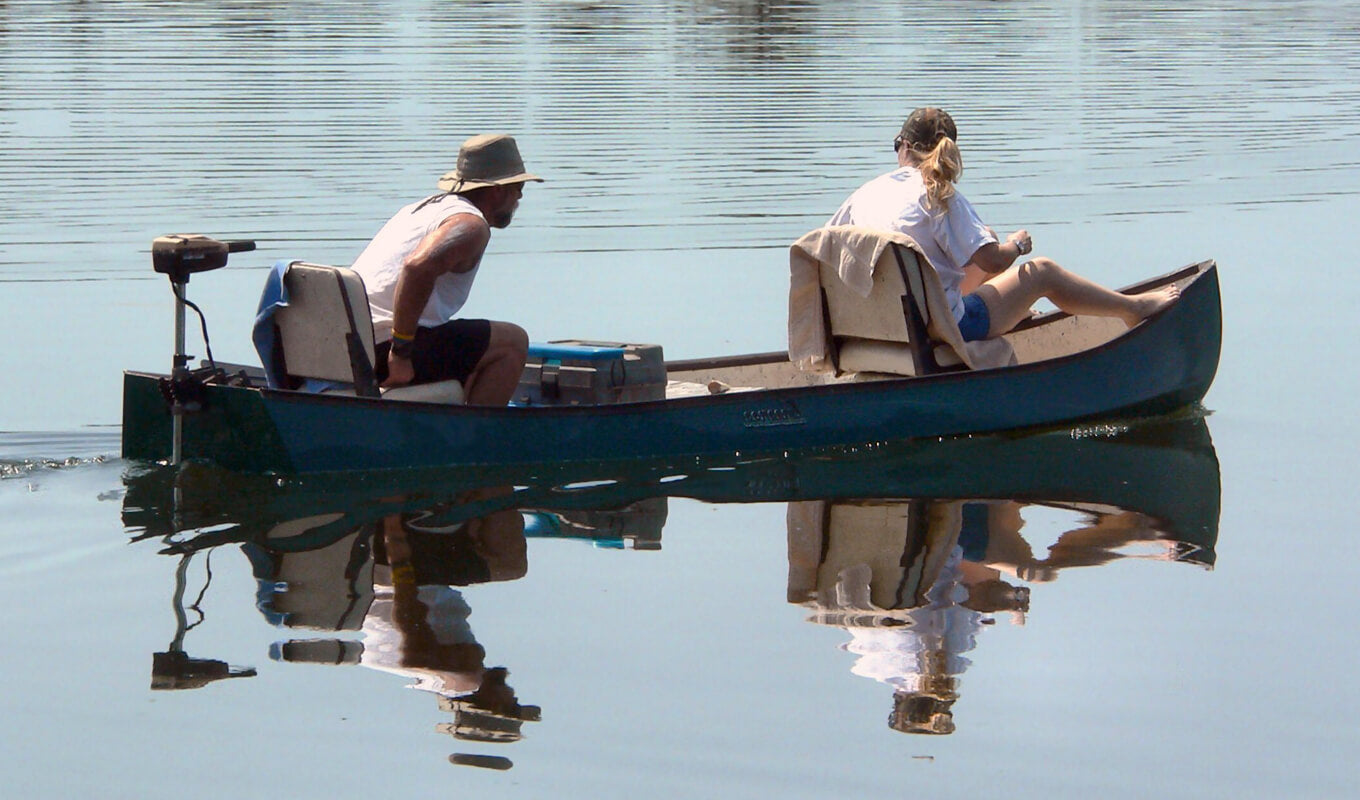
Man and a woman riding a boat with a trolling motor

Trolling motors are a fantastic little add-on to your kayak that essentially transforms your once paddle-powered vessel into a high-performance motorized boat.

If you’ve been thinking about adding a trolling motor to your kayak, whether that be for fishing purposes or to simply run circles around your kayaking buddies, then you’ve come to the right place.

We’ve created the ultimate guide to trolling motors, including the benefits of kayak trolling motors, the best trolling motors for kayaks on the market, and the main things to look out for before purchasing.

So, if you’re wondering what are the best kayak trolling motors for your specific kayak, keep on reading as you’re about to become an expert.

What is a Trolling Motor?

A trolling motor is a relatively small electric engine that attaches to the back of a kayak to help propel it through the water at faster speeds. These motors are often used by kayak anglers as they emit very minimal sound and allow fishermen to creep up on their potential catch.

In general, trolling motors are fairly straightforward pieces of gear, and it doesn’t take a genius to figure out how to use one. To turn in any direction, you simply move the handle of the motor left or right. And if you don’t want the motor in the water for any reason, you can quickly and easily pull it out thanks to the rotational clamp that secures the motor to your kayak.

Benefits of a Trolling Motor

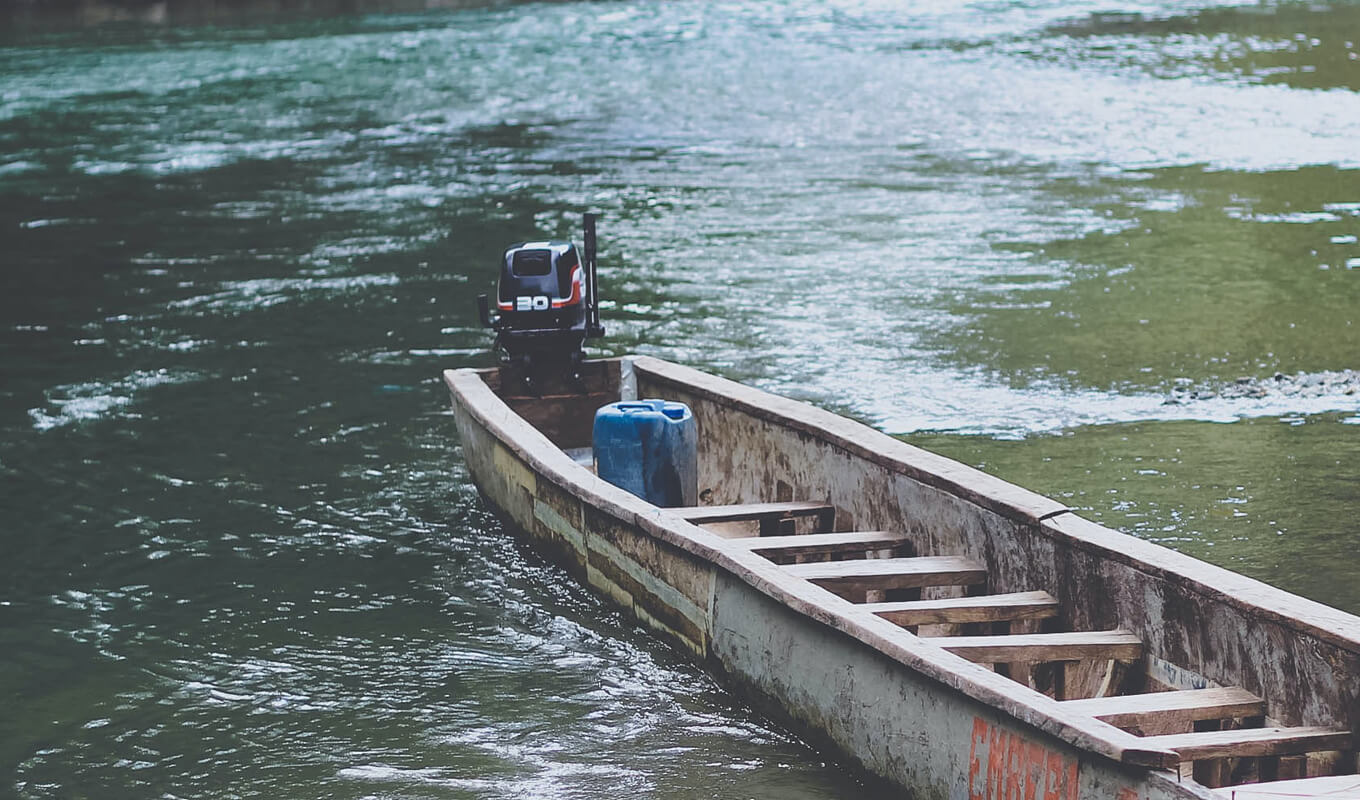
Long boat with a trolling motor

Granted, kayak makers originally designed kayaks to be powered by paddle, but no one ever said you couldn’t amp up the kayak’s performance by adding a motor. Motors are a great way to transform your recreational kayak into the ultimate streamlined fishing vessel, and if you weren’t already swayed into purchasing your own trolling motor, you will be thanks to these incredible benefits.

No Splashes

The first major benefit of a trolling motor is the fact that they barely disturb the water. This reason alone is what draws in many kayak anglers, as with a trolling motor, you’re able to creep up on fish in a way you wouldn’t be able to with a paddle.

Hands-Free Fishing

Another huge benefit to a trolling motor is the fact that it removes the need to paddle, meaning you can be hands-free at all times. As well as freeing up your hands to hold other things such as a fishing rod, eliminating a paddle also gives your arms a break as we all know how tiring paddling a kayak can actually be.

Convenient and Useful in Emergencies

There is no shame in getting tired mid-paddle because, after all, just an hour of paddling can burn roughly 476 calories. A trolling motor allows older or slower paddlers to keep up with the pack without getting physically exhausted. They are also extremely useful in the event of an emergency as they’ll get you back to shore far quicker than a paddle ever would.

You Can Head Down to Smaller Tributaries

If you’re trying to decide between a regular fishing boat or a trolling motor-fitted kayak, then in our opinion, the kayak will come out on top. Kayaks that are fitted with a trolling motor are extremely streamlined and portable, meaning you can head over to more remote or narrower tributaries that larger boats can’t enter.

GILI’s Top Picks: By Budget

8 Superior Trolling Motors for Kayaks

Newport Vessels NK 180

It doesn’t get much more premium in the world of kayak trolling motors than the Newport Vessels NK 180. Newport Vessels designed the NK 180 specifically for kayaks, and the 24-volt, 60 pounds thrust motor will have you zipping through the water quickly, efficiently, and most importantly, quietly.

If you have a drill on hand, you can easily attach the aluminum motor mount to the back of your kayak. Once you’ve attached the motor mount, you can then further attach the motor as the package comes with (almost) everything you’d need to get out on the water. For those with a power pole already installed to their kayak, the good news, the installation process will be even easier.

The one thing you will need to purchase separately is a lead acid deep cycle or a lithium deep cycle battery that has a nominal output voltage between 24V and 29V. And then, once you’ve installed the battery, you’ll be ready to hit the water using the speed controller, the digital throttle control, and the steering cables.

Newport Vessels 55 lbs Thrust Kayak Series

The Newport Vessels’ Kayak Series made it onto our best kayak trolling motor list thanks to its impressive 55 pounds of thrust. And yes, you won’t need anywhere near that amount for your tiny little kayak, but it’s always nice to have the option.

Newport Vessels gave their 55 lbs thrust electric kayak motor a 24-inch adjustable shaft, which is ideal for most standard kayaks. And as the adjustable feature makes the motor versatile, if you ever upgrade your ‘yak in the future or if you switch over to a canoe, you won’t need to buy a new motor.

Staying on the topic of the motor’s shaft, Newport Vessels designed their motor out of fiberglass so you can use it as a freshwater or saltwater kayak trolling motor. This ability to kayak in any water type of waterway makes the Newport Vessel’s trolling motor an excellent option for recreational kayakers who like to switch up their kayaking destinations.

To help improve the trolling motor’s performance, Newport Vessel equipped it with a 6-inch telescoping handle and eight different speeds: five of which propel the kayak forward and three which reverse it back.

And to finish off, Newport Vessels also added an interesting feature to the throttle. The throttle on the 12-volt trolling motor clicks when you change gears or when you turn the motor off which helps prevent you from accidentally leaving the motor on and subsequently draining the battery.

AQUOS Haswing Electric Trolling Motor

The AQUOS Haswing Electric Trolling Motor comes in at the mid-range price point for trolling motors, and with an available and adjustable shaft length of 24.4 inches, it is a suitable option for kayaks and other small boats.

AQUOS equipped their saltwater trolling motor with five forward and three reverse speed options to give the user ultimate speed control while out on the water. And then, to further help with controlling the motor, AQUOS added an ergonomic adjustable 13.7-inch handle so you can steer and direct your kayak from the comfort of your kayak seat.

Some other mentionable features of the Haswing Electric Motor include the ability to tilt the motor out of the water when the depth of the water changes, the corrosion-resistant metal components making it perfect for saltwater fishing, and the LED power reader that lets you check your battery power at any time.

GoPlus Electric Trolling Motor

The Goplus Electric Trolling Motor comes in a 46 lbs, 55 lbs, and 86 lbs thrust variation, however, as you’re only powering a kayak, we’re focusing on the smallest of the three. Goplus designed their electric trolling motor to have 8-speed control settings, 5 of which run forward and 3 in reverse. You can easily adjust these speed controls by turning the dial on the ergonomic telescopic handle, which can also be adjusted for optimum comfort.

To make the motor as sturdy as possible, Goplus created it out of fiberglass composite rods, die-cast aluminum heads, and reinforced composite materials so it is able to withstand damage, warping, and bending in both salt and freshwater conditions.

And if you find yourself traveling through different water depths, you can adjust the shaft height and the shaft angle at the mounting bracket tilt mechanism for proper depth placement. This feature also means that you can comfortably steer your kayak from a sitting or standing position without any issues.

Cloud Mountain FineFind 36 lbs Thrust Electric Trolling Motor

The Cloud Mountain FineFind Electric Motor is another motor that comes in a range of different thrust options, from the smallest 36 lbs, which we’re focusing on today, to the largest 86 lbs, which is suitable for larger boats.

Cloud Mountain designed their 36 lbs motor out of corrosion-resistant fiberglass and ensured that you can adjust the shaft for proper depth placement in all types of water conditions. Then, to aid even further in durability, they added a reinforced nylon bracket and saltwater-compatible hardware so your motor will stand the test of time for years to come.

As with many other trolling motors on this list, the FineFind Electric Trolling Motor has 5 forward and 3 reverse speed setting on the 6-inch telescoping adjustable handle so you can control the speed and direction in which your kayak is going.

Watersnake Tracer Transom Mount Trolling Motor

The first Watersnake trolling motor to make our list is the Tracer Transom Mount Trolling Motor. This motor, in particular, has 30 pounds of thrust, however, there are larger options if you’d like a more versatile and powerful motor.

Watersnake gave their trolling motor 7 different speed options, five forwards and two in reverse, which you can control by the speed dial on the extendable handle. And speaking of extendability, the shaft is also adjustable and designed out of chrome-plated steel, so you can use the motor in saltwater.

Watersnake T18 ASP

If you’re after an incredibly lightweight trolling motor, then look no further than the Watersnake T18 ASp. This 18-pound thrust motor weighs only 4.85 lbs making it the lightest option (by far) on our list.

Most kayak trolling motors come with much larger thrust power, but if you’ll only be using the motor for kayaking, then this 18-pound thrust option will provide you with all the power you’ll ever need. If you do want the ability to switch the motor onto a different vessel, however, then the Watersnake T18 ASP also comes in a 24-pound thrust version.

Watersnake fitted their T18 ASP motor with an adjustable mount fitting that is compatible with a variety of fishing kayak fittings. They also decided on a 24-inch shaft length and created it out of alloy and stainless stress, so it is suitable for both fresh and saltwater.

Minn Kota Freshwater Trolling Motor

The good news for those shopping on a budget, cheaper trolling motors such as the Minn Kota Freshwater Trolling Motor will still provide you with all the power you need to get your kayak from A to B. The Endura Minn Kota Trolling Motors has a 30 to 42-inch shaft and provides kayakers with thrust levels of 30 to 55 pounds.

During the design process, Minn Kota created their motor from composite materials and gave it five forward and three backward rev settings. Something they also improved with this model is the battery life which now allows you to spend more time on your favorite lake or river without having to worry about your battery running out.

Comfort and ease of use were also heavily thought about, so Minn Kota equipped the Endura with a six-inch telescopic tiller that improves the motor’s overall comfort and ease of use.

Things to Consider When Choosing a Trolling Motor for a Kayak

Boats with motors

Before purchasing a trolling motor for your kayak, there are a few things you need to keep in mind.

Power

Kayaks are fairly small boats, and trolling motors, in general, are designed for boats far larger than your diddy little ‘yak. This means that you won’t need to worry too much about the power of your trolling motor, but we understand it’s useful to know what kind of voltage range is suitable.

For the most part, a 12-volt trolling motor would be more than enough for a kayak seating one or two people.

A general rule when it comes to kayak motors is that you’ll need 2 pounds of thrust for every 100 pounds of loaded weight. And when you’re on the market for a trolling motor, you’ll soon notice that even the puniest electric motor will provide you with more than enough thrust to power your kayak.

Control Type

Many electric trolling motor models will come with a foot pedal, and although foot pedals are incredibly useful on bass boats, they’re essentially pointless on a kayak. Instead, you’ll want a tiller handle trolling motor, which allows you to simply direct the direction of the boat by pushing the handle right or left.

You will also find remote-controlled trolling motors on the market, but these are more expensive than a standard tiller handle trolling motor.

Shaft Length

Trolling motors come in a range of shaft lengths, often being fairly long to reach the water from a bass boat. When it comes to kayaks, however, these long shafts cause a problem, so you need to pay close attention to how long the shaft of your motor is.

When purchasing your kayak trolling motor, you need to ensure that the propeller of the motor would sit 12 inches under the water. If the propeller is higher than 12 inches, it will suck air from the surface and create a lot of noise.

To figure out if the shaft length would be suitable for your kayak, measure from the horizontal bar of your motor mount to the surface of the water. Then, add 12 inches to this figure and a further 3-4 inches if you’ll be kayaking in rougher waters. This combined figure is your ideal trolling motor shaft length.

Mounting System

Most trolling motors are designed for bow mounting on a bass boat, but with a kayak, you’ll need a transom mounting system. Transom mounting systems fit the scuppers in your kayak’s cockpit, and once installed, the system will provide you with a solid bar that you can then mount your trolling motor.

Weight

Something many people don’t consider is the additional weight a trolling motor adds to your kayak. All kayaks have a maximum weight capacity, and your weight, the weight of any fishing gear (if you’re using your kayak for kayak fishing), and the additional weight of a trolling motor could tip you over the limit and cause your kayak to sink into the water.

Before you purchase a trolling motor, calculate your weight, the weight of any passengers (if you’re paddling tandem), and the weight of any gear that’ll be on board at any given time. Then add on the weight of the trolling motor you have in mind and ensure that you remain under your kayak’s maximum weight limit.

FAQ’S

What Air Rifles Are Made in Germany?

0

Germany has a long tradition of gun manufacturing, dating back to the 1500s. Today, some of the best air rifles in the world are made in Germany. If you’re in the market for a new air rifle, you may want to consider one of these German-made options.

Umarex

Umarex is a German company that has been making air guns since 1972.

Umarex Sportwaffen GmbH & Co. KG is a German manufacturer of air guns (including Umarex air pistols such as the Beretta Elite II), tear-gas and signal pistols, paintball markers under the RAM brand and airsoft guns, based in Arnsberg, North Rhine-Westphalia. The firm was founded in 1972. Its United States subsidiary headquarters is located in Fort Smith, Arkansas.

Their rifles are known for their quality and reliability. The Umarex Steel Force is a good choice for those looking for an affordable entry-level air rifle. It’s also a great choice for plinking and target practice.

Check out the Umarex Walther LGV Master Pro for something a little more high-end. This rifle is designed for serious air gun shooters and hunters. It features a precision trigger and ScopeStop, which ensures that your scope stays in place when cocking the gun.

Weirauch

Weirauch is one of the oldest airgun manufacturers in Germany. Their guns are known for their exceptional craftsmanship and attention to detail.

The Weirauch HW100S is a good choice for an accurate and powerful air rifle. It’s also relatively quiet, making it a good choice for hunting.

The Weirauch HW97K is another great option from this manufacturer. It’s designed for target shooting and features a front sling swivel and adjustable trigger pull.

Hammerli

Hammerli is another well-known German airgun manufacturer. Their guns are used by competitive shooters and hunters around the world.

The Hammerli 850 AirMagnum is a good choice for those looking for an affordable yet high-quality air rifle. It’s also one of the most popular guns among beginners and casual shooters.

For something with a little more power, check out the Hammerli AR20 This gun is designed for serious hunters and competitive shooters. It features a bullpup design and comes with a scope rail mounted on top of the barrel.

Walther

Walther is one of the most famous gun manufacturers in Germany. They’ve been making guns since 1886 and their products are used by the military, law enforcement, and civilians around the world.

The Walther LGV Challenger is a great choice for an accurate air rifle. It’s also relatively quiet and has minimal recoil, making it a good choice for beginners and casual shooters alike.

For something with more power, check out the Walther LGV Ultra Master Pro Target Rifle. This gun was designed for competitive shooters and features an ultra-precise trigger system that can be adjusted to your specific needs.

Diana

Diana is another well-known German gun manufacturer with a long history (the company was founded in 1890). Their guns are known for their quality, accuracy, and durability.

The Diana 48 Sidelever Spring Rifle is an excellent choice if you’re looking for an accurate air rifle that’s easy to cock thanks to its sidelever design. This gun also has minimal recoil, making it ideal for beginners or casual shooters who want to avoid being bruised by stronger guns!

Another great option from Diana is the Diana StormRider. This gun packs quite a punch but it’s also surprisingly quiet given its power.

(For more on the best .22 air rifle on the market, see this post)

Seven Tactics for Hunting Public Ducks

0

By Wade Bourne

For some waterfowlers, the words “public hunting area” conjure up images of crowded boat ramps, fierce competition for spots, and incessant calling. Others shrug off these annoyances and point to the bountiful waterfowl hunting opportunities available on national wildlife refuges, wildlife management areas, and other public lands. Both perceptions are correct to some extent.

Managed public lands typically attract plenty of ducks. They also draw large numbers of hunters. Here are seven surefire strategies to help you bag more birds on these come-one, come-all waterfowl hunting areas:

1. Locate the Best Spots

It’s a fact: certain spots are simply duck magnets. For a variety of reasons, some places on public hunting areas consistently attract more birds than others. Hunters who learn the best spots and gain access to them will experience more consistent shooting than those who don’t.

Here’s an example. Years ago my partners and I were hunting on a public wade-in area in west Tennessee. All waterfowlers were assigned to numbered sites on a first-come, first-served basis. Through experience, we learned about a secluded spot in the back of the area that was a veritable honey hole. It was just one of those places where mallards and other puddle ducks wanted to be.

Other hunters also knew this was a good spot, so we made it a point to be the first to get there whenever we hunted it. We would get up early enough to arrive at the blind an hour before legal shooting time, and wait in the dark. Hunters who showed up later had to go elsewhere. I don’t ever remember getting to this spot an hour early and finding someone else already there.

The takeaway: ferret out the good spots. Ask the area manager or a local conservation officer to point out the places that consistently draw more birds. Check harvest reports for blinds or specific units that have the best track record. Scout during nonhunting periods to learn where the ducks want to be.

Blinds on some public hunting areas are allocated ahead of time via drawings. Other blinds and sites are assigned on a daily basis. In either case, hunters who know the best spots can make informed selections when their turn to choose comes around. Learn where the best places are and go all out to claim them, and you’ll bag more ducks.

2. Hunt When Others Don’t

As a rule, the less pressure a public area receives the better the hunting will be. This is why hunting on weekdays is usually more productive than hunting on weekends, when more waterfowlers go afield. Other good times to hunt include holidays, opening days of hunting seasons for other game, and when extreme weather keeps many hunters indoors.

Here’s another scenario. If a popular local wildlife management area (WMA) is gunned heavily on weekends and rested on Monday and Tuesday, hunt it on Wednesday. Your chance for a good hunt should be higher on the first day the area reopens to hunting.

Certain times of day might also offer less competition and better hunting. Ducks often become programmed by hunting pressure. If pressure is heavy early but slackens as the morning wears on, the ducks might start feeding later in the day, when the disturbance from hunters is lower.

The point is, be alert for any opportunity to hunt on public areas when other hunters aren’t likely to show up. If you’re there when others aren’t, your odds of enjoying a good shoot will increase.

3. Hunt Where Others Can’t

He who works the hardest often fares the best. True of life in general, this old adage also applies to duck hunting. Here’s a shining example. Several years ago I wrote an article about two hunters from Little Rock, Arkansas, who frequented the state’s renowned Bayou Meto WMA. Bayou Meto’s flooded timber draws a lot of birds, but this area also has a reputation for drawing big crowds.

These two hunters made a habit of venturing into the most inaccessible reaches of Bayou Meto. They would motor as long as they had sufficient water to float their boat. Then they would climb out and start wading into thick, brushy woods through water that was only a few inches deep. This was where mallards liked to go to escape the hunting pressure in more popular-and more accessible-areas.

By working hard, these two hunters left the crowds behind and went where the ducks wanted to be. They outthought and outworked their competitors, and in doing so they consistently bagged limits of greenheads.

To increase your chances of success, hunt outside the box. Seek out and explore places that are hard to reach. Study maps and aerial photographs to find spots where ducks may go to escape hunting pressure. Learn to use a GPS-an invaluable tool for exploring backcountry. Consider hiking and wading in or using a Go-Devil boat and motor, a canoe, a kayak, or any other means of accessing new territory.

4. Hunt Multiple Areas

Don’t put all your eggs in one basket. Many states have multiple WMAs and refuges in close proximity to each other. As weather and habitat conditions change, waterfowl will move around from one place to another to take advantage of new opportunities to feed and rest. At times, ducks trade between these areas like Saturday-morning yard-sale shoppers. Hunters who keep up with the ducks’ movements and follow them can stay in the birds, while those who stick to one spot are likely to experience hit-or-miss shooting.

Several years ago, a friend and I towed a boat-blind rig to Kansas. We scouted several small public reservoirs and found few ducks, before finally hitting the jackpot. One lake was hosting several thousand mallards. These birds were flying out at dawn to feed in surrounding grainfields, then returning to the lake to rest in midmorning. My partner and I bagged easy limits of close-working greenheads from the same spot four days in a row. We did so because we were mobile. We kept moving and looking until we found the ducks.

Don’t be a homesteader. Instead, draw up an itinerary that includes several public hunting areas within a specified region, and keep moving and prospecting until you find ducks.

5. Stand Out in a Crowd

On public hunting areas, tactics that grab the attention of working ducks are often more effective in tolling birds than a more passive approach. Nowhere is this more evident than on Tennessee’s Reelfoot Lake. In a setting where blinds are close together and many hunters vie for the same ducks, professional guides often put out permanent spreads that sometimes number in the thousands of decoys. They also employ multiple wing-spinners and other motion decoys. And they are expert practitioners of Reelfoot’s legendary aggressive calling style-loud, continuous, and demanding. Sometimes several callers work together to capture and hold ducks’ attention as the birds circle and descend into shooting range.

This is not to imply that you have to put out as big a spread, add as much motion, or call as loud as a Reelfoot guide when you hunt on public land. Each situation is different. But you will gain an edge over the competition if you set out more decoys than the hunters around you, add some motion to your spread, and use insistent calling to attract the attention of passing ducks.

You can grab the attention of ducks in other ways as well. Make your decoys more noticeable by adding white to your spread in the form of pintail or spoonbill drakes. Or paint a few decoys flat black. These stark colors are more visible at long distances than drab-colored or faded decoys. Sometimes flagging draws long-range ducks as well as it does geese. Do whatever you have to do to get noticed, and you’ll have better odds of bringing birds into your decoys.

6. Hunt in Favorable Weather

Waterfowlers who time their hunts to coincide with favorable weather conditions can stack the odds in their favor. Frontal passages, heavy rain, snow, cold snaps, rapid thaws, fog, high winds, and other weather conditions can cause ducks and geese to move and be more eager to work to decoys and calls.

You should always keep an eye on the weather and plan to hunt when new birds are likely to arrive, or when “local” birds are more prone to move around. On classic waterfowling days, the migration is in full swing and new arrivals often work with reckless abandon. Exceptional gunning can also be had when a weather change causes ducks that are already in the area to become more active.

Here’s a good example. A friend of mine hunted on a WMA in Missouri a few years back. Nighttime temperatures froze the flooded cornfields where ducks had been feeding, but by midmorning the temperatures rose into the 40s and melted the ice. The ducks responded by feeding later in the morning. My friend observed this pattern and began hunting between 9 a.m. and 10 a.m. By then, other hunters were giving up and heading in, but my buddy was ready when the ducks showed up for brunch. He took a full limit of greenheads several days in a row.

Public waterfowling can go from slow to red hot when weather changes move the birds. Hunters who understand this and adapt accordingly can increase their chances for a banner shoot.

7. Remain Flexible

Finally, if the ducks aren’t coming your way, try something different. Change locations, calling styles, decoy strategies, and so on. Keep your options open, and remain adaptable and mobile.

When hunting public areas, it’s crucial to prepare for several options so you can quickly switch to a backup plan if you need to. If plan A isn’t working, go to plan B, and then to plan C.

When it comes to public waterfowl hunting, dealing with other duck hunters can be just as important as dealing with the ducks. The Golden Rule should always apply. If hunters would be considerate of each other and treat others the way they’d like to be treated, hunting on public areas would be a lot more enjoyable and productive for everybody. That’s a fact that’s as true as it is simple.

Continue Reading

10mm Auto vs .45 Colt (LC Long Colt) Ammo Comparison – Ballistics Info & Chart Caliber Ballistics Comparison 07 Dec, 2018 Posted By: Foundry Outdoors The following ammunition cartridge ballistics information and chart can be used to approximately compare 10mm Auto vs .45 Colt (LC Long Colt) ammo rounds. Please note, the following information reflects the estimated average ballistics for each caliber and does not pertain to a particular manufacturer, bullet weight, or jacketing type. As such, the following is for comparative information purposes only and should not be used to make precise predictions of the trajectory, performance, or true ballistics of any particular 10mm Auto or .45 Colt (LC Long Colt) rounds for hunting, target shooting, plinking, or any other usage. The decision for which round is better for a given application should be made with complete information, and this article simply serves as a comparative guide, not the final say. For more detailed ballistics information please refer to the exact round in question or contact the manufacturer for the pertinent information. True 10mm Auto and .45 Colt (LC Long Colt) ballistics information can vary widely from the displayed information, and it is important to understand that the particular characteristics of a given round can make a substantive difference in its true performance. Caliber Type Velocity (fps) Energy (ft-lb) 10mm Auto Handgun 1200 550 .45 Colt (LC Long Colt) Handgun 1050 500 [Click Here to Shop 10mm Auto Ammo] [Click Here to Shop .45 Colt (LC Long Colt) Ammo] Velocity As illustrated in the chart, 10mm Auto rounds – on average – achieve a velocity of about 1200 feet per second (fps) while .45 Colt (LC Long Colt) rounds travel at a velocity of 1050 fps. To put this into perspective, a Boeing 737 commercial airliner travels at a cruising speed of 600 mph, or 880 fps. That is to say, 10mm Auto bullets travel 1.4 times the speed of a 737 airplane at cruising speed, while .45 Colt (LC Long Colt) bullets travel 1.2 times that same speed. Various calibers Energy Furthermore, the muzzle energy of a 10mm Auto round averages out to 550 ft-lb, while a .45 Colt (LC Long Colt) round averages out to about 500 ft-lb. One way to think about this is as such: a foot-pound is a unit of energy equal to the amount of energy required to raise a weight of one pound a distance of one foot. So a 10mm Auto round exits the barrel with kinetic energy equal to the energy required for linear vertical displacement of 550 pounds through a one foot distance, while a .45 Colt (LC Long Colt) round exiting the barrel has energy equal to the amount required to displace 500 pounds over the same one foot distance. As a rule of thumb, when it comes to hunting, muzzle energy is what many hunters look at when deciding on what caliber of firearm / ammunition to select. Generally speaking, the higher the muzzle energy, the higher the stopping power. Again, the above is for comparative information purposes only, and you should consult the exact ballistics for the particular 10mm Auto or .45 Colt (LC Long Colt) cartridge you’re looking at purchasing. [Buy 10mm Auto Ammo] [Buy .45 Colt (LC Long Colt) Ammo] Please click the above links to take a look at all of the 10mm Auto and .45 Colt (LC Long Colt) ammo we have in stock and ready to ship, and let us know any parting thoughts in the comment section below. Foundry Outdoors is your trusted home for buying archery, camping, fishing, hunting, shooting sports, and outdoor gear online. We offer cheap ammo and bulk ammo deals on the most popular ammo calibers. We have a variety of deals on Rifle Ammo, Handgun Ammo, Shotgun Ammo & Rimfire Ammo, as well as ammo for target practice, plinking, hunting, or shooting competitions. Our website lists special deals on 9mm Ammo, 10mm Ammo, 45-70 Ammo, 6.5 Creedmoor ammo, 300 Blackout Ammo, 10mm Ammo, 5.56 Ammo, Underwood Ammo, Buffalo Bore Ammo and more special deals on bulk ammo. We offer a 100% Authenticity Guarantee on all products sold on our website. Please email us if you have questions about any of our product listings. Leave a comment Comments have to be approved before showing up Your Name * Your Email * Your Comment * Post Comment

0

The following ammunition cartridge ballistics information and chart can be used to approximately compare 10mm Auto vs .45 Colt (LC Long Colt) ammo rounds. Please note, the following information reflects the estimated average ballistics for each caliber and does not pertain to a particular manufacturer, bullet weight, or jacketing type. As such, the following is for comparative information purposes only and should not be used to make precise predictions of the trajectory, performance, or true ballistics of any particular 10mm Auto or .45 Colt (LC Long Colt) rounds for hunting, target shooting, plinking, or any other usage. The decision for which round is better for a given application should be made with complete information, and this article simply serves as a comparative guide, not the final say. For more detailed ballistics information please refer to the exact round in question or contact the manufacturer for the pertinent information. True 10mm Auto and .45 Colt (LC Long Colt) ballistics information can vary widely from the displayed information, and it is important to understand that the particular characteristics of a given round can make a substantive difference in its true performance.

Caliber Type Velocity (fps) Energy (ft-lb) 10mm Auto Handgun 1200 550 .45 Colt (LC Long Colt) Handgun 1050 500

Velocity

As illustrated in the chart, 10mm Auto rounds – on average – achieve a velocity of about 1200 feet per second (fps) while .45 Colt (LC Long Colt) rounds travel at a velocity of 1050 fps. To put this into perspective, a Boeing 737 commercial airliner travels at a cruising speed of 600 mph, or 880 fps. That is to say, 10mm Auto bullets travel 1.4 times the speed of a 737 airplane at cruising speed, while .45 Colt (LC Long Colt) bullets travel 1.2 times that same speed.

Various calibers

Energy

Furthermore, the muzzle energy of a 10mm Auto round averages out to 550 ft-lb, while a .45 Colt (LC Long Colt) round averages out to about 500 ft-lb. One way to think about this is as such: a foot-pound is a unit of energy equal to the amount of energy required to raise a weight of one pound a distance of one foot. So a 10mm Auto round exits the barrel with kinetic energy equal to the energy required for linear vertical displacement of 550 pounds through a one foot distance, while a .45 Colt (LC Long Colt) round exiting the barrel has energy equal to the amount required to displace 500 pounds over the same one foot distance. As a rule of thumb, when it comes to hunting, muzzle energy is what many hunters look at when deciding on what caliber of firearm / ammunition to select. Generally speaking, the higher the muzzle energy, the higher the stopping power. Again, the above is for comparative information purposes only, and you should consult the exact ballistics for the particular 10mm Auto or .45 Colt (LC Long Colt) cartridge you’re looking at purchasing.

Please click the above links to take a look at all of the 10mm Auto and .45 Colt (LC Long Colt) ammo we have in stock and ready to ship, and let us know any parting thoughts in the comment section below.

Foundry Outdoors is your trusted home for buying archery, camping, fishing, hunting, shooting sports, and outdoor gear online.

We offer cheap ammo and bulk ammo deals on the most popular ammo calibers. We have a variety of deals on Rifle Ammo, Handgun Ammo, Shotgun Ammo & Rimfire Ammo, as well as ammo for target practice, plinking, hunting, or shooting competitions. Our website lists special deals on 9mm Ammo, 10mm Ammo, 45-70 Ammo, 6.5 Creedmoor ammo, 300 Blackout Ammo, 10mm Ammo, 5.56 Ammo, Underwood Ammo, Buffalo Bore Ammo and more special deals on bulk ammo.

We offer a 100% Authenticity Guarantee on all products sold on our website. Please email us if you have questions about any of our product listings.

Best Air Rifle Deals

Popular Posts

Air Rifle Scope vs. Rifle Scope – Which One Fits Your Shooting Needs?

0
"Air Rifle Scope vs Rifle Scope: Unveiling the Ultimate Precision Optics. Discover the essential differences and benefits of these two optical devices, empowering shooters...

Can a Felon Legally Possess an Air Rifle in Tennessee?

0
"Understanding the Legalities: Felon Ownership of Air Rifles in Tennessee" can a felon own an air rifle in tennessee? In the state of Tennessee, the ownership...

What can you kill with a 177 air rifle?

0
"Unleash Your Precision: Discover the Power of a .177 Air Rifle to Take Down Targets with Accuracy. Explore the Versatility and Potential of this...

Best Distance for Sighting In an Air Rifle

0
Shooting with an air rifle always seems like a thrilling experience, but if you are a newbie then you have lots to learn. One...

PCP vs Spring Piston: Which one is better?

0
When reading about guns in the search for the first one that would be perfect for you, an age-old debate comes into question. Should...