")
")
")
")
")


Table of Contents
- What is the best long range muzzleloader for you in 2024?
- CVA Accura LR-X
- Remington 700 Ultimate Muzzleloader
- Traditions Vortek Strikerfire VAPR LDR
- CVA Paramount
- CVA Paramount Pro
- CVA Paramount HTR
- Enjoy this article on the best long range muzzleloaders for hunters in 2024? Please share it with your friends on Facebook and Twitter.
- NEXT: HOW 11 BEST HUNTING EAR PROTECTION OPTIONS FOR HUNTERS
What is the best long range muzzleloader for you in 2024?
Muzzleloaders have come a long way from the more primitive flintlock and percussion cap traditional muzzleloaders carried by most hunters in the 18th and 19th centuries. Indeed, the most advanced long range muzzleloaders available today offer capability that rivals the performance delivered by traditional centerfire rifles.
However, the situation can be pretty confusing at times. The big manufacturers are constantly introducing new muzzleloading rifle models each year, but they’re not always legal to use where you plan on hunting. Additionally, it’s also sometimes really tough get past the hype and media promotion that surrounds all new products in the outdoor industry.
From one hunter to another, trust me when I say that I’ve experienced a lot of that same frustration myself.
While there are some outstanding long range muzzleloader choices these days, they’re not all the same and some are much better choices for certain hunters than others. At the same time, some are legal to use in certain states, but not others.
Things are constantly changing on that front. Additionally, as you’ll learn here soon, the big manufactures have specifically designed some of their long range muzzleloaders to be legal for use during the muzzleloader seasons in many states.
So with all that in mind, I’m sharing my picks of the best long range muzzleloaders for hunters in 2024 so you can make an informed decision and choose the best long range muzzleloader for you.
Remember: rules and regulations regarding hunting with a muzzleloader can vary quite a bit from state to state. Certain muzzleloaders may be legal to hunt with in one state, but illegal to use during muzzleloader season during a neighboring state. It’s up to you to check local regulations in order to verify that you’re using legal equipment.
Before we get started, here’s a disclaimer: some of the links below are affiliate links. This means I will earn a small commission if you make a purchase.
This commission comes at no extra cost to you. This helps support the blog and allows me to continue to create free content that’s useful to hunters like yourself. Thanks for your support.
Now that we’ve got that out of the way, let’s get started.
CVA Accura LR-X
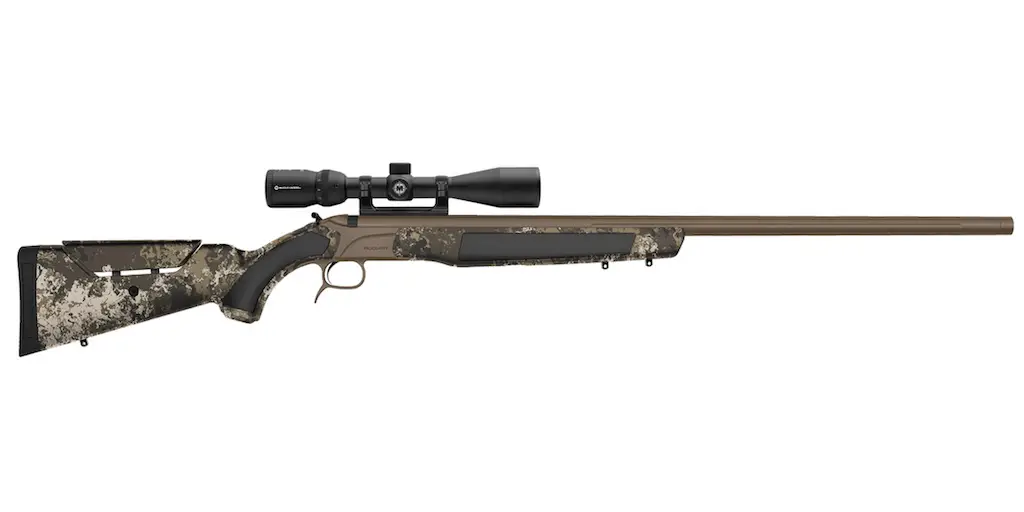
Basically, CVA designed the Accura LR-X muzzleloader to incorporate many of the great features of the CVA Paramount, but still use a standard 209 ignition with a regular magnum (instead of super magnum) powder charge.
So, the CVA Accura LR-X uses the new CVA X-Treme stock with an adjustable comb height to fit any shooter and optic selection. This is a great feature to help hunters obtain a proper cheek weld regardless of whether they’re using open sights or a scope. This is especially important for a long shot.
Like the Paramount line of long range muzzleloaders, the 30″ long barrel for the Accura LR-X is free-floated and has a threaded muzzle to accept the new Paramount Muzzle Brake. As you can imagine, these rifles have excellent accuracy potential and are great options for hunters who want great extended range performance without stepping up to the heavier and much more expensive CVA Paramount.
Additionally, the Accura LR-X is available in either .45 or .50 caliber. The .45 caliber version uses a fast 1:22″ rifling twist and the .50 caliber version uses a 1:28″ rifling twist. However, the really cool thing about these muzzleloaders is they can use the .45 or .50 caliber PowerBelt ELR bullets.
Especially with the .50 caliber LR-X, it’s important to use a full magnum charge (120gr of Blackhorn 209 or 3x 50gr 777 pellets) to get best accuracy with the PowerBelt ELR. That 1:28″ rifling twist will properly stabilize the longer PowerBelt ELR bullets and they’ll still reliably expand on impact, but only at higher velocities.
The upside is that these muzzleloaders will also shoot standard .45 or .50 caliber bullets (both full bore and saboted bullets) very well too.
In fact, CVA even offers a full money back guarantee for their Accura rifles if they aren’t the most accurate muzzleloaders you’ve ever shot.
Additionally, the CVA Accura LR-X comes with a Bergara barrel featuring a Nitride AND CeraKote finish on the exterior for even better corrosion resistance than a typical stainless steel barrel. Though it’s not totally corrosion proof, this Nitride and CeraKote finish is still extremely durable and resistant to corrosion, which is especially nice for hunters who live in wet climates.
The CVA Accura LR-X also has a lot of the same features of the standard CVA Wolf, Optima, Accura muzzleloaders like their Quick-Release Breech Plug, fully ambidextrous stock, and simple break open action.
Like I said, the CVA Accura LR-X is a less expensive and lighter alternative to the CVA Paramount that still has higher end features like a free floated barrel, adjustable stock, and the ability to use the more aerodynamic PowerBelt ELR bullets.
It uses a standard magnum powder charge, so muzzle velocities won’t be quite as high as with the Paramount, but the Accura won’t have quite as much recoil either. The Accura LR-X also uses 209 primers (instead of variflame ignition), but you can buy a conversion kit if you’d like.
All things considered, this is one of the best long range muzzleloaders CVA currently produces for those who want a little bit more reach without spending a lot of money, quite as much recoil, or as much weight. It’s also still a very flexible muzzleloader that will work really well with standard bullets at closer range if so desired.
For those reasons, this is a very flexible muzzleloader that will work great for deer hunting east of the Mississippi as well as game like mule deer, elk, and pronghorn out west where ranges can be a little longer.
- Overall Length: 45″
- Barrel Length: 30″
- Weight: 8.1lbs
- Sighting System: Iron Sights & Drilled/Tapped For Scope Mount or With Mounted Scope
- Caliber: .45 or .50 Caliber Magnum
- Ignition System: 209 Primers
BUY A CVA ACCURA LR-X HERE
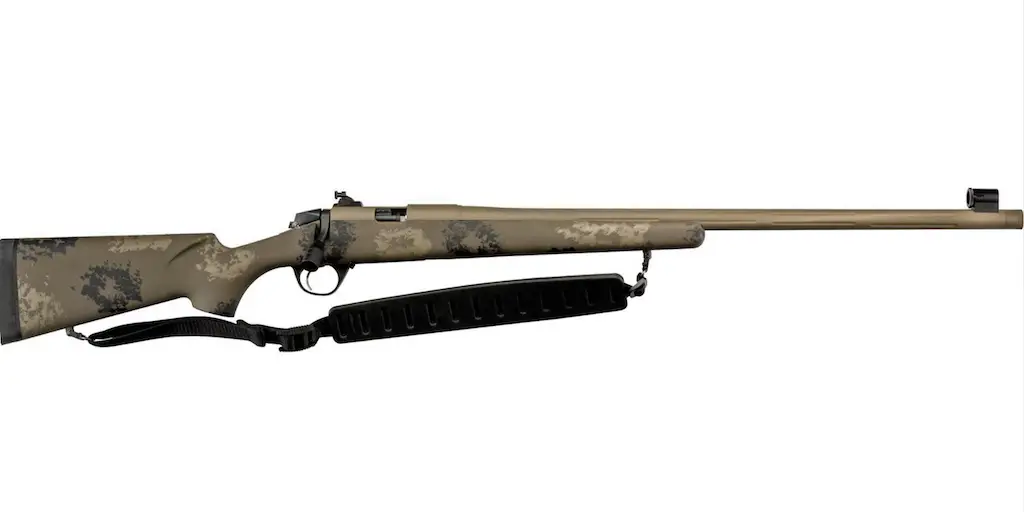
Remington 700 Ultimate Muzzleloader
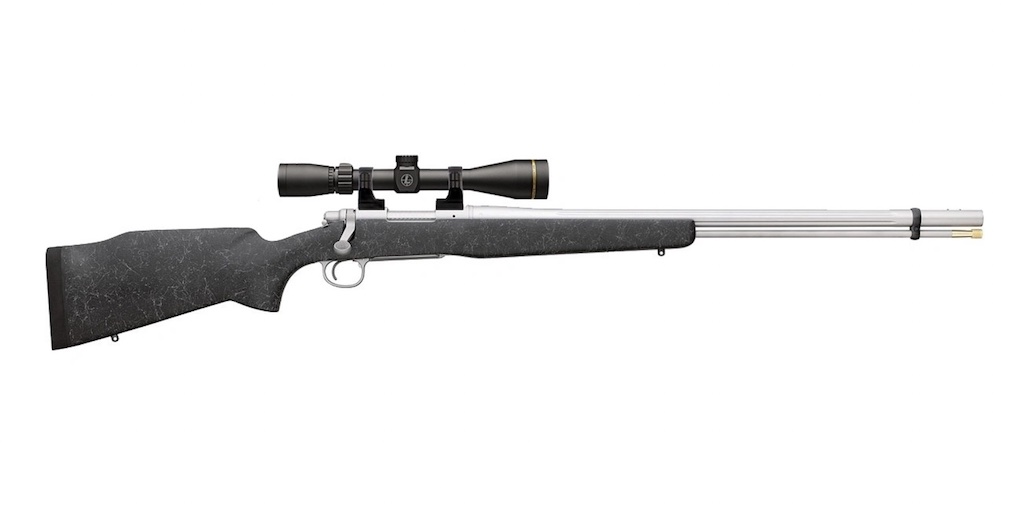
Since first hitting the market nearly a decade ago, the Remington 700 Ultimate Muzzleloader (UML) was the only real option for hunters wanting a good factory production long range muzzleloader (the Gunwerks muzzleloader and many of the various smokeless muzzleloaders are a custom job that’s significantly more expensive). Indeed, it was the best long-range muzzleloader in mass production for many years by the simple fact that it was the only real option for hunters who didn’t want a custom muzzleloader.
Remington has gone through a lot of turmoil in recent years, but they’re back in business now and producing the Remington 700 UML again (along with many of their other popular firearms).
Don’t let the fact that the Remington 700 UML is an older design (compared to the other muzzleloaders on this list) keep you from purchasing one either. It is still one of the best long range muzzleloaders money can buy.
What makes the Remington UML special?
Instead of a musket cap or a standard 209 primer, the Remington UML uses a special brass magnum rifle casing and a standard magnum rifle primer. This ignition system allows the muzzleloader to safely use up to 200 grains of black powder substitute, which is significantly more than most other muzzleloaders.
That’s even more propellant than the much newer CVA Paramount normally uses.
The Remington Model 700 Ultimate Muzzleloader was designed to use 250 grain Barnes Premier muzzleloader bullets that have a special sabot designed to handle those exceptionally large powder charges.
This bullet doesn’t have a very high BC like the PowerBelt ELR bullets used by the Paramount, but the Remington 700 UML can shoot those bullets at a very high velocity since it can use such a large powder charge.
While the Paramount might have an edge at longer range, the Remington 700 UML is no slouch either. Indeed, the Remington 700 is a very accurate muzzleloader, has a great barrel, uses the Remington adjustable X-Mark Pro trigger.
The fact that the Remington Ultimate muzzleloader is designed to use Barnes bullets is a definite plus for some hunters who like the terminal performance delivered by those bullets. The same goes for those hunters who want (or are required) to hunt with lead free bullets.
All things considered, it’s highly regarded among muzzleloader hunters and is still a very capable tool for hunting situations out to approximately 300 yards, maybe a little farther depending on conditions. For all those reasons, the Remington Model 700 Ultimate Muzzleloader is another good choice if you’re looking at long range muzzleloaders.
- Overall Length: 47″
- Barrel Length: 26″
- Weight: 8.5lbs
- Sighting System: Iron Sights & Drilled/Tapped For Scope Mount or With Mounted Leupold/Vortex Scope
- Caliber: .50 Caliber Magnum
- Ignition System: Remington UML Ignition
BUY A REMINGTON 700 ULTIMATE MUZZLELOADER HERE
Traditions Vortek Strikerfire VAPR LDR
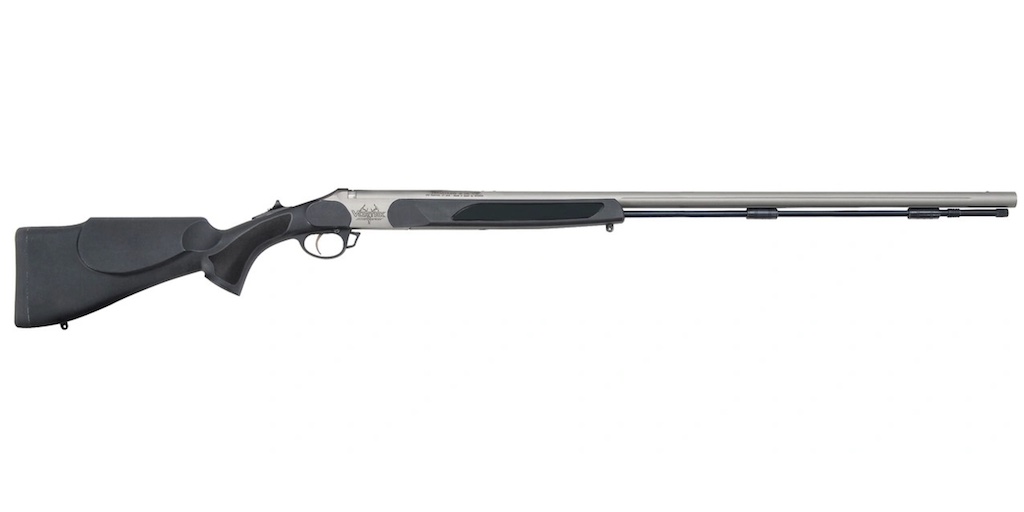
Traditions decided to go a slightly different direction from most of the competition with their Strikerfire line of long range muzzleloaders. Instead of using a traditional external hammer for ignition, the Traditions Vortek Strikerfire LDR incorporates an internal striker for ignition.
Similar to the firing pin system used by many modern firearms, this Strikerfire ignition system results in noticeably faster lock times and also allows hunters to mount their scope closer to the bore.
Additionally, Traditions also recently introduced their new VAPR barrels with a faster rifling twist. Instead of the 1:28″ twist that’s common with typical modern inline muzzleloaders, the Traditions VAPR barrels use a faster 1:24″ rifling twist. This allows hunters to use heavier and more aerodynamic bullets like the .50 caliber PowerBelt ELR.
Don’t worry, the Traditions Vortek Strikerfire LDR VAPR will still work great with lighter bullets, especially at shorter range. However, this does give that added capability at greater distances for hunters who want and/or need it.
It’s not quite as good at longer ranges as the CVA Paramount and Remington 700 UML. However, Traditions Vortek Strikerfire VAPR LDR with its 30-inch barrel is still a capable long range muzzleloader that’s available at a much lower price than those other muzzleloaders.
Additionally, this muzzleloader has a great, adjustable two-stage trigger that comes from the factory set at two pounds. It also has a Cerakote finish for corrosion resistance. The whole rifle weighs in at 6.8 pounds, which makes it by far the lightest rifle on this list of long range muzzleloaders.
All things considered, these features make the Traditions Vortek Strikerfire LDR VAPR one of the best long range muzzleloaders for hunters on a more strict budget.
So, if you want something with a little bit more reach than a typical modern inline muzzleloader without making the jump all the way up to the Paramount or even the Accura LRX, then the Traditions Vortek Strikerfire LDR VAPR is the long range muzzleloader for you.
- Overall Length: 46″
- Barrel Length: 30″
- Weight: 6.8lbs
- Sighting System: Drilled/Tapped For Scope Mounts or With Mounted Leupold/Vortex Scope
- Caliber: .50 Caliber Magnum
- Ignition System: 209 Primers
BUY A TRADITIONS VORTEK STRIKERFIRE VAPR LDR HERE
Note: CVA temporarily suspended production of all Paramount models during 2024 due to an ongoing lack of components (Blackhorn 209 and large rifle primers) for the end user. These are fantastic long range muzzleloaders, but their utility is severely hampered by the lack of availability of primers and powder right now. Be certain you can source appropriate components before purchasing one!
CVA Paramount
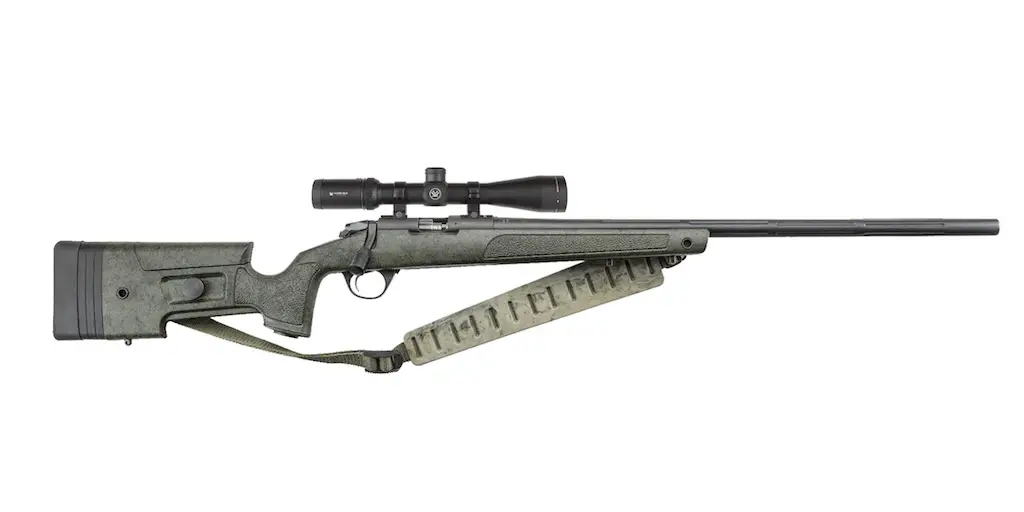
The Remington 700 Ultimate Muzzleloader (UML) was the best option for a long range muzzleloader for many years. However, that changed in 2019 with the introduction of the bolt-action CVA Paramount muzzleloader.
Not only did the Paramount likely dethrone the UML as the best long range muzzleloader, but the CVA Paramount was so successful that CVA introduced two new CVA Paramount models in recent years as well: the Paramount HTR and Paramount Pro.
We’ll talk about the CVA Paramount HTR and CVA Paramount Pro in more detail in a minute.
So, what makes the CVA Paramount line of long range muzzleloaders special?
CVA markets the Paramount line as capable of taking big game at ranges over 300 yards due to their outstanding accuracy, relatively flat trajectories, and really good resistance to wind drift.
The designers at CVA did this through a few important design principles.
First, the base model Paramount is a .45 caliber muzzleloader designed to use a “super magnum” charge of up to 160 grains of loose powder. This is significantly more than the 120 grain maximum charge of Blackhorn 209 other muzzleloaders typically use.
Second, the muzzleloader uses special adapters originally developed by Cecil Epps that permit the use of large rifle primers for hotter, more consistent, and faster ignition than with standard 209 primers.
Third, unlike most muzzleloaders, the CVA Paramount has a 26″ free-floating stainless steel Bergara barrel with a very fast rifling twist rate to stabilize the long, high BC bullets designed for use with these rifles. While most modern muzzleloaders have a 1:28″ twist rate, the Paramount has a 1:22″ twist rate.
Since the barrel is free-floated for better accuracy, the Paramount uses a collapsible ramrod that fits in an included pouch for use afield instead of storing the ramrod under the barrel.
Finally, CVA teamed up with PowerBelt to develop a line of new, extremely aerodynamic muzzleloader bullets specifically for the Paramount: the PowerBelt Extended Long Range (ELR). Each version of the PowerBelt ELR has a very high ballistic coefficient, so they retain energy and resist wind deflection exceptionally well.
The base model Paramount uses a .45 caliber 285gr PowerBelt ELR bullet.
Combined with the very high velocities that can be obtained by using super magnum charges of powder, this results in a very flat bullet trajectory for a muzzleloader that rivals the trajectory of some centerfire rifle cartridges.
The standard Paramount has a Bergara HMR stock that has adjustments for length of pull and cheek height and an internal aluminum chassis for rigidity. It also has an outstanding trigger and is just very easy to shoot accurately. Current production Paramounts also have a threaded muzzle and can use a muzzle brake to reduce felt recoil.
The end result is a long range muzzleloader that’s capable of incredible accuracy, has much less bullet drop at extended range than a typical muzzleloader load, and retains enough energy for impressive terminal performance on a wide range of game out past 300 yards.
CVA claims sub-MOA accuracy at 300 yards is very achievable with the Paramount and this has been my experience with this muzzleloader at the range.
All things considered, the CVA Paramount was a massive step forward in long range muzzleloader development and has been extremely well received by the hunting community. If you want an outstanding long range muzzleloader, then you really need to consider the CVA Paramount.
- Barrel Length: 26″
- Weight: 9.8lbs
- Sighting System: Accepts Remington 700 Pattern Scope Mount or With Mounted Leupold/Vortex Scope
- Caliber: .45 Caliber Magnum
- Ignition System: Vari-Flame Ignition
BUY A CVA PARAMOUNT HERE
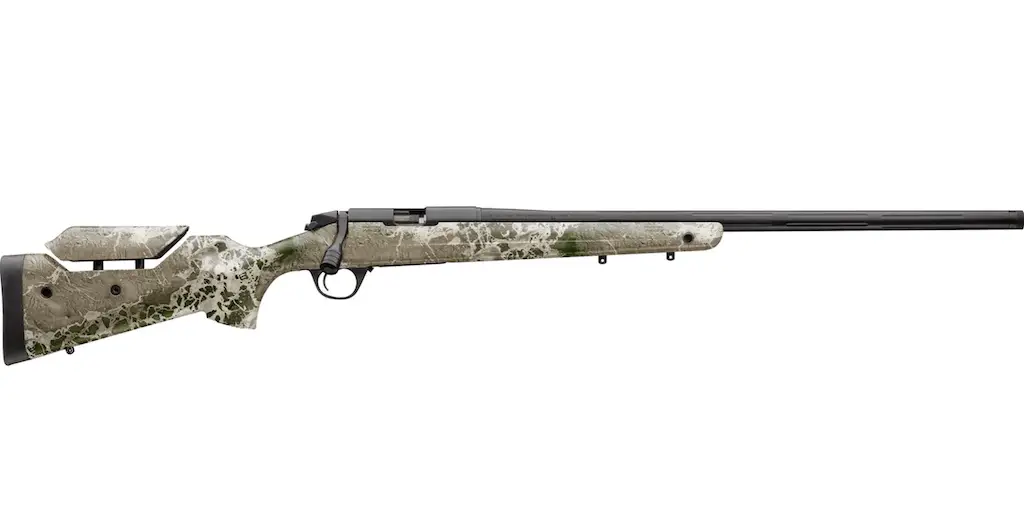
CVA Paramount Pro
CVA introduced the Paramount Pro muzzleloader in 2020 as an upgrade to the original Paramount. While the CVA Paramount is an outstanding long range muzzleloader, the Paramount Pro is even better.
Here’s why.
Hunters had three primary complaints about the original CVA Paramount.
First, recoil is pretty stout, especially with maximum powder charges. Next, the original Paramount was pretty heavy. Finally, the .45 caliber Paramount was not legal to use for hunting all game in all states.
So, designers at CVA worked to address those issues with the CVA Paramount Pro.
Additionally, they also made a few other changes to improve the already impressive ballistic performance of the original CVA Paramount and make it an even better all-around long range muzzleloader.
First, the CVA Paramount Pro has an upgraded Greyboe Terrain Stock. This stock is quite a bit lighter than the original Paramount stock and is better for hunting applications, especially in rougher terrain.
Tipping the scales at 8.2 pounds, the CVA Paramount Pro weighs about a pound and a half less than the 9.8 pound CVA Paramount.
The stock isn’t adjustable like the original CVA Paramount stock (which is more akin to a stock for a target shooting rifle than a hunting rifle), but Paramount Pro models designed for use with a scope do have a raised cheek for proper alignment with an optic.
Next, the Paramount Pro was designed from the start with a threaded muzzle to accommodate a muzzle brake to reduce felt recoil. This has been a welcome feature for Paramount shooters and has been so well received that current production Paramount models also have a threaded muzzle.
With regards to ballistics and legality in certain states, the CVA Paramount Pro is available in .40 caliber, .45 caliber, and .50 caliber versions.
The .40 caliber version of the Paramount Pro fires the .40 caliber 225gr PowerBelt Extended Long Range (ELR) bullet, the .45 caliber version fires the same 285gr PowerBelt ELR as the regular Paramount, and the .50 caliber version fires a 330gr PowerBelt ELR.
Capable of firing up to a 150gr charge of Blackhorn 209, the .40 caliber Paramount Pro has the flattest trajectory of any mass produced muzzleloader available today.
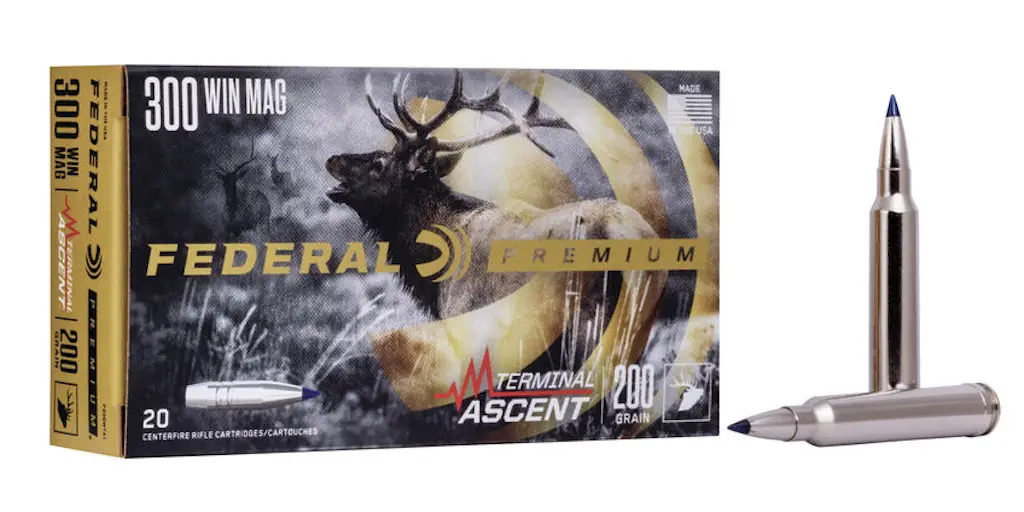
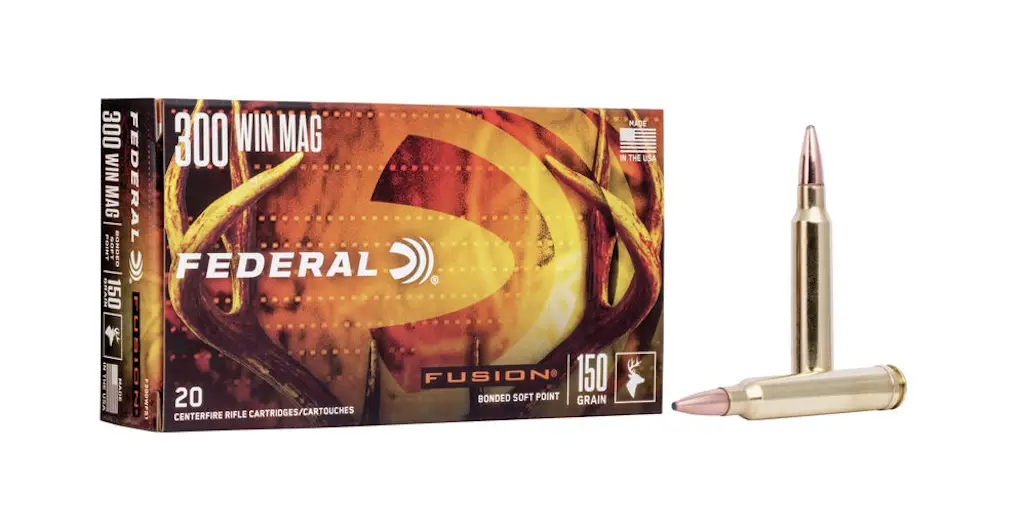
Indeed, CVA advertises that maximum loads for the .40 caliber Paramount Pro are approaching .300 Win Mag trajectories inside 400 yards!
That is some incredible performance that surpasses the already impressive ballistics of the .45 caliber Paramount. This is because the .40 caliber has an even higher BC than the .45 caliber PowerBelt ELR and can be fired at a faster muzzle velocity.
For comparison, the .40 caliber ELR has a BC of .360 and the .45 caliber ELR has a BC of .333. A 150gr charge of Blackhorn 209 (by volume) will propel the .40 caliber ELR at 2,740fps and the .45 caliber ELR at 2,300fps.
This is incredible performance for a muzzleloader with both bullets, but especially so for the .40 caliber ELR and the Paramount Pro.
Unfortunately, some states require larger caliber muzzleloaders for certain types of hunting. At the same time, a few states also prohibit the use of telescopic sights during muzzleloader season.
In particular, Colorado is an especially popular state for muzzleloader hunters that has a .50 caliber minimum for elk hunting and also prohibits scopes during muzzleloader season.
Well, CVA designed versions of the Paramount Pro to address those issues as well.
The Pro version is available in .50 caliber (which is legal for hunting deer, pronghorn, bear, elk, and moose all over North America). While some models are drilled and tapped for a scope, the Paramount Pro is also available with the outstanding Williams Western Precision Sight Set, which is the best mass produced muzzleloader sight available these days.
In addition to all of that, the CVA Paramount Pro uses a fully adjustable Trigger Tech trigger. The trigger on the Paramount is very good, but it doesn’t get much better than a Trigger Tech trigger, which allows for rapid adjustments by ounce between 1.5 and 3.5 pounds.
The Paramount Pro also has a 26” Nitride treated Bergara barrel with a Flat Dark Earth CeraKote finish for corrosion resistance. The .40 caliber versions have a 1:20″ rifling twist while the .45 caliber and .50 caliber versions use a 1:22″ rifling twist rate.
Aside from those changes I just discussed, the CVA Paramount Pro still incorporates a lot of the same features and design principles as the original Paramount.
This includes a free floated barrel, the VariFlame ignition system, and the ability to use “super magnum” powder charges (though only 150gr instead of 160gr of Blackhorn 209 by volume with the original Paramount).
With all that in mind, the CVA Paramount Pro is certainly one of the best (if not the best) of the long range muzzleloaders currently available for hunters with a variety of needs and desires.
For instance, a hunter looking for the best long range muzzleloader for use in states like Colorado that require a .50 caliber muzzleloader for hunting certain animals and/or prohibit the use of a scope should buy a .50 caliber CVA Paramount Pro.
Likewise, a hunter that’s not restricted by a .45 or a .50 caliber minimum that wants the absolute best long range muzzleloader with the absolute flattest trajectory, then go with a .40 caliber CVA Paramount Pro.
Finally, the .45 caliber CVA Paramount Pro is a good choice for those who are required to use a .45 caliber muzzleloader at a minimum, but want a lighter and generally nicer muzzleloader than the original Paramount.
- Barrel Length: 26″
- Weight: 8.2lbs
- Sighting System: Williams Western Precision Sights, Accepts Remington 700 Pattern Scope Mount, or With Mounted Leupold/Vortex Scope
- Caliber: .40, .45, or .50 Caliber Magnum
- Ignition System: Vari-Flame Ignition
BUY A CVA PARAMOUNT PRO HERE
CVA Paramount HTR
Introduced in 2021, the CVA Paramount HTR is a new muzzleloader that’s the newest model of the Paramount and occupies something of a middle ground between the original Paramount and the Paramount Pro.
The most significant change with the Paramount HTR is that it’s equipped with a hunting (as opposed to a target) oriented adjustable stock with a Realtree Hillside camouflage pattern. It has the same 8.2 pound weight as the Paramount Pro, but that adjustable stock is a very nice feature.
Available in either .40 or .45 caliber, the Paramount HTR also uses a 26″ fluted and Nitride treated Bergara barrel that’s threaded for a muzzle brake and the same trigger as the original Paramount. It also uses the same .40 and .45 caliber PowerBelt ELR bullets as Paramount and Paramount Pro muzzleloaders of the same caliber.
Of course, it still has a trajectory approaching what can be obtained with many center-fire rifles, especially in .40 caliber.
Since it is the latest iteration of the Paramount series, the CVA Paramount HTR also has many of the same features as the other Paramount models like a free floated barrel, the VariFlame ignition system providing that more consistent large rifle primer ignition, the ability to use “super magnum” powder charges, and is threaded for a muzzle brake.
Not surprisingly, the CVA Paramount HTR is a little more expensive than the original CVA Paramount, but is less expensive than the CVA Paramount Pro.
This makes sense because it has a few advantages over the original Paramount, but lacks a few features of the Paramount Pro.
With all that said, the CVA Paramount HTR is another outstanding long range muzzleloader. The .40 caliber version in particular is another great choice for a hunter wanting a really flat trajectory, while the .45 caliber version is excellent for hunters who want a lighter muzzleloader than the original Paramount that doesn’t cost as much as the Paramount Pro.
- Barrel Length: 26″
- Weight: 8.2lbs
- Sighting System: Accepts Remington 700 Pattern Scope Mount or With Mounted Leupold/Vortex Scope
- Caliber: .40 or .45 Caliber Magnum
- Ignition System: Vari-Flame Ignition
BUY A CVA PARAMOUNT HTR HERE
The CVA Paramount long range muzzleloaders also made cut for my holiday gift recommendations. To see what other stuff is on the list, check out the following article:
101 Best Gifts For Hunters
While this post covers the right long range muzzleloaders, that’s only a single part of the equation when hunting with a muzzleloader. For more detailed information on choosing the right primer, propellant, bullets, sights, and scopes, check out these other articles:
15 Of The Best Muzzleloader Primers For Igniting Your Powder
Blackhorn 209 vs 777 vs Goex Black Powder: Which One Should You Use In Your Muzzleloader?
These Are The Best Brands Of Black Powder and Black Powder Substitutes You Should Be Using In Your Muzzleloader
13 Of The Best Muzzleloader Bullets For Hunters
Best Muzzleloaders For Hunters In 2024
9 Best Muzzleloader Scopes For Hunters
These Are The Best 9 Best Muzzleloader Sights For Hunters
5 Best Traditional Muzzleloaders For Hunters
Essential Muzzleloader Supplies Every Hunter Needs
How To Hunt With A Muzzleloader
Make sure you subscribe to The Big Game Hunting Podcast and follow The Big Game Hunting Blog on Facebook, Instagram, Twitter, and YouTube.