Home Blog Page 194

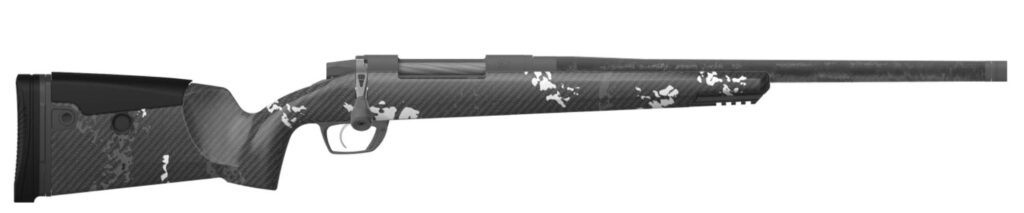
Hammerli 850 Review – A CO2 Rifle with PCP Accuracy

0

Umarex may be the new name but the old title of Hammerli remains just as popular.

This air rifle was introduced as high power CO2 option for game hunters!

The name situation makes things a bit hard to follow, but know this –

The Hammerli 850 goes under the name Umarex in the US market. 

They’re one and the same. 

German company Umarex are experts at CO2 power

(For more on the best air rifle brands, see this post)

They introduced the world to the first mass-produced, affordable and full-power 12 ft/lb CO2 hunting rifle, the Hammerli 850 AirMagnum.

It is powered by liquid gas, and made up of synthetic material, making it light in weight and economical.

The Hammerli 850 AirMagnum has been the solution for those seeking an accurate rifle with a real firearm feel but cannot afford the real deal.

Hammerli / RWS are well known for standing behind their guns, whatever they claim, and they do deliver!

Their warranty has always been the best in the market.

Therefore, Umarex Hammerli 850 is another trusted name in the community.

The Hammerli 850 AirMagnum is popular with pest controllers in particular.

(For more on the best air rifle for squirrels, see this post)

The rifle comes with smooth blacked-steel cocking and a generous bolt.

It’s a lot of fun to shoot with, so you will have a hard time putting it down.

The Hammerli 850 AirMagnum wood stock is synthetic though, known as an all-weather stock.

You can take the gun anywhere and not be worried about the finish as it is made of durable polymer with a Monte Carlo stock!

The Hammerli 850 AirMagnum uses an 88-gram air source cartridge,

Which allows you to have 200 – 250 shots before you need to change the cartridge. 

The rifle comes with a fiber-optic sight to help you acquire your target.

You can feel free to mount a scope on the 11mm dovetail rail.

Based on the German quality, Umarex makes a dovetail–to-weaver mount. 

This rifle is ideal for plinking, recreational target shooting, and competition.

The wooden stock is robust and reliable.

The Hammerli 850 AirMagnum not only has the look of a firearm, but it works like a firearm in terms of accuracy.

If you wish to have the experience of a military firearm, but cannot buy one, then the Hammerli 850 AirMagnum is the best choice for you. 

All told, the Hammerli 850 AirMagnum has just about everything if you have ever hoped for in a CO2 repeater!

(For more on 5 types of air rifles you need to know before buying, see this post)

Cocking Effort And Trigger

You should think seriously and consciously about the trigger performance or the cocking ability

You don’t want something that fires off course too easily. 

Luckily, the trigger performance of the Hammerli 850 AirMagnum air rifle is just unbeatable.

The HAM team has taken the test to check the ability of the trigger, and the results are amazing.

The Hammerli 850 has a cock-on-opening bolt-action,

And for sure, it is actually very easy to manage.

This means that the Hammerli 850 is suitable for both young shooters or less physically strong adults. 

The rifle does not discharge accidentally even with the lower pull weight of just 1 lb.

Therefore, the Hammerli 850 AirMagnum air rifle is safe to use in any way.

Moreover, the trigger pull is very smooth and consistent.

But I would make it clear here that if one snatches the rifle during shooting, it will miss the second target.

You would be amazed to learn that the Hammerli 850 has a bolt action that works like a firearm

This is the big attraction for you towards the rifle.

If you have a military background or interest in real firearms, you would love to have Hammerli 850 in your collection.

Note that the bolt is a little bit rough and bulky as you close the stroke.

But, maybe with time as you use the rifle, it’ll become smoother.

There is nothing wrong with having an action like this — it’s just something you’ll get used to.

Stock 

The Hammerli 850 AirMagnum wood stock is synthetic.

Umarex has made the gun to be used anytime, in any weather, and it’s beautiful in black – reminiscent of the military. 

(For more on the in-depth comparison between synthetic and wood stock, see this post.)

The Hammerli 850 has that renowned German quality as it is made of durable polymer.

With a raised cheek-piece on both sides of the Monte Carlo Stock, it is ambidextrous.

The rifle has an air-source cartridge of 88gms.

It is quite useful because it allows you to have up to 200 or 250 continuous shots before you change the cartridge.

Scope And Sight

The Hammerli 850 AirMagnum comes with fiber optic sights, which are very popular in airguns nowadays. 

These sights allow you to adjust between to a bright red, hooded foresight which is nicely designed along with an adjustable rear sight.

You can also add green fiber optics on a sliding ramp — all you need is a screwdriver to make the change.

(For more on how many types of air gun sights are out there and which one is suitable for you, see this post.)

Accuracy And Speed

Your concern regarding the accuracy has been very much considered by the Umarex Hammerli AirMagnum 850.

The speed of a CO2 air rifle can never be compared with a real gun because it cannot fulfill the requirement of a minimum number of shots per fill.

You can consider the multi-shot capability and lack of recoil at a reasonable price with a simple appearance and features.

We has tested the Umarex Hammerli AirMagnum 850 at a temperature of 65 degrees Fahrenheit. Below are the results:

PelletMuzzle Velocity-AverageMuzzle Energy-AverageAccuracy
Gamo Raptor Platinum 9.7 Grain674 fps9.8 ft/lbsGOOD
H & N field target trophy green 14.66 grain668 fps9.9 ft/lbsGOOD 
RWS hobby 11.9 grain640 fps10.8 ft/lbsEXCELLENT
Crosman premier HP 14.3 grain606 fps11.7 ft/lbsEXCELLENT
JSB Jumbo exact 14.35 grain610 fps11.9 ft/lbsBEST TESTED
H&N field target trophy 14.66 grain609 fps12.1 ft/lbsEXCELLENT
H&N Barracuda match 21.14 grain519 fps12.6 ft/lbsGOOD ONE FLYER

The muzzle velocity is quite a complicated topic when it comes to CO2-powered air guns since CO2 is performance is so dependent on temperature.

As the temperature rises, so too does the pressure of the CO2.

As the CO2 increases, the muzzle velocity increases as well since the temperature increases by 2 degrees Fahrenheit.

PelletMuzzle Velocity calculated at 67F-AverageMuzzle Velocity calculated at 75 F-AverageMuzzle Velocity calculated at 90F- Average
Gamo Raptor Platinum 9.7 Grain674 fps690 fps720 fps
H & N field target trophy green 14.66 grain668 fps684 fps714 fps
RWS hobby 11.9 grain640 fps656 fps686 fps
Crosman premier HP 14.3 grain606 fps622 fps652 fps
JSB Jumbo exact 14.35 grain610 fps626 fps656 fps
H&N field target trophy 14.66 grain609 fps625 fps655 fps
H&N barracuda match 21.14 grain519 fps535 fps565 fps

The table, as mentioned earlier, clearly shows the result of the increased muzzle velocity with an increase in temperature.

But the growth is limited; it cannot be said that it would grow at infinity.

At around 95 degrees Fahrenheit, there is increased pressure in the “valve lock”, and the muzzle velocity begins to fall very quickly.

Therefore, it is accurate to say that around 90 degrees Fahrenheit is the maximum shooting temperature for CO2-powered air rifles.

Manufacturers recommend that if you do this and your valve lock gets heated, then allow it to cool down.

This will bring the pressure down and allow you to shoot again. 

JSB Jumbo Exact Pellets achieved the best accuracy with the Hammerli 850.

However, this air rifle is not picky about pellets and shows good accuracy with a whole range. 

(For more on everything you need to know about air rifle accuracy, see this post)

Watch how this German-made tack driver puts .22 caliber pellets through the same hole at 35 yards:

check price on midwayusa

Consistency

The Umarex Hammerli 850 AirMagnum demonstrates good consistency all around.

The standard deviation dropped to a lower extent of 4.2 FPS with JSB jumbo pellets. 

With GAMO platinum PBA pellets, the standard deviation recorded by the Hammerli 850 AirMagnum air rifle was just 8.7 FPS.

This was its best performance. 

The weight of the trigger pull was rock-steady, with no such variations when tested by HAM. This is outstanding and quite rare!

Loudness 

The Hammerli 850 AirMagnum air rifle is a high-powered CO2 air rifle with no silencer.

However, this is not the disappointment it might seem as many shooters like the noise!

It’s worth noting that the HAM team expected the sound to be much louder because it is high power CO2,

So the noise still doesn’t meet the norm for this type of gun.

You cannot compare the Hammerli 850 AirMagnum air rifle with .22 LR firearms in terms of the noise of course – it’s much quieter, even in .177 caliber.

Nevertheless, shooters looking for a quiet air rifle best avoid this air rifle. 

Shooting Ability

Amazing results here for Hammerli 850 AirMagnum air rifle!

The Hammerli 850 AirMagnum air rifle is so perfect.

It is easy to shoot as there is not such heavy cocking and no recoil.

It doesn’t take at all long to master. 

The rate-a-gun score is 4.1, which is outstanding.

The Hammerli 850 AirMagnum air rifle is very easy to handle and quick on the target.

The 16 joules valve is best for shooting with accuracy.

You can load the clip of the Hammerli 850 XT very smoothly, but it is suggested for you to take some time to push every pellet right down to the hole

So that the compressed pellet is seated correctly by the O ring that runs around the clip.

The HAM team experienced no misleads during the examination of the Hammerli 850 AirMagnum air rifle.

Appearance

The attractive color and design of the Hammerli 850 AirMagnum air rifle would urge you to get one for any shooting activity, be it backyard shooting, hunting, or sports competition. 

The Hammerli 850 AirMagnum combo comes within the forearm, which is removable, the CO2 cylinder is well concealed inside.

The finish of the Hammerli 850 AirMagnum air rifle is very impressive, featuring:

  • A well-finished metal part
  • And a well-molded black ambidextrous synthetic stock.

Note here that the Hammerli 850 AirMagnum wood stock version is available in the US.

It might be available in Europe but we’re not sure about the price.

The price for a Umarex Hammerli AirMagnum 850 can be high outside the US.

Outstanding Grip

With the stock of black synthetic material, the Hammerli 850 AirMagnum wood stock has a slim pistol grip.

It has raised dots, which will increase the grip.

It has a thick rubber butt-pad, and the cheek-piece makes it suitable for shooting from both sides.

Price

The Hammerli 850 AirMagnum costs between $250 and $280.

Being a CO2 air-rifle, this is a viable alternative for the shooters or hunters who are looking for a PCP rifle with minimal recoil and don’t want to buy a refill tank. 

If you compare the accuracy and reliability, and indeed the real firearm feel, none can beat the Hammerli 850 AirMagnum at such a low price.

Pros

  • Adjustable rear fiber optic sight 
  • The air rifle has a rifled steel barrel with all-weather synthetic stock and both are durable and eye-catching just as you see the Umarex Hammerli 850 air magnum
  • Hooded front fiber optic sight
  • As you buy, you would 3-9 * 40 mm of AO optic from the center point.
  • It has hardwood stock, and it has sling mount
  • The speed can be shooting up to a velocity of 1100 fps.
  • It is ideal for the small hunting game
  • It has higher efficiency rate when you read the instructions
  • Outstanding accuracy
  • Over-length is 41 inches, therefore; easy on shoulders
  • Light in weight as it is synthetic
  • Great trigger
  • Easy to shoot
  • Accurate with all tested pellets
  • Best to experience firearm
  • Great CO2 bolt-action
  • Safe while using with family due to safety mode
  • It does not emit CO2 even at the lowest muzzle velocity, therefore; safe to use with the 

Cons

  • High-cost CO2
  • Poor open sight
  • Balky bolt action
  • Harder trigger but adjustable

check price on midwayusa

Specifications

  • The manufacturer is Umarex USA (old name Hammerli)
  • .22 caliber in Hammerli 850 AirMagnum xt kit
  • The Umarex Hammerli AirMagnum 850 xt has the 650 fps velocity
  • Ammo type is pellets
  • The Hammerli 850 co2 is Bolt-action
  • Barrel style is rifled
  • Firing mode is a repeater
  • Weight of rifle is 5.65 lbs.
  • Noise is 3-medium
  • CO2 mechanism
  • Automatic safety
  • Fiber option rear sight
  • Trigger pull is 3 in Hammerli 850 AirMagnum accessories
  • Target shooting/ Small game hunting/ backyard shooting/ plinking
  • 1-year warranty
  • Testers were Doug wall
  • Model number 2251001
  • Serial number G038251
  • Price $250 – 280
  • 200 – 250 shots per cartridge
  • Quick firing 8-shot rotary magazine 
  • Monte Carlo stock
  • 2 stages adjustable trigger in Hammerli 850 hPa in Hammerli 850 accessories
  • Product dimensions 12 * 45.1 * 4.2 inches

Customer Reviews

The reviews of the customers are very much in favor of the Umarex Hammerli 850 air magnum,

As people appreciate the rifle’s accuracy and the price, as well as the easy loading and changing of the magazine. 

Moreover, the smooth trigger pull is widely appreciated.

Even the retired servicemen and engineers who have bought the rifle left positive reviews. 

Even the reviews reveal that people who bought some other rifle or gun previously were disappointed with their decision

And are encouraging other people to go for the Umarex Hammerli 850 AirMagnum as it is the best choice for hunters. 

Not only hunters will reap the benefits, however.

If you’re looking to have a good backyard shooting session, or even looking to teach someone how to handle a firearm, this is a great starting point. 

Moreover, one of the users of the rifle commented that bottle O ring blew just after the 5th CO2 bottle.

This suggests that the rifle should have some quality standard.

Additionally, since the Umarex Hammerli 850 AirMagnum is synthetic, it’s praised for being to light.

It’s easy on the shoulders so you can carry and fire it all day. 

Generally, there are no recurring complaints made about the Umarex Hammerli 850 AirMagnum

So it’s safe to assume that it has no chronic problems. 

In the same way, safety is also being considered because the Umarex Hammerli 850 AirMagnum comes with accuracy and safety.

The rifle is safe to use without much stress.

It does not leak CO2 even at lower temperatures or pressure.

Conclusion

Hammerli 850 is an excellent CO2 air rifle for the money.

The Hammerli 850 AirMagnum fulfills every primary requirement of the shooters.

If you are looking for a magazine-fed bolt action rifle, with accuracy and ease of use, Hammerli 850 AirMagnum suits you down to the ground.

Great Meals For Hunting Camp

0

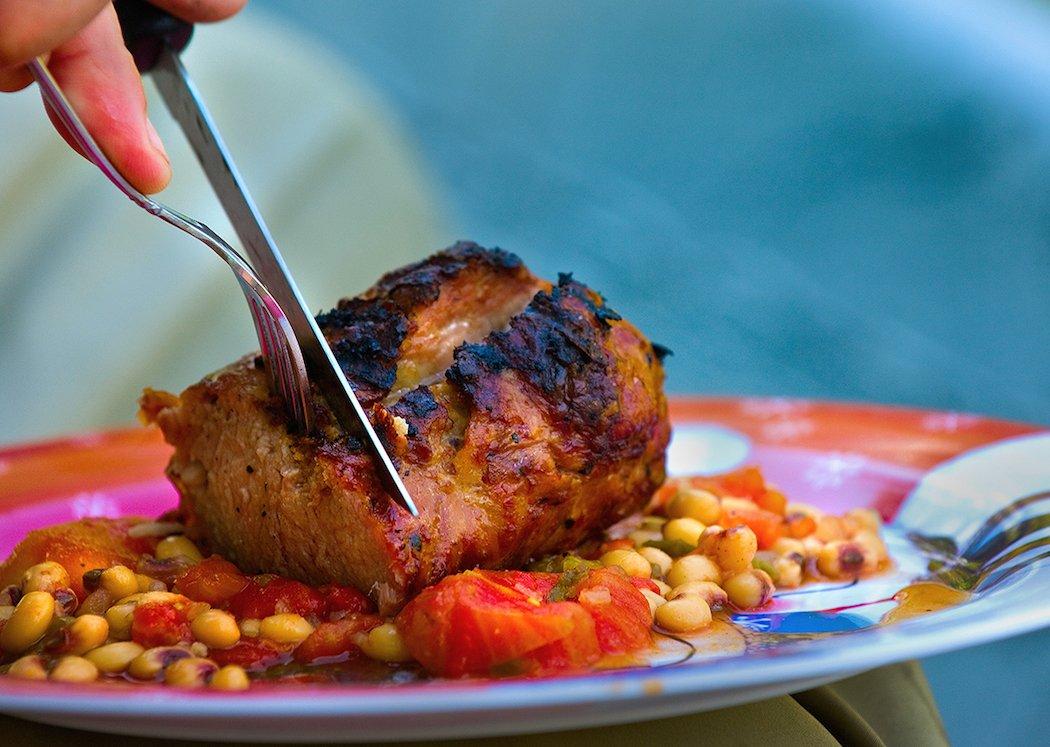
Cooking in camp is always fun, especially for everyone's taste buds. (Bill Konway photo)

One bitter cold January morning, I found myself in the duck blind of a good friend, an older gentleman with the title to a prime piece of Pamlico Sound saltmarsh. About mid-day, my breakfast was wearing thin, and I wondered aloud if there were any snacks to be had. My pal pointed me to a cooler in the stern of the boat. It’s loaded, he said. Help yourself. I opened up the lid. Inside I found a bag of chips, a jar of salsa, and enough canned beanie weenies for a small expeditionary force. Perhaps you have never wondered what ice-cold beanie weenies taste like in a 22-degree saltmarsh. Methinks you never should.

I thought of that day this past spring as I was loading up for a quick, two-day canoe camping trip along the Roanoke River. I’d volunteered to handle dinner duties, so I knew what sort of food would be desired. The cooler held 24 dove breast fillets, fresh Parmesan cheese, olive oil, garlic, chopped parsley, and other things rarely found in a two-man canoe. My buddy, Scott, was packing breakfast. I didn’t know what he had up his sleeve. But I knew Scott…and I knew it wasn’t instant grits and Pop Tarts. If I’m cooking breakfast, he’d told me earlier, then make sure you pack plenty of stove fuel. I could feel my arteries hardening already.

So here are some recipes to take your shore lunches and riverside dinners to a new level. They’re easy. A few call for wild game, but you can substitute your favorite cuts of meat. Most can be prepared with a single skillet, and all are designed for a backpacking stove. These recipes will make you forget all about beanie weenies.

DOVES CARBONARA

On my last canoe-camping trip, we feasted on this little bit of Italy deep in the swampwoods of eastern North Carolina. The hardest part about cooking this dish is not eating the dove breast fillets right out of the pan.

  • One dozen dove breasts, filleted
  • 2 garlic cloves, minced
  • 12 ounces uncooked, thin spaghetti noodles
  • ¾ cup grated Parmesan cheese
  • 2 tablespoons finely chopped fresh parsley
  • 1 cup milk
  • 3 eggs
  • 2 tablespoons butter
  • ½ teaspoon black pepper

AT HOME: Fillet dove breasts, and place in plastic baggie. Chop parsley. Break eggs, and combine with milk; store in small water bottle.

IN THE FIELD: Cook spaghetti noodles and drain. Melt butter in large nonstick skillet. Sauté dove breasts and minced garlic for one minute. Reduce heat to low, and stir in noodles, cheese, parsley, and pepper. Pour egg-milk mixture over noodles, and cook about four minutes, stirring constantly, until sauce thickens.

NO SWEAT ASIAN VENISON

This is a one-pan wonder. It’s cheap, easy, filling, and fast, and makes its way to my home table a couple of times a month in various interpretations. Replace the venison with shrimp and the beef-flavored noodles with shrimp-flavored noodles, and have an entirely different taste.

  • 12 ounces uncooked, thin spaghetti noodles
  • 2 garlic cloves, minced
  • ¾ cup grated Parmesan cheese
  • 2 tablespoons finely chopped fresh parsley
  • 1 cup milk
  • 3 eggs
  • 2 tablespoons butter
  • ½ teaspoon black pepper
  • 1 pound venison, cut into strips
  • 2 teaspoons dark sesame oil, divided
  • 1 12-ounce package of broccoli slaw
  • 1 cup sliced green onion
  • 2 packages of beef-flavored ramen noodle soup
  • 1 ½ cups water
  • 2 tablespoons soy sauce

AT HOME: Slice green onions into half-inch pieces. Slice tenderloin into thin slices.

IN THE FIELD: Heat one teaspoon sesame oil in a skillet over medium-high heat; add venison and onions, and sauté about one minute. Remove to a separate plate. Heat remaining oil until hot; add broccoli slaw, stir-fry one minute. Add to plate with venison and onions. Add water to skillet and bring to a boil. Add noodles from both packages and seasoning packet from one package. Cook until most of the liquid is absorbed, stirring frequently. Stir in venison, onions, and slaw, add soy sauce and combine.

FISH FRIED RICE

It's meals like these that make hunting camp that much more special. (Images on the Wildside/Denver Bryan photo)Stir-frying cold rice prevents the grains from clumping. Add to the mix bite-sized chunks of fresh fish—the firmer the flesh, the better—and here’s a meal you can cook in one pot quickly. Use 1½ pounds of fish fillets, cut into bite-sized pieces.
  • 4 tablespoons soy sauce
  • 1/8 teaspoon minced ginger root
  • 1/8 teaspoon ground red pepper
  • 2 tablespoons vegetable oil, divided
  • 1 cup canned peas
  • 1/3 cup green onions, sliced
  • 2 packages boil-in-bag rice, chilled
  • 2 tablespoons fresh parsley, chopped
  • 3 eggs

AT HOME: Mince ginger root, and mix with red pepper and soy sauce; store in small plastic bottle. Chop parsley. Chop green onions into ¼-inch pieces. Cook rice, then store in plastic baggies.

IN THE FIELD: Heat one tablespoon of vegetable oil in large skillet over medium high heat. Stir-fry fish fillets one minute. Add peas and onions, stir-fry 2 minutes. Add soy sauce, stir well, and remove the fish mixture from pan. Heat one tablespoon of vegetable oil, and add the rice and chopped parsley. Stir-fry one minute. Scrape mixture away from center of pan, leaving a softball-sized hole. Add eggs and scramble. Mix with rice and fish.

CHOPPED DUCK SANDWICHES IN CHERRY BARBECUE SAUCE

I first tried these sandwiches during the peak of the striper run on the Roanoke River. Almost forgot to fish. This is an excellent barbecue sauce for chicken, so make a double portion and freeze the leftovers. You can find the ancho chilies in specialty food stores and fine grocery stores.

  • 1 cup apple cider vinegar
  • 1/3 cup ketchup
  • 1/3 cup chopped onion
  • 1/3 cup dried tart cherries
  • 1/8 cup water
  • 1 ½ tablespoons molasses
  • 1 large dried ancho chili pepper
  • 1 garlic clove
  • ½ teaspoon ground coriander
  • pinch of ground cloves
  • 2 pounds duck meat, chopped
  • 4 large kaiser rolls

AT HOME: Grill or sauté duck breasts or whole ducks, then chop the meat. Remove stem and seeds from ancho chili pepper. Combine all ingredients (except for duck) in a medium saucepan. Bring to a boil, then reduce head to medium-low, cover, and simmer until cherries are tender (about 20 minutes). Let cool, then puree the mixture in a blender. If needed, return sauce to pan, and simmer uncovered until sauce thickens to consistency of tomato-based barbecue sauce. Add chopped duck.

IN THE FIELD: Load up the buns and eat.

CAJUN FISH WRAPS WITH SLAW

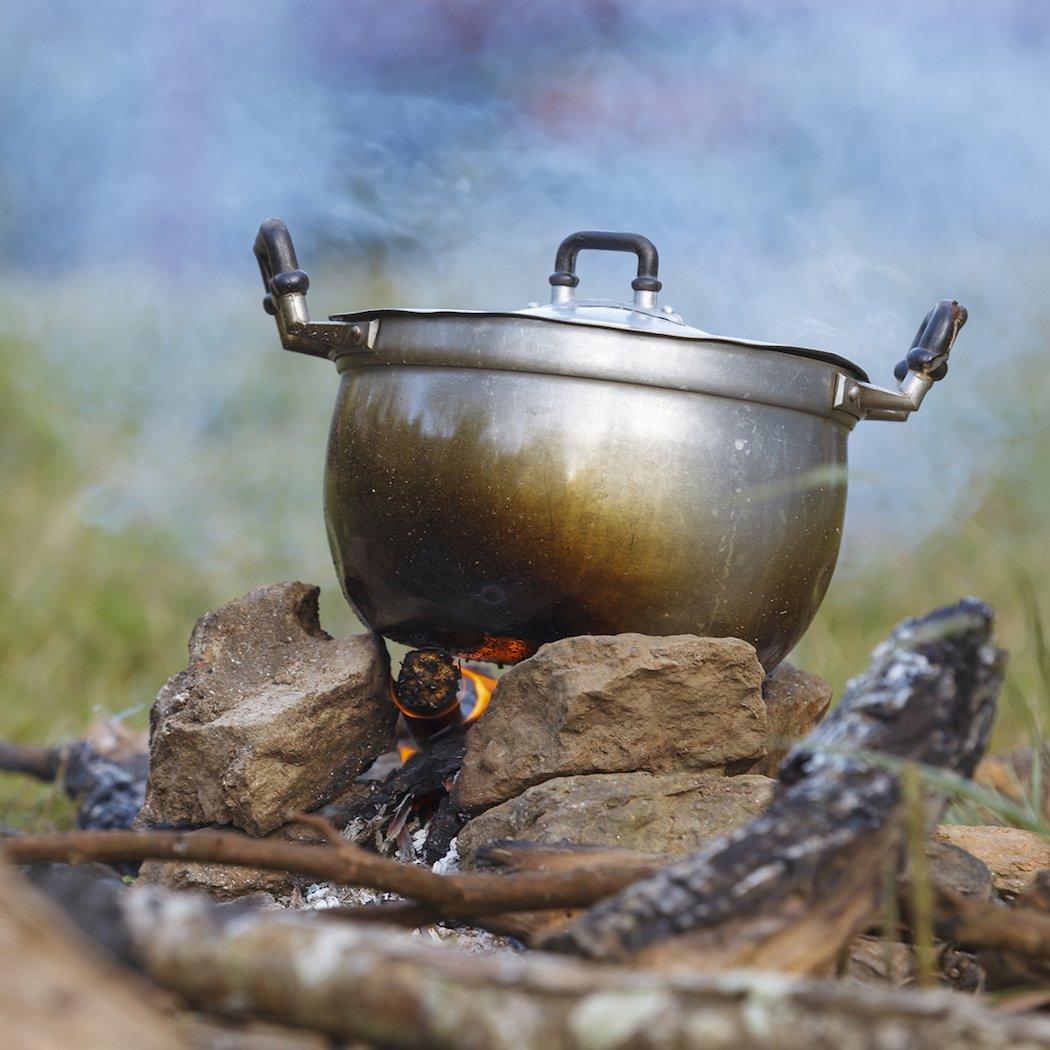
You don't need a lot of gear to make these camp meals a reality. (Imaake/Shutterstock photo)This is easier than falling off a mossy log. To make it even easier, buy cole slaw from your grocer, but you’ll miss the apple punch of the cider vinegar. A great thing about wrap sandwiches is that you can eat them with one hand, leaving the other hand free to grab a rod and set the hook.

WRAPS

  • 1 tablespoon all-purpose flour
  • 6 tablespoons Cajun seasoning powder
  • 4 half-pound fish fillets
  • 1 tablespoon butter
  • 4 8-inch flour tortillas

SLAW

  • 3 ½ cups thinly sliced red or green cabbage
  • ¼ cup mayonnaise
  • 1 ½ tablespoons cider vinegar
  • ½ teaspoon sugar

AT HOME: Make the slaw by combining all four ingredients in a bowl, cover, and chill in a plastic baggie.

IN THE FIELD: Catch fish, fillet fish. Mix flour and Cajun powder in a plastic baggie, add fillets one at a time, and shake until covered. Melt butter in a skillet, and sauté fillets until done. Place one fillet in a flour tortilla, top with slaw, roll up and eat.

GRILLED VENISON TENDERLOIN SANDWICHES WITH SUN-DRIED TOMATO MAYONNAISE

Cold, thinly sliced venison is the finest sandwich meat ever made. I’ve packed these sandwiches into duck blinds and on paddle trips for years. One of the secrets is good bread. I don’t know what’s better—the sandwiches, or the looks on the faces of my pals as they stare into yet another PB&J.

  • ½ cup soy sauce
  • ½ cup Italian dressing
  • 1 to 1 ½ pound venison tenderloin
  • 4 tablespoons prepared sun-dried tomato pesto, such as Bella Cucina
  • 4 tablespoons mayonnaise
  • 8 leaves Romaine lettuce
  • 8 slices onion
  • 4 hearty grain sandwich rolls or 8 slices of bread such as sunflower or nut grain

AT HOME: Combine pesto and mayonnaise; store in refrigerator. Combine soy sauce and Italian dressing; marinate tenderloin overnight. Slice onions into 8 thick slices, with all rings intact. Grill tenderloin and onion rings. Prepare each sandwich with: sliced tenderloin, 2 tablespoons sun-dried tomato mayonnaise, and two onion slices. Place lettuce leaves in separate plastic baggie.

IN THE FIELD: Add lettuce to sandwiches. Keep an eye on the bobber.

5 Best Turkey Decoys

0

The first step to successfully hunting uncooperative gobblers is to become confident in your turkey decoys choice and set up. It is easier to be patient, and you will hunt longer if you know that there are mature gobblers on your property. The best way to find out for sure if the birds are there is to set out game cameras. It seems that just about everyone these days is using a trail camera or two to scope out their deer herd, but I rarely hear of anyone using them to scout turkey activity. However, I have found that turkeys can be more predictable and easier to pattern than deer and you will find historic strut zones for optimal turkey decoys placement on stubborn toms.

Best Overall: Avian X LCD HDR Jake & Hen Combo for $239.98

Best for the Price: Flextone Thunder Creeper for $49.98

Most Mobile Combo: Lucky Duck Collapsible Combo for $67.47

Best Hen: Montana Decoys Miss Purr-Fect – $79.99

Best Value: HS Strut Lite Hen and Jake Turkey Decoy Combination – $84.99

Strengths: Easy to use, durability

Weakness: In some instances (10% of the time), turkeys feared the decoys and wouldn’t come in close when using the aggressive head.

The Avian-X® LCD HDR Jake and Hen Turkey Decoy Combo is designed to stir the blood of dominant toms nearby with its heavy-duty realism. These turkey decoys are made from durable blow-molded materials based on hand-carved designs, offering unbeatable detail and longevity to deceive even the most wary of gobblers. By combining lifelike feather detail and painting with flocking in strategic areas, both the HDR Jake and HDR Hen deliver a natural look that will leave big toms eager to assert their dominance. The barely undersized HDR Jake features a quarter-strut posture and subdominant feathers, and both turkey decoys come with two interchangeable heads. The Jake includes a curled, aggressive head and a straight and submissive head, while the HDR Hen features a lowered resting head and a raised active head. The rubber molded leg stumps and included carbon mounting stake (which stores in the tail) provide a quick setup and realistic movement without any unnatural spinning. Additionally, a carry bag is included for easy transportation.

  • For your average hunter who doesn’t plan to run a marathon with a turkey decoy in his vest, the Avian X set carries well enough.
  • For all the folks who have had issues with the decoys leaking, you will find exponentially more who have been happy with the durability of these decoys
  • It would be hard to find turkey decoys any better looking than these, especially for the price.

HDR-AvianX

Best Price

Strengths: Price point, easy to use, light to carry

Weakness: Doesn’t allow for actual tail feather, slightly undersized

The Flextone Thunder Creeper Turkey Decoy has the gobbler-attracting realism of a full-body decoy in a front-profile, easy-to-pack design. Blow-molded, one-piece construction has true-to-life painted feathers and the lifelike posture of a smaller-than-average strutting gobbler to challenge without being intimidating. Tail removes for easy transport. Includes carbon-fiber stake.

  • Front-profile, easy-to-pack design
  • Blow-molded, one-piece construction
  • True-to-life painted feathers and lifelike posture
  • Removable tail for easy transport

HDR-AvianX-2-getting-beat-up

Most Mobile Combo

Lucky Duck Collapsible Hen/Jake Decoy Combination – $67.97

Strengths: Price point, mobility

Weakness: Durability

The HD Collapsible Jake/Hen Turkey Decoy Combo from Lucky Duck in front of them. The pose of this semi-strut jake will get any mature tom fired up. Allows you to set it up as an upright hen or partially collapsed for a breeding hen position. Lightweight pair offer exceptional detail and the durability of molded EVA plastic construction. Both decoys collapse easily to fit in your vest when it’s time to move, and then deploy easily at the next spot. Includes 2 two-piece folding metal stakes.

  • Realistic jake and hen turkey decoy combo from Lucky Duck
  • Exceptional detail for lifelike realism
  • Durable, crack-resistant molded EVA plastic
  • Decoys collapse easily for transport
  • Includes 2 two-piece folding metal stakes

Best Hen

Montana Decoys Miss Purr-Fect – $59.99

Strengths: Portability, light weight, realistic look.

Weakness: Its lightweight and portability do lead to some less realistic features.

The ultimate portable decoy, the Montana Decoy Miss Purr-Fect can be packed down to the size of a baseball cap and spring into a full-bodied 3-D hen decoy in seconds. Detailed feathering built from an HD photo of actual feather cuts fools even the wariest of toms. In addition, the molded head and multiple leg-pole sleeves allow you to adjust the pose to fit the situation. Easy to carry and set up.

  • Packs down to the size of a baseball cap
  • 3-D soft-side body with ultrarealistic feathering
  • Adjustable head and multiple leg-pole sleeves add realism

DSD-Half-Strut-Jake

Best Value:

HS Strut Lite Hen and Jake Turkey Decoy Combination – $79.26

Strengths: Most realistic, durable, and transportable for the price
Weakness: Takes time to get the shape right.

Fool even the wisest toms in the woods with the H.S. Strut Strut-Lite Hen and Jake Turkey Decoy Combo from Hunter’s Specialties. This durable decoy combo features foldable hollow bodies that carry to your favorite gobbler hunting spots quickly and easily. Flake-resistant paint creates an extremely realistic look. The hen features a receptive upright position that’s sure to grab nearby toms’ attention, while the Jake’s semi-aggressive posture is sure to infuriate dominant toms and bring them running. Use the decoys apart, or together in a breeding setup. Comes with 2-piece ground stakes that help you set up quickly when needed.

  • Foldable hollow bodied decoys are easy to carry.
  • Long-lasting, flake-resistant paint for true-to-life look
  • Hen decoy – receptive upright position
  • Jake decoy – arrogant, semi-aggressive posture
  • Set up decoys by themselves or together in a breeding pose.

Keep Reading: Pros & Cons Of Every Turkey Shotgun Gauge

What county in KY has the biggest bucks?

0

That is a tough question to answer because there are several counties in Kentucky with a strong reputation for trophy whitetail deer. Many deer hunters travel to Kentucky each year in search of large bucks, and there are numerous prime locations for hunting.

Some of the counties in Kentucky with the largest bucks include Ballard, Edmonson, Grayson, Hopkins, Knox, and Union. As far as the largest bucks, hunting enthusiasts have most recently reported numerous big bucks taken from Ballard County, particularly around the Kuttawa and Cave-in-Rock areas.

What county in Kentucky has the deer hunting?

Deer hunting is allowed throughout the state of Kentucky, with each county having its own specific regulations. In Kentucky, deer hunting is typically restricted to certain seasons and specific areas of land, though trekking on private land can be allowed by the landowner.

To hunt deer in Kentucky, hunters are required to have a valid Kentucky hunting license, as well as a license tag and permits specific to their county. Popular counties in Kentucky that are known for their good deer hunting include Hart, Estill, Crittenden, Ballard, Hickman, Carlisle, and Greenup.

Each region has its own unique collection of habitats and topography that can provide excellent deer hunting opportunities. Additionally, hunters are encouraged to become familiar with the Kentucky Fish and Wildlife regulations for the county in which they plan to hunt in order to ensure a safe and enjoyable experience.

Which part of Kentucky has the biggest deer?

The Southeast region of Kentucky is the area with the highest concentration of whitetail deer, especially in areas such as Wayne County and Boyd County. This part of Kentucky is mainly composed of rolling hills, forests and lots of agricultural lands, making it a great habitat for deer.

The outskirts of cities like East Bernstadt and London can also provide great hunting opportunities. The rich farming and agricultural land in the Southeast region provides a lot of food and nutrients for the deer, which makes them thrive in this area.

Furthermore, the mild climate and mild winters contribute to an abundant and healthy population of deer. With the combination of diverse habitats and abundant food sources, it is no surprise that the Southeast region of Kentucky has the highest concentration of deer.

Does Kentucky have big bucks?

Yes, Kentucky certainly does have big bucks! Not only is Kentucky home to some of the finest whitetail deer hunting in the United States, but its diverse habitat and mild climate offer the perfect environment for big bucks to grow and roam.

From Boone and Crocket record deer to an abundance of well-managed public hunting land, Kentucky’s big buck potential is well documented. Kentucky’s average buck size is larger than most other states and numerous big bucks are harvested annually.

Kentucky is a top producer of Boone and Crockett bucks, producing over 25% of all record book trophy deer in the Southeast United States. The unique mix of quality habitat and mild conditions make Kentucky an ideal place for trophy deer to grow and thrive.

Where are the biggest whitetail bucks?

The biggest whitetail bucks are found in many different places across North America. Depending on the region, there are different optimal habitats and conditions for hunting. Whitetail deer prefer habitats with plentiful vegetation and adequate cover, such as forests, woodland edges, fields and meadows.

In the mid-west and southern parts of the country, large numbers of whitetail can be found in agricultural areas with corn and other food sources. In the northern parts of the United States and Canada, the biggest bucks will typically be found in the thick forest areas with hardwood trees.

Whitetail deer are also commonly found in southeastern areas of the US, such as the swamps and wetlands.

Regardless of where they live, whitetail bucks are most active during the fall and winter months when they are in their peak breeding season. During this time, they are more likely to move around, making them more visible and reachable for hunters.

Additionally, whitetail deer usually travel during the two hours after sunrise and two hours before sunset. During these times, the weather is usually calmer and the deer are most vulnerable due to their limited vision.

Although whitetail bucks can be found in many parts of North America, some of the best places to hunt for the biggest bucks include south-central Wisconsin, south-central and south-eastern Pennsylvania, northern Minnesota, western Michigan, and parts of Illinois, Iowa, and Indiana.

These areas have the optimal habitat, food sources, and plenty of cover that deer need to stay healthy and grow large antlers. However, wherever you choose to hunt for whitetail deer, local state hunting regulations should always be followed.

Good luck!.

How big are the deer in Kentucky?

The deer in Kentucky can vary in size, depending on factors such as the species, age, and sex of the deer. Generally speaking, the average adult white-tailed deer found in Kentucky stands around 3. 5 feet tall at the shoulder, and the average weight of an adult white-tailed deer typically ranges from 120 to 200 pounds, depending on its age and sex.

White-tailed deer fawn compared to adults are generally around half to two-thirds of the size of the average adult. In addition to these species, other deer species found in Kentucky such as Mule Deer, Pronghorn Antelope, and Rocky Mountain Elk, can range from slightly larger to significantly larger than the White-tailed deer, especially the Elk, which can reach up to 4-5 feet tall and weights of up to 500 pounds or more.

Is Kentucky a good state for deer hunting?

Kentucky is an excellent state for deer hunting and is considered one of the top deer-hunting destinations in the country. Kentucky is known to have a relatively healthy deer population and large areas of land that make ideal habitats for these animals.

The state also has an ample number of public hunting areas where deer hunting is open, making it easy and accessible to visitors and locals alike. Furthermore, the winters in Kentucky tend to be mild and snowfall is generally not a major issue, allowing hunters to easily access their favorite hunting spots throughout the year.

The recently implemented Electronic Game Check system also makes it easy for hunters to register their kills and stay in compliance with regulations. All in all, Kentucky is an ideal state for deer hunting.

What county produces the biggest whitetail deer?

The largest whitetail deer harvested on record was a buck killed in Kansas and it weighed an astonishing 312 lbs. Although this buck wasn’t certified as an official Boone and Crockett Club entry, it still stands as one of the largest whitetail deer ever taken by a hunter.

Other states that are known for producing large whitetail deer include Ohio, Minnesota, Iowa, Wisconsin, Illinois, and Pennsylvania. In the specific counties, some of the top spots for harvesting large deer are Gibson County, Indiana, Atchison County, Missouri, and Marion County, Illinois.

Depending on the season and weather conditions, these counties may have a higher as well as a lower concentration overall, but they tend to remain among the top producers for large whitetail deer.

Where is the largest population of deer?

The largest population of deer can be found in North America, with an estimated 30 million white-tailed deer, according to the Quality Deer Management Association. The majority of these deer are located in the eastern United States, with significant deer populations in Texas, Oklahoma, and the Midwest states.

White-tailed deer are widely distributed, with populations existing in every state in the continental U. S. , from the easternmost parts of Maine all the way to Washington, Oregon, and California on the west coast.

Canada is home to an estimated 6 million white-tailed deer as well, making North America the home to the largest deer population in the world.

Where can I find big mature bucks?

If you’re looking for big mature bucks, the best bet is to scout out areas with plenty of cover and food sources. Try to locate areas with dense cover and natural food sources such as acorns, chokecherries, and honeysuckles.

Visit the area at least once a week at different times of the day to observe any activity. Look for buck rubs and scrape marks in the area and use trail cameras to get a better idea of the deer movement in that area.

Also, keep an eye out for any clues that reveal deer bedding areas. When you find the bedding area of a mature buck, you will know you are in the right spot. Make sure to stay downwind of the deer to not spook them and observe any specific habits they may have when you find them.

As the seasons progress and the rut draws closer, mature bucks will become more active and roam larger distances, giving you more opportunities to pinpoint them. With the right scouting, patience, and techniques, you can be rewarded with the sight of a big mature buck.

What is the state for big bucks?

The phrase “big bucks” is oftentimes used to refer to large amounts of money. Depending on the context, it can refer to any amount above what a person might expect to make in income, or to a particularly high-stakes amount of money.

In particular, the phrase is often used to refer to high-level investments, large profits, enormous gifts, or big gambles.

The phrase “big bucks” originated as an American phrase in the early 20th century, with its first known usage dating back to 1925. It quickly became a mainstay of American slang, though its usage has since spread to other English-speaking countries.

In America, the phrase is often used to refer to large sums of money which are acquired in a business setting or as a result of a serious and profitable investment.

In summary, the phrase “big bucks” is used to refer to large amounts of money, often acquired in a serious, high-stakes setting. Its usage stems from American slang and has since spread around the English-speaking world.

What kind of deer does Kentucky have?

Kentucky is home to two species of deer, the white-tailed deer and the Virginia white-tailed deer. The white-tailed deer, or Odocoileus virginianus, is the most commonly seen species throughout the state, thriving in most conditions including suburban, urban, agricultural and forest habitats.

The Virginia white-tailed deer, or Odocoileus virginianus clavium, is the more reclusive subspecies of white-tailed deer and is more commonly found in remote areas of Kentucky. The Virginia white-tailed deer is only found in a few areas in northern Kentucky, most notably in Hopkins and Christian counties.

Both species of deer are medium-sized mammals with a reddish-brown coat in summer and a greyer, thicker coat in winter. They have white tails and underparts, and males usually have antlers from late summer into winter.

The deer are herbivores, eating mostly acorns, seeds, herbs, grass and other vegetation.

A Deep Dive Into Muzzleloader Maintenance | Deer & Deer Hunting

0

I love hunting with and shooting muzzleloaders. There is virtue to be found in the slower pace, the process of load development, and the added skills required to place a bullet on target. But I, along with most muzzleloader fans, HATE cleaning them. This is especially true of old-school percussion cap and flintlock models. That is not to imply that modern in-lines are fun and enjoyable to clean. Both platforms demand their own considerations when it comes to muzzleloader maintenance.

In this article, we want to shine the light on what it takes to deep-clean both in-line and closed-breech muzzleloaders.

We’ll begin with contemporary muzzleloaders because they are the easiest to clean and to maintain. Nearly all incorporate a removeable breech plug that simply screws into the back of the barrel. The Traditions NitroFire we’re using here does not have a breech plug due to its use of the Federal Premium FireStick technology, but the cleaning process is like that of standard in-line muzzleloaders.

A Deep Dive Into Muzzleloader Maintenance
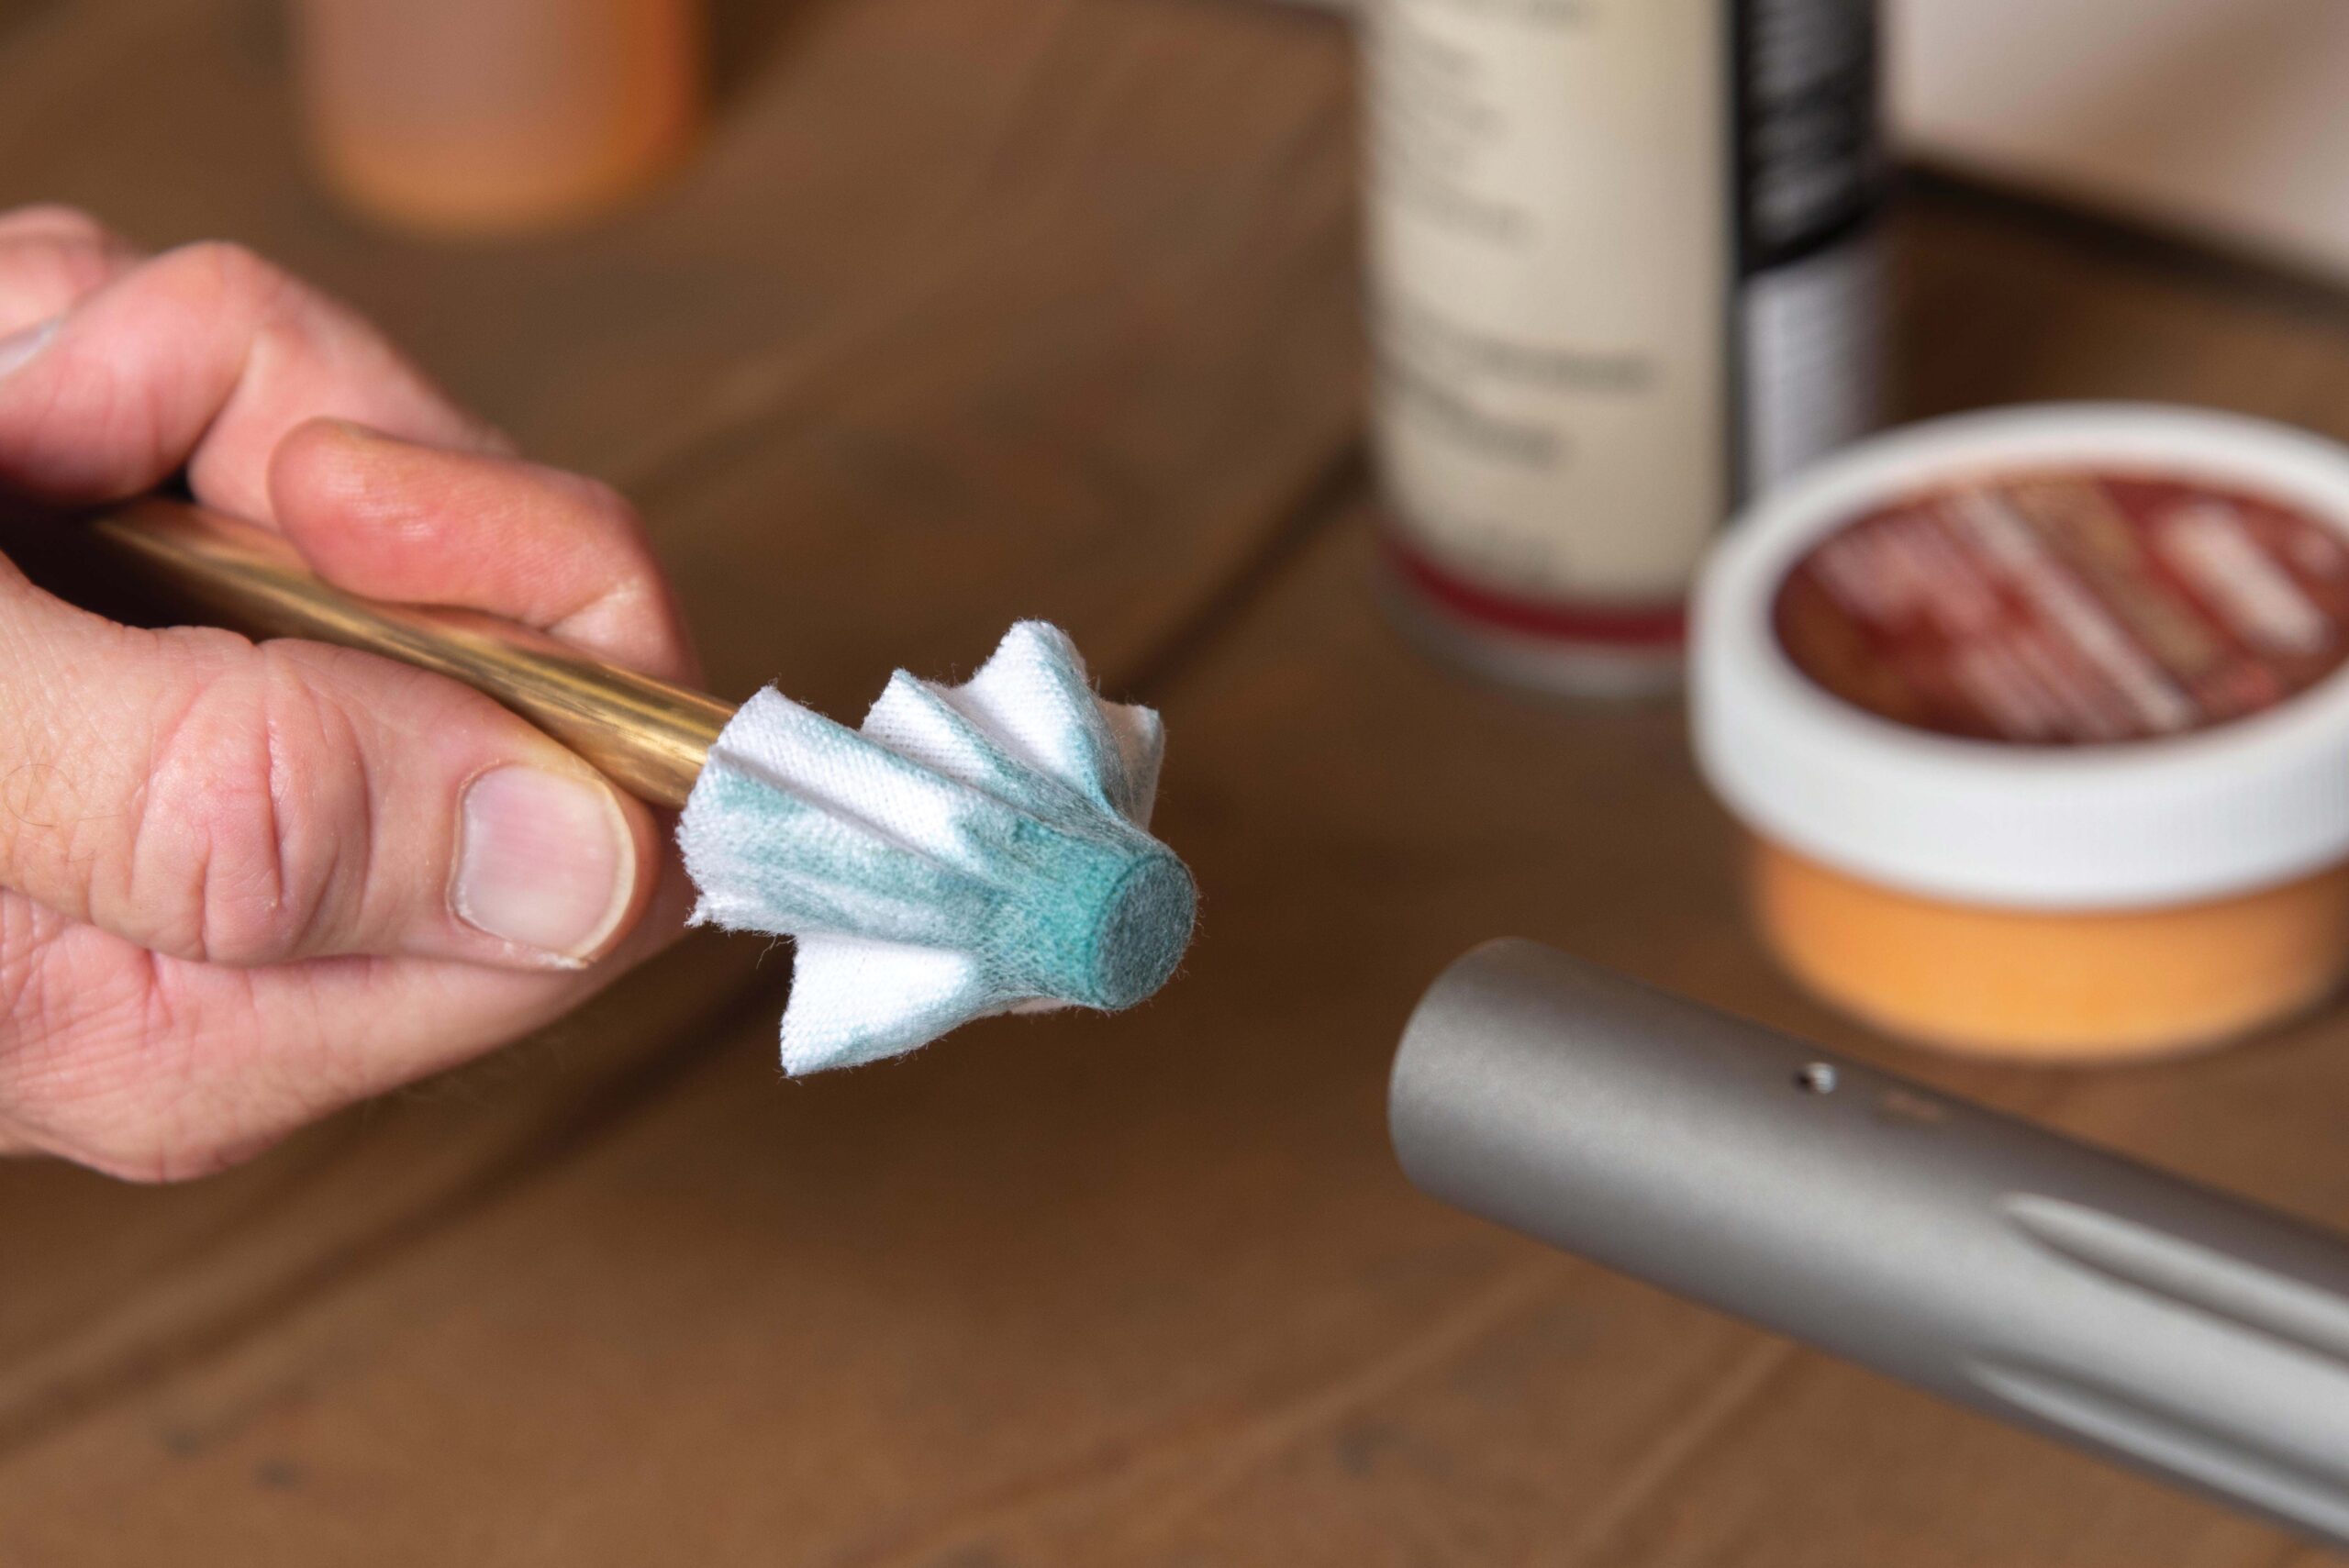
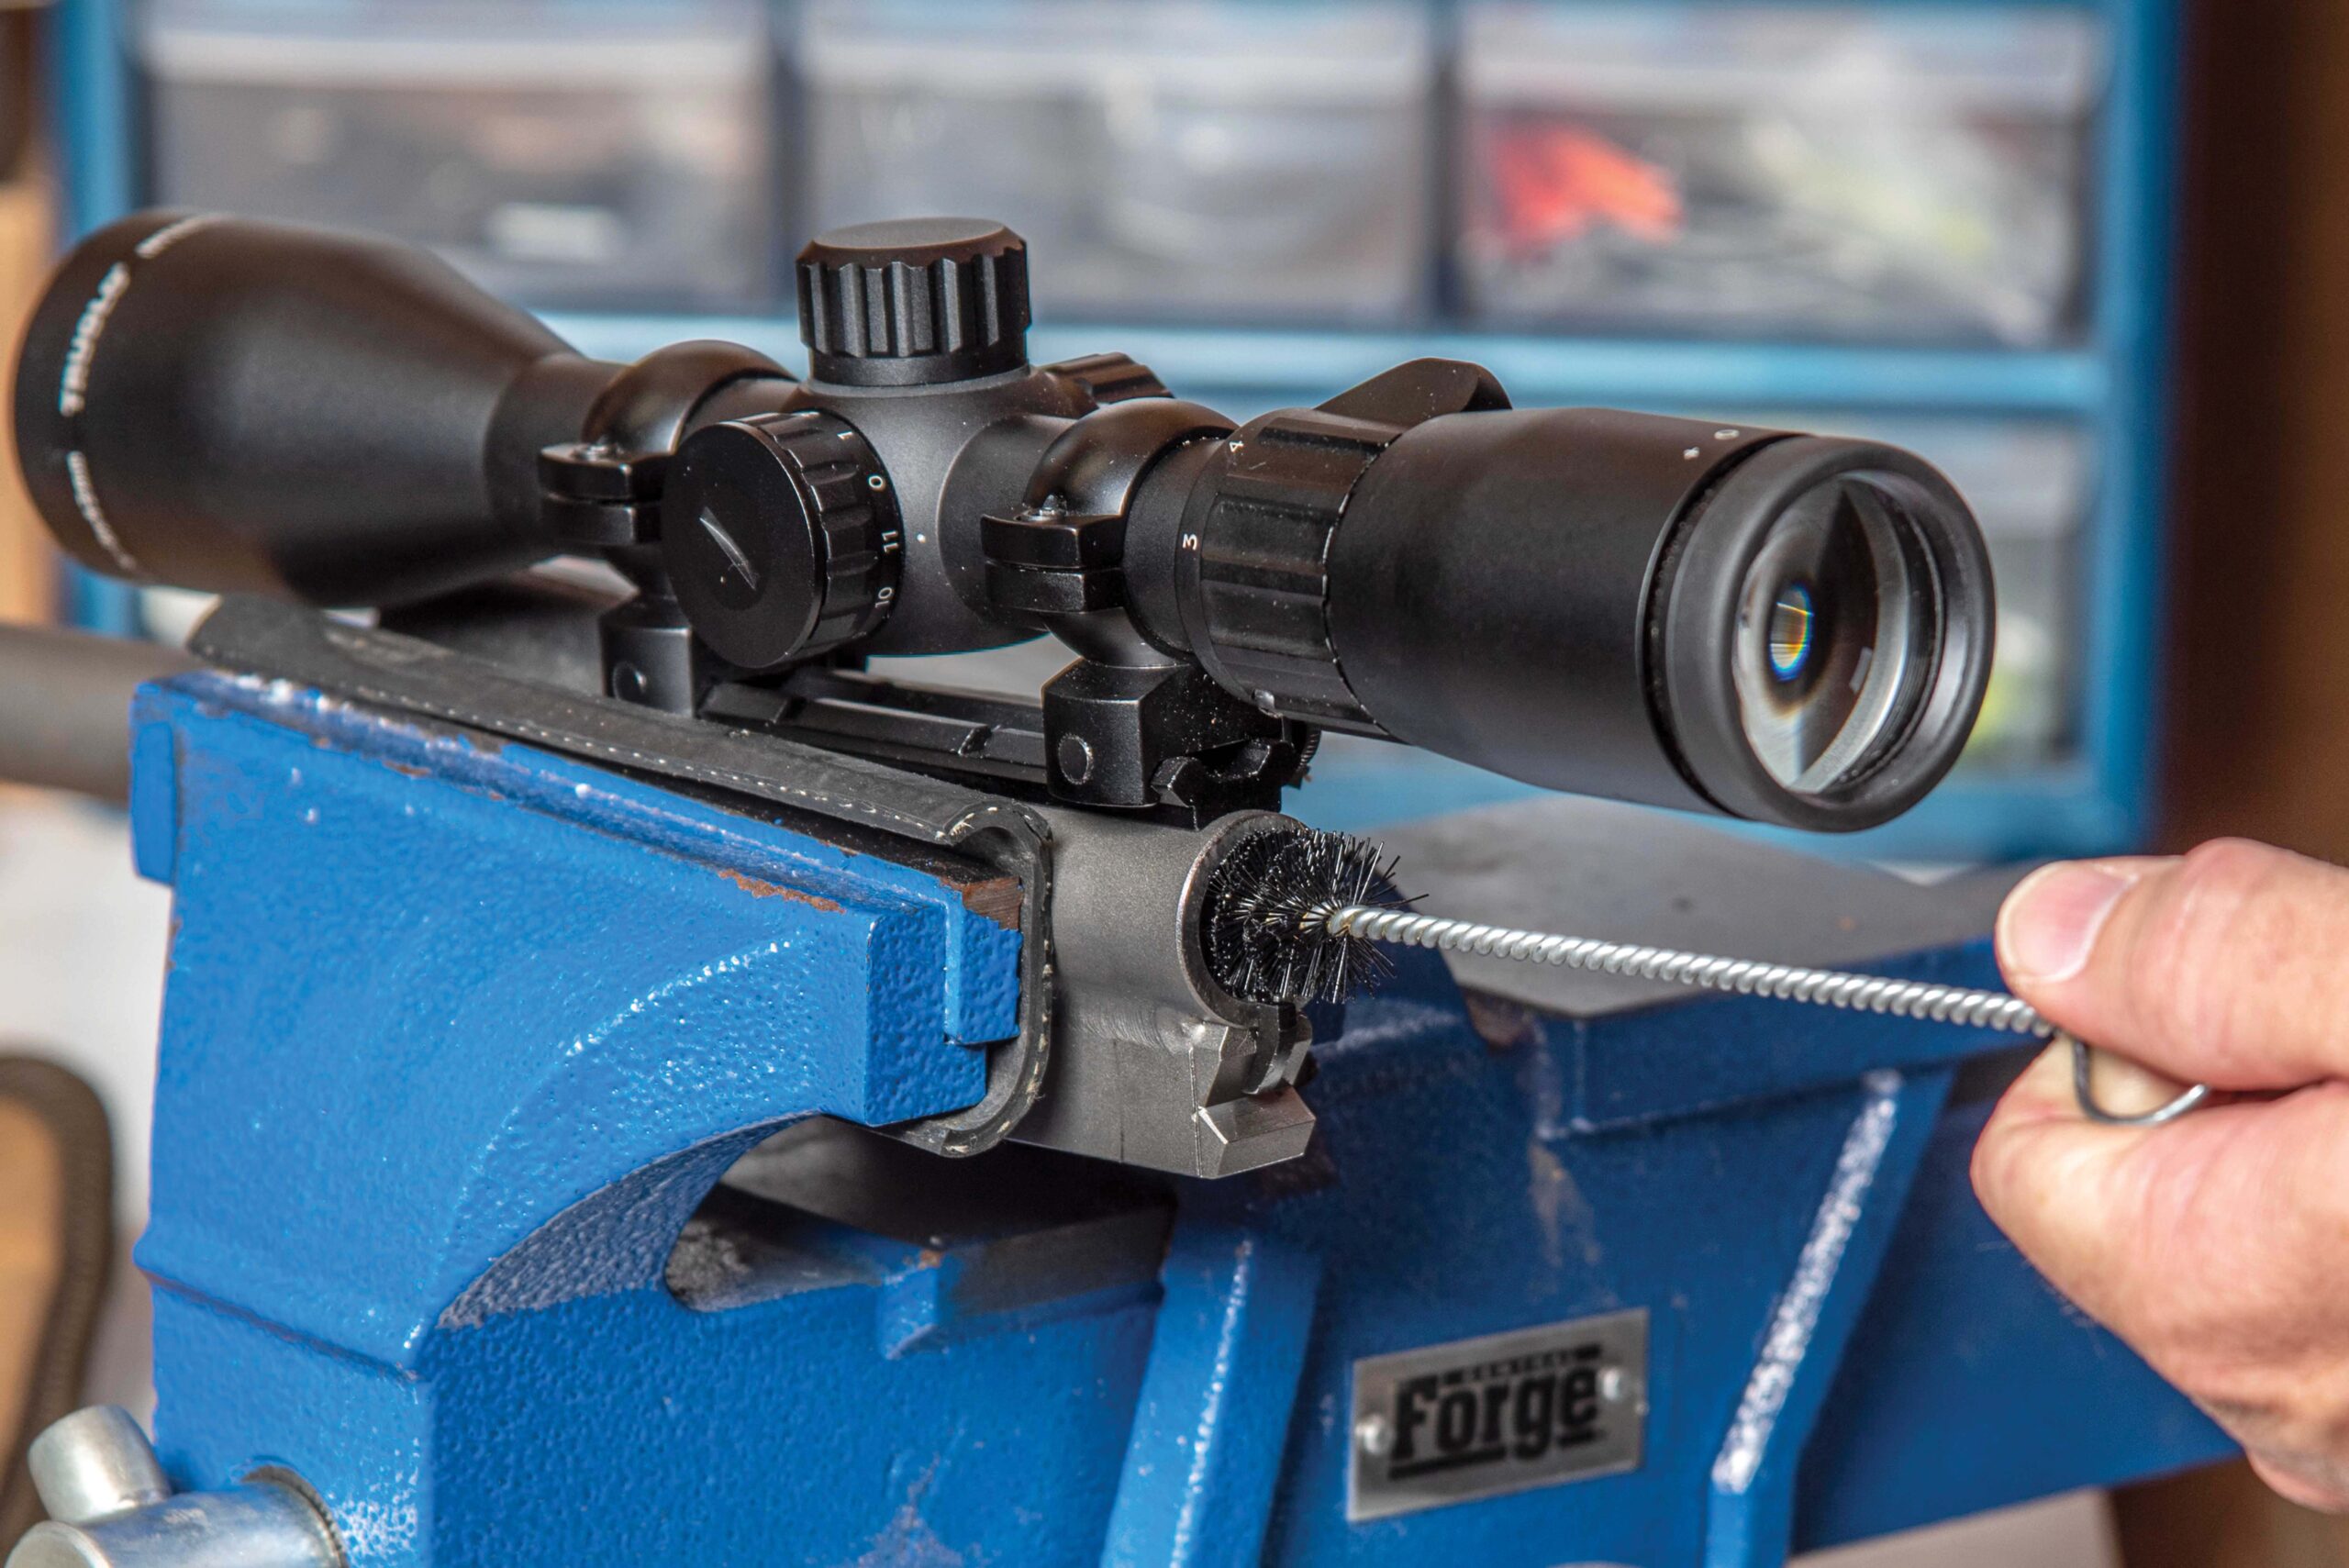
1. The Traditions NitroFire is machined with a “chamber” area that is larger in diameter than the rifle bore, necessitating the use of a special nylon bore brush. Solvent is also used to clean this portion of the barrel.

The thing to keep in mind regarding in-line muzzleloaders is that nearly all are used with copper-jacketed bullets and plastic sabots. This is a big difference compared to traditional muzzleloaders that propel lead balls or slugs, because you’re not so much dealing with lead and powder fouling in the bore, but copper and plastic. Both materials cling to rifling and any surface imperfections along the barrel’s lands and grooves. This means that your average muzzleloader bore solvent and cotton patches are not going to do a great job of eliminating this fouling.

2. After allowing the solvent to loosen the fouling, run a dry patch down the bore to remove the initial excess. This rifle had already been cleaned six months prior, but some measure of copper fouling remained in the bore. You can’t remove it all, and it’s not necessary that you do. As you can see here, it’s a difficult substance to remove and thus requires an aggressive approach. Repeat the process of solvent and bore scrubbing until you are satisfied that the bore is as clean as you can get it.

In-Line Muzzleloader Cleaning

Proper barrel cleaning of centerfire rifles and handguns demands a quality solvent and liberal application of a bore brush to remove built-up fouling that can be detrimental to barrel life and accuracy. It is no different with muzzleloaders that shoot copper-clad sabot bullets. In the minds of many shooters who may come from a traditional muzzleloader background, the idea of cleaning a barrel with a bore lubricant and a patch still lingers. Just because the in-line is a “muzzleloader” does not mean it holds to the same cleaning processes as closed-breech sidelock or flintlock muzzleloaders.

A Deep Dive Into Muzzleloader Maintenance
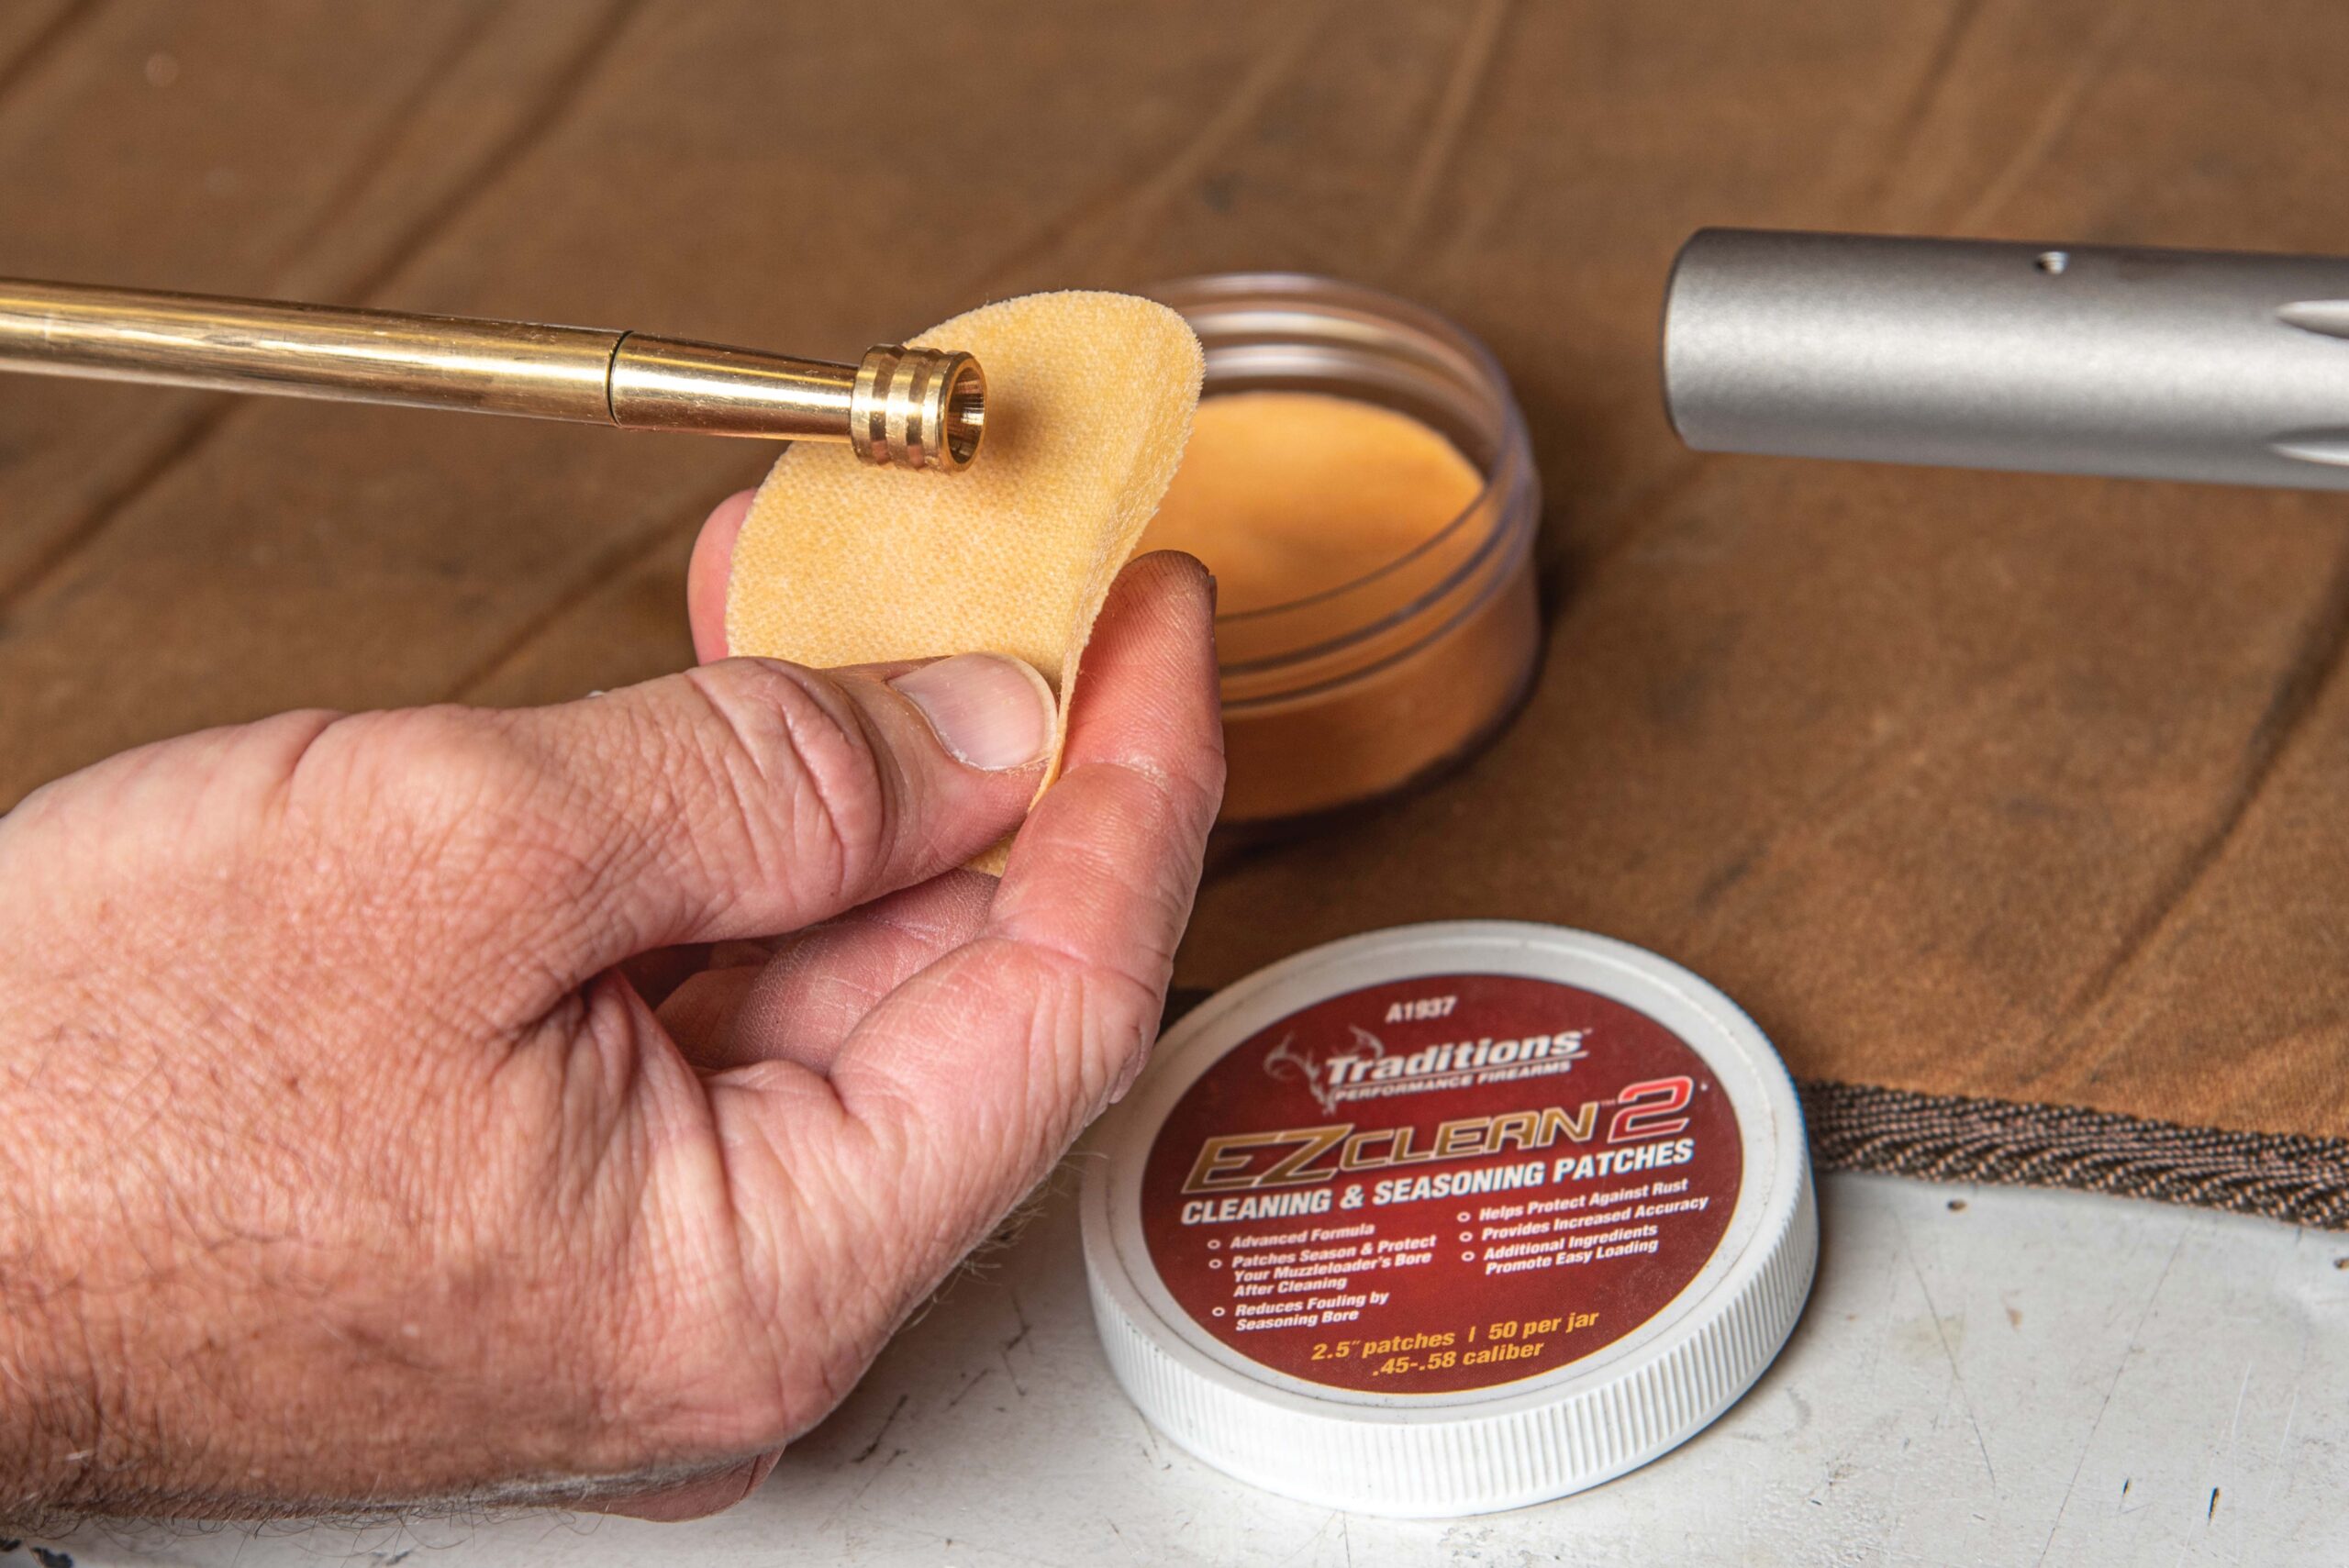
3. Once the fouling has been removed to your satisfaction, remove all solvent with dry patches (cotton flannel works best). Finish by running a seasoning patch down the bore. Here, we are using a Traditions EZ Clean 2 patch. You can also use a plain cotton patch saturated with conventional bore lubricant. Either one will provide a protective coat in the bore to help prevent rust and make loading easier when it’s time to hit the range or the field.

Treat your in-line muzzleloader as you would any conventional firearm. After removing the breech plug, run a patch saturated with a good solvent, such as Hoppe’s #9, down the bore to remove the gross fouling. Next, saturate a caliber-specific bore brush with the solvent and make around 10 passes back and forth in the barrel. Allow the solvent to do its work for 10-15 minutes.

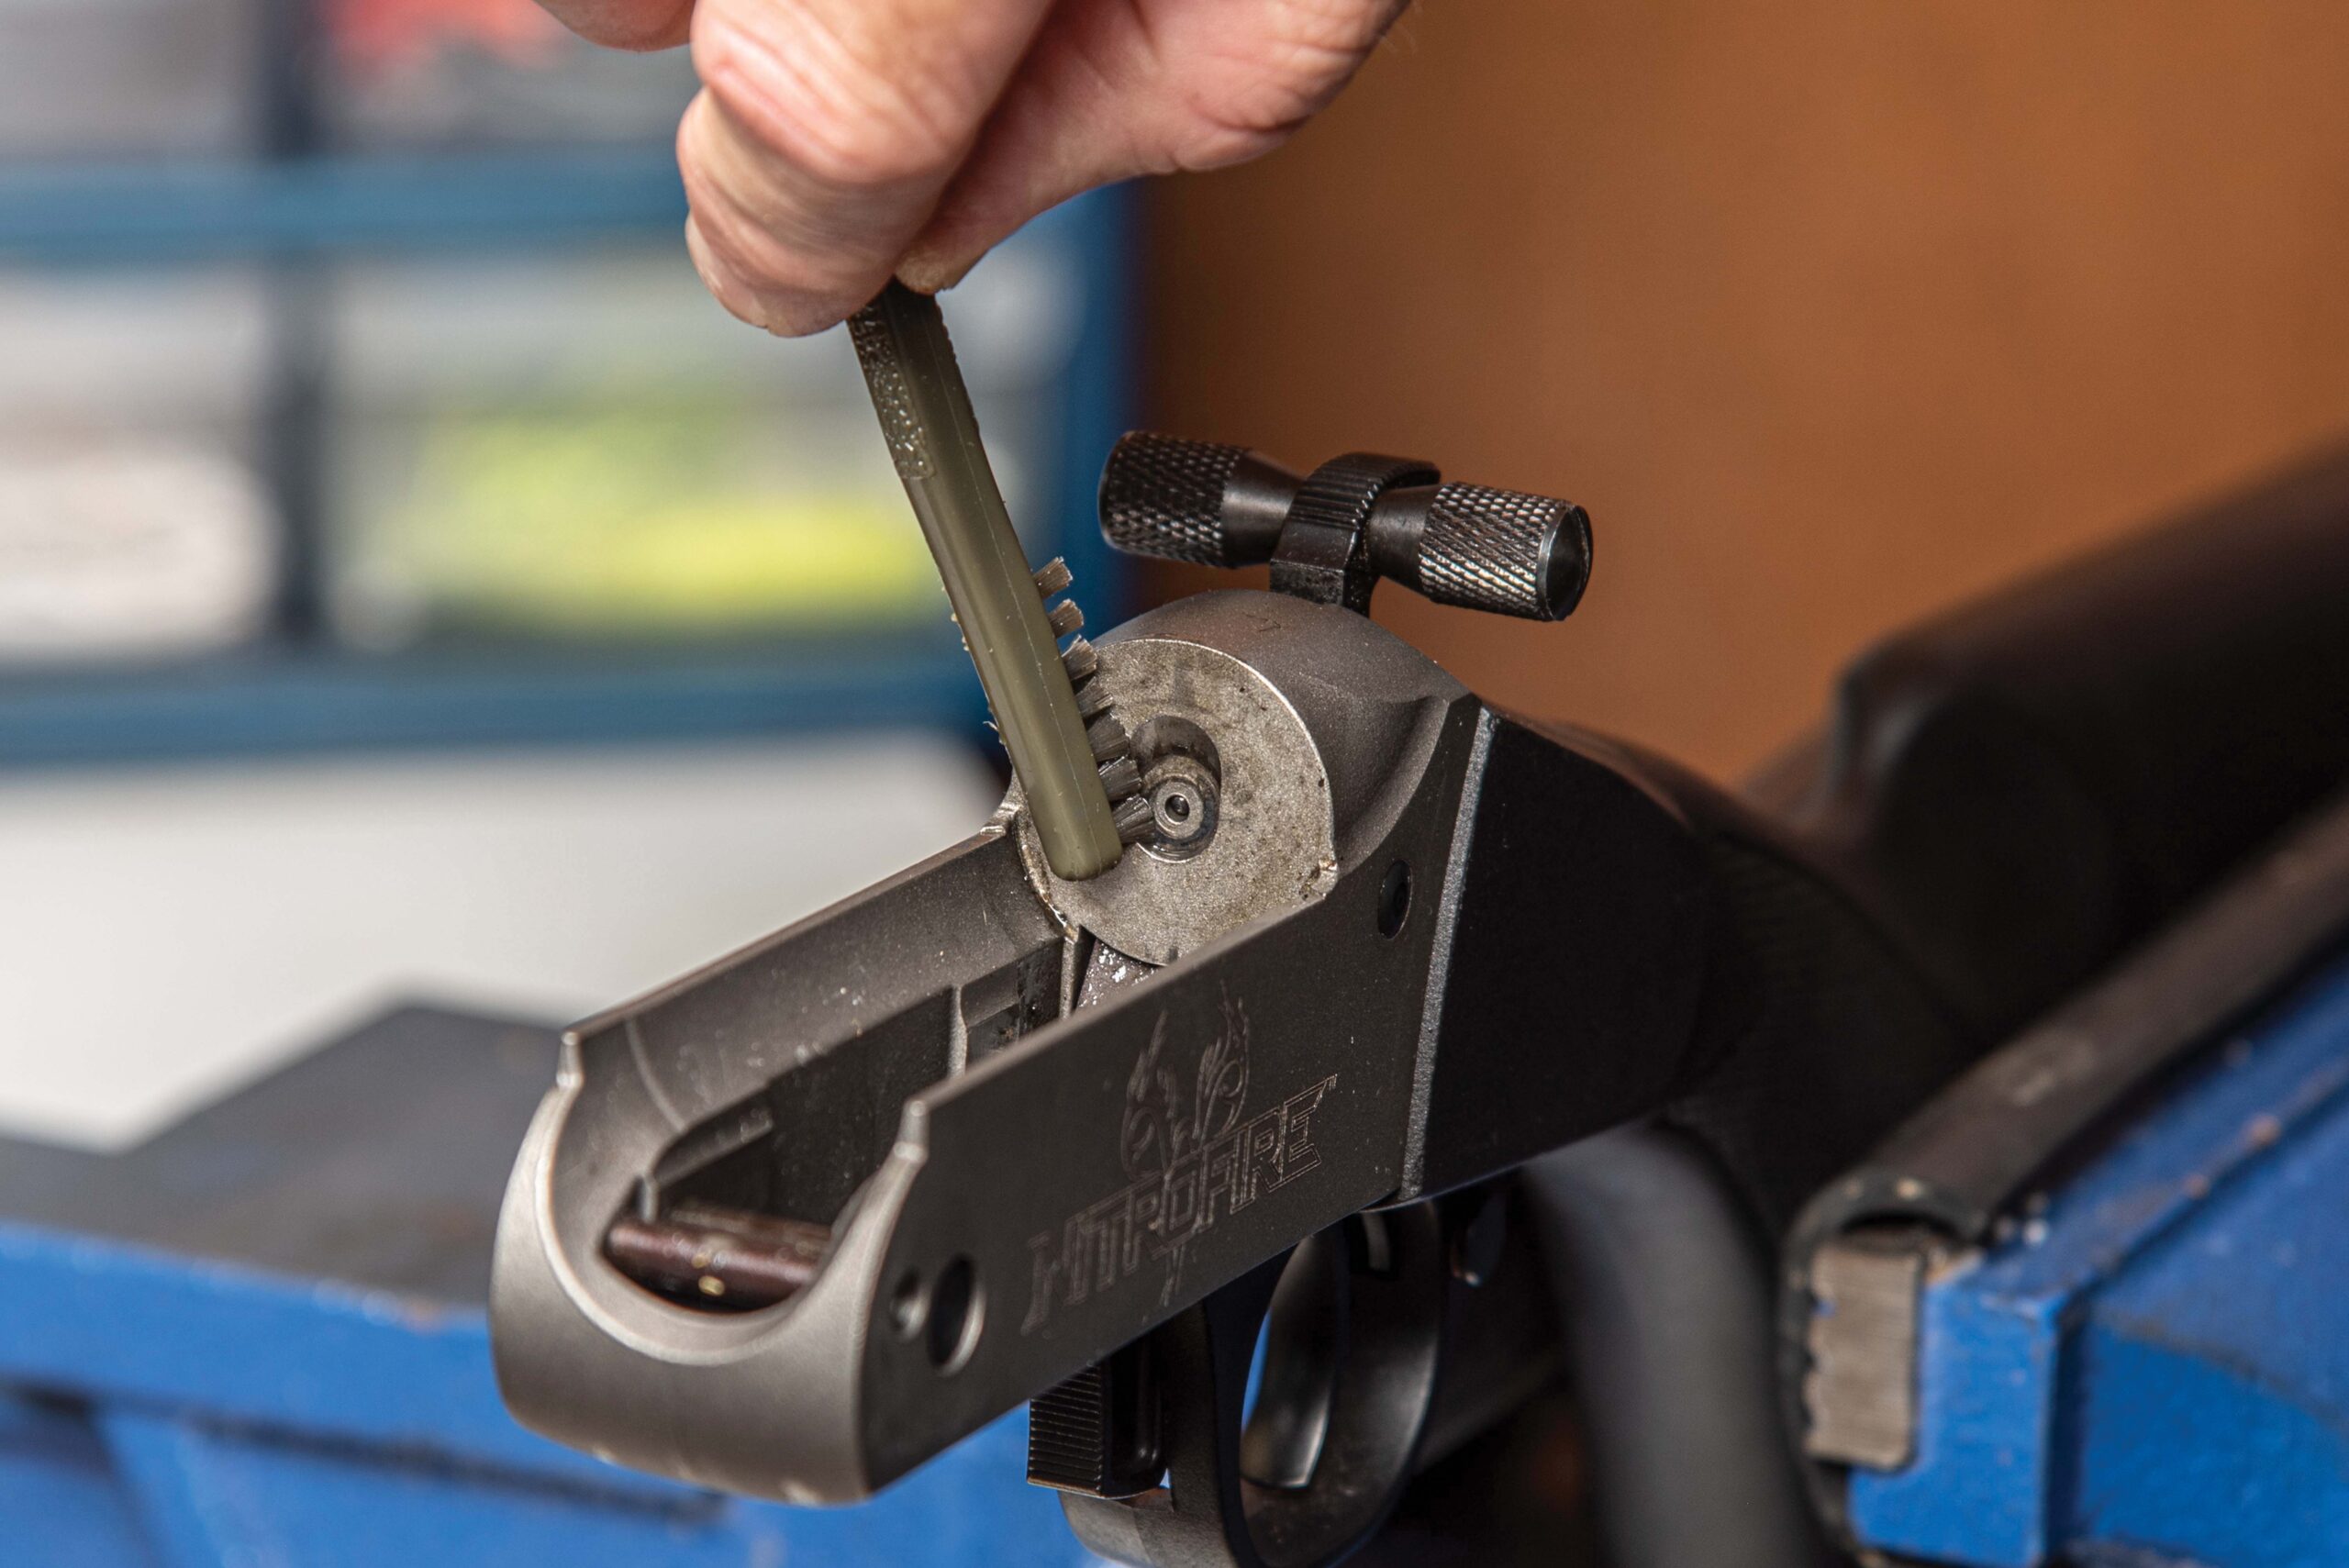
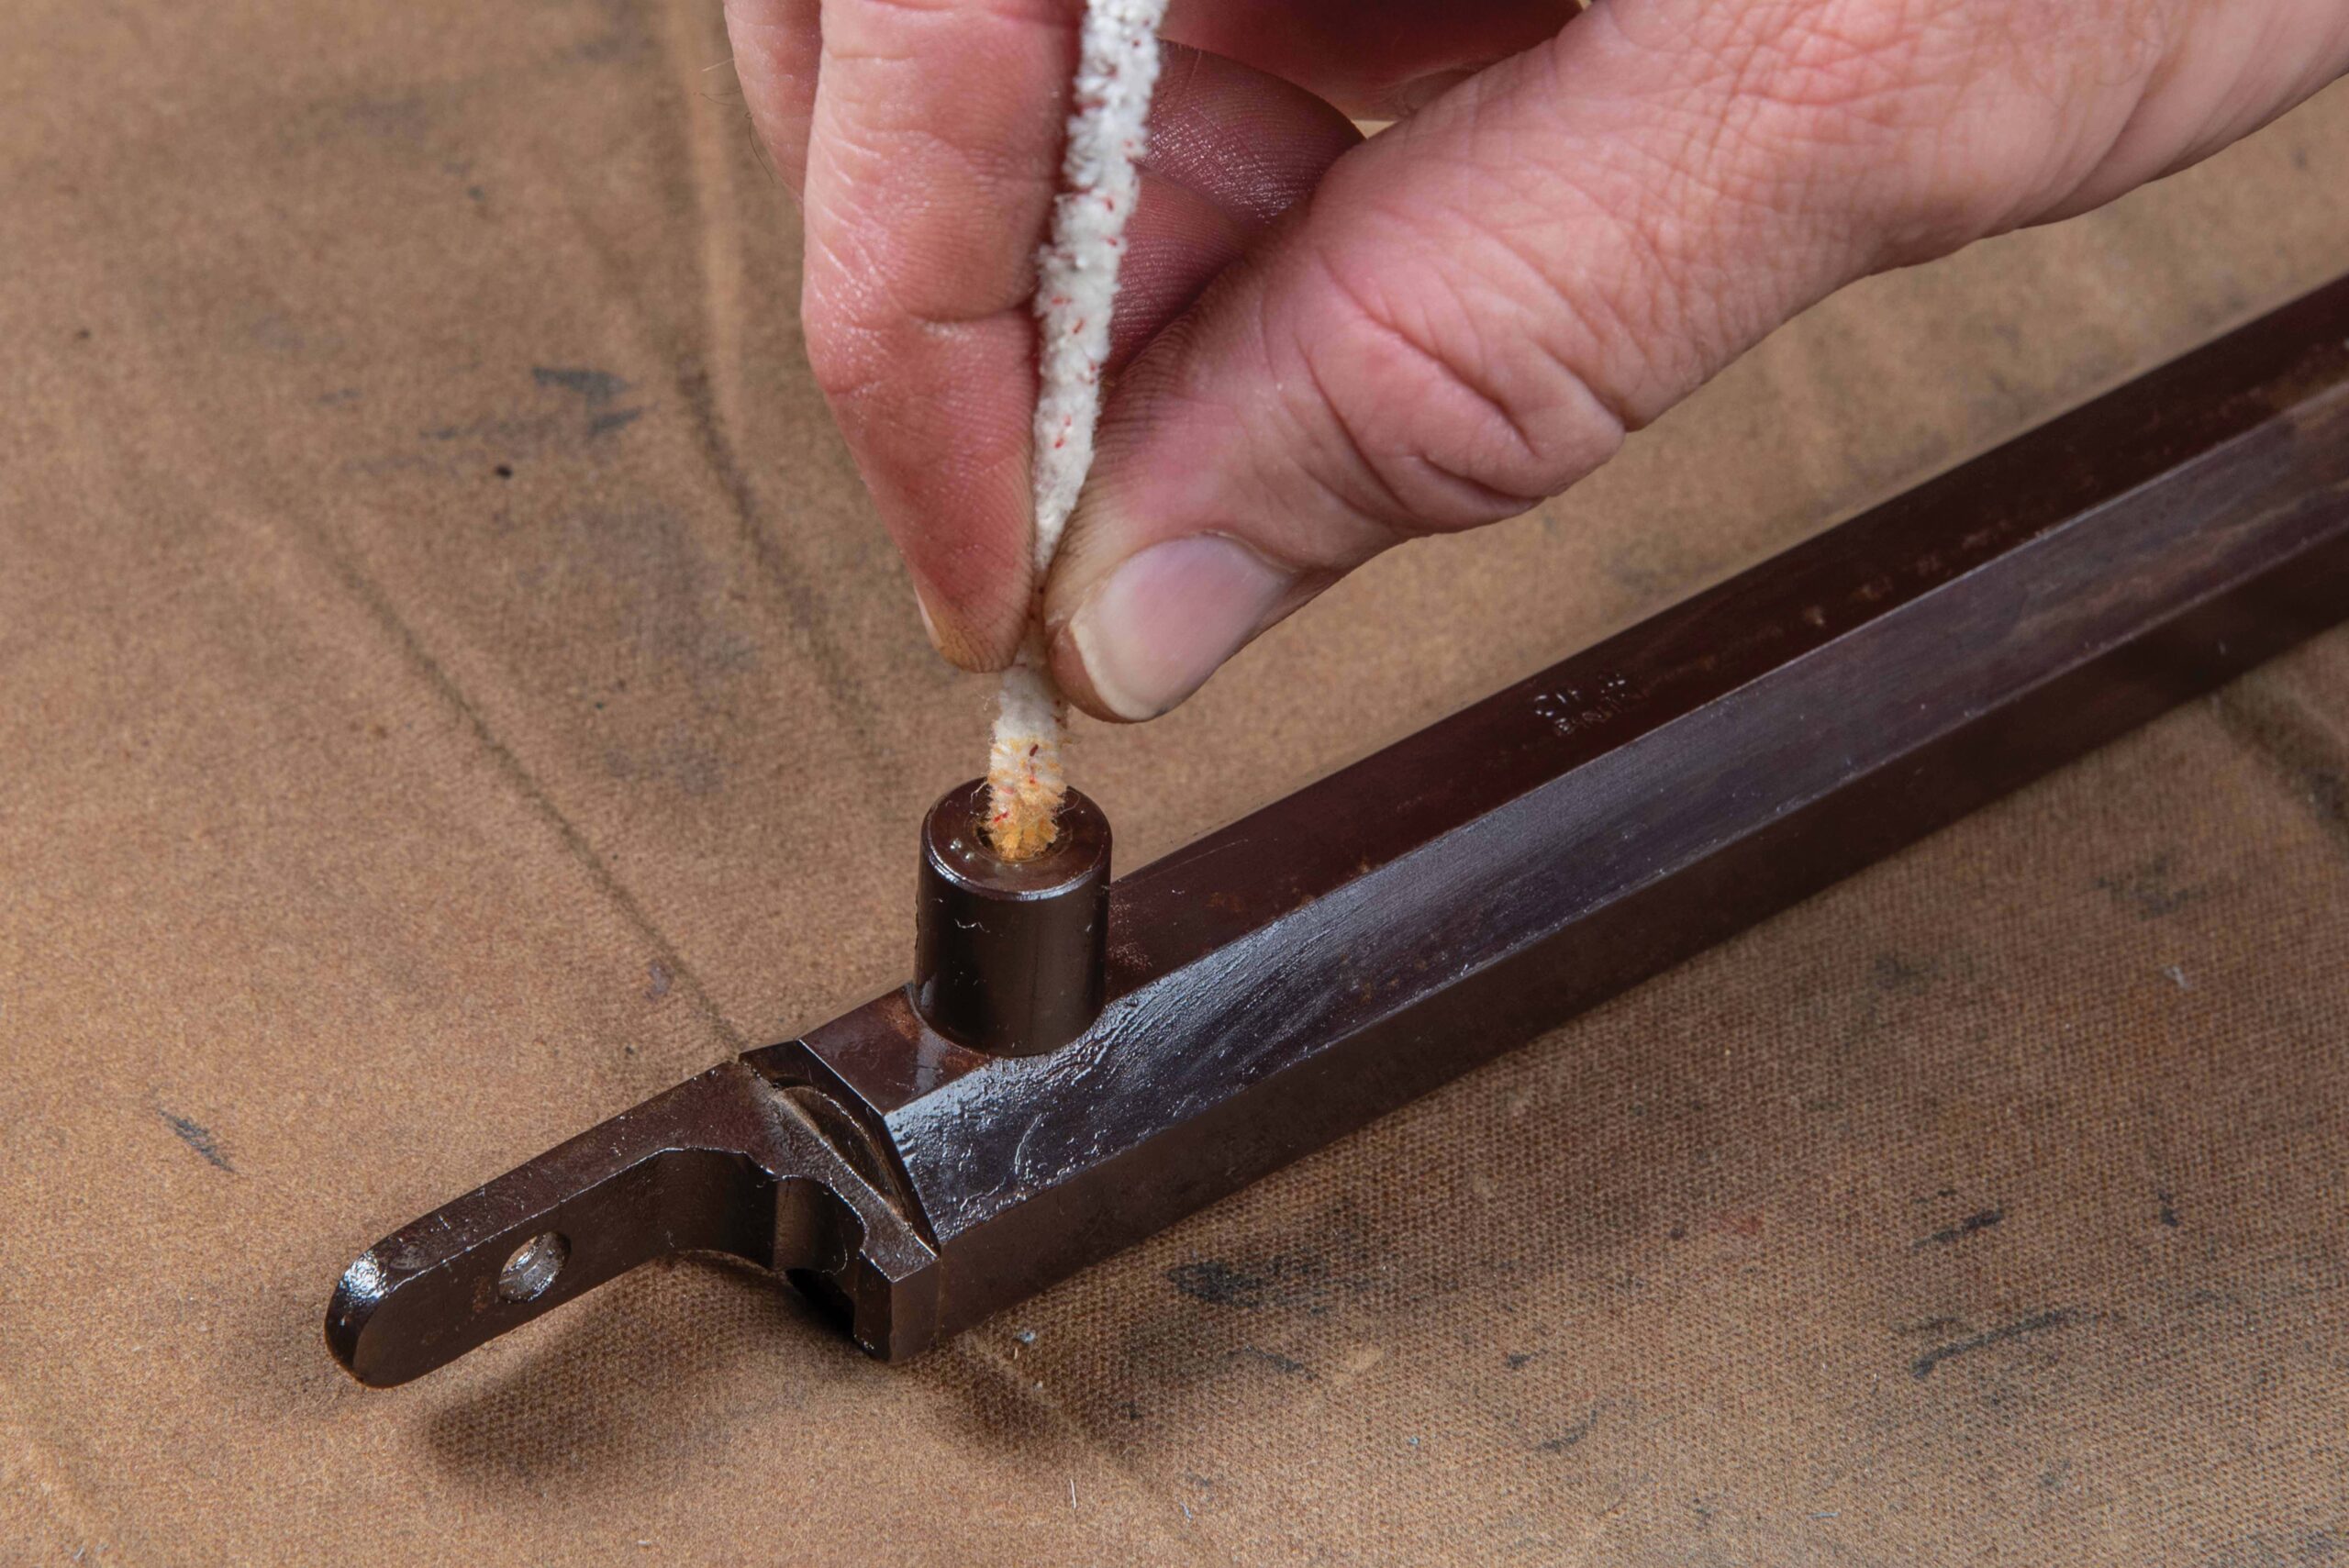
4. This portion of the receiver serves as the breech face of the Traditions NitroFire and should also be cleaned thoroughly with a brush and solvent to remove damaging powder residue. If you have a conventional in-line muzzleloader, you will want to clean the breech plug in similar fashion, making sure to remove all fouling from the fire hole with a specialty brush or pipe cleaner saturated in solvent. Once cleaned and dry, lightly lubricate the plug with gun oil, mineral oil or bore lubricant, and be sure to apply grease to the breech plug threads before reinstalling into the back of the barrel.

Sidelock Muzzleloader Cleaning — the Deep Dive

If I were to venture a guess, I’d reckon that relatively few commercially manufactured sidelock muzzleloaders owned by the occasional muzzleloader shooter or hunter ever receive a thorough cleaning. For many, the sidelock rifle is unfamiliar and uncomfortable territory. Most only receive the cursory cleaning by running a bore lubricant down the barrel a few times before calling it “done.” Fewer still, ever attempt to remove the sidelock to lubricate the mechanism and remove built-up fouling and debris.

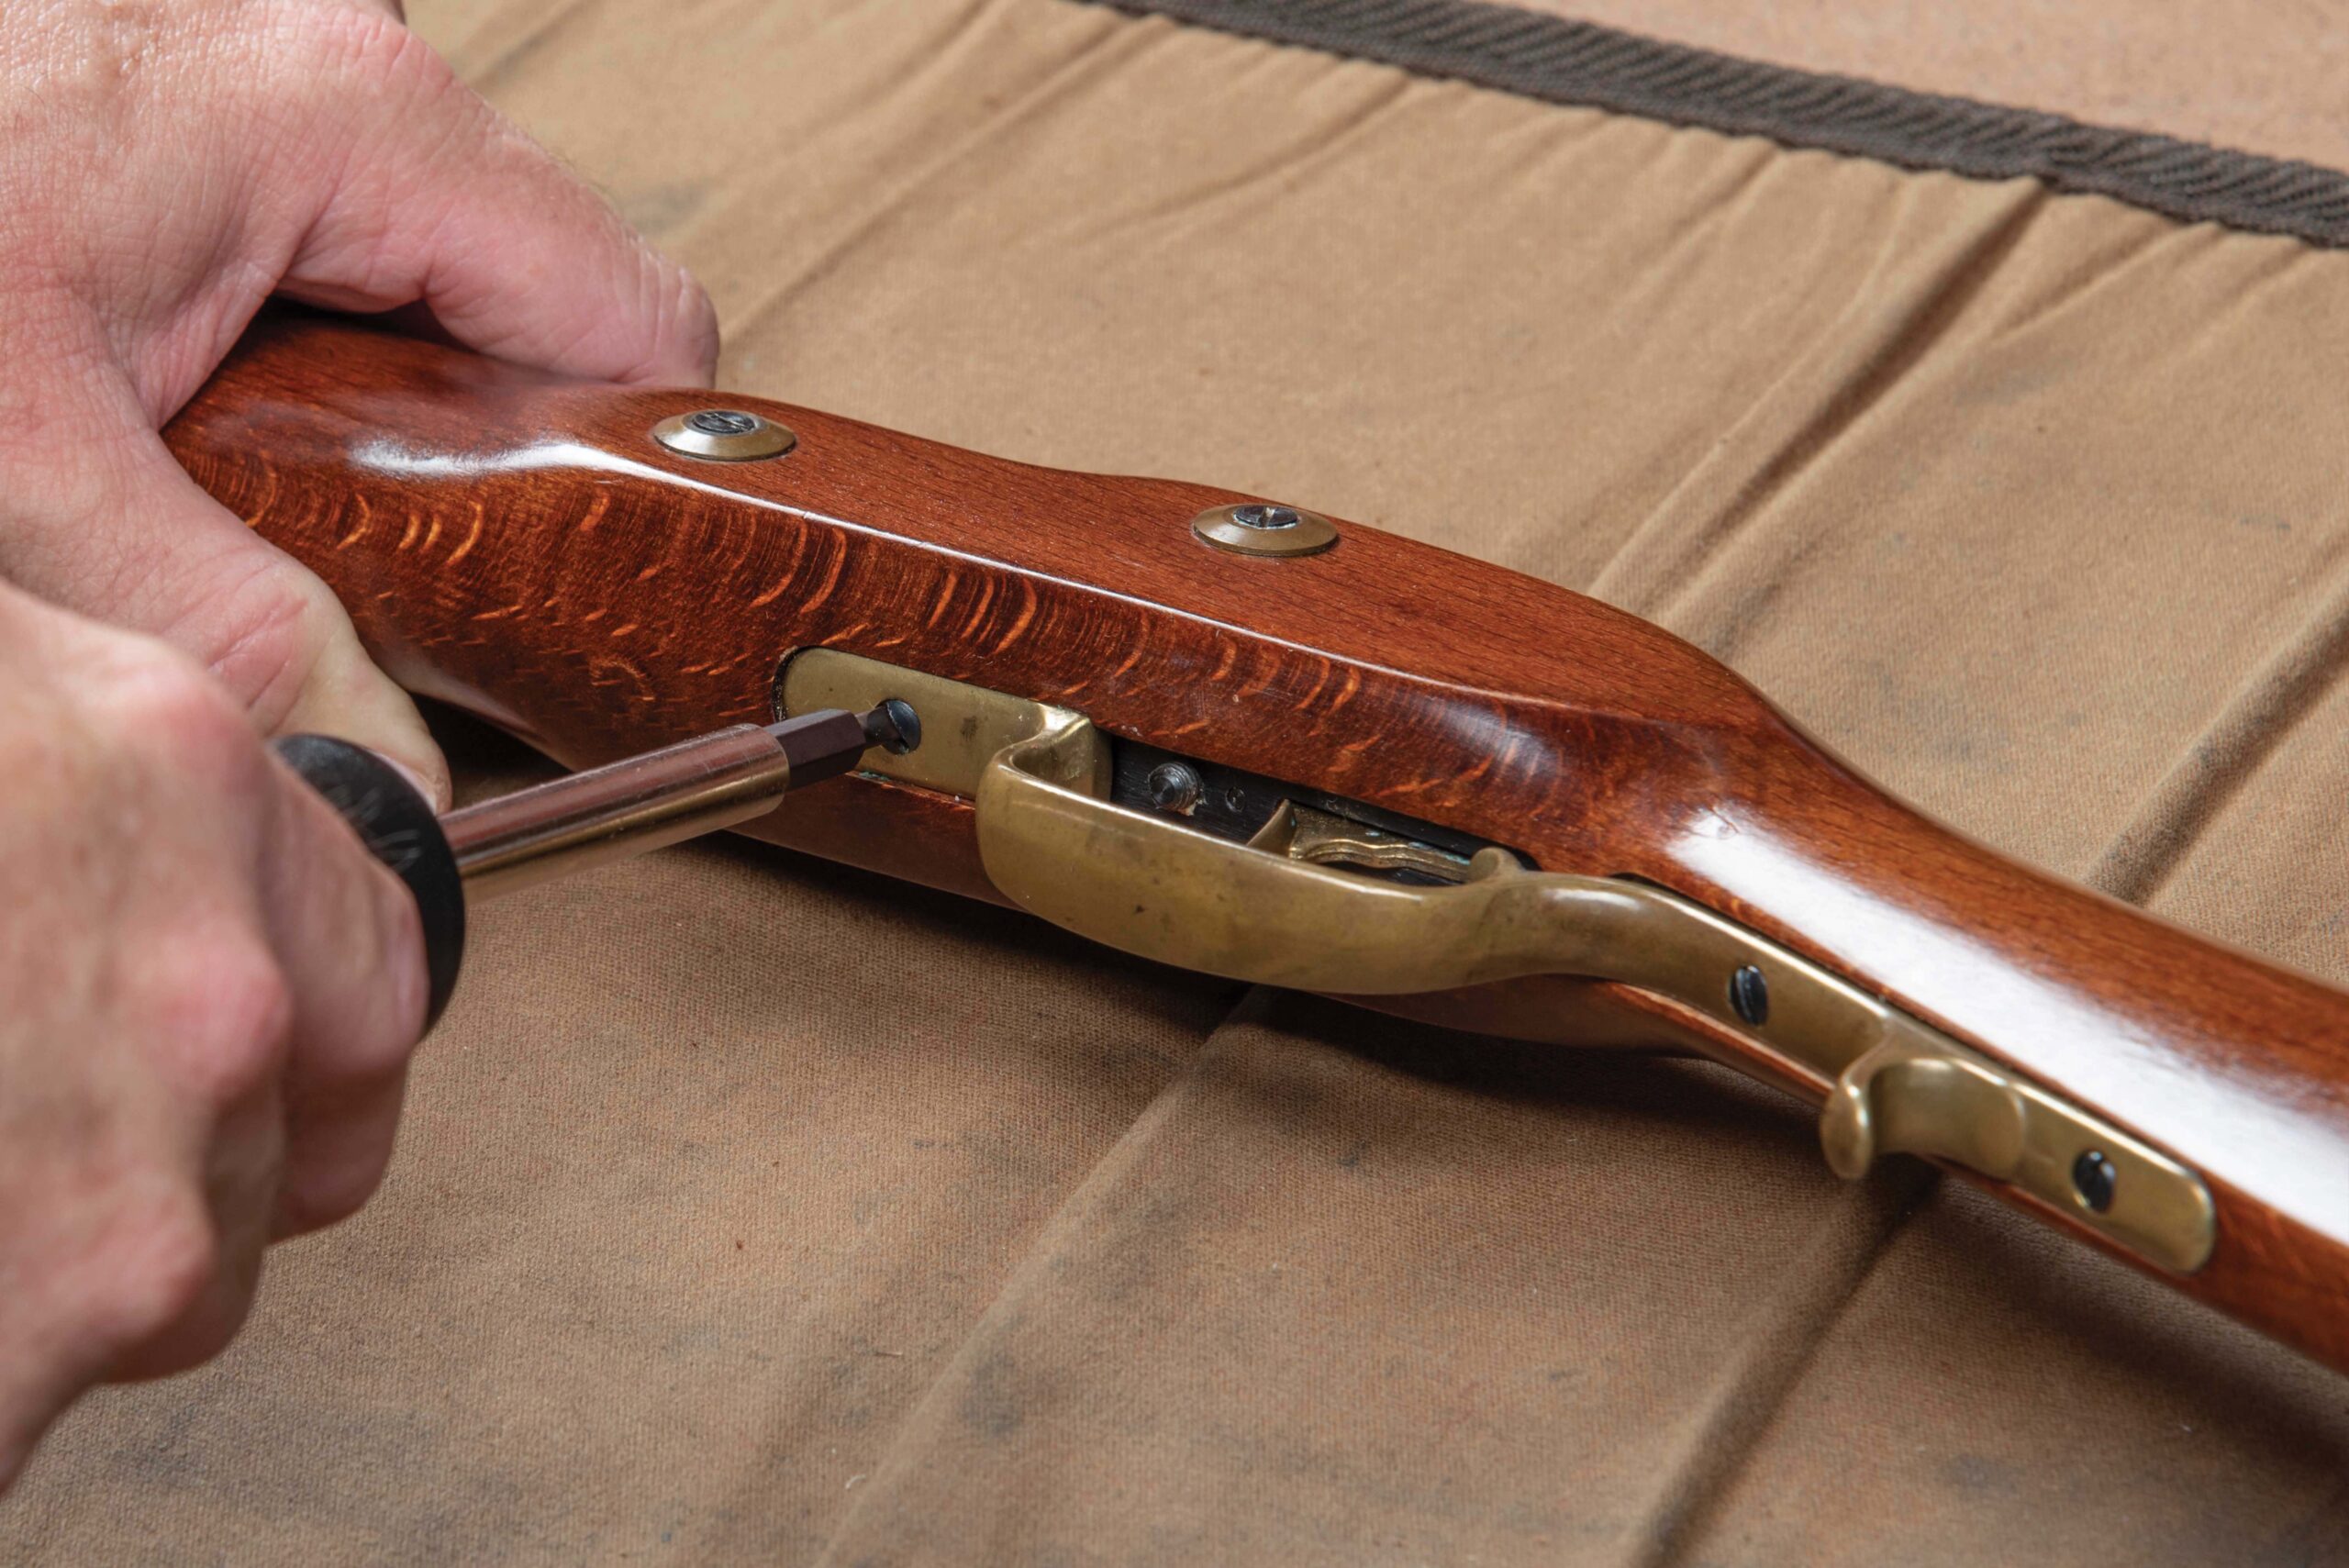
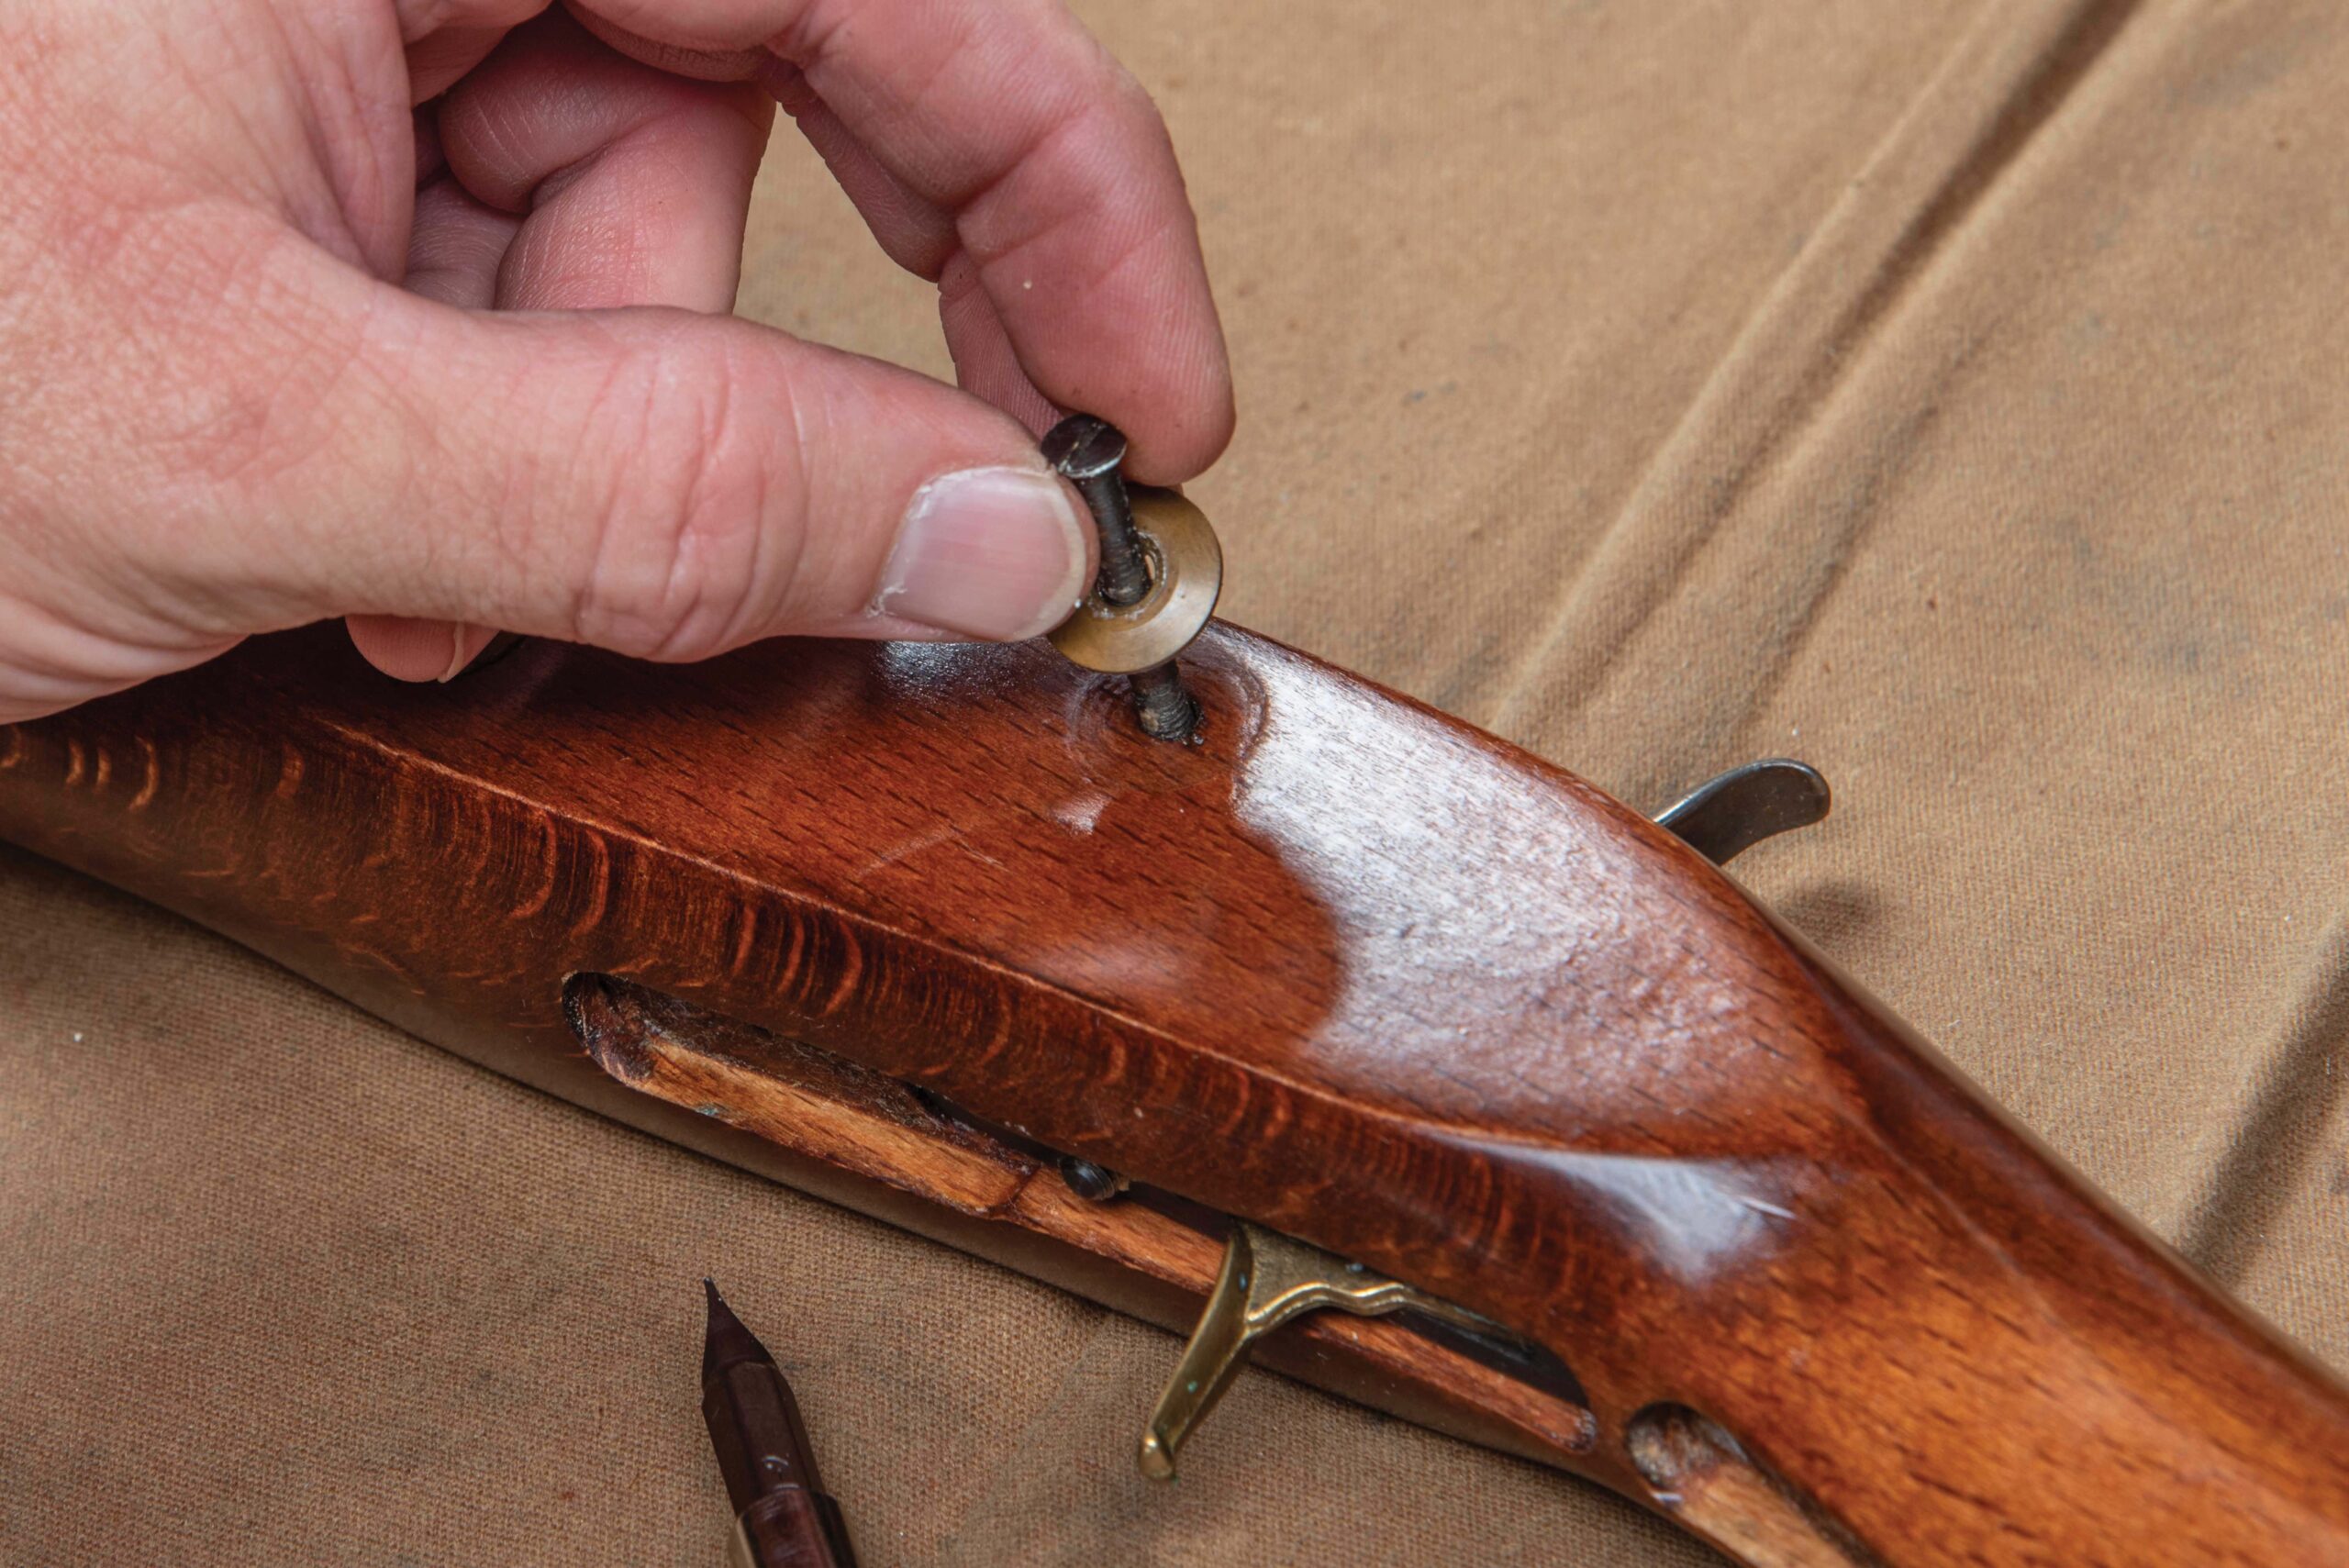
1. While it is not necessary to remove the triggerguard for this procedure, we’ll do so here so we can check the condition of the screws.

Well, the good news is that deep cleaning a sidelock muzzleloader is a simple task. It’s not fun and it is messy, but it is not difficult.

A Deep Dive Into Muzzleloader Maintenance
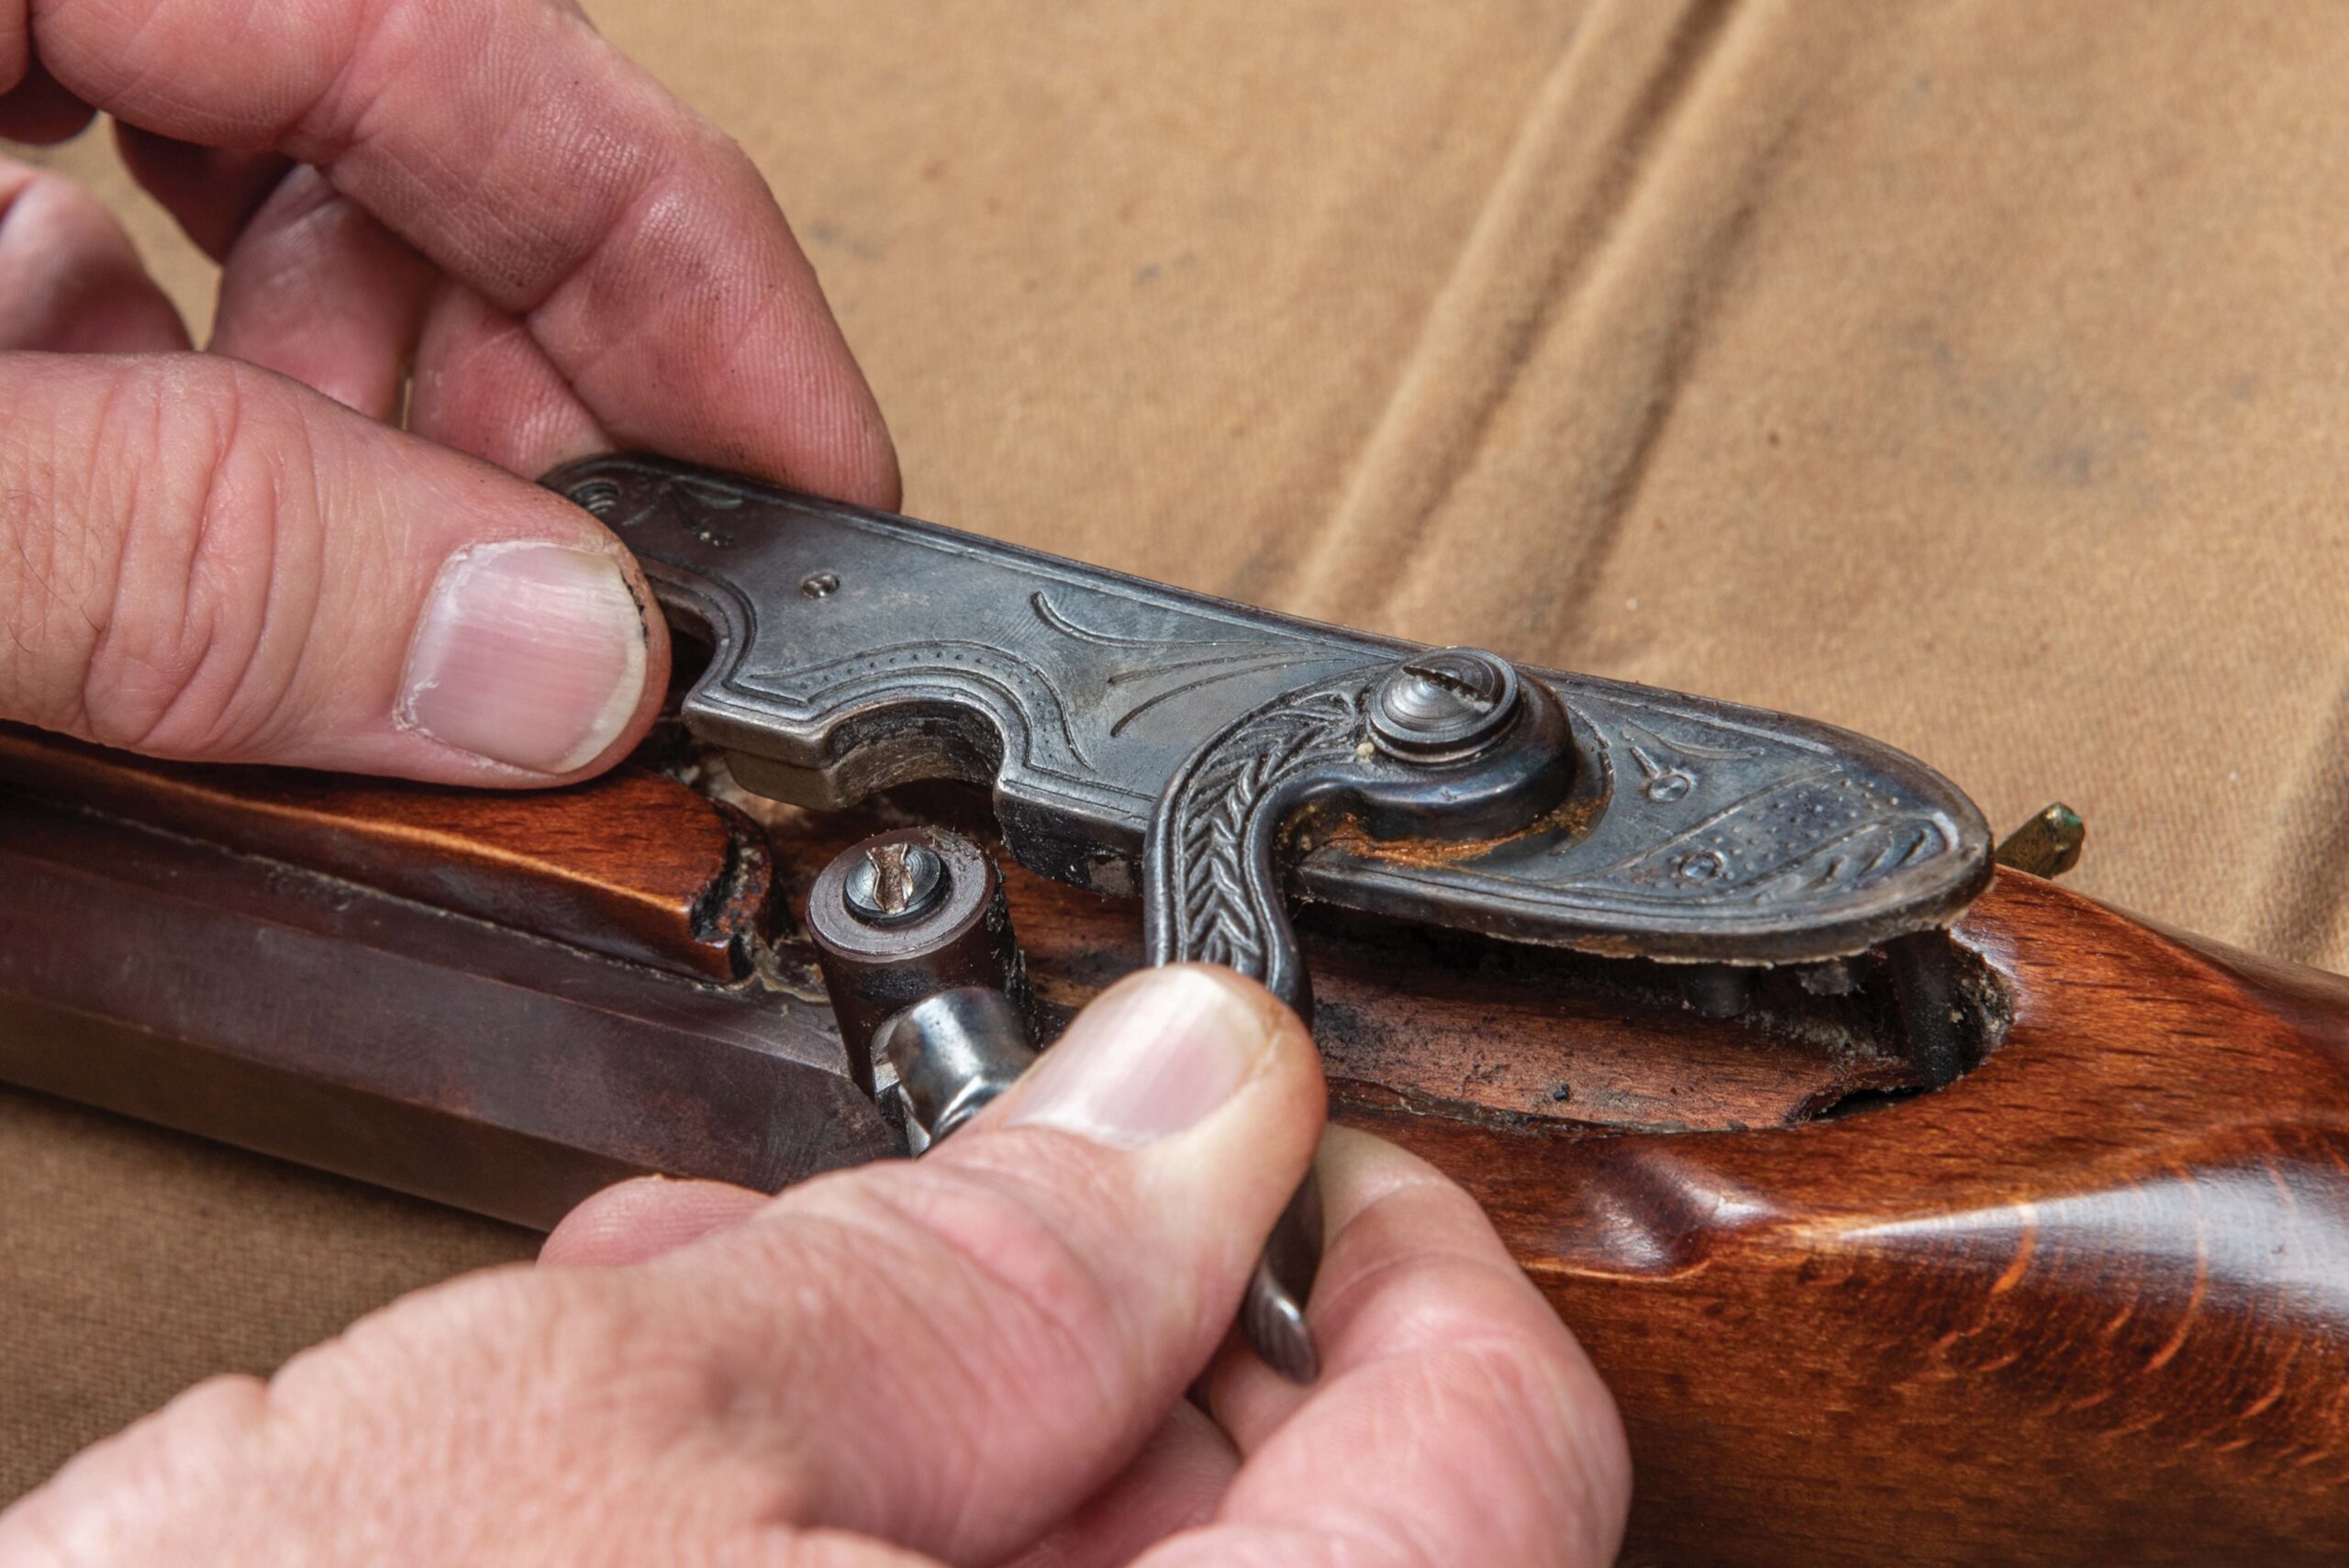
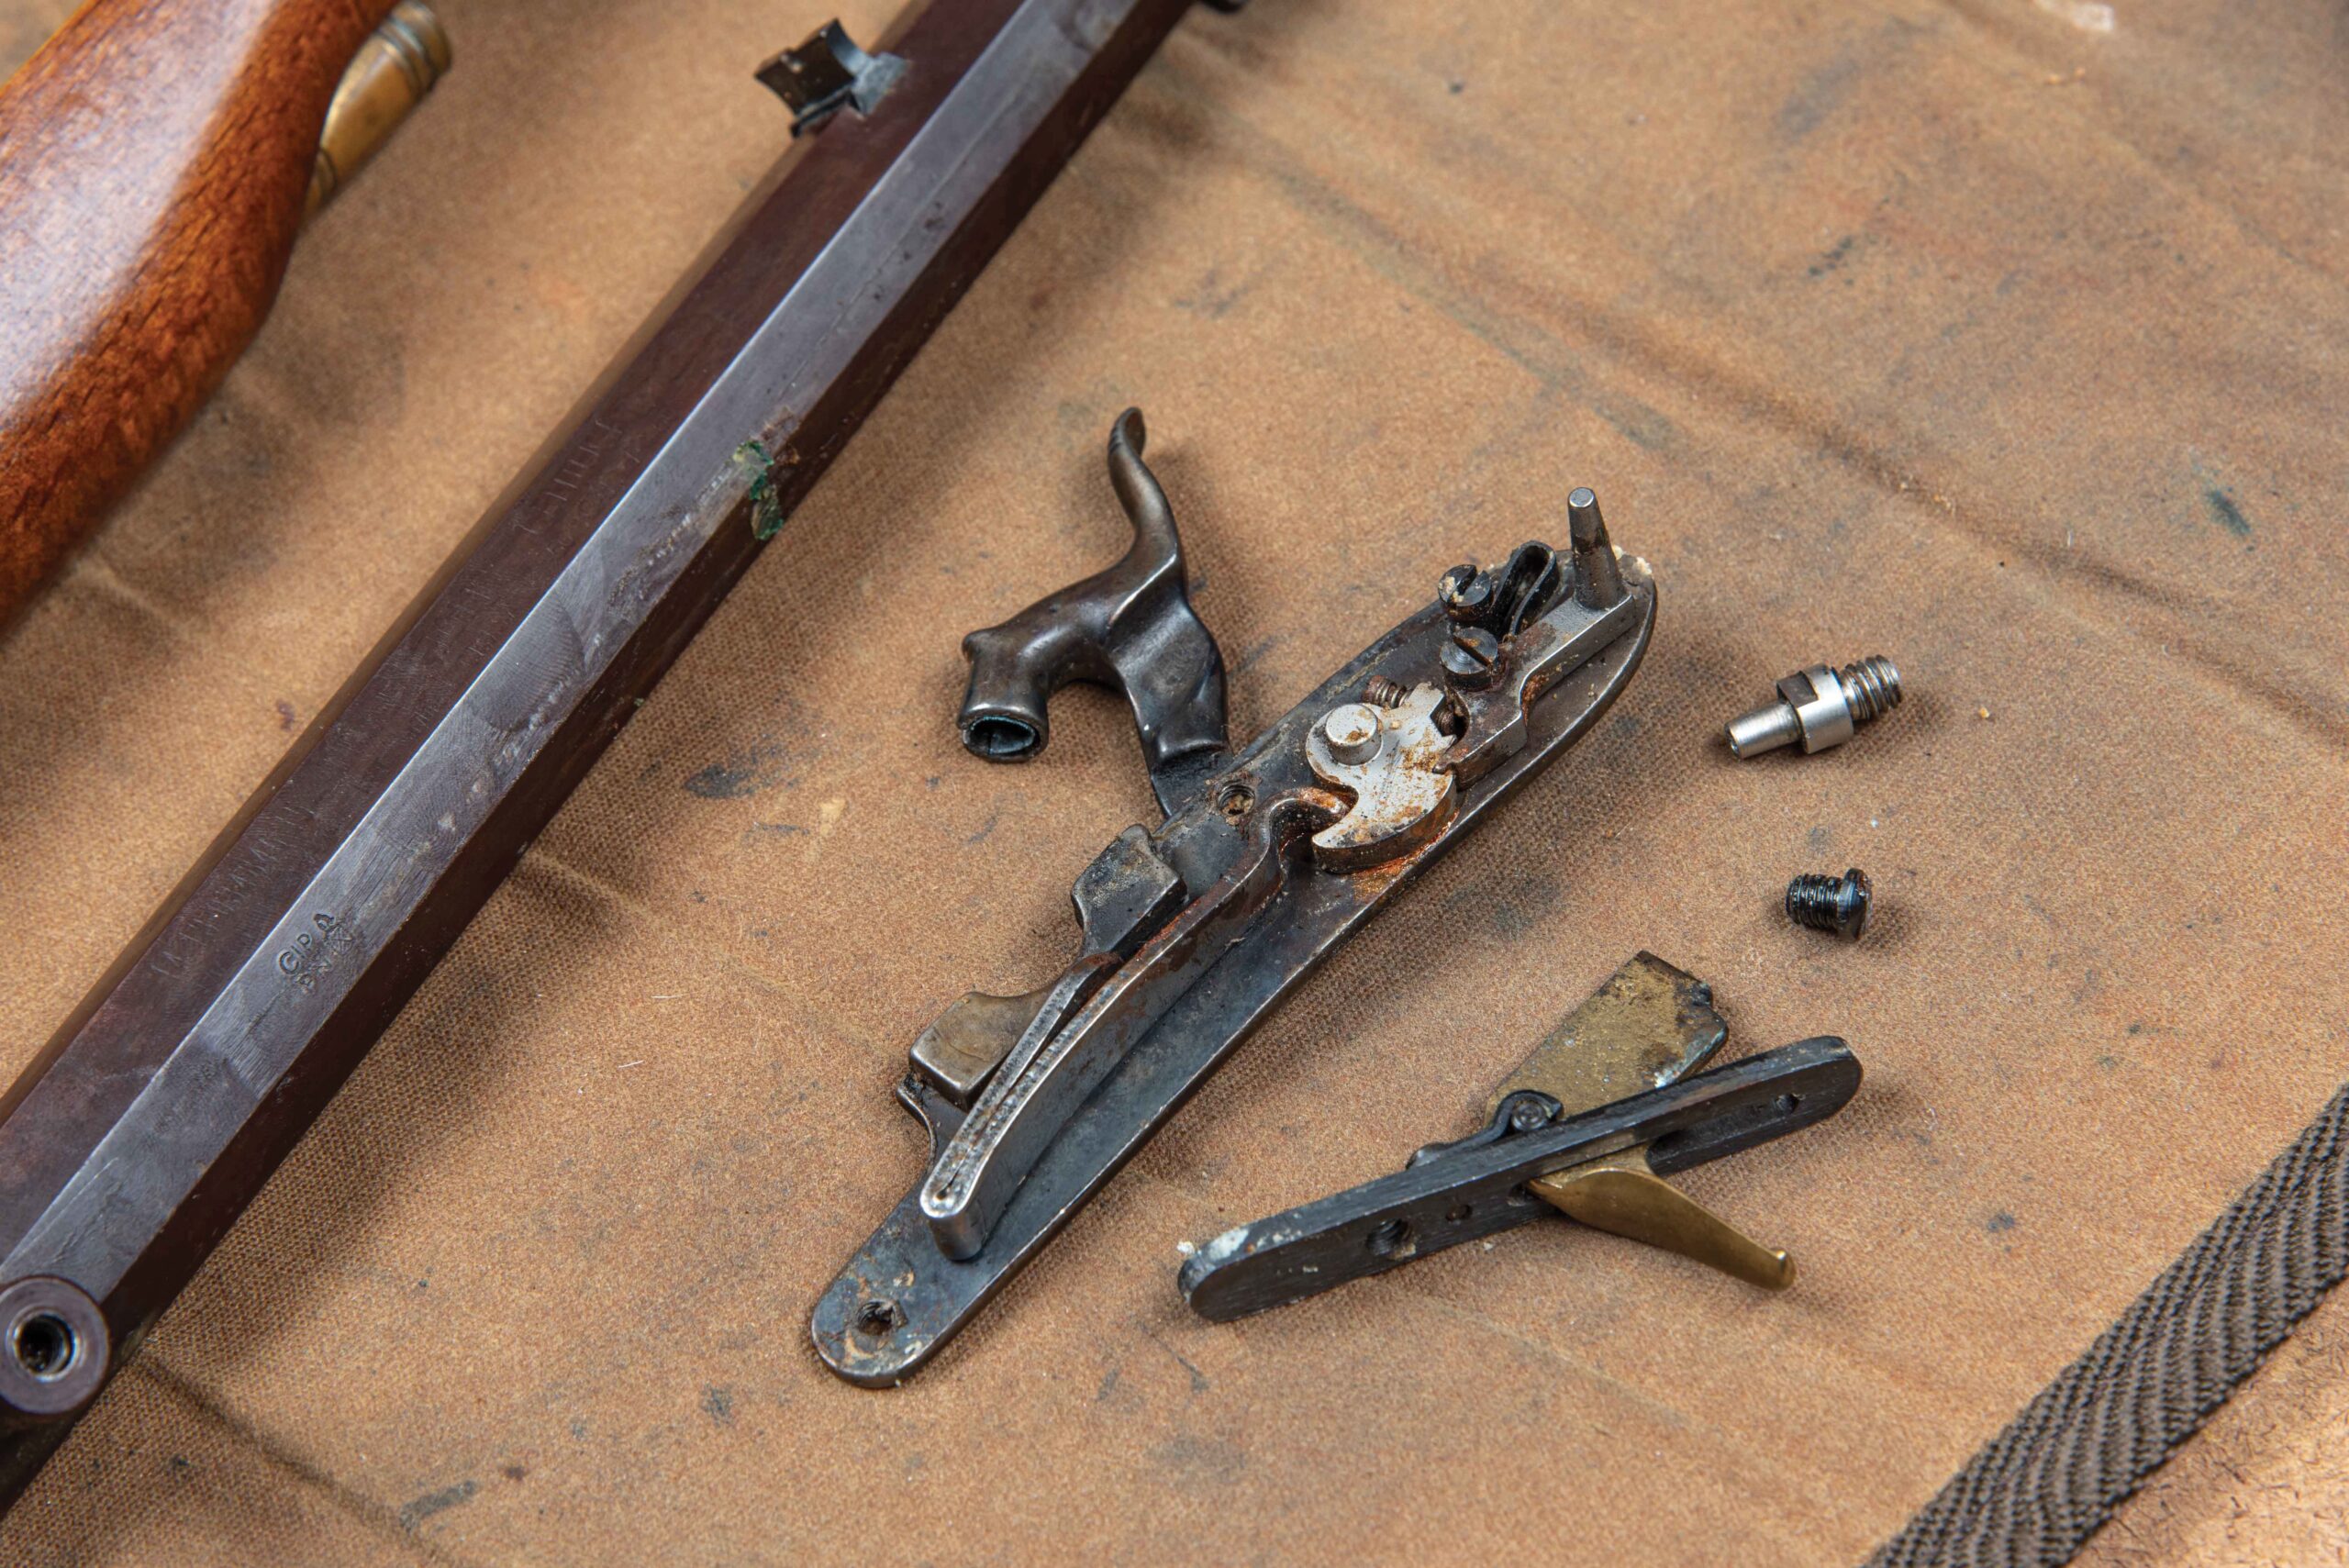
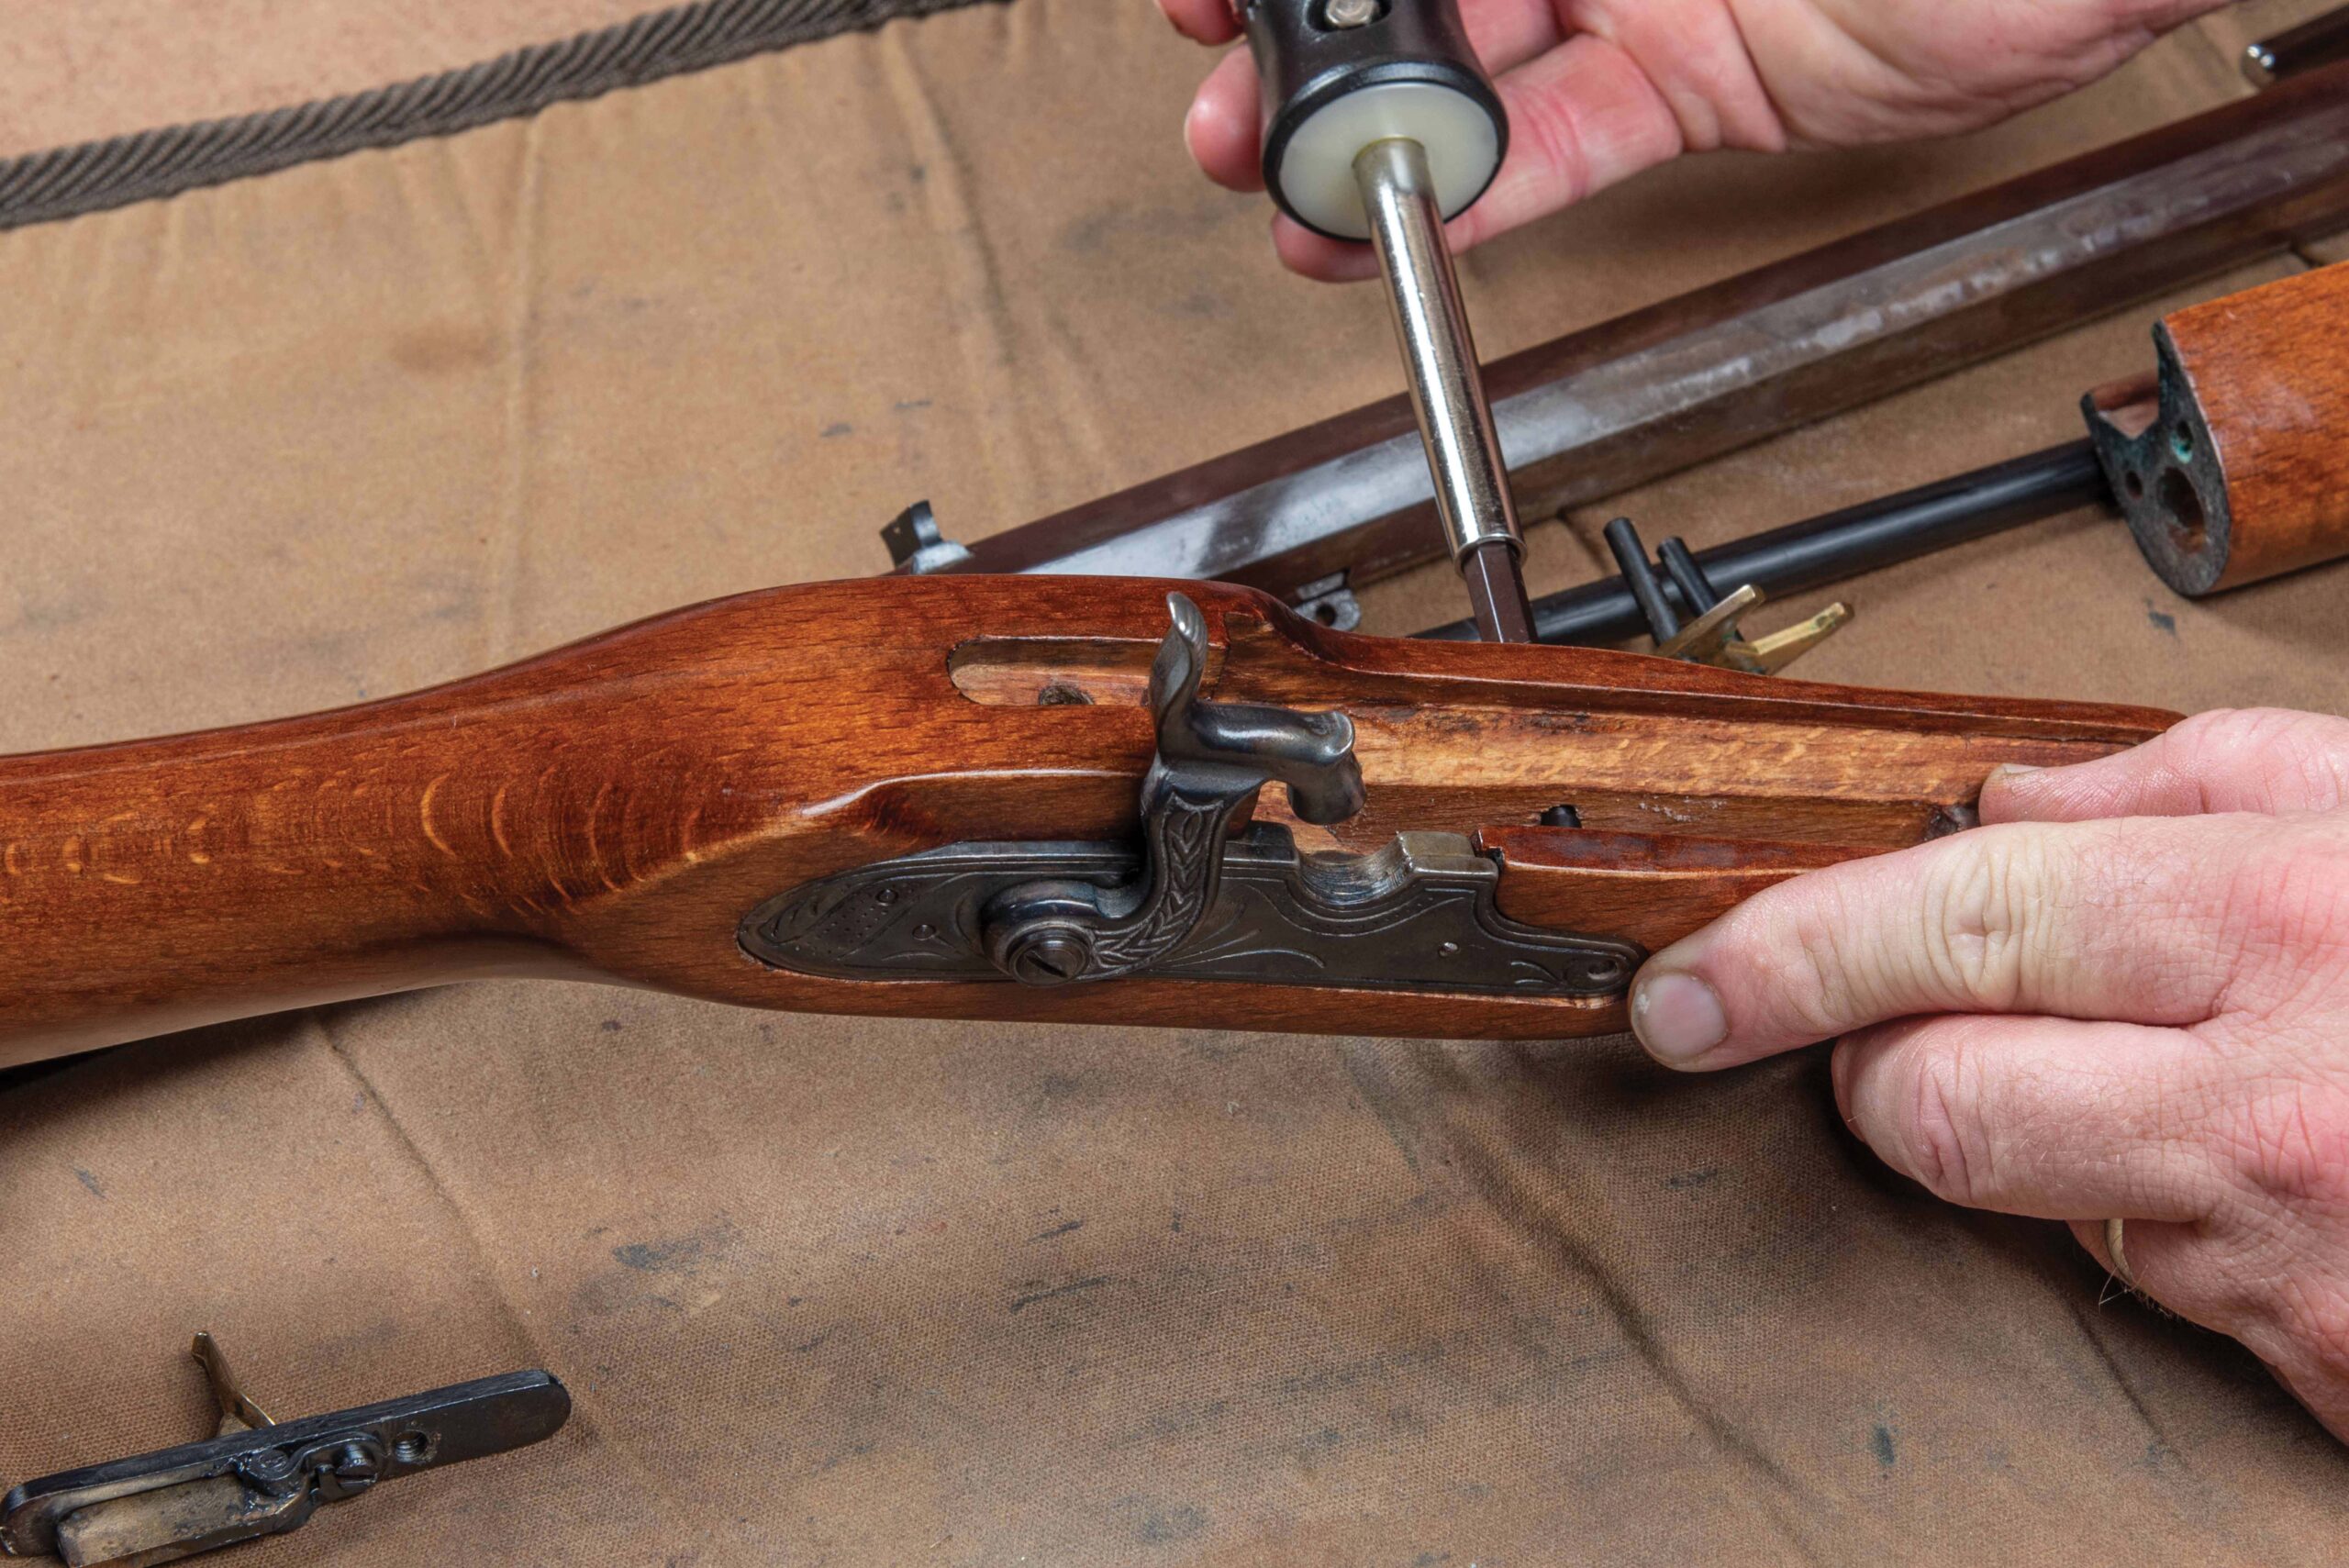
2. The lock assembly is secured in the stock with two lock plate screws. Remove both of these.
3. With the lock plate screws removed, the lock can be lifted out of the inlet.
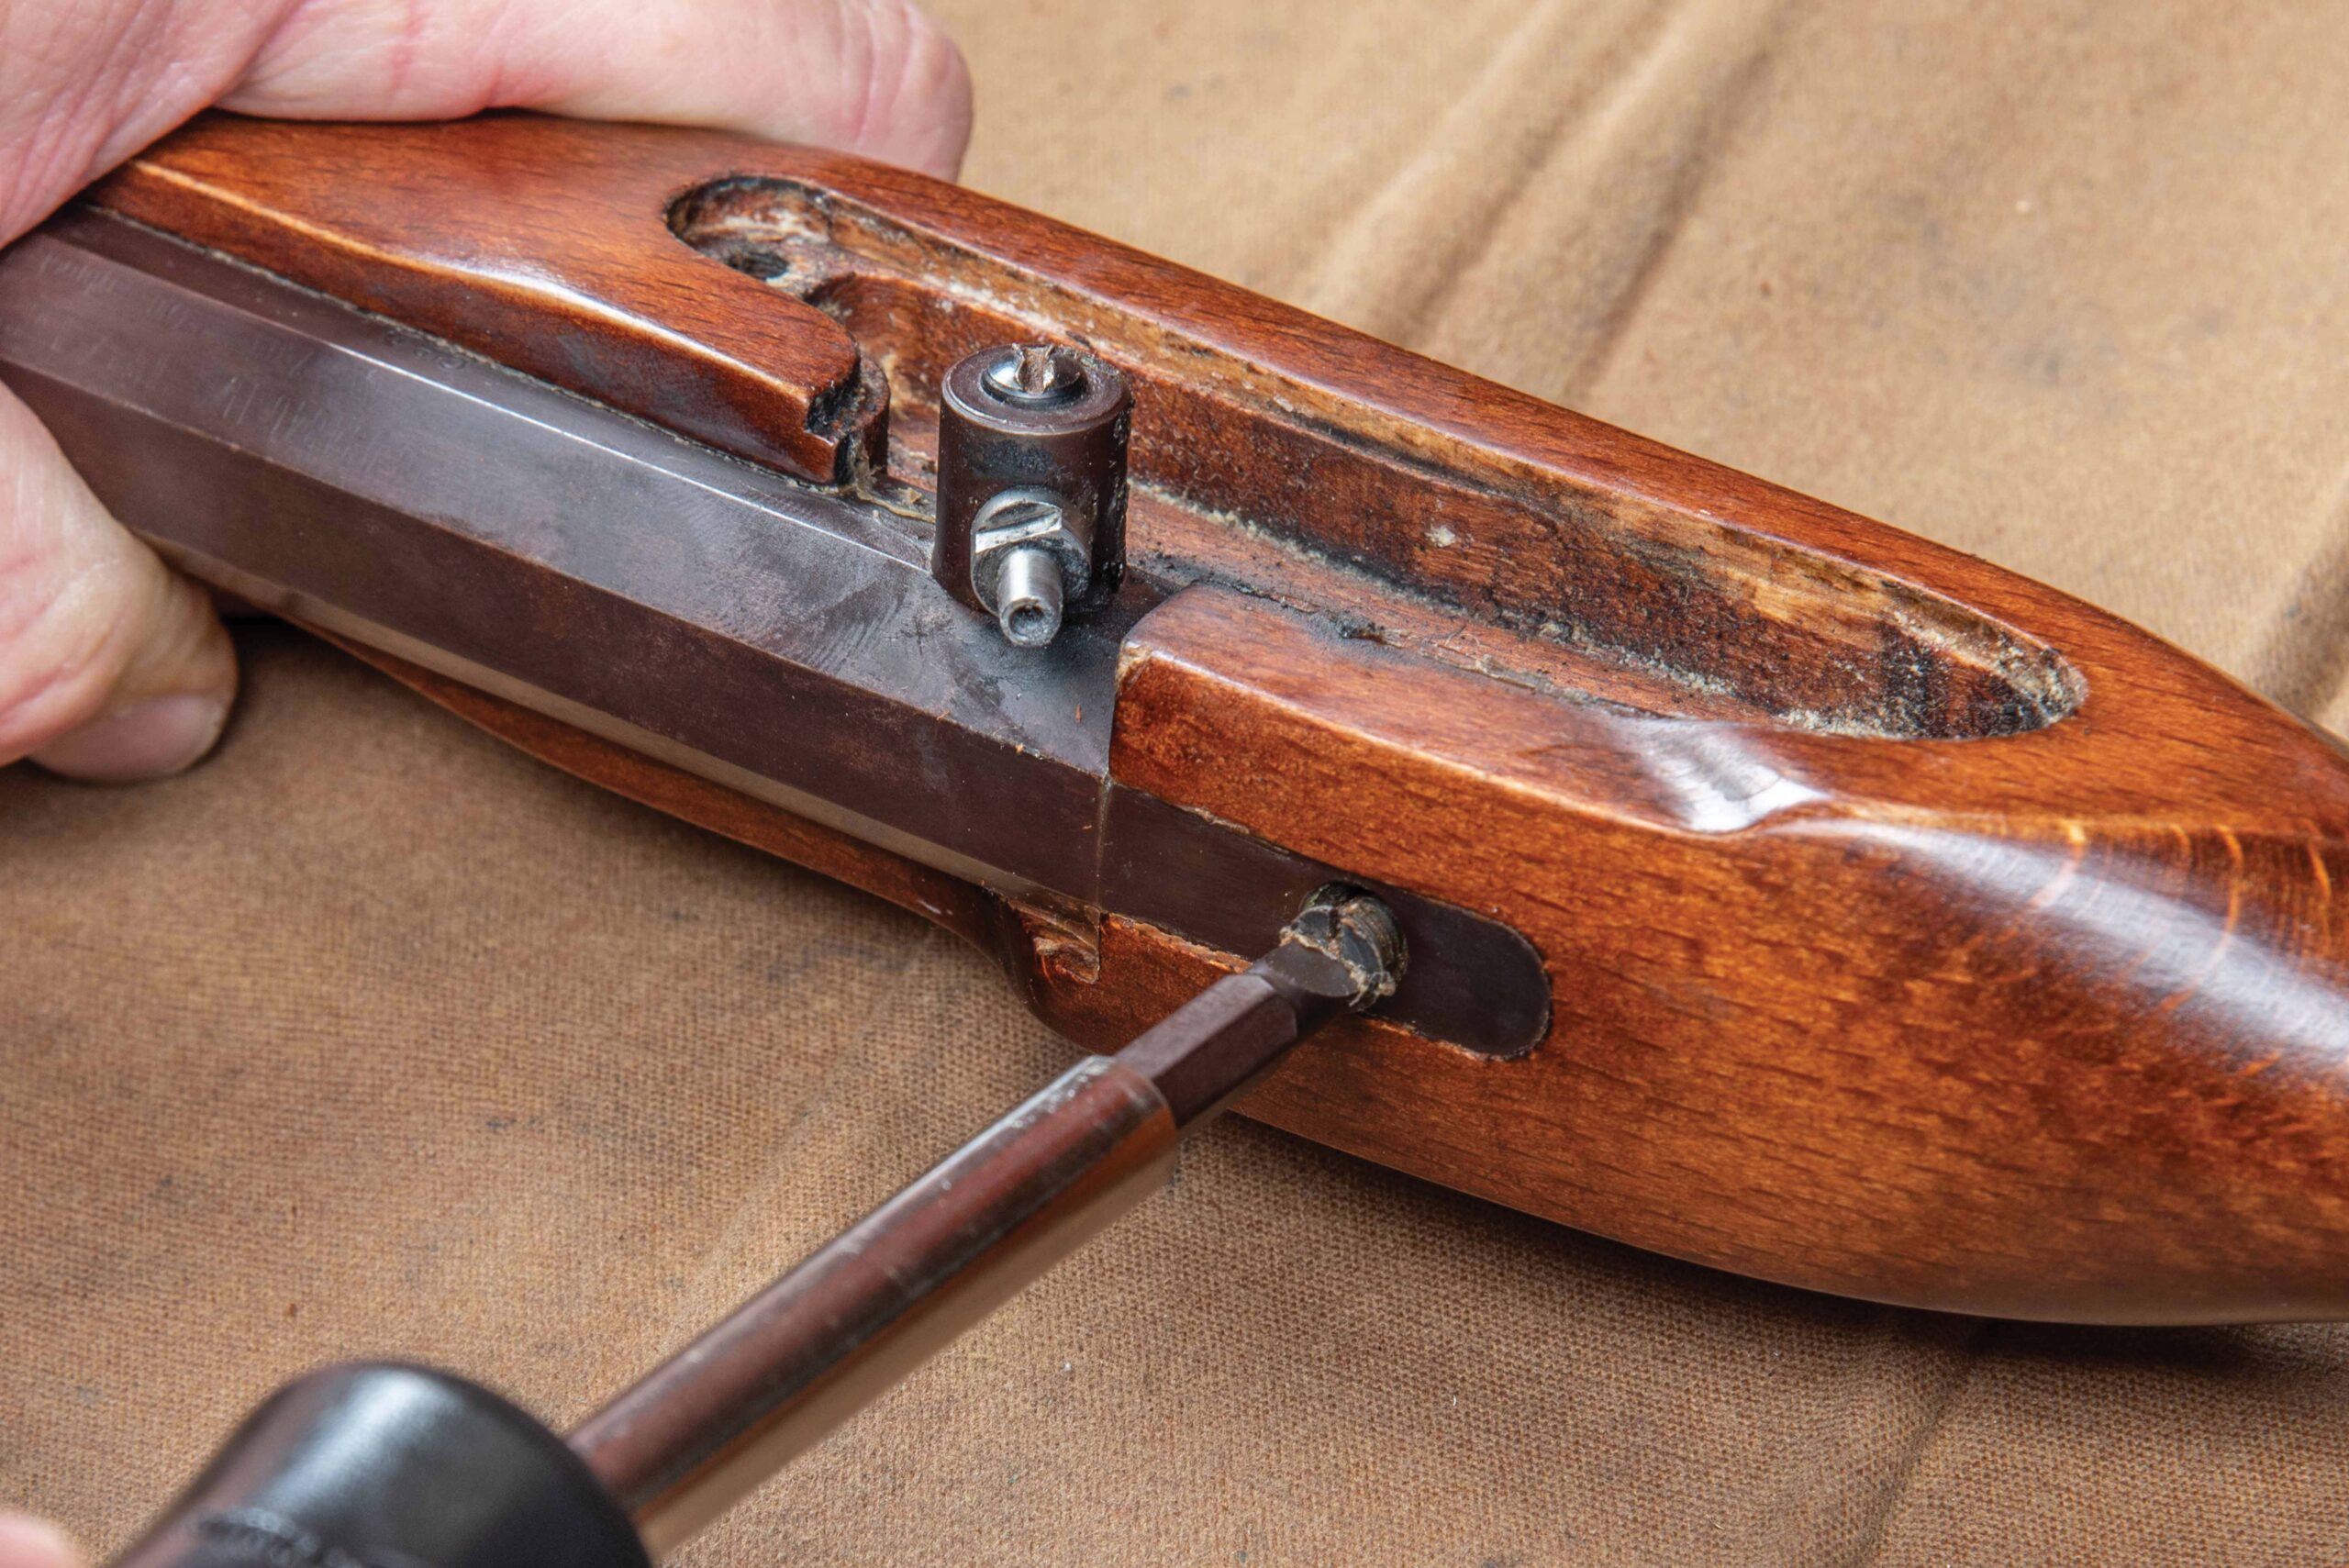
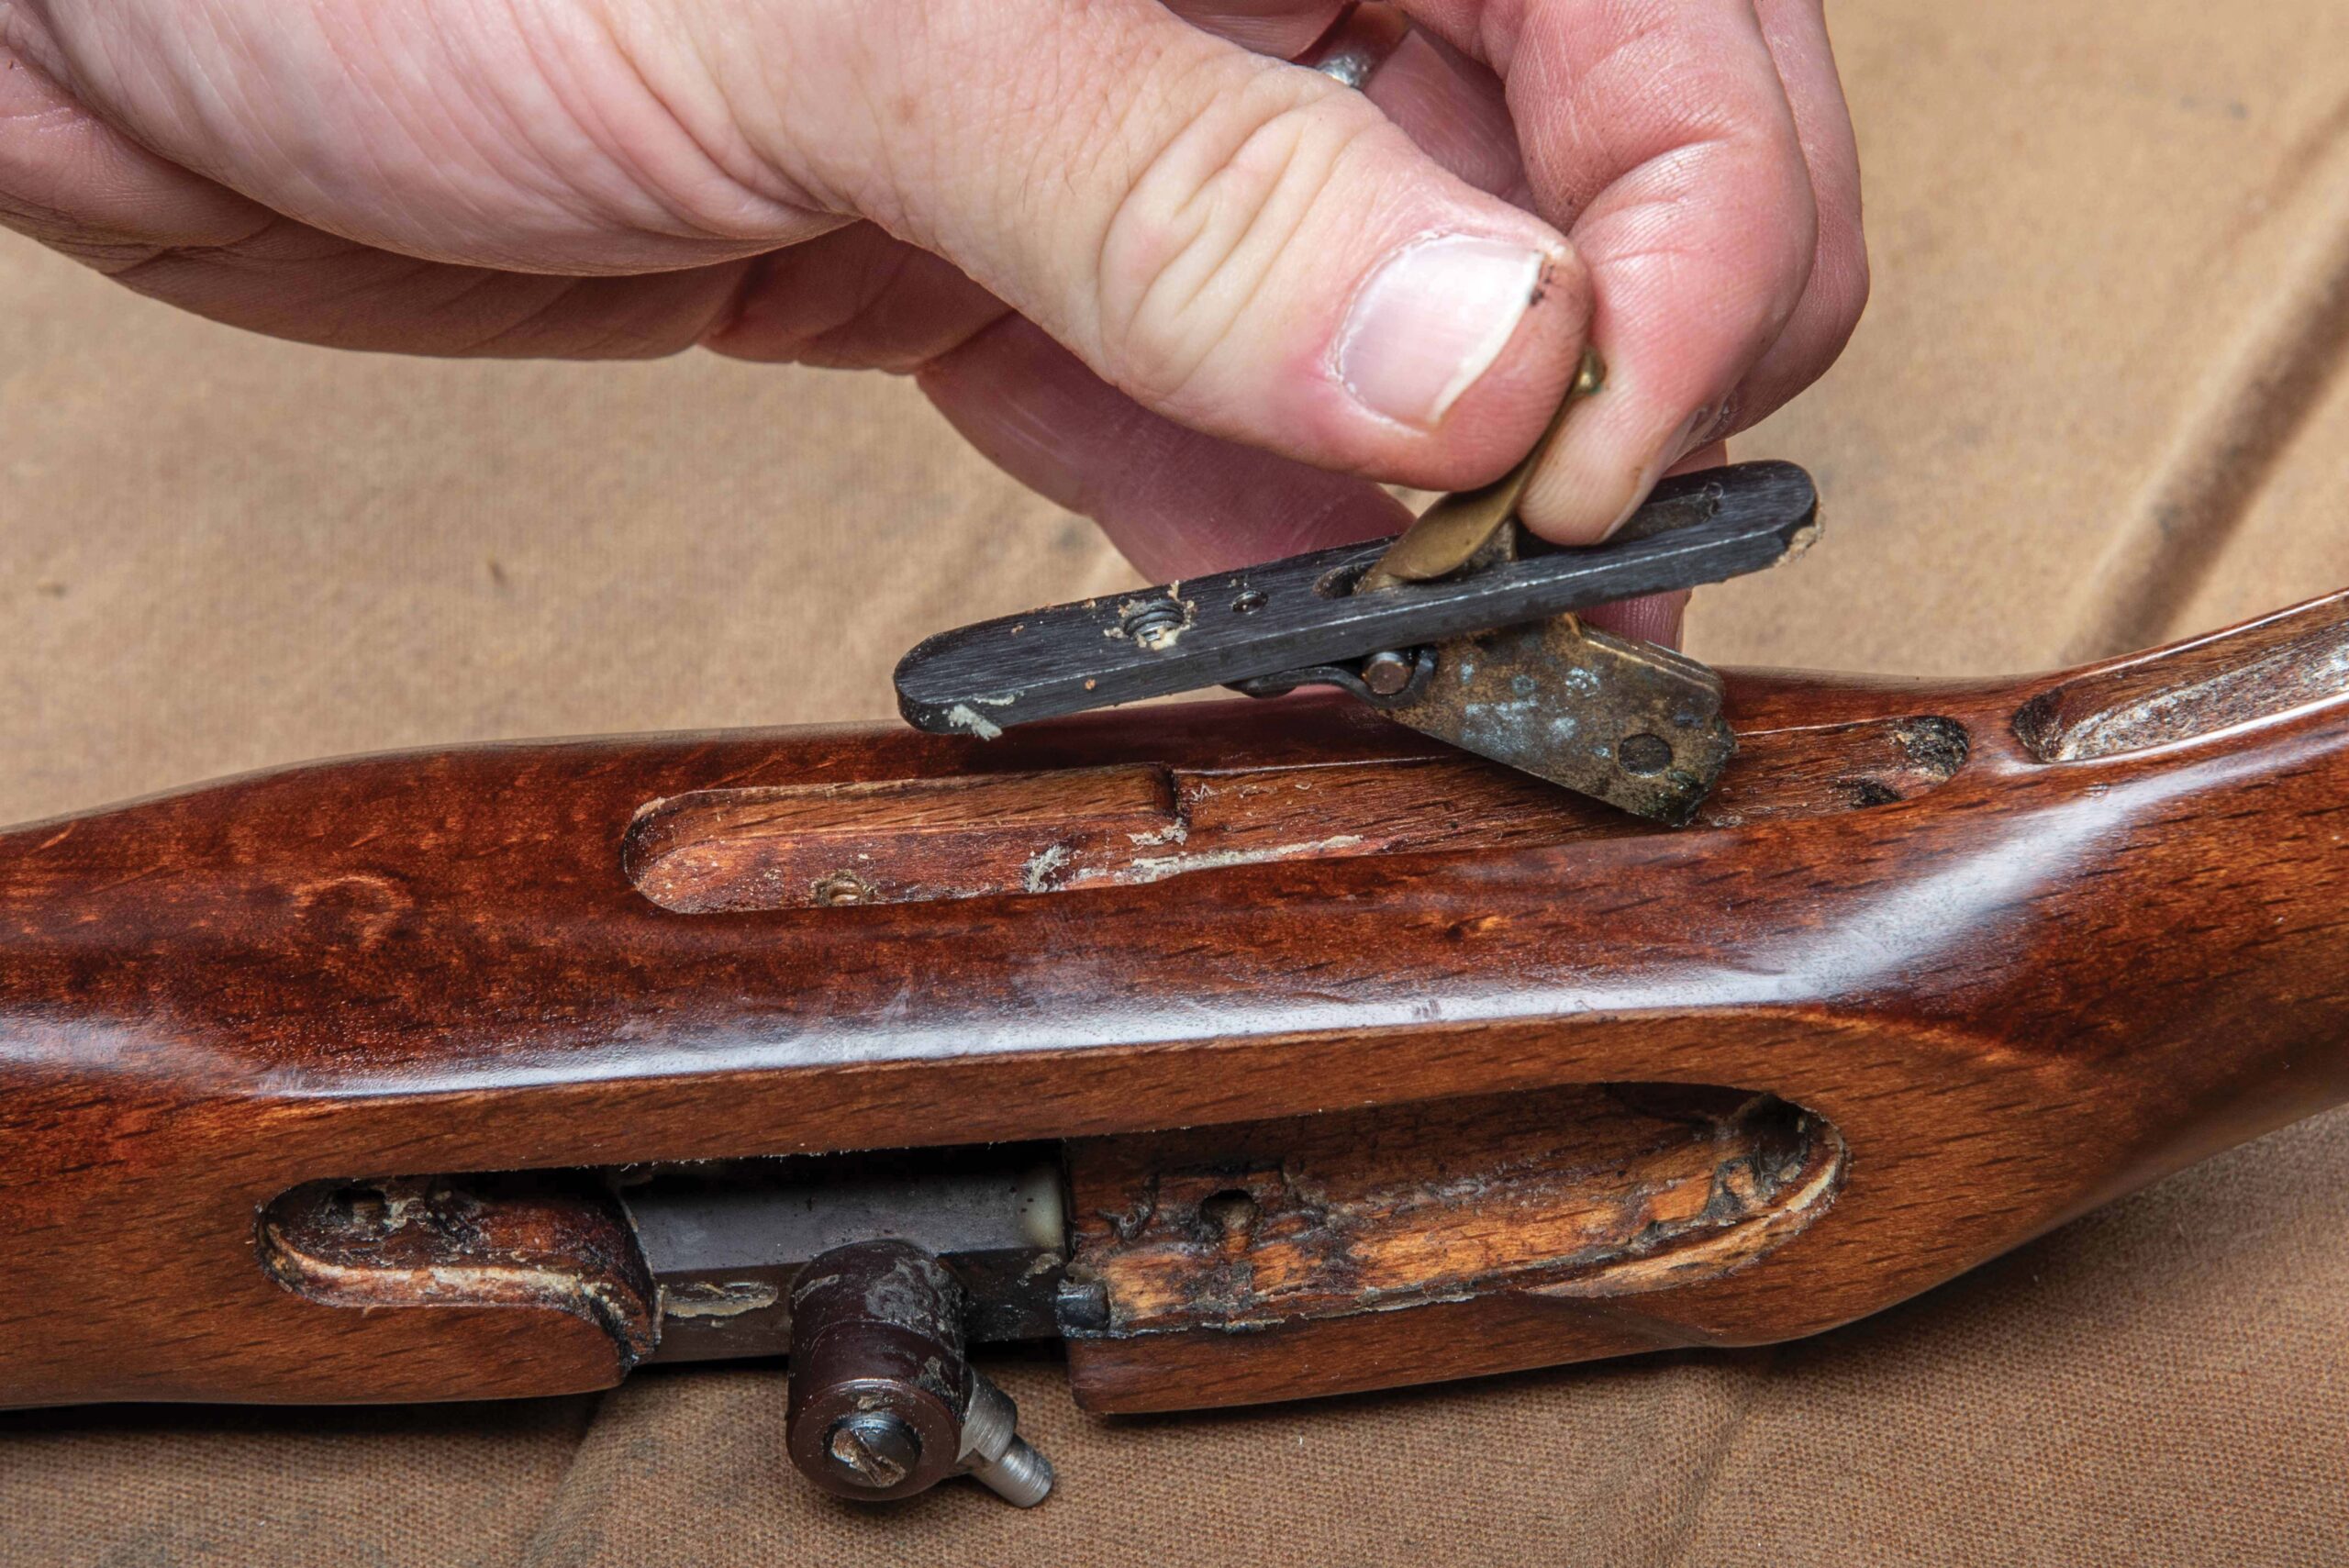
4. The tang screw passes through the tang, through the stock, and into the trigger assembly, securing both the tang and the trigger to the stock.
5. Remove the tang screw and remove the trigger assembly from the stock.

We’re going to show you how to disassemble a sidelock for cleaning. This is a Kentucky-style rifle made from a Traditions DIY kit six or seven years ago and it has never been taken apart since it was built. High time it was, and since most percussion cap and flintlock muzzleloaders are similarly built, it is a good representation of what you’ll find in most sidelock rifles.

A Deep Dive Into Muzzleloader Maintenance
6. If your rifle is a percussion cap, use a nipple wrench to unscrew the nipple from the bolster.
A Deep Dive Into Muzzleloader Maintenance
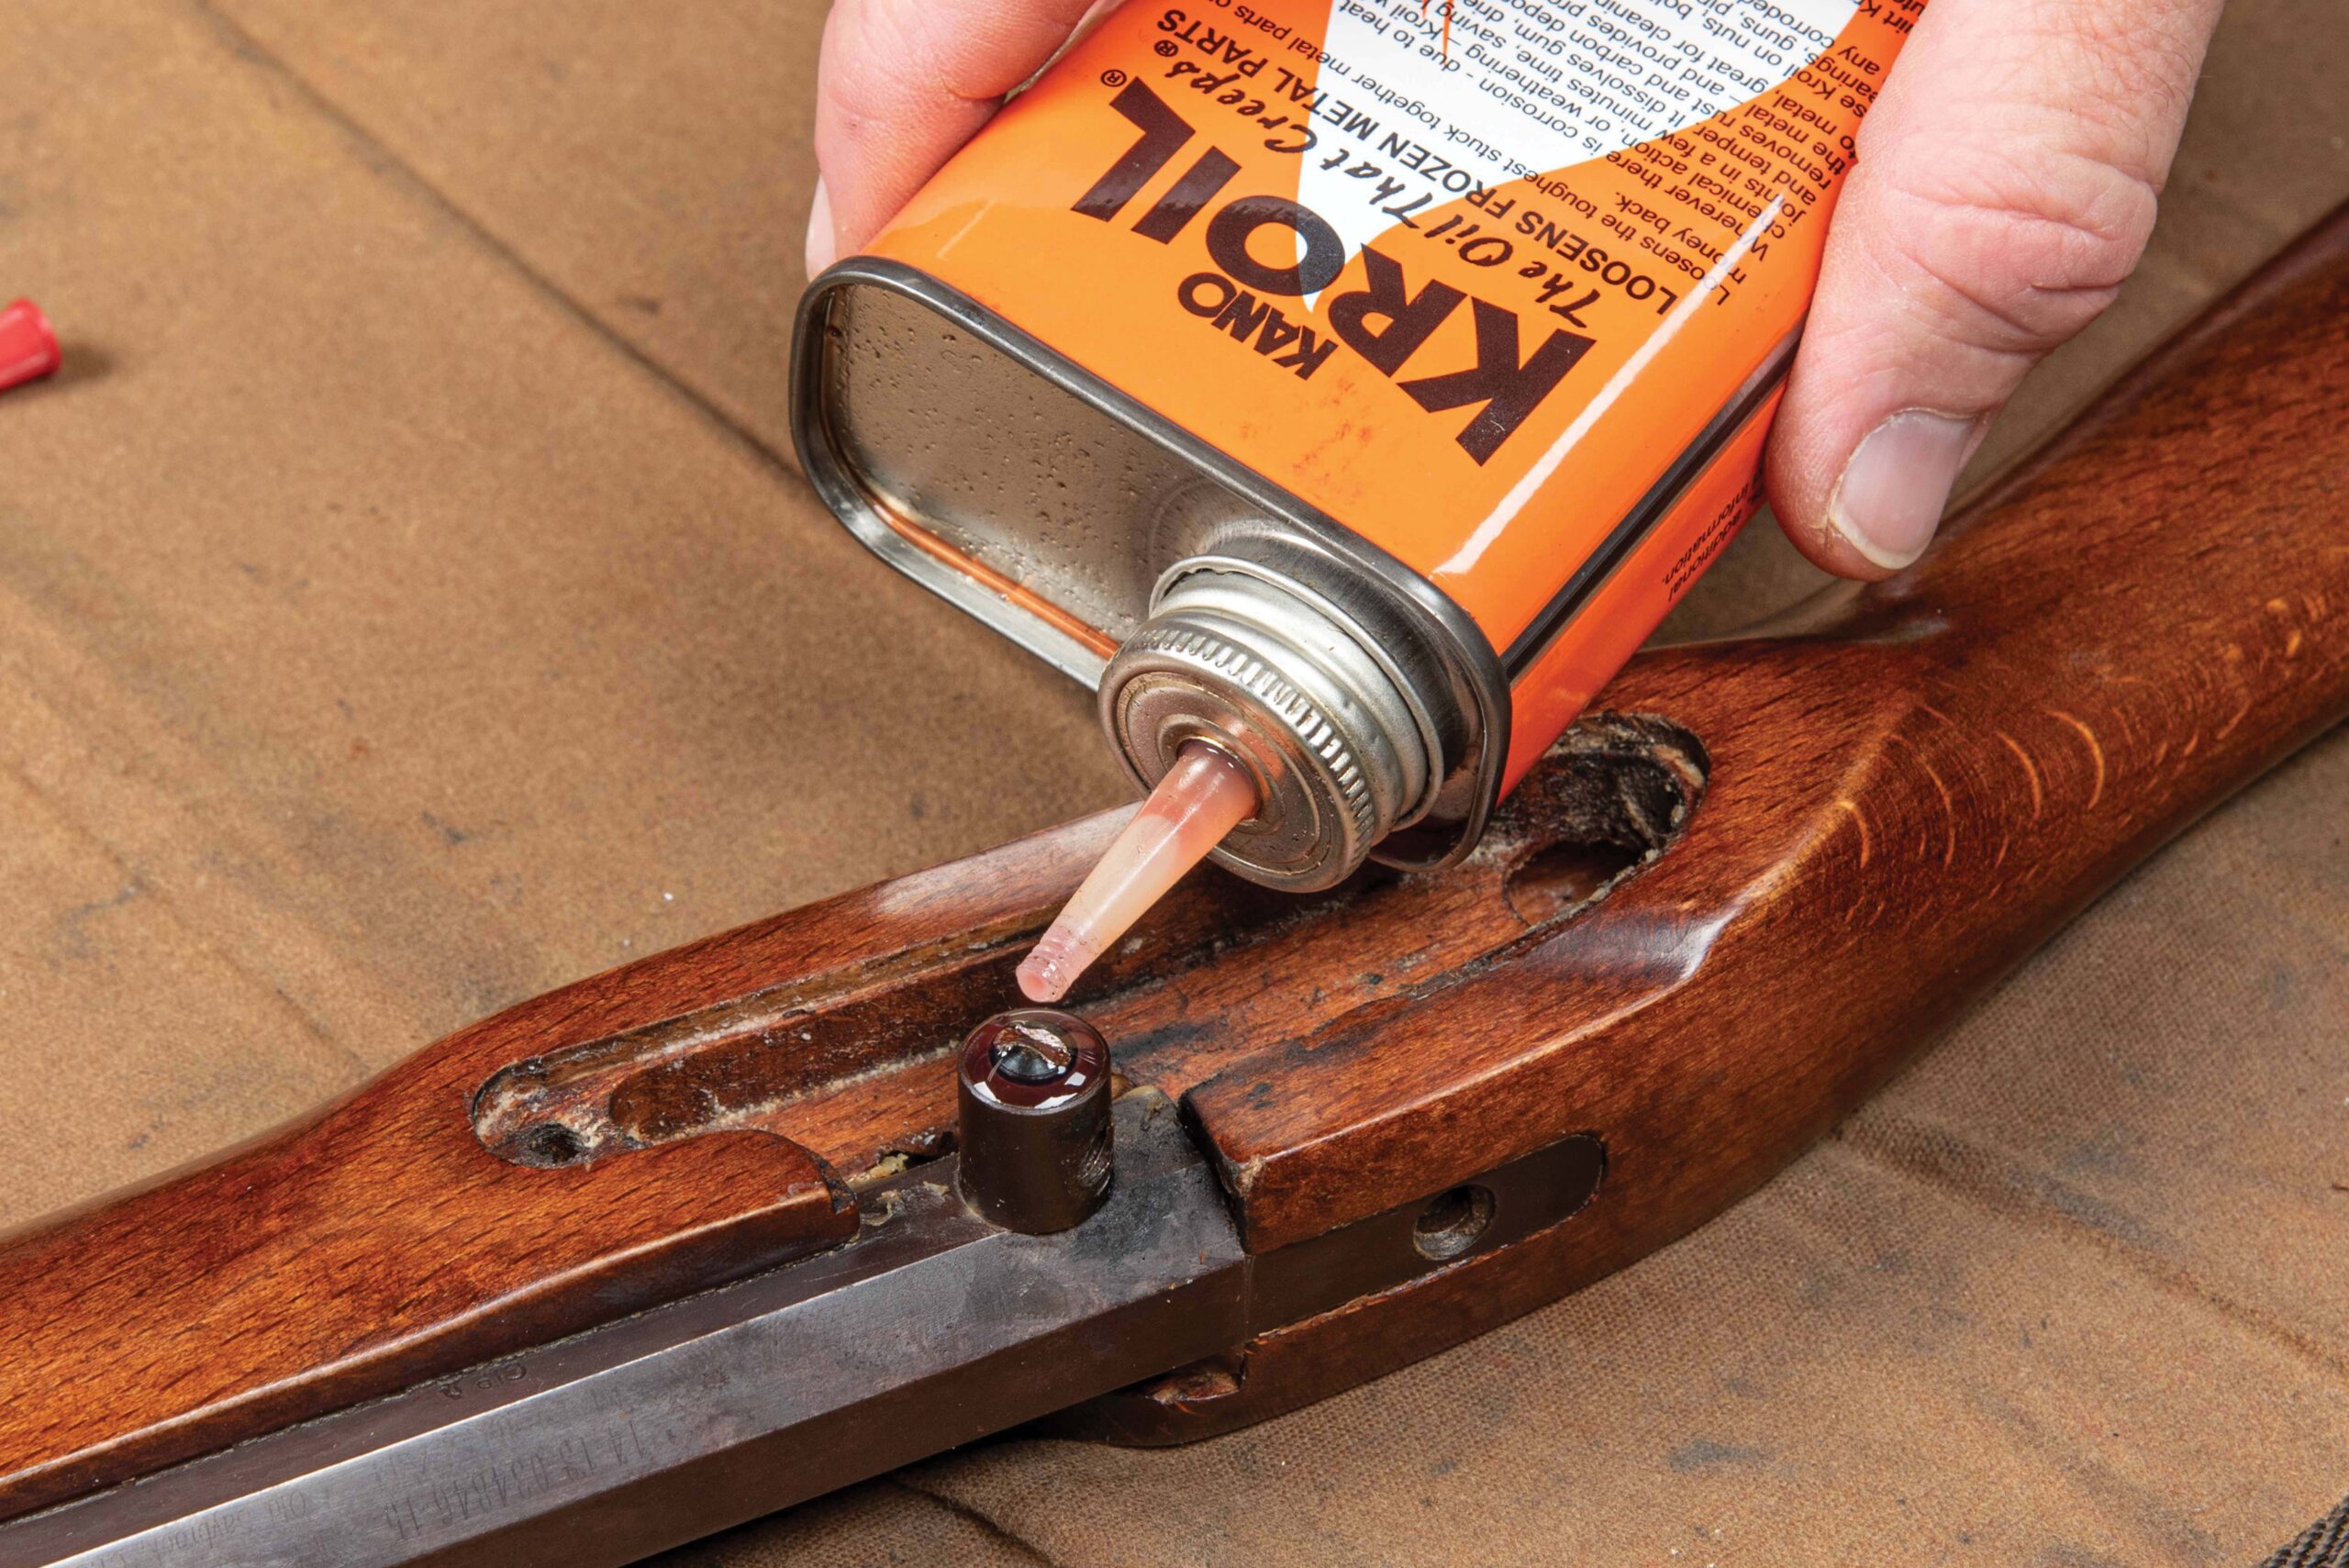
7. The bolster screw can sometimes be a tough one to get out if you don’t clean and lubricate it each time you clean the barrel. If yours is on tight and possibly corroded in the threads, apply some Kroil and allow it time to seep in and loosen the screw.
A Deep Dive Into Muzzleloader Maintenance
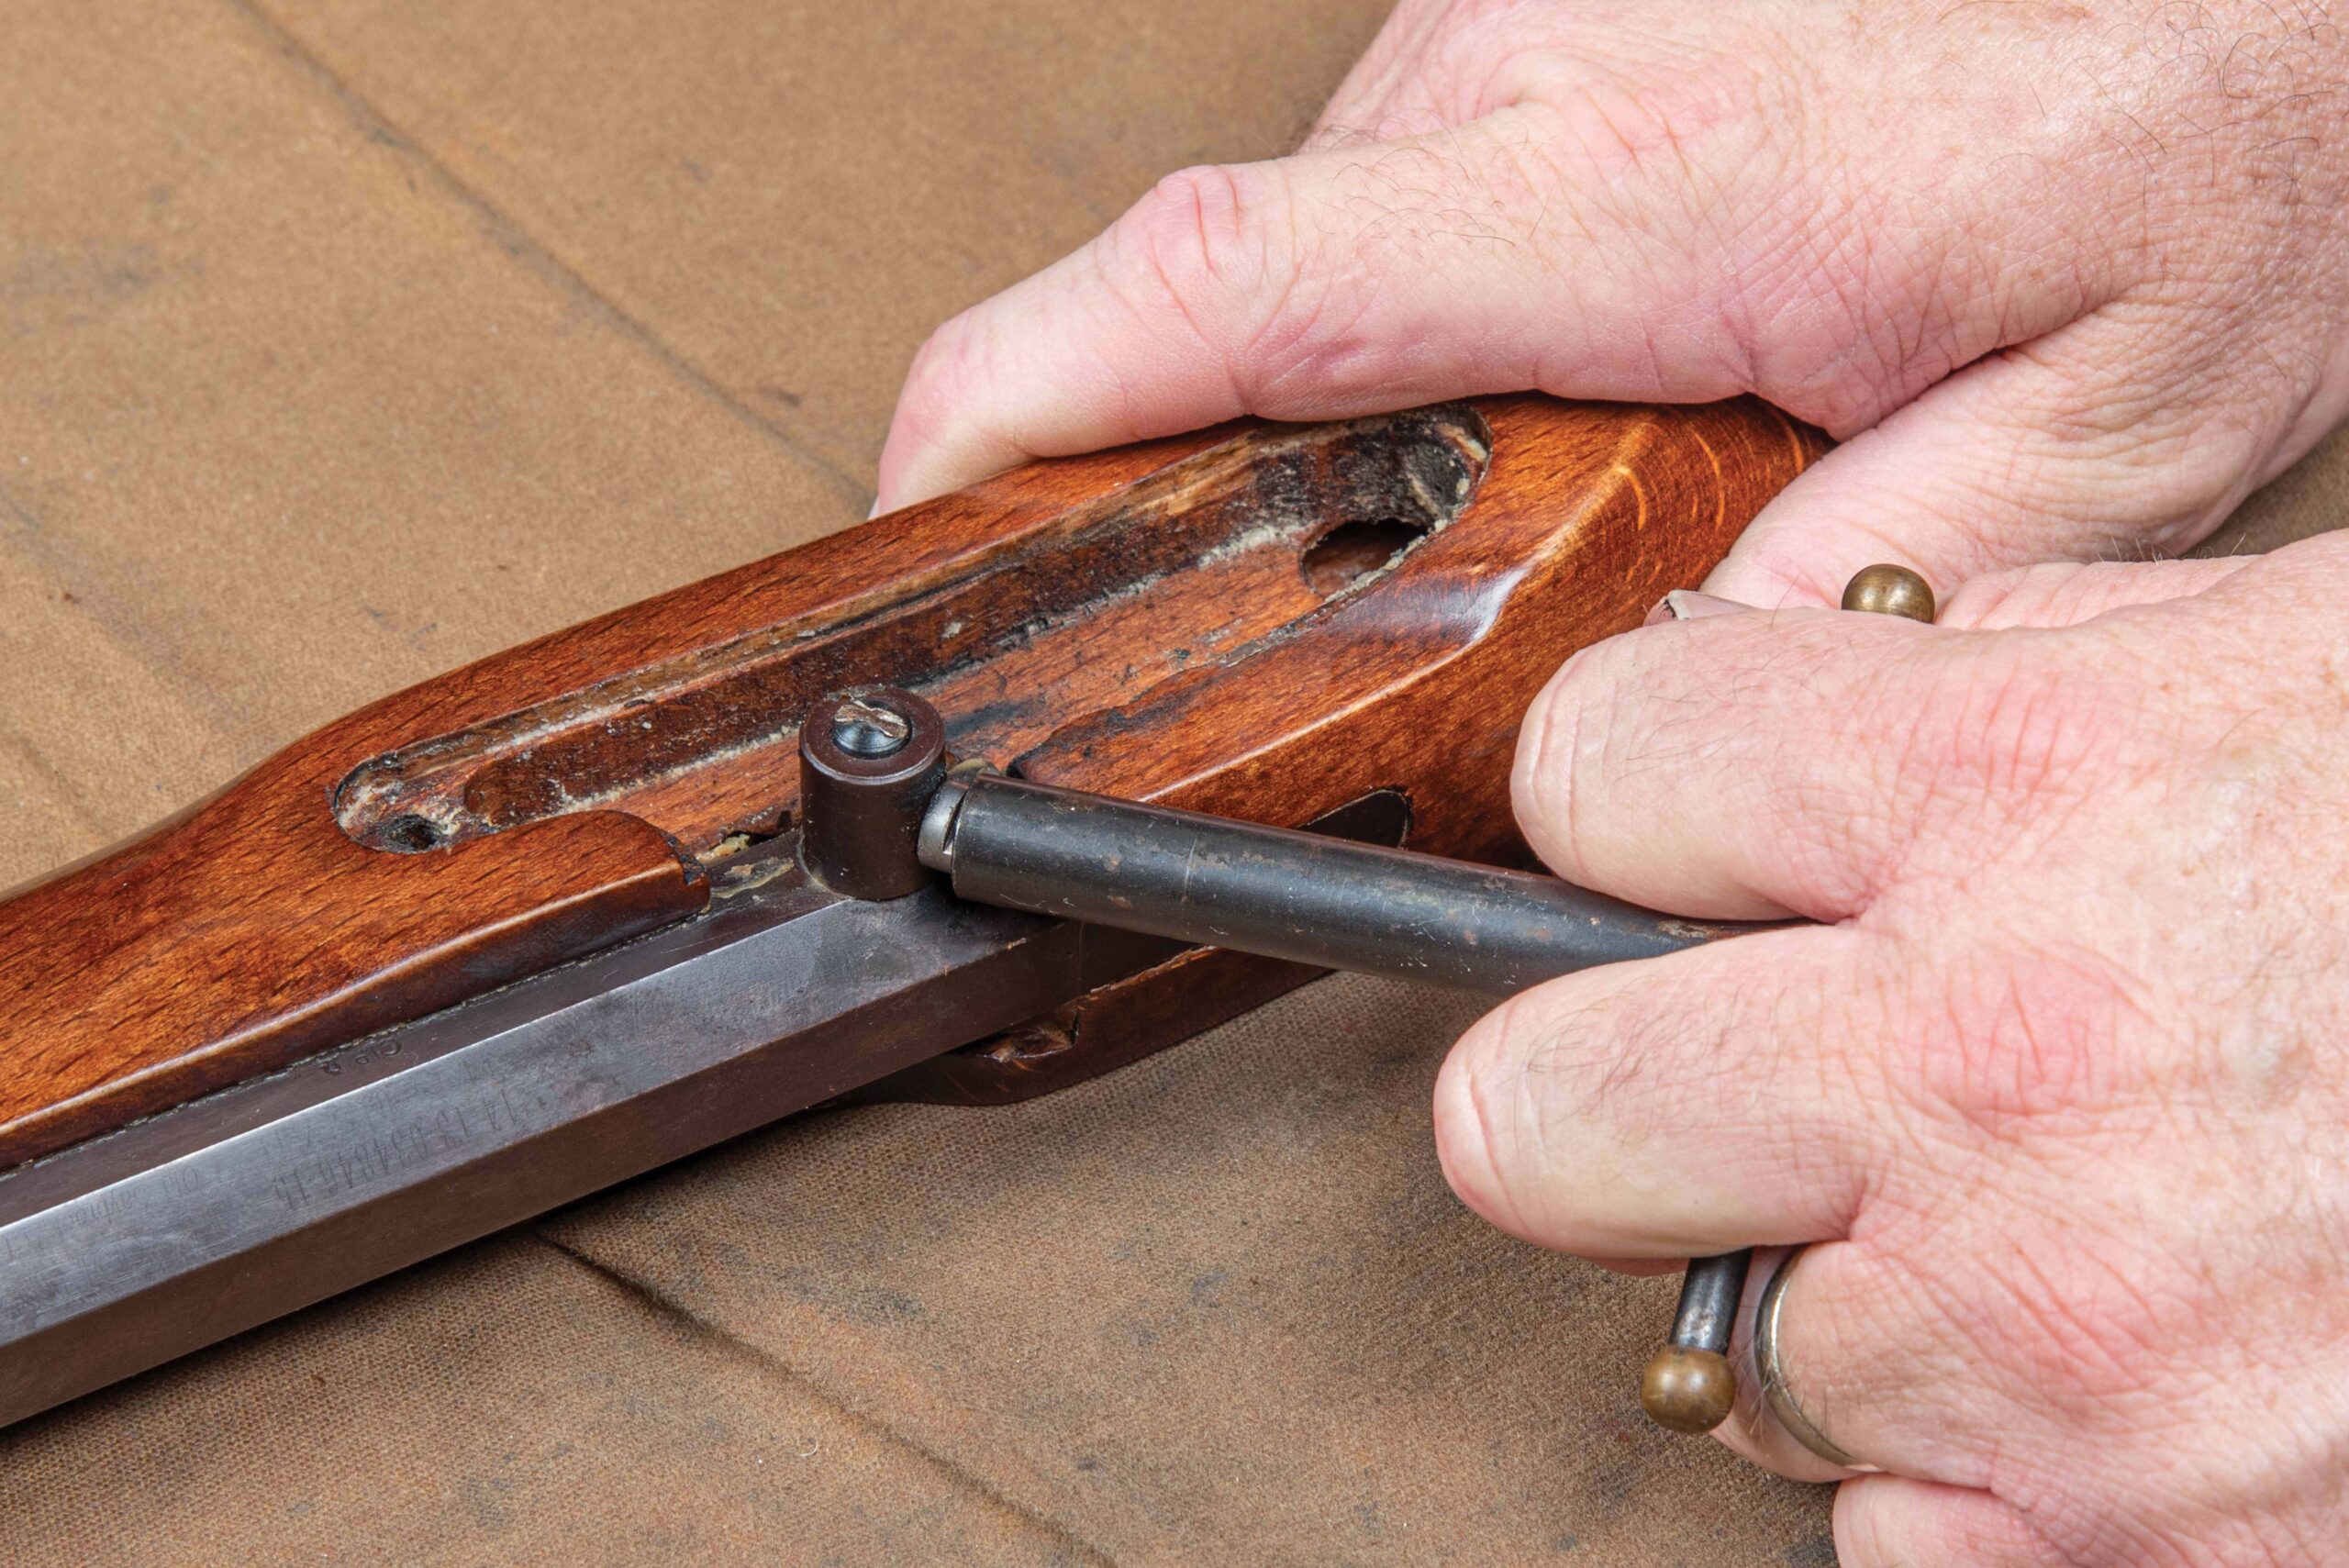
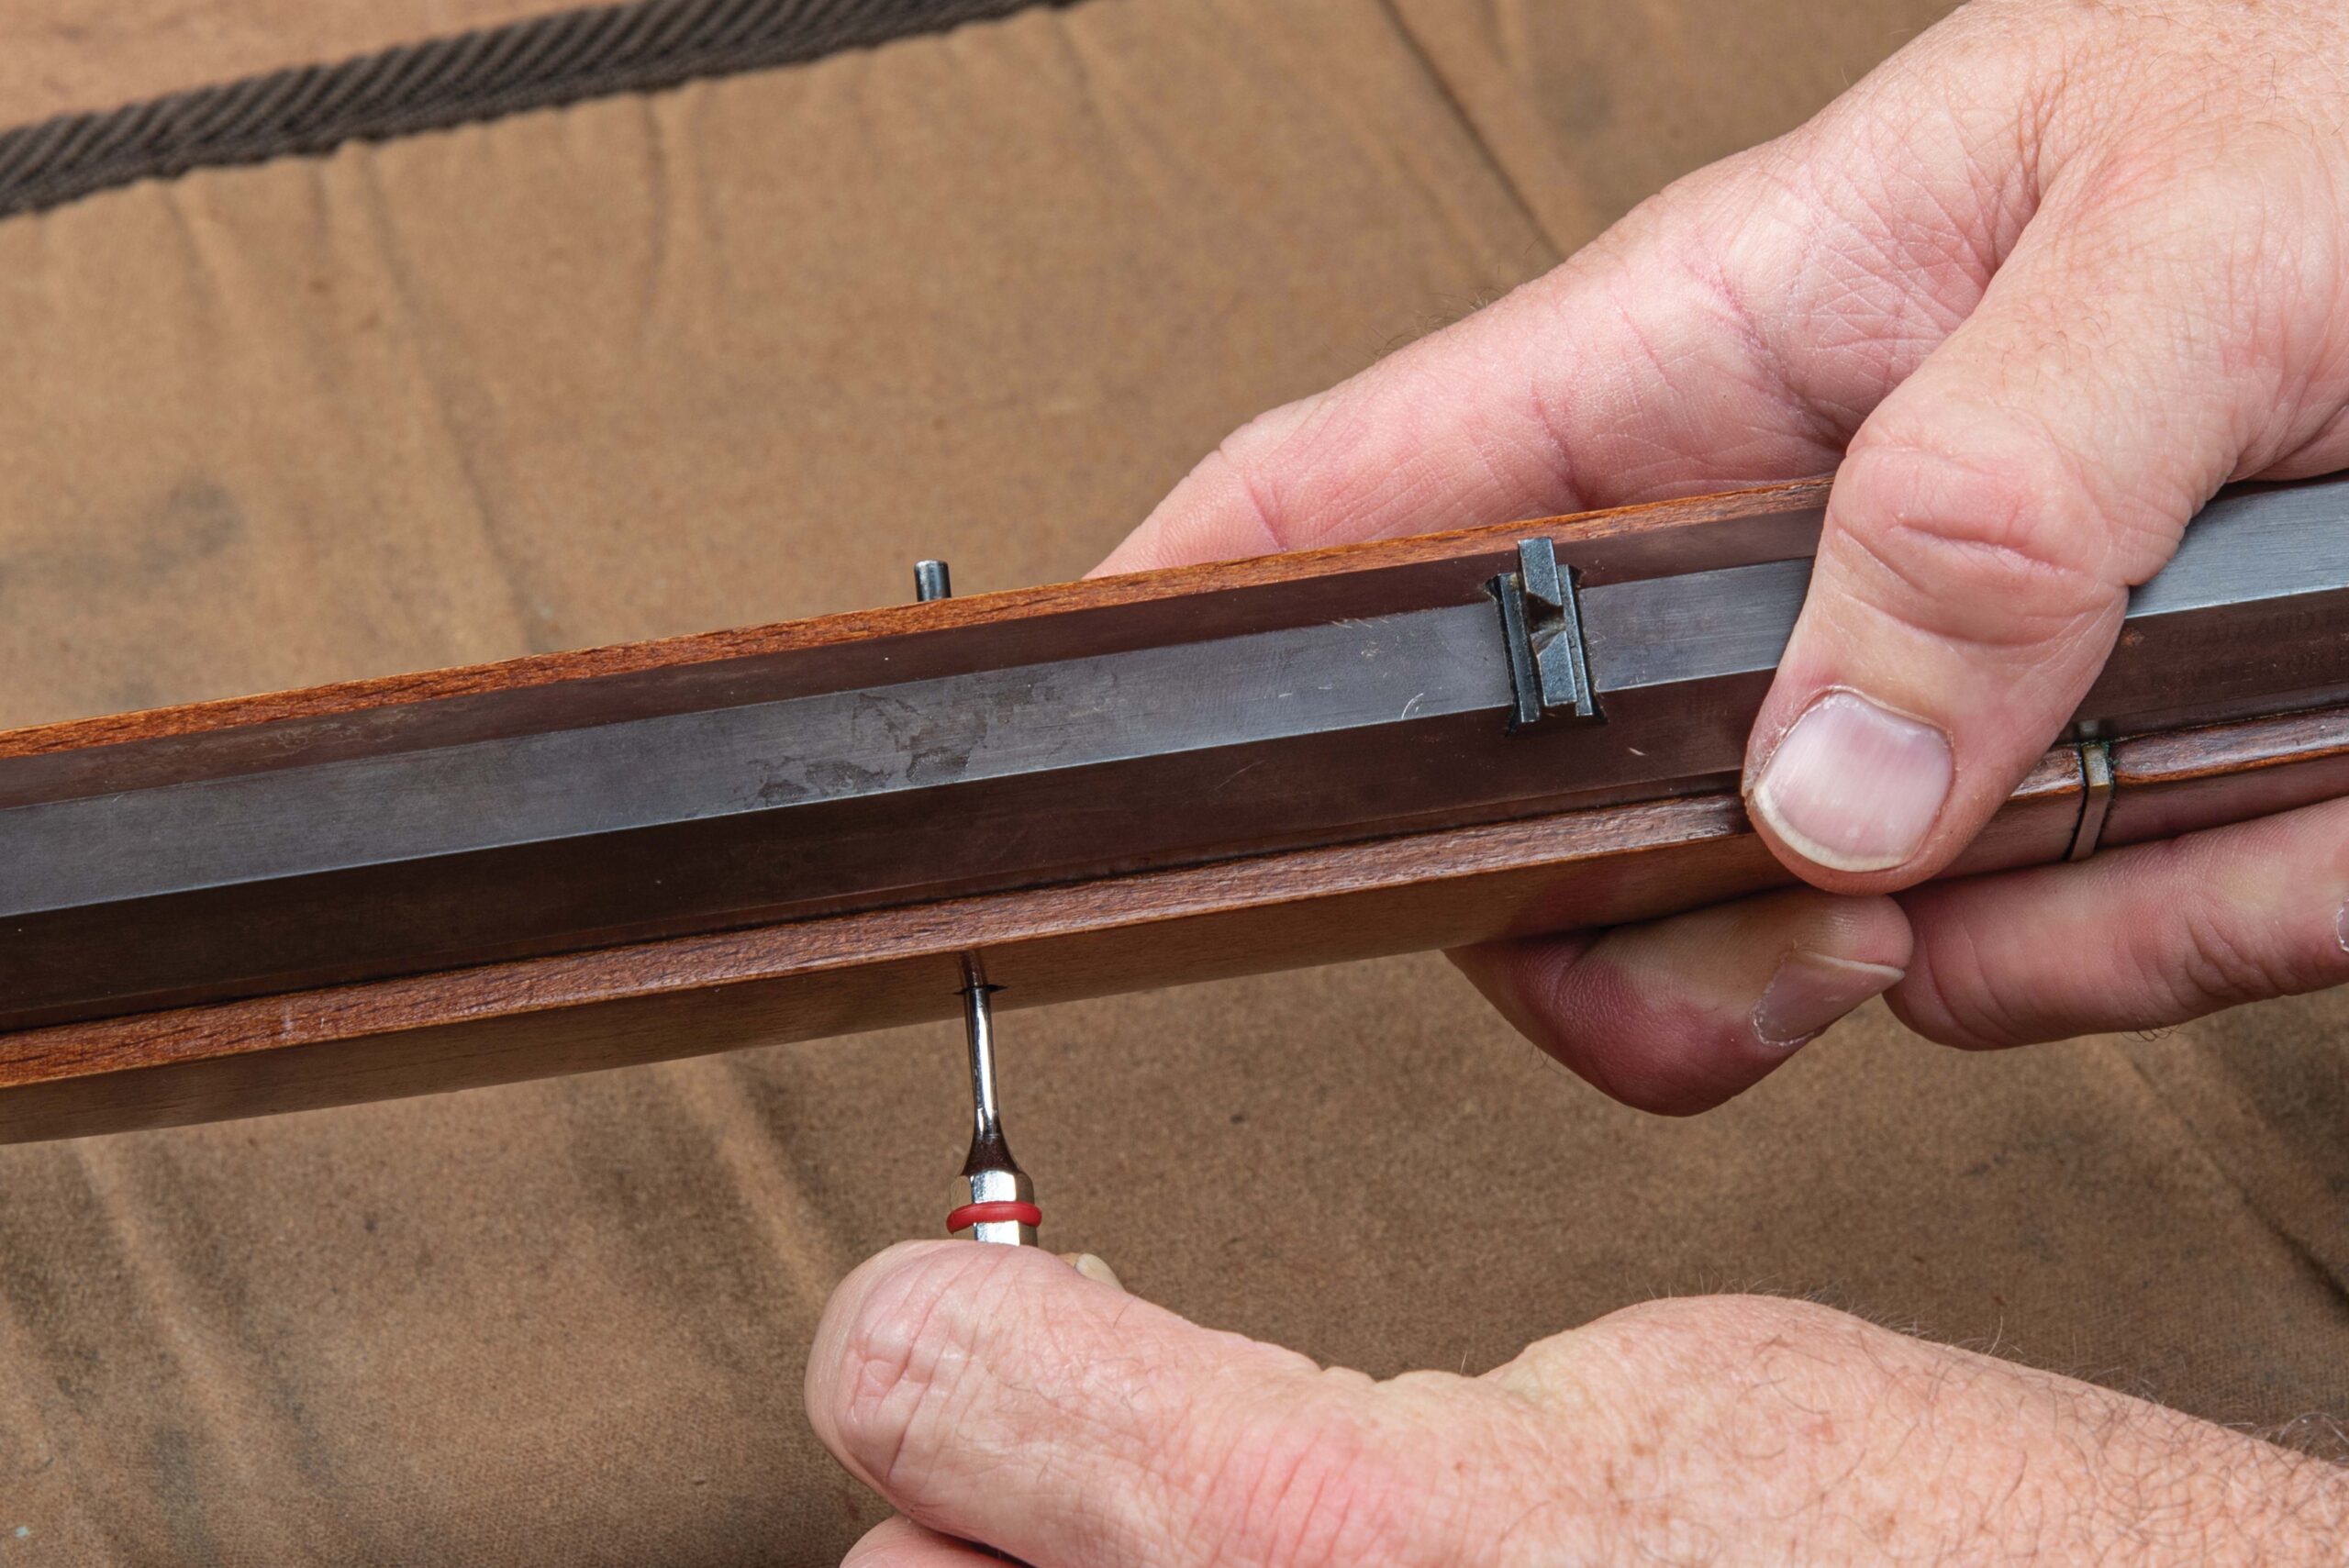
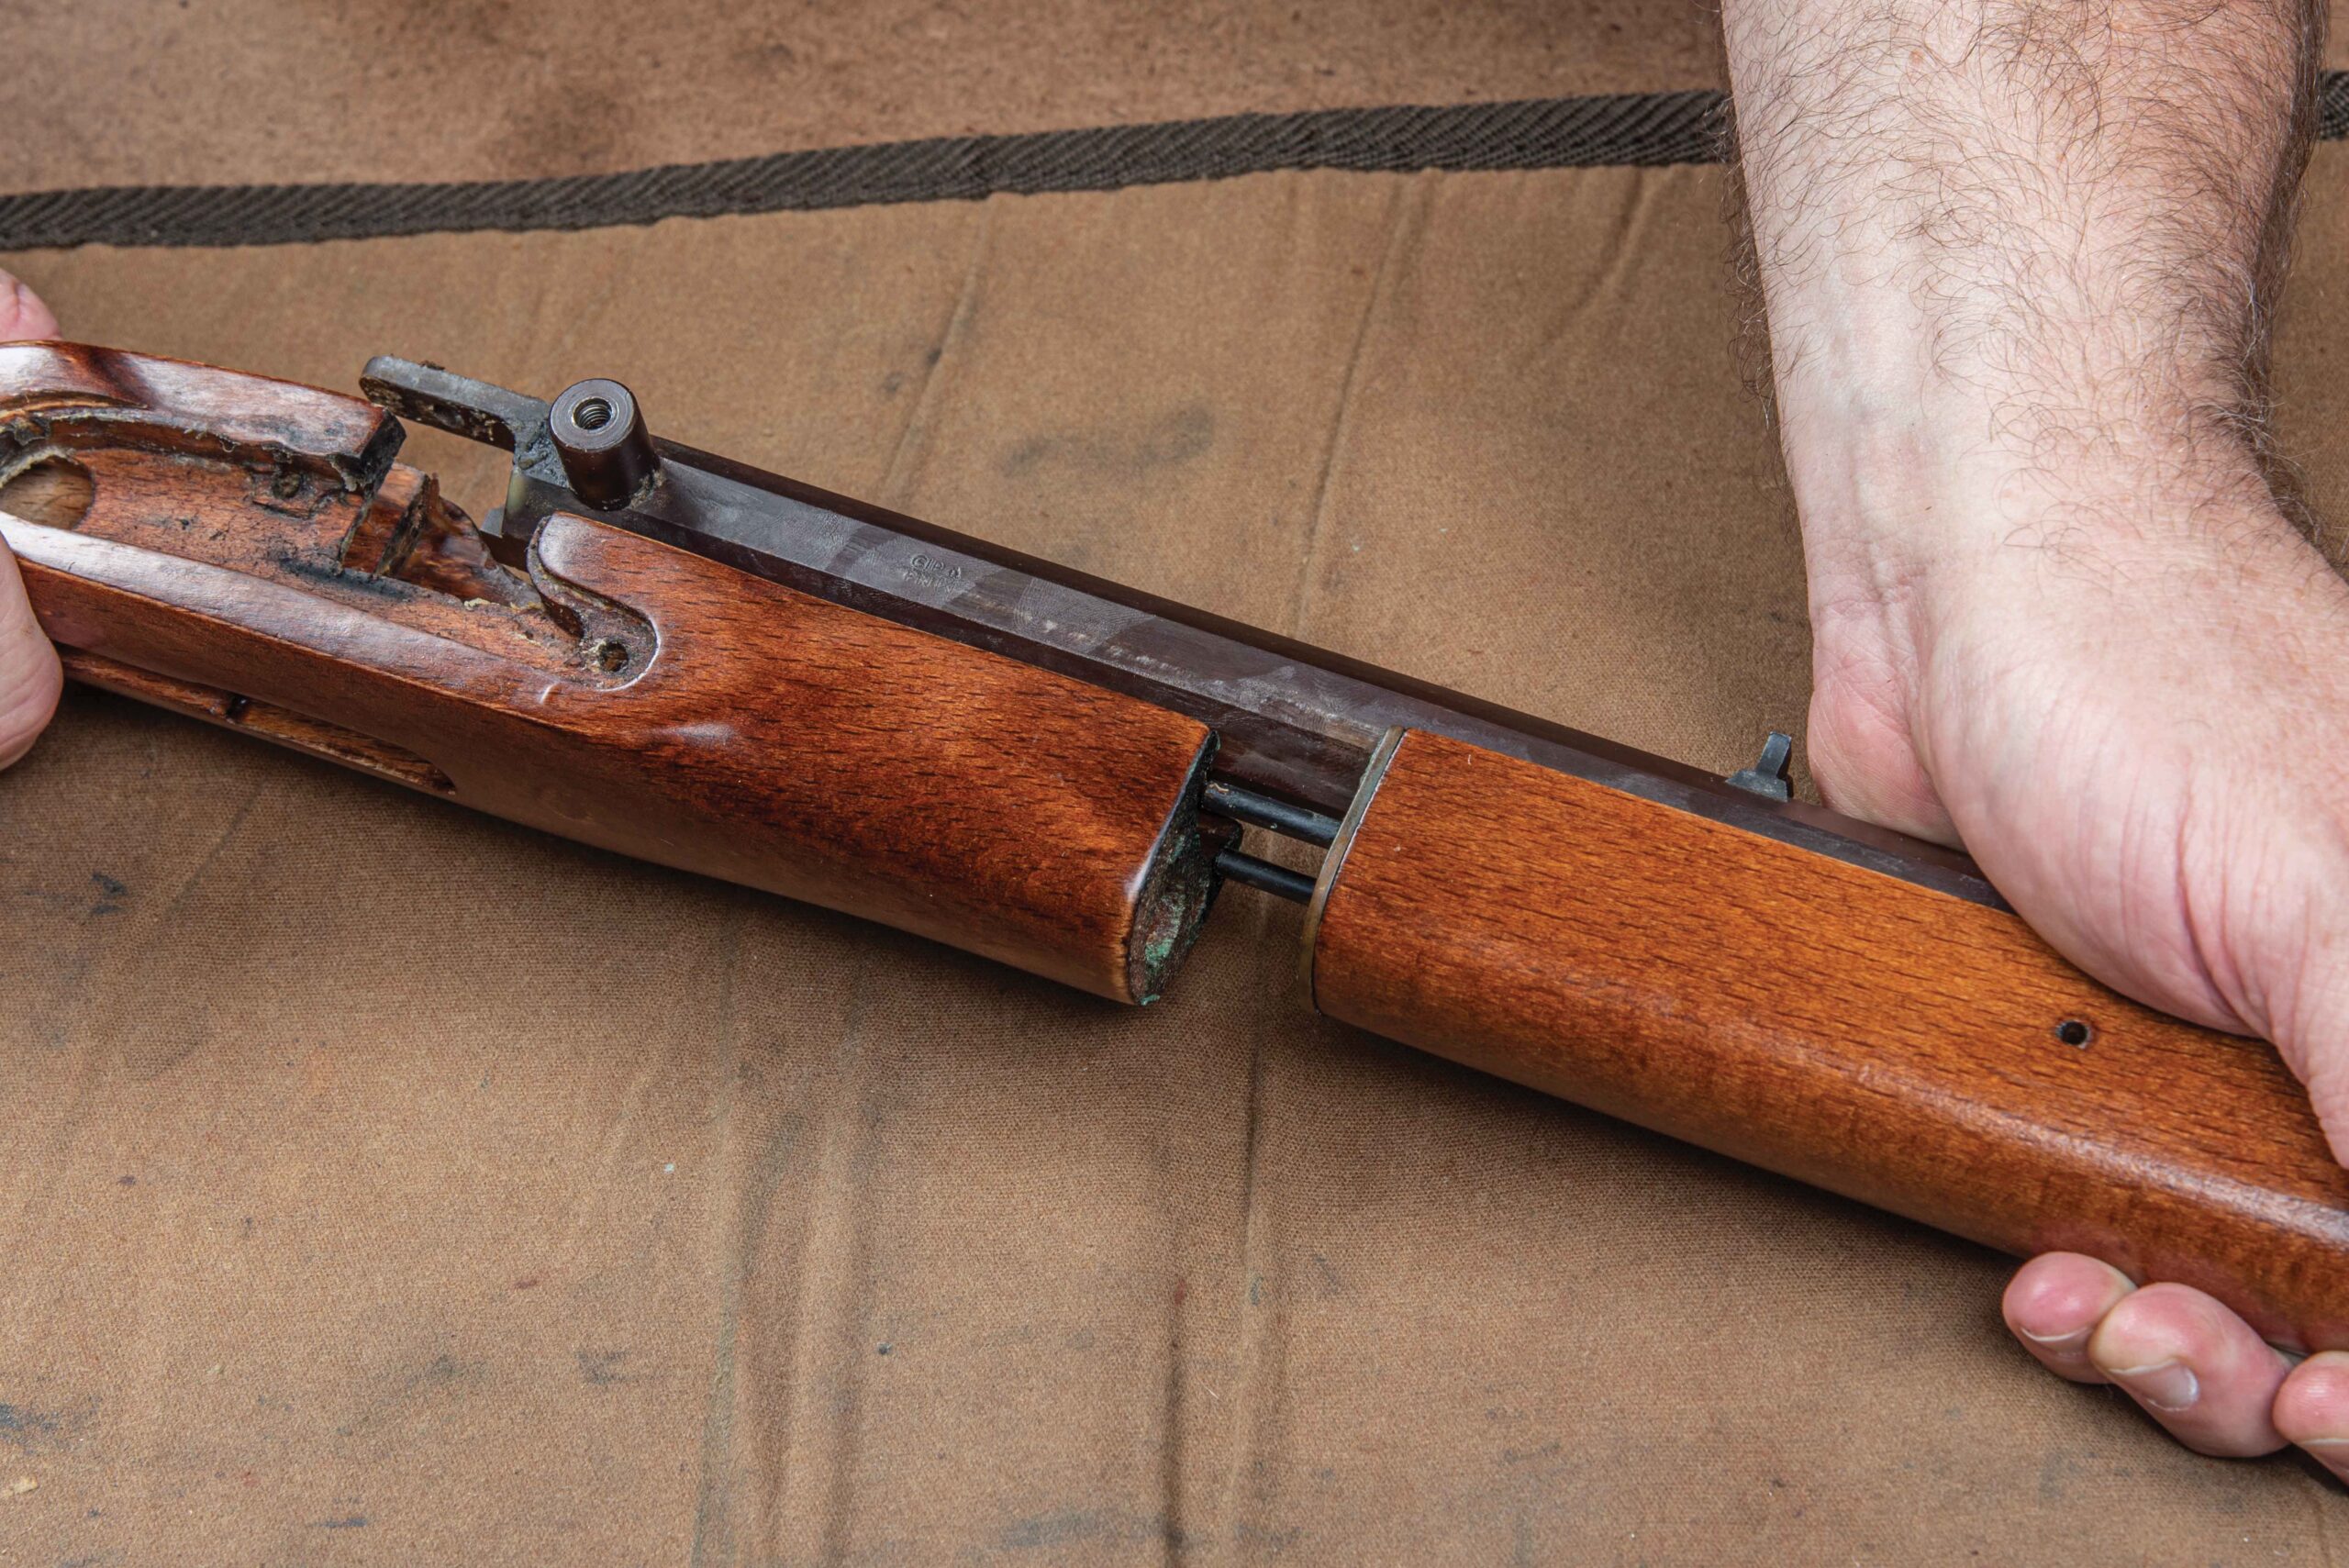
8. Kentucky-style rifles utilize tenons and tenon pins to secure the barrel to the forestock. Keep removal of these to a minimum to prevent wearing out the pins and holes. If you do remove the barrel, push the pins out from left to right with a punch. Hawken-style rifles use flat tenon pins to secure the barrel and can be removed as needed for barrel cleaning. Whichever style you have, remove the tenon pins to release the barrel from the stock.

Everyone seems to have their own preference when it comes to cleaning a closed-breech rifle barrel. Some feel a cotton patch and bore lubricant is sufficient (it’s not). Others favor solvent and a nylon brush followed by a patch and bore lube. [NOTE: Never use a copper brush in a closed-breech muzzleloader barrel because it will get STUCK!]

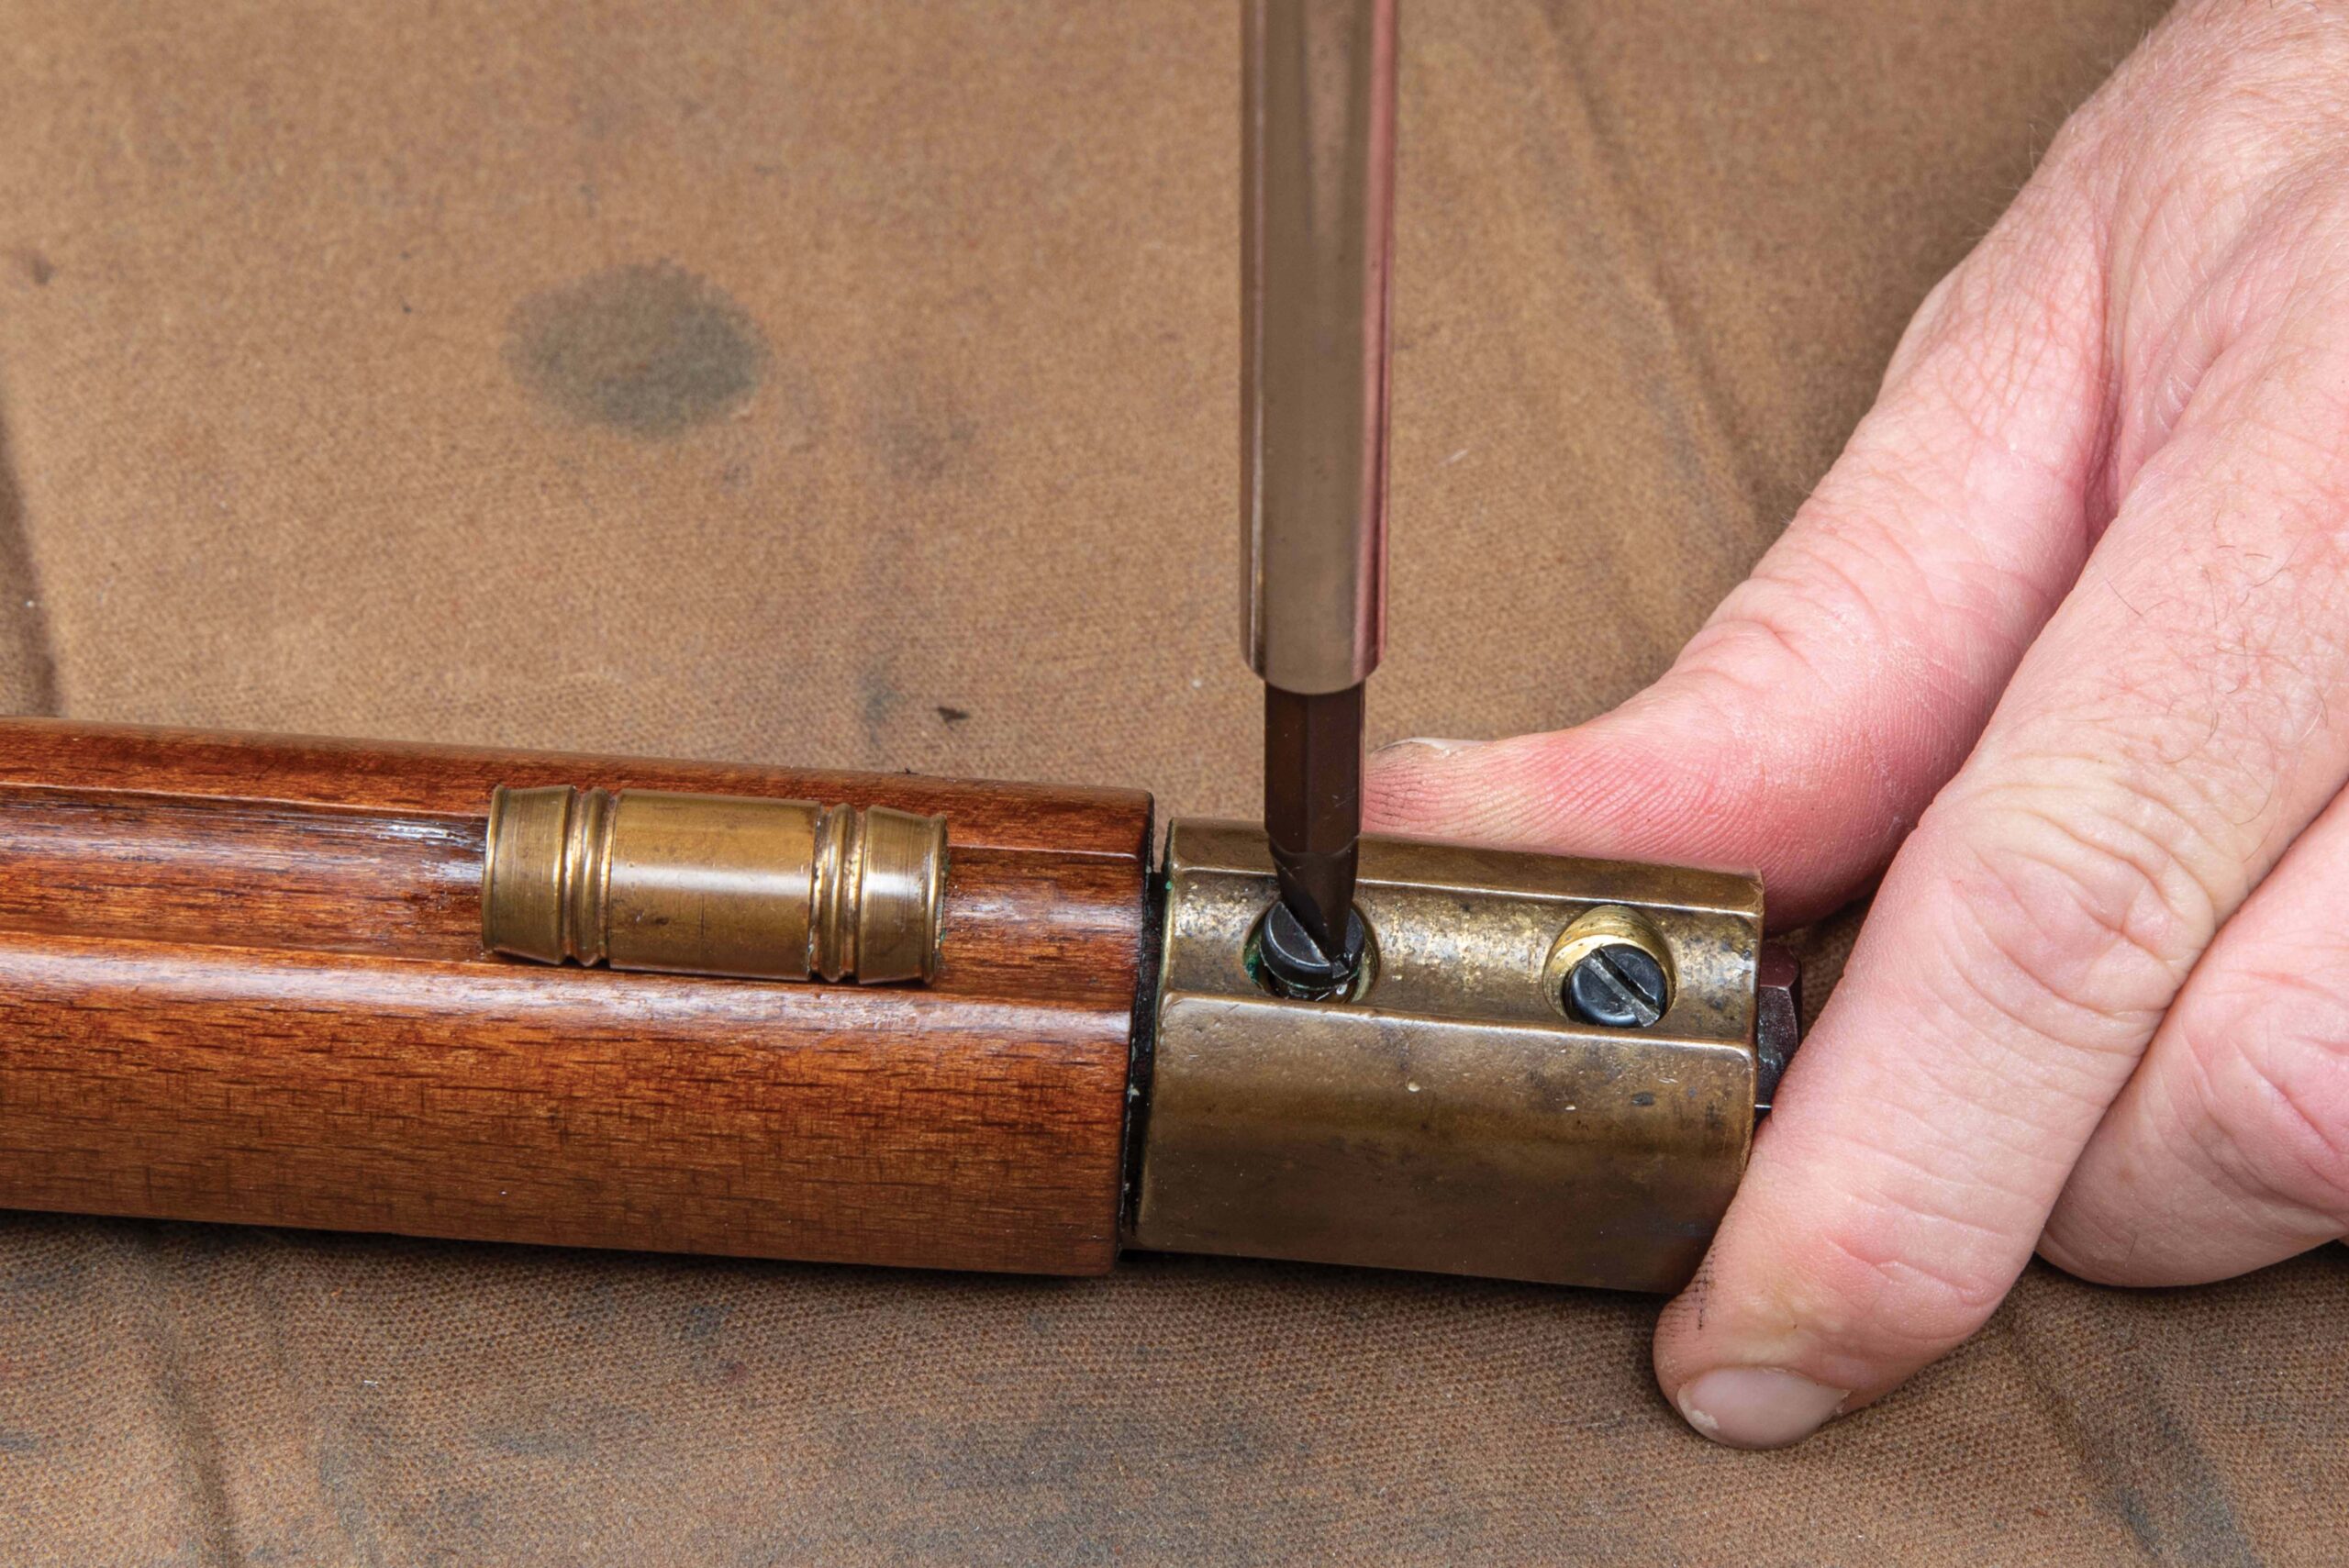
9. The nose cap on this rifle must be removed to separate the stock from the barrel.
A Deep Dive Into Muzzleloader Maintenance
10. This style rifle has a two-piece stock. The forestock should be separated from the buttstock before removing the barrel to prevent bending the stock joining pins or damaging the wood.
A Deep Dive Into Muzzleloader Maintenance
11. Yep, a bit worse than we had imagined. Although this rifle has seen a few deer seasons and its share of foul weather, the amount of rust and grime came as a surprise. This is why it is important to remove your lock and clean it at least once a year.

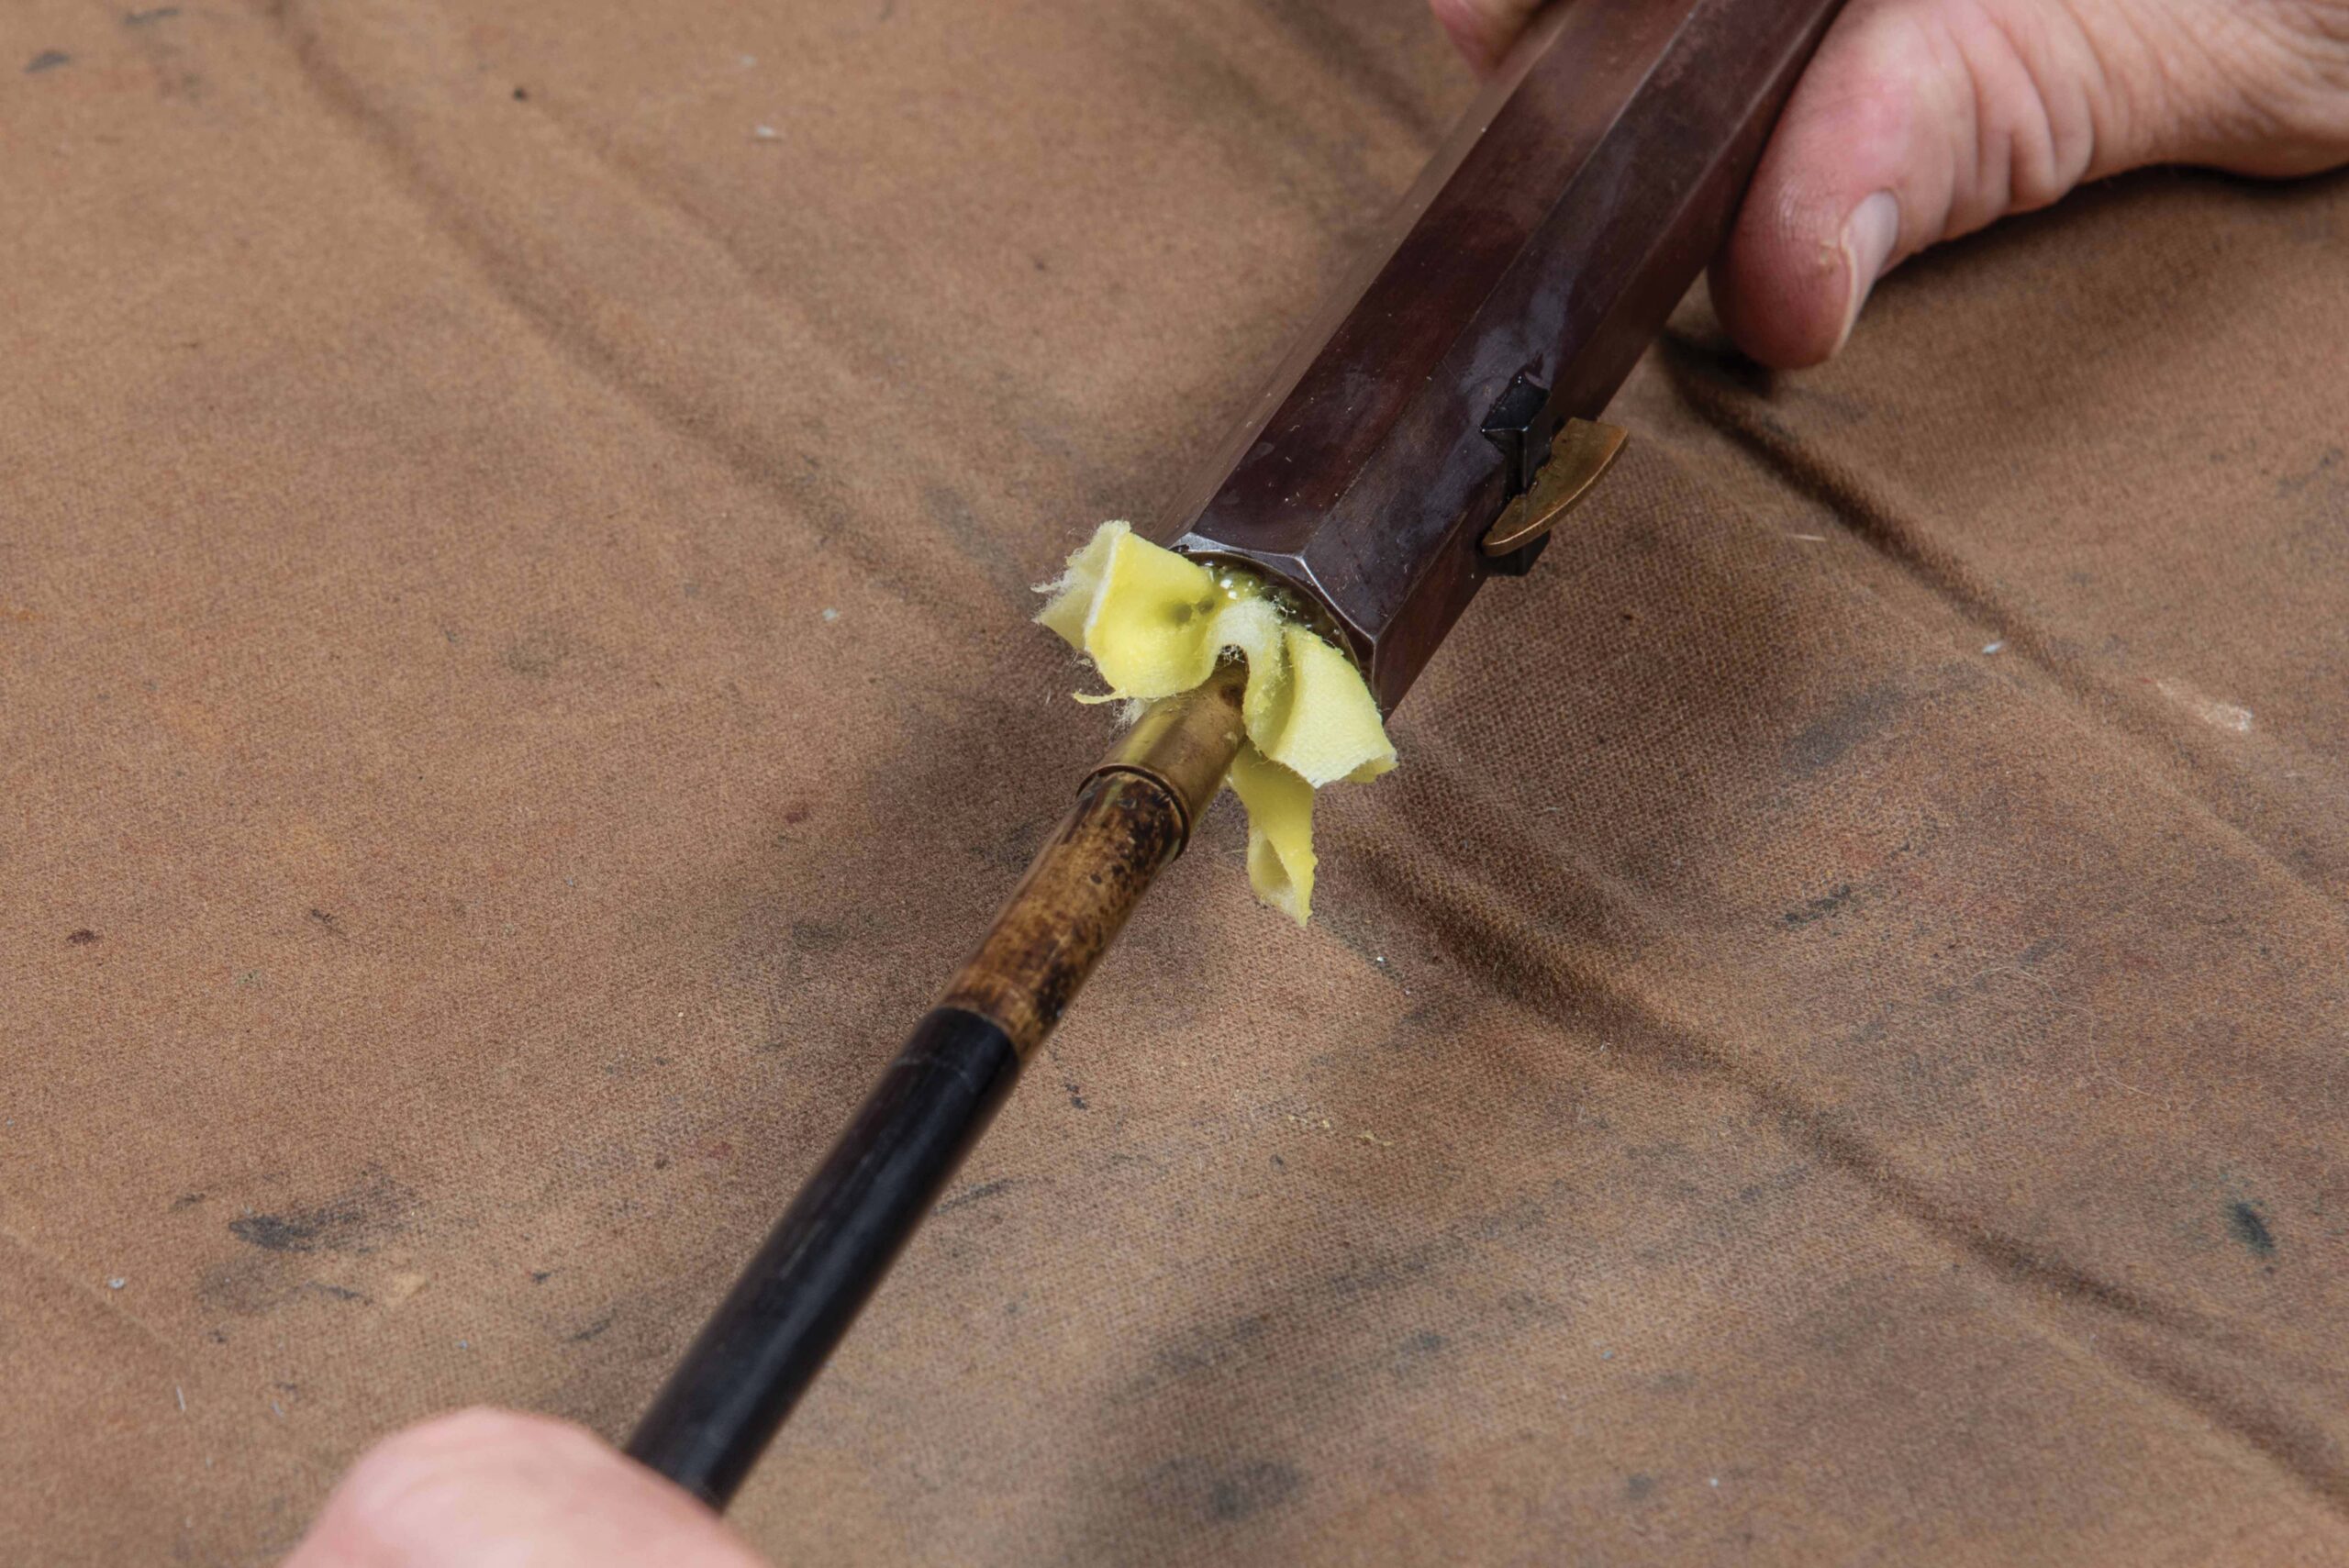
My preferred method is the one used by experienced blackpowder shooters — hot, soapy water. After removing the gross fouling with a couple patches and lube, followed by a patch or two saturated with solvent, my barrel gets a bath. Near-boiling water is funneled into the barrel and allowed to drain into a bucket. The breech end of the barrel is then placed in a bucket with hot, soapy water (dish liquid works well). There needs to be enough water to cover the bolster. Next, I screw a mop onto the end of the ramrod and go to town. Raising the wet mop up and down will hydraulically lift the water up the bore. I will scrub up and down like this for several minutes, change the dirty soapy water with fresh, and repeat until the water is clear.

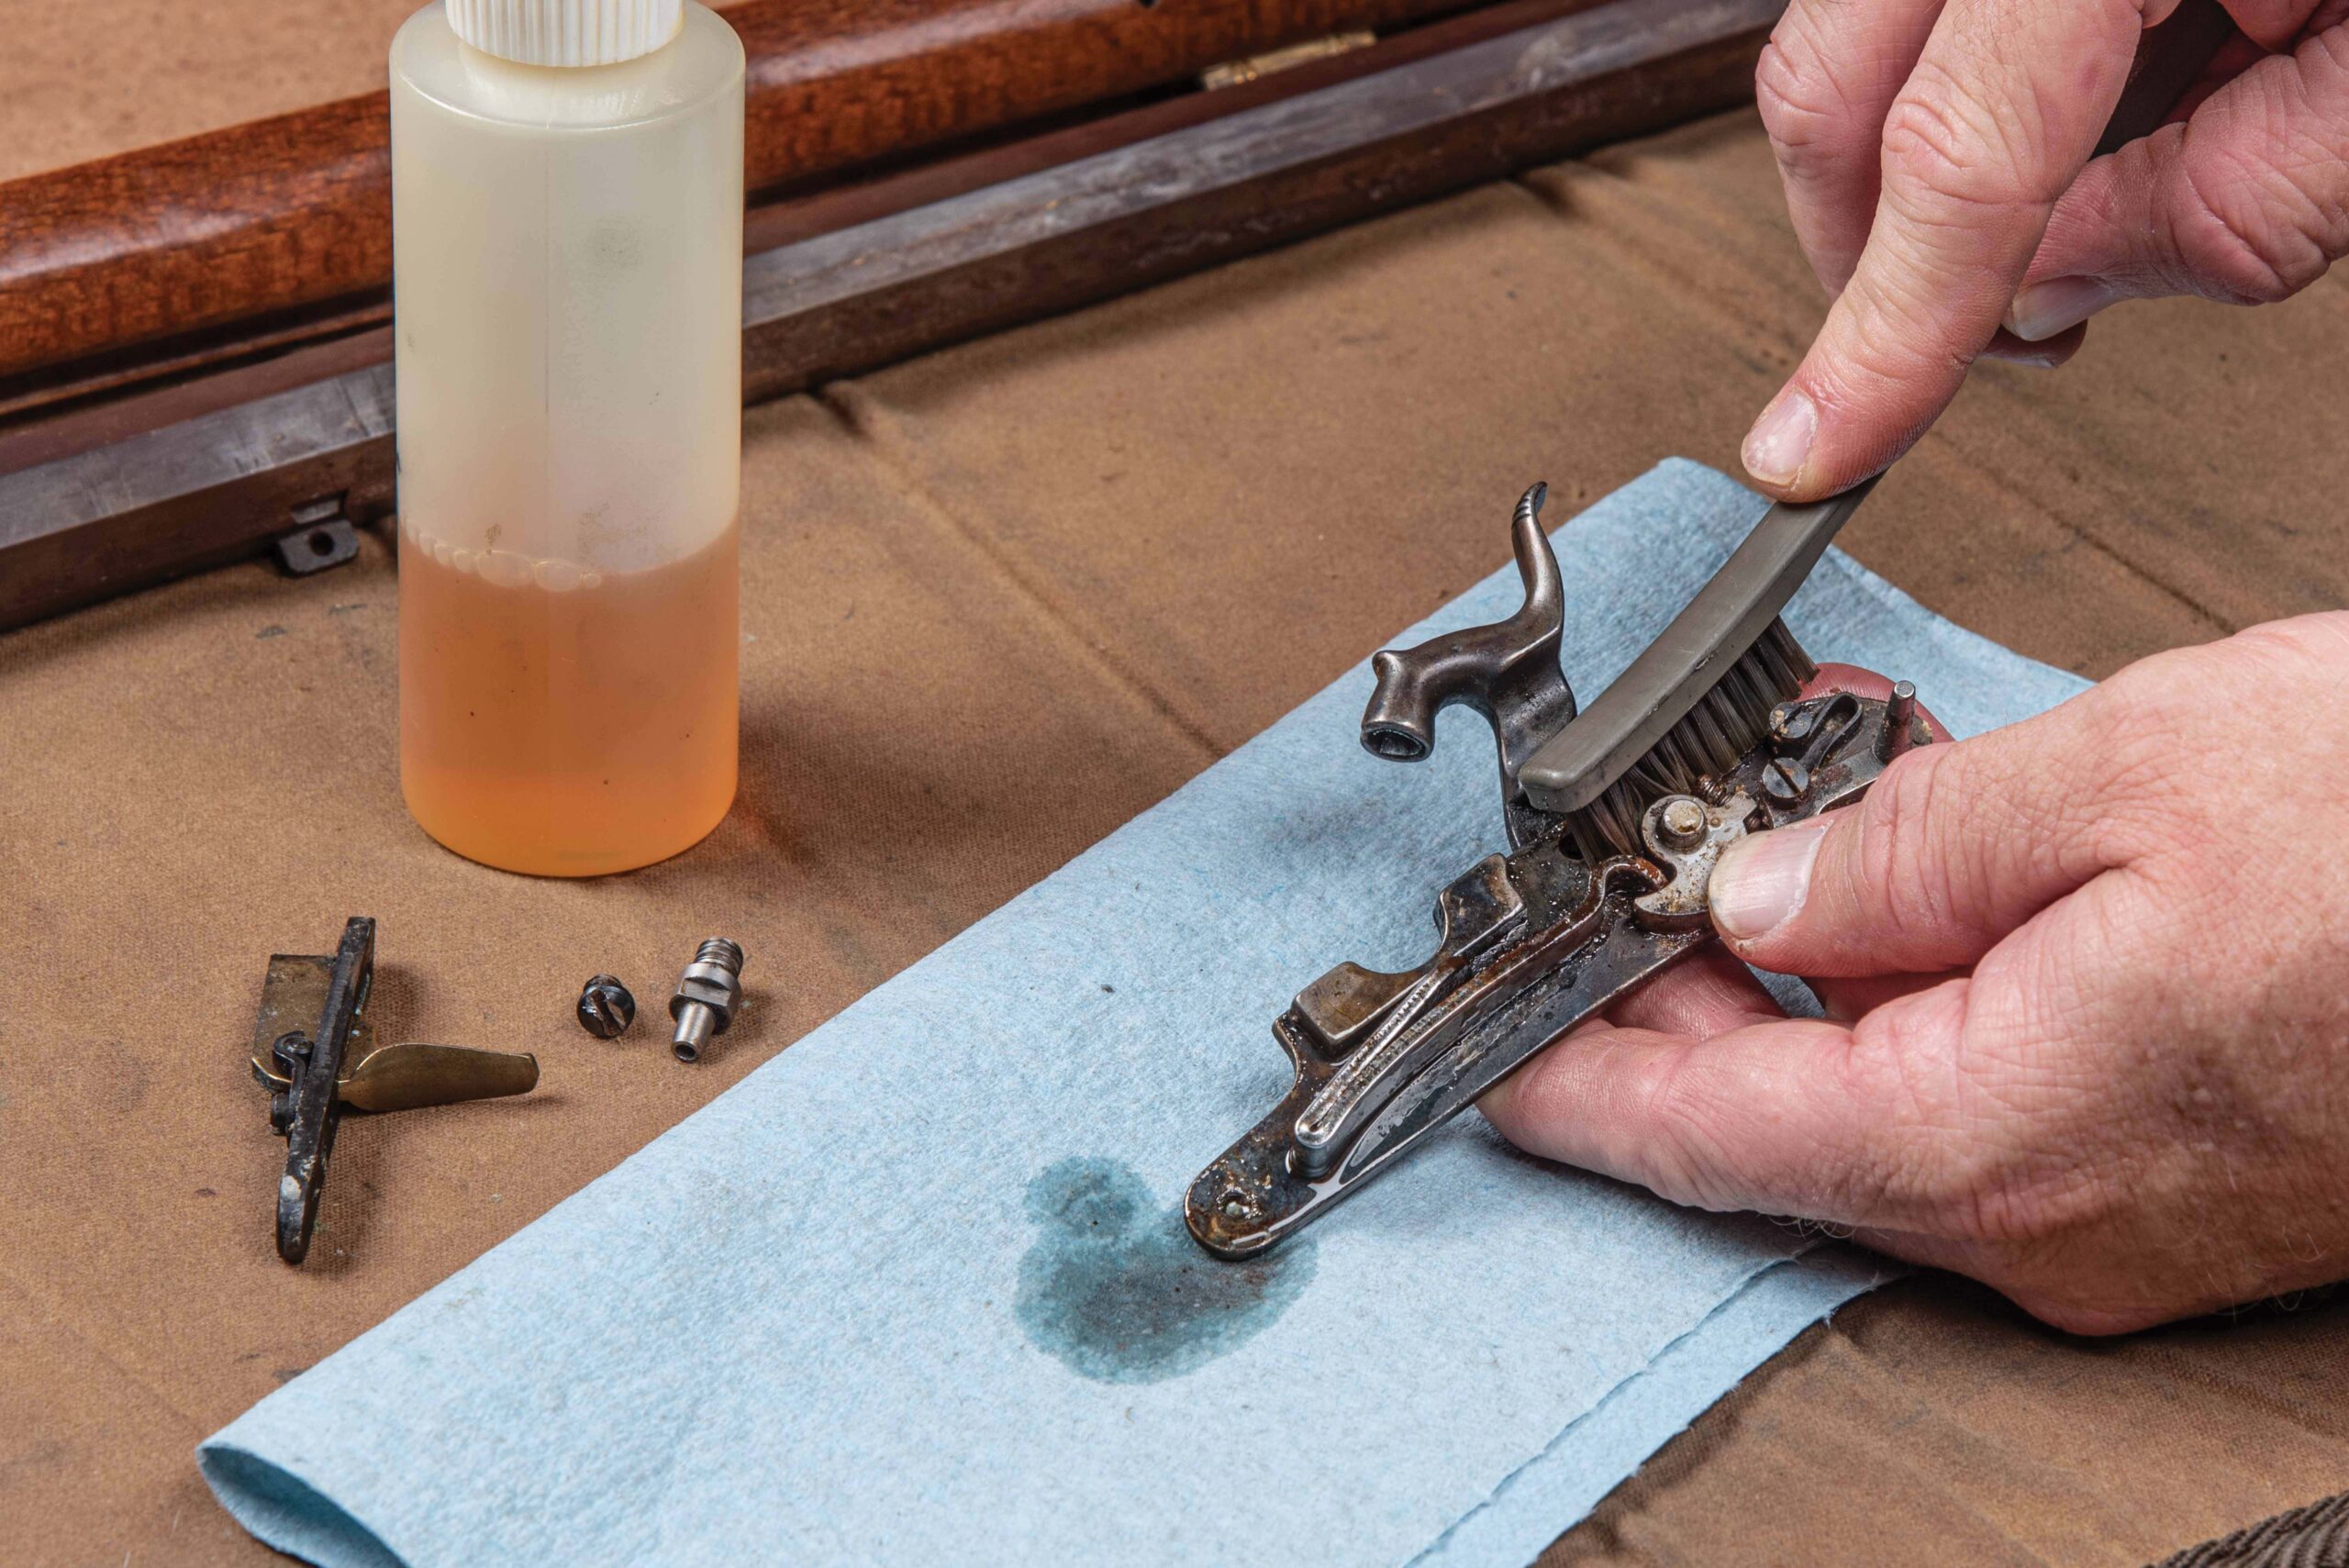
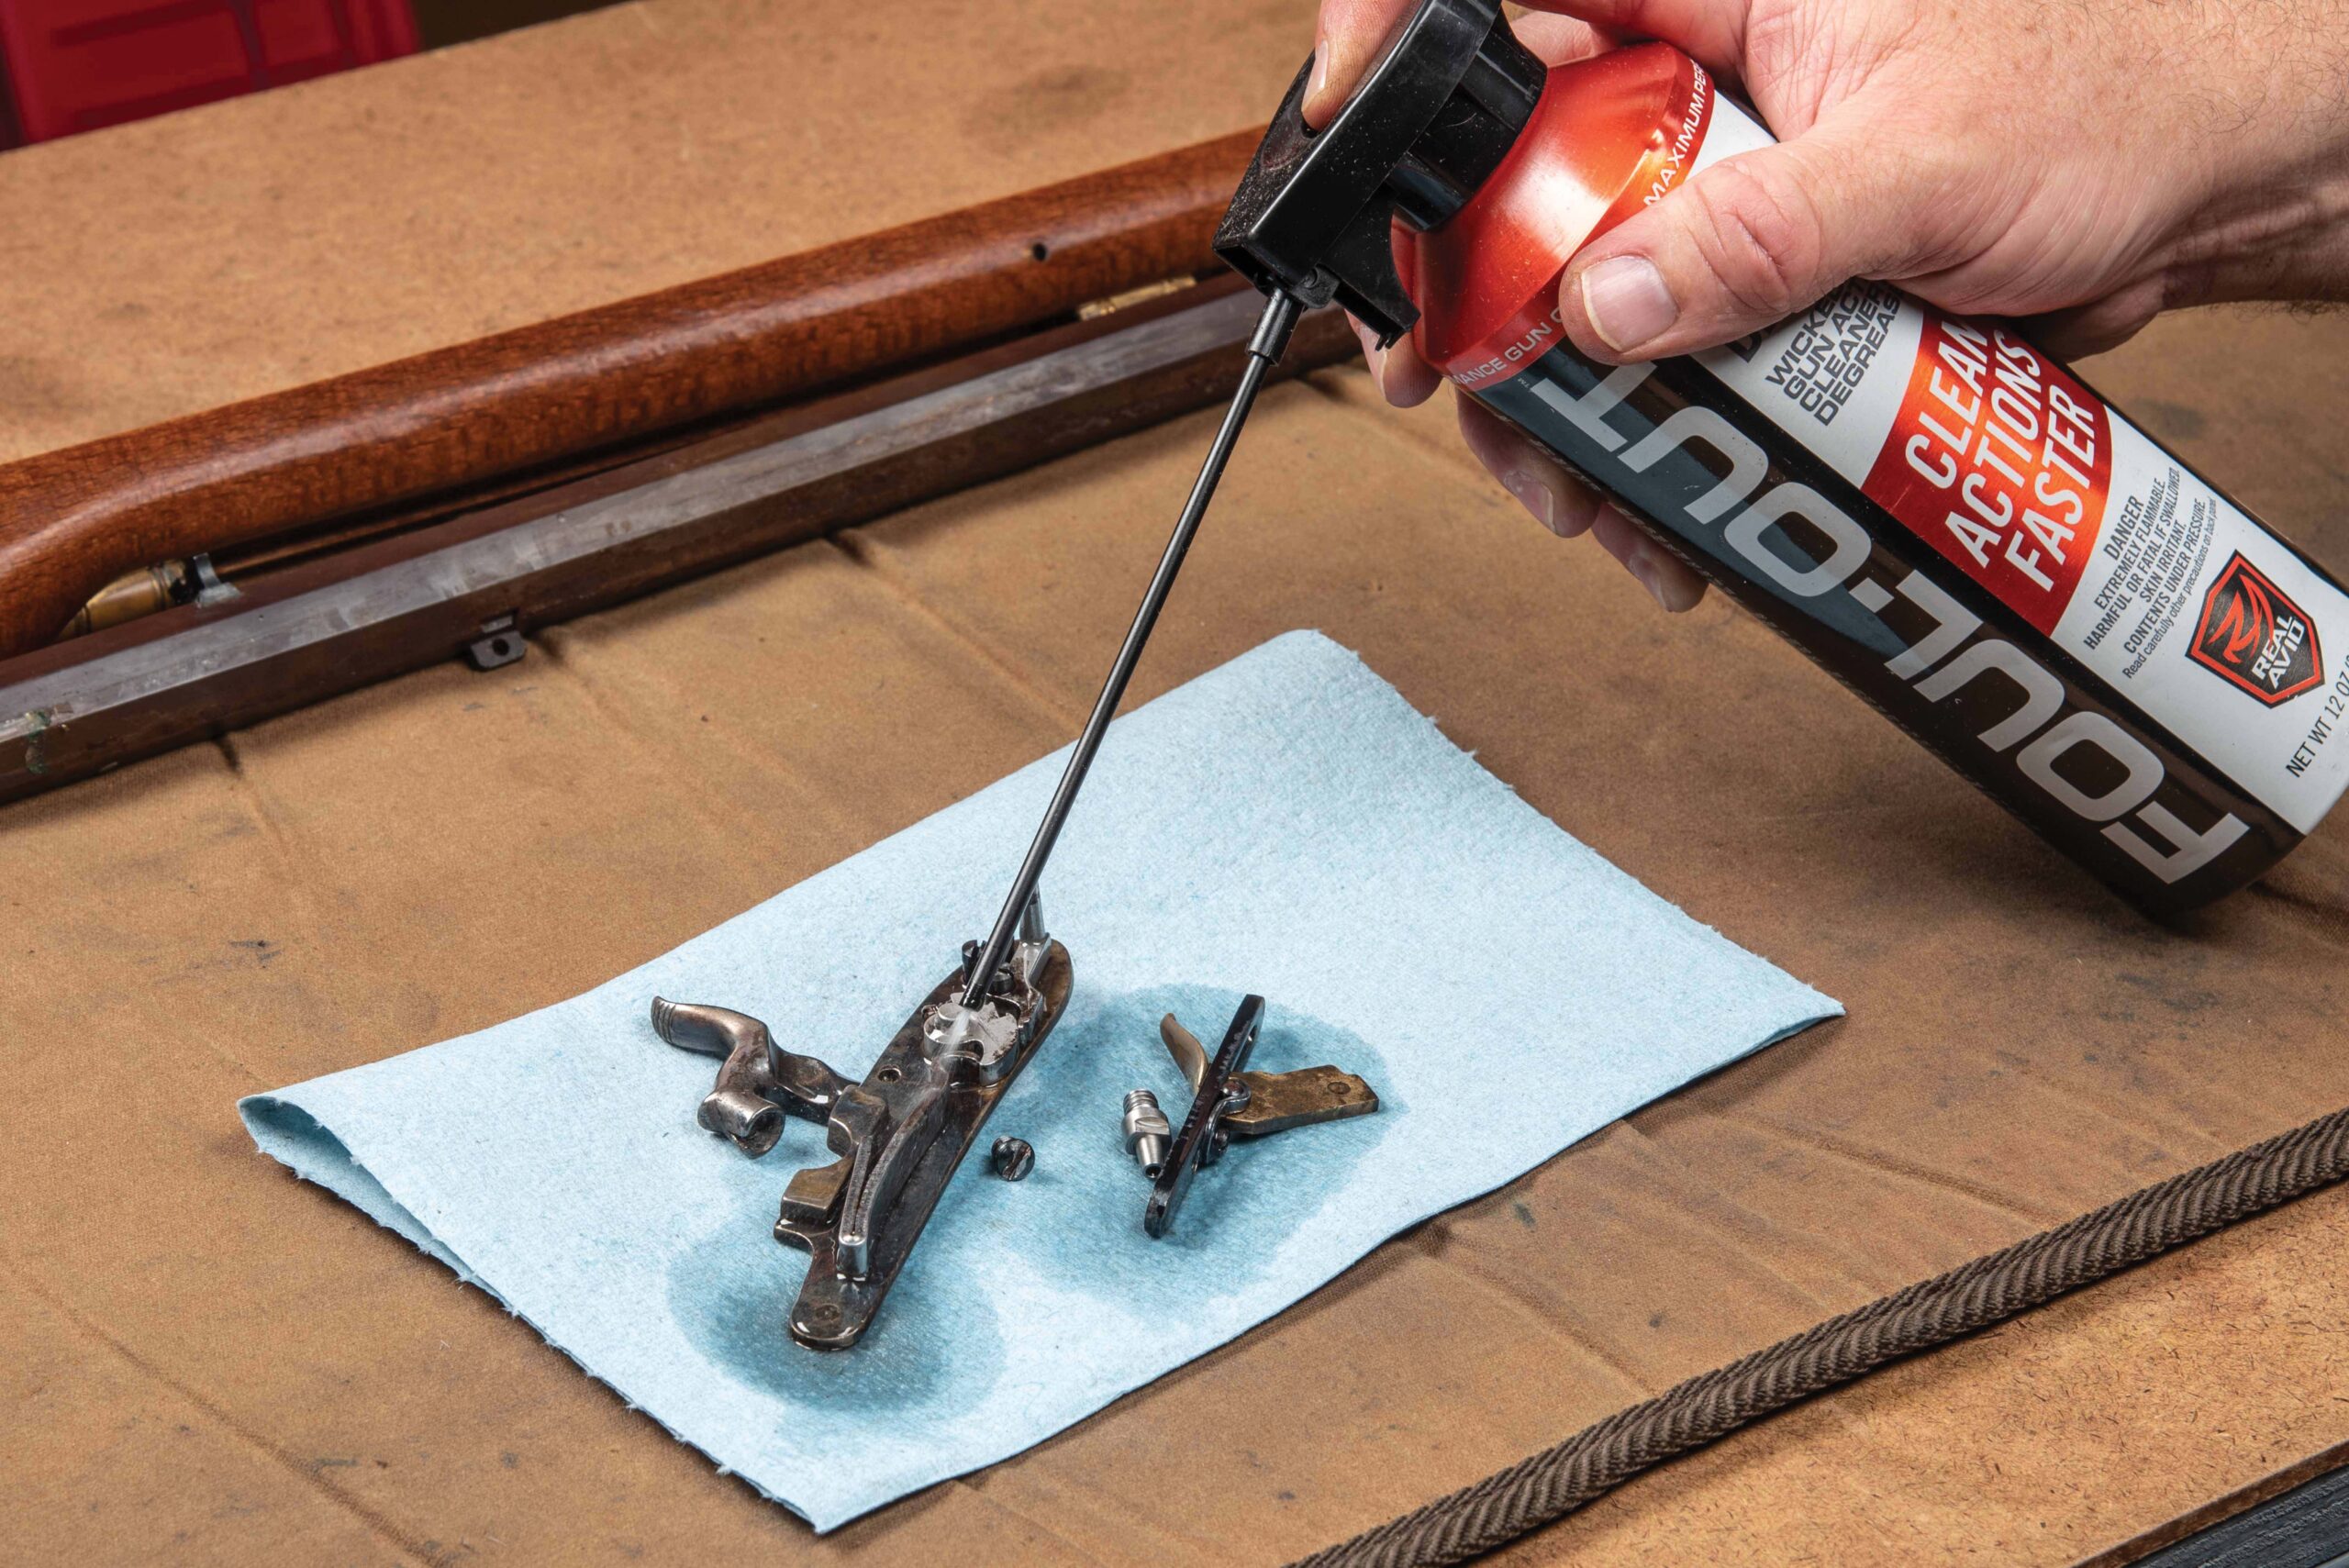
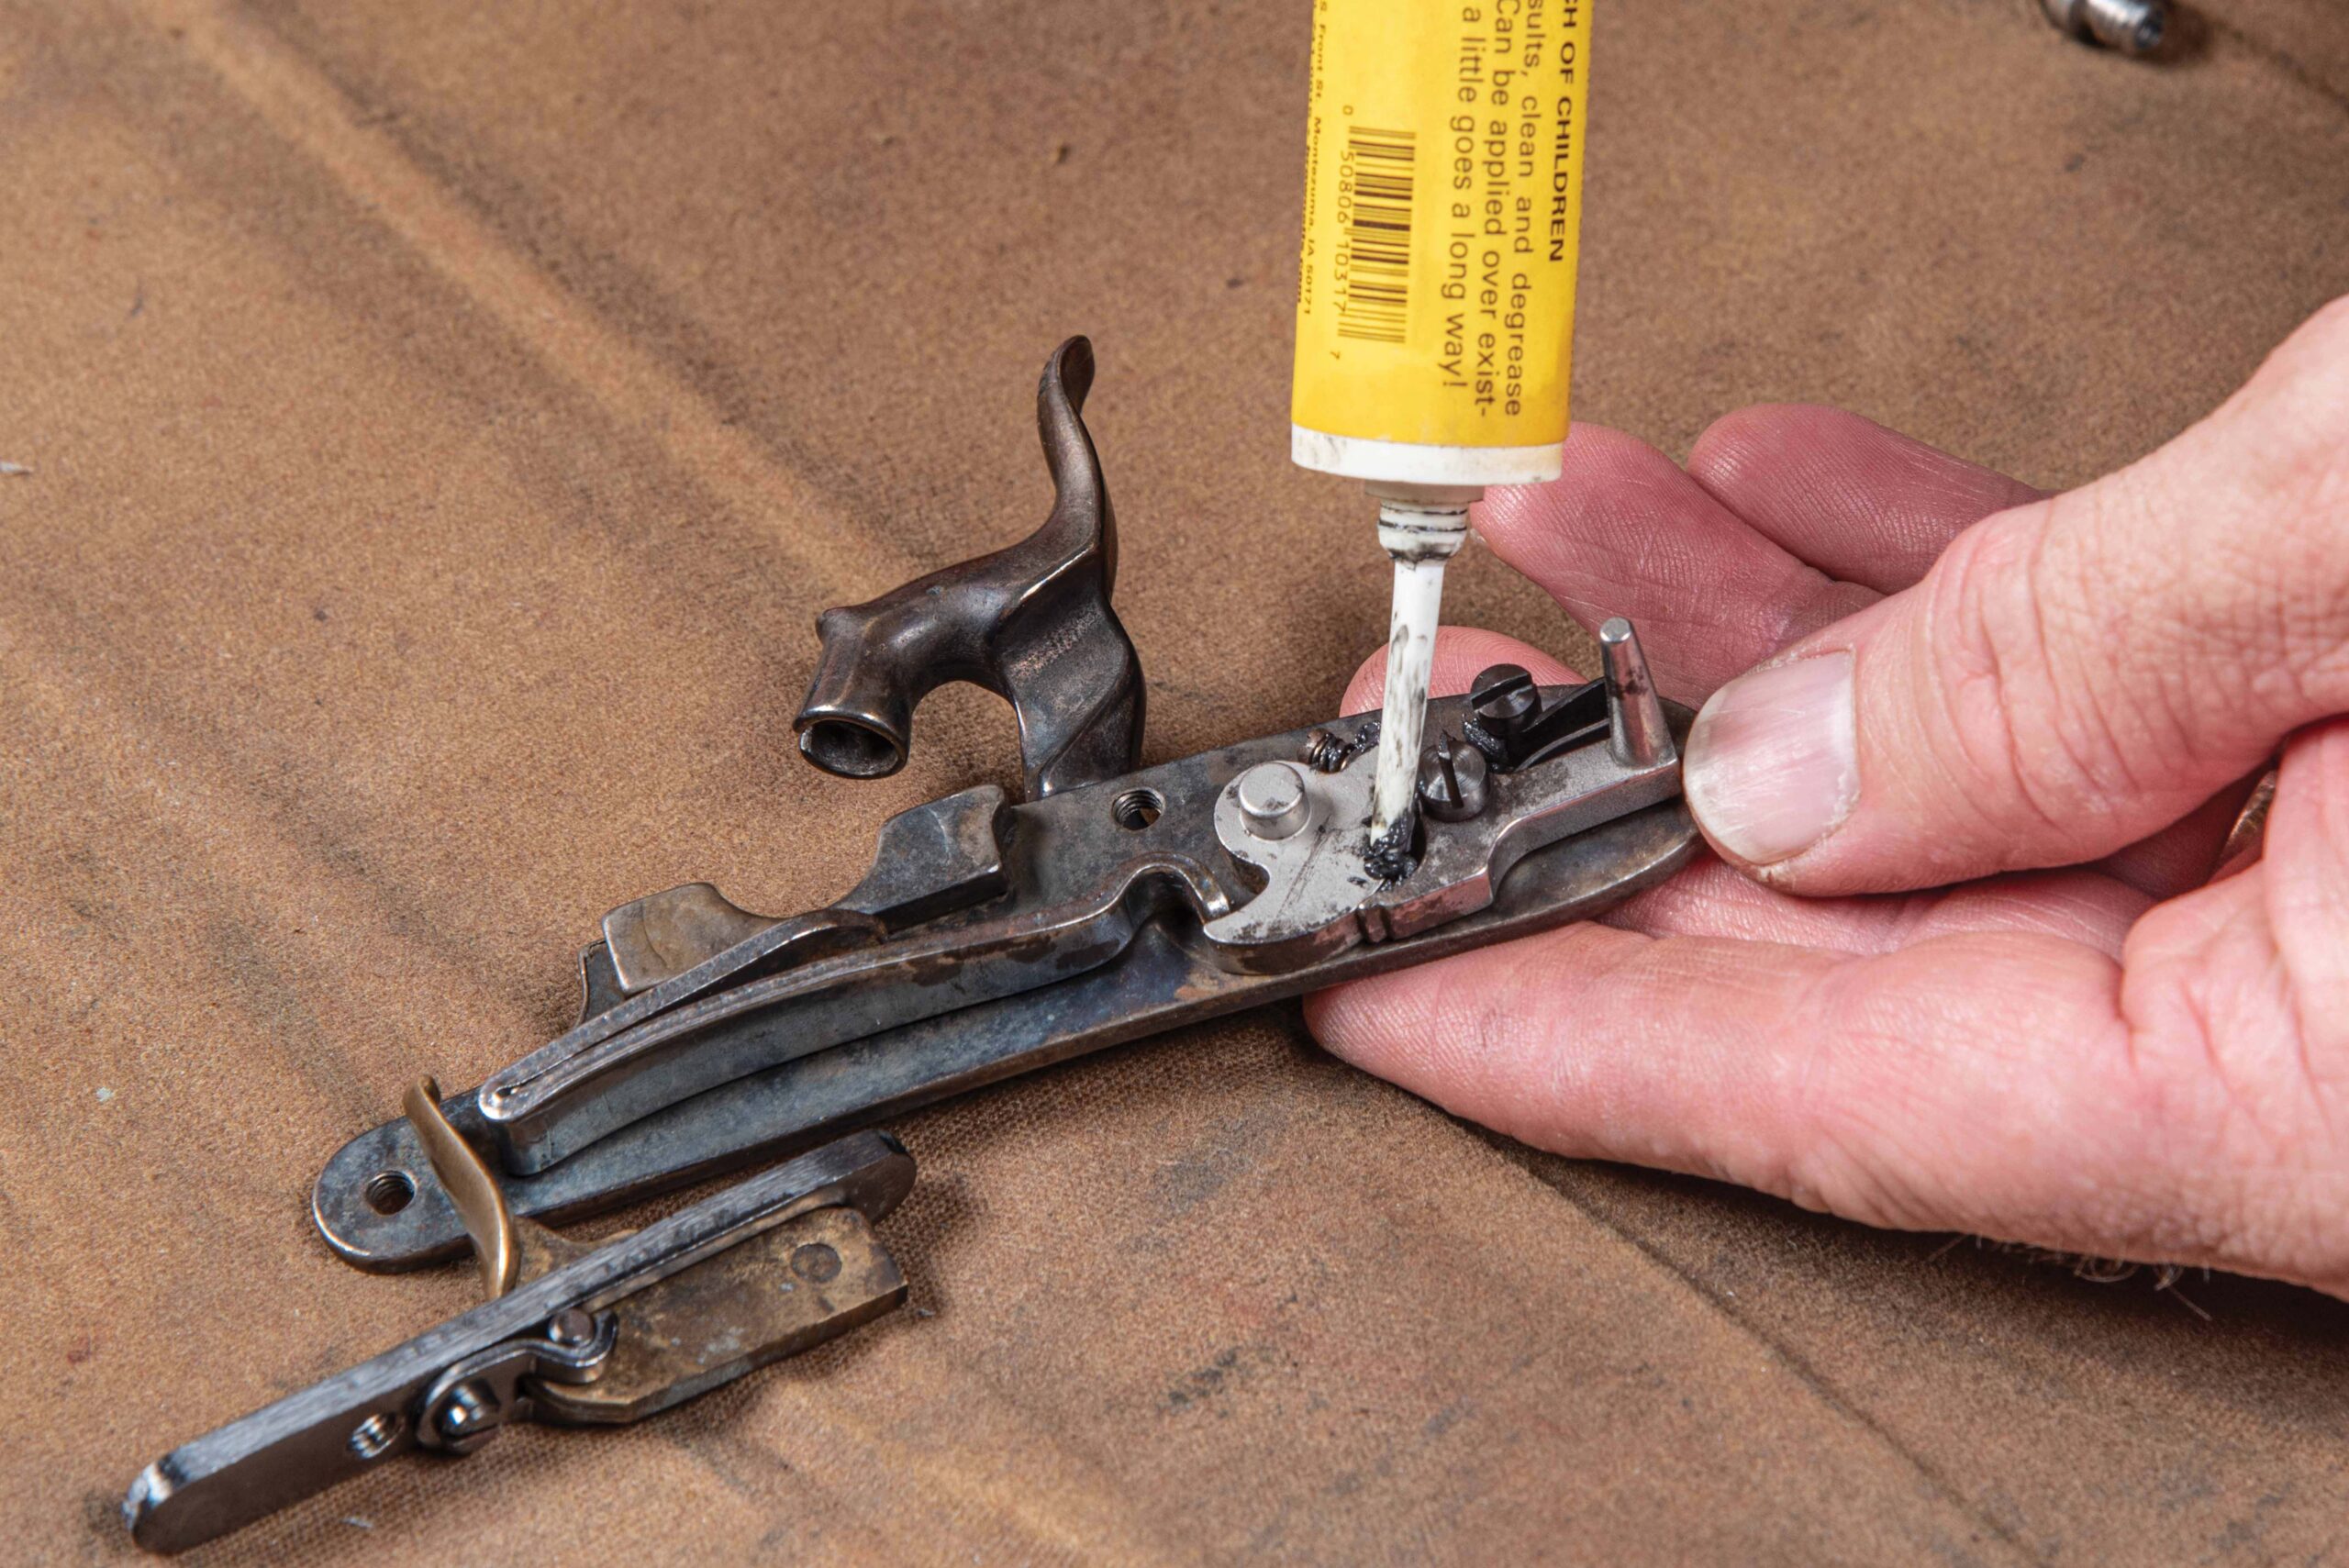
12. To clean the crud, we go back to Hoppe’s #9 solvent and a nylon brush. Saturate the parts with solvent and vigorously scrub to remove all the old grease, oils, powder fouling, and any other junk that has worked its way into the lock mechanism.
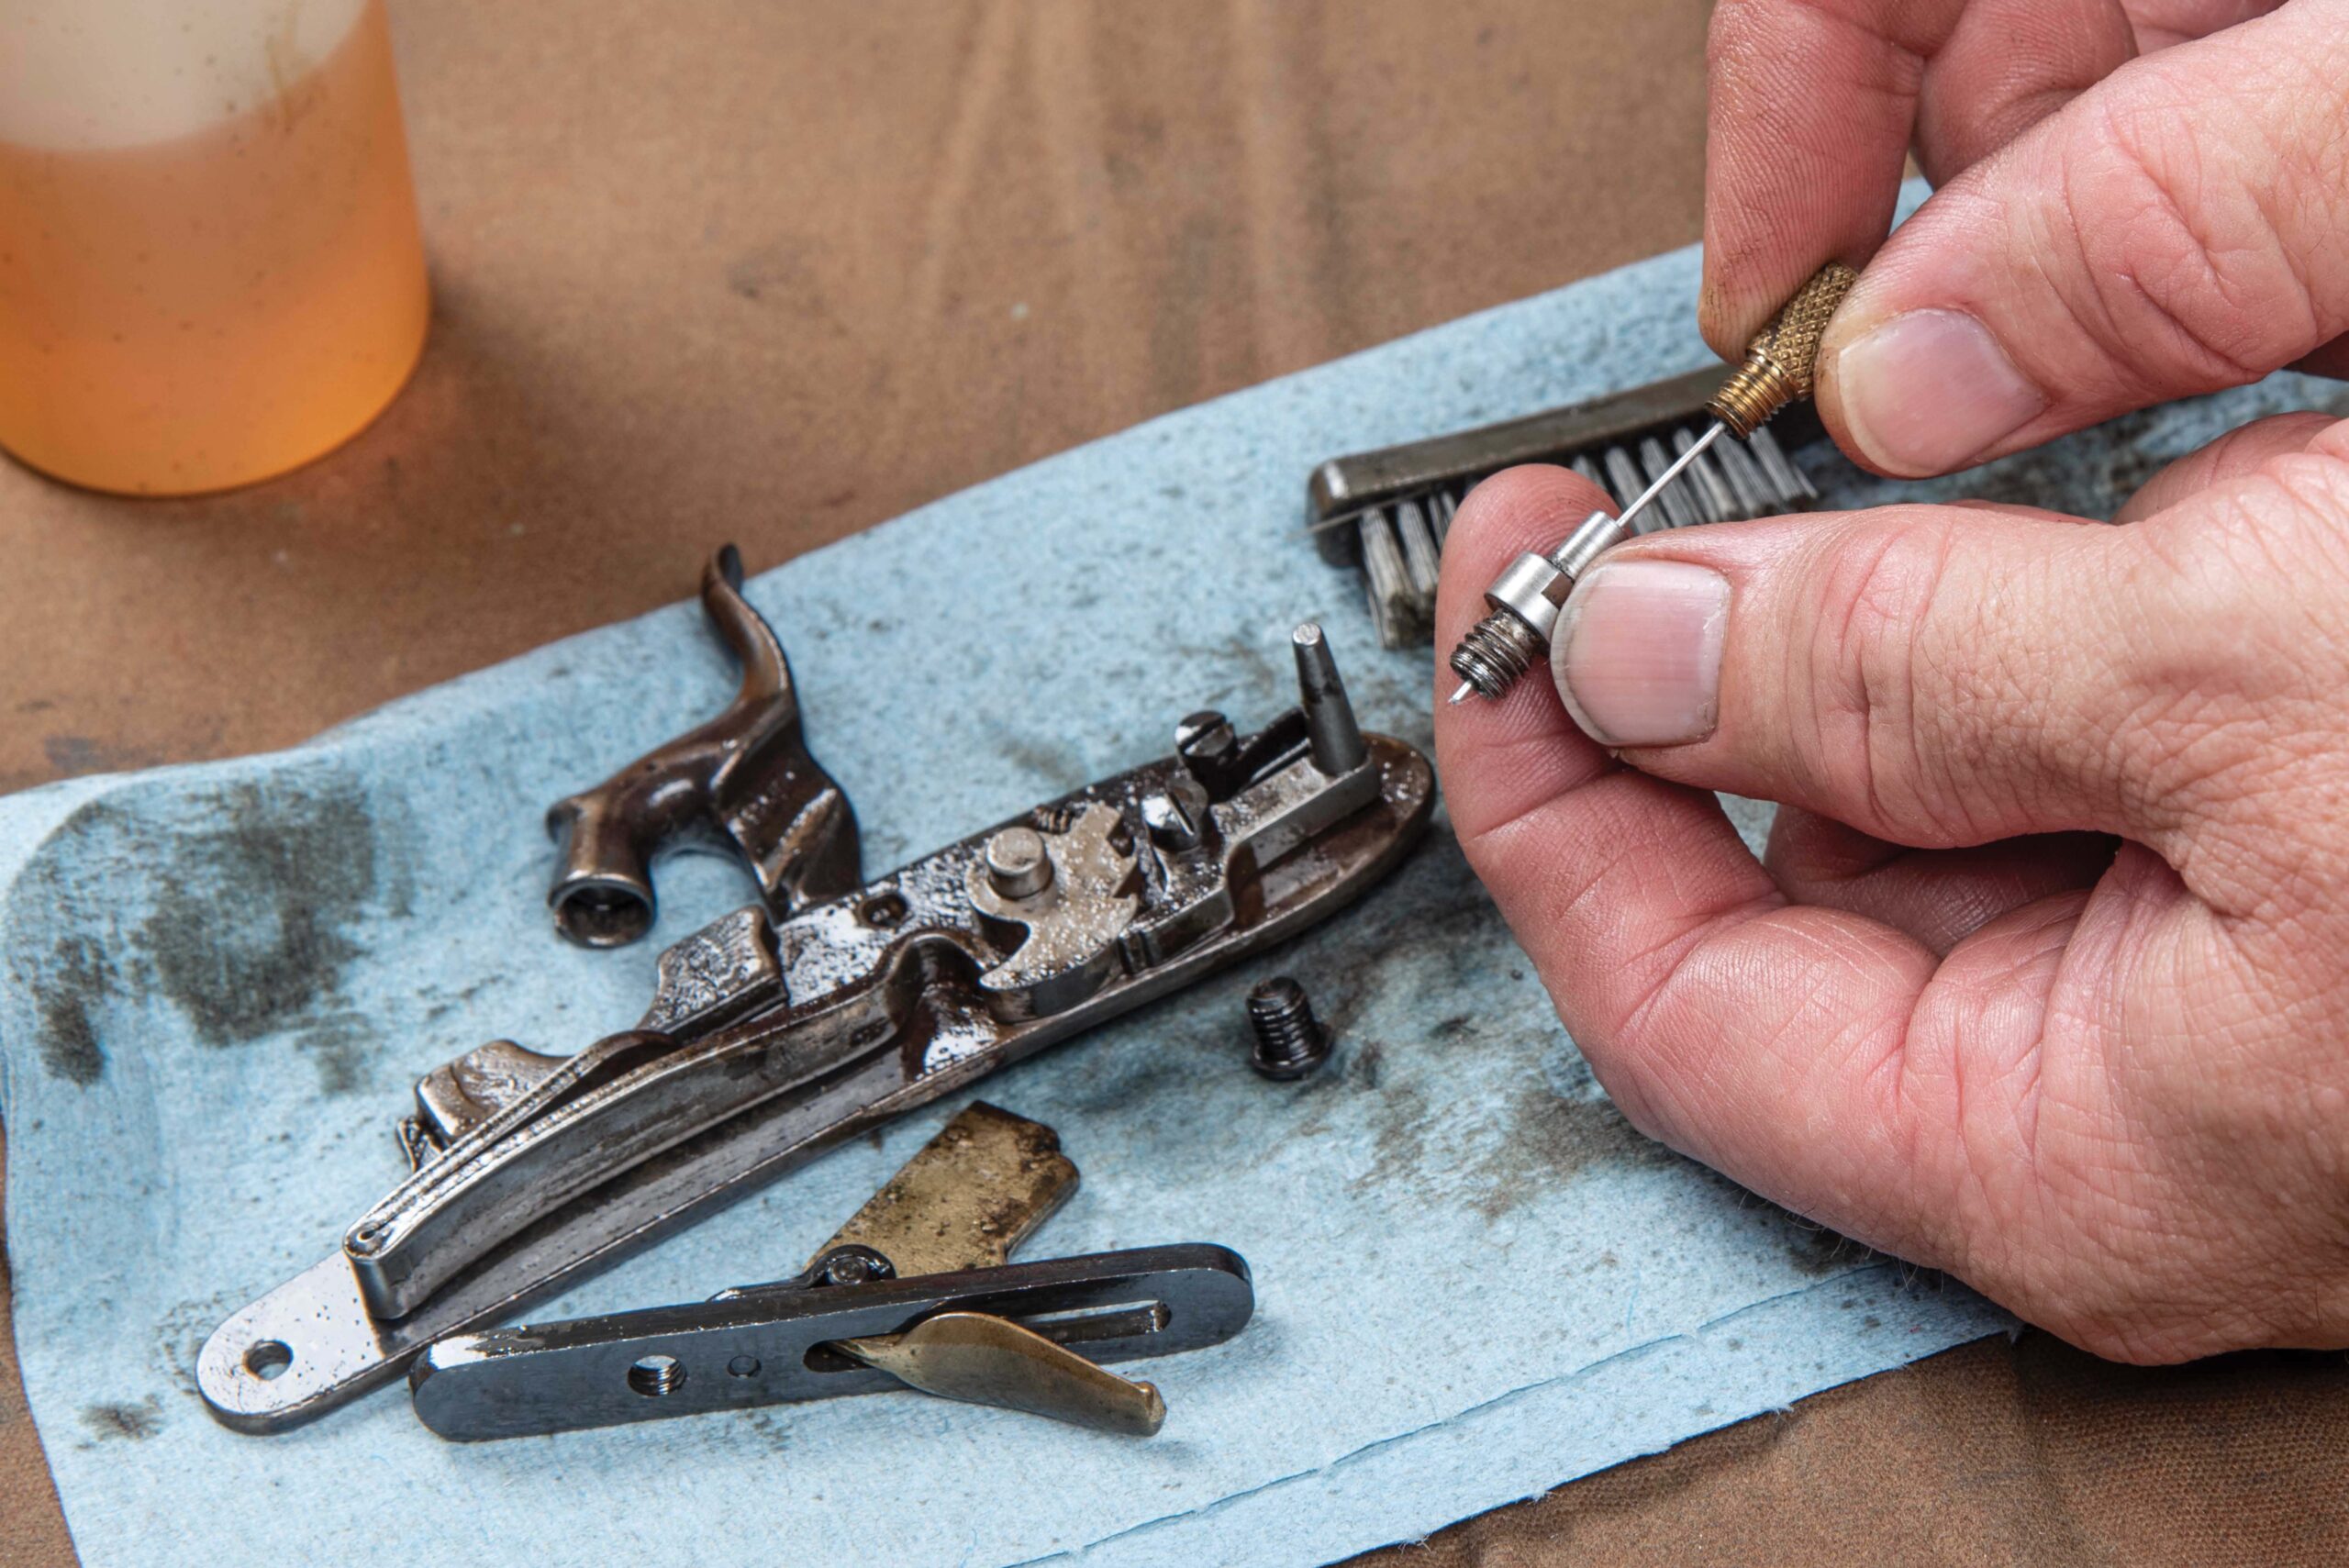
13. A nipple pick is essential for cleaning out the small fire hole in the nipple.
A Deep Dive Into Muzzleloader Maintenance
14. Once thoroughly scrubbed with solvent, use a degreaser to remove the slurry. Real Avid’s new Foul-Out is perfect for this. It works like denatured alcohol or brake cleaner to remove oils, but it has a pleasant odor and an adjustable straw that helps direct the spray exactly where you need it.

We mentioned earlier that it’s best not to remove the barrel from rifles that use small tenon pins. We only did this here to show you how it is done. Normally, you would keep the barrel on the rifle assembly when cleaning long rifles, such as the Kentucky- or Pennsylvania-style muzzleloaders. You can still use the hot water method, but instead of removing and placing the end of the barrel in hot water, a tube is secured over a special O-ring nipple and the opposite end placed in hot, soapy water. The tube allows the water to be sucked up into the barrel by the mop to effectively clean the barrel without having to remove it from the stock.

A Deep Dive Into Muzzleloader Maintenance
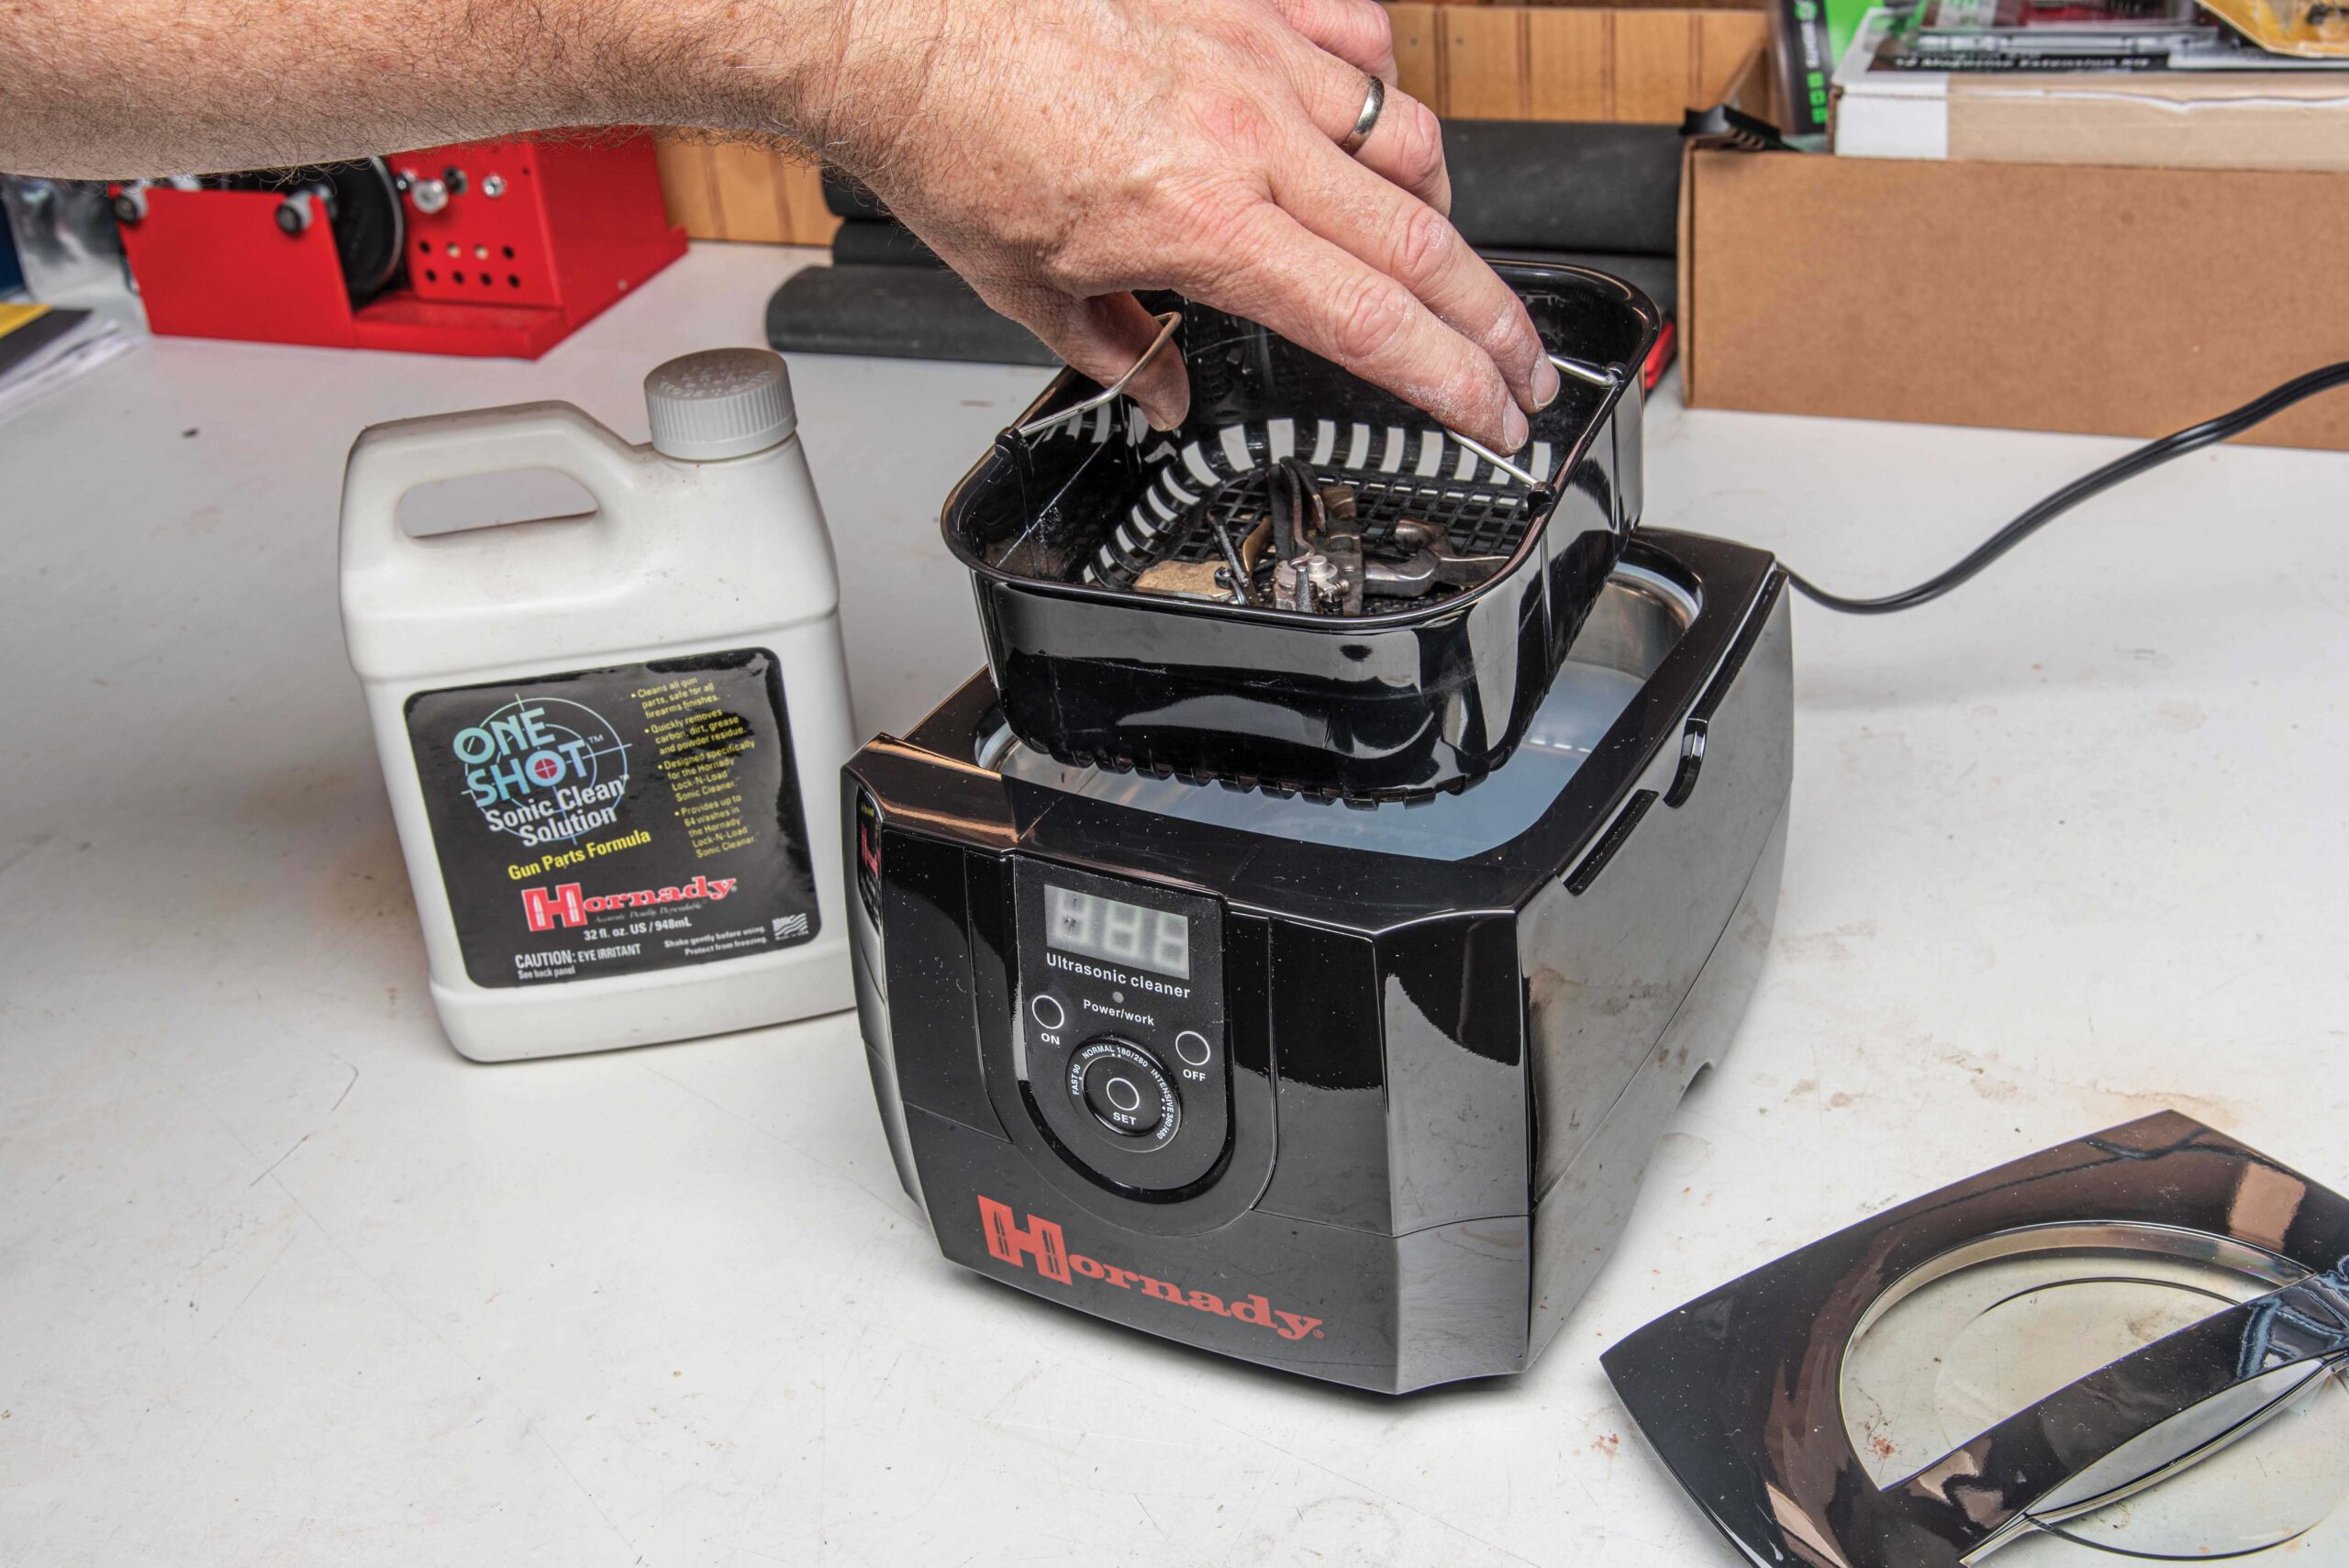
15. Because our small parts were quite nasty, we decided to give them a sonic bath to reach any junk that we couldn’t get to with the nylon brush. A sonic cleaner, like this one from Hornady, is a good thing to have in your gun shop. It not only works for cleaning empty brass cartridges, but you can also use it on small gun parts, as well. For owners of in-line muzzleloaders, this is a great method for cleaning that breech plug.
16. After the barrel is scrubbed clean and while the metal is still hot, run several clean cotton patches through the barrel, pausing at the breech to soak up any water at the bottom. Once the patches come out dry, allow the barrel to stand upright for a few minutes so that any residual moisture can quickly evaporate. Next, saturate a patch with bore lubricant and run this down the barrel. The lubricant will protect the bore from rust and corrosion during storage.
A Deep Dive Into Muzzleloader Maintenance
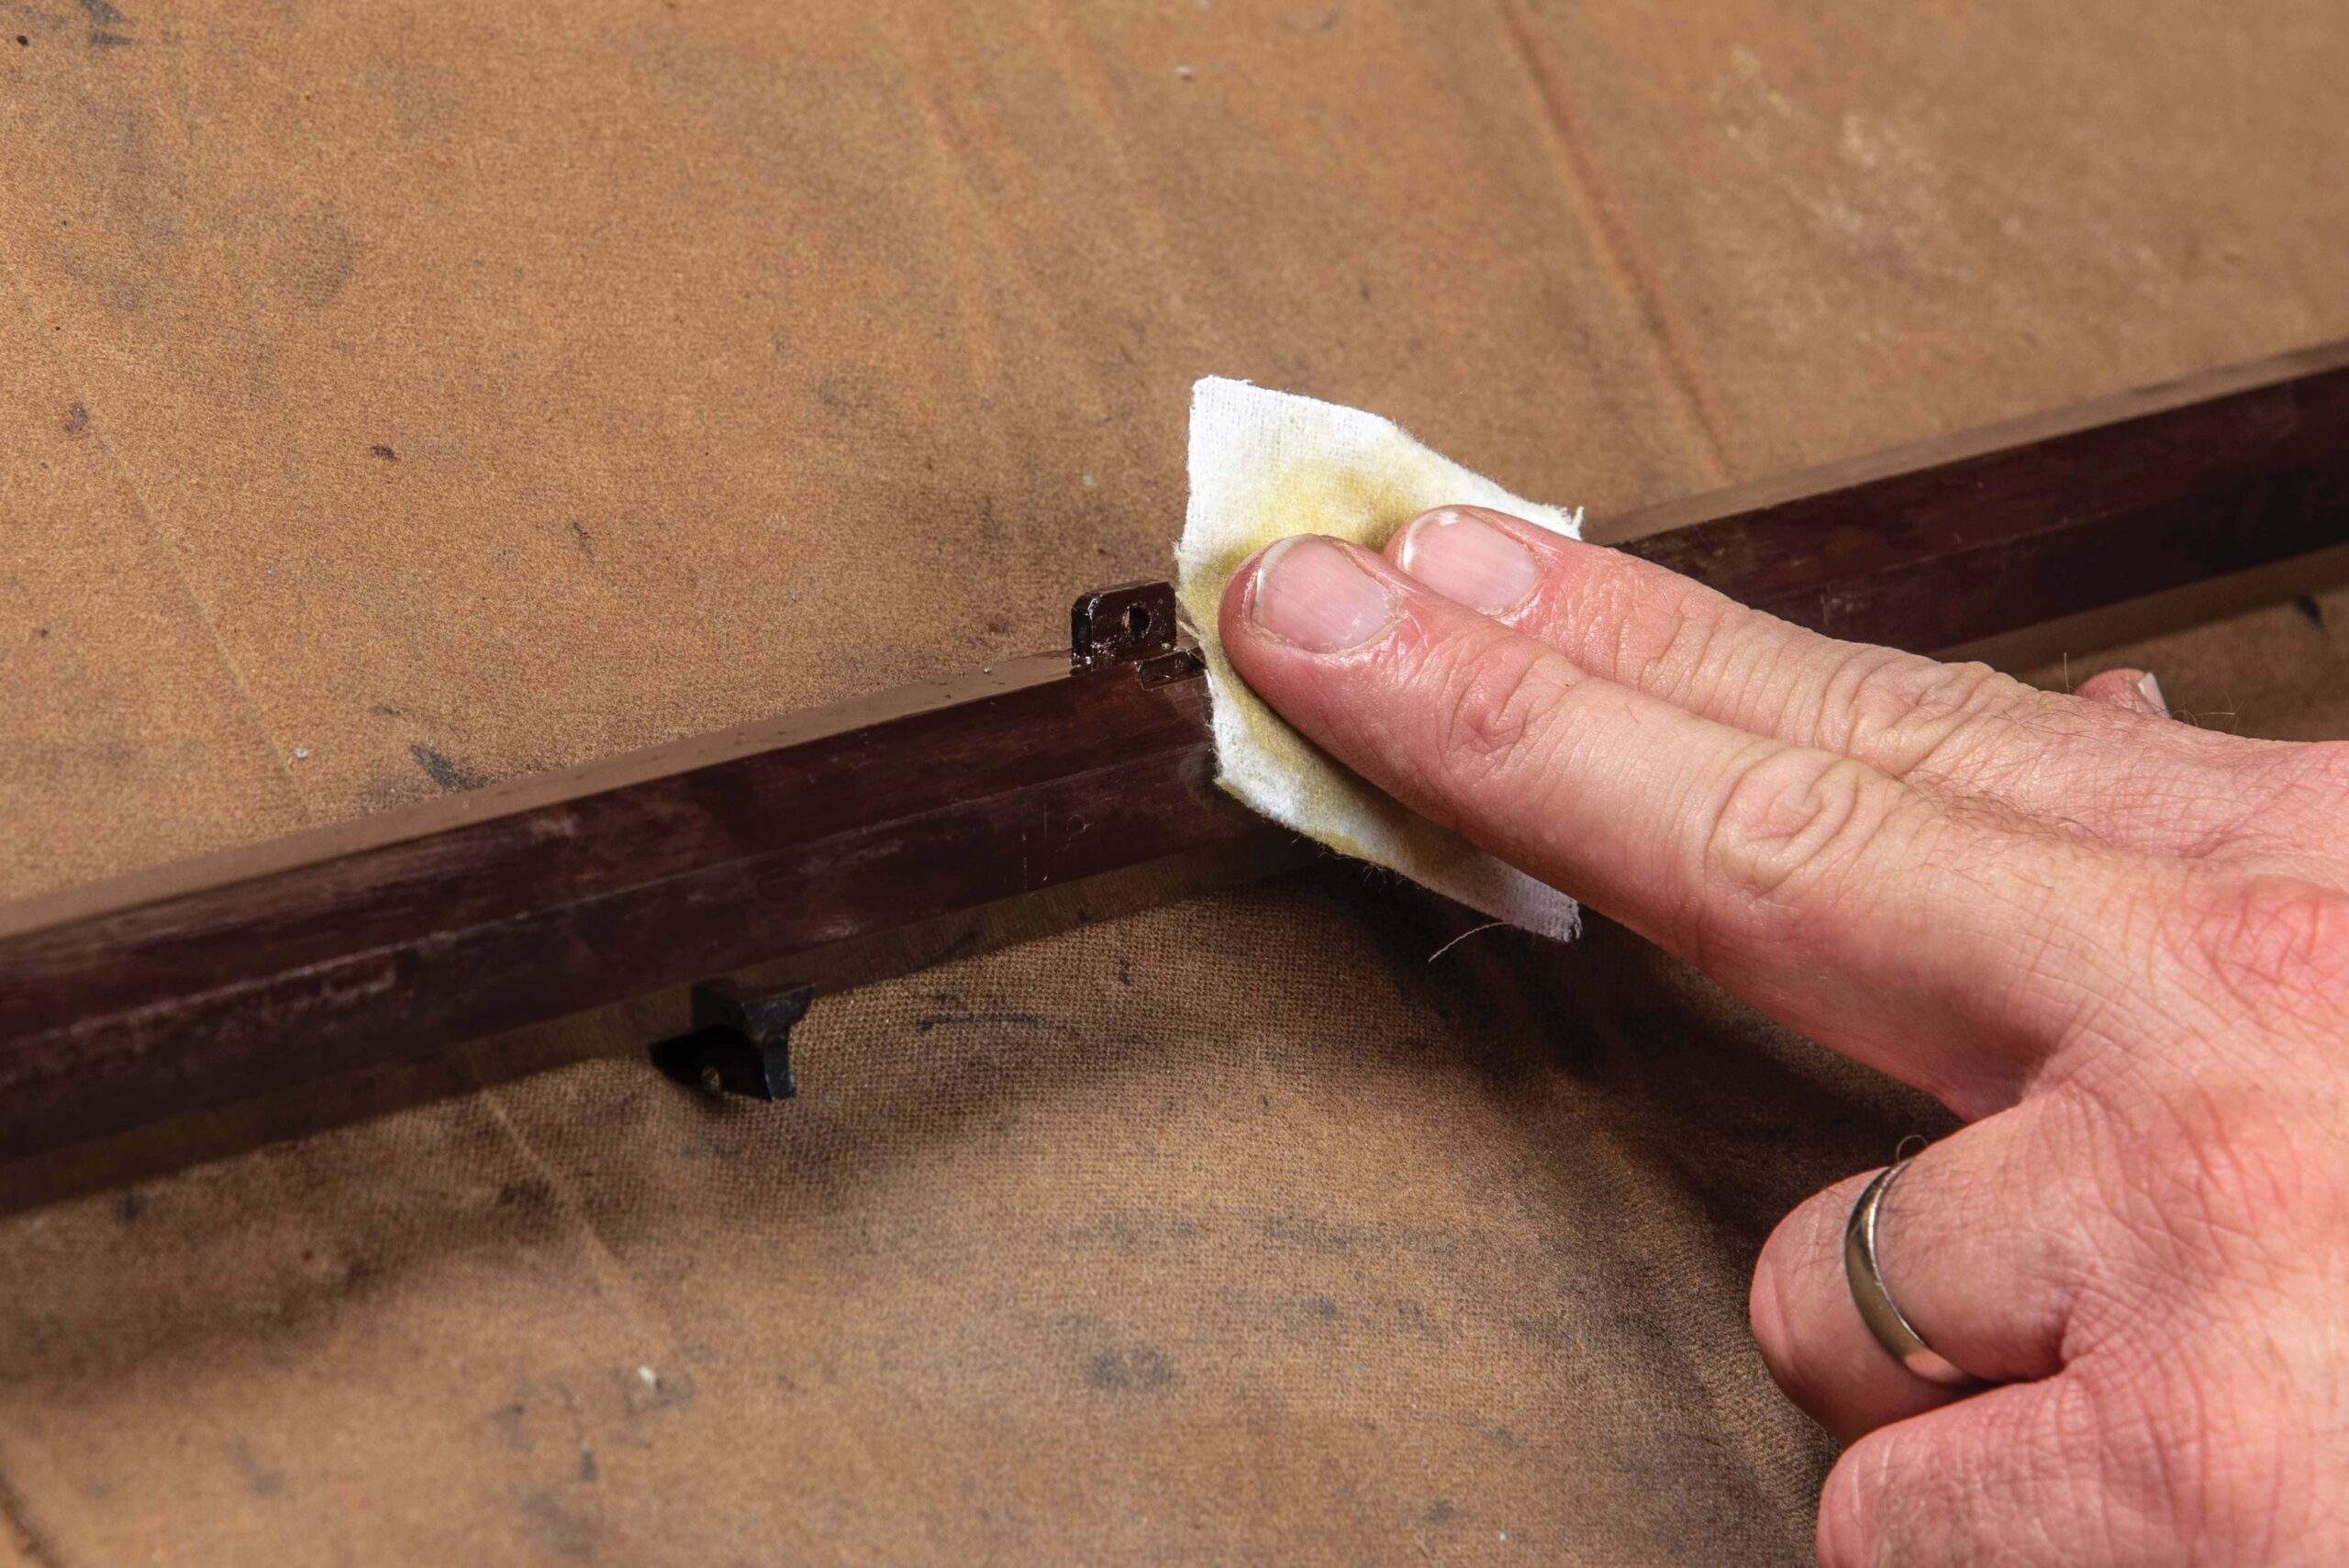
17. With the barrel clean, apply a light layer of bore lube to the exterior as a rust preventative.
A Deep Dive Into Muzzleloader Maintenance
18. Before reinstalling the bolster screw, use a pipe cleaner and swab the threads with bore lube to prevent rust and corrosion. Ditto for the bolster’s nipple threads and the threads on the nipple. [TIP: Replace your standard steel nipple with a stainless-steel nipple. They’re easier to keep clean and won’t rust.]
19. With the small parts removed from the parts washer, place them in a bowl of hot, soapy water and scrub them clean with a nylon brush. Dry immediately (compressed air is best to ensure all moisture is removed from the nooks and crannies) and lightly lubricate all metal surfaces. For the metal-on-metal moving parts, apply a coat of grease, such as Brownells Action Lube.
A Deep Dive Into Muzzleloader Maintenance
20. Assembly of the rifle is the reverse of disassembly. Be sure to check your trigger function to ensure it is safe and working properly. Sidelocks can bind up and screws that are torqued too tight can interfere with trigger and hammer operation.

Aimpoint Micro S-1 Red Dot Sight Perfect for Shotguns

0
Aimpoint Micro S-1 Red Dot Sight Perfect for Shotguns
Photos by Brad Fitzpatrick

Optics have become standard equipment for most hunting applications with one exception—wingshooting. It’s still relatively rare to see a waterfowl or upland gun that’s equipped with an optic, but that’s changing thanks in part to sights like the Aimpoint Micro S-1 red dot.

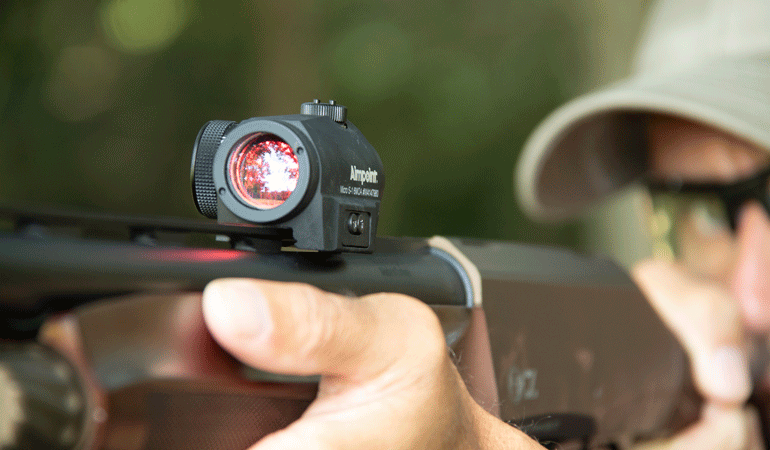
The Aimpoint Micro S-1’s miniaturized dimensions and light weight make it an ideal optic for use on a shotgun. With a length of 2.5 inches, a height of 1.6 inches and a weight (with battery) of just 3.5 ounces, the Micro S-1 doesn’t take up a great deal of space on the rib of a shotgun. With a high-strength aluminum housing featuring a semi-matte anodized finish and an integrated carbon fiber-reinforced polymer base, it doesn’t significantly change the balance point of the gun, either.

Unlike traditional shotgun optics that require shooters to purchase aftermarket bases and attach them to the gun’s receiver the Micro S-1’s integrated base fits onto the rib of virtually any gun. By measuring the height and width of your shotgun rib you can determine which base/plate combination is required, and Aimpoint offers an easy-to-follow diagram that helps you determine the right combo for your firearm.

The base secures to the sides and bottom of the rib and, when it’s tightened in place, holds zero even while firing magnum loads. It’s a simple installation process and, unlike traditional shotgun optics, you can quickly and easily install or remove the optic as desired. The Micro S-1 can be positioned at any point along the rib of the shotgun, and the low (.55 inches) optical axis makes it easy to view the 6 MOA red dot from a natural shooting position without having to lift your head from the gun. Eye relief is unlimited and there’s no parallax error with these sights.

The Aimpoint Micro S-1 red dot operates using a reflex collimator with LED display. This offers shooters the ability to adjust point of impact, a major advantage for shotgun shooters. Traditionally, shotguns ribs were designed with different points of impact (POI) based on the application. Trap guns, for instance, have a higher point of impact, from 70/30 (where 70% of the pattern rises above the rib) and up. Skeet, sporting clays, and field guns usually shoot “flat” with a 50/50 POI. Some high-end competition shotguns offer interchangeable ribs to adjust POI, but swapping ribs is a hassle. The Micro S-1 allows shooters to adjust POI quickly in the field using the provided tool and you can also adjust windage — something that’s difficult on guns without an optic. The ability to change POI is a major benefit for shooters and this feature increases the versatility of your shotgun.

Using a reflex sight on a shotgun has traditionally been a challenge because a bright sky can wash out the dot. To compensate for this, Aimpoint offers additional brightness settings. Illuminance is measured in lux (lx), and the Micro S-1’s red dot is visible from .1 lx (the equivalent of a moonlit night) to 55,000 lx (full sun). With 12 separate brightness settings, you can match the intensity of the dot to the light conditions regardless and you won’t lose sight of the dot even when you’re shooting clay targets or birds in full, bright sunlight.

Aimpoint Micro S-1 reflex optics are powered by a single CR2032 3V lithium battery that lasts for 50,000 hours of continuous use. Operating temperatures range from -20 to 140 degrees Fahrenheit and the unit is submersible to 15 meters which means if you drop your gun in shallow water while duck hunting your optic will still function properly. The durable Aimpoint sight is also resistant to shock, humidity, vibration and is resistant to occasional chemical exposure from gun cleaners, lubricants, fuel and insect repellents.

Aimpoint Micro S-1 Red Dot Sight Applications

I mounted the Aimpoint Micro S-1 red dot on the rib of a CZ 1012 12-gauge semiauto shotgun and zeroed the unit for a flat POI at 20 yards. The polymer base holds firmly onto the gun’s rib and even after multiple rounds of skeet and five stand there was no shift in point of impact. Despite having used shotguns with traditional beads throughout my shooting career I found that transitioning to the Micro S-1 was seamless. The aluminum housing is compact enough that it doesn’t distract the shooter and the 6 MOA dot offers a reference point regarding muzzle position even when the shooter is focused on the target. When I transitioned to trap targets, I had the option of adjusting POI to 70/30 in seconds. Additionally, I fired a full box of 3-inch magnum turkey loads through the CZ 1012 and the Micro S-1 withstood the heavy recoil without shaking loose or shifting POI.

The Aimpoint Micro S-1 improved my accuracy when shooting moving targets, especially on very bright days, and science shows that I’m not alone. Research conducted in Sweden in 2018 indicates that shooters who used Micro S-1-equipped shotguns performed markedly better than shooters who used guns with traditional bead sights on the country’s mandatory hunter exam. Two separate trials demonstrated that hunters using Micro S-1 optics hit a combined average of 24% more targets on the portions of the exam that simulates running hare and flying upland birds that shooters who didn’t use an optic. That’s an impressive jump in accuracy and lends credit to Aimpoint’s claim that shotgun performance improves with a reflex sight in place.

The unit’s innovative base design makes it the most versatile shotgun optic available. You can attach it to your upland shotgun while hunting birds or braking clays and then quickly transition the Micro S-1 to a waterfowl or turkey gun. It also improves the accuracy potential when shooting smoothbore slugs and its low-light capabilities make the Aimpoint Micro S-1 red dot a superb option for home defense scatterguns. Never before has a single optic offered this level of versatility for shotgun shooters in such a compact, durable platform. MSRP: $820

Best Warzone Sniper Rifle class loadouts: Attachments, Setup, Perks

0

There are so many choices when it comes to Sniper Rifles in the original Warzone, but some are simply better than others. We came up with a list of the best meta sniper rifle loadouts in Warzone Caldera.

Warzone still remains one of the greatest battle royales when it comes to weapon diversity, each weapon has its own character. Sadly, the nerfs in Season 3 made it so only a handful of the battle royale’s sniper rifles can still one-shot opponents.

To help you find the best sniper in Warzone, we’ve covered all the top-tier loadouts and attachments that maximize their efficiency. Whether you’re looking to increase your lethality or just wish to claim more long-range kills, then you can’t go wrong with these picks.

Remember, if you’re ready to dive into Warzone 2 and want to know which top-tier weapons to use, be sure to check out our list of the best Sniper Rifles to use in Warzone 2.

Contents

  • What is the best sniper in Warzone?
  • Best snipers in Warzone
  • Best Warzone sniper support weapons

What is the best sniper in Warzone?

operator using zrg 20mm sniper rifle in cod warzone

The best Sniper Rifle in Warzone is the Gorenko Anti-Tank Rifle. Currently, this sniper has the highest KD ratio and win rate out of all the rifles in the game and it’s easy to see why.

The Gorenko offers unmatched damage at long-range and while the 3 Line Rifle is a close contender, the Gorenko comes out on top thanks to its raw firepower.

12. Best Type 99 loadout

Attachments

  • Muzzle: Mercury Silencer
  • Barrel: Shiraishi 712mm Sniper
  • Optic: 1913 Variable 4-8x
  • Stock: Sakura CVR Custom
  • Underbarrel: M1930 Strife Angled
  • Magazine: 5.6mm 8 Round Mags
  • Ammunition: FMJ Rounds
  • Rear Grip: Leather Grip
  • Perk 1: Discard
  • Perk 2: Deep Breath

While the Type 99 may not be the most popular Sniper Rifle in Warzone, it’s still a pretty fun gun to use. Closer to the Kar98 and Swiss than some of the other options, the Type 99 is a relatively versatile sniper with good range and speed.

If you’re bored of the better options, check this Type 99 class out. But, if you find it underwhelming (which you probably will), then swap to something deadlier — like the other snipers on this list.

11. Best M82 loadout

Attachments

  • Muzzle: Infantry Stabilizer
  • Barrel: 22.6″ Combat Recon
  • Stock: Tactical Stock
  • Magazine: STANAG 9 Rnd
  • Rear Grip: Airborne Elastic Wrap

The M82 is a perfectly viable option in Warzone and we believe its power is nothing to scoff at. It may lack mobility compared to the higher-ranked Sniper Rifles on this list, but that isn’t to say the M82 isn’t worth taking out onto the battlefield.

Give it a go, and make sure to consult our detailed setup for the M82.

10. Best AX-50 loadout

Attachments

  • Muzzle: Monolithic Suppressor
  • Barrel: 32.0″ Factory Barrel
  • Laser: Tac Laser
  • Stock: Singuard Arms Assassin
  • Rear Grip: Stippled Grip Tape

A tried and tested fan-favorite over the years, the AX-50 is a solid choice but falls short compared to the other meta options in Season 5 Reloaded. While it can’t down people across the map quite as easily as the HDR and Gorenko, it’s a much more versatile option given its mobility, aim-down-sight (ADS), and firing rate advantages.

This AX-50 class maintains enough bullet velocity and accuracy to prove lethal from range, while still enjoying some mobility. You can be fairly comfortable pulling it out for a quick down during a gunfight before pushing with an AR or SMG.

Making this gun even more mobile to use is the Tac Laser, Singuard Arms Assassin Stock, and Stippled Grip Tape. The gun is quite versatile as Swagg was even able to turn it into the Intervention from Modern Warfare 2.

Make sure to check out our full breakdown of the best AX-50 loadout in Warzone right here.

9. Best Tundra loadout

Attachments

  • Barrel: 29.1″ Combat Recon
  • Laser: Ember Sighting Point
  • Optic: Ultrazoom Custom
  • Underbarrel: Patrol Grip
  • Magazine: Vandal Speed Loader

Despite receiving a set of hefty buffs back in the Season 5 patch, the LW3 Tundra is still sitting outside of the meta top 5. However, it’s still a powerful choice in the right players’ hands, and with the increase in damage range, it’s in a better state than ever before.

Our Tundra loadout above has great kill potential and even though it isn’t the most popular Sniper Rifle currently in Warzone, it definitely packs a punch.

8. Best Swiss K31 loadout

Attachments

  • Muzzle: GRU Suppressor
  • Barrel: 24.9” Combat Recon
  • Laser: SWAT 5mw Laser Sight
  • Underbarrel: Bruiser Grip
  • Rear Grip: Serpent Grip

A victim of Raven’s Season 3 nerfs, the Swiss is no longer a guaranteed one-shot down to the head anymore, stunting some of its use.

Although no longer dominant as it once was, the Swiss is still fast, has a clean default scope and reticle, and it downs enemies quite efficiently. Like the Kar98k, the Swiss is all about fast ADS, quick shots, and precision.

For a full, detailed breakdown of the best Swiss K31 loadout in Warzone, check out our dedicated class guide.

7. Best Pelington 703 loadout

Attachments

  • Muzzle: Stabilizer .308
  • Barrel: 25″ Extended
  • Stock: Duster Stock
  • Magazine: Vandal Speed Loader
  • Rear Grip: Field Tape

The Pelington 703 is a good Sniper Rifle for aggressive Warzone players who prefer to take quick shots. While the weapon definitely won’t do as much damage as the Gorenko or 3-Line Rifle, it does provide you with more mobility and a reduced ADS speed.

Also, with Raven buffing the Pellington’s damage in Season 5 Reloaded, it’s brilliant when paired up with a meta SMG or AR.

It’s worth noting that to knock an opponent with the Pelington, you’ll need to land headshots. So, if you’ve got a sharp aim and prefer a less stationary playstyle, consider picking up the Pelington and trying this loadout.

6. Best HDR loadout

Attachments

  • Muzzle: Monolithic Suppressor
  • Barrel: 26.9” HDR Pro
  • Laser: Tac Laser
  • Optic: Variable Zoom Scope
  • Stock: FTAC Champion

Following on from the Warzone Sniper weapon nerfs in Season 3, the HDR once again became a viable option thanks to its overwhelming firepower.

If you’ve ever been downed from hundreds of yards away out of nowhere, then it was probably the HDR. While this gun is heavy and slow-moving, both are entirely negligible, especially given its incredible kill potential.

This is the best HDR loadout for those who want to claim a bounty of long-range kills. It’s not about moving around, downing an enemy, and rushing in with a numbers advantage. It’s about sitting back, taking out enemies from afar, and trying to claim cross-map headshots.

Make sure to check out our full breakdown of the best HDR loadout in Warzone right here.

5. Best Kar98k loadout (Modern Warfare)

Attachments

  • Muzzle: Monolithic Suppressor
  • Barrel: Singuard Custom 27.6″
  • Optic: Sniper Scope
  • Laser: Tac Laser
  • Perk: FTAC Sport Comb

For what seemed like an eternity, this gun was deemed to be the best sniper in Warzone by many pros and content creators alike. It took a long, long time, but the Kar98k is no longer the king of Warzone.

The fastest ADS and mobility of the gun means it’s still a great gun to use, although its one-shot ability has been greatly tamed.

The only question mark about this Kar98 loadout is the Sleight of Hand usage, which is great for reload speed and gun swapping but can be sacrificed if you’re struggling to hit shots. If that’s the case, you can consider the Precision or the FTAC Sport Comb instead.

Make sure to check out our full breakdown of the best Kar98k loadout in Warzone right here.

4. Best Kar98k loadout (Vanguard)

Attachments

  • Muzzle: Scout Silencer
  • Barrel: VDD RE02K
  • Stock: Short Stock
  • Underbarrel: SMLE Pistol Grip
  • Magazine: 8MM Klauser 5 Round Fast Mag
  • Ammunition: FMJ Rounds
  • Rear Grip: Leather Grip
  • Perk: Fleet
  • Perk 2: Fully Loaded

With absolutely insane ADS speeds and a one-shot kill of up to 100 meters, the Vanguard Kar98k is ideal for aggressive Warzone players.

While you will need to be a sharpshooter with a solid aim to make this gun shine, it’s deadly in the hands of players who can quick scope their opponents from a distance.

Although the gun won’t be eliminating enemies in a single shot from massively long distances, it makes up for this shortcoming with its absurd ADS speeds and mobility.

3. Best ZRG 20mm loadout

Attachments

  • Muzzle: Wrapped Suppressor
  • Barrel: 43.9″ Combat Recon
  • Laser: SWAT 5mw Laser Sight
  • Stock: 5 Rnd
  • Rear Grip: Serpent Grip

Taking the third spot is none other than the ZRG 20mm Sniper Rifle from Black Ops Cold War.

Again, significant shifts in the game’s meta have allowed some underrated guns to flourish. None more so than the ZRG 20mm, which did enjoy some success when it first came out, but it has quickly become a fan favorite.

While it can’t quite contend with the 3-Line Rifle and Gorenko, its fantastic speed and great bullet velocity do make it much easier to use. Even Call of Duty streamer IceManIsaac has singled out one of the best Warzone sniper loadouts to try for the unstoppable ZRG 20mm Sniper Rifle.

Check out our own top ZRG 20mm loadout too.

2. Best 3-Line Rifle loadout

Attachments

  • Muzzle: Mercury Silencer
  • Barrel: Kovalevskaya 820mm R1MN
  • Optic: 1913 Variable 4-8x
  • Stock: ZAC Custom MZ
  • Underbarrel: Mark VI Skeletal
  • Magazine: .30-06 20 Round Mags
  • Ammunition: Lengthened
  • Rear Grip: Leather Grip
  • Perk 1: Silent Focus
  • Perk 2: On-Hand

The 3 Line-Rifle was ignored for a long time by a lot of Warzone players but a hefty set of buffs in Season 5 finally brought the gun into the fold.

Since then the rifle has been a dominant pick on Caldera that deals lethal amounts of damage. Which is why this is one of the best Warzone sniper loadouts out there.

Not only that, it’s currently the most popular rifle in the game and players are seeing a lot of success with the weapon, so don’t hesitate to make the most of this powerful sniper.

To make sure it’s the best it can be, we have a complete guide to the best 3-Line Rifle loadout here.

1. Gorenko Anti-Tank Rifle

Attachments

  • Muzzle: Mercury Silencer
  • Barrel: 420mm Empress
  • Optic: 1913 Variable 4-8x
  • Stock: Reinforced Stock
  • Underbarrel: GF-59 Flashlight
  • Magazine: 13mm AM 10 Round Mags
  • Ammunition: FMJ Rounds
  • Rear Grip: Leather Grip
  • Perk: Focus
  • Perk 2: On-Hand

The Gorenko burst into the meta in Season 5, establishing itself as one of the best Warzone sniper rifle and loadout after the one-shot nerfs to the Kar98k and Swiss. Now, the gun reigns as the top sniper in Warzone thanks to its lethality at long-range which makes it perfect for picking off opponents.

While it did get hit with a bullet velocity nerf in Season 5 Reloaded, this wasn’t enough to knock it off the top spot. It remains a devastating sniper option in the right players’ hands and offers a huge amount of damage at long range.

Best Warzone sniper support weapons

Once you’ve decided on the best Warzone sniper loadout for your individual playstyle, it’s then important you pick a solid secondary or support weapon.

Seeing as Sniper Rifles are ideal at long range, your best bet will be to find a weapon that is good at close and medium-range engagements, leaning toward whichever suits you best. We’ve listed three separate weapon loadouts that are perfect when paired with any of the sniper loadouts above.

1. Best Armguerra Warzone loadout

  • Muzzle: Recoil Booster
  • Barrel: Botti 315mm CII
  • Optic: Slate Reflector
  • Stock: Imerito SA Folding
  • Underbarrel: Mark VI Skeletal
  • Magazine: 9mm 60 Round Mags
  • Ammo Type: Lengthened
  • Rear Grip: Polymer Grip
  • Perk: Hardscope
  • Perk2: On-Hand

2. Best XM4 loadout

  • Muzzle: Agency Suppressor
  • Barrel: 13.5″ Task Force
  • Optic: Axial Arms 3x
  • Ammunition: STANAG 60 Round
  • Underbarrel: Field Agent Grip

3. Best MP40 loadout

  • Muzzle: Recoil Booster
  • Barrel: Krausnick 317mm 04B
  • Optic: Slate Reflector
  • Stock: Krausnick 33M Folding
  • Underbarrel: m1941 Hand Stop
  • Magazine: 7.62 Gorenko 45 Round Mags
  • Ammo Type: Hollow Point
  • Rear Grip: Polymer Grip
  • Proficiency: Steady
  • Kit: Quick

While many support weapons complement a sniper loadout in Warzone, if you’re struggling to find that perfect fit, these three should prove to be successful in the BR.

Looking for more of the best Warzone loadouts and tips? Check out our list of guides below:

Best Warzone settings to increase FPS on PC | Most popular Warzone weapons | Best Warzone loadouts | Call of Duty Warzone Mobile: Everything we know | What is Sabotage Contract in Warzone? | How to level up Vanguard weapons fast for Warzone

If you click on a product link on this page we may earn a small affiliate commission.

The Dark Side: Night Fishing for Big Brown Trout

0

Let’s Face It, in Most Cases Those Big Brown Trout in Your Local River Aren’t Falling Victim To a Size 10 Woolly Bugger or a 16 Prince Nymph

To be honest, you’re probably unaware of what lies beneath the surface tucked against a log jam or wedged under that giant boulder mid-river that you’ve fished countless times. In most cases in my night fishing experience, there’s almost always a much bigger fish that shows itself at night than any other previous fish you’ve might have seen during the daylight hours.

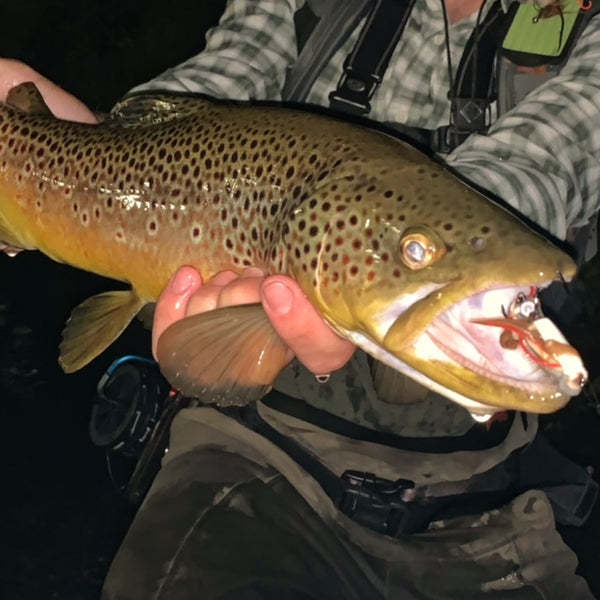
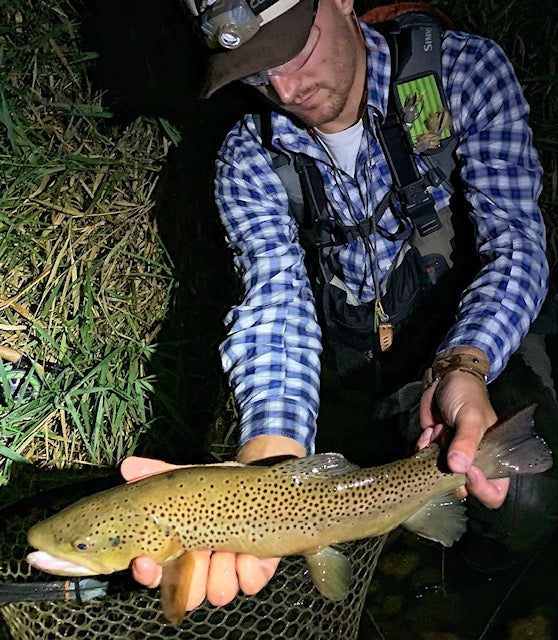
The majority of the largest trout I have ever seen were at night in less than 24” of water. Some of the most dominant predators on the planet feed at night… and brown trout are no different.

Before we go further into tips, tactics, and tackle, I’d like to preface that night fishing obviously has its additional challenges and even dangers. Safety is by far the utmost importance when fishing, especially night fishing. Understanding every inch of the river you plan on night fishing is extremely important. Knowing every boulder, drop off/ledge, and casting obstruction can prevent you from going for an unexpected swim, broken rod, or even a hook to the face (speaking from experience). Always wear eye protection (clear or light illuminating lenses), two headlamps (you’ll drop one in the river), and try to take a fishing buddy with you just for peace of mind.

Where I live in Pennsylvania as well as many places in the country, night fishing is more of a seasonal approach. By all means, you can night fish every month of the year and find some success, but there is definitely a “prime time” to be on the water. Typically, I personally begin my night fishing season during the “post hatch” season. After the majority of the caddis and mayflies hatch in May, and the water becomes skinny and shallow, this is when I find brown trout to be starved and more eager to eat larger meals.

This Will Change the Way You Fly Fish Pressured Waters

Night fishing in May, June, and even early July definitely produces plenty of fish, but not THE fish we’re all looking for. Once August rolls around and water temps begin to drop into safe fishing temperatures, that’s when you need to fish until the wheels fall off. Sleep becomes a thing of the past and coffee becomes your best friend. Your best shot at consistently catching brown trout 20”+ and even 24”+ is between August and October.

The worst conditions for daytime fishing are your best conditions for night fishing. Low and clear water is by far the best water conditions to target big brown trout at night. Dominant brown trout adapt and hide so well during these conditions during the daytime which make them almost impossible to target. Once the sun begins to fade, the fish will migrate out of structure and move into feeding areas for the night.

Swing It! Spey Streamer Fly Fishing Tips

A mistake anglers often make is fishing the same deep hole they typically would fish during daytime. Brown trout will move into shallow sandy tail-outs, or push into the head of a run where the water might be less than 24” in depth. The inside seam of a deep pool also offers a great ambush point for a large brown trout.

Tackle used when night fishing is very similar to fishing big streamers. Any 6wt, 7wt, or 8wt will suffice. On larger rivers, a trout spey or switch rod works great for swinging streamers or skating rodent patterns across the surface. A floating fly line is the most versatile line for night fishing in my opinion. You can fish surface flies, “pushers” that sit barely subsurface in the surface film, or even a streamer if you want to swing a baitfish into deeper pools. Your leader is extremely important when night fishing as well. Typically when fishing a surface style fly, keeping the leader short and stout is critical. Two feet of 20lb tippet to a blood knot, followed by three feet of 15lb tippet is typical when fishing surface style flies. Your leader needs to be strong and abrasion resistant. It’s not “if,” it’s “when” you toss your flies into a tree.

I have personally witnessed brown trout eat mice, rats, bats, baby birds, and even water snakes. A large brown trout over 24” is not much different than a musky. Don’t be afraid to think outside the box when night fishing. The biggest brown trout I’ve hooked at night was on a 6” rat pattern. The most important aspect of fly design for night fishing in my opinion is how much vibration, water displacement, or surface disruption you can create while not sacrificing your hook gap. Thin, but wide profile deer or foam body mouse flies work great. If using streamers, a pusher style fly that rides high in the water column seems to be extremely effective as well.

Tied with a Surface Seducer Double Barrel Popper & Slider Body.

How to fish you fly is totally dependent upon on moon phases, cloud coverage/ambient light, and speed of the current. A mouse is not going to swim upstream against the current.

The two most effective retrieves are:

  • Down and across just like you would swing a wet fly
  • Casting upstream and working the fly back to you

If the current is a classic soft dry fly drift, I almost always work the fly down and across. Your rod tip height as well as your casting angle will dictate the speed of the fly. While fishing short and soft inside seams of a faster run/pool, orienting yourself downstream or below the fish will enable you to cast directly upstream and work the fly right to your feet. This is also a fantastic approach to work upstream along parallel with a heavily wooded bank. I have seen countless times where a fish will strike multiple times with this approach and ultimately eat the fly at your feet after missing 3-4 times in one drift.

Be sure to always start your casts short, most fish are sitting right at your feet!

At the end of a long night as the sun begins to rise; rest assure, that legendary fish most likely got away. More times than not, they have to make a series of mistakes in order for you to land them. Whether it ran you into a long jam, bent a 1/0 hook, or it came off just short of the net; the giants of the dark will keep you coming back for more. Tip your cap, swig some spiked coffee and keep after it. More often than not, they’ll leave you with a memory rather than a photo that you will never forget. Some nights, all you’ll have left is a fly patch full of chewed up foam.

Want More Content Like This?

Join the Flymen Mailing List at the bottom of the page!

About Stephen Nymick:

The Dark Side… Night Fishing for Big Brown Trout </header> Let’s Face It, in Most Cases Those Big Brown Trout in Your Local River Aren’t Falling Victim To a Size 10 Woolly Bugger or a 16 Prince Nymph To be honest, you’re probably unaware of what lies beneath the surface tucked against a log jam or wedged under that giant boulder mid-river that you’ve fished countless times. In most cases in my night fishing experience, there’s almost always a much bigger fish that shows itself at night than any other previous fish you’ve might have seen during the daylight hours. The majority of the largest trout I have ever seen were at night in less than 24” of water. Some of the most dominant predators on the planet feed at night… and brown trout are no different. Before we go further into tips, tactics, and tackle, I’d like to preface that night fishing obviously has its additional challenges and even dangers. Safety is by far the utmost importance when fishing, especially night fishing. Understanding every inch of the river you plan on night fishing is extremely important. Knowing every boulder, drop off/ledge, and casting obstruction can prevent you from going for an unexpected swim, broken rod, or even a hook to the face (speaking from experience). Always wear eye protection (clear or light illuminating lenses), two headlamps (you’ll drop one in the river), and try to take a fishing buddy with you just for peace of mind. Where I live in Pennsylvania as well as many places in the country, night fishing is more of a seasonal approach. By all means, you can night fish every month of the year and find some success, but there is definitely a “prime time” to be on the water. Typically, I personally begin my night fishing season during the “post hatch” season. After the majority of the caddis and mayflies hatch in May, and the water becomes skinny and shallow, this is when I find brown trout to be starved and more eager to eat larger meals. This Will Change the Way You Fly Fish Pressured Waters Night fishing in May, June, and even early July definitely produces plenty of fish, but not THE fish we’re all looking for. Once August rolls around and water temps begin to drop into safe fishing temperatures, that’s when you need to fish until the wheels fall off. Sleep becomes a thing of the past and coffee becomes your best friend. Your best shot at consistently catching brown trout 20”+ and even 24”+ is between August and October. The worst conditions for daytime fishing are your best conditions for night fishing. Low and clear water is by far the best water conditions to target big brown trout at night. Dominant brown trout adapt and hide so well during these conditions during the daytime which make them almost impossible to target. Once the sun begins to fade, the fish will migrate out of structure and move into feeding areas for the night. Swing It! Spey Streamer Fly Fishing Tips A mistake anglers often make is fishing the same deep hole they typically would fish during daytime. Brown trout will move into shallow sandy tail-outs, or push into the head of a run where the water might be less than 24” in depth. The inside seam of a deep pool also offers a great ambush point for a large brown trout. Tackle used when night fishing is very similar to fishing big streamers. Any 6wt, 7wt, or 8wt will suffice. On larger rivers, a trout spey or switch rod works great for swinging streamers or skating rodent patterns across the surface. A floating fly line is the most versatile line for night fishing in my opinion. You can fish surface flies, “pushers” that sit barely subsurface in the surface film, or even a streamer if you want to swing a baitfish into deeper pools. Your leader is extremely important when night fishing as well. Typically when fishing a surface style fly, keeping the leader short and stout is critical. Two feet of 20lb tippet to a blood knot, followed by three feet of 15lb tippet is typical when fishing surface style flies. Your leader needs to be strong and abrasion resistant. It’s not “if,

Stephen Nymick is owner of Stephen Nymick Fly Fishing LLC, and a Guide for Steelhead Alley Outfitters. He began fly fishing at just 5 years old on his local streams in Western Pennsylvania. The day his father took him out to get his first fly rod, he also came home with his first fly tying kit. Stephen has been fly fishing exclusively for over 20 years and has guided for 7 years. Throwing big streamers or mice for brown trout and swinging flies for Steelhead are Stephen’s true passions. You can follow Stephen on Instagram @stephennymick. For further questions, email Stephen at [email protected]. To book a trip, contact Steelhead Alley Outfitters at 888-453-5899.

9 Best Hunting Rifles Available in 7mm PRC

0

I love 7mm PRC. I built a custom 7mm PRC two months before the cartridge was ever even announced to the public, and have been shooting it constantly. I’ve learned a lot about what does and doesn’t work well for this platform.

7mm PRC is a unique cartridge. The more experience I have with it, the more I realize that it matches some rifles extremely well, and others less well. Because of that, I’m going to be straightforward in this post in saying some rifles that I simply can’t recommend for 7mm PRC.

Why You Can Trust This Review

  • I have reviewed many dozens of hunting rifles to compare the best rifles at each price point.
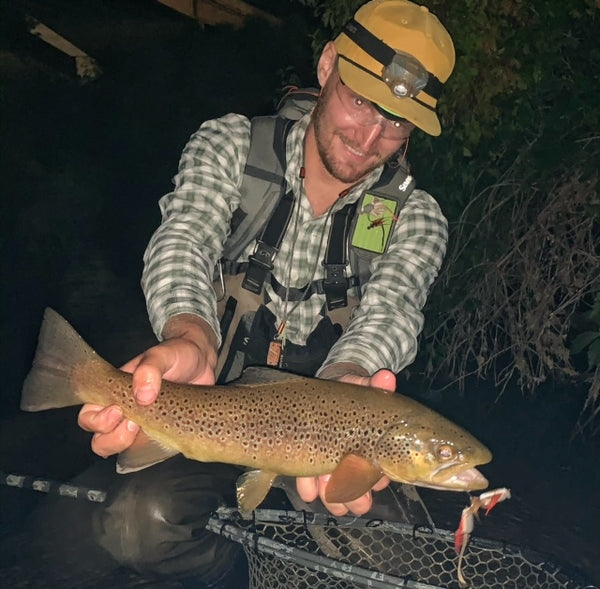
  • No rifle maker pays me for my opinions, which is why Backfire is one of few places you’ll see NEGATIVE as well as positive reviews. Most reviewers only talk about the good things because they want to please the manufacturers.
  • I’ve been shooting 7mm PRC since before the cartridge was even announced. I own two 7mm PRC rifles.
  • I have a somewhat rounded face, which research shows increases public trust in a person. Just kidding on this one 🙂

Later in this post, I’ll discuss some things to specifically look for in choosing a 7mm PRC rifle, but first, let’s dive in to some cool guns.

Option #1: Ruger American Go Wild!

This is a Ruger American Predator. It’s NOT the Go Wild Edition.

The Ruger American has become a beloved rifle at the low end of the market. Compared to dozens of other cheap rifles I’ve reviewed for the Backfire Youtube Channel, the Ruger American is one of the only ones that I’ve found to shoot reliably accurate groups. However, one early reviewer of the RA in 7mm PRC did have some accuracy issues.

The “Go Wild!” edition of this gun adds a few features such as burnt bronze Cerakote on the barrel and action, a camo-printed stock, and a muzzle brake. The biggest upgrade to the “Go Wild!” models is the magazine, which is far more reliable than Ruger’s old rotary mag. The feeding still isn’t 100% perfect, but it’s a substantial improvement over the standard Ruger American.

Overall, the Ruger American Go Wild is an excellent choice for a budget 7mm PRC rifle. You’ll likely have good accuracy, the manufacturing consistency is reliable, and you’ll have a durable gun that will last a long time. Plus, you can always upgrade the stock down the road because there is a robust accessory market for the Ruger American.

However, I the increased price of the Go Wild edition of this rifle puts it in a price point that competes with the Bergara B14 Hunter, Tikka T3x, Franchi Momentum, and CVA Cascade. Once those rifles are released in 7mm PRC, I would easily adjust my recommendation to move to one of those options that I think are better rifles in this price bracket.
It’s important to note that while the Ruger American is the only budget 7mm PRC rifle I can recommend right now, it’s NOT the only budget option out there. The Mossberg Patriot has also been released in 7mm PRC, but I wouldn’t touch it with a 39.5′ pole. Later in this post, I’ll discuss the rifles I DON’T recommend in 7mm PRC.

Option #2: Savage 110 Ultralite

Savage 110 Ultralite

Savage was one of the first rifle makers to embrace the 7 PRC. While many companies announced support at the launch of the cartridge, Savage is actually shipping rifles and brought it to no less than 11 different models immediately.
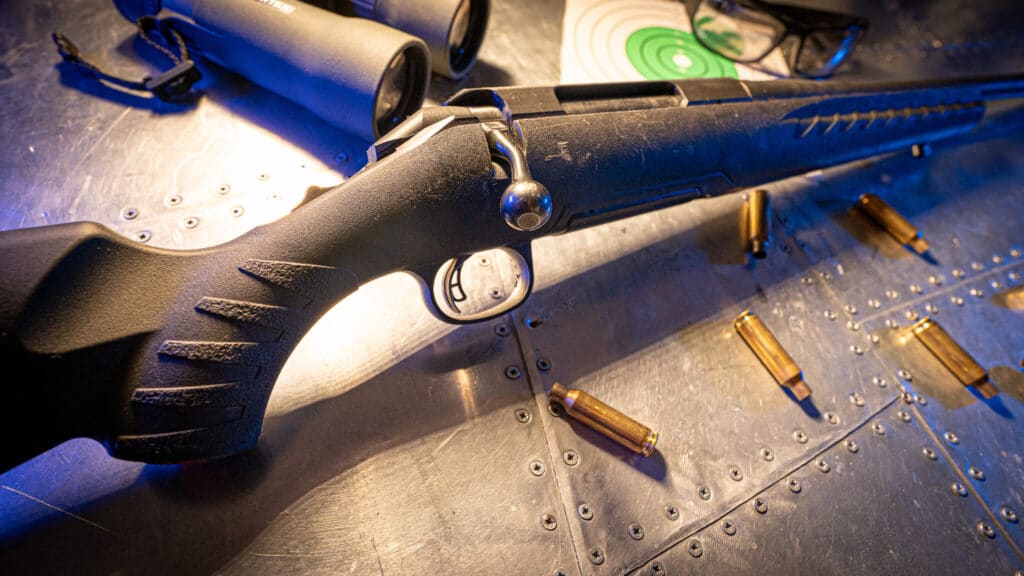
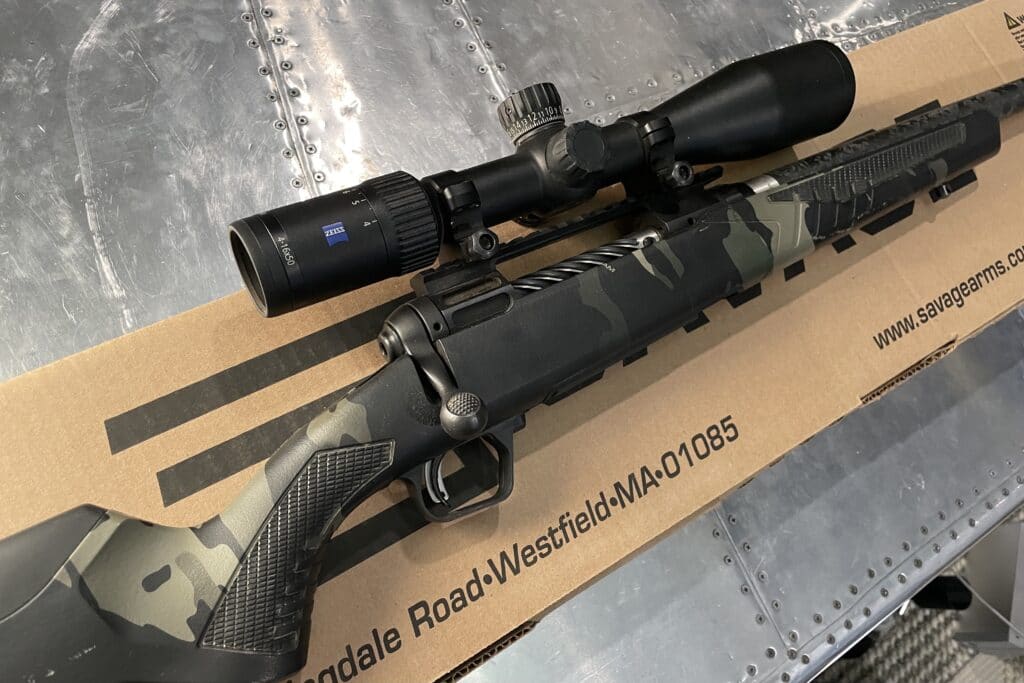
The Savage 110 Ultralite is universally very accurate. The real selling feature of the rifle is that it utilizes a Proof Research carbon fiber barrel. That’s a very high-end precision barrel for a rifle in a factory rifle. It felt like I couldn’t miss when I did my full review of the Savage 110 Ultralite.

The knock on the Savage 110 Ultralite is that it uses a clumsy Savage action and an unreliable plastic magazine and mag catch. I was once told that a Savage 110 Ultralite is a “$1,000 barrel attached to a $400 gun.” It’s a funny comment, but honestly it’s a very functional stock. It has an adjustable cheek piece and length of pull, and is decently rigid in the forend. Plus, because so many stocks are inletted for the Savage 110, it’s a piece you could replace with a carbon fiber stock at some point in the future and you’d have an extremely fine rifle.

Still, if you can look past the Tupperware stock, you’ll have a sinfully accurate rifle that is incredibly lightweight for a reasonable price. When I purchased the Savage 110 Ultralite a few years ago, I got it for $1,195, but now they run closer to $1,500. Still, it’s a fair price for what the rifle is.

Here is a full list of rifles that Savage will be releasing in 7mm PRC:

  • 110 Ultralite (HD or Camo) – $1,649 – $1,699
  • 110 High Country – $1,239
  • 110 Timberline (Right or left hand) – $1,239
  • Impulse Big Game – $1,449
  • Impulse Mountain Hunter – $2,437
  • 110 Apex Hunter XP (Right or left hand) – $709
  • 110 Apex Storm XP – $819

Option #3: Browning X-Bolt

The bottom of a Browning X-Bolt Hell's Canyon Speed rifle showing the bottom metal and magazine being removed by a gunsmith on a Hoppe's 9 gun vice.
The browning X-Bolt is a great gun, but plan to take out the trigger and put in a Timney.

The Browning X-Bolt line is a very compelling option for 7mm PRC. X-Bolt rifles are always styled to look cool, and I’ve found the manufacturing quality to be very reliable. Plus, they use a quality action with some cool features like the ability to pull the bolt back while still in safe.

If I were buying an X-Bolt in 7mm PRC, I would definitely look to their “SR” line. The “SR” line means “Suppressor Ready”, so you’ll get the muzzle threaded 5/8×24, and barrels that are 4″ shorter. Both of those are a great match for 7mm PRC, which does well in a shorter rifle, and also having a threaded barrel can help to reduce recoil by adding a brake or suppressor. Unfortunately, I haven’t seen the SR line yet available in 7mm PRC.

But no rifle is perfect. Here are a few issues I have with X-Bolt rifles:

  • Metric Patterns – They stubbornly still thread many parts of the rifle using metric patterns, which means you can’t add a suppressor or brake without an adapter. (Note: Their SR models have standard 5/8×24 muzzle threads, but still use metric threads in other areas).
  • Lawyer Triggers – Browning puts very heavy triggers in their rifles. It’s ironically called the “Feather Trigger.” I would not buy an X-Bolt without also buying a Timney replacement trigger for the X-Bolt. It’s a 2-minute install and you’ll have a much better gun.
  • Price – Price points aren’t competitive anymore. It’s tough to recommend an X-Bolt when you can get a Bergara B14 with a much stiffer stock and better action, or a Savage Ultralite with a high-end carbon fiber wrapped barrel for the same price.

Option #4: Fierce Carbon Rogue

Fierce Carbon Rogue

Fierce Firearms is a smaller rifle maker who creates all of their firearms in Utah. They stick out to me for a few reasons: (1) They are experts with carbon fiber so they’re rifles are usually very light, and (2) they make the coolest looking rifles on the market.

The Rogue is a hybrid rifle. It has a carbon stock and carbon-wrapped barrel. It has modern touches like a picatinny rail for mounting a bipod, and QD flush cups. Yet, it has a more traditional grip rather than a vertical pistol grip.

In my review of the Carbon Rogue, I found it to be accurate, extremely well-built, perfect at feeding, and it looks great. It’s a premium rifle at just over $2,000, but it can honestly compete with a full custom rifle that costs twice as much.

Watch my full review of the Rogue on Youtube.

Option #5: Fierce Mountain Reaper

Fierce Firearms has been one of my favorite manufacturers of high-end rifles for a while. They seem to understand that shooters want cool-looking, lightweight, shootable rifles.

While Fierce has had their Reaper model for quite a while, it was a little heavy. Now, they’ve started making the Mountain Reaper which takes all the best features of the Reaper, but puts them in a lightweight package.

It has a magnesium chassis, a titanium action, and weighs less than 6 lbs in many chamberings. Fierce rifles generally mitigate recoil well due to their stock designs and Limbsaver recoil pads, but I still might recommend a muzzle brake or suppressor to shoot 7 PRC in this light of a package. The recoil of the 7 PRC

The Fierce Mountain Reaper is available in 7 PRC with 20″ and 22″ barrels with a 1:8 twist, and personally I’d pick the 20″. My custom 7 PRC uses a 20″ barrel and I’m happy to see 2,950 fps with 150gr copper bullets for hunting.

Check out the Fierce Mountain Reaper.

Option #6: Put a 7mm PRC Barrel on a Rifle You Already Own

My custom-built 7mm PRC rifle

The fastest and cheapest way to start shooting 7mm PRC is to simply rebarrel one of your existing rifles. If you have a suitable rifle, such as a Tikka T3x, Bergara B14, Remington 700, or even a Ruger American, you can get a prefit barrel ordered and just screw it on. Done!

There are a few caveats, though. You’ll need a properly sized bolt face (the front part of the bolt that grabs on to the cartridge). The 7mm PRC uses the same bolt face as a 7mm Remington Magnum, 300 Win Mag, or a 300PRC or 6.5 PRC. If your rifle is already chambered to use that magnum bolt face, you’re set.

If your rifle doesn’t have that bolt face, you can either order a new bolt, or some actions have replaceable bolt faces which are cheap and easy to change out.

The next issue is you’ll need to make sure the rifle action is long enough. 7mm PRC has a cartridge overall length of 3.34″, so a long action is needed. If your rifle was chambered in .30-06, 300 Win Mag, 7mm Rem Mag or any other long-action cartridge, you’re set on this regard as well. If your rifle was configured for long action, you’ll probably also have a long enough magazine length for the cartridge as well.

Next, you’ll need a barrel. I like working with Preferred Barrel Blanks. They are already doing prefits for the 7 PRC, and have gone through a few reamers to find one that’s really reliable in a cartridge with extremely tight tolerances. I also found that they had many chassis options and other components available, which was nice.

Once you get your barrel, it’s just a matter of torquing it on in 5 minutes and you’re ready to go!

Option #7: Remington 700 Long Range

Remington absolutely destroyed its brand as a rifle maker over the last 20 years. Frankly, I was surprised that the owners of the new “Rem Arms” manufactured rifles even decided to bring the brand back. It seemed to me that the brand reputation was so destroyed that it would have been easier to start from scratch under a new name.

Yet, the reports I’ve heard so far from gun industry professionals that I trust has been positive. I still haven’t had my hands on one to review for the Backfire Youtube channel, but I’m eager to see if they’ve turned things around. I’ll believe it when I see it.

Prices for the new Remington in 7mm PRC are expected to be around the $1,000 price point.

Option #8: Christensen Arms MPR (And other models)

MPR stands for “Modern Precision Rifle.” It is a modern chassis design with adjustability in the stock, M-lok everywhere for attachments, and a pistol grip. It’s the type of rifle that most advanced shooters want.

I’ve reviewed a Christensen MPR on the Backfire Youtube channel and gave it mixed results. The mag well was so loose that I couldn’t believe it wasn’t a defect in the particular rifle I was using. The accuracy was okay, but not notable for a rifle in this price point. Plus, it was a little heavy for taking out into the woods.

In talking with other shooters, the MPR is a little polarizing. Some people get a good one that shoots very well and rave about it. I’ve talked with many others who have had poor accuracy or build quality issues.

Christensen is also chambering their other rifle models in 7 PRC, including:

  • Ridgeline FFT – Order it from Midway USA –
  • Mesa FFT – Order it from Midway USA –
  • Traverse – Order it from Midway USA –
  • ELR – Order it from MidwayUSA – A 7.5lbs rifle for long range shooting.
  • MHR (coming soon)
  • MPR

Option #9: Gunwerks Magnus Rifle System

If you are willing to shell out the big bucks (a little less than $6,000 for the bare rifle), then Gunwerks would be happy to take your money. They make extremely fine hunting rifles for shooters who value accuracy and a system that makes long-range shooting more streamlined.

Personally, if I were to spec out a new Gunwerks rifle today, I’d go with a Magnus rifle with these specs. I am naturally drawn to the lightweight hunting rifles, so I may be tempted to go with a Clymr, but after holding and playing with a Clymr stock, I found the comb was just too low to get a decent cheek weld. I can’t imagine paying that much for a rifle and having a stock that doesn’t fit.

The Magnus stock is only half a pound heavier, but provides much better ergonomics.

Gunwerks was very quick to jump on the 7mm PRC cartridge. They had their own 7 LRM cartridge for many years that was extremely similar to the 7 PRC’s design, so it wasn’t difficult for them to begin manufacturing the new cartridge.

Rifles in 7mm PRC That I Do NOT Recommend

  • Mossberg Patriot – I bought a Patriot in 308. Shot some of the worst groups I’ve ever seen out of a rifle (over 5″ at 100 yards). Sent it to Mossberg for repairs and it came back shooting terrible again. Then I got a second Mossberg Patriot in 308. It also is incredibly inaccurate. I know some people have a good experience with theirs, but TWO lemons AND I sent it in for repairs and I still can’t get it to shoot? Can’t recommend.
  • Savage Impulse (and Mountain Impulse) – I’m a big fan of the straight pull. It’s a really cool feature on a rifle; however, I’ve shot Savage’s Impulse twice and found it to be very clunky and heavy. Even their Mountain Impulse that is supposed to be a lightweight rifle is still a little obese for mountain hunters.
  • Christensen MPR – So much of this rifle speaks to me. I love a folding stock, modern stock design with adjustable comb, and a carbon fiber design; however, I didn’t get great accuracy on the ones I’ve reviewed, and found the build quality to be okay at best. It’s an amazing design, but I don’t feel it has the polish of a gun in this price point.

What Guns Will NOT Be Available in 7mm PRC?

Surprisingly, some gun makers are noticeably absent from the list above.

The following gun makers have no imminent plans to add 7mm PRC to their lineups:

  • Bergara – They told me it will likely come first in the Bergara Premier line, and then will eventually go into their less expensive guns. No models have been released yet in 7mm PRC.
  • CVA – No news thus far.
  • Springfield – No plans for 2020 Waypoint coming any time soon in 7mm PRC. I asked them at Shot Show and they were actually really rude about it. Totally gave me the cold shoulder for even bringing it up.
  • Sig – No plans for a 7mm PRC Sig Cross coming any time soon.
  • Tikka – Tikka/Sako have not announced any support for the 7mm PRC yet. Their reasoning is that they are members of CIP (basically a European version of SAAMI), which has not yet approved the 7mm PRC cartridge. I spoke with Hornady and they said they’ve already sent all information to CIP to get approved, but they work slowly.
  • Weatherby – No news thus far.
  • Howa – No news thus far.

List of Currently Available Rifles in 7mm PRC

The following table has a full list of the rifles that are currently announced and imminently available in 7mm PRC. There are over 20 rifle manufacturers who have announced they’ll be supporting the cartridge, but I haven’t yet seen listings for some of the volume manufacturers yet.

ModelPriceAvailabilityNotes

What to Look for in a 7mm PRC Rifle

Indulge me for a moment as we look at some of the very unique aspects of the cartridge, and what kind of rifle we would ideally have to take advantage of those unique features.

  • Built for Long Range Shooting – 7mm bullets, if all else is equal have the highest BC’s of any other caliber in the most common bullets for hunting. Because of the high BC’s, you’ll have great resistance to drop and drift-making this a long-range shooter. Pick a rifle platform that matches that capability with a good adjustable comb and modern stock design to help you stretch this thing out.
  • A Good Track Record of Attention to Detail and a Good Warranty – 7mm PRC uses very tight chamber tolerances. Several manufacturers I’ve worked with have spoken to me about struggling to not have their guns go over pressure if they slightly undersize the chamber, or having brass not fit properly. The PRC line can be tough for gun makers to get right, so pick a manufacturer with a good track record of customer service and attention to detail.
  • Built for a Hybrid of Hunting and Range Shooting – One of the unique things about 7mm PRC is how versatile it is. The faster twist enables it to shoot heavy bullets suitable for hunting larger game, but its balance of speed and recoil also makes it a good fit for target shooting. Pick a rifle platform that allows you to take advantage of both-lightweight for hunting, but stock fitment features (like adjustable cheek piece and a good trigger) to make it do well on the range.
  • 20″ or 22″ Barrel Lengths – Some shooters may want long 26″ barrels to take advantage of all of the speed available, but hunters generally want shorter barrel lengths to make the gun more packable. The 7mm PRC is well-suited to shorter barrel lengths because it has a moderate powder supply, and a fat case. For me, I went with a 20″ barrel, because I usually shoot suppressed and like the “handiness” of a short gun.
  • Quality Recoil Pad, Threaded Muzzle – I’m picky about recoil pads. It makes a big difference in the felt recoil, but so many manufacturers use cheap, junky products. Because the recoil is on the upper end of what most adult shooters can shoot well, having a good recoil pad and a threaded muzzle so you can add a suppressor or muzzle brake, can make a big difference.
  • Not Overly Light Weight – Because 7 PRC is built for longer range shooting and it has noticeable recoil, I’d suggest not going into an ultralight platform under 6.5 pounds unless you’ll be using a muzzle brake or suppressor.

List of Rifle Makers Supporting 7mm PRC

The following list comes from Hornady of rifle makers who have announced support for 7mm PRC rifles.

How to Keep and Raise Pigeons for Dog Training

0

Considerations for pigeon loft design, types of pigeons, and reasons why keeping birds is beneficial when training a bird dog

Congratulations! You just brought home a new bird dog puppy and among the many preparations you made in anticipation of this new family member was building a pigeon loft, stocking it with birds, and training the birds to rehome to their loft. Wait, you didn’t get around to that yet and you are just now searching the internet for training pigeons? You’ve come to the right place: here is a crash course in pigeon-keeping. It’s not nearly as tough as you might think.

During your research into training a bird dog, you have undoubtedly heard this simple cliché ad nauseum, “It takes birds to make a bird dog.” Nothing could be more true. Ideally, we would all train on wild birds and our dogs would be perfect, but that isn’t the case for the vast majority of us. Thankfully we have pigeons-the most reliable training partner a dog owner could ask for-and with the help from a well-timed remote bird launcher, we can make our pigeons flush wild just like any late season ruffed grouse. If you keep homing pigeons, they become a renewable and recyclable training resource; you can even sell your extra young birds to recoup some of the initial start-up and feed expenses.

“Hold on,” I can hear you saying, “I just committed my life to keeping a crazy bird dog puppy, and now this guy wants me to become a pigeon farmer. Are you out of your mind?” Maybe, but hear me out.

SUBSCRIBE to the AUDIO VERSION for FREE Google | Apple | Spotify

Reasons to keep pigeons for bird dog training

Many people feel that keeping a team of homing pigeons is a bit too much. They believe that the idea of getting their birds from poultry auctions, Craigslist, or trapping them is far less intimidating. All three are viable solutions to the problem of getting birds for training, but none of these solutions are on your terms. You are at the mercy of other people; poultry auctions are hit-or-miss when it comes to pigeon availability and another desperate bird dog owner may come along and outbid you. I was once that desperate bird dog owner who paid $25 for the only pigeon at the auction so that I wouldn’t go home empty-handed. Since the pigeon wasn’t homed to my loft, I watched my $25 “investment” fly off after a training session. Getting birds this way is not only unreliable, it can also be very expensive.

Catching feral birds is a nice D.I.Y. aspiration, but in reality, it is time consuming and perhaps a dangerous proposition if you choose to capture them by climbing ladders with a net in the dark. If you use traps, you will find yourself devoting a lot of time learning how to build traps and how to trap birds. You can burn a lot of time and gas checking your traps. I don’t have that kind of time to mess around and I would rather burn gasoline while traveling to my training destinations. You should also be wary of various bird diseases that can be transmitted to humans, as feral pigeons are little more than rats with wings and the areas they inhabit in barns and under bridges are beyond filthy from the droppings of generations of disease-ridden feral birds.

You can buy feral birds that someone else trapped, but then you get into the reliability factor. Your supplier could be out of birds when you need them, or perhaps they command top dollar in your area. Five dollars is the average per bird in my area, but I have seen them go for much, much more. Remember, too, that you aren’t reusing these birds again and again like you would with your own personal team of homing pigeons; you are literally throwing that $5+ bird away… and yet its diseases stay behind. You might consider building a holding cage to stock up on trapped birds and save them for your training sessions, but by then, my friend, you should definitely just build a loft and keep homers yourself.

What is a pigeon loft?

A pigeon loft is essentially a pigeon-friendly chicken coop. It is usually raised a few feet off the ground and offers shelter where the birds feel safe. Theoretically a loft could simply be built from a cardboard refrigerator box as long as it is weather- and predator-proofed. I’ve seen lofts in all shapes and sizes, from a five-gallon bucket mounted on the side of a garage housing a breeding pair of birds to an elaborate, multi-roomed mobile home converted into a pigeon racer’s dream breeding facility.

Pigeons aren’t hard to keep and they aren’t particular. But what if you don’t have a yard to keep your pigeon loft? Years ago I was an apartment dweller with a bird dog. I kept three homers in a rabbit cage on my balcony.

Get creative.

Over the years, I have made pigeon lofts out of greenhouses, modified shipping containers from moving companies, transformed old school bus stops from neighbors whose children have grown, and built one with scrap wood. A pigeon loft only needs a few things to make it a home for the birds. Pigeons will live in anything. The standardized loft design is mainly for your convenience in working with them.

Pigeon loft building considerations

Ventilation

The most important thing to keep the birds healthy is to achieve maximum ventilation with no draft. Pigeons create a lot of dander which is unhealthy for you and them. Poorly-ventilated lofts promote coccidiosis or pigeon lung disease, so there needs to be some air flow. However, the birds also need a way to get out of drafts which can kill them under the wrong circumstances. Some of the healthiest lofts I have ever seen are just three solid walls with the floor, roof, and one open face covered by hardware cloth. The birds had cubbies in which to shelter from any winds through the front of the building. A loft like this will also withstand some moderate overcrowding. Overcrowding happens. Maybe you are saving birds to sell to some chump who just got a bird dog puppy or maybe you are anticipating training with friends. The better the birds can breathe, the healthier they will be in crowded conditions.

Flooring

The floor must be dry. Whether you build a simple wire floor which allows droppings and spilled food to fall through or a wooden floor that you must scrape every day, it needs to be dry. Dirt floors work, but it is difficult to manage diseases when they come to visit your birds. My favorite floor is a raised plywood floor covered with firewood pellets. The absorbent nature of the firewood pellets keeps everything dry until I can get around to cleaning it.

Entrance and security

The birds need a way to get in and out. This is usually a pigeon-sized entrance with a landing board. It is essential that the opening is able to be securely closed so that the birds stay in and the predators stay out. Flapping pigeon wings are a dinner bell to avian predators and they will soon have your loft marked on their daily patrol.

You should also install a set of pigeon trap bobs over the entrance to allow the birds to enter but not leave. Pigeon trap bobs are readily available online in a variety of sizes. Once your birds have entered the loft through the bobs for the day, you will want a door you can close behind them to keep predators from entering or ambitious pigeons from exiting through the bobs.

Maintenance access

You must be able to access your birds for feeding, cleaning, and collection for training, etc. This is usually a standard door on the back or side of the loft but again, be creative with lifting hatches and sliding panels to save space and material!

Consider your strategy for preventing birds from escaping while you are netting some to take out for training. In a very large loft, perhaps the door can close behind you while you work in the loft. For smaller lofts, plan to be able to block the opening with your body while you are reaching in for access.

Perches and roosts

Pigeons need multiple perches. They will fight for their own territory within the loft, so it is important that each bird gets its own perch. This is the individually-claimed space that they are homing to when they fly great distances back to your loft.

A best practice is to build 1.5 perches per expected bird so that when temporary overcrowding inevitably occurs, the birds will each have their own spot to roost.

Food and water

Clean food and water are essential for healthy birds. A pigeon will perch on anything that it can perch on; when they perch, they poop. Buy pigeon-specific feeders and waterers which can readily be found online or build your own pigeon-proof system. This may take a few design iterations as their ability to poop in their own water will continually amaze you.

Pigeons need a special protein diet different from chickens, so specialized pigeon feed is a must for long-term health. Like most birds, pigeons need grit to aid in proper digestion.

Loft placement location

The loft should be placed away from other buildings and trees. An ideal loft location would be on a rooftop, making the loft itself the highest point around. Many birds are successfully kept on rooftops in cities. If there is something taller than the loft nearby, the birds will naturally want to perch on it instead of entering the loft. This puts your pigeons at risk of being picked off by predators. If it isn’t possible to place your loft away from buildings or trees don’t let that stop you, just be sure to never let the birds out on a full stomach or else returning home will be at the bottom of their priority list for the day.

The above considerations will get your loft started for relatively little time or financial investment. Once you’ve established a loft there are long-term bird-keeping nuances to learn, but that is for another article.

Read: Living with Pen-Raised Quail for Dog Training

Choosing pigeons for dog training

Not all pigeons are created equal and not all are suitable for dog training. You need homing or racing pigeons. These birds are athletes in their own right and have been selectively bred over hundreds of years for speed, endurance, and an incredibly strong desire to make it back to their home perch.

My pigeon mentor had one bird fly over 600 miles in a single day to win a race where it competed against thousands of other birds. Pigeon racing is a huge rabbit hole that I invite you to go down once you start keeping birds; it is a lot of fun with a rich tradition and history.

Because this homing instinct is so strong, avoid buying mature birds over four months old unless you are willing to have a breeding loft where you can keep these birds contained for the rest of their lives and only use their offspring to keep as training birds. It is possible, but time consuming, to “rehome” mature pigeons to your loft. Once the birds have had a few hatches of chicks, they have about a fifty/fifty chance at returning to your home loft if you let them out.

Where do you get racing pigeons? Find a local racing pigeon club; these are some of the friendliest and most helpful groups around and if you take an interest in their sport, they will open the door to a whole network of pigeon people in your area with birds and the right knowledge to help you keep them healthy. If there are no clubs within reasonable driving distance, then Craigslist, auctions, and feed stores are all good places to look for homing pigeon breeders.

Focus your pigeon search on one-month-old pigeons called “squeakers” (they are called this because they squeak instead of grunt or coo like older birds). Squeakers are visually identifiable by yellow strands of fuzz poking through their feathers and pink flesh around their beak. The fuzz goes away quickly and the flesh around the beak (called a wattle) will turn white as they mature. Generally, birds under three or four months of age will readily rehome to a new loft within a few weeks of being locked down. The lockdown helps the birds familiarize themselves with the loft surroundings.

Spring and summer are usually the best time to find squeakers as pigeon fanciers and racers will often have a surplus of birds. Locating squeakers during the winter and fall is a daunting task because the birds are usually separated at this time or not breeding.

Note: I do not recommend trying to rehome feral pigeons. As I mentioned above, there is limited chance that the bird will “rehome” after hatching babies, but the possibility of disease infecting the loft isn’t worth the risk.

A word on fancy and show pigeons: these birds are bred for their looks and not their flying abilities. I would avoid them at all costs. Even if you are just planning on shooting them, they will often only flutter a few yards away, allowing the dog an opportunity to catch them. I have even seen them land on the dog handler’s head before. It is best to stick with homing or racing birds, which are always strong flyers.

How many birds should I keep for training?

If you are training one dog, three to five pairs of homing pigeons will be more than adequate. This allows a buffer in case a bird is lost to a hawk or to disease. When the training season is over, you can add nest boxes to the loft and raise a new generation of training birds.

The number of birds you keep is highly dependent on the size of your loft. Many people suggest two to three cubic feet per bird. This is not an exact science, but I feel it is a good rule of thumb if you have adequate ventilation and an appropriate number of perches. Overcrowding leads to stress and stress leads to disease that can wipe out an entire flock. It’s always safest to go with fewer birds until you know what you are doing.

So there you have it: the basics to get your foot in the door and wrap your mind around keeping pigeons. It isn’t hard and once you have a team of birds trained (which I will get into in a later post) you can pay yourself $5 every time you release one to fly home. There is definitely a lot more to keeping a healthy team of training homers, but just getting a loft together is the hardest part. If you have been with me this far, you have found it really isn’t that hard at all.

The Five Mental States of Dogs in Training

Living with Pen-Raised Quail for Dog Training

Is Your Dog Soft or Confused in Training?

Best Air Rifle Deals

Popular Posts

Air gun 101: The differences between .177 & .22 – Which jobs they do...

0
I’ve always believed the popular phrase: “It’s not the size of the dog in the fight that matters - but rather the size of the...

What Is a Break Barrel Air Rifle?

0
A break barrel air rifle is a type of air rifle that uses a break action to load and unload pellets. It is one...

Can a Felon Legally Possess an Air Rifle in Tennessee?

0
"Understanding the Legalities: Felon Ownership of Air Rifles in Tennessee" can a felon own an air rifle in tennessee? In the state of Tennessee, the ownership...