Wow, this is a turkey to be proud of… A new world record! Congratulations Todd Pringnitz. I was just surfing the web and found his site and story about his new world record turkey. Here it is:
For many turkey hunters, the thought of a world record animal must occupy their brains much like the elusive giant whitetail bucks that I have been dreaming about my whole life. In all the thoughts that have entered my brain, shooting a world record turkey was the farthest thing from my mind when my good buddy Dan Johnson and I headed to our Bale Blind on the afternoon of April 13th.
I’ve turkey hunted the last few years without any-luck. My only previous experience having any sort of encounter with a tom turkey would be in my back yard back in my home state of Michigan. I somehow found a way to miss a tom turkey at about 8 feet. Needless to say, I didn’t exactly have a huge goal going into this turkey season. In-fact, I would have been pumped to kill any tom turkey with my bow! If it happened on video that would just have been an added bonus. I mean we’re whitetail video producers right?
Thankfully, the persistence of my good friend Dallas Ft. Worth to film my first few hunts of the season would end up being one of the best things to ever happen in my life. Our hunt started earlier in the year when while shed hunting I happened to find my long-lost decoy laying under a bunch of brush out in my CRP field. I remembered the location, and figured I’d grab it the first day I headed into the field turkey hunting. Thankfully I grabbed it a few days before I started hunting because there was an ant nest inside of it, and they were biters! I hosed it out, but didn’t have the stake to hold it in the ground. After digging through my old arrow pile, I found an arrow that would work just fine.
Throughout our first afternoon in the field, Dallas and I filmed a giant tom working the opposite side of the corn field as us. We called at the tom several times, but despite his gobbling and strutting action, he just wouldn’t come closer. I still considered this pretty darned cool because he was definitely a mature tom turkey, and we got some footage of him.
The following afternoon would find Dallas and myself back into the same Bale Blind in-hopes of seeing the giant tom from the day before. When putting out the decoy, we actually busted a hen from the field, so we didn’t even know if we would be seeing much. Within a few minutes, Dallas was performing his “box call magic”, and the wait was on.
About 45 minutes later, we saw a tom turkey enter the field. It was clear that he was a pig of a turkey, but he was leading a hen. He would work up to about 30 yards in-front of her, and then strut back. I honestly didn’t think he was going to come close because he was entertaining the hen. He worked back and forth within about 60 yards, and started circling parallel to us in the blind. With a hen decoy in-front of the blind, we called a little here and there to try to get his attention enough so that he would see the decoy.
With an occasional view of his strutting fan through the standing corn, he started coming closer to the opening in-front of our blind. I was very aware of the distances and shooting arrangement because we had been deer hunting from the same set-up this past late deer season here in Iowa. I knew if he was in the opening, he was within 40 yards, which was a bad place for him to be. He started working closer and seemed like he was committed to coming into the decoy.
This is a picture of the giant turkey entering the field. My first thoughts were “he’s a shooter”…
As he entered the opening, the old tom was clearly a giant turkey. Even though this tom was interested in the hen decoy, he seemed very cautious. He stayed out at a 35-40 yard parameter around the decoy and our bale blind, never coming closer to investigate the mangy looking hen with arrow fletching strangely sticking through the top of her back.
This shows my not-so-fancy decoy set-up in-front of our blind with the big tom circling at 35 yards…
In the back of my mind throughout these moments was the “Shipwreck” encounter that we had in the same corn field only a few months earlier. “Shipwreck” was the 190 class giant I had at 35 yards from a ground blind and I just couldn’t get a shot into him. With the same exact type of “cautious investigation” as the “Shipwreck” encounter, I wasn’t about to make the same mistake again. With the tom starting to walk back to the hen he was tending, I committed to the 35 yard walking shot and came to full-draw. A quick check with Dallas behind the camera, my anchor was locked, and an arrow was soon in-flight “tom-ward bound”.
This is when the tom started heading back toward the other hen in the field. It was now or never!
Of all the arrows I’ve ever release, boy am I glad this one was true. I hit the tom pretty-much dead-center of his body with a loud “thwack”. Dallas started screaming “you smoked him – you smoked him” and I couldn’t believe I had just shot my first tom turkey. After talking a short bit in the blind, we wanted to go track the bird and make certain he was done. After walking across the field, we saw the turkey and he was still alive. After making a quick stalk, I was able to center another arrow through the bird as he started his “death flap”.
This is Dallas and I in the bale blind just after the shot…
Still not knowing we had just shot the world record, Dallas and I were most concerned with putting the beautiful bird out of his misery. It wasn’t until I peeled back the feathers on his chest when all the beards separated and one after another was visible. My trembling hands sifted through the beards trying to keep track of them as they counted of. 1, 2, 3, 4, 5, and finally 6 beards were exposed and I couldn’t believe my eyes. I’d seen and heard of multiple bearded turkeys, but 6 wasn’t something I’d ever heard of. I proclaimed to Dallas; “I just shot a 200 class Boone and Crocket Turkey Dude”…. Yeah, I still had no idea.
Here is a picture I took of the beards in my hand after just realizing the turkey was a multi-bearded freak bird!
After taking our trophy pictures and making some phone calls, things started to take a turn to the ridiculous. I was SO excited to have killed this tom, I swear I don’t think I would have been any-more excited knowing what I had really just shot. Anyone who has seen our deer hunting videos before already knows what I’m talking about. I can shoot a doe and nearly start crying. Ok, maybe not that bad – but it’s pretty embarrassing I can tell you! This is no exception, but it is what it is. I’m not going to apologize for being myself. Ok, I apologize for those who don’t “get me” because sometimes I hate watching my own stuff!
Sitting in a Huntmore chair that I was fortunate enough to engineer for Huntmore owner Scott Hoffman; well, this is the best testing we can do. Pretty cool I get to combine my skills of product design with my passion for hunting. I’m a very fortunate guy to have Scott many years ago on a hunt in Effingham, Illinois!
Chris Brackett (Arrow Afflictions) was the first guy who let me know exactly what I had shot in his way “You idiot, you just shot a state record or something”. After sending him a cell picture of the beard he replied, “You just shot the new world record, you XXXXX”… I think you get the idea.
This is the Blind Ambitions Bale Blind that we used for this set-up. It worked perfectly!
After doing some “we don’t know how to properly measure turkeys – measuring”, we came to the conclusion that this indeed could be the new world record turkey. By this point all Dallas and I could do is laugh. I mean seriously; I’ve spent the last 22 years of my life basically “living for whitetails”. Every waking second of every single day I spend dreaming of bucks, planning, and working for the upcoming season. As soon as one is complete, we’re already working on the next aspect of our year-around pursuit.
Here’s another picture of the Iowa freaks beard.
The only comparison I can make is to the 12 year old that goes out for the first time bowhunting and shoots a 200 class whitetail. I indeed was just that of the turkey world, and I knew things would never be the same. With that being said, I’ve hunted hard enough over the past many years to realize there is always an element of “luck” in any hunt. I always considered all of my luck to be “made”. In this particular case however, it was not only luck, it was dumb luck! What do you do, every serious turkey hunter is probably going to hate me, but I guess there’s nothing I can do about that now.
The turkey was officially scored by Hazel Creek Taxidermy; and has been entered as the new archery World Record for the Eastern turkey in the NWTF record books. The entire experience has been eye-opening to say the least. I’d just like to thank the NWTF and Hazel Creek Taxidermy for their help with this unknown world of turkey hunting that I have just been thrust into. They have all been just awesome! Most of all, I want to thank my good friend, team member, and cameraman Dan Johnson (Dallas Ft. Worth). Without you brother, we wouldn’t have this experience documented to share with the entire world! The turkey and sport deserves it, and without you this would never have been possible. So, thank you so-so much dude! To think that a 9-fingered guy would film the new world record turkey kill – well, I don’t think you’re missing right index finger would have ever imagined. Definitely not right now anyway.
I would never have imagined in a million years that I would ever be “that guy”. Now that it’s done, I just can’t wait to share the story with everyone. I can only imagine how many “shaking heads” there will be when watching me completely not realize what I have just shot. To those guys, believe me, I feel your pain! With that being said, I’m not going to complain about being “that guy”…
My World Record Archery Eastern Tom Turkey had over 49” of combined beard length. He weighed 25.9 pounds, and had 1-1/4” spurs. He scored 149.6875 which beat the previous record of 139.2400. It could be broken tomorrow, but for the moment it’s pretty cool! Good luck to all the turkey hunters out there! Looks like I’ve got a new spring activity to get serious about. Unfortunately, it’s all down-hill from here!
Squirrel hunting can produce a substantial amount of extra meat for your dinner table, but once you have a squirrel in hand…how do you process it? Processing squirrel meat is a pretty simple process that requires just a little time and a sharp knife. As with anything that has been around as long as the processing wild game, there are several ways one can complete the task. For simplicity purposes we will examine just one, the one I use and find to be the simplest.
Before we begin processing the squirrel I’m going to assume a few things.
The squirrel has previously been skinned (field dressed) and all organs have been removed.
The feet on all legs, head and tail have been removed. If these are not completed, please do so before moving on.
If you were using a shotgun to get the squirrels, search the outer parts of the meat for pellets. There is nothing worse than chipping a tooth over dinner. Also, if the meat is bruised due to pellet or bullet penetration you may want to consider soaking the squirrel for a few hours (or overnight) in a solution of salt water. This usually “draws out” the bruising in the meat considerably well.
How to Process Squirrel Meat
Let’s begin:
Front Legs:
Cut from underneath the front leg (armpit area) in an upward motion severing the leg from the body. The socket where the front legs meet the shoulder isn’t very strong and should slice through rather easily. Repeat for other front leg.
Rear Legs:
Cut along the spine (tailbone) until you are able to “bend” the entire leg downward, breaking the socket loose, to remove the leg. Repeat for the other rear leg.
Another thing to do with the rear legs is to remove the small pocket of fatty tissue that is hidden below the surface of the meat, behind the knee. Slide the knife into the meat just enough to puncture it and dig the fatty tissue out. It isn’t a requirement to remove this but most people do so. Leaving it will not adversely affect the taste of the meat.
Torso:
Remove the “flappy skin” that covered the organ casing (belly meat) if you like. Some people choose to trip this meat from the rib cage down to the hip area while others keep it for the small amount of extra meat value. The choice is yours. I usually trim it if I’m going to fry the squirrel but if I use it for a stew or pull the meat from the bone, I’ll leave it attached.
Cut upward just below the bottom rib until you make contact with the backbone. Repeat for the opposite side. Grip the rib cage in one hand and the remaining bottom section in the other and twist. This will break the rib cage free for discarding (there is hardly any usable meat there). This will leave the area from just below the rib cage to the tailbone. Along the back is the loin area and can be cooked along with the legs.
Final
Lastly, remove the lower section of the tailbone (from the back section mentioned above) where no meat is present and discard the tailbone. You will now have all four legs and the back meat section to use for cooking, grilling or stews.
Note: Some people choose to soak the meat overnight in salt water or buttermilk. Some claim that this takes the “gamey” flavor out of the meat. I’ve tried this and do not notice a difference in taste. Plus, if you have an aversion to the flavor of squirrel…I have to ask…what are you doing reading this anyway?
Watch the video tutorial below:
How to preserve a squirrel hide
Preserving a squirrel hide acquired during squirrel hunting can be a fun activity for any young hunter. It can enable them to save their first squirrel or to learn about hiding preservation. Of course you have many other reasons to want to preserve a squirrel hide but before we begin, I must note that “preserving” a hide is different than “tanning” a hide. While Tanning leaves the hide soft and pliable, preserving it usually yields a much stiffer product. This stiffer product may not be as desirable, but with the only required chemical being table salt…many people prefer this method.
If you have a leftover hide from field dressing a previous squirrel, that will work fine but personally I like to get a better looking pelt by skinning it so that I have a much more complete and less damaged hide. Keep this in mind before skinning your squirrel, they way you clean it will determine how intact the hide will be.
Here’s what you’ll need:
Sharp knife
Large flat working surface or a sheet of plywood
Denatured alcohol
Non-iodized salt
Instructions:
Begin by slicing along the underside of the squirrel, from the chin to the anus. You only need to get under the skin so do not stick the knife in far or you risk opening the body cavity. The goal is to remove the skin, not disembowel the squirrel.
Once you have exposed much of the underside meat from the skin, work the skin free slowly and gently. It’s recommended to go ahead and remove the feet so that the legs can be pulled free of the skin. Leaving the feet attached risks allowing rot to take over and ruin your hide.
Split the underside of the tail slowly as you work out the tail. It’s difficult to get it 100{6eed75c7f8c195edd1162272d31c56c9d78bf8d95bfa341f234a4c2acf0cac3e} removed so if you are unable, stop at a reasonable spot and snap it off.
If you decide you want to keep the head on your hide you’re taking on the more difficult part of the skinning process. But with a little patient, you can do it. I choose to remove the head from the body (but not severed from the hide) and save this part for last, slowly work back the skin with your knife. Next, use a staple gun, tacks, small nails, etc to hold the hide open. I recommend taking it to a piece of plywood. Try to keep it on the very edge of the hide.
Add a generous amount of non-iodized salt to the hide, others have stated that regular table salt (with iodine in it works fine but I have not tested it). Be sure to get around the edges and make sure there are not any folds in the skin where the salt cannot reach. Work the salt into the head and tail.As you salt, remember this: Any unsalted spot is not protected and will rot!In a day or two the salt will become saturated or crusty with the moisture it has drawn out of the flesh. Scrape away the old salt and reapply a second generous layer. Allow the second layer of salt to remain for about ten to fourteen days.
To finish off the process, remove the salt and scrape away anything still remaining on the skin. Apply a small layer of Neatsfoot oil or other leather conditioner to give your pet some pliability. Allow it to absorb for a few hours then add another layer.
How to preserve a squirrel tail
Every hunter (squirrel hunters included) enjoys showing off their hunting prowess. Deer hunters often have a head or antlers mounted, fishermen sometimes have a nice size fish preserved and mounted on their wall. Squirrel hunters usually don’t have their squirrels taxidermied but often enough, we like to keep the tails so in this article we will see a simple way to preserve a squirrel tail.
When keeping tails as a record of your successful hunts there really isn’t too much involved in the preservation process. With some non-iodized salt, you can start collecting your squirrel tails as well.
Instructions:
Start with a pair of pliers and remove the bone. You can also try slicing down the tail to remove the bone but the pliers often remove it completely, reducing the chance of it rotting.
Once the bone has been removed, pour a generous amount of salt on the fleshy part of the tail (the inside). This is best done as soon as the bone is removed as some of the inside skin is exposed.
Turn it right-side-in again and pour some additional salt into it. Let this sit (on a flat surface) for at least 24 hours.
After 24 hours, wipe or scrape away the old salt and reapply another generous layer. Place it on a flat surface to dry for another couple days and the tail should stay preserved for many years.
How to Tan a Squirrel Hide
Squirrel hunting can provide many squirrel hides that can be turned into durable leather or made into nice decorative pieces in just a few simple steps. We will examine how to tan a squirrel hide in a simple and effective manner.
Squirrel pelts were traditionally used as a durable leather that had many uses, such as being sewn into patterns to make coats and other articles of clothing to keep our ancestors warm. Even though you can run down to the local Walmart store and buy a coat eliminating the NEED to tan a hide, the process of tanning a hide can still be an interesting and entertaining activity, even if it’s just done for fun.
Here’s What You’ll Need:
5-gallon bucket
Salt
Dull knife
Alum (tanning chemical, short for Aluminum) can be purchased many places, including Amazon.com. Do a quick Google search for a place that carries it near you.
Hide from a squirrel
Neat’s Foot Oil (purchased at any leather shop)
Instructions:
Prepare the pelt by scraping away as much visible meat and fleshy tissue as possible from the hairless underside of the hide. A dull knife is recommended, as it will scrape the hide without slicing through.
In a 5 gallon bucket, prepare a solution of salt water: 5 cups of salt to 1 gallon. Submerge the hide in the salt solution for a minimum of 24 hours. Remove and scrape away any remaining flesh and membrane that has come loose during the soaking process.
To prepare your tanning solution, begin with 2 lbs. of salt mixed into 4 gallons of water. You can reuse the same bucket as before. Stir it to dissolve the salt completely. In a separate container, mix 2 lbs. of alum in just enough water to dissolve and mix thoroughly. Add this to the salt mixture.
Place the scraped pelt into the tanning solution. Allow it to sit for 24 hours and stir it a minimum of two times during the tanning process.
Remove from the solution and rinse the entire pelt under clear running water. Hang the pelt outside with the fur side up, over a clothesline or railing out of direct sunlight. Let it hang for several days.
Rub the hide, back and forth, over a straight edge to soften the leather. A patio railings will work well for this process.
Work Neat’s Foot or other leather lubricants into the underside (leather) with your fingers to insure the tanned hide becomes both soft and pliable. Use a dog brush or other comb to work out any mats or tangles on the fur side of the hide.
Now you have your very own squirrel pelt. A set of them placed over the arms of your couch looks great!
Things to note:
The chemicals, salt and alum, are non-toxic to humans but should NOT be digested. Wear gloves and wash hands frequently. As always, you should read the product label before using any chemical.
This method can be used to tan almost any type of animal hide. Increase times and amounts of tanning solution for larger hides.
Squirrel hides can be frozen in the freezer until ready to tan if you choose to tan several at the same time.
Alum can usually be purchased at any pharmacy or drug store.
The tanned hide is NOT WATERPROOF. Exposing it to water can cause hair to fall out or the hide to stiffen. However this method is still good for preserving hides.
If you have a smoker or grill at home, you may wonder what the best fish to smoke are. While salmon and tuna are often the most popular options for smoking, home chefs will be pleased to know that dozens of fish make for delicious smoked meals.
Learn all there is to know about choosing the right fish for smoking and how to get the perfect cook.
Factors to Consider When Selecting Fish for SmokingWhen choosing a fish for smoking, consider these factors:
Texture: The texture of the fish is crucial when smoking. Choose fish with firm, dense flesh that can withstand smoking without falling apart. Delicate fish may not hold up well during smoking.
Flavor profile: Consider the fish’s natural flavor. Do you prefer something potent or light? The flavor should complement the smoky notes from the smoking process. For example, milder fish may absorb smoky flavors more readily, while stronger-flavored fish may provide a bolder smoky taste.
Oil content: Fish with higher oil content tend to produce a richer and more flavorful result when smoked. However, you can still smoke leaner fish with proper preparation and smoking techniques.
Size and thickness: Thin pieces may cook too quickly and become dry, while very thick pieces might take too long to smoke evenly. Choose fish portions that are of consistent thickness for even smoking.
While personal preference plays a significant role in determining the “best” fish to smoke, these fish are welcome staples in many culinary settings:
1. Salmon
Salmon has a high oil content, particularly in the form of healthy omega-3 fatty acids, which not only imparts a rich and buttery flavor but also helps the fish absorb and carry the smoky aroma effectively.
In addition, salmon has firm flesh, making it resilient during the smoking process, resulting in a moist and flaky texture when done correctly.
As all salmon lovers know, this delicious and buttery fish is versatile, especially when smoked.
Whatever the case, salmon has long been a favorite in backyard barbecues for many reasons. Learn the best way to smoke salmon at home in our guide.
2. Trout
Trout has a delicate and mild flavor that quickly absorbs the smoky nuances of the smoking process, resulting in a well-balanced and flavorful product.
It also has firm, flaky flesh that holds up well during smoking. Compared to other fish, trout is relatively small, allowing it to smoke quickly.
Trout is a popular choice among anglers, making it readily available in many regions and a favorite for home smoking enthusiasts looking to enjoy the process from catch to table.
3. Mackerel
Mackerel has a robust and distinctive flavor that produces a flavorful and bold smoked fish.
It’s also naturally rich in healthy oils, helping absorb and retain the smoky aroma effectively.
Additionally, mackerel’s dense flesh holds up remarkably well during smoking, staying moist and flaky.
Smoked mackerel often appears in the form of pate, rice bowls, salads, and even sushi.
4. Bluefish
While not a popular tablefish, bluefish is an excellent choice for smoking due to its strong and distinctive flavor. This bold flavor profile stands up well to the smoking process, resulting in a rich, smoky taste.
Bluefish’s higher oil content enhances its ability to absorb and carry smoky flavors. Its firm texture remains intact during smoking, ensuring a moist and flaky dish.
5. Haddock
Haddock has that signature mild and slightly sweet flavor you look for when smoking fish.
This mildness allows the smoky flavors to shine without overwhelming the palate.
Plus, its firm and flaky texture doesn’t fall apart upon smoking.
It’s versatile and an excellent star for dishes like chowders and fish pies, whose smoked flavor imparts depth and complexity.
6. Whitefish
Whitefish, such as lake whitefish or whitefish from the Great Lakes region, is an excellent choice for smoking because of its clean and mild flavor profile. The smoke doesn’t easily overpower it.
It holds up well during smoking and is perfect for salads, spreads, or simply enjoying as a standalone smoked fillet.
You can smoke whitefish into a seafood paella, various salads, and tacos.
7. Swordfish
Swordfish is a unique and excellent choice for smoking, thanks to its dense and meaty texture.
Smoked swordfish tastes almost beefy and is often more savory than tuna, perch, or trout. Thus, it makes the perfect protein for tacos or even on crackers.
8. Halibut
Halibut is among the most versatile fish for smoking, making an excellent addition to dishes like risotto, tacos, or as a standalone fillet.
The leanness and firmness of the flesh allow for a delectable burst of smoky flavor, especially when marinated.
In addition, frozen halibut is available year-round, making it a popular choice for family barbecues.
Kyle’s Tips for Smoking Fish
When done correctly, smoking fish can be a rewarding culinary experience. Here are some tips for first-time smokers:
Start with fresh fish: Use the freshest fish available. Freshness is critical to achieving the best flavor and texture in smoked fish.
Prep the fish: Clean and fillet the fish properly, removing any bones, scales, and entrails. Rinse the fish and pat it dry with paper towels.
Brine for flavor and moisture: Brine the fish for a few hours before smoking. Brining enhances flavor, helps the fish retain moisture, and adds a layer of protection against over-smoking. You can experiment with different brine recipes to customize the flavor.
Air dry: Allow the fish to air dry for an hour or more after brining. The fish will form a pellicle or tacky surface layer that helps the smoke adhere.
Select the appropriate wood: Popular wood chips and pellets include alder, hickory, apple, cherry, and oak. The wood you select will influence the flavor of the smoked fish.
Control the temperature: Maintain a consistent smoking temperature, ideally between 180°F to 225°F (82°C to 107°C). Use a reliable smoker thermometer to monitor the temperature.
Smoke the fish low and slow: Slow smoking allows the fish to absorb the smoky flavor gradually while retaining moisture and tenderness.
Use a drip pan: Place a drip pan underneath the fish to catch any drippings, prevent flare-ups, and keep the smoker clean.
Avoid over-smoking: Over-smoking can lead to a bitter or acrid taste. Smoke the fish until it reaches the desired level of smokiness, typically 1 to 3 hours, depending on the size and thickness of the fish.
Moisture maintenance: Use a water pan inside the smoker to maintain moisture levels and help prevent the fish from drying.
Check for doneness: Test for doneness by using a meat thermometer. The fish should reach an internal temperature of 145°F (63°C). It should be opaque and flake easily with a fork when done.
Remember that practice makes perfect when it comes to smoking fish. Don’t be discouraged if your first attempt isn’t flawless; learning the nuances of your specific smoker and your palate’s preferences may take some time.
Frequently Asked Questions
Can I smoke frozen fish?
You can smoke frozen fish, but thawing it thoroughly before smoking will yield better results.
Smoking frozen fish may result in uneven cooking and potentially unsafe conditions, as the outer layers may reach the desired temperature while the inner portions remain frozen.
Thawing the fish in the refrigerator or using a cold-water method ensures even cooking and better flavor absorption during the smoking process.
Can I use a regular grill for smoking fish?
You can use a regular grill for smoking fish through “indirect grilling.”
To do this, create a two-zone fire by heating one side of the grill and leaving the other unlit.
Place soaked wood chips or pellets in a foil packet on the lit side, then place the fish on the unlit side.
Close the grill lid, maintain the desired smoking temperature, and monitor the process carefully to achieve a smoky flavor while cooking the fish indirectly.
How do I store smoked fish, and how long does it stay fresh?
To store smoked fish, wrap it tightly in plastic wrap or aluminum foil to minimize exposure to air.
Then, place it in an airtight container or resealable plastic bag and store it in the refrigerator at temperatures below 40°F (4°C).
Smoked fish stays fresh in the refrigerator for about 5 to 7 days.
For extended storage, you can freeze smoked fish for 2-3 months, ensuring it’s well-wrapped and airtight to prevent freezer burn.
Summary
Fish is a highly underrated player in the barbecue game. If you have a grill at home, you’ll be surprised what you can do with the humblest of fillets.
For novice smokers, our wild Alaskan sockeye salmon is the ideal place to start. Learn the differences between lox, smoked salmon, and nova for the best results.
Art Weston is waiting to hear whether his catch will break two records. Kirk Kirkland / Facebook
An angler in Texas made the catch of a lifetime when he reeled in a 283-pound alligator gar that is now poised to break two world records.
Art Weston caught the enormous fish at Sam Rayburn Reservoir in southeast Texas on September 2. The reservoir, which is located about 140 miles northeast of Houston, is known for producing very large alligator gar (Atractosteus spatula), a distinctive-looking freshwater fish with a long snout and large, pointy teeth.
Weston, a 52-year-old angler who lives in Kentucky, was fishing with local guide and boat captain Kirk Kirkland on Kirkland’s vessel, the Garship Enterprise, when the behemoth latched onto his six-pound test line, reports Fox Weather’s Chris Oberholtz.
With help from Kirkland, Weston spent 2 hours and 45 minutes trying to reel in his big catch, which left him “shaking and visibly fatigued,” as Kirkland wrote on Facebook. Kirkland got severe rope burn on his palms after lassoing the beast.
When they finally pulled the fish to shore and weighed it, the creature nearly tipped over their scale because it was so heavy.
“The scale just kept going higher and higher,” Kirkland wrote on Facebook. “I won’t lie, we both jumped up and down.”
After weighing and measuring the creature—which spanned 8 feet, 4 inches long—they released it back into the reservoir. Now, they’re waiting to hear from the International Game Fish Association (IGFA) about whether the supersized swimmer set two new world records.
They suspect the catch has broken the IGFA men’s six-pound line class record and the IGFA all-tackle record for alligator gar, but they are still awaiting official confirmation. The IGFA celebrated Weston’s catch and described the records as “pending” in a Facebook post.
Weston is no stranger to reeling in monster-sized fish: He holds 23 IGFA records and has others pending, reports the Beaumont Enterprise’s Matt Williams.
The colossal creature was likely a female, because female alligator gars can grow larger than the males, says Solomon David, an aquatic ecologist at the University of Minnesota, to Live Science’s Harry Baker.
David estimates the gargantuan fish to be between 50 and 80 years old, though he can’t say for certain without studying the creature’s ear bone, which would show growth lines akin to the rings of a tree trunk.
Scientists suspect alligator gars can live to be more than 100 years old. They develop quickly, reaching lengths of up to two feet within their first year of life. By the time they turn 20, they can be up to six feet long. From there, growth typically slows down, though it doesn’t stop altogether.
With plenty of food and lots of space to swim around, alligator gars can become enormous—but even so, fish over eight feet long are “a true rarity,” as David tells Live Science.
“If we want to continue to see large alligator gars, we need to conserve them, especially the giants,” he tells the publication. “If we continually remove the largest individuals of a population or species, we remove the genes for large growth, which can eventually result in smaller-sized individuals in a population.”
The largest recorded alligator gar ever caught weighed 327 pounds, per Field & Stream’s Steven Hill. The fish died not long after commercial fisherman Kenny Williams reeled him in at Lake Chotard in Mississippi in 2011, so Williams donated the creature’s body to the Mississippi Museum of Natural Science. He caught the fish accidentally, after it became ensnared in a net he’d put out to catch another type of fish—as a result, it didn’t count toward an IGFA record.
In May 2022, angler Payton Moore caught an estimated 300-pound alligator gar at an undisclosed location near Houston. He did not weigh the fish on a certified scale and, thus, was not eligible for a potential IGFA record, per Field & Stream’s Kris Millgate.
The current IGFA all-tackle record for alligator gar is held by Bill Valverde, who hooked a 279-pounder in Rio Grande, Texas, on December 2, 1951.
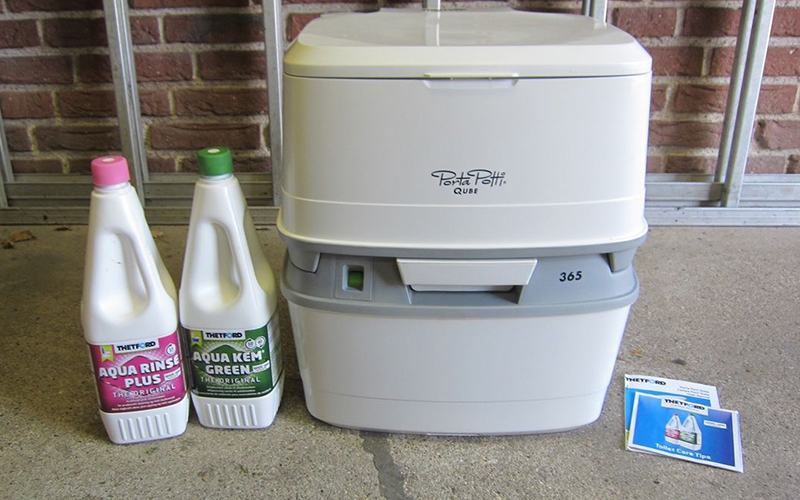
Is Thetford’s Offering One of the Best Portable Camping Toilets?
If you’re looking for a family-sized portable camping toilet, the Thetford 365 may be the right one for you. Discover what it has to offer and what you need from a portable toilet.
An innovator in the portable camping toilet space, Thetford’s history dates back to 1960. It was in that year that the company produced its first portable toilet for campers. Since then, it’s honed its models constantly and become a leading name in the industry.
The Thetford Porta Potti 365 Toilet is among the more popular models that it has to offer. In this review, we’re going to take a look at whether the toilet lives up to its billing, as well as tackling a few concerns. We’re also going to tell you what you need to look for when shopping for a portable toilet.
The Good
Offers 57 flushes before you need to empty it.
Very lightweight, which makes it easy to carry.
Made using high-quality and durable plastics.
Comes with a three-year warranty.
Comes with several features to help you empty it easily.
The Bad
May not ship with the chemicals needed (depending on the retailer).
Its size can make it difficult to transport with other camping gear.
The Bottom Line
The Thetford Porta Potti 365 Toilet is huge, which means you can usually get through a trip without having to empty it. The toilet’s light weight makes it easy to move around and it feels almost like a full-sized toilet.
This may be one of the best portable camping toilets available today.
The Full Review
To test this toilet, we took it out in the wild with us for a three-day camping trip.
We focused on a few key issues that we want to cover here. These include the following:
Ease of Use
Stability
Materials
The Smell
Portability
Capacity
Other Features
Let’s see how it fares.
Toilet Ease of Use
This is an area where the Thetford Porta Potti 365 really shines.
On a practical level, its size makes it one of the closest portable simulations of a regular toilet that you will find. Taller people won’t find themselves squatting uncomfortably while using it. That said, smaller children may need a little support.
However, it’s the emptying of the toilet that really makes this model stand out.
It comes with a visual indicator for the bottom tank. This tells you when the toilet’s starting to fill up. As a result, you don’t have to crack it open to take a look for yourself. You get to avoid an unpleasant experience as well as ensuring you don’t release any strange odors into your campsite.
Once it reaches capacity, you still don’t have to open the waste tank. Instead, you can take advantage of the emptying spout that Thetford builds into all of its toilets. This releases all of the waste that’s built up inside the bottom tank. Plus, it prevents any nasty splash back. It’s as simple as pressing the vent button after directing the emptying spout into the correct position.
Thetford has also focused on ease of use in their tank construction. The toilet consists of two tanks, which you can clip together using a clasp located at the back. The bottom tank holds the waste while the top tank contains the bowl.
Thetford has also placed the flusher on the back of the tank, which ensures that it doesn’t get in your way during use. You also get a choice of a piston or bellow flusher. Keep in mind that bellow flushers take a little more effort to push down. This may make them less suitable for children or the elderly.
All in all, the Thetford Porta Potti 365 simulates the toilet you have at home well. It’s easy to put together and you don’t even have to open it to empty it. Just keep in mind that its size and your flusher choice may make it slightly more difficult to use for children and the elderly.
Porta Potti Stability
Nobody wants a portable chemical toilet that can’t stay upright when in use.
Thankfully, the Thetford 365 excels in this area. Its cube shape means it’s rarely going to buckle when in use. Unless you’re actively trying to tip it over, you’ll find it stays in place well. This is surprising given the lightweight plastics used in its construction.
Of course, you’ll need flat ground to place it on. However, that’s pretty standard for all portable camping toilets. It’s also worth noting that it doesn’t come with any attachments that secure it to the ground. That’s normally not a problem, but it does mean you won’t want to leave it in the open if it gets too windy.
Having said that, there are a couple of accessories available that fix the toilet to the floor and keep it held down. However, you may have to buy these separately.
Materials
The Thetford Porta Potti 365 Toilet stands out because it contains practically no metal parts.
Instead, both of the tanks and most of the components use a high-quality plastic. You may think this raises questions about its durability, but we found that the plastics don’t present any problems. The toilet doesn’t buckle under the weight of whoever sits on it. Plus, the use of plastic means it won’t get damaged if left out in the elements,
That’s not to say that it’s indestructible. A heavy impact onto rocks or a similarly hard surface could cause damage. But that shouldn’t be a problem as long as you take care when handling it.
The Smell
No matter how well a portable chemical toilet works, if it has an overpowering smell you’re not going to want to use it.
Thankfully, this is another area where the Thetford 365 excels. Using a pink deodorising chemical in the top tank does a great job of masking any smells that it might emit. The plastic materials also prevent smells from escaping when the toilet’s not in use.
Toilet Portability
You would expect such a large toilet to present some portability problems. And that could be the case if you’re traveling in a compact vehicle. It requires a fair amount of room given that it measures 41.4 x 37.9 x 41.9cm. However, you can mitigate this problem if you disconnect the tanks before storing.
Carrying the toilet is a completely different story. Without any chemicals inside, the toilet weighs just 3.7kg. That means that any able-bodied adult should find it easy to carry.
There’s also a handle that extends out of the waste tank. This means you can carry it separately from the top tank if you’ve pre-filled it with chemicals before traveling.
The handle also gives you some separation from the waste tank while carrying. Anyone who’s gotten splashed with toilet chemicals before will appreciate this feature.
Tank Capacity
This is one of the best portable camping toilets when it comes to capacity.
The Thetford 365’s waste tank can hold 21 litres before it needs emptying. That amounts to about 57 flushes, which is more than enough to cover most short camping trips.
Other Features
Newer Thetford 365 models come with an integrated lock cover over the clasp that joins the two tanks together. This prevents you from accidentally unclasping the toilet when carrying it or when it’s in use.
This portable chemical toilet also comes with a three-year warranty. This speaks volumes about Thetford’s confidence in its durability.
Finally, it’s possible to purchase spare parts for this toilet. This offers some peace of mind for those who worry about their toilet breaking down while they’re camping. Plus, it means you may not have to shell out for a new toilet if something goes wrong.
5 Points On How to Choose the Right Portable Toilet:
Of course, the Thetford 365 is just one of many portable camping toilets that you can choose from. You’ll likely want to compare several models, which means you need to know how to choose the right portable toilet.
This buyer’s guide covers some of the key features of portable camping toilets. It also offers information about what you’ll need to keep your toilet in good working condition.
Keep it in mind when making your choice so you can avoid disappointment.
1. The Flusher
You’ll usually get a choice between automatic and manual flushers when choosing a portable toilet.
Automatic flushers tend to work electronically and usually just require the press of a button. This makes them easy to use, but it does open the toilet up to issues. If something happens with the electronics, you may end up being unable to flush.
Manual flushers require a little more effort. However, many would argue that they’re more reliable than automatic flushers.
You typically get a choice between a piston and bellow flushers when choosing a manual toilet.
Bellows require you to push down with some force to flush. This isn’t a problem for most, but may present issues for young children or the elderly. These flushers also have a habit of breaking as a result of people using more force than they need to flush.
Piston flushers require you to pull a piston up, rather than push down on the toilet. This makes them easier to use.
2. Tank Indicators
A tank indicator lets you see how close the toilet is to filling up. Some may provide a measurement, whereas others flash a colour, usually red, to tell you the tank needs emptying.
It’s important to note that not all portable chemical toilets come with these indicators. If that’s the case, you’ll have to open the waste tank to manually inspect it. This isn’t the most pleasant experience so it’s usually best to choose a toilet that has a tank indicator.
3. Spare Parts
Ideally, your portable toilet won’t require much maintenance. It should be sturdy enough to deal with repeated use.
However, it will eventually start to wear down. In particular, the parts that see repeated use, such as the flusher, will undergo wear and tear.
Being able to buy replacement parts can be a huge money saver in these instances. You can replace the component rather than buying a new toilet.
Unfortunately, not all portable camping toilets have spare parts available. If this is the case, make sure you choose a model that offers a long guarantee.
4. The Chemicals
There are two types of chemicals that you’ll need for your toilet – pink and blue/green.
The pink chemicals go into the water that’s used to flush the toilet. They help to keep the bowl clean as they get rid of deposits when you flush. Usually, these chemicals come perfumed, which masks any unpleasant odours the toilet might produce. They also help to keep the toilet’s seals lubricated, which ensures they don’t break down through constant use.
You need blue/green cassette toilet chemicals for the waste tank. They break down whatever waste ends up in the tank, which prevents the build-up of noxious gases. This also helps to control the smell issue.
It’s also important to check these chemicals for formaldehyde. This is a toxic chemical that can cause damage to the environment. You will need to take care when emptying the toilet to ensure you don’t cause any damage. Thankfully, there are chemicals available that don’t contain formaldehyde.
You may need to buy your chemicals separately before you start using your toilet.
5. Toilet Paper
You’ll want to avoid using thick or luxury toilet paper with your chemical toilet. The padding in these papers makes them difficult to break down.
Most camping stores offer specially designed porta potti toilet paper instead. While this is thinner and less comfortable than luxury paper, it ensures that your toilet doesn’t get clogged.
The Final Word
The Thetford Porta Potti 365 Toilet may be the gold standard against which we measure all other portable camping toilets. Its large size makes it comfortable to use, plus its light weight makes it easy to transport.
However, it’s the various features related to waste disposal that make it stand out. You never have to deal with any waste manually thanks to the vent button and emptying spout.
It also has very few negatives. Just make sure you choose a piston flusher if young children or the elderly will use the toilet.
All what’s left is to buy the toilet for your next camping trip. Check Thetford and their products at Tentworld and don’t hesitate to contact us if you have any questions.
For a long time, bowfin have been held in low opinion in the public eye in terms of being an eating fish. With that said, you might be wondering if you should kill bowfin like you might kill carp and eat them for food. Some people will tell you that you can, but is that advice misguided? Can you eat bowfin fish?
You can eat bowfin fish without it being dangerous, but most people don’t like the flavor because they don’t prepare it right. Incorrectly prepared, it has a soft, mushy texture. If you had to think about the flavor, most compare it to catfish with a meatier flavor.
While bowfin will thrash and squirm after you have put them at the end of your line and they put up a spirited fight, most people don’t think you should eat bowfin—they’re wrong. They don’t taste as good as walleye, northern pike or sunfish, but you can prepare them so that they will taste better.
The flesh of bowfin is soft and jellylike when incorrectly prepared, and while it might be edible, most people wouldn’t consider it worth eating. When prepared wrong, they’d be right.
Also worth noting, they call the bowfin the mudfish for a reason. It has a strong flavor of mud, which is why many bowfishermen won’t eat them. As one bowfisherman reports, “They’re edible, but I wouldn’t go out of my way to eat it.”
The other thing worth noting is that bowfin accumulate mercury in their body, and the older the bowfin, the more mercury it will have. In particular, pregnant women must be careful because of how mercury can harm an unborn child. It can harm parts of the child’s body like the lungs, kidneys and nervous system. In addition, it could harm a young child’s nervous system as well. That said, the mercury issue is true of any predatory fish. You can learn more about mercury issues with fish here.
If you did decide to eat bowfin, you should cook it right away to keep the meat from turning mushy. Don’t worry, we’ll show you how to properly prepare it soon so that it tastes good.
What Does Bowfin Taste Like?
How they taste depends on your cooking method. In Louisiana, they have come to be known as cotton fish, which describes the texture of it unless you cook it right. You can combat the texture of bowfin by cutting it like chicken fingers, and that’s the method that I would recommend. You might compare the taste to alligator gar in some ways or catfish as we said above when done right.
You would definitely call bowfin an acquired taste. A lot of people won’t like it, but some people do call it good eating. That said, most people don’t. I’ve had it to where it did taste good, however. Bowfin have small bones that you have to be careful of. As you chop the fillets, direct your efforts away from the stomach region. That is where the bowfin caught its nickname, the mudfish because it tastes like mud.
Bowfin Preparation—9 Tips for Eating It
How you prepare the bowfin will have an impact on the flavor. The preparation stages to create a good flavor are crucial but tricky. You can go wrong in several ways. First, you can’t put water on this fish without impacting the flavor. Avoid it at all costs. If you put water on it and don’t burn it as a result, it will negatively impact the flavor. Second, you can’t put this fish in the fridge and cook it tomorrow morning because the water will impact the meat and make it mushy and difficult to eat.
When you prepare bowfin right, it will have a meatier texture than other fish. As soon as you catch a bowfin, you take it home and start frying it up. Waiting will make it taste bad, which is why many fishermen have had a bad experience with eating bowfin. If you don’t have the time to cook it right away, put it back in the water and let it go. It’s not worth it, otherwise. This isn’t an invasive fish species like the snakehead.
Let’s take the example of someone who tries to put it in the fridge for tomorrow. In one case, the individual had the bowfin meat turn entirely to mush and run through his fingers when he went to cook it. He couldn’t even attempt cooking it. That flavor would’ve been downright scary. We’ll show you how to make it taste right, and you can decide for yourself if you want to try it.
Tip #1 Fillet It While Alive: You want to fillet this fish while alive because it will let the blood run out of it. The blood is responsible for the muddy taste of the fish. Unlike other fish, bowfin can store oxygen in their blood. For those who have a light stomach, this may be too gruesome, but the average fisherman who eats fish and fillets them won’t have a problem.
Tip #2 Don’t Put Water On It: We already talked about not putting water on it, but we can’t emphasize that enough. If you don’t put water on it at all, it will hold its shape without becoming mushy. As soon as you put water on it, however, it turns to mush, making it inedible. Don’t put water of any kind on it. It’s better to avoid it altogether for the best results when cooking.
Tip #3 Take Paper Towels to Pat the Meat: You take a roll of paper towels to pat down the meat and eliminate the blood to get rid of the muddy flavor. Again, we can’t use water on the meat because it will badly impact the texture to the point that you will struggle to eat it. While you can’t clean it with water, you still want it clean. Otherwise, it would be like eating bloody meat. Be sure to clean the scales off the meat as well. The scales on the bowfin are solid, and he has some tough scales. You may want to use an electric fillet knife to clean it in the initial stages.
The Bubba 110V Electric Fillet Knife is a great knife to clean it with because it can get past the scales. It also has a slip-free handle making it ideal for fish, which can be slippery.
Tip #4 Cut It in Half and Make Nuggets: Next, you will cut the two separate bowfin fillets in half to make it into four separate pieces. You don’t need to hit it exactly at the middle part, but you want it close for the portion sizes. Next, you will cut it crossways against the grain like you were cutting fish sticks out of it.
Tip #5 Grilling vs Frying: You can grill bowfin, and it will taste incredible if prepared right. Most people choose to fry it, but you can cook it on the grill as well, and it will taste equally as good. You can also cook it on the Blackstone. With whatever cooking method that you choose, the preparation steps will all carry the same steps.
Tip #6 Use Tinfoil for Grilling: With grilling the fish, we would recommend that you use tinfoil before cutting it up into fish sticks. You will put lemon pepper, Tony’s Original Creole Seasoning and lemon juice (optional). We would only recommend the last one if you like lemon on your fish.
Tip #7 Don’t Let the Bowfin Die: If you let the bowfin die before you can cook it, he won’t taste good because you need to let the blood run out of the fish while he’s alive. You must fillet it while alive for the best flavor. This fish is extremely finicky with how you prepare it, which explains why many people don’t like bowfin. They try it one time, if at all, have a bad experience and never try it again because they don’t know how to prepare it.
I was that guy, and I very hesitantly tried it a second time when a buddy showed me.
Tip #8 Good Fish to Learn How to Fillet: The bowfin offers you an awesome chance to learn how to fillet if new to filleting fish because of how it has a thick meat, and you won’t cut through it easily. In comparison to learning on a catfish, the bowfin is much easier to learn filleting on.
Tip #9 Beware of Making the Meat Cuts Too Thick: You don’t want the meat cuts too thick because of how it won’t cook as well. Make sure that the meat cuts don’t have as much thickness for the best results.
Bowfin Recipe
To begin cooking, we will assume that you have taken the proper steps to prepare it. Remember—good preparation will give you the best flavor in the meat. You want to prepare so that the following steps will make it taste good.
Take yellow corn meal and put it in a bowl.
Grab a handful of Tony’s Original Creole Seasoning and throw it in the bowl.
Add about the same amount of salt.
Mix the bowl up well to give it the best seasoning. You want an even mixing throughout the bowl.
Don’t wash anything with the fish. Remember, water will hurt the flavor. Take the fillets and put them directly into the bowl for seasoning.
Once you have the fillets in the bowl, you wil cover the bowl and start shaking it to put the mixture over the fish fillets.
After you have shaken it up, the mixture should take to the meat.
Fire up the fryer or the grill and add the fillets into the oil once it becomes hot. You want it at about 275 degrees Fahrenheit.
You will cook the meat for 12 minutes, give or take. You will know they’re done when golden brown.
Once you have done that, give the meat a try and see if you like it. Provided you prepared it properly, you may find that you like it. This isn’t the fish for everyone, but some people may say it in a new light.
The biggest problem with bowfin is that many people don’t know how to prepare it, and this meat is very finicky. If not prepared in the way outlined, it won’t taste good.
Try It for Yourself
The only way to learn if bowfin is edible is by trying it for yourself. When I first had bowfin, I didn’t like the flavor because I didn’t prepare it right. A buddy of mine showed me how to prepare it, and it tasted much better after that. Everyone will be different, and if you have the opportunity to try it, I would recommend it. You can’t be harmed by trying it one time.
With that said, the average person who doesn’t prepare it correctly may want to just throw it away or let the fish go back into the water before that point.
Bowfin Caviar: What Does It Taste Like?
While eating bowfin has never been popular, one thing that has picked up in popularity has been to eat bowfin eggs. Bowfin caviar has a jet black color, and they are firm. The taste is mildly tangy and earthy. In particular, bowfin caviar has picked up in popularity in the southern United States like Louisiana where it has the name Cajun Caviar. In South America, they call it Chourpique.
If you’d like to know what bowfin caviar tastes like, you can buy some American bowfin black caviar here. We would call it a less expensive version of sturgeon caviar. Many people have even liked it. They taste small, crunchy, mild and not overly salty. Bowfin black caviar offers you a great introduction to caviar if you never had it before.
For anyone wondering if it is Kosher, they don’t consider this Kosher in the Orthodox Union. Most caviar isn’t Kosher and when you find a Kosher, it is rare.
Bowfin caviar versus sturgeon caviar costs less. However, it doesn’t have the same stellar reputation as sturgeon caviar. In comparison to sturgeon caviar, sturgeon will taste much like the sea, but neither sturgeon nor bowfin caviar should have an overly fishy flavor.
Bowfin and Prevailing Negative Beliefs
You might be wondering to yourself, “Is bowfin dogfish?” Yes, bowfin is the same as dogfish, and if you know anything about dogfish, it has received an unjustified reputation. This native fish has existed in North America for thousands of years. You can learn more about this fascinating living fossil here.
Usually, when you catch a bowfin, you will hear the conversation go something along these lines, “You caught a dogfish? You didn’t put it back, did you? Dogfish kill other fish for fun!”
In truth, bowfin do not kill other fish for fun. They act as scavengers, and they eat some of the other fish that people love, but because they’re a native fish species, they should be left alone. Most likely, bowfin receive a bad reputation because they taste bad when prepared wrong, and they look like the invasive snakehead species. The snakehead brings diseases to native fish populations that can kill them off.
You can tell bowfin apart from snakeheads because snakeheads have one big long and continuous anal fin, while the bowfin’s anal fin is more like a regular fin. Bowfin don’t overpopulate, and they don’t cause any harm to other fish. Not only that, but they’re a native fish species: all the more reason to leave them alone.
Don’t Kill Bowfin if You Don’t Eat Them
People who say to kill bowfin speak from ignorance, rather than truth. Bowfin is like the snakehead in that it has a set of lungs, which allows it to survive on land for an amount of time. In fact, one recorded case of it surviving had the bowfin alive for up to 21 days in a dried up pond. Compare that to a northern pike, they can only live five minutes out of water.
That said, in some states like Indiana, they require you to kill snakeheads if you catch them, but these aren’t considered good eating anyhow. You should check your local laws to ensure that it is legal if you practice catch and release of a snakehead. With bowfishing, that never becomes a problem, however, because of how shooting a fish with a bow will kill the fish.
The problem is that a lot of people don’t know how to distinguish snakeheads from bowfin, and as a result, they kill them both. Bowfin do not have a continuous backfin while a snakehead does. When handling the bowfin, be careful because they have been known to bite without warning. This fish has fearsome teeth like a mouth full of canines, and they have been known to bite through fishing line.
You should only kill a bowfin if you intend to eat it.
Great Fighting Fish
If you have ever had a dogfish thrashing at the end of your line, you know what a fight these fish can put up. In fact, bowfin are one of the few species that do the deathroll like gators. They put up a furious fight. Many anglers even respect the bowfin because of its fighting capabilities. It puts up one of the hardest fights out of all the freshwater fish species. They fight harder than bass.
Check out this short video to see how a bowfin fights:
Conclusion
Provided you have prepared the bowfin correctly before you go to cook it, it will taste fine. In fact, I have known people who call it one of the best-tasting fish species around. That said, you have to prepare it right. In particular, people in the South like Mississippi seem to have the best understanding of how to cook it. If you don’t plan to eat it, you may want to release them back into the water. Some fishermen even believe that bowfin are beneficial to the local waters and the surrounding fish.
Not to mention, they never take over the waters like what carp do. In addition, they’re native, and that especially is why you shouldn’t kill them unless you plan to eat them.
The PSA Dagger vs. Glock 19 – this has to be one of the most hotly debated choices for a reliable sidearm in the firearm community.
Both offer a unique blend of reliability and functionality, leaving enthusiasts in a quandary over which to pick for their primary choice of protection.
What we hope to do here is delve deep into the features, handling, and performance of the PSA Dagger vs Glock 19 Gen 5 and provide a detailed comparison. By the end of this analysis, we think you’ll have a better understanding for making an informed decision.
We’ll use a Glock 19 Gen 5 slide on a Gen 5 gun for comparison as both the Palmetto State Dagger and the Gen 5 are modern options available to buyers.
So, stay tuned as we dive into the specifics and all the gritty details of the Glock 19 vs PSA Dagger battle.
The PSA Dagger Full Size and the Glock 19 are two 9mm striker-fired handguns that have many similarities in terms of dimensions and features. However, there are some notable differences between them. For instance, the PSA Dagger has a slightly shorter barrel length of 4 inches compared to the Glock 19’s 4.02 inches.
Additionally, the Dagger Full Size S model has a magazine capacity of 17 rounds, while the Glock 19 can hold up to 15 rounds. Furthermore, the PSA Dagger is compatible with most Gen3 Glock spare parts, which offers a wide range of aftermarket customization options.
When it comes to ergonomics, the PSA Dagger sets itself apart with a distinct grip shape and texture, setting it apart from the Glock 19. The grip is enhanced compared to the Gen 3, and there are no back straps. It also has a carry cut out, allowing you to strip the magazine without any issues.
This model is perfect for those who prefer a simple design and want to run their trigger finger in front of the trigger guard.
THE TRIGGER SKUTTLEBUTT
By reputation, everyone has told me that the trigger mechanism is the biggest difference between these two, with the Dagger featuring a hinged trigger similar to the M&P. There is also a cut-out for the magazine release, just like the old Gen 3. It has an accessory rail and wavy cuts in the front that are basically there, I believe, to make it look cool.
The PSA Dagger is widely recognized as a more budget-friendly option, offering a lower price point compared to the Glock 19. Overall, both handguns are reliable and well-suited for various shooting scenarios, with the PSA Dagger generally considered to be a reliable and affordable alternative to the Glock 19.
Here’s a breakdown comparison between the specs of the Glock 19 vs PSA Dagger:
PSA Dagger Full-Size S
Glock 19
Caliber
9x19mm (9mm Luger)
9x19mm (9mm Luger)
Action
Safe Action®
Safe Action®
Weight (empy mag)
22.5 oz
21.52 oz
Overall Width
1.28 inch
1.34 inch
Overall Length
7.15 inch
7.28 inch
Barrel Length
4.5 inch
4.02 inch
Magazine
Double stack
Double stack
Mag Capacity
17+1 rounds (standard mag)
15+1 rounds (standard mag)
MSRP $299.99
$539.99
PSA DAGGER VS GLOCK 19 – OUR TAKE
FINGER GROVE AND BEAVERTAIL
There is one feature on the PSA gun that I was not a fan of right away. The finger groove here is similar to older Glock models but was revised for the Gen 5. It has a slightly enhanced texture compared to the Gen 3, but in my opinion, it’s not as good as the Gen 5. On the other hand, I do appreciate the extended beavertail.
SLIDES AND CONTROLS
The gun also has standard Glock controls and takedown, as well as a slide lock (although it’s not technically meant to be used as a release). There are some wavy cuts in the front that are mainly aesthetic but can be used as a sort of gas pedal, although they’re not big enough for proper use.
Personally, I’d prefer if these cuts were deeper and more functional, like on some other gun models or customizations from companies like Agency Arms. Nonetheless, the slide itself is quite nice, with a tri-top design that I am a big fan of. In fact, I think it looks better than the stock Gen 5 slide.
The Dagger has a stainless steel guide rod, which I think is actually a big improvement upon the standard Glock plastic guide rod – it’s a little more durable, and I do like that it adds a little weight out front, reducing muzzle flip overall.
PERFORMANCE
During our testing, we fired two thousand rounds through the gun and found it to be highly reliable. There were no malfunctions during the entire duration of the test, which is exactly what we expected from one of the most reliable guns in the world.
We used various types of ammunition, including Phoenix Ring, Fiocchi, Winchester White Box, and 124-grain Gold Dot, as well as Critical Duty, and all of them worked exceptionally well.
MAGAZINE
We used the magazine that came with the gun, which was a Magpul magazine, as well as the standard Gen 5 Glock 19 and Glock 17 magazines, as well as extended magazines, and there were no malfunctions whatsoever.
This is particularly important since magazine compatibility is crucial for a gun’s reliability. This clone comes with one magazine included in the package – not surprising for the money. However, the standard Gen Five product comes with three magazines, which, in my opinion, is a better deal as more magazines are typically better.
In the final analysis, the accuracy of the Palmetto State Dagger is alright, but the standard Gen Fives are more accurate – the main reason being is that they have a better trigger.
TRIGGER
I personally am not that crazy about the Palmetto State Dagger trigger at all – it’s heavy, has a lot of creep and take up, and an awkward reset. The good news is that it takes Gen Three parts, so you can upgrade it with those new sweet old chimneys if you choose to. If you were going to keep this gun, that’s what I would suggest you do.
The big white combat sights are simplistic and durable up close. However, they are only slightly better than the lower-end sights on the market – so not that good. You can buy Gen 5 Glocks that have Ameriglo sights, which I would highly recommend.
SIGHTS
The Glock 19 sights are significantly better, with a slightly wider box that allows for quicker site acquisition up close, a thinner front sight that is high definition, and night sights with a tritium insert on the front sight. This allows you to use the sights at night, which is important for your safety.
I like the fact that the Gen 5s have this option, but they obviously cost more. If you want, you can buy these sights for $60 and put them in your PSA since they are compatible with Glock parts. Out of the box, I don’t like the accuracy of the Dagger sights, but it can be improved.
ACCURACY
In reviews, people often talk about mechanical accuracy, which I find amusing because handguns are difficult to shoot due to fewer points of contact and a five-pound trigger in a one-pound gun. This makes it challenging to shoot accurately, period.
Therefore, any accuracy issues are likely due to the interface and ergonomics of the gun. Primarily, it’s better to discuss the sights and the trigger. To be clear, the mechanical accuracy may be comparable to a standard Glock, but to achieve the same level of accuracy from it, you may have to address the trigger and sights issue.
ERGONOMICS
Moving on to the ergonomics, I think there are a lot of really good ergonomic features going on with the Palmetto State Dagger. Firstly, I love the tri-top slide; it looks very cool.
Additionally, the slide serrations are very usable and actually more effective than the Gen 5 Glock. The rear serrations work very well, too, and the finish on the gun is shiny and attractive, although it might not be quite as durable as the Gen 5.
HOLSTER COMPATIBILITY
While Glock clones such as the PSA Dagger mimic Glock designs closely, slight variations in sizes between the Glock and its clones can pose challenges when it comes to holster compatibility. These minute differences can affect the secure fit of the weapon, which is crucial for safety, accessibility, and comfort.
Therefore, having a specifically designed Glock 19 holster or a PSA Dagger holster is not merely an option but a necessity. It ensures that your firearm is held as securely as possible, enabling the best draw capability and reducing the risk of accidental discharges while improving ease of access when needed.
Conclusion: PSA DAGGER VS GLOCK 19 – THE BOTTOM LINE
Looking at the final score, it’s clear why both the Glock 19 and the PSA Dagger have firmly established their reputation in the firearm market – each has its own distinctive advantages.
Our comprehensive testing and rigorous evaluation of the PSA Dagger only reaffirmed its reliability and performance. While the Glock 19 continues to dominate as a reliable staple in the world of handguns, the introduction of more budget-friendly options like the PSA Dagger is certainly a welcome addition; especially beneficial for novices in the world of firearms who might be hesitant to spend a significant amount upfront.
The bottom line: prices and availability of firearms can fluctuate quite a bit. There was a time not that long ago when the PSA wasn’t readily available, and prices went up to over $450 apiece. In a case like that, why settle for the limitations of the PSA Dagger when you can go for the true original by spending a little more?
Having said that, anyone choosing to go for the PSA Dagger is not likely to be disappointed, especially if they can take the savings and put them towards some fine extras they wouldn’t normally be able to afford. In our opinion, both are fine weapons, which make the PSA worth your consideration.
Ultimately, the choice of firearm is a deeply personal decision, but one common factor remains – the necessity for a secure, well-fitted holster. A custom-made Craft Holster, be it IWB (Inside the Waistband) or OWB (Outside the Waistband), can be the perfect complement to your chosen firearm, enhancing safety, accessibility and your overall shooting experience.
DO YOU FANCY SOME MORE LIGHT READING? THEN CARRY ON WITH THESE ARTICLES
Glock 19 Review – The Best 9mm Pistol Ever Produced?
PSA Dagger Review: Is This Glock Clone Worth It?
Exploring PSA Dagger Problems: A Candid Look at Performance and Functionality
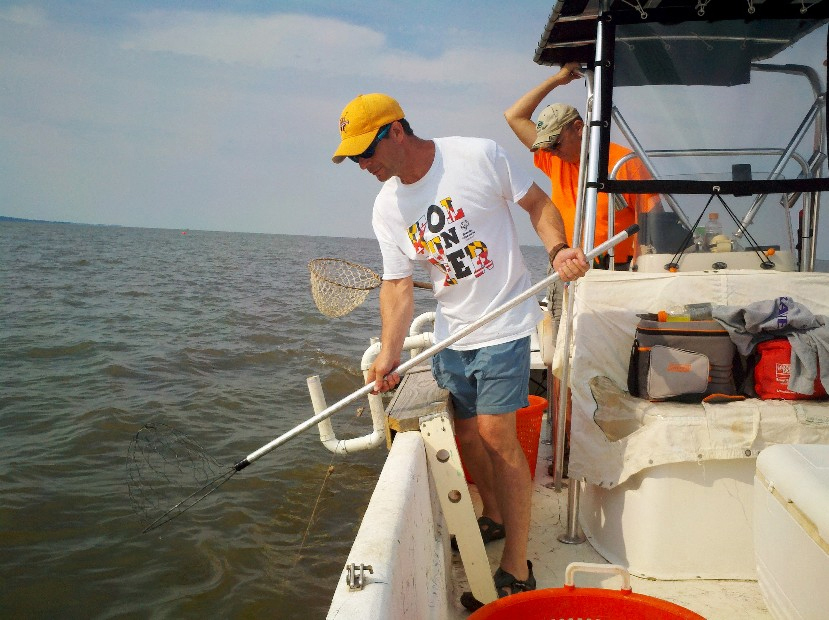
Crabbing is a great way to spend time on the water, and trot-lining is a very effective and fairly easy way to fill the bushel basket. Crabbing in my family started when I was very young, when I would go out with my dad and have a fun morning—and then an even better afternoon as we got to feast on the succulent crustaceans. Then I started my own business crabbing commercially for the past two summers. Here are 10 things I learned while trot-lining on the bay.
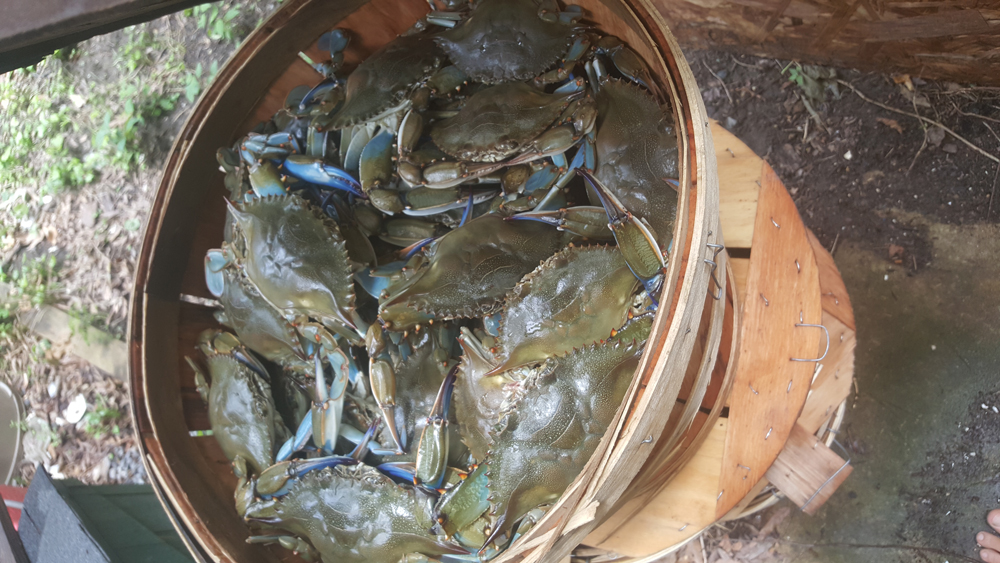
You want to catch a bushel of prime jimmies? Trot lining is the way to make it happen.
1. Don’t be afraid to pick up and move your line. Crabs are very depth- and bottom-oriented. If you’re not in the right area, you simply won’t catch crabs. Although moving the line may seem like a waste of time when you’re out on the water, if you’re only catching a crab or two that are keepers every run, it’s worth it to try a different depth. The type of bottom you’re over also plays a big role. If you notice that your trot line is flinging mud off your baits and you’re not catching crabs, go try a spot where you know there’s a shell bottom.
2. Use a heavy enough anchor. I highly recommend using mushroom anchors. Mushrooms are very easy to handle, can be dragged if necessary, and work on all bottoms. When buying your mushroom anchor, it’s crucial to choose an anchor heavy enough to stick on the bottom when you pick up the line to start running it. If your anchor is too light, you’ll drag it as the boat moves forward. This process will create lots of slack in your line, and will ruin that run—while also creating a problem (all that slack) that you need to fix. An anchor anywhere from seven to 10 pounds should do the trick. Although heavier anchors are harder to move around the boat, it is more important that you can run your trotline effectively.
3. Tighten or tie baits as tightly as possible to your line and snoods. Crabs are very tricky carnivorous devils. Whatever bait you are using, you should tie or tighten your snood as tightly as possible. On a good day of crabbing, especially if you are using chicken necks, after a couple of hours your baits will start to go missing. If you don’t tighten down the baits to your line to the full potential, even more will be missing. Crabs are able to dislodge baits from the line and they will scuttle away with it whenever possible, freeloaders taking that bait you paid for and painstakingly put on the line.
4. Use clips or carabineers at the ends of your main line. It’s great to use metal clips or carabineers for attachment points. They allow you to connect your anchor and float lines to your main line in a timely fashion. This will make setting out your line much easier, because all you must do is put a loop (at the end of your main line) in the clip and then you can keep feeding your line overboard. Also, this allows for easy storage of your anchors and floats because when pulling in the line you can simply unclip it and leave the rest of the rig on the boat until next time. When using a 1200 foot line it can be advantageous to have clips in the middle of your line, too. If you’re uncertain where crabs are going to be, you can split your trot line into two half-lines and lay them in different areas, to test where the crabs are.
5. At each end of mainline, use a short length of galvanized chain. This will ensure that the line is resting on the bottom, so crabs are able to locate the baits and hang on until the scooper is ready to attack. When using a long trot line, some people like to add another short length of chain in the middle.
This is the kind of bushel basket we like to see – one full of blue crabs!!
6. Keep enough slack in the line. Although too much slack can ruin your run and impede on the operations, it’s crucial to make sure that your line is not too tight, either. In most cases it’s obvious when your line is too tight; it will be stretched out so you see baits a mile away, and in turn, you will watch as crabs drop the baits because they see what’s headed for them. If this is happening to you, it’s actually very easy to fix. Go to the end and grab the anchor line, pull it until you feel the anchor lift off the bottom, and then simply drop it back down. This will add a bit of slack into your line and after you run it a few times, the line should level out and run more effectively.
7. Work with the tide and wind, not against it. When it is a bit choppy or windy it can be very hard to crab. Try your best to set the line in a calmer area that’s sheltered from the wind. If you know where the crabs are but your spot is troubled by wind, it is crucial that you run your line with the wind at your back. By doing this you will avoid many troubles; going too slow while the wind pushes against your bow, not being able to control where your boat is going, and your bow crashing against the waves and scaring off crabs. Don’t worry too much about how this affects your speed, because as long as you remain at idle it’s rare to go fast enough to cause crabs to drop off, even with a strong wind at your back.
8. Judge soak-time by trot line length. How long you wait before you begin scooping crabs again, after finishing a run, depends on how long your line is. When using a 600 foot trot line, it’s important to let your baits sit for 10 minutes (give or take) before running it again. This is because with a shorter line you will run it faster, and there will be less time for the baits to rest on the bottom. If you’re using a 1200 foot trotline, however, by the time you finish your run the first baits you scooped on have already been resting on the bottom for a while so you can go back to the start and run it right away. If crabbing is really hot, even with a shorter line you should start a new run quickly—in some cases the crabs will just eat off your baits, if you give them any extra time.
9. Use a wire-mesh net. Using a nylon or cotton mesh net is a very common mistake for beginner crabbers. Making an investment into a nice wire-mesh net is very important and will lead to a lot less frustration down the road. When using a nylon or cotton net, the crabs will get stuck in the mesh much easier or the mesh will tangle in the line. You have a lot less control with the mesh, and in turn will miss more crabs.
10. Try your best not to cast a shadow over your trot line. When running the line on a bright day, it’s important that you run the trot line in a direction so that your shadow doesn’t cast over top your line. If the sun is to your back and a shadow appears over your line, the crabs will see it and let go of the baits before you have time to scoop them. It may mean changing the direction you run the line in or even how you have your trot line laid out, but either way, eliminating that shadow will mean catching more crabs.
The more you go and do it, the more crabs you will catch. Every boat and every trot line is a little bit different, and it may take a season or two to get the trot-lining process down with confidence. But scooping crabs as you watch the sunrise is very relaxing—and eating crabs as you watch the sunset may even be better.
– by Max Rudow
Want to learn how to go trot lining from a kayak? Check out this video:
Certain baits have their time and place on both native trout and fresh stockies alike; here are some of the author’s favorites.
A look at some of the best offerings to tempt a trout this month and beyond.
Regardless of whether there is a closed season with opening day festivities or year-round angling in your home waters, April fishing is synonymous with trout. Even many hardcore saltwater anglers find themselves walking down a trout stream at one point or another in the 4th month. And while the trout purists are a group all unto themselves, for most of us trout fishing is a simple leisurely activity that provides a way to bridge the gap from winter shack-nasties to spring success. Nonetheless, certain baits have their time and place on both native trout and fresh stockies alike. For the purposes of today’s column, I will skip fly fishing as it simply isn’t my area of expertise—perhaps I’ll visit it next spring.
Whether cast, jigged or trolled, spoons such as the Kastmaster, Thomas Buoyant, Little Cleo, Tom’s Taz Lure and others are great options for actively-feeding fish. When the appropriate size lure is chosen, you can just as easily fish them in a deep-woods stream as an expansive lake. When a standard cast-and-retrieve isn’t working, or when hunting fish in deep water, a count-down method can be used. Cast the spoon out and let it sink for a pre-determined amount of time before beginning the retrieve. Make note of the sink time when you begin catching as more fish will often be found there. In deep lakes, don’t be afraid to bounce the spoon off the bottom—you might just end up catching the biggest fish of the day!
Inline Spinnerbaits
Much like the spoon, an inline spinner has long been a hot trout lure. Whether you throw a Mepp’s, Rooster Tail, Blue Fox, Panther Martin or local favorite, this is a great searching lure when fish have spread out from where they were stocked. I like to set one line out with bait of some sort and then prospect the nearby waters with a spinner on a second rod. They are available in a wide range of sizes, and as a bonus there probably isn’t a fish in your lake or stream that won’t strike a spinner so your odds of simply catching are greatly improved.
Jigs
Probably not the first thing thought of by the average trout fisherman, jigs are a deadly option nonetheless. Soft plastics such as Trout Magnets, Gulp or even an old-school curly-tail grub can be mounted on a jig head and cast to schooling fish. Small hair jigs can be extremely effective on heavily-pressured fish as well as holdovers that have become more accustomed to feeding on naturally-occurring baits as opposed to hatchery pellets. One trick for using a jig of any sort in a stream is to swing it below a float and let it ride down current on an open bail.
Hard Baits
While hard baits such as the Yo-Zuri Pins Minnow have been popular with trouters for many years, other options including the Yo-Zuri crystal minnow, Rebel minnow and the Rapala minnow should not be overlooked! Many a big brown trout has fallen for a large hard bait swum in the shallows around dusk, and they also produce in fast-moving streams where they can be held in the current or swung into a seam or deep pool.
Soft Baits
The word “PowerBait” is almost synonymous these days with trout fishing. Whether you use dough, nuggets, worms or eggs, this stuff is like crack to a trout. I’ve had days where I almost didn’t have time to set a second rod at a stocked pond as trout after trout slammed a hook tipped with PowerBait. It’s easy to use, always at the ready and lasts a long time on the hook.
The Real Deal
From egg sacks to garden worms to grass shrimp (where legal) to minnows, it is tough to beat the appeal of a live bait for trout. They can be fished on the bottom, free-floated in a stream or hung below a bobber. I fish some tidal streams that dump into the salt and have the occasional sea-run trout that noses up above the salt line. I fish with grass shrimp that I trap in the days leading up to a trip, and I can even start a bit of a feeding frenzy with a regular handful or two of shrimp tossed out into the current.
So with states across the Northeast stocking hundreds of thousands of fresh brown, brook, rainbow, tiger and even golden trout over the past few weeks, now is the time to dig out that freshwater rod, grab a few lures or baits and head to your local trout stream to dust the winter cobwebs off your casting arm!
A reliable camping hatchet or axe can be the difference between mere survival and a truly memorable camping experience
Do any sort of camping and you’re more than aware there truly are the right tools for the job. While implements such as a bushcraft knife are an absolute must to get you out of a backwoods switch, they are, at best, only adequate for certain tasks. Chief among these is processing any amount of wood.
This, when your kit requirements allow, is where the good old camp hatchet or axe comes into play. Antiquated for large tree-felling projects nowadays, these lightweight and heavy-duty tools bring your woodcraft abilities to a new level. From facilitating more elaborate shelter-building attempts and arming you with the ability to collect a magnitude more firewood, hatches and small axes prove a godsend in the harshest environments.
Let’s hack away at what goes into the best of these sometimes overlooked camping and survival tools and what presently are some of the top choices in the wilderness tools.
Camp Axes vs Hatchets
While there is no bright line from when you crossover from an axe to a hatchet, there is a generally safe rule of thumb. Axes sport enough handle to facilitate a two-handed grip, while hatchets are generally wielded with one hand—hence their moniker “hand axe”. Most times too, axes boast a slightly larger and heavier head with a slighter taper. Hatchets, you’ll find, have a much more pronounced taper to their heads in addition to some having other functions incorporated—such as a hammer.
Given this, axes provide more striking power, thus a bit more versatility since they’re capable of heavier work than hatchets, in addition to all the tasks the smaller tool is proficient at. Bushcraters have understood this for some time, with some favoring relatively small axes that make shelter building and wood splitting much less labor intensive. There is a tradeoff in going the axe route, however—no matter what, the great majority of axe options will weigh more than a hatchet.
A hatchet, aside from convenience, has some underlying benefits. Splitting wood in camp is much easier and safer with the hand axe given it’s more controllable and can function in smaller spaces. Many—as mentioned—are tailored to the tasks of camping with multiple functions engineered into them—a tent stake puller is always nice. And even in the realm of bushcrafting, the hatchet proves nimbler than the axe on many tasks—such as using it to whittle wood.
Which is Right For The Wilderness?
Overall, the winner of axe vs hatchet debate when it comes to the outdoors is only something you can determine by analyzing exactly what your needs are when out in the wild.
If your outdoor plans require a deep push into the backcountry, where woodfires are a secondary source of heating and cooking, a hatchet seems more logical. The same goes for excursions where you plan to collect fuel wood immediately around your campsite, as opposed to cutting down a tree.
Conversely, if wood fires are your main source of heat and cooking, even in deeper parts of the forest, and you’re on extended trips an axe might prove more useful. Furthermore, if you are going straight up Grizzly Adams and virtually living off the land, building your own shelters, well an axe provides an advantage. Hunters too, in blind building from fallen trees, could also benefit from the extra leverage allotted by an axe.
Again, these are not hard and fast rules, simply examples of where a hatchet might trump an axe and vice versa. Using each as well as understanding your needs and capabilities in the wilderness will likely point you to making the right choice.
Best Hatchets And Camp Axes
ESEE Gibson Axe
The hatchet is a James Gibson design which is now offered by ESEE. A knifemaker, flintknapper, and bushcraft instructor, James originally designed the Gibson Axe for himself, something to throw into a backpack as he tramped the hills and hollers of East Tennessee. As he tweaked his design, eventually cutting out a prototype made from thin plywood, he focused on its balance and “rocker.”
“An axe with perfect rocker is one of the best handling axes you can handle,” James said. “And I got the rocker perfect on this axe.”
And just what is rocker?
Gibson explains it’s when you take the hatchet and stand it up edge down on a straight surface. As he puts it, the bit’s edge should meet the surface in the “middle of the blade, the cutting edge and its dead center, and the handle [butt] should touch at the same time.”
When he showed a couple of prototypes of the axe to the folks at ESEE at a BLADE Show one year, they decided to add it to their lineup. At the time, ESEE was hearing from its customers that they wanted the company to offer an axe—and Gibson’s hatchet fit the bill.
James designed the handle to have finger grooves and a knob to secure the hand while swinging it. After the axe was made, he learned a hidden feature of his design: it has enough finesse to carve smaller objects. He says he sharpens pencils with it and once cleaned a trout with it. The result “is capable of doing some real work as well. It also has exceptional balance and you can choke up on it and use it like a knife for many applications,” explains Shane Adams, ESEE’s marketing director.
Of course, it being ESEE, the hatchet comes in the company’s oft-used blade material: 1095 carbon steel. “It’s us,” Adams said. “We know 1095 well.” It’s a steel that handles all the variables of the outdoors. “You can sharpen it with a rock if need be,” the marketing director advises. “Stones or systems, it doesn’t matter. I always like to finish on a loaded leather strop when possible.”
Charles Allen, president and owner of Knives of Alaska (KOA), knows the importance of being prepared. The Alaskan master big-game guide who has flown in the Alaskan skies professionally for almost three decades always keeps a hatchet stashed in his bush plane—and for good reason.
“When you look back at the old photos of the early trappers and hunters, you will see three things: a rifle, a knife, and a hatchet or tomahawk on their belts,” he said. “Hatchets are still one of the most useful tools a real outdoorsman can have in the field, and they can save your life by enabling you to quickly make a warming fire or emergency shelter.” When consumers demanded a multi-purpose hatchet, Allen studied the designs carried by the folks who make preparedness their motto: the Boy Scouts. “I looked at the historic Boy Scout’s hatchet I grew up with and know that it is a proven design that is hard to improve on,” he says.
But improve on the Boy Scout model he did with the KOA Hunter’s Hatchet. The hickory handle remains tough yet easy on the hands. Heat-treated properly, the S7 tool steel is designed to absorb the shocks of hard blows. With a Rockwell hardness of 50-54 HRC, the edge of the Hunter’s Hatchet is intended to dent if it collides with something hard, Allen says, such as bone while butchering game. And the head can be returned to a razor-sharp bite with Allen’s recommended sharpening tool: a flat, fine-toothed file.
When designing the Hunter’s Hatchet, Allen was sure to include a wide-enough poll so that users could pound stakes, nails and the like with it, too.
Hunter’s Hatchet SpecsCompany: Knives of AlaskaCutting Edge: 4.25″Head Material: S7 tool steelHandle: American red hickoryWeight: 1 lbs.Overall Length: 11″Sheath: LeatherMSRP: $169
Outdoor Edge Wooddevil
David Bloch, president and founder of Outdoor Edge, wanted a hatchet that could out-cut its class: Something small enough to carry easily but with enough heft to take down a medium-sized tree.
“I looked at and tested a number of compact hatchets on the market and came to the conclusion that most full-size hatchets were too large and heavy to take on outings where weight and volume were limiting factors,” Bloch said. “I also found that most every compact hatchet I tested, while cute in appearance, was not an effective chopping tool.”
During outdoor treks when the quality of your tools will make or break thetrip, the Outdoor Edge WoodDevil may be a guardian angel, made possible by the marriage of a combination of the right balance, a good handle and a wide cutting head.
“The WoodDevil stands up to its name,” David said. “With a 4-inch cutting surface, it has the ability to cut through large diameter material with the respect of its compact size.” Plus, its compact size makes it unobtrusive in the camping bin or pickup truck until needed for whatever task—from hammering tent stakes to “slicing tinder shavings,” he adds.
The 3Cr13 stainless steel in a Rockwell hardness of 52-54 HRC is malleable and resharpens easily, and the black oxide finish allows it to better resist corrosion. The TPR rubber handle provides a non-slip grip that soaks up the shock and vibration during use. It’s packaged in a nylon sheath retained with a fabric fastener that can hang from a belt.
Wooddevil SpecsCompany: Outdoor EdgeCutting Edge: 4″Head Steel: 3Cr13 stainlessHandle: Red ABS plastic with black rubberized TPRWeight: 1.2 lbs.Overall Length: 10″Sheath: NylonMSRP: $40
APOC Double Mukk
As Blake Pogue, product manager of CAS Iberia, tells it, the creation of the Double Mukk started with some pencil, plenty of erasing, and an idea.
“We wanted to bring a full-tang hatchet to market with some unique features at a good price point,” he said. Double-bit axes don’t seem as common as they used to be, but the Double Mukk’s design is grounded in some very real field experience. In fact, it is a design championed by George Sears, the famed outdoor writer with the nom de plume of Nessmuk.
“George Sears was an avid outdoorsman, canoe enthusiast, writer, and conservationist in the late 1800s,” Blake said. “He famously employed a trio of tools for woodcraft —a small folding knife, a thin-bladed belt knife and a short, double-bit hatchet.”
Pogue said after some field testing of their own, the makers learned they didn’t need to tweak much from Nessmuk’s favorite design. APOC Survival Tools makes the hatchet at a forge in Dalian, China, and it’s distributed by CAS Iberia. The blade is 9260 carbon steel, the same material used for swords, among others.
The double edge grants the hatchet additional versatility, as one side is flat ground for delicate carving tasks. The other side is convex ground to better slam through tough cutting jobs. Pogue recommends sharpening a hatchet with a hockey-puck-style sharpener designed for axes because it can easily follow the tool’s convex edges.
“I wanted one tool that could readily build a shelter, prep a fire for a meal, and do the intricate work required to make traps like the figure four,” he said. “If we can accomplish those three requirements, there isn’t much else you’d need but a small knife for food prep, and even then the carving side of the Double Mukk is no slouch!”
The Halfbreed is a very heavy-duty piece. It is thick and hefty, and capable of taking a serious beating and dishing one out. This variant is finished in a dark earth color and comes with a substantial sheath that allows for secure carry adaptable to a variety of belts and packs.
Notable is how heavy the little hatchet is. It feels very nice in the hand and allows for either a low or high grip depending on the task. The grip is round in profile and consists of somewhat smooth scales. The edge out of the box was shaving sharp and easily removed hair from the arm.
The high, comfortable grip allowed for great control when scraping tinder. It also was a beast breaking bricks to make a windbreak for small fires. That said, it is not great for splitting tasks and, due to the thickness of the edge, does not bite deep for chopping. The grip is very comfy for general chores, though because the hatchet has equal weight dispersion along its length, it can fatigue your hand in use. It can be swung quite hard but there is a great deal of wasted energy in each strike because the head doesn’t carry the bulk of the forward momentum.
The dark earth finish was also the fastest to come off in heavy use. This is to be expected; however, be aware that if used heavily, the hatchet head likely will show wear far more than the other review subjects.
In terms of fire-starting ability, the CRA-01 proved mediocre as a striking tool, though it was very easy to control the direction of the sparks. Overall, it is fine for small fire-starting work and if it was what I had, I could easily make it work.
HALFBREED BLADES CRA-01 SPECS: Style: Tomahawk Head Style: Curved edge w/hammer poll Blade Material: K110 D2 tool steel Head Thickness: .31” Blade Finish: Dark earth (available in Ranger green and black) Handle Material: G-10 Weight: 1.7 lbs. Sheath: Kydex w/safety strap, belt and PALS/MOLLE mounting optionsOverall Length: 9.52” MSRP: $400+
Winkler Knives Highland Hatchet
The Winkler has a full tang with scales attached. Worrisome for fear of the handle cracking in hard testing but it held up nicely. The finish is matte and held up well. It has a durable sheath that is simple and intuitive to use.
Despite the edge angles, it bit right into most wood, easily de-limbed trees and handled very light splitting. It stood no chance of taking a large log apart, though anything under 3 inches in diameter was taken to task.
For hammering and strength testing the Winkler held up extremely well. It broke bricks in a single strike and took very little finish damage in the process. Tent stakes were easy to drive in and were barely worth a mention, as a nice part of this little hatchet is it handles just like a 4-ounce tack hammer.
The Highland is a reliable fire maker, generating a showers of sparks and getting a flame going given equal materials. The edge showed no handicap in making kindling.
SPECS: WINKLER KNIVES HIGHLAND HATCHET Style: Camp hatchet Designer: Daniel Winkler Head Profile: Hammer poll Blade Material: 80CrV2 carbon steel Blade Finish: Black oxide Head Thickness: .336” Handle Material: Maple (laminate and walnut available) Weight: 20 ozs. Overall Length: 10 7/8” Sheath: Lined Kydex MSRP: $550
Condor Tool & Knife Mountain Pass AXE
The Condor Tool & Knife Mountain Pass might be classified as a jungle hatchet. It has a low beard and narrow thickness that is arguably much better at cutting wet wood, vines and bamboo in fast, repeated swings. For all intents and purposes, it is a foliage tool. As such it isn’t something for heavy splitting and camp chores. It ships with a very nice sheath of brown leather.
Swinging the Mountain Pass allowed for fast, accurate strikes. It bit in deep with each blow and was easy to withdraw. The edge was perfect for a camp axe when it arrived—not too sharp, not too obtuse. It handled limbs like a pro but was not up to heavy splitting. It sank in but lacked the mass to deliver sufficient splitting energy on the strikes.
A downside to hitting hard wood and other materials is Condor’s profile of the grip. It is visually appealing and very functional but narrow in cross section and wide front-to-back, thus making the impact of each hit apparent in a smaller area of the hand. If the grip was even 1/16 inch wider on each side it would have been an easy favorite in this test.
As far as hard camp work it broke brick easily with one hit, took little damage and easily drove tent stakes. It is not intended for either of these roles, but it did just fine considering it lacks a hammer poll.
The Mountain Pass was not particularly good at splitting fine kindling, but it did well and was easy to strike on, if not a bit large. Putting it in this role immediately made me realize it was really not meant for the work; it’s far better for clearing brush and gathering medium branches to process with a smaller tool.
The Ucon Hawk from TOPS Knives is probably the most visually striking hatchet in the evaluation, as well as the sharpest. It’s large with a wide cutting edge and deep belly. It has a long, very pointy and sharp beard and a substantial grip. It’s questionable the edge needs to be as sharp as it is; a dull knife is clearly a danger but an extremely sharp, full-size hatchet can be a hazard.
The Ucon’s size makes it adept for general camp tasks. However, when it came to splitting, the deep belly and sharp tips made pulling it out of a stubborn log relatively dangerous as the blade rarely penetrated all the way, thus leaving the tips exposed. If you were to put your foot on the log to apply pressure to withdraw the head, a possibility exists that you could injure your foot in the process.
That said, performance was fantastic as a camp tool and it could simply lop off branches in a single swing. The finish held up nicely and the edge stayed sharp even after hard use. It should be noted that only the TOPS and the Winkler had edges unaffected by use. The Ucon ships with a two-part sheath—one part goes over the blade and the other is a belt loop the hatchet can slip through.
For heavy-duty tasks it did well, easily passing through limbs. Splitting was possible, though the hatchet was a bit thin and grip-heavy to dive deep enough to separate a full-size piece of firewood. Breaking brick with the hammer poll was easy; it left virtually no damage to the tool. Driving tent stakes also was easy.
Making fire was a challenge in that you had to be extremely aware of where the tips of the edge were at all times. If you get in the mode where you’re striking rapidly, say if you’re cold and frustrated, you need to calm down and take your time (as you should always do when using any sharp edge). The Ucon produced the finest kindling of the bunch by scraping with its sharp edge. The hatchet needs to lose the super-pointy beards—otherwise it is a great performer.
SPECS: TOPS KNIVES UCON HAWK Style: Camp axe Designer: Leo Espinoza Blade Material: 1095 carbon steel Blade Finish: Tumble Head Profile: Curved blade, hammer poll Head Thickness: .25” Handle Material: Orange and Black SureTouch G-10 Weight: 1.94 lbs.Overall Length: 15” Sheath: Black leather MSRP: $330
A.G. Russell Pocket Safety Axe
The fold-out blade shield of the Russell Pocket Safety Axe is pure wizardry, especially considering the design is well over 100 years old. You won’t be caught saying “Where did I put the sheath?” with this one.
The A.G. Russell Pocket Safety Axe is a Marble’s design from circa the early 20th century. Marble took a small hatchet, 10.6 inches overall, and designed a fold-out metal shield in the handle to cover the bit in lieu of a sheath. Simply ingenious. The A.G. Russell version has a 4.5-inch 1070 spring steel head with a 2.4- inch cutting edge, and a typical old-school hammering base at the rear. The head has a distinctive three-slot mounting system Marble deemed superior to the standard oval style. The 8.8 inch handle is hickory and the whole kit and caboodle weighs 1 pound. Manufacturer’s suggested retail price: $79.95.
With much of its overall weight in the head, this is a very top-heavy hatchet—which can work to its advantage. In the bite test on the privet log, the Pocket Safety Axe finished first simply because the business end has a lot more weight (see the side-by-side comparison image on head thicknesses). Consequently, it chopped each test material well.
The fold-out bit shield has pluses and minuses. On the upside, it’s very convenient and there’s no sheath to keep up with. On the other hand, you have to pack it since there’s no belt-sheath option. Also, you’ll want to wear gloves for extended use, as the hinge mechanism in the handle can dig into the inner fingers. All in all, though, the Pocket Safety Axe is a stellar performer.
SPEC CHECK: A.G. RUSSELL POCKET SAFETY AXECutting Edge: 2.4” Blade Material: 1070 spring steel Head Width: 4.5” Head Thickness: .7” at the thickest Blade Coating: None Handle Material: Hickory Special Features: Metal blade cover in handle Carry: Pocket or pack Weight: 1 lbs. Overall Length: 10.6” MSRP: $80
Boker Plus Escape Hawk
Designed by Australian knifemaker/ designer Peter Fegan, the Boker Plus Escape Hawk is tactical in design. Hawks are primarily used for breaching and combat but can full other chores as well. Only 9 inches overall, the Escape Hawk has a 4.75-inch head of quarter inch-thick SK5 tool steel and a 2.56- inch cutting edge. The head has enough beard to be used for carving, and the curved 7-inch handle is adorned with nicely sculpted, diagonally grooved FRN ( berglass-reinforced nylon) scales. The butt can be used for hammering. The steel is protected throughout with a powder coat. A dual-strap Kydex sheath covers the head. MSRP: $189.95.
The Boker Plus Escape Hawk is a hatchet in disguise. The small hack-it’s 2.56-inch SK5 tool steel bit chopped rope in nice, clean lops, and hacked off nice-sized cedar tinder chips with ease.
Due to its small size, you won’t be doing much breaching with the Boker Escape Hawk, but the pint-sized hack proved its worth. The SK5 steel had plenty of hack, chopping rope in nice, clean cuts, and knocking out chunks of seasoned cedar for tinder. Though the bearded bit can be used for carving, the inward slant of the handle mounting to the head impedes its effectiveness for the purpose a tad. The handle has full-length scales—a bonus for freedom of grip—and the diagonal grooves afforded it the best purchase of the bunch. The Boker Escape Hawk is a hawk that thinks it’s a hatchet.
At 11.5 inches, the Western Blackriver Long Hatchet from Camillus is, indeed, the longest of the test hack-its. It sports a 4.5-inch-wide head with a 2.5-inch chopping edge. On the back side of the head is a gimped flat edge for hammering and a sharpened diagonal slot for cutting cord. The 9.5-inch handle has 5.25-inch black checkered rubber scales, and there is a shaving slot midway between the handle and the head. A ballistic nylon sheath with a firesteel pouch—with firesteel—is included. MSRP: $31.98.
The Western Blackriver Long Hatchet from Camillus is the batonner of the bunch. The thin bit cleaved into the tight hardwood grain like a thief in the night. Once the head was in, the final splitting was done by batonning the upper handle.
The Blackriver has the lightest head of the test group so it didn’t win the chopping wars, but its length and handle design give it a leg up on the others in some functions. The thin head is ideal for batonning, enhanced by the 4 inches of exposed steel below the bit, which can be used as a striking surface. The grip is very comfortable, the rubber scales aiding in impact absorption. The Blackriver will handle many chores around the camp, and the bonus firesteel and pouch on the sheath add value. It’s also by far the most affordable of the group.
Camillus/Wester Blackriver Long Hatchet SpecsCutting Edge: 2.5” Blade Steel: 420 stainless Head Width: 4.5” Head Thickness: .2” Blade Coating: Titanium bonded Handle Material: Rubber Special Features: Firesteel included Carry: Ballistic nylon belt sheath Weight: 1 lbs. Overall Length: 11.5” MSRP: $32
Winkler Hunter Axe LT
At only 9 inches long, the Winkler Hunter Axe LT is a small hack-it, but packs a full 19 ounces of weight—and that’s with a skeletonized handle tang. The Hunter Axe LT has a 3.5-inch-wide, bearded 80CrV2 carbon steel head with 2 inches of cutting edge, and there’s a hammering base out back. The steel thickness is a healthy .25 inch and is coated head to toe in Caswell black oxide. The scales are full-length, highly attractive curly maple. A padded Kydex sheath with nylon belt loops covers the head, and employs a shock-cord retention system for a quick draw. MSRP: $450.
The Winkler Hunter Axe LT’s Kydex sheath has a bungee-style tension cord for quickly releasing the axe from its housing. The sheath as a whole is very well made—a Daniel Winkler trademark.
The Hunter Axe LT may be short but at 19 ounces is the heaviest of the test hack-its—a full 2 ounces more than its nearest rival. The LT almost won the bite contest but didn’t due in part to its weight being more equally distributed than the top-heavy Russell Pocket Safety Axe. The 80CrV2 steel chops extremely well and the Caswell finish is very tough. Though not a carving axe per se, the LT was our best candidate for the chore and would have performed even better with a lower grind angle on the lead edge. The price is high but the Winkler is as close to a custom as you’ll get—plus, the sheath is a marvel in itself.
WINKLER HUNTER AXE LTSpecsCutting Edge: 2” Blade Material: 80CrV2 carbon steel Head Width: 3.5” Head Thickness: .28” Blade Coating: Caswell black oxide Handle Material: Curly maple Special Features: Skeletonized handle Carry: Kydex belt sheath w/tension release Weight: 1.9 lbs. Overall Length: 9” MSRP: $450
Gerber Freescale Axe
Gerber has had a successful series of axes and hatchets made in Finland that feature one-piece, hollow, molded handles for lightweight, optimum strength. An example is the 23.5-inch model in its Freescale series. The forged steel head is mated permanently to a lightweight composite handle, so there is little worry the handle will come loose during use. The oblong profile handle is hollow, which shifts the balance of the axe to being head-heavy. It is very forward weighted and that is a good thing. Use gravity to your advantage as you employ the axe, allowing it to fall naturally as you guide it. A tactile gripping surface in a contrasting green graces the handle. The handle flares at the butt, allowing your bottom hand to hook into it, trapping the handle in your hand so it doesn’t go flying. The handle style reportedly is virtually indestructible during heavy use.
The forged head exhibits a nice, steep “V” profile to help bite hard and deep into wood. A primary edge bevel thins the edge some and makes resharpening easier. A black PTFE coating provides additional corrosion resistance as well as a nonstick surface. A poll is designed as a hammer.
The Freescape is among the least expensive of the review axes, though don’t discount its performance based solely on price. Truth is, this axe is devastatingly effective. With each swing you can feel the forward-weighted balance power the Freescape through wood. The thickness and shape of the handle are just right, allowing a secure grip with both hands. Gerber includes a plastic caddy that seals the cutting edge and protects you and your belongings from being cut. The caddy has a large handle to carry the axe safely, as well for hanging on a pegboard in your garage or utility shed. For how it performs versus what you pay, it is an excellent value. If you’re a frequent axe user or just an occasional one, the Freescape will serve you very well.
A spike model, the RnD Compact Axe is the smallest in the Winkler Knives (WK) axe line, though that doesn’t mean it’s the least capable. The hatchet-like head is only 5.5 inches long. The 80CrV2 carbon steel head is ⅜ inch wide. The tang sports a distal taper toward the handle butt to improve balance and shift weight distribution toward the head. The spike is commonly found on tomahawks and does everything from prying to puncturing. WK also offers a front spike option integrated into the head’s main cutting edge. A black oxide finish helps resist corrosion.
The 80CrV2 offers extreme toughness and edge retention. It withstands an impressive amount of abuse yet remains easy to resharpen, even in the field. Daniel Winkler is a fan of 80CrV2 and uses it a lot for both his knives and axes.
The handle features two prominent grip positions. One is the traditional axe grip held close to the butt. A series of subtle finger grooves seats your fingers, and the butt has a bird’s-beak design that hooks the handle into your hand to prevent it from sliding from your grip. A secondary close-quarters grip is below the axe head at the handle’s humpbacked portion. This facilitates choking up for control in carving, whittling and using the cutting edge like a knife. The RnD feels very balanced and agile in the latter grip, one the other review axes don’t offer. The Winkler would be great at processing kindling and bushcraft chores that require more control with close-in cutting or whittling. Due to its length and weight, it would not be a primary use axe but maybe a complement to a larger model that does heavy splitting or felling chores.
A secondary close-quarters grip is just below the head of the RnD Compact at the handle’s humpbacked portion. This facilitates choking up to provide control for carving, whittling and using the cutting edge like a knife.
The walnut handle looks luxurious but pay heed to where you lay it down in the woods. The walnut’s color blends in well with leaf ground cover and you might lose it easily. Thread a loop of brightly colored pink, red or yellow paracord through the lanyard hole to make the handle stand out. The RnD comes in three handle materials: black Micarta®, maple and walnut.
A molded form-fitting sheath of Boltaron encloses the head. A thick shock-cord-quick-release-retention device secures the sheath in place, yet releases easily and quickly. An interior felt lining facilitates the easy slipping on/off of the sheath, as well as muffling the sound. Two nylon webbing belt loops enable the RnD to ride comfortably at your side. MSRP is $815, the most expensive of the test group. WK is very well known for manufacturing excellence and attention to detail, and the RnD Compact is no exception. For a bigger axe in the same design, check out the full-size model.
The TOPS Knives High Impact is a full-sized hatchet/small axe hybrid that packs a punch. At 20 inches overall and around 3.5 pounds, it is a formidable chopping tool that can be used with two hands as a traditional axe or one handed a la a hatchet.
Starting with a backbone of .38-inch-thick 1075 carbon steel, the High Impact’s main cutting edge is a little over 5 inches—plenty of cutting surface for large and small chopping jobs alike. The Black Traction Coating creates a layer of protection against corrosion and wear. The ergonomic handle is tan Micarta®, with a diagonal machined groove pattern for hand traction. Five pairs of large hex head screws fasten the Micarta scales, and there are two large brass-lined lanyard holes. The handle has a distinctive bulge that helps seat your grip, especially for one-hand use. The handle flares at the butt, creating a comfortable seat for your bottom hand when using two hands.
The first thing you notice is the High Impact’s weight. It’s impressive but will take some getting used to. Once acclimated with the heft, you will discover it is also an advantage for getting momentum in your swing. And when it hits, it lives up to its name. The High Impact takes out chunks of wood with each blow. TOPS has the heat treat on the carbon steel dialed in perfectly. The 1075 retains an edge really well but sharpens easily and quickly.
I tried both grip styles. With one hand, this is where the weight takes some getting used to. Due to the axe’s weight, one-handed use might be limited to short spells. Conversely, using two hands is where the power of this beast is unleashed. You can put power behind the swing and each blow is devastating. You can feel the axe head bite in with each blow. It’s a sure bite as well. The performance with one or both hands is equally impressive. Due to its weight, it’s a great candidate to store in your truck or ATV.
A nicely made leather holster fastens over the head, sealing the edge. Two button-snap straps secure it, though only the one at the end needs to be undone to slide the sheath off. Note the absence of a belt loop attachment to carry the axe. It’s just too heavy. Despite the weight being a factor, the High Impact packs a serious punch and is the heavyweight champ of the test bunch. MSRP: $360. TOPS makes the axe in its factory in Idaho Falls, Idaho.
TOPS Knives High Impact SpecsCutting Edge: 5.75″Head Material: 1075 RC 56-58Head At Its Thickest: .38″Handle: Tan Canvas MicartaWeight: 3.7 lbs.Overall Length: 20″Sheath: LeatherMSRP: $420
Wolf Valley Forge Camp Axe
The Wolf Valley Forge axe ate bundle after bundle of firewood like there was nothing to it.
The Wolf Valley Forge Camp Axe is in a class of its own. It came not with just a functional sling and cover, but also a small whetstone and a jar of wax by Axe Wax to help preserve it. Carrying the Camp Axe is comfortable and allows for a free hand while trekking. The handle is perfectly shaped and came with a leather strike guard.
Ike Bullington is the maker and the quality is immediately noticeable the second you unpack it. It is all properly shaped, textured and balanced for real work and has a very pleasing appearance. However, it is not a wall-hanger. The head is of a traditional profile and designed for a lifetime of work.
The edge arrived razor sharp, easily sharper than most knives. Not only that, but the edge is extremely durable and completely dispels the notion that you need a wedge-shaped splitter.
A sharp axe truly cuts the work in half and this one almost effortlessly passed through wood regardless of grain angle. In taking down bigger trunks it drove in the deepest and was the easiest to free. Chips flew with each chop and it made very short work of even the toughest test materials.
In addition to cutting wood, it was tested driving tent stakes and making kindling, which it did easily. As a camp axe it is very nice in the batoning role, and yes, you can baton an axe the same as you would a knife—so long as you grip it high up to the head and perform the task in a safe standing position as to not deflect the blade into your knee.
Wolf Valley Forge Camp Axe SpecsCutting Edge: 4″Head Material: 4142Head At Its Thickest: N/AHandle: HickoryWeight: 2.5 lbs.Overall Length: 23.62″Sheath: LeatherMSRP: $375
Fox Sekira
Considering what you get, the Fox Sekira is a great axe and relatively inexpensive. It handles like a traditional axe in the swing but has a crescent-profile edge that is shaped much the same as a carpentry axe, though with a longer handle. The head is wide at the cheeks and quite narrow in the blade. It splits very nicely though isn’t particularly deep-biting on each swing.
The head, while substantial, isn’t overly massive and there is a large concentration of weight in the handle. The weight is distributed across the axe, which could lend to some of the increased effort in getting it to send splinters flying.
As far as general performance, the Sekira is about as good as a traditionally constructed axe gets, and lacks nothing in utility. It stayed sharp and experienced no edge chipping, even after quite a bit of heavy use. The only noticeable downside is that the handle, while comfortable and very nicely finished, is somewhat on the large side and rounded from front-to-back.
When hands get wet or cold the axe has the tendency to want to rotate, which can be dangerous if you’re not holding on tight. Other than that minor issue, the Sekira is a fantastic axe that should offer years of hard-use service.
Fox SekiraCutting Edge: 4.33″Head Material: Carbon Steel C45Head At Its Thickest: N/AHandle: HickoryWeight: 3.35 lbs.Overall Length: 23.62″Sheath: LeatherMSRP: $150
Editor’s note: Dexter Ewing, Josh Wayner and Daniel Jackson contributed to this post.
More Axes, Hatchets And Tomahawks:
Bearded Axe: Best Bashers From Here To Valhalla
Best Tomahawks: Our Top Hawks For Backwoods To Battlefields
Wicked Breacher: Ben Seward’s SWAT Axe
Awesome Axes for Chopping Wood Like a True Lumberjack
Wyatt Earp has said:
Fast is fine, but accuracy is everything
And I just thought how many airgunners are obsessed with muzzle velocity and muzzle energy,...
")
")
")
")
")


 Review – The Best Name In The Air Rifle Game")


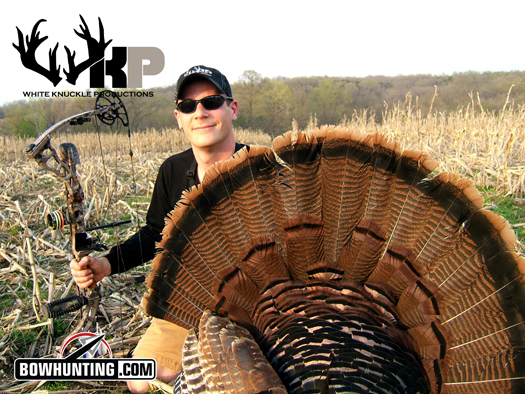
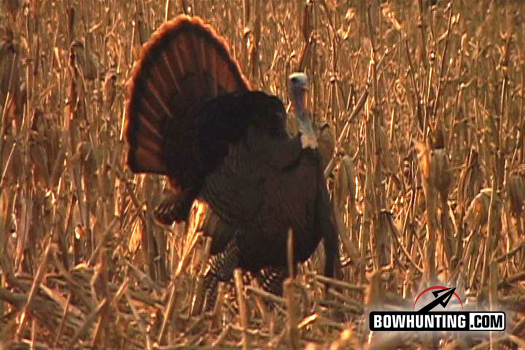 This is a picture of the giant turkey entering the field. My first thoughts were “he’s a shooter”…
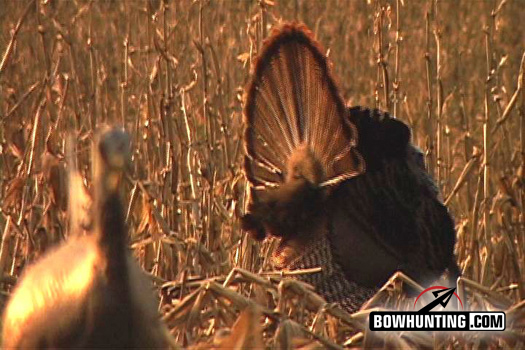 This shows my not-so-fancy decoy set-up in-front of our blind with the big tom circling at 35 yards…
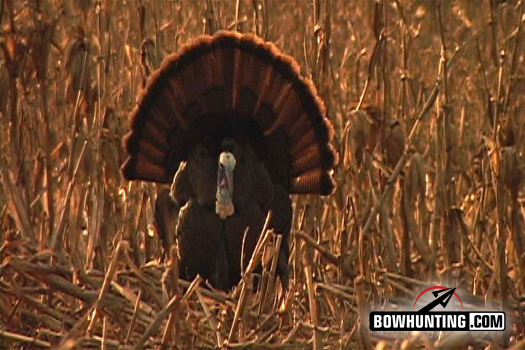
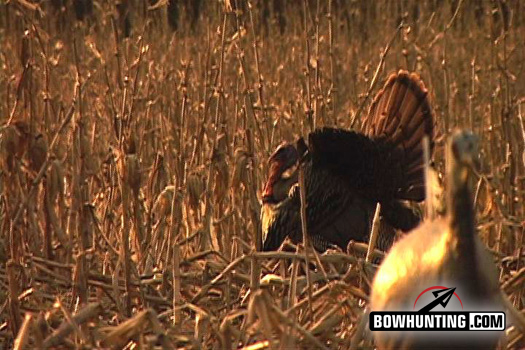 This is when the tom started heading back toward the other hen in the field. It was now or never!
 This is Dallas and I in the bale blind just after the shot…
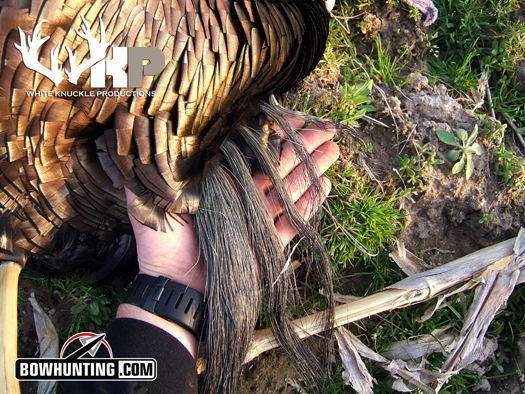 Here is a picture I took of the beards in my hand after just realizing the turkey was a multi-bearded freak bird!
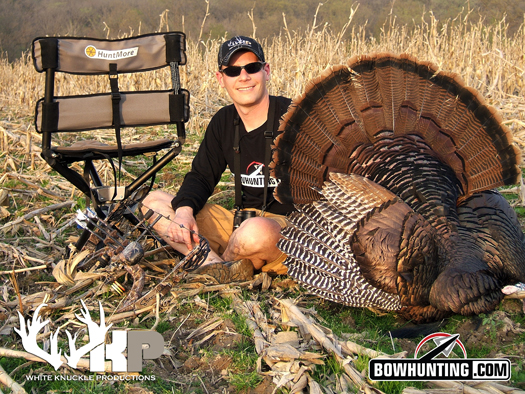
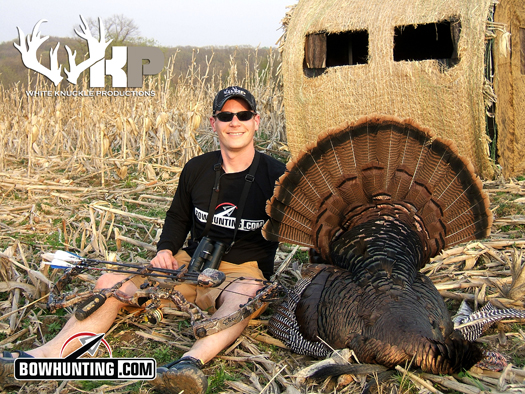 This is the Blind Ambitions Bale Blind that we used for this set-up. It worked perfectly!
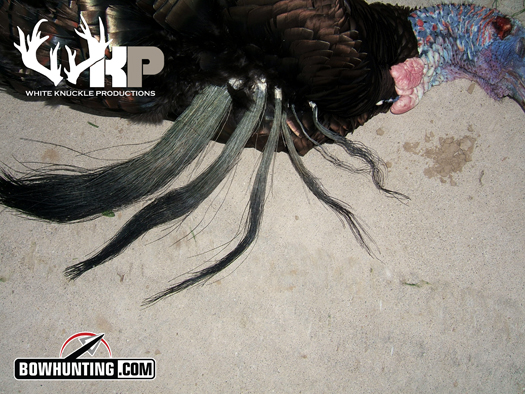 Here’s another picture of the Iowa freaks beard.
:focal(700x527:701x528)/https://tf-cmsv2-smithsonianmag-media.s3.amazonaws.com/filer_public/17/45/174553a9-960e-41b7-a061-c3ba1ecf57d9/crocodile-thing.jpg)