Exploring the Legal Possibilities: Can a Felon Legally Own an Air Rifle? Delve into the complex world of firearm ownership rights for individuals with criminal records, as we examine the specific regulations surrounding air rifles. Gain insights into the legal implications and potential restrictions faced by felons seeking to possess these non-lethal firearms.
Can a felon own an air rifle
In the United States, the ownership of firearms by felons is heavily regulated due to their criminal history. While federal law prohibits individuals with felony convictions from possessing firearms, the specific regulations surrounding air rifles are not as clear-cut. This raises the question of whether felons are allowed to own and possess air rifles.
The answer to this question largely depends on state laws and individual circumstances. In some states, felons may be prohibited from owning any type of firearm, including air rifles. These states generally classify air rifles as firearms and apply similar restrictions to them as they do to traditional firearms. On the other hand, there are states that do not consider air rifles as firearms and therefore allow felons to possess them.
It is important for felons to fully understand their state’s laws regarding air rifles before attempting to purchase or possess one. Consulting with an attorney or local law enforcement can provide clarification on whether or not ownership of an air rifle is permissible for individuals with felony convictions in a particular jurisdiction.
In many jurisdictions, felons are prohibited from owning firearms. However, the legal status of air rifles for felons varies by location. While some states classify them as firearms, others do not. It is crucial for individuals with a felony record to research and understand their local laws regarding air rifle ownership to avoid any potential legal consequences.
Ham radio is an amateur radio system with a long and exciting history. There are well over 600,000 ham radio operators in the U.S. and 2 ½ million around the world. Despite its name, Ham radio is much more than a hobby. Ham operators have advanced the science of radio and electronics, provided emergency communications during countless disasters, and even worked with NASA. If you’re interested in Ham radio, you can begin with a modest setup and increase your investment of time and resources as your interest grows. There is more than enough going on in the field to keep your attention for a lifetime. This guide will explain just what being a ham operator entails, what you need to know about radios and antennas, how to get started, and where to find resources for education and licensing.
At the very beginning of the 20th century, people began building “wireless” radio sets from plans published in magazines and books. Interestingly, teenagers were among the earliest fans of the new technology. Not only was radio communication a novelty, but it was also easy for young people to get involved because of the low cost of building a basic radio.
Those early amateur radios were used mostly for entertainment. Being able to chat back and forth with someone in the next town or even one state over was exciting. Before the advent of amateur radio, telegraph offices were the only way to communicate over distances, and they charged by the word. Ham radio let people communicate for free from the comfort of home; however, on the earliest Ham radio sets Morse Code was the only available type of communication.
More advanced radio technology that made voice communication possible arrived just a few years later. The number of amateur radio operators grew, and eventually, problems arose with interference. At this point, the Federal Communications Commission stepped in and began requiring licensing to operate an amateur radio. They also restricted amateur radios to certain frequency ranges and introduced call signs to give each operator a unique identity on the air.
The Different Types of Ham Radio
There are three basic types of ham radio, each with its own strengths and drawbacks.
Handheld Radios
Handheld radios are easily portable and resemble large walkie-talkies. They have a short, rubber-covered antenna known as a “stubby” or “rubber ducky”. Handhelds are common at large public events, or in emergency situations when amateur radio service is needed for communication. Disaster situations wreak havoc on cell phone networks, either because everyone is trying to use their phone at once, or because power loss takes down the service. Because they run on batteries, handheld radios are ideal for emergency services. Even though the small antenna provides a limited range, the lower frequencies allow the signal to propagate further than other radios could.
Mobile Radios
Mobile ham radios are the nearest equivalent to CB radios. These book-sized units are typically mounted under a dashboard in a vehicle. Their control interface is designed to be simple enough for beginning radio operators, and most importantly, for drivers. Mobile radios use handheld push-to-talk microphones and often operate specifically in the 10-meter band, where they’re tailored for use on the road. They all have standard antenna jacks, and a variety of antennas can be used with them. This gives them a significantly longer range than other popular types of mobile radio. Mobile ham radios can transmit with up to 200 watts of power across the high-frequency band.
Base Stations
Base station radios are considerably larger than mobile radios, are installed in a stationary location, and are more complex to use. They provide communication in multiple ham bands and can handle both analog and digital modes; they may be combined with computers for digital communication. Base station radios are often connected to more than one antenna to accommodate both the VHF and UHF bands. Some of those antennas are quite large and are usually mounted to small towers.
Base stations are a lot of fun once you know what you’re doing. Using these amateur stations, operators can talk around the world by bouncing radio waves off either the ionosphere or satellites. They present an endless set of challenges and opportunities for operators. Unsurprisingly, the most technically-inclined ham operators often use base station radios. They have the additional training and experience needed to get the best performance out of the equipment.
How To Choose A Ham Radio
Once you decide to become a ham radio operator, you’ll be shopping for equipment. The features you choose for your radio will depend on how you plan to use your new license. Because ham radio has a learning curve, it doesn’t make sense to buy a more advanced radio than you’ll need at the beginning.
If you’re not sure about your level of interest, handheld radios are the least expensive option and make a great point of entry. Because of their limited range and somewhat specialized use, handheld models will only connect over short distances. If your main interest is contributing to emergency services, a handheld radio is ideal. If you want to communicate over a wider range, a mobile radio might be a better choice. Mobile radios are a cost-effective option because you can disconnect the radio from your vehicle antenna and use the radio at home as a base station, connected to a larger antenna. It’s important to make sure that any mobile radio you purchase has a built-in antenna tuner.
At Stryker Radios, we’ve streamlined the user interface on our mobile radios to make them easier and safer to use in a vehicle. Stryker also makes antenna selection easy, with radio antennas and accessories ideal for mobile ham radios.
Experienced ham radio operators may want to set up a base station so they can transit over long distances. However, true base station radio sets can be quite expensive. They are also more complicated to use, and using them improperly can cause problems for other operators. The features and capabilities of base station radios are beyond the scope of a single article; if you’re just starting out as a ham radio hobbyist, a base station is probably not the best choice.
Ham Radio Licensing
In order to use a ham radio, amateur radio operators are now required by the Federal Communications Commission (FCC) to obtain a ham radio license. There are three levels of licensing for ham operators. The introductory level is known as a technician license. The 35-question license exam is easy for most people to pass with a little studying, especially since they removed the requirement to learn Morse Code. Once you pass the test, your ham radio license is mailed to you, along with your amateur radio call sign.
The three amateur radio licenses have increasingly difficult qualifications:
Technician Class: an entry-level license that grants transmitting privileges on the VHF and UHF bands used for local communication, and limited Ham bands for global transmissions
General Class: expands transmitting privileges to long-distance, international communication via signal propagation, and increased voice operation on Ham bands
Extra Class: provides access to the full range of Ham bands allocated to the Amateur Radio Service
Many beginners never feel the need to apply for a higher-level license because they enjoy operating a ham radio station with a technician’s license alone. For example, a growing number of people are moving from CB radios to 10-meter mobile radios in their vehicles. While CB radios have long been a mainstay for long-haul truckers, they are limited to a range of about seven miles. A Ham operator in the 10-meter band has more power and a range of 30 miles; having a technician’s license allows CB radio operators to use Ham radio as well.
For on-the-move hunter, Nukem’s Grab & Go Hunting Blind XL assembles and disassembles in under a minute. (Photo courtesy of Nukem Hunting)
Treestands get a lot of love from hunters. This makes sense. They have a lot to offer hunters. However, what they often lack is both protection from the elements and concealment. The blinds listed here—which I came across at the 2024 ATA Show—offer both in spades. And most are brand-spanking new for 2024.
Whether you’re a fan of big permanent blinds set up on a field edge or collapsible, portable soft-sided models that you can run and gun with, there’s something here that will fit the bill.
This new 90-inch diameter blind from Banks Outdoors boasts more than 44 square feet of room and eight silent-swinging tinted framed windows, making this a perfect option for bow and gun hunters. It’s also extremely durable and weather resistant due to a seamless polyethylene construction. The Sequoia is available as a base model, a complete accessory-equipped “Pro Hunter” option, a Scout ground blind or even an ice-fishing shelter. $4,799.00-$5,699.00 | banksoutdoors.com
Millennium Antler Shak 30-06 Ground Blind
Millennium Antler Shak
Designed for maximum visibility, concealment and comfort, the Antler Shak 30-06 ground blind features six Full-View mesh panels. These panels offer 180-degree panoramic views while preventing game animals from seeing into the blind. The interior and shooting windows are both blacked out for concealment, and the windows themselves are adjustable to fit the needs of gun, bow or crossbow hunters. They also make great customizable rests. The blind has ample space for multiple gun or bow hunters and is constructed of a quiet, water-resistant fabric covering a durable powder-coated steel frame. The Antler Shak also breaks down quickly for storage, so there’s no need to leave it out in the elements in the off-season. Pricing Unavailable | millennium-outdoors.com
Barronett Blinds Wide Side 95
Barronett Blinds Wide Side 95
This portable hub-style blind lets two hunters sit side by side while keeping ample elbowroom. The blind has a silent and fully adjustable panoramic front shooting window that you can adjust on the fly in the field. The outer shell is water-resistant HD 150 Denier fabric, and the interior has a black coating for concealment, with a small peak rear window for additional viewing. Included with the blind is an oversized carry bag, ground stakes and tie-down ropes. Altogether it weighs 18 pounds. $209.99 | barronettblinds.com
Nukem Grab & Go Hunting Blind XL
Nukem Grab & Go Hunting Blind XL
This was one of the more intriguing blinds I came across at the ATA Show this year. It’s a stake-free, lightweight, low-profile design that assembles and disassembles in under a minute and seems ideally suited for run-and-gun turkey hunting or any kind of highly mobile hunting. Before the show, I was unfamiliar with the original Nukem Grab & Go Hunting Blind, but the new XL model is, predictably, a larger version. While the original is primarily intended for hunters sitting on the ground, the new XL adjusts from 45 to 60 inches in height, so users can also hunt out of a chair. Unlike the original, it can also extend to over nine-feet wide to accommodate two hunters if needed. It has a 150 Denier Nylon construction, weighs only 3.5 pounds and collapses into a 38-inch long carrying case. It’s available in True Timber HTC Green, True Timber Strata, Mossy Oak New Bottomland and Mossy Oak Obsession. $129.99 | nukemhunting.com
Rhino R180 See Through Blind
Rhino R180 See Through Blind
While not strictly new this year, the 180 See Through Blind from Rhino remains a solid, yet affordable option for hunters of all stripes. The see-through mesh offers an unobstructed 180-degree view in front of the blind while preventing game from seeing the hunter inside. Internal dimensions (58 inches by 58 inches of floor space) offer ample room to accommodate up to three hunters, while the five-hub design makes for rapid setup and takedown. The 16-pound blind has silent slide window technology for quiet in-the-field adjustments and an oversized zipper-less door for similarly discreet entry and exit. Finally, brush straps outside the R180 allow hunters to further brush in the blind with native vegetation as needed. $212.49 | rhinoblinds.com
Barronett Blinds Face-Off
Barronett Blinds Face-Off
Perfect for run-and-gun hunting, the new Face-Off portable blind weighs in at just 12 pounds and offers a height of between 48 and 64 inches and a total length of 129 inches. The 16 inches of height adjustment courtesy of heavy-duty adjustable ground stakes and an oversized ground skirt are perfect for adapting to differently sized hunters or uneven terrain. Windows feature noiseless toggle and loop attachments for quiet adjustments. Materials wise, the blind has heavy-duty two-layer bonded fabric for enduring the elements, as well as one-way see-through fabric window attachments to see your prey without it seeing you. $169.99 | barronettblinds.com
Primal Outdoors Bale Out Hay Bale Blind
Primal Outdoors Bale Out Hay Bale Blind
While built with waterfowl hunters in mind, this blind could also be used to hunt deer in the right environment. The Bale Out Hay Bale Blind has a 63-inch by 58-inch footprint and a height of 72 inches, meaning it has tons of space for hunters. It’s supported with a heavy-duty steel frame that—while adding a bit of weight to carry (50 pounds)—does make for a solid structure. The 600-denier water-resistant shell contains nine zippered windows for 360 degrees of viewing, as well as two larger doors for entry. For the waterfowl crowd, meanwhile, there is also a spring-loaded 60-inch by 33-inch window with see-through mesh that is easy to open when it’s time to call the shot. $400 | primaloutdoors.com
Orion Hunting Products 55
Orion Hunting Products 55 hunting blind. (Photo by Drew Warden)
One of the most interesting new blinds I came across at the 2024 ATA Show was Orion Hunting Products’ new 55 blind. Orion has a unique concept for their blinds, in that they are assembled by the user. Blinds feature individual panels made from aluminum (both exterior and interior) with foam insulation between the inside and outside layers, and each of these panels latches into the adjacent panel and the base of the blind. It’s a neat process that the Orion folks demonstrated for me on the show floor, and they say it takes roughly 15 minutes to take one of their blinds from a truck bed to fully assembled in the field. All panels are sealed at the edges and where they meet the floor. The new 55 model is a 5-foot diameter, five-sided blind, and the base model comes with four horizontal gun windows. However, you can also swap panels with horizontal windows for panels with vertical windows if needed for bowhunting. $2,999 | huntorion.com
Greylight Daybreak Blind
Greylight Daybreak Blind
This neat ground blind is kind of a hybrid design that features both highly adjustable panoramic windows on one side and tall vertical windows on the other. The blind also has strategically placed one-way see-through vision panels and tight, silent, Velcro-free shoot-through screens. It has a silent-entry door, brush loops for adding more camouflage and a roof accessory mounting location for quickly attaching ground-blind accessories. It comes with an enclosed backpack to carry the blind and your equipment. $449.99 | greylightblinds.com
Primos Full Frontal One-Way See-Through Blind
Primos Full Frontal One-Way See-Through Blind
This handy ground blind from Primos features two full panels of one-way see-through mesh, which fully conceals movement inside the blind while facilitating maximum visibility outside of it. Silent Slide Windows allow for easy adjustment and excellent concealment. They are completely silent to move, so you can adjust in the field as needed. The Assist Door System, meanwhile, offers easy and silent access, whether you’re entering the blind or exiting it. Straps along the top ridges of windows allow you to brush the blind in with native vegetation, and it comes in a nice Veil camo. Its spacious dimensions (58 inches by 58 inches of floor space and 67 inches of height) permit two bowhunters or potentially more than two gun hunters, and the blind itself weighs 17 pounds with the bag and stakes. $199.99 | primos.com
Redneck Blinds Game Changer Platinum 360 6’ x 8’
Redneck Blinds Game Changer Platinum 360. (Photo by Drew Warden)
Big enough to comfortably fit up to four adults, this blind has 46-inch-tall vertical windows, large oversized horizontal windows and a spacious 70-inch wide by 94-inch deep by 80-inch ceiling. It’s a perfect blind option for bow, crossbow or gun hunting. If you need to sleep in the blind to catch a monster buck at first light, there’s also ample room for a cot or air mattress. Windows feature tempered, automotive glass; the ceiling is insulated closed cell foam; the floor has a marine-carpeted foam liner; and walls are acoustical foam covered for sound control and insulation. Three consoles are pre-installed to organize gear, and there are built-in shelves and gun holders. The blind itself is made from long-lasting fiberglass and is available with deluxe 5- and 10-foot stands and deluxe 5- and 10-foot stairway systems. The stairway systems feature 3/16 powder coated bent steel to resist rusting, non-slip steps and handrails on both sides for safety. $3,999.99-$6,599.99 | redneckblinds.com
Barronett Blinds FourSight
Barronett Blinds FourSight blind
As its name suggests, the FourSight is a large blind with four one-way see-through panels. Game can’t see in, but you can see out just fine through the mesh panels. The blind accommodates up to three hunters with a shooting width of 88 inches by 88 inches. The door also has a silent hinge for quiet entry. The corners are reinforced, and an OxHide two-layer fabric roof runs throughout. The frame, meanwhile, features extra-large, heavy-duty fiberglass poles and aluminum hubs for maximum durability. The blind’s exterior has brush holders for attaching additional concealment, and the blind itself comes with a backpack carry bag with a gear pocket and a chair holder. It comes with All-Terrain stakes and tie-down ropes as well. $399.99 | barronettblinds.com
Greylight Twilight Blind
Greylight Twilight Blind. (Photo by Drew Warden)
Blending elements of a true hard-sided blind with those of a soft-shell blind, the new Twilight comes wrapped in an insulated fabric with a 100-percent waterproof roof with fully taped seams up top. Within the blind, you’ll find friction hinge windows that are weather-sealed heavy-duty plexiglass and feature multiple latches to ensure you have airtight, rattle-free windows. There’s also a single-handed knob on each window, so you can easily lift it up or down while still holding your weapon. Like some soft-sided ground blinds, on the other hand, the Twilight has external vertical panels that quietly slide up or down to either block the window completely or adjust it to the exact size you need. The blind also has an ozone port should you like using an ozone machine to help reduce your scent. Lastly, it has a full-frame door that latches without any zippers for quiet entry. The Twilight blind is available as a ground blind or as a 10-foot tower blind. $1,299.99-$1,999.99 | greylightblinds.com
Trophy Treestands D-LUX Blind and Tower
Trophy Treestands D-LUX Blind and Tower<
This spacious yet affordable blind has a 70-inch by 70-inch footprint and a 90-inch-tall roof height. The frame is solidly constructed using powder-coated steel and has a weight capacity of 500 pounds. Outside the blind’s rear entry door, it also has a reinforced mesh platform. The blind itself has a heavy-duty weather-resistant shell to keep the elements out. Inside, the blind offers a 360-degree view with adjustable large windows, and the bottom of the interior has full-size silent black floor mats. The new D-LUX blind has two tower options available: 5-foot or 10-foot. $1,351.97 | trophytreestands.com
Deer are generally very fast runners and have evolved to be agile and swift to escape from predators. The average speed of a deer is around 40 miles per hour (64 kilometers per hour) for short distances. However, the top speed of a deer can vary depending on the species and individual. For example, white-tailed deer, a common species in North America, can run at speeds of up to 30-35 miles per hour (48-56 kilometers per hour). They are known for their ability to make rapid changes in direction to evade predators.
The Speed of Dogs
Dogs are also known for their speed and agility. The speed of a dog can vary depending on the breed and individual. Some dog breeds, such as greyhounds, are capable of running at speeds of up to 45 miles per hour (72 kilometers per hour) for short distances. Greyhounds are among the fastest dog breeds and are often used in racing competitions. However, not all dog breeds can match the speed of a deer.
Advantages of Deer in Running
While some dog breeds may be able to keep up with or even outrun certain deer species, there are several advantages that deer have when it comes to running. Deer are lighter than most dogs and have longer legs, which gives them a natural advantage in terms of speed. They are also very agile and can quickly change direction, making it difficult for dogs to catch them. Additionally, deer are often more familiar with their surroundings than dogs, giving them an advantage in evading capture.
Conclusion
In conclusion, while it is possible for some dog breeds to keep up with or outrun certain deer species, deer are generally faster runners than most domestic dog breeds. Deer have evolved to be swift and agile to escape from predators, and their natural abilities make them formidable runners. It’s important to note that chasing deer with dogs is illegal in many places and can be dangerous for both the dogs and the deer. It’s always best to keep dogs on a leash and avoid chasing or harassing wildlife.
The Speed Showdown: Deer vs. Dogs
Deer’s Speed
Deer are known for their incredible speed and agility, making them formidable runners. On average, a deer can run at speeds of around 40 miles per hour (64 kilometers per hour) for short distances. However, the top speed of a deer can vary depending on the species and individual. Some deer species may be slower, while others may be faster. For example, white-tailed deer, a common species in North America, can reach speeds of up to 30-35 miles per hour (48-56 kilometers per hour). Their long legs and lightweight build give them a natural advantage in speed.
Dog’s Speed
Dogs are also known for their speed and agility, although their running speed can vary depending on the breed and individual. Some dog breeds are capable of reaching impressive speeds of up to 45 miles per hour (72 kilometers per hour) for short distances. Greyhounds, in particular, are renowned for their racing abilities and can reach speeds of around 40-45 miles per hour (64-72 kilometers per hour). However, not all dog breeds are as fast as deer.
Factors Affecting the Outcome
While deer are generally faster runners than most domestic dog breeds, there are several factors that can influence the outcome of a chase between a deer and a dog. The species of deer and the breed of dog involved play a significant role in determining who would come out on top in terms of speed. Additionally, the terrain and environmental conditions can also impact the chase. Deer’s familiarity with their surroundings gives them an advantage when it comes to navigating obstacles and finding cover.
In conclusion, while deer are generally faster runners than most dogs, there are some dog breeds that can keep up with or even outrun them. Greyhounds, known for their incredible speed, are among the few dog breeds that can match or exceed the running speed of deer. However, it’s important to note that chasing deer with dogs is illegal in many places and can be dangerous for both the dogs and the deer. It’s always best to keep dogs on a leash and avoid chasing or harassing wildlife.
Breaking the Myth: Can Some Dogs Outrun Deer?
Deer vs Dogs: The Need for Speed
Deer are generally very fast runners, with an average speed of around 40 miles per hour (64 kilometers per hour) for short distances. However, their top speed can vary depending on the species and individual. On the other hand, dogs are also known for their speed and agility. While the speed of a dog can vary depending on the breed and individual, some dog breeds can reach speeds of up to 45 miles per hour (72 kilometers per hour) for short distances. So, it is possible for some dogs to keep up with or even outrun deer in certain circumstances.
The Advantages of Deer
Despite some dogs being able to match or surpass the speed of deer, there are several advantages that deer have when it comes to running. Deer are lighter and have longer legs, giving them a natural advantage in terms of speed. They are also very agile and can change direction quickly, making it difficult for dogs to catch them. Additionally, deer are often more familiar with their surroundings than dogs, which gives them an advantage in a chase. They know where to find cover and how to use it to their advantage.
Factors Influencing the Outcome
The outcome of a chase between a deer and a dog depends on various factors. These include the species of deer, the breed of dog, and the terrain they are running on. Different deer species have different running speeds, while certain dog breeds like greyhounds are known for their exceptional running abilities. The terrain also plays a role as uneven or dense areas may favor one animal over another.
Keeping Wildlife Safe
It’s important to note that chasing deer with dogs is illegal in many places and can be dangerous for both the dogs and the deer. It’s always best to keep dogs on a leash and avoid chasing or harassing wildlife. Respecting the natural behavior and habitats of animals is crucial for their well-being and conservation.
In conclusion, while deer are generally fast runners, there are some dog breeds that can keep up with or even outrun them. However, deer have certain advantages in terms of speed, agility, and familiarity with their surroundings. The outcome of a chase between a deer and a dog depends on various factors, and it’s important to prioritize the safety and well-being of both animals by respecting wildlife regulations.
Deer or Dog: Which Species Reigns as the Fastest Runner?
Deer’s Speed and Agility
Deer are generally very fast runners, capable of outrunning most predators, including dogs. The average speed of a deer is around 40 miles per hour (64 kilometers per hour) for short distances. However, the top speed of a deer can vary depending on the species and individual. Some deer species, like white-tailed deer, are known for their speed and agility. They can reach speeds of up to 30-35 miles per hour (48-56 kilometers per hour) and are able to make rapid changes in direction to evade threats.
Dog’s Speed and Variations
Dogs, on the other hand, are also renowned for their speed and agility. The speed of a dog can vary depending on the breed and individual. While most domestic dog breeds are not as fast as deer, there is variation among different breeds. For example, greyhounds are known for their racing abilities and can reach speeds of around 40-45 miles per hour (64-72 kilometers per hour). They are among the fastest dog breeds when it comes to running.
Factors Influencing Outcomes
In a chase between a deer and a dog, several factors come into play that determine the outcome. The species of deer, breed of dog, and terrain can all affect who will ultimately be the faster runner. Deer have certain advantages over dogs when it comes to running. They are lighter with longer legs, giving them a natural advantage in terms of speed. Additionally, they possess great agility and can change direction quickly, making it challenging for dogs to catch them.
However, some dogs may be able to keep up with or even outrun certain deer species depending on these factors. It’s important to note that chasing deer with dogs is illegal in many places and can be dangerous for both the dogs and the deer. It’s always best to keep dogs on a leash and avoid chasing or harassing wildlife.
In conclusion, while deer are generally fast runners, there are some dog breeds that can match or surpass their speed. However, the outcome of a chase between a deer and a dog will depend on various factors such as species, breed, and terrain. Both species have their own unique advantages when it comes to running, but it’s crucial to respect wildlife and ensure the safety of both animals by avoiding unnecessary chases.
Unveiling the Truth: Debunking the Idea that Deer Always Outrun Dogs
Deer vs. Dogs: The Need for Speed
Contrary to popular belief, deer do not always run faster than dogs. While it is true that deer are generally very fast runners and can outrun most predators, including dogs, there are some dog breeds that can keep up with or even surpass the speed of deer. The average speed of a deer is around 40 miles per hour (64 kilometers per hour) for short distances, but this can vary depending on the species and individual. On the other hand, some dog breeds, such as greyhounds, are capable of running at speeds of up to 45 miles per hour (72 kilometers per hour) for short distances. So, in certain circumstances and with the right breed of dog, it is possible for dogs to match or even exceed the speed of deer.
The Advantages and Disadvantages
While some dog breeds may have the potential to outrun deer in terms of top speed, there are several factors that give deer an advantage when it comes to running. Deer are lighter and have longer legs compared to most domestic dog breeds, which naturally gives them a greater advantage in terms of speed. Additionally, deer are highly agile animals and can quickly change direction while running, making it difficult for dogs to catch them. Furthermore, deer are often more familiar with their surroundings than dogs, allowing them to utilize cover and escape routes effectively during a chase.
On the other hand, dogs have their own advantages when it comes to running. Some dog breeds have been selectively bred for their speed and endurance over centuries. For example, greyhounds have long been renowned for their racing abilities and can reach impressive speeds. However, even with these advantages, consistently outrunning a healthy and motivated deer may still be a challenge for most dog breeds.
Protecting Wildlife and Ensuring Safety
It is important to note that chasing deer with dogs is illegal in many places and can be dangerous for both the dogs and the deer. Pursuing or harassing wildlife can cause stress, injury, or even death to the animals involved. It is always best to keep dogs on a leash and avoid any interactions that could harm wildlife. Respecting and protecting nature’s balance ensures the safety of both animals and humans alike.
In conclusion, while deer are generally fast runners, it is not always true that they outrun dogs. Some dog breeds have the potential to match or even surpass the speed of deer in certain circumstances. However, deer have several advantages when it comes to running, including their lightness, long legs, agility, and familiarity with their surroundings. Ultimately, it is crucial to prioritize the well-being of wildlife by keeping dogs under control and avoiding any activities that may harm or disturb them.
Speed Demons: Exploring the Running Abilities of Deer and Dogs
Deer Speed:
Deer are generally very fast runners, capable of outrunning most predators, including dogs. The average speed of a deer is around 40 miles per hour (64 kilometers per hour) for short distances. However, the top speed of a deer can vary depending on the species and individual. Some species may be faster than others, but in general, deer have evolved to be agile and swift to escape from natural predators.
Dog Speed:
Dogs are also known for their speed and agility. The speed of a dog can vary depending on the breed and individual. Some dog breeds are capable of running at speeds of up to 45 miles per hour (72 kilometers per hour) for short distances. Greyhounds, for example, are among the fastest dog breeds and can reach impressive speeds.
However, it’s important to note that while some dogs may be able to keep up with or even outrun certain deer species in specific circumstances, chasing deer with dogs is illegal in many places and can be dangerous for both the dogs and the deer. It’s always best to keep dogs on a leash and avoid chasing or harassing wildlife.
In conclusion, while deer are generally fast runners, there are some dog breeds that can match or even surpass their speed. However, it’s crucial to prioritize safety and respect for wildlife by keeping dogs under control around deer and other animals.
In general, deer are faster runners than dogs due to their long legs and powerful muscles. However, there are certain dog breeds specifically bred for speed that can match or even surpass the speed of deer in short bursts. Ultimately, it depends on the specific circumstances and individual abilities of both the deer and dog involved.
There are many versions of archery release aids, but the four most common types are: wrist strap index finger release, handheld thumb trigger release, handheld hinge release and the handheld resistance/tension type release. The features and best use of each release vary and there is a ton to consider when choosing an archery release aid. In this article, we will spend some time talking about the pros, cons, and scenarios for when you might use one over another.
The most popular release aid among bowhunters is the wrist strap index finger style. A major advantage of this type of release is that it’s familiar to most hunters. Most people begin hunting with a rifle where a trigger is pulled or squeezed to activate the shot. An index finger archery release is similar in that it has a trigger that has to be pulled to fire the arrow. It gives the archer the ability to control the shot precisely. Its commonly called “command shooting,” meaning that the archer commands the trigger, pulling it when the pin sight sits exactly on the spot where they want the arrow to hit. This can be a real advantage in a hunting situation where an animal is moving through timber and you need to pick your spot and fire an arrow at an exact moment or when a breeze is blowing and you need to execute a shot when your pin is precisely in the location you need it to be.
Another advantage of most index finger releases is that they commonly come with a wrist strap (either a buckle or velcro strap). This ensures you always have your release ready at hand when you need it. You may also find that a wrist strap helps you to pull your bow back easier than some other release options because you can utilize your wrist and muscles in your arms and back to pull.
There is a lot to like about index finger releases, but, for many of us, using an index finger release can eventually lead to “target panic.” The trigger itself isn’t the issue, but, rather, our tendencies and how we use it become the issue. Any time you have a trigger involved in activating the release you are inducing the conscious desire to fire the arrow when the pin is over the dot. Most people have a very hard time both aiming with the front half and executing a command shot with the back half. Trying to do both can lead to target panic. Target panic can be explained as the learned connection between the eye, brain and our release hand—the eye sees the pin cross the target, the brain triggers the fire reflex and the finger punches the trigger. Over time, we begin to anticipate the shot and that causes anxiety and flinching. Then, to ease the anxiety, subconsciously, we begin to aim and freeze outside of the intended target. Whatever the case the symptoms are the same: freezing off target, inconsistent shooting and flinching. If you want to continue shooting an index finger release you may need to rethink how you have it set up and how you shoot it.
Overall, index finger releases are easy to use, economical, and allow you to execute a shot quickly when you need to, but you may have to learn or relearn to shoot it a bit differently to get the most out of it. If you are dealing with target panic issues, check out the Tru-Fire Panic X release in the goHUNT Gear Shop which is specifically designed to help with that issue.
Let’s talk about the different index finger options. We carry several models of the Carter index finger releases: the Lucky, Quickie 1 Plus, and the Rx1. All three have hook style heads, which are great in a hunting situation because they are simple and quiet to “hook” to your D-loop. The Spot Hogg Wise Guy release is similar with a hook design head. Each of those offers something slightly different: trigger shape/angle, size of the head and trigger tension adjustability.
We also carry several closed jaw type releases. Obviously, one advantage of those is that your D-loop is enclosed and there is no way it can come out other than opening it with the trigger. The Scott Echo and Recon are excellent options as is the Hot Shot Nano, which is near the $50 to $100 price point.
You will also notice that several of the index releases have nylon straps that connect the body of the release to the wrist strap itself. These nylon straps can easily be adjusted in length to find the best fit for each archer regardless of hand size. They also are flexible, allowing for some variations in anchor point and reducing torque. The downfall of these is that they can flop around a bit. We also carry some solid arm options like the Scott Recon, Rhino or Spot Hogg Wise Guy. Those are rigid or may offer a fold back locking option to keep them back when you don’t need them. The point of this type of release is that it won’t flop around and you’ll easily have it in your hand when you need it. Personally, I prefer the nylon strap types because of the adjustability it provides, but it truly is a personal preference.
Handheld thumb trigger/button releases
I’ve often heard this type of release referred to a “thumb button.” Whether you want to call it a button or trigger, it’s the same thing. Essentially, it’s a handheld release that is activated by pulling the trigger with your thumb. Handheld thumb trigger releases seem to be growing in popularity with hunters, perhaps bleeding over from their prominence among target archers. There are some pros for handheld thumb releases. For one, I personally find that they are easier and more consistent to anchor with. The hand position utilized with a handheld release allows me to split my jaw bone between my first and second finger/knuckle. It provides an easy, comfortable, and more consistent repeatable anchor point than an index finger release. If you feel like your anchor point floats and has some inconsistencies, a handheld release can help solidify your anchor point. Most handheld releases also have closed jaw clasps that are handy when you are sitting in a tree stand or ambush hunting. Simply close the release over your D-loop and it’s hooked up and ready to go anytime you grab it. Your draw hand is free to use an elk call or stick in your jacket pocket on a cold morning.
I often overhear other bowhunters state that are switching to a thumb release so they can deal with their tendencies to punch the trigger on an index finger release. If you do it, switching releases can provide you the opportunity to relearn how to activate your release, but what I often see is that people pick up a handheld thumb release and start to punch the trigger on it, too. Target panic issues can continue or start just as easy with a handheld thumb trigger release as they do with an index finger release. This can be one negative of a thumb release unless you do some research and learn how to shoot a thumb release with back tension and relaxation through the hand, wrist, and draw arm. Another negative with a handheld release is that you have to keep track of it since it’s not attached to you although most do have a hole that you can attach a wrist tether to. One other potential downside is that many thumb releases have an audible click when the clasp is closed; however, the click is typically not loud enough to disturb an animal within range. One final negative is that in comparison to index finger releases, handheld thumb releases are quite expensive. A good thumb release can cost you a couple hundred dollars.
All around, thumb releases are great for target archery and hunting, but, if you decide to try one out, I would recommend that you take the opportunity to learn to properly shoot with one so that target panic issues don’t continue or develop. One of my favorite thumb releases is the Carter Chocolate Addiction. It has tons of adjustability, including trigger tension, trigger travel, and trigger location.
Hinge style releases
Another type of release is the hinge release or what some may refer to it as a back tension release. It’s the type of release you may have tried to use and punched yourself in the mouth with as it went off halfway through your draw circle. It’s intimidating to a lot of us, but, in reality, it’s fairly basic and user-friendly with some tips and practice. A hinge is basically a handheld release that does not have a trigger and is only activated by the slight backward rotation of the release. When the handle rotates, it causes a searing mechanism to slip and the hook opens and the bow fires.
So how do you shoot a hinge release and why would you?
When you draw your bow with a hinge release, you draw with the weight on your index finger with very little tension on the rest of your fingers. You wrap your thumb around the thumb peg, utilizing the thumb peg as leverage to help you pull back. When you settle into your anchor point and begin your aiming process you will begin to pull through with your rhomboid back muscles, squeezing your draw arm shoulder blade back while relaxing your release hand, wrist and arm. As tension builds, the angle of the release changes, the sear slips, and the string fires. The major benefit of learning to shoot a hinge release is that it allows you to develop a subconscious surprise release. This might not sound like that much of a benefit, but, in essence, what you are doing is removing one variable from the equation and leaving only one thing to focus on…aiming! A hinge release can be a great tool for getting over target panic, but, once again, it will require commitment and learning to shoot one properly. Like the handheld thumb releases, a handheld hinge release also helps to establish a solid repeatable anchor point.
Most top-tier target archers shoot a hinge release, but what about hunting with one?
I personally hunt with a hinge release and have for the past eight years. I had a bad case of panic and I almost quit archery all together. Fortunately, with the help of a friend, I learned to shoot a hinge and have rarely shot anything since. I will say that a hinge is not ideal in all hunting situations. For example, executing a very precisely timed shot is not as easy as it might be with a thumb or index finger release. Hinge releases are also handheld, which means that you have to keep track of it. It’s not as common to have a hole drilled in one to attach a wrist tether to and even on the ones that do I don’t find it comfortable to shoot with a wrist tether. So I carry it in my pack hip pocket and I absolutely have to keep track of it. Most hinges are a hook head design, which is great for quiet and quick hook-up to a D-loop, but I also can’t hang it from a D-loop like you can with many of the handheld thumb releases. So why shoot one for hunting? The best answer as to why I hunt with one is because I believe it helps me execute my best shot. Here’s an example: I was already at full draw on a 330” class bull in Wyoming when I used a cow chirp to stop him. His head swiveled, staring a hole in me as I stood out in wide open space. As my pins floated around on his vitals my inner voice was screaming, “Shoot! Shoot now! He’s going to run!” But I didn’t then; my body did exactly what it had done thousands of times, tension built, the release was a surprise when it went off and I watched the arrow hit exactly where I wanted it to. I watched the bull go down within a hundred yards. I don’t know if the outcome would have been the same had I rushed the shot. Hinge releases may not be for everybody, especially for hunting, but they are a good tool for learning a tension activated release and as a means of dealing with target panic. If you learn to shoot one and become very very comfortable with one, I personally feel that they are great for hunting and will help you make the best shot when it really counts.
Tension or resistance releases
The last release I will touch one is a tension or resistance activated release. It’s similar to a hinge, but has a built-in safety mechanism that allows you to draw the bow without fear of it firing. The Carter Evolution Plus is an example of this type of release and we just added it to our Gear Shop. It also feels more like a traditional handheld thumb trigger release and is an awesome training tool for transitioning to a thumb release. The Evolution does not have a trigger and you can’t punch it. The Evolution is fired by increasing resistance, meaning you must pull through the release for it to fire.
If you look at the Evolution, it appears to have a trigger, but that peg where the trigger typically is on a handheld release is actually a safety that allows you to draw the bow without fear that the bow will misfire. Once you get to full draw, you find your anchor point, take your thumb off the safety and then begin to execute your shot by pulling and building pressure on the back wall of your draw until the release fires. You can set up the Evolution at roughly five to seven pounds over your hold weight at full draw. This will allow you to release your thumb off the safety, and then build pressure to make the release go off. This type of release is truly a game changer for archers who are struggling with target panic or even archers who just want to progress and improve their shooting abilities. It can be frustrating when you initially make the switch. The most common feedback I get is that the release seems to fire sometimes and at other times the archer cannot get it to go off no matter how hard they feel like they are pulling into the backwall. In those cases, the issue is not the release; rather, it is an inconsistency with the shooter. If you will commit to it and learn to shoot it and execute the shot the same way every time, it can be a very helpful tool. In due time, it allows you to develop a subconscious, smooth, surprise release, which, in turn, grants you the opportunity to focus only on aiming. There are not many who use an Evolution for hunting, but I do know a few who have gotten proficient enough that they feel comfortable to hunt with it. Most hunters are using the Evolution to learn to shoot with back tension and then switching to a thumb trigger release to hunt. A handheld thumb release like the Carter Chocolate Addiction or the Hot Shot Vapor can be used in the same manner as the Evolution by seating the barrel of the thumb trigger on your thumb and then utilizing a relaxed hand, forearm, bicep and back tension to pull through the release to activate it. An Evolution resistance release is a great tool for any bowhunter.
In conclusion
Every archer is on a different spectrum when it comes to their experience and goals. Hopefully, everyone that reads this will find some value and direction that will help them take the next step in their progression and find a release that will help get them there.
Growing up a 22 LR Rifle was my best friend and my love for firearms directly came from the 22LR round. If you are considering buying a 22 rifle, you probably want to know what the Best 22LR rifle for you is.
First, everyone is different, and it’s extremely important to know that. So one size definitely does not fit all. But I will do my best to cover a full spectrum of 22 LR rifles so you can find one that suits you or the person you are shopping for best.
Here is our list of the 8 of the Best 22LR rifles of 2024!
Ruger 10/22
The Ruger 10/22 is a great 22LR rifle because of its superbly reliable action, outstanding durability, and extensive range of models available.
Its action can eat through the cheapest of ammo types with little issue, making it the perfect choice for hunters, survivalists and plinkers alike.
The Ruger 10/22 takes its place as the best overall because it can be used for essentially every purpose under the sun – from hunting to plinking to target shooting – while offering an affordable option for any shooter looking for a reliable semi-automatic 22LR rifle.
Additionally, it offers an array of ergonomic enhancements that improve accuracy and overall function.
The Ruger 10/22 is also the 22 rifle with the most available accessories on the market.
Smith & Wesson M&P 15-22
The Smith & Wesson M&P 15-22 is a great 22LR rifle for shooters who want an AR-style platform to practice their skills.
It offers the same features and similar functionality as an AR, making it perfect for training with a direct translation to your main AR.
The M&P 15-22 has an M-Lok handguard that allows you to attach any standard AR accessories, plus it has a threaded barrel for adding on a suppressor or flash hider.
Furthermore, the lightweight polymer receivers make this rifle easy to carry around without sacrificing durability or accuracy.
Additionally, its appearance stands out from other 22lr rifles due to its AR styling, which makes it appealing to those who like tactical designs.
Savage Mark II FV SR
The Savage Mark II FV SR is an excellent choice for a 22lr rifle due to its features and performance.
It comes with a 16.5-inch heavy-profile fluted barrel which provides accurate shots round after round.
The threaded muzzle is a nice feature that allows for suppressor mounting. The detachable box magazine holds five rounds of .22 Long Rifle ammunition.
Additionally, the rifle has an adjustable Savage AccuTrigger that allows shooters to fine-tune their trigger pull for a crisp and clean break.
Overall, this rifle offers great value for its price point while providing all of the features needed for effective small-game hunting or target shooting purposes.
Henry Golden Boy
The Henry Golden Boy is a great 22lr rifle due to its reliability, aesthetics, and affordability. It is built with high-quality components that ensure smooth operation and longevity.
The Henry Repeating Arms Golden Boy also features a classic lever action design that adds a touch of nostalgia to your shooting experience.
It comes in several different configurations, including a complete walnut stock or one trimmed with gold for added elegance.
The Henry Golden Boy is very affordable compared to other lever action rifles on the market, making it an attractive option for those looking for value without sacrificing quality or aesthetics.
Browning BL-22
The Browning BL-22 is a great 22LR rifle due to its high-quality design and features. It’s one of the best lever action rifles on the market even though it’s 22LR.
It is built as a tribute to John Browning’s gun-making mind and features scroll engraving on the receiver, a polished blued finish, and a takedown design for ease of cleaning and storage.
The SA-22 also has an ambidextrous bottom ejection port which was ahead of its time.
The 19-inch barrel has a 1:16 rate of twist for accuracy when shooting small game or varmints.
Furthermore, the 10-round magazine loads through a port in the stock, which gives it a slim design that is easy to handle overall – making it an excellent choice for those looking for an attractive yet reliable rifle at an affordable price point.
Ruger Charger
The Ruger 10/22 Charger is a compact and lightweight pistol version of the popular 10/22 rifle. It also inspired the 9mm version the Ruger PC Charger.
It measures just under 20 inches long and features a folding pistol brace for easy storage and transport.
The Charger also comes with an open front sight and grooves in the receiver for mounting a scope, making it ideal for plinking or target shooting.
It offers great value for money with its affordable price tag of just under $300. The Ruger 10/22 sets the standard for what a 22LR rifle should be with its reliable performance, durable construction, ergonomic design, and high-quality components that ensure accuracy and reliability over time.
Tikka T1x MTR
The Tikka T1x MTR is a great 22lr rifle due to its high-quality construction, accuracy, and versatility.
It is built using many of the same features as Tikka’s popular T3x centerfire rifles, which ensures that it has high-performance bedding footing, a single-stage trigger mechanism and a synthetic stock that can withstand temperature variations.
The semi-heavy barrel keeps everything cooler and steadier than a thin barrel while also contributing to increased accuracy.
The modular design of the rifle allows users to swap out components depending on their needs or preferences.
Overall, the Tikka T1x MTR offers outstanding quality at an affordable price point with plenty of options for any shooter looking for accuracy in their rimfire rifle.
What are the benefits of owning a 22LR rifle?
They are cheap to buy and shoot
22LR rifles are relatively inexpensive compared to other types of firearms, with prices ranging from $100 to $500.
Furthermore, .22LR ammunition is also relatively cheap compared to other calibers, such as 9mm or 5.56mm.
This makes 22LR rifles an attractive choice for shooters who want a quality firearm without breaking the bank.
Not only are they cheaper than most other types of guns on the market, but they also tend to have less recoil which helps people train and avoid flinching before shooting.
The low cost of ammunition means you can put a lot more rounds down range for your dollar than with other calibers.
They are accurate
22LR rifles are accurate but only effective to roughly 150 yards, with some gun models capable of achieving sub-inch groupings at 100 yards.
This level of accuracy is comparable to more expensive rifles such as those chambered in .308 or .30-06 but 22LR is not effective at the ranges those rounds are.
The key factor that contributes to the accuracy of a 22LR rifle is its barrel length. Longer barrels typically produce higher levels of accuracy than shorter ones due to their increased dwell time and the twist rate of the barrel.
Other features that can influence accuracy include the fit and finish of the rifle, as well as its stock design which can help reduce recoil and improve stability during shooting sessions.
They are suitable for shooting small game and pests
The 22LR rifle is capable of shooting a variety of small game and pests.
It is especially effective at taking small game such as squirrels, rabbits, ground birds and other similar animals.
It can also be used for pest removal tasks such as snake defense or eliminating other nuisance animals.
The 22LR cartridge works well for these types of tasks due to its low recoil and noise level, which makes it ideal for close-quarter situations.
There are even “pest control” rounds, often called rat shot which doesn’t damage property but can kill mice and rats at close range indoors.
On several occasions, I have dispatched a mouse caught on a glue trap before discarding him to stop the mouse from suffering.
They are available in a wide range of styles and sizes
There are a variety of 22LR rifles available, including bolt action, semi-automatic, and lever action rifles. These rifles offer different features depending on the type, such as:
Bolt action rifles offer precision shooting capabilities with a smooth operation and easy loading of rounds.
Semi-automatic rifles are more modern versions of rifles that allow for faster firing rates.
Lever action rifles provide an old-school cowboy look and feel while still being modern enough to use modern ammunition like 22LR rounds.
They are easy to handle and shoot
An easy-to-handle and shoot 22LR rifle should have the following characteristics:
Superbly accurate – The rifle should be able to accurately hit targets at various distances.
Lightweight – The rifle should be lightweight so that it is easy to carry around and handle during shooting sessions.
Excellent trigger – The trigger should be smooth and responsive, allowing for precise shots every time. Typically a low-poundage trigger pull is desired.
Comb height – The comb height should be adjustable so that shooters of all heights can comfortably use the rifle without strain or discomfort in their neck or shoulders while aiming down the sights or scope.
Fun to shoot – Shooting with any type of 22LR rifle should be enjoyable due to its accuracy, lightweight design, and fun features like a bipod or scope with adjustable magnification level if applicable in this particular model you’re considering purchasing (just make sure it’s legal where you live!).
They are quiet
22LR rifles benefit from being quiet because they use less powder and are typically shot from longer barrels.
By using a 22LR rifle that is quiet, hunters can reduce the risk of spooking their prey and increase their chances of success.
A quiet rifle is also beneficial for those who wish to practice shooting without disturbing their neighbors or damaging their hearing. However, you should always wearing hearing protection while shooting.
They are good for target shooting practice
Yes, 22LR rifles are great for target shooting practice.
The lack of recoil and relatively inexpensive ammunition makes the .22 LR cartridge ideal for beginners who want to learn how to shoot properly.
The lack of recoil also helps experienced shooters train to avoid flinching before pulling the trigger.
With the low cost of ammo that means that you can put more rounds down range for your dollar than with other calibers.
They are fun to shoot
Yes, 22LR rifles are fun to shoot. They are accurate, reliable, and offer a great range of uses.
They can be used for target practice, pest removal, or even for hunting rabbits in the fall.
Plus, they are relatively inexpensive compared to other types of ammunition and you don’t have to worry about them being scarce due to their popularity. Overall 22LR rifles provide an enjoyable shooting experience without financial burden.
What to consider when buying a 22LR rifle?
There is plenty to consider when buying a 22LR rifle for yourself or a loved one. From the brand to action, to any number of things. Here is a comprehensive list of things to consider when buying your rifle.
Action type
You probably already know what kind of action you’d like but here are the three most popular.
Lever Action
These .22 LR rifles are cycled by hand, but instead of a handle at the back of the bolt, there is a lever by the trigger that must be actuated to load another round.
A lever action rifle uses a manually operated system that feeds cartridges into the chamber by means of pulling back on the lever, which operates an internal mechanism that moves ammunition into position before cocking it ready to fire again when pulled back again by hand.
They are often recreations of guns from the Old West and are popular with those who are interested in that time period.
Semi-Auto
Semi-Auto rifles are typically magazine feed and often have a higher magazine capacity of 10-25 rounds and beyond.
These guns fire and reload with a single trigger pull and release. This allows for much higher rates of fire.
Single Shot
Single shot rifles only have one shot capacity as indicated by their name; after firing one round, you will need to manually reload before firing again.
These types of 22LR rifles are typically used for hunting small game since they don’t offer much firepower compared to other types of action firearms, such as semi-automatic or bolt action models.
Bolt Action
A bolt action rifle uses a manual mechanism to eject the spent cartridge and chamber a new one. This type of rifle typically has a longer barrel for increased accuracy and a larger capacity than other types of 22LR rifles.
Bolt action rifles are similar to single shot in that you have to chamber a new round manually; unlike single-shot rifles, you have an easy way to do that with a lever on the bolt.
Bolt actions are a classic rifle and are used for better accuracy and precision. They typically have smaller magazine capacities and even sometimes have internal magazines inside of the gun.
Caliber
When choosing a 22LR rifle, it is important to consider the caliber of the rifle.
You are probably saying 22LR, Duh.
You’re right. However, be sure to make sure it’s a 22 Long Rifle; there are a few flavors of .22 caliber rounds.
22LR, 22 Long, and 22 Short are all popular 22 caliber rounds. The most popular is by far the 22 Long Rifle (.22LR). But some rifles can shoot only one or all three rounds.
One thing is certain the 22 Longs and 22 Shorts in 22LR magazines are a recipe for disaster if they are not compatible.
There are four different types of 22 caliber rounds available: 22 Long Rifle (LR), 22 Long (L), 22 Short (S), and 22 Magnum (M).
22 LR: This is the most common type of rimfire cartridge and is compatible with most rifles and magazines.
It can be chambered safely in both tube-fed and detachable magazines.
It offers high accuracy, low recoil, and high velocity for long-range shooting. The standard muzzle energy is around 35 to 40-foot pounds which makes it suitable for small game hunting or target practice at short ranges.
22 Long: This round is not compatible with most 22LR rifles as it does not fit in most detachable magazines.
However, it can be fired safely in some rifles that are designed for both types of cartridges.
The muzzle energy for this round tends to be higher than the LR version at around 45 to 50 foot pounds which makes it more suitable for larger game such as varmint or small deer species up to 100 yards away from the shooter’s position.
22 Short: Like its longer counterpart, this cartridge also has limited compatibility with certain rifles that can handle both types of cartridges without any issues. The short is shorter than both the 22LR and 22 Long
Barrel length
When buying a 22LR rifle, it is important to consider the barrel length.
Longer barrels offer better accuracy and muzzle velocity, which can make a significant difference in terms of accuracy.
Additionally, longer barrels are more suitable for hunting as they can provide more power and range than shorter barrels.
Note that shorter barrels are typically lighter and easier to maneuver around obstacles in the field or at the range.
While there may be some tradeoffs with shorter barrels such as reduced accuracy or decreased muzzle velocity compared to longer ones, they still provide excellent performance in most situations and are an ideal choice for many shooters looking for a compact, fun rifle.
Trigger
The trigger pull for a 22LR rifle is typically smooth and reliable. The Ruger 10/22 features a tapered cold hammer-forged barrel that uses the two screw V lock system for a tight fit to the receiver.
Trigger pull and weight varies from rifle to rifle so finding one that is your preferred weight is important. You can also purchase rifles with adjustable trigger weights.
When buying a 22LR rifle, it is important to consider the features of the trigger group. Many modern rifles come with a push-to-fire safety that helps train younger shooters in proper rifle safety habits and can be found on both large and small caliber rifles.
On the other hand, some older 22LR rifles do not have a push-to-fire safety or any type of safety mechanism at all so it is important to know what type of trigger you are getting before making a purchase decision.
Safety features
When buying a 22LR rifle, safety features to consider include the following:
Bolt action – A bolt action rifle uses a manual mechanism to load and unload ammunition. It has a handle or lever that you pull back to open the chamber, then push forward to close it again. These typically have a push button safety
Semi-automatic – Typically, all have a push-button safety and can usually be found near the trigger or trigger guard.
Lever-Action – Traditional lever-action rifles do not have a push button safety. However, some .22LR rifles like the Rossi Rio Bravo have push button safeties.
Stock options
A variety of stock options are available for 22LR rifles, including:
Synthetic
Synthetic stocks are one of the most popular modern-day options for .22LR stocks. The Synthetic stock is available on nearly any rifle configuration offered today.
The synthetic stock is typically a plastic or resin that makes the gun light and extremely durable to wear and tear and the elements.
Wooden
Wood stocks are the classic look you remember from your favorite western movie. These stocks are often coated to resist wear and tear and moisture.
Many lever-action rifles and bolt-action rifles have wooden stock options.
Chassis
Drop-in chassis are extremely popular for precision shooters as they allow the barrel to free float, which improves accuracy. There are many different brands and options depending on which gun you purchase.
Some chassis even make the guns look more “tactical” or transform your rifle to look like an entirely different gun.
Scope mounting options
For 22LR rifles, scope mounting options include: Picatinny rail, dovetail mount, Weaver rail mount, ring mount and integral scope mounts.
Picatinny rails are typically found on newer models of 22LR rifles and provide an easy way to attach optics.
Dovetail mounts are more common on older models of 22LR rifles and can sometimes require the services of a gunsmith to install.
Weaver rails offer another option for attaching optics but may require drilling into the firearm’s receiver if it doesn’t already have a rail installed.
Ring mounts can be used with both Picatinny and Weaver rails or directly onto the barrel without any additional hardware required.
Integral scope mounts are built into some older models of 22LR rifles but may not be compatible with modern optics due to changes in design over time.
For 22LR rifles, there are a variety of scope options available. These include:
Magnification: Between 4 – 7X power
Fixed 4X or low power variable magnification optic (LPVO).
Athlon Ares 4.5-30×56 – Best scope for 22LR Benchrest
Bushnell Trophy TRS-25 – Best Red Dot Scope Under $100
Leupold VX-Freedom 1.5-4×20 – Best Scope for 22LR Squirrel Hunting
Magazine capacity
The magazine capacity for a 22LR rifle is the maximum number of rounds the rifle can hold in its magazine.
Most detachable magazines range from 10-25 rounds. You can find aftermarket magazines that get higher round counts but loading them may be a challenge.
Bolt action rifles often have a 5-10 round internal magazine. If it does have a detachable magazine it is typically a small single stack style magazine, think 1911 single stack magazine scaled down.
Bolt design
When buying a bolt action 22LR rifle, considerations should be made for the bolt design.
Bolt Actions are manually cycled from a handle at the back of the bolt and typically feed from a magazine.
They are reliable weapons that work well and are great hosts for suppressors if that’s something that interests you.
The bolt design should focus on a smooth action and a throw knob that lives up to your standards in size and style.
Weight and Balance
It is important to consider the weight and balance of the rifle. Ruger’s Precision Rifle in .22 LR offers a good balance between weight and accuracy, with a 6.8 lb weight and 35.13″-38.6″ length.
The Ruger Precision Rifle in .22 LR has an AR-style pistol grip, fiberglass chassis, heavy barrel, massive bolt handle which makes it look like most tactical rifles you’d see at the range.
The Ruger Carbine 10/22 Rifle also offers good weight balance with its 5 lb weight and 33″-34″ length.
The Ruger 10/22 Carbine Rifle comes with a wood stock which gives it an aesthetic advantage over other models in its class but it does not have any additional features that would make it stand out from other rifles of its caliber or type (such as AR-15s).
Customization Options
Customization options for 22LR rifles include:
Adjustable sights – Most .22LR rifles have adjustable sights to allow for precise aim and accuracy.
Long-range scope – A long-range scope can be added to increase the range at which a rifle can be accurately fired.
Trigger adjustment – Some models of .22LR rifles come with a built-in trigger adjustment feature that allows users to fine-tune their pull weight.
Stock adjustment – Some models of 22LR rifles allow users to adjust the stock for better fit and comfort.
Aftermarket Accessories – Some guns have far more aftermarket options than others. Typically the volume sellers like the Ruger 10/22 will have a ton of aftermarket accessory options.
Value for money
When evaluating the value for money of a 22LR rifle, it is important to consider the type of action and features that are offered and everything in the list above.
Depending on your needs, you can find rifles with different actions such as bolt action, lever action, semi-automatic and more. Additionally, some rifles offer features such as adjustable sights or rubberized grips for comfort and accuracy.
When comparing value for money between different 22LR rifles, it is important to consider the quality of the components used in each model.
High-quality components such as a steel barrel or synthetic stock will provide better performance over time than lower-quality parts like plastic stocks or aluminum barrels which may be less durable or accurate over time.
FAQ
What is the best 22LR rifle?
When it comes to the best .22 LR rifles, there are many options available. Some of the top models include:
Ruger 10/22
Smith & Wesson M&P 15-22
H&K 416 22
Browning BL-22
What are the advantages of a bolt action rifle compared to other types of rifles?
The main advantage of a bolt action rifle is its mechanical accuracy, which is the maximum potential accuracy of a firearm without any human inputs.
Bolt actions can be built to tighter tolerances than semi-autos, which increases accuracy and repeatability. Additionally, they are also great hosts for suppressors and are generally quieter than semi-auto-suppressed guns due to no moving action.
On the other hand, semi-automatic rifles such as 10/22s can be just as accurate in practice if they are fitted with custom parts or properly cared of by their owners. Ultimately it comes down to the shooter rather than the gun itself regarding practical accuracy in field conditions.
What type of ammunition is used in a 22LR rifle?
22LR rifles utilize rimfire ammunition, which is loaded with a primer and a bullet and the primer is in the rim of the cartridge, hence the name “rimfire.”
The rimfire system dates back to the 19th century and uses a small explosive charge located in the perimeter of the cartridge case around which the rest of the components are assembled.
22LR ammo can be prone to duds due to the primer being in the rim of the cartridge it can lead to poor performance in semi-auto rifles or other issues such as poor cartridge seating or decreased accuracy potentials.
Higher quality brands like CCI offer better performance at minimal recoil additions, while subsonic rounds keep projectiles below supersonic speeds for quieter shooting experiences coupled with suppressors.
Copper jacketed hollow point bullets provide for humane kills on small game hunts while providing reliable operation even in cheaper bulk offerings that often present more duds than centerfire cartridges do in similar situations.
What type of scope is best for 22LR rifles?
When choosing a scope for 22LR rifle scope, it is important to consider the shooting distance and the appropriate magnification.
A good scope will have the right magnification for your particular uses, such as squirrel hunting, bench rest competitions, or long range shooting.
For most types of 22LR rifle use, a variable-powered scope with low-powered magnification is ideal.
This allows you to use more than one magnification setting without buying multiple scopes.
Additionally, a variable-powered scope allows you to adjust quickly between different ranges without having to change out lenses or adjust settings on fixed power scopes.
What is the best trigger for a 22LR rifle?
The best trigger for a .22 LR rifle is one that is smooth, lightweight, and has little to no grit. It should be easy to pull with no grit or delay in firing.
The Savage AccuTrigger is one of the best affordable triggers available for a .22 LR rifle due to its adjustable design that allows you to customize your pull weight from 2 lbs all the way down to 0 lbs.
It also features an ergonomic shape that makes it comfortable and easy to use while still providing precise control over your shots.
Manticore makes an extremely adjustable Ruger 10/22 trigger.
What are the best accessories for a 22LR rifle?
When it comes to accessories for a 22LR rifle, there are many options available. Here is a list of some of the best accessories:
Bipods – These provide stability and balance when shooting and can be used with most 22LR rifles. We cover a number of them in our best bipod guide.
Scope or Optic – A scope or optic will allow you to accurately aim at your target and is essential if you plan on using your rifle for hunting or competition shooting purposes.
Hearing Protection – While not a direct accessory to the gun ear protection is important when shooting any type of firearm as it helps reduce damage caused by exposure to loud noises while also preventing hearing loss over time if worn regularly while shooting.
Magazine Loader – This tool makes loading magazines easier so that you can quickly reload without taking too much time away from the range or hunt.
Gun Case – To ensure that your rifle stays in good condition during transport, it’s important to invest in a good gun case that protects it from dust, moisture, and other potential damage sources during travel.
What type of rifle is best for squirrel hunting?
For squirrel hunting, the best 22 LR rifle would be one that is accurate, lightweight and easy to use.
Options such as the Ruger 10/22, Savage A22, and Christensen Arms Ranger 22 are good choices for this purpose due to their accuracy and ease of use.
For maximum effectiveness when hunting squirrels with a 22 LR rifle, it is recommended that you use high-quality ammunition such as copper-plated hollow points or full metal jacket rounds that have been optimized for small game hunting.
It is important to practice shooting from different angles before going out in the field so that you can become more familiar with your rifle’s range and accuracy capabilities.
If you are looking for more of a fun and cool-looking gun check out the GSG 522.
If you’re pressed on time, here’s a quick list of the best 300 blackout rifles:
Springfield Armory Saint: Best Overall .300 AAC Blackout
IWI Tavor X95: Best for CQB
Wilson Combat AR-15 Ranger: Best .300 Blackout Rifle for Hunting
Daniel Defense DDM4 V7P 300 Blackout: Best for Home Defense
1. Springfield Armory Saint: Best Overall .300 AAC Blackout
For AR lovers, the introduction of the AR-15 pistol brought a euphoric excitement on par with winning your first superbowl. Not that I’ve ever won a superbowl.
But I HAVE mistakenly shouted, “I’m going to Disney World!” after pulling my first shiny AR pistol out of the box.
So, does the Springfield Armory Saint .300 AAC Blackout induce such thrilling feelings? Let’s check out if this pistol is a total whiff or a game-winning touchdown…
Accuracy
At the 50-yard line, the Saint was putting up impressive groupings of less than half an inch.
The 1:7” twisted barrel didn’t seem at all phased by repetitive shooting, so the heat didn’t warp the metal and throw off my accuracy one bit.
For the close-range shooter, this 300 blackout pistol is fast and sharp as a tack. Exactly what you need for home defense.
Take it out another 50 yards, and it was still giving me groups around 2 inches, which is what I expected from an AR pistol.
After polling prospective shooters, SA decided to forego built in sights, but the top rail is plenty big for your favorite red dot.
(I’ll cover essential optics and accessories in a bit).
Reliability
Made with aircraft-grade anodized aluminum, the receiver extension and upper assembly are built to last.
Pair that with the indestructible steel barrel and bolt coated in a Melonite finish, and you’ve got one sturdy .300 AAC blackout pistol.
Once I got my ammo figured out, I put hundreds of 300 Blackout rounds through this Saint with no problems. It WAS finicky with some subsonic cartridges that caused a few frustrating misfeeds.
After I put on my suppressor, though, it was back to smooth sailing.
The Accu-Tite Tension System on the lower receivers made movement negligible.
Meaning less friction, more usable years on the weapon. Also, the stock was well-built and comfortable.
All in all, for a close-range home defense weapon, you want it to be reliable and durable.
The SA Saint certainly did the job in these categories.
Handling
One of my favorite ergonomic features of this pistol was the well-textured grip.
The Saint is fitted with a Bravo Company Mod 3 grip that has built-in storage that’s perfect for the adjustment hex or a small bottle of oil.
Even though the barrel didn’t seem affected by the heat of excessive shooting, holding this 300 blackout pistol after many rounds did have me wanting a glove.
The M-LOK handguard and Carbine “H” Heavy Tungsten buffer were well-placed and made the Saint fun and comfortable to shoot.
Trigger
I was impressed with the SA Proprietary trigger that comes standard on a Saint.
No take-up and a crisp break.
The nickel boron coated GI style was usable at about 6 and a quarter pounds of pull and had a nice Bravo Company trigger guard.
The reset had a distinctive “click” that some might find obnoxious, but I thought it added a level of ease to firing that made it that much simpler to reflex fire without too much thought.
Magazine/Reload
The SA Saint Blackout pistol comes with a sleek 30-round Gen M3 PMAG that is the top choice for many AR marksmen.
I found that the PMAG dropped easily from the well and the release was very convenient to access with my firing hand.
Length/Weight
One of the most compact options out there, the Saint has an overall length of 27.25 inches while still sporting a 9-inch barrel.
It’s about mid-range in weight for an AR pistol, coming in at about 5 and a half pounds. Even fully loaded, I found that it was an easily manageable 7 pounds.
Recoil
The excellent SB Tactical SBX-K brace makes for amazing recoil control in this 300 blackout. I hardly noticed any kick and saw virtually no muzzle rise.
If you’re looking for a soft-shooter (a rare find among .300 Blackout weapons), then the Saint is one of the best out there.
Ammo and Accessory Recommendations
My best groups came when using Remington UMC .300 AAC Blackout 120 OTFB and Hornady 300 Blackout 125 HP for higher velocities.
BUT these 300 blackout rounds didn’t seem like they were going to work WITHOUT A SUPPRESSOR.
That said, you’ll want to fit your Saint with something like the GemTech HVT-QD Tactical 300 BLK suppressor. Once I fitted this GemTech to my 300 AAC pistol, it shot beautifully without any issues.
Also mentioned above, the Saint doesn’t come standard with a sighting system.
So, to put up your best shots, I’d recommend attaching an Aimpoint Pro which makes target acquisition a breeze.
Price and Special Features
One of the best things about the Saint is the excellent price.
It retails for around $989.
Featuring the Direct Impingement Pistol-Length Gas Port with an adjustable gas block, the Saint can be tuned without altering the buffer, spring, or barrel.
A nice feature that most AR pistols don’t have.
Another unique feature is that beautiful brace we talked about before.
The SB Tactical qualifies this slick-shooter as a pistol, making it legal in places that otherwise would be hitting you with a fat $200 tax.
Is the Springfield Armory Saint Worth It?
If you’re looking for a compact, reliable, soft-shooting AR-15 pistol, then look no further than the Springfield Armory Saint .300 AAC Blackout.
Let’s look at a replay of the MVP features:
Durable
Light recoil
Great for home defense
Close-range groups under a half inch
Excellent brace
So, if you want to get in the AR pistol game for a great price and put mega accuracy, reliability, and size points on the board, then suit up with the SA Saint .300 Blackout… TOUCHDOWN!
2. IWI Tavor X95: Best for CQB
Picture this:
You’re a tactical specialist storming an enemy bunker in the sweltering Middle Eastern heat. Suddenly, a bogie pops around the corner armed to the teeth. Do you panic?
Of course not. You’ve got the most reliable, best close-quarter rifle this side of the continent. You quickly take aim, get off a few smooth rounds, target down. Now repeat indefinitely. No misfires, no thought.
Now, how would you like to hold a weapon like that in your hands? Good news: You can!
Let’s take a look at the powerhouse bullpup, IWI Tavor X95…
Accuracy
This pup is a beast at close range.
While bullpups aren’t traditionally known for their long-range accuracy, the X95 was putting out sub-2-inch groupings at 100 yards. Get even closer (25-50 yards) and I was getting five-round groupings of less than an inch.
The 1:7-inch twisted barrel with 6 grooves gave me a nice, tight shot.
What’s more? It comes fitted with built-in tritium front and iron back sights that conveniently fold right into the upper assembly.
You can’t get a better close-range 300 blackout bullpup than the X95.
Reliability
This weapon will stand the test of time.
Why? It’s got a long-stroke gas piston system that makes it ultra-durable, a high strength polymer stock, and a cold hammer-forged barrel.
After 500 rounds, the X95 showed no signs of wear and had no issues of any kind.
Handling
Balance is where this 300 blackout semi-auto really shines.
The balance point and charging handle are closer to your body and made it comfortable to shoot repetitively.
It was very easy to transition between targets, field strip, and perform all necessary shooting functions with my support hand. This weapon was perfect for close-quarter shooting.
My only encountered awkwardness was with the placement of the pistol grip that caused finger slippage behind the trigger.
Trigger
The X95 did have a heavier trigger pull weight around 7 and a half pounds.
Like most bullpups, the pull felt long, but the reset was more crisp than many pups I’ve fired.
Not the best trigger you’ll pull, but certainly not the worst!
Magazine/Reload
This Tavor model comes with a 30-round, 3rd Generation MagPul PMAG.
It took some practice to get the reload down (standard for a shooter who’s used to AR-15’s), but once I did, the placement of the well and ambi button made for flawless reloading.
If you have a go-to magazine for your AR’s other than a MagPul, the X95 does take any STANAG magazine.
Length/Weight
One of the best things about this 300 AAC blackout was the compact size.
It’s got a barrel length of 16.5 inches and an overall length just over 26 inches. It was a bit heavier than your typical AR, weighing in at 7.8 pounds.
For the shooter who’s looking to fire in tight spaces (like home defense), the compact feel of the X95 was preferable to a standard AR.
Recoil Management
Talk about smooth shooting…
The X95 had virtually zero felt recoil.
It’s not a heavy caliber weapon to begin with, but throw in the long-stroke piston system and thick rubber buttpad and you’ve got great recoil management with minimal muzzle rise.
I could definitely tell this 300 blackout gun was made for the combat-ready soldier who doesn’t have time to mess with a choppy rifle.
Ammo and Accessory Recommendations
While the X95 I shot was chambered in 300 Blackout, you can also get it in 5.56 NATO (try HPR 60 grain V-Max) and in 9mm.
I found the heavier the round, the more accurate shots, so I’d stick with higher grain 300 ammo.
As far as accessories, if the built-in sights aren’t your style, check out the Aimpoint Micro T-2 red dot. It was easy to attach to the picatinny rail and upped my accuracy significantly.
I’d also recommend a trigger upgrade if you can hack it. I like the Super Sabra pack made by Geissele as it has a smoother and lighter pull.
Price and Special Features
You can pick up the X95 for a retail price of around $1,999 at most gun shops.
The compact size and long-stroke piston gas block system are the standout features of the X95.
It’s also unique in that it is significantly shorter than an AR, but the full-length barrel makes it non-NFA. What does that mean for you?
No annoying $200 tax!
Is the IWI Tavor X95 Worth It?
So, with the higher price tag, is the X95 worth the investment?
After shooting this compact 300 blackout powerhouse, I can confidently say…
“Absolutely!”
It’s one of the best choices for combat shooting as well as close-quarters home defense. Here’s why:
Reliable
Compact
Well-balanced
No extra taxes
High polymer stock
Overall, this Israeli-made AAC blackout bullpup is a durable, well-balanced soft-shooter.
If you’re looking to take out short and mid-range targets with a high-quality 300 blackout rifle that’ll feel like it’s made just for you, then don’t miss your shot at the IWI Tavor X95.
3. Wilson Combat AR-15 Ranger: Best .300 Blackout Rifle for Hunting
Wilson Combat makes some of the most innovative, reliable, and deadly specialty weapons in the market.
But their AR-15 Ranger series may exceed even a die-hard Wilson fan’s expectations with its lightweight build and razor-sharp precision.
Let’s check out how this incredibly accurate, compact power-house will make you one of the deadliest predators in the field…
Accuracy
The Ranger is a precision paradigm.
Wilson boasts that this rifle has the lightest match-grade barrel on the market, making for extremely fast transitions between targets.
Via: Vickers Tactical
And I’d have to agree.
In speed drills, I was clocking my fastest times with my smallest groups ever in part because the taper of the aluminum barrel is incredibly light and maneuverable.
Via: Vickers Tactical
But chances are for hunting, you’ll need more accuracy within the 100 yard mark and less speed. So, I walked out to 100 yards and was pleasantly surprised at my 1.3-inch 5-shot groups.
I’d feel more than confident taking the Ranger out for whitetail, bear, and hogs.
Reliability
Nearly every component of the Ranger is mil-spec and MP inspected.
Not to mention the corrosion-resistant NP3 coating on the bolt and hard-anodized receivers coated in a super sturdy Armor-Tuff finish that make this rifle weather and wear-proof.
Via: Vickers Tactical
I pulled my Ranger straight from the box and put about 500 rounds through without incident.
Then, without lubricating a thing, I put through 500 more.
I’m not sure how long I could’ve sat there plinking, but after 1000 rounds the smooth action and sturdy hardware felt like they’d barely taken a hit.
Via: Vickers Tactical
This rifle will last as long as you need and is reliable enough for any length of hunting excursion.
Handling
With a midsize Wilson SLR click-adjustable gas block, the Ranger can be fine tuned to work best with whatever ammo you’re shooting.
This adjustment capability added an extra push to the already-comfortable rifle.
One thing I did find strange about the Ranger was the stock. It has such exceptional receivers, bolts, and hardware, that I didn’t expect to pick it up and feel cheap plastic.
Via: Vickers Tactical
That may have just been a first impression, though, because even later that day I couldn’t even notice the tacky-feeling stock.
Trigger
Here’s where I was sold on the Ranger.
The single-stage Tactical Trigger Unit had virtually zero take-up, no slack, and a distinct reset.
Via: Vickers Tactical
What’s more?
This trigger pulled crisp and clean right at a light 4 pounds.
Magazine/Reload
The Ranger ships with one standard 30-round magazine that clips into the well like just about every other AR.
Via: Vickers Tactical
Reloads were fast and easy, though I did scare away a few squirrels close by with the audible “click” as I snapped in the mag.
Since most AR-users want more than 30 rounds to work with, I’d recommend grabbing a few extra mags to keep in your bag.
Length/Weight
Virtually every metal component of the Ranger is made from lightweight billet aluminum, making it a reasonable 8 pounds.
Via: Vickers Tactical
With a barrel length of 16 inches and overall extended length of 36.5 inches, this rifle is easy to maneuver in thick brush as well as ground blinds.
Recoil Management
There wasn’t much kick to this rifle.
The Rogers Super-Stock buttstock absorbs a lot of the recoil and also features a unique locking mechanism to reduce movement.
Via: Vickers Tactical
Price and Ammo Recommendations
The Wilson Combat Ranger retails for $2300.
But, you get every ounce of what you pay for in a lightweight, accurate, and reliable precision machine.
The Ranger has a few caliber options, but my favorite is the .300 Blackout for its power and economy.
Via: Vickers Tactical
Here are my favorite rounds for the Ranger:
Hornady 110 gr GMX Full Boar: Designed for deeper penetration and higher weight retention, I love this round for quick, clean kills.
Winchester Deer Season XP 150 gr: Some of my best groups were with this Winchester round that was specially made to take down deer. This round fed smoothly and maintained a ton of power downrange.
Accessory Recommendations
The Ranger comes with a 10-inch MLOK rail and covers so that you can attach your favorite optics, lights, or accessories.
Via: Vickers Tactical
It also comes with a threaded muzzle fitted with an awesome Q-Comp muzzle brake.
Here are some of my favorite other add-ons for the Ranger:
EOTech EXPS3-0 Red Dot (Night Vision Compatible): I love this red dot for its large FOV that allows me to shoot with both eyes open. Plus, it’s night-vision compatible and has a quick-detach lever.
Wilson V3 Ultralight AR Scope Mount: To keep your rifle as light as possible, I’d go with this durable, lightweight mount that securely attaches your optic.
Viking Tactics Wide Quick Adjust Sling: This heavy-duty sling will stand up to just about any weather conditions and makes carrying my Ranger silent and comfortable.
Is the Wilson Combat Ranger Worth It?
The Wilson Combat Ranger is my favorite .300 Blackout AR-15 to take out mid to large size game.
Here’s why. It’s:
Lightweight
Compact
Accurate
Reliable
For the best groups, highest durability, and happiest shoulder in the field, I trust no other AR-15’s apart from the Wilson Combat Ranger.
4. Daniel Defense DDM4 V7P 300 Blackout: Best for Home Defense
Daniel’s Defense, headquartered in Black Creek, Georgia, has rapidly become a top of the line weapons manufacturer.
Producing the famed DDM4V7 rifle, Daniel’s Defense has now produced an AR pistol variant – the DDM4 300 Blackout Pistol.
Let’s break it down the specifics.
Accuracy
The DDM4V7 is a highly accurate blackout rifle designed to be used for competition shooting.
(Speaking of competition shooting, if you’re into long-range shooting, check out this guide on the best .338 lapua rifles).
The barrel is an in-house fabricated, cold hammer-forged 5.56 barrel with 1:7 twist, manufactured from 4150 CV ordnance steel.
While certainly a shorter range weapon than its rifle predecessors, the .300 Blackout is most certainly a highly accurate weapon.
In fact, I’ve shot over 100 rounds while maintaining 2” (or less) groupings. Seriously. The accuracy is spot on.
Reliability
The DDM4 300 is INSANELY reliable.
In fact:
I’ve yet to experience any malfunctions or jams – despite shooting over 200 rounds through a variety of handloaded ammo.
How is it that reliable?
For starters, the lower and upper receiver are forged out of 7075 T6 aluminum. The spring and bolt are both manufactured to MILSPEC standards. And the bolt itself is high quality 158 Carpenter steel.
In other words:
The Daniel Defense DDM4 is built to last.
Handling
The DDM4 is lightweight and pleasant to handle, without the sharp projections that sometimes come with other AR platform models.
Weighing in at a 5.44 pounds and measuring at 28.5 inches, the DDM4 can be moved with ease, making it a great option for sport shooting, target shooting, and self defense.
The grip, hand guards, and enlarged trigger guard is easy and comfortable to handle.
The collapsible butt stock is backed by a rubber inlay where it meets the cheek, gripping well and preventing sliding during firing.
My one complaint with the butt stock is that the rubber can sometimes grab beard hair. However, this is a minor inconvenience at most.
Trigger
The trigger is very light.
It’s a straight bow Geissele Automatics Super Dynamic system that allows an easy pull, minimizing the chances of yanking the gun to the side while shooting.
Magazine & Reloading
The DDM4 300 ships with a standard 30 + 1 round magazine.
The gun itself works with all standard STANAG 4179 compliant magazines. Which means you’ll almost certainly be able to use your other AR-15 magazines with the DDM4.
As said before, the DDM4 comes with the proprietary flared magazine well, making reloading quick and easy.
This is a blackout rifle that will not be difficult to reload in a high pressure situation — including self-defense or competition.
Length & Weight
The 300 Blackout is 28.5 inches long and only 5.44 lbs.
Part of what makes this weapon special is that it is considered a pistol.
In other words, it does not require ATF approval or a tax stamp to get your hands on it.
The LAW Tactical folding stock adapter means that the weapon’s length can be reduced even further, making this a prime weapon for close quarters encounters.
(A plus if you’re in law enforcement).
Recoil Management
The DDM4v7 does an excellent job of making recoil almost non-existent.
The pistol-length gas system paired with the length of the weapon means that the barrel won’t be climbing as you shoot.
Furthermore, the rifle comes equipped standard with Daniel Defense’s own “Muzzle Climb Mitigator,” a legal flash-hider.
Shooting this weapon is not like firing off an old 30-06 hunting rifle where your bruised shoulder will remind you that you’ve been shooting.
The recoil is pretty much zero.
Price
I’m going to admit:
The DDM4V7 .300 Blackout is an expensive weapon, costing between $1,729 to $2,016.
With many decent AR-15 variants being priced around $800, the price tag may come as somewhat of a shock.
In fact:
You certainly can get an AR-15 or AR pistol that works well for a cheaper price. However, you might encounter some reliability or accuracy issues.
That’s not the case with the DDM4V7. It’s highly accurate and reliable, and the price reflects that.
Recommended Accessories
The DDM4V7 .300 Blackout AR pistol comes with a full length MFR 9.0 rail that runs the full length of the gun.
Which means, you can upgrade this bad puppy with sick accessories. I’d recommend attaching a Nightforce NXS 2.5-0X42. Or an EOTech sight.
Is the Daniel Defense DDM4V7 Worth It?
If you’re looking for one of the best 300 AAC blackout, then the Daniel Defense DDM4 is for you.
It has great accuracy, fantastic handling, and fault-free function. In addition, its low weight and short profile makes it ideal for close quarters engagements.
In short: the DDM4 is a high quality 300 blackout rifle with high quality parts.
Now It’s Your Turn
I hope you enjoyed my best .300 AAC Blackout Rifle guide.
So as a recap:
What is the best 300 Blackout pistol? I highly recommend the Springfield Armory Saint.
What about CQB? Then opt-in for the IWI Tavor X95.
Looking for a .300 hunting rifle? Get the Wilson Combat AR-15 Ranger.
Lastly, if you’re looking for the best home defense 300 blackout rifle, then the Daniel Defense DDM4 V7P is what you’re looking for.
All of the 300 blackout rifles above are tried and tested. I’ve fired hundreds of rounds through them and have experienced no problems whatsoever.
Now I want to turn it over to you:
Which 300 AAC blackout rifle will you pick?
Let me know by leaving a quick comment down below.
For a very long time, people were unaware of how other birds (especially pigeons and doves) saw the world around them.
Recent investigations in the field of science have, thankfully, shed light on the astonishingly varied visual capabilities of these bird species. So, let us discuss Dove’s vision. Are they color blind?
Doves are not colorblind in any sense. They can see and differentiate colors easily. Doves’ eyes, in contrast to human eyes, find it easier to concentrate on stationary things than they do on moving ones.
Like most other types of prey animals, dogs have a single eye on each side of their heads, giving them a monocular field of vision.
They have a field of vision that is 340 degrees wide, much wider/advanced than humans and many other birds.
But there’s more to learn about how doves see the world around them.
In this article, we’ll explore the topic of Dove’s vision in more detail, including:
How doves see color and the difference between human and dove eyesight.
Doves have excellent vision and can see well in bright and dark light. They’re also able to see movement from a long distance away, making them superb hunters. In fact, doves are so good at spotting prey that they can often take down small birds with just a few quick pecks.
Doves have better vision than humans
Doves have a vision that is far superior to that of humans. Because of their eyes’ incredible sensitivity, they can discern UV colors that are entirely invisible to human sight.
These birds have the ability to recognize color, and when they spot brightly colored clothing that stands out from its surroundings, they will become alarmed. So, their hunt is a little bit tricky too.
Lack Depth Perception
Doves are distinguished by the constant bobbing of their heads, which is one of their features.
The action has been interpreted as a means of maintaining balance due to the position of their legs in relation to the rest of their bodies; nevertheless, there is another component at play here.
They have to continually refocus their eyesight to see objects clearly, particularly while they are moving around on the ground.
Their downward vision is highly developed and ground-focused, just as one would anticipate from any species belonging to the bird kingdom.
Eyes Anatomy/Shape
In comparison to the size of their bodies, the eyes of doves are significantly bigger than those of other birds.
The form of their eyes is likewise distinct from one another. The lenses have a significantly flatter profile.
The visual acuity of a dove is significantly superior to that of raptors because they have binocular vision, while doves have monocular vision.
In point of fact, doves have eyesight that is two times as excellent as that of humans when seen via their monocular lateral field of view.
Doves Are Constantly On the Lookout
Have you ever attempted to sneak up on a dove and get a closer look? It is incredibly challenging, and it may even be impossible.
As wild birds, they are experts at surviving in their environment and are highly attuned to their surroundings. When they are stumbling about on the ground, it may seem as though they are in a whole different universe; nevertheless, this is not the case.
Doves are always vigilant, and despite having to refocus their vision constantly, they have excellent eyesight, which helps them avoid potential threats.
When humans approach, they may appear to be unaware of your presence in regions that people often visit; nevertheless, you should not accept this impression since they are always aware of your position.
What colors entice doves to visit your garden?
Natural camouflage colors such as grey, brown, and olive are suitable possibilities for attracting birds with more cautious temperaments, such as doves, waterfowl, and other similar species. These birds are more likely to be scared off by brighter colors.
Note: White should be avoided at all costs since doves are more likely to be attracted to other exceptionally bright colors. It would appear that doves interpret this color as a warning.
Dove eye colors
Eye Color of doves varies from light brown to gray when they are young. But their eye colors change from dark brown to gray-brown or black as the species develops and becomes an adult.
The shade of their eyes also alters depending on the time of day and light availability.
During the nighttime, their pupil becomes more dilated to let in more light, just like the humans. On the other hand, in low light conditions, their pupil contracts to a small black dot.
When doves are alarmed or feel threatened, their eyes will also become more prominent.
The reason behind this is that their eyes need to be more focused when they are on high alert.
Doves also have a third eyelid, which is a translucent membrane that covers the eye when they blink.
In fact, this third eyelid helps to protect the eye and keep it moist.
Why are colors essential for doves?
Doves rely on color for a variety of reasons, including attracting potential mates and identifying food and water sources.
For the aim of breeding
The beginning of the mating season is signaled by the appearance of plumage with brighter colors. A mature and healthy mate can also be deduced from a partner’s use of brighter colors.
Cues from food as well as the surroundings
Seeds/fruits with bright colors are often ready to eat and have the highest concentration of nutrients when they are at their peak.
Seeds/fruits with bright colors are often ready to eat and have the highest concentration of nutrients when they are at their peak.
The changing of the colors of the leave also indicates doves migrate in the cold weather.
Can doves see colors?
Doves can see color, but their color vision is not as good as that of other birds, such as hawks.
The eyes are also used to detect movement and light. The retina contains rods and cones which respond to different wavelengths of light.
These cells have a high sensitivity for detecting motion, while the rods are more sensitive to low-intensity light than the cones. Birds’ eyes are also capable of seeing polarized light, which allows them to distinguish between objects with similar colors.
This ability comes from the fact that the eye contains an internal structure called the tapetum lucidum, which reflects light back through the lens.
How do doves see colors?
Dove’s eyes contain three types of photoreceptors: rods, cones, and double cones. Rods are responsible for night vision, while cones are responsible for day vision. Double cones are responsible for color vision.
Rods
Rods are located in the retina and help the bird see at night. Their function is to detect changes in brightness. When there is no change in brightness, the rod cell fires off an electrical impulse. If there is a sudden increase in brightness, then the rod cell stops firing.
Cones
Cones are located in the retina’s center and are responsible for daytime vision. They are made up of two parts: a short outer segment and a longer inner segment. The outer segment contains rhodopsin, which absorbs photons and triggers chemical reactions within the cone cell. Rhodopsin is activated by blue light, which makes it easier for the cone to absorb photons.
Dove eye and the human eye
In contrast to humans, who are trichromats and can only see three colors, blue, green, and red, doves are tetrachromats, meaning they can see four colors: ultraviolet (UV), blue, green, and red.
The ability to see UV light is what sets doves apart from other birds and animals, including humans.
In fact, this capability is thought to help doves find food and mates and avoid predators.
Do doves have peripheral vision?
Doves do not have peripheral vision. Doves have binocular vision, meaning they can see directly in front of them and to the side. This is because they have a band of nerve cells (the striated muscle layer) that runs across their eyes, allowing them to move their eyes quickly in any direction.
Binocular vision allows birds to judge distances accurately and helps them catch prey by spotting it from a distance. It also helps them keep track of other birds or predators when they are flying in formation.
What distinguishes a common dove from a mourning dove?
The distinction between these two species is primarily in their color. The blue-eyed ground dove’s body feathering varies from milky light brown to greyish buff, and it has a pinkish tinge to it. In contrast, the mourning dove has a coloration that is more brown and earthy and has black patches on its wings.
Distribution and habitat
Blue-eyed ground doves are found throughout much of North America, including Canada, Mexico, Central America, South America, and the Caribbean. They can be found in a variety of habitats, such as grasslands, prairies, savannas, deserts, forests, wetlands, and urban areas. Blue-eyed ground doves have been known to inhabit agricultural fields, parks, gardens, and even suburban backyards.
On the other hand, mourning doves live all over the world, except for Antarctica and Australia. They prefer open wooded areas, especially near water. They often nest in tree cavities or under bridges. Mourning doves are usually seen alone, although pairs will sometimes form if one member dies.
Can doves see at night?
Doves have excellent night vision, thanks to their rods. Rods are located in the retina and help the bird see at night. They detect changes in brightness, and when there is no change in brightness, the rod cell fires off an electrical impulse.
This allows doves to see in low light conditions and even in complete darkness. In addition, doves have a tapetum lucidum, which is a reflective layer of cells in the back of their eyes that reflects light and helps them see better in the dark.
What color are the dove’s eyes?
The color of a dove’s eyes can vary depending on the species. Common doves have dark brown eyes, while mourning doves have yellow-orange eyes.
Blue-eyed ground doves have blue eyes, which sets them apart from other species. The blue coloration is caused by a pigment called pteridine that reflects light and gives the eye its distinctive hue.
Do doves recognize faces?
Doves are one of the few species of birds that are capable of recognizing people’s faces, although they are a rare exception.
Doves are able to distinguish between individuals who provide them with food and those who intend to hurt them. This talent is essential for the birds to have in order to survive in the wild since it enables them to tell friends from foes.
People who provide doves with food regularly will notice that the birds are less likely to flee from them when they approach. The reason for this is that the birds have learned to recognize the human faces of the people who feed them over the course of time.
Do doves have the ability to see TV screens?
Doves are able to view the screens of televisions, computers, and other electronic devices.
The bird’s eyes are so sensitive to light that they can see the flickering of the images on the screen.
In fact, doves are not the only type of bird that can see electronic screens. Any bird with good eyesight will be able to see the images on a screen.
Summary
Before we move on to the conclusion, we’ve summarized this article into a short list of key points for you to remember:
Doves have good vision, with some species being able to see in dim conditions due to special cells in their eyes called tapetum lucidum.
Doves are one of the few species of birds that can recognize people’s faces.
Doves can see the screens of televisions, computers, and other electronic devices.
Grey doves have better vision than mourning doves.
Conclusion
In this article, we’ve learned about the anatomy of a dove and how its eyes work. We’ve also learned some interesting facts about the behavior of these birds.
We went over some interesting facts about doves. We also answered some common questions people have about these birds.
Doves are intelligent creatures that have the ability to recognize faces due to their extraordinarily sharp vision, enabling them to identify showy attire and activity from a considerable distance.
Additionally, we looked at the differences between the eyes of a grey dove and those of a mourning dove.
Finally, we discussed whether doves see color and why they might be colorblind.
Want to learn more about doves?
Ready to boost your knowledge to the next level? If so, check out the articles below:
Do Doves and Pigeons Make Good Pets?
What Do Turtle Doves Eat? Everything You Need To Know!
Even the best archers started somewhere. If you’re just starting your archery journey, some basic shooting tips for beginners will go a long way in helping you to enjoy your new hobby. While shooting with experienced archers is the best way to improve, that’s not always a possibility. Follow these tips from the expert Staff Shooters at 60X Custom Strings and watch as your skills improve.
Before you even notch an arrow, you need to get a basic archer’s stance down. Over time, you’re probably going to end up adjusting your stance as you get more comfortable with shooting. Once you find a stance that you’re comfortable with, find this position every single time you pick up your compound bow to work on how to shoot.
Of all the compound bow shooting tips we have for you, this one is the most important so don’t skip it. You can have the best archery bow for beginners but if you don’t get your stance down first, it won’t matter.
If you’re shooting at an actual range, there should be a line that runs parallel to the target. Use this shooting line as a guide for your stance. For ranges that don’t have a shooting line, create your own with a stick, rope, or chalk.
To find your stance follow these directions:
Relax your whole body.
Right-handed shooters, put your left foot in front of the line. Left-handers, use your right foot.
Keep your feet about shoulder-width apart.
Stand sideways so your feet are parallel to the line.
Keep your posture straight and rotate your head directly over your forward-facing shoulder.
Press your shoulders down and keep your lower back flat.
Now that you’ve got your stance, let’s dig into how to shoot a compound bow.
Find Your Anchor Point
Your anchor point is where your draw hand rests when you’re about to let the arrow fly. Most archer’s anchor their draw hand near their cheek or jaw. If you don’t have a consistent anchor point, choose one that you will use every time because consistency here is the key to great aim.
Find that exact same anchor point every time you shoot. The best archery bow for beginners will allow you to experiment with different positions until you find an anchor spot that feels right.
Hold the String with Two Fingers
When learning how to shoot a compound bow, as you load the arrow and draw the string back, use either two or three fingers. When it’s time to release the arrow, have your pointer finger above the arrow and your middle finger below it. Don’t touch the arrow with your fingers to stabilize it—you could injure yourself on the release or compromise the flight of the arrow.
When you release the string, a bow shooting tip we recommend you try is relaxing your fingers and letting both go at the same time. Any tension in your fingers will affect the string and change the direction of the arrow’s flight.
Don’t Wait Too Long to Shoot
As a general rule, as you’re learning how to shoot your compound bow, experts recommend shooting the arrow within seven seconds after pulling it back. That way, you stay focused on shooting. After seven seconds, you may become distracted by your surroundings or start overthinking your shot.
You should never take a shot if you’re not confident, so always make sure you’re mentally prepared before you notch an arrow — even when you’re using the best archery bow for beginners. Don’t forget to make sure that the coast is 100% clear before you even think about drawing your bow.
Shooting with Experts
Everyone has their own compound bow shooting tips, so it’s wise to learn from as many experienced archers as possible. After all, everyone has their own unique style when it comes to how to shoot a compound bow. These tips will get you started, but it’s a good idea to watch other archers and see how they’ve fine-tuned their approach. Plus, you can ask them questions and get tips on the best equipment.
Use Quality Equipment
One of the most overlooked tips is that bad gear leads to bad shooting. If you really want to get into archery and stick with it, investing in quality gear is worth it.
One of the easiest and most affordable ways to upgrade your bow is to use custom strings from 60X. We offer both single bowstrings and cables as well as sets for your convenience. You should change your strings and cables every year or so, but upgrading your stock strings right out of the box is a great way to squeeze the most performance from your compound bow as you learn how to shoot. Boost accuracy, stability, and arrow speed with the world’s best bowstrings and cables.
Share our bow shooting tips with your friends when you click on the social media icons below!
This is a dynamic everyday carry guide curated by all of our authors for preppers both new and experienced. It is constantly being updated with up-to-date and accurate information, so please check back frequently for updates.
Every day carry encompasses all the items you carry on your person every day. It is less of a kit and more of a daily loadout. EDC (Everyday Carry) is popular far beyond prepping and survival- many people try to optimize what they carry with them for every single day of their lives. It can include pouches, multi-tools, and CCW or just be your keys and wallet.
EDC also includes the clothes you choose to wear. Versatility, weight, size, and functionality are all important for EDC gear.
The everyday carry essentials with our recommended gear for each area. Outfitting yourself in most of these will give you the resources to tackle emergencies, disasters, or just every day life without notice.
Carried EDC Essentials
Keys: Attach to your keychain tools.
Wallet: Magpul DAKA Essential – One that is functional, durable, and either versatile or low-profile depending on your EDC approach. (See why the DAKA beats the others in our wallet review roundup)
ID: Quickly prove your identity.
Cash Stash: Don’t keep all your cash in one spot. Find out more about EDC cash stashes.
EDC Multitool: Gerber Dime – Make yourself endlessly useful even when there aren’t disasters! (See why this is our top EDC multitool)
Folding Knife: OKC Rat 1 – The quintessential survival folding knife. (See why this is the best value in survival folding knives)
Cell Phone: A smartphone loaded with survival apps.
Cell Phone Charger: Paired with your phone above.
Steel Water Bottle: Nalgene Stainless 38oz (See why this is the best survival water bottle)
Lighter: Ronson Jetlite (See why this is our favorite lighter)
EDC Flashlight: Olight i3T EOS Flashlight (See why this is the best EDC Flashlight)
Rainproof Pen: Rite in the Rain EDC Pen – take notes in any conditions (see why this is the best survival pen)
Rainproof Paper: Rite in the Rain Notebook
Mini First Aid Kit: A small, portable First Aid Kit.
Prescription Medication: Store your prescription medicine in a water and air-tight portable container.
Protein Bars: Clif Bars or your favorite protein/energy bar.
Feminine Hygiene Supplies: Keep supplies nearby.
Worn EDC Essentials
Work Gloves: Mechanix FastFit Covert Gloves (See why these are the best-reviewed survival gloves)
Socks: Darn Tough Light Hiker (See why these are the best survival socks)
Shirt:Carhartt Midweight Crew (See why this is the best survival shirt)
Underwear: Some clean ones.
Pants: TRU-SPEC Tactical Pants (See why these are our best budget pants)
Ball Cap: Condor Tactical Cap (See why this is the best survival ball cap)
Bandana: Colter Co. Reflective Bandana (See why this is the best survival bandana)
Boots/Shoes: Sturdy hiking shoes or boots.
Suggested Additions for Your EDC Loadout
This gear may not be essential by definition, but adding any of these to your EDC will improve your loadout’s versatility for even more situations.
EDC Backpack: A bag will allow you to carry much more equipment and gear wherever you go.
Belt: 5.11 TDU Belt – You may be wearing one anyway, but adding a belt to your outfit can be useful for emergencies. (See why this one is the best survival belt).
Jacket:5.11 Bristol Parka – Lightweight but extremely versatile for a wide range of conditions (See why we recommend this in our survival jacket review).
Poncho: Arcturus Rain Poncho – Staying dry is important during an emergency. (See why this is the best survival poncho)
Sunglasses: Whether driving or just outside, sunglasses come in handy.
Survival Mirror:UST Micro Mirror (see why this survival mirror is the best EDC option)
Power Bank: Portable battery packs have come way down in cost and are very versatile.
Whistle: SOL Slim Rescue Howler – Whistles make getting attention easy (see why this whistle is the best in a close race).
Concealed Carry Handgun: Your preferred CCW that you are trained on (see ours here).
CCW Holster: Alien Gear Concealed Carry Holsters – Get a holster in the profile you want from the best brand.
Ammunition: PSA Ammo Deals – Get ammo for your CCW at huge discounts.
Pepper Spray:Sabre 3-in-1 Pepper Spray – A great non-lethal weapon for personal protection. (See how this tested as the best pepper spray)
Purification Tablets: A few Aquatabs (see why these are our favorite purification tablets for EDC)
Water Filter: Sawyer Mini Water Filtration System (see why the Mini is the best-reviewed water filter)
Water: If using an EDC Backpack, keep your steel water bottle full.
Ration Bars: Millennium Bars (see why this is the best survival food bar)
Camp Utensils:Stainless Hobo Cutlery Set
Military Can Opener: P-51 Shelby Opener (see why this is the best portable can opener)
Batteries: Tenergy Premium Pro Rechargeable Batteries – Stocking up on standard batteries is smart, but rechargeables are clutch for emergencies and survival. (See why these ones tested as the best rechargeable batteries for disasters and survival)
EDC Sewing Kit:Singer 27pc Sewing Kit – Repairing textiles and other gear can extend their useful life. (See why this is our favorite EDC sewing kit)
Paracord: TOUGH-GRID Paracord (See why this is our preferred paracord)
Carabiner: 3″ Aluminum D-Ring
Duct Tape: Gorilla Tape 35 Yard Roll (See why this is the best duct tape for survival)
EDC Magnifying Glass: Credit Card Fresnel Lens – Start fires and read maps more easily. (See why this is our favorite EDC magnifying glass)
Ferro Rod: Bayite Toggle Hole Ferro Rods (see why this is our favorite EDC ferro rod)
Tinder/Fatwood: TinderQuik – start fires easier (check out the other best tinder and fatwood we tested)
Waterproof Matches: UCO Stormproof Match Kit (see why these matches are the best)
GPS Watch: Garmin Instinct 2– Pick your favorite GPS watch (see why this is our best-reviewed survival watch).
USB Drive: Load a USB drive with your favorite survival manuals and maps of the area.
Sun Screen: Your favorite brand with high SPF.
Bug Spray: Repel 100 (see why science says this is the best repellent)
Hand Sanitizer: During a pandemic, this is an essential EDC item.
Extra Supplies for your EDC Kit
Essentials and suggested additions have been covered, so this is the area will you will find everything else that could be useful to have on you every day. These extra supplies will help you in very specific situations, are less versatile, and may take up a lot of space. Even still, they could be the difference makers in an emergency- so it could pay off to consider adding these.
EDC Pouch:PJ13 Leather Sheath – Carry more and keep it accessible with an EDC pouch.
Scarf/Shemaugh: Free Soldier Shemagh – Stay covered in any environment (here are the best-reviewed shemaghs)
Compressed Towels: Lightload Towels (see why these are the best EDC towels)
Handwarmers: HotHands
HAM Radio: Baofeng UV-5R5
CB Radio: Uniden PRO401HH – HAM may get all the attention, but CB can be an alternative choice that doesn’t require a license.
Pocket Sharpener: Fallkniven DC3 – Small but effective diamond sharpener (check out our other option in our sharpener roundup)
Ammo Pouch: Accessible ammo can be a priority depending on your situation.
Handcuff Key: Streamlight CuffMate
EDC Fishing Kit: Readyman Fishing Card – Be ready to fish right from your wallet. (here are some other fishing kit options)
Beef Jerky: Pick your favorite brand and flavor.
Condiments: Make anything edible (like an MRE!) by dousing it in your favorite condiment. Check out our suggested condiment stockpile list.
Multi-Vitamins: Make sure your diet completes all of your body’s nutrient requirements.
Fishing/Hunting License: It’s not a bad idea to keep licenses on you.
Compass: Brunton TruArc – Stay on track and navigate with maps. (see why this is the best survival compass)
Local Maps: Print copies of local maps. Here’s how you download them for free.
Ranger Beads: Matte Ranger Beads – Teach yourself to pace count with ranger beads. (see why these beat the other ranger beads)
Playing Cards: Wilderness Survival Cards – Don’t forget the importance of entertainment and games. These cards are our favorite from our survival card review.
Toothbrush: Travel Toothbrush
Toothpaste: Colgate Travel Toothpaste
Floss: Floss is versatile and surprisingly strong!
Wet Wipes: Surviveware Biodegradable Wipes
Zip Ties: Gardner Bender HD Zip Ties(See how these tested as the best survival zip ties)
Oil Lubricant: Super Lube – There are over 2,000 uses for lubricant, and it’s a must-have for any tool kit.
Garbage Bags: Glad FlexForcePlus– Use them for trash, or plenty of other survival uses with these unique double-walled flexible bags. (See why these are the best trash bags)
Super Glue: Gorilla Super Glue Gel – For when you want something to stay and never move again. (see why this is the best super glue)
Pencil Sharpener: Twin Sharpener– A great tool to create wood shavings for fire starting. Or sharpening pencils.
The Definitive Everyday Carry Checklist
A perfect EDC loadout doesn’t exist- what is right for you depends on your situation and risk tolerance. That said, we have as close to perfect of a starting point for you: our definitive EDC checklist.
Our checklist is available as both a pdf download and as a Google Sheet/Excel file where you can check off items yourself, and even add and subtract items from the checklist.
Everyday Carry Printable PDF Checklist
If you are looking for the simplest way to print and use the checklist above, download our printable PDF version. It is one page long on 8.5″ x 11″ paper if you reduce the margins to 0.5″. This EDC PDF makes gathering and tracking your EDC gear extremely easy. Once you open the every day carry PDF checklist in your browser, you can either print it directly or save it through your browser.
Everyday Carry Excel / Google Sheet Checklist
If you are looking for a comprehensive way to track your EDC loadout, open our Excel / Google Sheet version. The sheet is sharable, and you just need to copy it to your own Google Sheet account or download it to excel to edit it. We also keep links to our reviews for each category linked to simplify shopping for any equipment you may find yourself missing.
The Next Step
EDC adds tons of versatile functionality to your everyday life. You’ll find yourself using many of the tools you added very often. Now we’re going to pivot and move on to the items you won’t use often at all.
Specialized kits are designed for people in specific situations. Not everyone needs every type of specialized kit. Knowing your capabilities and threats will help you as we move on to the next section: Specialized Kits.
You’ve Been Missing Out
Join the 2+ million preppers that rely on our prepping advice by subscribing to TruePrepper.
Practical guides and tips
Useful survival giveaways
Free, forever
< 0.4% of people unsubscribe
Thanks for subscribing, reading, and welcome to the club.
"Debate over whether a 22 air rifle can effectively take down a deer has sparked curiosity among hunting enthusiasts. With its lower muzzle velocity...
")
")
")
")
")


 There are three basic types of ham radio, each with its own strengths and drawbacks.
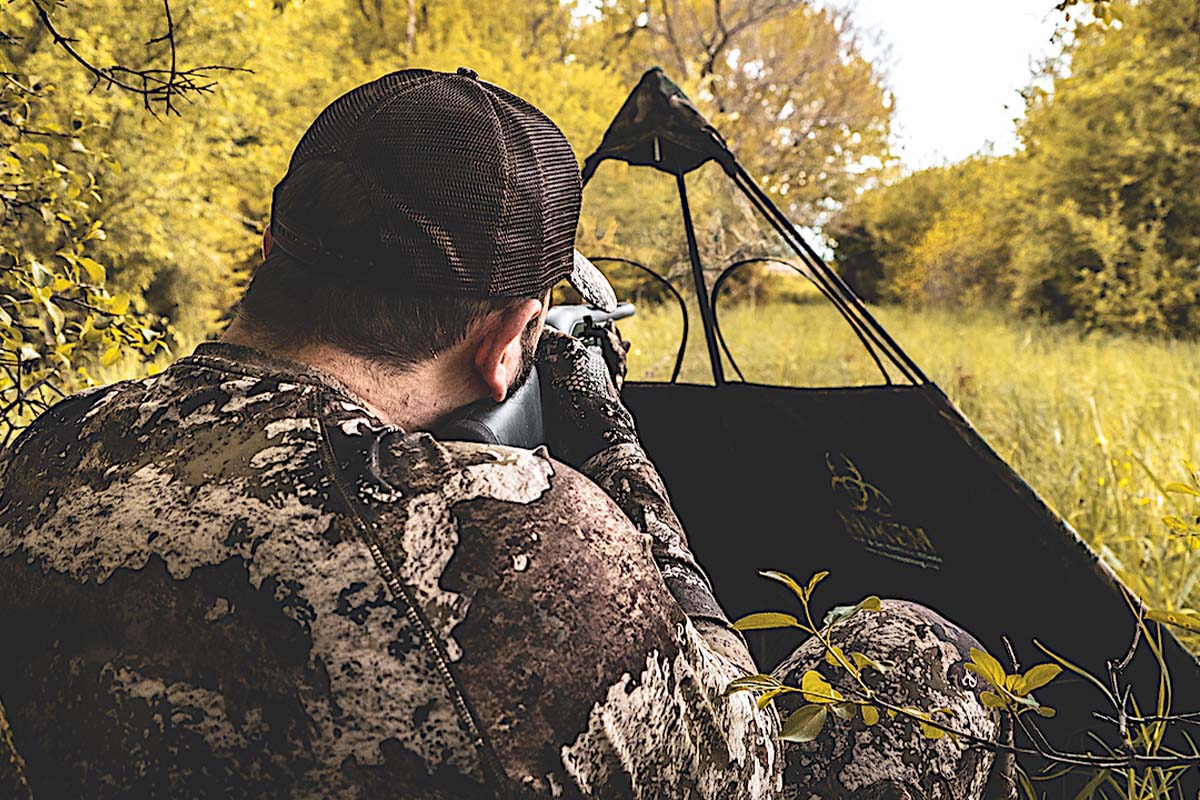


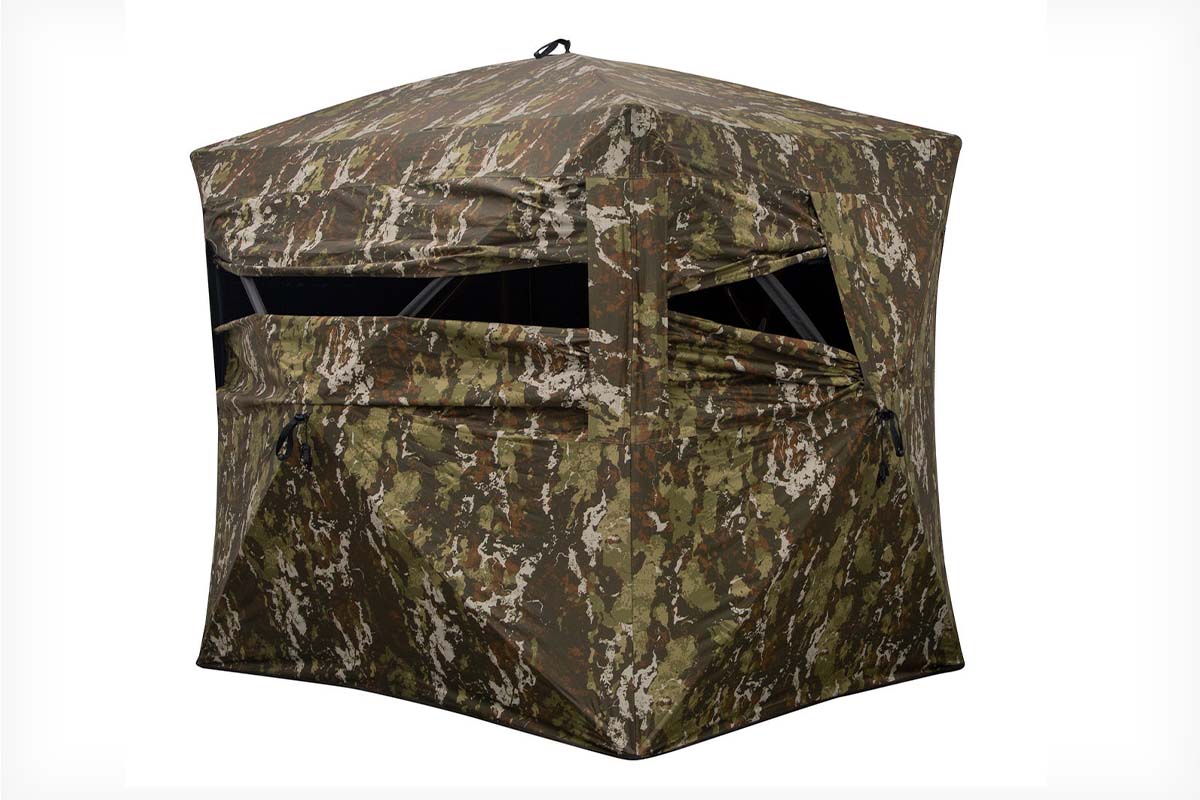


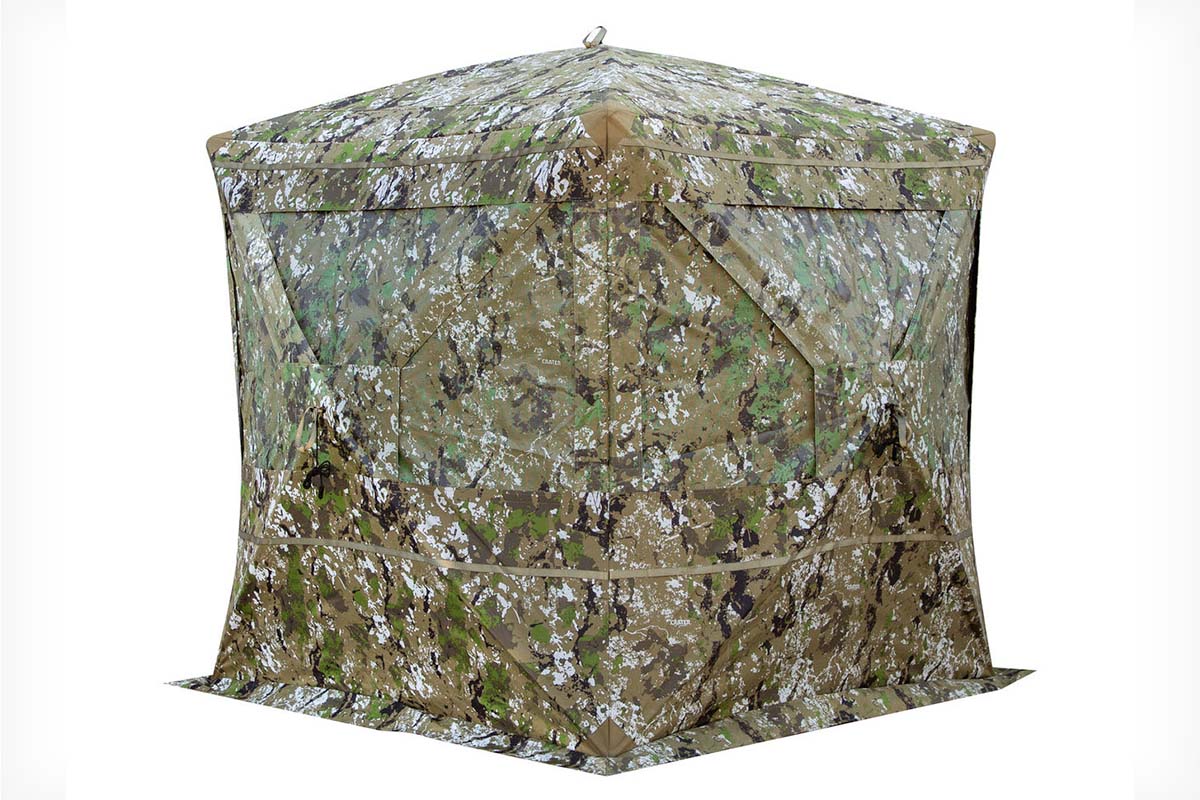


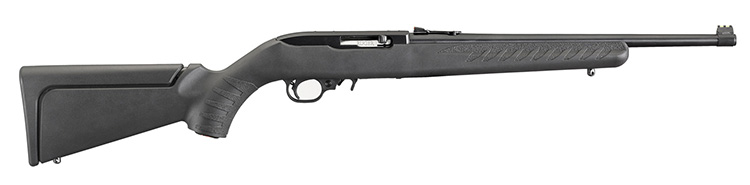


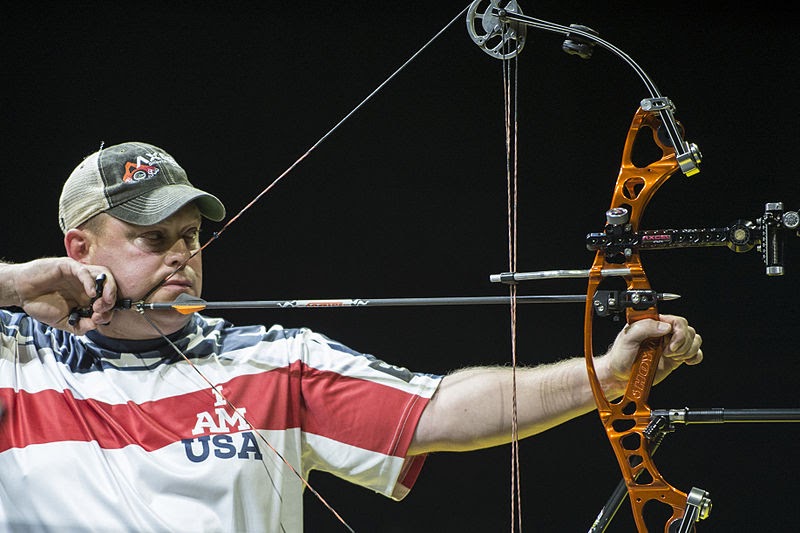
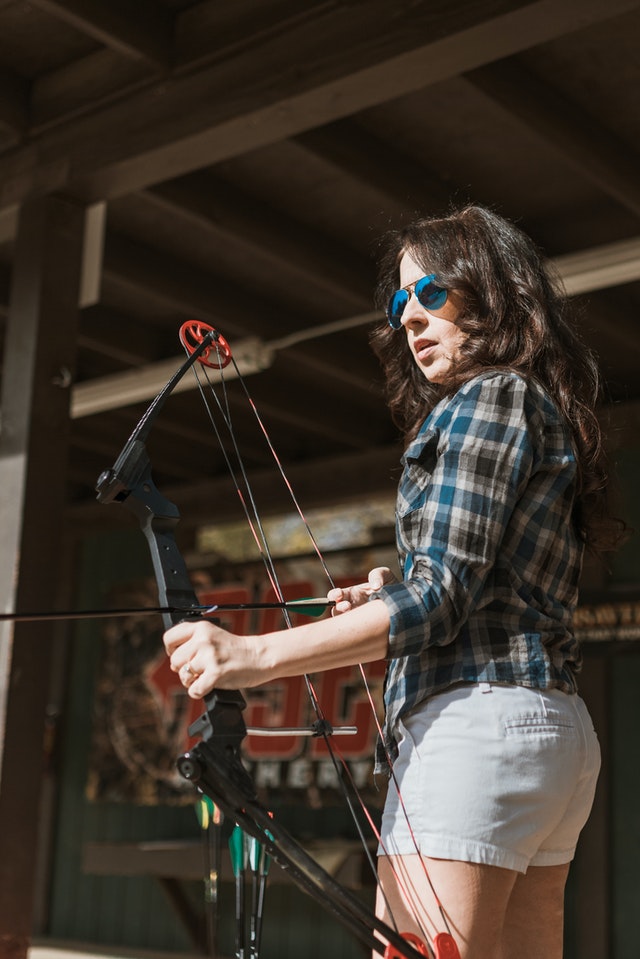 Everyone has their own compound bow shooting tips, so it’s wise to learn from as many experienced archers as possible. After all, everyone has their own unique style when it comes to how to shoot a compound bow. These tips will get you started, but it’s a good idea to watch other archers and see how they’ve fine-tuned their approach. Plus, you can ask them questions and get tips on the best equipment.


