Home Blog Page 148

What is Nymphing? An Introduction to the World of Subsurface Fly Fishing

0

Nymphing: The act of fishing with artificial flies that imitate aquatic insects in their juvenile, larval state or other sub-aquatic lifeforms including worms and crustaceans that trout find irresistible. In other words, a fly fishing technique to catch lots and lots of fish in practically any body of water, any month of the year, and any time of day whether there?s a hatch happening or not.

Before mayflies, caddisflies, and stoneflies become creatures of the air, they spend their humble juvenile lives underwater as nymphs. Some cling to rocks in cocoon-like husks and some crawl around or scoot through the water, inevitably getting washed downstream by the river’s current.

Regardless of the specific species and how they look and behave, at some point, all nymphs “hatch,” leaving behind their sub-surface dwellings to become winged adults. They shed their nymphal exoskeletons, rise through the water column, emerge through the surface film, dry their wings, then head skyward to mate, lay their eggs, and die.

Why should you care about these strange aquatic insects and their anti-climactic life cycle?

Because nymphs are trout food.

And if you want to catch trout consistently ? both in size and numbers ? knowing how to fish flies that imitate nymphs is absolutely essential.

To get started, let’s dive into why you should be fishing in the first place.

A couple years ago I wrote a mini book, that I gave away at the classes I taught. Get a FREE Download eBook called – Expert Nymphing Secrets

Why Nymphing is More Effective than Any Other Style of Fly Fishing

Although dry flies get most of the attention and praise among fly anglers, the truth is that trout spend the vast majority of their time feeding underwater ? not on the surface.

And what are they eating down there?

You guessed it ? lots and lots of nymphs.

No matter the time of year or hour of the day, nymphs are present in rivers and lakes. And most of the time, trout are snacking away.

That’s why fishing nymphs is so effective ? since trout are always eating nymphs, you don’t have to time it right or wait for a hatch to catch fish. Simply tie on one or more nymph flies in approximately the size and color that matches the natural insects in the water and get to fishing.

When and Where to Fish Nymphs

The beautiful thing is that just about every type of water ? be it a fast-flowing freestone, a glassy spring creek, or even a stillwater lake or pond ? likely hold resident populations of aquatic insects. And like we mentioned, the nymphs are underwater all day long, regardless of whether a hatch is happening or not.

So no matter what stream or lake you’re on and when you’re fishing, you can use nymph flies to catch fish. The first key to success, then, is to know what kind of natural nymphs the trout are eating so you can match your artificial to the real thing. The second key is to know how to read the water in order to deliver your offering to the right spot with the proper presentation to entice a trout to bite.

We’ll get into the specifics of how to do all this later on, but the point is, if you know there are trout in a stream or lake, you can use nymphs to catch them.

What are my Favorite Nymph Flies

I’ve got a dozen articles on nymph flies. The best way to fill your fly box is to get a great foundation of flies. Pheasant Tails Hare’s Ears, Caddis, Midge….here are some pictures and sizes, plus a FREE download with my list.

Guide Tip: I probably shouldn’t be giving this away, but in the class I teach I have a download to help folks get a great selection of flies. Get the DOWNLOAD HERE

What Gear do You Need to Start Nymph Fishing?

Many times in fly fishing, going after a new species or learning a new style of casting requires an expensive trip to the fly shop to buy all new specialized gear. Luckily, this isn’t the case with nymph fishing.

Nymph fishing rods can get a little technical. If you really want to get into this kind of fishing, (it really catches lots of fish) you should think about getting the TFO Drift Fly Rod. It’s a 3 wt 9 foot fly rod in it’s basic form.

The ground breaking feature of this rod is that you can add length without un-stringing your fly line. The rod sections extend the rod from 9 foot up to over 12 feet. Read about the rod in this article – The Best Nymph Fishing Fly Rod or in my recommended gear section – HERE.

If you want to check the prices and reviews on the TFO Drift here’s a link to AMAZON – TFO Drift Fly Rod – Definitive Nymph Fly Rod.

Most of the nymphing techniques we’ll cover involve short casts, so a high-performance rod isn’t necessary. Unless you hook into a true giant, your fly reel won’t see much action when nymphing other than conveniently storing line ? most fish can be landed by stripping line by hand.

To give you an idea of the basic fly fishing outfit required for nymph fishing, here’s a quick gear list:

  • Rod: 9-foot 4,5, or 6-weight, medium to fast action
  • Reel: Standard single action fly reel matched to rod
  • Line: Weight-forward floating line
  • Leader: 9-foot nylon tapered leader
  • Tippet: Spools of 3X, 4X, 5X, and 6X

Pretty simple, right? Of course, you’ll still need some flies and several other nymphing-specific pieces of tackle, but as long as you have that basic rod and reel setup, you’re ready to start putting the nymphing techniques we’ll cover to the test!

I’ve got an article called Nymph Fishing Putting it All Together (Link to article). It summarizes many of the articles on this website.

DIY: Prime Tips for Prime Cuts from Venison Hindquarters

0
DIY: Prime Tips for Prime Cuts from Venison Hindquarters

Illustrations by Peter Sucheski

Most hunters know how to remove choice cuts like the backstraps and tenderloins from deer. Fewer are as familiar with the legs, particularly the hindquarters.

This is a shame, as the rear legs offer fantastic cuts fit for various cooking styles. They’re also not as difficult to break down as many perceive.

First, if possible, hang the deer at least a day or two in cool temperatures to allow rigor mortis to subside. Also consider dry-aging before butchering. Done correctly in safe temperatures (33 to 40 degrees), it yields more tender and flavorful meat.

When it’s time to start cutting, use an area that provides ample space for the hindquarter and your tools. Consider a curved, semi-stiff boning knife and a straight, more flexible fillet knife for separating connective tissue and trimming. You also want a large cutting board, gloves, paper towels, a meat-storage container and plastic sheeting to cover the work surface and make cleanup easier.

There are two main ways to butcher a hindquarter: by removing the leg bone before separating the cuts or by taking individual cuts directly off the bone. Both are correct and often involve simply separating muscles along natural seams of connective tissue. I do better when removing the bone first, so I’ll focus on that method.

THE PROCESS

Step 1

Remove any hair, dirt, blood-shot and excess fat on the skinned hindquarter. All can contaminate meat and negatively affect flavor. Removing fat also helps reveal lines of connective tissue you’ll use to separate muscle groups.

Step 2

Remove the shank by slicing along the sinew lines between it and the round. Do this on both sides of the hindquarter with the tip of a boning knife. Cut the ligament opposite the shank. Then work the knife tip gently around the joint at the knee (not sawing at the bone) while using your offhand to move and apply pressure to the joint. Slowly, you’ll separate the shank from the round without needing a saw. If intended for grinding or stews, remove the shank meat from the bone.

Step 3

Set the round down with the inside facing up. The femur’s ball should be visible. Starting here, make a straight, shallow cut along the nearby seam down to the kneecap. You should feel the femur running beneath the tip of your knife.

Step 4

Cut on both sides of the kneecap and pull the meat back with your free hand. Continue cutting to expose the length of the femur. Work the blade tight around the bone’s contours, alternating cuts along both sides. Keep the blade flat against the curve of the bone, and don’t cut into the meat below. While holding the kneecap up with your offhand, cut below it and along the femur toward the ball until the entire bone is clear and comes free.

  • READ MORE: 4 Steps to Field-Dress a Deer

Step 5

Pull the round apart with your hands. The still-connected individual cuts should lay flat on the cutting board in front of you. You’ll see a mass of connective tissue with a particularly thick concentration near the center of the round. Inside is a gland, which you should carefully remove by trimming the surrounding connective tissue. Left in place, it can taint the meat.

Step 6

Separate the cuts along connective tissue lines with your hands and knife tip. Seams are evident, so let nature be your guide. You should never have to cut into muscle. Trim excess fat and sinew, but leave the silverskin that surrounds muscles to protect meat during freezing. Leave cuts large to avoid exposing more meat to air.

Venison Hindquarters
Illustration by Peter Sucheski

THE CUTS

Larger cuts include the top and bottom rounds, eye of round and sirloin tip. You also have the sirloin butt (rump), tri-tip and shank. All are great in their own ways.

Top and Bottom Rounds

Pulled from the deer’s hamstring area, these cuts are quite versatile. They’re tender enough for cutting into steaks and hardy enough for making roasts or enduring low-and-slow cooking methods, like smoking or braising. Cube them into kabobs or slice thin for jerky or stir-fry. Or butterfly and pound them out for chicken-fried steak or jagerschnitzel.

  • LEARN MORE: 15 of the Best Venison Sausage Recipes

Eye of Round

Called the hidden tenderloin because of its appearance, many cook them similarly. Pan-sear or grill whole, or as medallions. It’s also good as jerky or fajita meat, or it can be cured.

Sirloin Tip

Also called the sirloin, football or knuckle, the sirloin tip is tougher than the rounds but still makes great steaks, especially on young or aged deer. It’s perfect for a roast. Or it can be smoked, braised, ground up or turned into jerky.

Tri-Tip

A well-known beef cut, the tri-tip is mostly overlooked on venison hindquarters because of its small size and how it blends in with the sirloin tip. It’s great for flash-searing. Like tenderloins, lean toward rare and medium rare.

Sirloin Butt (Rump)

This cut’s size depends on how well you removed the hindquarter. It’s often small and used for pot roast, stew or grinding meat.

  • MORE RECIPES: 10 Most Popular Venison Dishes

Shanks

Shanks get a bad rap. They’re tough, sinewy muscles that deer use often. Cooked improperly, they’re almost inedible. Cooked right—low and slow in liquid—they’re delicious. Shanks are perfect for osso bucco, braising on the bone or simmering in a broth to produce succulent stew meat.

SEAL THE DEAL

Should you use an external or a chamber vacuum sealer for meat storage?

The most common vacuum-sealing device is the external vacuum sealer. Place the open end of a sealer bag into a tray, clamp the lid down and suck air out of the bag. The other option is a chamber vacuum sealer. The entire bag goes inside the machine, and the sealer removes all air within the chamber—inside and outside the bag.

Venison Hindquarters
MEAT! Chamber Vacuum Sealer (top) and Pro External Vacuum Sealer.

External vacuum sealers are inexpensive, and their design permits sealing larger cuts of meats. Chamber vacs excel at sealing liquids and other moist items. They’re great for marinating meats or for sous vide applications. They require more money upfront and are less portable.

With adjustable seal time and vacuum settings, and an integrated bag roll holder and cutter, the MEAT! Pro External Vacuum Sealer ($179.99; meatyourmaker.com) ups any hunter’s meat-preservation game. It’s also equipped with a removable drip tray for easy cleanup. For the hunter who freezes lots of meat or seals liquids often, there’s the MEAT! Chamber Vacuum Sealer ($799.99). This one also has adjustable seal time and vacuum settings, as well as a manual seal time mode. If you want professional-quality sealing, this is the ticket.

How To Be A Better Night Hunter – Simple Guide To Follow

0

Hunting is an exciting sport that some people enjoy doing. It’s a sport that gives you an adrenaline rush.

Night hunting can be even more exciting because of the activity levels of animals. You are more likely to be successful when hunting at night.

However, night hunting can also be challenging. You need to hunt in poor visibility conditions that could make it hard to detect animals and identify their whereabouts.

Here is a simple guide if you are wondering how to be a better night hunter.

How To Be A Better Night Hunter – Simple Guide To Follow

Follow this guide to ensure that you become a successful night hunter. Night hunting indeed comes with many challenges. However, when done correctly, night hunting can be a rewarding experience.

Remember to follow the below tips to ensure you get the best night hunting experience.

Speak With Other Experienced Hunters

Experience can always help you see things from a different angle. It’s the same with hunting. Those with a lot of experience in night hunting will be able to give you an insight into this whole subject.

Experienced hunters will also have unique stories of their hunting trips in the past. Their encounters will teach you a few lessons on hunting successfully at night.

They will give you tips and advice which you will not be able to learn otherwise. You can join them on their hunting adventures and learn the techniques and a few tricks they use to become successful.

Equip Yourself With The Right Gear

Night hunting is ideal for stalking your prey in the dark and getting close enough for a clean shot. However, none of this is possible if you don’t have the right hunting gear.

Here are some of the essential hunting gear that you should have.

The right ammunition

As much as you need a good air rifle for hunting, you must also use the correct ammunition. For instance, you might need to use a heavy bullet that will penetrate through the animal’s hide, especially when hunting deer.

On the other hand, a lighter bullet will be sufficient if you’re hunting animals like rabbits and squirrels.

A good light source

Will help you see the path ahead. However, it could also alert the prey of your presence.

Therefore, you need to use a light source suitable for night hunting. Examples are red-dot sight or night vision sights – more on this later. These lights give you good vision at night without giving away your position.

Other hunting gear

Here is a list of hunting equipment you should carry at night.

  • Weapon – Rifle or crossbow with ammunition or arrows
  • Quiver
  • Knife
  • Rangefinder
  • Flashlights or night vision lights
  • Food and water
  • First aid kit
  • Night vision binoculars
  • Camera

Find A Suitable Location And Have Patience

At night, it’s difficult to see your prey. Therefore, you need to find a suitable location with a good view of the open terrain. A clear and broad view will be advantageous in your search for prey.

Even after finding a good spot, getting your first prey could take a long time. That is why hunters need to have patience.

Another critical fact to note is to know when to go hunting. There are times when large numbers of animals roam around, while at other times, there are fewer. So, it’s vital to plan your hunting trip at a time when there are a lot of animals out there.

Use The Correct Lighting

Lighting plays a vital role in night hunting. You can’t use just about any light source available. For best results, you need to use the correct lighting, apt for night hunting. Animals are very swift runners; you can easily miss the game due to insufficient lighting. 

Many hunters make the mistake of using white light due to its sharpness. However, white light is inappropriate for hunting as it scares away the game, including foxes, bobcats, and coyotes. Therefore, these animals won’t come close enough for you to get a good shot.

The recommendation is to use red light, which softens the bright light and reflects a soft glow that illuminates the animal’s eyes. Target the light a little above the animal’s head so it won’t run away.

Use Night Vision

There are several night vision scopes in the market if you can afford them for your hunting trip. These include night vision scopes, riflescopes, or thermal imaging devices.

 These are devices that are specifically designed for night hunting. These devices make things clear and bright in low-light conditions.

However, these devices are costly, so many hunters avoid buying them. However, if you are a frequent night-hunter, you should consider investing in these devices.

The thermal scope is ideal to use if you are chasing the game. The thermal heat mapping in these devices increases your visibility.

The rifle scope is perfect when the hunter and prey are both static. It needs only a tiny amount of light to increase the visibility of the game.

The night vision scope gives you a large field of view and is tough to withstand heavy recoil. 

Hunting Call

Hunting calls are an excellent way to attract prey. It is a method that has been in use for thousands of years. In hunting calls, hunters mimic the sound of other animals to call the game.

It is an excellent technique for hunting at night due to limited visibility and concealed prey. Traditional methods use mouth calls that professionals used at the time.

However, now you also get digital call devices that are useful in this regard too. 

The right call will bring the game closer. So, as soon as it is in sight, all you need to do is to aim and shoot.

Dress Appropriately

Dressing appropriately is crucial for successful night hunting. You need to wear dark clothing that will blend with your surroundings.

You could also wear camouflage face paint to conceal your identity even more. It will keep you from being noticed by animals, thereby not signaling your presence.

Ensure you wear comfortable clothes and shoes, so you don’t make a noise while stalking prey.

Use Scent-Free Products

Animals are extremely sensitive to smells, more so than humans. It is their way of detecting predators. Therefore, you must ensure not to hide your position while hunting at night.

You can use scent-free soap to remove all traces of human scent in your body. You can also use scent-free detergent to reduce odor when washing your clothes.

Another product is a scent-free deodorant that you can apply to your underarms to reduce your scent further.

Final Thoughts

Hunting at night is an excellent way to catch prey, as it is when you’re most likely to see them. Becoming a better hunter at night is not challenging if you follow this simple guide.

Make sure you are well-equipped with gear specifically meant for use when hunting at night. Using the correct equipment with the right tactics will help you be successful in your night-hunting trips.

Frequently Asked Questions

Is It Better To Hunt At Night?

It’s better to hunt at night as it is when you’re most likely to see animals and get most of your kills. Many hunters recommend nighttime as the best time to hunt specific prey, including deer.

Why Do Hunters Use Red Lights At Night?

Red lights are suitable for hunting at night as they provide better eyeshine, which helps locate animals better than other colors.

The Best 20 Gauge Ammo for Home Defense, Whitetail, and Upland Game

0

The Best 20 Gauge Ammo for Home Defense, Whitetail, and Upland Game

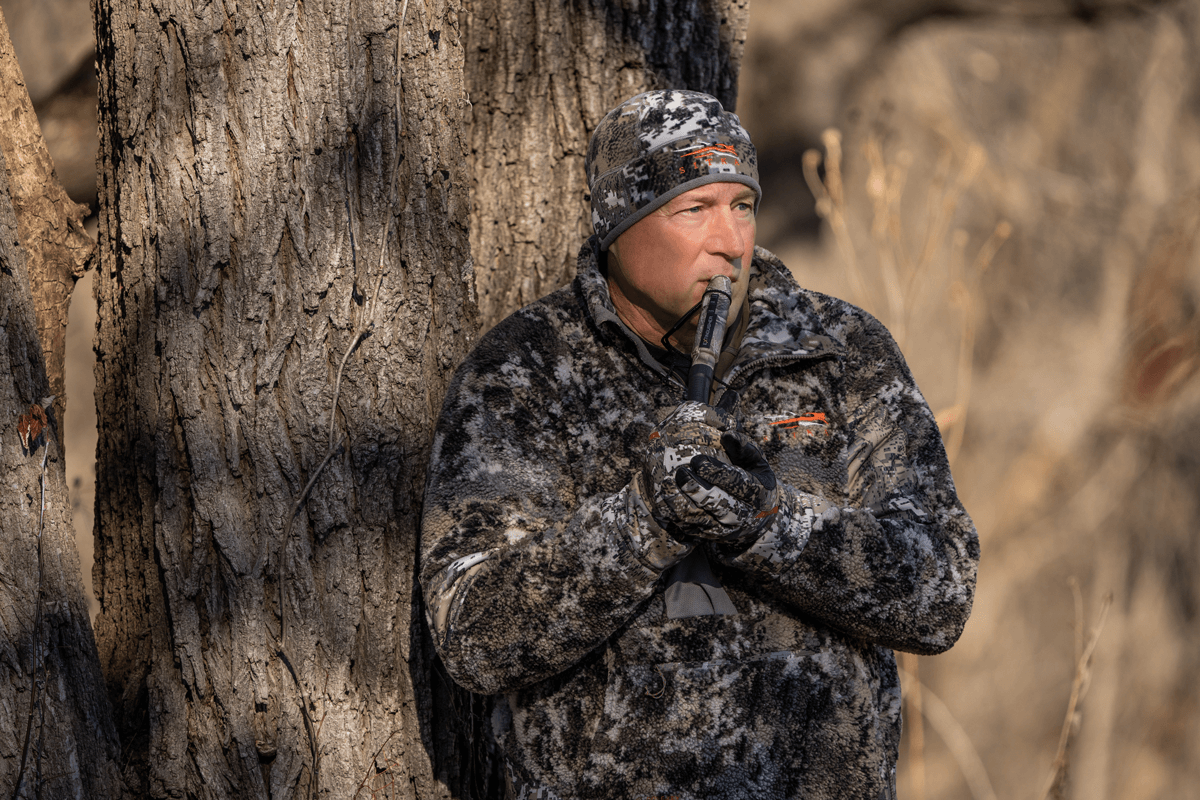
The venerable 20 Gauge is an often-underrated round, but the truth is it’s still an excellent option for sport shooting, hunting upland game or deer, and even home defense. It’s also a great option for new or recoil-sensitive shooters looking for something with less recoil than a typical 12 gauge.

These days, there is a plethora of great 20 gauge ammo choices out there for us to use, so much so that choosing the right one from all the ones available can actually be a little difficult.

We’re going to fix that.

Below you’ll find all of the best 20 gauge ammo options out there today. We’ve got picks for hunting (bird and buckshot), trap/skeet shooting, having fun at the range, and even self-defense. If you simply can’t wait, the best 20 gauge ammo overall is Winchester Super-X #3 Buckshot.

If you’re new to 20 gauge ammo and want to learn more about how to pick the best ammo for your shotgun, check out our Buyer’s Guide HERE.

Otherwise, keep reading because we went through a lot of 20 gauge shotgun shells to get this comparison done, so let’s dive right in.

Top 5 Best 20 Gauge Ammo Picks

1) Winchester Super-X #3 Buckshot – Best Overall

2) Winchester Defender #3 Buckshot – Best for Self-Defense

3) Federal Premium TruBall Rifled Slug – Best Slug Ammo

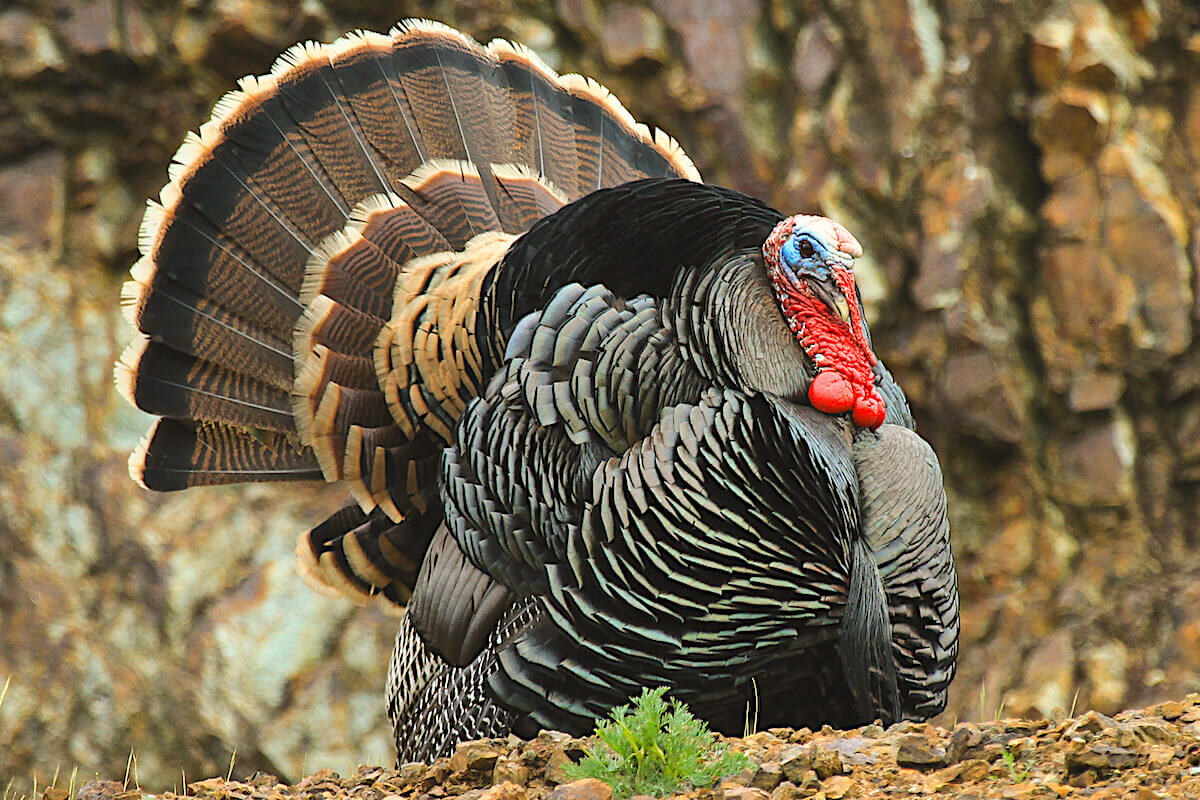
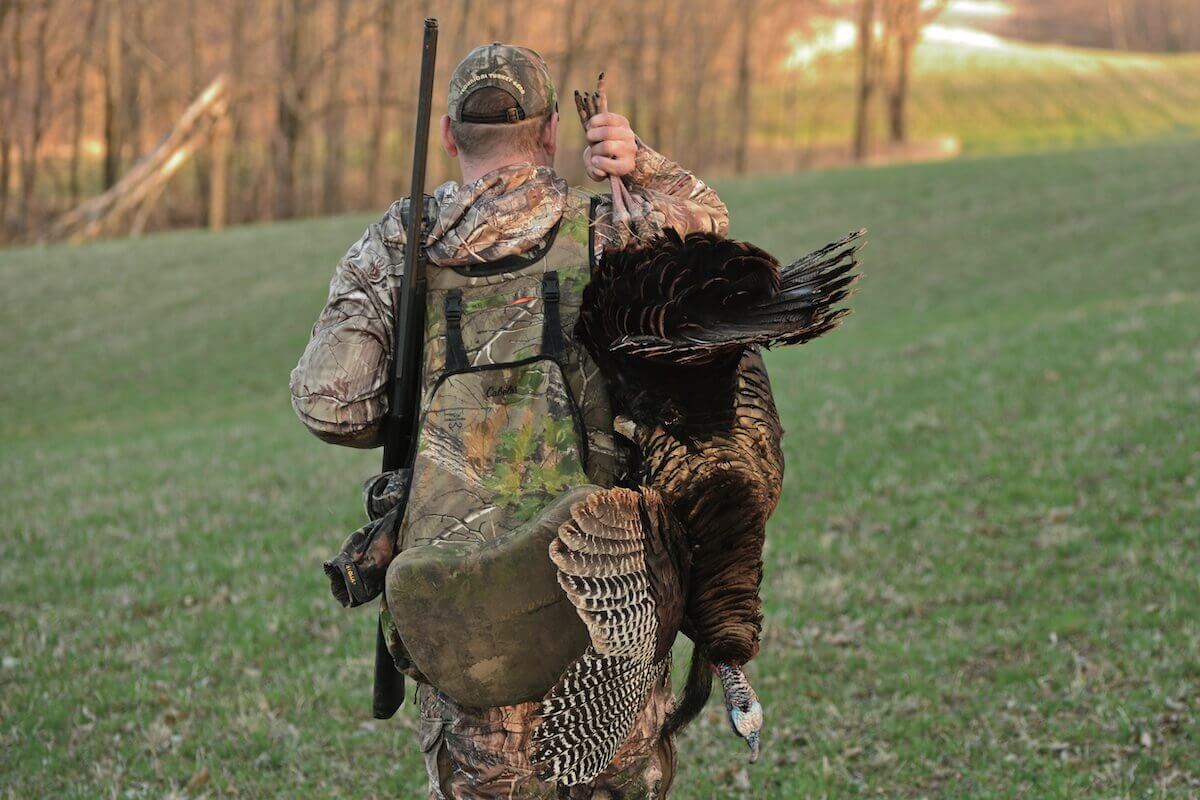
4) Remington Premier TSS #7 Shot – Best Turkey ammo

5) Federal Game Load Upland #7-1/2 Shot – Best for Upland Game

Best 20 Gauge Ammo Overall

Winchester Super-X #3 Buckshot

Specs

  • Shot Load: 20x #3 Buckshot
  • Length: 2 ¾”
  • Muzzle Velocity: 1200 fps

Pros

  • Very affordable
  • Available in bulk
  • Variety of shot loads available

Cons

  • Patterning less consistent
  • Might not cycle as well in gas or inertia-operated guns.

Why We Chose It

Whether you’re blasting clays, hunting on the cheap, or just stocking ammo for the end of days (which feels more and more like it could be any day now) it’s hard to go wrong with Winchester Super X.

Winchester offers a variety of shot loads from target loads/birdshot to slugs and high-brass buckshot. We’ve chosen the latter option here but really they’re all solid options you can buy cheap and stack deep.

The 20 gauge buckshot in particular is a good budget hunting or home-defense option that’s unlikely to let you down, though it does lack a little bit when compared to higher-end ammo that’s more tailored for defense or deer hunting.

Still, Super-X is plentiful, affordable, and more than sufficient for most tasks. And it’s the best on this list for turning money into noise at the range, which is a valuable attribute too. This is by far the best 20 gauge ammo for target shooting you’ll find.

Best 20 Gauge Ammo For Home/Self-Defense

Winchester Defender #3 Buckshot

Specs

  • Shot Load: 20x #3 Buckshot
  • Length: 2 ¾”
  • Muzzle Velocity: 1,145 fps

Pros

  • High-Velocity
  • Ideal Self-Defense Load
  • Copper Plated

Cons

  • More expensive than standard buckshot

Why We Chose It

12 gauge shotguns may be the default scattergun choice for home defense, but the humble 20 gauge makes for a great home defense shotgun too, especially with modern ammo shooting a plated payload

Winchester Defender is a high-brass, copper-plated buckshot round available in segmented and rifled slugs as well as #3 buckshot depending on your needs and whether you’re worried more about longer or shorter ranges.

We’ve chosen the buckshot option here because it offers a good shot size, and less recoil than some other roughly equivalent 20 gauge shells out there. Twenty #3 buckshot pellets are basically the equivalent of emptying a full magazine of handgun ammo with a single trigger press, so this is more than enough for close-range threats.

It has an advantage over traditional deer hunting loads because of that harder copper plating that makes it more akin to a steel waterfowl load, albeit with much larger pellets. We didn’t get the recoil gauges out, but it also seems to have lower felt recoil than some other defensive options.

Best 20 Gauge Slug Ammo

Federal Premium TruBall Rifled Slug

Specs

  • Bullet Weight: 328gr TruBall Hollow Point Slug
  • Muzzle Velocity: 1600 fps
  • Length: 2 ¾”

Pros

  • Inexpensive
  • Very High Velocity
  • 1.4” groups at 50 yards

Cons

  • Non-plated/jacketed lead projectile

Why We Chose It

For slugs, you have quite a few options but our favorite is the Federal Premium TruBall Rifled Slug. This is a great slug option for smoothbore barrels and is perfect for any medium-sized game or even self-defense in a pinch. A ¾ oz lead slug is going to make anything from a whitetail to a home invader take notice pretty quickly.

Federal uses a plastic ball (the TruBall in question) to lock the slug into the wad securely, which helps to firmly center the slug in unrifled barrels which translates into a big increase in downrange accuracy. It also helps the wad and slug to separate cleanly at the muzzle.

This is a great option for anyone that wants more versatility out of a smooth-bore 20 gauge barrel and is perfect for virtually any application that calls for a slug.

Best 20 Gauge Turkey Load

Remington Premier TSS 20 Gauge Ammo

Specs

  • Shot Load: 1.5oz #7 or #9
  • Length: 3
  • Muzzle Velocity:1,100

Pros

  • High-Velocity
  • 18g/cc Weight
  • Tungsten Super Shot Payload

Cons

  • Very Pricey

Why We Chose It

Remington’s Premier TSS is a favorite with turkey hunters that want to make every shot count due to its tight pattern and ultra-dense shot load. The specially-designed, ultra-dense tungsten pellets hit hard and make it easier to go with smaller (and more) shot and still get the same energy downrange due to the increased mass.

Mass x velocity in this case equals more dead birds than you get with a standard lead shot as these tungsten pellets are more than 50% the density of your average turkey load.

It is expensive, but if you’re like me you aren’t bagging birds left and right, so making every shot count matters more here and the extra expense is worth it. For a 20 gauge load, this is especially worth it even at short ranges.

Check out our available stock of Remington 20 Gauge Slugs or Fiocchi 20 Gauge ammo for more options.

Best for 20 Gauge Ammo for Upland Game

Federal Game Load Upland #7-1/2 Shot

Specs

  • Shot Load: 7/8 oz #7-1/2
  • Length: 2 ¾”
  • Muzzle Velocity: 1,210

Pros

  • Low recoil
  • Tight patterns
  • Affordable

Cons

  • Lead shot not allowed in all areas

Why We Chose It

The Federal Game Load Upland #7-1/2 is an excellent choice for do-all upland game load that won’t break your budget. These 20 gauge shells produced a nice, tight pattern in our hands and were extremely effective against quail, dove, and any other upland game that dare cross our path.

Packed into a nice, compact 2 ¾” shell length, Federal Game Loads had slightly less recoil than other offerings from Federal like their Vital-Shok, Power Shok, Hevi-Shot, and Top Gun. These game loads also proved to be a great option for sporting clays, as we had a great afternoon exploding clay pigeons with them.

The only downside to these game loads is that they are loaded with lead shot, which is prohibited in some areas. However, Federal has steel shot Game Loads if you need them, but for the price you simply cannot beat the classic #7-1/2 lead shot payload Federal offers.

Parting Shots

There are a ton of great options out there for 20 Gauge ammo, and hopefully, we’ve given you a good idea of what’s available and where to start your search.

Anyone going after larger game birds might be interested in Remington Premier TSS while anyone looking for a low-recoil self-defense option should check out the Winchester Defender line. Budget-wise, it’s hard to beat good old Winchester Super-X in either birdshot or buckshot loads.

And of course, there are other great options out there that we haven’t covered here, so be sure to check out our full range of 20 Gauge ammo to see if there’s something else that might be better suited to your specific needs.

Don’t forget to check out our Hornady 20 Gauge Slugs page for more slug options.

20 Gauge Ammo Buyer’s Guide

Congratulations on your new 20 gauge shotgun! I promise you are going to fall in love with this scatter gun as all the different varieties of 20 gauge ammo offer a ton of versatility without the punishing recoil of a 12 gauge.

No matter if you got a classic pump action like a Mossberg 500 or beautiful Benelli 828 Over/Under, we can help you pick the best shotgun loads for your new, favorite 20 gauge.

Below is our Buyer’s Guide to help you understand how to pick the right shotgun ammo for your new 20 gauge.

What’s a Gauge? Shotgun Bore Size Explained

If you’re familiar with shotguns, you’ll know that a lower gauge means a bigger caliber. However, if you’re new to shotguns or firearms in general, this can be a confusing concept to grasp.

Handgun and rifle calibers are defined by their internal bore diameter. A 40-caliber handgun has 0.40 inch diameter bore. This means the bigger the number, the bigger the bullet the gun can fire. However, shotgun gauges are determined by a more archaic system.

Gauge is determined by the number of lead balls with the same diameter as the barrel that add up to one pound.

So, for 20 gauge shotguns, it requires 20 lead balls with a 0.615 inch diameter to equal one pound. To put this into perspective, a 12 gauge shotgun has a 0.729” diameter bore.

Although this is really technical, just remember that for shotguns, a higher gauge corresponds to a smaller bore diameter.

Rifled vs Smooth Bore: What Slugs to Buy?

When it comes to deer hunting, you simply cannot beat a slug for pure stopping power and terminal performance. And although everyone seems to be gushing over their beloved 12-gauge deer guns, the 20-gauge shotgun is an extremely effective whitetail terminating machine.

Shotgun barrels come in two options, smooth bore or rifled. Smooth bore shotguns have no internal rifling and are the more classic design. Rifled barrels have rifling similar to handguns and centerfire rifles that help stabilize slugs by introducing spin to the projectile.

However, purchasing slugs for your new 20 gauge venison harvester can be confusing as there are two varieties available: rifled and sabot slugs. And understanding which shotgun ammo goes with your barrel is critical for downrange performance.

Rifled slugs are designed for smooth bore shotguns.

These slugs have rifling on the projectile that helps the slug begin rotation in the barrel. Rifled slugs shout NOT be used in a rifled barrel as this can cause leading and will negatively impact accuracy.

Sabot slugs are essentially a large bullet fired from a shotgun. The bullet is held in a plastic cup that falls off after the slug leaves the barrel. Sabot slugs are excellent for long range shots as the traditional bullet design is considerably more aerodynamic than a rifled slug.

Sabot slugs are used in rifled barrel shotguns.

Sabots can be safely fired from smooth bore shotguns but you will likely find they are considerably more accurate when fired from a rifled barrel.

Birdshot vs Buckshot: Shot Size Explained

The difference between birdshot and buckshot is the size of projectiles (shot/pellets) loaded into the shotshell and their penetration ability.

Buckshot fires larger pellets in lower numbers while birdshot fires smaller pellets in much higher quantities. Buckshot loads have high penetration while birdshot typically have lower penetration ability.

Read more about buckshot and birdshot here: Buckshot vs Birdshot.

As its name implies, birdshot is primarily designed for hunting birds like quail, grouse, pheasant, duck, goose, and even turkey. However, birdshot is capable of small game hunting and is quite capable against rabbits, squirrels, and even snakes.

Although primarily developed for bird and small game hunting, birdshot is also used for shotgun shooting competitions such as skeet, trap, and sporting clays.

birdshot pellet chart

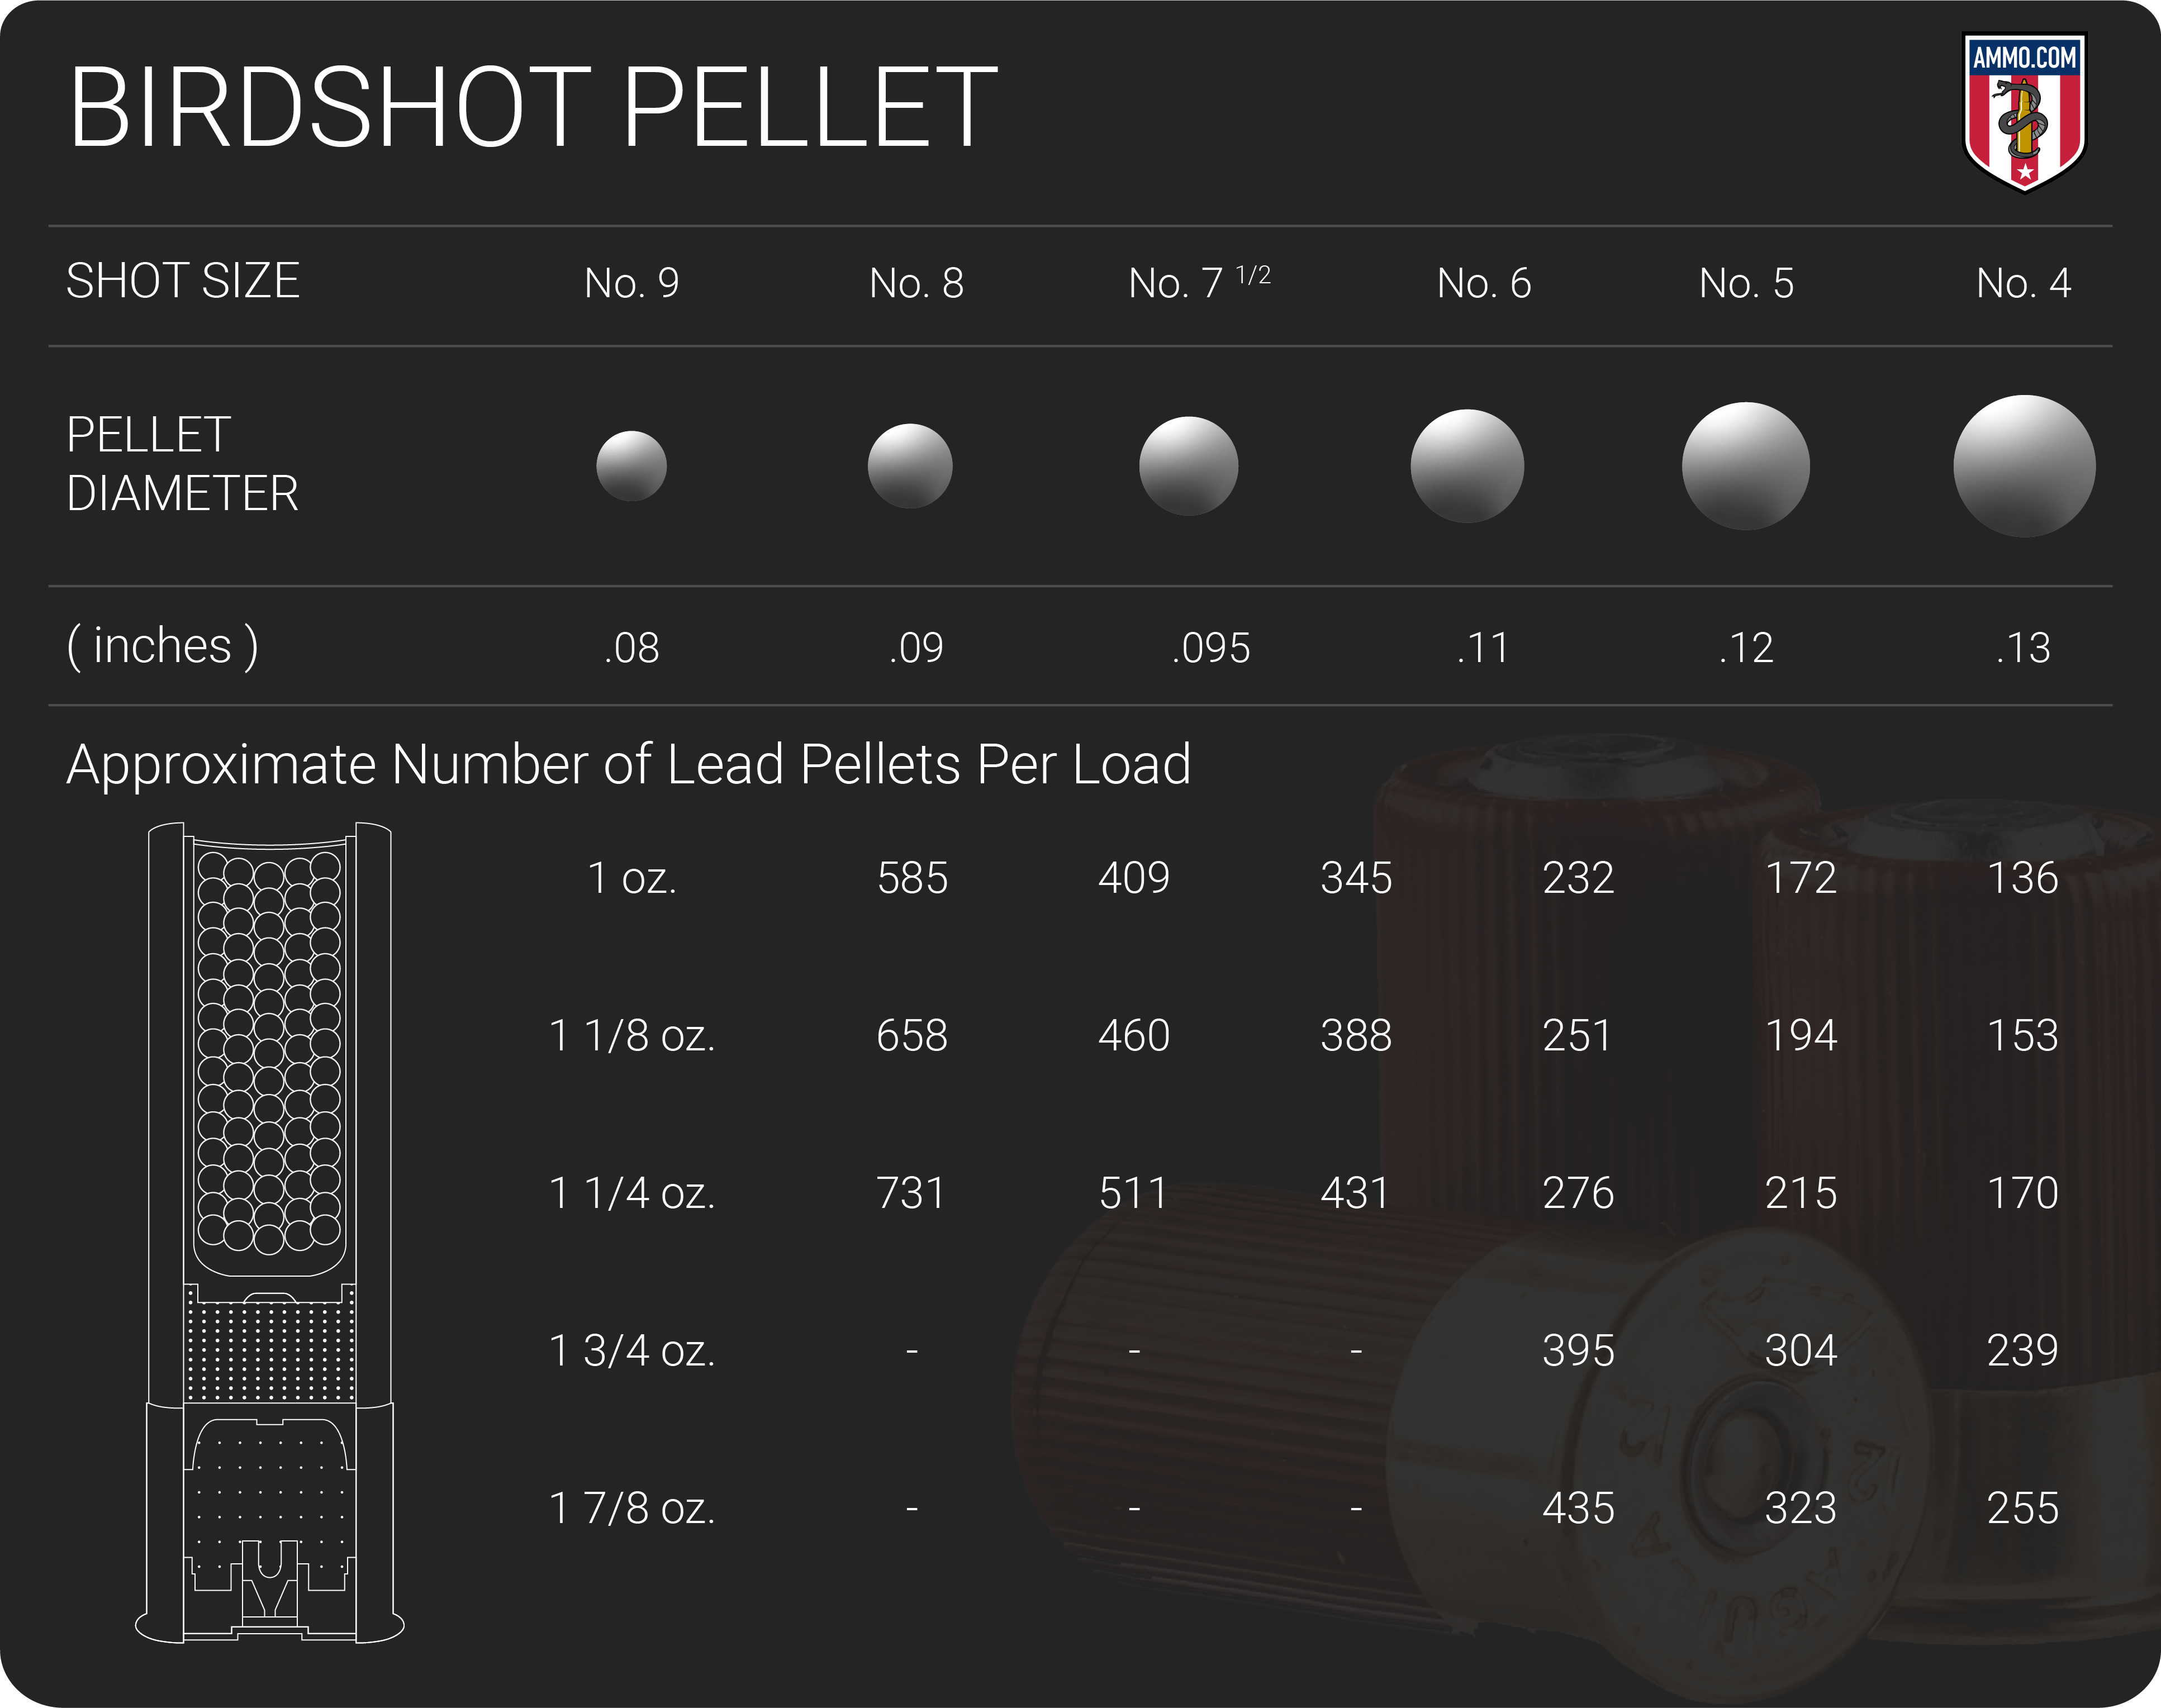
Pellet shot size works on an inverse scale, just like shotgun gauge, meaning that the larger the shot number, the smaller the pellet size. For example, #5 shot is larger than #8 shot. The most common birdshot sizes you’ll see at the ammo counter are 7, 7 ½, 8, and 9 which can be used for bird hunting and sporting clays.

Although some birdshot loads can carry well over 500 pellets, these lightweight projectiles don’t carry a lot of kinetic energy. Although perfect for felling birds or bursting clay pigeons, they are less effective on large game or in self-defense.

For that you’ll need something with a bit more oomph behind it…like buckshot.

Buckshot, like its name suggests, was designed for hunting medium to larger game. As a “buck” is a term for a male deer, buckshot was primarily designed for whitetail hunting.

Buckshot fires larger pellets but fewer of them. Furthermore, they are often loaded with more powder than birdshot, giving them higher recoil but increased penetration and range. However, unlike birdshot, buckshot typically has a tighter pattern as you want all that stopping power put into a smaller area to harvest big game.

Just like with birdshot, buckshot gauge is measured in reverse. This means that No. 4 Buck will be smaller than No. 1 Buck.

buckshot pellet chart

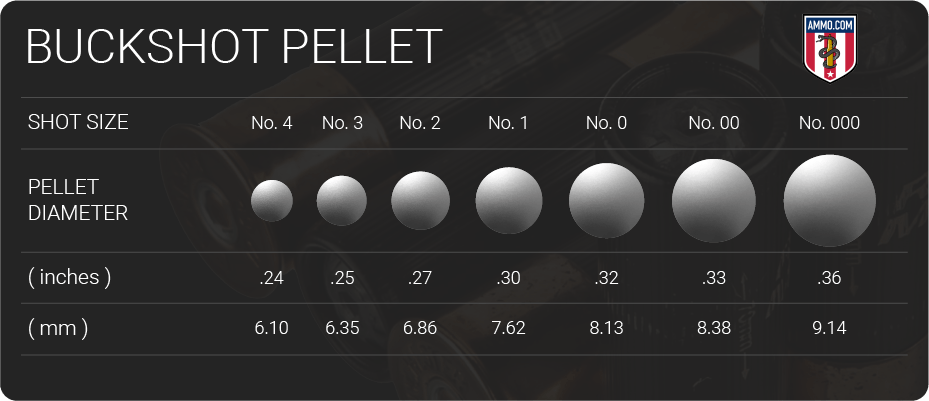
Buckshot is typically not used on birds or small game due to the amount of kinetic energy it carries. Using buckshot on a bird is considered, by many, unethical and typically renders the majority of the meat inedible.

Although buckshot might not be the best choice for bird hunting, its widespread use by law enforcement has led many homeowners to rely on a home defense shotgun loaded buckshot shells for protection.

Why are 20 Gauge Shotshells Yellow?

One thing you might notice is that virtually every 20 gauge shotshell is colored yellow. This is done to prevent them from being confused with 12 gauge shotgun ammo.

If a 20 gauge shotshell we accidentally loaded into a 12 gauge shotgun, a 12-gauge shell loaded behind could cause the 20-gauge shell to fire inside the magazine causing catastrophic damage to the firearm and potentially the shooter.

Although there is not an industry mandate that all 20-gauge shotgun ammo be yellow, most every manufacturer holds to this unofficial standard.

To learn more about how 12 gauge compares to 20 gauge, check out this article: 12 Gauge vs 20 Gauge.

What Shotgun Ammo Should You Buy? Buckshot vs Birdshot vs Slugs

Now that you have a better understanding of what types of 20 gauge shotgun shells are available, let’s talk about what you should be loading into your scatter gun.

For general target shooting, sporting clays, or upland game, you’re going to want to get some game loads or bird shot. This type of shotgun ammo has low recoil and fires a lot of tiny pellets to give you a good pattern and the highest probability of hitting your target. These loads are typically filled with #7-1/2, #8, or #9 shot and can be bought in bulk from companies like Rio, Fiocchi, Remington, Winchester, and Federal.

For home defense, buckshot is the best choice. A typical 20-gauge shotshell filled with #3 buckshot will contain around 20 pellets. This means when you squeeze the trigger, you are essentially firing the equivalent of twenty 0.25” caliber bullets at the same time. That will stop just about any threat pretty quickly if you ask me! Multiple pellets also have the added advantage of increasing your chances of hitting vital organs to incapacitate a bad guy as quickly as possible.

For deer hunting, slugs are your best friend. Although buckshot was designed for big game hunting, many states and territories prohibit its use for this purpose. This is because at longer ranges, buckshot spreads out and increases the potential for only wounding a deer. Slugs, on the other hand, provide hunters with higher levels of accuracy at longer ranges and focus all the shotgun’s power into a single point. Slugs increase stopping power and reduces the potential for merely wounding the animal.

Shotgun slugs can be used for home defense, however over-penetration is a big problem. A 20-gauge shotgun slug is great when hunting in the woods where over-penetration doesn’t really matter, but indoors you need to consider the safety of your family members. A 20-gauge slug will typically have no issues passing through any would-be home invader and several layers of drywall behind them, possibly hitting an innocent bystander or a loved one. Therefore, it is our recommendation that buckshot should be primarily used for home defense over slugs.

Now that you know which shotgun ammo to buy, let’s get back to our Top 5 List of the best 20 gauge ammo available by clicking HERE!

First focal plane or second focal plane riflescope for hunting?

0

First focal plane or second focal plane for hunting

There’s a ton of options out there nowadays when it comes to selecting a riflescope. You have MOA, MIL, various magnifications, different objectives, tube sizes and a ton more. But one of the hardest decisions seems to be around what focal plane to select.

In the past, I’ve always used second focal plane riflescopes for hunting. They have worked great for me on my rifles and I’ve taken a ton of animals with them, but a few years ago I wanted to try something new so I switched to a first focal plane system. Mainly this switch happened because I wanted to help people out with their decisions so I could better explain what option might work best for them and my opinion on them. They both work great, but I wanted to have real-world experience behind each design.

What is a first focal plane (FFP) riflescope?

For starters, we need to define a first focal plane riflescope. This is probably the scope version that most people in hunting are a little unfamiliar with. On a first focal plane riflescope, the reticle grows as the image gets bigger when increasing magnification and it does so at the same rate. And as you decrease magnification, the reticle also shrinks as the image gets smaller. This is all because the reticle is located in front of the magnifying lens assembly in the scope.

A first focal plane riflescope also means you can always use those hash marks on the reticle for any elevation holdover or windage no matter what magnification you are on. This can be great if you don’t have time to dial in your turret in a hunting situation and you need to use the hashmarks.

As I stated earlier, the first focal plane riflescope was new to me a few years ago. And since the switch, I don’t know if I’ll ever go back.

The only downside I see is when you’re at super low magnification the reticle is almost too small to see, especially if you’re in thick timber or hunting in low light. I really notice this on my Razor HD Gen II 4.5-27×56 riflescope that is in a first focal plane setup when I go down to 4.5 power. To deal with this, if you’re hunting in a state that allows an illuminated reticle to hunt with, the illumination could allow you to make use of low power in the thick timber on a first focal plane setup. But for the most part, I don’t see this as a hindrance at all since 95% of the time I’m not hunting in thick timber at lower power. But it’s just something you should think about if you’re going to purchase a new riflescope.

Possibly one other downside is if you’re trying to shoot at a very small target in practice at a longer distance because your reticle may block the target due to it getting larger at max power. I’ve seen this happen when I’ve been practicing out in the desert while aiming at something really small and and trying to be very precise.

One of the biggest benefits of a first focal plane riflescope is if you need to quickly make a shot and need to use the elevation or windage lines in the scope, this is when a first focal plane riflescope will shine. For the most part, since I’m a hunter first and not a competition precision rifle shooter, these situations are a little rare for a hunter to need to quickly use elevation holdover marks, but it’s nice to have that feature if you’re ever in this situation on the buck of a lifetime.

Cost is another consideration. Usually, a first focal plane riflescope is a little more expensive than a second focal plane riflescope.

What is a second focal plane (SFP) riflescope?

Second focal plane riflescope is what everyone is most likely used to in hunting. The biggest thing you’ll notice on a second focal plane riflescope is the reticle stays the same size, and the target grows as you increase the magnification. This is due to the reticle being located behind the magnifying lens.

A second focal plane riflescope seems to be nicer to aim through because you have a finer aiming point due to the reticle staying small as you hit full magnification which is great when practicing long-range shots as your reticle isn’t covering up the spot you are trying to aim at.

The one main downside of a second focal plane riflescope is when dealing with adjusting the magnification to anything other than max power and using the reticle for any holdover or windage when taking a shot. If your second focal plane riflescope is set for max power, that means that the holdover lines in the reticle are only dialed in at that one magnification and will not be at the correct yardages if you drop to a lower magnification. So if you drop to a lower magnification and use the holdover lines, it won’t be to scale and you’ll miss the target. So to fix this, if you want to use any of the hashmarks, you must remember that it is only truly calibrated at max magnification.

Keep in mind… that no matter what, in a second focal plane riflescope you can always dial your turrets and use the center of the reticle no matter the magnification you are on. This change in impact discussed above is when using any of the hashmarks outside of the center of the reticle when you are on anything but max power.

This is why whenever I’m hunting, I’ll always shoot at an animal at the highest magnification. Second focal plane riflescopes have worked wonders for a ton of hunters throughout the years. Again, remember that dialing up on the turret on a second focal plane riflescope works perfectly if you just aim at the center dot of the reticle no matter what magnification you are on.

In summary, if you use a second focal plane scope and you want to use the holdover hashmarks, know it will be only valid for one magnification.

If I’m going to need to use the windage or elevation marks in my riflescope, 99.99% of the time I’m going to be at full magnification which means everything will be accurate in a second focal plane setup.

The way I’d explain my reasoning for a second focal plane scope for a lot of years is this; pretty much any shot over 300 yards I’m going to be at full magnification. So at that point, it really doesn’t matter what riflescope plane I’m using since I will be at full magnification and would be able to use the hashmarks on a second focal plane if needed, and I would also have the same benefits of a first focal.

Below is a quick series of graphics to help showcase some of the differences side by side at low magnification and high magnification.

5x magnification

25x magnification

First focal plane vs second focal plane at 25 power

Once again, on the first focal plane riflescope on the 25x power example, you’ll notice that the reticle grows as the image gets bigger due to adding magnification and it does so at the same rate. And on the second focal plane image, the reticle stays the same size as you increase the magnification.

In closing

Vortex Razor HD AMG first focal plane riflescope

One last thing I should mention, if you have a riflescope with turrets in either first or second focal plane, it does not matter what magnification you are if you aim using the center of the reticle. You will still make an impact with the correct distance dialed in the turret. You could be at low magnification on a second focal plane riflescope and dial in for a shot with the turret and make an impact. Then you could dial in for a longer shot using the turret and crank the magnification all the way up and still impact the target aiming at the center.

So what do I prefer after using both?

At this point after using both for a long time now in hunting and practice, I’m still leaning toward first focal plane riflescopes. My dad, who also is very into rifles and long range shooting for practice and hunting, doesn’t like second focal plane scopes at all anymore either. Then if you’d ask my brother who I shoot with a ton… he prefers second focal plane on his hunting setup.

So at the end of the day, both focal planes will absolutely work wonders for hunting, it just comes down to what your eyes might prefer and your use case.

If you have the ability, find a friend who has a different scope than you do and really look at a first focal plane and second focal plane side by side. This is going to be the easiest way to determine what style you prefer.

Don’t forget, if you ever have any questions about anything optics, you can reach out to our Optics Manager Cody Nelson. He is a wealth of knowledge and a person you should take advantage of when deciding what optics to purchase. Cody can be reached at optics@gohunt.com or call him at (702) 847-8747 | Ext. 2.

Check out all the riflescope options we carry here

Join INSIDER

The John Feazell Buck – Virginia Archer Slams New State Record

0

LAST UPDATED: May 8th, 2015

When John Feazell stood in the hunting department at Wal-Mart prior to the 2009 hunting season, he was faced with perhaps the biggest decision of his life. Okay, not really. But he was faced with the decision of whether or not to buy a new grunt call, not just any grunt call, the new Flextone Bone Collector. “I have about 20 different grunt calls at home, so I don’t think I need another” said John, as he put the call back on the shelf and began to meander through the aisles. As he was walking away, however, he recalls, “Something in my head just told me to go back and buy it, so I bought it. I figured that call, capable of the snort-wheeze sound, would work on a mature dominant buck.” Little did John know that his impulsive acquisition of a new grunt call would lead to a new state record in the state of Virginia.

John Feazell harvested this monster Virginia whitetail last fall. With over 220 inches of bone, he is easily the largest whitetail ever taken by bow in Virginia.

Saturday November 7th, 2009 was the second Saturday of the Virginia Muzzleloader season. The evening prior, John headed afield with his Muzzleloader to a spot where he usually experienced good deer activity. Luck was on his side that day, as he harvested a “solid 8 pointer.” The following day he and his father decided to head to their hunting property in Botetourt County, Virginia. Since he had just harvested a nice buck the day before, he lent his Muzzleloader to his father, who does not own one. “I figured I would let my dad use my Muzzleloader since I just shot a good buck. I told him that I had plenty of time left to get a good buck with a bow,” says Feazell.

As much as John Feazell loves whitetail hunting, he says it’s not his favorite animal to hunt. “Turkey hunting is my bread and butter, I live for Spring Gobbler Season,” says Feazell. However, when bow season comes around, he takes the sport very seriously. “I wouldn’t call myself a serious bowhunter, but when I bow hunt, I’m serious,” Feazell aptly describes. “I’m extremely cautious when it comes to my scent, especially. I like to wash my clothes in unscented detergent, dry them in earth scented dryer sheets, then they immediately go in my scent free tote. I leave little room for error when it comes to the whitetail’s nose,” he says. So with bow in hand, Feazell headed to one of his bow stands, since the rest of his hunting party were carrying muzzleloaders. Perched just below the crest of a mountain, Feazell made mention of this being a good place to experience activity as two giant rock formations funnel deer to two different saddles in the ridgeline.

John Feazell with his new state record.

After settling into his stand well before daylight, Feazell sees his first deer at 7:45 a.m. “I see it’s a big bodied deer, but I can’t make out what it is. It takes 5 steps and I see antlers. Oh man, golly what a deer!” The buck, then in the open, broadside at 50 yards and Feazell remembers thinking, “There is no way I am taking the shot, I am not screwing up this deer.”

But just as quickly as he came he was gone. The monster buck had topped over the mountain and out sight. Feazell recalls two sobering thoughts, “First of all, no one is going to believe when I tell them of the buck I just saw, and I just wish I had my muzzleloader.” A little over an hour goes by, and Feazell jokingly remembers contemplating going back to camp and getting a Muzzleloader and “sitting on that mountain for a month, or however long it takes for me to get that buck.” In the meantime a doe and a half racked 4 pointer make their way to Feazell’s location. “That doe came by at 20 yards, and for a split second I thought about drilling her. But I thought don’t be stupid, don’t shoot this doe,” he says.

A truly once-in-a-lifetime buck! From drop tines, to mass, to bladed brow tines, this buck has it all.

Feazell’s will power proved to be strong as he elected to pass on the doe. With the doe and 4 pointer still in sight, he noticed the young buck staring off in one direction, “looking shaky.” Feazell then turns and sees the big buck coming back from behind a Chestnut Oak tree. “No way, there is no way it’s that buck. You just don’t get second chances like this. No way, I’m going to shoot this deer,” Feazell recalls. As the big buck makes his way back towards the younger buck and doe, the doe beds down and Feazell remembers, “I just KNEW that as soon as that doe bedded down, the buck would do the same thing. And, 5 seconds after the doe laid down, the buck plopped down 30 yards behind me.”

Sitting in his ladder stand, Feazell had a limited viewing window of this buck. The bowhunter had to stand for nearly 45 minutes, peaking around the tree his ladder stand was hung on. After time, the younger buck, which had been browsing on acorns, angles from Feazell’s left towards his stand. This grabs the attention of the larger buck, and feeling threatened that this youngster is going to steal his doe, stares down the younger buck before they both eventually shift their attention to the doe.

It was then that Feazell remembered about his grunt call. “If it would ever work in a million years, it will work right now,” he says. Grabbing his Flextone Bone Collector, Feazell calls, and on the second snort-wheeze the larger buck comes to full posture on the younger buck. With ears back and hair bristled, the bruiser buck makes a false charge at the younger buck, and that’s all it took for the younger buck to “get out of dodge.”

The John Feazell buck officially scored 221 2/8″ as a non-typical and was believed to be at least 5 1/2 years old.

Making his way from the Chestnut Oak towards the doe the buck stops at 30 yards broadside. “I’d rather all my shots be 20 yards or less,” Feazell says. “But I’m comfortable out to 30.” With a window the size of a circular dining table to shoot through, Feazell had to bend his knees just a tad to fit the arrow through. He draws releases and misses! The arrow deflects off a small twig and harmlessly flies off. With his entire focus and attention on the doe, the missed shot confuses, but doesn’t alarm the buck. Unaware, of what just had happened the buck settled down, and the doe began to walk away.

Feazell, remembering of another call in his arsenal of gear, grabs his Primos The Great Big Can call and turns it over. The doe then comes back towards the tree stand within 25 yards in Feazell’s shooting lane, before angling back down the mountain. In the meantime, the monster buck began rubbing, or as Feazell put it, “thrashing and tearing up and down” a young Chestnut Oak. In the process the buck had lost sight of his doe.

What a gorgeous whitetail. Fortunately, this buck was harvested by an ethical, hardworking sportsman in John Feazell. Congratulations, John!

Remembering his Flextone Bone Collector call again, Feazell snort-wheezes twice in succession. Immediately the buck’s hairs bristle up and he goes into full posture walking stiff legged broadside. “Two more steps, two more steps,” Feazell recalls will put his buck at 18 yards. Feazell then draws his PSE Firestorm Lite and releases his Carbon Express arrow tipped with a Two-Blade Rage. Thawck! “You drilled him, you drilled him,” Feazell says. Watching his buck tear down the mountainside some 100 yards, Feazell saw his buck begin to stagger then fall down. An avid sportsman, Feazell said he simply couldn’t wait to claim his trophy. “I know about the 30 minute rule on even lethal hits, but I couldn’t help it. I let out a war holler and ran straight down to my buck, I saw him go down,” he says. With a 200+ plus inch deer on the ground within sight, I think we can all forgive Feazell’s eagerness to recover the fallen giant. After having sat and listened to John Feazell tell the story of his buck, I am convinced that it could not have happened to a better person. “I was just meant to kill that deer, it was 99% luck. All the cards had to fall together and they did, the Good Lord just wanted me to kill that deer,” he concluded. The John Feazell Buck ended up officially scoring 221 2/8 Pope & Young inches as a non-typical, making him the biggest buck ever taken by bow in Virginia. With 38 5/8 inches in non-typical points, the buck still grossed 189 2/8 inches as a typical.

What is a Good Rifle Scope for 300 Yards?

0

Accuracy and precision are two key factors in shooting at any distance and with any firearm. A distance of 300 yards isn’t far enough yet to be considered ‘long range’ shooting, but it is farther than a lot of people are used to. At 50 or 100 yards mistakes and shooting errors aren’t as glaring. Without the proper knowledge and tools, at 300 yards you might be off the paper entirely, or at least far from the center. So, today we will be discussing rifle distances, scopes, tips for selecting good rifle optics for 300 yards, and shooting tips to remain effective at this distance.

Understanding the Challenges of Shooting at 300 Yards

To make informed decisions about the right 300 yard rifle scope first, we have to respect that this isn’t just backyard shooting. At 300 yards mistakes are a big deal, and the scope you choose should be considered with the same level of seriousness. Let’s discuss the challenges of hitting targets at 300 yards and beyond, and how the right rifle scope can be the difference-maker.

Bullet Drop

Bullet drop refers to the projectile’s descent due to gravity. At 300 yards you can expect to see the following.

  • A .308 caliber round will drop roughly between 10-12 inches (depending on specific load, conditions, and ballistic coefficient of the round).
  • A 6.5 Creedmoor will see a drop of around 7-9 inches.
  • A 5.56 round experiences a drop of approximately 11-13 inches.

Wind Drift

Another factor to reckon with is wind drift — the sideways motion of a bullet caused by crosswinds. Ballistic coefficients tell us how aerodynamically efficient a bullet is, which becomes more relevant as we shoot farther. The higher this coefficient, the less the bullet will be affected by wind drift.

For a 7 mph crosswind at 300 yards:

  • A .308 caliber round will drift by about 10-12 inches.
  • A 6.5 Creedmoor will drift around 7-9 inches.
  • The 5.56 round will experience a wind drift of approximately 9-11 inches.
Bullet drop and wind drift

Target Visibility

It’s basic logic: the farther the target, the harder it is to see clearly. When you’re aiming at 300 yards, being able to discern your target clearly becomes more important. A good rifle scope will not only offer magnification to bring the target into closer focus but also have clear glass that give a crisp image.

A jump from 100 to 300 yards in shooting is no small feat. Bullet drop, wind drift, and target visibility are challenges that shooters must navigate. However, with the right rifle scope hitting targets at 300 yards becomes far more achievable.

Considerations Of 300 Yard Scopes

When selecting a rifle scope for long shots, understanding specific scope features will guide you towards making a choice in deciding what a good rifle scope for 300 yards will be.

Parts of a scope
Parts of a scope

Magnification Range

Magnification is a key factor in providing a close-up view of your target. For 300 yards, a magnification range between 5x and 12x is considered suitable. It provides a clear view of the target while maintaining a decent field of view (FOV) to observe surroundings, helping shooters aim precisely and also track moving targets or changing conditions swiftly. Semi-auto shooters are sometimes concerned about being able to quickly acquire targets for closer shots, and many elect to add an offset red dot on a rifle mount for quick close-range shots.

Objective Lens Diameter

The objective lens of a rifle scope determines how much light the scope allows to influence the brightness and clarity of the image. A larger objective lens enables more light, rendering a brighter and clearer image, especially in low-light conditions. However, be mindful of the size and weight it adds to your setup, as a larger lens can be bulkier.

Reticle Type

A reticle, or “crosshairs” help a shooter select their point of aim. For 300-yard shooting, a Bullet Drop Compensator (BDC) reticle can be beneficial as it provides holdover points to account for bullet drop at various distances. Alternatively, a Mil-Dot reticle provides dots along the x and y-axes. These can be used to estimate distances and holdovers, aiding in adjusting for windage and bullet drop more dynamically.

Adjustment Turrets

Adjustment turrets are knobs on a scope that allow you to modify the reticle’s position for windage (horizontal) and elevation (vertical) to sight in your rifle scope at your desired distance. These shouldn’t be changed for windage and elevation of a single shot like in the movies.

Optics Quality

High-quality glass characterized by clear, sharp, and bright images, makes a huge difference in seeing at distances. Look for scopes with lenses that have coatings to reduce glare and enhance light transmission. Superior optical quality reduces eye strain and provides a clearer sight picture, which becomes more important as distance increases.

Durability

Your scope needs to be durable enough to withstand recoil and weather elements. Seek scopes that are fog-proof, and constructed with materials like aircraft-grade aluminum to provide longevity and reliable performance such as the Apex Falcon V2 LPVO Scope.

Eye Relief

Eye relief pertains to the distance from your eye to the scope’s ocular lens while still providing a full-sight picture. Too much or too little eye relief causes scope shadowing.

What is eye relief
Eye relief on a scope

It also protects your eye from ‘scope eye,’ or ‘scope bite’ which happens when the gun recoils and your eye is too close. It doesn’t feel good… I’m told.

Generally, an eye relief of at least 3.5 inches is considered safe and comfortable for most shooters with a more powerful rifle. Eye relief usually decreases as magnification increases, it is important to select the right picatinny mount for your scope.

Find The Right Scope For Your Long-Range Rifle

In selecting a proper 300 yard rifle scope you have to make sure it is compatible with your rifle. Many scope reticles on the market that compensate for bullet drop are caliber-specific and not interchangeable. So be sure to do your research or you may find yourself with an expensive scope that you cannot use.

Calibers For 300 Yard Rifle Scopes

Each caliber has different external and terminal ballistics which should be considered. For example, of the three calibers we have been discussing 6.5 Creedmoor has the highest ballistic coefficient. BC is part of the external ballistics of the round and dictates why it is less affected by external factors.

. A few popular calibers for 300-yard shooting include:

  • .308 Winchester: Known for its accuracy and versatility, the .308 Winchester has a relatively flat trajectory, which means it doesn’t drop as quickly at longer distances. It also delivers good energy and is less affected by wind, making it a popular choice for long-range shooting.
  • 6.5 Creedmoor: The 6.5 Creedmoor is highly regarded for its long-range precision. It combines a high ballistic coefficient with low recoil, allowing for accurate shots well beyond 300 yards. It’s known for maintaining velocity and energy at extended ranges.
  • 5.56 NATO: While the 5.56 NATO is not typically associated with extremely long-range shooting, but is still very effective at 300 yards and beyond, especially with the right barrel twist rate. It’s lightweight, which reduces recoil, and it’s readily available, making it a budget-friendly option for intermediate-range shooting.
Rifle calibers
Popular rifle calibers

Each of these calibers has its own ballistic profile, influencing aspects like bullet drop and wind drift at 300 yards, which should inform your choice of scope and reticle. The terminal ballistics of each round should also be considered based on your goals for the firearm. Terminal ballistics is the study of what happens to a projectile, such as a bullet, upon impact with a target.

Selecting Reticle For 300-Yard Shooting

The reticle is essentially your aiming point within the scope, and choosing a type that complements your shooting style and the ballistics of your caliber goes a long way to increase precision with distance.

BDC Reticles

Bullet Drop Compensator (BDC) reticles feature holdover points that visually represent bullet drop at varied distances, making it easier to quickly adjust your aim for long shots without needing to make any rifle scope adjustments. BDC reticles are calibers and bullet weight specific so choose one that aligns with your shooting profile.

Mil-Dot Reticles

Mil-Dot reticles are another fantastic option for long-range shooting. They feature dots along the crosshairs that represent specific distances (in milliradians) and can be used to estimate the distance to your target and adjust for both bullet drop and windage. This type of reticle allows for swift adjustments and is popular among military, tactical shooters, and hunters.

BDC Mil-dot reticle
BDC reticle (left) and Mil-dot reticle (right)

Illuminated Reticles

Illuminated reticles incorporate adjustable lighting into the reticle design. This helps visibility in low-light conditions – like during dawn or dusk, or in heavily shadowed areas.

This enhancement can significantly improve sight picture and target acquisition when natural lighting is suboptimal. However, don’t forget to swap out batteries, or bring extra on your hunting trip.

Looking for a scope that really does the job?

The Tacticon Armament Falcon V3 it a dedicated rifle scope that features an illuminated reticle that allows you to choose between red, green, and blue. The different color choices allow the scope to be more adaptable in different environments. With a 3x-9x range the scope is very capable at 300 yards, and the Mil-dot reticle assists shooters with hold overs for distance and wind drift. The scope comes in at a very affordable price, right around $150, and can be used for a variety of calibers.

Tips To Improve 300-Yard Shooting Performance

Effective shooting at 300 yards doesn’t only depend on choosing the right rifle scope, accounting for wind drift, and bullet drop. It also heavily relies on your shooting techniques, understanding of environmental factors, and knowledge about the ballistics of your chosen caliber. Let’s discuss some aspects that can fine-tune your 300-yard shooting abilities.

General Shooting Tips

There’s no replacement for proper shooting technique. Even minor inconsistencies in your shooting fundamentals are magnified over longer distances, transforming what might be negligible at 100 yards into a significant miss at 300 yards. Here’s a closer look at some general tips:

  • Trigger Pull: A smooth, consistent pull avoids disturbing the rifle’s position during firing.
  • Breathing: Pause your breath while squeezing the trigger to reduce movement.
  • Steady Shooting Position: Establish a stable position, ensuring that the rifle is well-supported and your body is relaxed. A minor error in any of these can result in a several-inch deviation at 300 yards, whereas the impact would be minimal at closer ranges like 100 yards.

Adjustment Factors

  • Wind Reading: Understanding how to read the wind and compensate for its effect on your projectile makes a big difference. Wind can push your bullet off course, and its impact is more pronounced at 300 yards. Look for tall grass, leaves, really anything that moves to help estimate wind speed.
  • Range Estimation: Accurate range estimation is key to compensating for bullet drop. Mil dot and BDC reticles will help with this. Range finders are also very useful. Don’t forget your analog skills though. In the movie Jarhead, Jamie Foxx asked his Marines how he knew the target was 300 yards away. One Marine replied “Three football fields, Sir.” When in doubt, use what you know.

Ballistics

Understanding the ballistic characteristics of your chosen caliber and ammunition is a fundamental piece of compensating for bullet drop and wind drift. The difference in bullet drop from a 55gr FMJ and 77gr OTM 5.56 round is about 4 inches at this distance, with the 77gr having less drop due to its higher ballistic coefficient.

Final Notes

Successful shooting at 300 yards comes down to marksmanship fundamentals first and foremost. After this having an accurate rifle is the next essential. Without these two there is no way to consistently make accurate shots.

A good scope will both increase accuracy and consistency once these two pieces are in place. For 300 yards it is best to have a scope with a way to compensate for environmental factors tailored to the caliber of the rifle.

Proper magnification between 5x-12x will greatly increase visibility and accuracy by making it easier to aim. Look for a scope with crisp, clear glass and keep it clean so it will serve you for years to come.

The opinions expressed in this post are those of the author and do not necessarily reflect the views and opinions of Tacticon Armament.

5 Spring Turkey Vocalizations & When to Use Them

0
5 Spring Turkey Vocalizations & When to Use Them

If a gobbler is traveling with a hen, hit them with some cutts. These sounds provoke aggressive responses from hens. If she comes in, the tom should follow. (Shutterstock image)

  • This article on turkey hunting is featured in the Midwest edition of March’s Game & Fish Magazine. Learn how to subscribe

When I started turkey hunting as a clueless 14-year-old, the loudest voices in the expert turkey space all said the same thing:

Yelp three times and shut up. Those were the dark ages of turkey hunting.

Since then, we’ve learned just how conversational turkeys can be—and how deep their vocabulary really is. To be a consistently successful turkey hunter, you need to understand this proclivity for conversation and know how to interact with turkeys accordingly.

1. YELPS

If you can’t yelp, you can’t call turkeys. This call functions to serve several purposes. The ladies use it to keep track of one another (gobblers too, just less frequently). Hens also use it to rope in a randy gobbler, and a good series of yelps often leads to other calls as intensity ramps up.

The key to understanding yelps is grasping cadence and structure. A yelp is a two-note call that drops off sharply at the end. Most beginners default to a one-note yelp, and it doesn’t work.

They also string their yelps together too quickly, which sounds unnatural. Whether you use a diaphragm call, slate or box, think “slow and purposeful” with your two-part yelps.

2. PURRS

Most of the purring you’ll hear from wild turkeys will come from hens as they preen themselves and slowly, contentedly pick their way past your blind. When birds fight, especially gobblers, they’ll engage in a souped-up purr that often transitions into other calls, but what most hunters should think about is the softer version. This is an all-clear, confidence-boosting call.

Whether you channel your inner Cajun and roll your Rs with a mouth call or drag a striker softly across a slate, this call is for close birds that need a little coaxing to cross the red line. It’s a great way to convince a hung-up gobbler that he should cover the last 50 or so yards.

3. CLUCKS

The cluck, a one-note sound that might remind you of that of a chicken, falls close to the purr on the vocalization spectrum. Content turkeys cluck, just like they purr. The two sounds are often made back-to-back, and if you learn how to do this, you can further sell the ruse that all is good with your faux flock.

The easiest way to do this is to end a purr on a slate call with a quick, soft pop of the striker. The key here is subtlety, just like it is if you make clucks with a mouth call. Content birds don’t scream their lungs out, so you want to keep your library voice going here. Again, if you’ve got birds that are hung up or respond negatively to more aggressive calling, clucking might be the ticket.

4. CUTTS

Cutting is the “come at me, bro” of the turkey vocabulary—though, technically, it’s more of a “come at me, sis.” This sound, which really ramps birds up, can be made like a cluck on a slate call but with some serious force and rapid-fire succession. It often triggers a dominant response from hens, which usually pulls in the boyfriends and can turn a dead setup into an action-packed gobble fest.

The cutt is also easy to make with a mouth call, but probably best created with a box call. Ensure you’re chalked up and confident, and tilt the paddle at as much an angle as you can. Then, bring it home with authority several times in a row.

Cutting, like all calling, is situationally specific. If you’ve got a hen that’s chatty, you’re off to a good start. You can also use the cutt around midday when nothing is going on, but you’ll want to start with softer yelps and purrs first. I often use two separate calls—a slate and a mouth call, for instance—to create calling sessions that sound like hens getting after one another. These sessions always lead to aggressive cutting, and they’ve brought in many longbeards over the years, especially on heavily pressured public ground.

5. GOBBLES

We all know what a gobble is, but most of us don’t actually know when to use it as a call. The best answer is “not very often.” Gobbling is something to consider if you know for certain that no one can potentially sneak up and shoot you with a load of No. 4s. It’s also a last resort for a hung-up gobbler that you can see but who just doesn’t believe your normal turkey talk. Occasionally, the competition aspect of throwing a gobble into the mix does the trick and you can coax a longbeard in closer.

There are gobble-shaker calls out there, but you can also hold a box call upside down and quickly shake it back and forth for a passable gobble. If you’re confident with a mouth call, you can shake your head like a lunatic and create a loud, realistic-sounding gobble that will have spit flying and your snoozing hunting partner checking his underwear. While a gobble might not be a great call for very many situations when you want to draw a longbeard into range, it’s an excellent locator call. In fact, in my experience, it’s the best one out there.

Turkey Calling
Read the situation and create the right sounds to communicate with birds. Starting subtly and building to aggressive calling often works best. (Photo by Tony. J. Peterson)

Locator Lowdown

Play a productive game of Marco Polo with toms.

As discussed, if you can gobble, you can get turkeys to gobble, which is the whole point of a locator call. Also, as mentioned, it’s not always smart to go around sounding exactly like the thing everyone in the woods is trying to kill. Fortunately, you’ve got other options.

Crow calls, owl hooters and even peacock calls are all available to spring longbeard chasers who just need to hear a few real birds to devise a plan. If you’re trying to roost a bird, an owl hooter is tough to beat (although a gobble is as good or better). If you’re running and gunning all day long and just want a midday bird to sound off, try a simple crow call. The best for this is a series of five caws, with the first three drawn out and the last two made very quickly (listen to real crows and this will make sense).

Spring Turkey Vocalizations
Clockwise from top left: Primos Veronica, HS Tongue Series, Zink Wicked Series Box, Flextone Potluck Glass.

CLUTCH CALLS

Seven of the best turkey calls to carry this spring

Owning—and knowing how to use—a variety of calls improves your odds in the spring. While plenty of options exist, running diaphragm calls like the Primos Veronica ($6.99; primos.com) is an excellent way to expand your vocabulary. This three-reed, spur-cut mouth call is designed so that users can produce everything from the high-pitched kee-kee to a low-and-slow raspy yelp. Another great option for mouth calls is the Hunter Specialties Tongue Series ($29.99; gsmoutdoors.com). A four-pack contains options for producing every sound a turkey can make thanks to the unique cuts of the latex.

Naturally, you’ll want more than diaphragm calls, and no turkey hunter worth his or her salt would be caught dead in the woods without a box call and a pot call. In the former category, it’s hard to find a better option than Zink’s Wicked Series Box ($119.99; zinkcalls.com). This premium call is hand-built, hand-tuned and is double-sided to allow for different tones. Pot call fanatics should check out Flextone’s Pot Luck Glass ($12.99; flextonegamecalls.com). This compact and weatherproof call is designed to keep working even when the rain comes, all while producing crisp, loud-as-you-need-them sounds.

What to Use as Coyote Baits: Here’s What Works!

0

Wild game meat is an excellent bait for coyotes. These wandering canines love fleshy game, so pig meat and dear meat make great coyote bait. The pungent odor of aged meat can also be highly effective in luring these predators from afar, thanks to their sharp olfactory senses.

What Is the Fastest Way to Attract Coyotes?

Using meat from a coyote’s natural diet is effective most of the time. However, if their habitat is teeming with prey, coyotes may not be able to pick up on the scent as quickly.

Therefore, if you want to capture their attention, try baiting traps with exotic varieties of meat or organs that aren’t endemic to the local ecosystem.

Fish, beaver, and gopher meat are all hearty options that a coyote will enjoy. If you can procure these foods, you’ll have a higher chance of attracting these curious predators.

How Do You Bait a Coyote at Home?

Baiting a coyote at home will require you to have a meat source that they’ll enjoy. A frozen hunk of meat from a deer or pig carcass can do the trick. It doesn’t have to be cleaned beforehand; the bloody scent that emits from these carcasses can be used to attract coyotes from faraway distances.

At home, you can set up foothold traps or neck snare traps around your property. Coyotes are unpredictable creatures and can threaten humans and pets, so these traps ensure that any live trap mishaps may be avoided.

How Do You Bait Coyotes for Hunting?

A baitsicle, or a frozen food source, is an effective lure to hunt coyotes. These piles can include mounds of liver, fat, and entrails from game such as deer and hogs that will trigger a coyote’s scavenging instincts.

Ideally, place your bait near the edge of a woodline or an open, forested space where coyotes will feel safe venturing into. Position yourself about 100 yards away from the bait, where you can secure a good vantage point.

Once you see a coyote approaching the bait, take your shot. You may also use a coyote call lure to mimic these creatures into entering the baited area.

What Scent Attracts Coyotes?

The best attractant scents for coyotes are musks that mimic their natural diet. These food lures include the smells of blood, guts, and rotting flesh from deer, cows, and other wild game in the surrounding area.

Exotic meat scents can also be effective trapping lures for coyotes. Coyote urine may also be used as an attractant for these coyotes. It may also attract bobcats, raccoons, and foxes, so use them sparingly if you somehow have access to this liquid.

Lastly, a coyote gland lure can be an effective predator bait. This trapping bait indicates a coyote’s presence, triggering a male’s territorial response.

coyote close up in a field of dry brush

What’s the Best Time of the Day to Hunt Coyotes?

Coyotes aren’t strictly nocturnal but prefer prowling the lands between dusk and dawn. For this reason, many hunters prefer to start their coyote hunts around sunset and continue into the night.

That said, it’s challenging to spot coyotes during the nighttime, so plan your hunt during the break of dawn. The little bit of light in the sky can provide enough illumination to spot the predator without the aid of external light sources.

In a similar vein, sunset hours may also be effective. There’s enough ambient light, and coyotes are about to start a new day of hunting on their own.

Is It Better to Hunt Coyotes Day or Night?

If you’re coyote trapping, set it up during the day and leave it open for a coyote to wander in during the night. If you’re predator hunting on your own, you might want to hunt during the golden hours.

These are the times of the day when there’s enough illumination in the sky to spot a coyote. But it’s not so bright that the animals return or are still inside their habitat. If you’re aware of the coyote’s den, then you can also plan a hunt around their denning schedule.

Coyotes usually stick to one place to rest and raise their young, so finding and waiting around their den can lead to a successful hunt. Just be careful—these coyotes can get aggressive if they suspect their cubs are in danger!

Can You Bait Coyotes With Dog Food?

Coyotes have been known to enter yards to eat dog treats left out in the open. Especially in semi-urban areas, using this as a type of bait is entirely possible.

Depending on the coyote, they may even develop a preference for dog food over certain types of meat so that they can be ideal baits for some trappers.

Are Coyotes Attracted to Dog Urine?

While male dogs pee as a mark of their territorial boundary, coyotes don’t often get the memo. Coyotes are deterred by wolf urine but not dog urine.

In fact, the urine of female dogs in heat can attract their wild canid cousins like coyotes to enter your property. As such, it’s essential to control your dog’s urination if you live in an area with a high coyote population.

coyote walking through winter landscape with dried brush in the landscape

Do Coyotes Travel in Twos?

Coyotes travel individually or in pairs when they hunt. They may also form a coyote family of around 2 to 3 adults and 7 to 11 cubs, but these families will eventually break up and hunt on their own once they reach maturity.

They may work collaboratively with other coyotes to take down large prey, but if they’re not part of the family den, they won’t find the need to travel in a pack with this new group.

What Food Attracts Coyotes?

Coyotes have a varied diet consisting of meat, fruits, and detritus. Their typical diet includes:

  • Rodents
  • Dog food
  • Carrion and dead game
  • Livestock
  • Poultry
  • Insects
  • Fruits

A coyote most commonly eats rodents and marsupials, which comprise about 75% of its diet. This includes mice, voles, chipmunks, skunks, rabbits, and squirrels.

They’re not picky when it comes to their food, either. They enjoy feasting on various types of meats, even once they’ve never eaten in the past.

Should You Call to Late-Season Bucks?

0
Should You Call to Late-Season Bucks?

Don’t be afraid to use calls during the latter portions of deer season. However, when doing so, focus more on soft contact grunts and doe bleats. (Illusion Systems photo)

The rut is over. The majority of deer season is behind us. The late season is here, and soon, it’ll be a distant memory, too. But for now, we still have tags to fill. With dropping testosterone, and months of heavy hunting pressure, it’s a different game.

So, it begs the question, should you tap that late-season deer on the shoulder? Or completely stay off its radar? Well, it depends. But most of the time, it’s probably best to hit the mute button.

Late-Season Dynamics

Mike Dukart, CEO and owner of Illusion Systems, and J.J. Dukart, president of The Deer Society, are both seasoned whitetail hunters and experts in whitetail vocalization.

Naturally, it was a breath of fresh air when these guys — who make a living selling grunt tubes (and other deer gear) — advised caution on calling to pressured and late-season bucks. That kind of genuineness and honesty can be rare in business, and it immediately captured my attention.

Of course, most states’ gun seasons fall in November and December. That translates to a lot of applied hunting pressure throughout the last two months of the year. It takes a toll on deer, and these animals respond to that.

Bucks can be aggressive during the late season, too. However, it’s usually in the form of body language, not vocalizations. (Josh Honeycutt photo)

“In Minnesota, gun season opens up when they start becoming the most boisterous and active (pre-rut and rut),” Mike says. “All of this human pressure (and guns) that’s going on in their normal habitat completely changes their behavior. They get skittish. We don’t get to interact with them a whole lot because they’re overcalled and over-pressured. They go nocturnal. Seeing a deer and trying to naturally call or communicate with it is 100% harder once they start getting pressured.”

However, to minimize impact on their own grounds, Mike prefers to leave his hunting properties alone during times of heavy pressure. This gives deer a safe zone, because he’s certain that whitetails almost always filter into areas that offer less pressure. They also respond better to calling later in the year.

Alternate Forms of Communication

As deer transition into the post-rut and beyond, they become much less vocal and less outgoing. While deer were very extroverted throughout the rut, they’re becoming the introverted beings they always are after the breeding season ends, and after being hunted hard.

That doesn’t mean they aren’t communicating though. Mike and J.J. both agree that deer still convey messages to one another.

“I think scent and visual cues are some of the things that pick up during (and after) gun seasons,” J.J. says. “Once all of that pressure kicks in, from a communication standpoint, the more natural you can be the better. Deer have been on edge for weeks. Human scent is all over the woods. The rut is winding down. Their minds are a little clearer than they were a few weeks ago.”

In other words, it’s probably best to lay off the grunt-snort-wheezes, and other battle cry and war whoop vocalizations, too. Both Mike and J.J. notice other forms of communication really pick up after deer have been pressured.

“One of the things that I’ve been picking up on with trail cameras, and also just throughout the years, is the amount of communication via scent, scrapes and rubs,” Mike says. “This definitely increases and becomes the dominant way for them to communicate. Bucks pee on everything. They’re rubbing glands on everything they can find. They’re not only letting the does know they’re there but also letting the other bucks.”

Of course, the rut kickstarts this behavior. Testosterone levels are rising. Does are pushing away fawns. Every deer in the woods is freaking out and wondering what’s going on in the world, as the Dukarts put it.

Calling-Late-Season-Mock-Scrape.jpg
Deer communicate via scent year-round. Make some mock scrapes to hunt near and post trail cameras over. (Josh Honeycutt photo)

That said, by the late season, dropping testosterone, hunting pressure and lack of will to confront rival bucks causes these deer to get quieter. But they definitely still communicate via body language and scent.

“By smelling each other, they know exactly who it is,” Mike says. “So, if that buck comes in there and makes a rub or hits that scrape, other bucks know who it is, and if he isn’t from that area.”

These guys create situations to take advantage of this behavior. They make mock scrapes in key areas that are advantageous for hunting, or near cameras where they can gather intel.

Deer use posturing and other varieties of body language to transfer messages, too. Short of using a decoy — which isn’t a common late-season tactic — this isn’t actionable information for hunters though.

Making the Right Late-Season Call

The truth is that deer hunting isn’t black and white. It’s highly situational. You might see a deer during the late season that’s acting extremely aggressive. That’s generally the exception and not the rule, however. More times than not, it’s better to be passive in the vocalization department.

“I would call less frequently,” Mike says. “I wouldn’t challenge deer or put a lot of emotion into anything. Even if I did an estrus bleat, it wouldn’t be a crazy or wild one. If anything, I’d try to mimic that hunter mentality of the does coming back together with the fawns. There’s a little bit more communication going on there. Create an illusion of deer that a buck might want to come check out.”

Generally, that comes in the form of soft doe and fawn bleats, and subtle grunts. Don’t be very loud, though. Keep it quiet, and keep the frequency to a minimum. That’s normal behavior for this time of year.

J.J. Dukart poses with a great big buck. (The Deer Society photo)

Like Mike, J.J. highly encourages keeping things natural, such as light sparring or soft contact grunts. Given that the occasional adult doe or doe fawn might enter estrus late in the season, he even gives the nod to a few doe estrus bleats. He certainly stresses keeping the volume down, though.

“Start low enough that maybe they don’t hear you, and then work your way up,” J.J. says. “A lot of people call too loud and put deer on the defensive. It spooks and educates them.”

Calling aside, there are certain tactics that work better during the late season. Mike acknowledges this, and that’s pretty cool.

“At this time of year, as far as calling goes, I would try more to get deer patterned,” Mike says. “They’re settling into a place where they’re around food, and [where] they feel more comfortable. They’re going to [create] a pattern during the late season. I would focus more on that, and be aggressive on getting into position to get a shot at that deer than I would about trying to call a deer into a stand that’s been there all year long.”

Enough said.

Best Air Rifle Deals

Popular Posts

.22 vs .25 Air Rifle: The Ultimate Comparison Guide

0
When I first got introduced to the world of rifles, I often thought that a bigger caliber meant better performance. So, I thought that...

Best Air Rifle Brands – Who Makes the Best Pellet Gun?

0
In Jeff Bezos’ own words: "A brand for a company is like a reputation for a person. You earn reputation by trying to do hard...

Pump Air Rifles vs Break Barrel

0
Exploring the Pros and Cons: Pump Air Rifle vs Break Barrel - Unveiling the key differences and advantages between two popular air rifle mechanisms....

Can you dry fire a gamo air rifle?

0
Unveiling the truth behind dry firing a Gamo air rifle, this intriguing headline delves into the possibility of safely practicing without ammunition. Join us...

Air gun 101: What is a PCP air rifle? Is PCP gun the best...

0
A PCP air gun is one of five types of air rifles in the market today. PCP air guns have become more and more...