Home Blog Page 127

Best 5 Thermal Scopes 2024

0
Best 5 Thermal Scopes 2024

We have some great new Thermal Rifle Scopes in 2024. Here is a list of my Best 5 Thermal Scopes 2024. We are currently in the process of reviewing them and will be posting videos on The Old Deer Hunters Youtube Channel.

ALL Scopes Available at Outdoorlegacygear.com

Pulsar Thermion 2 DUO D XP50 Thermal/Day Scope

Best Thermal/Day Scope – Multi-spectral

Best Thermal/Day Scope - Multi-spectral

Pulsar Night Vision has release the Pulsar Thermion 2 Duo DXP50, the first multi spectral hunting riflescope. It combines thermal imaging with of full-colour daytime optics to provide the hunter with a true night or day hunting scope.

Thermal Image for Night Hunting – Full Color Digital Image for Day Hunting

The Pulsar Thermion 2 Duo DXP50 is based on the Thermion 2 XP50 Pro, plus a 4k full-color channel for daytime hunting.

The Thermal can be use in darkness, fog or rain, and the 4k resolution digital camera gives you a clear, full color image during the day. Plus you can record your hunts.It requires only one click of a button to switch between the two channels – thermal and daytime digital. It’s simple, fast and convenient.

Using the Thermion Duo DXP50 as a daytime riflescope is simple and easy as the lens does not require focusing. The daytime digital channel gives you a focused image at any range.

There is an equal field of view for both thermal and digital channels. You can easily switch between thermal and digital without compromising focus on the observed object and clearly identify your target any time or any weather condition.

The new riflescope is equipped with a high-sensitivity European-made Lynred sensor with < 25 mK NETD which unprecedented heat separation when observing in low temperature contrast conditions such as rain or fog.

The 640×480 pixel resolution ensures exemplary detail and identification of the target and the surrounding landscape. The size of the sensor allows for a wide field of view for comfortable and informative observation of both static and dynamic scenes.

Just like the Thermion 2 LRF, the Thermion Duo DXP50 features high-precision ambidextrous focusing knobs. They now come with a fin lever, which perfectly does the job for precise focusing of the thermal channel. Positioned on both sides of the scope, the knobs make this device comfortable for both left- and right-handed users.

High-definition digital zoom allows the hunter to zoom-in with up to eight times magnification without loosing image quality—ideal for long-distance shooting. One of the Best 5 Thermal Scopes 2024.

best christmas gifts for hunters 2024

See our Christmas Gifts Suggestions For Hunters

Pulsar Thermion 2 LRF XG50 Thermal Scope

Best ALL PURPOSE Thermal Scope

Best ALL PURPOSE Thermal Scope

The 2024 Pulsar Thermion 2 LRF XG50 is a new thermal rifle scope with a lot of improvements over the original Thermion XG50 introduced a couple of years ago. It has a new thermal sensor, Laser Range Finding (LRF) capability, magnification of 3X-24X and is priced at $6000.

The Thermion 2 LRF XG50 has a new sensor for improved image quality and overall performance. The original XG50 used a BAE sensor, but it did not quite live up to normal Pulsar performance standards.

Fast forward to 2024 and Pulsar has upgraded from the Thermion XG50 to the Thermion 2 series. The Pulsar Thermion 2 LRF XG50 now has a new 12-micron Lynred thermal sensor for improved image quality and overall performance. Plus, it now has laser range finding capability and Stream Vision Ballistics software (coming soon) that actually plots the aiming point for the target. (more about that later).

The combination of LRF and 3X base magnification make this scope ideal for coyote hunters who have to often deal with longer shots than hog hunters. It is also great for hog hunters because the field of view is 46 feet wide at 100 yard. The LRF is a good option for all hunters because it is so difficult to judge distance at night.

The new Thermion 2 LRF XG50 is a 640×480 high definition thermal rifle scope. The differences between the new Thermion 2 LRF XG50 and the Thermion 2 XP50 Pro are the magnification range and the different types of thermal sensors.

The XP50 Pro has a magnification range of 2-16X with a 17-micoron <25 MKv sensor. The Thermion 2 LRF XG50 has a magnification range of 3-24X with a 12-micron <40 MKv sensor. I compared these scopes side by side, and both have about the best image available in this price range of under $6000.

The Big Question everyone has “Is the XG50 image quality as good as the XP50?”

The Thermion 2 XP50 Pro has a little better heat separation capability so the image may be a little better in bad weather. The Pulsar Thermion 2 LRF XG50 has a 12-micron sensor that makes the animal appear larger in the screen with more detail. Lets take a look side by side and see how they compare in the video below.

After testing the two scopes side by side, the answer to the Big Question is YES! The image of the LRF XG50 is as good as the XP50 Pro.

The image of the Thermion 2 LRF XG50 is as good or maybe better because you can see more detail of the target animal, and the detail of the background is not bad either. Just look at the video abovw to see for yourself. One may be better than the other in different weather conditions, but on a good thermal night, they are both great. The video shows you a good image, but the image in the scope is even better. You will be very pleased with the image quality.

Hunting With The Thermion 2 LRF XG50 is totally enjoyable. There are no “I wish my scope had…) thoughts going through your mind. I think it has the perfect magnification range, a superior image and with all the features of a Pulsar Thermion 2, you can hardly ask for more. One of the Best 5 Thermal Scopes 2024.

Awesafe Gun Safe, Biometric Gun Safe for Pistols*

Best 5 Bedside Handgun Safes awesafe

Awesafe Single Bedside Gun Safe $65 at AMAZONAwesafe 2-Handgun Bedside Gun Safe $119 at AMAZON

InfiRay Bolt V2 TH50c Thermal Scope

Best Thermal Scope For Coyote Hunting

Best Thermal Scope For Coyote Hunting

The new InfiRay Bolt TH50c V2 now has audio recording in 2024 to go with one of the best thermal scope images available on the market.

The InfiRay Bolt TH50-C Thermal Riflescope is the latest addition to the Bolt series of thermal rifle scopes and is distributed in the United States by IRay USA. The InfiRay Bolt TH50 3.5x14x5 has a 640×512 12-micron thermal processor, 3.5X base magnification, and a 50mm objective lens. It is a tube-type thermal scope that looks very much like a traditional glass scope which makes it more user-friendly for bolt-action rifles. Of course, it is right at home on a modern sporting rifle as well. The image is displayed on an OLED screen, with a 2560×2560 pixels resolution. It has all the features needed to be a great scope and carries a price tag of $5495.

Features Include:

  • High-Resolution 640X512 Sensor
  • Rugged Aircraft Aluminum Housing
  • Internal Recording
  • Wifi connectivity with InfiRay Outdoor App
  • 8 Hour internal battery
  • 18500 Removable/Rechargeable Battery Capable (4hrs)
  • Full Circular Display
  • Tactile Turret Adjustment
  • 30mm Mounting versatility
  • Weighs 33 ounces

I was very happy to see InfiRay and IRayUSA offer the new Bolt series of Thermal Rifle Scopes. I have to say I am a fan of the new tube-type thermal rifle scopes. Not only do they work much better on my bolt action Tikka T3, but they are much easier to use. The controls are handier to use in the dark than the older models with just a row of buttons on top. Zooming is done with the top turret knob. The power, record, brightness, and palette buttons are grouped together on top of the eyepiece making it very convenient.

Overall, the InfiRay Bolt TH50-C is one of the best thermal scopes I have used. It has an excellent image, is solidly built, comes with a 5-year warranty, but most of all it is easy to use. If your main hunting interest is coyotes, there is nothing in this price range that will beat the overall capability of this scope. The scope has excellent image quality, the dual battery system gives you 8-10 hours of battery life with inexpensive 18500 backup power in your pocket. Controls that hunters use the most at the tip of your fingers. It may not record audio, but it is a coyote killing machine. One of the Best 5 Thermal Scopes 2024 I have tested.

If you buy this scope, you will not be disappointed. AVAILAVABLE at Outdoorlegacygear.com

Best Compact Thermal LRF Scope

Best Compact Thermal LRF Scope

The AGM Varmint LRF TS50-640 2.5-20X Thermal Rifle Scope is AGM’s top-of-the-line laser range-finding thermal scope. This new thermal rifle scope gives you a great image and a built-in, easy-to-use Laser Range Finder for under $4995. In addition, this new scope is powered by a single rechargeable 18650 battery that will give you up to 4-6 hours of hunting time on a single charge.

The AGM Varmint TS50-640 2.5-20X LRF is a compact thermal scope with laser range finding capability. It uses a 640×512 resolution, 12-micron thermal processor. It has a base magnification of 2.5X and a digital zoom to 20X. The AGM Varmint LRF TS50-640 2.5-20X has a 1024×768 OLED screen and provides an excellent image day or night.

This optic can be used as a thermal riflescope or handheld monocular and can be applied to scenarios such as patrolling, hunting, and static observation. It is only 8.5 long × 2.6 wide × 4.2 in tall and weighs less than 25 ounces.

The built-in laser range finder of the AGM Varmint LRF is accurate out past 600 yards. It has a small box on the screen that you bracket the target in, then a single push of a button gives you the range that is displayed in the upper right corner. The range has a single or continuous 15-second scanning mode.

One 18650 rechargeable battery gives the device up to 6 hours of continuous operation time on a high-grade fully charged battery. Compared to a similar scope using CR123 batteries, the Varmint’s 18650 rechargeable battery will save you about $10 per hunt. Two 18650 batteries are provided with the scope.

An external 5V power bank (battery pack) can be used via a USB to USB-C connector but you probably won’t need it if you charge the two supplied batteries before your hunt. The device has 16 Gig’s of storage for onboard video recording and image capturing. It does not capture audio. An internal Wi-Fi module for live video streaming and video/image recording via the T-Vision application are included.

Another plus for this thermal riflescope is the mount. It comes from the factory with the excellent American Defense Manufacturing single lever quick detachable mount at no extra charge. This single lever configuration is not only secure but makes reattaching the scope to the rifle quick and easy without a need to re-zero. One of the Best 5 Thermal Scopes 2024.

N-Vision Optics Halo-XRF Thermal Scope

Best Thermal Scope On The Market <$10K

Best Thermal Scope On The Market <$10K

The N-Vision Optics Halo-XRF Thermal Scope is arguably the best thermal scope on the market. It is priced at $9,495.00. Based on the American made BAE thermal core, it has a fantastic image even above the base magnification. It also runs on 18650 batteries and has an ADM QD mount. One of the Best 5 Thermal Scopes 2024 – actually the best of all.

If you can afford this scope, buy it and you will be extremely happy.

See N-Vison Halo XRF Video Review Here

AVAILAVABLE at Outdoorlegacygear.com

Specifications

Calibration (NUC) Manual: Manual

Identification range: 380 yards Display Type: OLED 640&times;480 B&W Size: 8.9 x 4.1 x 3.4 inches Recognition range: 726 yards

Detection range: 2020 yards

Power: two 18650 batteries

Digital Zoom: 1x/2x/4x/8x

Sensor Pixel Pitch: 12 um

Remote power: USB 5.0V

Resolution: 640 x 480

Magnification: 3.5x

Refresh Rate: 60 Hz

Weight: 41.5 oz

Lens: 50mm F1.1

Focus: Fixed

What Is Cane Pole Fishing and How to Get Started

0

Cane pole fishing might seem primitive compared to other types of rod fishing, but you’ll be pleasantly surprised by how fun and exciting it is, even if it is reel-free. But how do you get started on this fishing method that dates back generations?

We’ll walk you through everything you need to know about cane pole fishing, including how to make one!

What Is a Cane Pole?

Before buying your supplies for a DIY cane pole for fishing, you need to know what a cane pole is. Don’t worry, though. It is not as complex as you think it is.

A cane pole is a long stick that usually has a 1″-1-1/2″ butt diameter and is between 8-foot-20-foot in length. Some are made from bamboo, while others are graphite or fiberglass. Unlike modern fishing rods, a cane pole doesn’t have a reel, drag system, and line guide. As a matter of fact, you will be using a line as long as the pole itself, if not a tad longer. The hook is at the end of the line, wherein you can use live or artificial baits.

What Are the Different Types of Cane Poles?

Bamboo fishing rods and poles are the most popular. However, there are other types of cane poles that you can use.

Telescopic Cane Poles

B&M BW4 Black Widow Telescopic Rod, 13-Feet, 4 Pc (Telescopic)

Telescopic poles are made from graphite or fiberglass instead of treated bamboo. This choice of material makes them more lightweight. Since they are collapsible, often shrinking half of their length, they are more compact for camping trips and air travel.

For convenience, many fiberglass telescopic poles also have add-ons like a metal eye tip and line keeper. Length can also vary too, ranging from 8-foot to 20-foot.

Calcutta Poles

Calcutta cane poles are made from solid bamboo, specifically the Calcutta Bamboo (Dendrocalamus Strictus) species. They are highly prized in the fishing community because of their strength and flexibility, which many argue is 100% better than fiberglass. A high-quality Calcutta Bamboo pole is also resistant to rot from saltwater.

These poles are available in various lengths, although most are between four and twenty-five feet long.

Pro Tip: The longevity of bamboo poles is determined by how well they are cared for.

Jigger Poles

Jigger poles are typically 15 to 20 feet long and can also be telescopic. They’re adaptable and great for fishing in places where traditional casting is tricky. Jigger poles can be bamboo, fiberglass, or graphite, among other materials. They’re strung with a short leader attached to the pole’s end and a plastic or wooden plug at the other end.

How to Rig a Cane Pole?

Rigging a cane pole is easier because there is no reel to deal with. However, it’s best first to secure your line lower down the pole’s body. This way, if the tip breaks under pressure, you won’t lose your line or fish.

Rigging a Bamboo Cane Pole

  1. Tie a piece of dacron or monofilament to the center of your pole, just below a notch.
  2. Twist the line to the tip of your bamboo pole by rotating the pole.
  3. Do a half hitch and secure the line in the slit you made in the tip when you get to the top.
  4. Make sure you have enough monofilament to reach the pole’s handle.
  5. At the end of the line, add a swivel or a hook. If you want to adjust the depth of the hook, add a bobber and any split shot you want.
  6. You can now put your bait to the test.

Rigging a Telescopic Cane Pole

Rigging a telescopic pole is as easy as stringing a bamboo rod. As a matter of fact, the procedure is nearly identical, except that there is a decreased danger of the tip breaking under stress.

How to Fish With a Cane Pole

Cane pole fishing is pretty simple, but since it doesn’t have any reel and your line is limited, it can be challenging at first. Here’s how you can master cane pole fishing.

  1. Lower your line into the water by gradually dipping the rod below and slowly raising it.
  2. Avoid moving it around too quickly or forcefully.
  3. Once you’ve hooked a fish, raise the pole above your head. This will bring the fish closer to the banks or boak.
  4. Then grab the fish, either by hand or net and remove the hook.

Cane Pole Fishing Techniques and Tips

You can use cane fishing poles to catch small to medium-sized fish, including bluegills, crappies, and catfish. If you target a larger fish like a Northern Pike, we suggest using a conventional fishing rod.

  • Bass: If you want to catch bass, make sure you use a bait that can function in cover. The bait should also look as natural as possible to the bass.
  • Trout: Use a tiny fly as bait and travel upstream to the stream’s or pool’s mouth. This approach entails carefully dangling the fly 2 or 3 inches over the water’s surface and occasionally touching it, just like a natural fly would.
  • Bluegill & Crappie: While crappie and bluegill are generally easy to catch, a cane fishing pole allows you to get your bait into hard-to-reach areas near dense cover.
  • Catfish: Use a slightly heavier line and anchor your line closer to the base of the pole because the weight of this fish can put a strain on your pole and potentially cause it to crack.

How to Make a Cane Fishing Pole?

You don’t need a sophisticated rod to catch fish at your nearby lake. The following is a step-by-step guide to making your cane fishing pole:

  1. Find a 10-foot to 20-foot long piece of bamboo. Choose one that is straight as much as possible.
  2. Cut the bamboo stalk below the knuckle closest to the ground, near the root.
  3. Remove any attached leaves, but be careful not to cut into the stalk itself.
  4. Cut the tip of the stalk just above the last knuckle.
  5. Allow the stalk to cure for a few weeks by hanging it in a dry location until it turns a solid tan hue. This ensures that the bamboo has dried thoroughly and will endure as long as feasible.
  6. Sand the base and the rest of the pole.
  7. Apply a coat or two of wood lacquer.
  8. Set up your fishing cane and get started.

Cane Pole Fishing FAQ

What Are the Best Baits for Cane Poles?

When using a cane rod or pole to catch fish, the most common species are bluegill and tiny catfish. When going after catfish, you’ll use a variety of baits, including earthworms, crickets, mealworms, and a minnow-shaped plug that floats.

How Long Should a Cane Pole Line Be

The rope’s length should be enough to extend from the pole’s tip to the bottom. This ensures that even if the pole’s very thin tip broke, you could still land a bigger fish.

How to Cure a Cane Pole for Fishing?

You can cure a cane pole for fishing by laying the bamboo on a flat surface. It can take several weeks to months before it completely cures. You will know that the pole is cured if its color changes from green to brown. Never put bamboo poles under direct sunlight because they will crack.

Back to Basics

Cane pole fishing offers you the opportunity to go back to the basics of fishing! It may seem primitive and outdated, but the joy of catching a fish without using any modern fishing gear is exhilarating! Plus, it is a terrific method to learn to fish without spending a lot of money.

My First Deer: There Is No Feeling Like The First Time

0

Keep reading to learn the story about how I got my first deer.

Just after first light that morning, my father tapped me on the knee and slowly motioned to our left. I looked and saw two shapes carefully moving through the mist. Looking through the scope on my rifle, I could see that the shapes were two young bucks about 50 yards away walking warily towards the feeder in front of us and my pulse quickened. “They’re bucks” I whispered to my father. “Pick one and go ahead and shoot him” my father responded. Steadying the rifle on the front rail of the deer stand, I took aim at the front shoulder of the lead buck and squeezed the trigger. With the roar of the rifle, I shot my first deer and my life changed forever.

The road to that day began many years previously when I began accompanying my father and grandfather on their deer hunting trips, as I described in my previous article. As the years went by and I grew older and more mature, I began hunting myself. I started off hunting squirrels and other small game animals. By the time I turned 11, my father decided I was old enough to hunt deer under his supervision.

That summer we attended a hunter education class together and he purchased a rifle for me: a post-1964 Winchester Model 70 Featherweight chambered in .308 Winchester. He made some special reduced power hand loads for me that had considerably less recoil than factory loads. The 130gr bullet fired at 2300 feet per second was still plenty powerful for a white tail at relatively close range, but the recoil was much easier on my wiry frame to shoot than full power loads.

My father was, and still is, very serious about hunting safely and ethically. Even though I was going to be hunting under his direct supervision, he was very strict about ensuring that understood when and when not to shoot as well as the details of shot placement. As a result, I spent hours at the range practicing precise shot placement at various ranges and angles.

Finally, I had to pass a written test designed and administered by my dad. The test covered a lot of details about hunting in general that were not covered in the hunter safety class. For instance, one of the questions was: How do you best determine if a deer is actually dead when you find the body after trailing it? Answer: while approaching the deer from behind, use a stick or the barrel of your rifle to touch the deer’s eye. If there is no reflex movement, then the deer is actually dead and is safe to otherwise touch. When we hit the woods that fall, I was probably one of the best prepared boys to ever start deer hunting.

Several years previously, my dad had constructed a two person, elevated stand down in a creek bottom overlooking a feeder on our land in eastern Texas that we would hunt from that year. That area was always a solid producer of deer: my dad once counted 17 does eating from the feeder at the same time. If there was ever an ideal place for a young hunter like me to shoot my first deer, this was it.

That first morning dawned foggy and crisp with a very light wind from the north. To this day I love weather like that because I’ve had so much success hunting in those conditions. This particular morning would be the first of those successes and I distinctly remember seeing the muzzle flash of my rifle through the fog while looking through the scope at the buck.

The buck staggered at the shot and disappeared back the way he came. From his reaction, I knew that I had made a good shot. If it is even possible, I think my father was even more excited than I was after the shot (and I was pretty darn excited). He gave me a pat on the back and said “You didn’t even feel the rifle kick did you?” No, I didn’t, and I don’t remember the report of the rifle hurting my ears either due to the adrenaline rush I was feeling.

After a few minutes, we got down and began looking for the buck. We quickly found him shot through both lungs. Even that reduced power .308 Winchester load did a number on him: the buck ran less than 25 yards after the shot. With just six points, he was not a big deer by any stretch of the imagination. However, I was a very happy young man that day and I still look back upon the hunt where I got my first deer fondly. I have plenty of larger and more impressive trophies hanging in my office, but I still proudly display the antlers from that little buck on the wall. There is no feeling like the first time and on that cold day in December I took my first step into the world of big game hunting.

Enjoy this article about my first deer? Please share it with your friends on Facebook and Twitter.

Make sure you follow The Big Game Hunting Blog on Facebook, Instagram, Twitter, and YouTube.

NEXT: 33 BEST HUNTING BOOKS EVERY HUNTER SHOULD READ

5 Best Fall Smallmouth Fishing Tactics

0

Fall, specifically October, is arguably the best time to catch a smallmouth bass. Here's why. Image by Shutterstock / S Nafzger

As a kid, we fished for largemouth bass in the summer. We’d catch the lion’s share of them around weed beds and shady docks. But every now and then I’d wake up early enough to tag along with the grownups to go smallmouth fishing. In the summer, our resident brown bass didn’t make many appearances after 8 a.m. But I can remember the sage advice from my mentors back then. Just wait until October, they’d say. That’s when the smallmouths really move in.

And they were right. Fall smallmouth trips were special times.

And they were right. Fall smallmouth trips were special times. Much of fishing remains a mystery to a youngster, and it’s the unknown factor that makes a great selling point. Now, as a more seasoned angler, I realize the smallmouth were there all along — just not in areas where we’d cross paths.

(Don’t Miss: The 3 Biggest Catfish Ever Caught)

But I also still believe in the power of autumn. I’ve fished for smallmouths all across the country and have found one solid rule: the colder it gets in the fall, the better they bite. Whether it’s water temps dropping to the 50s in Tennessee or ice forming on the Great Lakes, the decline in water temperature triggers a feeding spree among smallmouth bass.

Winter can be tough, and to survive and thrive, bass must put on as much weight as possible beforehand. In fact, studies have found that successful springtime spawns within smallmouth populations are often dependent on the previous fall’s feed.

Regardless, the fish are ready to eat, and we’re ready to be a part of that. We just need to get in the right areas.

(Don’t Miss: Is It OK to Eat Bass?)

A black or brown jig can work wonders along shallow rocks, or transitions, like where rocks meet sand or sand meets grass. Image by Joe Balog

Tactic One: Shallow Rocks

Let’s start with the easiest and most obvious. Around much of the North, especially on bodies of water with a mix of rocks and vegetation, smallmouth bass are drawn to specific hard structures. Water temperatures are dropping, grass beds are dying off, and the remaining rocky areas attract solid food items like crawfish and perch. At times, a single large rock may hold a bruiser worthy of personal-best status. One of my largest bass, a fish eclipsing 7 pounds, came in this very scenario on a cold November day on New York’s Chautauqua Lake.

Here, it’s imperative to find the sweet spot. Big smallmouths are masters of their domain, and they know the best hunting grounds. Transitions, like where rocks meet sand or sand meets grass, are always best. Side-imaging depth-finders help, but many of these spots can be seen with a good pair of sunglasses on a nice day. Line up and make accurate casts, and repeat them — exactly – once fish are located.

It’s tough to beat a jig and plastic in this scenario. The best smallmouth options are a little lighter (around ¼ ounce) and more streamlined than a standard flipping jig. Stick to blacks and browns, and fish them on a long rod and 12-pound fluorocarbon. On particularly cold days, afternoons are best, once the rocks warm surrounding waters.

(Buy Alert: Gray Bass Long Sleeve Tee)

Deep-water smallmouths can be caught by using cranks, jerkbaits, grubs and drop-shots. Image by Joe Balog

Tactic Two: Long Points

Across the Southeast, everything revolves around baitfish. Large shad schools tighten up and begin migrating to major creek arms on the country’s biggest reservoirs. Not surprisingly, bass follow. While largemouth bass have a reputation for getting in the skinniest of water, smallmouths in the same system usually remain in mid-depth, main lake areas. More comfortable as pack feeders than lone ambushers, smallmouths prefer to work schools of baitfish in groups.

Large points are great places to find these roving bands of bass. They key here is to first locate baitfish. Location will depend on the stage of the game: main lake in early fall, large creeks later on. Regardless, find the bait and you’ll find the bass. Look for large points with vast flats on top, and fish there early in the day with topwater baits. Nothing beats a walking bait for smallmouths. As the day progresses, bass will often move off the sides of points, especially if a creek channel intersects. If rocky or wood structure coincides, all the better. Deeper fish can be caught on cranks, jerkbaits, grubs and drop-shots. Occasionally, the topwater bite lasts all day. Remember to stay by the bait.

(Don’t Miss: Why You Suck at Throwing a Baitcaster)

A hair jig works well for shallow-water fishing. Image by Joe Balog

Tactic Three: Bluff Banks

Our third strategy mimics the second. However, here, we want to find a place where schools of bass can pin baitfish. This is an incredible fishing opportunity when it presents itself. On many lakes with steep, bluff shorelines, smallmouths will hold on small shelves and rock piles waiting for baitfish to blow in. When that happens, the bass go berserk and massacre the minnows right up against the wall.

Again, it’s imperative to first find the baitfish, then find areas where wind or current will blow them against the bank. Even areas with strong winds producing noticeable waves against a bluff bank are still in play. Occasionally, a large sea-wall or the face of a dam will suffice. In any case, we’re looking for places where baitfish are being disoriented and facing a large object.

These spots are often snaggy, so a cast-and-retrieve bait is better than a bottom-bouncer. Swimbaits on a heavy jighead are great. Big bladed spinnerbaits come on strong once the water clouds up from wave action. At times, a Rat-L-Trap is all you need. Remember, this is an all-or-nothing method, so you’ll know right away if it’s working.

(Buy Alert: Red Fish Long Sleeve Tee)

Sometimes a good bladed bait is all you need to trigger the bite. Image by Joe Balog

Tactic Four: Great Lakes Basins

The big brown bass of the Great Lakes are a different breed. Sure, some come shallow in fall, but most stay deep and move deeper. In twenty-plus years of fishing the big waters, autumn was never underrated. Start your search where the best summer fishing occurred, and move deeper. Bass from adjacent structures will eventually meet up in one special area. Years ago, I coined these places Basin Zones, where the outside edges of summer structure meet vast, open water basins. On Lake St. Clair, this is often 18 feet of water; on Ontario is may be 50.

What we’re looking for here is the last piece of structure before the bottom drops to never-never land. Don’t begin casting until you mark significant numbers of fish. We’re looking for the motherlode here. The best presentations will be efficient deep-water methods. Drop-shot plastics remain number one, followed by metal blade baits and spoons. Underspins are becoming popular, as are solid-body swimbaits on jigheads weighing 3/4 ounce. The key is to get a bait down, even in the rough seas associated with fall fishing up north. Once you find them, the fish will do the rest.

(Don’t Miss: The Best Postspawn Crappie Fishing Tactics)

Use a jerkbait with a brisk, aggressive retrieve. Image by Joe Balog

Tactic Five: Flats in the Desert

A quick review of recent smallmouth action reveals new fisheries in the West are coming on strong. Lakes like Havasu and Mead are producing eye-opening catches. Here, tactics mimic those of other parts of the country, with a desert twist. Clear waters and large striper populations put baitfish on high alert. When looking for smallmouths, sometimes the best play is to first find the stripers.

Striped bass are efficient open-water predators, likely due to their saltwater roots. Other species, notably largemouth and smallmouth bass, often feed in and around schools of stripers. Picking up the scraps can make for a good life.

Look for feeding action around shallow points and rocky flats. There, fish jerk baits and topwaters with a brisk, aggressive retrieve. If your catch includes nothing but stripers, slow down with a white hair jig fished in and around the school. Mike Guerra — an old friend living and fishing in Vegas — jigs a white hair jig around striper schools until temps cool to jacket weather, and he has some of his best smallmouth days when everyone thinks he’s striper fishing.

Sorry to let the cat out of the bag, Mike.

(Don’t Miss: Hundreds of Sharks Congregate in West Florida Canals)

Get your gear at the Realtree store.

Welcome to Dave Genz.com

0

By Dave Genz

You can’t catch fish if you can’t find them. It’s as true in ice fishing as it is in open water.

There are two things most ice anglers have a lot of trouble with: choosing the right type of lake to fish during the ice-up period, and finding fish once the good “first-ice” bite slows down. Let’s address both of these issues in some depth: (Get it? Depth? Lots of fish go deep during the iced-over period?)

Choose The Right Lake At Early Ice

You should, simply put, fish smaller bodies of water early in the iced-over period. It’s often fairly easy to locate fish on smaller lakes, because it’s a high-percentage move to look in the deepest basin area. Many, if not most, of the fish in a smaller lake will spend the winter in the deepest basin, especially if there’s only one, and it’s significantly deeper than the rest of the lake.

The problem with many smaller lakes is that they develop an oxygen problem as winter wears on. Where those “small-lake” fish are in a biting mood at early ice, you return to those lakes later in the winter and often find no takers.

The fish are still there, of course (unless they suffer a die-off), but they are often severely stressed due to the low oxygen levels.

Bigger Lakes Stay Better Later Into The Season

We’re oversimplifying things here, but it’s generally true to say that larger bodies of water will hold better fishing later into the winter season.

One of the most difficult aspects of catching fish through the ice on larger bodies of water is finding them. With so much turf to search, you can feel lost before you even start. One clue is that you should always fish anywhere you drill a hole and find green weeds. As long as sunlight can penetrate the ice, weeds can actually grow, something many anglers don’t realize. But if you drop down your lure and come back with green weeds on the hook, make good notes on where you are.

Also, don’t just blindly follow the crowds. Many anglers, from past experience, know of good spots. And groups of fish houses pop up over these spots every winter.

Sometimes, even just getting off to the edge of the group of houses, off to the fringe of all the ruckus, can help you find fish that aren’t as “on guard.” Activity moves the fish, especially at midday.

One of my strategies is to go to the crowd of fish houses just to see what type of spot they’re fishing. Is it deep? Shallow? Hard or soft bottom? How close is it to really deep water? By studying the characteristics of the spot, you can often find similar spots by looking at a contour map of the lake, and get off to a new hot- spot that’s all yours.

Another hint: At “prime time,” when the sun is setting at the tree tops, fish often move right into those “community spots” where all the fish houses are. They are pressured and on guard, but they still return to that spot, because it’s where most of their food is in many cases.

Finding Fish At Midwinter

It’s probably tougher to locate fish at midwinter than any other ice-fishing period. Here are some high-percentage haunts, to shortcut the hunt:

Walleye-Classic midwinter walleye locations include deep edges of remaining green weed growth, and good-sized hard-bottom points and sunken humps. First find large expanses of deep basin water, then look for these structural elements close by. Fishing pressure will force walleye off the most obvious spots. Check around the perimeter of groups of anglers, even out over deep water. If you find stair-stepping dropoffs, fish each small “stair” or flat.

Northern Pike-Eating machines that bite good in winter. Sorry to be vague, but they can be anywhere the food is. If a bay is full of small panfish, tip-ups can take pike. But also look for them to drop relatively deeper as winter wears on. Check the outside weed edges, but pay special attention to deeper rock and other hard-bottomed areas near good-sized shallow food shelves.

Largemouth Bass-Often disinterested in feeding at this time of year. There are disagreements about winter movements. Considered by some, including me, to be roamers. By working shallow cover such as weeds or stumps you can catch some on small minnows, but don’t expect to catch a lot of largemouths very often at midwinter.

Smallmouth Bass-Generally, a much deeper midwinter fish, and more catchable, than largemouths. Smallies like expansive areas of rock or other relatively hard bottom, in “deep, but not too deep” zones from about 20-40 feet.

Yellow Perch-Notorious as bottom feeders, and midwinter is no exception. Keep those baits puffing up or sitting on bottom. They tend to be in deeper water, down to 40 feet or so. Don’t look on drop offs, but instead along the flats out from them. Perch feed on insects and larvae that live in the mud, and breaklines tend to be along harder bottom!

Bluegills and other Sunfish-“Where aren’t sunfish?” might be a better question. On some lakes, it won’t matter where you drill a hole; small sunnies will be there waiting. But in general, organic (mud) bottomed bays and flats the bigger the better hold the most consistent sunfish action. If the areas are close to deep water, so much the better.

If you’re willing to hunt for rod-benders, seek out the biggest areas of shallow or deep weed growth. Do your best to get away from the crowds, and be quiet in your approach. And even though sunfish, befitting their name, have a reputation as good daylight feeders, the twilight periods of dawn and dusk are prime big-fish times.

You’ll have to fish your specific water, because some lakes hold big sunfish shallow all winter. Heavy fishing pressure, though, can “cream off” most of the big bulls, making deeper weed- or mud-related fish a better bet. We’ve caught most of our biggest midwinter bluegills in deeper water lately. We look for mud and weeds in 20-30 feet, and sometimes even deeper than that.

Crappies-You will find some nice crappies in shallow flats areas, mixed in with sunfish. But many midwinter slabs are in deep water, often suspended. Look over the areas just away from deep weed edges, or edges of other cover.

Deep points, and deep inside turns, can hold concentrations of midwinter crappies. Searching vast areas of deep water can turn up big schools, but it’s a needle-in-the-haystack proposition.

First printed in 1995

5-inch Senko Rigging Guide – Pro’s Choice

0

By TJ Maglio

There are very few baits responsible for more big bass, big limits, and tournament wins than the 5-inch Senko. What Gary created out of a ballpoint pen tube didn’t just change the soft plastics game, it changed bass fishing altogether.

How many bass fishermen catch their first bass on a Senko each year? And if you’ve ever got a true rookie in the boat with you, what’s the first thing you rig up for them?

A Senko no doubt.

The most brilliant thing about Senkos is their versatility. They are equally effective in the hands of top tour pros or the greenest of the green; and whether you’re fishing a mountain lake; lowland reservoir, tidal river, or a farm pond, you’re going to get bit.

Here’s the part where you may be thinking “Yeah; Senkos catch fish, tell me something new…”

What you may not know is that despite the Senko’s pedigree, one of the most common questions anglers still ask us all these years later is “what’s the best way to rig a Senko?”

We all know the truth.

There’s no wrong way to rig a Senko. You can use it cut in half on the back of a tiny Ned head or punch it through a thick mat of hyacinth behind a 2-ounce sinker. It really doesn’t matter much; as long as it’s in the water the bass eat it.

Since the vast majority of anglers realize that; I suspect the real question they are getting at is not “what’s the best way” but rather “how should I rig it?” Meaning what hook, line, rod, reel, etc.

A great way to solve questions like this is to sample a group of experts on the topic; listen to their opinions and then see where you fall. Which is exactly what we wanted to do. We decided to reach out to four of the Yamamoto Tour pros know specifically for their Senko prowess (Brent Ehrler, Larry Nixon, Jimmy Reese, and Jay Yelas); and ask them to break down how they specifically rig Senkos in a couple of the most popular ways (Texas Rigged and Wacky/Neko), so you can get a variety of details on the specifics of what terminal tackle, line, rods, and reels they use to catch fish across the country.

Hopefully these setups will help you narrow down your options as you search for the perfect setup for the way YOU fish!

Texas Rig

Brent Ehrler

Rig: 4/0 Gamakatsu Offset Round Bend, 16-pound Sunline FC Sniper fluorocarbon

Rod/Reel: Daiwa Tatula Elite MPS 7’3”, Daiwa Tatula Elite Reel (7.3:1)

Notes: Brent’s go-to Texas rig is actually weighted, which he likes as it shows the fish something a little different. “That little sinker really changes the fall of the 5-inch Senko. It’s still subtle but it has a really nice spiral on the fall; which bass don’t see a lot.”

Jimmy Reese

Rig: 5/0 Gamakatsu EWG (standard gauge), 12-pound Yo Zuri Fluorocarbon

Rod/Reel: Douglas Rods 7’2” Medium Rod LRS724F, Daiwa Tatula 150 (7.3:1)

Notes: The key to Reese’s Texas rig setup is versatility; and he keeps it on the deck pretty much all the time. “You can throw that thing up against a rock, dock, piece of wood, whatever you see – you can just pick things apart with it; and you can go pretty much anywhere around the country with that setup and go down the bank and catch fish.”

Jay Yelas

Rig: 5/0 Gamakatsu Superline EWG (heavy gauge), 15-pound Strike King Tour Grade Fluorocarbon

Rod/Reel: Lew’s Custom Speed Stick 7’ MH, Team Lew’s Hyper Mag Speed Spool (8.3:1)

Notes: Having a high-gear ratio reel is critical to Yelas with a Texas rig. “Particularly in shallow water; big bass will grab that Senko and just take off. If you can’t reel fast enough to catch up to it, you’re never going to get a good hook into it.”

Larry Nixon

Rig: 4/0 Gamakatsu EWG (standard gauge), 10-pound Sunline FC Sniper fluorocarbon

Rod/Reel: Dobyns 7’ Champion XP 705 Casting rod, Bass Pro Shops Johnny Morris Series (7.1:1)

Notes: Patience is the key when Texas rigging a 5-inch Senko says Arkansas legend Nixon. “Most of the time I fish a Texas rig weightless; and I’ve caught about a gazillion fish doing it. Just be patient and let the bait do its thing. If you’re not getting Senko bites; you very well could be fishing it too fast. Slow down and you’ll get bit.”

Wacky/Neko

Can You Eat Venison [Deer Meat] Raw or Pink? Is it Safe?

0

Venison is not only popular in the UK and the US, but also in other parts of the world like Spain and New Zealand. It is high in protein and has fewer calories than other types of red meat. But can you enjoy it raw or rare?

Raw or undercooked venison is not safe. It is recommended to cook venison to a safe internal temperature of 145 °F (62.8 °C) for roasts and steaks, 160 °F (71.1 °C) for ground venison and sausages, and 165 °F (73.9 °C) for others.

Moreover, the meat shouldn’t come from a deer shot in the wild.

How can you prepare and store venison safely, and how should you order it at restaurants? All the answers are detailed below.

Can You Eat Venison Raw?

According to research, eating raw or undercooked venison may not be safe because of pathogenic contamination, which is discussed in the next section. Venison that came from antlered animals like deer that are shot in the wild is also unsafe.

A study was conducted to examine 30 carcasses drawn from whitetail deer shot by hunters with guns loaded with lead bullets. The carcasses showed extensive metal fragment dispersion. Of the 30 carcasses turned into ground meat, 80% of them contained lead.

The researchers conducted another study and fed the venison to pigs. The pigs’ blood results showed significant amounts of bioavailable lead (source: Lead Bullet Fragments in Venison from Rifle-Killed Deer: Potential for Human Dietary Exposure).

Furthermore, the organs of these antlered animals, such as the liver, kidneys, brain, and gizzard are not to be consumed, since lead accumulates in the organs. They can contain other metals too, as well as chemicals.

Chemicals used in many manufacturing and industrial plants could infiltrate and persist in the environment where the animals live. These chemicals can accumulate in the animals’ bodies.

Some of these chemicals and metals include:

  • Dioxins
  • Polychlorinated biphenyls
  • (PCBS)
  • Per- and polyfluoroalklyl substances (PFAS)
  • Cadmium
  • Mercury

So, what could happen if you ingest these?

These compounds and metals are may result in the development of diabetes and cancer, depreciated immune and thyroid functions, issues with fertility, and strained brain development in children (source: The Michigan Department of Health and Human Services).

Lead can negatively affect neurological, cardiovascular, renal, skeletal, hematopoietic, and reproductive functions when it accumulates in the body (source: Journal of Hazardous Materials Advances).

Therefore, whether rare or cooked, it is best to avoid venison that was shot in the wild.

While it’s true that some meats can be eaten raw safely, it is crucial to consider the safety of consuming raw venison. Venison tartare may also be unsafe, as found in many research studies discussed below.

Can Raw Venison Make You Sick? Does it Have to be Cooked?

Undercooked venison has been in the limelight for being linked to toxoplasmosis.

According to a 2017 study, a retreat was held wherein never-frozen purposely undercooked venison was served to the attendees. Nine out of the eleven attendees who consumed the venison had to seek help.

They experienced myalgia, body aches, fatigue, fever, sweats, arthralgias, lymphadenopathy, chest pain, shortness of breath, blurred vision, and more.

It was discovered that the Toxoplasma gondii that caused their infection came from contaminated undercooked venison (source: Clinical Infectious Diseases).

A study in 2019 published the possible first encounter and report of food poisoning caused by Sarcocystis truncata. The incident took place in Japan, where a 67-year-old man consumed raw venison.

Sarcocystis infection can lead to intestinal sarcocystosis with symptoms of fever, diarrhea, vomiting, and nausea (source: Internal Medicine).

Also in Japan back in 2004, researchers found out that eating raw venison can result in hepatitis E virus (HEV) infection (source: Journal of Medical Virology).

Raw venison can also be a vehicle for Mycobacterium bovis, which can cause infection in the gut and lungs, as well as symptoms of fever, night sweats, chest pain, abdominal pain, weight loss, and if untreated, death (source: FDA).

When buying venison, make sure to purchase from a reliable seller or store. Do not buy the wild-caught type, or at least make sure the animal was not shot with lead bullets.

Make sure to clean all utensils, tools, and surfaces that come into contact with the meat. This means cleaning them before and after handling the venison. You can use 1 teaspoon of kitchen bleach in every quart of water for a simple disinfectant.

Chill venison at no more than 40°F (4.4°C). For longer storage, you can freeze it. In the fridge, it will keep for 1-2 days, and in the freezer for up to 1 year. Ground venison meat can keep for 6-9 months (source: Utah State University: Preserve the Harvest Extension).

Have you ever wondered how long venison can remain cold in the fridge or on ice? Proper handling and storage are crucial to maintain its quality. Familiarizing yourself with the guidelines for storing venison correctly is valuable. It helps preserve freshness and enhances the optimal flavor.

Because venison is a lean meat, cooking it for too long will dry it out. But to keep it safe, you will need to cook venison steaks and roasts to a minimum internal temperature of 145 °F (62.8 °C).

Ground venison or venison sausage should be at 160 °F (71.1 °C), while soups stews, stews, casseroles, and leftovers should be at 165 °F (73.9 °C).

To achieve these cooking temperatures, it is best to use a food thermometer (source: University of Minnesota Extension: Cooking venison for flavor and safety).

Can You Eat Pink Deer Meat?

Venison steak cooked at this temperature is medium rare and still pink inside. And because it is still rare, we recommend cooking or having it cooked at least medium well to make it safer.

When ordering at a restaurant, make sure the venison isn’t wild-caught. Burgers and sausages made from venison have to be cooked at a minimum of 160 °F (71.1 °C). At this temperature, the meat will be well-done and won’t probably have any pinkish tint.

Venison is a great source of high-quality protein and also provides essential amino acids, iron, niacin, thiamine, riboflavin, and zinc. Just make sure to prepare it safely for you, your family, or your friends.

Are you curious about the potential side effects of consuming deer meat, commonly known as venison? Check out my guide to learn about the various ways it can affect our bodies.

Best Spotting Scopes for Birding and Wildlife (2024)

0

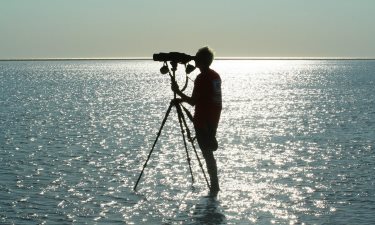
Below we review the best spotting scopes for birding and wildlife viewing for 2024 by price range:

  • Super-Budget (Under $200)
  • Budget (Under $500)
  • Semi-Budget ($500-$1,000)
  • Mid-Priced ($1,000-$2,000)
  • Best of the Best (over $2,000)

Table of Contents

Don’t Get a Spotting Spotting Scope for Less Than $100!

Just one thing before we proceed…

I plead with you not to buy a spotting scope for birding/wildlife viewing that is priced less than $100.

They will cause you eye strain and even worse, severe frustration.

Cheap scopes may be good for looking at an elephant 100 yards away or to see your 22 cal bullet holes in your paper target at the range, but they are not made for bird watching.

You’re better off just looking through your binoculars than using such a scope.

One exception would be for someone who just wants to look at backyard birds from their deck and/or take photos of them and doesn’t want to hold binoculars.

Good. Now that I got that off my chest, we can proceed.

Straight or Angled?

Most of the scopes listed below come in both angled and straight models.

Its up to you and the kind of viewing you mostly do.

Click here for reviewing the pros and cons of Angled or Straight bird watching spotting scopes.

Also, most scope models are available in several different objective lens sizes. It all depends on your personal needs.

Click here to review objective lens sizes for bird watching spotting scopes.

Best Super-Budget Spotting Scope (Under $200)

Celestron 80mm Ultima Zoom Spotting Scope

The Celestron Ultima Zoom Spotting Scope is an refractor-style scope with an 80mm objective lens with built-in zoom from 20x-60x.

It comes in both straight and angled designs (see all listings below).

If you want an entry-level scope, this is a very good choice.

The only drawback is that the scope does not have the more expensive ED glass which helps prevent blue fringing at the higher magnification.

  • Multi-coated optics
  • Waterproof
  • Eyecup can be removed to attach a camera on standard T-Thread
  • 45 degree angled eyepiece supports shorter tripod if needed
  • Lightweight at 3.6 pounds
  • Comes with padded carrying case that has access zippers on both ends of scope so you can use the scope without removing the case

The Celestron Ultima also has other options available such as a 65mm (cheaper) and 100mm (more expensive) objective lens and also comes in both angled and straight models for each of the sizes.

Objective Lens Size

The bigger the objective lens, the greater the light-gathering capacity of the scope, but it also increases the weight.

If you do a lot of low-light birding (i.e., at dawn and dusk, in cloudy locations, etc.) then you may want to get the 100mm size.

But for most conditions, the 80mm will be plenty. We wouldn’t recommend getting the 65mm in this scope since this is a lower-end scope without premium optics.

Also, Celestron states “The Ultima 80 mm offers a step up in aperture from the 65 mm, offering 50% brighter images.” 50% is quite significant and I think worth the extra cost.

You can review more about objective lens sizes here.

And again, if you’re not sure if you want a straight or angled scope, read our quick tips here about choosing scope body design.

-> View the Celestron Ultima Spotting Scope

Here are all the Celestron Ultima model choices in angled and straight bodies with either the 80mm or 100mm objective lens.

Best Budget Spotting Scope (Under $500)

Vortex Diamondback 20-60×80 Spotting Scope

The Diamondback is an exceptional scope at this price point. It is Vortex’s lowest-price model compared to the Viper HD and Razor HD spotting scopes.

The Vortex Diamondback line comes in both straight and angled models in both 60 mm and 80 mm objective lens sizes.

It is a full-sized scope in a compact design, weighing less than most spotting scopes in this size at only 33.8 oz and 47.1 oz for the 60 mm and 80 mm lenses, respectively.

We recommend the 80mm lens which will always give you that added brightness edge, especially valued in low-light conditions.

And not for nothing, we really love the view-through case that actually is easy to use and view-through because of its generous-fitting design.

  • Full XR multicoated optics
  • Dielectric prism coatings for improved brightness
  • ArmorTek scratch-resistant coating
  • O-ring sealed and nitrogen-purged – waterproof and fogproof

We also love Vortex’s Warranty:

~Vortex VIP Warranty~

Lifetime. Unlimited. Unconditional.

Vortex will repair or replace the product in the event it becomes damaged or defective.

Absolutely free—no matter the cause!

-> View Vortex Diamondback HD Spotting Scope

Vanguard Endeavor HD 20-60x65mm Spotting Scope

The Vanguard Endeavor HD Spotting Scope is an amazing bird watching scope for its size and price in the under $500 price range.

Birders have been impressed with this one and love that it’s light and compact for on-the-go birding adventures.

Features include:

  • ED Extra-Low dispersion glass virtually eliminates color fringing
  • Fully multi-coated optical system with improved coatings gives high light transmission rate
  • Rubber armored magnesium housing for lightweight and durability
  • Retractable sunshade with peep sight
  • Eyepiece and deluxe scope coat included
  • Fully waterproof (submersible) and fog proof – nitrogen filled body & eyepiece
  • Phase coated Bak4 prisms for high resolution
  • Detachable eyepiece with 20-60x zoom with retractable eyecup and up to 20mm of eye relief
  • Available digiscoping adapter allows use of the scope as a super telephoto lens

65mm or 82mm Objective Lens?

The Vanguard Endeavor comes in both 65mm and 82mm sizes.

Unless you plan to do a lot of digiscoping or will often be in low-light conditions, we think the 65mm objective lens is suitable for most birding situations, especially with the ED and multi-coated glass.

This smaller lens and resulting lighter weight will also be appreciated by those who plan to carry it a lot.

-> View the Vanguard Endeavor HD Scope

Best Semi-Budget Spotting Scope ($500-$1,000)

Celestron Regal M2 20-60x80ED Spotting Scope

If you can afford a $500+ scope, the Celestron Regal M2 80ED Spotting Scope is well worth the investment with ED glass, XLT multi-coated optics, and a magnesium alloy lightweight, yet very durable body.

  • Extra-Low Dispersion (ED) glass minimizes chromatic aberration, increases resolution and contrast, and provides color fidelity
  • Proprietary XLT (Fully Mulit-Coated) lens coatings maximize light transmission for bright, sharp images
  • Magnesium allow body – lightweight yet strong – decreases overall weight by 14% compared to previous model
  • Fully waterproof and nitrogen purged to prevent fogging
  • Upgraded dual focus mechanism – can focus on objects 2x faster
  • T-Ring and T-Adapter for attaching your camera for digiscoping

Celestron Regal M2 80ED Spotting Scope Overview

-> View the Celestron Regal MD 80ED Spotting Scope

Best Mid-Priced Spotting Scope ($1,000-$2,000)

Vortex 20-60×85 Razor HD Spotting Scope

The Vortex 20-60×85 Razor HD Angled Spotting Scope is a high-quality bird watching spotting scope and an excellent value at that in this price range.

  • Premium Extra-Low Dispersion (ED) glass for exceptional viewing in low light conditions.
  • Ultra-hard coated Armor Tek protects exterior lenses from scratches, oil and dirt
  • Dielectric prism coatings provide the clearest, brightest, most color-accurate images
  • Proprietary XR anti-reflective coatings increase light transmissions for maximum brightness
  • Triplet apochromatic lens reduces chromatic aberration.
  • Porro prism offers maximum image quality and performance
  • Waterproof O-ring sealed optics keeps out dust and debris
  • Fogproof – argon gas purged

-> View the Vortex Razor HD Scope

Best of the Best Spotting Scope (over $2,000)

Kowa TSN-800 Series Prominar Pure Fluorite Spotting Scope

The Kowa TSN-800 Series is one of the best bird watching spotting scopes money can buy.

The TSN-883 is the angled body model, TSN-884 is the straight body model.

Crystal clear clarity from Kowa’s unique Prominar pure fluorite crystal lenses is just the beginning.

  • The combination of the ultra-low dispersion pure fluorite crystal paired with a concave lens provides stunningly bright razor sharp images, minimizing chromatic aberrations (color fringing), image fuzziness and extended twilight and low light performance
  • Dual Focus: Quick & Fine focusing. Quick will focus from infinity to five meters in 2 revolutions. Fine is smooth with pinpoint accuracy for high magnification adjustments and for digiscoping
  • Lightweight, compact design – the highly achromatized objective lens makes the scope as compact a 60mm scope without sacrificing performance
  • Waterproof to JIS 7 protection class 7 (protects against effects of temporary immersion in water – aka, “Oops!” protection) and nitrogen purged to prevent fogging
  • 3 eyepieces available: TE-11WZ (25-60x, wide zoom), TE-17W (30x, wide) TE-20H (25x, LER – long eye relief). There is an eyepiece locking mechanism to prevent accidental release. Note that the TE-11WZ has replaced the older TE-10Z (20-60x, zoom) model.

Kowa TSN-883 (Angled) and TSN-884 (Straight) Spotting Scopes Overview

Kowa TE-11WZ (25-60x, wide zoom) Eyepiece (Replaced TE-10Z)

Digiscoping with the Kowa TSN-883 Spotting Scope and TE-11WZ 25-60x Wide Angle Eyepiece

The stills and video below were shot using a Panasonic GH4 Micro Four Thirds 4K Camera.

The Kowa TSN-DA10 Micro Four Thirds Digiscoping System

The Kowa TSN-DA10 digiscoping adapter is made for Micro Four Thirds camera system bodies and Micro Four Third compact lenses up to 25mm focal length (full size) (50mm MFT equivalent) and can be combined with the Kowa TE-11WZ eyepiece.

  • Set-up is simple (takes less than a minute) and you can easily switch between landscape and portrait positioning as well as quickly slide the adapter off for normal observation.
  • The DA10 fits lenses with a 43mm filter thread. If your lens has a different size filter – simply add one of our adapter rings – AR28/30/30.5/37/43/46/52/55/58/62/72mm between your lens and the DA10.
  • All camera functions remain including camera lens auto-focus and focus peaking.

Digiscoping with the Kowa TSN-883 Spotting Scope and iPhone 6S 4K Video

Even an iPhone delivers stunning footage and photographs through the Kowa-TSN 883.

Kowa TSN-800 Series Cost: $$$….

Seeing your life-bird as a crystal-clear, razor-sharp image, even in low light… Priceless!

-> View the Kowa-TSN 883/884 Prominar Spotting Scope

Recap

Below in the product widget are all of the best spotting scopes for birding (as well as for other outdoor wildlife viewing) in the 5 price ranges: Super-Budget, Budget, Semi-Budget, Mid-Priced and Best of the Best.

We also listed the Nikon Prostaff 5 Proscope 20-60×82 in the Semi-Budget range as a good second choice in that category. We have found that Amazon typically has the best prices, including shipping which is usually free.

Our overall advice: Buy the best spotting scope you can afford.

***NOTE: The Alpen Scopes are no longer available due to the company going out of business.***

Our new pick in this price range is the Vortex Diamondback 20-60×80 Spotting Scope as noted above.

Or jump to the Semi-Budget Spotting Scope category.

Bird Watching Spotting Scopes FAQs

Is an Angled or Straight Spotting Scope Better?

It depends how you will primarily be using your spotting scope.

If you will be using your scope to spot things above the horizon, then looking into an angled cope will be more accomodating.

It’s also easier for groups of people of varying heights to use an angled scope.

However, a straight spotting scope can be easier to spot and follow moving objects and to use from an elevated position or when mounted on a car window. Angled vs straight spotting scopes.

What do Spotting Scope Numbers Mean?

A 20-60×80 spotting scope has a magnification range between 20-60 with a 80mm objective lens.

Larger spotting scope objective lenses provide more light, but will be heavier and more expensive.

In the next section below, we discuss these features in detail.

How Do I Choose a Spotting Scope?

In deciding how to choose a spotting scope, you should consider magnification, objective lens and exit pupil size, eyepieces, FOV, optical and body design, eye relief, focus mechanism, close focus distance, glass/prism quality, and weatherproofness.

Are Spotting Scopes Better than Binoculars?

No, they serve different functions.

Simply, if you want to see details on birds or other wildlife or any types of objects from a long distance, especially in low-light conditions, a spotting scope will give you an advantage over binoculars, unless you use high-powered binoculars that are either image-stabilized or with a tripod to help provide a steady image.

How do I choose a spotting scope for birding and other wildlife viewing?

Get a bird watching spotting scope that has at least an objective lens size of 60mm which will allow enough light to enter the scope, especially during low-light conditions.

If you want to take photos through your scope (Digiscoping), you may want a bigger ojective lense (85mm and up).

Most birders like a variable zoom lens (i.e., 20-60) vs a fixed magnification.

Best travel scope for birding?

If you are looking to get a more compact spotting scope for birding while traveling, the Celestron Hummingbird 9-27x56mm ED Micro Spotting Scope is a good choice weighing only 1.43 pounds and small enough to be carried in a coat pocket.

How to Choose a Spotting Scope

What are the best spotting scopes for birding and wildlife viewing?

watching warlber with a spotting scope for birding

Scopes can range in price from $200 to $2,000. So what’s the difference between a cheap scope and an expensive one?

Let’s start with the basics and then define and compare the different features of spotting scopes to help you decide on a purchase.

To help you with your purchase, we will discuss the following spotting scope features:

  • Magnification
  • Objective lens size
  • Exit pupil size
  • Eyepieces
  • Field of view
  • Optical design
  • Body design
  • Eye relief
  • Focus mechanism
  • Close focus
  • Weatherproofness and
  • Glass/prism quality

What is a spotting scope?

A spotting scope is a terrestrial telescope, compact and portable, designed for observing objects on or near the earth (as opposed to astronomy viewing).

Spotting scopes are essentially telescopes designed for birding or other nature observation.

How is a spotting scope different than an astronomy telescope?

A spotting scope typically has lower magnification, a wider field of view, is easily portable, field-durable and its prism provides a correctly oriented image.

Often, astronomy telescope images are upside down and reversed (mirror-image). No problem with stars, bad with birds.

It’s hard enough to ID right-side up birds. And a mirror image will just mess with your mind.

Try following a bird that looks like its moving right, when in reality it’s moving left.

Astronomy telescopes are typically designed with a longer focal length for higher magnifications, but smaller fields of view.

In birding, we don’t need astronomy-level magnification (100x+).

We like to see the details on the bird, but don’t need to see every hamuli of a feather.

And the wider field of view on spotting scopes is definitely an advantage for “spotting” the bird in the first place.

Conclusions:A good astronomy telescope won’t be good for bird watching and a birding scope won’t be good for astronomy.

You can certainly use your spotting scope to look at the night sky (good for Moon and stars), but if you really want to see spectacular details, then get an astronomy telescope. If you’re getting a telescope primarily for birding, get a spotting scope.

Why get a spotting scope? What are the advantages over binoculars?

Spotting scopes are for long-distance bird watching. They provide the magnification necessary to see distant birds and to admire details at closer ranges. They provide the means to identify birds beyond the reach of your binoculars.

Under low light conditions, scopes will give you a brighter, clearer image and the magnification needed to see more details.

All birding scopes will have a mounting plate to attach a tripod for stabilization at these higher magnifications.

There are times when your 7x-10x binoculars cannot get you close enough to see what you want.

It may be because youblack crowned night heron magnification 
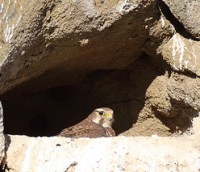
simply can’t get close enough with your binoculars such as viewing waterfowl in a lake, shorebirds in the mudflats, or cliff-nesting birds. Or perhaps you want a closer look, but don’t want to disturb the bird, especially sensitive species, say on a nest.

Or in open spaces, when trying to get close enough with binoculars will scare them away. With a spotting scope, you can admire birds from a distance.

Personally, we use spotting scopes often during the field season to make observations of nesting Golden Eagles and Prairie Falcons.

Many times we don’t even get out of the vehicle, but rather use a window mount to observe. We simply would not be able to observe certain adult and chick behaviors without a scope.

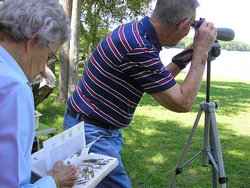
It’s also nice to have a spotting scope when birding in groups so that everyone can get a closer look. It’s a great way to share bird watching with beginners, especially young birders.

You can also record images and video with a spotting scope with either a regular telephoto 35mm camera, digital camera and/or video camera (see digiscoping).

Spotting Scope Features to Consider Before Purchasing

Magnification

In general, a good magnification range for your bird watching spotting scope is between 15-60x.

Below 15x, you might as well use your binoculars.

Above 60x, the field of view becomes too narrow and image brightness begins to dim, especially a problem in low light conditions.

Most often, 20-40x gives both the best field of view and image brightness for bird watching.

A point to remember: The higher the magnification, the larger the objective lens is needed to maintain image quality.

Additionally, any distortions (heat waves) or scope movement (tripod tremors) will be intensified at higher magnifications.

If you do want more magnification, remember that the quality of the lenses and prisms (which affects transmittance) become increasingly important.

Low quality lenses and prisms will produce low quality images, especially above 45x.

The highest useful magnification of your scope depends on the quality of the lenses and prisms, the objective lens size (discussed below), and outside conditions (low or bright light, haze, heat waves, etc.)

Objective Lens (Aperture)

The size of the objective lens determines the light-gathering capacity of a spotting scope.

More light = more clarity and detail which = a brighter, clearer image.

Aperture is defined as the diameter of the objective lens, usually measured in millimeters.

Bird watching objective lenses normally range between 50-80mm.

In general, a larger objective lens equals more weight and more $$.

When deciding on the objective size for your scope, get the largest objective you’re willing to pay for, but also willing to carry.

If you’re willing to carry a little extra weight, an 80mm objective lens will give you good images in nearly all light conditions, especially at higher magnifications. This is up to you.

Think about where and when you will be doing most of your birding.

If you live in Seattle (many cloudy days), go for the bigger objective lens.

If you live in a dry, sunny location, i.e. Arizona desert, and do most of your birding during the day (not dusk or dawn) and you want to carry something lighter, perhaps you could consider going a little smaller.

Exit Pupil

Along with objective lens size, the exit pupil is the best measure of image brightness.

The exit pupil is the diameter of light in millimeters visible through the eyepiece.

To calculate the exit pupil divide the objective lens size by magnification.

So the higher the magnification, the larger the objective lens needed to maintain image brightness.

As a general rule of thumb, try to get a scope where the exit pupil is 1.33mm or more.

Because in conditions besides optimal (bright, calm), an exit pupil below this will be insufficient, especially at higher magnifications.

So if you had a scope with a 20-60x zoom eyepiece, an 80mm objective lens would be suitable for all magnification ranges.

80mm (obj. lens size)/60 (highest magnification)= 1.33mm (exit pupil size).

However, a 50mm objective lens at 60x would give you an exit pupil of .83 mm (50/60=.83). Not as good, especially in lower light conditions.

Eyepieces

The eyepiece is what determines the magnification of your scope. It is also is a factor in determining field of view, exit pupil size, and eye relief.

Eyepieces sometimes are included with you scope but more often are sold separately.

Most scopes have interchangeable eyepieces, specific to manufacturer and line, allowing you to choose one or more that fits your preferences.

You can get either interchangeable fixed or single zoom (variable) eyepieces for your scope.

There are some spotting scopes, usually zooms or waterproof scopes, which have eyepieces that are non-interchangeable.

Zoom eyepieces have a range of magnification levels from low to high, usually 15-45x or 20-60x.

Birders find these very useful because they can scan at the lower magnification (wider field of view) to find the bird, then use the higher magnification to see details.

If most of your birding is done in wide open spaces, i.e. ocean seabird watching, hawk mountain ridges, then you may want to get a fixed wide-angle eyepiece which provides a wider field of view.

Or one with long eye relief (usually 25 or 27x) for those who wear eyeglasses. Or an eyepiece just for digiscoping.

Just remember to get a scope with an objective lens size that will be able to provide you with good images at all magnification ranges (review objective lens size and exit pupil size).

The quality of the eyepiece glass and design affects image quality as well. So selecting an eyepiece is just as important as selecting the scope body.

Note that manufacturers may have eyepieces that can only be used on one design line while other may be used on multiple lines.

You may want to consider this and see what eyepieces can be used on your scope if you plan on getting more than one.
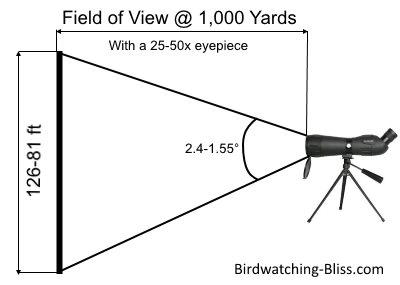
Field of View

The linear field of view (FOV) is measured as the width of area visible at 1,000 yards (or meters) from the observer.

It can also be expressed in degrees as the angular field of view. Normally as magnification increases, field of view decreases.

In general, a wide field of view is better for following fast-moving objects or for scanning and finding birds in the scope.

how to chose the best bird watching spotting scope

As discussed earlier in the eyepieces section, if most of your birding is done in wide open spaces, i.e. ocean seabird watching, hawk mountain ridges, then you may want to get a fixed wide-angle eyepiece that will provide you with a wider FOV.

You will notice that when comparing a 20x fixed eyepiece with a 20-60x eyepiece that the fixed 20x will have a wider field of view than the zoom at 20x. Just a matter of design.

Optical Design

The 2 basic optical designs of scopes are refractive and catadioptric.

Nearly all birding spotting scopes are refractive.

The reason being that even though catadioptric scopes provide clearer images at higher magnification (of same weight of refractor), they cost significantly more than refractive scopes and are not as strong and durable for field use as refractive scopes.

If you want that extra bit of edge for better images, have the cash, and think your scope won’t get bumped around too much, then go for the catadioptric.

Otherwise, a refractive scope is what you want.

But remember, catadioptric scopes may have images that are vertically correct, but reverse the image left and right.

REFRACTOR CATADIOPTRIC Uses optical glass to bend light Primarily uses mirrors to reflect light Image is correct (right-side up and right to left) Image vertically correct, but reversed right to left Focal length shorter (wider field of view Focal length longer (narrower field of view More durable and field-reliable, low maintenance More fragile, but rubber armor coating can help with protection from elements Simpler design, Less expensive 3-5x more expensive than refractors Heavier Provides greater magnification than refractors of the same weight Best for for terrestrial, nature viewing, birding, hunting, outdoor viewing Best for long distance above-horizon terrestrial applications, telephotography and astronomical observing. Can use fixed or zoom eyepieces Designed to primarily use fixed eyepieces. Performance above 60x diminishes Can provide useful magnifications up to 200x

How To Choose A Spotting Scope for Birding

Here is our continuing discussion of bird watching spotting scope features and how to choose a scope.

spotting scope angle

Spotting Scopes Part I above discusses magnification, objective lens, exit pupil, eyepieces, field of view and optical design.

In Spotting Scopes Part II we will discusses body design, eye relief, focus mechanism, close focus, weather proofing, and glass composition to help you choose a spotting scope.

Spotting Scope Body Design: Straight or Angled?

There are two basic body designs of refractor spotting scopes: straight and angled.

Straight scopes have the barrel and eyepiece aligned with each other, angled scopes have the eyepiece offset 45 or 90 degrees from the barrel.

There are pros and cons for both.

Personally, we like the straight design.

It’s easier to follow birds that are moving and because we often use our spotting scope from inside the car with a window mount, a straight scope is not a problem.

Many people fine the straight line of sight is easier for accurate aiming.

A straight design is also easier to use from an elevated position.

For example, viewing your backyard birds from a second-story deck.

On the other hand, if you are tall or do a lot of birding with groups, or most of your viewing is above the horizon (looking at cliffs, viewing soaring raptors, birds on tree-tops) than perhaps an angled design would be a better choice.

It all depends how you want to use your spotting scope.

An angled scope can be shared easier than a straight scope because more people of different heights can comfortable look into the scope without adjusting the height.

Think about how you will most often be using your spotting scope. This will help you decide which design best suits your needs.

Part I Spotting Scopes 101 Part II Spotting Scopes 102 Magnification Body Design Objective Lens Eye Relief Exit Pupil Focus Mechanism Eyepieces Close Focus Field of View Weather Proofing Optical Design Glass Composition

Spotting Scope Focus Mechanism

There are 3 basic focusing mechanism designs: single knob, double knob, and helical.

If you can, try different mechanisms and see which one works best for you.

If you can’t, then choose a knob focuser which is generally preferred for bird watching and nature viewing.

Single Double Knob Helical Most common, slow but precise, not as accurate with fine focus 2 drive knobs. One knob gives fast coarse focus, other knob gives precision fine focus Slower on coarse focus, better fine focus control, works well for observing objects that are quickly changing distances, near to far Used by: Bushnell, Kowa, Pentax, Bausch & Lomb, Swift and Zeiss Used by: Leica Used by: Swarovski and Nikon

There are also rack & pinion designs which are commonly found on astronomical telescopes and usually offer fairly fast, smooth focusing, but most components are external and subject to potential deterioration from dust and moisture over time.

Spotting Scope Glass Composition/Coatings

Color aberration is sometimes noticeable with refractor scopes.

Also light transmission can be increased by reducing reflections.

This can be mostly eliminated with the right kind of glass and coatings.

Look for scopes with ED (extra-low dispersion) FL (Fluorite) HD (High Density) and/or APO (apochromatic) glass.

These elements will provide you with an image of higher clarity, detail, and sharpness which in turn will reduce eyestrain.

Of coarse scopes with these extras add extra cost.

Another factor to weigh, but you’ll be paying the cost in frustration when you can’t see those details on that special bird on an overcast (low-light) day.

Spend the extra money on your spotting scope, save by making coffee at home, renting movies, skip the fast-food, make your own x-mas or birthday presents.

Not eating french-fries for a month may buy you the feathered look of a lifetime!

Weather Proofing/Protection

Unless your scope is going to reside inside your home, weather proofing is not an option.

You never know when that rain cloud will just pop-up out of nowhere.

Look for scopes with waterproof and fogproof (nitrogen/dry gas filled) designations.

Rubber armoring is also a nice addition.

It provides protection against abrasive materials, corrosion and helps cushion the scope against unexpected impacts (oops!).

It also makes it more easier and comfortable to handle in cold, wet weather.

Spotting Scope Eye Relief

Eye relief is an important feature on for eyeglass wearers.

It is the distance in millimeters between the eyepiece of the spotting scope and your eye that still allows you to see a complete field of view image in focus.

birding scopes summary

As an eyeglass wearer your eye is further away from the spotting scope eyepiece, which means a longer eye relief is needed in order to see the entire field of view.

For most eyeglass wearers, an eye relief between 12-15mm will be adequate.

Without adequate eye relief, you won’t get a complete field of view and find you’ll need to remove your glasses in order to see the image properly.

So long eye relief promises full field viewing with eyeglasses.

As mentioned previously in the eyepiece section, there are eyepieces specifically made with long eye relief.

You may also want to select eyepieces that have folding or rollback eyecups so you can get your eyes closer.

Spotting Scope Close Focus

Close or near focus is the distance between the scope and the nearest object you can focus on, while maintaining a good image and sharp focus.

In general, as magnification increases, the minimum close focal distance also increases. So scopes will typically have longer close focus ranges than binoculars.

For bird watching, a short close focus is beneficial for seeing details of a bird that has landed up-close to your scope.

It is also better for taking photographs (see digiscoping). So if this is important to you, selecting a scope with a close distance of 15ft or less would be optimal.

Summary:Get a lightweight, strong & sturdy scope.

If it’s not lightweight, it will be uncomfortable to carry around.

And if it’s not well built with strong housing, the first time it gets bumped when you’re frantically grabbing it from your back seat to see that lifetime peep (a.k.a sandpiper), you may be very disappointed when the focus doesn’t focus.

You get what you pay for – so don’t go cheap. Cheeps are for the birds.

So as with anything else, weigh the cost against the benefits, and get the best spotting cope you can afford.

If you can’t afford a Swarovski, Leica or Zeiss (top-end, most expensive manufacturers) then look at others such as Kowa, Nikon or Pentax which can have just as good designs, but be significantly lower priced.

And don’t forget to leave money in your budget for a sturdy tripod to support your scope, otherwise it’s like putting a Mercedes on golf cart tires.

Spotting Scope Basics

Hope you’ve enjoyed this review of spotting scope basics and we wish you the best in finding that perfect scope.

Digiscoping – Photography with spotting scopes

How to Choose Bird Watching Binoculars

Bird Watching Binoculars 101

Best Binoculars for Bird Watching

Types of Binoculars

High Power Binoculars – sometimes can be used as an alternative to spotting scopes if used with a tripod or monopod.

Jason Binoculars – Auto Focusing Binoculars

Best Zoom Binoculars

Best Mini Binoculars

Infrared Binoculars

Best Marine Binoculars

Cornell’s Review of Birding Spotting Scopes

The New Era – All about Sweet Home since 1929

0

The antlers of a Union County bull elk have been officially scored at 406 6/8, which would make it the second-place record for a typical Rocky Mountain elk in Oregon.

The bull’s skull and antlers were found by a cone collecting crew on private timberland in the Catherine Creek Unit during the summer and turned in to ODFW.

Mark Penninger, a certified scorer for Northwest Big Game Records Inc, officially scored the elk in early November after waiting the required 60 days.

(An animal must undergo a minimum of 60-day drying period before it is officially scored as skulls and antlers will shrink some after their first “green” score immediately after harvest or pick-up.)

“Bull elk of this caliber are incredibly rare in Oregon but it’s great to see that they are still around,” said Penninger, who described the antlers as “jawdropping.”

“This bull is testament that age, good genetics, and high-quality habitat can produce truly world class elk,” he said.

ODFW does not track trophy records but will be submitting the score to Northwest Big Game Records for official placement.

Northwest Big Game Records is one organization that keeps records of game animals including both those that are harvested by hunters and those that are found dead.

(In Oregon, due to poaching concerns, it is unlawful to possess or transport found dead game mammals or their parts, except for naturally shed antlers or certain parts when salvaging roadkill.)

The last time an elk with typical antlers scoring higher than 400 was found or harvested was 1984 by Randy Ryerse in Crook County, an elk now bumped to the #4 record with a 400 0/8 score.

The #1 Rocky Mountain elk was a 418 2/8 bull taken in Crook County in 1942 or earlier and attributed to Hugh Evans.

Until now, the second largest was a bull taken in Grant County by Jim Sproul with antlers measuring 401 1/8. This bull was displayed in the John Day Elks Lodge until it was lost in a fire when the building burned down, according to Penninger. The bull had the longest main beam of any bull anywhere for a long time, he says.

With this Catherine Creek elk, the top four Rocky Mountain elk will all score higher than 400. After that, antler scores drop into the high 300s.

The two Tafts

The top 10 for typical Rocky Mountain elk still includes “Taft,” a Wallowa Lake bull that was scored at 391 4/8 for a typical Rocky Mountain elk in 1930. This bull is ranked even higher in the non-typical category-it’s the No. 3 state record with an official score of 411 0/8.

“In fairly rare cases, an animal meets minimum qualifications for both typical and non-typical categories for the species,” said Penninger. “Typical scores subtract non-typical points.” (Learn more about how elk and other big game are scored by listening to this week’s Beaver State Podcast with Penninger.)

According to David Morris of Northwest Big Game, this record setting bull is often mixed up with another one of the same name (both are named after William H Taft who served as U.S. President 1909-1913). But there were actually two different Rocky Mountain elk that came to be called “Taft” in northeast Oregon in the early 20th century.

While historic records indicate elk were abundant in the Wallowa Mountains and Blue Mountain Plateau, market hunting had reduced numbers to a few small herds by the late 1800s/early 20th century, so elk were transplanted into the state to restore the population.

(The Oregon Legislature provided protection for elk in 1899 by making it illegal to sell meat from wild animals and by closing elk season from 1909 through 1932, and the Rocky Mountain elk population has since rebounded to more than 70,000 today.)

The first “Taft” was one of the original elk relocated from the Jackson Hole area to Oregon in the early 20th century. In 1912, 15 elk from Wyoming were released at Billy Meadows in Wallowa County followed by another 15 in 1913, and one of those was the first “Taft.”

The first Taft’s shed antlers are still displayed at the Enterprise Elks Lodge. Sheds from the second Taft (the 1930 record-setting bull) were displayed at La Grande’s Elks Lodge and are now at the Baker City Elks Lodge, according to Morris. Their antlers look different.

Morris spent several years researching the two Tafts and the story about what he found is in his book (The Record Book for Oregon’s Big Game Animals, 6th Edition).

Based on his research, Morris says the second Taft was likely one of a handful of elk born in one of the enclosures at Billy Meadows where the transplanted elk lived for several years; the fences were taken down in 1922.

ODFW hopes to eventually display the Catherine Creek bull’s record antlers in one of our offices and thanks taxidermist Brody Turner for working with us to get them ready for display.

See https://www.nwbiggame.com/top_10.cfm for Rocky Mountain elk and other big game records.

10 Gauge Vs 12 Gauge Shotgun, The Differences Explained

0

The difference between a 10 gauge and 12 gauge shotgun lies in the size of the bore, or interior diameter, of the barrel. A 10 gauge shotgun has a larger bore than a 12 gauge shotgun, which means that it is capable of firing larger and heavier shot.

The size of a 10 gauge shotgun barrel will vary depending on the make and model of the gun. However, in general, the bore diameter of a 10 gauge shotgun barrel is approximately 0.775 inches. This is larger than the bore diameter of a 12 gauge shotgun, which is typically around 0.729 inches.

The larger bore diameter of a 10 gauge shotgun allows it to fire larger and heavier shot than a 12 gauge shotgun. This can make it more effective for shooting larger game animals or for shooting at longer distances. However, the larger size and weight of a 10 gauge shotgun can also make it less maneuverable and more difficult to handle for some shooters.

Image comparison between 10 vs 12 gauge shotgun

10 gauge shotguns were once popular among hunters and were commonly used for shooting large waterfowl and other game animals. However, they have largely been replaced by 12 gauge shotguns, which offer a good balance of power and versatility.

One of the main differences between 10 gauge and 12 gauge shotguns is the amount of shot they can hold. A 10 gauge shotgun has a larger bore and is therefore able to hold more shot than a 12 gauge shotgun. This can be an advantage when shooting larger or more distant targets, as it allows the shooter to use more shot to increase the chances of a hit.

Another difference between 10 gauge and 12 gauge shotguns is the amount of recoil they produce. Because 10 gauge shotguns are larger and heavier, they tend to produce less recoil than 12 gauge shotguns. This can make them more comfortable to shoot for people who are sensitive to recoil or have smaller frames.

In terms of performance, 10 gauge shotguns are generally considered to be more powerful than 12 gauge shotguns. This is because they are able to fire larger and heavier shot, which can deliver more energy and penetration to the target. However, this added power comes at a cost, as 10 gauge shotguns are typically more expensive and heavier than 12 gauge shotguns.

What is the better for deer hunting?

It is difficult to say which type of shotgun would be better for hunting deer without knowing more about the specific circumstances, such as the type of terrain, the range at which the deer are typically shot, and the type of ammunition that will be used. In general, a 12 gauge shotgun is a more versatile choice for hunting because it can handle a wider range of ammunition and shot sizes than a 10 gauge. However, a 10 gauge shotgun may be a better choice for long-range shooting or for shooting larger shot sizes. Ultimately, the best choice will depend on the individual hunter’s preferences and needs. Here are more helpful tips on buying your first firearm.

The choice between a 10 gauge and 12 gauge shotgun will depend on the intended use and the preferences of the shooter. 10 gauge shotguns are powerful and versatile, but they are also more expensive and heavier than 12 gauge shotguns. On the other hand, 12 gauge shotguns offer a good balance of power and versatility and are suitable for a wide range of hunting and shooting applications.

Best Air Rifle Deals

Popular Posts

Best Air Rifle Brands – Who Makes the Best Pellet Gun?

0
In Jeff Bezos’ own words: "A brand for a company is like a reputation for a person. You earn reputation by trying to do hard...

PCP vs CO2 Guns: Which One is Better?

0
The most talked-about debate between hunters and gun enthusiasts is what the best power source of a gun is.  The five main sources of power...

How far can an air rifle shoot accurately?

0
An air rifle's effective shooting range depends on various factors, including the type of rifle, the caliber, and the power source. Generally speaking, most...

Air Gun 101: What You Should Know about Air Rifle Barrels Before Buying

0
Have you ever heard the phrase: “Imitation is the sincerest form of flattery”? The Chinese must have been very sincere in emulating this proverb. I...

How Do Break Barrel Air Rifles Work?

0
A break barrel air rifle is a type of airgun where the barrel breaks open at a hinge point just above the breech. This...