Wild game meat is an excellent bait for coyotes. These wandering canines love fleshy game, so pig meat and dear meat make great coyote bait. The pungent odor of aged meat can also be highly effective in luring these predators from afar, thanks to their sharp olfactory senses.
Using meat from a coyote’s natural diet is effective most of the time. However, if their habitat is teeming with prey, coyotes may not be able to pick up on the scent as quickly.
Therefore, if you want to capture their attention, try baiting traps with exotic varieties of meat or organs that aren’t endemic to the local ecosystem.
Fish, beaver, and gopher meat are all hearty options that a coyote will enjoy. If you can procure these foods, you’ll have a higher chance of attracting these curious predators.
How Do You Bait a Coyote at Home?
Baiting a coyote at home will require you to have a meat source that they’ll enjoy. A frozen hunk of meat from a deer or pig carcass can do the trick. It doesn’t have to be cleaned beforehand; the bloody scent that emits from these carcasses can be used to attract coyotes from faraway distances.
At home, you can set up foothold traps or neck snare traps around your property. Coyotes are unpredictable creatures and can threaten humans and pets, so these traps ensure that any live trap mishaps may be avoided.
How Do You Bait Coyotes for Hunting?
A baitsicle, or a frozen food source, is an effective lure to hunt coyotes. These piles can include mounds of liver, fat, and entrails from game such as deer and hogs that will trigger a coyote’s scavenging instincts.
Ideally, place your bait near the edge of a woodline or an open, forested space where coyotes will feel safe venturing into. Position yourself about 100 yards away from the bait, where you can secure a good vantage point.
Once you see a coyote approaching the bait, take your shot. You may also use a coyote call lure to mimic these creatures into entering the baited area.
What Scent Attracts Coyotes?
The best attractant scents for coyotes are musks that mimic their natural diet. These food lures include the smells of blood, guts, and rotting flesh from deer, cows, and other wild game in the surrounding area.
Exotic meat scents can also be effective trapping lures for coyotes. Coyote urine may also be used as an attractant for these coyotes. It may also attract bobcats, raccoons, and foxes, so use them sparingly if you somehow have access to this liquid.
Lastly, a coyote gland lure can be an effective predator bait. This trapping bait indicates a coyote’s presence, triggering a male’s territorial response.
What’s the Best Time of the Day to Hunt Coyotes?
Coyotes aren’t strictly nocturnal but prefer prowling the lands between dusk and dawn. For this reason, many hunters prefer to start their coyote hunts around sunset and continue into the night.
That said, it’s challenging to spot coyotes during the nighttime, so plan your hunt during the break of dawn. The little bit of light in the sky can provide enough illumination to spot the predator without the aid of external light sources.
In a similar vein, sunset hours may also be effective. There’s enough ambient light, and coyotes are about to start a new day of hunting on their own.
Is It Better to Hunt Coyotes Day or Night?
If you’re coyote trapping, set it up during the day and leave it open for a coyote to wander in during the night. If you’re predator hunting on your own, you might want to hunt during the golden hours.
These are the times of the day when there’s enough illumination in the sky to spot a coyote. But it’s not so bright that the animals return or are still inside their habitat. If you’re aware of the coyote’s den, then you can also plan a hunt around their denning schedule.
Coyotes usually stick to one place to rest and raise their young, so finding and waiting around their den can lead to a successful hunt. Just be careful—these coyotes can get aggressive if they suspect their cubs are in danger!
Can You Bait Coyotes With Dog Food?
Coyotes have been known to enter yards to eat dog treats left out in the open. Especially in semi-urban areas, using this as a type of bait is entirely possible.
Depending on the coyote, they may even develop a preference for dog food over certain types of meat so that they can be ideal baits for some trappers.
Are Coyotes Attracted to Dog Urine?
While male dogs pee as a mark of their territorial boundary, coyotes don’t often get the memo. Coyotes are deterred by wolf urine but not dog urine.
In fact, the urine of female dogs in heat can attract their wild canid cousins like coyotes to enter your property. As such, it’s essential to control your dog’s urination if you live in an area with a high coyote population.
Do Coyotes Travel in Twos?
Coyotes travel individually or in pairs when they hunt. They may also form a coyote family of around 2 to 3 adults and 7 to 11 cubs, but these families will eventually break up and hunt on their own once they reach maturity.
They may work collaboratively with other coyotes to take down large prey, but if they’re not part of the family den, they won’t find the need to travel in a pack with this new group.
What Food Attracts Coyotes?
Coyotes have a varied diet consisting of meat, fruits, and detritus. Their typical diet includes:
Rodents
Dog food
Carrion and dead game
Livestock
Poultry
Insects
Fruits
A coyote most commonly eats rodents and marsupials, which comprise about 75% of its diet. This includes mice, voles, chipmunks, skunks, rabbits, and squirrels.
They’re not picky when it comes to their food, either. They enjoy feasting on various types of meats, even once they’ve never eaten in the past.
We may not like it. But it happens every year. Deer season must come to a close. Then, bucks shed their antler…and we move in to pick them up. Here’s a little more insight on how deer grow and shed antlers as well as how to find them once on the ground.
The antler-growing process begins almost as soon as the antlers are dropped. Sometime in early spring, velvet-covered antlers begin to protrude from the pedicles. Growth peaks in late August throughout most of the whitetail range. Most bucks shed their velvet between mid-August and mid-September. Increasing levels of testosterone cause their velvet to peel off. Then—in late winter after the rut is over—bucks shed their antlers.
HOW BUCKS SHED THEIR ANTLERS
Whitetails shed their antlers like many species in the deer family. There are several factors that play into this biological- and chemical-based occurrence.
Antler drop is influenced by genetics. Every subspecies of whitetail is a little different on when they let go of their headgear. Depending on what subspecies of whitetail you hunt will influence when they shed.
Geographical location also plays a role because it dictates climate. Depending on where the deer are will dictate what weather conditions they are exposed to. Extreme cold causes deer to shed their antlers sooner than milder conditions.
Nutrition and food source availability factor in, too. Deer suffering from malnutrition are subject to shedding sooner than healthier whitetails. Years with severe mast crop failures—like this year—can be a major player if no other food sources are available.
The fourth—and final major factor—is stress from the rut. Years that produce harsh rutting conditions for bucks cause bucks to shed sooner than usual. Areas with uneven buck-to-doe ratios dump bigger loads on bucks. Does get missed because there aren’t enough bucks to breed them in a timely manner. Therefore, the rut gets stretched out and lasts longer.
Once late winter arrives, the antler base loosens, and then the antler falls off. All of the factors above cause the connective tissue beneath the base of the antler to degenerate even faster.
WHERE TO FIND SHED ANTLERS
Shed hunting has become the latest buzz in the deer hunting world. You have to put miles on your boots to find them. But put the right miles. There are certain areas that tend to produce more sheds than others. Here are those prime spots.
Bedding Areas
Cedar thickets
South- and east-facing slopes
CRP fields
Field-grass beds
Fingers of trees
Travel Routes
Fence crossings
Ditch crossings
Creek crossings
Feeding Destinations
Crop fields
Food plots
Pockets of mast crop
Water sources
TIPS TO FIND SHED ANTLERS
It’s best to hunt smart, not hard. The same goes for hunting shed antlers. Just like there are better places to look, there are better ways to find them. Keep these tips in mind.
Tools of the Trade
Monitor the drop with trail cameras.
Use binoculars to scan fields and open woodlots.
Ride a four wheeler while looking in large fields.
Methods of Shed Hunting
Use a shed dog.
Look for the tip of an antler, not the entire thing.
Take someone who knows the ropes.
Look on rainy days. Antlers shine better then.
Shed hunt where you would late-season deer hunt.
Draw a grid on a map and search each quadrant.
Change perspective. Crouch down. Stand up. Find more sheds.
The annual antler drop is here. If it’s not in your area, it soon will be. Take time this post-season to get out and look for shed antlers.
“I’ll hold the rifle and look at it while getting the feel, place my face against the comb to get an idea of how the gun will hold when I have a scope mounted.”
Furthermore, he says:
“I’ll grip the pistol grip to see if it fits comfortably and cradle it in my arms to see how it will carry.”
The very essence of this is to evaluate the quality and usability of the gun.
The stock definitely makes the larger bulk of the gun and therefore must be assessed carefully.
The design of the stock depends on what material is used to make the stock.
The two main materials used for the stock are wood and polymer.
The rest of the gun is usually made of metal.
This metal part may or may not be incorporated into the stock.
One major factor the manufacturers take into consideration when designing air rifle stocks is how the air rifle will feel in the hands of the shooters.
It must be comfortable since it is the part you hold as you aim at the target and fire.
Your cheek rests on the stock while shooting.
Coupled with the action of the hands, you are able to stabilize your gun for an accurate shot.
The stock enables you to handle even the longer varieties.
Additionally, the stock of the airgun helps absorb some of the aftershocks generated after shooting the high-powered airguns.
This is of course in addition to the butt pad, normally made of rubber or plastic.
Let us now delve deeper into the main types of stocks in regard to the materials used to make them.
What is synthetic stock?
The invention of synthetic materials revolutionized the manufacturing industry, not only the airgun industry.
Chemists have been on a continuous journey to join small molecules for the production of long polymer chains that have better characteristics.
In addition, material specialists and engineers have come up with new processing methods and technologies to better the characteristics of materials.
Durability is at the heart of these inventions.
The desire to produce goods that last for a long time has never waned.
Additionally, the world is championing materials and technologies that are sustainable, more energy-efficient, and capable of reducing pollution.
In this sense, airgun manufacturers hopped onto the bandwagon of synthetics.
Over the last 20 years or so, the airgun industry has seen a deep influx of synthetic stocks.
However, the first synthetic stock emerged onto the market back in the mid-1960s.
The company brown Precision started using fiberglass to produce airgun stocks.
Further on, around 1980, Weatherby came up with the Fibermark.
This was the very first factory rifle with a synthetic stock.
From that time, many other manufacturers joined the movement and have been producing air rifles with synthetic stocks.
Initially, synthetic stocks were simply made of hand-laid fiberglass.
Technology has seen to it the introduction of other materials such as Kevlar, graphite, boron, and urethane, among many others.
Before synthetics became famous, wood was the material of choice in making air rifle stocks.
What is wood stock?
The very term stock is a German word for the tree trunk.
The name dates way back to 1571 when hunters started hunting with rifles.
The version of the rifle used then was known as the hand cannon.
The handle was a simple stick fixed into a kind of socket in the breech.
From this earliest version, the wooden stock has greatly evolved in shape and structure as manufacturers continue to make better airguns.
Right now, walnut is the most popular wood type for air rifle stocks.
Other types of wood commonly used include myrtle, birch, maple, and mesquite.
The choice of wood for use in airgun stocks is a very sensitive issue.
Not every timber can be carved into a gunstock.
The natural properties of the wood must first be considered.
First of all, the pattern of the grain of the wood is very important as it determines how strong the wood is.
The grain pattern also leads to desirable features such as crotch figure, fiddle back, feathering, and burl.
Having known the two most popular types of stocks as regards the material used in making them, it is time now to get deeper into the performance aspects of synthetic and wood stocks.
Synthetic vs Wood: Accuracy
One hunter shares his experience with a wood stock rifle in this Hunt Talk thread.
After spending lots of money on an excellent pre-64 Winchester model 70, the barrel is free-floated in its original walnut stock.
Upon going on an elk hunting trip, it happened to snow and rain a lot.
The result was the walnut stock swelling and completely throwing off the accuracy of the rifle as the barrel moved about.
He finally had to borrow another gun to complete the hunt.
Airgun accuracy goes hand in hand with the shooting distance.
What you normally want to know is how close the pellet will fall close to your aim.
For instance, you have a ring drawn on paper and your aim is the center of the ring.
A very accurate air rifle will drive the pellet right through the center of the ring if aimed properly.
A less accurate rifle may not hit the target.
Accuracy definitely diminishes as the target distance is increased.
The further away from the target, the less accurate the rifle becomes.
This is because of other factors such as a decrease in velocity due to air resistance.
That aside, all factors held constant, air rifles with synthetic stocks have been shown to be generally more accurate than air rifles with wood stocks.
This is however after using the airguns for a long period of time.
When a wood-stocked airgun comes from the factory, if it is machined to high-quality standards, chances are that its accuracy is similar to that of synthetic stock airguns.
However, as the wood gets more exposed to the elements, there is a greater possibility of warping and swelling.
The result is a barrel that is no longer perfectly fixed to its position.
A shaky barrel will definitely not release the ammo in the intended trajectory.
Synthetic vs wood: Recoil
Recoil can be quite a nuisance for any shooter out there.
As the ammo flies from the airgun, Newton’s third law of motion sees to it that the rifle moves slightly.
This is how it happens for spring and gas piston airguns:
Pulling the trigger releases the spring so that the piston can be pushed forward.
At the same time, there is a backward push by the spring.
As the piston gains momentum, the spring continues to move in a forward-backward motion.
This series of actions is what we refer to as recoil.
The major problem is the possibility of the rifle shifting away from the target.
Another effect of recoil is the shock effect on your hand and body.
So, between the synthetic and wood stocks, which one exhibits the most recoil?
The recoil felt actually depends on how heavy the rifle is.
If we can conclude that wood stocks are generally heavier than synthetic stocks, it then follows that synthetic stocks will have more recoil than wood stocks.
Wood stocks are also more solid than synthetic stocks.
This way, they are able to absorb more of the recoil than their synthetic counterparts can.
Starting with wood stocks, quite a number of trees have been used for making airgun stocks.
Initially, Maple was the tree of choice.
Maple has an average density of 750 kg/m3.
As the years rolled on, it became increasingly hard to find good maple.
The next preferred tree was the Walnut.
This was chosen because it was pretty hard but still workable.
Walnut has an average density of 650-700 kg/m3.
Other varieties of walnuts have even fewer densities.
For instance, the Claro Walnut averages 490 kg/m3, the European Walnut averages 570 kg/m3, and the Amer black walnut averages 630 kg/m3.
Other woods used for airgun stocks include birch, myrtle, and mesquite.
What am I getting at?
The weight of the stock depends on the type of wood used, of which there are quite many that can be used.
Similarly, there is quite a variety of synthetic materials in use.
These materials are of a wide range, each with different densities and construction choices.
Some are solid while others are hollow.
The difference in weight between different synthetic stocks is also as varied as is the case with wood.
Therefore, we cannot make a definite conclusion on which stocks are heavier, between the wood and synthetic ones.
Synthetic or wood rifles
Improb lists the top 10 air rifles for hunting. In the table below, you will see how many have synthetic stocks and how many have wood stocks.
Air Rifle
Stock
Gamo Big Cat 1250 .177 Caliber
Synthetic
Crosman Nitro Venom Break Barrel Air Rifle
Synthetic
Ruger Yukon Air Rifle
Wood
Swiss Arms 288723 Tac-1 Break Barrel
Synthetic
Benjamin Marauder Pellet Air Rifle
Synthetic
Crosman Optimus Break
Wood
Ruger Blackhawk Combo Air Rifle
Synthetic
Gamo Whisper Silent Cat Air Rifle
Synthetic
Umarex 2251300 Surge Combo
Synthetic
Remington Tyrant Air Rifle
Synthetic
The wood vs synthetic ratio here is 2:8, or rather 1:4. Does this ring a bell? Let us look at another list by Airgun Maniac – Best PCP air rifles 2020.
Air Rifle
Stock
Benjamin Marauder PCP Air Rifle – Best overall PCP Air Rifle
Wood
Hatsan Flash QE PCP Air Rifle – Best Entry-level PCP air rifle for youth and beginners
Synthetic
Beeman QB Chief – best PCP air rifle for the money
Wood
Airforce Condor PCP Air Rifle – Best budget PCP air rifle
Synthetic
Benjamin Discovery PCP Air Rifle – Best budget PCP air rifle
Wood
Diana Stormrider PCP air rifle – Best budget PCP air rifle
Wood
AirForce Condor SS PCP Rifle – most accurate PCP air rifle
Synthetic
Umarex Gauntlet – Best regulated PCP air rifle
Synthetic
Hatsan BullBoss QE Rifle – Best PCP air rifle under 500 dollars
Synthetic
Seneca Sumatra 2500 – A powerful yet affordable air rifle
Wood
Air Arms S510 XS Xtra FAC – The best PCP air rifle for accuracy and looks
Wood
Hatsan AT44-10 Long QE – The best PCP air rifle under $ 600
Synthetic
AirForce Texan Big Bore – The most powerful PCP air rifle
Synthetic
Hatsan BullMaster Semi-Auto PCP Rifle – The Best PCP air rifle under $1000
Synthetic
Seneca Dragon Claw 500cc Air Rifle – Best PCP air rifle for hunting
Wood
In this list, the wood vs synthetic ratio is 7:8.
I would say that there is a good balance between air rifles with synthetic stocks and those with wood stocks.
Synthetic vs wood: Durability
Durability goes hand in hand with moisture resistance.
Obviously, synthetic stocks are more moisture-resistant than traditional wood stocks.
Synthetic stocks hardly absorb moisture.
This way, they are not prone to swelling and shrinking like their wood counterparts.
Wood, even the best quality absorbs moisture when exposed to the open air.
Absorption of moisture leads to swelling of the stock.
When the stock loses moisture as it is exposed to the sun, it shrinks.
The alternate swelling and shrinking compromises the bedding quality of the barrel.
In the end, the wood stock wears and the airgun becomes fairly inaccurate.
Synthetic stocks on the other hand can last for several years without any significant decline in the bedding quality.
Synthetic vs Wood looks
There is no doubt that wood carries the flag in terms of looks.
Being natural, beautiful patterns cannot be equaled by any man-made material.
In fact, man has tried to imitate the natural patterns of wood by inventing wood laminates.
The resulting product is somewhat beautiful but still does not match the natural beauty of wood.
The same is true for synthetics.
There is nothing so fancy about the matte finish.
Even though the manufacturers try other tricks like blueing, they have not been able to produce something more beautiful than wood.
Wood is also warm. It has the tendency to influence your mood and give you that confidence you need when hunting.
If you can recall, the initial air rifles had wood stocks.
Having an air rifle with a wood stock psychologically gives you the feeling of handling a real firearm.
And what does that do to you? Increase your confidence!
Final Verdict
The brunettes or the blondes? Having laid out the facts, which one will you go for?
Personally, I am usually a synthetic guy. I am always ready to sacrifice the good looks of wood and benefit from the durability of the synthetics. In a few cases, I’ll go to the wood if it’s well-manufactured and long-lasting like a Diana or a Weihrauch.
It’s a beautiful thing when testosterone kicks in and gnarly old mulie bucks quit thinking. Nocturnal monarchs strut around in broad daylight, thicket-loving old hermit bucks stand silhouetted on open ridges, and alpine-country cliff dwellers descend to mingle with does in less protected, more accessible habitat.
In most regions, you’re not allowed to hunt mule deer during the rut. All you can do is take a detour through areas high in doe numbers on your way to work, break out the spotting scope, drool all over the front of your business suit, and take some shaky iPhone photos through the ocular lens.
Mule deer bucks are notorious for using the rough terrain to their advantage. That’s why it’s so crucial to find them when their guard is down during the rut.
But if you really want to hunt bucks during the mule deer rut badly enough, there are ways. No, I’m not talking about poaching.
Several great mule deer states offer some sort of a late-fall rut hunt. Usually, it’s in a limited-draw area, and you’ll put in for half your life in the hopes of pulling a tag. However, there are exceptions. Frequently, those exceptions involve archery equipment and lots of cold weather, so you’ll have to be both adaptable and tough to capitalize on them.
Take my home state of Utah. Ask any local hunter if Utah offers a general-season mule deer rut hunt, and he’ll laugh ruefully in your face. Utah, like many Western states, manages for hunter opportunity, not hunter success.
But after a minute a light will go off in some cobwebbed recess of that local’s brain, and he’ll say something like, “Actually, if you’re willing to work your way through a labyrinth of suburban neighborhoods, park near city water tanks or whatnot, and climb near-vertical slopes into the Wasatch Mountains, there’s an extended-season archery unit€¦.” Hunters may pursue big old bucks until mid to late December on the west-facing, extremely steep slopes above Salt Lake City.
These deer are never rifle hunted. Some years ago, a law prohibiting hunting with rifles was created due to fears of rifle bullets flying out over the city. That’s not to say that the local deer are dumb — far from it.
They get hunted from mid August to the end of the year. But it’s a legitimate rut hunt, and you’ll see big bucks working does among the oak brush clinging to the steep slopes. Whether you’re man enough to climb and put a stalk on one is up to you. I’ve put many a stalk on mature bucks on those slopes and blown all but one.
Just like chasing whitetails, peak movement for mulies will happen when the sun is low.
A buddy and I found a big buck near the bottom of the far slope in a steep, very rugged knife-bottomed draw, tending a doe in estrus. After racking our brains for a way to put a successful stalk on him, it dawned on us that if spooked uphill, the ledges and cliffs above him would funnel him through a 20- yard-wide gap in the rocks atop the far ridge. There was simply no other way for him to go — assuming he went up instead of fishhooking around.
It was worth a try. I won the toss and spent the next three-and-a-half hours in knee-deep snow, dropping clear down to the valley floor to get across the draw without spooking the buck, then climbing the gut-wrenching far ridge. Finally in position, I thumbnail-scraped the eighth-inch layer of ice off my bowstring and arrow and waved at my partner. He piled off the far slope in a cloud of powder, going right at the buck.
Just about the time I could no longer stand to wait, antler tips showed suddenly above the bulge of the slope below me. With my heart doing jumping jacks on my stomach, I focused on a spot at the front edge of his shoulder, planning to smoothly draw my recurve and shoot as he passed only 18 yards away, leading the region I wanted to hit by just a few inches.
Suddenly in the perfect spot, tongue hanging out from climbing the slope, the buck stopped. In disbelief, I drew to anchor, rushed the shot, and missed right over the 170-class buck’s back. I still haven’t forgiven myself.
Destination Testosterone: Where To Hunt
While many hunters believe that the mule deer rut occurs at the same time as the whitetail rut (and in some regions it’s true), most of the violent rutting action I’ve observed occurred after the first of December.
Finding a place to hunt can be complex. Studying the regs in the state you want to hunt is a great start, but a call to a wildlife biologist can prove a worthwhile shortcut. Biologists can point you to areas with high deer populations, tell you about migration patterns you’d otherwise be unaware of, and suggest routes to access remote public land.
Sometimes the land where rut hunts occur is private, and knocking on doors to ask permission to hunt can prove as fruitless as a celebrity marriage. Fish & Game agencies can often help by referring you to cooperating landowners that participate in open-access programs. High-tech GPS mapping programs that display blocks of public within private lands can also be very useful.
Killer Methods: How To Hunt
Once you’ve found a region and a legal spot to hunt and obtained a tag, get your boots on the ground and find out where the does congregate during late November and December. Rutting bucks are as predictable — and as unpredictable — as teenagers with high hormonal levels, and usually the old bucks can be found patrolling doe populations.
I once read that a good way to tag a monster buck during the rut was to find the biggest group of does in the area and watch that group — sniper style — day after day. Sooner or later, a gnarly old buck will swagger out of the nearest thicket and start sticking his nose under the tails of those fine-looking does.
A less boring method is to roam and glass doe groups from a healthy distance. Sooner or later, you’ll find a big buck as he cruises through during the mule deer rut. Be warned: With a bunch of buck-ravished, spooky doe eyes on the lookout, stalking can be tougher than sweet-talking a pretty girl at a church quilting bee.
Hunting mulies requires patience, because you never know what buck will be found in the next group of does.
If there’s good fresh snow, tracking can be effective. Take a skillful buddy along, put him on a promising big track, and veer out to the side, climbing high points in the terrain and watching out in front of your partner as he works the track. You might just catch a big old buck sneaking through the thickets ahead of him.
If you’ve got a long season, where you can relax and have a little fun, try rattling in edge cover near high doe populations. While I’ve never personally rattled in a mulie buck, my brother has — big ones.
If you catch an amorous but lonely buck just right, he might come stomping in snorting steam, blood and fire in his eyes. More probably, the big bucks in the area will just raise their heads at the sound and look long and hard — which can be just the trick you need to get a clear look at a buck to evaluate his rack.
In the end, though, glassing is where it’s at. Cover a lot of country during high movement periods at dusk and dawn and carry powerful binoculars that suck up light, along with the very best spotting scope you can afford. When you find the buck you want, move on him with everything you’ve got because you may never see him again.
Hunting mule deer in the rut is a far cry from hunting rut-crazed whitetails. They don’t vocalize much, they aren’t really callable, and they don’t hold predictable rutting territories. On the other hand, they do become visible.
A highly visible monster mule deer is the most contagious carrier of buck fever in the world, and if you decide that hunting rutting mulies is on your bucket list, you’ll contract it sooner or later.
The first thing that needs to be understood is that bullet weight does not directly have anything to do with what rifle twist you should be using in your AR15 barrel chambered in 5.56 NATO or .223 Wylde.
Now before some people start pounding their table, and grabbing pitchforks, let me explain.
Bullet length is what ultimately dictates your barrel rifling twist. If you do a quick google image search, you will find a few different charts or graphs that specifically show bullet weight and which rifle twist you “need”.
Ar-15 Rifling Twist Rate
While it is a general rule of thumb with weight, in reality, the longer a bullet is, the heavier it becomes.
With newer types of bullets on the market and lead-free designs, some bullets made of copper and zinc are very light but require extra length to achieve the same weight compared to a lead core projectile.
So, the longer the bullet you shoot, generally speaking, the faster the rifling twist needs to be to properly stabilize the bullet in flight. With great stability comes great accuracy. But what does the barrel twist mean?
A Cliff Notes History Lesson
In the early years of the AR15’s development, the rifling twist that was adopted was a 1:14 rifle twist.
The easiest way to explain what that means is that the rifling makes a complete twist 1 time every 14″. Most loads shot through these barrels were a very short, lightweight bullet in the 40-55 grain category.
You can read a more complete history of the M16, but for now, let’s fast forward to the present.
The early M16A1 utilized a rifle twist rate of 1:12 to stabilize the 55 grain M193.
After the adoption of the M16A2, the military started using a 1:7 rifle twist, which was faster. The rifling made a complete revolution within 7″ now instead of 14.” We are talking twice as fast.
The military also adopted a longer, heavier projectile with the SS109 steel core projectiles loaded in the M855 cartridge.
The current example of an M4 carbine with a twist rate of 1:7 to stabilize the 62 grain M855.
Capitalism at Its Finest
So why are there multiple rifle twists on the civilian market with the 1:9, 1:8, and the 1:7 as stated before?
Short answer: Capitalism.
If you are a red-blooded American, you enjoy the perks of capitalism.
The one drawback of capitalism though is that the market breeds more choices and more decisions. A lot of barrel manufacturers sell all of the top three rifle twists in their barrels, and it can be a little daunting when you are trying to figure out which one to get.
We covered the fact that you need to properly stabilize a bullet, and we have covered a quick history of different rifle twists. Stick with me here, because I am going to make this a very easy decision for you.
A Lot of Bad Info
Out in the unnatural world of the interwebs, you can run into a lot of bad information regarding practically anything. Rifle twist and bullet choice are no different.
When it comes to slower rifle twist, i.e. 1:14, 1:12, 1:9, you really shouldn’t be shooting bullet weights over 65 grains or the equivalent length for a 65-grain bullet. It won’t damage your rifle, but you will have very poor accuracy.
Are bad twist rates why Stormtroopers can’t hit anything?
It is absolutely true that heavier, longer bullets in the 69-85 grain flavors like faster rifle twists of 1:8, or 1:7. When someone tells you, “if you want to shoot some operator level Mk262 77 grain OTM ammo, you need a 1:7 twist”, believe that they have your best interest at heart.
But what about an all-purpose twist you may ask?
Maybe you are just like me, and you want a barrel twist that can excel with the heavier 77 grain or 85-grain loads, BUT at the same time you want to get out and smoke some woodchucks or prairie dogs, and you would like a 40-grain bullet to shoot accurately?
Can you “over-stabilize” a lighter bullet with too fast of a rifling twist?
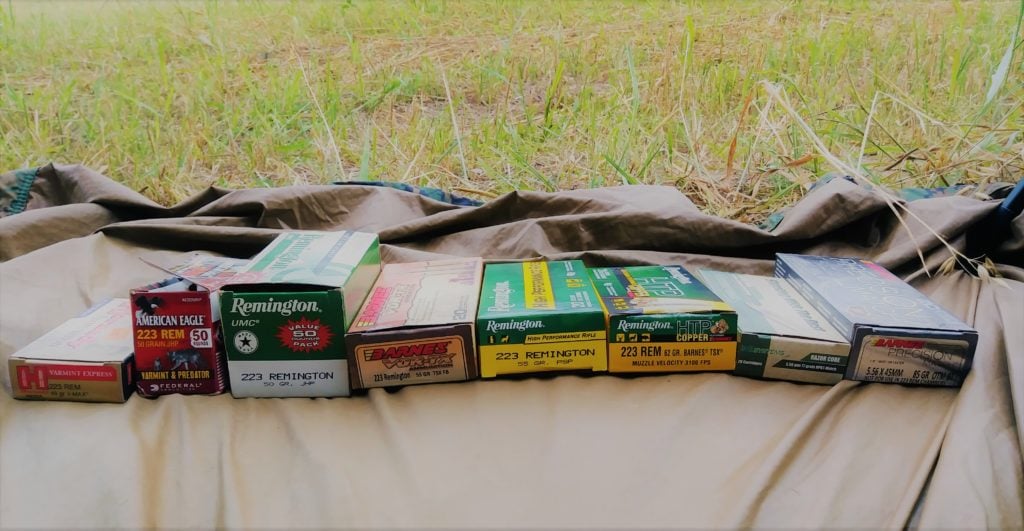
Ammo for days! A sampling of the different loads shot for the experiment
Shoot, Switch Ammo, Repeat
I decided to run through a little experiment with multiple loads of .223 Remington and 5.56 NATO. Ten different loads to be exact. And to make this even more scientific, I did it with two different rifles that both have a 1:7 rifle twist.
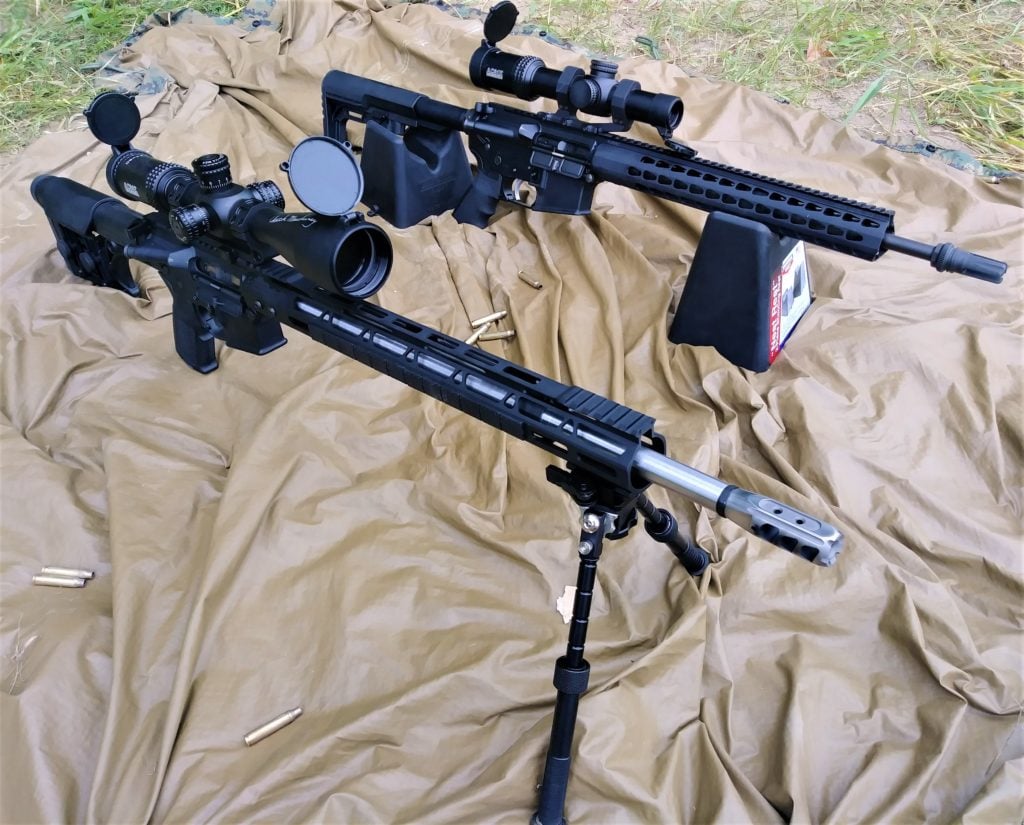
The first rifle that I tested is a home-rolled rifle that utilizes a Radical Barrels, LLC 20″ 416R stainless barrel. Rick Hoffmeyer of Radical Barrels, LLC made it for me, and it’s a fantastic barrel.
The optic on this rifle is an ACME Machine 6-24x50mm FFP TR-MOA. For the price, it is hard to beat for a first-focal-plane optic.
Author’s two rifles used for the accuracy test of a 1:7 rifle twist
The second rifle is a factory Bushmaster Minimalist that Remington had me use on a hog hunt down in Texas at the Spike Box Ranch. (If you ever get offered a chance to go there, don’t think about it. DO IT.) The only thing I added to this rifle was an ACME Machine 1-8x28mm FFP low-powered variable optic.
Glass clarity on this scope is impressive, to say the least. Both rifles used scope mounts from Green Blob Outdoors, and for the price, are exceptionally solid scope mounts that lock down tight.
From the lightest grain bullet to heaviest shot was:
Hornady 40 Grain V-Max
Winchester 45 Grain JHP
Federal 50 Grain JHP (Varming & Predator)
Remington UMC 50 Grain JHP
Tul-Ammo 55 grain FMJ (Just for the hell of it.)
Barnes 55 Grain TSX
Remington 55 Grain PSP
Barnes 62 Grain TSX
IMI 77 Grain OTM Razorcore
Barnes 85 Grain OTM
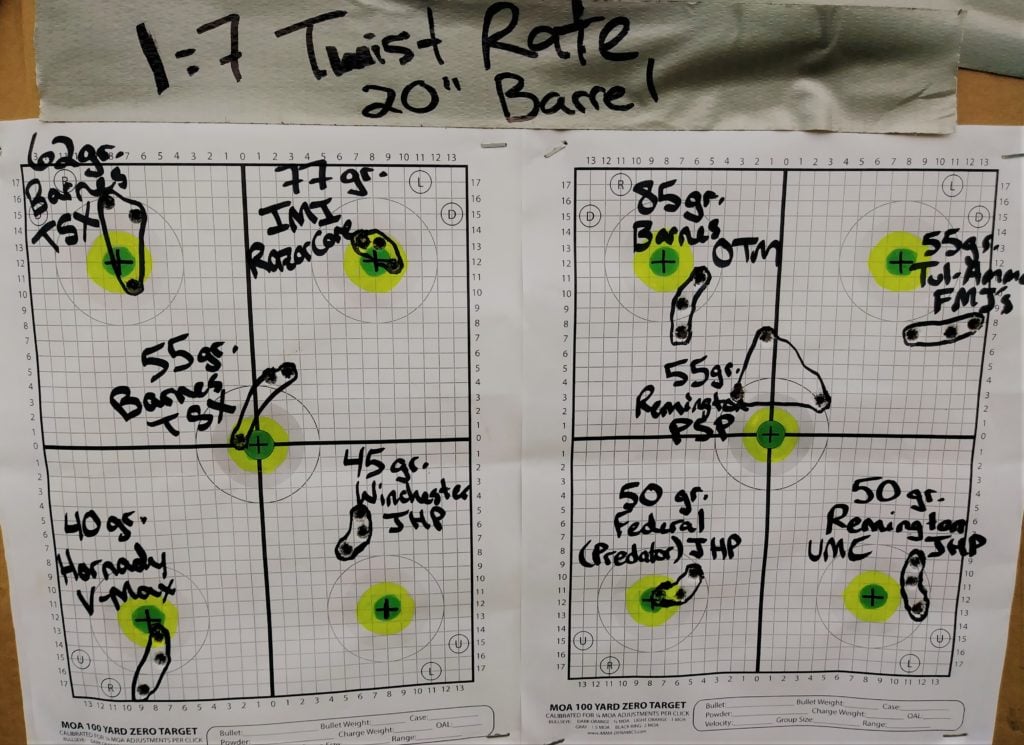
Moment of Truth
With ten different loads, all varying from the lightest/shortest to the heaviest/longest projectile that will fit inside the mag well of an AR15, I went about firing 3 round groups with each load at 100 yards to test how well each bullet would do.
I fully understand that some purists may be wringing their hands in the air because I did not do 5 shot groups. I get it. When I really test accuracy for a specific load, I fire 5-10 round groups to really see its potential.
The reality of the situation is that I have kids to feed, and a wife that will literally stab me to death in my sleep if I drain my bank account for ammo. She showed me the knife…
While this isn’t a comprehensive accuracy test for each load, this test shows a good representation of the accuracy potential for each load out of a 1:7 rifle twist barrel.
As you can see from the included photos, there was absolutely no loss of accuracy from an “over-stabilized” lighter/shorter bullet.
Both rifles tend to shoot roughly the same point of impact, varying across the whole spectrum of bullet lengths and weights at 100 yards.
Some conventional “wisdom” would dictate that my accuracy should have suffered greatly with the shorter/lighter bullets with a faster 1:7 rifle twist or worst case scenario tumble through the air and keyhole the target. This just isn’t the case.
Within the normal ranges that most shooters fire their rifles, bullet length and twist should not be a concern if you have a faster 1:7 rifle twist.
Targets for the 10 different loads tested out of a 20” Radical Barrel
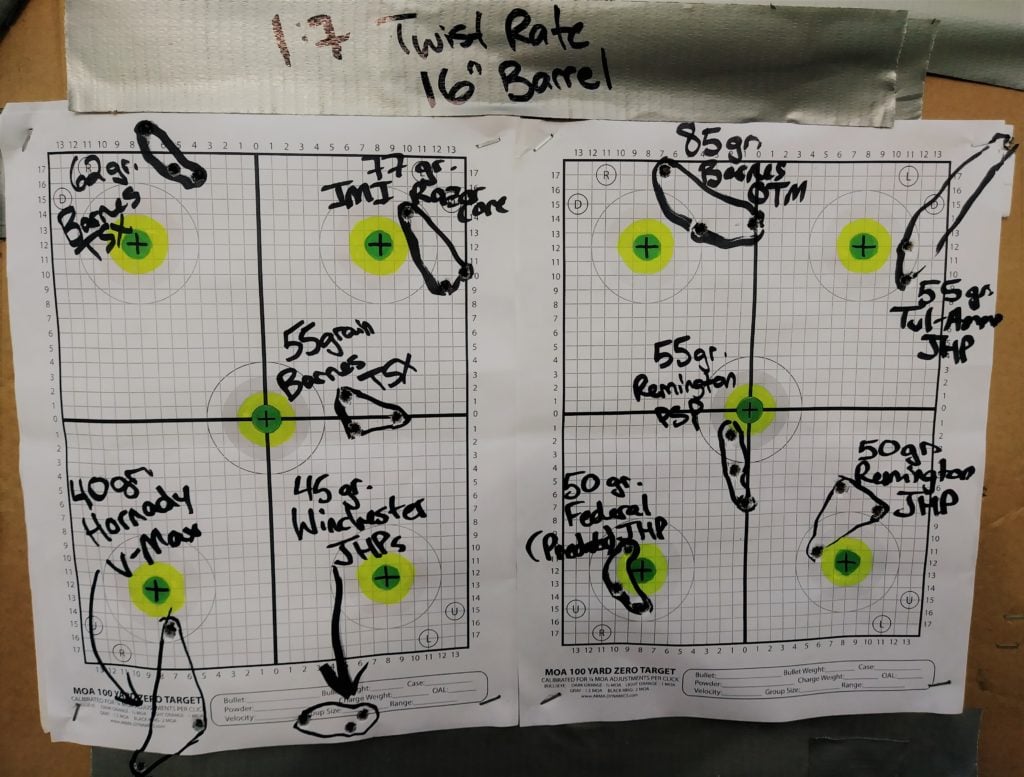
What should be a concern though, is feeding your rifle quality ammunition, and making sure your barrel is of good quality if you are striving for accuracy. Ultimately, that is the deciding factor of accuracy when using a 1:7 rifle twist.
Targets for the 10 different loads tested out of a 16” Bushmaster barrel
Decisions, decisions…
So its time to pay the piper, and make a decision on the rifling twist that will best suit your needs as a shooter. My vote is a 1:7, hands down. With a 1:7 rifle twist, shooting quality ammo, you can go as light as you would like with commercially available ammunition.
A case could be made that “over-stabilization” can bring about issues at extended ranges, but why would you honestly shoot a 40-grain projectile past 300 yards? If you are actually trying for accuracy at extended ranges of 300-700 yards, a 69-85 grain bullet is much better suited for the task at hand.
For up-close shooting drills, or within 300 yards, bulk 55 grain M193 will do just fine as well out of a quality barrel when you are on a budget.
Obviously, your mileage may vary, but generally speaking, if a load shoots like a dumpster fire, more than likely, your barrel just doesn’t like that specific mixture of powder weight and bullet style.
In my opinion, it just makes sense to stick with a 1:7 rifle twist! And now that you know how twist rates affect you, you’ll want to know what the Best AR-15 Ammo: Home Defense & Range is for you and your rifle.
What twist rate is your barrel in? What is your favorite ammo? Let us know in the comments!
This fact sheet serves as a reference for the safe preservation of venison, defined by United States Department of Agriculture (USDA) as meat from deer, elk, moose, caribou, antelope, and pronghorn. Venison is typically a very lean meat and may contain a “gamey” flavor. Because wild game is more active, it may be less tender, and the fat may have an unpleasant taste, which you may want to remove before storage or use.
Food Safety Concerns During Harvest and Transport
Proper field dressing of wild game, such as deer, is the first step in reducing the risk of food borne illnesses caused by pathogens such as E.coli, Salmonella, and Toxoplasma. E.coli, for example, is found in the intestines of wild game and can be easily transferred to the meat during butchering.
Also be aware that parasites and tapeworms are commonly present in wild game. One common parasite is Toxoplasma gondii, the cause of the disease toxoplasmosis. Symptoms of illnesses caused from consuming parasites can range from mild discomfort to severe illness and possibly death.
Considerations
How do I keep the unprocessed venison safe?
Planning ahead is the key to having a safe meat supply. Here are a few things to consider before the hunt to make sure that your meat is properly cared for.
Time/temperature on the day of the hunt: During warm hunting seasons (over 40 F), meat will need to be chilled within three to four hours of the kill. Refrigerate as soon as possible for best quality. Freezing the carcass may cause the meat to toughen. Cool the meat quickly by filling the cavity with bags of ice. Keep meat in the shade with good air circulation. Use of ground pepper and cheesecloth to cover the meat can help with deterring flies. DO NOT use tarps or wrap tightly in material that would hold heat which could cause the meat to spoil.
Transporting the meat: Wrap the carcass in a clean sheet but do not tie to the hood of a car or keep in the trunk. Keep the meat cool until processed and out of direct sunlight while allowing for good air circulation.
Aging the Meat: The process used to tenderize and enhance the flavor of venison is called aging the meat. Temperatures must be controlled between 34 F and 37 F from seven to 14 days for the process. DO NOT AGE meat harvested during warm weather and not chilled, as the meat is not safe for human consumption. If the animal was severely stressed prior to the kill, if gunshot wound was extensive, or if under one year of age, the quantity of usable meat will be reduced.
Other Safety Precautions
The Centers for Disease Control recommend that “hunters should avoid eating meat from deer and elk that look sick or test positive for chronic wasting disease.” Some symptoms of chronic wasting disease include loss of body condition, listlessness, blank facial expression, excessive salivation, and drooling. If you suspect the deer is unhealthy, check with the local game warden or a commercial venison processor to determine if the meat is safe to consume.
Parasites and tapeworms are common in venison. Freezing for 24-48 hours prior or cooking to internal temperature of 160 F will destroy parasites. If you are planning to pressure process the meat, both raw pack and hot pack methods will safely destroy parasites.
Field Dressing
Have questions on how to safely field dress an animal? The Ohio Department of Natural Resources publication “Field Dressing Your Deer,” (ODNR #111) wildlife.ohiodnr.gov/portals/wildlife/pdfs/publications/hunting/pub111.pdf provides a step-by-step guide for safely handling venison once the animal has been harvested. It also addresses aging the meat and how to create various cuts of meat. You may decide the simplest and safest way for you to handle the previously listed food safety concerns is to have the venison commercially processed at a licensed meat processing facility.
Preparation of the Meat for Long-Term Storage
In order to reduce the wild game taste of the meat you may want to try one of these two methods.
Soak the meat in salt-water brine made using 1 tablespoon of salt per quart of cold water.
Soak the meat in a vinegar solution made using 1 cup of white vinegar per quart of cold water.
Regardless of which brine solution you choose, soak the meat for at least one hour to overnight in the refrigerator. Meat needs to be completely covered with the solution. Discard solution after soaking.
Storing Raw Venison
If you decide to home process the venison, whole cuts of venison may be stored in the refrigerator for three to five days (at 40 F or below) before canning or freezing. Ground venison may be stored in the refrigerator for one to two days (at 40 F or below) before canning or freezing.
Food Safety Concerns During Processing
Clostridium botulinum (C. botulinum) bacteria grow in a reduced-oxygen environment. Precautions need to be taken regardless of whether you are vacuum-sealing venison for freezing or canning venison, since both of these methods provide part of the conditions needed for pathogen growth.
Freezing venison in vacuum-sealed packaging increases the risk of C. botulinum growth when thawing the meat. Be sure to use one of the approved methods of thawing such as thawing in the refrigerator, thawing in the microwave and then immediately cooking, or thawing as a part of the cooking process. Be sure to remove venison from the packaging prior to thawing it in the refrigerator or microwave.
When canning venison (or any other food product) it is important to make sure the canner is operated correctly and has been tested for accuracy. Because venison is a low-acid meat, it must be processed in a pressure canner. If the canner is not functioning correctly, it may result in an under-processed product which has an increased risk for C. botulinum.
Canning Venison
Venison must be processed in a pressure canner. For more information on pressure canning, refer to the “Canning Basics” fact sheet at ohioline.osu.edu/factsheet/HYG-5338.
Strips, Cubes, or Chunks
Choose quality chilled meat. Remove excess fat. Remove large bones. Cut into uniform strips, cubes, or chunks.
Hot Pack
Precook meat until rare by roasting, stewing, or browning in a small amount of fat. If desired, add 2 teaspoons of salt per quart to the jar. Fill jars with meat; add boiling broth, meat drippings, water or tomato juice, leaving 1 inch of headspace. The hot pack is preferred for best liquid cover and quality during storage. The natural amount of fat and juices in today’s leaner meat cuts are usually not enough to cover most of the meat in raw packs.
Raw Pack
If desired, add 2 teaspoons of salt per quart. Fill with raw meat pieces, leaving 1 inch of headspace. Do not add liquid. Adjust lids and process.
Ground or Chopped Meat
Choose quality chilled meat. Avoid flavoring sausage with sage; canning may cause a bitter, off-flavor. If desired, add 1 part high-quality pork fat to 3-4 parts venison before grinding. Shape chopped meat into patties or balls, or cut cased sausage into 3- to 4-inch links. Cook until lightly browned. Ground meat may be sautéed without shaping. Remove excess fat and fill jars. Add boiling meat broth, tomato juice, or water, leaving 1 inch of headspace. If desired, add 2 teaspoons of salt per quart. Adjust lids and process.
Table 2. Recommended Processing Times for VenisonStyle of PackJar SizeProcess Time (in minutes)Canner PressureDial GaugeWeighted Gauge0-2,000 ft.0-1,000 ft.1,000+ ft. Hot or Raw (strips, cubes or chunks of meat) Pints 75 11 lbs. 10 lbs. 15 lbs. Quarts 90 Hot (ground or chopped meat) Pints 75 11 lbs. 10 lbs. 15 lbs. Quarts 90 Note: Processing times will vary for elevations over 2,000 feet. See USDA Canning Guide for additional information: nchfp.uga.edu/publications/usda/GUIDE05_HomeCan_rev0715.pdf.
Freezing Venison
If not freezing immediately, the meat should be chilled without delay to 40 F or lower to prevent spoilage. Freeze meat using proper freezer wrapping materials (be sure freezer wrap is designed for freezing). Wrap meat tightly, pushing out as much air as possible. Consider packaging meat in portion control sizes to reduce waste. Freeze and store at 0 F or lower.
Deer, antelope, moose, and other large game can be handled for freezing like any other meats. Trim and discard bloodshot meat before freezing. Package the meat, seal, and freeze.
Storage Guidelines
Most cuts of venison may be stored for six to nine months in a freezer with the temperature at 0 F or below. Liver, heart, kidney, or tongue may be frozen for six months for best quality.
If interested in making jerky, please reference the fact sheet “Making Jerky” at ohioline.osu.edu/factsheet/hyg-5362.
Preparation of Work Area
Regular cleaning and sanitizing of the equipment, utensils, and work surfaces reduces the possibility of food contamination and the transmission of disease-causing organisms. Although cleaning removes the visible soil, sanitizing reduces the unseen microorganisms that might be present on cutting boards, countertops, knives, pans, and other equipment used for processing raw meats. They should be sanitized before use and allowed to air dry.
Both wood and plastic cutting boards can be used. Nonporous surfaces are easier to clean and sanitize. Wash them in hot, soapy water, scrubbing vigorously. Rinse with clear water, sanitize, and let air dry. When a cutting board becomes excessively scarred and difficult to clean, it should be discarded.
Chlorine bleach can be used to make a sanitizing solution for food-contact surfaces. Use standard chlorine bleach for this purpose rather than the scented varieties. For cleaning and sanitizing equipment and utensils:
Add 1 tablespoon of chlorine bleach to 1 gallon of water.
Add 1 teaspoon of chlorine bleach to 1 quart of water.
Change the bleach water solution often. Food particles will dilute the bleach.
Wash hands with warm, running water and soap. Hands should be washed for at least 20 seconds and dried with a single-use paper towel. Be sure to clean cuticles and fingernails, as these are places that are more difficult to clean. Jewelry should not be worn while butchering.
Cloths used for wiping down equipment and other surfaces should be wrung out frequently in a sanitizing solution and stored in the solution when not in use. Launder cleaning cloths daily or more, if necessary. Keep cloths used for food-contact surfaces separate from other cloths.
Additional Resources
The USDA Meat and Poultry Hotline is another resource if you have questions regarding food safety and storage of venison: fsis.usda.gov/food-safety/safe-food-handling-and-preparation/usda-meat-and-poultry-hotline.
Sources
Chronic Wasting Disease and Potential Transmission to Humans. (2004). Centers for Disease Control and Prevention, wwwnc.cdc.gov/eid/article/10/6/03-1082_article.
Complete Guide to Home Canning: Preparing and Canning Poultry, Red Meats, and Seafoods. (2015). U.S. Department of Agriculture, nchfp.uga.edu/publications/usda/GUIDE05_HomeCan_rev0715.pdf.
Field Dressing Your Deer. (2006). Ohio Department of Natural Resources, Publication #111, wildlife.ohiodnr.gov/portals/wildlife/pdfs/publications/hunting/pub111.pdf.
Game from Farm to Table. (2011). U.S. Department of Agriculture Food Safety and Inspection Service, s3.amazonaws.com/assets.cce.cornell.edu/attachments/19032/Game_from_Farm_to_Table.pdf?1481131140.
Goard, Linnette. (2015). ”Canning Meat, Poultry and Game.” Ohio State University Extension, ohioline.osu.edu/factsheet/HYG-5330.
Goard, Linnette. (2015). ”Freezing Meat, Poultry and Game,” Ohio State University Extension, ohioline.osu.edu/factsheet/HYG-5334.
Let’s Preserve Meat and Poultry (2015). Purdue Extension Health and Human Services, extension.purdue.edu/extmedia/HHS/HHS-801-W.pdf.
Parasites and Foodborne Illness. (2017). U.S. Department of Agriculture Food Safety and Inspection Service, fsis.usda.gov/food-safety/foodborne-illness-and-disease/pathogens/parasites-and-foodborne-illness.
Proper Field Dressing and Handling of Wild Game and Fish. (2011). Penn State University Extension, extension.psu.edu/proper-field-dressing-and-handling-of-wild-game-and-fish.
“Safe Handling of Wild Game Meats.” (2007, revised). Clemson Extension HGIC 3516, hgic.clemson.edu/factsheet/safe-handling-of-wild-game-meats.
Wild Game Meat. Illinois Department of Public Health.
Whether you’re a first-time hunter or have years of hunting experience under your belt, you know the importance of scouting the area beforehand. Getting a feel for the surrounding wildlife and lay of the land gives you an advantage when you set out on your next trip.
Trail cameras are the perfect solution to giving you the upper hand. With coverage of your entire property, you can have a clear view of many outdoor angles to better strategize your next hunting venture. Many of these cameras work on cellular plans to give you real-time visibility regarding what’s happening around your property.
On average, trail camera plans can range anywhere from free to costing $60 or so each month, often paid upfront for a year. Some plans run about $1,000 annually. Others cost more or less depending on the number of cameras on your data plan and whether that company charges for data usage or on a picture-by-picture basis.
Incorporating a cellular trail camera into your hunting and scouting process, security or wildlife photography hobby can enhance your experience. Learn the benefits of choosing Moultrie Mobile as your cellular trail camera provider by reading below.
Integrating a cellular trail camera with a data plan is one of the best ways to ensure your trail cam photos are easily accessible and stored somewhere safe. With the proper connection, you can check up on areas of your property any time you desire without worrying about a choppy feed, disconnected coverage or lagging.
Some benefits of choosing trail cameras that send pictures to your phone include:
Access to your photos from anywhere you have a cellular signal — regardless of your proximity to your trail camera. You can also view pictures via your log-in credentials on the mobile website.
The option to store your photos in cloud-based storage, keeping them safe and secure if anything happens to your phone.
The ability to customize your data plan to match how many cameras you have and how often you plan to use them.
Additional perks and features, like built-in AI capabilities, the ability to change camera settings remotely, image filtering and sorting options and push alerts when photos are taken or delivered.
You can enjoy the views of the great outdoors right from your fingertips with reliable coverage sent to your phone. If you’re scouting out your next hunt, choosing the right trail cameras offers you all the above benefits as you explore the great outdoors.
Now that you know more about the benefits of cellular trail camera data plans, you might be wondering how much you can expect to pay for the costs of these connectivity packages. The answer depends on several factors, including:
Whether you are paying monthly or for an entire year upfront.
The brand, model and type of trail camera you are using.
How much data and photos you anticipate using each month.
Whether you opt for thumbnail-size or full-resolution images.
Any add-ons or bonus features, like access to cloud storage, may cost additional fees, depending on the manufacturer.
Exploring your options for the best trail camera manufacturer plans can give you a better idea of which choice gives you more bang for your buck. Comparing the quality and costs of each one can make your decision easier.
The Best Cellular Trail Camera Plans With Moultrie Mobile
Every game camera manufacturer provides different services from others. Prices vary across the industry, and the value of any 4G wireless trail camera plan depends on how well that manufacturer meets your specific needs. Some of your needs may include the following:
Compatibility with a cellular service provider that has extensive coverage in your area.
Whether the data plan includes the cost of photo transmissions or total data usage.
High-quality products that are suitable for your intended use.
Availability of multi-camera packages and other add-on options.
Your budget for both the initial camera purchase and monthly fees.
The ability to pay monthly, quarterly or annually.
The overall quality of the product, service and ongoing care.
At Moultrie Mobile, we take all of these crucial factors into consideration when helping you find quality coverage that fits your budget.
As a long-time leader in the trail camera industry, we designed the Moultrie Mobile cellular trail camera plans to integrate seamlessly into your lifestyle and offer convenient features that enable you to get the most out of your camera footage. All plans below include unlimited cloud storage, HD versions of images available for on-demand download and advanced image recognition — all with no contract required.
Our plans are compatible with Verizon- and AT&T-connected cellular trail cameras, offering maximum coverage. Additionally, our Moultrie Mobile App is also easy to use, allowing you to access and monitor your camera’s status and settings when you’re away.
Choose from one of these flexible, cost-efficient Moultrie cellular train camera plans:
Standard: The Standard plan includes 1,000 images and 10 videos each month. It costs $8.99 per month if you pay annually and $9.99 if you pay each month.
Unlimited: The Unlimited plan includes a limitless number of images and 50 videos each month, which costs $12.99 per month when paid annually and $16.99 when paid monthly.
Pro Series Unlimited: The Pro Series Unlimited plan includes unlimited images and 50 videos each month, and you save more when you have four or more cameras on this plan. Your first camera is $34.99 per month, and additional cameras are $7.99 per camera each month.
Every Moultrie Mobile plan offers competitive pricing and includes convenient features and anytime-access to our helpful team of customer service representatives.
Do you need a few more pictures for one month than you do in another? Moultrie has you covered. Our plans are flexible and adaptable to your lifestyle. For the Standard plans, you can easily add 500 more images to your plan for an additional $4.99, or add 50 videos for $1.
With every Moultrie Mobile monthly plan, you also have the option to pay annually rather than monthly, saving up to 40% on total monthly costs. Plus, you can upgrade or downgrade your plan anytime and there is never an activation or cancellation fee. Regardless of the Moultrie Mobile plan you choose, you’ll have access to valuable features that will enhance your hunting and scouting experience.
Cellular Service Providers for Trail Cameras
Some cellular game data plans are compatible with only one cellular service provider, while others are compatible with two or more. Always consider the service provider when choosing your trail camera plan and check that their high-speed coverage extends to the areas where you install your cameras.
The two most popular service providers compatible with 4G cellular trail camera plans are Verizon and AT&T:
Verizon: You need a connected device plan to access Verizon cellular game camera plans. Verizon’s connected device plans can work through your account’s unlimited or shared data plan, or you can opt for a single-device plan instead. Single-device data plans range from 500MB to 1GB, while shared data plans can reach 10GB. You can also use add-on data boosts for your Verizon cellular trail camera plans for an additional fee. Verizon covers more than 99% of the U.S. population, so you likely won’t have trouble picking up a strong signal where you need it most.
AT&T: With wireless coverage in every state, AT&T has both prepaid and standard contract data plans. AT&T game trail camera service prepaid data options include an 8GB high-speed data plan, an unlimited data plan and an unlimited plus data plan that includes a 10GB mobile hotspot. Standard contract AT&T trail camera plans include unlimited and mobile share options, so you can adapt them to fit multiple cameras if necessary.
Why Moultrie Mobile Offers the Best Cellular Trail Camera Plan
With adaptable, cost-efficient plans, flexible coverage options and world-class customer support, Moultrie Mobile is the best cellular trail camera plan for anyone who wants reliable quality and convenient built-in features. Here’s what you get when you choose Moultrie Mobile:
Multiple coverage options: With the ability to choose between Verizon, AT&T and other major cellular networks as your service provider, you can select the one with the best coverage in your area. You are not bound to whichever company currently services your cellphone — our plans are their own entity and can exist on a different network from your cell phone.
Flexible plan options: We offer several different plan options to suit various needs and lifestyles, all with no required contracts and no fine print. You have the opportunity to pay either monthly or upfront for the year, which saves you money. As your needs and lifestyle change, you can easily adjust your plan to a lower or higher tier, or add 500 photos to your current month for an extra charge.
Unlimited cloud storage: Every plan has free unlimited cloud storage, so your photos are easily accessible and safely stored. Even if your phone breaks, you can access your images without issue.
Advanced image recognition: Our advanced image recognition system helps you get the most value for your money, sifting through your game cam photos to identify and tag ones with deer, buck, turkey, people and vehicles in them.
Trained customer support: Our highly trained support team is based in the U.S. and is always available to help if you have questions or require assistance — even on nights and weekends. Enjoy further peace of mind with our three-year hassle-free warranty program.
Easy setup: It only requires three simple steps to set up and you’re ready to receive photos and improve your hunting.
More than a trail camera: The Moultrie Mobile app includes quality features and technology that is sure to impress. You’ll have everything you need with one innovative app.
High resolution: You’ll receive HDR images and HD videos with sound directly to your phone. You’ll have the ability to scout from virtually anywhere.
Free two-year warranty: You’ll be backed with our industry-leading warranty for up to two years after the purchase date. Remember to register your camera to ensure the two-year warranty covers you.
Summer is here, and you know what that means: it’s fire pit season. In recent years, backyard fire pits have exploded in popularity, because let’s be honest: what’s better than sitting around a warm fire on a cool summer night while roasting marshmallows for s’mores? Nothing, that’s what. And if there’s one brand that can take the lion’s share of the credit for making home fire pits a thing, it’s Solo Stove.
Solo Stove’s popularity can be attributed to a number of factors. Its fire pits are ruggedly-built, well-designed, easy to use and (mostly) portable. The brand’s trademark smokeless technology actually works, eliminating the most annoying thing about traditional fire pits and bonfires: the smoke that seems to constantly always be in your face no matter how hard you try to escape it.
The Texas-based brand offers a number of products outside of its core fire pit lineup, including pizza ovens, patio heaters, camp stoves and an array of accessories, but when most people say “Solo Stove,” they’re referring to fire pits. But there isn’t just one definitive fire pit made by the brand — Solo Stove makes a number of different models in various sizes to suit different needs and situations. So if you’ve been wondering about different Solo Stove sizes and wondering which of the brand’s fire pits to get, here’s what you need to know.
Signature 360° Airflow: This is the defining feature of Solo Stove’s fire pits. It’s a proprietary ventilation system that uses a system of perforations throughout the fire pit to continually feed fresh oxygen to the base of the fire while simultaneously pumping superheated oxygen to the top of the flame. This results in both a hotter and more efficient flame and a near-total absence of smoke.
304 Stainless Steel Construction: Every Solo Stove fire pit, regardless of size, has the same general design made from 304 stainless steel. That makes them extremely durable and resistant to heat, while also keeping them relatively lightweight. Even the largest Solo Stove is technically portable (though you might need some help lugging it around).
Lifetime Warranty: Finally, every fire pit sold by Solo Stove is backed by a lifetime warranty against manufacturer’s defects. And even if your Solo Stove is damaged through your own misuse, the brand will still give you a 50 percent discount on a replacement.
Solo Stove Mesa
Diameter: 5.1 inches
Height: 6.8 inches
Weight: 1.4 pounds
The smallest Solo Stove fire pit is the Mesa, which is designed to sit on a tabletop and stands just 5.1 inches tall on its included stand. But don’t let the diminutive size fool you: this is a Solo Stove fire pit, through and through. It features dual-fuel capabilities, meaning you can use either wood pellets or firewood — very tiny firewood — as fuel. Unlike other Solo Stoves, the Mesa is also available in a variety of colors other than plain stainless steel, including limited-time options that pop up now and then.
Given its small size, this isn’t the fire pit for the family to gather around in the backyard. It’s designed to live on a table, with a warming radius of just one or two feet. It’s ideal for a couple or to add a little ambiance to an outdoor meal.
Solo Stove Mesa XL
Diameter: 7 inches
Height: 8.6 inches
Weight: 2.3 pounds
The Mesa XL is, as you may have deduced, a larger version of the Mesa. It’s two inches wider, roughly two inches taller and weighs about a pound more. But don’t let the “XL” give you the wrong impression. This is still a tabletop fire pit. It differs from the regular Mesa only in size and capacity. The XL holds up to 1,000 grams of pellets compared to the original’s 285-gram capacity, it has a burn radius of two to three feet and its burn time is 45 – 60 minutes rather than 30 – 45 minutes.
If the Mesa seems just a little too dainty for your needs, then you’ll likely be happy with the Mesa XL.
Solo Stove Ranger 2.0
Diameter: 15 inches
Height: 12.5 inches
Weight: 15 pounds
Moving off of the table and onto the ground, we have the Solo Stove Ranger. Solo Stove positions the Ranger as its most portable full-size fire pit, as it’s large enough for a small group hangout but still light and small enough for a single person to easily tote around. As one of Solo Stove’s full-size fire pits, it features the brand’s easy-to-clean removable ash pan and can only be fueled with wood (unless you spring for the pellet adapter). It also includes a carrying case and works with a wider range of accessories than the Mesa, such as the Heat Deflector and Pi Fire Pizza Oven attachment (read our review of the Pi Fire here).
Solo Stove Bonfire 2.0
Diameter: 19.5 inches
Height: 14 inches
Weight: 23.3 pounds
The Bonfire is Solo Stove’s flagship fire pit, and its most popular. In other words, it’s the right choice for most people. It’s large enough to live in your backyard at nearly 20 inches across, but also still light enough to take to the beach or campsite (like the Ranger, it includes a carrying case). It provides plenty of heat for a crowd and features all of the brand’s latest technology, like the removable ash pan. It also, given its popularity, has compatibility with just about every Solo Stove accessory.
Solo Stove Yukon 2.0
Diameter: 27 inches
Height: 17 inches
Weight: 41.6 pounds
The Yukon is the fire pit for party people. It’s by far Solo Stove’s largest, measuring well over two feet across and weighing nearly 20 pounds more than the Bonfire. This means that it’s best suited to live permanently on your patio or in your backyard. Though it is technically portable, there’s no included carrying case and it’s awkwardly shaped and fairly heavy, so you’ll want help moving it. Since it’s the largest, the Yukon of course throws off the most heat of any Solo Stove fire pit, making it best suited for larger spaces and bigger crowds. Like the Bonfire and Ranger, the Yukon is compatible with a number of Solo Stove accessories.
The world’s oceans are full of fascinating creatures, including quite a few large and rather intimidating marine animals! If you love nature and the ocean as much as we do at Harbor Breeze Cruises, we hope you’ll be excited to gain some insight into two predators found in the oceans: the orca and the great white shark.
Meet These Impressive Apex Predators
Great white sharks and orcas are known as apex predators, which means that they reside at the top of the food chain. They play a crucial role in regulating the populations of other species and maintaining the balance of the world’s delicate marine ecosystems.
Because great white sharks and orcas are two of the most iconic marine mammals in the world, it’s no surprise that a debate exists over which animal is the most formidable.
Orca vs great white shark . . . which one is bigger? Which one is faster? Which one is the most relentlessly fierce and deserves to be known as the ultimate marine predator? Let’s see if this debate can be settled once and for all!
Orca vs Great White Size
On average, orcas—also known as killer whales—are twice as long and three times as heavy as great white sharks, making their difference in size and weight quite significant. The orca’s larger body mass and muscular build contribute to their ability to take down larger prey with relative ease. So, when it comes to orca vs great white size, the orca is the clear winner in this category.
Great White vs Orca Speed
Great white sharks are incredibly fast swimmers; they can reach speeds of up to 25 miles per hour in short bursts. It’s worth noting, however, that orcas are faster when swimming long distances. Orcas can reach speeds of up to 35 miles per hour and, most importantly, they can maintain this consistent speed. When it comes to great white vs orca in terms of speed, the answer essentially depends on the distance they’re swimming.
Orca vs Great White Teeth and Bite Force
The orca’s bite force is estimated to be around 19,000 pounds per square inch (psi), while the great white shark’s bite is closer to 4,000 psi. An orca’s teeth are designed for tearing or shredding, but not for chewing; they consume their food in chunks or swallow their prey whole. In contrast, great white sharks have sharp and serrated teeth, making it possible for them to immobilize their prey and slice through flesh. According to Animals Around the Globe, “Great white sharks . . . have 300 sharp triangular teeth in several rows in their mouths. They also have an extraordinary sense of smell which helps them detect their prey from far away.” Though bite force and the shape of their teeth must be considered when comparing these apex predators, another comparison that needs to be made involves how they hunt.
Great White vs Orca Hunting Techniques
Orcas and great white sharks take different approaches to hunting. Great white sharks prefer to hunt alone; they use their speed and agility to ambush their predators at lightning speed. Orcas, on the other hand, hunt in pods of up to 40 whales so they can have an even better chance of taking down their prey, which often includes large mammals such as seals and sea lions. Regarded as social and cooperative hunters, orcas seem to understand the importance of underwater teamwork, utilizing their strength and size to ensure that they have the big, filling meals they need to survive and thrive.
Orca vs Great White Shark: Who’s the Apex Predator?
Are you tempted to say that the orca is the apex predator, considering its size, weight, speed, bite force, and hunting strategies? Or are you inclined to believe that even though the shark is smaller, its speed, rows of sharp teeth, and agility make it the apex predator?
If you were to cast your vote on which is the ocean’s apex predator based on appearance alone, the great white shark would surely be the winner. Their frightening appearance has even inspired Hollywood movies like Jaws and Deep Blue Sea.
Many scientists and researchers, however, seem to agree that the orca is the more ferocious predator, hunting and catching whatever type of prey becomes available to them. Orcas seem to have no fear and, of course, working together boosts their overall success rate.
All comparisons considered, it also comes down to which one could kill the other. While there is no evidence to suggest that orcas regularly prey on great white sharks, American Oceans writes, “Orcas are also the only known predators of great white sharks. Scientists have been studying this behavior for several years and have even captured video footage of orcas killing and eating great white sharks off the coast of South Africa. The orcas use their powerful jaws and teeth to inflict fatal wounds on the sharks, and then consume their liver, which is a nutrient-rich organ.” A-Z Animals also notes, “According to a 2019 report, orcas that relocate to an area to hunt seals will drive away any great white sharks that previously resided in the area. In addition, these sharks tend to keep clear of the area for at least an entire season. This reluctance to return indicates that the sharks possess some level of fear of the orcas and do not wish to chance an encounter by returning too soon.”
Interestingly, Science Focus declares orcas as the apex predator upon taking another important factor into consideration: their intelligence. Their article simply states, “Not only are orcas much bigger, they are also smarter.”
Join Us on an Unforgettable Cruise
Orcas and great white sharks—along with other marine life—remind us of the importance of respecting, protecting, and appreciating these magnificent animals and the oceans in which they live.
Harbor Breeze Cruises is proud to offer year-round whale-watching tours that are affordable and family-friendly. During your cruise, you can plan to sit back and relax while you wait to spot whales and dolphins in their natural habitat. You’ll feel right at home on the water on our eco-friendly, comfortable, and state-of-the-art catamarans operated by friendly and knowledgeable crew members, including educators representing the Aquarium of the Pacific.
For more information or to book a tour with Harbor Breeze Cruises, call 562-432-4900 or purchase your tickets online. We’d be thrilled to welcome you aboard one of our whale-watching cruises. While seeing a killer whale is not guaranteed, it’s certainly a possibility! Our crew and passengers have spotted blue whales, gray whales, humpback whales, and other whale species, and we can confidently say that no matter what type of whale species you may spot during a cruise with Harbor Breeze, you’ll be humbled by and grateful for the experience.
Hunting dog names are perfect if you plan on taking your pup hunting with you.
But how do you know which one to pick?
Our dog Toby with a duck toy
Out in the fields, an owner will have to call the dog’s name many times, so it’s essential to choose wisely.
When you think of a typical hunting dog, a few adjectives come to mind: loyal, disciplined, tough, and intelligent. Excellent hunting dog names reflect these characteristics.
You can also draw inspiration from nature, the ammunition and tools you use, mythology, famous hunters, and much more.
Our list of 215+ hunting dog names will provide plenty of ideas and lead you to the perfect name for your new pup!
When looking for the perfect dog name, it’s hard to know where to start. So to kick off our list, let’s explore some traditional hunting dog names that encompass the essence of the hunting experience.
These are tried-and-true, traditional names that signify your four-legged friend is a hunting dog. They’ve been used by thousands of hunting enthusiasts just like yourself when naming a new pup.
Look and see if any are a fit for your soon-to-be hunting buddy.
Ace – You’ll have an ace hunting dog if you train correctly. Get a leg up by naming your dog Ace.
Blaze – Like blaze orange! Or how fast your dog will be running after prey.
Bud – Hunters have a special bond with their dogs in the field. You become buds with your pup!
Buddy – A slightly longer variation of Bud.
Boomer – If we were to get a male hunting dog, this would be our pick for the name.
Camo – Camouflage clothing is worn during hunting.
Chase – It goes without saying: A hunting dog does a lot of chasing.
Dakota – This name is excellent on many levels. The plains of North and South Dakota are prime hunting spots. And it also pays tribute to the Dakota tribe.
Decoy – Setting up a decoy is an important tactic.
Dixie – The region of Dixie is considered the south and southeastern portion of the United States, where hunting is quite popular.
Duke – is also powerful and an excellent choice for male hunting dog names.
Hunter – After all, your dog is a hunter, too.
Huntress – This is one for the female hunters.
Liberty – There’s something about hunting that makes you feel free.
Radar – Hopefully, your dog is like a radar when you’re hunting together and monitors everything that is going on.
Ranger – Your dog helps you monitor the landscape and take care of business, just like a ranger.
Scout – Your pup will help you scout the land. This name is classic and cool.
Shadow – Your pup is like your shadow in the field.
Trapper – The goal is to trap animals, and this is a unique, rugged name.
Hunting Dog Names Inspired by Guns and Ammunition
A critical part of the hunting experience is the guns and ammunition. In addition, they provide fun ideas for gun dogs!
Below are ideas based on commonly used brands and products. However, you might find a name that resonates with you based on your preferences.
The best part about these picks is that they’ll especially resonate with other hunters, who will immediately understand their meaning.
Ammo – An abbreviation for ammunition and a unique name for your canine hunter.
Beretta – This Italian firearms company makes a cool name for a female hunting dog.
Bullet – And then out goes the bullet!
Colt – Colt has been making firearms in the United States since 1836.
Gauge –The gauge of a firearm is a unit of measurement used to express the barrel’s diameter. It’s also a tough, strong dog name.
Glock – As in the Glock pistol.
Gunner – A term for a person who operates a gun or cannon.
Hammer – The hammer is the part of a firearm that converts stored energy to fire a projectile.
Kimber – American small arms manufacturer.
Magnum – As in the Magnum gun.
Musket – Looking for a super unique name? Musket – the muzzle-loaded, smoothbore firearm fired from the shoulder – makes a cool moniker.
Nelli – Benelli, an Italian firearm manufacturer, Benelli is best known for shotguns used by military, law enforcement, and civilians all over the world.
Pistol – As in the short firearm.
Powder – The powder in a gun that propels the bullet and makes a softer hunting dog name.
Remington (Remmy) – Based in the United States, the Remington Arms Company is a leading manufacturer of firearms and ammunition.
Ruger – The Ruger company, also based in the United States, produces high-quality firearms.
Sauer – SIG SAUER is a German firearm company.
Shooter – A fantastic, expert-sounding choice.
Smith – Smith & Wesson is an American firearm and ammo manufacturer from Massachusetts.
Sniper – A rifleman who fires from a concealed place.
Tank – As in a tank gun.
Trigger – When firing a shot, you first pull the trigger.
Wesson – Smith & Wesson is an American firearm and ammo manufacturer from Massachusetts.
Winchester –The Winchester Repeating Arms Company is a prominent American maker of repeating firearms. How regal is this name?
Bow Hunting Dog Names
Bowhunting is another form of hunting. If you’re a bowhunter, you may not be hunting with your dog, but it can be fun to name your pup after your hobby!
These names encapsulate this unique activity and draw inspiration from the tools, popular brands, famous bow hunters in pop culture, and more.
Arrow – Some forgo guns and use arrows for hunting instead.
Bear – Compound bow brand and father of bowhunting Fred Bear.
Bow (Bowe) – Your primary hunting tool
Bull (Bullseye) – A great shot
Cam – Part of a compound bow
Fletch – Short for fletching, the feathers or vanes of an arrow
Hawkeye – Marvel archer
Hoyt – Hoyt Archery brand
Legolas – Elf with a bow from Lord of the Rings
Link – Bow-wielding hero of Zelda video games
Matthews – Bow brand
Robin – Robin Hood
Animal-Inspired Hunting Dog Names
The names of animals – either hunters or commonly hunted – also make excellent hunting dog names.
Animals are an integral part of the hunting experience, so it only makes sense that they can be an inspiration for naming your dog.
Strong and distinct, these names reflect the spirit of hunting.
Bear – Bears are often hunted and are also hunters themselves. This is quite the popular dog name and frequently makes our top 20 list.
Buck – A buck is a male deer which are commonly hunted.
Drake – Duck hunting is quite popular. By picking drake, the name of a male mallard, you recognize the animal without being literal.
Fawn – Deer are a popular hunting target, and Fawn makes a perfect name for a female dog.
Finch –This animal name is a little different. The finch isn’t hunted or a hunter, but we love this cute, lovely name for a hunting dog.
Fox – We love this name. Foxes are quick and lively – great qualities in a hunting dog.
Grizzly – As in a Grizzly Bear, the massive bear that hunts its prey.
Hawk – The hawk is an agile, strong hunter.
Lynx – The lynx, a medium-sized wild cat, is a natural hunter. Like your dog, hopefully.
Tiger – Tiger is a brutal, strong animal.
Wolf – A wolf is also a wild canine hunter.
Other Ideas For Hunting Dog Names
Let’s look at other names options that are tough and tenacious, just like your dog.
Here are dozens of more ideas that work perfectly for pups who love to hunt.
Beast – Tough? Check. Fun? Check check.
Blitz – This military term also serves as a cool hunting dog name.
Bolt – A good hunting dog is quite speedy, which makes this a fitting name.
Brutus – Tough and funny.
Cabela – This retail store is a mecca for hunters.
Dash – Hunting dogs are super fast, after all.
Diesel – Diesel has just the right edge of toughness and rebellion.
Gander – As in Gander Outdoors.
General – If your dog is intelligent and commanding, this is a great name.
Jag – This name is tough and to the point.
Justice – Righteous and strong, justice is a great way to describe a hunting dog.
King – This regal name is fabulous for hunting dogs.
Legend – This name is unique, fun, and confident.
Mack – Mack is a tenacious and tough name.
Maverick – A maverick is someone who takes an independent stand apart from his or her associates.
Max – This name is quite a popular choice for male pups.
Outlaw – If you want a rebellious name, Outlaw is a daring choice.
Porter – A hip, cool hunting dog name.
Rex – If you’re looking for a classic dog name, Rex is the way to go.
Shiloh – This name is the quintessential classic dog name.
Spike – Cute and tough at the same time, Spike is a lovable hunting dog name.
Rambo – Another iconic, tough Sylvester Stallone character.
Rebel – Great for kick-butt, daring pups.
Rocky – As in Rocky Balboa, the tough boxer played by Sylvester Stallone. Rocky is another name on our top 20 most popular choices.
Rogue – A rebellious, fun option for female hunting dog names.
Ryder – A strong and stylish moniker.
Sarge –I love this powerful, commanding name.
Scheels – This retail chain has plenty of great gear for hunters.
Scooter – This sounds like a hunting dog name, doesn’t it?
Spartan – Sparta was a warrior society in ancient Greece that defeated Athens in the Peloponnesian War.
Walker – Like Walker Texas Ranger!
Wolverine – If you’re a sci-fi geek who also likes to hunt, Wolverine perfectly combines the two worlds.
Hunting Dog Names Based on Nature
You’ll spend a lot of time in nature if you like hunting. So why not recognize the great outdoors with these nature-inspired names?
They’re simultaneously strong and beautiful all at the same time.
Check them out and see what you think for your four-legged friend.
Aspen – A tree native to cold regions with cool summers.
Aurora – As in Aurora Borealis, also known as the Northern Lights.
Brook – A small stream (and a gorgeous dog name).
Cedar – The name of a coniferous tree.
Dawn – Hunting often starts at the crack of dawn!
Forest– Land filled with trees and a great hunting dog name.
Maple – After the beautiful, colorful tree.
Meadow – Hunting usually takes place in fields and meadows. How pretty is this name?
Prairie – An open area of grassland where hunting often takes place.
Rain – Rain is a gorgeous all-natural name.
River – Your hunting trip just might be near a river.
Sunny – How cute is this dog name? It’s cheerful and bright.
Sky – You’ll be under the beautiful sky for hours upon hours on your hunting trip!
Stormy – Hopefully, your hunting trips are storm-free. But, we do love this strong name for hunting dogs.
Thunder – This name is powerful and tough, perfect for a hunting dog.
Tundra – A cold arctic region.
Willow – Willow trees and shrubs are common in nature. This is a beautiful, natural name.
Names Inspired by Mythology
Hunting has been around since the beginning of humanity. As such, it’s no surprise that there are many hunters and warriors in ancient mythology.
These ideas make for cool and cultured dog names that reflect the centuries-old hunting tradition.
Artemis – In Greek mythology, Artemis was the goddess of the hunt. So, how perfect is this name?
Athena – Athena was the gal who was good at everything, including war strategy. She was known for her wisdom, strength, and athleticism.
Apollo – The god Apollo rocked at everything, too. One of his biggest strengths was archery.
Hercules – Half-god, half-man, Hercules is recognized for his great strength. This makes a tough, unique hunting dog name!
Odin – Odin, the name of Thor’s father, is the leader of the Wild Hunt.
Olympia – Around 1,000 b.c., Greeks prepared an athletic festival to honor Zeus. It took place in Olympia, and thus the Olympics were born.
Orion – Orion was a giant huntsman whom Zeus placed among the stars as the constellation of Orion.
Nyx – The Greek goddess of night, Nyx is a shadowy figure with greek beauty.
Xena – As in the warrior princess.
Zeus – Speaking of Zeus, his name makes a pretty sweet hunting dog name, too.
We’ve got plenty more mythology dog names if you like this vibe.
Famous Hunters and Shooters
Let’s take a look at real-life people known for their hunting prowess. They could make cool hunting dog names!
Fun and unique, it’s all but a guarantee you won’t find other dogs on the hunting field with one of these names.
Aldo – Aldo Leopold was an American ecologist and environmentalist who was also a hunter.
Annie (Oakley) – An American sharpshooter, Annie Oakley wowed exhibition crowds from the late 19th century to the early 20th century.
Davy (Crockett) – This 19th-century folk hero was the “king of the wild frontier.”
Crockett – An alternate to above.
Boone – Daniel Boone is another American pioneer known for his hunting skills.
Cody – William Buffalo Bill Cody was a famous bison hunter from the wild west.
Jesse – Jesse James was a famous outlaw who knew his way around a gun.
Roosevelt – Theodore Roosevelt was an American President and famous hunter who protected the land.
Saxton – Saxton Pope was a famous bowhunter who hunted grizzlies in Yellowstone.
Winston – Winston Churchill was English Prim Minister who loved hunting.
Wyatt – Perhaps the most famous sheriff in the old west, Wyatt Earp was the town marshal in Tombstone, Arizona Territory, who took part in the gunfight at the O.K. Corral.
Fishing Dog Names
If you’re a fan of fishing, you may find these fishing dog names an excellent choice.
Many hunters also enjoy the sport of fishing. After all, both provide lots of time in nature and the thrill of catching an animal.
One of these fishing dog names can pay tribute to your other passion or try out a nautical dog name.
Anchor
Angler
Bass
Berkley – fishing line
Brook – a small stream
Captain
Cisco – fishing brand
Croix – pronounced Croy for St. Croix river/rods
Finn – part of a fish
Gill – fish openings for breathing
Hook
Jig
Keeper – a good one!
Kota – Minn Kota motors
Lindy – tackle brand
Lunker – huge fish
Lure
Marina
Minnow
Oakley – sunglasses brand
Pike – species of carnivorous fish
Ranger – popular boat
Rigger – setting up sails/assembling tackle
Rip – fast pull on the rod
Sandy
Skipper / Skip
Spinner – fishing lure with a rotating blade
Sunny
Trout
Other Strong and Stoic Hunting Dog Names
Alaska
Alpha
Atlas
Arya
Avalanche
Bear
Blade
Blaze
Blizzard
Butch
Calgary
Captain
Colt
Crash
Dallas
Danger
Digger
Duke
Echo
Ember
Falcon
General
Ghost
Goliath
Hammer
Harley
Harper
Hawkeye
Huck
Hulk
Indiana
Jagger
Jet
Jinx
Kane
Major
Montana
Nikita
Radar
Raven
Rocky
Saber
Sable
Shadow
Sheriff
Stallone
Stormy
Tank
Thor
Trooper
Vinnie
Virginia
More Dog Name Ideas
If these dog names do not inspire you, try our online generator and discover more options. You can sort by your favorite styles and themes to find the perfect name for your pup.
Or check out these popular categories that are perfect for hunting dogs:
Sports names for male dogs and female dogs
Also, you might find these articles helpful:
Labrador dog names
Big dog names
Badass dog names
Country dog names
Advice for Picking Hunting Dog Names
Although you don’t have to shy away from cutesy dog names, prepare for some teasing out in the field if you have to call a name like “Princess” for hours on end.
As a kid, we got a dog – a female chocolate Labrador Retriever – with my dad’s intent to use her for hunting. My brother and I wanted to call her Lady, but my dad quickly kiboshed that idea.
That was probably a wise idea considering his wise-cracking hunting buddies.
Here are other helpful tips when it comes to selecting a name for your dog:
Is it easy to say? Some names are great in theory but tough to pronounce in everyday life. So before you lock in on a name, make sure it rolls off the tongue.
Say it out loud. Can you imagine loudly calling for your dog with this name? If not, then it’s not the right name, and you should move on.
Does it fit your dog? Check to see if the name matches your dog’s personality and appearance. This is important for both you and your pup.
And finally, trust your gut. When you find the right name, you’ll know it!
5 Easy Steps to Teach a Dog Their Name
Once you have a name, how do you teach it to your dog? We have an awesome guide that makes it easy.
Good Luck and Happy Hunting
Having a dog is a fantastic experience, and the relationship between an owner and his dog deepens when you bond over an activity like hunting. You’re in store for happy times and many memories.
Consider these names to help you in your search and play around with our easy-to-use dog naming tool. We hope you find what you’re looking for.
")
")
")
")
")


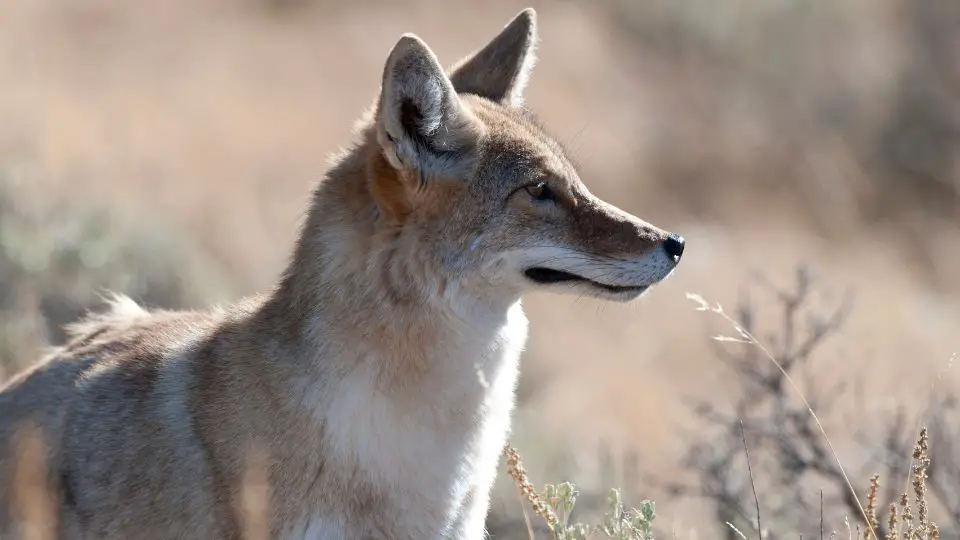
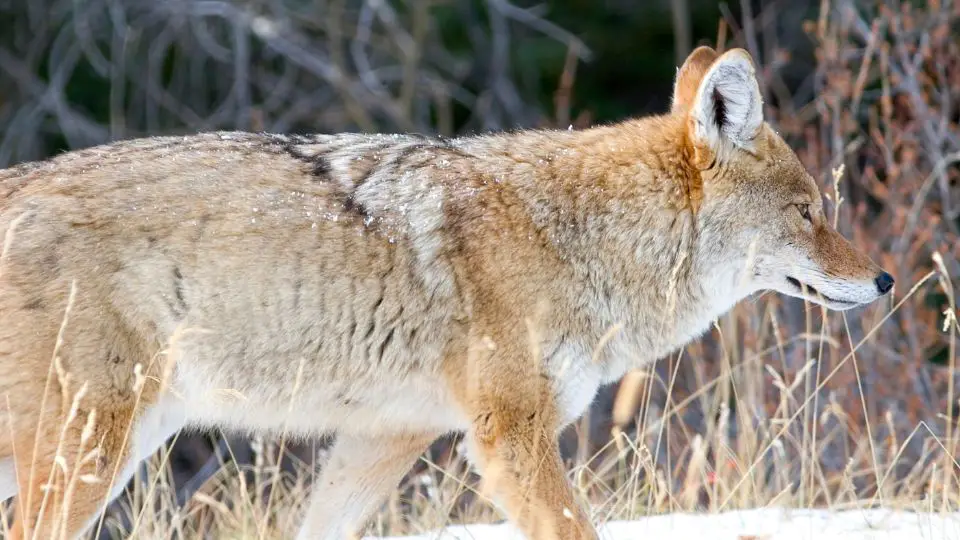
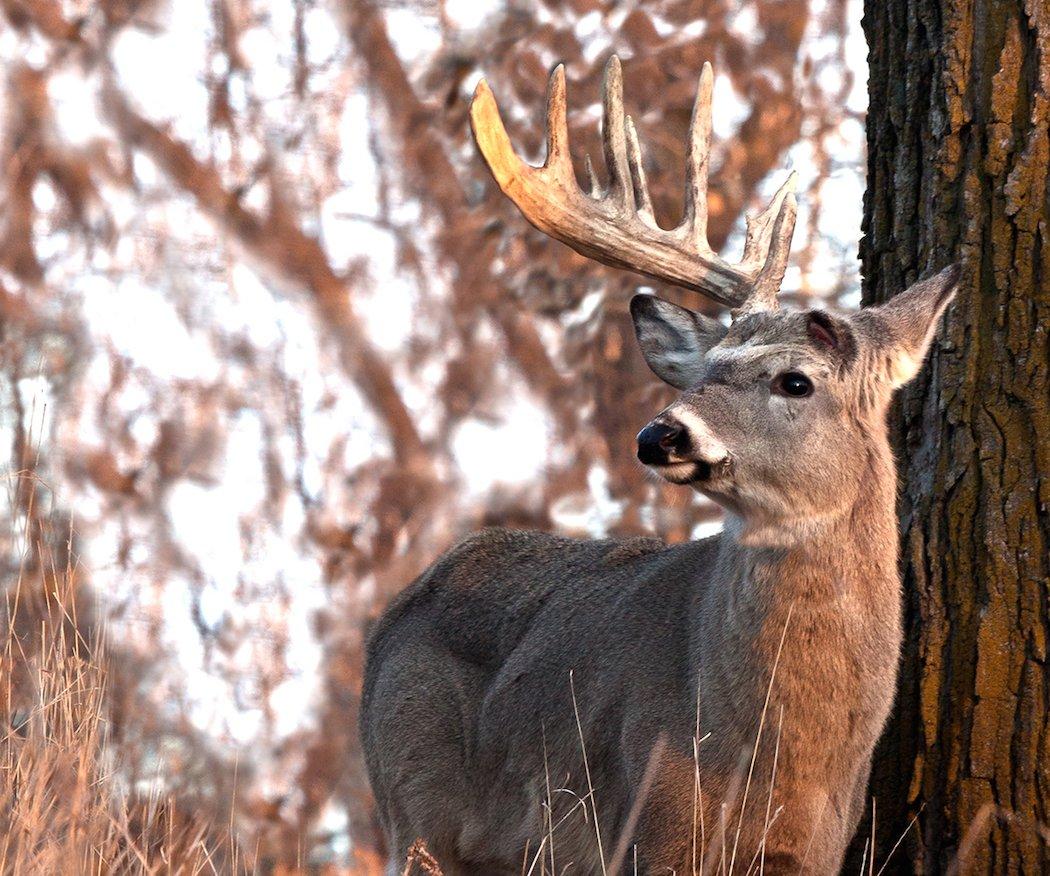
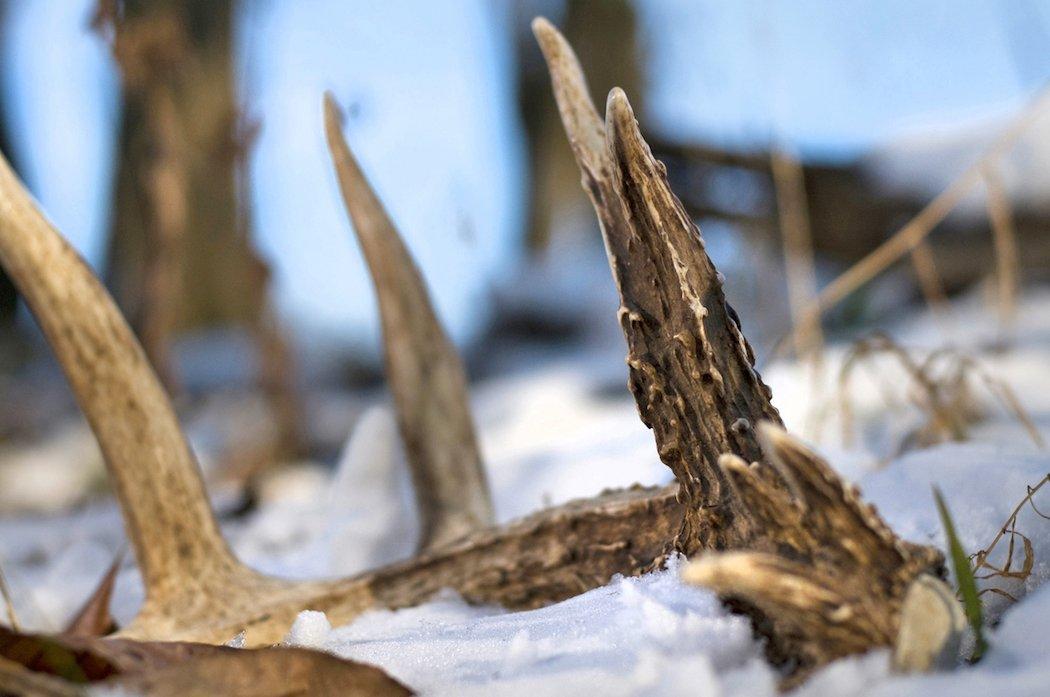 Antler drop is influenced by genetics. Every subspecies of whitetail is a little different on when they let go of their headgear. Depending on what subspecies of whitetail you hunt will influence when they shed.