Home Blog Page 122

How to Age a Deer and Why It's Important

0

While there is plenty of available data, charts, and information on aging deer, we hope the info below, as well as our whitetail deer aging chart, can help you learn how to age a deer on the hoof before your next hunt. And if you successfully harvested a deer, we provide three additional aging techniques to determine deer ages.

Reasons to Learn the Age Class of Deer (Before You Shoot)

Aging whitetail deer isn’t necessary for general deer hunting goals. It won’t make you more successful at putting meat in the freezer during or after hunting season. But for those who choose to target older, more mature bucks, estimating age is a skill you must master.

Those who aren’t confident with their ability to age deer in the field on the fly should start by aging deer within trail camera photos. Then, if they see the deer while hunting, they’ll already know if they plan to shoot or not.

Of course, there are plenty of reasons to age a deer and ensure it’s an older member of the herd before shooting it:

  1. If you want to shoot a mature deer, you must ensure it is one before sending a bullet or broadhead downrange.
  2. If managing land for older bucks, identifying a deer as a young buck, and subsequently passing on it to allow it to reach a more mature age class, is necessary.
  3. Passing on younger bucks means more and bigger bucks to see and shoot in the future.
  4. Allowing bucks to age gives them time to express and spread their antler genetics.
  5. Not shooting younger bucks — and taking the correct number of does — helps balance the buck-to-doe deer population ratio.
  6. Allowing bucks to get older creates a balanced, natural age structure for the deer population
  7. Having a balanced age structure improves the overall deer herd.
  8. Improving the buck age structure increases the overarching area’s hunting (and land) value.

On a side note, if you’re tracking numerous bucks and following them over a number of years, it’s hard to beat DeerLab’s Profiles. It’s an excellent tool that can help you with your deer management. The service allows you to track individual bucks or even groups of bucks, keeping logs of their activity and movement, as well as seeing a buck’s historical growth over time. One lesser-known feature is Albums. This is helpful if you want to share your trail cam photos (without all the stats DeerLab gives you), say just of your hitlist bucks or photos of mature bucks, with others, so they can help you with your deer management.

Aging Deer on the Hoof: Characteristics of Age Classes

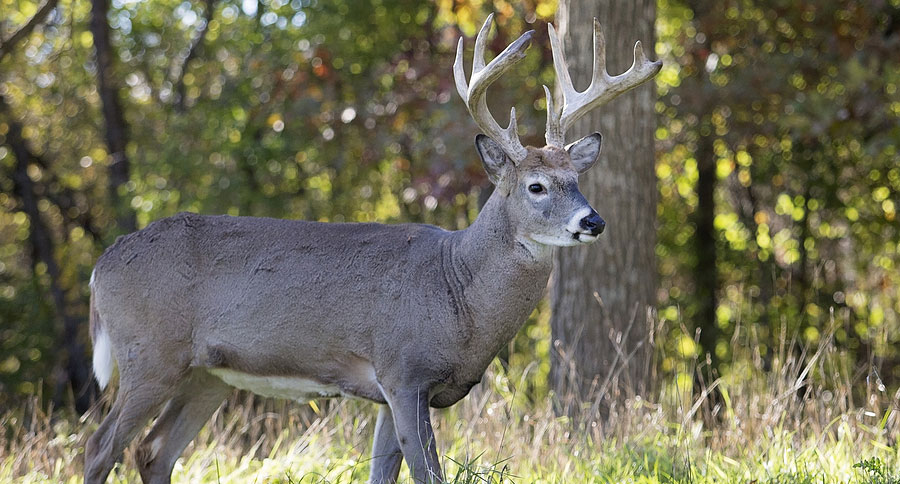
While it’s not likely to age doe on the hoof, keying in on whitetail bucks body characteristics can help you make an age estimation. Each buck exhibits unique antler, body, and personality traits. However, certain body features tend to consistently change with age and exhibit features tethered to particular age groups. Because of this, it makes aging deer possible. Aging deer on the hoof won’t tell you the exact age, but it will within a year or so of its actual age, and this can help deer management.

Whitetail Deer Age Chart using body characteristics

Some deer body parts to look at when trying to age class a whitetail deer on the hoof include the antlers, back, belly, head, legs, neck, and tarsal glands. Each of these changes over time, and how they look can provide clues as to what age a deer is or isn’t.

Age Estimate: 1 ½-Year-Old Buck

This ½-year-old whitetail buck on hoof

Also referred to as yearling bucks, a 1 ½-year-old resembles a small doe with antlers. Antler size has only reached approximately 20-30% of overall potential and is likely a spike, four-pointer, six-pointer, or very small eight-pointer. Regardless, the spread for younger deer will remain inside the ears.

The head appears long and slender. Body weight distribution is more toward the rear end. The back line appears to slope downward from back to front. The belly and back of the buck do not sag. The deer’s neck has no swelling. Legs seem to be very long compared to their torso. Tarsal glands are lightly stained.

Age Estimate: 2 ½-Year-Old Buck

2 ½-year-old buck on hoof

Once a buck reaches 2 ½-year-old status, it’s synonymous with large does with antlers. It often grows antlers with a spread just inside, at, or just outside the ears, and it’s likely sporting about 50-60% of its lifetime antler potential. Often, it grows between six and 10 points, with a typical average number of eight points.

The head is still long and slender. Body weight distribution shows a heavier rump than front end. This age bracket has a backline that still slopes from the rump to the shoulders but has no sagging of the back or belly. The buck’s neck is generally slightly more muscular than the year before, but no severe swelling occurs. The legs still look too long for the body. Tarsal glands are somewhat stained.

Age Estimate: 3 ½-Year-Old Buck

3 ½-year-old buck on hoof

Now we’re beginning to see some size. This is the age bracket when a buck starts being classified as “big.” It almost always has an antler spread outside the ears and expresses decent mass and good tine length. This buck sports approximately 70-80% of antler potential.

As for the body, the head still appears elongated, but it’s getting thicker from top to bottom, too. It now has a straight line across the back from rump to shoulders (no downward angle or sagging). It has a tight belly line. Weight seems to be distributed evenly from front to back. The neck begins to swell considerably, especially compared to 2 ½-year-old bucks. Legs finally look proportionate to the body. Tarsal glands are moderately stained.

Age Estimate: 4 ½-Year-Old Buck

4 ½-year-old buck on hoof

While a 4 ½-year-old deer is close to being fully mature, it still has much potential to express. In fact, on average, it only grows approximately 80-90% of its antler potential. That said, it exhibits impressive antler size, and begins showing exceptional antler mass, tine length, and more.

The head is now blockier than it once was. Its weight distribution is mostly even from front to back. This age bracket still has a straight line across the back and belly. The neck has significant swelling. The legs still look mainly proportionate to the body. Tarsal glands are heavily stained.

Age Estimate: 5 ½-Year-Old Buck

5 ½-year-old buck on hoof

No hunter can argue that a 5 ½-year-old deer isn’t mature. This animal expresses most of its antler potential, sporting about 90-95% of it, and its body is huge. Antlers generally display incredible mass, beam length, tine length, etc.

Its head appears shorter and thicker than ever before. Weight distribution seems to shift more toward the front of the body. The backline is still straight from rump to shoulders but might show slight swaying. The belly might do the same. The neck shows heavy swelling, and the legs appear too short for the body. Tarsal glands are very heavily stained.

Age Estimate: 6 ½-Plus-Year-Old Buck

6 ½-year-old buck on hoof

Now a bona fide mature deer, a 6 ½-plus-year-old buck’s body is taking on a new shape. It now carries approximately 100% of its antler potential but could grow its largest rack at age 7 ½ or 8 ½. This deer is distinctly different from younger bucks. The difference can be quite staggering.

Its head appears very short and very thick. Weight distribution makes it seem as if the buck’s front is much heavier than the rear end. The back and belly exhibit significant sagging. The neck is extremely swollen. The legs appear much too short for the body. And tarsal glands are extremely stained.

Aging a Harvested Deer

Hunters aren’t limited and restricted to aging deer on the hoof. Although there is no catch and release in hunting, hunters can certainly ground check their bucks, too, which is the act of determining the size, age, and gender of a deer or other game species once it is dead. There are two good ways to do this and a third option that works for supportive reassurance.

Skull Plate Thickness

Speaking of supportive efforts, those who skullcap their bucks will notice older deer exhibit significant increases in skull plate thickness. Generally speaking, the older a deer gets, the thicker its bones and skull plate becomes. The skull plate for young deer is more fragile, while older deer have thicker skulls. In theory, the skull plate aging method works, but when aging deer this way, it’s difficult to measure and it’s definitely not an exact science. If you want to be more accurate, tooth replacement and wear, as well as cementum annuli are the best routes to go.

Tooth Replacement and Wear Method

In contrast, tooth replacement and wear is an excellent and more common method for aging bucks after the harvest compared to on the hoof. This method was developed by C. W. Severinghaus in 1949 (1) and is sometimes referred to as the Severinghaus technique. The bottom jaw changes as deer age. The first step in determining the age of a deer with the tooth replacement and wear technique is counting teeth. Here’s a breakdown centered around tooth characteristics, as well as a video going through deer teeth wear from the Pennsylvania Game Commission.

Fawn Teeth

Fawns have five (or fewer) jaw teeth, and the third premolar has only three cusps. For a fawn 3 to 4 months old, either the first molar is just starting to show, or isn’t showing yet. A fawn that’s 4 to 6 months old has its first molar erupted but its second is not seen. For fawns that are 7 to 9 months old, the second molar is now starting to show or fully erupted, but the third molar can’t be seen.

1½-Year-Old Deer Teeth

Deer or yearlings that are 1 ½-years-old likely have six jaw teeth along the bottom jaw, the third molar is starting to show, and the third premolar tooth has significant wear, having three cusps.

2½-Year-Old Deer Teeth

Once it reaches 2 ½, the third tooth has only two cusps, and the crests are sharp and pointed. There is minimal wear showing on molars.

3½-Year-Old Deer Teeth

At 3 ½, the slight wearing of the permanent teeth is visible, and slight concavity is present. The cusps of the first molar show substantial wear and the third molar is fairly level.

4½-Year-Old Deer Teeth

Most 4 ½-year-old bucks exhibit noticeable tooth wear and often slope heavily downward toward the jawbone. The cusps on the first two molars will have significant wear.

5½-Year-Old Deer Teeth

The same holds true for 5 ½-year-old deer, as the teeth become significantly blunted and worn. All three molars will show significant wear.

6½-Year-Old Deer Teeth

Once deer reach 6 ½ and older, the teeth are worn down smooth, or flattened, and little enamel shows. Eventually, the teeth will wear down very close to the jawbone.

Cementum Annuli Aging

Lastly, the best and most accurate method for aging deer is called cementum annuli (CA). In short, cementum is the connective tissue that forms on the root surface of most teeth.

4 year old white-tailed deer harvested in Missouri, courtesy of Matson’s Laboratory

During the life of a whitetail, as well as other mammals, cementum forms layers or rings, similar to growth rings that you would see in tree trunks. These rings are visible microscopically and form a pattern that wildlife aging experts can use to determine deer ages.

Pope and Young world record typical archery elk harvested by Steve Felix in Montana

To have a professional age your deer, you would need to remove teeth from the lower jaw and send them off to be examined in a laboratory setting. Once there, the lab studies the teeth and tooth wear to age them. It costs approximately $50 per deer, and two of the most used labs include Matson’s Laboratory and Wildlife Analytical Laboratories.

Appendix

Cementum – A protective hard tissue that surrounds the root of each tooth.Anulli – Layers that are formed over the root of a tooth that are used in the process to age individual deer.Cusps – A point or ridge of a tooth, when viewed from the side.Crest – The top of the cusps or ridges of a tooth.Dentin – That part of the tooth that is beneath enamel and cementumEnamel – The white part of a tooth.Molar – The three permanent teeth in the rear of the deer’s jaw.On the Hoof – Alive, not yet harvested.Premolar – The three teeth in front of the jaw that are replaced by permanent teeth.Skullcap – The top part of the skull.Tarsal Gland – Found on bucks and does, the tarsal gland is a pad of stiff hairs located on the inside of each deer’s rear leg. The gland secretes an oily material that coats the hair, making it darker.

References Cited

  1. Severinghaus CW. Tooth development and wear as criteria of age in white-tailed deer. Journal of Wildlife Management. 1949;13(2):195-216.

Air Venturi Avenger Review

0

Before you become an expert hunter, you need hours and hours of practice. 

It isn’t always easy to navigate through the wide world of hunting.

Where should you practice hunting? Should you begin with a small game or a medium game? Which rifle should you practice hunting with?

These are just some of the questions you might encounter as you begin hunting. 

Trust me, I used to have the same questions that you do now. 

With all the hunting experience I have by now, one thing is clear to me: the gun and setting that you begin practicing hunting with will make or break your entire experience with this sport.

So, to make this intimidating world a little easier for you, there is a review of one of the most sought-after beginner guns – the Air Venturi Avenger. 

Now, if you have considerable hunting experience, you might have seen even experienced people using this gun to hunt small game. 

The Air Venturi Avenger is actually used by both skilled hunters and beginners alike. 

So, no matter what experience level you have, this review of the Air Venturi Avenger will have something for you. 

It might answer one of the biggest questions that you have seen floating around – Why is the Air Venturi Avenger so popular and sought after?

(For more on the best PCP air rifle on the market, see this post)

Air Venturi Avenger Complete Review

To give you the best possible idea of using the Air Venturi Avenger, let’s take a look at each feature of this air rifle:

Gun Type

Air rifles are available in various types including PCPs, Spring-Powered Piston, Variable Pump, CO2 Powered, and Gas Piston. 

Now, the Air Venturi Avenger is a pre-charged pneumatic (PCP) air rifle. Therefore, it contains high-pressurized air in its chamber for propelling the bullets.

Stock

The Air Venturi Avenger is available in three different stocks as mentioned below:

1. Synthetic Stock 

Air Venturi Avenger with synthetic stock has a sleek and classy feel to it due to its black finish. It weighs just around 6 pounds, making it comfortable to use. 

You will also find that the stock contains stippling in the pistol grip, along with forestock and integrated sling mounts. 

2. Wood Stock 

If you’re not a fan of the synthetic stock and prefer the old-school stocks, opt for Air Venturi Avenger in the wood finish.

The solid wood finish gives an absolute sturdy appearance to the air rifle. It also adds up to the weight, as this one weighs around 7 pounds. Apart from this, you can expect a stable and firm hold from this rifle. 

3. Bullpup 

Finally, Air Venturi Avenger is available in bullpup type and weighs around 7.5 pounds. Its appearance is somewhat similar to the synthetic stock, but you can expect some clear differences.

Ammo

The Air Venturi Avenger has pellet-type ammo.

Sight

The Air Venturi Avenger doesn’t have any sighting system included in it. You won’t find any iron sights or even bundled scope in this rifle. 

Now, it may seem like a limitation, but it has actually reduced the rifle’s price. Also, it allows users to mount the scope they like with the rifle. 

Trigger

The Air Venturi Avenger has a two-stage adjustable trigger. Note that the trigger action of the Air Venturi Avenger is zero.

You’ll find that you can adjust the pull weight, sear engagement, and length of the trigger externally too. 

The best part is that the trigger included in the Air Venturi Avenger bullpup offers an ergonomic feel too. This is quite tricky with bullpup-style rifles.

Cocking and Loading

The Air Venturi Avenger has a side lever and an adjustable regulator.

It also has dual triggers, both of which are easily adjustable.

In the dual gauges of this air gun, the one on the right has regular pressure whereas the one on the left has fill pressure.

This gun also has a fully shrouded barrel and manual safety.

Moreover, the Air Venturi Avenger has two magazines and a one-shot tray.

Lastly, this gun has a fire mode repeater.

Velocity, Accuracy, and Power

The Air Venturi Avenger is known for having impressive velocity, accuracy, and power. In fact, this air gun will give you the best velocity, accuracy, and power for the price range that it belongs to.

The table below demonstrates the FPE and FPS of Air Venturi Avenger with various pellets.

Accuracy

CalibersPelletsDistancesGroups
.22JSB Diabolo Exact Jumbo Heavy 18.13 gr50 yards1/2"
.25JSB Match Diabolo Exact King 25.39 Gr35 yardsnickel size
.22JSB Diabolo Exact Jumbo Heavy 18.13 gr10 yardsone hole
.22JSB Match Diabolo Hades 15.89 Gr25 yards0.41"
.22JSB Match Diabolo Hades 15.89 Gr50 yardsone hole
.25JSB Match Diabolo Exact King 25.39 Gr30 yardsone hole
.22Air Arms Diabolo Field Heavy 18 grain50 yards1"
.177JSB Exact heavy Diablo 10.34 gr25 yards1/4"
.177JSB Exact heavy Diablo 10.34 gr50 yards1/2"
.177JSB Exact heavy Diablo 10.34 gr100 yards1 1/2"
.177JSB Exact heavy Diablo 10.34 gr27 yards0.26"
.22JSB Match Diabolo Hades 15.89 Gr107 yards2"
.22JSB Diabolo Exact Jumbo Heavy 18.13 gr50 yards3/4"
.22H&N Barracuda Match 21.14 gr25 yardsone hole
.22H&N Barracuda Match 21.14 gr50 yards1/4"
.22JSB 18 gr50 yardsone hole
.22JSB Diabolo Exact Jumbo Heavy 18.13 gr40 yardsdime size
.22JSB Diabolo Exact Jumbo Heavy 18.13 gr50 yardsnickel size
.22JSB Match Diabolo Exact Jumbo Monster 25.39gr30 yardsone hole
.22JSB Beast Jumbo 34 Gr50 yardsdime size
.22Crosman Premier Hollow Point 14.3 Gr20 yardsone hole
.22JSB Diabolo Exact Jumbo Heavy 18.13 gr50 yards0.5"
.22JSB Diabolo Exact Jumbo Heavy 18.13 gr75 yards.688"
.22JSB Diabolo Exact Jumbo Heavy 18.13 gr100 yards1.25"
.25JSB Match Diabolo Exact King 25.39 Gr50 yardsone hole
.22Crosman Premier 14.3 Gr45 yardsone hole
.25JSB Match Diabolo Exact King 25.39 Gr50 yards0.45"
.22JSB Exact Jumbo Monster 25.39 gr50 yards0.33"
.22JSB Diabolo Exact Jumbo Heavy 18.13 gr50 yards0.38"
.22NSA Slugs 20.2 gr50 yards0.59"
.22FX Hybrid Slugs 22gr50 yards0.48"
.22H&N Slug HP 21 gr
50 yards0.62"
.22FX Hybrid Slugs 22gr100 yards1.55"
.22FX Hybrid Slugs 22gr50 yards0.42"
.22Jumbo Exact 16 gr50 yards1.07"
.22Patriot Javelin Slugs 23 gr50 yards0.63"
.22Patriot Javelin Slugs 23 gr100 yards1.67"

Chrony tests

CalibersPelletsFPSFPE
.25JSB Diablo MKII Heavies, 33.95 gr843 53.59
.22JSB Diabolo Exact Jumbo Heavy 18.13 gr86530.13
.22JSB Monster 25.39 gr87342.98
.22JSB Match Diabolo Hades 15.89 Gr85025.5
.25JSB Match Diabolo Exact King 25.39 Gr91046.7
.25JSB Match Diabolo Exact King 25.39 Gr90045.68
.25H&N Barracuda 31.02 gr83347.81
.22JSB Match Diabolo Hades 15.89 Gr88027.33
.22JSB Monster 25.39 gr91246.9
.22JSB Match Diabolo Hades 15.89 Gr89027.96
.22JSB Diabolo Exact Jumbo Heavy 18.13 gr90032.62
.25Slug 41 gr78556.12
.22Slug 25 gr82537.79
.22JSB Diabolo Exact Jumbo Heavy 18.1 Gr93234.92
.22Crosman Premier 14.3 Gr95028.66
.25JSB Hades 26.54 gr91749.57
.22JSB Beast Jumbo 34 Gr85054.56
.22Crosman Premier Hollow Point 14.3 Gr82221.46
.25NSA Slugs 26.8gr 90248.43
.25JSB Match Diabolo Exact King 25.39 Gr94450.25
.25JSB Match Diabolo Hades 26.54gr875 45.13
.22Crosman Premier Hollow Point 14.3 Gr97630.25
.22JSB Exact Jumbo Monster 25.39 gr89044.67
.22JSB Diabolo Exact Jumbo Heavy 18.13 gr86730.27
.22NSA Slugs 20.2 gr94840.32
.22FX Hybrid Slugs 22gr90840.29
.22H&N Slug HP 21 gr
84633.38

As you can see, Air Venturi Avenger can deliver a power-packed performance with its high muzzle energy!

Note that this rifle is excellent for both small and medium hunting games. However, it might not be the best for big hunting games. For a big hunting game, you should opt for a rifle with an FPE above 50.

A veteran hunter, Keith Warren, dropped 4 hogs in just 1 minute with the Air Venturi Avenger:

Noise

The Air Venturi Avenger has three medium loudness levels. But you can easily find a moderator to make it silent when it shoots.

Moreover, Air Venturi Avenger comes with a built-in shrouded barrel that can help with noise dampening, making it backyard-friendly.

However, note that it’s not the quietest PCP rifle out there, as some users have complained about its noise.

Maintenance

Similar to other guns, the Air Venturi Avenger is best stored with slight pressure in the fill.

 Shooting Range and Intended Use

The Air Venturi Avenger is intended to be used for small game or hunting practice. It can shoot out quite accurately to 50 or 100 yards too.

Warranty

The Air Venturi Avenger has a limited warranty of one year.

Specifications

You can find Air Venturi Avenger 25 caliber with a 10 magazine capacity, Air Venturi Avenger 22 caliber, and Air Venturi Avenger 117 caliber with an 8 magazine capacity.

The length of the Air Venturi Avenger is 42.75 inches, out of which the barrel has a length of 22.75 inches.

The weight of the Air Venturi Avenger is 6.4 lbs.

Customer Reviews

I probably don’t need to tell you the craze about Air Venturi Avenger in the hunting world. Most customers are raving about its accuracy, repetitive shots, adjustable nature, and reduced weight. 

However, a few customers have complained about low-quality synthetic stock and a poor magazine cover.

The Air Venturi Avenger is an excellent choice for beginners as well as for shooting small games.

Pros and Cons

ProsCons
  • Excellent value for the money
  • Lightweight and well-balanced
  • Powerful and easy-to-use
  • Light weight and easy to load magazines
  • Easy to cycle the bolt for loading
  • Great trigger adjustment and regulator pressure adjustment
  • The stock is hollow

Price

The price of the Air Venturi Avenger begins at around 300 dollars.

How much your Air Venturi Avenger will cost you depends on the specifications that you opt for in your gun.

Air Venturi Avenger vs Benjamin Marauder

CategoryAir Venturi Avenger Benjamin Marauder
VelocityBetween 900 to 1000 fps1100 fps
Loudness3 medium level noise74 decibels
Size42.75 inches and 6.4 lbs48 inches
Price300 USD onwards400 USD onwards

The Benjamin Marauder air gun has a velocity between 680 to 830 fps whereas the Air Venturi Avenger has a velocity between 900 to 1000 fps.

The Air Venturi Avenger has a 3 medium-level noise whereas the Benjamin Marauder makes a sound of at least 74 decibels.

The Air Venturi Avenger is 46.1 inches in size and weighs 3.3 lbs whereas the Benjamin Marauder is 48 inches.

The price range for the Air Venturi Avenger begins at 300 USD whereas the Benjamin Marauder will cost you around 400 USD.

Air Venturi Avenger vs Umarex Gauntlet

CategoryAir Venturi Avenger Umarex Gauntlet
VelocityBetween 900 to 1000 fpsBetween 800 to 1075 fps
Loudness3 medium level noiseBuilt-in barrel to reduce noise
Size42.75 inches and 6.4 lbs46.1 inches and 3.2 lbs
Price300 USD onwards450 USD onwards

The Umarex Gauntlet has a velocity between 800 to 1075 fps whereas the Air Venturi Avenger has a velocity between 900 to 1000 fps.

The Air Venturi Avenger has 3 medium-level noise whereas the Umarex Gauntlet has a built-in barrel to reduce noise.

The Umarex Gauntlet is 46.1 inches in size and weighs 3.3 lbs whereas the Air Venturi Avenger is 42.75 inches in width and weighs 6.4 lbs.

The price range for the Air Venturi Avenger begins at 300 USD whereas the Umarex Gauntlet will cost you around 450 USD.

Umarex Origin vs Air Venturi Avenger

CategoryAir Venturi Avenger Umarex Origin
VelocityBetween 900 to 1000 fps1100 fps
Loudness3 medium level noiseBuilt-in barrel to reduce noise
Size42.75 inches and 6.4 lbs43.1 inches
Price300 USD onwards350 USD onwards

The Umarex Origin has a velocity of 1100 fps whereas the Air Venturi Avenger has a velocity between 900 to 1000 fps.

The Air Venturi Avenger has 3 medium-level noise whereas the Umarex Origin has a built-in barrel to reduce loudness.

The Umarex Origin is 43.1 inches in size whereas the Air Venturi Avenger is 42.75 inches in width and weighs 6.4 lbs.

The price range for the Air Venturi Avenger begins at 300 USD whereas the Umarex Origin will cost you around 350 USD.

Umarex Gauntlet 2 vs Air Venturi Avenger

CategoryAir Venturi Avenger Umarex Gauntlet 2
VelocityBetween 900 to 1000 fpsBetween 985 to 1075 fps
Loudness3 medium level noise4 baffle design to reduce the loudness
Size42.75 inches and 6.4 lbs48.75 x 9.75 x 4.25 inches
Price300 USD onwards450 USD onwards

The Umarex Gauntlet 2 has a velocity between 985 to 1075 fps whereas the Air Venturi Avenger has a velocity between 900 to 1000 fps.

The Air Venturi Avenger has a 3 medium-level noise whereas the Umarex Gauntlet 2 has a 4 baffle design to reduce loudness.

The Umarex Gauntlet 2 is 48.75 x 9.75 x 4.25 inches in size whereas the Air Venturi Avenger is 42.75 inches in width and weighs 6.4 lbs.

The price range for the Air Venturi Avenger begins at 300 USD whereas the Umarex Gauntlet 2 will cost you around 450 USD.

Frequently Asked Questions

Where Is Air Venturi Avenger Made?

The Air Venturi Avenger air rifle is manufactured by Air Venturi Ltd. They are based in Solon, Ohio – which is where these air rifles are also produced.

How Loud Is the Air Venturi Avenger?

The Air Venturi Avenger has three medium loudness levels.

But you can find an Air Venturi Avenger moderator in gun stores very easily.

How Many Shots Air Venturi Avenger Shoot?

The Air Venturi Avenger shoots 24 shots per fill.

Where To Buy Air Venturi Avenger?

Although it is produced in Ohio, you can find the Air Venturi Avenger in stock in gun stores all across America.

In fact, this gun is so popular that you can find Air Venturi Avenger for sale in gun stores in different countries worldwide.

Motion Decoy Strategies

0

By Hampton Bourne

motiondecoys2SO19

In the late 1990s the spinning-wing decoy crashed onto the duck hunting scene like a tsunami. Two decades later, it has become the most widely used motion decoy, and most hunters have at some point integrated spinners into their decoy spreads. A superstar to some hunters and pariah to others, these decoys have definite strengths and weaknesses.

The first spinning-wing decoy traces its roots to California’s Sacramento Valley. The initial prototype was rather basic and consisted of a single spinning blade, powered by a small electric motor, atop a stake. The blade’s alternating colors produced a strobe effect. The magic comes from the strobe. Unlike humans, ducks can see in the ultraviolet spectrum, which allows them to pick out a hunter’s face shining in the sunlight as well as a spinning-wing decoy from two to three times farther than the human eye can see it. Likewise, a duck’s sharp vision and eyes on the side of its head allow it to see a wide panorama of motionor lack thereofin a decoy spread.

While some hunters achieve tremendous results with their motion decoys, others insist that they cause more harm than good. Here are a variety of tips from experts who make motion work.

EXPERT TIP #1 Understanding Motion Concepts

The spinning-wing concept spread like wildfire. Terry Denmon, an engineer by trade, was approached by a friend who owned a sporting goods store. Their goal was to develop a small, battery-powered motor that could drive spinning wings on a duck decoy. The idea quickly morphed into MOJO Outdoors, which has since established itself as a major manufacturer of spinners and other motion decoys.

Denmon separates his theory of motion into two categories: “long-range strobe” and “simple motion.” Long-range strobe, he says, is “the flash of a spinning-wing decoy generated by turning a wing at a certain minimum speed.” Simple motion, he continues, is “any movement not within the spinning-wing concept. This could be movement of decoys, water, or wings that do not produce the strobe or flash.”

If motion decoys were duck calls, the strobe would be the highball, and simple motion would be the lonesome hen. Like the highball, the strobe is very effective at attracting ducks from long ranges but can cause them to flare when they’re in close, particularly later in the season. Simple motion, on the other hand, is not visible to ducks from a distance but is more likely to help finish birds, just like the lonesome hen call.

While MOJO made the spinning-wing decoy famous, Higdon Outdoors pioneered the development of other types of motion decoys. In 1994, Mark Higdon built a goose decoy with a moving head, which went on to become the first mass-produced motion decoy.

Brook Richard, corporate relations manager for Higdon Outdoors, explains Higdon’s idea of motion. “Visual motion,” he says, “is produced by decoys that can be seen from a distance, but visual motion is not always useful when you’re trying to finish ducks. Water motion, on the other hand, is the process of putting a ripple on the water to make decoys move. With visual motion you’re trying to attract ducks from a long distance. With water motion you’re trying to get circling ducks to commit.”

The message is simple. Some motion decoys attract ducks from long distances, while others put ducks at ease when they are circling your spread. Understanding the difference helps you to be more strategic and creative when using motion.

motiondecoys3SO19

EXPERT TIP #2 Get Creative

It’s no secret that decoy positioning is crucial to successful duck hunting, and that is especially important with the placement of motion decoys. Conventional wisdom indicates that if a decoy looks like a duck landing, it should be positioned in a spread where you want ducks to land. While placing a decoy in the middle of a landing hole may not be a terrible idea, a little more thought and creativity can yield better results.

Mark Kirsten has been hunting the rice fields of his family’s Sacramento Valley farm for nearly 30 years, and he has experienced the evolution of spinning-wing decoys firsthand. “When the original spinners were invented, they were almost unfair,” Kirsten says. “Their effectiveness has lessened over time, however, and the farther south you go, the less effective they can be.” As ducks move down the flyway, he explains, and especially as the season progresses, they can begin to see the strobe produced by the spinning wings as something unnatural.

“In my experience,” Kirsten continues, “as the season moves on, ducks don’t always finish as well when the spinners are spinning. I use one only if it has a remote, and we always turn it off as ducks get closer. As the season moves on, I also tend to place them farther and farther away from my blind. If ducks begin to act leery of a spinning-wing decoy, I’ll even put it outside my spread and partially behind cover so ducks can see it only at certain points in their circle. I think it can be a great tactic to continue attracting ducks without sacrificing the ability to finish them.”

Denmon endorses the tactic. “One of the biggest misconceptions for spinning-wing decoys is that they are good finishers,” he says. “The decoy was always intended to be a long-range attractor. But if ducks become shy and you remove it completely from your spread, you give up the ability to attract ducks from far off. If they aren’t finishing because of your spinning-wing decoy, move it to the far end of your spread, out of your landing hole. If you need to, move it a hundred yards outside your spread. It might not look as natural to us, but at least you’re still attracting ducks from far away. Once they are close enough to be shy of the strobe, the spinners have already done their job.”

motiondecoys4SO19

EXPERT TIP #3 How Conditions Can Affect Motion

Ron Kee is a lifelong New Yorker who cut his teeth hunting ducks in the saltwater marshes of Long Island. A Wall Street veteran and former New York state DU vice chairman, he now hangs a shingle as a pro staffer for several waterfowling manufacturers including Mossy Oak, Drake Waterfowl, Buck Gardner Calls, and Tanglefree.

Changing weather conditions can present a challenge for any hunter, but those on our nation’s coasts also have to deal with tides. “Sometimes, the tide can shift six to eight feet over the course of a hunting day,” Kee says. “In a falling tide, a decoy on a pole will eventually stand too far out of the water. In a rising tide the same decoy will quickly be covered with water. We usually hunt from boats and almost always use floating spinning-wing decoys so our profile and motion adjust automatically with the tide.”

Hunters logging hours on coastal waters can also see a higher frequency of strong winds. “Most of the time we hunt sea ducks in a stout wind,” Kee continues. “We frequently use wind-powered spinning-wing decoys. While many inland hunters won’t see winds with enough power to spin motorless decoys, we commonly hunt in winds that produce the strobe that ducks can see from a long way away. They’re also lightweight and very affordable.”

Kee also encourages hunters to remember some tried and true old-school motion tactics. “Flagging passing ducks is one of the most effective techniques we use,” Kee says. The flag he uses is a black, square flag on a handle, similar to a black golf flag. Hunters grip the handle and flap the flag to simulate a duck or goose flapping its wings. “When ducks are at a distance, I’ll hit them with a few flaps,” Kee continues. “I just use a few flicks to get their attention, and once they start coming, I’ll stop flapping. Unlike dabblers, many divers and sea ducks don’t respond well to a duck call, so flagging gives me the same feeling of involvement that calling does. It really is an art form and can be a lot of fun.”

motiondecoys5SO19

EXPERT TIP #4 Finesse Finishes Ducks

If the waterfowling community crowned a “King of Motion,” Ronnie Capps would be a strong contender. A retired game warden and current professional outfitter, Capps is widely regarded as an expert at bringing life to a dull decoy spread, to the point that clients have referred to his Reelfoot Lake timber hole as “Duck Disneyland.”

Capps believes that shy ducks require a more delicate approachsomething many decoy spreads lack. “You will scare far more ducks with erratic motion than subtle motion. Many hunters use what I call ‘The Haunted House Scenario,'” he says. “If you use too much motion at the wrong time, it’s like a guy with a chainsaw popping out at a haunted house.

“Keep your motion decoys on a remote or a hardwire switch, and don’t ever hit your heavy motion decoys when the ducks are looking right at your spread. When they get downwind and aren’t looking directly at you, hit your motion decoys a few times to stir up the water and create ripples and motion out of the corners of their eyes. I am also a big believer in swimming decoys, especially in and around my landing hole. I believe they are extremely beneficial when used for finishing ducks.”

Higdon’s Richard agrees. “Ducks move, and they move a lot,” he says. “I think the biggest mistake people make is devaluing the power of water motion, especially when there’s no wind or if you’re in the woods. Water motion is critical for finishing ducks.”

“With decoys arranged in a classic half-moon pattern, there are several different ways to use motion best,” Richard adds. “First, make sure your motion decoys are slightly upwind in the spread so the ducks will continue flying over them as they circle. Also consider placing a motion decoy among static decoys to compound their effectiveness. Putting a low-key motion decoy, like a swimmer, exactly in the spot where you want the ducks to land is also a great tactic.”

EXPERT TIP #5 Be Strategic

Supplementing your decoy spread with motion isn’t guaranteed to increase your harvest, but it’s hard to argue against it. The key is being strategic. While some decoys are meant to function like a hammer, others play subtler but equally important roles. Success comes when you understand the hunting conditions, read the birds’ behavior, and use the right tools for the job.

Continue Reading

10 Best Hunting Flashlights of 2024 [Bright & Powerful LEDs]

0
Grey LED deer hunting flashlight laying across a bed of leaves and sticks
Our Favorite Flashlights for Hunting of 2024: Bright, Powerful & Durable

I’ve you’ve seriously injured a deer, elk, or any other wild game, it’s your obligation to track that animal down and harvest it, even if it’s dark out. That’s why we’re here to tell you about the best hunting flashlights of 2024. We want you to get your hands on the exact gear you need for a successful hunt.

Whether you’re tracking animals through the night, performing search and rescue after dark, scaring away bears from camp, or poking around your hunting tent, a proper flashlight is an essential piece of the hunting puzzle.

To help you choose the right option, we scoured hundreds of products in search of the brightest, most powerful, and highest-rated LED torches available today. As a result, we’ve whittled down the industry’s best hunting flashlights to the following ten best options from Fenix, Nitecore, SureFire, Streamlight, and more.

We’ve also taken a deep dive into the critical factors that go into choosing a proper light, like luminosity, throw, run time, and weather resistance. And, to help maximize your purchase, we recommended a few add-on accessories that’ll bring out the best in your light.

Ready to brighten up the night with one of 2024’s best hunting flashlights around?

Let’s get started.

Best Hunting Flashlight for the Money Fenix PD36R

Max Lumens: 1,600 Max Run Time: 115 hours at 30 lumens Batteries: USB-C rechargeable Weight: 5.6 oz Pros: Ergonomic, USB-C rechargeable, incredibly bright for its size, excellent run time, extremely durable and weather resistant, rail mount accessory add-on for guns Cons: Can get hot on turbo mode

The Fenix PD36R is the flashlight I’ll use for the 2024 elk and deer hunting seasons, and I bet it’ll be my go-to torch for many years to come. For my money, it doesn’t get better than this little beast. It does everything I could ask of it.

Straight out of the box, this flashlight feels sturdy and maneuverable in your hand. It’s big enough to get a good grip on and compact enough to clip to your belt unnoticed. It pumps out a powerful beam, has five different brightness settings, and boasts incredible run times thanks to its 5,000 mAh USB-C rechargeable battery.

Because this bad boy has high-end IPX8 water and IPX68 dust resistance, there’s no need to stress if the weather gets nasty or if it falls into the mud. To help out during rifle season, Fenix sells a mounting accessory that allows you to attach and detach the PD36R to your gun’s rail while hunting at dusk.

Thanks to its power, durability, weather resistance, and ergonomic feel, we confidently recommend the Fenix PD36R to hunters of all stripes. It’s highly versatile, too, and would make for a great everyday carry in the offseason.

PRO TIP: Order the PD36R through Fenix’s official website, and they’ll laser-engrave your flashlight with a design and/or custom text for free!

VIEW ON FENIX

USB-Rechargeable Runner Up Nitecore MH25S

USB-C rechargeable Nitecore MH25S

Max Lumens: 1,800 Max Run Time: 1,500 hours at 1 lumen Batteries: USB-C rechargeable NL2150 Weight: 5.4 oz Pros: Bright and powerful light with a long throw, USB-C rechargeable, very durable and weather resistant Cons: Could be more ergonomic, turbo mode kills battery life

Nobody loves fumbling around with batteries when their light is losing juice, so we included another powerful USB-C rechargeable option, the Nitecore MH25S. This torch is pretty similar spec-wise to our top overall recommendation, the Fenix PD36R, so you can rest assured it’s good to go.

This bad boy is well-engineered and full of clever features. With 1, 50, 300, 1,050, and 1,800 lumen settings, it packs the brightness to thrive in any environment and has an impressive throw that reaches nearly a third of a mile on its turbo setting. It also has a handy battery indicator, automatic temperature regulation, and can clip to a gun’s rail with a tactical ring accessory.

So, why don’t I recommend the Nitecore MH25S over the Fenix PD36R? For starters, the battery life on the Fenix is slightly better, and it also has a sleeker, more ergonomic design. The Fenix also rings in 30 bucks cheaper than the Nitecore and comes with a free customized engraving.

But don’t overlook the MH25S just yet. It does pack 200 more lumens than the DP36R and has a significantly longer throw. It’s a mighty torch in a compact package and a well-deserved runner-up.

Hunter’s Favorite Do-it-All Flashlight SureFire G2X Pro

Max Lumens: 600 Max Run Time: 52 hours at 15 lumens Batteries: CR123A (2) Weight: 4.4 oz Pros: Comes in four different colors, compact, ergonomic, weapon mountable, very durable Cons: Not as many lumens as we’d like, only two different brightness settings, not USB-rechargeable

This list would be incomplete if I left out the SureFire G2X Pro. It’s a top option among hunters and outdoorsmen and is one of the most widely-used flashlights in the hunting industry. It’s a great all-around torch at an approachable price.

For starters, it’s available in four colors, giving hunters the option to choose a light that’ll match their specific kit. Like the first two lights I mentioned, it’s tough as nails, compact, ergonomic, and weapon mountable. It’s a versatile light that’ll serve you well in the field or as an everyday carry.

But I prefer my Fenix PD36R torch over this one for several reasons. For one, this flashlight uses replaceable CR123A batteries and isn’t USB-rechargeable. It puts out 600 lumens (as opposed to the PD36R‘s 1,600) and only offers two brightness levels (as opposed to five for the Fenix). Specs-wise, it just doesn’t match up.

Overall, the SureFire G2X Pro is a solid little light widely used in the field. Hunters swear by it, and its popularity is something we can’t ignore. No, I won’t swap out my Fenix for this anytime soon, but I imagine it would still get the job done if I did.

Durable, Functional, Available as Rail Mount Streamlight ProTac HL-X | Rail Mount HL-X

Indestructible Streamlight ProTac HL hand light for hunters and outdoorsmen

Max Lumens: 1,000 Max Run Time: 20 hours at 65 lumens Batteries: Rechargeable 18650 (1) Weight: 6.2 oz Pros: Ergonomic, weather resistant, USB-rechargeable batteries, highly rated for its durability, available as a rail mount for long guns Cons: Battery life isn’t great

Streamlight’s ProTac HL-X is another extremely popular flashlight among hunters and outdoorsmen, and for good reason. It’s powerful, durable, versatile, and also available in a modded version that’ll mount to the rail of your gun.

If you scour through its thousands of five-star reviews, you’ll see why hunters and outdoorsmen love the HL-X: it’s bright, reliable, and serves multiple uses. At 5.5 inches in length and with a max brightness of 1,000 lumens, we think it’s the perfect size and strength to guide you through the dark of the backcountry.

As we mentioned, Streamlight offers a version of the ProTac HL-X that can mount to your gun’s rail. For about $30 extra, this version comes with a built-in mount, retaining clips, and remote switch. Sure, this version would be more practical for tactical and self-defense situations than for hunting big game, but we wanted to highlight it nonetheless.

The ProTac HL-X checks all the boxes for hunters and backcountry explorers alike. We’re not huge fans of its below-average battery life, but other than that, we’re having a hard time finding flaws. Though we still recommend the Fenix PD36R and its optional rail mounting accessory as our top overall option, this light is a no-brainer if you’re a Streamlight fanboy (or girl).

Best Red-Green-Blue-UV Hunting Light Nitecore SRT7GT

Max Lumens: 1,000 Max Run Time: 240 hours at .1 lumens Batteries: 18650 (1) or CR123A (2) Weight: 6.1 oz Pros: Red, green, blue, and UV lights help with blood tracking, preserving night vision, and stealthiness, powerful 1,000-lumen output, very weather resistant Cons: .1, 3, 13, and 1,000-lumen settings leave a significant gap in brightness, not as compact or ergonomic as other options

Nitecore produces some of the market’s most technologically advanced flashlights and flashlights. Don’t believe me? Just check out their SRT7GT. It’s packed with loads of easy-to-access features, most notably its twisting dial that allows you to switch between red, green, blue, and UV lights.

So, how are all these different colored lights useful for hunters?

  • Red lights work well for stealthiness and preserving night vision
  • Green lights work well for blood tracking and night fishing
  • Blue lights also work well for blood tracking but don’t preserve night vision
  • UV lights are used for blood tracking but only when used with luminol

This feature-rich light could come through in the clutch for hunters, especially those who go after deer, elk, and big game at dusk and want a capable blood tracking solution.

Since I already rock a powerful headlamp with red, green, and blue lenses, I don’t need the SRT7GT. I do, however, think this torch would be an excellent option for hunters with headlamps that don’t feature multiple colored lenses. Blood tracking and privacy lights are pretty important in the deer and elk hunting world, and this versatile light has all the features to get it done.

Very Bright Option for Challenging Environments Ledlenser P18R Signature

Ledlenser P18R Signature brightest illumination device, best for outdoors

Max Lumens: 4,500 Max Run Time: 70 hours at 30 lumens Batteries: 3 x 18650 battery pack Weight: 1.4 lb Pros: Extremely bright and powerful, slick magnetic charging system, compatible with RGB color filters, loads of high-tech features Cons: Heavy, bulky, expensive, lacks a mid-brightness setting

For most hunters, the Ledlenser P18R Signature would be overkill. But for those who get tags in ultra-challenging environments and push themselves to the limit, this hulk of a flashlight might be the ticket.

This bad boy operates at four different brightness settings — Low: 30 lumens, Mid Power: 1,000 lumens, Power: 2,600 lumens, and Boost: 4,500 lumens — that help it thrive in the darkest and most relentless terrain. Its twisting dial at its head allows for fluid adjustment between tight spot beams and wide flood lights, allowing hunters to dial in their beam diameter to fit the surroundings.

It also rocks an impressive set of ‘smart light’ features that combine to make it highly customizable and responsive. This is a high-end flashlight for which gear nerds will fall head over heels.

A flashlight this bright and powerful would be useful for hunters who traverse remote areas with few obstructions. If search and rescue is a real possibility, the Ledlenser P18R will provide you with the power you need to look for lost or injured hunters, send SOS signals, or track animals in wide-open environments.

PRO TIP: Order the P18R Signature through Ledlenser’s website, and they’ll laser-engrave your flashlight with custom text for an extra $10.

Ultralight Hat Brim Clip-On Flashlight Fenix E18R

Max Lumens: 750 Max Run Time: 70 hours at 5 lumens Batteries: USB-rechargeable Fenix 16430UP Weight: 1.7 oz Pros: Very lightweight and compact, USB-rechargeable, durable and weatherproof, can clip to a hat brim, would work great as an EDC light Cons: Small – could get lost, easy to burn through the battery at high and turbo settings

Ultralight backcountry hunters will take any opportunity to reduce their pack weight, and that’s why I’m seriously considering trying out this tiny little Fenix E18R torch for the 2024 season. It’ll give me the lumens I need, and it barely weighs a thing.

It’s a compact little bugger, too, and could stash away easily in my pocket, bino harness, or clip to my hat’s brim to work as a headlamp. It can recharge magnetically via USB, is IP68 rated to stand up against the elements, and cranks out a good amount of brightness for how compact it is. It won’t break the bank, either.

The problem is, I’m great at losing smaller gadgets like this in the heat of the moment, so I’d probably end up securing it to a lanyard to keep it from disappearing. There’s something to be said for an ergonomic flashlight, and this isn’t it.

The Fenix E18R would make a great addition to any hunter’s arsenal whose style gravitates towards lightweight and compact gear. At 750 lumens, it’ll provide plenty of light to navigate through the woods at dark as you follow a blood trail.

VIEW ON AMAZON

Best Value Buy Flashlight for Hunters Ledlenser P7

Ledlenser P7 budget gadget for outdoor use

Max Lumens: 450 Max Run Time: 40 hours at 25 lumens Batteries: AAA (4) Weight: 6.2 oz Pros: Approachable price, reliable, Advanced Focus System lets you control your beam diameter, seven-year guarantee Cons: Not super powerful, weather protection isn’t great (IPX4), four AAA batteries aren’t ideal

Some hunters don’t want to drop 100 bucks on a flashlight, and we get that. For those who are after a torch that won’t break the bank, check out the Ledlenser P7. It’s a solid all-around light with plenty of great reviews.

There’s nothing mind-blowing about the P7, but we dig it anyway. Its 450 lumens are on the lower end of torches we recommend, but hunters still report a bright and powerful beam that gets the job done in the backcountry. We also appreciate its Advanced Focus System feature, which puts out tight, focused beams that can transition between spotlights and floodlights with one hand.

Its IPX4 rating is on the lower end of the water-resistance spectrum, meaning it should be able to handle splashes and light precipitation fine, but might not hold up during a prolonged downpour. Weather resistance aside, this sturdy aluminum light should be able to survive drops and falls just fine.

If you’re looking for a sturdy, reliable light from one of the industry’s most trusted brands, consider the P7. Just don’t forget to register it with Ledlenser, so it’ll be eligible for its seven-year warranty.

PRO TIP: Order the P7 through Ledlenser’s website, and they’ll laser-engrave your flashlight with custom text for an extra $10.

Brightest Torch for Search & Rescue, Distance Tracking Nitecore TM39

Max Lumens: 5,200 Max Run Time: 36 hours at 200 lumens Batteries: Rechargeable internal NPB68HD Weight: 3.0 lb Pros: Incredibly bright and powerful, crazy-long throw, massive battery life, durable, reliable Cons: Very bulky and heavy, impractical for most hunting applications, very expensive

Let’s get this out of the way immediately: the ultra-high-end Nitecore TM39 is as large and powerful of a hunting flashlight as I’m comfortable recommending. It’ll excel in rescue situations or while tracking animals in environments with few obstructions, but it would be overkill for anything else.

This absolute unit is as burly and bright as you could ever ask for. With an insane throw of 1,500 meters, it’ll shine powerful beams as far as the eye can see, whether you’re scanning for humans, animals, or anything else. Nitecore markets it as a searchlight, and that’s precisely how hunters should use it.

At three pounds, the TM39 weighs far more than anything else on this list. It’s not going to stash away unnoticed in your pack, nor will it be effortless to lug around the woods. If I were using it, I’d leave it behind at camp to use in case of emergency and clip my Fenix PD36R to my belt as my more practical hunting carry.

Much like the Ledlenser P18R Signature I wrote about earlier, I only recommend the Nitecore TM39 for those who hunt in remote areas with few obstructions and low visibility. In threatening environments where search and rescue or tracking from a distance is possible, this “tiny monster” is the high-performance torch you need.

Best Blood Tracking Light for Deer & Elk Primos Bloodhunter HD

Primos Bloodhunter HD blood tracking light for deer, elk, and big game

Max Lumens: 600 Max Run Time: Not listed Batteries: CR123A (4) Weight: 1.1 lb Pros: Best option on this list for blood tracking by far, durable and water resistant, solid run time Cons: A bit bulky, serves a very specific use, will need to be paired with a traditional flashlight or headlamp

The Primos Bloodhunter HD is our favorite overall blood tracking light on the market, and it’s not even close. It’s the go-to option for deer, elk, and big game hunters worldwide and could be the difference between tracking down your kill and losing it to the darkness.

We big game hunters love to think that we’ll nail perfect double lung shots every time, but we also know that hunting rarely goes as planned. If you seriously injure an animal but don’t stop it dead in its tracks, the Primos Bloodhunter HD will help you illuminate its blood trail against leaves, sticks, and the earth.

Remember that this light serves a particular purpose: blood tracking in the dark. It isn’t your traditional hunting torch with a powerful white LED beam that can shine for hundreds of yards, so you’ll need to pair it up with a capable flashlight or headlamp if you want a well-rounded setup.

Batteries, Extra Power & Backup Light

Once you get your hands on a proper light for the upcoming hunting season, you’d better make sure it doesn’t die on you when you need it the most. Here are the batteries, power bank, and backup light that I recommend to cover your bases.

Factors We Consider When Reviewing Flashlights

There’s a lot to consider when choosing which flashlight to lead you through the darkness

The torches on this list are intricate little gadgets, so we made sure to analyze the inner workings of each device before they could make this list. Getting the exact light you need to match your hunting style is essential, so keep a close eye on the following seven considerations as you make your decision.

Lumens

Simply put, lumens are a measurement of brightness. If you’d like a more technical definition of lumens, click here.

Products on this list can shine anywhere between .5 lumens in low mode and 5,200 in turbo mode. Check out our chart below to help you visualize the brightness along this range.

Approximate Brightness in Lumens

  • 1 – 10: Best for up-close uses like cooking, going through gear, and reading
  • 11 – 50: Low brightness, will illuminate immediate surroundings but not much else
  • 50 – 200: Low-to-medium brightness for hiking and use around camp
  • 200 – 500: Medium brightness, suitable for following blood trails
  • 500 – 1,000: Medium-to-high brightness, good for tracking animals from a distance
  • 1,000 – 2,000: High brightness, used in military and during search and rescue missions
  • 2,000 – 4,000: Extreme brightness, the strength of most cars’ headlights
  • 4,000+: ‘Probably overkill’ level brightness, meant for incredibly challenging situations

Throw

A flashlight’s throw measures the longest distance its beam can reach, and is typically measured in meters.

For example, if you have a flashlight with a rated throw of 500 meters and you shine it towards a barn 400 meters away, the beam should be visible on the barn. If you shine the same flashlight towards a barn 600 meters away, the beam should weaken and disappear before it hits the barn.

Throw distance depends mainly on how concentrated your flashlight’s beam is. Spotlights, or more focused beams, will have larger throws, whereas floodlights with wider beams will have shorter throws. Many flashlights on this list allow users to switch back and forth between spotlights and floodlights.

Run Time

Run time, or how long you can expect your light’s battery to run, is measured in hours and minutes. The higher amount of lumens your light is emitting, the lower its run time will be (and vice versa). A light with multiple brightness settings will have multiple different run time ratings.

Batteries

As I mentioned, know exactly which type of battery your light requires, and bring extras along if you need them. Nobody wants to struggle through the woods at night as the beam on their flashlight keeps fading and fading.

The most common battery on this list is the CR123A, though we’ve also included a few lights that use AAAs and 18650s.

You’ll also see a couple of lights with internal batteries that you can recharge via USB, AC (wall charger), or 12-volt (car charger). If you’re hunting with one of these lights, be sure you bring along a battery bank or an inverter so you can charge it.

Durability & Weatherproofing

Hunting is tough on your gear; that’s no secret. While making this list, we did our best to include products known for their durability and weather resistance. Nobody’s got time for a light that’ll flicker and shut off after a few minutes in the rain.

Nor do you want a light that’ll break if you drop it on a rock or back over it with your car.

All the products on this list were built for the outdoors and should thrive in dicey conditions.

Click here for a detailed explanation of IPX ratings, which determine how weather-resistant your flashlight is. If you’re hunting in a dry climate, you could get away with bringing an IPX4-rated light, whereas if you’re hunting in a wet and humid climate, you’ll want to bring along something rated IPX6 or better.

Weight

As an ultralight backpacker and backcountry hunter, I keep the weight of my pack down as low as possible while remaining comfortable. Heavy kits can lead to sore knees, rolled ankles, and drained energy. We hunters need all the help we can get, so why would we want to drag a heavy pack around all day?

That’s why it’s important to consider a flashlight’s weight before committing to it. Search for a light with enough lumens for your hunt and zero in on models within a reasonable weight range.

A few ounces here and there may not seem like a big deal, but they do add up. Don’t buy a heavier light than you need, especially if you’re covering big miles in the backcountry.

Which Flashlight Will You Take Hunting in 2024?

Hunter in a dark forest shining his flashlight down the trail in search of deer and elk
Don’t get left in the dark; buy a robust and reliable flashlight this hunting season

Whether you need a hunting flashlight to track wounded animals through the night, light the way as you search for firewood, scare away predators from camp, or go searching for a lost hunter, you’re here for a reason.

When night falls on your hunting trip, you want to be prepared for anything.

That’s why we analyzed, reviewed, and recommended the industry’s ten brightest and best torches of 2024. From rechargeable LED lights to options with red and green settings to lights explicitly made for blood tracking, we wanted to provide our readers with various options that suit all different hunting styles.

So, what’s it going to be? Are you going to grab our top overall recommendation, the Fenix PD36R? How about the red, green, and blue capable Nitecore SRT7GT? Do you prefer the ultra-bright and powerful Ledlenser P18R Signature?

No matter the luminosity, throw, run time, or weather resistance of your future light, we hope we have simplified the buying process and helped you make up your mind. Night or day, we hope whichever product you choose gets its job done during a safe and successful harvest.

Now, grab that flashlight, pack up your gear, and get ready to brighten up the 2024 hunting season.

Related Posts

  • Electric Bikes for Hunting: Best Off-Road eBikes
  • Cellular Trail Cameras for Deer & Big Game Hunters
  • Hunting Watches: GPS vs ABC + Garmin or Suunto?
  • Hunting Flashlights [Bright & Powerful LEDs]
  • Best & Brightest Headlamps for Hunting & Fishing
  • Blood Tracking Lights for Deer, Elk & Big Game
  • Ozone Generators for Hunting & Scent Control
  • Long-Range Walkie-Talkies (Two-Way Radios)
  • GPS for Hunting: Top-Rated Garmin Handhelds

Last Updated on August 15, 2024

What Is An Air Rifle?

0

If you have stumbled upon this article, chances are that you probably have a pest problem at your house. This is a very common problem, especially if you are living in Florida – the wild side of the United States. 

Although the situation may seem like it’s out of hand, pests can easily be controlled by using an air rifle. 

Air rifles are sufficiently silent and do not scare away these little animals, who usually are very fast and alert. With the sound out of the scenario, they make perfect weapons for short-distance shooting and hunting. 

If you are a beginner at hunting, this article will guide you through the basics of air rifles and their benefits. 

I have compiled everything you need to know, so read on to find out!

What Is An Air Rifle?

Airguns or air rifles are weapons that fire using compressed air or other gases. They are typically long, use BB pellets, and are used for hunting, shooting, sports, and sometimes even in wars. What sets them apart from normal shotguns is their firing system.

Air rifles usually have some kind of gas compressed behind the pellet which is released during the time of the shooting. They have many variations, like spring pistons and pneumatics,  but technically, any gun that uses compressed gas is considered to be an air rifle. 

History Of Air Rifle

The creation of the first modern air gun dates back to 1580 and is a representation of the oldest pneumatic technology in our world. From the 17th to 19th century, the caliber used for air guns was usually between .30 to .51 and the velocities were generally 650 to 1000 ft. 

In modern times, air guns are mainly used for killing pests or for the sport of shooting and are not considered to be deadly firearms. 

However, you would be shocked to know that these light weapons were preferred for wars during a certain time for their durability in the rain and the fast, muzzle-loading guns. 

Besides that, air guns were silent, smokeless, and did not cover the shooter’s view, – great features for a soldier on the battlefield. 

The first commercialized air rifle was called the Challenger – an air gun model developed by Markham Air Rifle Company in Michigan, in 1886. 

Air rifles first started becoming a part of target shooting during the 1890s in Birmingham, England. The activity was carried out by people divided into teams and matches were hosted in public houses. The sport became very popular in 1899 and many rifle associations started to exist across Great Britain. 

This was the time air guns also started becoming linked to poaching. Although air rifles are not considered to be arms, they can still be deadly and need to be dealt with carefully. 

How Does An Air Rifle Work?

The main difference between air rifles and pistols is the presence of gas.

In air rifles, the trigger is built in a way that locks the gun with the spring and compresses gas (normally CO2) inside it. When the trigger is pressed, it creates a sudden release of that compressed gas, making the pellet shoot out. 

This system can be found in all sorts of air rifles – spring-piston guns, airguns, and PCPs and is an effective way to silently kill prey. 

Types Of Air Rifles

If you are concerned about which variety of air rifles to pick from, you need not fret anymore. Following is a compilation of the different types of weapons.

1.Spring Piston

    The spring piston gets its name from the fact that it has a coiled spring inside its chamber which is compressed when the gun is cocked. It is a very common beginner’s gun and has an easy system. 

    Upon pulling the trigger, the spring is decompressed and the piston is shifted, causing the bullet to shoot ahead. 

    Although it is a great buy at an affordable price, it has its cons, like how there is more recoil than other rifles. 

    Spring pistons also wear off with time and go weaker over the years. Spring pistons were originally used in shooting games at the Olympics before, but these days are best fit for killing small prey and animals. 

    2.Gas Spring

    There is only one other type of spring piston – a gas piston/spring and just like its name, it uses a gas spring instead of a mechanical one. 

    Gas pistons also require some experience and years of handling guns. They are best to use in cold climates as they have low frictional heat and need to be greased before usage. 

    You should get a gas spring if you want to make consistent firing shots of any kind as they give you a great, accurate vision.                                                                                                                                                                                                                                                                                                                                                                                                                                                                                                                                                                                                                                                                                                                                                                                                                                                                                                                                                                                                                                                                                                                                                                                                                                                                                                                                                                                                                                                                                                                                                                                                                                                                                                                                                                                                                                                                                                                                                                                                                                                                                                                                                                                                                                                                                                                                                                                                                                                                                                                                                                                                                                                                                                                                                                                                                                                                                                                                                                                                                                                                                                     

    Pneumatic 

      Pneumatic air rifles get their name from their function – using pneumatic potential energy stored in compressed air to shoot pellets. Pneumatic air rifles are of two kinds. 

      3.Pump Pneumatic 

      Pump pneumatic guns are pneumatic air rifles with a piston and pressure cylinders inside them. 

      When the gun is cocked, the compressed air in between them is released and forced into the cylinder, which locks the chamber to keep the air in until you shoot. The bullet is shot by the force of compressed air when you pull the trigger.

      Pump air rifles can be beneficial as they are lightweight and have no recoil, but it is not the most popular air rifle out there due to the fact that pumping can become a very tedious task.      

      4.Pre-Charged Pneumatic    

      Pre-charged pneumatic air rifles are basically pumped air rifles, but minus the process of pumping you need to do before you fire it. It keeps high-pressurized air (up to 3000-4000 psi) in the chamber using scuba tanks or hand pumps. PCPs are considered to be the best air rifle as it is recoilless with a high level of accuracy. 

      Its only con would be that PCPs are very high maintenance. They are slightly more expensive as compared to other air rifles and it needs a lot of charging equipment to keep them functioning. 

      Apart from these, they are great guns that are great for any sort of shooting activity and quickly allow you to shoot more than once in a row. 

      5.Compressed Gas

        Compressed gas air rifles have detachable pressure cylinders that are prefilled with compressed CO2 or air/nitrogen. There are three different types of compressed gas guns. 

        • CO2 

        Compressed gas guns with CO2 in the cylinders work the same way a PCP air gun would. The main source of firing power is pressurized gas which causes the pellet to move inside the barrel when the trigger is pulled. They are highly accurate, convenient for shooting back to back, and have no recoil.

        The cons of CO2 compressed gas guns would probably be that they are high maintenance. 

        They get easily affected by the weather since CO2 contracts and expands at different temperatures. It would also be heavy on the pocket to continue buying CO2 cartridges as a hunting enthusiast. 

        • High-Pressure Air 

        High-pressure air gas rifles work the same way CO2-compressed guns do – except, they use pure nitrogen or compressed air (since it is 78% nitrogen). 

        They were first developed for paintball makers but were proven more efficient as nitrogen is more inert than CO2 and remains longer in the gaseous state. 

        • Air Cartridge System

        This is the most modern form of a compressed gas-air rifle which was developed during the 1980s by the company Brocock as their special system. 

        What made them different from normal air-compressed guns was that they used special removable cylinders full of gas instead of a built-in reservoir for the gas. 

        Although air cartridge guns started as rifles that were not considered firearms, in the early 2000s, due to the rising gun violence, these sorts of guns became illegal due to the damage they could do. 

        What Are Air Rifles Used For?

        Air rifles are a modern alternative to shotguns. They are quicker, lighter, and easier to manage and make almost no sound with no recoil. 

        Apart from recreational activities, air rifles are mostly kept by 63% of families in the US for personal protection – according to a survey conducted by Gallup in the year 2019. 

        The following are the three main reasons why people keep air rifles. 

        1. Recreational Shooting

        Shooting as a recreational activity, also known as plinking, is a casual method of practicing the rifle. You shoot at random objects within range like road signs, bottles, logs, tin cans, and other targets. Since the target is not any living being, plinking is safe and legal to do as long as you rightfully own the gun.

        It is an easy way to practice your aim, and get the satisfaction of shooting targets without harming anybody. You can also turn it into a game of shooting perfect shots in a row or firing closest to the target. 

        Air rifles are also used in 10 m Olympic Air Rifle and Air Pistol events with the increased affordability of PCP rifles. 

        1. Pest Control

        Air rifles are also kept for pest control as they are very efficient for this purpose. These guns are silent killers that do not disturb the neighborhood and get the job done easily. 

        An air rifle with a .22 – .250 caliber is enough for short-range shooting and rabbiting. 

        1. Hunting

        Hunting is another recreational activity that makes use of air rifles for their game. Since they are recoilless and go off silently, it is very easy to hunt with them. 

        They also allow rapid firing which makes it more convenient for them. The most common game birds are grouse, pheasant, partridge, and quail. 

        Air rifles are also helpful for all types of small, medium, and big game hunting. The table below denotes the use of an air rifle for hunting purposes.

        Type of Hunting Animals
        Small Game HuntingSquirrels, rabbits, groundhogs
        Medium Game HuntingRaccoon, woodchucks
        Big Game HuntingWild hogs, Wild bear, deer, bison 
        1. Safety

        According to a recently published statistic by the Centers for Disease Control and Prevention, more Americans died of gun-related injuries in the year 2020 than in any other year. 

        Due to the heavy gun violence in the US, the most common reason for buying air rifles is for their own safety and protection.

        Benefits Of Air Rifles Compared To Traditional Rifles

        Although a lot of people prefer the traditional, heavy feel of carrying guns and going out on a hunt, air rifles are much safer, easier to use, and affordable in many ways. The following are a few reasons why air rifles are much better than traditional rifles. 

        1. Flexibility in Performance

        A good air gun is far more flexible than a traditional rifle. Air rifles are silent, lightweight, and allow multiple shots of back-to-back firing. They are accurate and can be used for getting rid of pests such as rabbits, birds, and squirrels and can even be used for hunting big game. 

        On the other hand, a traditional shotgun or rifle cannot be used for general work like killing pests or plinking. It is not neighborhood friendly and can startle anyone with its sound. 

        You can also not practice with normal shotguns on an everyday basis due to the sound it will create and the money that will go into the process. 

        1. Affordability

        Air guns are more affordable and easier to maintain than traditional firearms. Although good air guns are expensive, a decent air rifle of 177 cal would be easily available to purchase as compared to a regular shotgun. 

        Air rifles may be cheaper than their traditional counterparts, but their pellets are even more affordable than those of a regular rifle. 

        As a person who owns a gun, it is likely that you have a certain budget for your hobby. You can easily get more air rifle pellets in that amount as compared to normal ones. 

        Due to their affordability, you also do not need to worry about how many pellets you spend on a regular basis and can go all out with practicing.

        1. Low Maintenance

        With affordable pellets and no need for pumps or extra accessories, air rifles are very easy to maintain. Even their ammunition does not deteriorate over time. 

        Regular shotgun pellets are made of lead mixed with other natural metals. So, even if their normal life span (with proper storage)  is anything from six to twelve months, a slight change on the warmer side can easily ruin your best-quality pellets in 3 or 4 months. 

        Air rifle ammunition is simply a pellet with no special primer powders, hence it remains ready to use and saves you a lot of money as well. 

        1. Legalized

        Air rifles are not considered to be firearms, and are legal in the US in most states. This is not the case with a regular shotgun which can be seen as threatening in many parts of the country due to its gun problem. 

        If your weapon is legalized, you can not only keep it for everything you need it for but also practice and get better at a sport. 

        Since most pellets in an air rifle lose their velocity after around 50 yards, it is also considered to be much safer and trustable than a traditional rifle. 

        Conclusion

        Hunting pests can become a sport once you get a hold of your air rifle and learn how to operate it. Many shooting enthusiasts start with air rifles to kill pests but soon grow to love the sport. Perhaps something similar might happen with you and your first air rifle?

        We hope that this article has helped you understand whatever you wanted to learn about air rifles and their pros and cons. 

        Frequently Asked Questions

        1. Can A Felon Own An Air Rifle?

        An air rifle does not come under the category of a firearm. Hence, it is legal for a felon to own an air rifle. 

        1. What Type Of Air Rifles Are Used In The Olympics?

        The Olympic shooting events are divided into 15 events under three groups – rifle, pistol, and shotgun. The pistols used in the ISSF 10-meter air pistol event are gas-driven with a 4.5 mm caliber. The 10-meter air rifle event uses rifles with a 4.5 mm caliber. 

        1. What Is The Fastest Air Rifle?

        The fastest air rifle is a pellet gun named Magnum, manufactured by the company Gamo. It has an advertised FPS of 1650. 

        1. Can You Kill A Fox With An Air Rifle?

        It is possible to kill a fox with an air rifle hypothetically, but these rifles are used to kill prey like rabbits at a short distance of around 50 yards. The minimum caliber for a rifle to kill a fox should be around .25 cal at 800-900 fps. 

        1. What Air Rifle Should I Get?

        You should get an air rifle depending on the purpose of your gun. A good feature for beginners is .177 cal with a velocity of around 1000 fps, although most guns can be controlled with some practice.

        1. How Far Will A .22 Air Rifle Shoot?

        A .22 air rifle can shoot up to 100 yards according to the level of power it is at. A rifle of the same range with 1100 FPS and a heavier bullet can even go up to a mile. 

        1. Are Red Dot Sights Good For Air Rifles?

        Red Dot Sights work well for air rifles as they have many pros – a wider and easier range, give you direct aim, and make it easier for the hunter to spot the prey. They make a good accessory for your air rifle but are expensive. Hence, they are a great addition that makes shooting easy but is not necessary to go shooting. 

        1. Can You Shoot Pheasants With An Air Rifle?

        Technically, it is possible to shoot pheasants with an air rifle, but most people prefer to use a shotgun. If you use a rifle, you would need to aim directly at the head. 

        1. Is Air Rifles Legal In California?

        Yes, air rifles and small game hunting are legal in California. Any sort of Caliber is allowed but when hunting turkey, the prey must be hunted by a caliber of at least 0.177. 

        1.  Do Silencers Work On Spring Air Rifles?

        Yes, silencers work on spring air rifles, but the brand and quality of the product matter too. 

        1.  Do They Still Make Sheridan Air Rifles?

        No, the Sheridan air rifles had been discontinued after nearly 70 years in the year 2013. However, the .20 caliber pellets are still available for purchase. 

        1.  What Is The Best Air Rifle Manufacturer?

        Hunting enthusiasts buy air rifles depending on the purpose of the product. Hence, it cannot be determined who the ‘best’ air rifle manufacturer is. However, some commendable names are Hatsan, Weihrauch, Daystate, and Brocock. 

        1.  Is Air Rifle Quiet?

        Yes, air rifles are generally quiet as compared to a shotgun as they use a lesser amount of high-pressure air.

        1.  Is Air Rifle Accurate?

        An average air rifle with a .22 caliber has the potential to hit accurately up to even 1.28 km. However, this was proven by a record that was broken, and on average, a high-end air rifle can be accurate at 50-100 yards. 

        1.  Will a .22 Air Rifle Kill A Rabbit?

        Yes, a .22 air rifle is considered to be the best option for killing small animals like pests and rabbits as it is believed that it gives clean kills. Other caliber rifles of other fps can also be used. 

        Make hay the old-fashioned way with this homemade hay baler (built for under $150)

        0

        During the week Jason Price is a management consultant and efficiency expert. At the weekend he has an odd fascination with doing things by hand, like baling hay.

        Words: Jason Price Images: Jason Price, Andrew Ward

        Who: Jason Price & Bella the Corporate Dog Akatarawa Valley, 40km north-east of Wellington What: 1.2ha Twitter: @Corporate_Dog, @Jason_E_Price Web: Check out Jason’s other passion, Norwegian round wood stacks

        It’s important to know what you’re getting into when it comes to managing your first-ever lifestyle block. Alternatively, you can say to yourself “oooh, that’s a lovely spot” and just move to your dream property. That’s what I did.

        One of my first problems was what to do with the fast-growing spring pasture on my hilly paradise. I did get some helpful advice from block-owning friends.

        “Seriously, you haven’t got sheep yet?”

        That began my journey into land management and sheep. A few weeks later, three enthusiastic lambs arrived and promptly disappeared into the long grass. The stunned expression on their woolly little faces matched my own.

        My first thought was to make hay. The sun was shining. Machine mowing the steep gradient of my block makes that too dangerous. A small budget meant hiring a contractor wasn’t a viable option either.

        Hay has been cut, dried and baled by hand since medieval times. How hard could the old-fashioned way of doing things be? Project DIY Hay Baler began. Google provided a range of articles. I quickly clicked past the one entitled “don’t buy a lifestyle block until you’ve done your homework” and moved on to the traditional haymaking results.

        The basic method of making hay is cut, rake, turn, dry, bale.

        The North Carolina Forestry Service’s leaflet on how to build a simple box baler got me enthused about what they called: “A low-cost, simple-to-operate-and-build solution that is ideal for small-scale/start-up operations.” I ignored the drawbacks column with its pessimistic talk: • cumbersome • labour-intensive • limited production

        And the most pertinent to someone in my profession: • inefficient

        DOWNLOAD THE NCFS BOX BALER BUILD INSTRUCTIONS

        STEP ONE: CUT AND RAKE YOUR GRASS (THE HARD WAY)

        I did make one concession to modernity and common-sense. I admire the many people on YouTube who show such enthusiasm for cutting grass with a traditional scythe. But learning to scythe on a hilly section of the Akatarawa Valley would be more likely to result in a trip to the hospital. Scythes are also surprisingly expensive to buy and require a high level of skill to use efficiently. A petrol brushcutter with a grass cutting blade would do the job.

        The grass was knee-height, the weather forecast was for a week of sun, and I had time off work. Manually cutting a hillside field of grass is as labour-intensive, cumbersome, and inefficient as you’d imagine. Once cut, the grass needed to be raked up into windrows. These long lines help the piled-up grass to dry out. Work methodically across the field, raking the cut grass up into mounded rows.

        This is a nice way to spend a sunny day but it’s easier if you can find others to help you. My helpers were bull terrier-cross Beanie and white German Shepherd Kujo. Their definition of ‘help’ was to repeatedly crash through the neatly-raked rows. Occasionally they would wee on it.

        One essential investment is a decent pitchfork. You need to turn each windrow twice a day, about lunchtime and again in the late afternoon-early evening, to dry the hay. You want to turn and spread it out to expose any hidden green grass to ensure it is evenly sun-baked. Too green and wet and your hay will go mouldy, or worse, get so hot it starts a fire in your barn.

        JASON’S TIPS FOR MAKING A HAY RAKE

        I didn’t have a suitable hay rake, so I made one out of a broom handle, a length of scrap timber and some 8mm dowelling. This was a lot cheaper than those for sale online. Miraculously, it also works well. Don’t glue the dowel ‘teeth’ in place. It’s a lot easier to pull them out and replace them when they break. If you want to be efficient, cut yourself some spare dowels and take them with you when you’re raking.

        STEP TWO: BUILD A BOX BALER

        You will need to print the instructions to make this baler. The following is my commentary on my project as I followed (and sometimes didn’t follow) those instructions.

        I bought the timber, plywood, coach bolts, screws, door hinges, and eye hooks from Mitre 10 for under $110.

        1. The box baler is a square loading box with a lever system to compress the hay. It’s attached to a loading platform, providing stability to balance the lever arm. The loading platform frame and the loading box are constructed from 4×2 timber, with sheets of plywood in between. Start by constructing the base platform from two long and one short length of 4×2”.

        2. The rear corners of the loading box are two pieces of 4×2” timber attached to one another at right angles and fixed to the base platform. Screw a sheet of plywood between these and fix the central 4×2” length to the centre to hold the lever arm.

        3. Fix another piece of 4×2” to the base to form the front of the loading box. Connect across the top with a shorter length of 4×2”, holding the side plywood sheeting. On the front, below the cross beam, cut a plywood piece for the door.

        You’ll notice I went for a two-door front-opening model as opposed to the single door version in the reference plans. There was no strategy behind this; I cut a bit of plywood in the wrong place and had to adapt it to get the baler finished in a day. It works fine, but in practice, I think the single door model would be more robust during the baling process. Fix the door to the side upright with hinge or hinges and add a secure closing mechanism (either a bolt or a hook on the far side).

        4. Make the lever arm and compression platform. The lever arm is made up of two shorter lengths of 4×2” and a long central length. Use coach bolts to secure these at the top of the central pillar on the back. In the centre of the space between the two shorter lengths, use a coach bolt to fix the vertical 4×2” that holds the compression platform (the bit that goes into the box baler top). The compression platform itself is a square of plywood, the same dimensions as your box, attached by two pieces of 4×2 (in photo 4 you can see it where it inserts into the loading box). When the arm is lowered, this compresses your hay inside the box.

        5. The floor of the loading box has two pieces of wood fixed to it, with eye hooks sitting next to them. These are the runners that hold your baling twine in place. Fix these into the floor of your baler and screw in the eye hooks so the side of the eye is touching the wood.

        5a. Fix two eye hooks to the outside back of the baler. Position a little way down from the top, and keep them in line with the floor runners. These hold the baler twine ends during loading.

        6. You’ll notice the doors have slits cut into them. These should be at the same distance as the floor runners. The slits allow you to tie the baler twine.

        I discovered two things from this experience: • human beings can improvise if they need to; • the woodworking adage of ‘measure twice, cut once’ is correct and it’s better to pay attention the first time around.

        STEP THREE: GATHER AND BALE YOUR HAY

        At this point, you will definitely need help from others. This is also when you learn why the original article had the word ‘cumbersome’ in its list of disadvantages. Carrying the baler down to the field is a two-person job.

        You also discover an oversight in the plans. Robust carrying handles would be a good addition.

        Gathering the hay was relatively straightforward. We used a large blue tarpaulin. One person was on pitchfork duties and two more people dragged the tarpaulin. We also had three dogs to disrupt the process and liberally scatter hay. It’s a great team-building exercise. You’ll quickly find yourself with a large haystack on a tarpaulin that you can slide easily around your field. Move the hay to sit beside the baler.

        HOW TO USE THE BALER

        This is an important health and safety message. If you take the easy option of resting the compression platform on top of the loading box frame, it can slip off and you’ll get a nasty bump on the head.

        The moving parts can trap a finger, so be careful when you’re using it. We worked out that folding the level arm right back (as seen in the image below) after making each bale was worth the few seconds to avoid it falling and causing injuries.

        1. Set up the hay baler with twine, ready for loading. Put a loop of twine over the eye hook on the back of the baler and run it down the inside of the loading box. Run it under the gap between the eye hooks and wooden strip on the baler floor. Don’t put it through the eye hooks – it needs to go between them and the wooden strip (see 1A, below).

        This allows the twine to slip out once you’ve tightened it. If you run it through the eye hook, you’ll just fix your finished bale to the floor of the box and have to start again.

        2. Bring the end of the twine through the slot in the front door, leaving enough length to tie it off later.

        3. Repeat these steps on the other side so you have two lines of twine set up.

        4. Close and bolt the door, then fill the baler with hay from your haystack. Press it down by hand after each addition of hay. Keep loading until the hay sits level with the top of the baler box.

        5. Take your bailer twine off the eye hook at the back. Bring it over the top of the hay in the baler.

        Find the top of the slit in the front door and bring the twine through, ready for tying off in a moment (see 5A).

        6. Carefully bring the baler arm over and insert the flat plate into the top space of the baler.

        7. Pull down on the arm to compress the hay inside into a tight bale. If, like me, you opt for the two-door model, you might need to put your foot in front of the door to stop it bursting open. This is a good reminder to accurately follow the plans next time.

        8. Once the hay is compressed, take the ends of the baler twine from the top and bottom of each slot and tie them up tightly together. This holds your compressed bale together when you open the door. If you break the twine, you’ll have to unload the baler, re-set it and start again.

        9. Lift up the compression arm so it’s clear of the baler. You can rest it on the top, but it’s better to put it back in the ‘safe’ position ready to start again.

        10. Open the front door to reveal your compressed hay bale.

        11. Give the twine a tug and pull forward your compressed bale onto the loading platform. Practice makes perfect. Our processing time for the first bale was 12 minutes. We got to a final production-line-efficiency time of under five minutes to re-set, fill, tie, compress, unload and stack a neatly-packed bale.

        We’re not going to win any awards for farm efficiency compared to machine baling, but it does have some advantages: • it’s an oddly entertaining way to spend a day with friends in a field; • it’s low-cost if you live on a block that is too small to warrant investment in machinery or a contractor, or not accessible for a tractor; • it gives you a satisfying sense of achievement as you innovate new ways to speed up your production line process; • I got a lot fitter.

        Our productivity could have been increased further by not having dogs barrelling through the haystack. However, that would have cut back on a lot of the fun. My knee-length grass problem was turned into around 40 bales of hay. You do need to factor in the cost of beers and a barbecue to thank the raking, moving and baling team. Hay baling by hand is an experience to remember.

        Love this story? Subscribe now!

        Goliath Tigerfish Facts

        0

        Goliath Tigerfish Profile

        The Hydrocynus Goliath, more commonly known as the goliath tigerfish, or giant tigerfish, is a vicious predatory fish found lurking in the waters of large rivers and lakes in central Africa.

        They are found predominantly in the Congo River basin and Lake Tanganyika. This giant predator is one of the largest of the order of characids, which also include tetras, and piranhas.

        They are thought to be one of, if not the most dangerous freshwater fish in the world.

        goliath tigerfish facts

        Goliath Tigerfish Facts Overview

        Habitat: Large rivers and lakes in central Africa Location: The Congo River basin, Lake Tanganyika Lifespan: Up to 10-15 years in captivity Size: 5 ft (1.5m) Weight: 50 kg (110 lb) Color: Pale grey/olive with black stripes, red or orange fins, grey dorsal fin Diet: Fish Predators: Crocodiles, humans Top Speed: 40 kph (25 mph) No. of Species: 1 Conservation Status: Least concern

        Goliath tigerfish belong to the genus Hydrocynus, which is native to sub-Saharan Africa. There are five recognised species of the Hydrocynus, including the Hydrocynus Vittatus and Hydrocynus Brevis. 1 The Latin word hydrocynus means ‘water dog’, and the term ‘goliath’ speaks to the size of this monster – referring to the biblical giant of the same name.

        Adult goliath tigerfish can reach up to 5 feet in length and can weigh up to 110lbs. They have a mouth full of vicious, razor sharp teeth. The teeth interlock when the jaw is closed and protrude outward slightly from the jaw, giving a fearsome appearance. Goliath tigerfish are feared for a reason: they are the only freshwater fish in Africa with documented attacks on humans.

        They are usually an olive brown moving to a pale grey in color; with red or orange fins and a black dorsal fin. The name tigerfish refers to the black stripes that are often found running the length of the creature’s sides, as well as to its ferocious nature.

        Hydrocynus Goliath depend heavily on highly oxygenated and fast-flowing waters. They therefore inhabit deep river channels and open lakes. They are not found in headwaters or marshy areas.

        They are extremely strong swimmers due to their preference for fast moving waters, and are therefore able to snatch their prey even in the most turbulent of water. They are piscivores, and known to prey on fish up to 40% of their body length in size.

        They have few known predators, due to their size and ferocity. Their only real threat is the crocodile. However, they are a widely-prized game fish and are therefore hunted by humans.

        Interesting Goliath Tigerfish Facts

        1. They get their name from their appearance, demeanor and size

        The name tigerfish is a reference to the black stripes that are often found running down the flanks of these huge fish, as well as their fierce, sharp teeth and rapacious nature; while the word ‘goliath’ refers to their giant size.

        However, the nickname tigerfish is used to refer to a number of vicious, predatory African river fish.

        Jeremy Wade with a goliath tigerfish
        Jeremy Wade with a goliath tigerfish. Image Credit: DCL | Discovery.

        2. Goliath tigerfish have up to 32 razor-sharp teeth

        The upper jaw contains 12-20 teeth, while the lower jaw 8-14. The teeth interlock into matching indents onto the opposite jawline, and protrude slightly from the mouth.

        The teeth are slightly conical in shape and can be up to 2.5cm (1 inch) in length. To put this into perspective, they are a similar size to a great white shark.

        Goliath tigerfish have been known to snap their prey in half with a single bite. 2

        3. They have replaceable teeth

        Although relatively little study has been carried out on these elusive creatures, a study by Gagiano et al (1996) observed that captive tigerfish would replace all their teeth simultaneously within a period of 5 days, with no replacement having been observed previously!

        4. They have a double hinged jaw

        This means they are able to open their jaws a lot wider than other fish, and as a result its teeth point further forward when it strikes prey, allowing it to take chunks from their flesh.

        5. They can grow to the size of a small adult

        Although they grow slowly, the juvenile goliath tigerfish will only grow on average four to six inches per year. It can therefore take up to 10 years for the fish to reach its full size.

        goliath tigerfish
        Jeremy Wade with a goliath tigerfish. Image Credit: DCL | Discovery.

        6. They hunt alone

        Tigerfish are solitary and have generally been observed alone, rather than hunting in schools or groups like their smaller cousin the piranha.

        However, the females will migrate together to breed.

        7. Females can lay up to 750,000 eggs

        Female goliath tigerfish choose riverbanks or lakeshores to lay their eggs. Eggs are laid in underwater vegetation to protect them from predators as the young are not cared for by the parent fish.

        The females lay a large number of eggs in order to increase the chances that some will survive to adulthood. Females can lay literally thousands of eggs – sometimes up to as many as 750,000. The fact that the nests of eggs are hidden in vegetation suggests a vulnerability in the juvenile goliath tigerfish.

        8. Goliath tigerfish are predators from birth

        These fish are piscivores, meaning that they feed only on fish. The infant goliath tigerfish go through a larval stage during which they feed on animal plankton.

        They gradually migrate to larger fish as they grow in size and strength. They have been known to attack large animals.

        9. Goliath tigerfish can turn to cannibalism

        Goliath tigerfish are willing to ‘take chunks out’ of other large fish, large animals, and even each other in order to survive, although generally they only turn to cannibalism if food sources are scarce.

        Goliath tigerfish underwater, mouth open!

        10. Goliath tigerfish need highly-oxygenated waters

        The Hydrocynus species have a dependence on well-oxygenated and/or warm, fast-flowing freshwater, confining them to large rivers and open lakes.

        This is in contrast to many other species, which can tolerate a wider range of ecological conditions.

        11. They are known by natives as ‘M’Benga’

        The goliath tigerfish is an elusive creature, and there is a lack of scientific knowledge about this beast.

        However, it has long been a feature of myth and legend in its native Africa; earning itself the nickname ‘M’Benga’, which means ‘dangerous fish’ in Swahili dialect.

        M’Benga is believed to be an evil spirit, and it has been said that it is very bad luck to spot one at the start of your journey. However, they are prized if ever caught.

        12. They are the “greatest freshwater gamefish in the world”

        At least, according to Bill Hansford-Steele in his ‘African Fly-Fishing Handbook’, as well as extreme angler Andy Coetzee.

        Due to its size – and fearsome reputation – the goliath tigerfish has lured many a fisherman to attempt to catch the elusive beast.

        A successful catch could feed many hungry mouths, especially in the rural parts of Africa where they live. The flesh of a tigerfish is said to be somewhat similar to Tilapia. 3

        13. They have been reported to attack crocodiles, and humans

        It is the only freshwater fish in Africa that is claimed to take lumps out of crocodiles that consider pursuing them, and even humans.

        Although they are elusive, and attacks on humans are therefore rare, there are reports of natives on the Congo being bitten by these mysterious fish, and even a limited number of deaths reported.

        A person on the show River Monsters reported that a goliath tigerfish was responsible for jumping out of the water and biting a man on his neck, killing him instantly.

        Goliath Tigerfish Fact-File Summary

        Scientific Classification

        Kingdom: Animalia Phylum: Chordata Class: Actinopterygii Order: Characiformes Family: Alestidae Genus: Hydrocynus Species Name: Hydrocynus Goliath

        1. Fenton Peter David Cotterill (2009), “How many tigerfish species? Genetic insights into the evolution of Africa’s Tigerfish and the taxonomic status of Tanzanian Hydrocynus“, Research Gate.
        2. Barry Berkovitz, Peter Shellis (2017), “The tigerfishes (Hydrocynus spp.) are voracious hunters, of which the giant tigerfish (Hydrocynus goliath: Fig. 4.30A) is the largest“, The Teeth of Non-Mammalian Vertebrates.
        3. Bill Hansford-Steele (2013), “African Fly-fishing Handbook A Guide to Freshwater and Saltwater Fly-fishing in Africa“, Google Books.

        17 Best Rifle Scopes For Hunting, Expert Picks (2024)

        0

        What’s the best rifle scope for hunting you should be using this fall?

        I think we can probably agree that choosing the best rifle scope for hunting can be a pretty difficult task, especially for those who are new to hunting or just don’t know a lot about hunting rifle scopes in general.

        To start off with, there are so many different rifle scopes available on the market these days that selecting the right one can be overwhelming. Additionally, it can be difficult to cut through some of the marketing speak and hype out there in order to determine what stuff is worth your hard earned money and what rifle scopes you’re better off avoiding.

        I’ve experienced a lot of that same frustration myself.

        I’ve tried out literally dozens of different rifle scopes with varying results over the years. Though I’ve never owned a truly bad scope, I have purchased a few models that I felt were a waste of money and would would not recommend to others. Luckily, there are several high quality rifle scopes for hunters on the market today that provide exceptional performance both at the range and afield.

        In this post, I share my picks for the best rifle scopes for hunting. Just buying one of these rifle scopes won’t guarantee that you’ll fill your tag this fall. However, the right scope can still provide an important advantage when you need it most and increase the odds that you’ll cleanly and ethically take the game you’re after.

        Before we get started, here’s a disclaimer: some of the links below are affiliate links. This means I will earn a small commission if you make a purchase.

        This commission comes at no extra cost to you. This helps support the blog and allows me to continue to create free content that’s useful to hunters like yourself. Thanks for your support.

        Now that we’ve got that out of the way, let’s get started.

        Feel free to scroll straight through the article, or click one of the links below to jump straight to the best rifle scopes for hunting in the specific category you’re looking for.

        Most Versatile Rifle Scope For Hunting

        Best Value Rifle Scope For Hunting

        Best Rifle Scopes For Hunting Under $200

        Best Rifle Scope For Hunting Under $300

        Best Rifle Scope For Hunting Under $500

        Best Rifle Scope For Hunting Under $600

        Best Rifle Scope For Hunting Under $1,000

        Best Rifle Scope For Hunting Under $1,500

        Best Rifle Scope For Hunting Under $2,000

        Best Rifle Scope For Hunting Under $3,000

        Best Scopes For Hunting With An AR

        Best First Focal Plane Scope For Hunting

        Best “Smart” Rifle Scopes For Hunting

        Most Versatile Rifle Scope For Hunting

        Leupold VX-5HD 3-15x44mm

        I’ll cut straight to the chase: I think the Leupold VX-5HD is the most versatile hunting scope currently available on the market. Not only that, but this is my favorite hunting scope. Full stop.

        Why? First, it has fantastic glass and provides outstanding light transmission. Plus, the specific VX-5HD model I’m recommending here also uses an illuminated FireDot Duplex reticle. Basically, it’s a standard duplex crosshair with an illuminated red dot in the center that you can turn on and off.

        It works just like a typical scope during the day, but you can turn on that illuminated reticle to aid in aiming during low light conditions. I’ve been in several situations where I had game come out during legal shooting light, but it was dark enough that I had trouble seeing the animals with my naked eye.

        Fortunately, the light gathering capabilities of the VX-5HD are so fantastic that I could see much better while looking through the scope.

        For example, I successfully and cleanly took a big blue wildebeest with my VX-5 on a recent hunt in Africa at dusk when it was so dark that I could not see the black crosshairs on his dark body. However, I just turned on the illuminated reticle, put the dot where I wanted to hit, squeezed the trigger, and he dropped in his tracks.

        There’s no way I could have ethically or practically taken that shot with a scope that lacked the fantastic light transmission of the VX-5HD or without the illuminated reticle.

        The Leupold VX-5HD also comes with Leupold’s CDS-ZL system. This is basically a custom elevation turret matched to your favorite hunting load. Once you install the new CDS-ZL2 dial, it’s a simple matter of turning it to the right range and doing your part as a shooter.

        No more taping a bullet dope chart to the stock of your rifle or trying to determine the proper amount of hold over before you take a long range shot. If your target is 400 yards away, just set the custom elevation dial to 400 yards, hold the crosshairs exactly where you want to hit, and squeeze the trigger.

        The VX-5HD also has a side focus parallax adjustment dial and a wide zoom range from 3x all the way up to 15x on the high end. This wide zoom range makes the scope well suited for basically any hunting situation you can think of from whitetail in thick timber, to open country antelope or mule deer hunts, or even elk up in the Rocky Mountains.

        This scope is also really well built, tracks beautifully, has forgiving eye relief, and holds a zero exceptionally well.

        To be fair, the Leupold VX-6HD line has a few additional features that some hunters really like. However, I own and have hunted with both and, in my opinion, the VX-5HD provides the best balance of size, weight, price, and the features that are most important to me.

        I have a couple of 3-15×44 VX-5HD scopes on my traditional hunting rifles as well as a 1-5x20mm version on my .458 Win Mag that’s perfect for use on dangerous game at close range.

        All in all, this is a fantastic rifle scope for hunting that provides high end performance at a surprisingly reasonable price. If that big buck or bull of your dreams steps out of the woods right at last light, you want a scope like the VX-5HD on your deer rifle so you can make that shot when it counts.

        Key Features

        • Weight: 19.7 ounces
        • Magnification Range: 3-15x
        • Objective Lens Diameter: 44mm
        • Tube Diameter: 30mm
        • Field of View: 38.3-7.7 feet at 100 yards
        • Turret Click Values: .25 MOA
        • Reticle Focal Plane: Second
        • Parallax/Focus: Side adjusting parallax/focus knob
        • Knob Style: Capped Windage & Custom Dial System-ZL Elevation (CDS-ZL)
        • Illuminated Reticle: Yes

        Pros

        • Wide magnification range
        • Excellent quality glass
        • Illuminated reticle is perfect for low light situations
        • Great balance of useful features without too many unnecessary “extras”

        Cons

        • On the heavy side
        • Lacks throw level on magnification ring
        • Higher price point

        BUY A LEUPOLD VX-5HD SCOPE ON AMAZON HERE

        BUY A LEUPOLD VX-5HD SCOPE AT OPTICS PLANET HERE

        Best Value Rifle Scope For Hunting

        Leupold VX-3HD 4.5-14x40mm

        The Leupold VX-3HD scope is next up as my selection for the best value rifle scope for hunting. Leupold makes fantastic quality hunting scopes and their VX-3HD model (which replaced the old VX-3i) provides a good mix of useful features and high end glass in a relatively compact package that’s also available at a moderate price tier.

        This scope uses a 1″ main body tube, which helps keep it light and compact. Scopes like this one with a 1-inch tube are easier to mount low to the bore, which facilitates a good cheek weld and gives the rifle a more streamlined profile that’s less prone to snagging on obstructions.

        A 4.5x magnification at the low end is good for closer range hunting situations while a 14x magnification at the high end works great for checking targets at the range or for shots at longer range afield.

        Speaking of which, the Leupold VX-3HD also comes with a coupon you can redeem with Leupold to receive a custom elevation turret matched to your favorite hunting load. They call this their Custom Dial System Zero Lock (CDS-ZL). After installing the new custom dial, just range the target, turn the dial to that number, and aim dead on. Furthermore, the ZeroLock system on that turret eliminates accidental dial movement.

        Add it all up, and you’ve got a great hunting rifle scope with lots of useful features at a reasonable price point that should serve you well for many years of use afield.

        Key Features

        • Weight: 13.3 ounces
        • Magnification Range: 4.5-14x
        • Objective Lens Diameter: 40mm
        • Tube Diameter: 1-inch
        • Field of View: 19.9-7.4 feet at 100 yards
        • Turret Click Values: .25 MOA
        • Reticle Focal Plane: Second
        • Parallax/Focus: Fixed at 150 yards
        • Knob Style: Capped Windage & Custom Dial System-ZL Elevation (CDS-ZL)
        • Illuminated Reticle: No

        Pros

        • Light and compact
        • Good quality glass
        • Removable throw lever on magnification ring facilitates rapid adjustments
        • Lots of features with a reasonable price

        Cons

        • No parallax adjustment dial
        • No illuminated reticle

        BUY A LEUPOLD VX-3HD SCOPE ON AMAZON HERE

        BUY A LEUPOLD VX-3HD SCOPE AT OPTICS PLANET HERE

        Best Rifle Scopes For Hunting Under $200

        Vortex Crossfire II

        The Vortex Crossfire II is a great entry level rifle scope and is exactly what you need if you want a no frills rifle scope for hunting under $200 and don’t want to do a lot of shopping.

        This scope is nitrogen filled so it’s is fog proof and waterproof. It also has multi-coated lenses that facilitate light transmission and clarity under a variety of circumstances.

        This scope is available with the Vortex Dead Hold BDC reticle. At the maximum magnification, the hashmarks on the reticle provide 1.5 MOA, 4.5 MOA, and 7.5 MOA holdover points as well as 2 MOA, 4 MOA, 6 MOA, and 8 MOA windage hold marks.

        While the Vortex Optics Crossfire II does not provide light transmission or image quality on par with some of the more expensive optics on this list, it’s still a capable hunting scope for those who don’t need a high performance optic. It’s also comes with Vortex’s lifetime warranty.

        Make no mistake: the Crossfire II is perfectly adequate for typical hunting situations, especially for hunters on a tight budget.

        Key Features

        • Weight: 14.3 ounces
        • Magnification Range: 3-9x
        • Objective Lens Diameter: 40mm
        • Tube Diameter: 1-inch main tube
        • Field of View: 34.1-12.6 feet at 100 yards
        • Turret Click Values: .25 MOA
        • Reticle Focal Plane: Second
        • Parallax/Focus: Fixed at 100 yards
        • Knob Style: Capped
        • Illuminated Reticle: No

        Pros

        • Light and compact
        • Very reasonable price
        • Perfect for a budget conscious hunter

        Cons

        • Lower image quality than the higher end scopes
        • Restrictive eye box
        • No parallax adjustment dial
        • No illuminated reticle

        BUY A VORTEX CROSSFIRE II SCOPE ON AMAZON HERE

        BUY A VORTEX CROSSFIRE II SCOPE AT OPTICS PLANET HERE

        Burris Fullfield E1

        While the Vortex Crossfire scope is often slightly less expensive, the Burris FullField E1 scope has a couple of advantages for hunters at a slightly higher price point. It still usually comes in under $200 though.

        First, this scope uses slightly better quality glass than the Vortex Crossfire. It also uses the Burris Ballistic Plex Reticle that includes holdover points for various yardages. This is also a durable and well built scope, but comes with the Burris Forever Warranty in case something breaks.

        With those things in mind, the Burris provides a good step up in performance for just a little bit more money than the Vortex Crossfire II.

        Key Features

        • Weight: 13 ounces
        • Magnification Range: 3-9x
        • Objective Lens Diameter: 40mm
        • Tube Diameter: 1-inch
        • Turret Click Values: .25 MOA
        • Reticle Focal Plane: Second
        • Parallax/Focus: Fixed at 100 yards
        • Knob Style: Capped
        • Illuminated Reticle: No

        Pros

        • Light and compact
        • Very reasonable price
        • Perfect for a budget conscious hunter

        Cons

        • Lower image quality than higher end scopes
        • No parallax adjustment

        BUY A BURRIS FULLFIELD E1 SCOPE ON AMAZON HERE

        BUY A BURRIS FULLFIELD E1 SCOPE AT OPTICS PLANET HERE

        Best Rifle Scope For Hunting Under $300

        Leupold VX Freedom 3-9x40mm

        The Leupold VX-Freedom is another good rifle scope that’s an excellent choice for hunters on a budget. Leupold made a bunch of changes to their line of optics a few years ago and the VX-Freedom replaced the old VX-2 line of scopes. However, this update is a good thing and the VX-Freedom still incorporates the features people loved about the Leupold VX-2 with a handful of added improvements.

        Like all Leupold rifle scopes, the VX-Freedom uses quality glass that’s coated to maximize light transmission and minimize glare and reflection. The glass on this scope is not quite as good as what you’ll find on the VX-3HD, VX-5HD, or VX-6HD, but it’s still really good (better than the Vortex Crossfire II).

        Plus, the scope is even lighter and little smaller in profile than the VX-3HD.

        The Leupold VX-Freedom also comes with a coupon you can redeem with Leupold to receive a CDS-ZL turret matched to your favorite hunting load. This facilitates shots at slightly longer range and a good rifleman should have no issues reaching out a bit on game if necessary.

        Even so, this scope is better suited to short to medium range hunting scenarios. Hunters who plan on doing a lot of hunting in open country where encounters with game at longer distances are more likely should look to one of the higher end scopes on this list instead.

        Even so, the VX-Freedom is a very capable rifle scope for hunting, especially since it’s available for less than $300.

        Key Features

        • Weight: 12.2 ounces
        • Magnification Range: 3-9x
        • Objective Lens Diameter: 40mm
        • Tube Diameter: 1-inch
        • Field of View: 33.1-13.6 feet at 100 yards
        • Turret Click Values: .25 MOA
        • Reticle Focal Plane: Second
        • Parallax/Focus: Fixed at 150 yards
        • Knob Style: Capped Windage & Custom Dial System-ZL Elevation (CDS-ZL)
        • Illuminated Reticle: No

        Pros

        • Light and compact
        • Very reasonable price
        • Good quality glass
        • Lots of features with a reasonable price
        • Perfect for a budget conscious deer hunter

        Cons

        • Lower image quality than the higher end scopes
        • No parallax adjustment dial
        • No illuminated reticle

        BUY A LEUPOLD VX-FREEDOM SCOPE FROM AMAZON HERE

        BUY A LEUPOLD VX-FREEDOM SCOPE FROM OPTICS PLANET HERE

        Best Rifle Scope For Hunting Under $500

        Vortex Diamondback 4-12x40mm

        Next up is the Vortex Diamondback 4-12x40mm scope, which I think is the best rifle scope for hunting under $500. Vortex makes great quality hunting scopes and their Diamondback line provides a good mix of good quality glass in a rifle scope suitable for most hunting situations that’s also available at a moderate price tier.

        The Vortex Diamondback uses a solid one-piece aircraft-grade aluminum alloy construction that makes this scope very durable and also offers good resistance to heavy recoil, even from magnum cartridges like the 7mm Rem Mag and 300 Win Mag. The Diamondback is also purged with argon to ensure it’s waterproof and fogproof.

        Plus, it uses advanced fully multi-coated optics to deliver crystal clear images. This scope also uses Vortex’s Dead-Hold BDC reticle. At the maximum magnification, the hashmarks on this reticle provide 1.5 MOA, 4.5 MOA, and 7.5 MOA holdover points as well as 2 MOA, 4 MOA, 6 MOA, and 8 MOA windage hold marks.

        This scope also uses a 1″ main body tube, which helps keep it light and compact. Scopes like this one with a 1-inch tube are easier to mount low to the bore, which facilitates a good cheek weld and gives the rifle a more streamlined profile that’s less prone to snagging on obstructions.

        A 4x magnification at the low end is good for closer range hunting situations while a 12x magnification at the high end works great for checking targets at the range or for slightly shots at longer range afield.

        Add it all up, and you’ve got a great hunting scope that’s right in that “sweet spot” where it doesn’t cost too much, but should also serve you well for many years of hunting use. This is the sort of scope the vast majority of hunters could buy today and happily use for the next 20-30 years without ever feeling like they needed something nicer.

        Key Features

        • Weight: 14.6 ounces
        • Magnification Range: 4-12x
        • Objective Lens Diameter: 40mm
        • Tube Diameter: 1-inch
        • Field of View: 32.4-11.3 feet at 100 yards
        • Turret Click Values: .25 MOA
        • Reticle Focal Plane: Second
        • Parallax/Focus: Fixed at 100 yards
        • Knob Style: Capped Windage & Elevation
        • Illuminated Reticle: No

        Pros

        • Light and compact
        • Good quality glass
        • Good light transmission
        • Reasonable price
        • Durable construction

        Cons

        • No parallax adjustment dial
        • No illuminated reticle

        BUY A VORTEX DIAMONDBACK 4-12x SCOPE ON AMAZON HERE

        BUY A VORTEX DIAMONDBACK 4-12x SCOPE ON OPTICS PLANET HERE

        Best Rifle Scopes For Hunting Under $600

        Vortex Viper HS-T 4-16x44mm

        The Viper line is the next tier of rifle scopes above the Diamondback line and below the Razor line from Vortex. As such, the Vortex Viper has better quality glass, better anti-reflective coatings, better overall construction, and a few more features than the Vortex Diamondback.

        In that vein, the Vortex Viper HST (Hunting Shooting Tactical) is a very tough, well built hunting scope with fantastic extra-low dispersion glass, a forgiving eye box, exposed tactical turrets, and a side focus parallax adjustment dial that’s just a great all-around optical system. It’s not quite as nice as the Vortex Razor LHT (more on that scope shortly), but the Vortex Viper is still a darn good scope, especially considering you can pick one up for quite a bit less than $1,000.

        All in all, the Vortex Viper HST is a fantastic hunting rifle scope that provides high end performance out to surprisingly long distances at a shockingly reasonable price.

        Key Features

        • Weight: 20.8 ounces
        • Magnification Range: 4-16x
        • Objective Lens Diameter: 44mm
        • Tube Diameter: 30mm
        • Field of View: 27.4-7.4 feet at 100 yards
        • Turret Click Values: .25 MOA
        • Reticle Focal Plane: Second
        • Parallax/Focus: Side adjusting parallax/focus knob
        • Knob Style: Exposed Windage & Elevation Dials
        • Illuminated Reticle: No

        Pros

        • Wide magnification range
        • Excellent quality glass
        • Reasonable price for scope with great glass and lots of features

        Cons

        • On the heavy side
        • Lacks throw level on magnification ring
        • No illuminated reticle

        BUY A VORTEX VIPER HS-T SCOPE ON AMAZON HERE

        BUY A VORTEX VIPER HS-T SCOPE AT OPTICS PLANET HERE

        Best Rifle Scope For Hunting Under $1,000

        Zeiss Conquest V4 3-12x44mm

        European companies like Zeiss and Swarovski are known for producing outstanding quality optics in general. You tend to get what you pay for with that stuff though and European optics are also generally very expensive.

        Fortunately, the Zeiss Conquest V4 is a great way to get a high quality European rifle scope for less than $1,000. This scope does not have a lot of “bells and whistles”, but it’s still an excellent German scope with great low light performance. Zeiss advertises that it uses six-layer multi-coated lenses to offer exceptional 90% light transmission and a clear sight picture.

        This is not billed as an extremely lightweight hunting scope or one that’s ideally suited for long range hunting situations. However, the Conquest V4 is an outstanding choice for a hunter who wants a good rifle scope without paying for a bunch of extra features.

        Key Features

        • Weight: 22.5 ounces
        • Magnification Range: 3-12x
        • Objective Lens Diameter: 44mm
        • Exit Pupil (low magnification): 14.66mm
        • Exit Pupil (high magnification): 3.66mm
        • Tube Diameter: 30mm
        • Field of View: 19-4.8 feet at 100 meters
        • Turret Click Values: .25 MOA
        • Reticle Focal Plane: Second
        • Parallax/Focus: Fixed at 50 yards
        • Knob Style: Capped
        • Illuminated Reticle: No

        Pros

        • Excellent light transmission at a reasonable price
        • Very good quality glass
        • Perfect for a hunter who wants a good scope without a bunch of “extras”
        • Very durable

        Cons

        • Physically on the large and heavy side
        • Smaller field of view
        • No parallax adjustment dial
        • No illuminated reticle

        BUY A ZEISS CONQUEST SCOPE FROM AMAZON HERE

        BUY A ZEISS CONQUEST SCOPE FROM EURO OPTIC HERE

        BUY A ZEISS CONQUEST SCOPE FROM OPTICS PLANET HERE

        Best Rifle Scope For Hunting Under $1,500

        Vortex Razor HD LHT 3-15×42

        Look no further than the Vortex Razor HD LHT if you want the best rifle scope for hunting under $1,500. This scope uses high quality glass, has a reticle with a center illuminated dot, a side parallax knob, and an exposed elevation turret with Vortex’s RevStop Zero System (their version of a a zero stop).

        There’s a reason why Vortex Optics markets the Razor HD LHT as “one scope to rule them all” and this rifle scope is well suited for use in dark-timber on whitetails as well as for open country mule deer and pronghorn hunts where precision long range shots may be necessary.

        The Razor HD LHT also comes with a coupon you can redeem with Kentron Industries to receive a custom elevation turret matched to your favorite hunting load to assist with making long shots on game and at the range.

        Finally, the illuminated reticle is especially nice for use in low-light conditions where there’s still legal shooting light, but it may be too dark to see the reticle. Just turn on the illuminated center dot, place that red dot where you want to hit, and squeeze the trigger. The reticle also works just fine during the daytime when illumination is turned off.

        If you want the a great scope for hunting, then strongly consider getting a Vortex Razor HD LHT.

        Key Features

        • Weight: 19.1 ounces
        • Magnification Range: 3-15x
        • Objective Lens Diameter: 42mm
        • Tube Diameter: 30mm
        • Field of View: 35.3-7.0 feet at 100 yards
        • Turret Click Values: .25 MOA
        • Reticle Focal Plane: Second
        • Parallax/Focus: Side adjusting parallax/focus knob
        • Knob Style: Exposed elevation turret (MOA)
        • Illuminated Reticle: Yes

        Pros

        • Can order a custom elevation dial
        • Excellent glass quality
        • Illuminated center dot
        • Well suited for a variety of hunting situations

        Cons

        • Busy reticle
        • On heavy side

        BUY A VORTEX RAZOR SCOPE ON AMAZON HERE

        BUY A VORTEX RAZOR SCOPE AT OPTICS PLANET HERE

        Best Rifle Scope For Hunting Under $2,000

        Leupold VX-6HD 3-18x44mm

        The Leupold VX-6HD product line is Leupold’s top end hunting scope lineup and, at least in my opinion, the 3-18x50mm version of the VX-6HD is definitely Leupold’s best rifle scope for hunting overall.

        This is because it uses outstanding glass with superior coatings that facilitates excellent light transmission. Plus, this particular scope also has an illuminated FireDot Duplex reticle. Just like the VX-5HD I mentioned earlier, the FireDot Duplex reticle is a standard duplex crosshair with an illuminated red dot in the center that you can turn on and off.

        The VX-6HD is basically an upgraded VX-5HD with a wider zoom range (6x instead of 5 x magnification), a little bit better quality glass, and a couple of other extra features many hunters like having like a reversible throw lever, an electronic reticle level, and flip up alumina lens covers.

        While I think the VX-5HD an absolutely outstanding rifle scope, those extra features and capability of the VX-6HD make it a better choice for other hunters who want a little bit better scope with slightly better low light performance, a couple of extra features, and who don’t mind spending a little bit more.

        All things considered, the Leupold VX-6HD is an amazing rifle scope. This optic provides a substantial improvement in low light performance over the VX-Freedom and VX-3HD scope lines as well as a modest improvement over the VX-5HD overall.

        You can definitely rely on the VX-6HD when the chips are down on a big hunt!

        Key Features

        • Weight: 21.6 ounces
        • Magnification Range: 3-18x
        • Objective Lens Diameter: 44mm
        • Exit Pupil (low magnification): 14.67mm
        • Exit Pupil (high magnification): 2.44mm
        • Tube Diameter: 30mm
        • Field of View: 38.3-6.4 feet at 100 yards
        • Turret Click Values: .25 MOA
        • Reticle Focal Plane: Second
        • Parallax/Focus: Side adjusting parallax/focus knob
        • Knob Style: Capped Windage & Custom Dial System-ZL Elevation (CDS-ZL)
        • Illuminated Reticle: Yes

        Pros

        • Wide magnification range
        • Excellent quality glass
        • Illuminated reticle is perfect for low light situations
        • Just about every feature you could want on a hunting scope

        Cons

        • On the large and heavy side
        • Higher price point

        BUY A LEUPOLD VX-6HD SCOPE ON AMAZON HERE

        BUY A LEUPOLD VX-6HD SCOPE AT OPTICS PLANET HERE

        Best Rifle Scopes For Hunting With An AR Platform

        Riton 3 TACTIX 1-8×24

        The rise in popularity of the AR platform over the past few years has fortunately resulted in a dramatic increase in scope options specifically designed for hunting with those rifles. Don’t just slap any rifle scope on your AR-15 or AR-10 though.

        Instead, you should use a scope like the Riton 3 TACTIX 1-8×24 LPVO (low powered variable optic) that will help you take advantage of the strengths of the AR platform while afield. Specifically, the Riton 3 TACTIX 1-8×24 is a reasonably priced, but feature rich rifle scope that’s great for those hunting situations.

        With a 1-8x magnification range, the scope has a wide field of view that facilitates rapid target acquisition at lower power for close quarters work, but also provides ample magnification for longer ranged shots. It also comes with flip up lens covers and an illuminated reticle, which are uncommon features on scopes in this price range.

        I especially like the illuminated reticle, which is great for low light performance and can be turned up bright enough to be useful during the day as well. This rifle scope also has a streamlined profile that allows it to be mounted close to the bore to facilitate a good cheek weld while shooting and minimize the chances of the scope getting hung up on vegetation or clothing.

        This is the scope I hunt with on my AR-15 and it’s perfect for the job.

        Key Features

        • Weight: 19.3 ounces
        • Magnification Range: 1-8x
        • Objective Lens Diameter: 24mm
        • Tube Diameter: 30mm
        • Field of View: 105.8-13.1 feet at 100 yards
        • Turret Click Values: .5 MOA
        • Reticle Focal Plane: Second
        • Parallax/Focus: Fixed at 100 yards
        • Knob Style: Capped
        • Illuminated Reticle: Yes

        Pros

        • Wide magnification range
        • Wide field of view
        • Removable throw lever on magnification ring facilitates rapid adjustments
        • Overall design is perfect for quick target acquisition
        • Lots of features for a reasonable price

        Cons

        • On the heavy side
        • Non-traditional reticle

        BUY A RITON TACTIX SCOPE ON AMAZON HERE

        BUY A RITON TACTIX SCOPE FROM RITON HERE

        Use promo code BIGGAME10 to receive 10% off orders directly from Riton.

        BUY A RITON TACTIX SCOPE AT OPTICS PLANET HERE

        Vortex Strike Eagle 1-8x24mm

        Vortex also produces a great scope for hunting with an AR-platform in the Strike Eagle 1-8x24mm. This rifle scope is also a LPVO that’s well suited for use on the AR platform while hunting (put it on your battle rifle too).

        Specifically, the Vortex Strike Eagle 1-8×24 is a reasonably priced, but still low profile, capable, and feature rich scope that’s perfect for those hunting situations.

        With a 1-8x magnification range, the scope has a wide field of view that facilitates rapid target acquisition at lower power, but also provides plenty of magnification for longer ranged shots. It also comes from the factory with a removable throw lever for rapid magnification adjustments and an illuminated reticle. This scope also has a streamlined profile.

        Key Features

        • Weight: 17.6 ounces
        • Magnification Range: 1-8x
        • Objective Lens Diameter: 24mm
        • Tube Diameter: 30mm
        • Field of View: 109.0-14.4 feet at 100 yards
        • Turret Click Values: .5 MOA
        • Reticle Focal Plane: Second
        • Parallax/Focus: Fixed at 100 yards
        • Knob Style: Capped
        • Illuminated Reticle: Yes

        Pros

        • Wide magnification range
        • Massive field of view
        • Removable throw lever on magnification ring facilitates rapid adjustments
        • Design is perfect for quick target acquisition
        • Lots of features for a reasonable price
        • Durable

        Cons

        • On the heavy side
        • Non-traditional reticle

        BUY A VORTEX STRIKE EAGLE ON AMAZON HERE

        BUY A VORTEX STRIKE EAGLE FROM OPTICS PLANET HERE

        Best Rifle Scope For Hunting Under $3,000

        Swaroviski Z6i 2-12x50mm

        We can’t talk about the best rifle scopes for hunting without mentioning Swarovski. Specifically, I think the Swarovski Z 6i 2-12x50mm scope is the best rifle scope under $3,000.

        Swarovski optics are known for having some of the absolute best quality glass in the business. Just look through a Swaro rifle scope or binoculars and you’ll immediately see what I mean.

        Well, the Z6i is one of their higher end scopes and uses incredible glass that provides outstanding transmission while at the same time minimizing glare and reflection.

        The Swarovski Z6i also has an illuminated reticle that also facilitates aiming under dim lighting conditions. Users also have the option of adding a custom elevation turret for use at longer range. The wide zoom range combined with the with the large 50 mm objective lens also makes this a very flexible scope with a large exit pupil across a wide magnification range.

        All things considered, it’s tough to argue with a combination of crystal-clear images, incredible light transmission, moderate weight, and those additional features that make the Swaro Z6i such an excellent hunting scope both for use during the middle of the day as well as at dawn and dusk when things are so challenging.

        To be perfectly clear, the Z6i is about as far as you can get from a “cheap” or a “budget friendly” scope. However, you really get what you pay for with optics and this rifle scope is certainly no exception to that rule.

        Not everybody needs a scope this nice, but the Swarovski Z6i is definitely a great option for someone who wants the best rifle scope for hunting possible.

        Key Features

        • Weight: 18.3 ounces
        • Magnification Range: 2-12x
        • Objective Lens Diameter: 50mm
        • Exit Pupil (low magnification): 25mm
        • Exit Pupil (high magnification): 4.16mm
        • Tube Diameter: 30mm
        • Field of View: 63-10.5 feet at 100 yards
        • Turret Click Values: .25 MOA
        • Reticle Focal Plane: Second
        • Parallax/Focus: Fixed
        • Knob Style: Capped Windage & Optional Custom Elevation Turret
        • Illuminated Reticle: Yes

        Pros

        • Reasonable size and weight
        • Outstanding quality glass
        • Illuminated reticle
        • Excellent image quality

        Cons

        • Higher price point
        • No parallax adjustment dial

        BUY A SWAROVSKI Z6i SCOPE FROM AMAZON HERE

        BUY A SWAROVSKI Z6i SCOPE FROM EURO OPTIC HERE

        Best First Focal Plane Rifle Scope For Hunting

        Nightforce ATACR 5-25×56

        With a gigantic 56mm objective lens and fully multi-coated ED glass, the Nightforce ATACR is another excellent addition to this list of rifle scopes for hunting. This scope also has a large 34mm main tube, exceptionally clear glass, and a zoom range from 5x all the way up to 25x on the high end that make it a good choice for long-range shooting.

        The Nightforce ATACR also provides over 35 mils of elevation adjustment. This rifle scope is also available in first focal plane and second focal plane configurations. Plus, this scope is the very definition of durability too! For all those reasons, I think the ATACR is the best long range hunting scope.

        So, this is the best rifle scope for you if you’re looking for something with excellent low light performance that you can also use to reach out to extreme ranges with.

        Key Features

        • Weight: 39.1 ounces
        • Magnification Range: 5-25x
        • Objective Lens Diameter: 56mm
        • Exit Pupil (low magnification): 10.5mm
        • Exit Pupil (high magnification): 2.2mm
        • Tube Diameter: 34mm
        • Field of View: 18-4.9 feet at 100 yards
        • Turret Click Values: .25 MOA or .1 MRAD
        • Parallax/Focus: Side adjusting parallax/focus knob
        • Knob Style: Capped
        • Illuminated Reticle: Yes

        Pros

        • Wide magnification range
        • Optimized for long distance performance
        • Illuminated reticle
        • Exposed elevation turrets facilitate rapid adjustments
        • Side focus parallax
        • Unsurpassed low light performance
        • Excellent image quality

        Cons

        • Large and heavy
        • Expensive

        BUY A NIGHTFORCE ATACR SCOPE ON AMAZON HERE

        BUY A NIGHTFORCE ATACR SCOPE ON EURO OPTIC HERE

        BUY A NIGHTFORCE ATACR SCOPE AT OPTICS PLANET HERE

        Best Rimfire Rifle Scope For Hunting

        Leupold VX Freedom 3-9x40mm Rimfire

        Though they’re not very popular for big game hunting, rimfire cartridges are extremely common in the hands of small game hunters and are also just a lot of fun to shoot at the range. With that in mind, Leupold optimized a version of their highly regarded VX-Freedom rifle scope for use with rimfire cartridges like the 22 Long Rifle (22LR), 22 Magnum (22 WMR), and 17 Hornady Magnum Rimfire (17 HMR).

        This scope is basically just a regular VX-Freedom rifle scope with a fixed parallax at 60 yards to put it more in line with the most commonly encountered shooting ranges rimfire cartridges are used at. Plus, it has a special rimfire reticle to help the shooter with the appropriate holdover at various ranges.

        Don’t worry: this scope is not caliber specific either and will work with basically any rimfire cartridge. Heck, you can even put it on a centerfire rifle and take longer shots with it if you want to.

        Additionally, this rifle scope still has all the other features of the VX-Freedom with great glass, a durable and waterproof construction, and a lightweight and compact overall profile.

        Add it all up and the Leupold VX Freedom Rimfire is without a doubt the best rimfire hunting scope and it won’t let you down. Put one of these scopes on your Ruger 10/22, Bergara B-14R, rimfire AR, or other rimfire rifle and hunt with confidence!

        Key Features

        • Weight: 12.2 ounces
        • Magnification Range: 3-9x
        • Objective Lens Diameter: 40mm
        • Tube Diameter: 1-inch
        • Field of View: 33.1-13.6 feet at 100 yards
        • Turret Click Values: .25 MOA
        • Reticle Focal Plane: Second
        • Parallax/Focus: Fixed at 60 yards
        • Knob Style: Capped Windage & Elevation Turrets
        • Illuminated Reticle: No

        Pros

        • Light and compact
        • Very reasonable price
        • Good quality glass
        • Lots of features with a reasonable price
        • Perfect for a budget conscious deer hunter

        Cons

        • Lower image quality than the higher end scopes
        • No parallax adjustment dial
        • No illuminated reticle

        BUY A LEUPOLD VX-FREEDOM RIMFIRE SCOPE FROM AMAZON HERE

        BUY A LEUPOLD VX-FREEDOM RIMFIRE SCOPE FROM OPTICS PLANET HERE

        Best “Smart” Rifle Scopes For Hunting

        Sig Sauer Sierra6BDX 3-18×44

        The Sig Sauer Sierra series of rifle scopes utilize an innovative design that incorporates the SIG SAUER BDX (Ballistic Data Xchange) technology to provide a rapid, and load specific holdover that’s calibrated to the prevailing environmental conditions.

        On one hand, this is a traditional rifle scope you can mount on a rifle and use just like any other. However, it really becomes a powerful hunting scope when integrated with the (free) Sig BDX app and/or with a BDX equipped rangefinder (sold separately).

        When used together, the Sig Sauer Sirra 6 BDX can calculate an elevation holdover and wind hold for your favorite hunting cartridge out to 1,000 yards.

        How does it all work?

        First, build a ballistic profile for your chosen hunting cartridge in the app, link your scope to your rangefinder and smartphone via Bluetooth, and sight the scope in properly with that load.

        Next, use a BDX equipped rangefinder to measure the range to the target. The rangefinder will also measure the current temperature and altitude, will automatically calculate the appropriate ballistic solution and holdover for that exact distance and environmental conditions, and will transfer that data to the scope instantly via a Bluetooth connection. The rangefinder does not measure wind speed or direction, but the user can enter that information manually in the app to calculate a wind hold as well.

        Then, the scope will display an illuminated dot in the reticle that indicates the appropriate elevation holdover (and an additional dot indicating a wind hold if the user entered that information in the app).

        Finally, the hunter just needs to place the reticle (which is an illuminated dot) on the spot they want to hit on the target and squeeze the trigger.

        This whole system can calculate a ballistic solution out to around 1,000 yards (depending on the exact rifle/cartridge/bullet combination). Fortunately, this rifle scope will likely calculate a ballistic holdover at basically any reasonable range for most centerfire rifle cartridges.

        Additionally, it’s important to note that this scope will NOT automatically turn the user into someone capable of shooting targets or game at 1,000 yards. Yes, it can make it a whole lot easier to calculate a ballistic holdover, but there’s more to being a good marksman than that.

        It’s also important to note that this is not the best hunting scope for everyone. First, it requires a little bit of tech “know how” and practice to get everything working together.

        This scope also requires the use of some specific rangefinders and a ballistic app for maximum utility (it can be used alone, just not to its full potential). It’s also not legal to hunt with in every single place. For instance, it’s definitely illegal in Idaho along with potentially a couple of other places, so check the rules in your area before purchasing.

        Furthermore, some hunters just don’t like scopes like the Sierra 6 (or the Burris Eliminator that’s up next) because they think it’s unethical or will encourage hunters to take shots at ranges they should pass on.

        Furthermore, this is a battery powered scope (uses 2 CR2032 batteries) and will not work if the batteries die. And to further emphasize the point, it also relies on a Bluetooth connection with a phone and/or rangefinder to make full use of all the scope’s capabilities.

        While not gigantic, the Sig Sauer Sierra 6 is also on the heavy side.

        Additionally, since it has those electronic systems inside, the Sierra 6 has lower quality glass than is the case with traditional rifle scopes at a similar price point.

        With all that said, I’ll be the first to admit that the Sig Sauer Sierra 6 is not the best hunting scope for everyone. However, I still think it’s worth further investigation for those who appreciate its capabilities (especially at longer ranges) and who hunt in places where it’s legal.

        Key Features

        • Weight: 23.8 ounces
        • Magnification Range: 3-18x
        • Objective Lens Diameter: 44mm
        • Tube Diameter: 30mm
        • Field of View: 34.9-5.8 feet at 100 yards
        • Turret Click Values: .25 MOA
        • Reticle Focal Plane: Second (digital)
        • Parallax/Focus: Side adjusting parallax/focus knob
        • Knob Style: Capped
        • Illuminated Reticle: Yes

        Pros

        • Rapidly calculates ballistic holdover
        • Increases ethical range of hunter
        • Comes with removable throw ring to facilitate rapid magnification adjustments

        Cons

        • On heavy side
        • Lacks exposed elevation turrets
        • Requires batteries
        • Can be used as a “stand alone product” but requires use of app and special rangefinder for full utility
        • Not legal in every state
        • Lower optical quality than similarly priced hunting scopes

        BUY A SIG SAUER SIERRA 6 SCOPE ON AMAZON HERE

        BUY A SIG SAUER SIERRA 6 SCOPE AT OPTICS PLANET HERE

        Burris Eliminator IV

        The Burris Eliminator is perhaps the most advanced hunting scope currently available to the average hunter. Why is this the case?

        Well, the Eliminator is a rifle scope with a built in rangefinder, ballistic calculator, and inclinometer. Prior to the hunt, just plug in the ballistic data for your chosen hunting cartridge and sight the scope in properly with that load.

        Once that’s complete, the hunter only needs to aim at the target (or animal) they want to shoot and push a button to activate the built in rangefinder. After measuring the range to the target, the scope will automatically calculate the appropriate ballistic solution and holdover for that exact distance and adjust the reticle within the scope accordingly.

        At that point, the hunter just needs to place the reticle (which is a bright red dot) where they want to hit and squeeze the trigger.

        This scope can measure ranges out to 2,000 yards. This is a hunting scope though and it will not calculate a ballistic solution out that far. The details really vary and depend on the cartridge in question, but this rifle scope will likely calculate a ballistic holdover at basically any reasonable range for most centerfire rifle cartridges.

        Additionally, though this scope can indeed greatly assist in quickly making a shot at extended range, it’s important to note that it will NOT turn a poor marksman into an expert.

        The capabilities this scope has are impressive, but this is also a somewhat controversial rifle scope. For one thing, the Burris Eliminator IV is not legal to use everywhere (Idaho being a notable example of where it’s illegal). Other sportsmen are uncomfortable with just how easy this scope can make it for someone to shoot at extended range out of fear that it’s unethical or will encourage hunters to take shots they have no business attempting.

        Furthermore, this is a battery powered scope (uses 2 AA batteries) and will not work if they die (which is a possibility in very cold weather). The Eliminator IV is also physically pretty large and heavy. Heck, it’s easily the heaviest rifle scope on this list of the best hunting scopes.

        Finally, this scope is also pretty expensive. However, due to the fact that it also has a laser rangefinder and all those electronic systems inside, the Eliminator IV has lower quality glass than is the case with traditional rifle scopes at a similar price point. The glass isn’t bad by any stretch of the imagination, but it’s just not quite as good as a similarly priced traditional scope.

        With all those things in mind, the Burris Eliminator IV is definitely not the best hunting scope for everyone. However, I think it’s the best scope currently available for someone who hunts in areas where it’s legal to use and who appreciate the advantages it delivers.

        Key Features

        • Weight: 28.8 ounces
        • Magnification Range: 4-16x
        • Objective Lens Diameter: 50mm
        • Tube Diameter: Direct mount (no rings necessary and mounts directly to Weaver or Picatinny style rail)
        • Turret Click Values: .125 MOA
        • Reticle Focal Plane: First
        • Parallax/Focus: Bell mounted parallax/focus knob
        • Knob Style: Capped
        • Illuminated Reticle: Yes

        Pros

        • Rapidly calculates ballistic holdover
        • Eliminates need to carry separate rangefinder, dope card, or ballistic calculator
        • Increases ethical range of hunter

        Cons

        • Physically large and heavy
        • Requires batteries
        • Not legal in every state
        • Expensive
        • Lower optical quality than similarly priced hunting scopes

        BUY A BURRIS ELIMINATOR IV SCOPE ON AMAZON HERE

        BUY A BURRIS ELIMINATOR IV SCOPE AT OPTICS PLANET HERE

        Enjoy this article on the best rifle scopes for hunting? Please share it with your friends on Facebook and Twitter.

        Make sure you subscribe to The Big Game Hunting Podcast and follow The Big Game Hunting Blog on Facebook, Instagram, Twitter, and YouTube.

        NEXT: BEST HUNTING EAR PROTECTION FOR SPORTSMEN

        Guide to Dove Hunting in Texas: Best Practices and Locations

        0

        Dove hunting in Texas is a cherished tradition among hunters, offering exciting opportunities to test your skills and enjoy the beauty of the great outdoors. With its diverse landscapes and abundant dove populations, Texas is a premier destination for this thrilling sport. In this guide, brought to you by Find A Hunt, we will explore the best practices and top locations for dove hunting in the Lone Star State.

        I. Understanding Dove Hunting Regulations:

        Before embarking on your dove hunting adventure, it is crucial to familiarize yourself with the regulations set forth by the Texas Parks and Wildlife Department (TPWD). These regulations include hunting seasons, bag limits, legal shooting hours, and licensing requirements. It is the responsibility of every hunter to comply with these regulations to ensure the sustainability of dove populations and the preservation of the sport.

        II. Best Practices for Dove Hunting:

        Scout Your Hunting Area: Doves are highly mobile birds that move in response to food availability and environmental conditions. To increase your chances of a successful hunt, scout potential hunting locations prior to your trip. Look for areas with ample food sources, such as grain fields, sunflower fields, or water sources, as these are attractive to doves.

        Concealment and Decoys: Setting up proper concealment is crucial for dove hunting. Doves have sharp eyesight and can detect movement easily. Use natural cover like trees, bushes, or blinds to blend into the environment. Additionally, utilizing dove decoys can attract passing doves, increasing your chances of a successful hunt.

        Safety First: Safety should always be the top priority when hunting. Always be aware of your surroundings and never shoot at low-flying birds or in the direction of other hunters. It is also essential to wear appropriate protective gear, including eye and ear protection.

        Effective Shot Placement: Doves are small and agile birds, so shot placement is vital. Aim for the head and neck region, as it offers the highest chances of a clean kill. Practice your shooting skills regularly to improve accuracy and ensure humane harvests.

        III. Top Dove Hunting Locations in Texas:

        South Texas: Renowned for its vast agricultural lands and warm climate, South Texas attracts large populations of mourning and white-winged doves. The cities of Uvalde, Carrizo Springs, and Dilley offer excellent dove hunting opportunities.

        Central Texas: The expansive agricultural fields and river bottoms of Central Texas provide prime dove hunting grounds. Areas around San Antonio, Austin, and Fredericksburg are popular among hunters.

        West Texas: The arid landscapes of West Texas are home to significant numbers of doves. Cities like Abilene, San Angelo, and Lubbock offer diverse hunting opportunities, with sunflower and wheat fields serving as key attractants.

        North Texas: The rolling prairies and croplands of North Texas provide excellent dove hunting experiences. Regions around Wichita Falls, Graham, and Decatur are frequented by both mourning and white-winged doves.

        Conclusion:

        Dove hunting in Texas is an exhilarating experience that combines the thrill of the hunt with the beauty of the state’s diverse landscapes. By adhering to regulations, implementing best practices, and exploring the top hunting locations mentioned in this guide, you can maximize your chances of a successful and memorable dove hunting trip. Remember to always prioritize safety and respect for the environment as you participate in this time-honored tradition. Happy hunting!

        43 Hunting and Fishing Terms, and Their (Tongue-in-Cheek) Meanings

        0

        You thought that you knew your hunting and fishing terms, but you were wrong.

        Whether you have a fishing rod in your hands, big game hunting, slinging flies, or sharing in an upland hunt, you need to know what your hunting and fishing terms are. Sometimes the English language can fool us into believing that a slang term is actually the real phrase, and vice versa.

        We’re declaring it an open season to jump on your hunting buddies and let them know that what they are saying really means something else. Maybe you’re in the bar discussing game birds or bag limits, or maybe you’re talking with your tree hugging cousin who wonders why you’re hunting with an “assault rifle.”

        Face it, a lot of us have been using these hunting and fishing terms wrong all this time and didn’t know it. Here’s where the rubber meets the road and you can find out what you’ve been missing.

        Keep these in mind when your know-it-all friend starts talking in the blind.

        Snort: The sound you make when your buddy swears it was a 10-point that he missed.

        Wheeze: The sound you make dragging a deer through the woods.

        chronic wasting disease management act

        Grunt: The sound you make when you see that gun you’ve been wanting is discontinued.

        Rabbit-in-distress: When you step on your wife’s ankle biting dog’s tail.

        Crankbait: That expensive bass boat with all the bells and whistles.

        Buzzbait: Those ice cold brewskis in the cooler.

        Buck-in-rut lure: That new tight dress your girl is wearing.

        Honker: That jerk at the boat launch that’s totally impatient.

        High-ball: Whisky or rum?

        Swamp donkey: What you call your buddy when his new 4×4 gets stuck.

        Tree rat: That dude sitting in your stand.

        Smokepole: That stick of salami/pepperoni you put in your backpack.

        Kicker: When the kid finds out he can’t go fishing with you.

        Kentucky windage: When you aim a little right or left of where you’re trying to walk after too much bourbon at deer camp.

        Robin Hood: That dude pitching the timber that can’t miss.

        Burn a hole in the yellow: Peeing in the snow.

        Glassing: The reason why a dude wears dark sunglasses to the beach with his girl or wife.

        43 Hunting and Fishing Terms, and Their (Tongue-in-Cheek) Meanings

        Bluebill: What your buddy gets when he falls in the water in January.

        Chuckle: What you do before, during, and after your buddy falls in that cold water.

        Boar: That dude that can’t stop talking about his skill.

        Deep diver: That guy that can’t stop telling fishing lies.

        Brow tines: That buddy that always wears his shades on his forehead.

        Bull: What you’re thinking when your buddy tells his fishing stories.

        Call-shy: When you can’t get up the nerve to call that gal you met at the boat show.

        Cape: What your buddy thinks he wears when he scores a nice buck.

        Gobbler: What your buddy turns into over that first fresh venison steak of the year.

        Confidence decoy: Your pal who’s the wingman tonight.

        Cow: What your wingman is helping you to avoid.

        Pointer: That dude your friend brought along that wants to try every spot he sees.

        Furbearer: What you didn’t know about that guy until he took his shirt off at camp.

        Shaker: Your buddy when he sees a buck.

        Greenhead: What your buddy gets when your buck is bigger.

        Gutshot: That feeling you get when the neighbor scores the buck you’ve been hunting all year.

        Inside spread: The distance between you and the other guy working a shoreline.

        Jump shoot: When you come up too fast to another angler working a spot.

        Limb saver: When your friend helps you drag your deer.

        Locator call: When you have to call from the driveway to wake your buddy up early because he stayed out too late.

        Pass shoot: What that one buddy seems to do every time you kick a deer by him.

        Quiver: Every time that same guy sees a deer.

        Shed: What your wallet does every time you go into the hunting/fishing store.

        Trapline: That aisle in the outdoor store where everything is marked 50% off.

        Shock gobble: What your wife does when you get home from the hunting/fishing store.

        43 Hunting and Fishing Terms, and Their (Tongue-in-Cheek) Meanings

        Butt out tool: What you say to that friend who wants to know where you caught that bucket of crappie.

        There’s a method to our madness when it comes to the outdoor phrases that we use every day. The big fish that got away is usually just a couple of words from the real definition and you didn’t even know it. Now you have the ammunition to block out that one loud guy in your group and make sure that when the trap closes, it’s just his mouth you’re talking about!

        You may even be able to get around the game warden with some of this wily jargon, but don’t bet on it. The next time that you’re on a fishing trip or out with the long bow remind your buddy that sometimes a diving duck is really just that thing you do when the guy in the front of the boat casts without looking behind him!

        You’ll be better off for it.

        Looking for a little more? Follow my webpage, or on Facebook and Twitter

        NEXT: TAKE MY QUIZ TO SEE IF YOU ARE INDEED AN OCDH: OBSESSIVE COMPULSIVE DEER HUNTER

        WATCH

        Best Air Rifle Deals

        Popular Posts

        Can a 22 air rifle kill a deer?

        0
        "Debate over whether a 22 air rifle can effectively take down a deer has sparked curiosity among hunting enthusiasts. With its lower muzzle velocity...

        Can a Felon Legally Possess an Air Rifle in Tennessee?

        0
        "Understanding the Legalities: Felon Ownership of Air Rifles in Tennessee" can a felon own an air rifle in tennessee? In the state of Tennessee, the ownership...

        Best Distance for Sighting In an Air Rifle

        0
        Shooting with an air rifle always seems like a thrilling experience, but if you are a newbie then you have lots to learn. One...

        Synthetic vs Wood Stock: The Final Showdown Between Brunette And Blonde

        0
        I understand that you’re here to get some quick facts on synthetic vs wood stocks Probably to guide your purchase.  Quick alert - the debate...

        Air Rifle Scope vs. Rifle Scope – Which One Fits Your Shooting Needs?

        0
        "Air Rifle Scope vs Rifle Scope: Unveiling the Ultimate Precision Optics. Discover the essential differences and benefits of these two optical devices, empowering shooters...