The antlers on bucks in full velvet have incredible tactile appeal. Every hunter has heard the story of a buddy who harvested a beautiful, trophy-sized buck only to arrive at the taxidermist with a patchy, ragged-looking specimen. Once velvet is off there is no way to reattach it.
That’s right — there’s no way. Not even if you save all the shed velvet and bring it along with your now hard horned set of antlers to the taxidermist. Velvet is like a banana peel. Basically, it’s just a skin, with no real veins running through it. Although some shops offer sprayed-on flocking, the results will likely look too perfect, and unnatural. The flocking process can also run $2.50 per Boone & Crockett inch, so your 200-inch buck suddenly got $500 more expensive to preserve.
Instead, here’s how to preserve the unique characteristics of your buck’s velvet antlers all the way to your taxidermist from a backcountry hunt:
Do Not Touch. Velvet is delicate. In September a buck’s velvet is slick, like a bar of soap, and primed to come off. A buck can rub off all his velvet in 10 minutes; just think what your hands can do if you drag a buck by his antlers. Grab those antlers, pull hard, and you’re likely to end up with your hands full of velvet while the deer stays in the same spot. The oils in your skin will also do two things. First, it will cause the velvet to become nappy and matted, particularly in warm conditions. Second, when it meets the natural oils from the deer velvet, it will make the environment more of a potential breeding ground for bacteria.
Bring rope. Many hunters grab along the base of the antlers to drag a buck after a successful harvest. Grabbing and pulling will puncture the velvet on all the little knobs around the base that give antlers their character. Instead, if you need to move the entire deer, use a rope to wrap around the deer’s neck and base of the skull to drag it with instead of using your hands.
Do Not Rub. Any kind of abrasion will ruin velvet, especially dragging. Continue to avoid all contact with anything that’s potentially abrasive, including your backpack straps when hiking out of backcountry. Instead, strap the skull to your pack, not the antlers themselves.
Wrap it. If for some reason you can’t cape your buck, gently wrap the antlers with your base layer or another piece of spandex material. Wrap them tight and tape down the material with electrical tape. Wrapping before strapping down reduces potential friction. Now you can carry your antlers with straps if needed.
Cushion your buck for the drive. If your hunt is closer to home, you don’t need to follow quite as many steps. Get your deer to your truck using a wheeler or a cart instead of dragging it by the horns. Then secure the head so the antlers don’t come in contact with any surfaces.
Don’t have straps? Put something soft, like a jacket, pillow or sleeping bag, underneath the antlers. This prevents the velvet rubbing off when you rattle down the road or your buddies check out your buck.
Cool and cover. Heat and blood speed the decomposition process. Keep your buck as cool as possible. A shade tree is ideal. Cover the antlers to keep the flies off, but never use a plastic garbage bag. The plastic will turn your velvet into a ruined, smelly mess. Instead, cover the antlers with a deer meat bag to allow for air circulation without any spoilage.
Don’t hang. Antlers in velvet are full of blood that needs to be drained out if you’ll be staying any length of time in the backcountry. Some say to hang the buck upside down by the skull and make pinholes with your knife at the tip of each tine. Blood should then drain out the tips. However, I don’t recommend this method because those small cuts split open the living tissue and are likely to crack when they dry, leaving extra work for your taxidermist to try to repair.
Drain without making a mark. The better drainage method is to get the hide off the skull of the deer by caping it. This process will sever the blood vessels that run outside of the skull between the antlers and the velvet, effectively draining the antlers themselves.
Resist cutting the cape too short; you’ll need from the middle rib forward. Your taxidermist can always cut off what isn’t needed, but can’t make a substantial cape appear from nothing. Then prop the antlers against a tree, base down. The blood will simply drain out of the bottom of the antlers without leaving any marks.
Leave chemicals to the experts. You can get embalming fluid from your taxidermist before your hunt, but in a backcountry situation the last thing you need to worry about is dealing with this highly potent chemical. Embalming fluid is extremely dangerous and requires you to wear double latex gloves and eye protection when using it.
The fluid also demands a syringe and needle to inject the antlers properly. Remember: embalming fluid preserves whatever it touches, so if it gets on your skin, seek emergency medical attention. Not to sound too dramatic, but if embalming fluid gets in your eye, and you’re out of easy ambulance/EMS range, you will most likely lose it.
Be quick. Velvet starts to decompose right from the moment of harvest. Get those antlers and cape to a taxidermist today. Not tomorrow. The quicker your taxidermist can inject your velvet with embalming fluid, the better. This fluid bonds the proteins together and stops decomposition in its tracks. Now your velvet will last for years, no matter how you mount your trophy.
Take care with velvet antlers and you’ll have a beautiful trophy as a way to remember that great hunt. Taxidermists can fix small blemishes with an airbrush and epoxy, but they can only make a deer look as good as when it came in the shop, not better.
A finished velvet buck is an impressive sight. Be sure to take extra care in the field to protect the velvet so you can give the taxidermist a chance to make a breathtaking mount.
Throughout my childhood, my Dad would tell me old hunting stories from before I was around. At the time, I hadn’t really experienced much of the hunting life, so these stories sunk deep in my mind. One of those stories was of an archery deer hunt in upstate New York. It was just him and his bow. No rangefinder to speak of.
My Dad was sitting up in a tree and a lone buck came in beneath. He pulled his bow back, aimed, and let it loose thinking that deer steaks wouldn’t be far away. What really happened was he watched the arrow fly right over the buck’s back, followed by said buck running out of his life. “Should have aimed lower” my Dad said. It was my first lesson on shooting up or downhill with a bow.
Because of that story, I ALWAYS have an angle compensating rangefinder with me on archery hunts. It’s non-negotiable, because angles are a plenty in bowhunting. Whether it’s a 15 degree angle or a 40 degree one, your arrow will not hit where you want, if you don’t make the proper adjustments for the angle. Angle compensating rangefinders do just that for you.
Whether it’s uphill or downhill, yardage needs to be cut off in order to hit what you’re aiming at. The wordage in this article is referring to Vortex Optics Rangefinders.
Line of sight is the distance from you to your target, whether you are standing on an angle or not. This is how rangefinders read distance from the beginning until angle compensating versions came out. Still to this day though, most rangefinders seem to have a mode for Line of Sight. This article is about using angle compensation though right? So, why is Line of Sight important?
Before angle compensating rangefinders, archers would use cut charts to calculate the proper amount of yardage that they needed to cut off with angled shots. Without getting to deep into the math, they’d take the Line of Sight distance given from their rangefinder, pair that with data from an inclinometer to get the proper angle, and refer to their custom cut chart for their set up. Sounds complicated and takes some extra time I know. It was accurate though and that’s what mattered. In fact, there are still folks that use Line of Sight distance paired with a custom cut chart. In terms of precision, it may be splitting hairs, but this is the most precise way of being accurate on angles.
HCD(Horizontal Component Distance Mode) on Your Rangefinder
When shooting at angles the distance that we actually want to aim for is not Line of Sight, but it is the Horizontal Distance. This is literally the horizontal distance between you and the target. Whether you’re standing even, uphill, or downhill it is the horizontal distance that will put you in the X. And the horizontal distance is always shorter than the line of sight distance, which is why one needs to cut yardage rather than adding it. It can be difficult eyeballing this in the field though and going through the cut chart process takes away valuable time. This is where HCD mode comes in.
The Horizontal Component Distance Mode on your Vortex rangefinder makes the cut for you and it does it with one click of a button. Whatever range this mode spits out for you is the range that you want to aim for. Don’t take more yardage off of this calculation, because you’ll hit low.
In terms of accuracy and precision, I tested the Razor 4000 rangefinder up against a custom cut chart I had made for myself. The calculations were within a 10th of a yard between the two. I don’t know about you, but I’m not that good to tell the difference in a 10th of a yard with my shooting ability. With only a 10th of a yard difference, that arrow is going in the lungs come hunting time.
Here’s a Video Demonstration Using Line of Sight vs. HCD
Closing Thoughts
Back in the days of old, my Dad didn’t have a rangefinder, let alone one that had angle compensating abilities. If he did, that buck feeding beneath his treestand might have been on the wall of the house I grew up in rather than high tailing it through the forest. An opportunity lost.
The fact of the matter is, bowhunting is literally a game of inches. Every little thing matters and any ethical advantage we can put in our favor, it will put us that much closer to success. Angle compensating rangefinders are in our corner. They’ve served me extremely well through the years and I know they’ll do the same for you. That’s my angle and I’m sticking to it.
As an Amazon Associate, I earn from qualifying purchases
Maine is blessed with a healthy, stable population of black bear, conservatively estimated at 35,000. Statewide we average 9 bears/100 square miles; in our area, WMD 9, the percentage is much higher. Our region in north central Maine, is a consistent producer of adult bears each season and the new state record bear weighing 699 lbs. was taken on a bear bait less than 20 miles from our lodge in 2012. In the areas we hunt, our hunters consistently tag better than 1 out of every 3 bears taken here each fall. That is not due to sheer numbers but the quality of the hunt. As bear hunting outfitters we limit each weekly hunt to 10 participants, to ensure personalized service. We have hunted this area since 1995 and know how to do it right! We manage our hunting area for a sustainable harvest, consulting with the state bear biologist for harvest goals to maintain a healthy, stable population of mature bears.
Our goal is to provide you the hunter an opportunity to harvest a mature Maine Black Bear dressing over 200 lbs. (add approx. 17% for live weight). Bears reach full adult size, at about 4-6 years of age. Boars average 250-600 pounds and measure 5-6 feet from tip of nose to the tip of their tail. Females are smaller, weighing 100-400 pounds, and measuring 4-5 feet in length. Males stand about 40 inches tall at the shoulder whereas sows seldom exceed 30 inches in height. We have virtually 100% sightings for each hunter and over 90% success rate. (Some good bears are passed by discriminating, returning hunters waiting for a bigger trophy than their last bruin.) Year after year we have about one third of our hunters coming back for another hunt.
The four-week bait season for bear varies slightly each year, but is generally the last week of August through the third week of September. The state tabulations for 2018 (latest available at this time) show the following:
Nonresident hunters took 63% (2,064) of the 3,314 bears tagged and 92% (1,903) of them were on guided hunts. 94% (3,127) were adult bears and 57% were males. 74% of successful hunters took their bear over bait
The numbers show that your very best chance to shoot a mature Maine black bear is to book with a reputable guide and outfitter. And of course we hope you will consider Northern Pride Lodge for your Maine bear hunt.
Choosing Your Bear Hunting Guide or Outfitter
There are many bear outfitters or bear guides to choose from. Make your choice carefully. We are avid hunters ourselves, and we strive to provide to you the type of hunt that we would look for when we are booking a guided hunt. Here are some of the things that set us apart from other operations:
We have sighting in at the range upon arrival and orientation meetings the first night. Often a Game Warden will join us for our evening meal and you will gain a world of insight from his experience. After dinner, we review recent game camera pictures, and explain how to judge the size of a bear, shot placement and share many tips.
Our stands are comfortable and safe, 15 foot steel ladder stands certified by the Treestand Manufacturer’s Association. We require safety straps and have plenty available if you do not have one.
Our sites are pre-baited starting in July (when the law first allows), monitored by game cameras to pattern the bears’ activity for up to 30 days prior to your hunt (see pictures on right), and set up with our prevailing winds in mind.
We set our stands to provide bow hunters 16-20 yard shots and gun hunters with 30-35 yard shots.
Stands are set for left- or right-handed shooters and have shooting rails or bow hangers, as needed by the hunter.
We have many bear bait sites in several different areas. We hunt one area each hunt week, ensuring that each week’s hunters, throughout the season, can hunt “fresh” areas.
We place you on active sites, monitored with game cameras and we have multiple sites available for each hunter. You won’t get stuck staring at the same scenery day after day. 100% sightings.
Our guides deliver you directly to your stand, make sure you are situated and freshen the bait (which is included in your hunt, no additional fees, no up-selling to a “premium bait.” Every stand gets the best.)
Each hunter is provided a radio for safety and quick response by your guide.
We will field dress and hang your bear in our cooler shed. We have good butchers and taxidermists we can recommend as well.
We provide scent free soap, and advice on scent management as well as keeping your hunting clothing scent-free.
Always ethical, lawful hunting. Never cited for a violation.
If you would like to see the freshest game camera pictures, just like us on Facebook.
How We Run Our Bear Hunts Here in Maine
Our bear hunting packages provide a great opportunity to harvest a big game trophy that eludes many hunters who have spent a lifetime in the woods. The thrill of seeing a mature boar or sow silently appear at the edge of your vision is enough to get anyone’s heart beating faster!
The way we set up our hunts and bait sites makes it easily enjoyed by anyone capable of climbing a ladder. We accommodate bow hunters, muzzleloaders, pistol and rifle hunters and we have stands to accommodate right- or left-handed hunters, at comfortable, confident shooting distances. Youths can get a youth license and hunt, accompanied by an adult; at 16 years old they can hunt on their own. We can set a pair of stands together for a parent and child shared hunt and a lifelong memory for both. On the other hand, we have had hunters in their 80’s bag their bear! Your guide will drive you to within easy walking distance and get you settled into the stand. We can also accommodate couples or those unable to climb with ground blinds.
Radios are provided for immediate access to your guide when you need him. He will come and collect you at the stand at the end of legal shooting time and take you back to the lodge for the evening meal and yarns.
Comfortable rooms and plenty of good hot food [see menu for representative meals] will be ready for you. It is always a great time of sharing stories with fellow hunters. With a limit of 10 hunters per week, you will get a chance to reunite with returning friends and to make new ones. The camaraderie between bear hunters is a special aspect of our kind of people. When we mention repeat customers let’s just say that we are not talking about everybody who ever came a second time. We have hunters that come year after year and even have a couple standing reservations for every year. We earn that loyalty and it bring us great joy. We will do everything we can to assure you have a great time on your own Maine bear hunt.
Typical Day – What to Expect on Your Bear Hunt
This is a gear list (note this as additional page) of what we recommend you have on your hunt. You can always call us to discuss special needs or ask advice on equipment and gear. We’ve probably seen it all over the years.
Your hunt with us starts with a Sunday afternoon arrival. We serve our Prime Rib dinner around 5 pm and afterward have a get together with all the staff and the weeks’ hunters, so that everyone can get to know each other. After dinner we meet in our gathering area to give everyone a rundown on what the week will be like and to answer any questions you may have. This covers all aspects of your hunt and your time at the lodge. We discuss bear behavior and review game camera photos, how to judge bear size, where to place your shot and what to do after the shot. When available, we have our local warden here to help cover local hunting laws and issues that they have encountered during previous bear seasons. This is a very informative yet casual gathering and we have been complimented many times on how helpful it has been to the hunters.
Your hunting day starts with breakfast at about 7 am. While you are enjoying your meal, your guides will be out putting fresh bait at each site and inspecting the bear sign from the previous feeding. Your morning can be spent fishing on our lake or on the nearby Roach River, which can be excellent at this time of year. Some hunters also try their luck at calling coyotes.
Lunch is our big dinner of the day and is served about Noon. After eating, you will shower and get ready to go out for the afternoon hunt. Transportation to and from your bait site is included. Wayne corrals everyone about 2:30-3:00 pm and begins to deliver hunters to the sites. You will be walked into the bait site and your guide will wait while you climb into the 15-foot ladder, T.M.A. certified tree stand, clip in to your safety line and get comfortable. Each hunter is given a radio, for safety and so when a bear is shot, the guides can respond quickly, to recover the bear. On occasion we have big bears feeding on baits in the mornings. When this happens we will sometimes put a hunter out in the AM.
Legal hunting hours end ½ hour after sunset each day. If you have not had an opportunity for a shot and are still in your stand, the guides pick up each hunter at the end of legal shooting. Your bear guide will walk in to the stand by flashlight, in order to assist you in exiting, but also to ‘spook’ any nearby bears so that they do not peg a hunter descending from the stand. Once all of the hunters have been picked up, you arrive back at the waterfront lodge to a hearty meal and tales of bear sightings and bears shot.
Book your Bear Hunt Now
We still have openings for this season so give us a call at (207) 695-2890 to hear our competitive rates and reserve your bear hunt. We are often asked which week is the most opportune to hunt. Over the entire season we have consistent success and large bears have been taken early and late in the season. Our numerous bait sites allow us to keep entire areas fresh for each successive week’s hunters. So, week 1, week 2 or week 3, you can be confident of bear sightings and shot opportunities.
Licenses are available locally or online. Check the state’s Bear Hunting Page for current regulations, license and permits fees.
Testimonials
“Thank you for the wonderful time I spent at your lodge. If anyone says they had a better bear hunt or food somewhere else they’re just plain lying.”
Joe, Georgia
“I just wanted to say thanks again for the great bear hunt I had with you this fall. Your lodge was comfortable, warm and squeaky clean. The menu was outstanding and the meals couldn’t have been better.”
“The success of your hunters is due in the most part to Wayne’s hard work and positive attitude. The fact that most of the hunters saw bear every night speaks volumes for your hunts. Of course, the best part of Northern Pride Lodge is the friendly atmosphere you provide. From the time I arrived I felt welcome and at home in your lodge.
“It’s not often that you do something that really, really exceeds your expectations but this was one of them!”
Dave, New York
“You have a really great hunting service and my hunting experience with you was just incredible and it was exceptionally exciting. …it was your attitude, friendliness and exceptionally good nature that made my stay in your house feel like my own home. All of the meals were really extraordinary, even overwhelming.”
Ellis, Georgia
Gear List – Bear Hunter’s Checklist:
Weapons: .270’s and the .30 calibers are all good choices, as are shotguns with slugs and muzzleloaders. .44 mag and larger hand guns with a good solid-base bullet, and bows and crossbows are also effective options. Sight guns in for 30 yards. We will check all guns at the range before hunting.
Safety Harness: We require a safety harness in our tree stands. If you do not have one, don’t worry-we have plenty to loan out.
Clothing: Dark camo clothing head to toe, hat, face mask and gloves. Must be quiet clothing. Scent elimination is a must, so keep your hunting clothes scent free. Clothes should be warm weather or something comfortable for 40° – 65° and sitting still for about 4 hours. Also bring rain gear, just in case.
Flashlight or headlamp: whichever is your preference.
Pee bottle (you don’t want to get in and out of the tree stand)
Boots: I prefer rubber boots or at least rubber bottoms
Coolers to take your meat back in
Slippers or something to slip into when you get back to the lodge (no muddy, bloody boots worn in the lodge, please)
Rain Gear: quiet, dark camo pattern
Seat Cushions: some stands have them, some don’t. Bring one just in case, if you can.
You will need proof of a current hunting license in your home state or proof of completing a hunter safety course in order to get your Maine hunting license. Maine hunting licenses can be obtained prior to coming to Maine by logging onto Maine Inland Fisheries & Wildlife. Don’t forget, you need a big game license or archery license and a bear permit.
A fishing license is also required, if you intend to fish. The fly-fishing-only Roach River can be spectacular in September. Fishing licenses are also available locally, if you’d like to wait until you’ve taken your bear.
Rates
Visit our hunting pricing page for rates and options.
Most people think of purrs, gobbling and yelps when it comes to common wild turkey vocalizations. It’s easy to see why. They’re extremely common and easy to hear echoing through the spring woods.
But spring gobblers make another, lesser-heard vocalization too. It’s called a turkey drum.
If you’ve never heard this extremely low guttural drumming sound before, don’t feel too bad. Many experienced hunters haven’t either. Here’s everything you need to know about it.
What is turkey drumming?
This vocalization is made exclusively by male turkeys and even scientists are uncertain of exactly how they do it. You’d think with birds as common as turkeys we would know all their secrets, but this one is one of those sounds in the woods that we know very little about.
Some hunters hear the word drumming and think it has something to do with a noise made by the wing feathers, but it’s generally believed a big gobbler makes this sound by quickly sucking in air and then forcing it out again quickly. The result is one of the lowest sounds in the woods. It’s so subtle, you may not even realize the gobbler in front of you is doing it if there’s enough background noise!
Most hunters refer to drumming as a gobbler spit-drum because there is also a distinct spitting sound right before the drum. Either way, this is not a long distance sound like a gobble. It is an up close and personal type of vocalization and if you hear it, it likely means the bird is already in bowhunting range.
What does it mean when a turkey is drumming?
Just like the mystery of how the sound is produced, it seems no one really knows exactly why turkeys make this strange sound. The consensus opinion is that it probably has something to do with mating rituals since it is most often heard while longbeards are strutting and trying to impress hens in the springtime. Many hunters hear it when a bird is responding to their decoys.
Although it’s also worth noting that turkeys strut all year-round, so maybe the spit-drum has some other meaning that we humans simply cannot understand? It would sure make things a lot easier for turkey hunters if we had a translator, but sadly, we do not.
Perhaps drumming is simply a way of intimidating rivals or establishing territory. One thing is for sure, it’s a sound you want to listen for each turkey season.
What does a turkey drumming sound like?
Unlike gobbling, yelping or clucks, a gobbler spit-drum sounds like nothing you’d expect from a turkey. It’s an almost alien sound. The spit part of a spit-drum sounds exactly like the name. There’s a brief, loud “Psssst!” sound. This is followed by the drum, which is truly hard to explain to someone who’s never heard it. Phonetically, the closest we can get is, “Whoooooommmmm.”
It almost sounds like the low hum of a surround sound speaker, or someone plucking one string of a bass guitar. It has a reverberation quality to it that you can actually feel if you’re in close enough proximity.
There are plenty of videos on the internet of turkeys drumming, but even these have a hard time capturing the sound of this low turkey call. Most of the time, you need to listen to audio like this with headphones in order to pick out the very distinct hum. The first time I heard it, I didn’t believe it came from a turkey!
Once you hear a turkey drumming for the first time, you too will probably be dumbfounded by this sound. It’s like no other noise these birds make.
Notice in some of these videos that the gobblers almost look like their whole body or feathers are vibrating as they drum. It seems the Tom must really dig down deep to pull this sound out. It almost sounds like the type of noise a big game animal like a deer would make!
What does turkey drumming mean for hunting?
Turkey drumming is a sound you should be actively listening for every time you step in the woods after a big gobbler. Most hunters know the frustration of a turkey that suddenly stops gobbling, but some hunters might not realize that bird is still approaching them. Some Toms quit gobbling and start drumming, but the sound is so subtle, the hunter misses hearing it. Then, when the hunter stands up to leave, the turkeys spook.
Have you ever had a situation like that? If you have, it’s probably likely that turkey was drumming near you and you didn’t realize it.
Other hunters hear a turkey drum in the woods for the first time without knowing what it is, and it takes them completely by surprise. It is a relatively rare sound of the woods. If you’ve ever heard it while out turkey hunting, you’re lucky. Not many hunters have ever heard it.
Most seasoned experts agree on this turkey hunting tip: If you’re out after a big gobbler in the spring or fall turkey season and you suddenly hear this low sound reverberating through your area, get your bow or gun ready and hope your camo is good. Because there’s a Tom in the area and he’ll probably be within shooting range before you know it! In fact, he’ll be very likely to be within archery range.
Ultimately, the science and research behind turkey drumming and how it’s produced is rather incomplete. On top of that, wild turkeys are known to do some of the most unexplainable things we can imagine, so the mystery shrouding this bird and its actions shouldn’t come as much of a surprise.
For more outdoor content from Travis Smola, be sure to follow him on Twitter and check out his Geocaching and Outdoors with Travis YouTube channels.
NEXT: 10 WAYS TO EXPERIENCE THE BEST OF AMERICA’S BIG GAME HUNTING
“Exploring the Consequences: Unveiling What Happens When a Deer is Shot in the Neck. Discover the potential outcomes, ranging from immediate incapacitation to survival strategies employed by these resilient creatures. Join us on an enlightening journey to understand the implications of such an encounter.”
The Effects of Shooting a Deer in the Neck: Caliber, Bullet Type, and Direction Matter
Shooting a deer in the neck can have varying effects depending on several factors such as the caliber of the gun, bullet type, and direction of the shot. It is important to consider these factors as they can determine whether it will be an effective kill shot or result in wasted meat.
When using a.308 caliber rifle and shooting a deer in the spine just behind the neck, it can result in an instant kill by targeting vital organs such as the heart and lungs. However, there is still a risk involved as shooting slightly low may cause damage to other parts of the body without ensuring a quick death.
Neck shots are generally considered risky because if one fails to hit an artery or the spine, it may not be a lethal shot. This can lead to unnecessary suffering for the animal. Some hunters prefer shooting deer in the head with a Winchester model 70.308, resulting in a dead deer with intact antlers. However, this method does not provide any edible meat from the head.
The effectiveness of shooting in the neck also depends on where exactly in the neck and what caliber of gun is used. Hunting with a 30-06 and aiming high in the neck has been found to be successful for achieving instant death without wasting meat. However, this approach carries high risks due to small targets like the spine and blood vessels.
If a hunter’s shot is off by even an inch or two, it could cause significant muscle damage rather than hitting vital areas. This can lead to situations where wounded deer run off without bleeding enough to bleed out. In such cases, they may suffer from massive infections or bacterial illnesses that eventually prove fatal.
Bow hunters should exercise caution when considering neck shots as they pose additional challenges. There have been instances where broadheads snapped off in deer vertebrae were found, indicating unsuccessful neck shots. This can result in the deer experiencing immense pain and potentially dying from thirst or choking.
In conclusion, shooting a deer in the neck can have both positive and negative outcomes depending on factors such as caliber, bullet type, and shot direction. It is crucial to aim for vital areas like the spine or main blood vessels to ensure an instant and humane kill. However, there are inherent risks involved, including potential damage to muscles or missed arteries/veins that can lead to suffering and prolonged death for the animal. Bow hunters should be particularly cautious when attempting neck shots due to the challenges they present.
Exploring the Risks and Rewards of Shooting a Deer in the Neck
Shooting a deer in the neck can be both risky and rewarding, depending on various factors such as the caliber of the gun used, the specific target area, and the type of bullet employed. While some hunters prefer neck shots for their potential for instant kills, others caution against it due to the small target area and potential for non-fatal wounds.
One hunter shares his experience of using a.308 caliber rifle to shoot deer in the spine just behind the neck. This technique ensures that even if the shot is slightly low, it still takes out vital organs like the heart and lungs, resulting in a kill shot. However, he advises against aiming directly at the neck as it may not hit an artery or spine, potentially leading to a non-lethal wound.
Another hunter mentions using a Winchester model 70.308 to shoot deer in the head. While this results in an immediate kill, it leaves behind an ugly-looking carcass that is not suitable for consumption. However, if preserving the rack is important to you, this method may be preferred.
The effectiveness of shooting a deer in the neck largely depends on accuracy and precision. If one manages to hit either the spine or main blood vessels, death can be nearly instantaneous. However, these targets are quite small and missing them by even an inch or two can cause significant muscle damage without causing fatal bleeding. This can lead to prolonged suffering for the animal and eventual death due to infection or other complications.
It’s important to note that bow hunters should exercise caution when considering neck shots. The risk of missing vital targets increases with bows due to their shorter effective range and lower velocity compared to firearms. There have been instances where broadheads have snapped off in deer vertebrae after unsuccessful neck shots.
In conclusion, shooting a deer in the neck presents both risks and rewards. While it can result in an instant kill if the shot is accurate, there is a significant chance of non-fatal wounds or prolonged suffering for the animal. It’s crucial for hunters to assess their skill level, equipment capabilities, and ethical considerations before attempting neck shots.
Instant Death or Potential Suffering? The Consequences of Neck Shots on Deer
Neck shots on deer can have varying outcomes depending on several factors. These include the caliber of the gun used, the specific location within the neck that is hit, the type of bullet employed, and the direction in which the bullet is traveling. It is important to note that neck shots can result in a significant amount of meat being damaged, so many hunters prefer to avoid targeting this area. Personally, I opt for shooting deer in the spine just behind the neck using a.308 caliber rifle. This allows for a kill shot even if my aim is slightly low as it takes out the heart and lungs. However, neck shots are considered risky because if an artery or the spine is not hit, it may not result in an instant kill.
I have had experience shooting deer in the head with a Winchester model 70.308 rifle, and while it does result in a dead deer, it often leaves behind an unsightly appearance. Since I do not consume the head and prefer to keep its rack intact, this method suits my needs. However, it should be noted that the effectiveness of neck shots largely depends on their placement within the neck and the caliber of gun used.
For those who choose to target the neck area, especially when hunting with a 30-06 rifle like myself, aiming high in the neck has proven successful for achieving instant death without wasting any meat. Nevertheless, taking such shots comes with high risks and potential rewards. Hitting critical targets like the spine or main blood vessels results in near-instantaneous death. However, these targets are relatively small and missing them by just an inch or two can cause significant muscle damage without sufficient bleeding for a quick demise.
In cases where a shot veers off course and blows out the throat without hitting arteries or veins, a deer may choke to death if lucky, or die of thirst after a few days if unlucky. It is important to exercise caution when considering neck shots, especially for bow hunters. I have personally encountered two deer skeletons deep in the woods with snapped-off broadheads buried in their vertebrae, indicating that they ran away injured rather than succumbing to an immediate death.
In conclusion, neck shots on deer can result in instant death if critical targets such as the spine or main blood vessels are hit. However, due to the small size of these targets and the potential for missing them by a slight margin, there is also a risk of causing severe muscle damage and leaving the deer to suffer before eventually dying from infection or other complications. Bow hunters should be particularly cautious when attempting neck shots to ensure a quick and humane kill.
Understanding the Outcome of Shooting a Deer in the Neck: Factors to Consider
Shooting a deer in the neck can have varying outcomes depending on several factors. One important factor is the caliber of the gun used and the type of bullet. For example, using a.308 caliber rifle with a specific bullet may result in different effects compared to using a different caliber or bullet type.
Another crucial factor is where exactly in the neck the deer is shot. If the shot hits an artery or the spine, it can be a near-instantaneous kill. However, these vital targets are relatively small, and even a slight deviation in aim can lead to unintended consequences.
The direction and trajectory of the bullet also play a role in determining the outcome. If the bullet travels through major blood vessels or damages critical structures like the spine, it can result in immediate death. On the other hand, if the shot misses these targets but causes extensive muscle damage, it may not be fatal and could lead to significant suffering for the deer.
It’s worth noting that shooting a deer in the neck can result in significant meat loss due to potential damage caused by high-powered rounds. Therefore, some hunters prefer alternative shots that target vital organs like the heart and lungs while minimizing meat wastage.
In conclusion, shooting a deer in the neck carries both high risks and potential rewards. While hitting crucial arteries or structures can lead to an instant kill, missing these targets may cause severe injuries and prolonged suffering for the animal. It is essential for hunters to carefully consider their aim, choice of firearm, and potential outcomes before opting for this particular shot placement.
Is Shooting a Deer in the Neck a Reliable Kill Shot? Examining Different Perspectives
1. The Effectiveness of Shooting in the Neck
Shooting a deer in the neck can be an effective kill shot, but its reliability depends on various factors. One hunter shares their experience using a.308 caliber rifle and aiming for the spine just behind the neck. This approach ensures that even if the shot is slightly low, it still takes out vital organs like the heart and lungs, resulting in a quick kill. However, they caution against shooting directly at the neck due to the risk of missing important arteries or the spine, which may not result in an immediate kill.
2. Considerations for Successful Neck Shots
Another perspective highlights that shooting a deer in the neck can yield high rewards if executed accurately. Using a 30-06 rifle and aiming high in the neck has proven to be successful for this hunter, resulting in instant death and no wasted meat. However, they acknowledge that hitting small targets like the spine or main blood vessels can be challenging, emphasizing the need for precise aim.
3. Potential Risks and Consequences
While shooting a deer in the neck can offer quick kills when done properly, there are potential risks involved. If a shot is off by even an inch or two, it could cause significant muscle damage without ensuring enough bleeding for the deer to bleed out. This can lead to prolonged suffering and eventual death from bacterial infection or thirst if it cannot drink due to throat damage. Bow hunters are especially cautioned against taking neck shots due to instances of snapped-off broadheads found buried in vertebrae.
In conclusion, shooting a deer in the neck can be reliable if certain factors are considered: using an appropriate caliber firearm, aiming precisely at vital areas like the spine or main blood vessels, and being aware of the potential risks involved. However, it is crucial to prioritize ethical hunting practices and ensure a quick and humane kill for the animal.
The High Stakes of Shooting a Deer in the Neck: A Critical Analysis
Neck Shots: Risky but Potentially Rewarding
Shooting a deer in the neck can be a high-risk, high-reward scenario. The outcome largely depends on various factors such as the caliber of the gun, bullet type, shot placement, and direction of the bullet. While some hunters prefer neck shots for their potential instant kill, others find it too risky due to the small targets involved. If executed perfectly, hitting the spine or main blood vessels in the neck can result in near-instant death. However, even a slight deviation in aim can lead to severe muscle damage or missed arteries and veins, causing prolonged suffering for the deer.
The Importance of Shot Placement and Caliber Selection
To increase the chances of success when aiming for a neck shot, careful shot placement and appropriate caliber selection are crucial. Experienced hunters often recommend targeting just behind the neck in line with the spine. This position allows for a potential heart and lung hit if slightly low, ensuring a lethal outcome while minimizing meat wastage. However, using larger calibers like.308 or 30-06 is advisable to ensure sufficient stopping power and penetration to reach vital organs or blood vessels.
The Risks Faced by Bow Hunters
Bow hunters should exercise caution when considering neck shots on deer. The use of broadheads can pose additional risks due to their potential for snapping off within the vertebrae. This not only results in an unsuccessful kill but also leaves the deer to suffer from injuries and potentially die from infections or thirst over time. Therefore, bow hunters are advised to opt for alternative shot placements that offer higher chances of immediate incapacitation without compromising animal welfare.
In summary, shooting a deer in the neck presents both risks and rewards. While it can lead to a quick and humane kill if executed perfectly, the small targets involved and potential for muscle damage or missed vital structures make it a high-stakes endeavor. Careful shot placement, appropriate caliber selection, and consideration of the specific risks faced by bow hunters are essential factors to ensure ethical hunting practices and minimize unnecessary suffering for the animal.
In conclusion, shooting a deer in the neck can result in immediate death or severe injury. It is critical to consider ethical hunting practices and aim for vital organs to ensure a quick and humane kill. Additionally, seeking proper training and adhering to local hunting regulations are essential for responsible hunting.
So you’re at your favorite local sporting goods store, looking at the deer feeders, and you notice that they’re a little on the pricey side. Not only that, but they’re mostly pretty simple designs. And you think to yourself, “I wonder if I could just make my own and save some money?”. Well, you can!
An effective DIY deer feeder is easy to make, even for the most mechanically challenged. You can make them as simple or as complicated as you want, and with some creativity, you can make one out of stuff you already have lying around, taking up space on your property. Here are five ways you can quickly build your DIY deer feeder that will be higher quality than the store bought ones and a heck of a lot cheaper too.
PVC Pipe Gravity Feeders – Quick and easy to make, transport, and set up. You can make them in different sizes to hold more or less feed. And they have the added benefit of being low profile and unobtrusive.
Buckets & Drums – These can hold larger amounts of feed, so they don’t have to be filled as often and can be made from discarded, easily obtained materials.
Tripods – A tripod mounted bucket or drum gives you more versatility with placement, and they’re more stable. They can also be equipped with a motorized automatic feeder to drop feed on a schedule or use the simple gravity feed method.
Troughs – Simple frame construction to hold protein or corn. Instead of spilling onto the ground, the feed fills a trough.
1. Poor Man’s PVC Feeder
This design is just what it says, all the materials can be bought at your local hardware store for $50 or less, and the only tools needed are a drill and a hacksaw.
You pour your corn or whatever feed you’re using into the top of the tube, and gravity keeps it moving downward as it gets eaten.
It has a drain at the bottom to let out any rainwater that gets in to keep the feed from becoming moldy. Deer will have no problem getting their snout into the pipe to retrieve the feed.
Bill Of Materials
One PVC pipe of the desired length (at least 3’ and up to 10’) and 6” diameter
Two 6” PVC slip-on end caps
One 6” PVC Wye (Y) coupler
Several small eye-bolts (number depending on length)
One can PVC primer
One can PVC cement
Spray paint for camouflage
Power drill
Hacksaw
Steps
Cut the 6” PVC pipe to the desired length. The longer it is, the less often you’ll have to fill it, but longer ones will be harder to reach to fill.
Primer the end of the pipe and one female end of the Wye coupler following the directions for use. Add cement to both pieces and attach them.
Drill some holes for drainage in one of the end caps, primer and cement the inside edge, and attach it to the bottom of the Wye coupler.
Drill holes along the side of the pipe to attach eye-bolts. These will be used as strapping points to secure it to the tree. Number required depends on length.
Take the end cap that will cover the top of the feeder and drill one hole in the center and one in the side, with a corresponding hole in the main pipe. Attach one eye-bolt in the top to use as a handle. The second eye-bolt will attach the lid to the pipe to keep the raccoons from raiding your feeder.
You can mount your new feeder to a tree with bungee cords, ratchet straps, or rope. You can also find pre-made drain caps at the store but make sure the holes are small enough to keep your feed in.
2. 5-Gallon Bucket Deer Feeder
Another easy-to-build and ridiculously affordable feeder. It uses a 5-gallon bucket to hold the feed, with a small hole cut into the bottom.
A wooden bridge is fitted across the inside of the bucket about two inches from the bottom that suspends a length of an all-thread rod through the hole. A large tin can is suspended from the bottom of the rod so the wind or nudging deer can cause the feed to fall from the hole.
The feed is kept in the bucket until the can is moved by a washer slightly larger than the hole suspended on the rod an inch or so below the hole, just enough to keep the feed in the bucket until the rod is moved when a small amount of feed will drop to the ground.
Bill Of Materials
One 5-gallon bucket with a lid
One ¼”-20 all-thread rods (threaded along the whole length) about 36” long
Five ¼” washers and one 2” washer
Six ¼” nuts
One 1” x 2” board 16” in length
One large tin can (or similar item)
Power drill
Saw
Steps
Cut a 1” wide hole in the bottom of the bucket
Cut two 2” long sections off of the board then trim the board to fit across the bottom of the bucket (most 5-gallon buckets are 10.33” across at the bottom)
Drill a hole through the middle of the board aligned with the hole in the bucket, large enough to allow the rod to swing slightly, nail or screw 2” pieces to the end of the board as supports, place in bottom of the bucket
Place 2” washer on the rod with ¼” washers and nuts on each side, double nuts on the lower side to keep it securely in position on the rod
Secure the rod from the wooden bridge through the hole in the bucket, adjust the 2” washer so it’s about 1” below the hole
Drill ¼” hole through the side of the can in the middle, attach to end of the rod with nuts and washers
Use a rope to hang your 5-gallon feeder over your spot, adjusted so the deer can reach up and nudge the can for feed. Ensure your 2” washer is placed so the feed can flow, but not too quickly. The sound of the feed plinking on the can will also attract other deer in the area when they get accustomed to it.
3. 55-Gallon Drum Gravity Feeder
This one takes a bit more work to make but it’s very economical to build. If you live a long way from your property or can’t get out there very often, this will hold enough feed to last for a while.
This plan leaves the lid attached to the drum to make sure rainwater stays out. It’s simply a 55-gallon drum mounted a few feet off the ground on a wooden platform and held in place with a ratchet strap.
Four 2” holes are cut around the bottom of the drum and 2” PVC elbows are inserted and cemented in place to channel the feed. Then cheap and readily available 12” drywall mud trays are bolted underneath the channels to hold the feed.
The drum can be filled by removing the plugs on top and using a large funnel. It’s secure and stable and works quite well.
Bill Of Materials
One watertight 55-gallon plastic drum
Materials for platform
Four 2” PVC elbow joints
Four 12” drywall mud trays
Eight screws
PVC cement
Power drill
Steps
Build a platform to hold drum 2’ off the ground securely. You can do this with boards, concrete blocks, or even PVC tubing. Just be sure it can handle the weight and won’t tip over.
Cut 2” holes at four points around the bottom of the barrel about 4” up.
Insert 2” elbows into holes and cement in place. You can cut off part of the elbow to let the feed enter at a lower angle.
Drill holes in corners of drywall mud trays and corresponding holes in the drum to attach the trays underneath the feed channel. Screw trays in place.
Attach drum to the platform with a ratchet strap.
You’ll want to use spray paint to camouflage your feeder before you begin. If you have a white plastic drum you can leave a strip unpainted so you can observe the feed level.
4. Tripod Feeder
If you’re looking to build a feeder that’s easy to transport, holds a lot of feed, and automatically distributes feed on a timed schedule, this is the plan for you.
This design uses a metal or plastic drum of whatever size you choose equipped with a motorized automatic feeder such as the type manufactured by American Hunter, Moultrie, and other companies.
Aluminum tubing is used to make a tripod with detachable legs that can be easily taken off for transport and reattached with a quick release pin. The brackets to hold the legs are made from tubing slightly larger than the legs so that they can slide inside and be secured with a pin.
A hole is cut into the bottom of the drum to allow feed into the motorized feeder. A funnel can be fitted to the inside bottom of the drum to ensure that all the feed is used.
Bill Of Materials
One metal or plastic drum, camo painted
Aluminum tubing, two different diameters
Six 1/4” bolts with washers and nuts
Plastic tubing caps
Motorized automatic feeder
Large funnel
Power drill and bits
Hacksaw
Basic hand tools
Steps
Cut leg tubing to the desired length. For bracket tubing, cut three 14” lengths.
Flatten 4” on one end of bracket tubes and drill two ¼” holes for bolts. Drill another hole 4” from the round end for connecting pin.
Cut hole in the bottom of the drum the approximate size of the feeder entry
Drill holes in drum and attach brackets with bolts
Drill ¼” hole in leg tubes 4” from the end that will slide into the bracket
Bolt automatic feeder to bottom of the drum, fit funnel over the hole in the bottom
Install tubing caps on end of legs and attach to bracket with a quick-release pin
Remember to put a piece of plywood under leg caps to keep legs from sinking in soft ground.
5. Protein Trough
This simple design can be done in several ways, but this plan is super sturdy and will last for years. It uses a 55-gallon drum cut in half to hold the feed, mounted on a covered platform made with 4” x 4”s and corrugated roofing panels. A little wood construction experience will help, along with access to the appropriate power tools.
Bill Of Materials
55-gallon plastic drum with lid
Three 4” x 4” x 8’ treated beams
Three 2” x 4” boards
Three sheets of corrugated roof panels
¼” bolts, nuts, and washers or screws
Steps
Cut 55-gallon drum in half
Construct frame, and two upright posts mounted on beams with a crossbeam at the top and another about 32” above the ground.
Build a roof frame on the platform with 2” x 4”s
Attach corrugated roofing panels to frame
Make sure the roof covers enough to protect the feed and brace the posts with 2” x 4” sections.
Learning where to shoot a deer is, of course, the most important lesson a new hunter can learn. It’s important to be able to visualize your shot placement and where you’re hoping to hit vitals. We’ve built out the ultimate guide for just that so you can not only see exactly where you need to aim, but also the path your bullet or arrow will take through the deer’s vitals.
It’s exciting to be eye to eye with deer in a ground blind or when you’re on a spot-and-stalk hunt. Every move you make is seen, your scent is more noticeable and your aiming point can be different. Even the best deer rifle can’t help you overcome bad shot placement. Let’s look at different strategies for hunting on the ground.
The quartering-to shot is a tough shot for a bowhunter. Often, it is best to wait for the deer to give you a better angle. If you are a veteran bowhunter and confident you can make the quartering-to shot, your aiming point should be right behind the elbow of the lead leg. At 15 yards or less, wait for the deer to move the lead leg forward and take your shot. The goal is to hit the lung and liver.
The quartering-to shot is not a horrible angle for rifle hunters, but not ideal either. If the deer is not going to give you a better angle, then aim right behind the elbow of the lead leg. Other choices are between the lead leg and breastplate or high shoulder. Hunters should avoid the shoulder socket; this is not a great choice for any weapon.
Eye-Level Quartering-Away Shot
The quartering-away shot is the bowhunter’s dream. The deer is less likely to see you draw your bow, and important vitals are exposed. It’s best to aim for the opposite shoulder and worry less about the point of entry. When you hit the opposite shoulder, you have sent an arrow through the vitals and the tracking job is usually short and sweet.
The quartering-away shot for rifle hunters is extremely lethal.
Ideally, the opposite shoulder is taken out, and the deer does not travel far. It is best to aim for the opposite shoulder, knowing you will take out most vitals along the way. Let a young hunter sit in a stand that will likely have a quartering away shot. The success rate is high, and they will never forget the hunt.
The Eye-Level Broadside Shot
The broadside shot is one bowhunters should not hesitate to take. Find a tuft of hair or spot of mud just behind the lower shoulder. You are trying to aim at something small in hopes of missing small. A tuft of hair is often easier to aim at than the entire side of a deer. The goal is a clean pass-thru for a quick kill and an easier tracking job.
The broadside shot for the large caliber hunters is more challenging than one might think. A high shoulder shot here is ideal. The animal will go down right away, and a follow-up shot is seldom needed. Don’t take this shot for granted; stay focused, and you will soon load this deer in the truck.
Hunters in tree stands or elevated blinds have a distinct advantage. Their scent is harder to detect, their movement is often not noticed and they have a greater field of view. The disadvantage can be that shot placement is different from an elevated position than on the ground. Let’s look at other strategies from an elevated stand or blind.
The Elevated Quartering-Toward Shot
The quartering-to shot for bowhunters is not ideal. If the deer is not going to give you a better angle, then the point of aim is just above and behind the elbow of the lead leg. Your best chance to hit the lungs and liver is when the deer moves its front foot forward. Remember, with an elevated shot, the exit point is as important as the entry point. The quartering-to shot for rifle hunters is not the ideal shot to take, but it’s not the worst. Much like the bowhunter, you want to aim right behind and slightly above the elbow of the lead leg. Hopefully, you can wait until the lead leg is forward. You can also use the area between the lead leg and breastplate for a lethal shot.
The Elevated Quartering-Away Shot
The elevated quartering-away shot will give any bowhunter buck fever. Bowhunters know this angle will expose important vitals, and the likelihood of jumping the string is low. Make sure your shooting lanes are clear and aim for the opposite shoulder. Your entry point may seem high, but you will have a clean kill as your arrow travels through vitals.
A rifle hunter making an elevated quartering-away shot should also aim at the opposite shoulder. With an accurate shot, this deer is going down. Not everyone thinks about a quartering away shot when setting up a tree stand. Make sure you have a clean window to shoot through as the deer walks by.
The Elevated Broadside Shot
The elevated broadside shot is what every bowhunter plans for. Shooting lanes are trimmed and corn is left in the perfect spot to stop the deer broadside. Your aim should be right behind the elbow of the front leg. Not too high since broadside deer are notorious for dropping on the shot. Visualize the shot before and during your sit. Relax and don’t overthink the shot; this is what you have waited on.
The elevated broadside shot for a rifle hunter is the stuff dreams are made of. The high shoulder is a great aiming point — this spot often drops the deer quickly. If you’re filming your hunt with a scope-mounted camera, make sure you stay on the deer after the recoil. Often, this shot results in the deer going down on camera. Have a Strategy
Many hunters don’t think about shot strategy until the deer is in front of them. This lack of planning only adds to the effects of buck fever. There are other angles to consider, but they generally end with the walk of shame. We discussed how the quartering-to, quartering-away and broadside shot strategies will help you make an ethical and lethal shot.
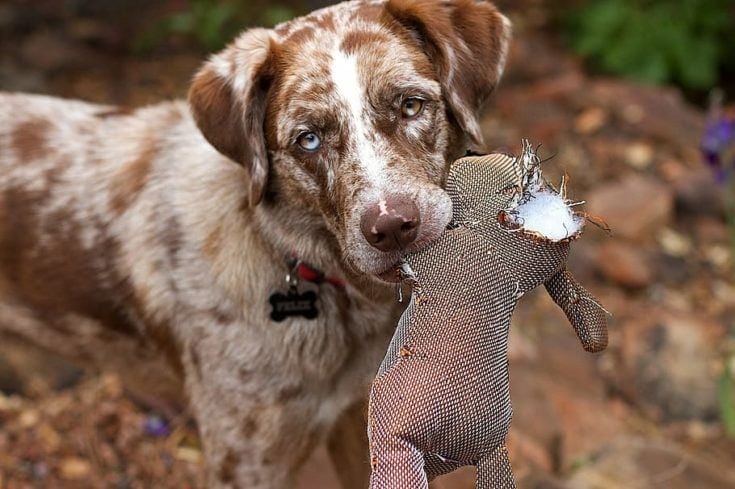
Your hunting dog is a focused and dedicated partner, helping you find, retrieve, or flush your quarry. Such a loyal and helpful companion deserves a great name, and why not make it hunting-themed?
Whether you have a hound, terrier, retriever, or gun dog, you should be able to find a great name on our list. We’ve gathered over 100 amazing hunting names, covering males, females, unique names, duck hunting names, and names that are just right for a Labrador Retriever. Scroll down to find your new favorite hunting dog name!
There are quite a few hunting dog breeds, including hounds, terriers, and retrievers. Here’s a look at four exceptional hunting dog breeds:
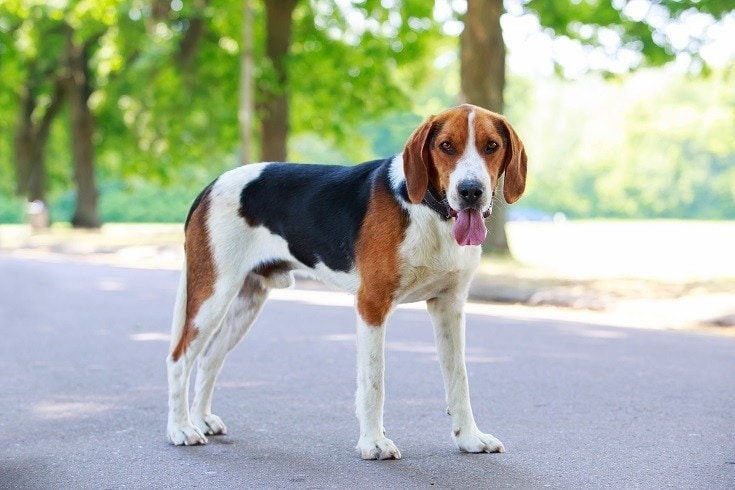
American Foxhound
Foxhounds look a little like Beagles, but as their name suggests, they were specifically bred to hunt foxes. These lean, athletic dogs specialize in hunting and tracking. They’re also low-maintenance, loving family dogs.
Beagle
These popular, loyal hounds make great hunting dogs. They were bred to hunt animals like birds, foxes, rabbits, and even small deer. Curious and adorable dogs, Beagles are intelligent and easy to train.
Bloodhound
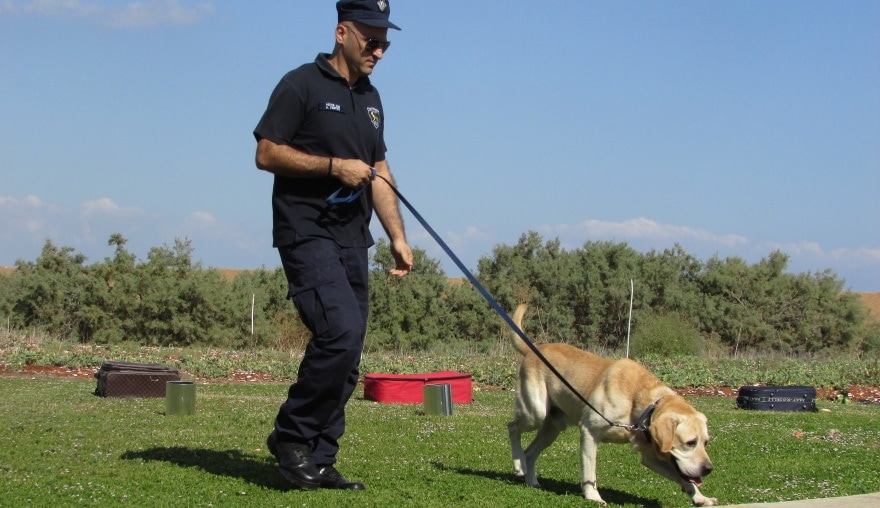
As you’ve probably seen in countless detective movies, Bloodhounds have an amazing sense of smell. They’re good at tracking prey using scent and have been used by search and rescue teams to find missing persons.
Golden Retriever
In recent times, Golden Retrievers have become popular family dogs, but they were originally used as bird hunting companions. As their name should tell you, Golden Retrievers are good at retrieving birds after you’ve shot them. They’re also loyal, smart, and athletic dogs with friendly dispositions and beautiful golden coats.
Finding the Right Name for Your Hunting Dog
Have you found a great name for your hunting dog? We hope that our extensive list has shown you the wide range of the hunting dog names available, whether you prefer something unique like Artemis or duck-themed like Mallard. Your hunting partner will thank you for taking the time to find just the right name!
Not quite there? Don’t worry, we’ve got plenty of other creative options:
While most shooters mistake the Beretta M9 and M9a1 as one weapon, their primary differences lay on their outer surface and build as their mechanical alignment and functioning are similar. This article aims at shedding light on the few differences observed between the two.
Well, there is not much to differentiate between them; the few differences that I came across in my research were not one you may ignore. Even the slightest curve in a handguns stock builds holds a significant effect on its performance. Before diving into these aspects, let us first take a look at a general overview of these Beretta products.
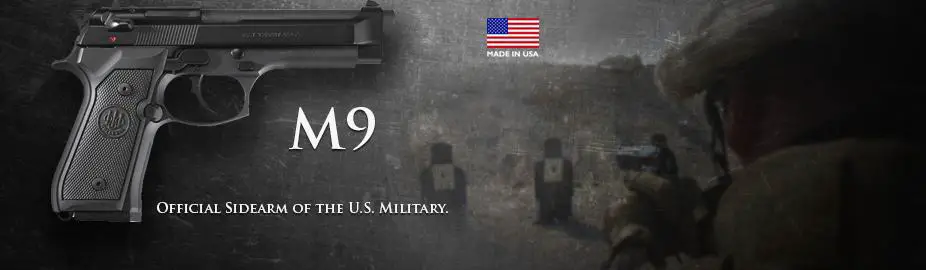
The Beretta M9 is an Italian made semi-automatic pistol explicitly designed for 9mm. It is among a long catalog of 9mm Beretta handguns and ranks among the top sellers and most favored in the shooting genre. Its popularity mostly lies in the fact that the US armed forces adopted it as the official side firearm during the ’80s. Because of this, we saw them being a preference for most law enforcement officers in the modern world.
The internal engineering of this handgun features a short recoil accompanied by a single or double action mechanism. Its magazine capacity is 15 of 9mm rounds, which is standard for a day to day handgun user. Its design accommodates both left and right-handed shooters with a reversible magazine release button correctly positioned for the two types of shooters.
The Beretta M9 is also a perfect option for personal or home defense since it is among the most reliable firearms from Beretta. All of its parts are 100% interchangeable, with a wide variety of replacement parts available. Its flexible nature also simplifies its maintenance even when on intense conditions.
Beretta M9A1
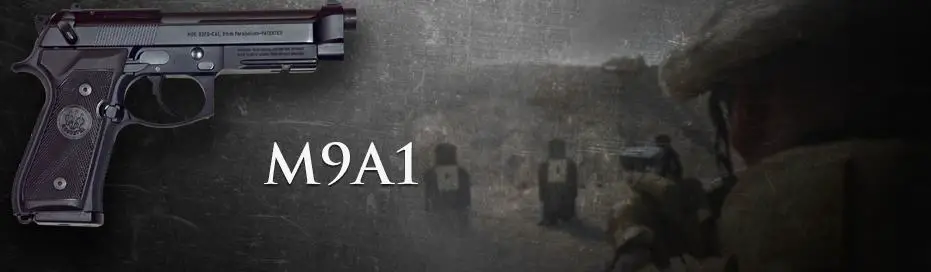
The Beretta M9a1 is an evolved gun from the M9 and features specific improvements in its design, resulting in a better performance. These modifications make the handgun perfect for tactical encounters mostly to occur with the US marine corps. They incorporate the previous m9 features and marry them to other adjustments and additions to meet the essential need for the ever changing tactic approaches.
The fact that it features more excellent reliability and effectiveness than the m9 makes it an even better option for self-defence and concealed carry. Its performance is traced back to its premium components and flawless manufacturing. Not only is this Beretta handgun deliver quality and consistent performance, but its exterior build is also a sight to behold.
A unique sand resistant coated magazine and a three-dot sight on its build are some of the outstanding improvements placed among the top-rated handguns. In more than one article, the Beretta M9a1 has been mentioned as among the best Beretta 9mm handguns. It is practically the easiest to maintain with its compact nature and vast replacement options. It also features a disassembling button that eases the breaking down the process of the gun. Those who have had the opportunity to feel this weapon can testify to its premium results.
Differences between the Beretta M9 and the Beretta M9a1
Now that we are all familiar with both weapons, why don’t we dive right into the distinguishing features?
Sights
The material used in their make is the only similarity in their sights, as the M9 features a two white dot front sight for your sighting needs. On the other hand, the M9a1 has a more detailed three-dot feature. This includes one dot on the rear segment and the other two strategically positioned at the front piece.
The primary purpose of sight is to ease your target acquisition by providing a fixed plane to base your aim. Beretta gun makers have been in the firearm game for as long as I can remember, meaning that they have undisputed experience in what makes up a perfect sight for a gun. It is no surprise to find that both components on the two weapons are made of steel for more durable and productive use.
I believe that the M9a1 sight is best for most shooters due to their detailed build.
Accessory Rail
I honestly do not see the need to add more accessories to your handgun, mostly Beretta made ones. It just adds on more weight to your gun, offsetting the average balance of the weapon. Despite my opinion, most shooters find lasers and other sighting additions best for their Beretta guns. If you are among this crowd, then you should opt for the M9a1 since it has a Picatinny rail available on the bottom front side of the barrel.
The M9, on the other hand, does not have any railing to accommodate any additional accessory. Instead, at the location where the Picatinny rails on its counterpart, it features a prefix serial number. This differentiation does not make the M9 any less as both these weapons are close competitors in the shooting field.
Magazine
The magazine on both these Beretta handguns has an equal capacity of 15 9mm rounds and is made of the same material. The difference between their magazines being their coatings.
The M9 was first to be released between the two, meaning that it was first to hit the shooting fields. After several trips into the battleground, its users found that its magazine casing faced damage as a result of exposure from sand and other natural elements.
Later, when the M9a1 joined the market, it featured an improved PVD coated magazine casing. This magazine was also sand resistant, meaning that it could maintain its quality finishing even after excessive exposure to these elements.
Grip
Every experienced shooter realizes the importance of a quality grip in a grip. Among the components that hold significant influence in the aim and performance of a gun lies this crucial piece. Both gun grips have proven to be reliable no matter the encounter; however, their nature includes some differences.
The M9 grip has a smooth front and back lining on its grip and only features a side checkering plastic that provides the required grasp on the gun. On the other hand, the M9a1 grip has a strap checkering that provides more natural and comfortable handling of your handgun. It also plays a significant role in reducing the recoil felt, and you will achieve better results on consecutive shots.
Markings
To some, this build engraving might not be seen as a difference. However, since there are not many of the differences to list down between these two similar handguns: I found it an important difference. You can easily tell the difference just by looking at the gun’s engravings.
The M9 is a military used weapon hence its military-style markings on its finishing. On one side of the firearm lies a “US 9mm M9 Beretta USA” engraving that is visible even on a longer distance. The official build and serial number lies on the other side of its body and adds a unique feel to the handgun. It is only featured on the M9, whereas the M9a1 only features a serial number engraving on its surface.
M9 vs 92FS
The Beretta 92FS is among the long catalog of 9mm pistols from the Beretta makers. Actually, the 92FS pistol is based on the M9 model and features explicit modifications that improve its performance both on paper and in the field. These modifications result in a civilian edition of the military-grade M9; its evolution is innovative and features creative adjustments to its functioning.
In this section, we will discuss the minor improvements that lead to this perfect self-defence weapon.
Sights
Like all Beretta 9mm handguns, both these weapons feature iron sights fixed correctly at the front and rear. The M9 then features a two-dot sighting pair, with the front and rear sections having a white dot in their make. To some shooters, this is an excellent characterization that provides them with accurate and satisfying results.
The 92FS, however, has a three-dot sight, which is more detailed and promises even more accurate results. Two of the white dots are strategically positioned on the rear piece while the front company holds the third dot. This third white dot proves to be useful for finessing your aim and improving the target acquisition.
Hammer
Among the complaints that came from the M9 military use included claims that the slide shot back towards the shooter upon firing. This malfunction was responsible for causing severe damage to most military men during combat, compromising the troop’s success.
The Beretta team considered this when designing the 92FS, and installed a larger hammer pin. The giant hammer eliminated the risk of the slide flying backwards to the shooter, allowing for safer use. Considering that the 92FS was explicit for civilian use, such malfunctions would result in extreme damages.
Grip
In comparison to the M9, the 92FS features a narrower handle with a distinguished arc on its hold. Only with close observation of the grip will you notice this arc that extends to the gun’s beaver-rail. The M9, on the other hand, has a broader stock, and no turn is noticeable in its body finish.
Judging from their grip structuring, it is correct to conclude that the 92FS has better handling with its slim grip nature. It allows for a better fit on the shooter’s palm, improving the shooter’s control of his or her firearm. Here are some of the Best Beretta 92F grips
The Best Overall:
In conclusion, both these weapons are perfect options depending on their applications. For tactical encounters, I would suggest the M9, whereas defensive approaches are best for the 92FS.
Most Popular Handgun Accessories
Frequently Asked Questions (FAQs)
Can Civilians Own a Beretta M9?
Regardless of DOD claims, you can successfully purchase a military-grade M9. The only requirement you need to meet is to be in a state that does not restrict firearm usage. Beretta is marketing these pistols as law enforcement pistols.
Why did the Army Replace the M9?
Following claims sourced from army officials, the M9 did not meet required standards for modern combat. Besides, cost analysis showed that its repair costs were equivalent to purchasing new service pistols. This is what led to their discontinuing in certain troops.
Would a 9mm Kill a Bear?
Yes, a 9mm would kill a bear. However, the bear would die of the injuries rather than the weapons stopping power. Before the bear falls to its demise, it will still have enough energy to cause severe damage to you.
Conclusion
The M9a1 is just an improvement of the M9 version, which I highly advocate for because of its magazine coating and Picatinny rail in its build. Its grip is also an aspect that sways most shooters find attractive over the M9.
However, the M9’s association with the US military gives its counterpart a run for its money. In conclusion, both are significant purchases and come at pocket-friendly pricing.
What if you really needed a rifle to survive outdoors?
What I mean by that is if you are a camper, a hiker, a kayaker, or anything involving the great outdoors and endless adventure, then you may carry a gun for survival purposes.
There is no logic or mercy in the great outdoors, and once you step out of civilization and into nature, you are just another part of the food chain.
As my Gunnery Sergeant would say, “it would behoove you to be ready for it.”
Some carry a handgun, some a packable shotgun, but others may prefer to take a rifle. A rifle offers more range than either a shotgun or pistol, and they are relatively more comfortable to shoot accurately.
They have less recoil than most shotguns, and their design often makes them quite compact.
Let’s go through what I deem a true “survival rifle” and my top picks to get you out of trouble. So keep reading!
Input into this article came from the PPT editorial team, who has a combined shooting experience of 30+ years and includes instructors and competitors in multiple disciplines.
We’ve spent countless hours researching and analyzing guns and gear to determine which is the best when it comes to features, reliability, ergonomics, and bang for your buck.
We had to make some tough calls. If you don’t see your favorite rifle, it doesn’t mean we hate it, just that we couldn’t include it this time.
Defining Survival
People tend to define survival differently.
When people hear the word survival, they may think long term disaster scenario or massive emergency (see our Essential SHTF Gear). That’s fair enough, but today we are talking about more localized and personal situations.
I’m thinking hikers, campers, pilots, and anyone who spends time outdoors in the brush, over the water, and more.
This guide is also written for folks like me who live in the middle of nowhere and may desire a vehicle gun they could hike with, in the event of a severe breakdown.
These situations mean shooters are less likely to encounter a defensive situation involving another person but more than likely might encounter pests, predators like coyotes, and of course, snakes. You may also need to eat if the survival situations go on for days, so you need a game-getting gun too.
This is how I define a survival rifle.
My Standards
The likelihood of having to use one of these rifles is quite low.
I’ve been camping, hunting, hiking, and adventuring hundreds of times and never had to use mine. I have taken a few squirrels for fun and to cook over a campfire, but never needed to for survival.
With this in mind, I want the rifle to be extremely small and unobtrusive. Something you can pack without it taking up too much room or weighing too much.
For these reasons, I came up with a few standards:
First, it needs to weigh less than 5 pounds.
Second, it needs to be capable of fitting in a standard-size backpack. This means the gun is required to break down or fold in some way.
Third, the design needs to have lightweight ammo that is easy to find and easy to store.
This leads me to eight distinct rifles…
Best Takedown Survival Rifles
1. Ruger 10/22 Takedown
The Ruger 10/22 is, without a doubt, the most popular rimfire rifle ever. It’s been made in the millions since the 1960s and is the standard for semi-auto .22 LRs.
The Takedown model allows the gun to be split in half and easily toted.
This is a proper rifle with a real stock, a comb for a cheek rest, and handguards. It’s everything the Chiappa is not.
It only weighs 4.6 pounds in its factory configuration and skates right under my 5-pound limit. I own a standard 10/22, and it’s one of the most fun guns I’ve ever handled.
As a semi-auto. 22 LR rifle, the gun is very easy to handle, and you can quickly dump rounds into a target. This makes it a bit more capable of taking on larger dangerous animals.
Admittedly, I’d want something bigger, but 10 rounds of .22 LR should cause enough pain compliance for a lot of animals to change their mind.
10/22 Takedown also comes with a carrying case which is nice, but it’s also easy to pack into a bag on its own. You can find magazines for the Ruger 10/22 that can hold 10, 15, 25, and even up to 110 rounds in a drum.
The takedown and assembly procedure is straightforward and quick. Its stainless steel parts are rust-resistant and very easy to clean, which is convenient for a survival rifle.
The Ruger 10/22 is an extremely reliable gun and one of the most customizable rifles you can buy.
It’s easy to tailor to your needs and is ultimately a gun you won’t regret buying. If you choose the Ruger 10/22 Takedown as your survival rifle, it can double as a great plinking gun.
Of course, you can choose any of the Ruger 10/22 models and still be decently equipped.
Oh…and there’s tons of great ammo out there. Check out our Best .22 LR Ammo Guide.
2. Henry AR-7
The Henry AR-7 was initially built as a survival rifle for U.S. Air Force pilots. It’s a .22 LR semi-automatic rifle that feeds from box magazines containing eight rounds.
Whether or not you know it, you’ve likely seen the gun in some form or another.
It has a very odd design, and this is due to the fact it’s a very early takedown rifle design. The barrel and receiver detach from the stock, and the stock is then used as a storage compartment for the receiver and barrel.
The entire design is toolless, compact, and lightweight. This gun weighs a mere 3.5 pounds and is very simple in design. It lacks any handguard, so the barrel will heat up after extended firing.
This rifle isn’t designed to be a high-volume plinker, but that doesn’t mean it won’t keep going and going.
With a 14-inch length of pull, it is excellent for adult-sized shooters. The gun is a blast to shoot and comes with two magazines. Eight rounds are more than enough for most situations, but extended magazines are available and are reasonably affordable.
The top of the receiver sports a short rail, but a mounted optic won’t allow the gun to be stored in the stock.
The gun is very lightweight and comfortable to shoot. It may be a 1950s design, but the overall design screams space age.
Plus, the use of a plastic stock means the internals of the rifle and the gun will be well protected from bounces and bumps while hiking and camping. The stock is sturdy and provides a very comfortable and easy grip when firing the weapon.
You can’t hold the rifle too far forward and must use the magazine well for a grip, but it isn’t bad. The light recoil and lightweight of the weapon make it comfortable to fire, even for an extended period of time.
The gun is called the Henry Survival rifle, and it has proven to be quite adept at its role.
Want more details on the Henry AR-7? Check out our full review here!
What’s your take on the AR-7? Rate it below!
3. Savage Model 42 Takedown
I’m a shotgunner at heart; I love shotguns and their versatility. They are great survival weapons, but this is a list about rifles, right? Well, what if I suggested a weapon that was both?
The Savage 42 weighs 6.1 pounds, but the compact version comes in at 4.65 pounds and both are takedowns that break into two pieces. It comes with its own Go Bag, which is a nice touch.
Best of all, the gun comes with one .410 barrel and a rifle barrel in either .22 LR or .22 Magnum.
This two-shot weapon is the ultimate game-getter. The bottom .410 barrel is a bit more potent than the top rimfire barrel, but the top barrel makes it easy to touch a target at a distance and gives you a precise option for medium-range shooting.
The bottom .410 barrel allows you to dispatch a variety of different game with buckshot, slugs, or birdshot. The combination of the two calibers gives you the perfect gun for collecting small game as well.
Best of all, it breaks down with the push of a single button and goes back together in an instant. The stock and furniture are mostly polymer, reducing the weight and making it easier to carry. This little gun utilizes a hammer-fired, single-action design and has a very crisp trigger.
The Savage Model 42 Compact is an excellent choice if you put a premium on versatility. It’s an affordable gun that will simply work every time while giving you options while using it.
4. TPS Arms M6 Takedown
The M6 Takedown is a classic survival firearm originally developed for the United States Airforce for pilot survival. While it might have come out of the 1950s, it’s still a viable option mainly because of its versatility.
I’m cheating a bit again with the M6. This is an article on survival rifles, and this isn’t just a survival rifle…it’s a rifle and shotgun.
TPS Arms recreates this classic survival rifle for a great price point with a few improvements.
For example, the takedown pin is an AR-style captured takedown pin that makes it easy to break the gun down for storage. Also, instead of just being stuck with .22 Hornet and .410, we get multiple options.
While the bottom barrel stays .410, the top barrel can accommodate .357 Magnum, .22 WMR, .17 HMR, .22 LR, .22 Hornet, or even two .410 barrels. There are tons of options, all of which are viable survival cartridges.
The .357 Magnum can take any medium game animal in North America, and the .410 can take down birds, squirrels, snakes, and other pests. However, a .22 LR allows you to carry 500 rounds in your cargo pocket.
Pick the right option for you and your environment, and the modern M6 rifle will serve you well.
Like the classic M6, the M6 Takedown Series from TPS Arms is super lightweight, fairly short, and separates in half for tossing in a backpack. The stock features a customizable storage compartment to fit a number of different rounds.
Additionally, the .410 barrel has interchangeable chokes, and you can outfit the modern variant with a scope rail for optical enhancement.
Not only are these guns faithful representatives of the classic M6 guns, but they improve upon the original design.
Best Folding Survival Rifles
5. Chiappa Little Badger
The Chiappa Little Badger is the first gun on the list due to how well it fits all of my standards.
It’s the lightest rifle on the list, likely the most affordable, and it is adorable. The Chiappa Little Badger is a folding rifle chambered in either .22 LR, .22 Magnum, or 17 HMR.
I own a .22 LR model, and it’s an enjoyable gun.
Chiappa’s Little Badger is a single-shot rifle with a wire stock and hardly anything but a small barrel, receiver, and wire stock. It weighs 2.9 pounds and comes with four short rails to attach accessories to. The small peep sights are quite adjustable and very easy to use.
The gun folds in half to be only roughly 17 inches long. It’s super thin and fits in a backpack with hardly any room taken up.
This gun even has a little plastic attachment to hold extra rounds. Admittedly, I found them a little too loose to hold ammo securely.
My .22 LR version is excellent, but the .22 Magnum variant will pack more of a punch. This would likely be the better choice for a survival rifle for its game-getting abilities.
The gun is very easy to operate — all you have to do is load the gun, close it up, cock the hammer, and pull the trigger.
Simplicity also means it’s not going to fail because you forgot to clean it. It’s not a rapid-fire weapon, but with well-aimed shots, you can quickly get dinner and kill off snakes, coyotes, and other pests.
The trigger isn’t great but is light and consistent. Its hammer is easy to cock, and the entire operation of the gun is simple. Don’t expect much of a cheek weld, and be aware the length of pull is very short. The rifle is easy to use for anyone, including kids.
The gun is just begging to be modded, and you can add a means to carry ammo, a knife, paracord, or whatever you want.
It’s less than $200, and even outside of a survival rifle, it’s a cool toy to play with. Also, the threaded barrel makes it very easy to suppress.
Want more single shots? Take a look at our round-up of the Best Single Shots on the market.
6. Kel-Tec Sub 2000
The Kel-Tec Sub 2000 is one of the few common, affordable, and reliable semi-auto centerfire guns I could find for this list.
This gun is a unique folding rifle that comes in pistol calibers, specifically .40 S&W and 9mm. The gun feeds from a wide variety of different pistol magazines from different manufacturers.
When folded in half, the Sub 2000 sports an overall length of only 16.25 inches. Unfolded, the rifle is still a short 30.5 inches. It weighs in at only 4.25 pounds and fits well into a standard backpack or even a messenger bag.
The Sub 2000 comes in both Gen 1 and Gen 2 models, and the various models can take Glock, S&W, Canik, Beretta 92/96 series, and Sig magazines.
It’s quite a bit more potent than the previously mentioned rimfires, making it a better dangerous animal gun and an excellent close-range gun for medium game.
A very simple blowback system means it is quite reliable. It does have more recoil than a standard carbine due to this system, but it is still easy to control.
The sights are ok — nothing special, but plenty usable out to 100 yards. Adding optics to the gun is tricky but doable.
If you need something to fend off animals like cougars, then the Sub 2000 will do it a lot better than any of the rimfire rifles on this list. While 9mm and .40 S&W wouldn’t be my first choice for cougars in a handgun, in a rifle, it is easy to shoot and easy to fire rapidly.
With the right defensive rounds, the gun will cause some serious damage to anything. I suggest a solid round, something like 147-grain 9mm JHP, or even a fancy hard cast load. A 180-grain .40 S&W load will deal with some hurt too.
See our articles on the Best 9mm Ammo and Best .40 Ammo for our favorite plinking and self-defense rounds.
Be sure to check out our complete hands-on review of the Kel-Tec Sub 2000!
Best AR-Style Survival Rifles
7. Aero Survival Rifle LTE – 9mm
A semi-automatic, AR-type PCC that breaks down with ease and weighs less than 4 pounds? Well, yeah, it exists and comes from a little company called TNW Firearms.
They’ve been producing takedown carbines in various calibers for years, but the Aero Survival LTE series reduces the weight to a light 3.95 pounds.
With it, you get a Glock magazine-fed, lightweight, takedown, semi-automatic carbine with a 16-inch barrel. It’s plain and stripped of everything but the basics.
However, it will launch 9mm pills fast and hard. When used with 147-grain JHPs, you have a weapon that can take medium-sized game at close range.
The semi-auto design allows for fast follow-up shots, which can be invaluable, and very few lightweight survival rifles offer that capability.
Shooters get a nice-sized optic rail and an M-LOK handguard, but that handguard is extremely short with just a few M-LOK slots. After adding an optic or light, you can still walk away with a weapon weighing less than six pounds.
It breaks down into two 17.25-inch-sized components for easy storage and carrying. Grab a few extended Glock mags, and you’ll be set for most threats inside 100 yards.
8. CMMG Banshee Mk57
I might be breaking the rules here, kind of. While the Mk57 is most commonly sold as a braced AR pistol, a short-barreled rifle variant is available. To fit under the 5-pound limit, you’ll need to grab the 5-inch barreled variant.
Like any standard AR-15, you can easily break the thing into two pieces and store them in a backpack.
The 5.7x28mm round fits neatly between a rifle and pistol cartridge, boasting flat-shooting performance out to 150 yards or so and excellent penetration.
This round is fairly smaller and lighter than most rifle and pistol rounds, but it’s an oddball that works well and works inside most shooters’ capabilities. The 5.7x28mm round is unusual but effective and well-suited for survival applications.
CMMG makes fantastic guns, and the Banshee is their short and light series.
This little fella offers you the modularity of the AR platform in a high-performance, lightweight caliber. It’s a premium-grade weapon with a superb trigger and M-LOK handguard and uses the FN Five-Seven magazines.
The CMMG Mk57 isn’t a cheap firearm by any means, but it offers you AR-15 controls in a very small and lightweight package.
Oh, and ammo isn’t cheap either, but it fills its own niche and might be one of the better choices for practical survival.
Final Thoughts
Keep in mind that most responsible hunters, hikers, and campers will never need it, but a good survival rifle is worth its weight in gold should you ever need it.
These choices are perfect for most budgets, are lightweight, and quite discrete. Although these may seem like basic survival rifles, be sure to check your local laws and the laws of anywhere you may consider camping to ensure they are legal.
What do you prefer as your go-to survival gun? Let us know in the comments below! Don’t forget the rest of your SHTF Gear or even Best Trunk Gunsor just the plain ole Best Rifles, period.
Wyatt Earp has said:
Fast is fine, but accuracy is everything
And I just thought how many airgunners are obsessed with muzzle velocity and muzzle energy,...
Unveiling the truth behind dry firing a Gamo air rifle, this intriguing headline delves into the possibility of safely practicing without ammunition. Join us...
")
")
")
")
")


 Wrap it. If for some reason you can’t cape your buck, gently wrap the antlers with your base layer or another piece of spandex material. Wrap them tight and tape down the material with electrical tape. Wrapping before strapping down reduces potential friction. Now you can carry your antlers with straps if needed.
 Cushion your buck for the drive. If your hunt is closer to home, you don’t need to follow quite as many steps. Get your deer to your truck using a wheeler or a cart instead of dragging it by the horns. Then secure the head so the antlers don’t come in contact with any surfaces.
 Don’t have straps? Put something soft, like a jacket, pillow or sleeping bag, underneath the antlers. This prevents the velvet rubbing off when you rattle down the road or your buddies check out your buck.
 Resist cutting the cape too short; you’ll need from the middle rib forward. Your taxidermist can always cut off what isn’t needed, but can’t make a substantial cape appear from nothing. Then prop the antlers against a tree, base down. The blood will simply drain out of the bottom of the antlers without leaving any marks.
 The fluid also demands a syringe and needle to inject the antlers properly. Remember: embalming fluid preserves whatever it touches, so if it gets on your skin, seek emergency medical attention. Not to sound too dramatic, but if embalming fluid gets in your eye, and you’re out of easy ambulance/EMS range, you will most likely lose it.
 Take care with velvet antlers and you’ll have a beautiful trophy as a way to remember that great hunt. Taxidermists can fix small blemishes with an airbrush and epoxy, but they can only make a deer look as good as when it came in the shop, not better.
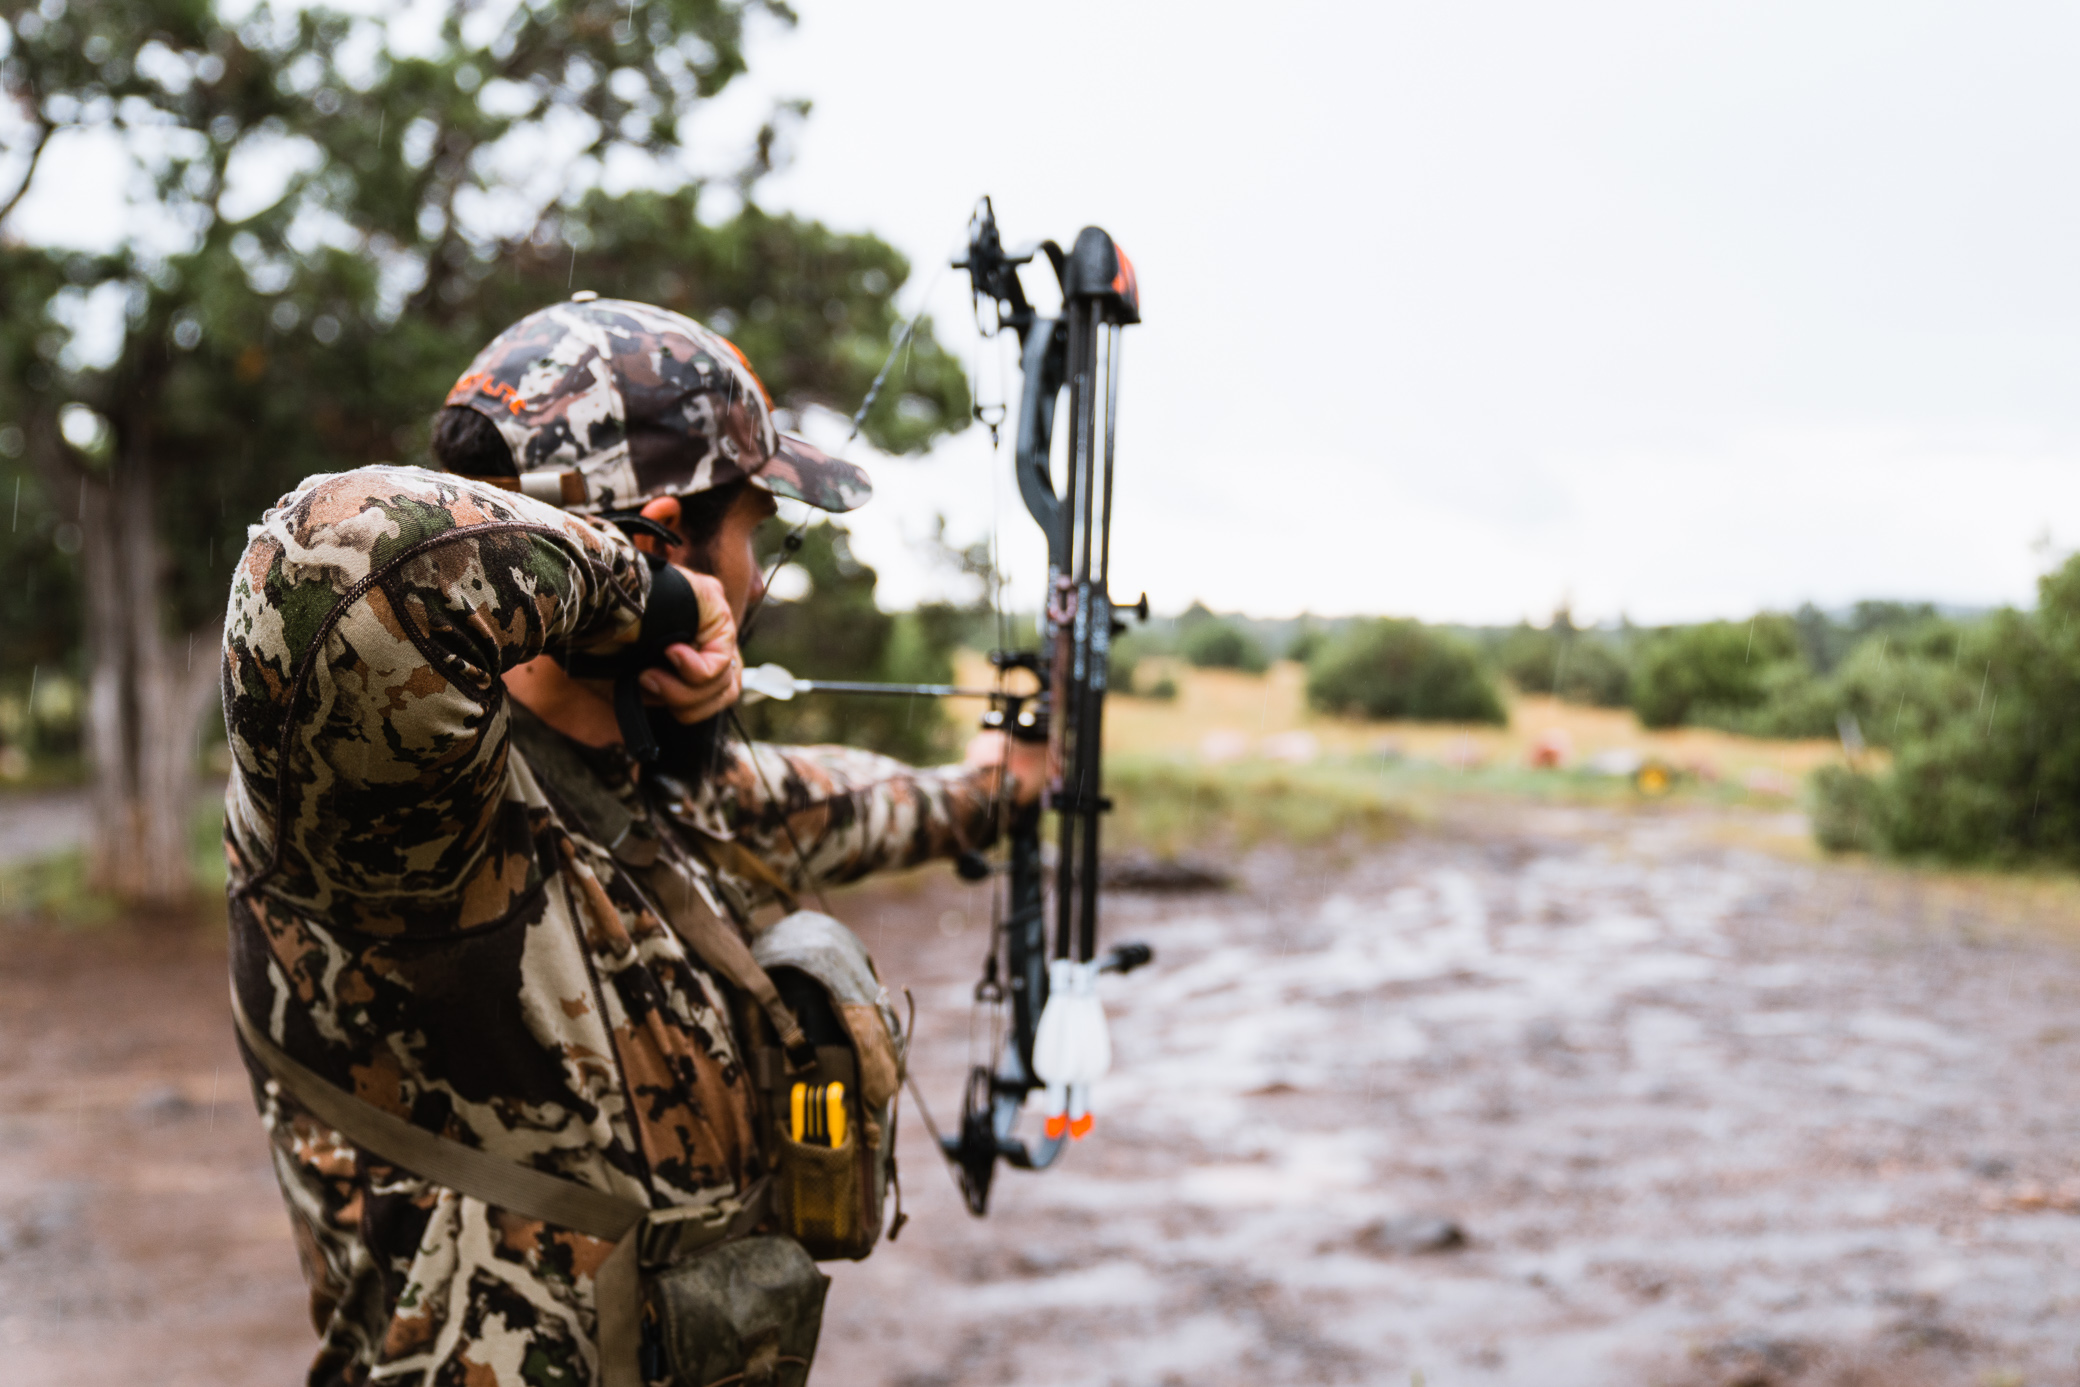

 Our goal is to provide you the hunter an opportunity to harvest a mature Maine Black Bear dressing over 200 lbs. (add approx. 17% for live weight). Bears reach full adult size, at about 4-6 years of age. Boars average 250-600 pounds and measure 5-6 feet from tip of nose to the tip of their tail. Females are smaller, weighing 100-400 pounds, and measuring 4-5 feet in length. Males stand about 40 inches tall at the shoulder whereas sows seldom exceed 30 inches in height. We have virtually 100% sightings for each hunter and over 90% success rate. (Some good bears are passed by discriminating, returning hunters waiting for a bigger trophy than their last bruin.) Year after year we have about one third of our hunters coming back for another hunt.
 Our bear hunting packages provide a great opportunity to harvest a big game trophy that eludes many hunters who have spent a lifetime in the woods. The thrill of seeing a mature boar or sow silently appear at the edge of your vision is enough to get anyone’s heart beating faster!
 Comfortable rooms and plenty of good hot food [see menu for representative meals] will be ready for you. It is always a great time of sharing stories with fellow hunters. With a limit of 10 hunters per week, you will get a chance to reunite with returning friends and to make new ones. The camaraderie between bear hunters is a special aspect of our kind of people. When we mention repeat customers let’s just say that we are not talking about everybody who ever came a second time. We have hunters that come year after year and even have a couple standing reservations for every year. We earn that loyalty and it bring us great joy. We will do everything we can to assure you have a great time on your own Maine bear hunt.
 Lunch is our big dinner of the day and is served about Noon. After eating, you will shower and get ready to go out for the afternoon hunt. Transportation to and from your bait site is included. Wayne corrals everyone about 2:30-3:00 pm and begins to deliver hunters to the sites. You will be walked into the bait site and your guide will wait while you climb into the 15-foot ladder, T.M.A. certified tree stand, clip in to your safety line and get comfortable. Each hunter is given a radio, for safety and so when a bear is shot, the guides can respond quickly, to recover the bear. On occasion we have big bears feeding on baits in the mornings. When this happens we will sometimes put a hunter out in the AM.