Home Blog Page 96

Do Deer Eat Oranges?

0

“Exploring the Unusual: Do Deer Have a Taste for Oranges? Discovering the dietary preferences of deer and shedding light on whether these graceful creatures are inclined to indulge in juicy citrus fruits like oranges. Join us as we delve into this intriguing question and unlock the mysteries of deer’s natural diet.”

The Role of Oranges in a Deer’s Diet: Do They Really Eat Them?

Deer are known to have a varied diet, consisting of grass, berries, fruits, and vegetables. While oranges and tangerines may not be their top favorites, deer do eat citrus fruits occasionally. These fruits are not the first choice for deer, but they are aware that they are edible and will keep them “lined up” for later consumption. When other food sources such as berries, pears, plums, peaches, carrots, apples, and bananas run out, deer will turn to options like pumpkin or citrus fruits.

Oranges and tangerines provide several nutritional benefits for deer. They contain significant amounts of vitamin C, iron, calcium, magnesium, potassium, and protein. These nutrients contribute to the deer’s immune system and overall health. Additionally, oranges and tangerines are rich in fiber, which is an essential component of a deer’s diet. While fiber takes longer to digest and extract nutrients from, it is a normal part of their diet.

However, it is important to note that oranges can be potentially dangerous for deer if they consume a large amount without being accustomed to them. Deer have sensitive digestive systems that need time to adjust to new types of foods. Therefore, oranges should be given in moderation as a treat or supplement rather than a primary food source.

In terms of orange tree leaves, citrus trees are not the preferred delicacy for deer due to their aromatic nature. However, when better food options become scarce, deer may resort to eating the leaves of citrus trees. It is also worth mentioning that deer can cause damage to citrus trees by rubbing their antlers on the bark of the trunk. To protect these trees from deer damage, wrapping a steel mesh around their trunks is recommended.

Overall, while oranges and tangerines may not be the top favorites for deer, they can still be appreciated as a food source, especially during winter when other options are limited. It is important to feed them in moderation and ensure that the deer have time to adjust to these new foods. By providing oranges and tangerines as part of their diet, deer can benefit from the nutritional value they offer.

Exploring the Nutritional Benefits of Oranges for Deer

Exploring the Nutritional Benefits of Oranges for Deer

When it comes to the nutritional benefits of oranges for deer, these citrus fruits offer several important nutrients that can support their overall health. Oranges are rich in vitamin C, which is essential for a healthy immune system in deer. This vitamin helps protect against diseases and infections, especially during harsh winter months when deer may have limited access to other food sources.

Oranges also contain iron, calcium, magnesium, and potassium, which are all vital minerals for deer. Iron is necessary for oxygen transport in the bloodstream, while calcium and magnesium contribute to strong bones and teeth. Potassium helps regulate fluid balance and muscle function in deer.

In addition to these minerals, oranges provide protein, which is essential for muscle growth and repair in deer. Protein plays a crucial role in maintaining their overall body condition and supporting proper functioning of various bodily systems.

Furthermore, oranges are high in fiber content. While deer primarily consume grass as part of their normal diet, they can benefit from the fiber found in oranges. Fiber aids digestion and helps regulate bowel movements in deer.

It’s important to note that while oranges can be a valuable supplement to a deer’s diet, they should be consumed in moderation. Deer have sensitive digestive systems that need time to adjust to new types of foods. Feeding them large amounts of oranges without acclimating them first can lead to digestive issues.

To ensure the safety and well-being of deer when feeding them oranges or any other food, it’s best to start with small amounts and gradually increase the quantity over time. This allows their digestive system to adapt properly.

Overall, oranges offer significant nutritional benefits for deer due to their vitamin C content, minerals like iron and calcium, protein content, and fiber content. When provided in moderation as part of a balanced diet, oranges can contribute positively to a deer’s overall health and well-being.

Are Oranges Safe for Deer to Eat? Understanding the Risks and Rewards

Oranges can be a safe and nutritious food for deer, but there are both risks and rewards associated with feeding them these fruits.

Firstly, it is important to note that while oranges are not a top favorite food for deer, they do recognize them as edible and will consume them when other food sources become scarce. In winter times, when berries, pears, plums, peaches, carrots, apples, and bananas are no longer available, citrus fruits like oranges and tangerines can be appreciated by hungry feral deer.

From a nutritional standpoint, oranges and tangerines offer several benefits for deer. They contain significant amounts of vitamin C, iron, calcium, magnesium, potassium, protein, and fiber. These nutrients can support the immune system of deer and provide them with energy.

However, it is essential to feed oranges to deer in moderation. If they consume a large amount of these fruits without being accustomed to them, it can upset their sensitive digestive system. It is recommended to introduce oranges gradually into their diet over a period of 3-4 weeks.

In terms of safety concerns, oranges themselves are not dangerous for deer to eat. However, if left out in large quantities or not properly washed to remove any chemical residues from pesticides or fertilizers, they may attract pests such as raccoons or rats.

To feed deer oranges safely, it is advisable to wash the fruits thoroughly before offering them in small amounts alongside other fruits and vegetables. Feeding deer oranges should also be done away from residential areas to avoid attracting unwanted pests.

In conclusion, while oranges can be a beneficial addition to a deer’s diet due to their nutritional content, caution should be exercised when feeding them these fruits. With proper introduction and moderation, oranges can provide necessary nutrients for deer while minimizing any potential risks.

Do Deer Enjoy Eating Oranges? Unveiling Their Preferences

Deer are known to eat a variety of fruits, including citrus fruits like oranges and tangerines. While these fruits may not be their top favorites, deer are aware that they are edible and will consume them when other food sources become scarce. In winter, when options are limited, hungry feral deer will appreciate the nutritional benefits of citrus fruits.

Oranges and tangerines contain significant amounts of vitamin C, iron, calcium, magnesium, potassium, and protein. These nutrients contribute to the deer’s immune system and overall health. Additionally, the high fiber content in citrus fruits aligns with the deer’s natural diet of consuming large amounts of fiber from grass.

While oranges can be a beneficial treat for deer when consumed in moderation, it is important to note that their sensitive digestive system needs time to adjust to new types of food. Feeding them a large quantity of oranges without prior exposure could be potentially harmful.

In terms of preference, citrus trees and leaves are not the preferred delicacy for deer due to their aromatic nature. However, if there are no better options available, deer will consume them. It is not uncommon for deer to help themselves to ripe fruit or young shoots from citrus trees.

When considering feeding oranges or any other fruit to deer, it is essential to check local regulations as some states prohibit feeding wildlife due to potential overpopulation risks. If it is allowed, ensure that the oranges are thoroughly washed before offering them to the deer.

Feeding small amounts of oranges mixed with other fruits and vegetables can be a good approach. However, keep in mind that altering their diet may change their eating habits and behavior. Placing the oranges at the far edge of your garden can help avoid attracting unwanted pests.

In conclusion, while deer can eat oranges and tangerines, it is best to introduce these fruits gradually into their diet. Citrus fruits may not be their preferred choice compared to other fruits and berries. If you have further questions about feeding deer citrus fruits, feel free to ask in the comments below.

Feeding Deer Citrus Fruits: What You Need to Know About Oranges

Feeding Deer Citrus Fruits: What You Need to Know About Oranges

Oranges and tangerines may be delicious for humans, but what about deer? It turns out that deer do eat citrus fruits, including oranges and tangerines. While these fruits may not be their top favorites, deer recognize them as edible and will keep them for later when other food sources run out.

For hungry feral deer with limited food sources in the winter, citrus fruits like oranges and tangerines can be appreciated. These fruits provide nutritional benefits to deer, such as significant vitamin C content, iron, calcium, magnesium, potassium, and protein. The high fiber content in oranges is also beneficial for their digestive system.

However, it’s important to note that oranges can be dangerous for deer if they consume a large amount without being accustomed to them. Deer have sensitive digestive systems that need time to adjust to new types of foods. Oranges should be given in moderation as a treat or supplement.

Deer may also eat orange tree leaves if they have run out of better options. While citrus trees are not their favorite delicacy due to their aromatic nature, deer will consume them when other food sources are scarce. It’s important to protect citrus trees from damage by wrapping a steel mesh around their trunks.

If you’re considering feeding oranges to deer, make sure it’s allowed in your area and wash the oranges thoroughly to remove any chemicals. Start by giving small amounts of oranges mixed with other fruits and vegetables. Feeding deer oranges could change their eating habits and behavior.

It’s worth noting that other animals such as woodpeckers, mockingbirds, squirrels, rats, raccoons, and catbirds also enjoy eating oranges when they are in season. If you plan on leaving oranges out for wildlife to eat, place them away from your home to avoid attracting pests.

In conclusion, deer can eat oranges and tangerines, but they should be given in small amounts and introduced gradually. While not their preferred treat, these fruits can provide nutritional benefits to deer. It’s important to consider the potential impact on their eating habits and behavior when feeding them oranges or any other food.

Deer and Oranges: A Closer Look at their Relationship in the Wild

Deer and Oranges: A Closer Look at their Relationship in the Wild

Deer and oranges may not have the strongest relationship in the wild, but these fruits do play a role in their diet. While oranges and tangerines are not top favorites for deer, they are aware that these fruits are edible. In times when other food sources like berries, pears, plums, peaches, carrots, apples, and bananas run out, deer will turn to pumpkin or citrus fruits and trees. So while oranges and tangerines may not be their first choice, hungry feral deer with limited food sources in winter times will certainly appreciate them.

One of the reasons why deer may not prefer oranges and tangerines is because they have adapted to consume high amounts of fiber from grass. Grass takes longer to digest and extract nutrients from, but it is a normal part of their diet. Oranges especially contain a lot of fiber, which can be beneficial for deer’s digestive system. Additionally, these fruits provide essential nutrients like vitamin C, iron, calcium, magnesium, potassium, and protein that contribute to the overall health of deer’s immune system.

While oranges can be a good treat and supplement for deer when consumed in moderation, they can also be dangerous if consumed in large amounts without being accustomed to them. Deer have sensitive digestive systems that need time to adjust to new types of foods. Therefore, it is important to introduce oranges gradually into their diet.

In addition to consuming the fruit itself, deer may also eat orange tree leaves when they run out of better options. Citrus trees are not their preferred delicacy due to their aromatic nature, but if there are no other food sources available, deer will resort to eating them. However, it’s worth noting that deer can cause damage to citrus trees even without eating them by rubbing their antlers on the bark of the trunk.

Overall, while oranges and tangerines may not be the top favorites for deer, they can provide nutritional benefits when included in their diet in moderation. These fruits offer fiber, vitamin C, flavonoids, limonene, calcium, and potassium that contribute to deer’s overall health. However, it is important to be cautious when feeding oranges to deer and to consider any regulations or guidelines in your area regarding feeding wildlife.

Key Points:

– Deer do eat citrus fruits like oranges and tangerines, but they are not their top favorites.
– Oranges and tangerines can be appreciated by hungry feral deer with limited food sources in winter times.
– These fruits provide essential nutrients like vitamin C, iron, calcium, magnesium, potassium, and protein for deer’s immune system.
– While oranges can be a good treat for deer when consumed in moderation, they can be dangerous if consumed in large amounts without being accustomed to them.
– Deer may also eat orange tree leaves when other food sources are scarce.
– It is important to introduce oranges gradually into the diet of deer and consider any regulations or guidelines regarding feeding wildlife.

Sources:
– “Oranges and Tangerines: Do Deer Eat Them?” (https://www.deerworlds.com/oranges-and-tangerines-do-deer-eat-them/)

In conclusion, while deer have been observed consuming oranges in some cases, it is not a typical part of their diet. The occasional consumption may be due to scarcity of natural food sources or curiosity. Therefore, it is not advisable to intentionally offer oranges as a primary food source for deer.

Post-Kill Rituals: Matters of the Heart

0

Hunting’s post-kill rituals aren’t spontaneous gestures like high-fives or war-whoops, but perhaps that’s where they began.

Maybe those instinctive, visceral celebrations evolved as ancient hunters and their tribes considered what they gained at the animal’s expense. From there, things got complicated as time and culture took hunters’ thoughts and hunting’s utilitarian tasks, and shaped them into formal tributes to the animal’s life and the meat it provided.

That process created ceremonies—large and small, personal and communal—to instill and sustain ancient reverence. Maybe that’s why post-kill hollering, laughing and chest-thumping can appear disrespectful to others. Ignoring post-kill tributes—even those silent and subtle—suggests we’ve forgotten the old ways, never took time to learn them, or never knew of them in the first place.

Either way, today’s post-kill rituals are rooted in history and traditions, and mostly of European or Native American origins. The Germans, for instance, prayed to St. Hubert, the patron saint of hunters. They built forest chapels on their hunting lands and made worship mandatory. American Indians, meanwhile, have long dropped pinches of tobacco onto the animal’s body to offer respect, believing that tobacco—crumbled or smoked—connects them to the spirit world.

Many hunters still practice post-kill rituals, borrowing from history, other cultures and their own imaginations to honor the fact that life requires death, which warrants respect. With that in mind, here are some post-kill rituals you might recognize.

Blooding: This common ritual varies widely, but usually involves a parent or the camp’s senior member taking blood from a hunter’s first kill and applying it to his or her face. Some elders carefully streak the hunter’s cheeks with a blooded finger, while others hastily smear blood all over the hunter’s face.

This rite traces back to the 700s A.D. as a tribute to St. Hubert. To receive the patron saint’s blessing for the kill, the group placed a knife in the animal’s fatal wound to coat it in blood. One of them then used the knife to gently apply red crucifixes on the hunter’s forehead and both cheeks. The hunter then accepted everyone’s congratulations.

Joe Hamilton, director of development for the Quality Deer Management Association, recalls a similar ritual from his younger days. In this case, an older hunter explained the symbolism while applying blood: The streak down the first-timer’s nose honored the quarry’s sense of smell; a second streak over one eye honored the quarry’s sense of sight; a final streak over the other eye honored the hunter’s accomplishment. “They honored the hunter for being quiet, patient and stealthy to overcome the animal’s natural defenses,” Hamilton explains.

Horn Blowing: Houndsmen hunting deer often blew horns to communicate with the dogs and each other. To make the sounds, they used everything from a bull’s actual horn sheath, to horns or bugles made of brass or pewter. Today many huntmasters in Europe still blow horns to communicate to their charges. Some American hunters do, too. Regardless where it’s blown, the sound of a horn reverberating through a hardwoods swamp or a deep forest can make the hair on hunters’ arms stand up.

The Last Bite: The “letzebissen” or “letzer bissen” is practiced in Austria, Holland and Germany, and by some Americans. Valerius Geist, 78, of British Columbia, is a retired zoology professor and hunting authority who was raised in Germany and Austria. Geist says Germans break (never cut) a twig from one of five tree species in descending preference: oak, pine, spruce, fir and alder. With the animal placed on its right side, they pull the broken twig through its mouth from one side to the other and leave it clamped between its jaws.

Eating Raw Liver: Al Hofacker, founding editor of Deer & Deer Hunting magazine, recalls hunters in 1960s-era deer camps in northeastern Wisconsin that brought the liver of their first kill back to camp each year. “At night they’d slice small pieces of the raw liver and each eat a piece,” he says.

Slitting the Throat: Hofacker also recalls a once-routine practice he could never explain. “Decades ago it was common to slit the deer’s throat before field-dressing it,” he says. “It never made sense because the heart has stopped beating, but they thought they were ‘bleeding it out.’ That’s pretty much gone now.”

Meat, Skulls, Shoulder Mounts: Long after the kill, hunters continue honoring their quarry by cherishing and consuming its meat, and displaying its skull or full-shoulder taxidermy mount. Such honors, however, are easily tarnished. “You should never desecrate head mounts by placing cigarettes in the mouths, sunglasses over the eyes, or hats or Santa Claus caps on their heads,” Geist says. “You also don’t sit on the animal’s body after you’ve killed it. That dishonors the creature.”

This is obviously an incomplete list, but perhaps it reminds us that honoring our quarry is largely a matter of the heart. And that, Geist says, should focus on the kill itself.

“Rituals aren’t a bad idea; I see their value,” Geist says. “But you show the utmost respect by concentrating on killing the animal quickly. Hunters’ conduct toward wildlife and nature should be consistent with their conduct toward other humans.”

Hiking With Wide Feet: Wide Width Hiking Boots That Will Make Your Feet Smile

0

Enjoy Happy Trails, the free monthly newsletter from Hiking For Her.

Receive a free resource: Hiking Layering System Explained

If you’re hiking with wide feet, you know what I mean when I talk about smiling feet!

Smile, purr, send little heart emojis into the air, it’s all good when it comes to finally finding a pair of hiking boots that fit your wide feet.

So let’s get to it!

Just so you know, I recommend the brands and stores that deliver the goods. Some of my links go to trusted affiliates, meaning Hiking For Her earns a small percentage of your purchase price.

  • It costs you nothing extra to support this website while hiking with wide feet 😉

Best brands for hiking with wide feet

As a hiker, I have my personal favorites that I know work for my quirky ultra wide feet.

I also follow all the hiker chatter on line, so I learn about hiking boot brands reported to work well for hiker’s wide feet.

Although I try hard to give you reliable information, please be flexible with these recommendations.

Your wide feet are unique, and you will have to experiment with the brands I’m about to recommend.

Ready?

Here are my two lists of wide width hiking boot brands you should look at.

My personal listof hiking footwear that accommodate wide feet

These brands have been on my wide feet for decades:

  • Keen
  • Salomon
  • Zamberlan
  • Merrell

My researched list of wide width hiking boots that are reported to work well

These brands perform well for other hikers with wide feet, based on top selling statistics and trail reports:

  • Oboz
  • LaSportiva
  • Altra
  • Vasque

General tips for shopping for wide boots

Before you dig into particular brands, it’s important to realize that every outdoor brand becomes known for certain important features.

The brands of hiking footwear I’m sharing here have wide width options along with their other options, or are built with a wider toe box to begin with.

But beyond brand names, it is important to know exactly how to shop for wide width trailwear.

  • Drop down to my tips before you buy a pair.

And if this is your first pair of hiking boots, read my detailed tips for selecting the right pair here.

Now let’s take a tour of those brands!

Why Keen boots make hiking with wide feeta comfortable experience

Here’s the whole story in one diagram:

And here’s the boot you will find on my feet for day hikes on established trails, wearing a day pack.

119903
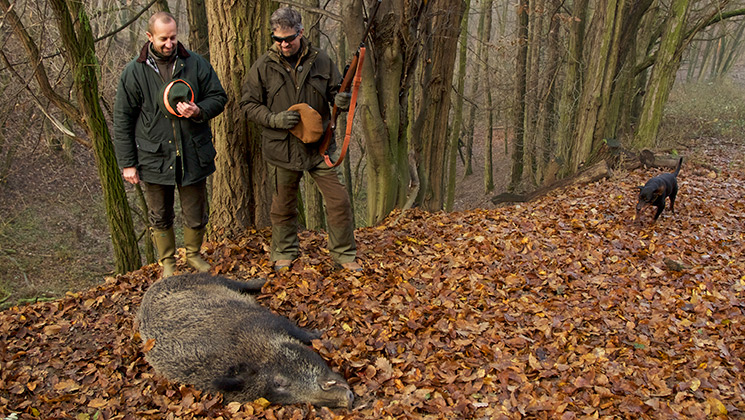
KEEN Targhee III Waterproof Mid Hiking Boots

You can read my detailed Targhee review here.

Salomon hiking boots if you arehiking with wide feet

These are the boots I use when I need good traction and ankle support, on day hikes as well as multiday trips.

187457Salomon X Ultra 4 Mid GORE-TEX Hiking Boots

Note that these boots have a high cut. If you don’t want your ankles surrounded and protected, consider these Salomon trail shoes instead.

They are what I wear for straightforward day hikes on non-rocky, dry to moderately muddy trails.

187460Salomon X Ultra 4 Low Hiking Shoes

Zamberlan hiking boots for wide feet

These boots are built for rugged use. And the price reflects that.

So only look at these if you’re going to be wearing them through tough conditions.

Zamberlans are on my feet when I do multiweek backcountry treks, because they stand up to water, rock, jagged trail debris, snakes, and more.

And while they are not labeled “wide width”, the toe box is plenty roomy for my wide feet.

They also receive rave reviews from hikers with toe problems, including hallux rigidus and arthritis.

128769Zamberlan Vioz GTX Hiking Boots

An important sizing note

I always go up one full size with this brand, to accommodate foot swelling and my two pairs of hiking socks.

In fact, the first time I bought a pair of Zamberlan hiking boots, I made the mistake of ordering my regular size. They were a bit snug :/

  • So if you’re going to use sole inserts, or are at all concerned that your regular size might be too snug, order up one size.

Merrell trailwear whenhiking with wide feet

These are the trail shoes I wear when I want to go fast and light, with minimal weight on my back.

They give good traction and are quite comfortable.

Ordering up a half size gives you a good chance that you will enjoy roominess, if you have any doubt.

Also, I only wear one pair of socks with them, and never get blisters.

202124Merrell Moab 3 Waterproof Hiking Shoes

Oboz hiking boots in wide widths

These boots seem to run a bit small, so be sure to order up a size, and make certain you select the wide option.

857721Oboz Bridger Mid Waterproof Hiking Boots

LaSportiva boots for wide feet

These boots are ankle protectors, so choose them for trails that will fling roots, rocks and debris at you.

And the tread will impress you.

As with many European brands, they can run a bit narrow. You know what to do if you’re hiking with wide feet!

183603La Sportiva Ultra Raptor II Mid GTX Hiking Boots

Altra Lone Peak boots

These boots feature a wide foot bed, nice and roomy for your toes. They call it the “Footshape toe bed”, designed to allow your toes to relax and spread out naturally.

They run up to a size 12.

217487Altra Lone Peak Hiker 2 Hiking Boots

Tips for shoppingfor wide width trail footwear

There are many brands which have given hikers with wide feet good outcomes. And now you’re familiar with some of them.

Here are a few general tips for shopping for wide width hiking boots, to make your choice a bit easier. You want to be hiking with wide feet and a wide smile on your face, right?

Hiking boot reviews are gold mines of information

As with buying any hiking gear, read the reviews and cross check user experiences before trusting your feet to any one brand.

Pay close attention to how reviewers describe their feet.

  • You want someone to mention a wide width.
  • And if you’re lucky, they will also mention their arch height.

If in doubt, go up in size

If you have feet that are just a tad bit wider than “normal”, you might not have to worry about sizing.

But if you have truly wide feet, and have struggled with sizing before, order up a size or at least a half size.

And pay attention when you look at the boot, either on line or in the store.

  • You want the “wide” version if the brand makes regular width as well.

Relax, it’s REI!

Because you are purchasing from REI Co-op, you can return the boots and try another size if they aren’t perfect the first time.

  • More REI benefits here

Be prepared!

I don’t recommend that you pop into a gear store on a whim to try on wide width boots or trail shoes.

Go at the end of your day when your feet are at their maximum size.

And bring your own hiking socks, so you can get an exact feel for how wide the boots run.

  • What’s that? You don’t use dedicated hiking socks? Read this!

If the lacing right out of the box seems weird on your feet, unlace them and try some other lacing techniques, like these.

Pro tip

Need insoles that fit wide hiking boots?

Embrace hiking with wide feet

Don’t let the width of your feet slow you down.

(Ha! A hobbit foot just flashed through my mind. Embrace the width!)

Take good care of your wide feet with my foot care tips for hikers.

BTW, If you’ve found other brands of footwear that makes hiking with wide feet a good experience for you, drop me a line here. I’ll add it to our list!

Home > Best Hiking Gear >

Hiking With Wide Feet: Best Hiking Boots

.45-70 vs .30-06: What Should a Big Game Hunter Prefer?

0

Both the .45-70 and the .30-06 are popular choices in the hunting community, especially among the large game hunters. But they also have a bunch of differences that set their performances apart.

These hard-hitting rounds work exceptionally well in close ranges, but as the range increases, the otherwise superior .45-70 loses accuracy and trajectory.

Today we’re making a head-to-head comparison between .45-70 vs .30-06 cartridges to help you find the best cartridge for you.

30-06 vs 45-70 Rounds: Head-to-Head Comparison

A Quick Look at the .45-70

The .45-70, AKA the “.45-70 gov/govt,” came out in the years following the American Civil War (1861-1865). These mighty cartridges were introduced by the U.S. Army’s Springfield Armory in 1873.

.45-70 rifle cartridge

They became widely known as the “forty-five seventy” among the U.S. troops and hunters. Aside from being one of the primary ammo for the military, these hard-hitting bullets are capable of taking down any large game animal that roams around North America.

A Quick Look at the .30-06

The compact .30-06 rounds also have a history with the military. Also known as the .30-03 Springfield, these rounds were patterned after the famous 7x57mm Mauser cartridge that was used during the Spanish-American War.

The .30-06s are 30-caliber, rimless, and centerfire rifle cartridges that fire 0.308” diameter bullets. They were used in the semi-auto M1 Garand and a scoped variant of the 1903 Springfield for long-range shooting.

.30-06 cartridge

Known as the American Military Powerhouse, the .30-06 rounds became vastly popular among civilians and are still today, after 100+ years after its invention in 1906. They served in both world wars.

Key Differences Between the 45-70 and 30-06 Cartridges

Cartridge Size

.45-70

When it comes to cartridge size, the 45 70, compared to the 30 06 bullets, are a bit wider and feature a shorter case length.

The case length is one of the only two aspects where the numbers speak for the .30-06. The .45-70 also features a straight-walled design.

.30-06

In spite of being inferior to the .45-70 in almost all aspects, the 30-06 surprisingly packs a much heavier punch than the .45-70 in terms of SAAMI spec maximum pressure.

The shorter and narrower rounds literally dwarf the .45-70 with more than twice the pressure.

Property45-7030-06Parent CasingN/A.30-03Base Diameter0.505”0.471”Neck Diameter0.480”0.340”Bullet Diameter0.458”0.308”Case Capacity81.8 gr68 grCase Length2.105”2.494”Overall Length2.550”3.34”Max Pressure (SAAMI)28,000 psi60,200 psi

Ballistic coefficient

.45-70

To put it bluntly, the ballistic coefficient shows how aerodynamic a bullet is. The higher the number is, the better your bullet will perform against the wind.

The .45-70 is at a slight disadvantage here. The bullet is heavier. Despite performing really well in the close and mid-range, the performance of .45-70 bullets goes down a bit in the long-range.

45-70 Ballistic coefficient

.30-06

The heavier bullets usually come with a higher BC count, but not in this case! The aerodynamic design helps the .30-06 dominate in BC count, even at long ranges.

Recoil

.45-70

The amount of recoil felt depends on the shooter, the ammunition, and the weapon used. Heavier rifles tend to soak up some of the recoil energy so that it puts smaller stress on your shoulder.

Being heavier and armed with more firepower, the .45-70 will impart significantly heavier recoil energy (around 33 ft lbs) into your shoulder.

.45-70 Recoil

.30-06

Both the .30-06 and the .45-70 come with a high recoil profile. However, the recoil energy from the .30-06 is notably less (around 23 ft-lbs) than the .45-70.

In fact, they were specifically designed to have less recoil energy than the popular hunting cartridges of that time, like the 45-70.

Trajectory

.45-70

Usually, the heavier a bullet is, the higher muzzle velocity it produces. As a result, the bullet gradually loses momentum, and gravity takes more time to pull the bullet downwards.

The 45-70 cartridges are heavier than the .30-06, producing a more steep trajectory. That is why the performance also drops significantly downrange. You’ll not get good results if you are shooting from 300+ yards.

.30-06

The lighter .30-06 absolutely dominates this category with a much flatter trajectory than the .45-70. That’s why they are one of the most widely used cartridges in mid-to-long-range hunting across the globe.

Accuracy

.45-70

Accuracy is subjective, meaning it greatly depends on the person shooting and the firearm used. These hard-hitting rounds can deliver bone-crushing power at close range but lose accuracy significantly at longer ranges.

.30-06

With a flatter trajectory, the .30-06 dominates long-range hunting. These compact rounds can maintain their supersonic speed for a little over 1000 yards before the gravity and sit resistance starts to affect the accuracy.

If you are hunting within a range of 200-300 yards, you’ll notice no significant differences in the accuracy between the .45-70 and the .30-06.

However, the contrast will become harder to ignore as the range increases.

Use

.45-70

The .45-70 was a superhero at its time. It was one of the most powerful cartridges in the late 1800s and was used by the army in the American Indian Wars.

Aside from that, these powerful cartridges are also super efficient in harvesting large games and responsible for nearly wiping out the American Buffalo. They can easily take down big games like moose, grizzly, and elk as long as the range is within 200 yards.

Ammo for hunting rifles

.30-06

The 30-06 combats the mighty .45-70 with its longer effective shooting range. They can deliver more than 1,000 ft-lbs of force even past 500 yards.

As a result, the .30-06 can effectively make a clean kill from a long distance.

Availability

.45-70

As I’ve already mentioned, the .45-70 bullets require more material and are larger in dimensions. That is one of the reasons that the .45-70 cartridges are a bit expensive.

You’ll need to spend around $2.75/round for practice ammo and $5/round or more for premium hunting loads.

Additionally, these rounds were designed to use with lever-action rifles. As a result, you’ll have fewer options when it comes to rifles. The Marlin 1895 is one of the best guide guns for the .45-70.

.30-06

30-06 Cartridges Availability

The 30-06 cartridges offer more variation to choose from in comparison with the .45-70. The .30-06 were military cartridges; thus, they are more widely available at a lower price.

They also offer a wider variety of bullet weight options (100gr-220gr) for small to large games. Standard .30-06 will cost about $1.50/round, whereas the premium loads will cost you double that amount.

Reloading

.45-70

The amount of available reload options in 45 70 compared to 30 06 is slightly lower. However, there are still plenty of loading options for hand loaders to choose from. As a result, the mighty .45-70 loses advantages despite offering a wide variety of customization.

.30-06

The compact .30-06 rounds take the lead with a far wider variety of options when it comes to custom reloading your bullets. Not only do they offer a common 0.308” diameter, but they also can utilize many different powders.

Reloading 30-06

They require a large rifle primer and 30-caliber bullets. As a result, you’ll be able to craft hand loads for 4+ different calibers while purchasing only one caliber of bullet and primer size.

.30-06 vs .45-70: Which one to choose?

.45-70 vs .30-06: Which one should you pick? The answer will vary from person to person.

The .45-70 compared to .30-06 is still relatively popular among those who hunt big game animals in heavy cover and black-powder silhouette shooters. The 45-70 cartridges have served for over a century.

In justification of being more expensive, the hard-hitting big game .45-70 rounds offer bone-crushing muzzle energy that can be lethal for any game within 300 yards. If you’re a fan of big game hunting and have no issues with the price or the recoil, go for the .45-70.

On the flip side, if you’re more into long-range hunting, we recommend that you grab the compact .30-06. The stopping power and the long-range capabilities of these versatile rounds will make your game hunting more dynamic in a number of different hunting scenarios.

Even many modern rounds don’t come close to the popularity and raw stopping power that the.30-06 provides. They literally can harvest every four-legged animal across the North American continent.

The .30-06 bullets are also more cost-efficient. If you value those qualities, the compact 30-06 rounds won’t disappoint you at all. In conclusion, when talking about .45-70 vs .30-06, remember that the .45-70 works best at close-to mid-range whereas the .30-08 is perfect for long-range shooting.

FAQs

1. .45-70 vs .30-06 – what’s more powerful?

Ans. “More powerful” is something hard to define when talking about ammo. In general, .30-06 is more effective for large distances since it’s faster and has more energy than .45-70.

However, at short ranges, the .45-70 is more powerful against large animals but past that, the .30-06 wins against conventional game.

2. How far can I shoot a deer with a .45-70?

Ans. With a .45-70, you can hunt any game animal under 100 yards but for deer and elk, you can go 200 yards if you’re a skilled hunter.

3. 45-70 or 30-06 for bear hunting?

Ans. Both are fine and what matters most is the range here. The .45-70’s heavier mass is helpful when you’ll face off an angry bear at close range. On the other hand, the .30-06 will have more advantage with more energy as the range increases.

4. What was the 45-70 designed for?

Ans. The 45-70 was originally designed as a military round for the U.S Army in 1873, during their campaign against Native Americans in the Western United States. Since its launch, it has proven to be an effective tool that can take down virtually any game animal.

5. How far can a 30-06 shoot?

Ans. The maximum effective range of a 30-06 is about 800 yards for a skilled shooter, although it can reach up to 1000 yards with the right barrel and ammunition. Beyond that, it will still have some stopping power when shot at its maximum range, but accuracy will be severely affected.

Snow Geese Hunting Without Decoys: 8 Tips for Getting Geese Without Help

0

Why Hunt Snow Geese without Decoys?

There are many good reasons to hunt snow geese without decoys, and there are several situations where you might have to. For example, if they are moving around in one big group, if you don’t have access to the field they are feeding in, or if you have limited hunting time, it may make more sense to set up a quick pass shoot rather than to decoy the birds.

There may be other practical reasons: if snow geese are destroying wheat crops, which could lead to ecological imbalance, or if you’re attempting to harvest as many snow geese as possible because their population is too high. Whether the reasons are practical or necessary, there are several effective ways to harvest snow geese, such as pass shooting, using a cow board, or sneaking. These eight essential snow geese hunting tips can save you money by helping you hunt without decoys.

8 Tips for Hunting Snow Geese Without Decoys

Find Exact Location

The most important variable in hunting snow geese is location. Considerable effort is required to scout them and understand their migratory patterns to locate their feeding, watering, and roosting areas, as they can migrate a remarkable distance within a short period of time.

Therefore, time is of the essence, and scouting will help you make the best use of the time you have. The more critical time is, the less time you can attribute to setting up decoys. Time is better spent making sure you know the exact location of the geese than trying to lure them somewhere.

Take Cover

When scouting, you should also be thinking of spots to conceal yourself effectively. Hide among the trees and woodland in the areas geese land to feed so they can’t see you and refrain from moving as much as possible to not startle them.

Fence lines can also give you some cover to hide. You can also try lying down in weeds in a field and using the ground as camouflage. Don’t startle the geese by jumping the gun. You’ll probably have to lay still for a while, so be patient.

Clothing

When it comes to blending in, you’ll want to wear appropriate clothing that matches the natural background. Wear the colors of the area you’ve scouted and find a comfortable position. There are also many professional layout blinds available designed specifically for hunting geese that you can choose from.

Pass Shooting

Now that you’ve done the basics, it’s time to consider various methods of hunting snow geese without decoys. Pass shooting is among the most popular and obvious. It is a relatively inexpensive method that allows the Geese to pass by an area you have already scouted.

After they arrive, target one or two geese in one group and shoot once or twice when they’re in range while the other group is further away. It’s critical that the second group maintains its usual patterns, so be sparing at first. This will help to increase the number of snow geese you can bag.

Use a Cow Board

Instead of decoys, you can use a cow board, which may seem a bit odd at first but is inexpensive and gives the geese the impression that they’re landing in a normal field devoid of humans. You will need to be a quick shot, however, as you’ll need to move it realistically so the geese don’t understand it’s fake, and be ready to shoot when a bird is in range within about 50 yards.

Sneaking

Sneaking takes some practice but is another effective method once you know how to do it. Naturally, sneaking works best during high harvest in the late season where you can hide more easily, and again you should take pains not to move too much by crawling slowly and making as little noise as possible. Target the geese at the edge of the flock closest to you, and shoot when you feel like you are close but not yet noticed.

Jump Hunting

Jump hunting involves traveling around and looking for flocks of snow geese already feeding in fields. If you have the requisite permission to hunt in the area, you can use the element of surprise to sprint out into the field and shoot as many of them as possible before they get away. First, though, you’ll want to get as close to them as possible by using the stealth methods described above.

Capture Their Attention

You can simulate geese calls from your hiding place, either by training your voice to emit sounds like theirs or, probably more easily, by using pre-recorded sounds and an amplification device. In your scouting and study of snow geese patterns, learn a comprehensive range of geese sounds.

For example, they cluck when they are excited, murmur when they are looking to feed, and honk when they are relaxed. So make calls, or use recordings, that correspond to where you need them to be: cluck when they are at a distance, and murmur when they are heading in your direction.

A Successful Snow Geese Hunt Without Decoys

You can use a combination of any of the methods above, or all of them, for a successful snow geese hunt, though some, such as capturing their attention, will take more practice than others.

Some of the tips are inexorable: you will not be able to bag snow geese without doing the necessary scouting and concealing yourself adequately before discharging your weapon.

The Benefits of Snow Geese Hunting without Decoys

Not using decoys when snow geese hunting is straightforward and easy to learn and can also result in good fun. If you want to save money, save time, or have a reason to eliminate snow geese as quickly as possible, you can easily circumvent the need to use decoys. All it takes is a little practice and patience.

You can also check:

Great Benefits of Hunting Activity

Air Rifles for Small Game (Buying Guide)

How to Start Hunting

Tips to Keep Your Feet Warm During Hunting (Read Article)

Eating Trout Raw: Guidelines for Freshwater Sushi Enthusiasts

0

If you’re an avid trout fisherman, you’ve probably wondered if you can eat trout raw. Saltwater fishermen talk all the time about catching Spanish mackerel or tuna and eating right on the boat. But saltwater fish and freshwater fish live in very different environments. So can you eat trout raw?

The quick answer is that yes, you can eat trout raw if you’re desperate – but otherwise, you should not. It’s not recommended and could be bad for your health. Freshwater fish (including trout) have a higher chance of carrying parasites that could harm you.

On the other hand, saltwater fish are less likely to have harmful parasites in them – and are safer to eat raw. But even then you can still get very ill from eating any type of raw fish.

But what are your other options then? What are the best ways to prepare trout if you’re camping and if you do have to eat trout raw (like if you’re trying to survive without a fire), how would you go about doing it as safely possible?

We’ll answer all these questions and more in this article. Let’s get to it!

Why Can’t You Eat Trout Raw?

raw rainbow trout fillets

Before we get into what you should do if you absolutely have to eat trout raw as well as ways to prepare trout you’ve just caught, let’s go into a bit more detail as to why you cannot eat trout raw.

Author Note: With any raw fish, you run the risk of picking up any parasites that might be living in its meat. These parasites could be tapeworms, lung fluke, or other digestive bugs that will cause you serious harm if transferred to your digestive system.

As we mentioned earlier, saltwater fish don’t have nearly as many parasites that survive in human bodies and are there for less risky to ingest raw. That being said, health experts recommend you freeze all raw fish (saltwater included) at -4 degrees Fahrenheit for at least 7 days to kill any parasites that might be living in them.

This is the standard that sushi restaurants live by and applies to all raw fish.

Can Trout Be Eaten as Sashimi?

Sashimi is small pieces of raw fish – so aligning with our previous answer, you should not eat trout as sashimi. It’s still raw and can harm you for all the same reasons you shouldn’t eat trout raw.

Just because it has a fancy name does not make it any different from eating plain raw trout!

What to Do If You Have to Eat Trout Raw

Now that you know you should not be eating trout raw unless you need to to survive, let’s go over the things you try and do before eating it. It’s worth noting that we are NOT medical experts so if you do take our advice we are not liable for your health.

The first thing you should do is make absolutely sure you have no way to start a fire to cook the trout. Can you use friction to start a fire with two sticks?

Do you have a lighter somewhere on you or someone in your party that you may have forgotten about? Be absolutely sure you can not start a fire before proceeding.

After you’ve checked that, you should focus on cleaning the fish properly and quickly. You’ll want to eat the trout as quickly as possible after you catch it to ensure it doesn’t go bad.

The longer you wait after it is dead the more time bacteria have to grow on it and cause you harm.

How to Clean a Trout

Fresh trout

Once you’ve caught a trout (maybe with a bobber setup or using a stick to spearfish) that you want to eat, you should immediately cut its gills to let it bleed out.

This will preserve the flavor of the meat and remove some of the stronger flavors in the blood.

Author Note: After cutting the gills you should clean it as soon as possible. Here’s how to clean a trout. The process is similar for all species of trout, whether it’s a rainbow trout, cutthroat trout, or lake trout.

Instructions

  1. The first step in cleaning the trout is to make sure you have a sharp knife. Considering you’re in survival mode, even a pocket knife will work fine. If you don’t have a knife. We recommend finding a sharp rock and trying to follow these steps.
  2. Begin by cutting down the trout’s belly starting from the anal fins up to the pelvic fins and the beginning of the collar. We like resting the fish on a big rock to get leverage.
  3. Next, reach up inside the trout and pull out the innards. You may need to use both hands to pull them loose if they are stuck to the rib cage.
  4. Wash away the blood and extra gut from your rock then cut through the collar and remove the head.
  5. Next, it’s time to cut out your fillets. Make a cut across the end of the tail on both sides. Then connect the cut your already made on the belly to the end of the tail.
  6. Make a cut from the top of the backbone starting at the collar and going all the way down to the tail. Move your blade all the way down the spine while cutting through the skeletal bones.
  7. You can then use your knife to cut away the fillet from the collar of the trout.
  8. The last step is to remove as many of the pin bones as you can with your fingernails. This step can be time-consuming but will give you bone-free fish.
  9. The last step is to inspect the meat for any visible parasites or worms. They should be relatively obvious. If you see something weird, don’t eat that part of the fish or try and catch another one.

How to Cook Trout Properly

Luckily you will find yourself in this situation instead of the above. You’ve caught a trout while camping and you are ready to prepare it over a fire! This is a much safer option than eating trout raw. Let’s go over how to cook trout properly while camping.

Instructions

  1. First, you should follow the above steps we laid out for cleaning the trout properly. This will ensure you avoid eating bones (which can be dangerous) and will make the trout taste better. Bleed the fish first then remove the guts. If you brought any seasoning with you (salt, pepper, etc.) this is when you should add it.
  2. After cleaning the raw trout, find a long thin stick with a tip you can sharpen with your knife. This is going to be the skewer that you will use to hold the trout fillets over your campfire.
  3. Slide each filet onto the stick. If you don’t have enough room on your stick, you should find another stick and sharpen it so you have two skewers. Make sure the skewer holds the filet flat and maximizes its surface area. This will help the fish cook quickly and evenly.
  4. Once you build your fire, wait until the big flames have died down. This is the most common mistake when cooking trout while camping – you don’t want to cook it over open flames! You can, but it will impart a bad tasting charcoal flavor from the smoke.
  5. Once the big flames have died out, push the logs apart so the coals are exposed. This is where you are going to cook your trout.
  6. Hold the trout filets over the coals to cook them. You should start smelling cooked fish. Pay attention to the surface of the meat as well – you don’t want it turning black or burning.
  7. The best way to tell if the trout is done is to feel it. If it is firm like the muscle of your thumb and index finger, it’s done.

What Kind of Trout Tastes Best?

Fresh raw trout

Author Note: We also get this question all the time, and the answer is that it depends on your personal preference! Smaller species of trout like rainbow trout and brook trout tend to have firmer meat – like bass or pike. They also tend to taste like perch or other small predatory fish.

Larger species like lake trout tend to be softer and oilier. This is because they don’t have to work as hard to find food and have a higher fat percentage in their meat. If it was up to us, we would eat rainbow trout and steelhead the most.

We think they have the best texter and a mild flavor that tastes great with very little seasoning. Steelhead are a unique type of trout in that they can be caught year-round – even in the winter.

But if you’re in survival mode and purely eating the trout because you need sustenance, you probably won’t care what kind it is or what it tastes like. Hopefully, you don’t find yourself in that situation!

Parting Thoughts

We’ve been camping many times, and inevitably someone asks can you eat trout raw? It might be tempting at first – how much more fresh could the fish get? But as you now know eating trout raw can be dangerous to your health and should be avoided at all costs.

If you do have to eat trout raw, you should make sure to clean it properly first. Hopefully, you’ll have the resources to start a fire and avoid eating it raw.

We hope you found this article useful and informative. If you have additional comments or thoughts about eating trout raw, feel free to shoot us a note in the comments below.

Happy Hunting!

Baby Blues: It’s Snapper Time!

0
2018 8 Its Snapper Time Child
Snapper blues are just about the perfect saltwater species to introduce new anglers to the exciting sport of fishing. (Photo by Toby Lapinski)

When I think of snapper blues I think of my youth. Countless memorable days in late August, sunburned shoulders, casting from a jetty in Madison, CT near my grandparents’ house. There was no 10-fish limit back then, and a bucket full of snappers fed the family fried-fish dinners for several nights. Today, the same excitement still thrills me when I feel one tugging on my spinning gear, fighting like a fish twice its size. Tigers cloaked in kitten bodies.

I’ve met anglers who believe snapper blues are their own species, and those folks were surprised to learn that “snappers” are simply baby bluefish. Anyone familiar with juvenile blues knows the name comes from the fast and fierce snapping of the jaws, which can inflict an impressive finger wound from even the smallest fish.

Snappers are young-of-the year bluefish, which become a “catchable” size of about 5 inches long when they invade our waters in late July and early August. They eat and grow at a remarkable rate, sometimes approaching nearly an inch per week. Late-season snappers reach at least 10 inches long before they migrate south in September, and are formidable opponents on a light outfit. They’ll strike at any lure smaller than themselves, making them a great target for young or beginner anglers and anyone looking for fishing fun on the saltwater.

Snapper Appeal and Locations

“When you find a school of snapper blues,” said Elliott Taylor, a snapper expert with 20 years’ experience in both CT and RI waters, “the bite can last all day, and you don’t need any special tackle to catch a limit. You don’t have to be a saltwater angler to get into snappers [although a saltwater license is necessary to target and/or harvest them], a lightweight freshwater rod will suffice, making these fish accessible to people of all ages and skill levels. Snappers, however, are not hardy fish—many don’t survive the catch-and-release process—so it’s best to have a plan for your catch, and stick to the limit only.

“You can find snappers close to shore, in estuaries and near structure like rock piles, docks and jetties where they chase bait like silversides, mummichogs and grass shrimp. Breachways and mini rip lines near shore often hold snapper blues, and nearshore tern activity is a great indicator the fish are there. Fleeing baitfish and small surface breaks are other exciting giveaways.”

2018 8 Its Snapper Time Catch
Whether they’re sought for food, sport or bait, snapper blues make great summer targets.

Technique

The easiest technique for catching snappers is to fish a small metal lure. Using this method, you cast—from either shore or a boat—as far as you can and then slowly reel in. Small tin lures are designed to tumble and flash, imitating a wounded or escaping baitfish, which draws any snappers within sight. Snapper pros experiment with different retrieve speeds to see what works best on a given day—faster speed keeps the lure near the surface, and slower speed allows it to sink a bit. Generally, try to keep the lure about 2 feet below the surface with your rod tip near the water.

An advanced technique is to work a flat metal rapidly across the surface with your rod tip held high, which causes the lure to travel along the top like a jumping baitfish—the same concept as working a big surface plug for adult bluefish. The trick is to reel it as slowly as possible while keeping the lure skimming the surface. The commotion triggers aggressive strikes, and it’s fun to see the hits on top.

Despite their reputation as voracious feeders, bluefish of all sizes are sometimes fussy. Bait is often the answer when small blues hesitate striking tin lures. If you’re only stocked with lures, try dicing a silverside into tiny chunks and use a piece to sweeten the treble hook on your metal.

Other snapper experts are diehard bait anglers, which means using a snapper rig—purchased from a tackle shop or home tied—consisting of a small hook threaded with shiners and bobber or “snapper popper.” Set the popper to hold the bait about 18 to 24 inches below the surface. Cast your line a little way out from the dock or jetty and wait. Some anglers try to cast as far as they can, but that’s unnecessary with bait and may cause a soft bait to tear from the hook. Like fishing for freshwater panfish, when you see the popper dip below the water you know a snapper is biting.

“Gently but erratically retrieving snapper poppers will attract fish that are spread out,” said Taylor, “as will using small, freshwater, surface-popper lures with the first treble hook removed. In areas with a large concentration of fish, a very small tin such as a Kastmaster, Hopkins or Deadly Dick is most efficient.”

Tackle

An inexpensive, light and durable 5- to 7-foot, small spinning outfit and assortment of small metal lures are perfect for quickly loading up a limit on snappers. You can add to the fun and challenge by bringing along a small fly rod.

“I use ultralight tackle,” said Taylor, “like a 6-foot 6-inch Ugly Stik Intercoastal and small reel spooled with 10-pound mono finished with a short 20-pound fluoro leader. But slightly heavier saltwater rods to 8 feet will also work, especially if you’re expecting any type of larger fish mixed-in. Long casts and intermittent twitches during a quick retrieve with a 1/8-ounce silver Kastmaster from any craft, including a kayak or SUP, attracts plenty of attention from the ever-present summertime snappers. You can move up to a 1/4-ounce for bigger snappers later in the season. Four- to 5-weight fly rods are also an absolute riot for snapper blues using a minnow imitation or bucktail retrieved quickly.”

Snappers for Bait

In the absence of traditional baitfish like porgies or bunker, snapper blues make good baits for slammer bluefish and even striped bass, but the main use for snappers as bait is for late-season doormat fluke. Keeping within the 10-fish limit, you can fish snappers either dead or alive, and there are several approaches when doing so. Some pros rig the snapper in the same manner you’d rig a shiner for largemouth-bass—from the bottom lip through the top, typically off a traditional fluke rig, either with a fluke bomb or off a three-way swivel.

To fish the fluke bomb, start with a barrel swivel attached to a 3-foot section of 30-pound fluorocarbon leader. Tie in a 6-inch dropper loop at the mid-point of the leader, and attach a large, flashy teaser. At the end of the leader, attach a snap swivel to clip on a fluke ball heavy enough to hold bottom. Cut a second 3-foot length of 30-pound fluoro, and attach it to the 9 o’clock position on the fluke ball with another snap. Tie in a 5/0 Gamakatsu live-bait hook for your main bait at the trailing end of the leader. This rig works equally well with live or dead snappers.

To fish a snapper live, some people prefer to place the hook in the back, just in front of the dorsal fin. You can also hook them through the nostrils. They can stay alive this way for a length of time. If the snapper is dead, however, don’t fish them with the flared gill covers and bent up head, typical of their rigor mortis position, because they spin in the current. If that condition happens, cut off both gill covers and bend the body straight. Sewing the mouth shut helps, too.

Other fluke pros “butterfly” the snapper bait by running a fillet knife from the tail up close to the head on both sides of the spine. Some experts then remove the spine for an unobstructed flutter action.

2018 8 Its Snapper Time Fish
While an array of lures and bait will produce snapper blues, tried-and-true “tins” like a Kastmaster or Hopkins is tough to beat.

Snappers in the Skillet

Many people don’t like eating bluefish, and therefore won’t eat snappers. But snappers don’t have the same dark meat and strong taste as adult blues. Their flesh is light and finely textured.

“They are great in the frying pan,” said Taylor, “just remove the head by making a diagonal cut behind the gill covers, cutting through the backbone. Gut the fish by pulling the head down, removing it from the body along with the entrails. Season to your liking with salt, pepper and oregano, and fry on medium heat until golden brown.” You then simply and easily eat the fillet off the backbone as you would a small trout.

The Elusive Striper

“These juvenile bluefish,” said Taylor, “also work great as live bait for large striped bass. When I was 10 years old, I was out in our Merrimac canoe with my father near a rock pile on Quonny Pond in Westerly, RI. We watched pods of bait swirling with packs of snapper blues meticulously corralling and devouring the peanut bunker and shiners. We were casting small Kastmasters and slowly filling our two-person limit for dinner. Suddenly, a large striper erupted inches from the boat, startling us, and taking a mouthful of bait and snappers with it. Frantically, we casted hoping to catch the bass, but to no avail. Since then, I have landed several 15- to 35-pound stripers using snapper blues.

“Catching your bait can be just as fun as catching your target species. Snapper fishing is consistently fast-paced, making it a quick cure for the fishing bug when other fisheries are slow in late summer.”

Scope Magnification for 1,000 Yards: What You Need to Know

0

One thousand yards is considered to be a long-range distance for shooters, whether you’re hunting or target shooting. Therefore, for the best hunting experience, you need a long-range rifle scope that will provide you with the best image quality and top accuracy. A magnification range plays a big part in that, so it’s important to know the best magnification for a 1000-yard scope so you can shoot long range. Keep reading to find out what it is.

Scope Magnification for 1,000 Yards: The Basics

When people think of extremely high magnification scopes, they think of Spotting Scope vs Telescope. The human eye can only see so far, which is why a high magnification range is a must for any long-range shooting. If you regularly partake in long-range hunting to catch animals that are easily startled, you need to choose a rifle scope with enough magnification for targets up to 1,000 yards.

The best scope magnification for 1,000 yards makes your target seem like it’s no more than 100 yards away, which can be done with about 10x magnification. This provides you with a major advantage that will see your shooting success rate at long range skyrocket. However, you won’t always need a magnification of 10x, which you should keep in mind when choosing the Best Spotting Scope for 1000 Yards for you.

Scope Magnification for 1,000 Yards: How to Choose

picture of best scope for 1000 yards

It may be tempting to choose a scope that has a higher magnification range, especially if you go long-range shooting often. However, you have to have a thorough understanding of your hunting habits in order to validate that this is the right choice for you.

When in doubt, go with a rifle scope that provides you with more flexibility as to not limit you on your hunting trips, like a 4-16×50 rifle scope. A scope with variable magnification is the best choice to provide you with that versatility, refine your skills, and help you make the most out of your hunting trips.

Chances are you will occasionally need to catch a target that’s closer than the 1,000-yard range. In fact, this may happen more often than catching targets at 1,000 yards. This is why you don’t want to choose a rifle scope with a starting magnification that’s too high. Staying within a starting magnification of 4x to 6x is a safe bet. For the best results, choose a rifle scope with a magnification of 6x-24x or 5x-30x to give you enough options out on the field. If 1,000 yards is too extreme, check out Best Scope Magnification for 500 Yards. There is a scope that fits everyone’s needs!

Other Things to Consider for Scopes for 1,000 Yards

Magnification is one of the most important factors to consider when choosing the right scope. It’s more important for longer-range shooting than for shorter distances that may not need as much magnification. Obviously you wouldn’t use a 4×32 scope range for long distance shots!

Although magnification is up there in terms of factors that affect long-range shooting, there are several other factors that you should consider when purchasing a scope for 1,000 yards. These factors include:

  • Reticles and reticle adjustment
  • Quality of the glass (including clarity, brightness, and color)
  • Field of view (FOV)
  • Durability of the body

Scope Magnification for 1,000 Yards – Vortex Viper HST 6-24×50 Rifle Scope

If you’re looking for a high-quality rifle scope for the 1,000-yard range, look no further than the Vortex Viper HST 6-24×50 Rifle Scope.

With a magnification of 6x-24x, the Vortex Optics Viper is great for accurate holds at a long range. The 4x zoom provides versatility and provides a lot of scope adjustability. The side-focus parallax adjustment provides solid image focus and parallax removal. Use the fast focus eyepiece to quickly adjust the reticle to your eye and find your target.

This optic also features premium, multi-coated, extra-low dispersion lenses for excellent resolution and prime color fidelity. You’ll also find exposed turrets, styled like targets, for repeatable and precise finger-adjustable clicks. In all, this is a top choice from Vortex for a scope for 1,000 yards that will deliver results.

Frequently Asked Questions

Conclusion

Long-range shooting extends the possibilities of your hunting trip and allows you to hit targets that would be impossible to strike at shorter distances. Therefore, it’s worth investing in scope magnification for 1,000 yards to give you the best chance of hitting all of your targets. Hopefully, this article has given you an idea of whether a scope for 1,000 yards is right for you.

What is a Grub? – Lawn Pests & Fishing Bait

0

Everyone has seen them, perhaps not knowing them by name. Gardeners despise them, but kids love them. Found under lawns, rocks, and dirt, fishermen have long turned to them for bait. They look like short thick worms, but exactly what is a grub?

Feast your eyes on the following run down about everything grub related. Find out what they are, where they come from, where they are found, and most importantly how they can be used to catch fish!

Appearance – Life Cycle – and Common Characteristics of Grubs

The definition of a grub in laymen’s terms is the larva stage (or worm stage) of a beetle. When a beetle hatches from its egg it is first a grub, or beetle larva. Beetles come in all shapes, sizes, and colors. They also come this way while in their larval form giving quite a variety to theirWhat is a grub 
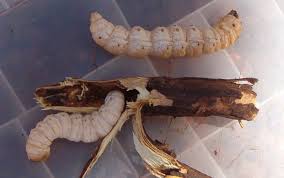
appearance. Common grubs are white grubs which are know to be quite devastating to lawns. Other grubs might not be so conspicuous, but they can all work wonders triggering a fish to bite.

Most grubs look like short and hairless caterpillars, but they like to live under ground. Grubs often curl up when exposed making a kind of C shape. They vary in terms of lifespan, but many grubs can spend several years before the metamorphosis to a beetle takes place. They can be found in almost every area of the world. Grubs prefer soft, damp dirt and can be found under grass, rocks, dirt, old stumps, fallen trees, etc.

Grubs from a Fisherman’s View Point

While the gardener is trying to kill these pests and keep them from destroying his lawn or crop, thefisherman sees them as the next best thing to night crawlers. Yes it’s no big secret I guess that a lot of fish like to eat worms, and grubs are basically that. They’re close enough it seems, because fish don’t seem to make much of a distinction.

When it comes to fishing with grubs, there are two different classifications an angler should be aware of. The first and less common is fishing with live grubs. You won’t hear as much about this, but fish don’t care what info is out there. They’ll eat them with pleasure. The second is all about fishing with plastic lures. Specifically what’s known as grub lures. You’ll often hear single or double tailed grub associated with these kinds of plastics. They work as well or better than live grubs. Getting a start using grubs for fishing takes nothing more than an affordable spinning rod an reel combo.

Fishing with Live Grubs

Live grubs will work to catch any kind of fish that forages for worms and insects as a food source. You can use grubs as bait by employing almost any set up you like. Bobbers, fly line, or the Carolina rig are all good techniques to use. Many grub larva will pop when you pierce them, so hook them once in and back out to keep them set.

This kind of fishing will require place casting to a spot you either see fish, or believe is holding fish. Sit back and wait for a bite. Give it some time, then move and try a different area if you don’t see action.

Fishing with Artificial Grubs

Fishing with artificial grubs is also known as fishing plastics. The grub lure really doesn’t look that much like a live grub. The lures are made with tails that give a spinning look by curling as they are propelled through the water. I believe it’s this spinning effect that draws strikes.

One thing I love about artificial grub fishing is that I’m never standing around. I do a lot of casting and usually get to pull on some fish, but I’m never lazy. Another feature of fishing a plastic grub is the ability to catch predatory fish that believe it’s something swimming through the water. I get halibut and spotted bay bass that would be much less likely to eat a live grub. Trout and fresh water bass have no problem eating a live or a plastic grub.

What is a Grub Going to Catch?

There will be a distinction between species of fish you catch depending on whether you’re using live or artificial grubs. This will be the same in either fresh or saltwater bodies that provide habitat for multiple species of fish. The difference between the two lies mostly in how the fisherman is able to present them to the fish.

Using live bait mostly requires that you use weight to get your bait out when casting, and into a desired location. It then sinks to the bottom where it lays in wait for foraging fish to swim by. Now it’s not to say that larger predatory fish don’t forage at times because they do. This can often be a result of seasonal behavior. You will tend to catch foraging types of fish more often than not with this kind of technique.

When you’re fishing an artificial grub as a lure, you will tend to get more reactionary strikes. This means you will catch fish that are more predatory in nature. They’re used to having only a second to decide whether to attack or not. The spinning tail of the artificial grub is especially suited for reaction strikes. You can slowly bounce it off the bottom, or swim it at any speed desired. The tail works effortlessly either way, and drives fish mad.

Wrapping up the Grub

Any landscape artist or gardener has surely come across these pests in their everyday work. They’ve mentioned them in bellyaching conversation and been asked in return, What is a grub? It’s quite interesting that the same critters that give these professional tradesmen so much grief can be valued by fishermen. I do hope you’ve enjoyed the bit of info provided, and I suppose the moral of the story is to get those grubs out of your lawn and into the water.

Guide to Buying Your First Rifle

0

guide to buying your first rifle

Arguably, rifles are harder to shoot (and harder to shop for) than pistols and shotguns. Out to a certain distance, rifle shooting is pretty straightforward, but long-range shooting might be the most difficult kind of shooting there is. What’s more, you’ll often see many kinds of scopes and attachments on rifles. Do you need any of that stuff? How do you know if you do?

Buying your first rifle doesn’t have to be hard or confusing, as long as you ask the right questions and follow the right steps.

Why Do You Want a Rifle?

Why Do You Want a Rifle?

Most people buy rifles for one of three reasons: hunting, home defense or sport shooting. Most rifles are designed primarily for one of these three purposes, although some can fill multiple roles fairly well. For your first rifle, we recommend focusing on just one of these applications — whichever is most important to you. Later in this guide, we’ll offer some tips on how to choose the best rifle for your specific needs. If you’re more interested in a different kind of firearm, we have a guide to buying your first handgun and a guide to buying your first shotgun, too.

Know the Law

Under federal law, you must be at least 18 to purchase a rifle from a gun shop or licensed firearm dealer. Most states have the same requirement, but in some places, the minimum age may be higher. Be sure that you understand the law before attempting to purchase a firearm.

Other legal requirements apply. To purchase a rifle, you must:

  • Not have any past criminal convictions, with certain limited exceptions

  • Not have undergone treatment for drug or alcohol addiction within the last five years

  • Not suffer from any disease or mental illness that could impair your judgment

  • Be a U.S. citizen or legal immigrant

  • Obey all other state and county laws in your place of residence

If you need help finding or understanding your local firearm laws, contact the police department or sheriff’s office. They’ll be happy to help you fill in the blanks.

Types and Parts of Rifles

Types and Parts of Rifles

Before you buy your first rifle, you should have a basic understanding of the vocabulary of firearms, as well as the types of rifles and how they work. We won’t cover everything there is to know about rifles here, just the fundamentals. You can find a more detailed breakdown in our guide to identifying the parts and functions of a rifle.

  • Rifle bullets are measured by caliber, which describes the diameter of the bullet in either inches or millimeters. Generally, you can assume that the measurement is in inches if it doesn’t have a “mm” specification, as in “7mm.” Larger bullets typically travel faster, hit harder, and inflict more damage, but depending on your needs, that may not be the ideal outcome.

  • The barrel is the part of the rifle through which bullets travel after being fired. The end of the barrel (from which bullets exit) is called the muzzle, and the end closest to the shooter is called the breech or chamber.

  • Depending on the type of rifle, bullets (also called “rounds”) are loaded into a detachable magazine, a tube magazine, or directly into the chamber by hand.

    • A magazine is a container that feeds bullets into the chamber, usually by means of a spring. Detachable magazines, as the name suggests, can be separated from the gun entirely. Tube magazines, on the other hand, are integrated into the rifle itself.
  • The bolt is a heavy, cylindrical part driven by a spring or operated by hand. Its function is to push bullets out of the magazine and into the chamber.

  • The charging handle, if present, enables the shooter to manually retract the bolt, and the bolt release allows it to return to its normal forward position.

  • The stock rests against the shooter’s shoulder to provide support and stability.

  • The trigger actuates the firing pin when pulled. The firing pin, in turn, strikes the primer of the bullet currently loaded into the chamber, igniting the gunpowder and causing the rifle to fire.

Action Type

Action Type

There are many different rifle action types, but in most cases, the differences are negligible from the user’s perspective. For simplicity, we’ll go over semi-automatic rifles (a broad category), bolt-action rifles, and lever-action (or pump-action) rifles.

The majority of rifles owned and sold today are semi-automatic. These rifles use detachable or integrated magazines and fire one round with each pull of the trigger, with no further action required from the shooter. Many novice shooters prefer semi-automatic rifles for their simplicity and ease of use, although they’re typically more expensive.

Bolt-action rifles are close behind semi-automatic models in popularity. They may use detachable or integrated magazines, or they may require rounds to be loaded directly into the chamber by hand. After firing, the shooter must manually retract the bolt to eject the empty casing, then close it to chamber a new round. Bolt-action models are easy to use and often cheaper than semi-automatic rifles, making them another great choice for your first rifle.

Today, lever-action and pump-action rifles aren’t very common, but they’re still popular with certain kinds of shooters. Both have integrated, tubular magazines similar to those found on many shotguns. Shooters load rounds into the magazine individually, then chamber rounds by actuating the forearm or lever mechanism. Some shooters prefer inexpensive, pump-action rifles chambered in small calibers, such as .22LR, for target practice or varmint control.

Caliber Selection

Caliber Selection

When you’re ready to start shopping for your first rifle, we recommend choosing a caliber or range of calibers first, based primarily on the role you most want the rifle to fill.

There’s no official consensus on where the dividing lines are between small, medium, and large rifle calibers, but there are some especially common and popular calibers within each group.

  • Popular small calibers include .22 LR, .22 WMR and .17 Hornet

  • Popular medium calibers include .223/5.56, 7.62x39mm and 6.5mm

  • Popular large calibers include 30-06, .308, and .50 BMG

If you plan to go hunting, caliber selection depends on what you want to hunt; you’ll need bigger bullets for bigger game. Sport and recreational shooters also choose calibers based on the particular sport. Different events call for different calibers, and there’s a lot of variance. Home-defense rifles should generally be medium-caliber, but overpenetration may be a major concern; we’ll cover this in more detail toward the end of this guide.

Carrying or Transporting Rifles in Public

Carrying or Transporting Rifles in Public

In most states, it’s legal and fairly straightforward to transport long guns in your vehicle. Keep them in a case and unloaded to be safe. You can also check cased guns as baggage when you fly domestically—just make sure you comply with all TSA and airline-specific regulations.

It’s also legal to drive through firearm-unfriendly states with guns in your car, as long as you comply with all provisions of the Firearm Owners’ Protection Act (FOPA). For more information, check out our guide to traveling with guns.

Other Considerations

Safety

Safety

Most modern rifles have external safety mechanisms that must be toggled off before the rifle will fire. Be sure to familiarize yourself with the safety mechanism of any rifle before you buy it, as there are many different kinds. Always follow the four rules of gun safety, and if you have kids, make an airtight plan for keeping your guns out of their hands (our gun safety guide for parents is a good start).

Reliability

Reliability

In the context of firearms, a gun is reliable if it consistently fires when it’s supposed to (and never fires when it’s not supposed to). Most modern rifles are highly reliable, but be sure to emphasize this point in your research.

Capacity

Capacity

Magazine-fed rifles typically hold between five and thirty rounds. In general, a bigger magazine is better, but some states have implemented legal restrictions on magazine capacity, so make sure you know the law. There are also some situations wherein you may want or need a smaller magazine — more about that in the next section.

Size, Length and Weight

Size, Length and Weight

A rifle’s overall size, weight and caliber are three of the biggest variables that determine how easy or hard it is to fire it. In particular, smaller shooters will find it more difficult and uncomfortable to fire large, high-caliber rifles.

Pay special attention to a rifle’s length and weight if you plan to install any firearm attachments, such as scopes, bipods or extended magazines. It’s easy to get carried away with attachments, too many of which can make a rifle too bulky and awkward to use effectively.

Price

Price

Guns are expensive, and high-quality guns are really expensive. Even so, we don’t recommend looking for the cheapest rifle you can find. Cheap rifles are more likely to be poorly designed or manufactured, either of which can lead to safety or reliability problems. There’s nothing wrong with shopping around for a good deal, but in our experience, it’s best to spend a little more on a well-made gun that you can count on for a lifetime.

Accessories

Accessories

New shooters should buy only those accessories that are truly essential for the rifle’s intended purpose. For example, if you want to hunt deer or compete in long-range shooting sports, a decent or high-end scope is virtually mandatory. A sling and a hard-sided case are good investments for any rifle shooter.

Ease of Use

Ease of Use

There is such a thing as “too much gun.” If you’re new to rifle shooting, start simple and master the fundamentals first. To that end, a mechanically simple rifle with few or no accessories is often best. Once you’ve become familiar with a rifle’s parts and operation, you can confidently upgrade to a fancier, more complicated model if you want to.

Cleaning

Cleaning

There’s usually a linear relationship between simplicity and ease of cleaning. Bolt-action plinking and hunting rifles that have only a few moving parts are quick and easy to clean, whereas some semi-automatic models can require much more labor-intensive maintenance. Whichever way you go, never underestimate the importance of keeping your rifle meticulously clean.

Choosing the Right Rifle for Your Needs

Now that we’ve gone over the basic considerations, we’ll offer a few tips on choosing your first rifle based on its primary purpose.

Hunting

Hunting

You’ll want to choose the caliber of your hunting rifle based on the kind of game you plan to hunt. Your local Game and Fish department likely enforces restrictions regarding minimum calibers for large game (bullets that are too small can’t ensure a clean kill and cause the animal unnecessary suffering). Conversely, you don’t want a large-caliber rifle for small game; there won’t be much usable meat left behind.

In some states, there are also restrictions on magazine capacity for hunting rifles. The intent behind these laws is to encourage hunters to take careful shots so as to maximize the chances of a clean, humane kill — an important skill to practice, even if it’s not mandated by law.

A high-quality scope is arguably the most important part of a hunting rifle. Any experienced long-range shooter will tell you that an expensive scope on a cheap rifle will serve you better than a cheap scope on an expensive rifle.

Sport Shooting

Sport Shooting

Again, we can’t offer much specific advice on choosing a rifle for sport shooting because it will depend heavily on the sport. There is one useful rule of thumb, though: don’t spend a ton of money on a rifle right out of the gate. Start with a basic, affordable rifle that complies with the rules of the sport and give yourself some time to make sure you want to stick with it for a while. If you do, you can upgrade your gear later on.

Home Defense

Home Defense

Pistols and shotguns are typically better home-defense weapons than rifles, but not always. The biggest problem with using rifles for home defense is overpenetration. Rifle bullets travel much faster than pistol and shotgun projectiles, meaning they tend to go through more things before finally stopping. This can be a real problem indoors; rifle bullets are more likely to penetrate multiple walls, possibly hitting your other family members, or even your neighbors several houses over. You could be held civilly or criminally liable if you accidentally shoot an innocent bystander while defending your home.

If you do choose a rifle for home defense, keep the caliber relatively small. Calibers like 5.56 are popular for home defense because they offer decent stopping power without a wildly increased risk of overpenetration. Be sure to also choose ammunition specifically designed to minimize penetration, such as hollow-point rounds or frangibles. Or you could opt for a shotgun to defend your home instead.

Finally, bear in mind that rifles are long, meaning they’re difficult to maneuver in small rooms or hallways. Regular training on using long guns in close quarters can help mitigate this concern.

Once you’ve narrowed your list of potential rifles down to a few candidates, test them out, if possible. Many gun ranges rent out rifles for $10 to $20 per hour so you can try before you buy. If you’ve never fired a rifle before, sign up for a beginner’s class or ask an experienced friend to help you get started. After following all the steps in this guide, you’ll be well-prepared to buy a rifle perfectly suited to your needs. Happy shooting!

Best Air Rifle Deals

Popular Posts

Synthetic vs Wood Stock: The Final Showdown Between Brunette And Blonde

0
I understand that you’re here to get some quick facts on synthetic vs wood stocks Probably to guide your purchase.  Quick alert - the debate...

How to make a break barrel air rifle more powerful

0
"Unleash the Power: Mastering Break Barrel Air Rifles for Maximum Performance. Discover expert tips and techniques to enhance the power and precision of your...

Air Gun 101: How many types of Air Gun Sights are there and which...

0
The former American president, Joe Biden, was recently quoted saying: If you need more than ten rounds to hunt, you better stop that business and...

What Is An Air Rifle?

0
If you have stumbled upon this article, chances are that you probably have a pest problem at your house. This is a very common...

Guide to find Best Scope for Break Barrel Air Rifles

0
"Unlock the Perfect Shot: Discover the Best Scope for Break Barrel Air Rifles. Enhance your shooting experience with precision and accuracy, as we delve...