Home Blog Page 85

Types of Hunting Traps: Where, When, Why, and How

0

Jeremiah Wood, a biologist for the State of Maine, works through various aspects of fur trapping in this second part of his guest series. (Read part one, Five Reasons to Reconsider Trapping, here.)

For the uninitiated, trapping can seem disconcertingly complex. Trappers target a wide variety of fur-bearing animals all across the landscape, using very specialized tools and equipment on the trapline. Just look into the bed of a trapper’s pickup truck and try figuring out which item does what and where it’s used. The jumble of gear is enough to make your head spin. But once you figure it out, traps and their use are really not that complicated.

Traps can be broken down into three basic types: footholds, body-grips and hunting snares. Each is distinct from the others and has its own unique purpose on the trapline.

Foothold Traps

Foothold traps have been around almost since trapping began. Though some are complex, all footholds operate on a simple premise: the target animal steps on a pan in the trap’s center, tripping a trigger and causing spring-loaded jaws to close and grip the animal’s foot. Foothold traps are the most traditional, popular and effective trap used today. Every fur-bearing species can be caught with foothold traps and they come in a wide variety of styles, shapes and sizes.

The three main types of foothold traps are categorized by the springs that strengthen them. Long spring traps are the traditional footholds constructed with long, flat steel springs that power the jaws closed. Jump traps are powered by a single, short, flat steel spring situated underneath the jaws. Coil spring traps are a modern version of the jump trap, instead using coiled music wire springs to lift levers that power the jaws shut.

Foothold traps have a wide variety of applications on the trapline, from catching marten in the wilds of Arctic Alaska to beaver trapping in the swamps of Louisiana and most places in between. One significant benefit of foothold traps is that, when used properly, they allow for the unharmed release of any non-target animals. Foothold traps are the most common tool used to trap predators like foxes and coyotes, and are commonly used in wildlife management applications. In fact, footholds have been critical to the success of numerous furbearer studies and relocation efforts by state and federal wildlife biologists throughout the country.

Body-grip Traps

The body-grip trap, often referred to as the ‘Conibear,’ was revolutionized by trapper and inventor Frank Conibear in the 1950’s. It was offered as an alternative to the foothold trap in situations where a quick, humane kill of the captured animal was desired. The basic design of the trap includes two square jaws made of round steel in a box-shaped design, powered by one or two springs of the same material. When the springs are compressed, the jaws form an opening for an animal to enter, tripping a trigger in the opening when it travels through. The jaws then close shut, proving an almost instant kill.

Because of their lethal design body-grip traps aren’t useful in all situations, especially near civilization, where there’s potential to catch the neighbor’s dog or cat. They are most commonly used in water trapping, particularly for beaver, mink and muskrats, in wilderness trapping far from the beaten path and in other situations when precautions are taken to avoid non-targets. The body-grip trap was truly an innovation that filled a need in the trapping world and has greatly enhanced trappers’ ability to address animal welfare issues and capture some furbearers far more effectively.

Snares

While it appears the most simple, the snare may just be the most complex tool in the trapping industry. Type of cable and wire, diameter, orientation, breaking strength, lock types, stops, swivels, breakaways and a number of other components make snares incredibly customizable. If you know what you’re doing, you can create just the right snare for most any trapping situation.

Snares can also be fairly controversial, due to their past reputation for catching non-target animals. But advancements in snare technology have made much of that controversy a thing of the past, and many states are expanding snaring opportunities for trappers who know how to use them right. For instance, snares once would catch the occasional deer. Using a stop that limits loop size closure eliminates deer capture. When a large animal like a mountain lion or elk is captured, a breakaway allows them to power out of the snare, breaking it open and freeing them from capture.

Traditional snares used to kill some non-target animals. Using a relaxing lock instead of a kill-type lock allows a snare to hold an animal gently, effectively rendering the snare something we now call a “cable restraint.” In other situations where a quick kill is desired, springs and poles can be used to make that happen incredibly effectively. What was once a simple wire loop has now transformed into one of the most useful and adaptable tools at a trapper’s disposal.

Between footholds, body-grips and snares, a trapper’s arsenal can seem pretty complex—and perhaps it needs to be. Like everything else, trapping has changed with the times. Advances in technology have continued to make traps more efficient and effective, helping trappers continue to responsibly harvest wild fur. And if you’re looking to get into trapping, these advancements have made for a great set of tools to help start the journey.

Jeremiah is a biologist with the State of Maine and runs Trapping Today, a website dedicated to providing information and entertainment to the modern trapper. Find more from him at www.trappingtoday.com.

header image: Day Six Outdoors

5 DIY Deer Feeder Plans: Easy Homemade Designs

0

So you’re at your favorite local sporting goods store, looking at the deer feeders, and you notice that they’re a little on the pricey side. Not only that, but they’re mostly pretty simple designs. And you think to yourself, “I wonder if I could just make my own and save some money?”. Well, you can!

An effective DIY deer feeder is easy to make, even for the most mechanically challenged. You can make them as simple or as complicated as you want, and with some creativity, you can make one out of stuff you already have lying around, taking up space on your property. Here are five ways you can quickly build your DIY deer feeder that will be higher quality than the store bought ones and a heck of a lot cheaper too.

Most Common Homemade Deer Feeder Designs

  • PVC Pipe Gravity Feeders – Quick and easy to make, transport, and set up. You can make them in different sizes to hold more or less feed. And they have the added benefit of being low profile and unobtrusive.
  • Buckets & Drums – These can hold larger amounts of feed, so they don’t have to be filled as often and can be made from discarded, easily obtained materials.
  • Tripods – A tripod mounted bucket or drum gives you more versatility with placement, and they’re more stable. They can also be equipped with a motorized automatic feeder to drop feed on a schedule or use the simple gravity feed method.
  • Troughs – Simple frame construction to hold protein or corn. Instead of spilling onto the ground, the feed fills a trough.

1. Poor Man’s PVC Feeder

This design is just what it says, all the materials can be bought at your local hardware store for $50 or less, and the only tools needed are a drill and a hacksaw.

You pour your corn or whatever feed you’re using into the top of the tube, and gravity keeps it moving downward as it gets eaten.

It has a drain at the bottom to let out any rainwater that gets in to keep the feed from becoming moldy. Deer will have no problem getting their snout into the pipe to retrieve the feed.

Bill Of Materials

  • One PVC pipe of the desired length (at least 3’ and up to 10’) and 6” diameter
  • Two 6” PVC slip-on end caps
  • One 6” PVC Wye (Y) coupler
  • Several small eye-bolts (number depending on length)
  • One can PVC primer
  • One can PVC cement
  • Spray paint for camouflage
  • Power drill
  • Hacksaw

Steps

  1. Cut the 6” PVC pipe to the desired length. The longer it is, the less often you’ll have to fill it, but longer ones will be harder to reach to fill.
  2. Primer the end of the pipe and one female end of the Wye coupler following the directions for use. Add cement to both pieces and attach them.
  3. Drill some holes for drainage in one of the end caps, primer and cement the inside edge, and attach it to the bottom of the Wye coupler.
  4. Drill holes along the side of the pipe to attach eye-bolts. These will be used as strapping points to secure it to the tree. Number required depends on length.
  5. Take the end cap that will cover the top of the feeder and drill one hole in the center and one in the side, with a corresponding hole in the main pipe. Attach one eye-bolt in the top to use as a handle. The second eye-bolt will attach the lid to the pipe to keep the raccoons from raiding your feeder.

You can mount your new feeder to a tree with bungee cords, ratchet straps, or rope. You can also find pre-made drain caps at the store but make sure the holes are small enough to keep your feed in.

2. 5-Gallon Bucket Deer Feeder

Another easy-to-build and ridiculously affordable feeder. It uses a 5-gallon bucket to hold the feed, with a small hole cut into the bottom.

A wooden bridge is fitted across the inside of the bucket about two inches from the bottom that suspends a length of an all-thread rod through the hole. A large tin can is suspended from the bottom of the rod so the wind or nudging deer can cause the feed to fall from the hole.

The feed is kept in the bucket until the can is moved by a washer slightly larger than the hole suspended on the rod an inch or so below the hole, just enough to keep the feed in the bucket until the rod is moved when a small amount of feed will drop to the ground.

Bill Of Materials

  • One 5-gallon bucket with a lid
  • One ¼”-20 all-thread rods (threaded along the whole length) about 36” long
  • Five ¼” washers and one 2” washer
  • Six ¼” nuts
  • One 1” x 2” board 16” in length
  • One large tin can (or similar item)
  • Power drill
  • Saw

Steps

  1. Cut a 1” wide hole in the bottom of the bucket
  2. Cut two 2” long sections off of the board then trim the board to fit across the bottom of the bucket (most 5-gallon buckets are 10.33” across at the bottom)
  3. Drill a hole through the middle of the board aligned with the hole in the bucket, large enough to allow the rod to swing slightly, nail or screw 2” pieces to the end of the board as supports, place in bottom of the bucket
  4. Place 2” washer on the rod with ¼” washers and nuts on each side, double nuts on the lower side to keep it securely in position on the rod
  5. Secure the rod from the wooden bridge through the hole in the bucket, adjust the 2” washer so it’s about 1” below the hole
  6. Drill ¼” hole through the side of the can in the middle, attach to end of the rod with nuts and washers

Use a rope to hang your 5-gallon feeder over your spot, adjusted so the deer can reach up and nudge the can for feed. Ensure your 2” washer is placed so the feed can flow, but not too quickly. The sound of the feed plinking on the can will also attract other deer in the area when they get accustomed to it.

3. 55-Gallon Drum Gravity Feeder

This one takes a bit more work to make but it’s very economical to build. If you live a long way from your property or can’t get out there very often, this will hold enough feed to last for a while.

This plan leaves the lid attached to the drum to make sure rainwater stays out. It’s simply a 55-gallon drum mounted a few feet off the ground on a wooden platform and held in place with a ratchet strap.

Four 2” holes are cut around the bottom of the drum and 2” PVC elbows are inserted and cemented in place to channel the feed. Then cheap and readily available 12” drywall mud trays are bolted underneath the channels to hold the feed.

The drum can be filled by removing the plugs on top and using a large funnel. It’s secure and stable and works quite well.

Bill Of Materials

  • One watertight 55-gallon plastic drum
  • Materials for platform
  • Four 2” PVC elbow joints
  • Four 12” drywall mud trays
  • Eight screws
  • PVC cement
  • Power drill

Steps

  1. Build a platform to hold drum 2’ off the ground securely. You can do this with boards, concrete blocks, or even PVC tubing. Just be sure it can handle the weight and won’t tip over.
  2. Cut 2” holes at four points around the bottom of the barrel about 4” up.
  3. Insert 2” elbows into holes and cement in place. You can cut off part of the elbow to let the feed enter at a lower angle.
  4. Drill holes in corners of drywall mud trays and corresponding holes in the drum to attach the trays underneath the feed channel. Screw trays in place.
  5. Attach drum to the platform with a ratchet strap.

You’ll want to use spray paint to camouflage your feeder before you begin. If you have a white plastic drum you can leave a strip unpainted so you can observe the feed level.

4. Tripod Feeder

If you’re looking to build a feeder that’s easy to transport, holds a lot of feed, and automatically distributes feed on a timed schedule, this is the plan for you.

This design uses a metal or plastic drum of whatever size you choose equipped with a motorized automatic feeder such as the type manufactured by American Hunter, Moultrie, and other companies.

Aluminum tubing is used to make a tripod with detachable legs that can be easily taken off for transport and reattached with a quick release pin. The brackets to hold the legs are made from tubing slightly larger than the legs so that they can slide inside and be secured with a pin.

A hole is cut into the bottom of the drum to allow feed into the motorized feeder. A funnel can be fitted to the inside bottom of the drum to ensure that all the feed is used.

Bill Of Materials

  • One metal or plastic drum, camo painted
  • Aluminum tubing, two different diameters
  • Six 1/4” bolts with washers and nuts
  • Plastic tubing caps
  • Motorized automatic feeder
  • Large funnel
  • Power drill and bits
  • Hacksaw
  • Basic hand tools

Steps

  1. Cut leg tubing to the desired length. For bracket tubing, cut three 14” lengths.
  2. Flatten 4” on one end of bracket tubes and drill two ¼” holes for bolts. Drill another hole 4” from the round end for connecting pin.
  3. Cut hole in the bottom of the drum the approximate size of the feeder entry
  4. Drill holes in drum and attach brackets with bolts
  5. Drill ¼” hole in leg tubes 4” from the end that will slide into the bracket
  6. Bolt automatic feeder to bottom of the drum, fit funnel over the hole in the bottom
  7. Install tubing caps on end of legs and attach to bracket with a quick-release pin

Remember to put a piece of plywood under leg caps to keep legs from sinking in soft ground.

5. Protein Trough

This simple design can be done in several ways, but this plan is super sturdy and will last for years. It uses a 55-gallon drum cut in half to hold the feed, mounted on a covered platform made with 4” x 4”s and corrugated roofing panels. A little wood construction experience will help, along with access to the appropriate power tools.

Bill Of Materials

  • 55-gallon plastic drum with lid
  • Three 4” x 4” x 8’ treated beams
  • Three 2” x 4” boards
  • Three sheets of corrugated roof panels
  • ¼” bolts, nuts, and washers or screws

Steps

  1. Cut 55-gallon drum in half
  2. Construct frame, and two upright posts mounted on beams with a crossbeam at the top and another about 32” above the ground.
  3. Build a roof frame on the platform with 2” x 4”s
  4. Attach corrugated roofing panels to frame

Make sure the roof covers enough to protect the feed and brace the posts with 2” x 4” sections.

Fungi foraging

0

Local chefs are hunting mushrooms for Lowcountry restaurant menus.

Story by Robyn Passante

Chicken of the Woods mushrooms
Mushroom lovers search for Chicken of the Woods mushrooms October through February. Many claim the mushroom tastes like chicken. It can be used as a substitute for chicken in a vegetarian diet.

When Red Fish sous chef Josh Goldfarb spied a 7-pound Chicken of the Woods mushroom growing high on a tree earlier this year, the avid mushroom forager made a mental note to return soon with a way to retrieve it.

Unlucky for him, fellow forager Chaun Bescos spotted it too — and he keeps an extension ladder in his car all winter for just such an occasion.

“It adds to the fun of it, the treasure hunting feel,” says Bescos of the camaraderie and competition among the handful of certified mushroom foragers in the Lowcountry. Bescos, chef at WiseGuys, helped teach Goldfarb about foraging when Bescos was executive chef at Red Fish, and now the two share information — and occasional, good-natured ribbing — regarding their lucrative pastime.

Locally sourced mushrooms, prized for their flavor and their health benefits, are popping up more and more on menus across the Lowcountry, thanks to the hard, hot work of Bescos, Goldfarb and a few others.

Red Fish sous chef Josh Goldfarb
Red Fish sous chef Josh Goldfarb shows off a massive lion’s mane mushroom he found here in the Lowcountry. The mushroom produces huge delectable fruiting bodies that can be an awesome addition to any meal.

How lucrative is it?

Chanterelles are probably the most popular and most plentiful wild mushroom in the area, and Goldfarb says a little hard work can yield a sweet paycheck. “During summertime if the weather’s right, we can pick up about 100 pounds a week if the conditions are right, and sell them for 20 bucks a pound retail,” says Goldfarb, who spends about 15 hours per week foraging in the summer, and sells first to Red Fish and then to a handful of chefs at other restaurants. “It’s hard, but it’s worth it.”

Why is it hard?

“It’s a mosquito and tick battlefield,” says Bescos, a Hawaii native who has spent time living and foraging in the Pacific Northwest and in upstate New York. “I’ll come home and have 30 ticks on me. It’s no joke. It’s hot, and you’re dripping sweat when you’re out there in the woods but you gotta dress up in full pants, long underwear, you gotta wear long-sleeved shirts. I wear two to three shirts, I tuck ’em in, long snake boots and then I put on that DEET and go.”

Goldfarb, who moved here from Dallas in 2014, agrees on the relative misery of the conditions in the South. “I come back and even after wearing 100 percent DEET, I’m covered in mosquito and chigger bites. It’s very miserable. But we enjoy getting out in the woods. And I enjoy the check that comes with it.”

OK but otherwise, how hard is it?

“I wouldn’t recommend anybody go out in the woods and try to pick mushrooms unless you absolutely know what you’re doing,” says Goldfarb, who along with Bescos had to go through a two-day training and test to become a certified forager in the state. It’s illegal for those who aren’t certified to forage and sell wild mushrooms — mostly because there are toxic lookalikes out there that can seriously harm or kill those who eat them.

“When I pick, I separate my mushrooms. I don’t put them together,” says Bescos, explaining that if he were picking chanterelles and mistakenly picked a jack-o’-lantern mushroom, the poisonous chanterelle lookalike, even if he realized his mistake and threw out the jack-o’-lantern before preparing the rest of the bunch, “that one jack would make everybody that had that dish sick, just from getting some pieces (of it) mixed in with the chanterelles.”

Where do you forage?

The guys are secretive about their specific hot spots, but Goldfarb has one prime plot in Ridgeland that isn’t technically his but has become his through the generosity of a stranger.

“We were out pickin’ and this guy drove up on this little 4×4 and said, ‘Hey, this is my land.’ We said, ‘Oh, we’re sorry, we didn’t know.’” He asked Goldfarb and his friend what they were doing and when they told him about mushroom foraging, he was intrigued. “He’s given us permission to keep returning to his land, and we’ve found lots of beautiful mushrooms — lion’s mane, Chicken of the Woods, chanterelles — over the seasons. And we invited him to come eat at Red Fish and we made him a mushroom-themed dinner for him and his family. It was really cool.”

Local ‘shrooms

There are 20 wild mushrooms now approved for certified foragers in South Carolina, North Carolina and Georgia. Three of the most common wild edibles on local menus:

Golden Chanterelles – Bright orange-yellow edible that grows on the ground with the root system of live oaks, benefiting the trees. Typically can be found from mid- to late-May until the end of October.
Lion’s Mane – Edible, medicinal white mushroom with hanging spines that grows on dying oak trees. Known to enhance nerve regeneration and boost the immune system. Typically can be found between Halloween and Christmas.
Chicken of the Woods – Bright yellow-orange edible that grows on dead or dying hardwood trees and is said to taste like chicken. Typically can be found from late October to mid-February.

Fun facts

Lion’s mane are large, white, shaggy mushrooms that resemble a lion’s mane as they grow. They have both culinary and medical uses.

•Mushrooms are also called toadstools.

•Unlike plants, mushrooms do not require sunlight to make energy for themselves.

•A single Portabella mushroom contains more potassium than a banana.

•Mushrooms are made up of around 90 percent water.

•China produces about half of all cultivated mushrooms.

•Mushrooms spores repel over 200,000 species of insect.

•Mushrooms have fewer calories than a rice cake.

•Ancient Egyptians referred to mushrooms as the plant of immortality in hieroglyphics.

•Mushrooms contain more protein than most vegetables.

•Mushrooms are an awesome source of vitamin D.

Everything You Ever Wanted to Know About Deer Poop

0

Man, that’s a big pile of buck crap right there.

I’ve heard it a dozen times. You’ve heard it too, or even said it. We all have. But the deer biologists in goggles and gloves who study deer poop for a living (and other, more glamorous things) say it’s actually pretty difficult to distinguish buck and doe droppings.

While the myth of the buck turd is mostly false (more on that momentarily), there are still plenty of things we can learn from deer scat.

Deer dung is full of secrets. You can learn a lot by studying deer poop. (Shutterstock / Aaron J. Hill photo)

1. Fawns poop when does tell them to.

Since a major part of fawn survival hinges on scent reduction, they don’t poop where does hide them. Does will take fawns to neutral areas – well away from daytime hideouts – and let them nurse and poop all at once. Fawns can only defecate after their mothers stimulate them while nursing, according to Duane Diefenbach, wildlife ecology professor and leader of the PA Cooperative Fish and Wildlife Research Unit. Weird as it is, does often consume their fawns’ feces, too. This process reduces scent and helps protect the fawn from predators.

2. Adult deer are very regular.

During fall and winter, most whitetails empty their bowels about 10 to 15 times per day. In spring and summer, this frequency spikes, fluctuating between 20 and 30 times. Interestingly, their bowel movements are so predictable that many wildlife agencies often guestimate deer population densities based on the number of poop piles they discover within a designated area. You can do the same: Hunters who take trail camera surveys seriously can use this method to verify population densities.

3. It’s nearly impossible to distinguish between buck and doe poop.

The commonly held belief is that large, tubular excrements belong to bucks, and small, pelleted piles belong to does. But according to Buckmasters, research shows that it’s virtually impossible for hunters to distinguish between buck and doe poop. Both sexes produce both scat shapes. When comparing tubular scat, bucks can have longer stool pieces, but that’s not always true. The bottom line? Unless you see the deer that dropped it, scat shape alone won’t indicate a deer’s sex.

4. Bucks sometimes drop more pellets, though.

Male deer can, however, produce more pellets than female deer. When comparing pelleted scat, a buck drops 70 to 80 per session on average, while does generally produce 50 to 60. Seriously though – what hunter is going to stop and count? If you’re after a mega-giant though, maybe you should bring a latex glove and a No. 2 pencil, and count to 80.

5. Color and moisture suggest how long the scat has been there.

The coloration and moisture level of a pile helps determine the age of deer poop. Droppings that are still dark, shiny and wet are likely less than 12 hours old. If there’s no moisture and droppings look lighter in color, there’s a good chance the scat is at least 24 hours old, if not several days. Droppings become more fibrous over time, and scat that’s cracked, crusty or broken is usually at least a week old.

6. Digging through poo gives clues.

Learn what deer are eating, and when, by examining scat. A forage’s water content will dictate its composition and shape. Mounds of firm, pelleted dung suggests woody browse (buds, leaves, twigs), grain (corn, oats, soybeans) and hard mast (acorns and nuts). Long, singular, squishier poop indicates recent consumption of broadleaf plants, forbs, grasses, and soft mast (apples, peaches, pears, persimmons, plums, etc.).

7. Handle deer droppings with care.

Prions – malformed proteins shed by CWD-positive deer – are commonly found in deer urine, feces and saliva. While it’s currently believed that humans can’t contract this disease, who really wants to become a lab rat? If you’re going digging, carry gloves or use a stick.

8. Concentration indicates high-traffic areas.

The best lesson you can learn from deer poop is that a lot of it indicates a good hunting spot. Hunters who stumble on extensive piles of poop should take note. Often, excessive scat is located near preferred food sources, water sources, and bedding areas. If you find a bedding area that’s full of it, go mobile and get as tight as you dare on that deer.

Shop Realtree Gear

The best dry fire training systems to save on ammo

0

When we tested the Mantis Blackbeard Trigger Reset System, it was a high-performing item for anyone looking to get more rifle practice without spending a ton of money. A system that replaces the bolt carrier group and magazine of most AR-15 rifles, the Blackbeard allows the user to not alter the trigger pull of their weapon, and have visual feedback of where the “round” goes. The system consists of the bolt carrier replacement, which can house an adjustable laser and which also contains a motor that resets your trigger, as well as a battery pack that fits into the magazine well of the rifle like a normal magazine. To complement this, the Blackbeard can be used with the Mantis Laser Academy app, which allows for virtual target scoring for drills and games. Overall, for rifle training, it’s hard to outdo the Mantis Blackbeard, especially for indoor close-quarter training situations.

The Mantis Blackbeard excels in close-quarters rifle training, operating as a simple drop-in kit to give you realistic trigger reset. The biggest advantage to this is that it’s totally safe, due to making your rifle completely inoperable when properly installed, which means that you can theoretically use this for force-on-force or live hostage rescue. It’s also totally platform agnostic as long as you use an AR platform rifle, meaning you can use it with a Smith & Wesson M&P 15 or a military issue M4 with no extra steps. The biggest advantage, however, is that it lets you keep your trigger pull, meaning that if you’re like my friend, you can drop this into your super-expensive Radian Model 1 or LMT MARS (he has both) and appreciate the improved trigger pull that both bring with dry fire and with live fire. In my own testing, the Blackbeard greatly assisted with trigger control training, getting into a good rhythm of pressing and releasing the trigger, preventing short stroking.

The Blackbeard has no recoil or force feedback, and basically just functions as a trigger reset device and laser projector. This isn’t like the CoolFire on our list that actually provides force feedback, or the SIRT pistol, so you won’t get that simulated recoil impulse. Another thing is that even if you do use the app, it doesn’t track things like weapon or trigger control, so you won’t get the same input that you get with the Mantis X on this list. Finally, the app that you need to get training metrics from, Mantis Laser Academy, is extremely temperamental. It costs a fair chunk of money, doesn’t work in daylight, requires a tripod to use, and needs extensive setup to work properly, making this a decidedly indoor dry fire training system.

The Mantis Blackbeard is a laser trainer and trigger reset system that converts any rifle into a training rifle, and for those purposes, it’s nearly perfect. Allowing shooters to conduct dry fire training with their actual trigger pull, and without requiring them to manually reset the hammer, is extremely helpful, and the issues with not tracking motion and trigger control can be solved by adding a Mantis X device to the rifle to work in conjunction, although that lowers the value proposition significantly.

Best Bipod – What The Pros Use

0

This post reviews the bipods the best precision rifle shooters are using. This data is based on a survey of the top 50 shooters in the 2014 Precision Rifle Series (PRS). The PRS tracks how top competitors place in major rifle matches across the country. These are the major leagues of sniper-style competitions, with targets typically in the 300-1000 yard range. For more info on the Precision Rifle Series and who these guys are, or to view the data for other pieces of gear scroll to the bottom of this article.

Bipod

Although we’ve been surveying the top shooters in the PRS for a couple years, this is the first year we asked them what bipod they use. Here’s what they said:

Bipods

Harris Bipod

Over 75% of the shooters were using a Harris Bipod, with the overwhelming majority of those being the Harris S-BRM 6-9” Notched Bipod (HBRMS). The official product name according to Harris is HBRMS. While that may seem cryptic, the diargram below breaks down what the letters mean and lets you see the features on the Harris S-BRM bipod compared to the standard Harris HBR model.

Harris Bipod

The Harris HBRMS is their shortest bipod with legs that extend 6 to 9 inches, and Harris refers to it as their “benchrest” model. PRS matches are clearly not shot from a bench, but many shots are taken from prone positions and the height range of this bipod is ideal for most prone scenarios.

The M in the model name indicates the bipod has notched legs. The notches provide a few preset height reference points to make it easier to adjust both legs to the same height. Virtually all of the top 50 shooters were using a bipod with these notched legs.

The S in the model name indicates the bipod can swivel, which allows you to tilt the rifle from side to side. This makes it easy to get the rifle perfectly level on uneven terrain without fiddling with the leg heights. Even a small amount of rifle cant can result in a miss at long-range, and this feature can help a shooter effectively manage that.

Harris Bipod Swivel

While most guys were running the 6-9 inch HBRMS model, there were a couple guys running the medium height Harris HBLMS model, which Harris advertises to have legs that extend 9 to 13 inches. In my measurements, it looks like the Harris HBLMS measures closer to 8 to 12 inches.

Harris Bipods

There was also one shooter in the top 50, Matt Gervais, who ran a custom Harris bipod he modified to extend from 7 to 12 inches. I have to admit, I was intrigued by the idea because it sounds like the ideal range. So I followed up with Matt and he graciously provided more detail with permission to share with fellow shooters. He found that when he used the 6-9” bipod, he never used the lowest setting, and when he used the 9-13” bipod, he never used the highest setting. Sounds familiar! As an auto mechanic by trade and tinkerer by heart, Matt’s curiosity drove him to sit down one day and take apart both bipods to compare them. After a little time, machining, and troubleshooting … viola! The ideal 7-12” Harris bipod was born. It was primarily derived from a modified 9-13” model, but there were a few donor parts taken from a Harris 6-9” bipod. Here’s a comparison of the custom Harris 7-12” bipod with a standard Harris 6-9” bipod. Note: Springs were removed from the 6-9″ bipod, and used on the 7-12″.

Custom Harris Bipod

Virtually all of the shooters had added an after-market swivel lock to their Harris bipod (only applicable to the S series). These allow you to quickly adjust the amount of tension it takes to tilt the bipod side-to-side. The stock Harris swivel models have a fixed amount of tension that isn’t adjustable in the field, but these aftermarket levers and knobs allow you to reach up and torque down the swivel with one hand from behind the rifle. There are a few products out there that do this, such as the KMW Pod-Loc Kit, Alpha-Bravo Bipod Lock, and recently Harris introduced their own Harris lever. (Why not offer a model with the lever preinstalled?!) These handles are easy to install (watch video), and make it easier to operate the bipod swivel and ensure your rifle is cant-free before sending a round down range.

Harris Bipod Lever

LaRue also makes an improved version of the Harris bipod. They integrated their popular, low-profile, quick-detach, picatinny mount. LaRue explains: “We have replaced the Harris OEM stud attachment base with a custom chassis … ruling-out the risk of the stud screw and grabber becoming loose. By doing so, we were able to lower the profile by roughly .25″. A large knob on the rear provides easy leverage when adjusting swivel tension.”

Larue Bipod

Note: The LaRue bipod in the photo has spikes installed. That is not part of the LaRue improved package. Those are JEC JPEGs Harris Bipod Spikes made by JEC Customs that I installed myself later. They help ensure you’re dug in and able to consistently load your bipod on any surface (sand, mud, stone, concrete, gravel, dining room table, car hood, etc.).

Atlas Bipod

The second most popular bipod was the Accu-Shot Atlas Bipod. 11 of shooters who placed in the top 50 were running an Atlas bipod.

While most are familiar with a standard bipod like the Harris, the Atlas bipod is very different. The popular standard height PSR Atlas Bipod includes a lot of unique features that aren’t available on other bipods. Here’s a few of the notable features:

  • Bipod can be loaded with legs straight down (90°) or 45° forward. This provides a height adjustment from 4.75-9”, which is huge compared to similar bipods.
  • Provides 15° of pan and 15° of tilt
  • Legs can be stowed forwards or backwards
  • Can be mounted directly to a picatinny rail
  • Notched legs (similar to Harris)

Atlas Bipod

Since the Atlas bipod only introduced in 2010, you might not expect it to have the accessories that the community has developed around the well-established Harris bipod … like the LaRue quick detach mount, or the variety of aftermarket feet and spikes. But, B&T Industries, makers of the Atlas, seems to have thought this through as well, and they offer a wide selection. It includes adapters to connect the Atlas bipod to just about any rifle, and accessories to adapt it to any terrain or scenario. Here’s just a few of the accessories offered for the Atlas:

Atlas Bipod Accessories

The quick-change feet and leg extensions can be “easily installed with the press of a stainless steel plunger,” according to the manufacturer. Having personally installed spikes on a Harris bipod … I can say almost anything would be easier. Having the ability to easily extend the legs by 3 inches seems to allow you to use one bipod for many scenarios, especially with the huge range of height adjustability the Atlas bipod already offers.

One of the attractive features of the Atlas bipod is the option for multiple leg positions (45 and 90 degrees), but could be a downside to that flexibility. The added adjustability can potentially make the bipod slower to deploy and get in position. At least during competitions, seconds count, and it’d be near impossible to top the quick and simple Harris deployment.

There are certainly other bipods out there, like the Versa-Pod bipod, the Long-Range Accuracy bipod, and the new Accu-Tac bipod … but none of those were represented among these top precision riflemen. It was a short list, with just two brands … but some of the most solid gear you can find.

Meet The Pros

You know NASCAR? Yes, I’m talking about the racing-cars-in-a-circle NASCAR. Before NASCAR, there were just a bunch of unaffiliated, regional car races. NASCAR brought structure by unifying those races, and created the idea of a season … and an overall champion. NASCAR identified the top races across the country (that were similar in nature), then combined results and ranked competitors. The Precision Rifle Series (PRS) is like NASCAR, but for rifle matches.

The PRS is a championship style point series race based on the best precision rifle matches nationwide. PRS matches are recognized as the major league of sniper-style rifle matches. At the end of each year, the scores from around 15 different national matches are evaluated and the top shooters are invited to compete head to head in the PRS Season Championship Match. We surveyed the shooters who qualified for the finale, asking all kinds of questions about the equipment they ran that season. This is a great set of data, because 50+ shooters is a significant sample size, and this particular group are also considered experts among experts. It includes guys like George Gardner (President/Senior Rifle Builder of GA Precision), Francis Kuehl, Wade Stuteville, the GAP Team, the Surgeon Rifles Team, shooters from the US Army Marksmenship Unit, and many other world-class shooters. Thanks to Rich Emmons for allowing me to share this info. To find out more about the PRS, check out What Is The Precision Rifle Series?

Other “What The Pros Use” Articles

This post was one of a series of posts that look at the equipment the top PRS shooters use. Check out these other posts:

  • Calibers & Cartridges
  • Tactical Scopes
  • Scope Mount
  • Gunsmiths
  • Rifle Actions
  • Rifle Barrels
  • Custom Rifle Stocks
  • Reloading Components (Bullets, Powders & Brass)
  • Muzzle Brake & Suppressor
  • Shooting Bags
  • Bipod
  • Rifle Sling

10 Best Fishing Pliers: Top Picks For Every Angler's Tackle Box

0

Why You Need A Good Pair Of Fishing Pliers

Every angler should carry a quality set of fishing pliers. While regular pliers are OK, fishing pliers with strong cutters are more appropriate for fishing applications. Here are the 3 key reasons why you need a good pair of fishing pliers.

1. Your Health & Safety

For years I watched my dad use his teeth to cut mono fishing lines. Bad idea. With pliers by his side, he might have saved a few broken teeth.

Removing hooks from the mouths of fish with sharp teeth is hazardous. With fish like barracuda, pike, and sharks, it’s downright dangerous. You risk severe lacerations or worse – the loss of a finger or hand when you attempt hook removal without pliers.

Opening split rings and replacing treble hooks requires force. Without pliers, you risk embedding hooks in your hand.

2. Fish Health

For catch and release, removing embedded hooks from deep in the mouth of a fish is nigh on impossible without a good set of fishing pliers.

Without pliers for clean, efficient hook removal, you risk doing great harm to a fish, reducing its chances of survival, or killing it outright.

3. Catching More Fish

If your line’s not in the water, you’re not catching fish. Fishing pliers provide excellent rigging efficiency as well as the ability to fine-tune lures and rigs quickly.

With good fishing pliers, you can tie complex, high-performance rigs much faster, giving you more time in the water – the key to every successful fishing trip.

Fishing Pliers Buying Guide

Fortunately for us, there are a lot of great products out there, and it’s hard to go wrong with fishing pliers. Here are some key purchasing criteria to keep in mind.

Cost

You can get serviceable pliers for under 10 bucks. For quality, multifunction pliers there’s a lot to choose from around $20 to $40.

Between $40 and $100 expect multifunctional, lightweight designs with superior anti-corrosion credentials. Above the $100 mark, high-end ergonomics and construction materials are a must. Pliers at this price point have to feel great and last for years.

Functionality

If you fish a lot of lures or tie more complex rigs regularly, split ring nose and crimping functions are ideal. They must also include blades appropriate for cutting braided lines, monofilament fishing lines, fluoro leader, and steel leader.

But for many anglers, an ergonomic grip, with secure jaws and side cutting is enough to cover their needs. For example, a crimping tool is great for closing splitshot weights, but easily achieved with any nose shap.

Saltwater Pliers vs Freshwater Fishing Pliers

Most pliers are constructed from anti-corrosion materials. By and large, the higher the price point, the more corrosion resistant. At the highest price point, expect no rust at all.

Once you’re over $100, expect them to be corrosion-proof. If you want pliers that endure, only buy saltwater fishing pliers. For me pliers that are suitable only for freshwater fishing are unnecessary.

Materials

Most fishing pliers are made from a variety of lightweight alloys for corrosion protection and easy handling. Many brands will have different materials, such as stainless steel (often replaceabl) for the jaws for better grip and durability.

Stainless steel pliers are very durable if at times a little heavy. Materials such as aircraft-grade alloys and tungsten are generally reserved for more expensive brands and models.

Lightweight aluminum pliers are inexpensive and durable, and always a good bet.

Cutters

Tungsten carbide blades are pretty well the standard these days for blades. They’re not all constructed equally, however, so stay-sharp durability can be a bit of a lottery. To avoid replacing pliers regularly, look for reversible and replaceable blades.

Nose Length

If you’re removing hooks from big fish with big mouths and teeth, look for long nose pliers with a total length of up to 11 inches. 7 inches is a standard overall length, and you’ll be choosing between standard and needle nose. 7 inches is the Goldilocks length and suitable for the vast majority of fishing applications.

I like the maneuverability and dexterity afforded by needle nose. However, there’s a lot to be said for the purchase afforded by standard nose widths. This will often come down to feel – therefore a personal choice.

Grips

Ergonomic grips can make a set of pliers. But we all have different ideas as to what constitutes grip comfort.. Comfort is important, but I also look for non-slip grips. Some anti-corrosion coatings and anodizing can be slippery – I tend to avoid these. A solid grip is vital, as is a safe grip. An aluminum handle will often have a well-shaped ergonomic design, great for gripping, but can be cold to the touch in winter.

Be aware that plastic and rubber overlay grips will allow salt and sand to get between the grip and the handles. This can cause corrosion if not cleaned properly. Spring-loaded handles are great, but the spring can invite weakness and corrosion.

Lanyard & Sheath

In nearly all cases, the lanyard, and sheath will die long before your pliers do. The key thing to look for is the strength of the link between the chord and pliers, and the sheath and pliers. These are often weak points. I always change out the factory links with my own strong split rings or carabiner for peace of mind.

Final Words On The Best Fishing Pliers

Every angler should carry pliers. Fortunately, there are countless worthy options in every price bracket. My winner today, the Piscifun Aluminum Fishing Pliers, has very strong competition. But for price-relative functionality, they were hard to beat. My runners-up are the KastKing Intimidator Fishing Pliers, and the Gerber Magnipliers – awesome options from contrasting price points.

Benchmade 940 Review

0

Last Updated: September 4, 2019 If you are as obsessed with knives as I am, you may be on the hunt for “the perfect EDC knife.” You know, the one blade that has it all. Naturally, it is the perfect size, features great materials, is beautifully designed, and carries like a dream. But in my mind a perfect EDC needs to go beyond that. It has to be greater than the sum of its parts, and a little “X factor” never hurt either. Lets be real, for a knife to earn some time in the rotation is one thing, but to stand the test of time the knife has to work for you on another level.

Benchmade 940 Osborne Review 
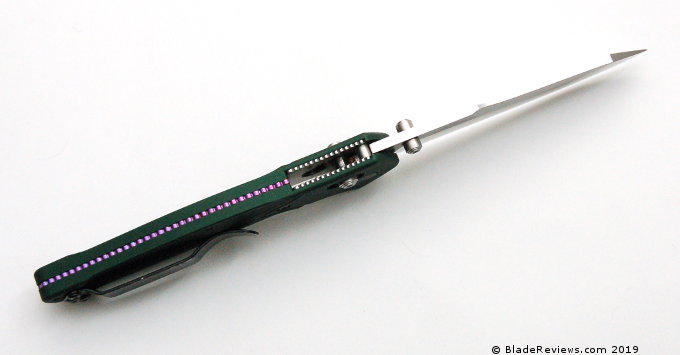
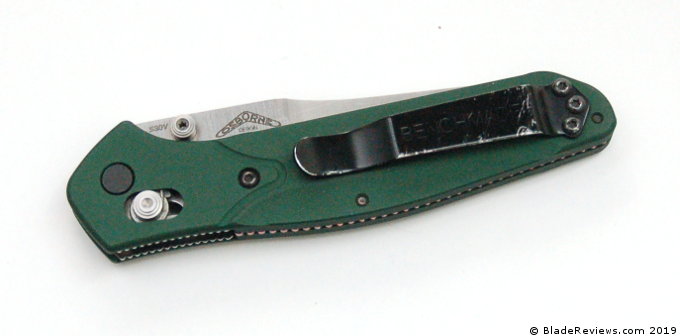
Buy the Benchmade 940 at BladeHQ

Buy on Amazon

That is what drew me to the Benchmade 940. On paper it has all the basic requirements of a good EDC knife, which is always nice to see. But then the 940 had something else. Maybe it’s the unique handle, or the unconventional blade shape. Whatever it was, it drew me in like a moth to a flame, and I know that I am not the first to succumb to this emerald beauty. The 940 has been in Benchmade‘s catalog for well over a decade, and remains one of their most popular designs to this day. Needless to say, it is high time we gave this classic a thorough review.

Benchmade 940 vs. 940-1

General Dimensions and Blade Details

The 940 (or “940 Osborne”) has an overall length of 7.87″, a 3.4″ blade, weighs 2.90 ounces, and is made in the USA. In my mind these are real nice numbers for EDC, and that is exactly how I have been using my 940.

But I can also appreciate how the 940 could go beyond a mere EDC item. With an almost 3.5″ blade and an equally generous handle, the 940 could easily be pressed into a self defense role (although I sincerely hope you will never need to use it that way). On the opposite end of the spectrum, the 940 is a beautiful and elegant knife. In many ways exemplifies a modern gentleman’s folder. This is a knife that would do just fine in a suit pocket, or carried on special occasions. So I really like the versatility of the 940. It is fancy enough to make for an upscale EDC, but is big enough to get a lot of work done.

Benchmade 940

The blade on the 940 is a reverse tanto design. Popularized by the 940’s designer, Warren Osborne, this unique blade shape is best known for providing a sturdy tip, although I think the main draw is just the unique aesthetics. Warren has designed a few reverse tanto models for Benchmade, including the Benchmade Rift and I have generally been impressed by them. This particular blade has been given a high flat grind, and features a swedge running across the top. The 3mm thick blade holds it’s thickness pretty much to the tip thanks to the reverse tanto design. This is an interesting blade shape, and I found it quite capable for all my daily tasks.

Benchmade 940 Osborne Blade

The 940 Osborne makes use of S30V for the blade steel, an excellent USA made stainless from the folks over at Crucible. I have spoken about S30V many times before, but as a quick recap S30V is widely regarded as one of the best high end steels commonly found on production knives. When properly heat treated S30V is known for good edge retention, high corrosion resistance, relatively easy sharpening, and a good level of toughness for daily use. I am a big fan of S30V and Benchmade always does a fantastic job with heat treating their blades. Treated to 58-60 HRC, this 940 was no exception.

Handle, Ergonomics and Pocket Clip

The handle on the 940 is where things start to get interesting. First you have the striking aluminum handles. These have been bead-blasted to an attractive matte finish, and then anodized a deep green. I absolutely love the texture of these handles. They aren’t particularly aggressive, but they aren’t slippery either – given the intended use I found it to be a nice balance. Sandwiched between the aluminum handles is a single piece of anodized purple titanium. This backspacer compliments the green handles nicely, and provides a good deal of visual interest.

Benchmade 940 Osborne Handle

As for actual construction, the 940’s handle is top notch. There are partial stainless steel liners, and they have been polished to a lustrous shine. I like how when you peer inside the knife the liners reflect the titanium backspacer. It is a little detail, but some times it’s the small stuff that gets you going. Everything has been screwed together with black hardware, and all the pieces line up perfectly. The overall fit and finish of this knife is exceptional.

Benchmade 940 Osborne Spine

In 2015 Benchmade released the 940-1, a premium version of the 940 with carbon fiber handles and a S90V blade. It’s a beautiful knife and well worth considering if you are a fan of the original 940. Check out our review of the 940-1 here.

Benchmade 940 Osborne Ergonomics

In hand the 940 is surprisingly capable. I say “surprisingly” because at a glance we have a rather thin handle here. In practice I found the handle long enough to comfortably accept my larger hand, and the rows of jimping on both the thumb ramp and finger choil provide a good amount of grip. It is a comfortable knife in forward grips, and I can get some good work done with it. The 940 also works well in reverse grip, and in the closed position as well. Actually, when closed, the 940’s thin profile makes it an excellent choice as a kubotan – another nice option to have.

Benchmade 940 Osborne Pocket Clip

The pocket clip on the 940 Osborne is a standard Benchmade clip – the same kind you will find in models like their classic Griptilian and Mini Griptilian. I am a big fan of this style of clip. It is simple, sturdy, and works quite well. Benchmade drilled and tapped this model for ambidextrous tip up carry. In pocket the 940 carries wonderfully. Thin and lightweight, this is a knife that you forget you are carrying.

Here is your pocket clip shot:

Benchmade 940 Osborne in the Pocket

Deployment and Lockup

The 940 makes use of a pair of ambidextrous thumb studs and an axis lock. Much like many of the other Benchmade knives that I have reviewed with this configuration, deployment on the 940 is extremely fast and smooth. The thumb studs are easy to access allowing you to flick the blade out with alarming speed and very little effort. Phosphor bronze washers aid in that regard, and the net result is reliable deployment in any situation.

Benchmade 940 vs. Benchmade Bugout

Similarly, the axis lock on my knife has also been really well done. Lockup is tight with no blade play, yet the lock is easy to disengage with a single hand, and the blade rotates freely into the closed position. It is no secret I am a big fan of the axis lock, and the 940 is a great example of why. If true one hand operation is important to you (as a righty or a lefty) then I find the combination of thumb studs and an axis lock very tough to beat.

Benchmade 940 vs. Spyderco Endura and Spyderco Delica

Benchmade 940 Osborne Review – Final Thoughts

The 940 combines excellent materials with smart design and wonderful fit and finish to produce an exceptional daily carry item. On paper this has always looked like an awesome knife, so I was very happy to find that the 940 was just as awesome in real life. Everything works, and it works well. The way I see it, the biggest potential downside here is that the knife isn’t particularly cheap, but for a made in the USA folder with these kinds of features, I actually think the price is quite reasonable.

But what about beyond the specifications? Do we really have a “perfect” EDC knife? I must admit, there is something special about this one. The 940 has really distinguished itself as a design and it has a little something extra that keeps me coming back. I don’t doubt that for many people this will be a perfect EDC knife.

I recommend purchasing the 940 at Amazon and BladeHQ. Buying anything through the links on this website earns BladeReviews a small commission at no additional cost to you. All proceeds generated are used to keep the site running. Thank you very much for your support.

How to Avoid 16 Common Grouse Hunting Mistakes

0

The ruffed grouse is without question one of the most challenging upland gamebirds to hunt. But one way you can improve your luck with this handsome brown and russet speedster is to avoid making mistakes.

I feel uniquely qualified to write a piece on this topic, since over the years I believe I have made every mistake possible in the grouse woods, some of them many times over. But gradually I began to learn from those mistakes. And as I did, I saw both my flushing and harvest rates go up and also my enjoyment of the sport. Sure, just walking through grouse country is fun. But bagging a few now and then certainly makes the experience a bit more rewarding!

It would be easy to list literally dozens of mistakes I’ve made or seen other grouse hunters make over the years. But we’ll focus on the ones that are most common and the ones that hurt your chances for success the most. Knowing what they are ahead of time should help you avoid them, or at least recognize when you make them and avoid them the next time.

1. Not Getting in Hunting Shape

Grouse hunting is extremely demanding physically. You’ll walk for hours, often in uneven, hilly or mountainous terrain. First get a physical, and then start an exercise program that is hunter specific before you get serious about grouse hunting. You might walk 5-10 miles in a day carrying a 6-7 pound firearm. Be ready for the challenge before you take it.

2. Using the Wrong Gun

Benelli Nova Pump-Action Shotgun

Many grouse hunters use guns that are way too heavy. They also carry guns with barrels too long.

A heavy gun becomes a burden to carry on the long hikes through hilly or mountainous country grouse inhabit. It also is harder to bring up quickly and swing on a fast-departing target when you only have a second or two to find the bird and fire. The long barrel is a hindrance working through the thick, vine-tangled, briar-infested cover where grouse like to hang out. It can even get caught on sapling branches when you try to mount and fire.

Leave those guns at home and save them for waterfowl or pheasant hunts. Instead, tote a 12-28 gauge shotgun in any action you please, but make sure it’s light. It should also have a fairly short barrel, for easy, quick swinging in thick cover. I like a double, but autoloaders and pumps are also fine. Avoid a single shot if possible, because you’ll often miss with your first shot and occasionally the grouse will still be in view for a second try.

3. Using the Wrong Choke

Using the wrong choke tube is a common mistake for many kinds of upland bird and small game hunting, but it’s especially critical for grouse. The thick cover these birds inhabit most of the time means shots will be short range. Sometimes they might be as close as 10-15 yards. Other times maybe out to 20-30 yards. Thirty-five yards would be a very long grouse shot.

Grouse can be extremely well camouflaged. Can you spot this one? Check grouse image below to see if you did.

That makes it clear that an open choke tube is usually the best bet. At times improved cylinder will be okay. But very rarely will a modified be a good choice. My main grouse gun is a 16-gauge bored skeet and skeet. If a bird gets up 35 or 40 yards away, I just pass it up. But 90 percent of them get up closer, and the open barrel gives a broad pattern that helps my mediocre shooting skills.

4. Using the Wrong Pellet Size

Small shot, size 7 1/2 or 8 is usually best for grouse. The smaller the pellets, the more in a shell and the more likely one or two will connect. And though they look big, grouse are fragile birds and fairly easy to bring down. I go with size 8 for early hunting, 7 1/2 for late season. If you’re hunting unusually open terrain or it’s late in the season and some grouse are flushing far out, 6’s can also be a good choice. Anything bigger simply hurts your chances of connecting.

5. Walking Too Fast

Human nature makes us want to cover a lot of ground as we search for grouse. The more ground we cover, the more birds we’ll find. Right? No. Not really.

Red circle around Grouse where camoflauged in the wooded area
Did you spot the Grouse sitting on the log in this picture ?

Actually you’ll probably walk past a lot of birds if you use that approach. You’ll also wear yourself out faster physically and have to cut the length of the hunt short. Or you’ll be tired when a bird flushes and not be able to mount and fire as quickly as you otherwise could. You’ll also tend to rush past good bits of cover instead of walking them out thoroughly.

Grouse are extremely well camouflaged and really don’t like to fly. They would much rather sit tight and let you saunter past them, even as close as ten feet away, rather than fly. They know they’re exposing themselves to possible danger when they do and want to avoid it if possible. The slow walker seems more threatening to them and is more likely to make them flush.

6. Not Stopping Often Enough

This brings us to a related mistake. Not only should you walk slowly while hunting to be sure you cover the best habitat carefully, you should pause often. This is not just to keep your stamina up, but also a strategic tactic. Pausing seems to make a grouse feel a predator has spotted him and is about to attack. The silence unnerves him, compared to a hunter just casually walking past him. He tenses and flushes.

I’ve found that you’ll flush almost twice as many birds by stopping frequently in good cover as you will if you simply walk through it. It also lets you raise the gun to port arms and be ready if a bird rockets out.

7. Not Stopping at the Right Locations

Make sure you’re in a clear area when you stop so you can raise the gun and swing it without the barrel catching on a grape vine or sapling growth. Also stop near enough to the prime cover that when a bird flushes he won’t be out of range. And finally try to chose a spot where there won’t be an obstruction between you and the quarry when it flushes.

8. Hunting in the Wrong Type of Cover

Not finding the foods grouse use is another mistake.

There are generally two types of cover in a typical forest. One is open, park-like, with mature timber. It looks like a nice place to take a walk or have a picnic. Then there’s grouse cover!

It’s thick, congested, overgrown with grapevines, greenbrier and dense sapling growth. There are blowdowns, laurel, rhododendron, young aspen and alder trees. Sometimes the area is growing back from clear-cutting. It makes for tough walking and tough shooting. But that’s where the grouse are.

The mistake too often made is hunting where it’s easy walking, easy shooting and inviting. The grouse aren’t there. They’re in the thick stuff. Get in and bust them out.

9. Not Finding the Food

Not only do you need to find this thick grouse habitat, you can improve your chances further by pinpointing areas within these dense jungles that provide grouse the most food. It could be grapes, honeysuckle, ferns, greenbrier, oaks, or aspen. Dogwoods are also favored, as are hawthorn, alder, blackberry, raspberry, viburnum, plum, sumac, ash, birch, cranberry and olives. Old abandoned orchards can also attract the birds for the leftover fruit. Ridges are often best early. Later they may move down to hollows, stream bottoms and more protected cover with less snow accumulation.

It’s important to have a bird dog that will stay close, like this Irish Setter, so they won’t scare off the grouse.

10. Hunting Too Close to the Road

Birds will be warier and spookier here. They’ll also be present in lower numbers because of the hunting pressure they’ve been exposed to. Hike in a quarter or half mile, and then start hunting. You’ll find more birds and they’ll be less skittish.

11. Using Wide-Ranging Bird Dogs

A dog can be a great help in grouse hunting. But if you have a wide-roaming hunting dog that doesn’t stay close and obey commands well, it can actually bump more birds out of range than it points for you. By all means, bring a dog if he’s trained to hunt close and knows grouse. Otherwise, you might do better off just jump shooting the birds. I like a dog that sticks close, always within about 50-75 yards or closer.

BirdDown Dog Training Grouse Scent

Tip: BirdDown Dog Training Scent lets you add the scent and smell of real grouse to your dog’s training easily. Easy-to-apply and easy-to-use, this wax-based stick adds a strong scent of a grouse to a training dummy with a simple dab or wipe on the dummy.

12. Not Shooting Quickly Enough

This is common among novices in particular. A grouse thunders out of cover, often right at your feet, so loudly and raucously that it’s shocking. By the time you collect yourself and raise the gun, he’s out of sight. Or maybe he’s so close you let him get a ways out so the shot won’t damage the meat. In both cases, the clever grouse will likely put brush or a tree between you and him and vanish before you slap the trigger. Shoot quickly, as soon as you can get the gun up to your shoulder and firmly mounted and your cheek down on the stock.

13. Not Being Ready for a Second or Third Grouse to Flush

If you flush a grouse, there’s often a chance another bird may be in the covert where he was. Be ready for a second chance if you missed the first bird. If you bagged the first grouse and have marked carefully in your mind exactly where it fell, then you can try for a second one. If you haven’t, let the second grouse go and concentrate on locating the one you hit.

14. Not Watching Carefully Where a Flushed Bird Flies

If you miss a grouse, there’s a decent chance you can re-flush it. But to do that you need to watch carefully as it flies away and get a good bead on where it might have landed. Often it will fly through a semi-open area, land and then run into the next thick patch of cover. Pay attention and you may get a second, or even a third crack at that bird.

15. Hunting in Areas Exposed to Strong Winds

Grouse don’t like wind. It robs them of their ability to sense movement of brush and potential approaching predators. And in winter it robs them of body heat and chills them. Look for hollows, valleys, dips, and sides of hills protected from the strongest breezes to bag the most grouse. You’ll also find the hunting more comfortable there as well.

16. Hunting Alone

If the truth be known, I have to confess I do this a lot. But when possible, always try to bring a buddy or two along. It’s much easier to thoroughly hunt a patch of cover if two bodies are walking through it, trying to flush birds.

Often you’ll move a grouse that will fly by your partner and vice versa. That will give you extra shooting opportunities you wouldn’t otherwise have. Four eyes are also better than two for finding dead birds. And it’s simply fun to share the woods with a companion and share the joys and frustrations of chasing America’s most challenging upland game bird.

A Brassica Breakdown: Variety and Timing

0

The Incredible, Edible Brassica

A look at which brassicas are best at various times of the season and under different conditions.

Todd Amenrud

different types of brassicas

From the time Toxey Haas and BioLogic first guided “whitetail deer management” into the age of planting brassicas, we have been researching, learning more about them and understanding better how to utilize different brassicas to help us accomplish a wide variety of management goals. If you have enough ground to devote to your food plot program, most managers would agree that a well-diversified food program with an assortment of plants that will offer your herd what they need regardless of the time of the season or current conditions is the way to go. Some of the plants you choose would likely be perennials, but for the best in attraction during the hunting season it’s hard to beat a food plot full of luscious late summer to fall planted annuals. When it comes to annuals, many readers know that brassicas are, in my opinion, the best deer food God ever created. They are my favorite plantings for numerous reasons; they are the most attractive, best producing (yield), most nutritious, easiest to plant and one of the hardiest growing food plot choices we have. Combine that with the fact that they’re also great for the soil. What’s not to like? Sure, I live in the North, but those in the South shouldn’t be so quick to snuff them. They work the same throughout the South, but closely examining the palatability timeframe and conditions under which each variety of brassica performs best is more important in the South than in northern climes. At first (about 20 years ago) we at BioLogic ran into a couple instances of having to battle the “whitetails’ learning curve.” When you introduce a plant deer have never seen before, one that if they tried it before the sugars had developed may have been bitter, it could take them a season or two to become accustomed to it. However, that was rare and I haven’t heard of it happening in years. Annuals, in general, are typically easy to plant and since these are late summer to fall plantings, (depending on your location north to south) the summer weed cycle should be over for the most part. While always called a fall planting, you’ll see that I call these late summer to fall plantings. Because if you wait to plant some of these until it’s literally fall (September 22 or 23, depending on the year and your location), in some areas you may end up with a failure, or at the very least you’re not getting the most out of the plants, especially brassicas. Many still plant their brassicas when they have always traditionally planted their cereal grains. In the northern region and into Canada, brassicas should be planted during July through early August and cereals planted from late July (in the far north around the Canadian border) through August or even September further south (Iowa, Illinois, Nebraska, etc). Obviously that should be adjusted a bit later the further south you go, all the way into October for the Deep South. Years ago, when Toxey Haas and Grant Woods first introduced brassicas to the food plot market, rape was the primary type of brassica used. As most of you probably know, brassicas require cold temperatures to convert the plants’ high levels of starch into sugar and transform it into its most attractive, palatable stage. Initially, for some in the South the brassicas weren’t reaching their most appealing state until after the hunting season was over. Since then, BioLogic has introduced other types of brassicas that develop their sugars much earlier, and even in the South are likely the best attraction and nutrition you can plant – bar none. A common progression during the hunting season would see your herd switch from legumes (both perennials like clover or alfalfa, or annuals like soybeans or cowpeas) to cereal grains (like oats, wheat or triticale) to brassicas (like radishes, turnips, rape and kale). While there are many other things we can offer our herd, with these three types of plantings your herd should have a palatable food choice throughout most of the hunting season or until each type of food runs out. Different crops will dramatically extend the palatability timeframe of your plot. To take that “variety approach” a step further, within every type of crop, by planting a different assortment of each it will also extend the amount of time your plot will remain attractive, especially when it comes to brassicas. From my experience, they will attack radishes first. Whitetails will first lay siege to the green tops, then finish by devouring every bit of the long root tubers. These aren’t your “auntie’s dinner radishes,” these are large tubers that resemble a “huge, white carrot” rather than our more familiar small, round, red and white radishes. My favorite blend is BioLogic’s Deer Radish, it’s not just my preferred brassica planting, it’s my favorite planting, period. From my experience they will begin eating these radishes as early as late August in the north and around early October further south (northern Alabama) until they’re gone. So if you plant enough, they can last throughout the season. Next, your whitetails will typically set their sights on various turnips and beets. While sugar beets are actually in a different plant family and are not a brassica, they are very similar. Just like turnips, they hold a high concentration of sucrose, however it is contained mostly in the root bulb (They still eat the tops.) as opposed to brassicas that have sugars contained throughout the plant, and the sugar presence is caused more by photosynthesis than cold temperatures. I usually see them hit these plants after the radishes, and I use them for attraction during the months of November and December and on until they’re gone. My favorite blend is Winter Bulbs & Sugar Beets, and just like the radishes, they will consume the entire plant. First they’ll eat the greens and then the root bulbs. The radishes are easier for them to pull out of the ground to consume, so with turnips and beets you’ll often see partially eaten bulbs or they’ll scoop out the top and inside of the turnip or beet so it looks like a “beet bowl” left in the soil.

green globe turnip food plot
Green Globe Turnip

Lastly, they tend to hit rape, canola and kale after the radishes, turnips and beets. These last three brassica types do not produce large root bulbs or tubers like radishes, beets or turnips, but they produce an amazing yield of sweet, green forage. I tend to use these last three brassica types more as winter nutrition than hunting time attraction, but especially when it comes to the blend Maximum, you may want to also plant some for hunting attraction. Maximum produces a yield of more succulent, nutritious forage than any other planting I’ve ever seen. While they certainly may hit these brassicas as soon as cold temperatures convert the plants’ huge green tops to become sweet, if you have radishes and turnips also planted, they’ll typically consume rape after the other two brassica types. Kale is especially cold hardy. Kale’s large leaves will stay green and attractive long into the winter even if covered by several feet of snow. I tend to utilize kale only as winter nutrition. Remember that the timeframe I’m suggesting for these to be their most attractive is just an estimate. It can vary from year to year and region to region. As an example, in the “big woods” where there isn’t a lot of agriculture or other crops to back up your food plots, they may eat any of these as fast as they come out of the ground. Or, if we have an unseasonably warm fall it may take the brassicas longer to develop their sugars, pushing back the entire attraction calendar. I didn’t want to be too northern biased in this piece, so I asked the “frenetic food plot scientist of Alabama,” Austin Delano, who also heads-up BioLogic’s Research and Development, “How do you notice whitetails reacting to each of these plant varieties throughout the south?”

Austin said, “I definitely agree with the order. I think deer density, surrounding food sources (or lack of), a deer herd’s familiarity with the plot, and weather conditions during that year are all variables that can determine how fast and when a brassica plot is consumed.”

He also echoed how important it is to have a “blend” with varying maturity rates and palatability timeframes.

Delano continued, “As far as a north/south comparison, I do think deer consume brassicas earlier in the fall the further north you go. Not just because the onset of cold weather changes the plants, but it also changes a deer’s metabolism and increases their need for heavier carbohydrate foods like brassicas. I also believe that brassica consumption (regardless of type) increases over time and gets earlier in the year when they are planted in the same area every year. In other words, deer that have several generations of exposure to brassicas typically use them earlier and more often.”

Basically he’s also talking about a learning curve, but now it’s working in the opposite direction, in the deer’s favor. I guess it’s in our favor too. The other great thing about brassicas is not only are they the best attraction I have ever seen, they are without a doubt the absolute best nutrition you can provide for your herd. With an average crude protein content of 32% to 38% (depending on the cultivar and stage of growth) and a TDN (Total Digestible Nutrients) of over 80%, that would suit me fine, but add to it they yield more than any other planting and they are great for the soil (radishes especially). Check mate! Brassicas win! As I said, best deer food God has ever created.

deer in brassica field

More often than not, I plant my cereals and brassicas separately, for several reasons. However, if a manager wants a fast, simple, “one and done” plot, a blend of cereals and brassicas (and sometimes other plants) together may be your ticket. Blends like Full Draw, Last Bite, Green Patch, or Winter Grass Plus provide brassicas mixed with cereal grains. An annual or bi-annual clover is sometimes added to provide extra nutrition or a flush of nutritious forage reemerging after dormancy the following spring. Delano also told me, in his home state of Alabama, he likes to mix Trophy Oats with Deer Radish. He said it’s an easy to do, “one and then you’re done” hunting plot. Provided you plant enough, this can keep them coming back for more throughout the entire hunting season. I don’t know anyone who tests more food plot options than Austin, or many who know as much about deer management, so when he says so, I take it as fact. There are several reasons why a manager may choose to plant each (oats and radishes) separately, but as a simple plan for an uncomplicated, yet diverse hunting plot I would consider this. Think about all the options we have to plant for whitetails, we’ve only partially covered brassicas (and one beet type). We didn’t even talk about spring planted crops that can also be very attractive to whitetails like corn, buckwheat or clover. Or other late summer/fall planted annuals like winter peas, which are amazingly appealing to whitetails. One important thing to mention is that brassicas can also be planted with perennials. In the North they traditionally plant perennials during the spring, but in the South this can be a great way to kill two birds with one planting. If you’re in the transitional region or north and habitually have problems with weeds in your perennials, planting a brassica/perennial blend during the late summer can produce a great start to a perennial plot. Blends like Perfect Plot or Premium Perennial are my go-to products for this. You just need to make certain when planted you give the perennials 50 to 60 days of growth so they can establish their root systems, which will ensure their survival and reemergence after winter dormancy. With the perennial/brassica option since obviously the brassicas are annuals and won’t come back, I would suggest that you over-seed with a pure perennial like Clover Plus or Non-Typical the following spring to fill in any spaces vacated by the annual brassicas growing there the previous year. In a very roundabout way, I guess I’ve tried to convey that “variety in a food plot program is important” and “brassicas are my favorite food plot crop.” All of the plants mentioned are great choices for a food plot, but they’re eaten at different times or under different conditions, which is exactly why it is wise to plant a variety if you have enough acreage to devote.

Best Air Rifle Deals

Popular Posts

How far can an air rifle shoot accurately?

0
An air rifle's effective shooting range depends on various factors, including the type of rifle, the caliber, and the power source. Generally speaking, most...

How to make a break barrel air rifle more powerful

0
"Unleash the Power: Mastering Break Barrel Air Rifles for Maximum Performance. Discover expert tips and techniques to enhance the power and precision of your...

Best Distance for Sighting In an Air Rifle

0
Shooting with an air rifle always seems like a thrilling experience, but if you are a newbie then you have lots to learn. One...

PCP vs Gas Piston: Which One is Better?

0
The perfect airgun is a difficult pick when you are new to gun-hunting. There are a lot of things to keep in mind, starting...

What Is a Break Barrel Air Rifle?

0
A break barrel air rifle is a type of air rifle that uses a break action to load and unload pellets. It is one...