Home Blog Page 82

The Best Rod, Reel, Line and Lure for Crappie Fishing

0

Sharing is caring!

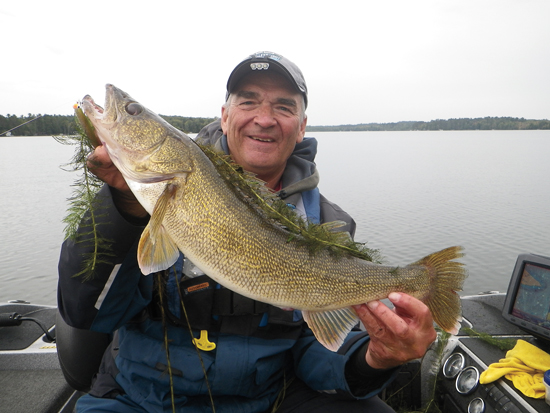
Editor’s Note: Bob Judkins, an experienced crappie fisherman and member of the Oregon Bass & Panfish Club, offers his favorite equipment and tackle choices as well as some tips about where to catch local crappie, especially in the spring.

Recommended Crappie Rod: Cascade Pro Series

5′-6″ light-action spinning1/8 – 1/4 ounce lure, 2 – 6 pound line

This rod is really light, so you can fish all day without much arm fatigue. That’s a great plus for older anglers like me.

My other rod is a Wally Marshall Signature Series WM80CP-2, 8′ light-action, 1/16 – 1/4 ounce lure weight, 2 – 6 pound line. That rod is good for fishing brush piles because it has a longer reach and a good backbone for lifting big slab crappie out of the nastiest brush pile.

Ultra-lights and micro-lights are fun rods for crappie fishing. I don’t use them anymore. I’ve lost too many big fish such as bass and channel cats while fishing for crappie with those rods, and you will probably hook one of these monsters while crappie fishing.

If you are a first-time crappie angler, you don’t have to go out and buy a dedicated crappie rod. The rod that you may have been using for trout fishing will work just fine.

Recommended Crappie Reel: Wally Marshall Pro WP30 Spinning Reel

Weight: 7.6 ounces; 6 bearingsLine capacity: 160 yards / 6-pound line

This reel has a larger spool than most small reels. The larger spool helps reduce line twist, a common occurrence when using monofilament line and light jigs. The drag of this reel is really smooth and it will handle the largest of fish.

Recommended Crappie Line: Bass Pro Shop Premium Excel Monofilament Line

6-pound test, clear blue fluorescent (for high visibility)This is the fishing line I always end up using. It’s easy to see and “line watching” is important when you fish for crappie. Also, the memory of this line is not bad at all.

As far as super lines are concerned, I have used the Fireline Crystal in 6-pound test. It handles great and casts a long distance with no line twist, but I recommend that you tie on a clear monofilament leader.

The reason is as follows: A few years ago, I was fishing for crappie at Brownlee Reservoir with a friend. We were fishing the same depth, using identical jigs and bobbers, but we had on different fishing lines – mine was monofilament and his was a “superline.”

I was catching fish on every cast, but my friend was not. We then switched rods to see if that would make a difference. It did – no fish for me, but a fish on every cast for my friend. The conclusion was very clear to us: If you use a “superline,” tie on a clear leader.

Recommended Crappie Bobber: Weighted Torpedo Foam

Length: 1 ½” or 2”

There are so many types of floats to choose from – balsa, plastic, foam – and they all work well. I prefer the weighted torpedo foam for a longer cast.

Recommended Crappie Lure: Northland Fire-Fly Feather Jig

Sizes: 1/16, 1/32 and 1/64 ouncesColor: Parakeet.

This Northland jig is my favorite “go to” jig in color and size. I like its slow fall and small profile. It is a good jig for all panfish. My second “go to” jig is a Northland Gypsi Jig with crystal-flash in chartreuse and in 1/16 to 1/32-ounce sizes.

I use this jig in late summer and fall. It has a bigger profile with lots of flash. Soft plastic crappie jigs of different shapes and colors work well, too. If that’s what you have, use them.

COLOR?I’ve asked lots of crappie anglers, “What color is your favorite?” Their answers covered so many different colors. It may be that when crappie are on the bite, color may not be that important. But, when the fishing is tough, I “go to” the small Fire-Fly and white Crappie Nibble.

Recommended Crappie Bait: Berkley Crappie Nibbles

Color: White.

Crappie Nibbles come in other colors – pink, chartreuse, glow-in-the-dark. I’ve used them all. But WHITE nibbles are the ones to use and “I don’t leave home without them!”

Crappie Nibbles are really soft. If you take them out of the jar, spread them out and let them air-dry for 24 hours, they will firm up a bit and stay on your jig longer when used. But, if you dry them too long, they will become rock hard and you would not want that to happen. I keep two jars of “cured” nibbles ready to go.

When and Where to Catch Crappie in Oregon

For the beginner, the best time to fish for crappie is during spawning time in the spring. This is one of the easiest times to catch crappie. Spawning takes place when the water temperature is 62 – 65 degrees. Around Portland, this may be in May and June (give or take a couple of weeks). Small shallow ponds and lakes warm first.

My favorite small body of water is Vernonia Lake, located just south of the town of Vernonia, Oregon. To get there, take Highway 26 west to Highway 47; turn right; follow Highway 47 to Vernonia. Continue driving through town and you will find the lake to your right.

The travel distance from downtown Portland is about 50 miles. This lake is very people friendly. It has wheelchair accessibility, a small gravel boat ramp (boats with electric motors are allowed). Special Regulation: The limit is 10 crappie per day; no minimum length.

When I fish Vernonia, I go to the left of the parking lot and down to the wheelchair dock.

Most anglers will be fishing for trout in the main lake. I turn around and fish back toward the bank. I also fish the shade under the dock.

Use a 1/64 ounce Fire-Fly with Crappie Nibbles, a bobber, and jig it 2-3 feet down. This is a good place to start. If you don’t catch fish here, just move around the lake and try different spots.

In the Portland area, Swan Island Lagoon (on the lower Willamette River) can be a good spot. It’s a popular place and if your timing is right, you will have lots of company! It has good bank access.

Fish the west side of the Lagoon. Look for logs, pilings, docks and shade. They are all good spots to fish.

The Oregon Bass & Panfish Club is involved in a variety of angler education and fisheries enhancement activities. See their club page on this website.

Understanding and Keying In on Lockdown Bucks During the Rut

0

Hunters who can dissect and recognize the unique activities that occur during the lockdown phase of the rut are the ones most likely to earn a trip to the taxidermist.

Once bucks find a receptive doe they stick with her until breeding is completed in what is known by some hunters as the lockdown phase. This can be a challenging time to hunt mature bucks but it’s not impossible to put your tag on one during this period. (Photo: Getty Images)

It doesn’t matter if you pick up a rifle once a year and climb into your only treestand, or if you hunt the entire deer season across multiple states, every whitetail hunter has one thing in common: anticipation of the rut. That’s because the rut always makes deer more visible, more likely to fall into our laps, and ultimately we have a better chance to see big bucks during this period of the season. We all buy tags with the goal of punching them, and even those of us self-proclaimed “meat hunters” are mesmerized by a fine set of antlers.

While the rut is often referred to as a singular event, in reality it’s a series of events that are all biologically neces- sary for deer to do their business and create more deer. You don’t have to be a biologist to understand the whitetail’s breeding rituals, and thankfully there are plenty of places to apply your knowl- edge and hunt during the heart of the rut — when daylight deer activity is at its annual peak and your odds of scoring are highest.

The lockdown phase of the rut helped me kill my best buck to date, after an eight-hour standoff in the Nebraska Sandhills. Before I share that story, let’s brush up on some rut realities with whitetail biologist Dr. Harry Jacobson, and discover why he’s also a fan of hunting bucks during the lockdown.

RUT TRIGGERS AND TIMING The breeding and birthing schedule of whitetails is optimized to maximize fawn recruitment. Research and logic suggest weather greatly dictates the timing of this schedule, so that does drop fawns when Mother Nature is feeling warm and fuzzy.

White-tailed does carry their fawns an average of 200 days no matter where they call home, but there are some notable differences in the rut across the whitetail’s range. For instance, white- tails in Canada breed only once per year, usually in October/November. Canadian fawns are thereby born during summer, when they have plenty of time to insulate their bones before winter’s harsh grip takes hold. On the opposite end of the spectrum, Southern deer, living where the average climate is moderate, have a wider breeding period.

A decreasing amount of daylight — or photoperiod — is the primary trigger for whitetails to prepare their bodies for breeding. We refer to this initial stage as the pre-rut. Bucks start getting antsy and they become increasingly drunk with testosterone, priming them to establish their role in the pecking order. They rub trees and lose velvet on their antlers, their necks swell, they make scrapes, and they start sparring to prepare for the breeding war that looms on the horizon. When it comes to does, however, these changes are mainly within their internal reproductive system and therefore less evident.

While photoperiod is the main factor influencing rut timing, genetics can also play a role. Jacobson pointed to a study in which a handful of deer were swapped between Michigan and Mississippi, and the deer “… shifted their reproductive patterns about three weeks earlier or later, depending on whether in Michigan or Mississippi. However, regardless of geographic location, the rut of Mississippi deer was about seven weeks later than that of the Michigan deer.” Intriguing data, but under natural circumstances with native deer, you should be able to closely predict annual rut timing in your neck of the woods by photoperiod — because it’s consistent year to year.

Pre-rut bucks begin traveling more, hoping to find the first hot does on their stomping grounds. “Usually the first does to come into estrus for the year will trigger most of the buck fighting activity,” Jacobson explained. “It might be three to four weeks before the peak of the rut. The fights are most serious at this time of year, so this is when most buck-fighting trauma occurs.”

The pre-rut is chaotic, as anxious bucks impatiently wait for does to fulfill their breeding desires. It can be an exciting, yet frustrating time to be in the woods. You’re likely to witness chasing, fighting and an overall surge in deer movement. But this is also when bucks become unpredictable, and those you see are likely to be on a mission and difficult to stop for a shot.

WATCH: WHAT TO DO AFTER FINDING DEER SIGN IN THE WOODS

PEAK RUT AND LOCKDOWN And now, the moment we’ve all been waiting for: the peak rut. It’s a critical event for whitetail hunters because a doe — or multiple does — are ready to bow-chik-a-wow-wow with bucks on your hunting ground. This goes hand in hand with lockdown.

Lockdown is when an estrous doe is being tended by a buck or multiple bucks. Estrus lasts approximately 24 hours and the doe might only be receptive to breeding a fraction of that time, so her suitor will stick to her like Gorilla Glue.

“During that period she usually gets pushed into thick cover by a dominant buck,” Jacobson said. But other bucks will often be lingering nearby, hoping for their chance at some action. “I’ve seen 12 to 14 bucks hanging around a doe,” Jacobson added.

Strategically, Jacobson recommends covering lots of ground to make the most of lockdown. “Bucks can be downright stupid during lockdown, but it’s pretty unpredictable where they’re going to show up, so I go look for them by spotting and stalking,” he said.

“You need larger acreages to be able to do it.” This is easiest done with a rifle in hand, but don’t think for a second it’s impossible as a bowhunter. “I’ve used this tactic in several places — Texas, New York, Mexico — and I haven’t hunted with a rifle for well over 30 years,” Jacobson said.

How far will a buck travel during peak rut? According to Jacobson, it depends on individual bucks.

“Basically, you’ve got two types of bucks: the searcher that travels throughout the countryside looking for receptive does, and the buck that just waits in the neighborhood for the action to begin. But when the rut is on, both types of bucks will be traveling way more than at any other time of year.”

Bucks in open country with sparse cover are also likely to travel farther than their brush-country brothers, and they’ll also be more visible. Chasing Western whitetails during the rut can be very fun and productive. Regardless of your location, there’s one constant as noted by Jacobson.

“Bucks are much more approachable during lockdown than they are at any other time in the season. As long as the doe doesn’t see you, the bucks are going to stay. They almost ignore you.”

Buck-to-doe ratios, nutritional conditions, habitat types and other local factors can influence such deer dynamics during lockdown. Generally speaking, most does in one area will go into estrus within a short time window and get the opportunity to mingle with at least one buck.

“With a very low buck-to-doe ratio, there’s a remote possibility a doe won’t be bred on her first cycle,” Jacobson noted. If she doesn’t get lucky, she will go into estrus again 21 to 29 days later — referred to by some as the second rut. “If you have good nutritional conditions, upward of 40 percent of yearlings will breed during their first year of life,” Jacobson said. “This usually happens a month or two after the first rut. They’re using that extra time to reach a critical body weight that allows them to carry fawns as yearlings.”

Buck-to-doe ratios, nutritional conditions, habitat types and other local factors can influence such deer dynamics during lockdown. Generally speaking, most does in one area will go into estrus within a short time window and get the opportunity to mingle with at least one buck.

EIGHT HOUR STAND-OFF It was mid-November in north-central Nebraska — a remarkable region of the country where mule deer and whitetails thrive together in the rolling, rugged Sandhills. As I pulled into Goose Creek Outfitters, owner Scott Fink greeted me and my cameraman, Jeff “FaFa” Shelby. Two years had passed since I’d visited Goose Creek for an unforgettable mule deer hunt, when I killed my first muley buck that was locked down with a doe. This time, whitetails were on my mind.

Upon our arrival at dusk, I verified the zero of my Mossberg Patriot with Nosler Ballistic Tips punching a tight group at 100 yards. Scott added to the momentum of my confidence by laying out a game plan for the following morning. “A really big buck has been hanging around a swamp down the road. I think we’ll start by glassing that swamp tomorrow.” A deceiving warm breeze whispered across the prairie as we packed up and headed back to the Fink ranch, but ScoutLook Weather forecasted a cold front that would scream into the area overnight. Morning came quickly and two important predictions were validated as we glassed the Sandhills at sunrise: It was blistering cold and the swamp buck was there.

But the 150-class whitetail wasn’t across the road in the willow swamp where Scott expected. Instead, I spot- ted him through my 8X Nikon binocular on our side of the road — chasing a doe into a dense patch of cedars. Several minutes passed as I watched for the deer to pop out, but it didn’t happen. It was the tail end of the rut, but this buck was on lockdown with one last hot date.

These deer were tucked into a precarious position. They were downhill just far enough that I’d have to get even with them to be in comfortable rifle (and camera) range, but the only available cover would put them downwind. Scott backed out to reduce the human variable of our potential failure. FaFa and I plopped down in the wide open, with a stiff wind blowing across our desperate faces. I set up my shooting sticks and he deployed his camera tripod. We would wait until the buck surfaced outside the cedars, but like him, we knew this futile effort was at the mercy of a stubborn doe.

“There he is!” The buck came blazing out of the thicket on the doe’s heels. I didn’t even have time to shoulder my rifle, let alone prepare for a shot. They ran to the opposite side of an adjacent woodlot, out of sight. “Damn,” I whined to FaFa. “We’re probably screwed on this deal.” But holding onto a fragment of hope, we hurriedly ran uphill and circled around an evergreen windbreak, praying this would get us parallel to the deer while remaining downwind and in range. We found our new post and settled in.

The massive swamp buck reappeared in a flash, this time jumping a fence and showing himself just long enough to make us scramble for a shooting position, but just brief enough to compound our frustration as he disappeared again behind heavy cover. Seven hours had now passed since my first glimpse of this lockdown giant. The gloomy autumn light was fading, but our commitment to this hunt was burning stronger than ever.

One hour later — a total of eight hours on this rutting duo — I found a steady rest and sent a Ballistic Tip into the swamp buck’s broadside heart. Patience, determination and luck were all integral to my success … but I’d be remiss without extending some gratitude to the bossy doe that kept a lovesick buck on lockdown.

— Josh Dahlke is an outdoor writer and host of an online hunting film series called THE HUNGER. To see the author’s hunt featured in an exciting short film, search YouTube for “Hunting a giant whitetail on lockdown.” When his three freezers aren’t full of wild game, he suffers from anxiety and depression.

What Eats A Deer?

0

What Eats A Deer? – 10 Deer Predators

In this article, we talk about the mighty predators of deer

For a long time, deer have been a commonly hunted animal – both by humans and other animals.

In fact, they were introduced into many places, such as New Zealand, simply for the purpose of pleasure hunting.

6 species of deer are found in the United States, though only two of them are native to the land.

While thinking of deer, you might be thinking of only smaller, white-tailed species (such as Bambi). However, larger animals such as moose and reindeer are also species of deer.

Despite their larger size, even these species of deer are herbivores. All deer have many large and small predators in the wild, some of whom we discuss below.

Deer Facts

  • Deer have eyes placed on the opposite sides of their heads. This allows deer to have a 310 degrees visual field. Compare this to the vision field of humans, which is only 100 degrees!
  • New-born fawns have underdeveloped scent glands and are essentially odorless. After birth, the doe licks away any odor-causing component that can be detected by predators.
  • Antlers are commonly used to distinguish male deer (have antlers) from females (do not have antlers). However, both sexes of the Chinese water deer do not possess antlers. The males are instead identified by their long canines or tusks.
  • Now extinct, the Irish elk deer was the largest-ever deer species. They could grow up to seven feet in size. Their antlers spanned as much as 12 feet!

What Animals Eat Deer?

Being lower in the food chain, deer are a primary food source for many carnivorous animals in the jungle.

They are mostly defenseless in front of larger predators and only have their speed to help them escape. Older or baby deer and disabled members of the herd are at high risk of being hunted.

Wolves Eat Deer

Deer have many natural predators. Wolves are one of the apex predators in the jungle, and deer form an important part of their diet.

Wolves hunt in packs. A single deer kill can feed a wolf pack multiple times.

Since deer also move in herds, wolves tend to narrow in on them until one of the deer gets separated or left behind.

Deer have no way of protecting themselves other than by running away or fighting with their antlers.

Coyotes Prey on Deer

Coyotes are also natural predators of deer. Unlike wolves, they are solitary creatures but will still hunt in packs to bring down larger animals.

Coyotes mainly eat many small animals, including rodents and birds. However, they are scavengers and often feed on left-behind deer carcasses instead of actively hunting them.

There has been much debate as to whether coyotes are negatively impacting the deer population in some areas.

However, it’s hard to tell whether they actively kill or simply eat leftover venison.

Bear Feed on Deer

Bears feed on a variety of animals and plants. They are omnivorous, and their diet consists of fish, small mammals, berries, grains, and honey.

They also hunt deer on occasion, as well as feed on deer carcasses.

Beers are opportunistic (lazy) hunters. They prefer to target babies and sick deer for their hunt because they are no match for the deer’s speed.

Not only are they slower, they can only cover short distances even if they try to run fast.

Hogs Are Predators of Deer

Wild hogs are generally considered an invasive species. They are aggressive and exist in the same regions as deer.

Hence both species cross paths, often making a meal out of the deer. Hogs are not native to Central and North America. They were brought there by Spanish explorers as a food source.

Now, hogs have become a primary predator responsible for the decline of the white-tailed deer population.

They actively hunt deer as well as feed on deer carcasses. New-born fawns are common victims, as they are left behind by their mothers in leaf beds to forage.

Mountain Lions Are Deer Hunters

Both whitetail and mule deer form an important part of a mountain lion’s diet. Mountain lions are a type of big cat that is responsible for hunting at least one deer per week.

Apart from deer, they also feed on elk, moose, sheep, rabbits, raccoons, and other smaller mammals. They may also eat cubs of other apex predators, such as coyotes and wolves.

Despite this, deer are their favorite as one deer can sustain them for a long time.

They hunt by aiming at the neck of these animals and snapping their spine. Mountain lions are solitary hunters.

Lynxes Can Eat Deer

Lynxes feed mainly on two types of deer – the roe deer and the red deer. This is because their habitat range primarily overlaps with the range of these two deer species.

Lynxes are big cats that are mainly carnivorous. Along with deer, they prey on smaller rodents and mammals like rabbits, raccoons, marmots, squirrels, and more.

Sometimes, they may feed on older deer carcasses. Usually, they do not hunt larger animals and prefer to eat carcasses in such cases.

Wolverines Are Deer Predators

Despite the name, wolverines are actually a type of bear. Wolverines are small in size but are bold and aggressive to take on any animal crossing their path.

Deer are not one of the primary diet meats they rely on. They mostly eat smaller mammals.

However, fawns and disabled deer can be good game for wolverines. They are not as agile and cannot hunt faster and stronger deer.

They scavenge and often eat old deer, elk, and moose carcasses.

Alligators Consume Deer

Alligators are one of the top predators of deer. They float just beneath the water, and camouflage themselves against dried wood logs.

They grab deer from the water’s edge as the herd comes looking for a sip.

They have extremely strong jaws with great crushing power. They snap the necks of their prey and drag them underwater until the animal passes out.

Alligators are cold-blooded and run on low energy. They only need one major feeding a week to keep going.

Large Birds of Prey Can Eat Deer

Deer fawns, when born, are extremely defenseless. Both young deer and sick deer can be good game for large birds of prey such as hawks and eagles.

Wild crows and vultures feed on old deer carcasses left behind by other predators.

Raptors can often take away smaller-sized deer in flight. However, this is rare, and prey birds mostly prefer smaller animals, such as rabbits and squirrels.

Humans Hunt Deer For Meat

Deer have been a prime sport animal for humans for ages. For ages, deer have been hunted as a sport as well as for food.

Deer meat, known as venison, is bitter but nutritious and high in animal protein.

Deer hunting is now illegal in most parts of the world. In the US, it is a regulated activity within certain areas, where hunting is allowed during deer hunting season if they pose a threat to crops.

This is not considered poaching as long as you have a deer hunting license issued by the State.

What Does A Deer Eat?

Deer are herbivorous animals and survive on a green, leafy diet of plants.

A typical deer diet consists of grass, acorns, sedges, leaves from trees, ground vegetation, buts, berries, alfalfa, fruits, mushrooms, and more.

Because of their dietary preferences, they sometimes also destroy crops. Carrots (or any broad-leaf vegetable), for example is a target crop which often gets destroyed if deer are around.

To remain healthy, a deer must consume around 6 to 8 percent of its overall body weight in vegetation daily.

Generally, male deer weigh between 120 to 160 pounds. Females weigh less, going up to 120 pounds.

Other Deer Articles

  • Deer hunting season in the US ranges from October to December. If you are a deer hunter, here are some tips to avoid blunders.
  • Deer have a very sharp sense of smell and hearing. Those hunting deer might wonder if keeping a propane heater with them in the cold might ward off deer. Deer can smell propane heaters; you can find out more in our other article.
  • If you’re using acorns as bait and the deer are not taking it – it could be because it’s too hard. We have covered more on this here.
  • If you have cows and other cattle nearby, this could be alarming the deer as well – check it out here.
  • If you’re worried that they’re being spooked by the smell of human poop or urine – you can read more here.
  • Foggy weather can also restrict their movement. Find a cold, low-humidity day for hunting – read more in our article on deer movement in the fog here.

Frequently Asked Questions

Wrap Up

Deer are common wild animals found in almost every forest and savanna across the world.

Other than Australia and Antarctica, they thrive on every continent and are an important link in the food chain.

Deer herds are necessary for vegetation control and for the survival of larger predators. Many wild cats, such as lions, coyotes and other big predators love to hunt deer.

While they are able to use their speed to protect themselves, the young and the sick are typically easy prey for these large animal.

Currently, deer have a conservation status of “Least Concern.” After bans on hunting deer in many countries for meat and sport, their population has been growing constantly.

Perhaps, more than anything else, human being are the biggest threat to deer.

Thank you for reading.

The Best Broadheads for Hunting in 2024

0

There are a lot of moving parts that go into a successful archery hunt. Broadhead choice is an intricate piece of it. They provide confidence and confidence is as deadly as the broadheads themselves.

After sending broadhead upon broadhead downrange through both targets and animals, we’ve come up with a recipe for success. The broadhead needs to be durable, fly well, and excel at slicing and dicing of course. With that in mind, we’ve put together a heavy hitter list of broadheads that deserve your attention in 2024.

Scroll through to see all of our recommendations, and at the end of our list, be sure to check out our buyer’s guide. Check out our comparison chart when it’s time to narrow down your decision.

The Best Broadheads for Hunting in 2024

  • Best Overall Broadhead: Evolution Jekyll
  • Best Budget Broadhead: Muzzy Trocar three-blade
  • Best Fixed Blade: Day Six Evo
  • Best Mechanical: Sevr
  • Best Hybrid:Evolution Outdoors Hyde

Broadheads Comparison Chart

Evolution Jekyll420 Stainless steel, 7075 aircraft aluminumMuzzy Trocar three-blade1-3/16100 grainDay Six EvoS35VN Steel1-1/16″ (main blade), ½” (bleederSevrTitanium ferrule, stainless steel blades1.5″, 1.75 in., or 2.0Evolution Outdoors Hyde420 stainless steel, 7075 aircraft aluminum0.75″ fixed, 2.0″ mechanicalAnnihilator broadheads4140 alloy steel0.910Hypodermic Trypan NCTitanium ferrule, stainless steel blades2100 grain Grim Reaper Micro Hades Pro Stainless steel1-1/16single-bevel broadheadA2 Tool Stee1-1/16″ (main blade); 0.75 in. (bleeder blade100, 125, 150, 175, 200, 225, 250 grainGrade 5 Titanium, 440C Steel1.25″ (Main Blade) ⅞ or 1 ⅛ inch(bleeder) 100, 125, 150100% heat-treated stainless stee1 3/16Stainless steel 1⅜

Why You Should Trust Us

Failure is something I became friends with early on bowhunting. Through the lessons that came with this failure, it’s become very apparent to me what works and what doesn’t. With broadheads, failure is not an option for me.

If all of the hours got added up of me spending time in the bowhunting woods trying to reach out and touch big game animals with broadheads, well I’d probably consider myself even luckier than I already do. Those woods are a classroom, and choosing which broadheads come along for the ride, could mean the difference between getting an A or an F.

Whether it’s trying to hit a dot on a target or hit a single patch of hair on a live animal, broadhead, functionality, durability, and effectiveness are all things on my radar. When I find one that hits all of those marks, I hang on for dear life, because confidence is not easily earned.

Along with my personal experience, I also took into consideration the opinions and experiences of other seasoned hunters around me. And with that what broadheads were hot on the market was also paid attention to.

Every broadhead listed above will do what you need it to do. If you’re kicking around what broadheads to run for the coming bowhunting season, one of these is going to do you right and then some.

Buyer’s Guide: How to Buy the Best Broadheads for Hunting

Mechanical vs. Fixed

One of the age-old and ongoing debates in archery hunting camps is mechanical broadheads versus fixed-blade broadheads. Passionate arguments exist on both sides of the spectrum and both broadhead designs reliably work. Which one is better, though? The better question is which one is better for you.

The flat-out truth is this — both of these broadhead designs work. Endless success photos from bowhunters across the country are the proof in the pudding. Of course, each has its pros and cons. So, we’re going to break it down.

Fixed Blade

(Photo/Josh Kirchner)

The fixed-blade broadhead has been doing its thing since the beginning of bowhunting. It’s been there and done that millions of times over again. So, it’s no surprise when hunters cling to this style of head. What you get is what you get with a fixed blade.

The biggest advantage of running a fixed-blade broadhead is going to be reliability. There are no moving parts on a fixed blade like there are on a mechanical broadhead. For this reason, there is no worry of failure.

Along with that, these are inherently going to penetrate better, as there is no loss of energy from blades having to open. That means more pass-through shots. And lastly, fixed blades tend to be more durable overall. Especially the one-piece designs and heads made with higher-end steel.

When it comes to downsides, the first that comes to mind is tuning. Fixed-blade broadheads are harder to tune across the board. These vanes on the front end of your arrow influence flight much more than mechanicals do. This makes field point accuracy harder to come by.

Secondly, you might get more pass-through shots, but the wound channels are smaller. Smaller wound channels can lead to tougher blood trails, especially on marginal shots. And the last note is that higher-end fixed blades are also much more pricey.

Pros
  • Reliable
  • Better penetration
  • Durable
Cons
  • Harder to tune
  • Smaller wound channels
  • Higher-end heads are very pricey

Mechanical

Technology is an ever-evolving thing. People see gaps in efficiency and naturally want to fill them. The mechanical broadhead is a perfect example of that. It excels where the fixed blade doesn’t.

broadhead arrow tip
(Photo/Joshua Kirchner)

A huge selling point for mechanical broadheads is their impeccable arrow flight. It is very unlikely that you’ll need to do any sort of broadhead tuning with these things. This makes things so much easier before a hunt.

And once you do get on that hunt, you’ll hopefully loose an arrow at what you seek. Note that the blood trail is nothing short of fantastic, due to the massive cutting diameter that these broadheads inflict. If that sounds good to you, you won’t have to pay an arm and a leg to get yourself into a quality mechanical broadhead, either.

While the mechanical broadhead excels where the fixed-blade broadhead doesn’t, it also lacks where the fixed-blade excels. First on the list is reliability. These have moving parts and can absolutely fail. With how hard archery opportunities are to come by, that doesn’t sit well with some bowhunters.

And because these heads expand on impact, there is always a loss of energy due to the force it takes to open up the blades. This robs folks of penetration. If the broadhead indeed comes out the other side, it’s also a very real possibility that it won’t all be intact. Mechanical broadheads aren’t nearly as durable as fixed blades.

Pros
  • Impeccable arrow flight
  • Huge wound channels = Great blood trails
  • Affordable
Cons
  • Can fail and not open
  • Lacks in penetration
  • Prone to breaking

Final Thoughts

hunter in the wild looking out for animals
(Photo/Joshua Kirchner)

When the book comes to a close, I’m not going to tell you that there is a right answer here across the board. There are too many variables for that.

Some folks swear by fixed blades and others swear by mechanicals, and that says two things. One, they are both damn good at their job. And two, don’t get too caught up in what other folks think. Mold your arrow setup to you and your style of hunting.

In the end, a broadhead is just a tool. The person wielding that tool is the one really running the show.

FAQ

Six Essential Commands for Retrievers

0

By Gary Koehler

One of the most common mistakes amateur retriever trainers make is rushing the learning process. The temptation to get a young dog out in the field as soon as possible can be hard to resist. Born with an innate retrieving drive, the pup is already raring to go. And with hunting season only months away, you may be just as eager to start running retrieving drills.

Before you jump headlong into field work, however, make sure your dog has mastered the fundamentals of obedience. Be patient and take it slow. There are no shortcuts. To be able to perform advanced tasks, a retriever must first learn to follow basic commands. Repetition and consistency are the only sure ways to build understanding and trust.

Here’s a brief primer on 6 basic commands that will help set the stage for your retriever’s future training and hunting success:

1. Here

Some trainers use the word come instead. Whatever word you use, your dog must learn that this is an unconditional command, not a request. Get a 20- or 30-foot check cord and attach one end to your pup’s collar. Hold the other end in your hand and walk several paces away from the dog. Say the command here. If the dog does not move in your direction, begin pulling him toward you with the check cord. Be firm but not rough. Repeat this exercise several times until the dog learns to come to you without hesitation. Remove the check cord and repeat the exercise again. Praise the pup when he does well to help make this lesson as much fun as possible.

2. Sit

This command can be incorporated into your pup’s feeding regimen. Hold the food bowl in one hand and say sit while pushing down on the dog’s rear end with your other hand. When the dog sits, place the bowl in front of him on the floor. The pup will quickly learn that the reward for sitting is food, which is a great motivator.

3. Stay

You can teach stay as an extension of the sit command. While the dog is sitting, hold your hand out toward him with your palm facing outward and say stay. Walk away, wait a minute, then call the pup to you. Gradually extend the length of time the dog remains in the sitting position. If the pup breaks and runs to you without being called, take him back to the spot where he was originally sitting and start the lesson over again. Never allow your dog to think that staying put is optional. He should remain in place until released.

4. Kennel

This lesson is easy. When putting your pup in his crate, simply say kennel. Once the dog learns to associate this word with entering the friendly confines of his kennel, you can use it when loading him into a vehicle, boat, dog hide, blind, and other such places. The key is to make the crate as attractive as possible from the get-go. You can do this by placing a blanket and a treat inside to entice your puppy to enter it.

5. Heel

Your retriever should be trained to walk at your pace and not drag you down the street. That’s the purpose of the heel command. Begin walking with your pup on a lead. He should always be on your left side. When he quickens his pace and pulls ahead, say heel and pull him back toward you with the lead. Repeat this lesson each time he moves ahead of you. If you stop walking, your dog should stop and sit down beside you.

6. No

This command should be used to discourage undesirable behaviors such as chewing on furniture, jumping on people, messing in the house, and similar indiscretions. Be sure to say it loudly and emphatically. Your dog should not have any doubt about what you mean when you say no.

For more retriever tips, visit ducks.org/retrievers.

Continue Reading

Identifying Animal Eyes at Night | With Eye Shine Chart

0

Whether you are a hunter or just curious about what animal is in the woods near you, being able to identify them by their eyeshine is a pretty cool skill to have. I did a lot of research but had trouble finding a good resource. So, I decided to compile everything I learned and share it here with you. This is what I found out.

In identifying animal eyes at night, you should consider four primary factors – the color, the shape of the eyes, pupil slit orientation, and eyelid shape. Predatory animals have glowing eyes with vertically elongated pupils, while harmless animals have horizontally elongated pupils.

In total, there are five primary eye shine colors that are visible in animals: blue, green, white, yellow, and red.

Here is an eye shine chart of 38 animals:

BlueGreenWhiteYellowRed

By the way, this fascinating book on Amazon covers how animal eye color affects behavior.

This article will examine why some animals have eyes that glow in the dark and how this feature helps them survive. We’ll also share a helpful eyeshine chart that you can use to identify animal eyes in the dead of night.

Four Colors of Animal Eye Shine

Why Do Animal Eyes Shine at Night?

Before we look at what colors go with actual animals, let’s talk a bit about the science.

Many animals have a thin reflective membrane at the back of their eyes, known as tapetum lucidum. This reflective membrane layer lies behind the iris and acts as a retroreflector, which means it reflects light back at the source – in this case, back at your flashlight.

It reflects visible light passing through the retina back to increase the amount of light on the photoreceptors. The presence of a tapetum lucidum gives nocturnal carnivores superb night vision.

Animals reflect the light directly toward the light source to give the retina a succinct image to analyze. Cats have incredible night vision because the reflective effects boost their night vision.

By matching the original and reflected light, the reflective layer maintains the image’s contrast and sharpness. The reflective layer uses constructive interference to increase the amount of light passing through the animal’s retina.

This phenomenon is also known as eyeshine because the glowing eyes are simply reflections of the light source trained at the animal. Shining light directly on the face of an animal with a tapetum lucidum causes the eyes to glow.

Eyeshine comes in various colors, including white, yellow, red, blue, pink, or green. Since the reflective layer is iridescent, the pupils’ color is affected by the angle of vision, eye color, and the mineral makeup of the tapetum lucidum.

Related Which Animals’ Eyes Reflect at Night? | A Biological Insight.

Night Vision and Eyeshine

Owl Face Close-Up with Yellow Eyes

A tapetum lucidum improves an animal’s ability to see in the dark and low-light conditions. The reflective eye membrane is typical in mammals, reptiles, invertebrates, and amphibians.

The eyeshine color depends on the animal and can be red, orange, yellow, pink, blue, or green. The sheen depends on eye color, the shape of the eyes, and the light’s angle shining on the animal.

The intensity of the eye glow varies between species, with some animals glowing brighter than the rest. The animals with the brightest eyeshine have excellent night vision because their eyes have fewer cones. Unfortunately, perfect night vision comes with limited color vision or complete color blindness.

Eyeshine in Predators

Most of the nocturnal predators have a tapetum lucidum to help them see in the dark. Dogs, house cats, big cats, alligators, and ferrets are some of the predators with eyes that reflect in the darkness.

Improved night vision is essential to these predators because it allows them to track prey in pitch darkness.

Cool Fact: Some predatory fish, like walleye, need excellent night vision to hunt in the dark, deep waters. As a result, they have reflective eyes.

Interestingly, while owls have eyes that glow in the dark, they lack a tapetum lucidum in their eyes.

Glowing Eyes in Predators

Unsurprisingly, some of the prey targeted by the predators with improved night vision developed a tapetum lucidum layer. The layer evolved as a defense mechanism to help these herbivores detect predators in low-light conditions.

Some non-predators with excellent night vision include cattle, deer, pigs, camels, kangaroos, and horses.

Identifying Animals by Eye Glow at Night

While it’s possible to identify some animals by their eyeshine, the eye glow color is more of a guideline than accurate science.

Several factors influence the color of an animal’s eyeshine, including:

  • The color of the light source – flashlight, camera, LED, or moonlight
  • The color of the animal’s eyes
  • The size of the animal’s retina
  • The distance between you and the animal
  • Your position and light source angle

Here are charts grouping animals by their eyeshine color:

Eyeshine Charts

It’s important to note that accurately identifying an animal at night might require more information than just its eye color. If you can, try to use the animal’s general size, behavior when looking at you, habitat, eye size, and more.

Related What Does Moon Overhead and Underfoot Mean?

Animals With Red Glowing Eyes at Night

Some animals with characteristic red eyes at night include:

  • Alligators and crocodiles- The large eyeballs of alligators and crocodiles glow fiery red in the dark, making them easy to identify. If you’re near a river, lake, or swamp in an area that these creatures live in, take extra caution if you see red eyes in the dark.
  • Owls- Owls are nocturnal birds with big eyes that glow red or orange after dark.
  • Red fox- Foxes have red glowing eyes with perpendicular pupils.
  • Rabbits- A rabbit’s eyes will exhibit a light red tone when you shine a light on them.

Animals With Yellow Eye Glow at Night

A Lynx with Glowing Eyes at Night

Some animals have glowing yellow eyes at night, including:

  • Bears- A bear has dark brown eyes that take on a bright yellowish glow when you shine a light on them in the dark.
  • Cats- Some cats have eyes that give off a yellow glow in the dark, but this can vary depending on the cat in question.
  • Deer- A deer’s eyes glow yellow in the dark. As deer often live in the same habitats as bears, you should also look at the height and size of the eyes to determine which animal you’re looking at.
  • Raccoons- Raccoons have big eyes that glow bright yellow in the dark.
  • Chinchilla- Commonly kept as exotic pets, chinchillas also have big eyes that glow yellow in the dark.
  • Panthers- This big cat has smallish eyes that glow yellow in the dark. You might not see the yellow glow if you shine the light directly on their face.

Animals With Glowing Green Eyes at Night

Some animals with eyes that glow green in the dark include:

  • Dogs- Some dogs can have an eerie green nighttime glow that can be unsettling in the dark. A dog’s eyeshine can take on different colors, including blue, orange, green, and red.
  • Foxes- Some foxes have an intense green glow in their eyes as they forage for food after dark, though a few types of foxes have white or yellow eyes instead.
  • Opossum- Opossums have big eyes that light up green in the dark. You’re likely to find them perched up high on a tree at night.

Animals With White Eye Glow at Night

Some of the animals with eyes that glow white in the dark include:

  • Coyotes- Coyotes have big eyes that glow bright white in the dark. While they’re predators that typically hunt in packs, you don’t need to panic if you see a pack of white eyes staring at you, as coyote attacks on humans are extremely rare.
  • Deer- A deer’s eyes will reflect the white light of a camera equipped with a flash to assume a bright white glow in the dark.
  • Tigers- Tigers would be difficult to spot in the dark were it not for their large eyes that glow white in the dark.

Why Human Eyes Don’t Shine

Human eyes do not have a reflective layer called the tapetum lucidum. In fact, all haplorhine primates are diurnal and do not have the tapetum lucidum.

To read more about this topic, go here.

Conclusion

Shining a flashlight into the darkness only to see a pair of glowing eyes staring back at you can be a bit frightening. And unless you know whether those eyes belong to a dangerous predator or a harmless herbivore, you won’t know whether to ignore them or be on your guard. Fortunately, you can identify an animal by its eyes at night if you have the correct information.

Some animals have eyes that glow in the dark because they have a special reflective membrane behind their retinas. The membrane is a unique adaptation to help their ability to see at night.

Most common eyeshine colors include white, green, red, yellow, and orange. The eye glow color depends on the specific animal, eye color, and light source, among other factors.

You’d need more information about an animal in addition to its eyeshine, such as habitat, size, behavior, eye size, and more, to identify it accurately.

Still, the included eyeshine chart should help. And don’t forget to check out this book on Amazon, it’s extremely helpful.

I hope this article has provided the info you needed. Thanks for reading!

For more, check out What Can Deer Smell? (How To Avoid Detection).

Can a felon own an air rifle in PA?

0

“Understanding Pennsylvania’s Laws: Can a Felon Legally Own an Air Rifle? Discover the regulations surrounding felons and air rifle ownership in Pennsylvania, ensuring clarity on this important topic.”

can a felon own an air rifle in pa?

can a felon own an air rifle in pa

According to Pennsylvania state law, felons are prohibited from owning or possessing firearms, including air rifles. Although an air rifle may not be classified as a traditional firearm, it is still considered a weapon under state law. Therefore, felons are subject to the same restrictions and penalties when it comes to owning or using an air rifle.

The prohibition on felons owning air rifles in PA is rooted in the state’s commitment to public safety and crime prevention. By restricting access to firearms, including air rifles, authorities aim to reduce the likelihood of convicted criminals committing further offenses. It is important for individuals with felony convictions in Pennsylvania to understand that violating this law can result in serious legal consequences, including potential imprisonment and fines.

In Pennsylvania, felons are prohibited from owning firearms, including air rifles. The state’s laws make it clear that individuals with felony convictions are not exempt from this restriction. Therefore, despite the differences in power and function between a traditional firearm and an air rifle, a felon cannot legally possess or own an air rifle in PA.

Walleyes In Weeds

0
Walleyes In Weeds
Greg Bohn of Hazelhurst, Wisconsin, enters the Freshwater Fishing Hall of Fame as a Legendary Guide in 2016. He’s spent decades developing fishing patterns for walleyes in weedgrowth.

Greg Bohn of Hazelhurst, Wisconsin, enters the Freshwater Fishing Hall of Fame as a Legendary Guide in 2016. He’s spent decades developing fishing patterns for walleyes in weedgrowth.

A pair of marble eyes suspended in green shadows. Last thing seen by many a baitfish. The weed-walleye connection is well documented, and many walleye tournaments have been won by targeting walleyes above, outside, and buried in weeds.

Species of aquatic vegetation used by walleyes vary with environments. Seasons ordain certain species of vegetation as walleye kingdoms while evicting walleyes from others. So what weeds do walleyes use most, or in what order as the environment changes with the seasons?

Clasping Leaf Pondweed (Cabbage)

Some think it’s simple: Follow the forage. But it’s hard to find weeds without forage. Other factors are afoot. Where to start on any given day — in green cabbage? Elodea or coontail? Tobacco cabbage? Some other pondweed. Perhaps milfoil?

Wisconsin’s Greg Bohn puts clients on 10-pound walleyes like Miguel Cabrera hits baseballs — at a record pace. He can take clients trophy hunting or go for numbers, day or night. Either way, count on fishing around weeds. For Bohn, vegetation is more than cover. Plants are indicators, gauges, pointers, and signs on his dashboard. “I’m always excited anticipating how the weeds are going to be developed when the season opens in Wisconsin,” he says. “Lakes can be frozen on opening day, and I’ve seen openers with stalks already three feet high. It’s a guessing game until you get out there and investigate.”

In a warm spring, plants grow quickly and chances are good walleyes are in and around some variety of “cabbage.” What anglers commonly refer to as cabbage is mostly clasping-leaf pondweed. But most seasons start with a different plant species — the first one standing, and Bohn’s best early indicator. “Takes time for some types to develop,” he says. “So you have a growth shallow right away, and it progresses deeper during that first month of the season until you’re fishing around different species at different depths in May than in June.”

Bohn’s walleye compass when the season opens is elodea, sometimes called waterweed. “It’s available right at ice-out,” he says. “Elodea grows from a couple feet out to about 8 feet — sometimes in depths of 10 feet. Walleyes love it early. Find elodea and you find walleyes because it’s the only game in town. Perch are looking for vegetation to spawn on most years when the only greenery is elodea, which grows to a height of 10 inches to a foot. Start searching for it early in 2- to 4-foot depths. It generally appears first in bays where the water warms up sooner than the lake.”

Then he looks for what some call broadleaf, tobacco, or brown cabbage, soon followed by clasping leaf pondweed, also called green or narrow-leaf cabbage. “When green cabbage reaches maximum height, the buds pop out above the surface,” he says. “It’s a tough plant. The main stalk can break light line when a big fish wraps in it. It comes up quick and it’s fast growing. It’s the next thing to take off after elodea, and it’s the first type of vegetation most anglers begin to pattern walleyes in.”

Broadleaf, Brown, or Tobacco Pondweed (Cabbage)

Once a big-fish weedbed, always a big-fish weedbed. “There’s something about certain weedbeds that draw big fish almost every year,” he says. “One particular weedbed in a lake may continue producing big fish all your life at a certain point of the season. The attraction sometimes is a steep drop along one edge into deeper water. Sometimes it’s boulders along it. Sometimes it’s consistency of growth year-to-year. It could be they spent a lot of their young lives there, because it’s close to spawning habitat. Little idiosyncrasies that make it attractive in ways we can’t see — that progression is the neatest thing to follow.”

Walleyes are attracted to peak growths of different species of vegetation, but other conditions may determine how walleyes use it. “Walleyes come in-and-out of weeds a lot,” he says. “They react immediately to a change in the surface chop or a change in the light around weeds. They use vegetation differently, based on conditions and weather. They travel half way across the lake to find warmer water in spring. Your temperature gauge becomes your guide. In the 40°F- to 60°F-range, a few degrees makes all the difference. When it gets cold at night early in the season, deeper water is warmer than shallow water and walleyes are in deeper weeds. On sunny days, you find them moving shallower as the water warms — always to a peaking species of vegetation growing in some slightly different substrate.

“As the season progresses, walleyes might be less concerned about a few degrees of temperature change, but temperature remains critical all summer,” he says. “Plant species shift and walleye preferences change, too. They follow the vegetation to an edge, gradually shifting deeper as vegetation extends downward. The 4-foot plants are unproductive by late June, when 8- to 10-foot weededges become prime. It’s a combination of two things — water temperature and maturity of plant growth.”

Elodea

Bohn always works vegetation from the outside edge inward. “Don’t pile right into the vegetation,” he says. “Our initial casts don’t even reach the weededge. Any clumps or points off the edge — that’s where the big fish are. Start well outside the weedline and feel for the edge. You often can tell what kind of plants are present by jigging. If not, try to get a look. Most days, the type of vegetation is important. When you start catching walleyes, you have to know what plants to look for on the next spot.”

Mid-summer cabbage lines and coontail clumps stop between 6 and 20 feet, depending on water clarity. “It takes time for the food chain to get going down there,” he says. “Minnows may not inhabit those deep edges for a while. Until the plants mature, baitfish continue to use shallower vegetation. But those plants may become too thick and walleyes seem to avoid beds that are overly dense. They like newer growth coming into peak height. It’s like a stair-step progression. Walleyes use plants at 4 to 6 feet, then within a week or two they move down to those at 8 to 10 feet, and so on. The deepest are coontail and sandgrass down to about 20 feet and that’s the end of the cycle. That’s where they stay until ice-up.”

Patterns and Presentation

“Walleyes are there big-time or not at all,” Bohn says. “It takes a short time to figure out which plants to focus on. Move quickly because walleyes do. It’s amazing what can happen in seven days as the ‘right weeds’ suddenly become too thick for walleyes and they move to a new restaurant just a few feet deeper. Sometimes walleyes cross the lake to find the next stage of weedgrowth. These movements aren’t necessarily taking place on the same piece of structure or in the same area of the lake. Sometimes it seems like the entire walleye population moves into one particular weedbed for a short time. Usually, though, when they move it’s a pattern that persists around the lake. Say they move to a type of vegetation growing at 10 feet on a sandbar. Every sandbar on the lake that has that type of vegetation has walleyes.

“Wind pushes walleyes shallower,” he says, “but I love to fish vegetation on flat, sunny, calm days right after a cold front. Bluebird days after fronts can be awesome in weeds. Walleyes favor shade and hold where feeding is easy. Look for fish activity on the surface. Young perch dimple the surface and outline a weedbed in calm water. Watch for them skipping out of the water, indicating predators on their tail. But windy days are great, too. In either case, I catch walleyes in weeds with 1/16- to 1/8-ounce perch-colored jigs.”

Milfoil

As surface temps warm between 60°F and 68°F, Bohn switches from fatheads and chubs to leeches, then to crawlers under slipbobbers from 68°F and up — but he uses more artificial softbaits than anything else. “When plant growth is developing, panfish become a nuisance, especially at the leech-and-crawler stages,” he says. “Softbaits take off when the water reaches 60°F. At a certain point every summer, I stop bringing livebait. Softbaits outproduce livebait in warm water.”

He jigs with 10-pound Stren Magnathin. “I like mono with plastics,” he says. “Braids work in vegetation, but the drop is less radical with thicker mono. And when you lift with braid, action is more abrupt because of the lack of stretch. It removes the arc in your lift-drop, too. Walleyes tend to hit on the drop, so having that arc, that pause at the top, and that slower fall is critical. Braid is too abrupt. No need for long casts, either. In weeds, short casts are a must.”

Bohn pitches with a rod at least 7 feet long with a medium power and a fast tip. “G. Loomis makes the BSR852, a 7-foot 1-inch stick,” he says. “It’s better known as a bass rod, but it’s an awesome jigging rod for plastics and walleyes. Medium power and fast action are needed to rip weeds free. For jigging I use a slightly heavier jig with plastics. If I’m using a 1/16-ounce jig with minnows, I use a 1/8-ounce one with softbaits. There are many differences between jigging livebait and plastics. To be productive, you have to appreciate those differences.”

Bohn uses 4-inch soft jerkbaits in minnow shapes in 55°F to 75°F water. “Once leeches and crawlers start working, Kalin’s and Berkley grubs excel,” he says. “Paddletail minnows and small swimbaits — a lot of softbaits work, but I have my best luck in warm water with 3-, 4-, and 5-inch action tails that resemble leeches and crawlers. Ring worms and grubs are good in warm water. Once the water starts to cool and days get shorter, minnow-style baits come back. We began catching bigger fish faster with softbaits than we did with livebait years ago. It’s so effective. I was strictly a livebait guy for years, but now I rarely have livebait on board once the water warms.”

After becoming a “plastics guy,” he designed the Walleye Limit Minnow. “It has the right texture and lifelike flexibility,” he says. “Stiff plastics don’t work well for walleyes. They get bumped and tapped, but not eaten. I think those bumps sometimes indicate walleyes are testing the texture of the bait. The Walleye Limit Minnow is the best soft jerk for walleyes I’ve used.”

Coontail

Most people jig upward all the time. “With softbaits, you need something a little different,” he says. “Every day can be different. Some days it’s pop it up and let it fall, but sometimes they want it moving horizontally then dropping. You have to incorporate a pull, a short swim, or a slow lift, giving walleyes the opportunity to move under the jig. I freeze the rod tip at 11 o’clock, never go beyond noon, and never drop it below 10 o’clock. I watch the bow in the line. When you lower the rod you lose contact with the jig long enough for fish to pick it up and spit it out without feeling a thing. Freeze that rod at 11 o’clock and you feel everything. You see more line strikes and feel more ticks and light bites.”

A jig has to be rigged perfectly with softbaits. “It has to be straight,” he says. “If it’s spinning, circling, or running sideways, it won’t produce. Make sure the lure looks symmetrical and straight — not off balance, bunched up, or crooked. With minnow-shaped softbaits you do more twitching. With action-tails you twitch less and swim more. Hopping them is good, but a slow, steady swim can be best. With livebait, you give them time to get a good hold on it. With softbaits, you want to set the hook immediately. Clients often get bites without setting the hook right away. It’s in and out of their mouths so quickly. Weeds feel almost the same. If you feel a tip or a tap like a perch tapping a nightcrawler, that’s a strike. A lot of strikes are weight strikes — if you feel weight, set the hook.”

With softbaits, you get a lot of “let’s-get-acquainted bumps,” he says. “The best way to get that walleye to strike after a bump is to keep going. Act as if nothing happened and keep jigging. Once you get the lure near the boat, don’t raise it up immediately. Walleyes follow more than muskies. After the lure gets to the boat we catch tons of walleyes by jigging up and down right under the boat. Maybe 6 to 8 inches, and just a couple lift and drops. If they’re there, they react to that abrupt change in retrieve angle. Work it all the way in.”

As mentioned before, Bohn likes perch colors. “Walleyes are on perch-imitating jigs and baits based in green,” he says. “Chartreuse-and-lime, glow watermelon — any shade of green. A perch-glow head in firetiger or parrot is my favorite. All green or green-back, pearl-belly plastics are key in weeds.”

A soft jerk on a small jig swimming through green shadows. Last thing seen by many a marble eye near Greg Bohn.

Which Rifle Round is Better: 7.62 vs. 5.56 NATO

0

There was a time when I was exclusively in love with the 7.62x51mm for every rifle task.

According to the gun magazines at that time, the 5.56 was an abject failure in both Iraq and Afghanistan. So, I became convinced that the round was a poodle shooter.

Then, I joined the infantry and went to figure it out for myself.

Over my deployments, I carried weapons chambered in both 7.62 and 5.56 and got a good idea of how both worked and where they were successful.

US Marine in Combat Gear
Not me, but that pretty much sums up the infantry experience.

Like most things in life, they both have their place and the roles in which they succeed. The idea that you have to choose one over the other is silly.

Own both.

From there, you can choose the right tool for the task at hand.

Before you go selecting one or the other, though, it helps to know the real difference between them. Where do they stand in a side-by-side contest and when should you use one over the other?

Lucky for you, that is what we are exploring today. We’ll touch on the history of each round, its purpose, and ultimately which is the right cartridge for the job.

7.62x51mm NATO

With so many 7.62 rounds, I have to distinguish this one as x51mm.

This .30 caliber projectile has long been a popular choice for both rifles and handguns. Developed as a replacement for the .30-06, it was standardized with our European allies through the newly created NATO.

The 7.62x51mm became the round de jour for infantry rifles and machine guns.

Though it was short-lived as an infantry rifle cartridge in the United States, it saw wider use across NATO.

It’s worth mentioning, this caliber still sees action in sniper rifles, designated marksman rifles, and machine guns within the U.S. military.

During the development of the 7.62x51mm, Winchester saw the commercial potential and developed the .308 Winchester.

The .308 Win. is, fundamentally, the same round but intended for the civilian market.

5.56x45mm NATO

You’re probably used to see 5.56x45mm NATO a lot more than 7.62x51mm NATO. There’s a reason for that.

The 5.56 was the successor to the 7.62 in terms of general military use. It became the infantry cartridge of choice during the Vietnam War.

Developed from the commercial .223 Remington, minor alterations were made during the 5.56’s development.

Shooter Beware: 5.56 should NEVER be fired in .223 marked rifles. (But .223 can be fired in 5.56 rifles.)

Assorted 5.56 Rounds (XM193, XM855, Gold Medal 69gr)

After its initial growing pains, the 5.56 cartridge proved to be incredibly successful.

The round serves to this day in the hands of most U.S. troops.

Paired with the vast majority of America’s favorite rifle — the AR-15 — 5.56 NATO has become one of the most popular rounds in the nation.

The Money

Before we dive into the performance, size, and uses of these calibers, let’s talk about the most common make or break for anything…

Money.

5.56 is the substantially cheaper route.

The cost of 5.56 versus 7.62 NATO is often a 50% difference in price per round. Rarely do you see 7.62 NATO below 40 cents per round.

Note: those are normal prices and we are far from normal at the time of this writing.

Whenever an event occurs that drives up demand, the first batch of rounds to hit sky-high prices are almost always 9mm and 5.56. The year 2020 is no exception with 5.56 NATO a rarity in the marketplace and crazy expensive when it does pop up.

At this point, 5.56 and 7.62 NATO are both more than a buck a round.

The Size Difference

You can easily visualize the size difference when you utilize the metric measurements to describe the rounds.

The 7.62x51mm is a much bigger round — not only in projectile size but also in weight and case length.

5.56 ammunition, on the other hand, is shorter in length and thus lighter to carry.

Let’s run some numbers.

A fully loaded 30-round AR-15 magazine weighs about 16-ounces, give or take. A fully loaded 20-round SCAR H magazine weighs 17.6-ounces.

That’s a substantial increase in weight with a decrease in ammo.

5.56 vs 9mm vs 7.62x51
5.56 vs 9mm vs 7.62x51mm

Ask any soldier, the average infantryman would rather carry more ammunition. More ammo equals more suppressive fire while bettering the ability to maneuver.

Let’s be honest here, the M16 saw some growing pains in its early days. That said, the M16’s adoption proved to be successful just based on the logistics of combat.

M14-EBR-Afghanistan
5.56 rounds

In my experience as a machine gunner carrying the M249 light machine gun, I was able to tote 1,000 rounds of linked 5.56 ammunition. The ammo was lightweight, as was the weapon.

When I took the 7.62 chambered M240 medium machine gun, I carried only 600 rounds and distributed 400 more throughout my squad.

Performance Matters

While 5.56 might be the lighter ammo weight, it’s also lighter in performance power.

The 7.62x51mm has some real punch behind it with the round retaining tremendous energy compared to the 5.56. The heavier duty 7.62 NATO is still used in the military due to the extra power and range it offers.

7.62 208 gr Ballistic Tip vs 175 HPBT
An M14 hard at work in Afghanistan.

When comparing the 5.56 M885A1 load and the 7.62 NATO M80 round, we see the big differences upfront.

7.62 retains over 1,700 foot-pounds of energy at 500-yards versus 5.56 which hits 950 foot-pounds at 500-yards.

5.56 FMJ vs Open Tip vs Ballistic Tip, Side
7.62 208 gr Ballistic Tip vs 175 HPBT

Pushing out to 1,000-yards, the 7.62 M80 loads retain over 1,000 foot-pounds of energy.

That extra power makes it a more capable long-range round.

Even at moderate ranges, it outperforms the 5.56 ballistically, penetrating deeper and transfering more energy.

.308 (168gr vs 208gr)
5.56 FMJ vs Open Tip vs Ballistic Tip, Side

Remember when we said the .308 Win is the civilian form of the 7.62 NATO?

.308 Win’s performance, like its 7.62 sibling, earned it high praise among hunters. Power paired with a short-action capable design and moderate recoil made the .308 Win family an excellent round to take down large game on hunts.

poodle
.308 (168gr vs 208gr)

Though the 7.62 NATO load whips the 5.56 in range, power, and penetration, that all comes at a cost.

What is that, you ask?

Cartridge length and weight as well as muzzle rise and recoil.

When compared to the 5.56, it’s easy to see why the 5.56 is called a poodle shooter.

Insulated Wall with 5.56, Box O Truth
They call it WHAT?!

Overall, 5.56 is a much kinder, gentler experience.

There is something to be said for too much power and too much penetration.

A 7.62 NATO load is a bit much for home-defense when you start factoring in neighbors.

Miss a shot and that very powerful round will be flying very far and through lots of potential walls.

Clips of Green Tip 5.56
Insulated Wall with 5.56, Box O Truth

Where the 5.56 Dominates

The 5.56 NATO is one of the best infantry fighting calibers in the world.

It’s fought for decades and done an excellent job at its role as a general infantry cartridge.

Sure, it’s not perfect, but the cartridge has proven to be a reliable warfighting cartridge.

5.56 vs 7.62x51
Clips of Green Tip 5.56

Best used within 300-yards, the 5.56 can be pushed out to 500-yards.

It’s a great close-quarters fighting cartridge and has very little risk of over-penetration should a miss occur.

Clip of 5.56 XM193
5.56 vs 7.62x51mm

Recoil and muzzle rise are naturally quite limited, which makes it an excellent round for shooters of all sizes.

Well-suited to the competitive market where speed rules, the 5.56 is a great companion in multi-gun events. The 5.56 AR-15 absolutely dominates the competition!

km precision rifle training 2
Clip of 5.56 XM193

Competitions aside, 5.56/.223 Rem. can be used for close-range hunting on small to medium game.

Anything larger than a whitetail deer, though, should be taken with a larger, more potent cartridge.

The 5.56 and .223 Rem. are perfect for targets closer than 300-yards and for shooters looking for a lightweight, compact platform.

Where the 7.62x51mm Rules

The 7.62x51mm and .308 Win. are both powerful cartridges with long-range potential.

Perfect for Precision Rifle matches, these rounds, in general, work well in long-range shooting events.

They have their place in the heavy metal division of multi-gun matches as well.

Assorted 7.62x51mm (MEN 147gr, PPU 165gr, PPU 180gr, Gold Medal 168gr
When you want to hit things really, really far away.

If you’re looking to get into long-range shooting — and by that, we mean 500-yards plus — starting with the 7.62 NATO is one of the easiest routes to take.

Ammo is common, affordable, not to mention, lots of data, gear, and optics are produced with 7.62 NATO in mind.

Popular .308 Winchester and 7.62x51mm Ammo
Assorted 7.62x51mm (MEN 147gr, PPU 165gr, PPU 180gr, Gold Medal 168gr)

.308 Win. is one of the most popular North American hunting cartridges. Used in bolt-actions and semi-auto guns with easily manageable magazine platforms, the cartridge can take deer, hogs, predators, and even bear with the right rifle.

When you need a little more range and a lot more power to achieve a task, the .308 Win and 7.62 NATO loads are perfect.

Favorite 5.56 and 7.62 NATO

Ok, now you know what’s what…so which brands do we prefer at Pew Pew Tactical?

Glad you asked.

Here is a collection of our favorite 5.56 and 7.62 NATO rounds. (Don’t blame us if they’re out of stock, though. Ammo shortage, and all…)

Conclusion

Let’s be real, 7.62 and 5.56 NATO are excellent fighting cartridges with long, battle-proven histories. 5.56 may be better suited for home defense and 7.62 rules long-range matches and big-game hunting, but both cartridges perform well in their respective roles.

So how do you as the shooter choose between the two? Identify the task, target, and goal. From there, you can choose a caliber and platform that fits those metrics.

Which Rifle Round is Better: 7.62 vs. 5.56 NATO
Popular .308 Winchester and 7.62x51mm Ammo

Cartridge wars are always silly, and people rarely prove one popular cartridge is better than another. Different rounds have different purposes, and there is plenty of room at the table for everyone to sit.

Which is for you? 5.56? 7.62 NATO? Both? Let us know below which you prefer and why. Want more? Check out the Best 7.62x51mm Ammo and the Best AR-15 Ammo!

Length of Pull: What It Is and How to Measure It

0

Achieving proper ergonomics and comfort when shooting a rifle is crucial for accuracy and overall shooting experience. One important measurement to consider is the rifle length of pull. Determining the correct length of pull ensures that the rifle fits your body size and shooting style. In this comprehensive guide, we will walk you through the step by step process of measuring the rifle length of pull accurately. Whether you are an advanced shooter or a beginner, understanding this measurement will help you achieve optimal shooting posture and control. So, let’s dive in and learn how to measure the rifle length of pull effectively.

Understanding Rifle Length of Pull

Understanding the concept of the rifle length of pull is important for every shooter. The length of pull refers to the distance from the trigger to the butt plate or end of the stock, and it plays a crucial role in achieving proper shooting mechanics and ergonomics.

One of the primary reasons why the length of pull is important is its impact on maintaining a consistent sight picture. When the length of pull is too long or too short, it can affect the alignment of your eye with the rifle’s sights or scope. A proper length of pull allows you to position your eye comfortably and consistently behind the sights. Ensuring proper sight alignment and improved accuracy.

Additionally, the length of pull influences your ability to control recoil effectively. When the length of pull is too long, it can cause the rifle to kick back forcefully into your shoulder, leading to discomfort and potential loss of control. On the other hand, if the length of pull is too short, you may experience excessive muzzle rise, making it difficult to recover quickly for follow up shots. By determining the correct length of pull, you can achieve better recoil management, enabling faster target reacquisition and improved shooting performance.

Achieving a Comfortable Shooting Position with Length of Pull

Moreover, achieving a comfortable shooting position is vital for maintaining stability and accuracy. A proper length of pull allows you to position your body in a natural and balanced posture, reducing muscle tension and fatigue during extended shooting sessions. When the rifle fits you correctly, it enhances your ability to hold the firearm steady and execute smooth trigger pulls. This, in turn, improves your shooting consistency and overall accuracy.

Understanding the significance of the rifle length of pull highlights its impact on your shooting experience. A well fitted rifle ensures better alignment of your eye with the sights or scope, improved recoil control, and enhanced shooting comfort. To achieve the optimal length of pull for your rifle, it is important to consider factors such as your body size, shooting style, and personal preferences. By measuring and adjusting the length of pull, you can customize your rifle to fit your individual needs, leading to improved shooting mechanics and increased shooting satisfaction.

Tools and Materials Needed to Measure Length of Pull

Before starting on the process of measuring the rifle length of pull, it’s important to gather the required tools and materials. Having these items at hand will ensure accurate measurements and enable you to make any necessary adjustments for optimal fit and comfort. Here are the tools you will need:

  • Measuring Tape:

A measuring tape with both metric and imperial units is ideal for precise measurements. Choose a tape that is long enough to span the distance from the trigger to the butt plate or end of the stock.

  • Non-Stretchable String or Cable:

This is an alternative to a measuring tape and can be used to measure the length of pull. Ensure that the string or cable is strong and doesn’t stretch when tension is applied.

  • Marker or Tape:

You will need a marker or tape to mark the reference point on the rifle. This will serve as a consistent starting point for accurate measurements.

By having these tools ready, you will be fully prepared to measure the length of pull on your rifle accurately. As well as proceed with any necessary adjustments to achieve the ideal fit and comfort for your shooting needs.

Measuring the Rifle Length of Pull

Now that you have gathered the necessary tools and materials, it’s time to dive into the step by step process of measuring the rifle length of pull. Each stage will be explained in detail to ensure accurate and reliable measurements. Let’s begin:

  • Preparing the Rifle:

Before starting the measurement process, it is crucial to ensure that the rifle is unloaded and in a safe condition. Remove any ammunition from the chamber and magazine, and confirm that the firearm is completely empty. Treat every firearm with the utmost respect for safety.

  • Establishing a Reference Point:

Identify a reference point on the rifle that will serve as a consistent starting point for your measurements. The center of the trigger is a commonly used reference point. Using a marker or tape, mark this reference point clearly for future reference.

  • Positioning the Rifle:

To maintain consistency throughout the measurement process, it is important to adopt the correct shooting posture and positioning. Assume a comfortable shooting stance with proper grip and shoulder placement. Ensure that the rifle is shouldered firmly and consistently for accurate measurements.

  • Measuring the Length of Pull:

Using either the measuring tape or non stretchable string, proceed to measure the distance from the reference point (center of the trigger) to the butt plate or the end of the stock. Make sure to keep the measuring tape or string taut for precise measurements. Take note of the measurement in inches or centimeters, depending on the units used by your measuring tool.

  • Analyzing the Measurement:

Once you have obtained the measurement, it is important to interpret its implications for your shooting comfort and ergonomics. A length of pull that is too short may result in a cramped shooting position and limited control. While a length of pull that is too long may lead to a stretched out posture and decreased stability. Analyze the measurement in the context of your body size, shooting style, and personal preferences. This is to determine if any adjustments are necessary.

By following these steps, you will be able to accurately measure the rifle length of pull. Remember that achieving the proper length of pull is crucial for optimal shooting comfort, control, and accuracy.

Making Adjustments to the Length of Pull

After measuring the rifle length of pull, you may find that adjustments are necessary to achieve the ideal fit for your body size and shooting style. In this section, we will explore various techniques that can be employed to modify the length of pull. It is important to note that these adjustments should be done with caution. And when in doubt, it is recommended to seek professional help or consult with experienced shooters or gunsmiths to ensure proper adjustments without compromising safety or functionality. Here are some common techniques:

  • Adding or Removing Spacers:

Many rifles have adjustable stocks that allow the addition or removal of spacers between the stock and the butt plate. Adding spacers increases the length of pull, while taking them off reduces it. By adjusting the number of spacers, you can fine tune the length of pull to suit your preferences.

  • Adjusting the Buttplate:

Adjustable butt plates on certain rifles allow you to move them horizontally or vertically. These features enable you to change the length of pull. These adjustments can be made using screws or other mechanisms provided by the manufacturer. It is important to refer to the rifle’s user manual. Or consult with a professional to understand how to make these adjustments properly.

  • Considering Aftermarket Stocks:

If the existing stock does not allow for sufficient adjustment or if you prefer a different stock design, consider investing in an aftermarket stock. Aftermarket stocks offer a wider range of customization options, including adjustable length of pull, ergonomic features, and different materials. Research and choose a manufacturer that offers stocks compatible with your rifle model.

When making adjustments to the length of pull, it is essential to prioritize safety and functionality. Make sure to follow the manufacturer’s guidelines when making modifications. Always ensure that the rifle remains in a safe and working condition. Additionally, seek the advice of professionals or experienced shooters who can provide valuable insights based on their expertise.

Remember, the goal of adjusting the length of pull is to achieve a comfortable and natural shooting position. This allows for proper sight alignment, recoil control, and overall shooting performance. Experiment with different adjustments and configurations while considering your individual preferences and shooting needs.

Additional Considerations for Length of Pull

When it comes to the rifle length of pull, there are several more considerations that should be taken into account. These factors can greatly influence the ideal length of pull for an individual shooter. Let’s explore these considerations in more detail:

  • Shooting Applications:

Different shooting applications, such as hunting, target shooting, or competitive shooting, may require varying lengths of pull. For example, hunters who frequently shoot from different positions or in dense brush may prefer a shorter length of pull for better maneuverability. Target shooters, on the other hand, may prioritize a longer length of pull to achieve a more stable shooting platform. Consider the specific shooting application and how it may impact your length of pull preference.

  • Personal Preferences:

Each shooter has unique preferences when it comes to rifle fit and comfort. Some individuals may feel more comfortable with a slightly shorter length of pull, while others may prefer a longer length. It’s important to take personal preferences into account when determining the ideal length of pull for yourself. Experiment with different lengths and observe how they affect your shooting experience and overall comfort.

  • Physical Limitations:

Individuals with physical limitations, such as limited mobility, arm length, or shoulder issues, may require specific adjustments to the length of pull. It’s essential to consider any physical limitations you may have and how they might impact your shooting mechanics and comfort. Making appropriate modifications to the length of pull can help accommodate these limitations and ensure a more enjoyable shooting experience.

  • Ergonomics and Body Size:

The ergonomics of the rifle and the shooter’s body size are crucial factors in determining the ideal length of pull. A shooter with a larger frame may require a longer length of pull to achieve proper alignment and stability, while a shooter with a smaller frame may need a shorter length. Consider your body size, including your arm length and shoulder width, when determining the ideal length of pull for your rifle.

By taking these considerations into account, you can better understand the broader context and individual nuances associated with measuring and adjusting the rifle length of pull. Remember, the goal is to find a length of pull that maximizes comfort, stability, and shooting performance for your specific needs.

Wrap Up

Throughout this guide, we have explored the concept of rifle length of pull and its importance in shooting mechanics. We have discussed the step by step process of measuring the length of pull, including preparing the rifle, establishing a reference point, positioning the rifle, and accurately measuring the distance. We have also delved into the potential need for adjustments based on the measurement results, covering techniques such as adding or removing spacers, adjusting the butt plate, or considering aftermarket stocks. Additionally, we have highlighted the significance of considering shooting applications, personal preferences, and physical limitations when determining the ideal length of pull.

By achieving the correct length of pull, you can experience enhanced shooting comfort, improved control over the firearm, and increased shooting accuracy. A proper length of pull allows you to maintain a consistent sight picture, effectively manage recoil, and achieve a comfortable shooting position. It is a fundamental aspect of rifle fit that should not be overlooked.

However, it’s important to remember that each shooter is unique, and personal preferences may vary. What works for one individual may not necessarily work for another. It is essential to experiment, seek professional guidance when needed, and ultimately find the length of pull that feels most comfortable and natural for you.

In conclusion, understanding and measuring the rifle length of pull is an essential step in optimizing your shooting experience. By following the steps outlined in this guide and considering the various factors discussed, you can achieve a well fitted rifle that promotes better shooting mechanics, comfort, and overall accuracy.

Happy shooting!

Leave a comment

Comments will be approved before showing up.

Comment *

Best Air Rifle Deals

Popular Posts

Master Small Game Hunting with an Air Rifle: Tips and Techniques

0
"Experience the thrill of small game hunting with an air rifle! Embark on a captivating journey as you test your accuracy and precision in...

Air Rifle Scope vs. Rifle Scope – Which One Fits Your Shooting Needs?

0
"Air Rifle Scope vs Rifle Scope: Unveiling the Ultimate Precision Optics. Discover the essential differences and benefits of these two optical devices, empowering shooters...

Air Rifle vs BB Gun: Understanding the Key Differences and Choosing the Best Option

0
"Air Rifle vs BB Gun: Unveiling the Key Differences and Choosing the Perfect Weapon for Your Shooting Needs. Delve into this comprehensive guide to...

What Is An Air Rifle?

0
If you have stumbled upon this article, chances are that you probably have a pest problem at your house. This is a very common...

What can you kill with a 177 air rifle?

0
"Unleash Your Precision: Discover the Power of a .177 Air Rifle to Take Down Targets with Accuracy. Explore the Versatility and Potential of this...