Bluegill and sunfish are fun to catch and make great table fare. But for years I practiced strict catch-and-release whenever I targeted bream because I felt there wasn’t enough meat for the effort required.
Then a buddy of mine invited me to a bluegill fish fry, and I realized just how wrong I’d been.
From that point on, I was a believer in cleaning and eating a portion of the bluegill and sunfish I caught. The truth is, they’re really not that difficult to clean, and their mild flavor and flaky white meat make them some of the best-tasting freshwater fish you can eat.
If you haven’t given fried bream a try, you don’t know what you’re missing!
RELATED: Are Bluegill Good to Eat? [Answered]
There are three primary ways to clean bluegill and sunfish, each with its own advantages and disadvantages. Let’s take a look at the three methods, and you can ultimately decide which best suits your needs.
By far, the easiest way to clean bluegills is the scaled and dressed method, which only requires three simple steps:
Cut off the head of the fish, right behind the pectoral fin.
Dress the fish by cutting the belly open from the anus to where you cut off the head. You can then remove all the internal organs.
Scale the fish. This is a simple process of removing the fish’s scales by scraping them from the rear of the fish towards the front (the opposite direction than they are laying).
There are tools specifically made to scale fish, but it can also be done with the edge of a knife blade or even a spoon. To get a good visual of the process, check out the YouTube video below.
The biggest benefit of this method is that it’s quick and easy. And since you often have a bunch of bluegill or sunfish to clean at once, that means less time cleaning fish, and more time kicked back enjoying a cold beverage while talking about the one that got away.
The downside is you’ll have all the bones to contend with, so you and your guests have to be extra careful to ensure no one accidentally swallows a bone. You also have the skin on, which some fish eaters don’t care for.
Skinned and Dressed
The second easiest way to clean bluegills is similar to the first, but rather than scaling the fish, you take the time to skin it. You still remove the head and internal organs.
The only real benefit to this method over scaling and gutting is that it eliminates the skin for those who don’t like the flavor. You still have the bones to deal with.
Personally, this is the one method discussed here that I don’t personally waste my time on, but I wanted to mention it for those who may find it beneficial (I’m looking at you, crunchy fish skin lovers).
Filleted
While filleting bluegill is a little more time-consuming, and requires a little more finesse, it’s my preferred way to prepare them. With a little practice, you’ll be able to filet bream almost as quickly as you can scale and dress them, and you won’t have to worry about getting a fish bone caught in your throat.
Fileting bluegill isn’t difficult, but you’ll need a couple of tools to make the job go smoothly: a sharp fillet knife and a good cutting board.
It’s much easier to show someone how to fillet a fish than it is to describe in an article, so we’ve included an excellent video below from the Kentucky Department of Fish and Wildlife Resources.
But to summarize, after gutting the fish, you make a cut behind the pectoral fin until you hit the spine at the top, and the opening where you gutted the fish at the bottom. Then turn your blade toward the back of the fish, and run it down the spine at the top, and through the middle of the belly on the bottom. When you get to the tail, stop just short of removing the whole side of the fish.
Flip the half over the tail, then proceed to run your knife blade right along the skin of the fish, removing all the meat. Once you’ve removed the skin, you still have one step left. The rib bones are still in the fillet at this point, so you want to carefully cut them out, minimizing the amount of meat that comes out with them.
Once the ribs are out, you should have a nice boneless bluegill fillet ready for some breading and the frying pan!
Summary
Bluegill are plentiful, fun to catch, and delicious to eat. So don’t let the thought of a little fish cleaning keep you from taking advantage of the opportunity to host a fish fry for family or friends. There are a few great ways to quickly and efficiently process the fish, and whichever method you choose, the result will be mouth-watering fried bluegill.
In the world of air rifles, few models have garnered the kind of reverence and lasting appeal that the Beeman R7 enjoys. Often referred to as the “little R1,” this compact powerhouse has been winning over shooters since its introduction in 1982. In this comprehensive review, we’ll explore why the R7 continues to be a benchmark for quality in the spring-piston air rifle market, and why those who sell theirs often end up regretting the decision.
The story of the Beeman R7 is intrinsically linked to the golden age of precision air rifles. Introduced in 1982, just one year after the legendary Beeman R1, the R7 represented a different philosophy in air rifle design. While its bigger brother, the R1, was built for power, the R7 was engineered for precision and ease of use.
The R7 is, at its core, a specialized version of the Weihrauch HW 30S, but with distinctive Beeman touches that set it apart. This collaboration between Beeman and Weihrauch, two giants in the airgun industry, resulted in a rifle that combined German engineering precision with American market sensibilities.
The rifle’s development history is particularly interesting, as it reflects the evolution of air rifle design through the decades. The original model featured a longer forearm stock than the HW 30S, showcasing Beeman’s attention to aesthetic and functional detail. When Marksman later acquired Beeman, the stock design was shortened, though current models managed by Air Venturi have returned to the classic pre-Marksman style – a decision that has been warmly received by enthusiasts.
Design and Build Quality
Physical Specifications
Caliber: .177
Overall Length: 38.50 inches
Barrel Length: 15.50 inches
Weight: 6.10 lbs
Velocity: 700 fps
The R7’s physical dimensions strike an excellent balance between portability and stability. At 38.50 inches overall length and weighing 6.10 lbs, it’s 5 inches shorter and 2.5 lbs lighter than the R1, making it particularly manageable for smaller-framed shooters while maintaining enough heft for stable shooting.
Stock and Finish
The rifle’s beech stock features a satin finish that’s both attractive and practical, offering good resistance to minor scratches and wear. The checkered pistol grip provides positive control, while the rubber buttpad adds both comfort and stability during shooting. With a 13.75-inch length of pull, the stock dimensions accommodate both adult and younger shooters comfortably.
Engineering and Construction
German engineering shines through in every aspect of the R7’s construction. The rifled barrel delivers excellent accuracy, while the double-jointed cocking lever mechanism represents a clever solution to reducing cocking effort while maintaining power. The 11mm dovetail grooves machined into the receiver provide a solid mounting platform for optical sights, though the included open sights are of notably high quality.
Performance
Velocity and Power
Chrony tests:
Calibers
Pellets
FPS
FPE
.177
Crosman Premier Hollow Point 7.9 gr
745
9.74
.177
JSB Exact RS 7.33 gr
679
7.51
.177
H&N Field Target Trophy 8.64 Gr
555
5.91
.177
RWS Hobby 7 gr
649
6.55
.177
RWS R10 Light 7 gr
660
6.77
.177
Beeman Silver Bear 7.1 gr
637
6.4
.177
RWS Super-H-Point 6.9 gr
637
6.22
.177
Napier ProHunter 7.69gr
611
6.38
.177
JSB Match Exact Express Diabolo 7.87 Gr
623
6.78
.177
Crosman Premier Light 7.9 Gr
592
6.15
.177
Predator Polymag 8.0 gr
618
6.79
.177
H&N Match Heavy 8.18 Gr
611
6.78
.177
RWS Superdome 8.3 gr
563
5.84
.177
RWS Superpoint 8.2 gr
556
5.63
.177
RWS-R-10 Match Heavy 8.2 Gr
575
6.02
.177
RWS Meisterkugeln 8.2 Gr
586
6.25
.177
H&N Field Target Trophy 8.64 Gr
624
7.47
.177
Beeman Silver Sting 8.64 Gr
615
7.26
.177
Beeman FTS Double Gold 8.64 Gr
607
7.07
.177
H&N Crow Magnum 8.80 Gr
568
6.31
.177
RWS SUPERMAG 9.3 gr
478
4.72
.177
JSB Diabolo Exact Heavy 10.34 Gr
527
6.38
.177
Crosman Premier Heavy 10.5 Gr
470
5.15
.177
Beeman Kodiak Match 10.65 gr
514
6.25
.177
Beeman Kodiak Double Gold 10.65 Gr
502
5.96
.177
Beeman Silver Arrow 11.57 gr
446
5.11
.20
Beeman Silver Bear 9.88 Gr
546
6.54
.20
Beeman Silver Sting 12.81 Gr
505
7.26
.20
H&N Spitzkugel 10.96 Gr
551
7.39
.20
Beeman Field Target Specials 11.42 Gr
496
6.24
.20
H&N Field Target Trophy 11.42 Gr
527
7.04
.20
Beeman FTS Double Gold 11.42 Gr
463
5.44
.20
H&N Baracuda Match 13.58 gr
527
8.38
.20
H&N Crow Magnum 12.81gr
451
5.79
.20
Beeman Kodiak Extra Heavy 13.27 gr
417
5.13
.20
JSB Exact 13.73 gr
417
5.3
.20
Predator Polymag 13.89 gr
411
5.21
With a stated velocity of 700 fps, the R7 sits in the sweet spot for target shooting and casual plinking. While this might seem modest compared to more powerful air rifles, the R7’s velocity is perfectly matched to its intended use. The consistent power delivery and smooth shooting characteristics make it ideal for accurate shooting at typical air rifle ranges. Currently, the Beeman R7 is one of the best spring air rifles for the money.
Accuracy and Precision
Accuracy tests:
Calibers
Pellets
Distances
Groups
.177
FX Air Rifle 8.4 Gr
25 yards
one hole
.177
JSB Match Diabolo Exact 8.44 Gr
25 yards
1/4"
.177
Crosman Premier Hollow Point 7.9 gr
50 feet
dime size
.177
Crosman Premier Hollow Point 7.9 gr
20 yards
quarter size
.177
JSB Exact RS 7.33 gr
22 yards
one hole
.177
RWS Hobby 7 gr
10 yards
one hole
.177
JSB Match Diabolo Exact 8.4 Gr
20 yards
dime size
.177
H&N Field Target Trophy Cal, 8.64 Gr
25 yards
0.5"
.177
JSB Match Exact Express Diabolo 7.87 Gr
27 meters
3/8"
.177
RWS Hobby 7 gr
27 meters
0.5"
.177
Beeman Hollow Point Coated 7.2 gr
15 yards
.323"
.177
RWS Superdome 8.3 Gr
15 yards
.323"
.177
Crosman Premier Hollow Point 7.9 gr
15 yards
.573"
.177
Air Arms Diabolo Field 8.44 Gr
15 yards
.198"
.177
Air Arms Falcon 7.33 Gr
15 yards
.448"
.177
Beeman Hollow Point Coated 7.2 gr
20 yards
.698"
.177
RWS Superdomes 8.3 gr
20 yards
.698"
.177
Crosman Premier Hollow Point 7.9 gr
20 yards
.823"
.177
Air Arms Diabolo Field 8.44 Gr
20 yards
.448"
.177
Air Arms Falcon 7.33 Gr
20 yards
.511"
.177
Beeman Hollow Point Coated 7.2 gr
25 yards
.761"
.177
RWS Superdome 8.3 Gr
25 yards
.948"
.177
Crosman Premier Hollow Point 7.9 gr
25 yards
.823"
.177
Air Arms Diabolo Field 8.44 Gr
25 yards
.636"
.177
Air Arms Falcon 7.33 Gr
25 yards
.573"
.177
Beeman Silver Bear 7.1 gr
40 yards
5/8"
The R7 truly shines in the accuracy department. The combination of the precision-rifled barrel, solid lock-up, and excellent trigger control allows for exceptional accuracy potential. The adjustable rear sight and globe front sight with interchangeable inserts provide excellent sight picture options for those who prefer open sights, while the 11mm dovetail rail accommodates a wide range of optical sights for those seeking maximum precision.
One of the R7’s crown jewels is its Rekord trigger system. This two-stage adjustable trigger is renowned for its crisp, predictable let-off and consistency. The trigger can be finely adjusted to user preferences, offering a level of customization that’s particularly appreciated by target shooters and those who value precise trigger control.
Cocking Effort and Shooting Cycle
Perhaps one of the R7’s most impressive features is its modest 18-pound cocking effort – almost half that of the R1. This is achieved through the clever double-jointed cocking lever design, making the rifle particularly accessible to younger shooters or those who prefer a lighter cocking effort. The shooting cycle is notably smooth, with minimal recoil and jump, contributing to the rifle’s excellent accuracy potential.
Practical Applications
Target Practice and Plinking
The R7 excels as a target practice and plinking rifle. Its combination of manageable power, excellent accuracy, and smooth shooting characteristics makes it ideal for extended shooting sessions. The rifle’s precision makes it satisfying for serious target work, while its ease of use keeps it fun for casual plinking.
Training and Skill Development
For new shooters or those looking to develop their marksmanship skills, the R7 provides an excellent platform. The manageable recoil, excellent trigger, and consistent performance help develop good shooting habits without developing flinch or other compensatory behaviors that can occur with more powerful air rifles.
User Adaptability
One of the R7’s strongest points is its adaptability to different user groups. Whether you’re a smaller-framed shooter, a woman, a youth shooter, or simply someone who appreciates a well-made, easy-to-shoot air rifle, the R7 accommodates a wide range of users without compromise.
Maintenance and Longevity
The R7 is built to last, with many examples still performing excellently after decades of use. The quality of construction and materials means that with proper care, these rifles can indeed deliver the “decades of shooting pleasure” promised in their marketing materials. The lifetime limited warranty provides additional peace of mind, though the rifle’s reputation for reliability means it’s rarely needed.
Maintenance requirements are relatively straightforward:
Regular cleaning and inspection of the barrel
Occasional lubrication of moving parts
Periodic checking and tightening of stock screws
Proper pellet selection and storage
Price
While not the least expensive option in its category, the R7 represents excellent value for money when considering its:
Superior build quality
Long-term reliability
Excellent performance characteristics
Versatility across user groups
Strong resale value
Lifetime warranty coverage
The initial investment is justified by the rifle’s longevity and consistent performance, making it a classic example of “buy once, cry once” philosophy in air rifle ownership.
The Beeman R7 represents a nearly perfect balance of power, precision, and usability in a spring-piston air rifle. Its combination of German engineering, thoughtful design, and excellent performance characteristics has earned it a devoted following, and rightfully so. While it may not be the most powerful or the least expensive option available, it excels in the areas that matter most: accuracy, consistency, and user-friendly operation.In an age where many products seem designed for obsolescence, the R7 stands as a testament to the enduring value of quality design and construction.
When learning about firearms, it’s important to be precise. There’s a wealth of terminology and an even greater number of products on the market.
So when wondering about ammo, simply asking “what bullets do the most damage?” is a vague question.
You must qualify it for it to make sense. For example, a shotgun slug will do far more damage to a barn door than a .22 will do to a pig, yet the .22 caliber has been used in more killings than the shotgun slug.
OK, then what are we talking about here? There are only a few reasons why this conversation would be taking place.
The first is sheer curiosity. Some bullets look pretty gnarly, and naturally you would think they would do severe damage to anything they encounter.
You might wonder why all bullets aren’t made that way. Another reason this discussion might come up is to cause debate amongst friends or in political circles.
The final reason — and the one being addressed here — is if someone is trying to make an informed decision about which rounds best suit home defense or everyday carry needs.
Let’s start off with a little cold, hard truth that many people simply don’t like. All bullets are inherently lethal.
Even so-called “non-lethal” or “less-than-lethal” rounds have accidentally killed people.
All bullets are dangerous — in fact, even the use of blank-firing cartridges has led to deaths in some extremely rare cases.
This brings us to the next point: Despite what gun legislation opponents will tell you, no bullet is “designed for the battlefield” and inherently more dangerous than others.
Almost every caliber round has been used somewhere in a theater of war.
While there are some obscure rounds that were never used in battle, there’s honestly no round that is somehow safer than another because the military isn’t currently using it.
This brings up another point worth mentioning: Hollow points and full metal jacket rounds are inherently no different from each other at their most basic level.
They are both projectiles designed to be fired from a gun and can both kill. In fact, for those that think hollow points are somehow more deadly, the U.S. military doesn’t use hollow point ammunition in infantry units.
It uses FMJ. Again, that doesn’t mean they are more deadly. It just means that a bullet is a bullet.
The point here is that there are many misconceptions about different ammunition and the reality is that most of them are conjecture at best and outright lies at worst.
What Constitutes Damage?
When it comes to the measurement of ammunition capabilities, damage is measured in a couple of ways.
First, most rounds are measured by ballistic coefficient. Next, rounds are often judged by penetration ability.
Lastly, damage can be measured by the size of the overall hole left on the object the bullet struck.
Ballistic Coefficient
What exactly is a ballistic coefficient? In the simplest terms, a ballistic coefficient is the ability of the bullet to overcome air resistance in flight.
The better a bullet is able to overcome air resistance as it flies, the more energy it retains through flight.
The more energy the bullet retains over the course of flight, the more energy it has to deliver into the target.
While this isn’t the only thing you should be looking at in terms of judging your potential rounds for the damage they can do, it’s a good indicator that you’re on the right track.
There are other factors involved here too, like the mass of the bullet, but that is a part of the calculation for the ballistic coefficient.
So, as a general rule, the higher the ballistic coefficient number, the more damage the bullet is capable of inflicting.
It doesn’t mean it will — just that it could.
Penetration
This is also a factor that can be misleading. Like the ballistic coefficient, the penetration capability of the round deals with the potential of the round to deliver damage.
Rounds with the ability to penetrate well into the target are more capable of delivering energy into the target.
In older times, to ensure something that was shot was truly shot, manufacturers would try to load as much powder as possible into loads.
This was because some rounds that were made for handguns but that could be fired from rifles — such as the .44 Long Colt — might not actually enter into the target far enough to accomplish the intended goal.
Plus, thick layers of clothing or degrees of distance could cause some rounds to fail at truly damaging an intended target.
This is where a round’s penetration ability became important.
The powder loads were adjusted over time, along with bullet designs and materials used, to ensure a more stable flight path for the round.
This has allowed modern loads to use only enough powder to deliver the round while ensuring it’s able to penetrate the target on arrival.
Now, rather than running the risk of over or under penetration, the rounds are more consistent throughout their journey.
As far as damage is concerned, this penetration ability can translate to larger cavities as the round travels farther into and even through the intended target.
But, as with the other measurements, this factor alone is not a solid judgement of what makes a round do more damage.
The .223/5.56, for example, is known for penetration ability, but there is a ton of evidence of people being shot and having rounds go right through them without them even knowing.
Penetration alone is not enough of a barometer.
Exit Wound/Wound Cavity
Another factor for measuring damage is the size of the wound cavity a round makes and the exit hole it leaves.
Some rounds deliver their energy in such a way that the force pushes through, causing a cavity to form around the bullet.
Most rounds create a cavity much larger than the round itself, so the size of the round is not a factor. What can be important is a combination of the size and other factors as well as the composition of the target.
In addition, when this occurs, it leaves an exit wound with a much larger hole than that of the entry wound.
Again, this one factor alone is not enough to judge which rounds do the most damage.
It’s a combination of all factors, plus the type of gun being used and the conditions at the time of fire.
Rounds are designed to very specific standards and tolerances, and any number of factors can throw them off.
Everything from the weather to the way you hold the gun can negatively impact the ability of the round to perform optimally.
Most Damaging Rounds
So, what does the most damage then?
Which rounds have the best combination of those factors aside from the person pulling the trigger?
However, the answer is simple: It isn’t about what’s best, but rather what’s best for you.
It’s going to depend on what gun you’re using and your purpose for that gun.
Someone going to war has different needs than someone carrying for self-defense. But that said, the most popular calibers of bullets are popular for a reason.
For handguns, you can’t go wrong with a 9mm, a .40 or a .45 caliber. Based on ballistic tests, all these rounds are capable of doing more than enough damage to suit your needs.
Similarly, for rifles, the .223/5.56 rounds, .308, 7.62 x 39mm and even .300 Blackout are all equally damage-inducing depending on application.
The reality of the situation is that for modern uses, there is no one round that does more damage in all situations for all shooters.
They all do fantastic jobs depending on why you’re buying them. Like everything else, it’s situationally driven.
So get out there and find what works best for you; the exploration is the fun part.
Are you curious are the most expensive fishing rods on the market? There’s an old saying that it’s better to buy once and cry once than multiple times. When it comes to rod quality, it comes down to the materials used, attention to detail, and the experience of the craftsman. In this article, we’ll show you a handful of expensive rods that you should check out.
Take it from someone who has sold a lot of fishing rods, the right rod is worth the money.
Pat Schlapper (Bassmaster Elite Angler)
Yes, expensive fishing rods are worth it. However, only you can decide whether it is worthwhile. Do you fish frequently enough to justify the purchase, or will this be another beauty on a shelf collecting dust?
Do you wish to feel a lot and compete in competitions, or are you more of a casual/recreational angler? Do you need the most expensive fishing rods?
As stated, the short answer is yes. It’s worth it to pay a little more for better quality. However, no amount of high-quality, superior technology can make up for time on the water and first-hand experience. Purchase of this magnitude warrants an angler who will put in both the time and effort to maximize a rod’s potential.
Expensive rods are more sensitive, detect tiny bites, and are more enjoyable to use than their less costly equivalents.
The difference between a $50 rod and a $150 rod is significantly greater than between a $100 rod and a $300 rod.
1. Oyster Bamboo Fly Rods
Handcrafted Heirloom for Future Generations
Key Features:
Full coverage hand engraving by W.S. Oyster on the reel seat and ferrules
Richly flamed cane with silk thread wraps and trim wraps on every guide
The Oyster Bamboo Fly Rod has a starting price of $4,600, making it the most expensive fishing rod on the market. It is partly because each example is handcrafted after a client makes a purchase.
It is the world’s only bamboo fly rod with a manufacturer who engraves his rods by hand. More so, each rod is outstanding in terms of performance and looks.
2. Orvis Penns Creek Full-flex Bamboo Fly Fishing Rod
Classic Fishing Rod with Remarkable Casting
Key Features:
It has a fast action blank, light tip, and superb rod strength
It has a timeless style, built with impeccable care and craftsmanship
Short and light, encouraging effortless short-medium distance casting
Whether you’re searching for your first bamboo fly rod or you’re a seasoned collector, you’ll want Orvis Penns Creek Full-flex Bamboo Fly Rod in your collection.
Perhaps Orvis’s most enjoyable full-flex bamboo trout rod in more than a century. In the traditional trout line, weight, fast action, and a soft tip are coupled with the power of a swelled butt.
3. Hamachi 2018/2019 XOS GT’n’Doggie Expedition Series Popper
Best Popping and Spinning Fishing Rods
Key Features:
Spinning popper rods – Spin reel version (fixed spool/thread line reel)
XOS Gt Doggie Series, suitable for popper, lure fishing, and general spinning both shore and boat
Ultra-high tensile full nano carbon blank
The XOS GT’n’Doggie Expedition series is a three-piece popping, plugging, stick bait rod with great casting distance and power!
If you’re after Jurassic-sized GTs, gigantic red bass, monster Dogtooth, Bluefin/Yellowfin Tuna, or other oceanic monsters, then this is the rod you need.
4. G. Loomis Asquith 690-4 All Water Fly Rod
Most Technologically Advanced Fly Rod
Key Features:
Proprietary spiral X construction, superb power transfer from tip to hand
G. Loomis Asquith is the world’s most technologically advanced fly rod, a result of its international collaboration in design, materials, and manufacturing methods.
This fishing rod is built on Shimano’s Spiral X platform, which provides excellent power transmission from tip to hand, rapid recovery, and enhanced sensitivity.
This rod is a step into the future of rod production technology, designed by world casting champion Steve Rajeff, bringing a world-class rod to the average angler.
5. Sage Fly Fishing – X Fly Rod
Multi-Application Fly Rod with Fast Action
Key Features:
Graphite Ille Technology, Fast action
Fuji ceramic stripper guides, dark green thread wraps with metallic grey trim wraps
Gloss black anodized aluminum up-locking reel seat, cork foregrip, and rear grip
The Sage X Fly rod’s all-new fast action taper, developed with Konnetic Technology, provides more blank recovery and a sharper tip stop. It results in tighter, more efficient loops across the board.
More so, this taper enables you to dig deeper into the rod and access the bottom portions, bringing power closer to the angler.
6. Sage Salt HD Fly Rod
Best Fly Rod for Fast Moving Saltwater Species
Key Features:
Squid Ink blank color, Black thread wraps with blue trim wraps
Integrated hidden hook keeper in the real seat, laser etched line weight on the slide band
Black rod bag with blue logo and model tag, blue powder-coated aluminum rod tube with Sage medallion
The Sage Salt HD Fly Rods are built with a singular purpose in mind: to allow anglers to reach further, faster, and with more delicacy.
Sometimes anglers must make rapid first shots and be able to repeat this at speed or faster. Because of the salt’s fast-moving inhabitants, this fishing rod is the perfect combination of speed and accuracy.
Full wells, AAA grade cork grip, aluminum rod tube with cloth rod bag
The G Loomis NRX T2S Fly Rods masterfully combine an original design with the industry’s most cutting-edge materials and technology. This provides anglers with greater control and responsiveness than ever before.
It uses Dynamic Recovery Technology to deliver the power, line speed, and loop stability that current fast-action rods are known for without sacrificing “feel” and elegance in the short game.
From the first perch to monstrous deep-sea leviathans, fishing is a pastime that has been endured for many millennia. Fishing spans the gamut from family outings to competition. It is a sport, tradition, and way to put food on the table all wrapped in one.
Unfortunately, many of the rods purchased from generic superstores and sporting goods outlets can be overpriced and underwhelming in their performance.
The best fishing rod for your money can make all the difference when it counts, leaving you with a happy memory and not an empty hook.
Final Thoughts
These are the most expensive fishing rods that were made with a high level of craft. Throughout the process, every move and detail is closely examined. These rods are usually costly because of this.
Whether your budget and preferences lead you to a $900 fishing rod or a $9000 bamboo rod, fly anglers typically agree on one thing, Bamboo rods are second to none in terms of performance.
Nonetheless, they do take some getting used to. There’s no need to adjust if you’re starting with a bamboo rod, so it’s better to start with the best.
I love hunting with and shooting muzzleloaders. There is virtue to be found in the slower pace, the process of load development, and the added skills required to place a bullet on target. But I, along with most muzzleloader fans, HATE cleaning them. This is especially true of old-school percussion cap and flintlock models. That is not to imply that modern in-lines are fun and enjoyable to clean. Both platforms demand their own considerations when it comes to muzzleloader maintenance.
In this article, we want to shine the light on what it takes to deep-clean both in-line and closed-breech muzzleloaders.
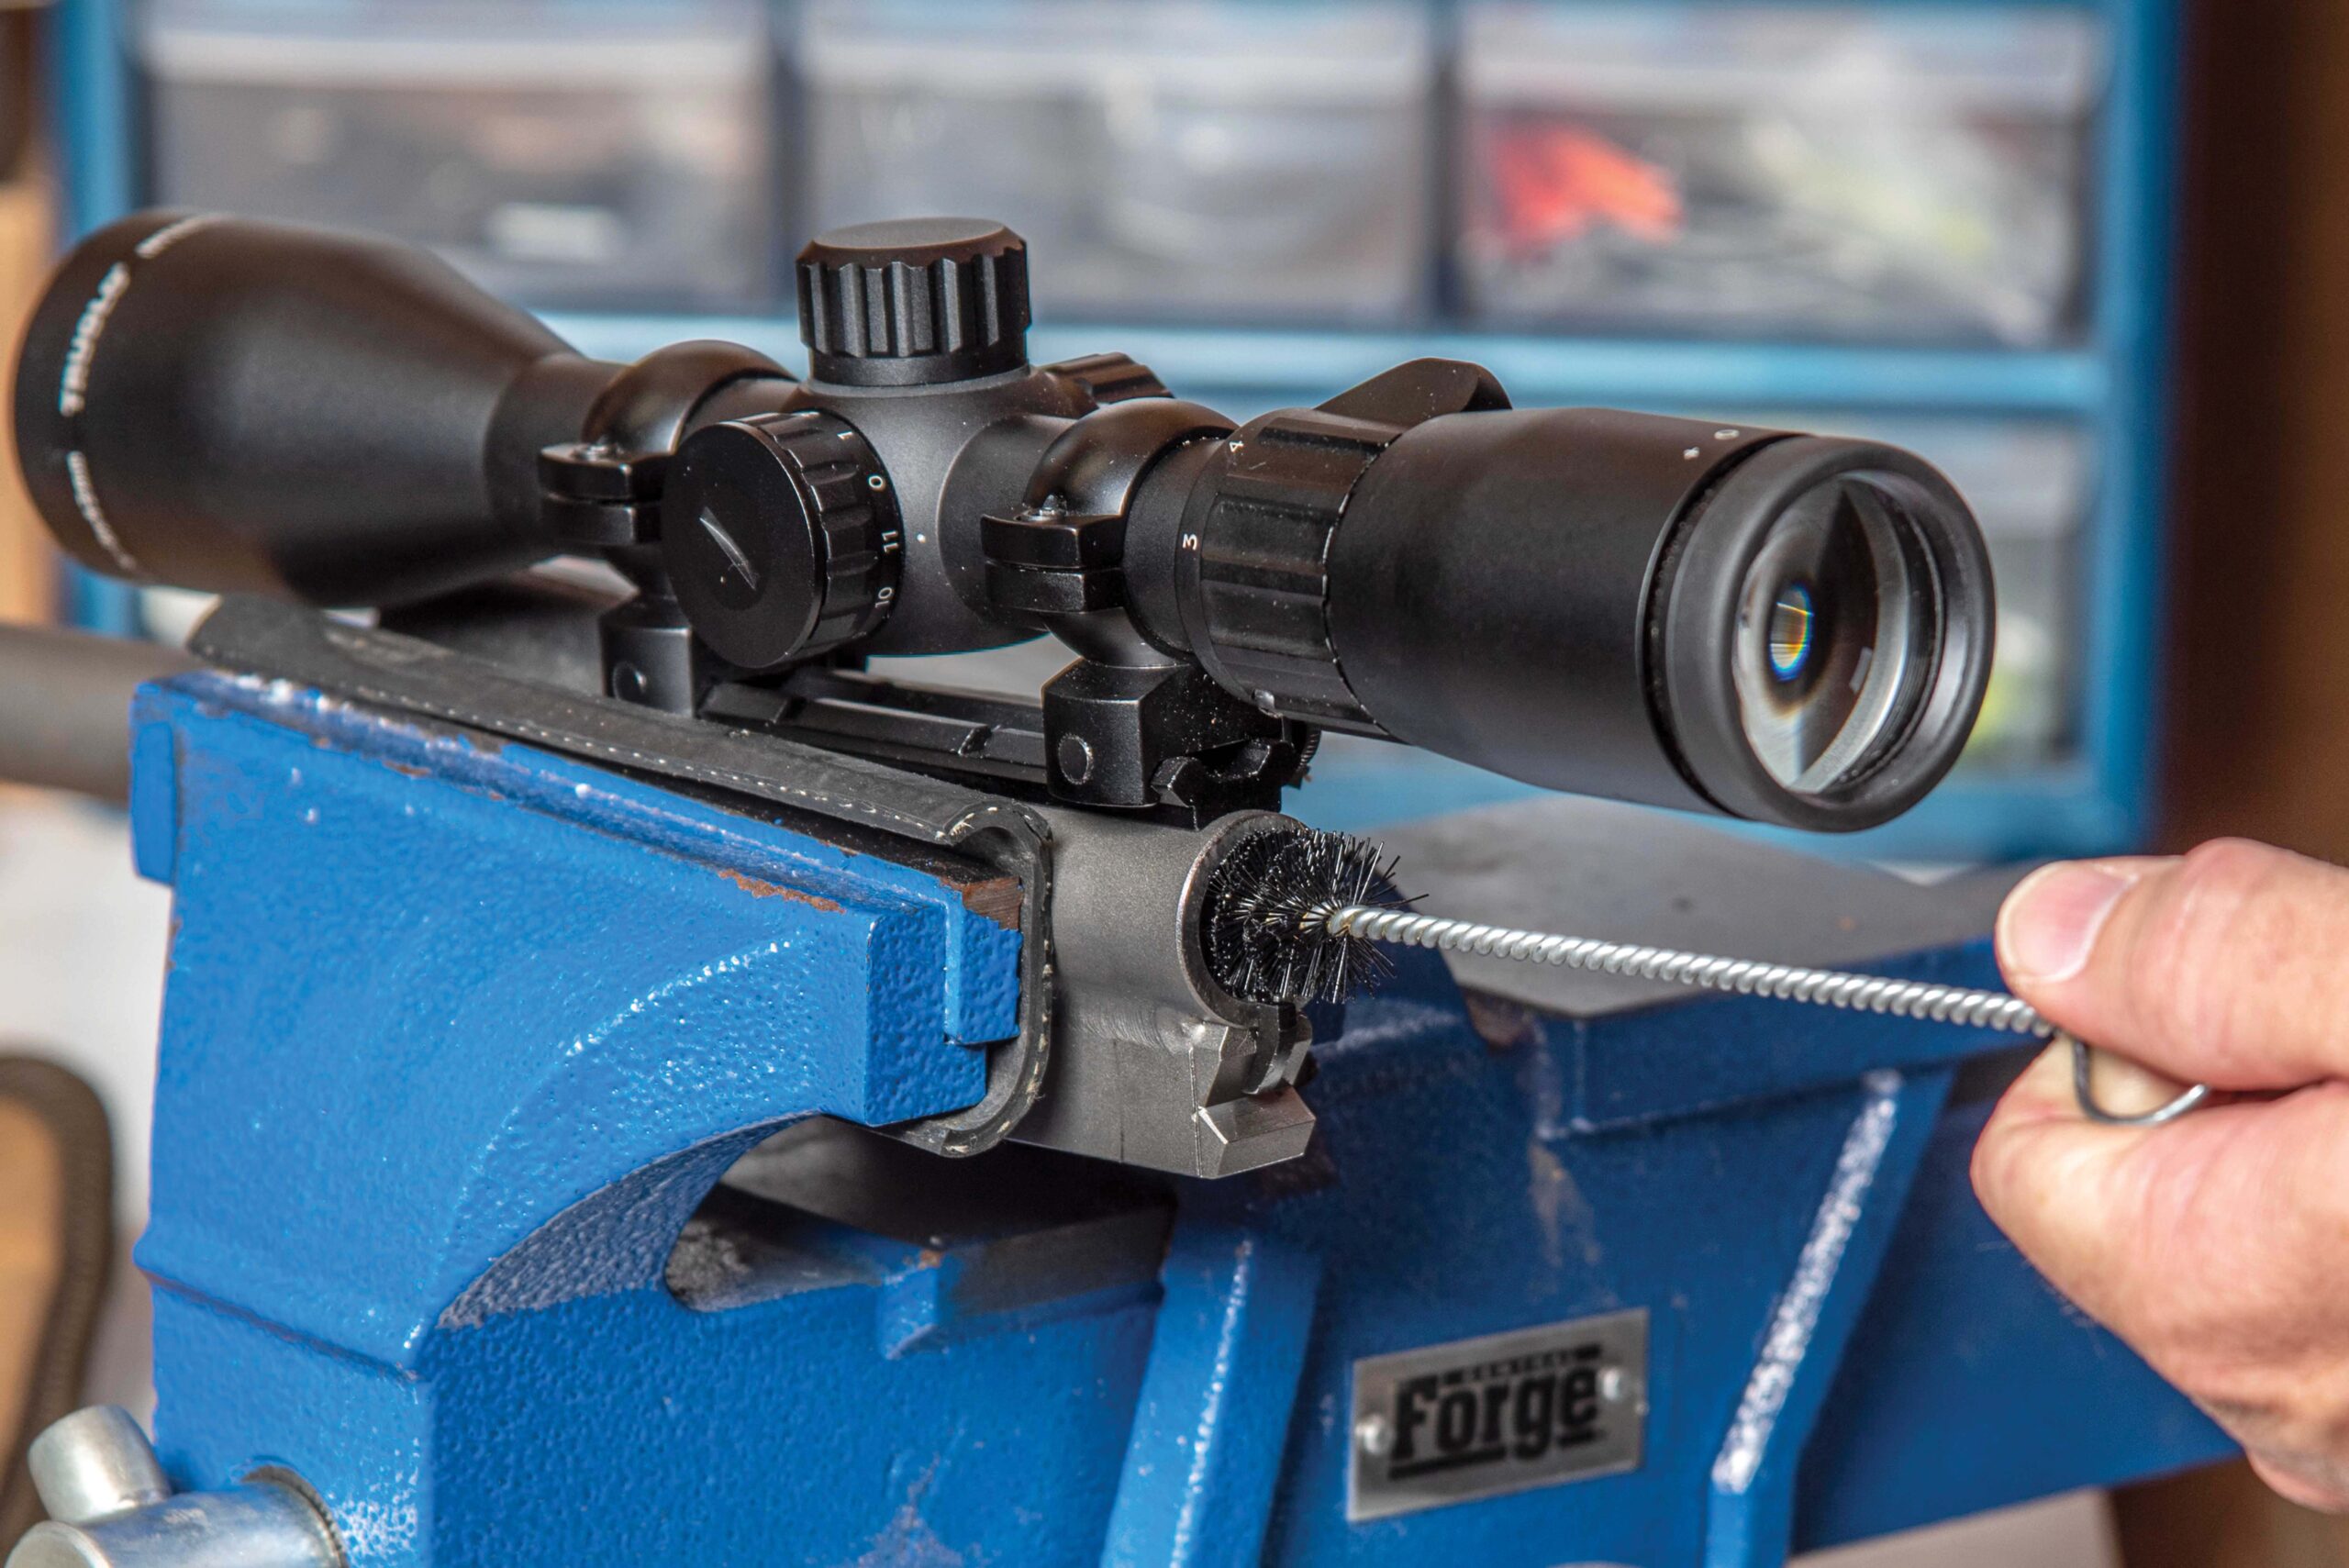
We’ll begin with contemporary muzzleloaders because they are the easiest to clean and to maintain. Nearly all incorporate a removeable breech plug that simply screws into the back of the barrel. The Traditions NitroFire we’re using here does not have a breech plug due to its use of the Federal Premium FireStick technology, but the cleaning process is like that of standard in-line muzzleloaders.
1. The Traditions NitroFire is machined with a “chamber” area that is larger in diameter than the rifle bore, necessitating the use of a special nylon bore brush. Solvent is also used to clean this portion of the barrel.
The thing to keep in mind regarding in-line muzzleloaders is that nearly all are used with copper-jacketed bullets and plastic sabots. This is a big difference compared to traditional muzzleloaders that propel lead balls or slugs, because you’re not so much dealing with lead and powder fouling in the bore, but copper and plastic. Both materials cling to rifling and any surface imperfections along the barrel’s lands and grooves. This means that your average muzzleloader bore solvent and cotton patches are not going to do a great job of eliminating this fouling.
2. After allowing the solvent to loosen the fouling, run a dry patch down the bore to remove the initial excess. This rifle had already been cleaned six months prior, but some measure of copper fouling remained in the bore. You can’t remove it all, and it’s not necessary that you do. As you can see here, it’s a difficult substance to remove and thus requires an aggressive approach. Repeat the process of solvent and bore scrubbing until you are satisfied that the bore is as clean as you can get it.
In-Line Muzzleloader Cleaning
Proper barrel cleaning of centerfire rifles and handguns demands a quality solvent and liberal application of a bore brush to remove built-up fouling that can be detrimental to barrel life and accuracy. It is no different with muzzleloaders that shoot copper-clad sabot bullets. In the minds of many shooters who may come from a traditional muzzleloader background, the idea of cleaning a barrel with a bore lubricant and a patch still lingers. Just because the in-line is a “muzzleloader” does not mean it holds to the same cleaning processes as closed-breech sidelock or flintlock muzzleloaders.
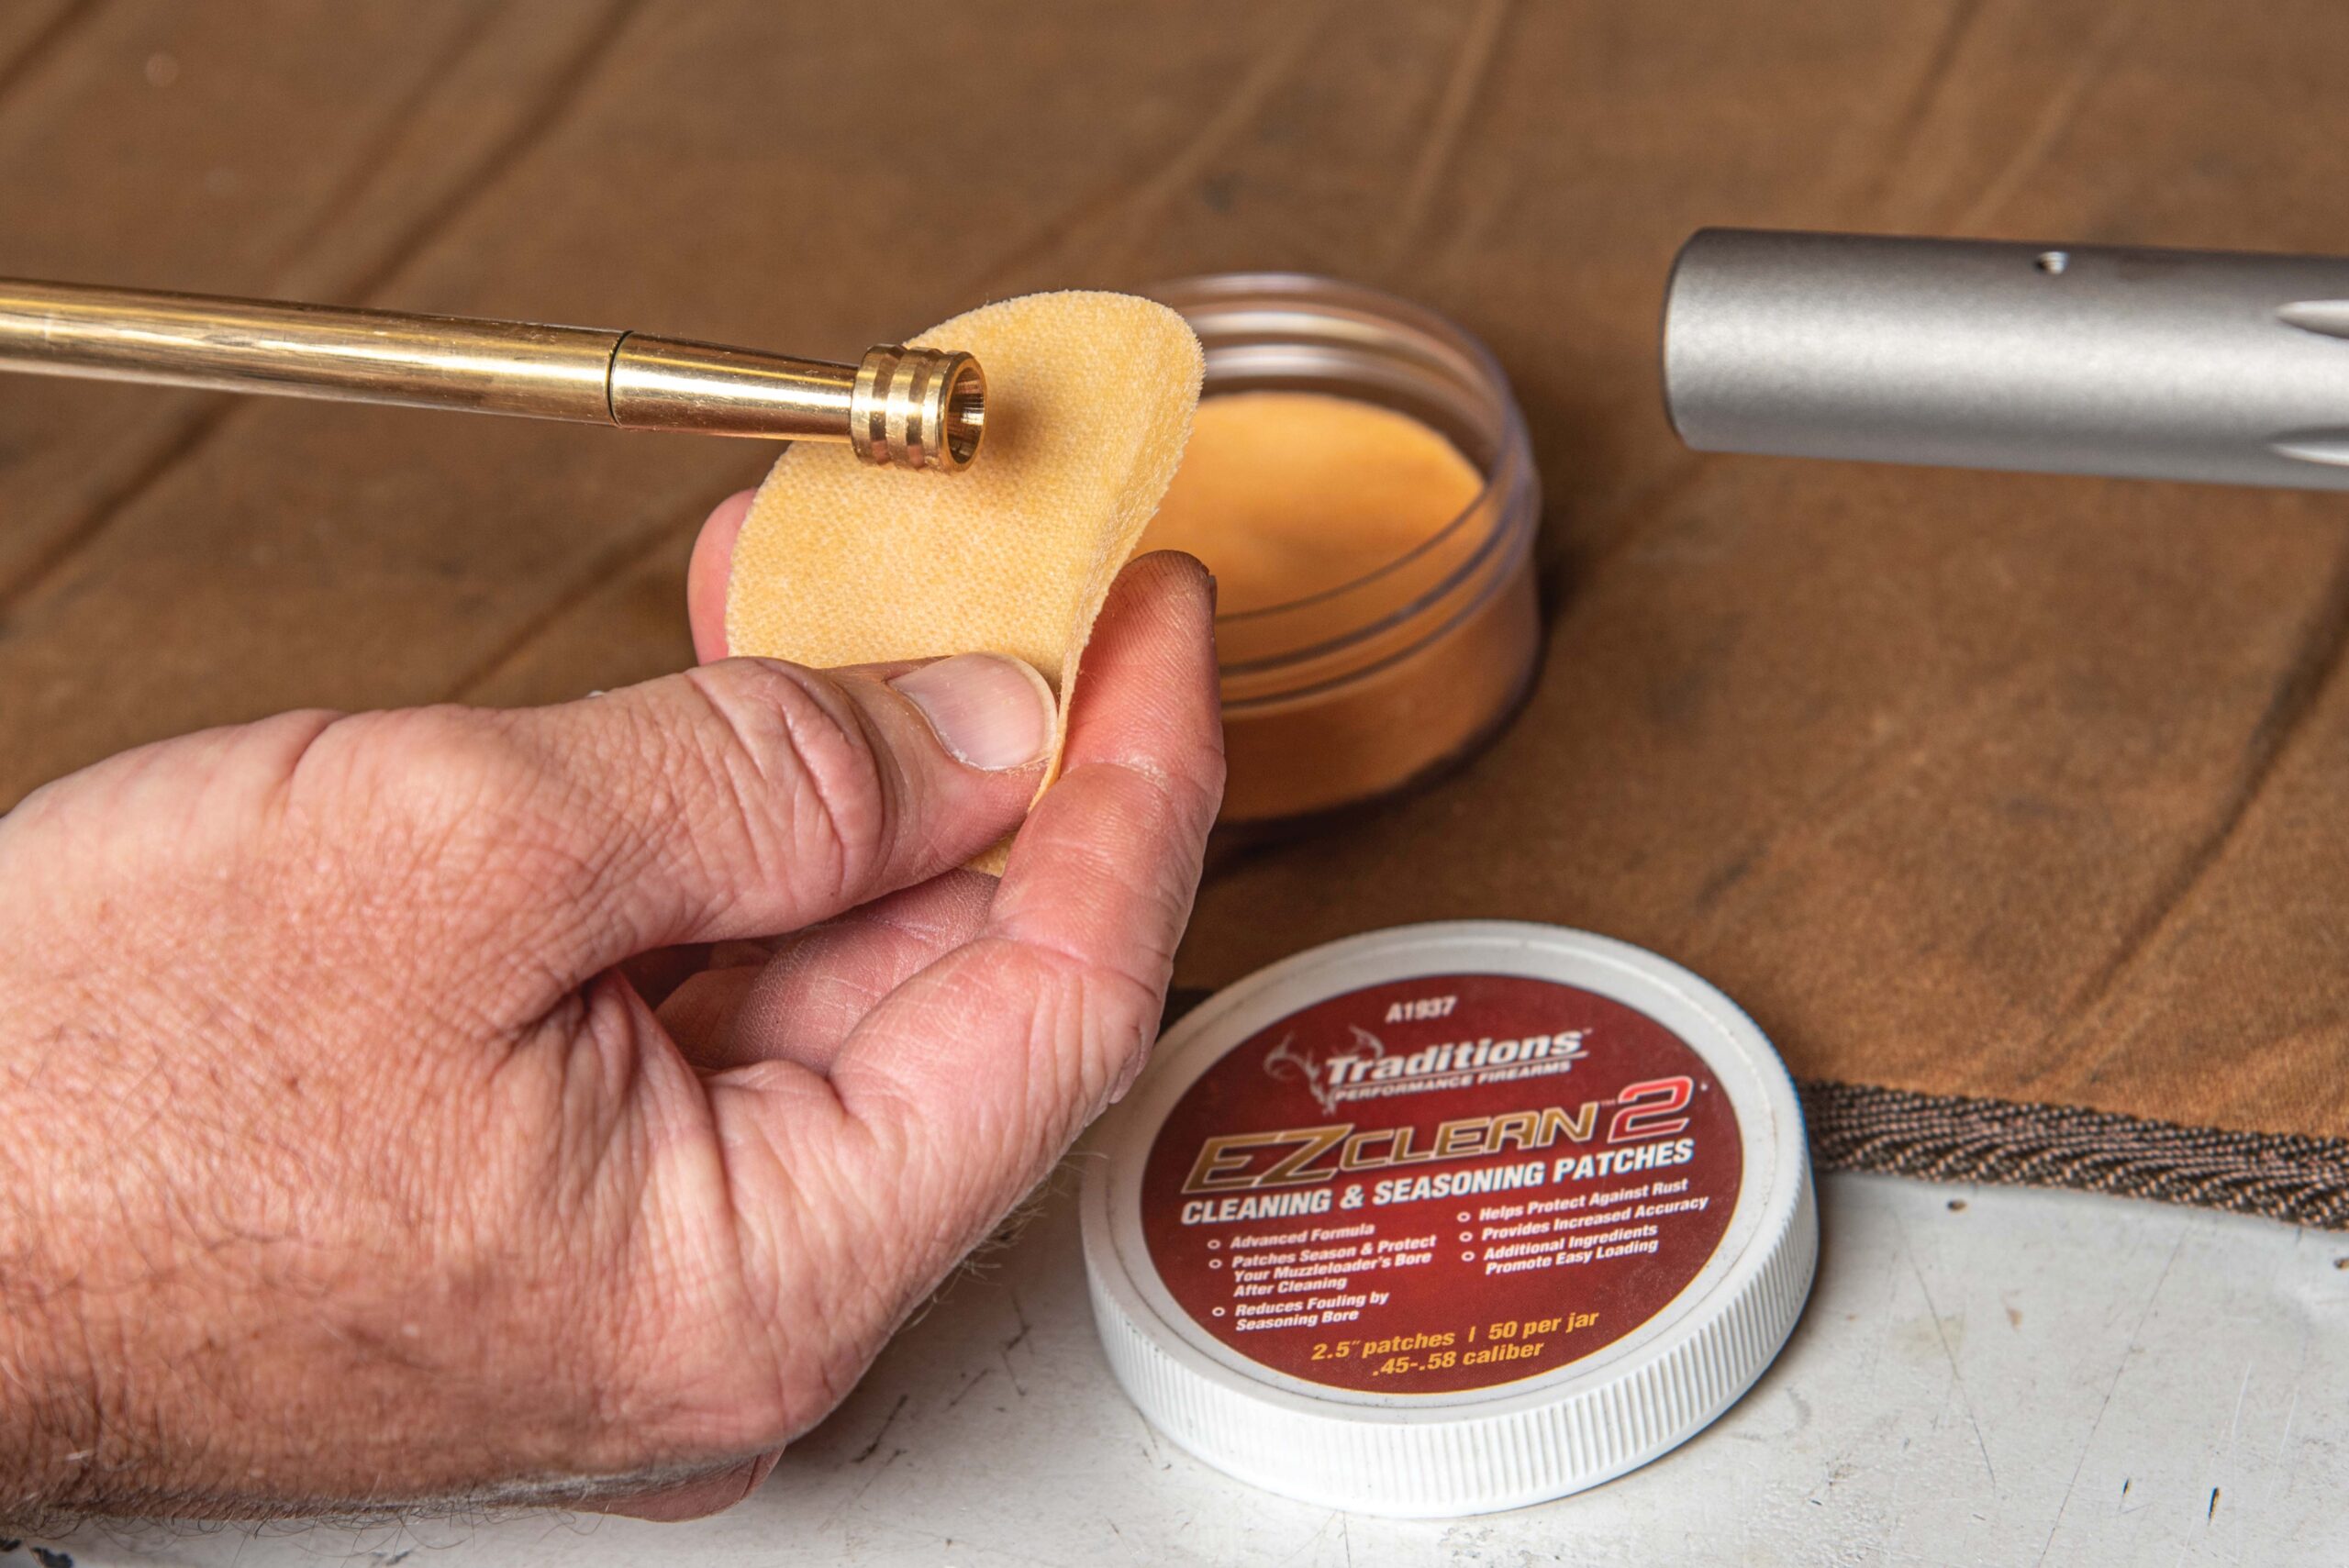
3. Once the fouling has been removed to your satisfaction, remove all solvent with dry patches (cotton flannel works best). Finish by running a seasoning patch down the bore. Here, we are using a Traditions EZ Clean 2 patch. You can also use a plain cotton patch saturated with conventional bore lubricant. Either one will provide a protective coat in the bore to help prevent rust and make loading easier when it’s time to hit the range or the field.
Treat your in-line muzzleloader as you would any conventional firearm. After removing the breech plug, run a patch saturated with a good solvent, such as Hoppe’s #9, down the bore to remove the gross fouling. Next, saturate a caliber-specific bore brush with the solvent and make around 10 passes back and forth in the barrel. Allow the solvent to do its work for 10-15 minutes.
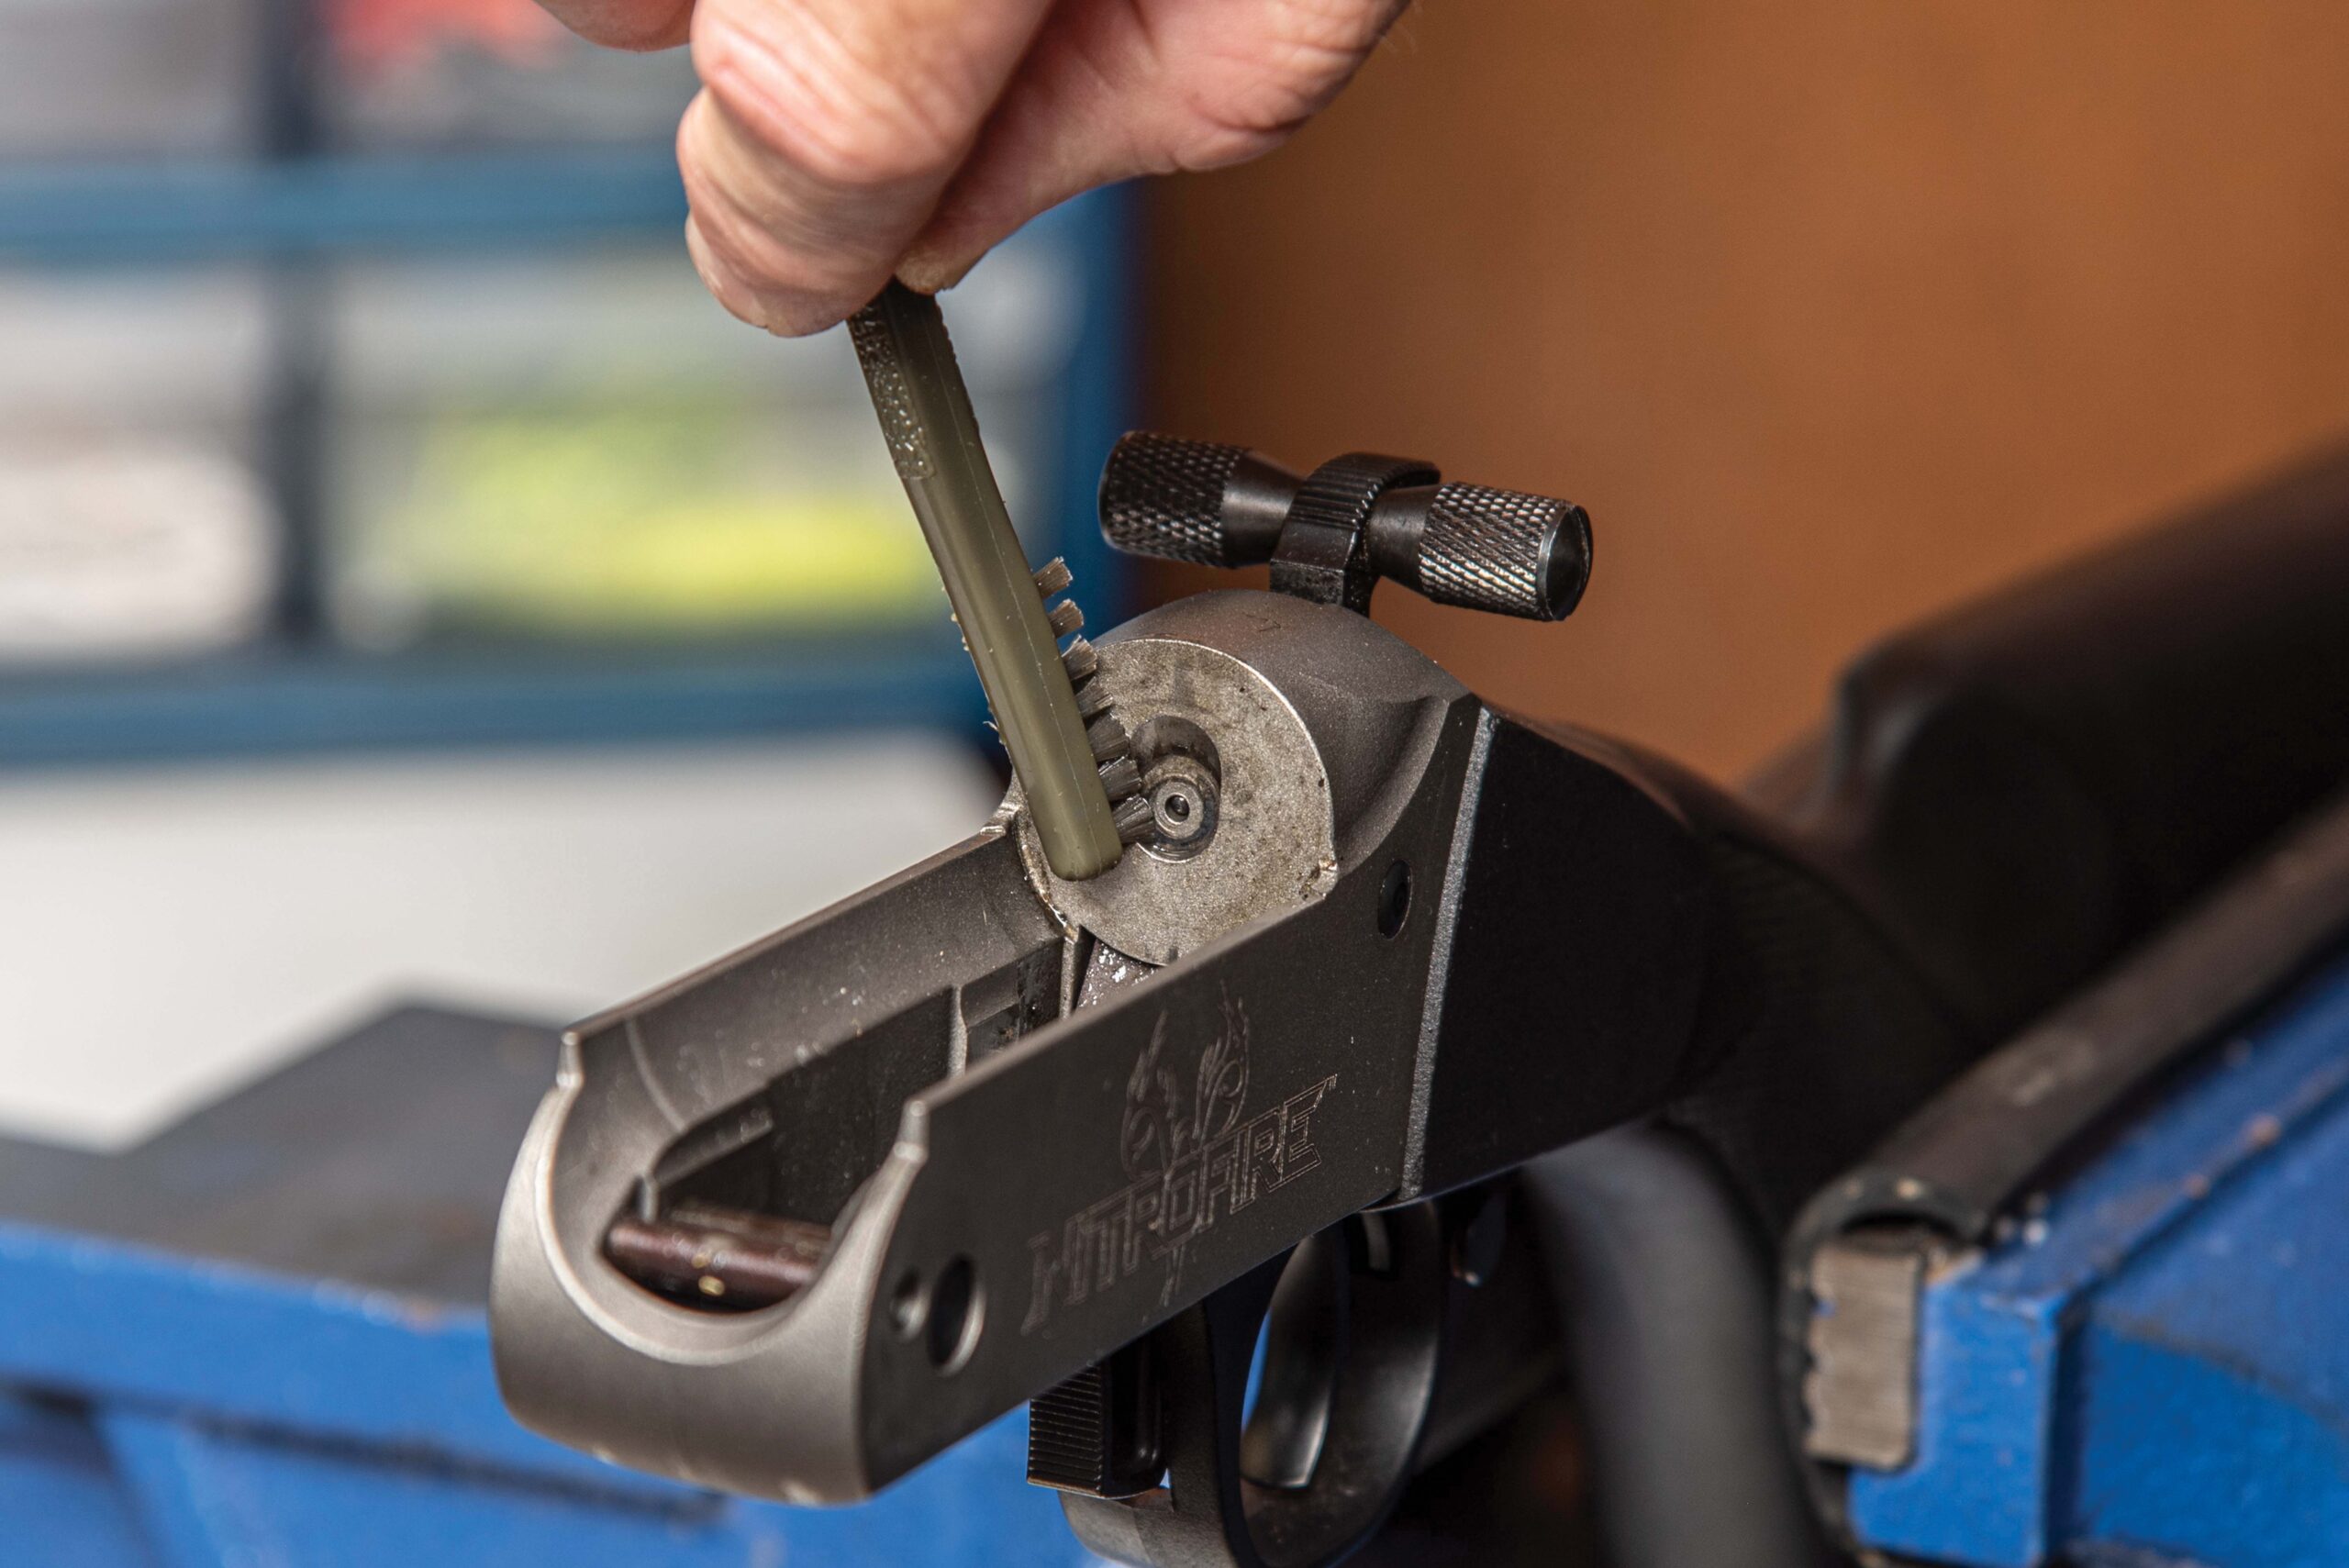
4. This portion of the receiver serves as the breech face of the Traditions NitroFire and should also be cleaned thoroughly with a brush and solvent to remove damaging powder residue. If you have a conventional in-line muzzleloader, you will want to clean the breech plug in similar fashion, making sure to remove all fouling from the fire hole with a specialty brush or pipe cleaner saturated in solvent. Once cleaned and dry, lightly lubricate the plug with gun oil, mineral oil or bore lubricant, and be sure to apply grease to the breech plug threads before reinstalling into the back of the barrel.
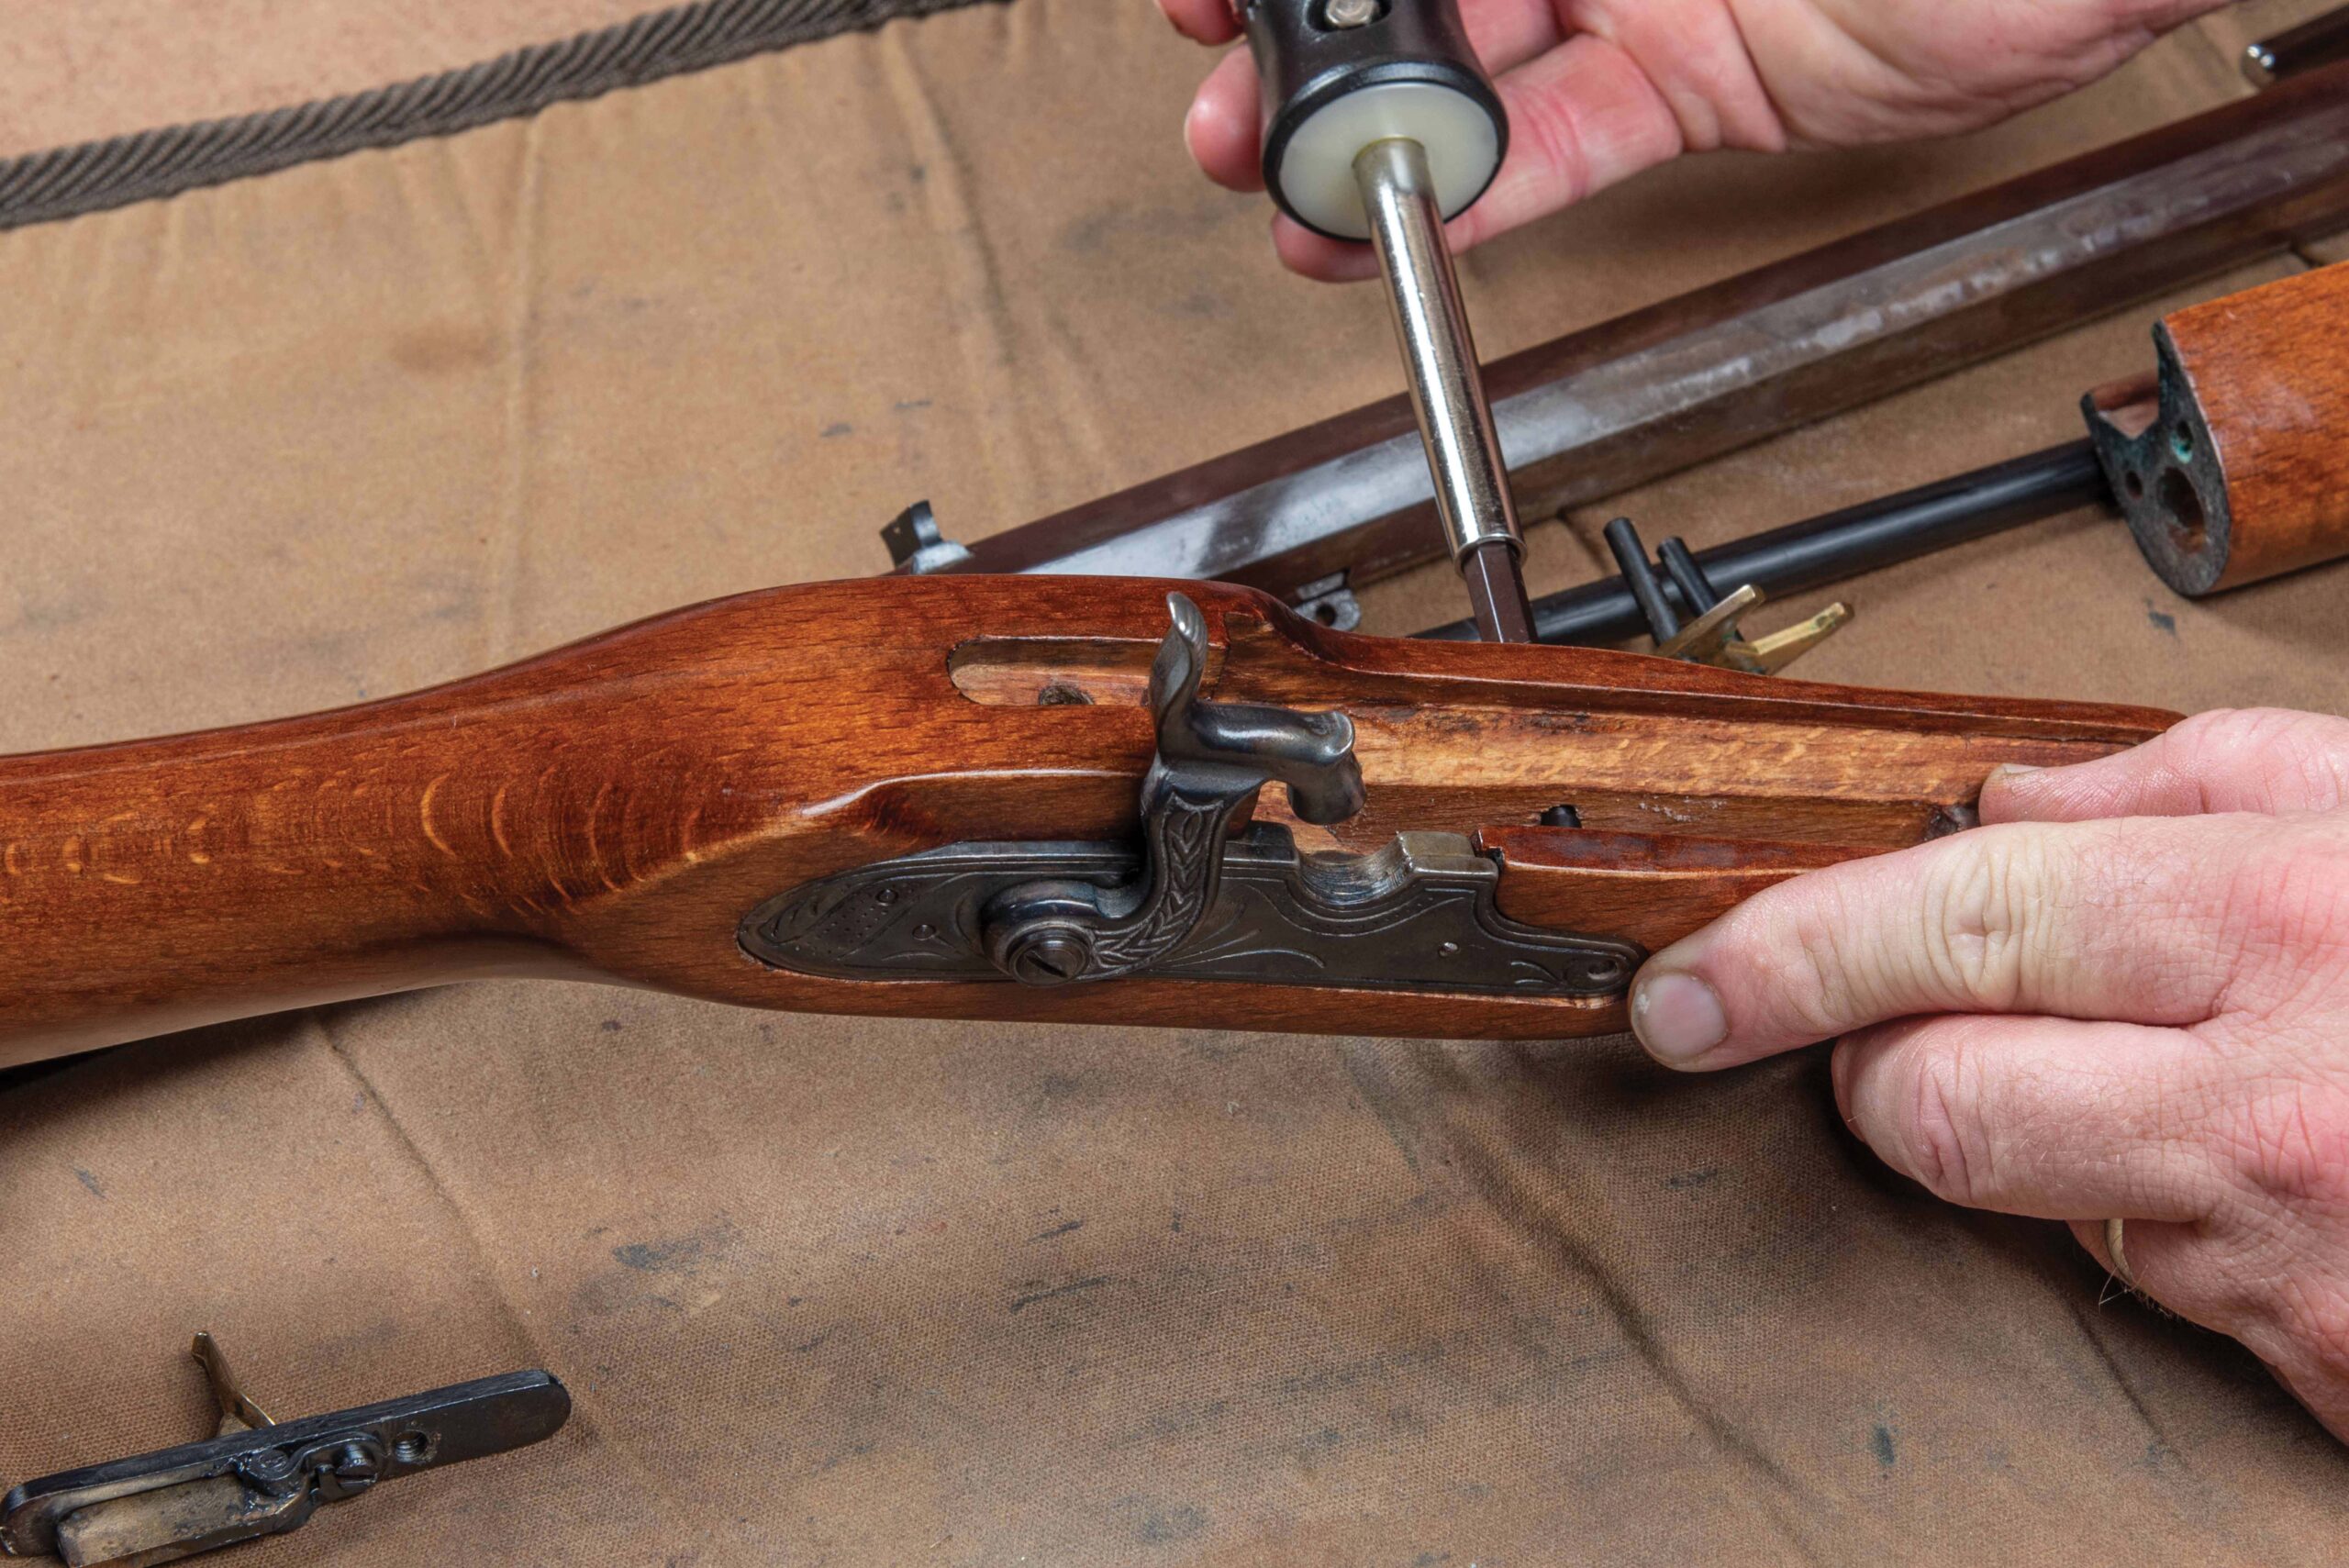
Sidelock Muzzleloader Cleaning — the Deep Dive
If I were to venture a guess, I’d reckon that relatively few commercially manufactured sidelock muzzleloaders owned by the occasional muzzleloader shooter or hunter ever receive a thorough cleaning. For many, the sidelock rifle is unfamiliar and uncomfortable territory. Most only receive the cursory cleaning by running a bore lubricant down the barrel a few times before calling it “done.” Fewer still, ever attempt to remove the sidelock to lubricate the mechanism and remove built-up fouling and debris.
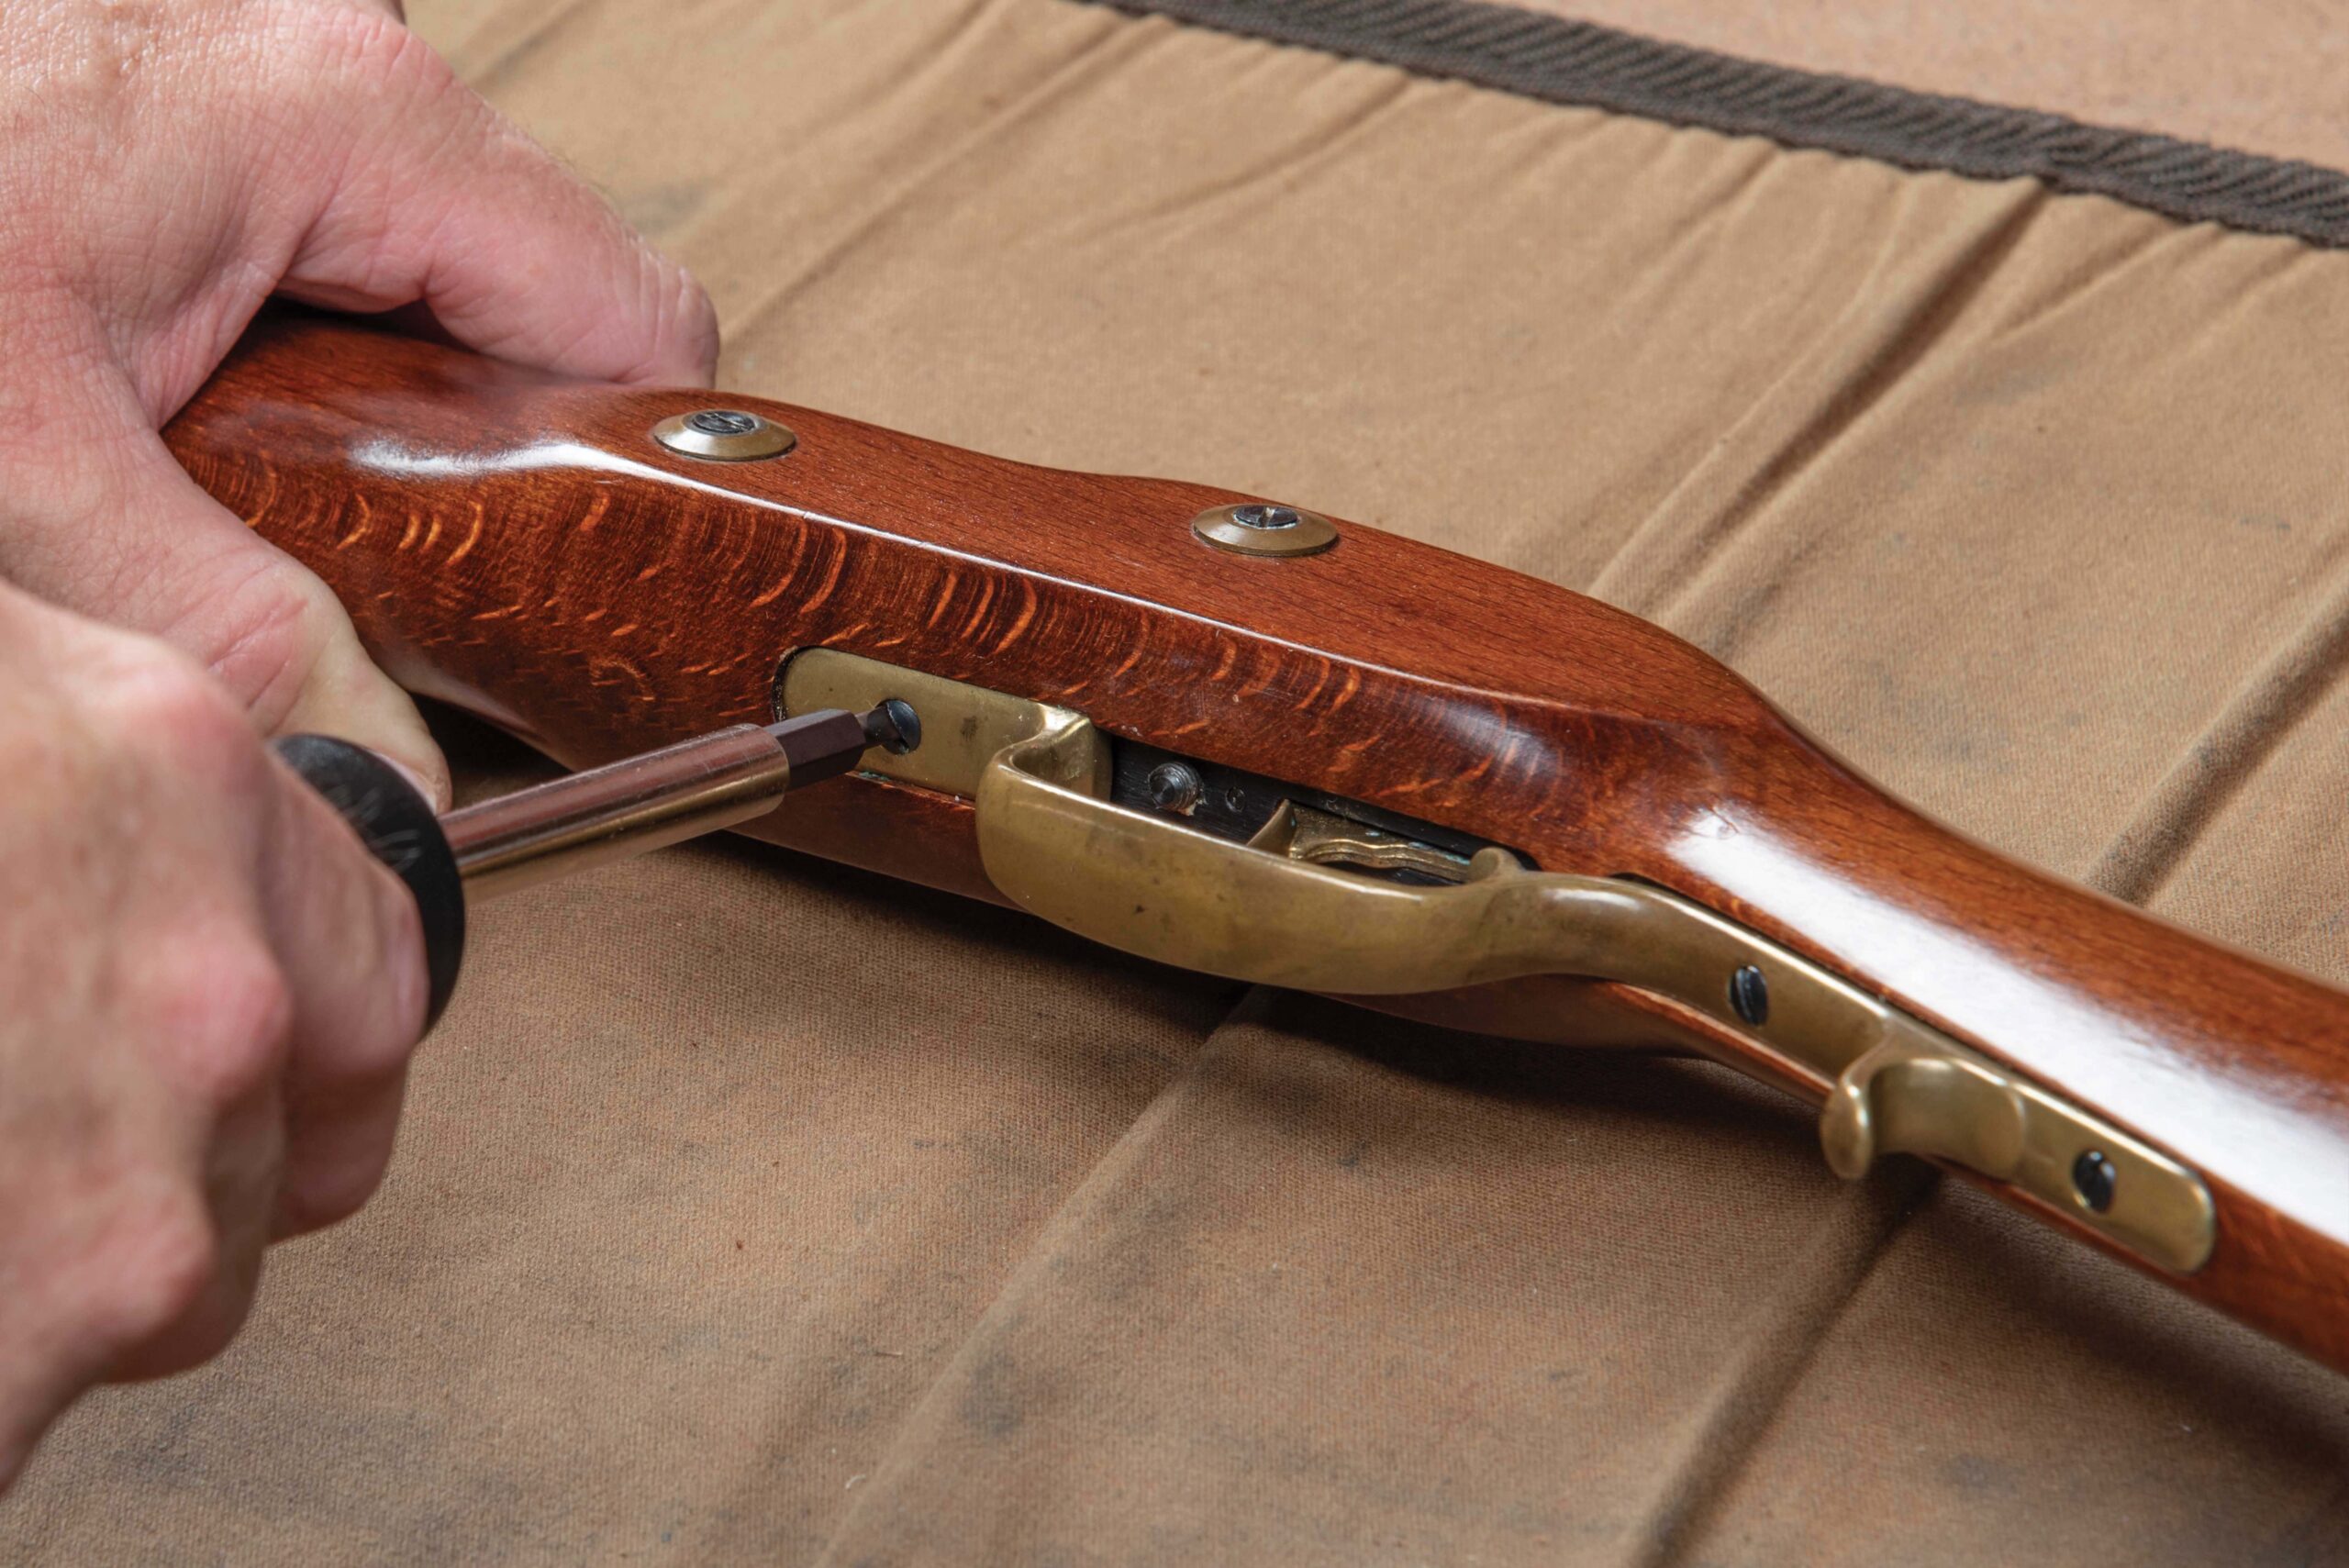
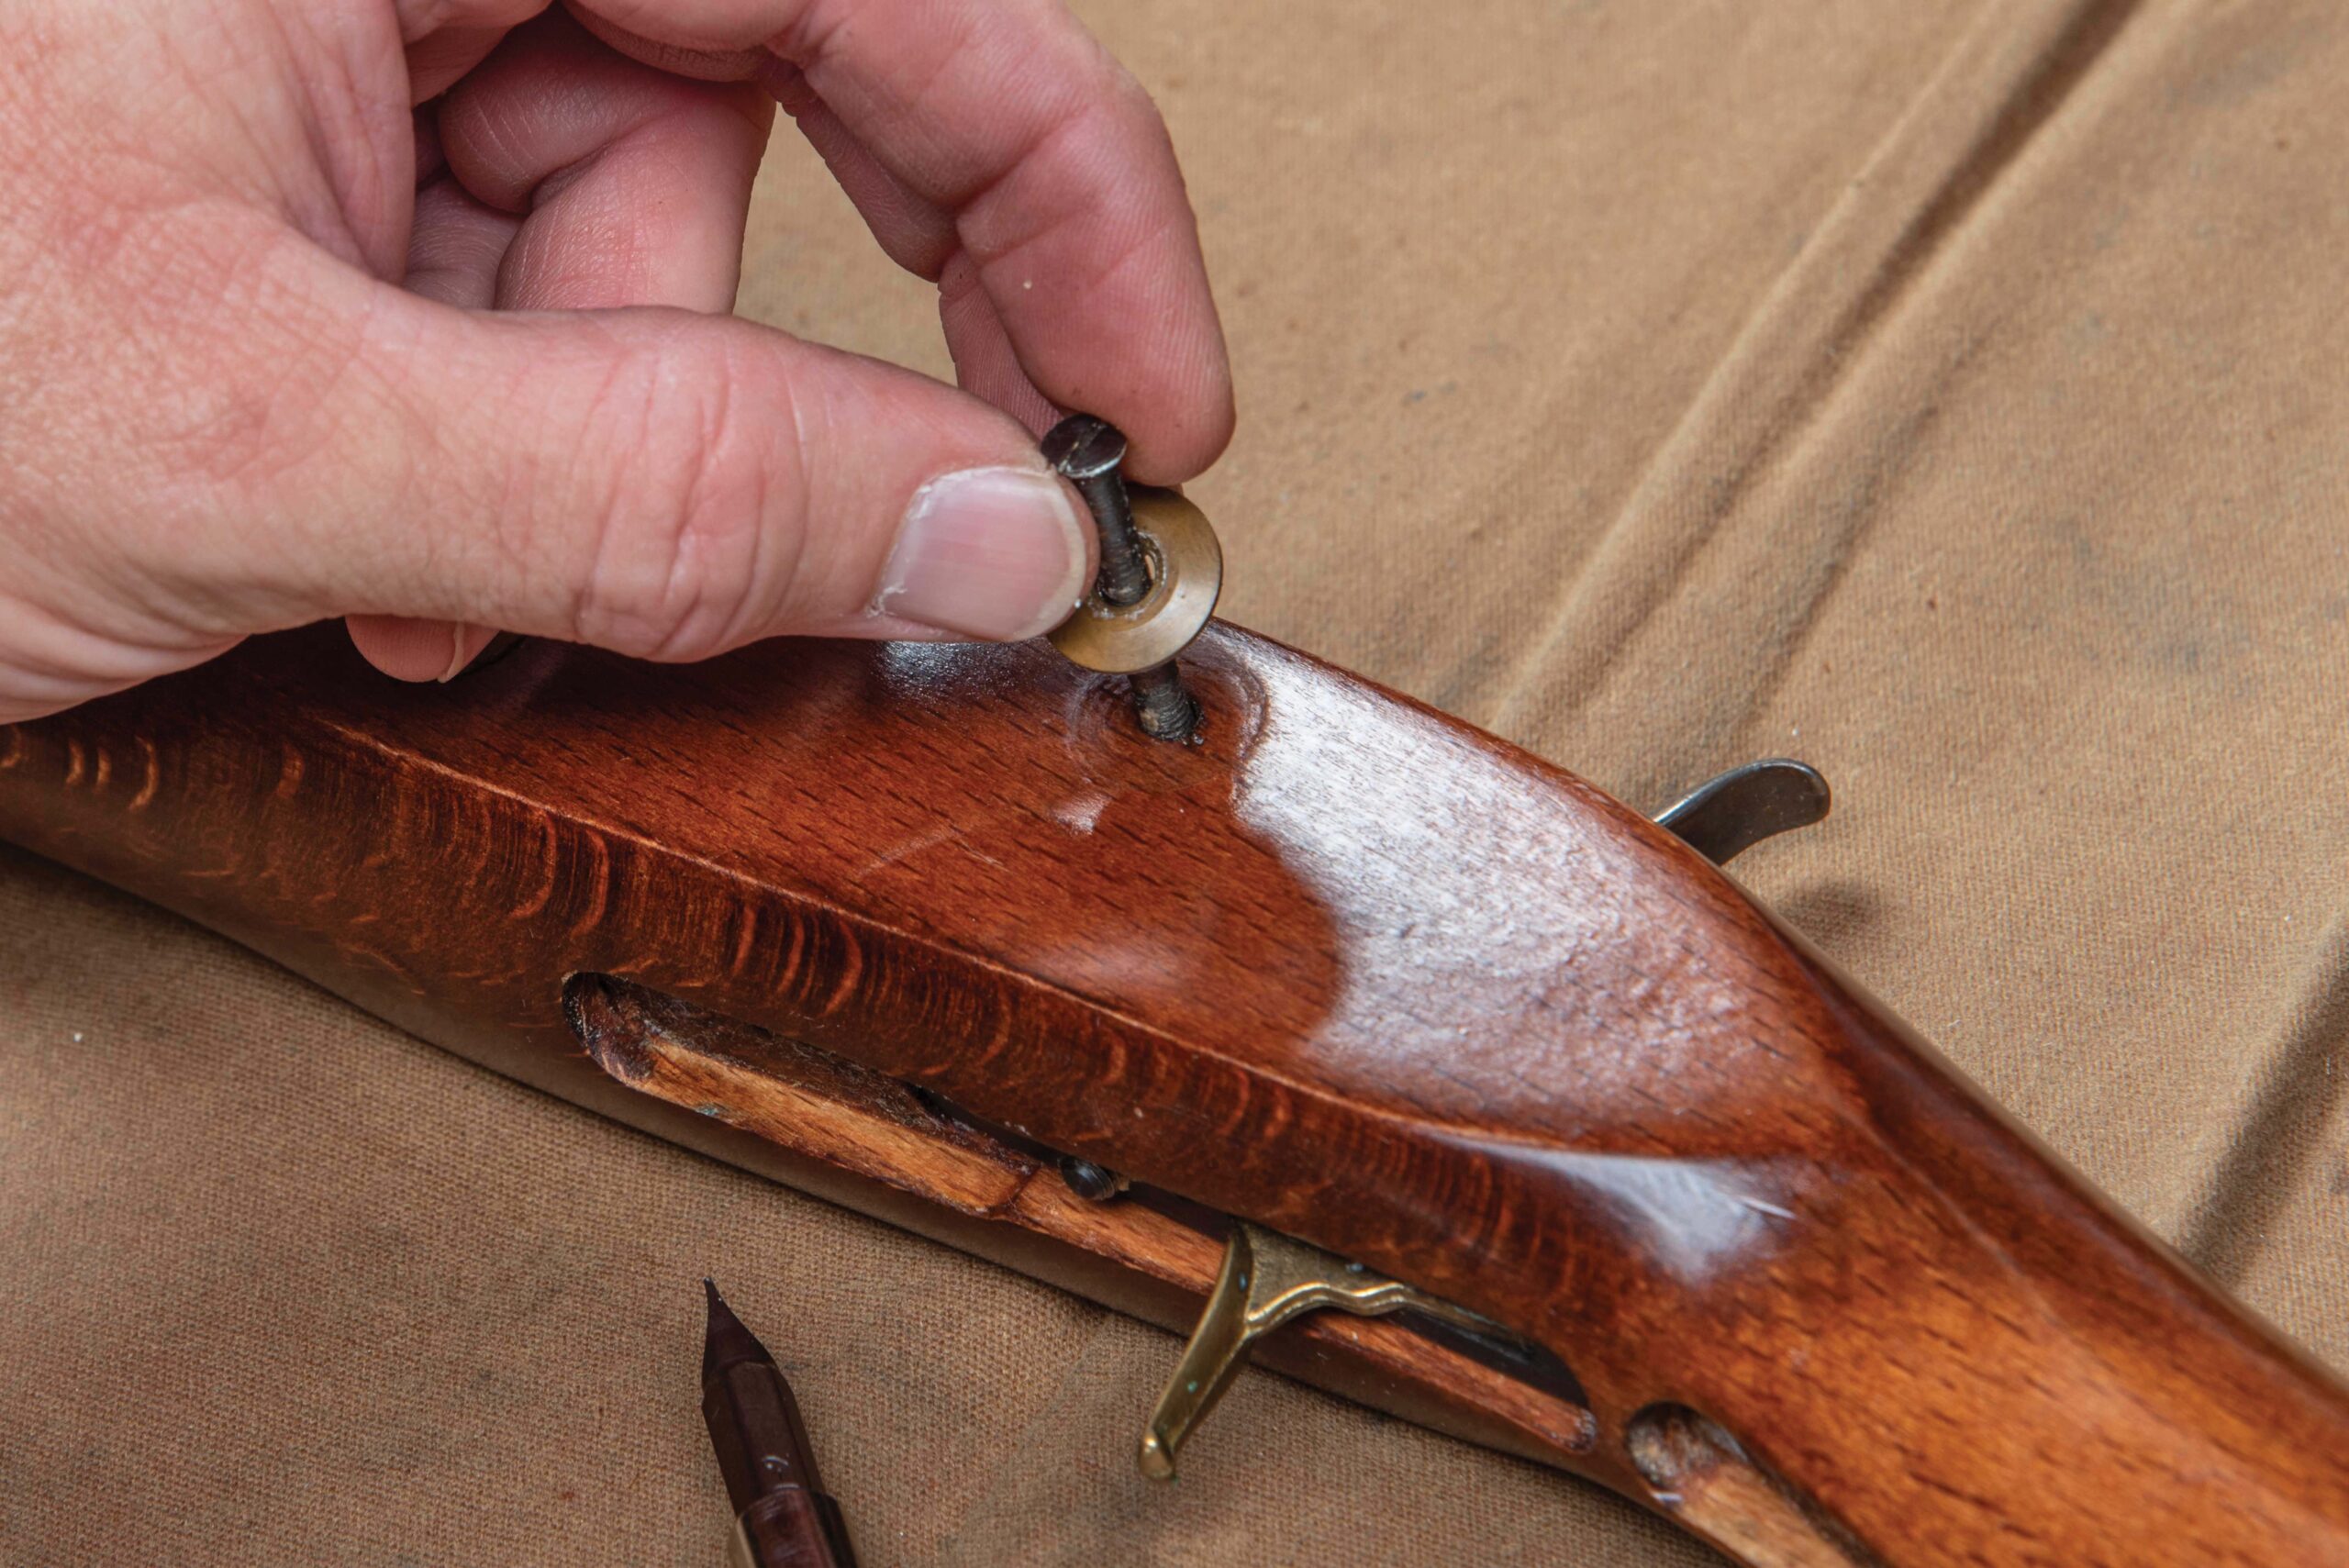
1. While it is not necessary to remove the triggerguard for this procedure, we’ll do so here so we can check the condition of the screws.
Well, the good news is that deep cleaning a sidelock muzzleloader is a simple task. It’s not fun and it is messy, but it is not difficult.
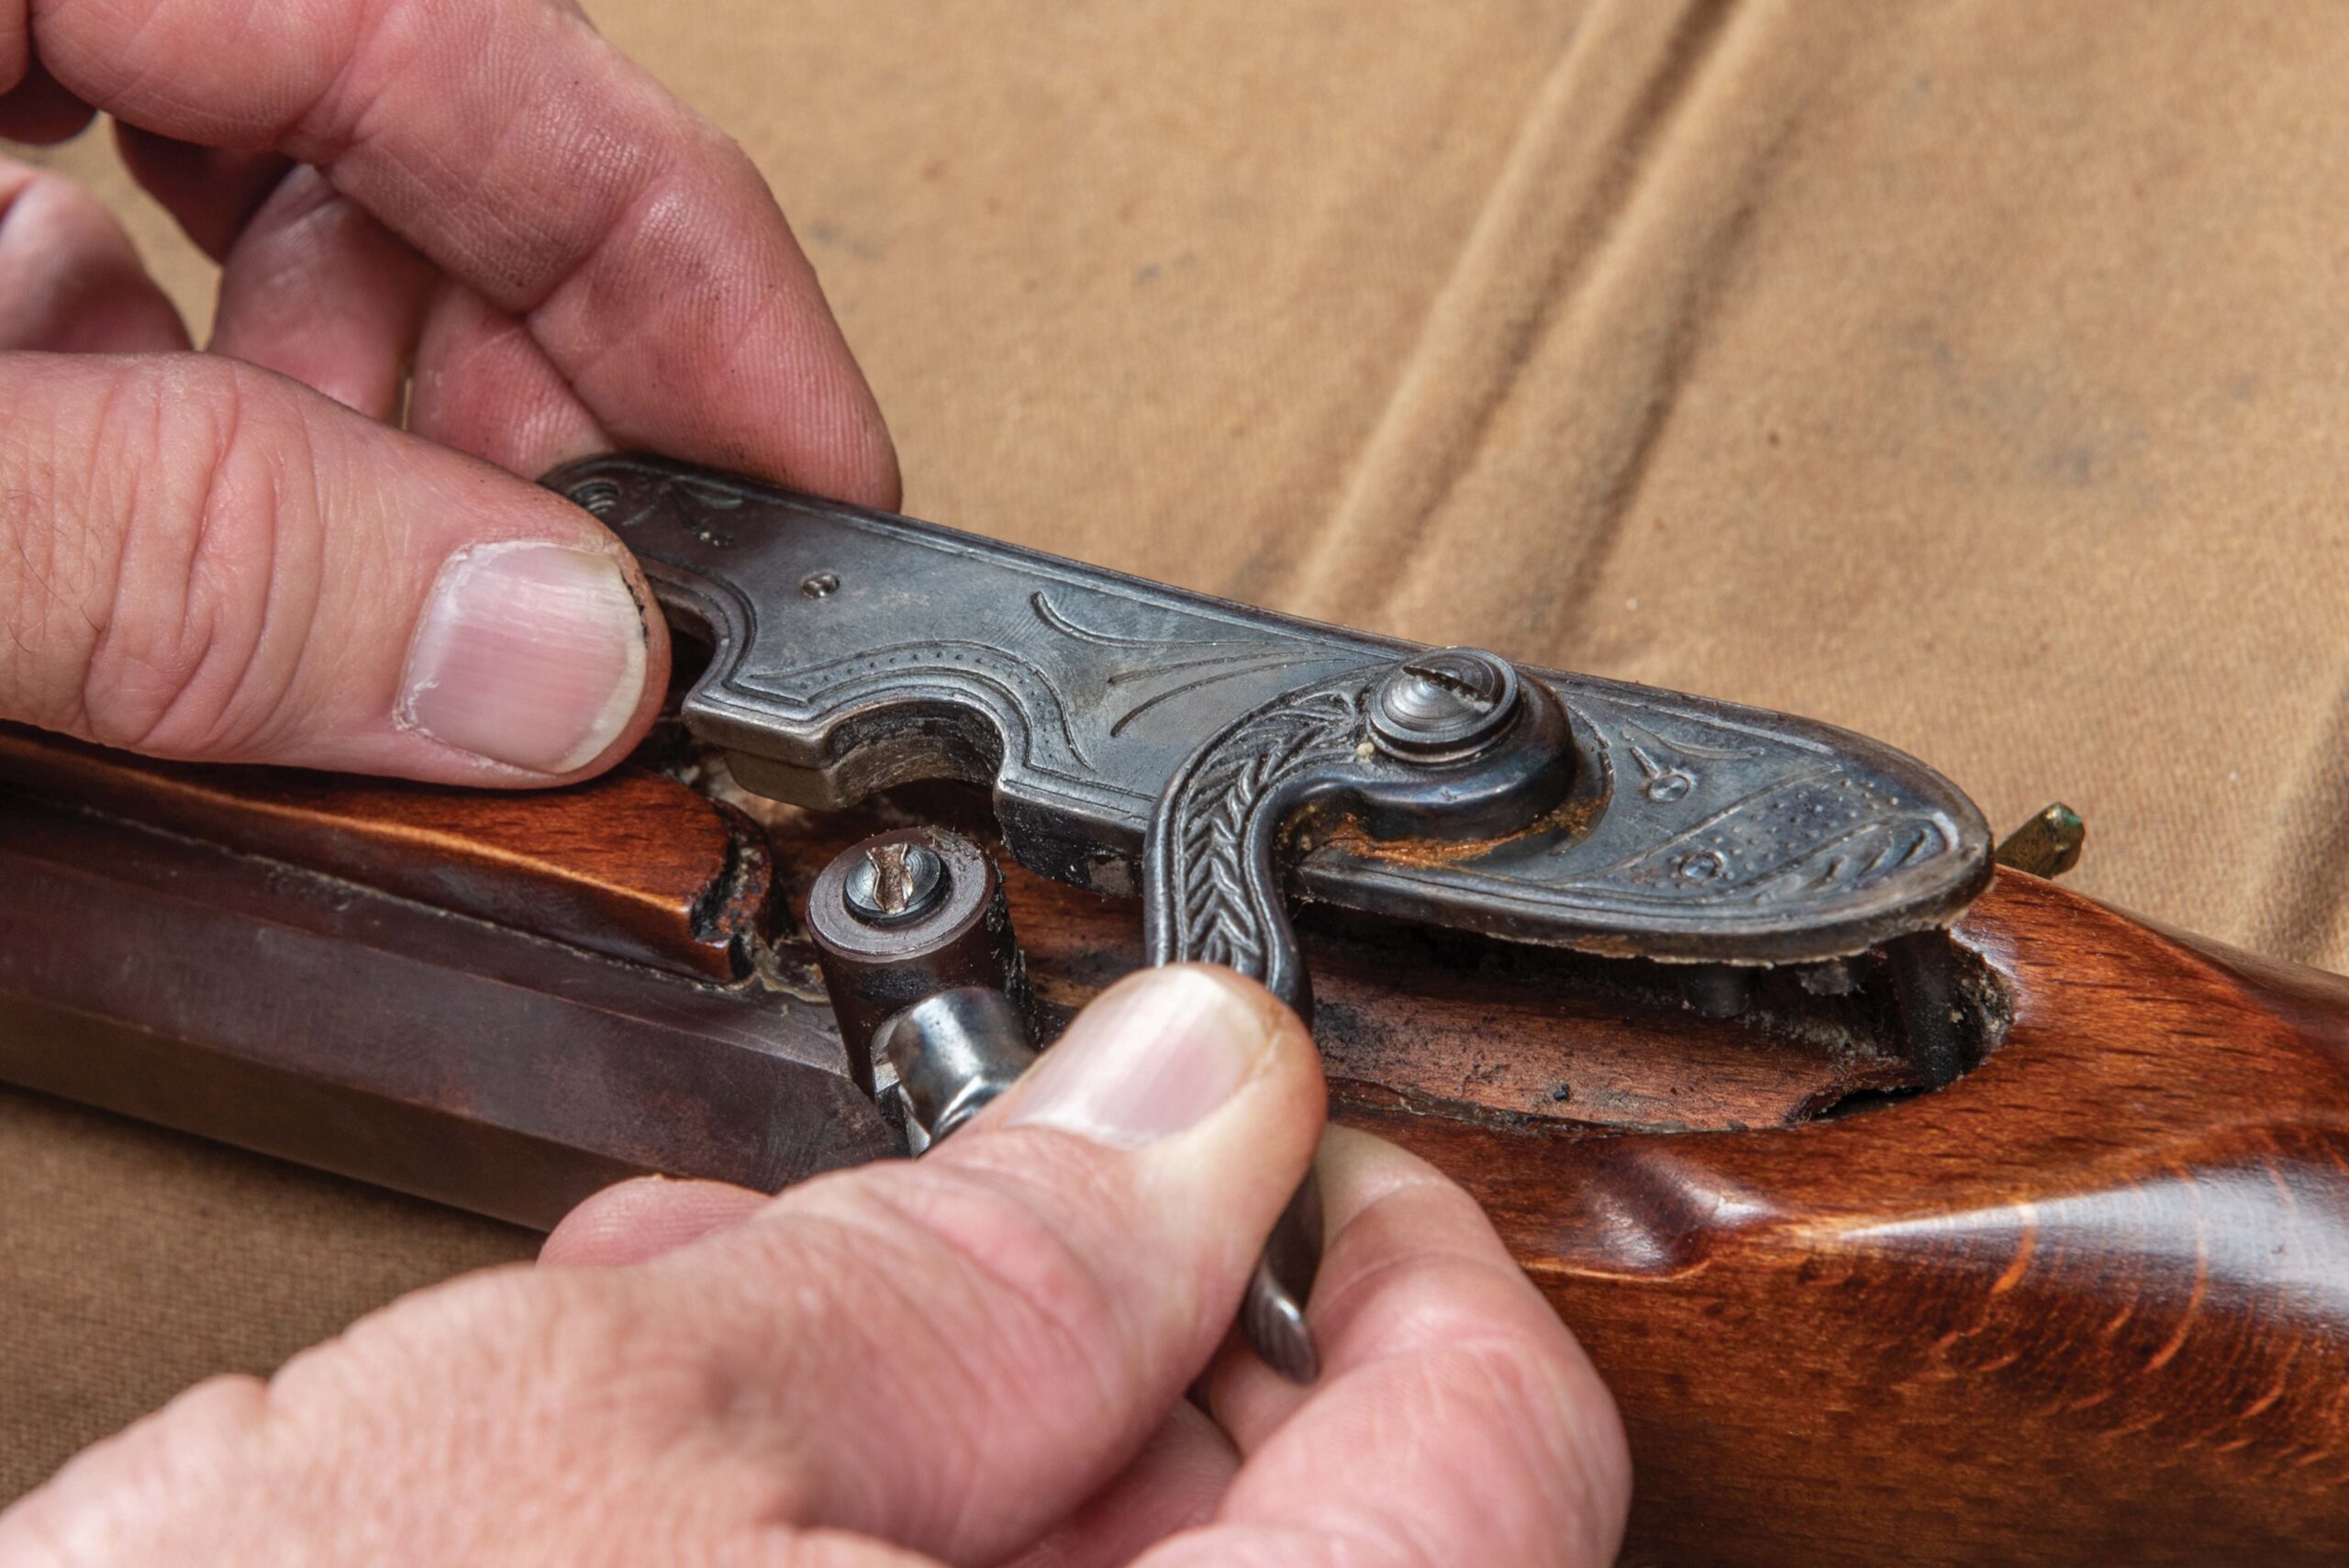
2. The lock assembly is secured in the stock with two lock plate screws. Remove both of these.3. With the lock plate screws removed, the lock can be lifted out of the inlet.4. The tang screw passes through the tang, through the stock, and into the trigger assembly, securing both the tang and the trigger to the stock.5. Remove the tang screw and remove the trigger assembly from the stock.
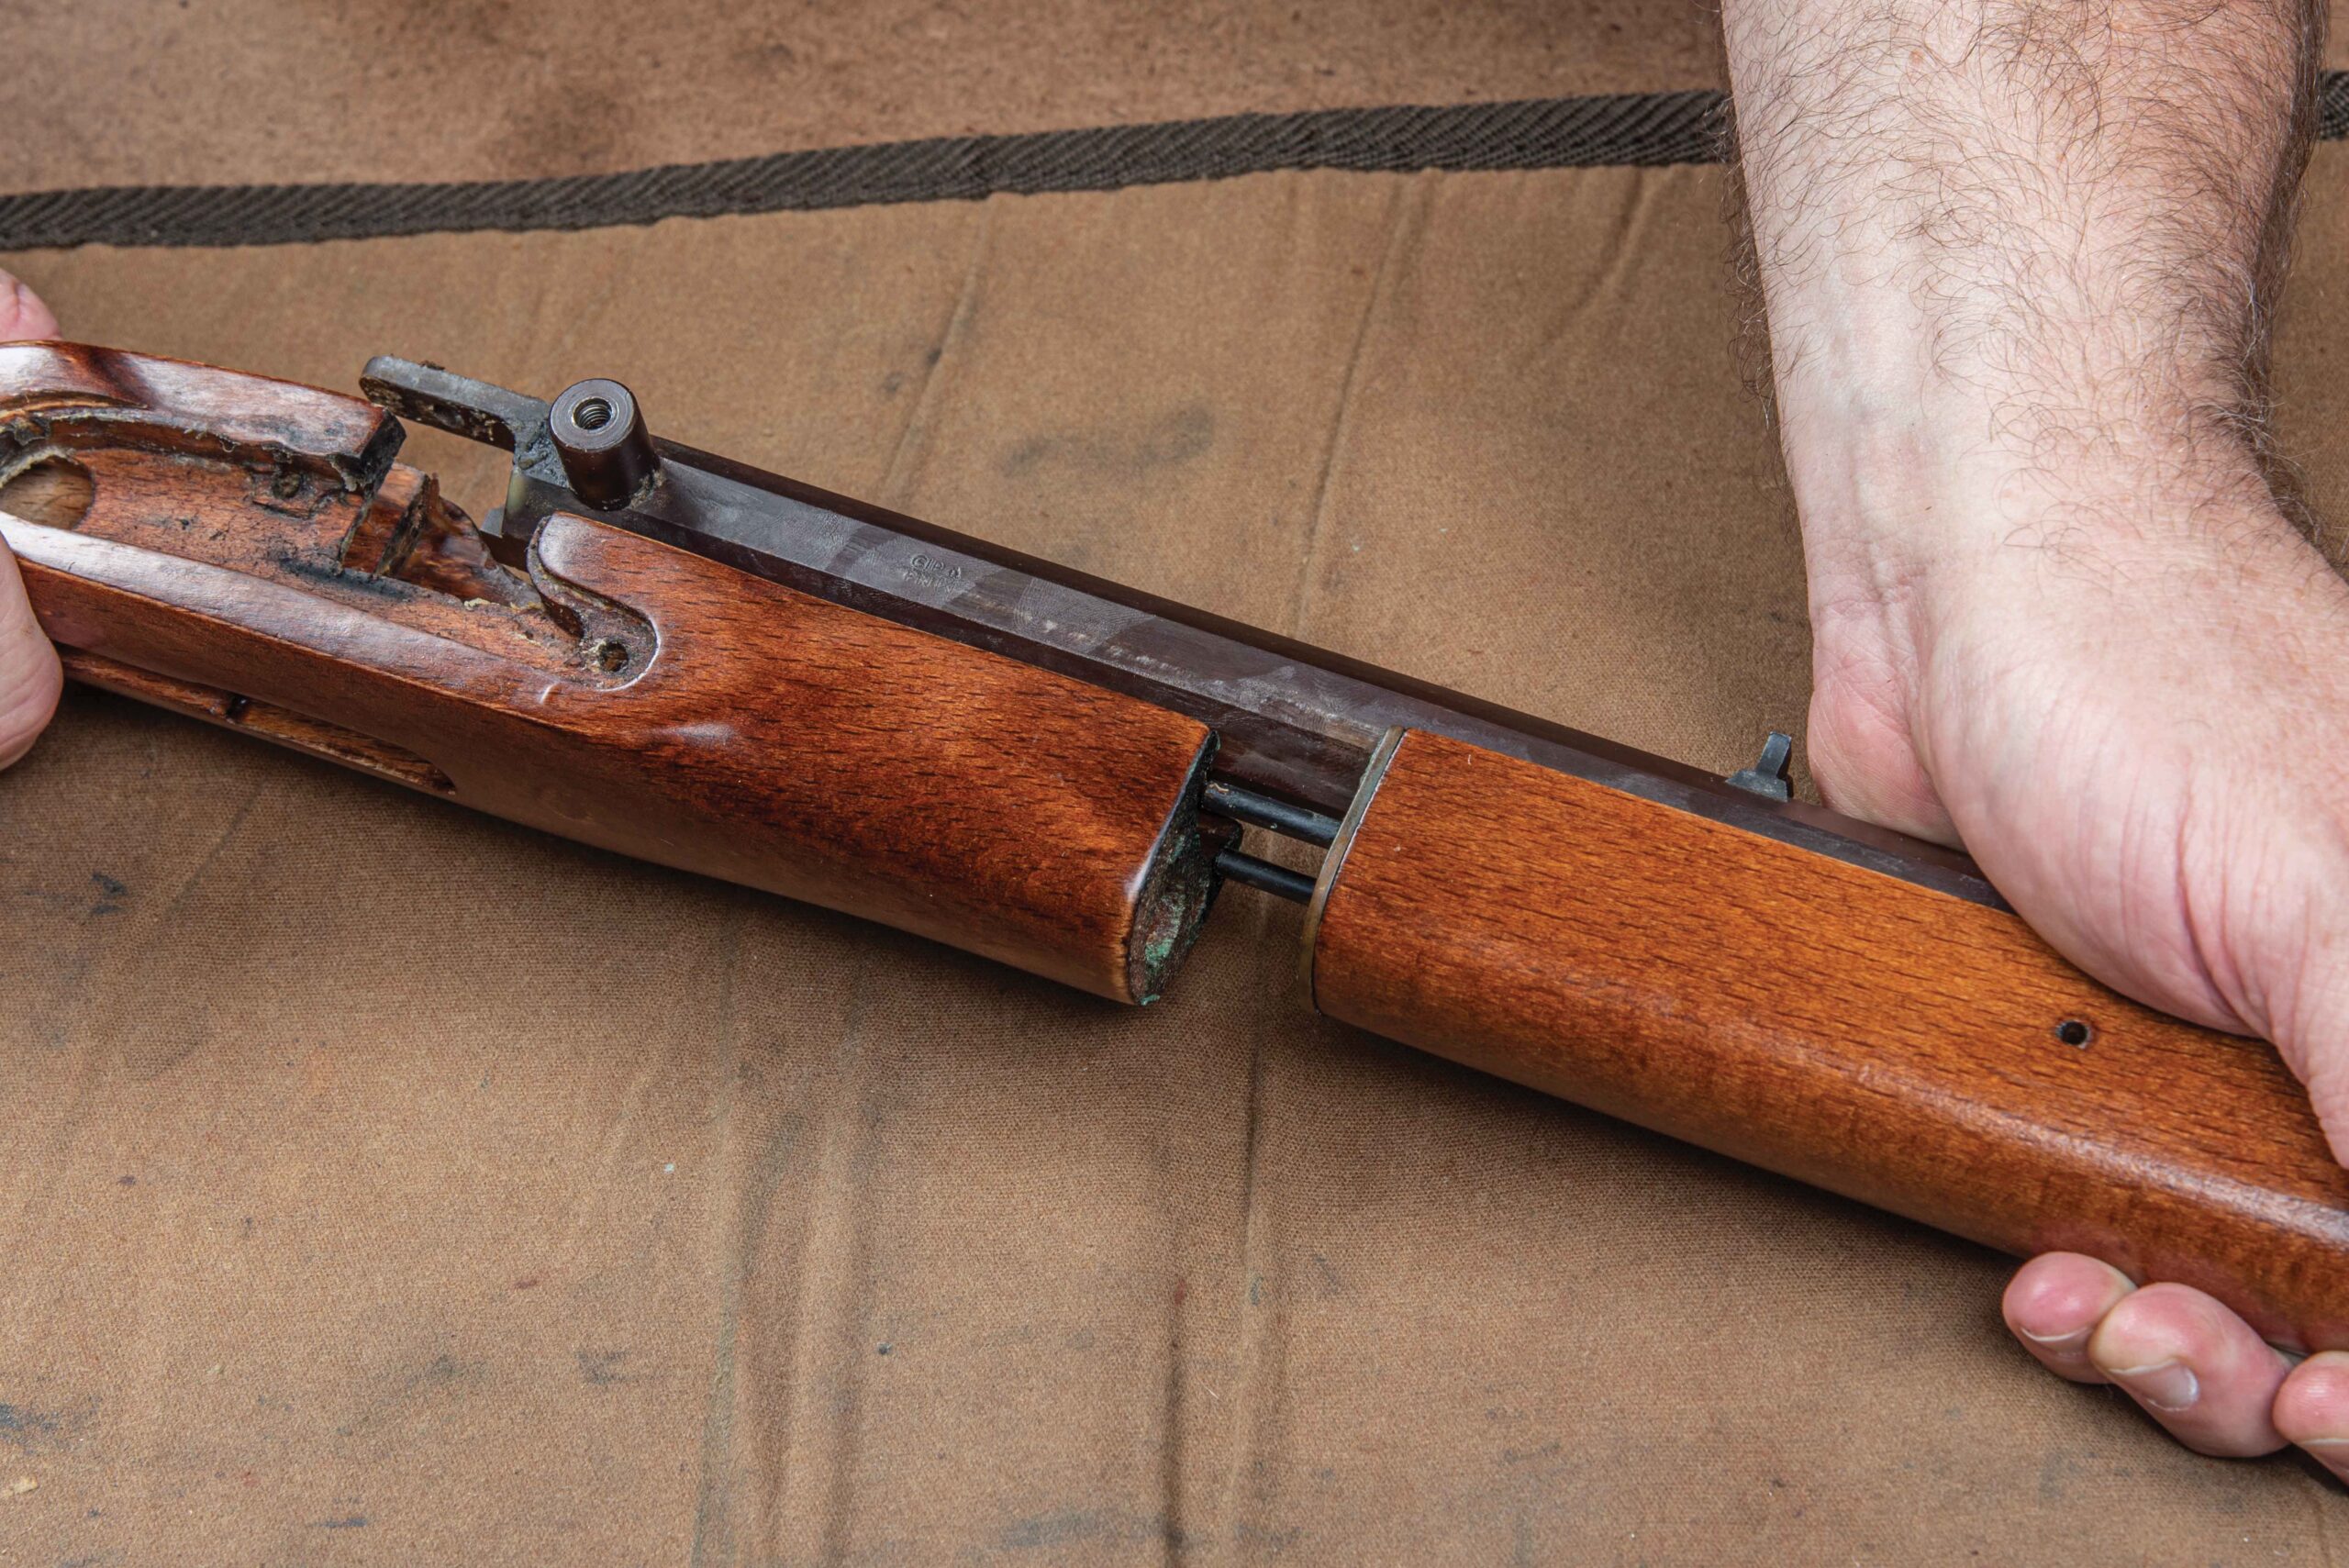
We’re going to show you how to disassemble a sidelock for cleaning. This is a Kentucky-style rifle made from a Traditions DIY kit six or seven years ago and it has never been taken apart since it was built. High time it was, and since most percussion cap and flintlock muzzleloaders are similarly built, it is a good representation of what you’ll find in most sidelock rifles.
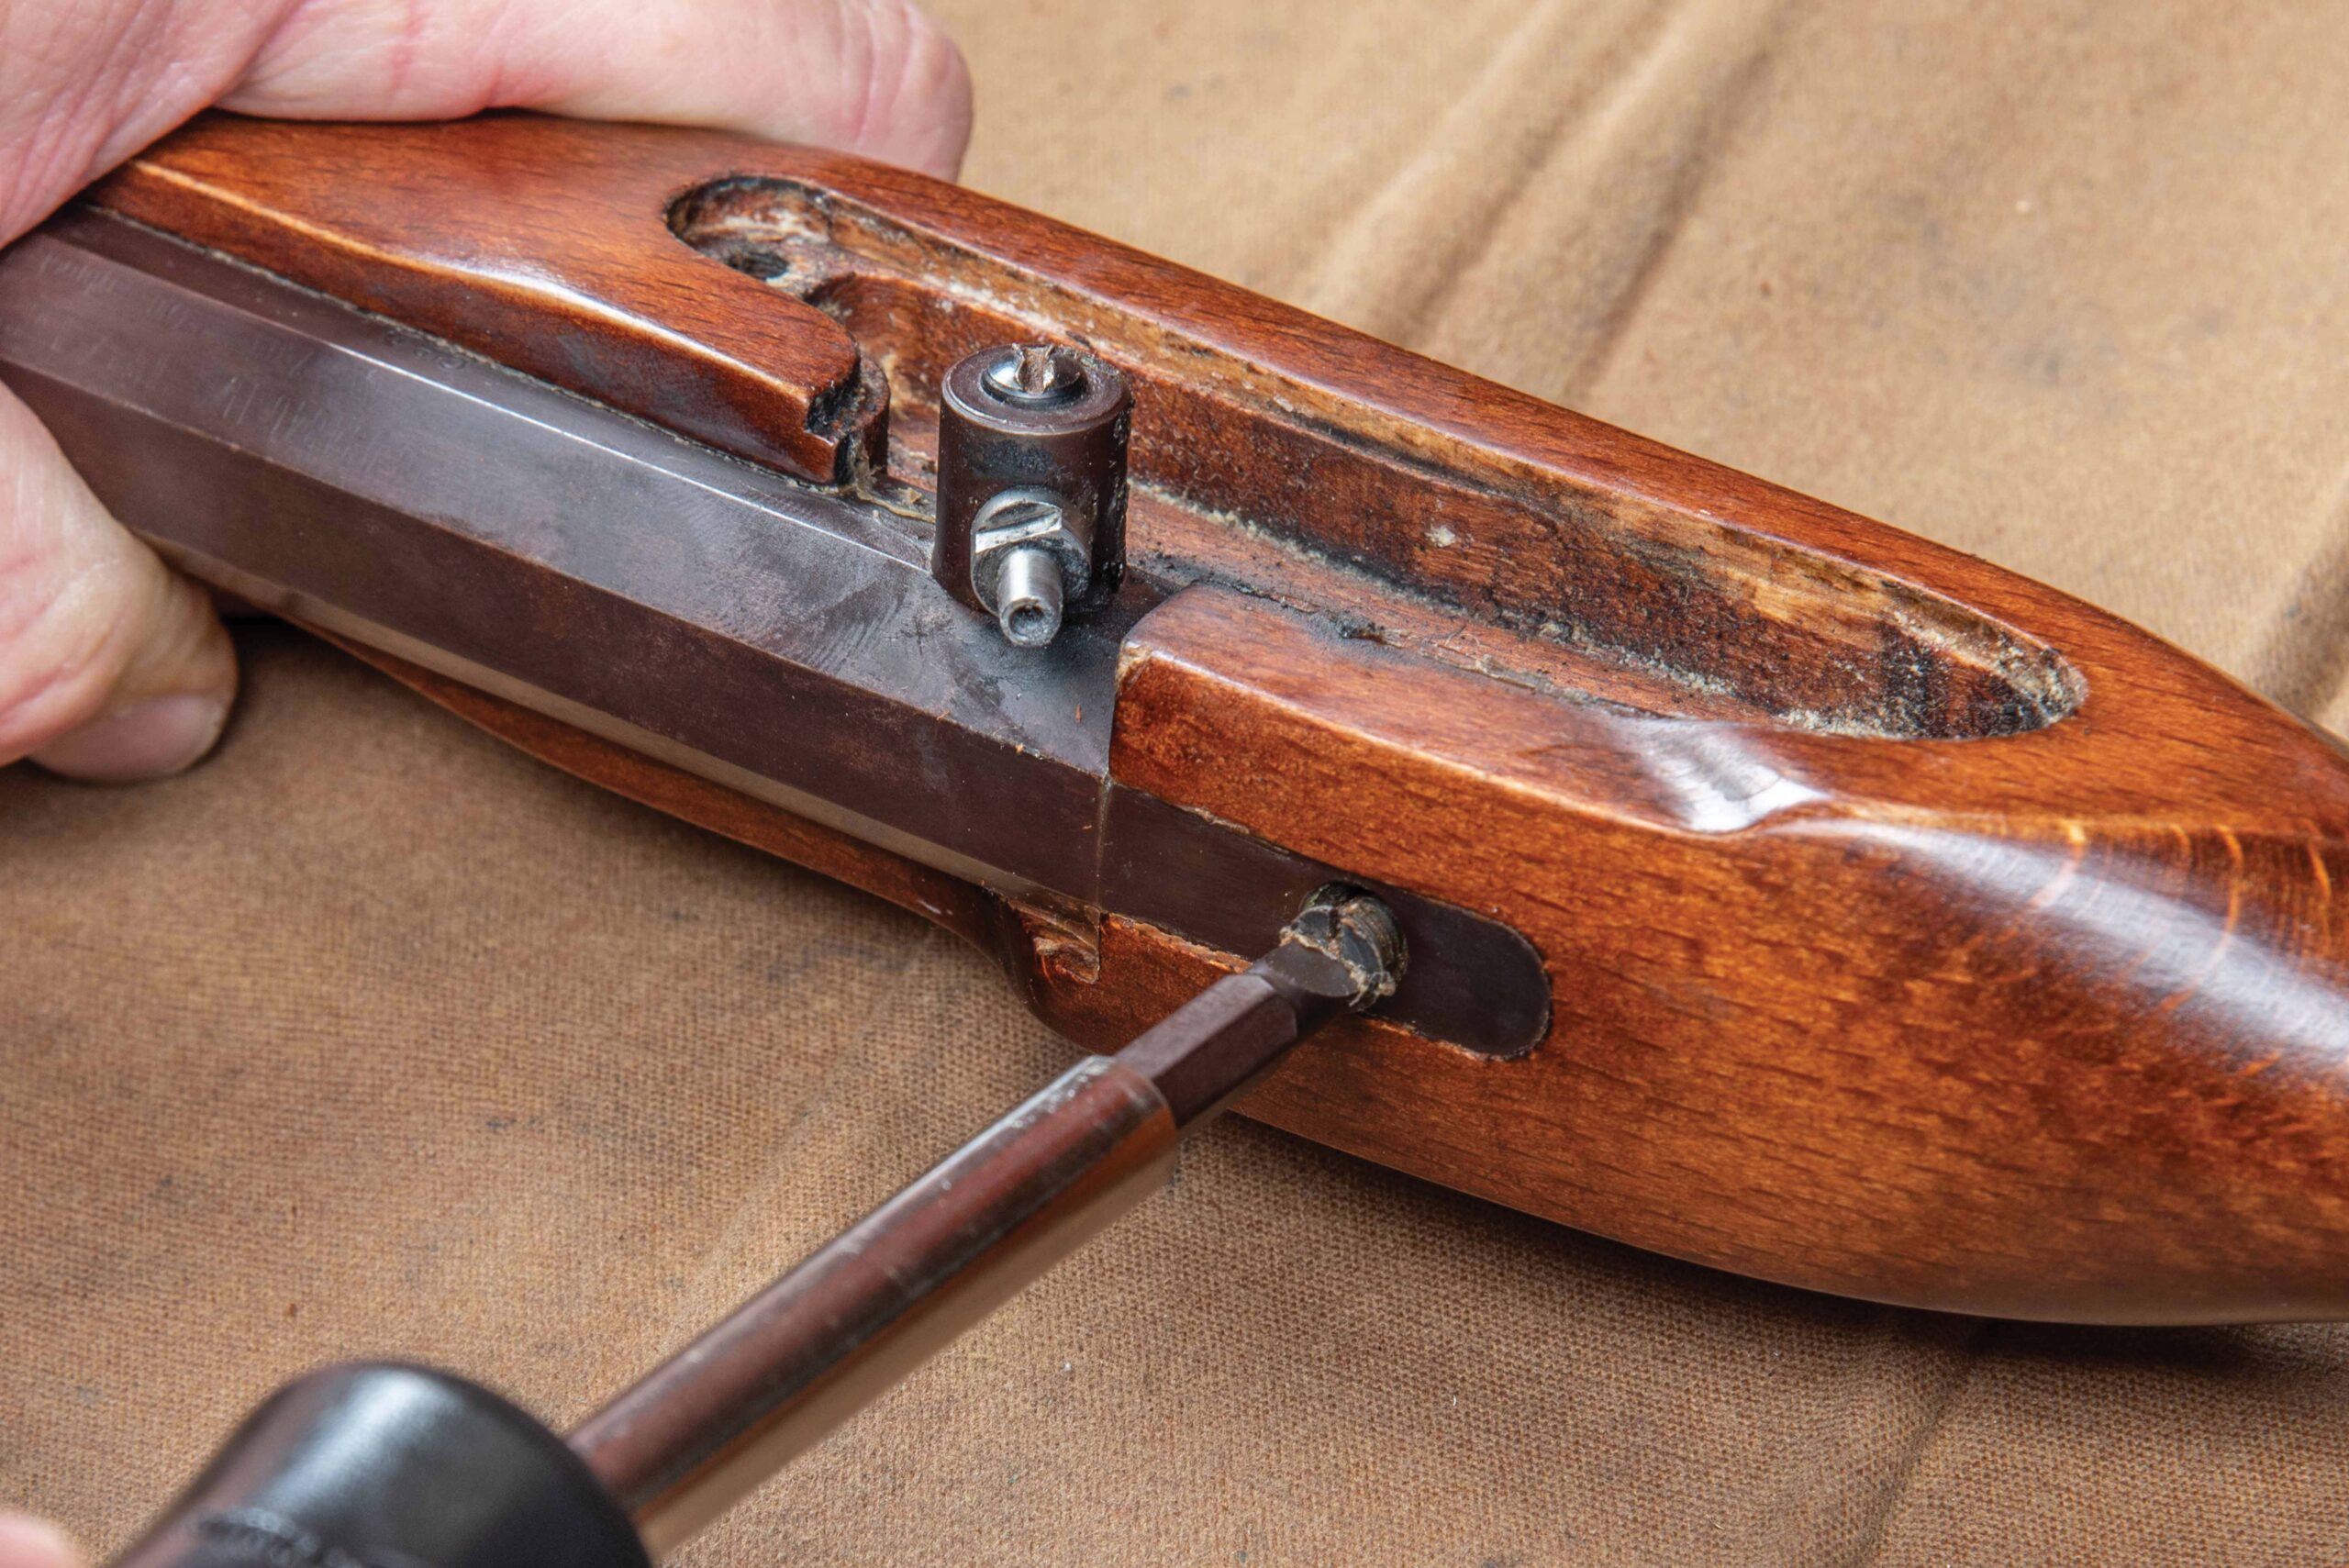
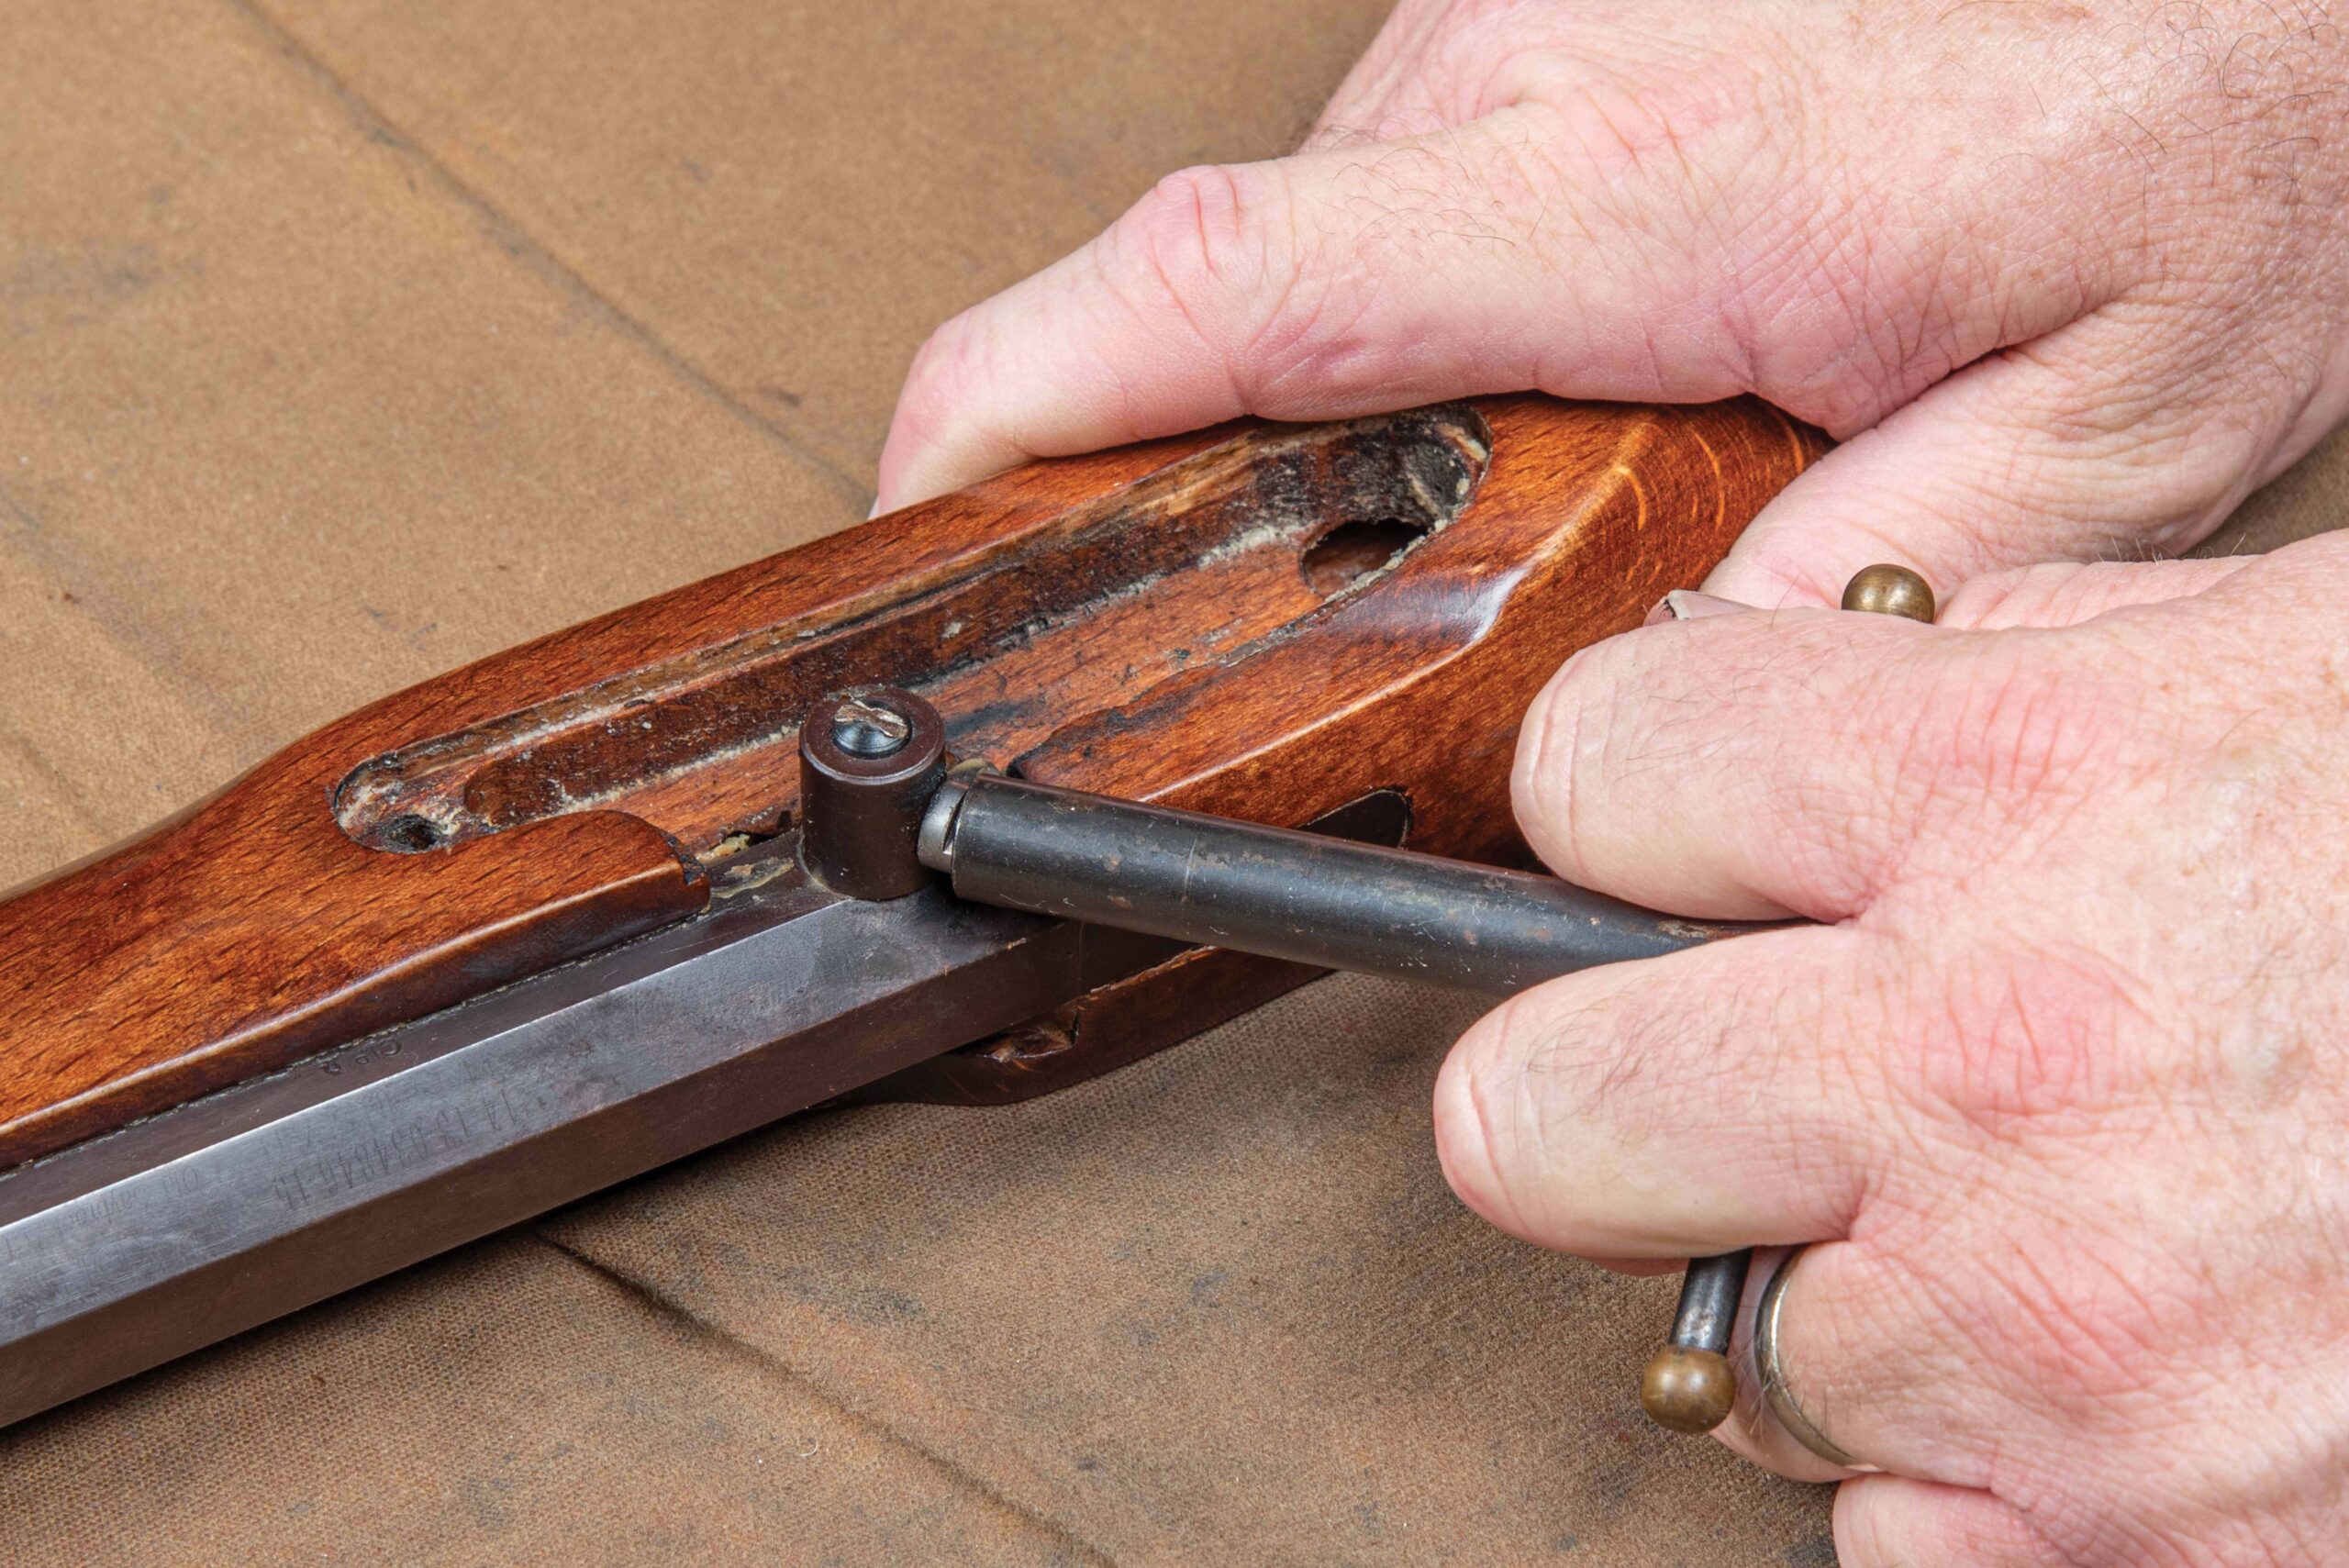
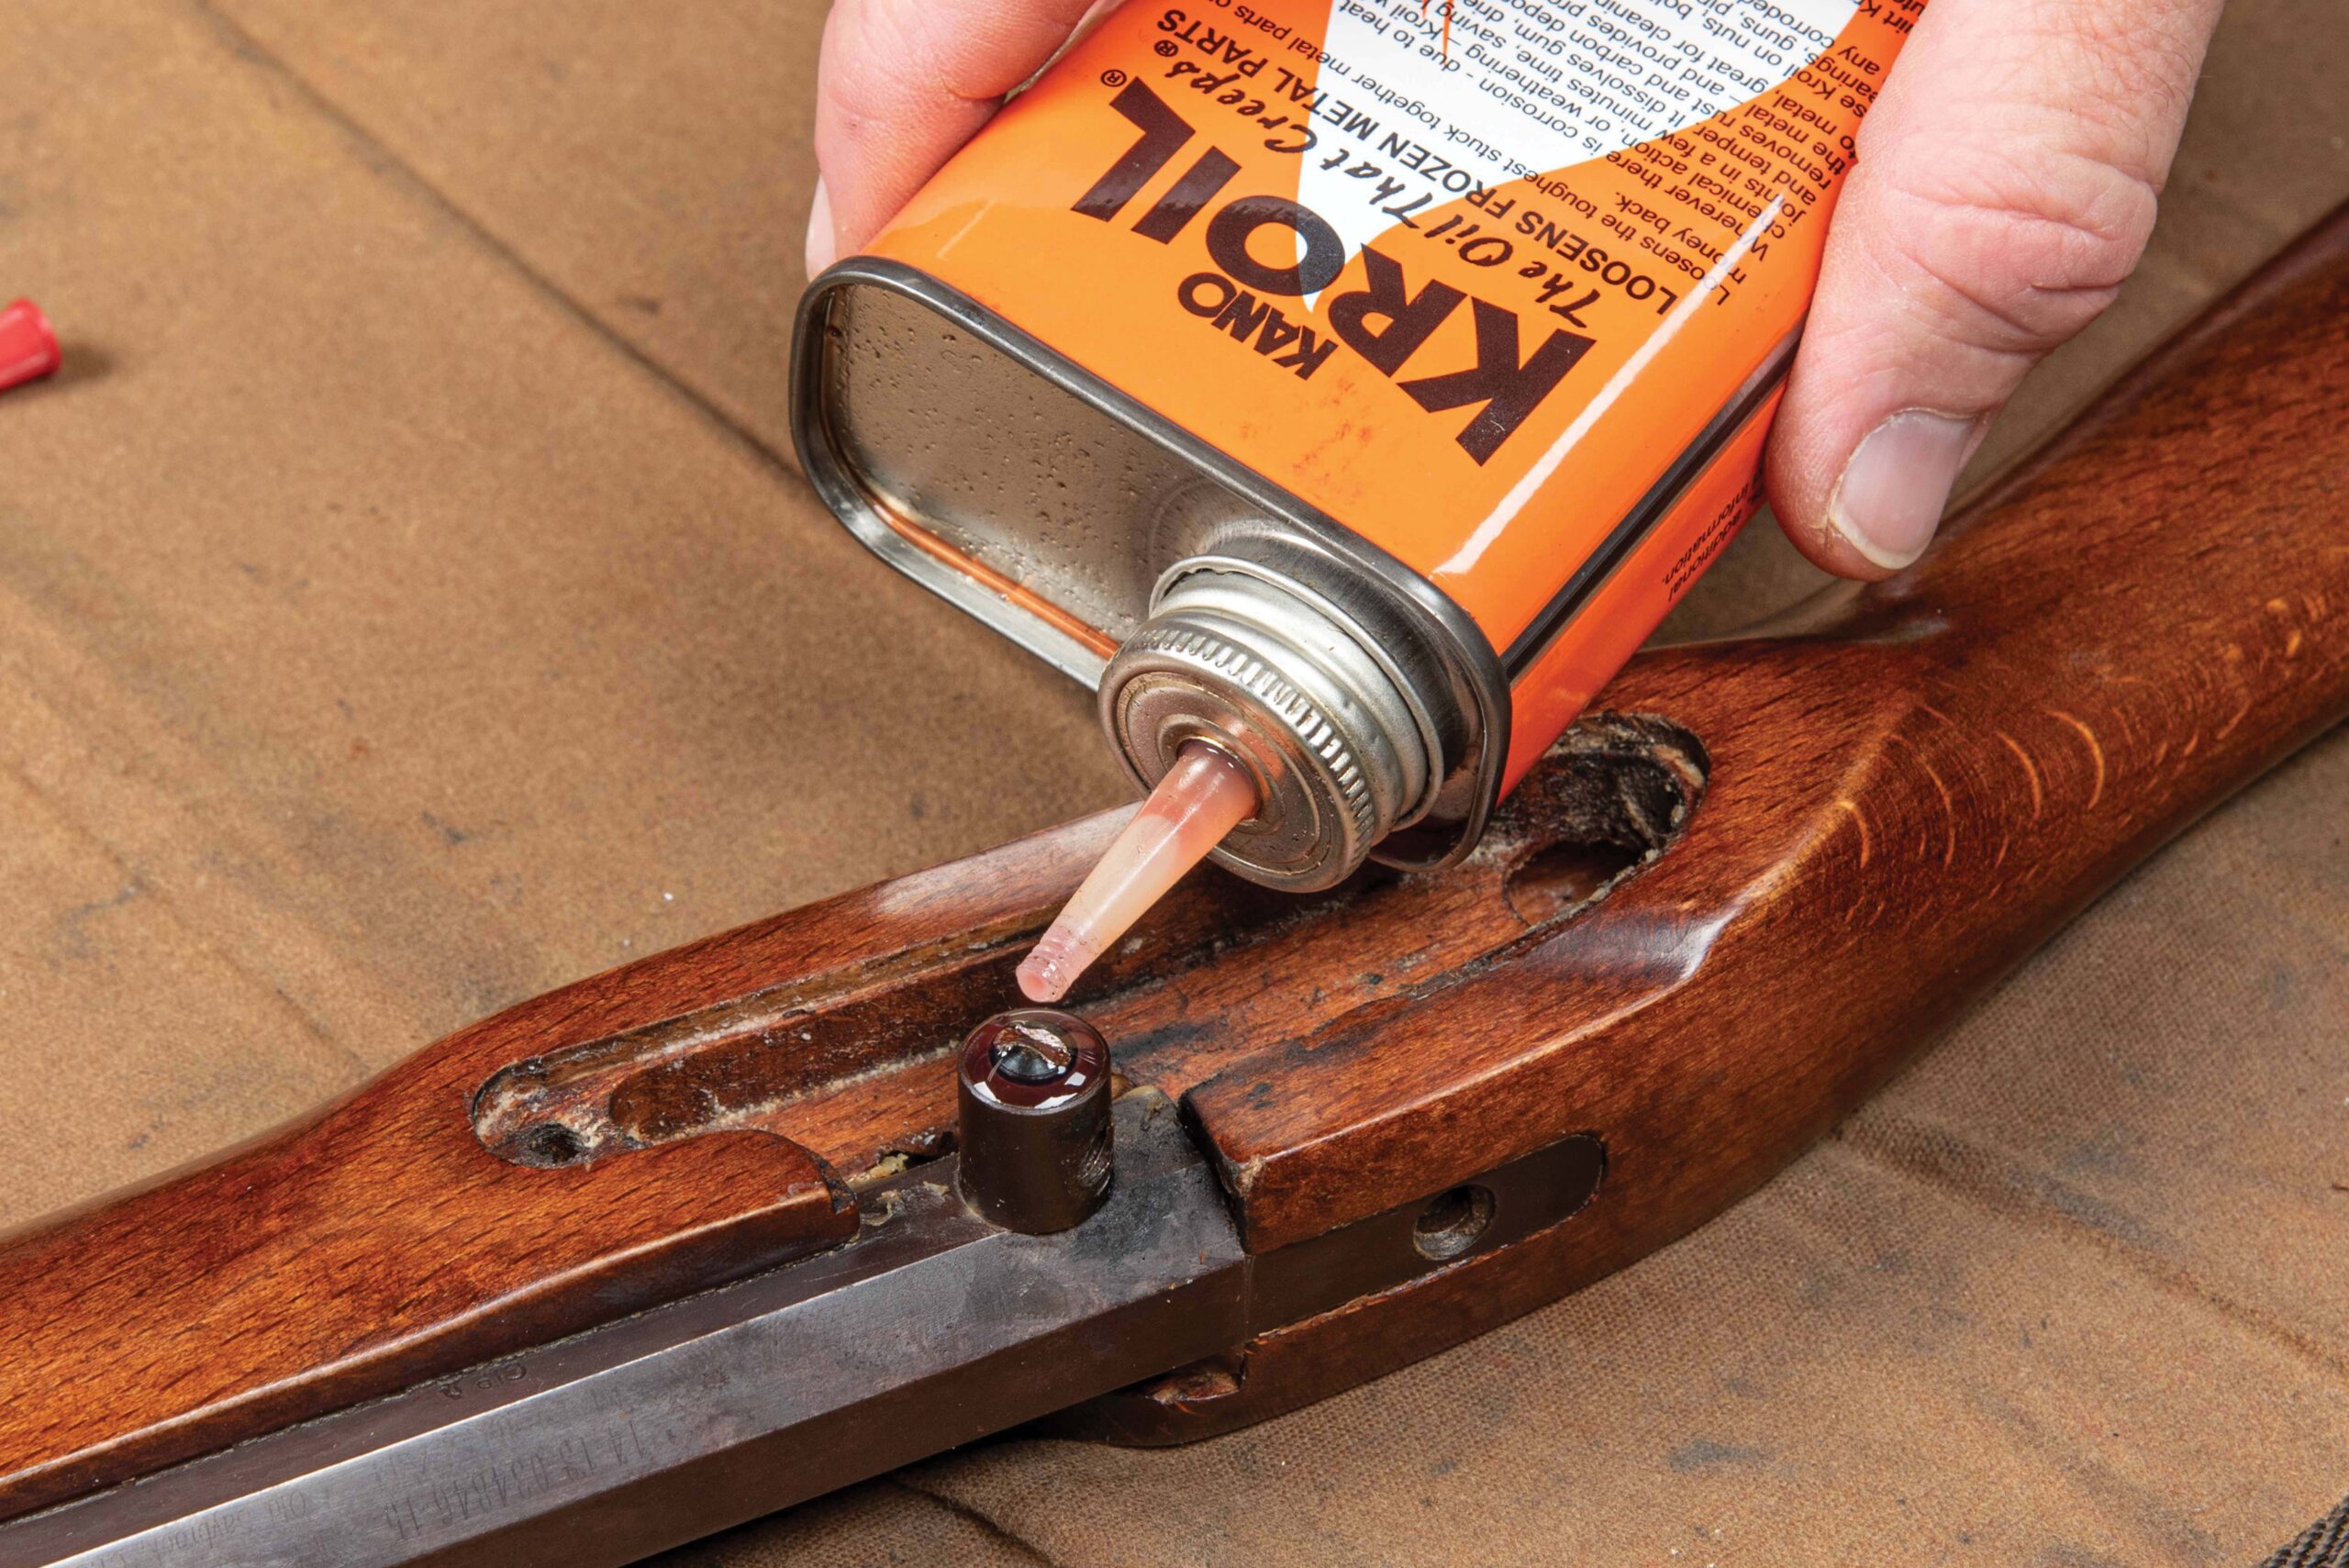
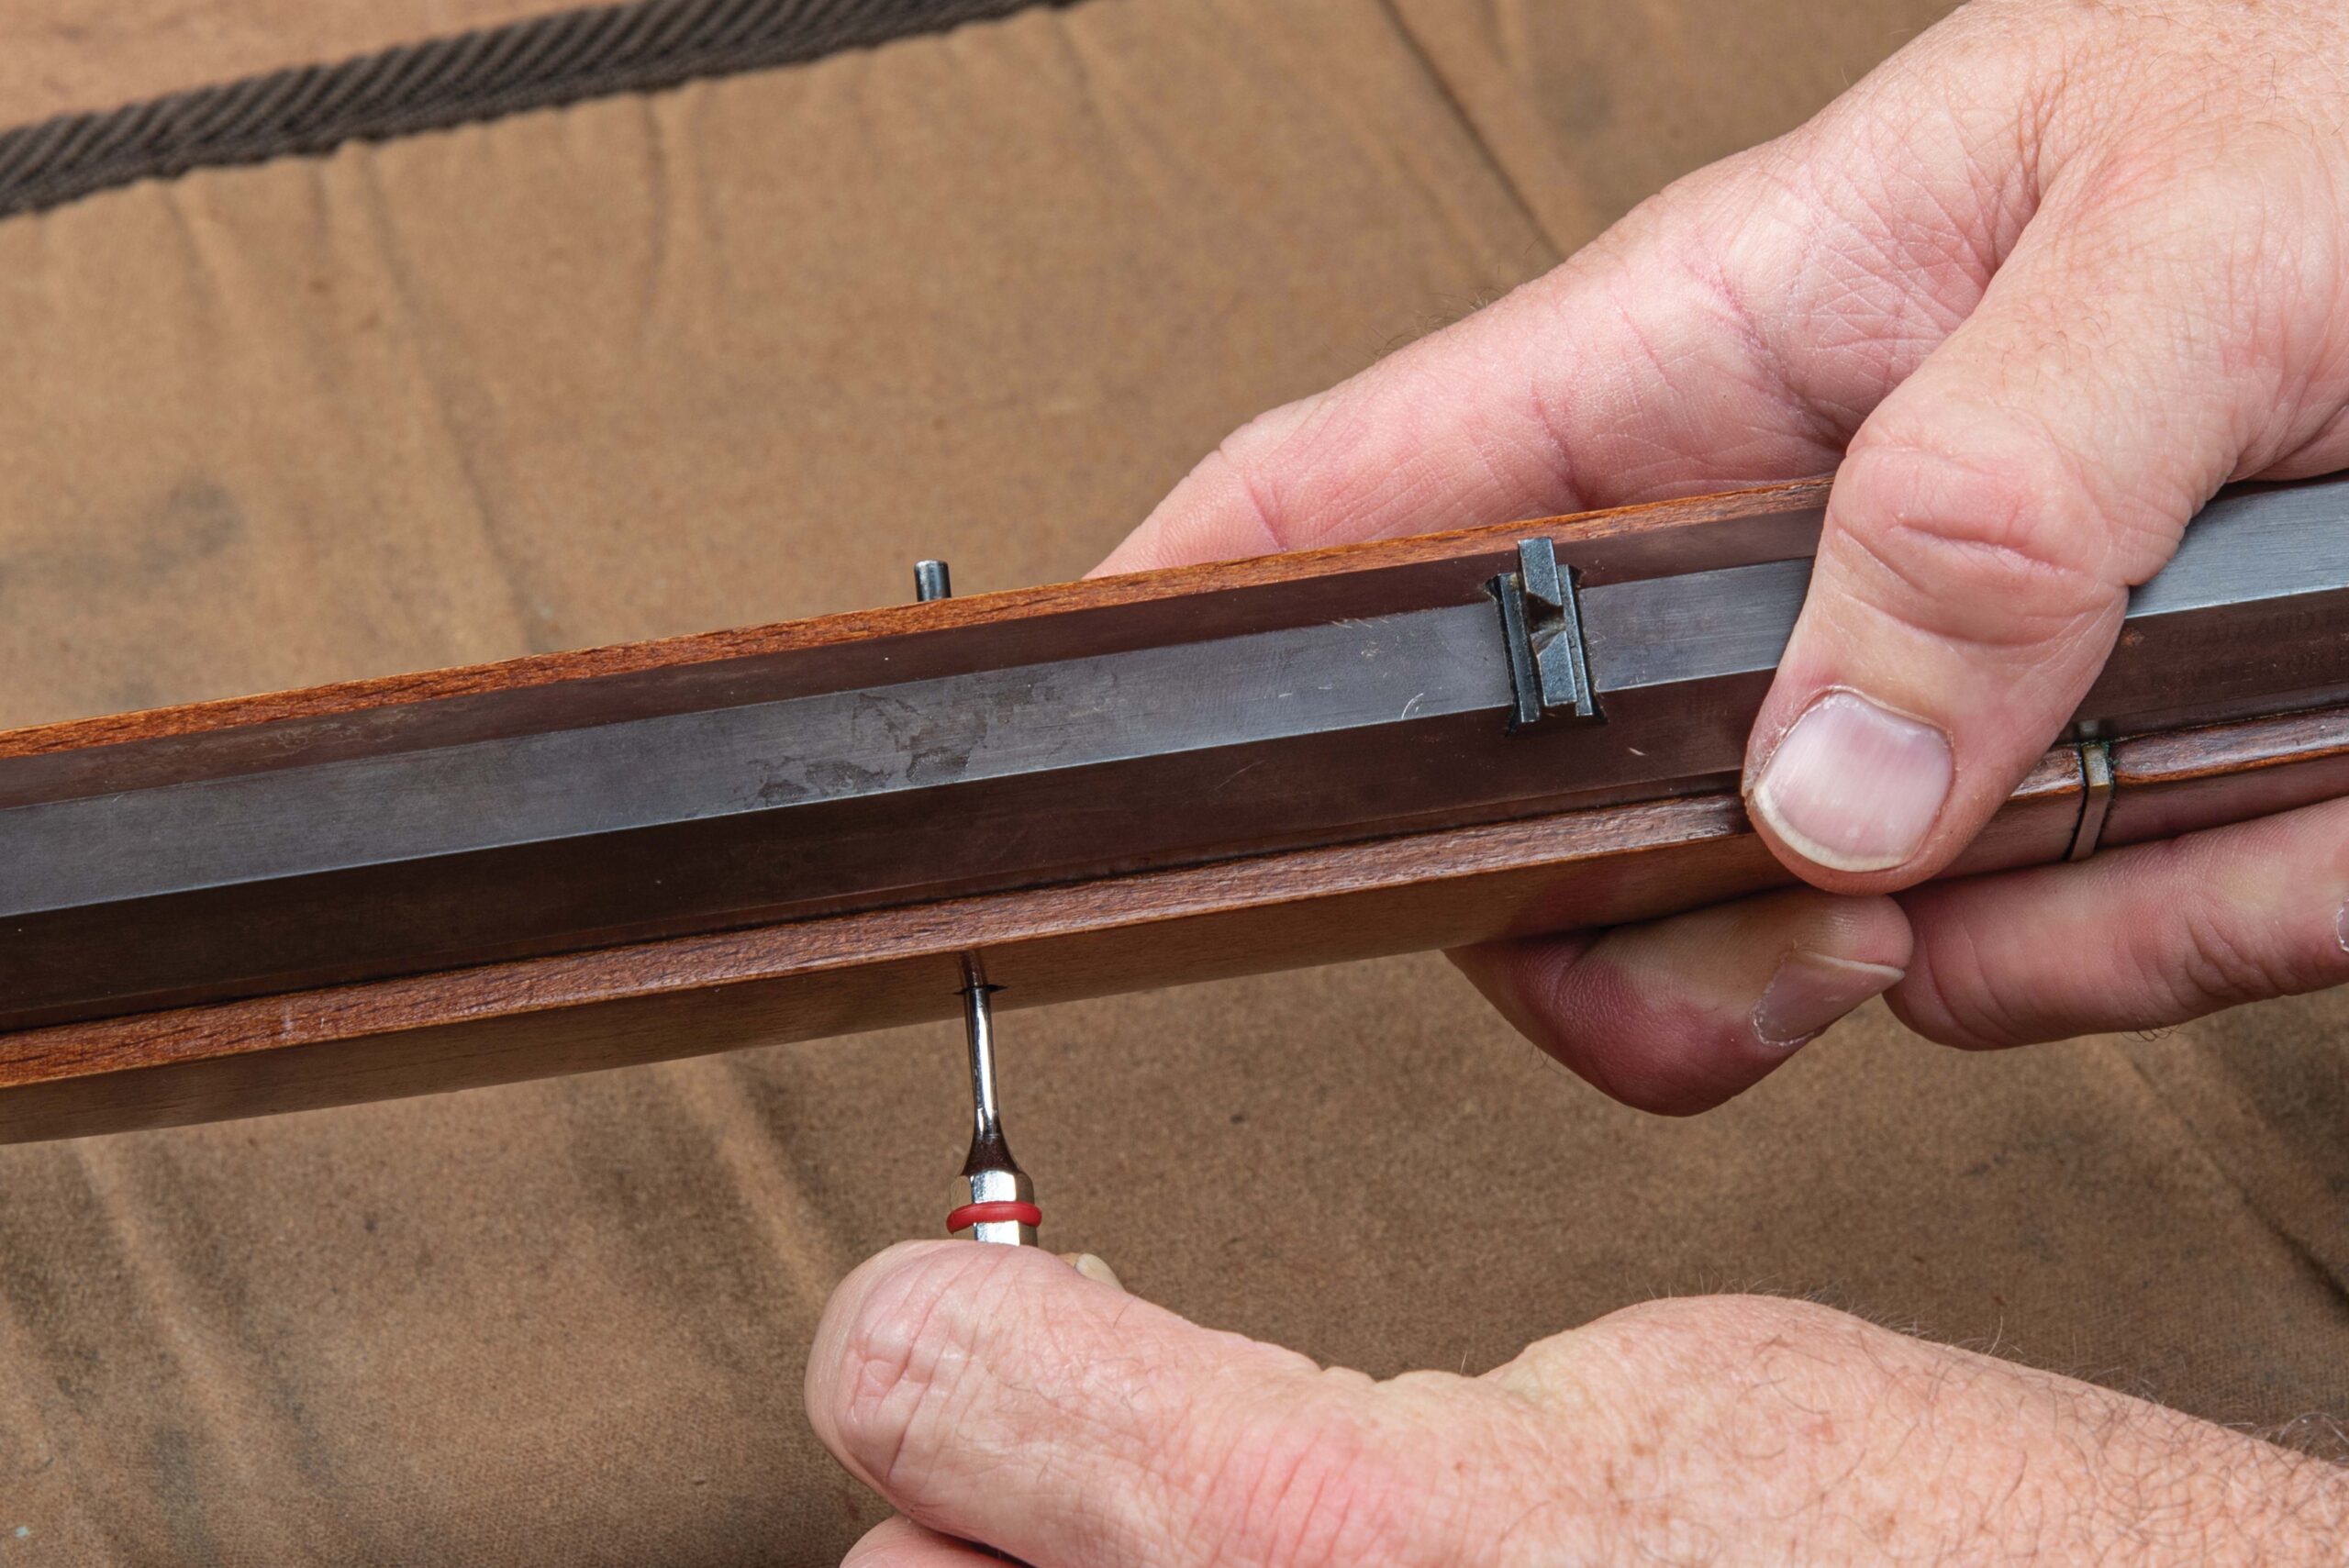
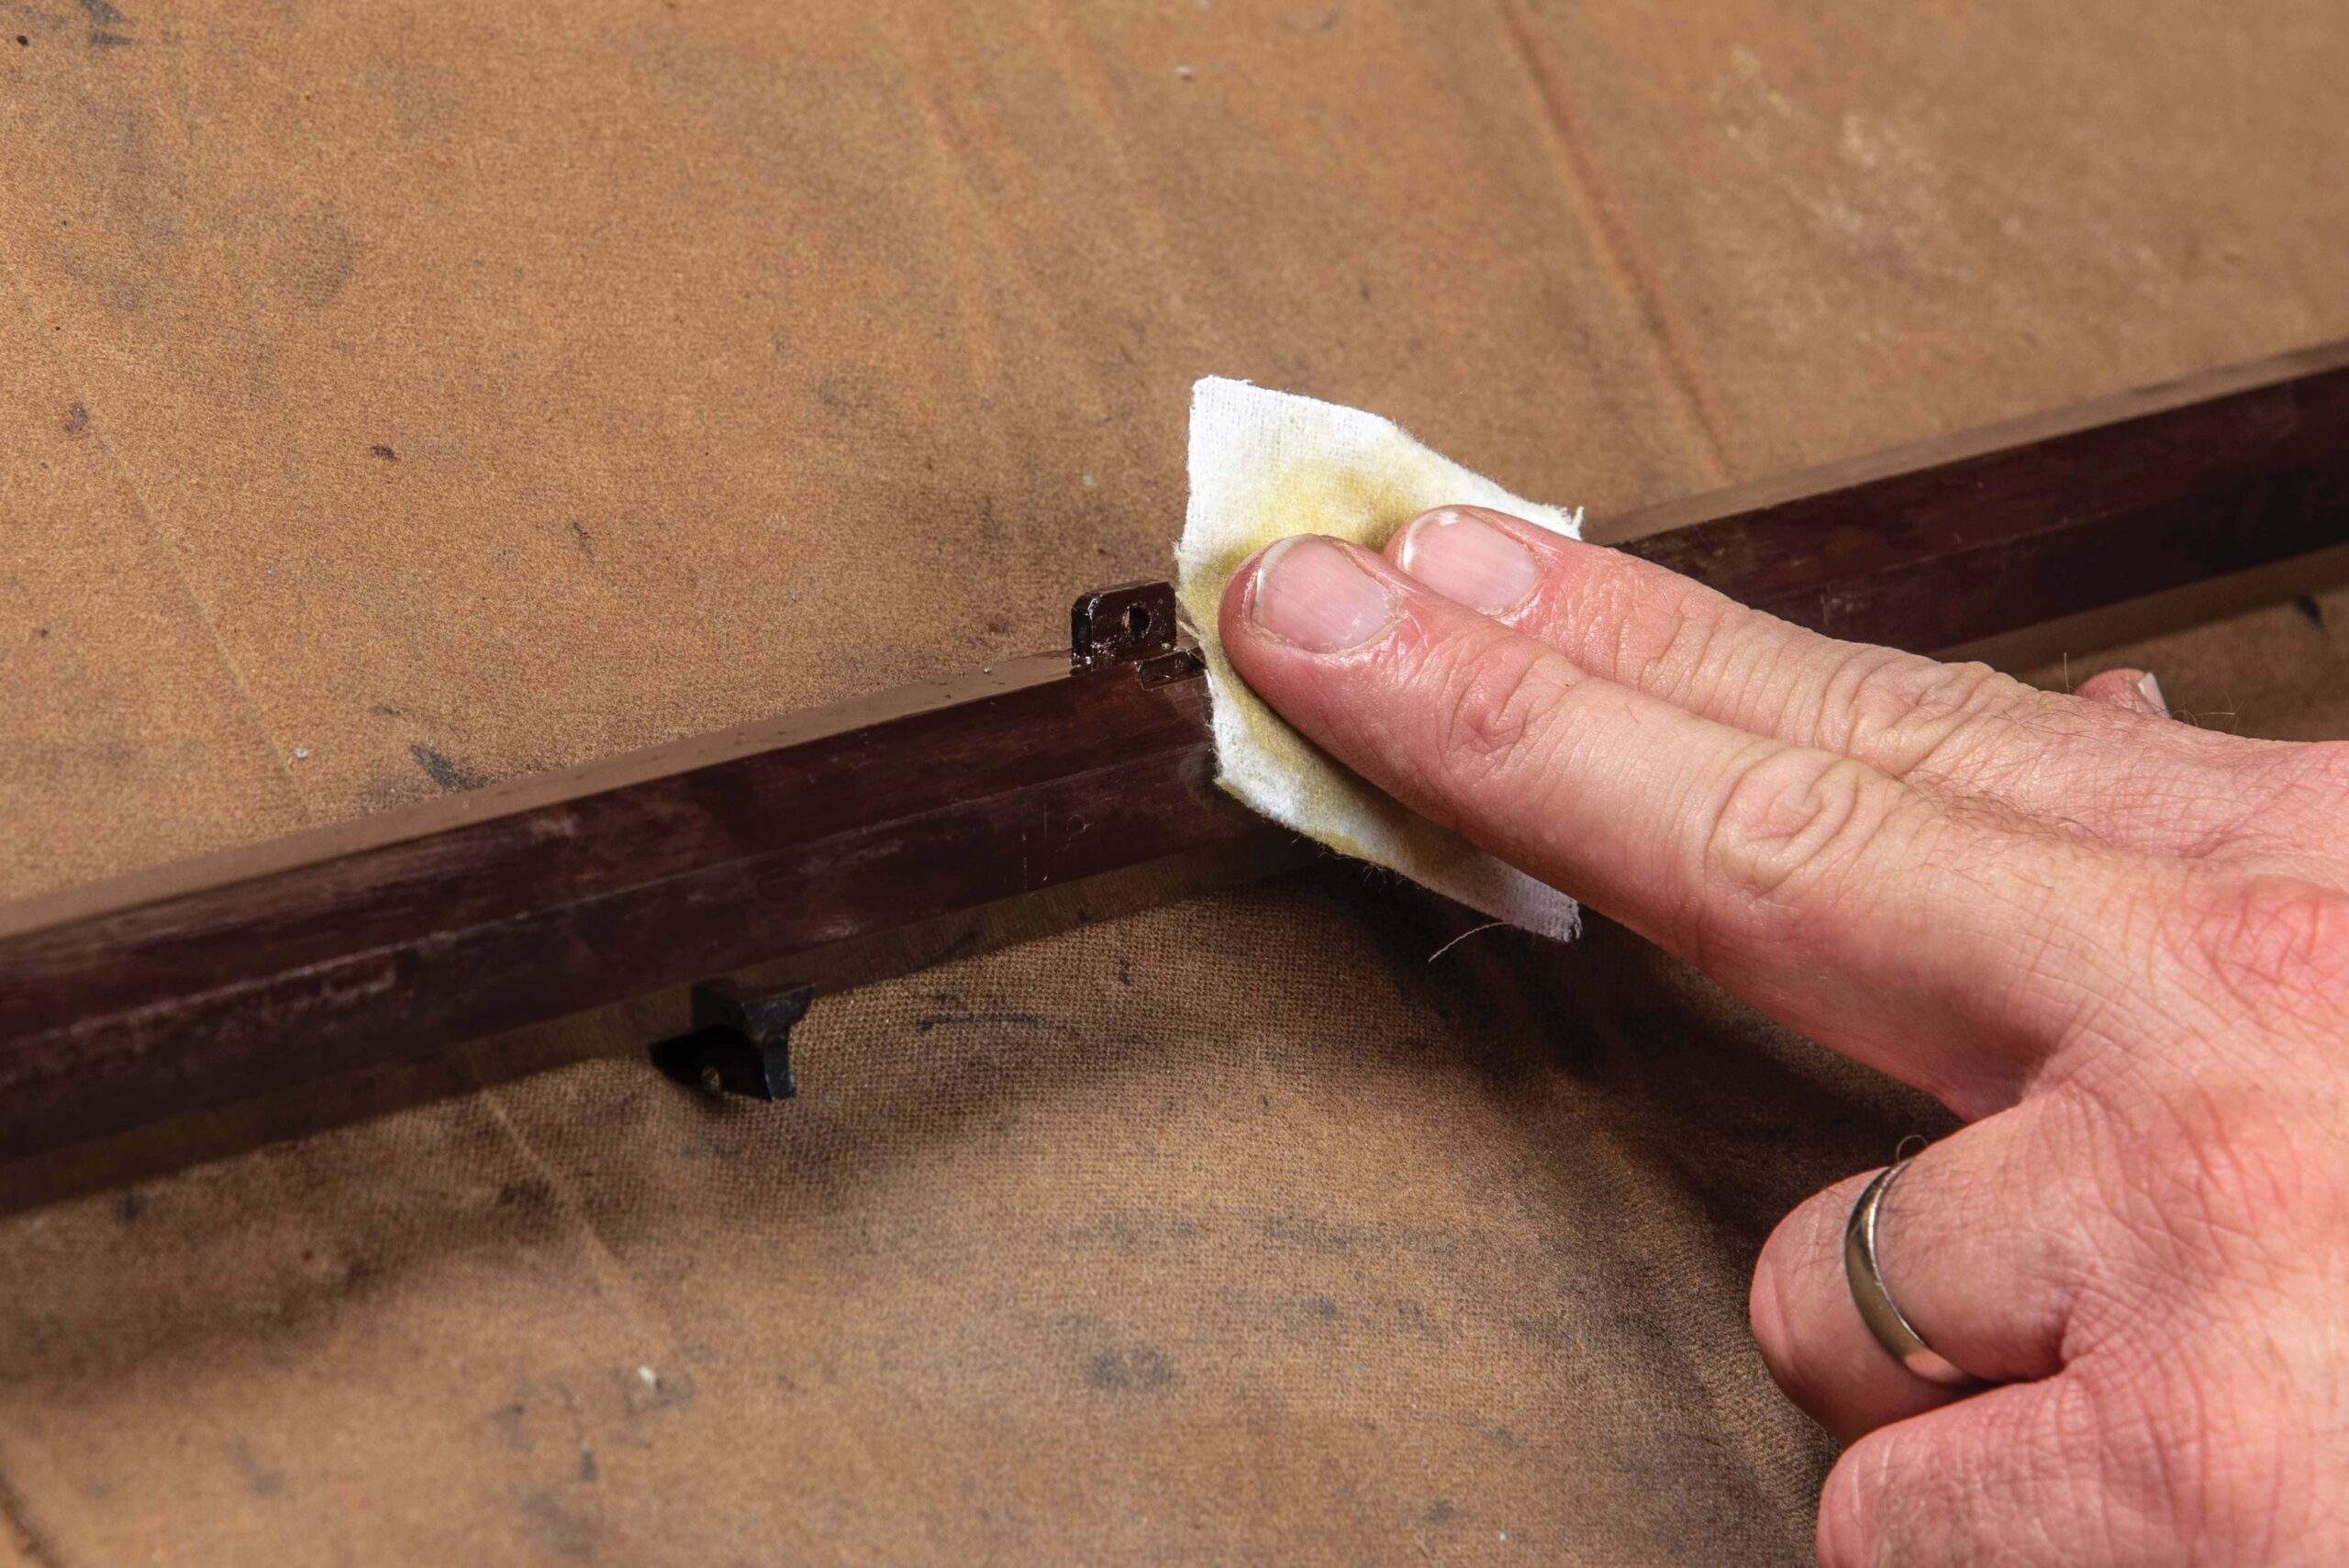
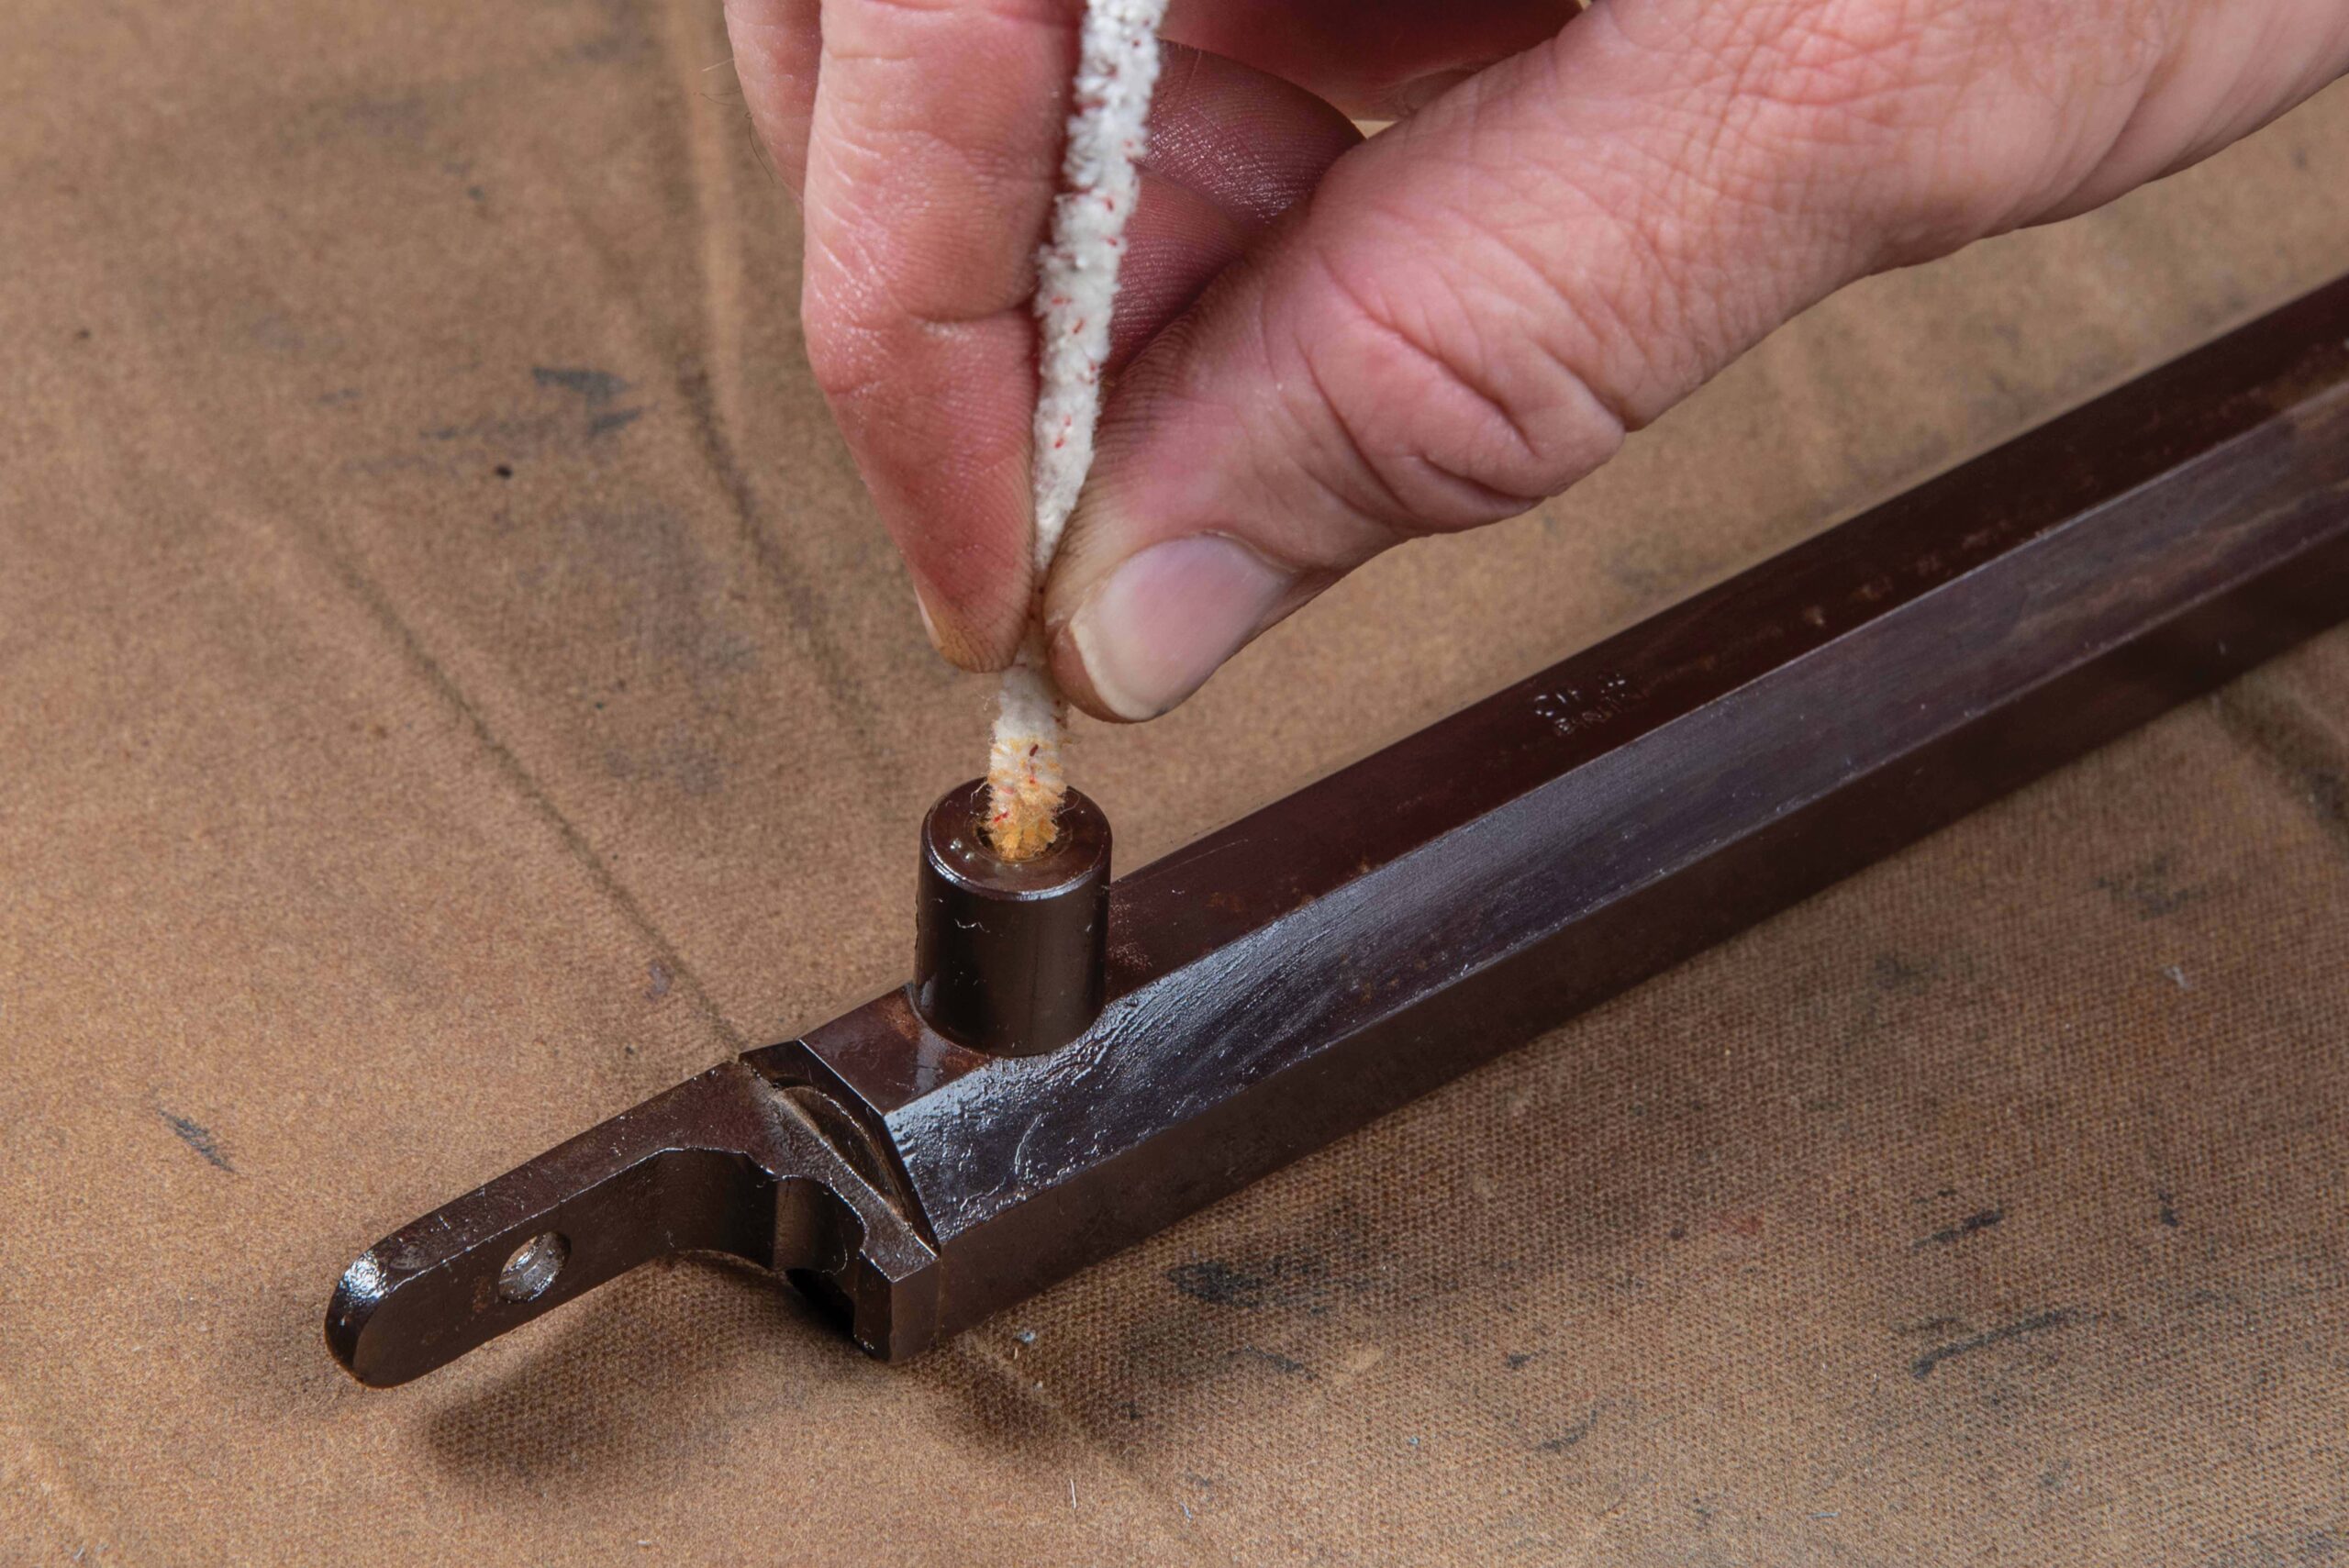
6. If your rifle is a percussion cap, use a nipple wrench to unscrew the nipple from the bolster.7. The bolster screw can sometimes be a tough one to get out if you don’t clean and lubricate it each time you clean the barrel. If yours is on tight and possibly corroded in the threads, apply some Kroil and allow it time to seep in and loosen the screw.8. Kentucky-style rifles utilize tenons and tenon pins to secure the barrel to the forestock. Keep removal of these to a minimum to prevent wearing out the pins and holes. If you do remove the barrel, push the pins out from left to right with a punch. Hawken-style rifles use flat tenon pins to secure the barrel and can be removed as needed for barrel cleaning. Whichever style you have, remove the tenon pins to release the barrel from the stock.
Everyone seems to have their own preference when it comes to cleaning a closed-breech rifle barrel. Some feel a cotton patch and bore lubricant is sufficient (it’s not). Others favor solvent and a nylon brush followed by a patch and bore lube. [NOTE: Never use a copper brush in a closed-breech muzzleloader barrel because it will get STUCK!]
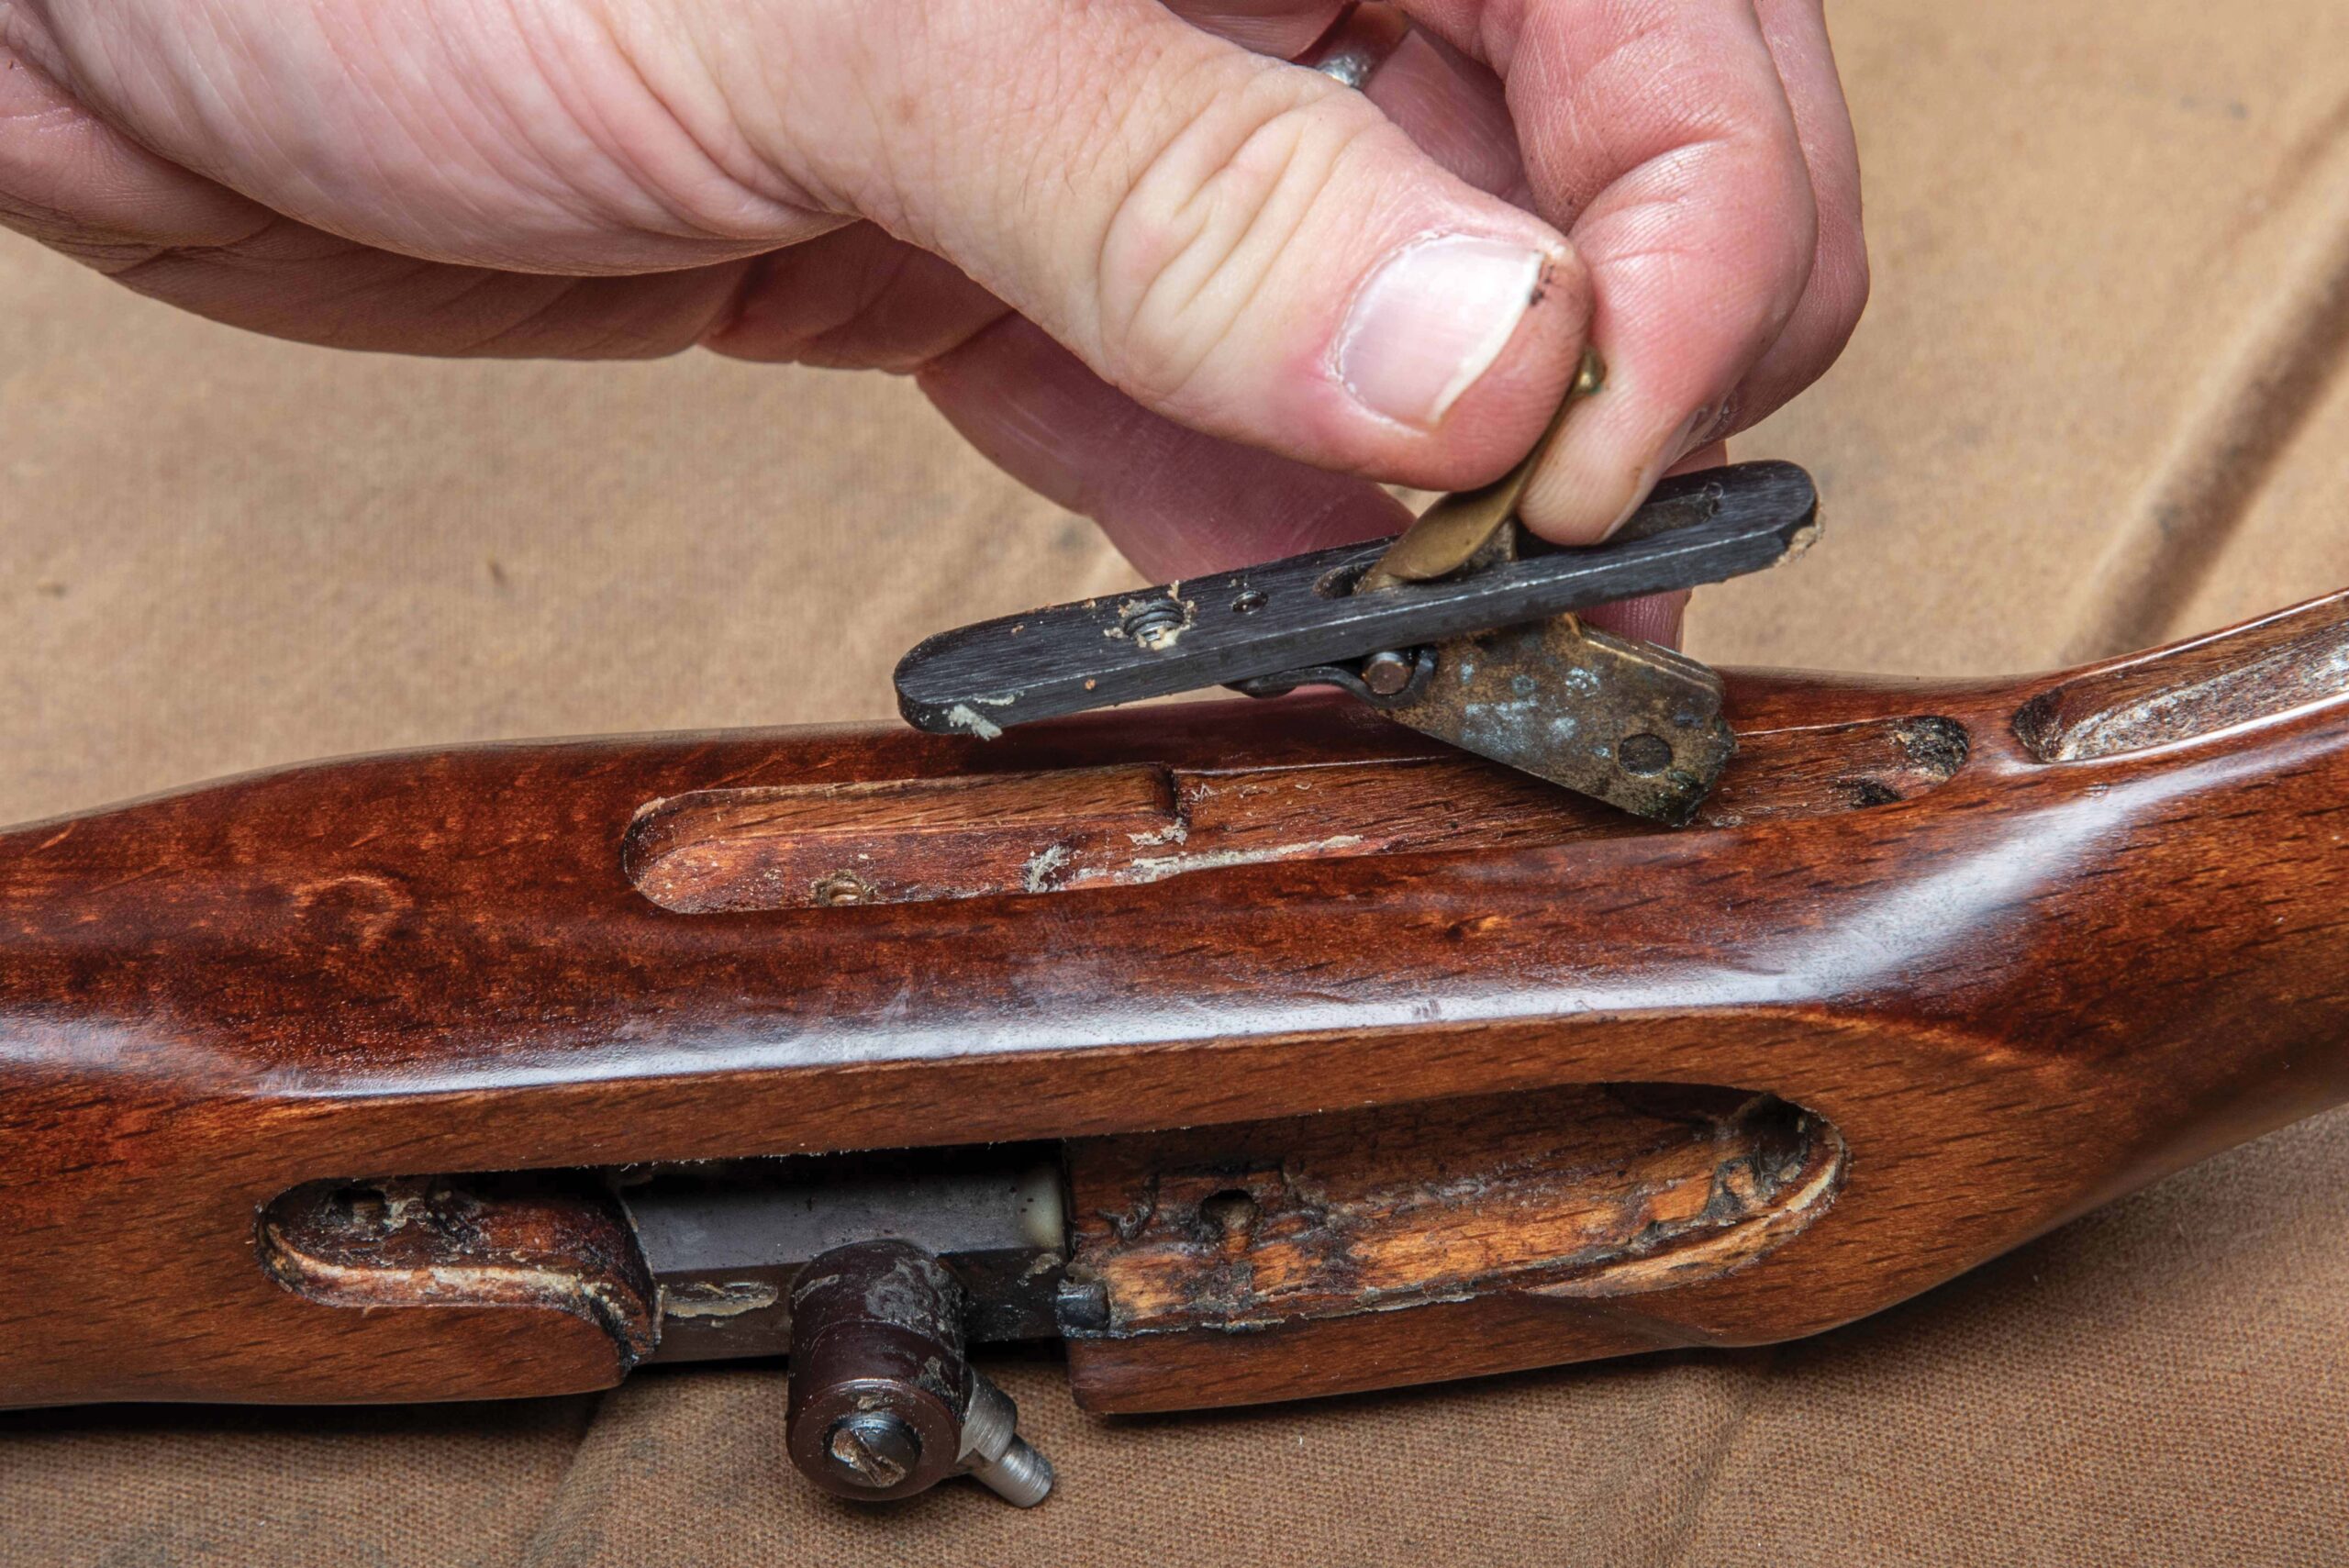
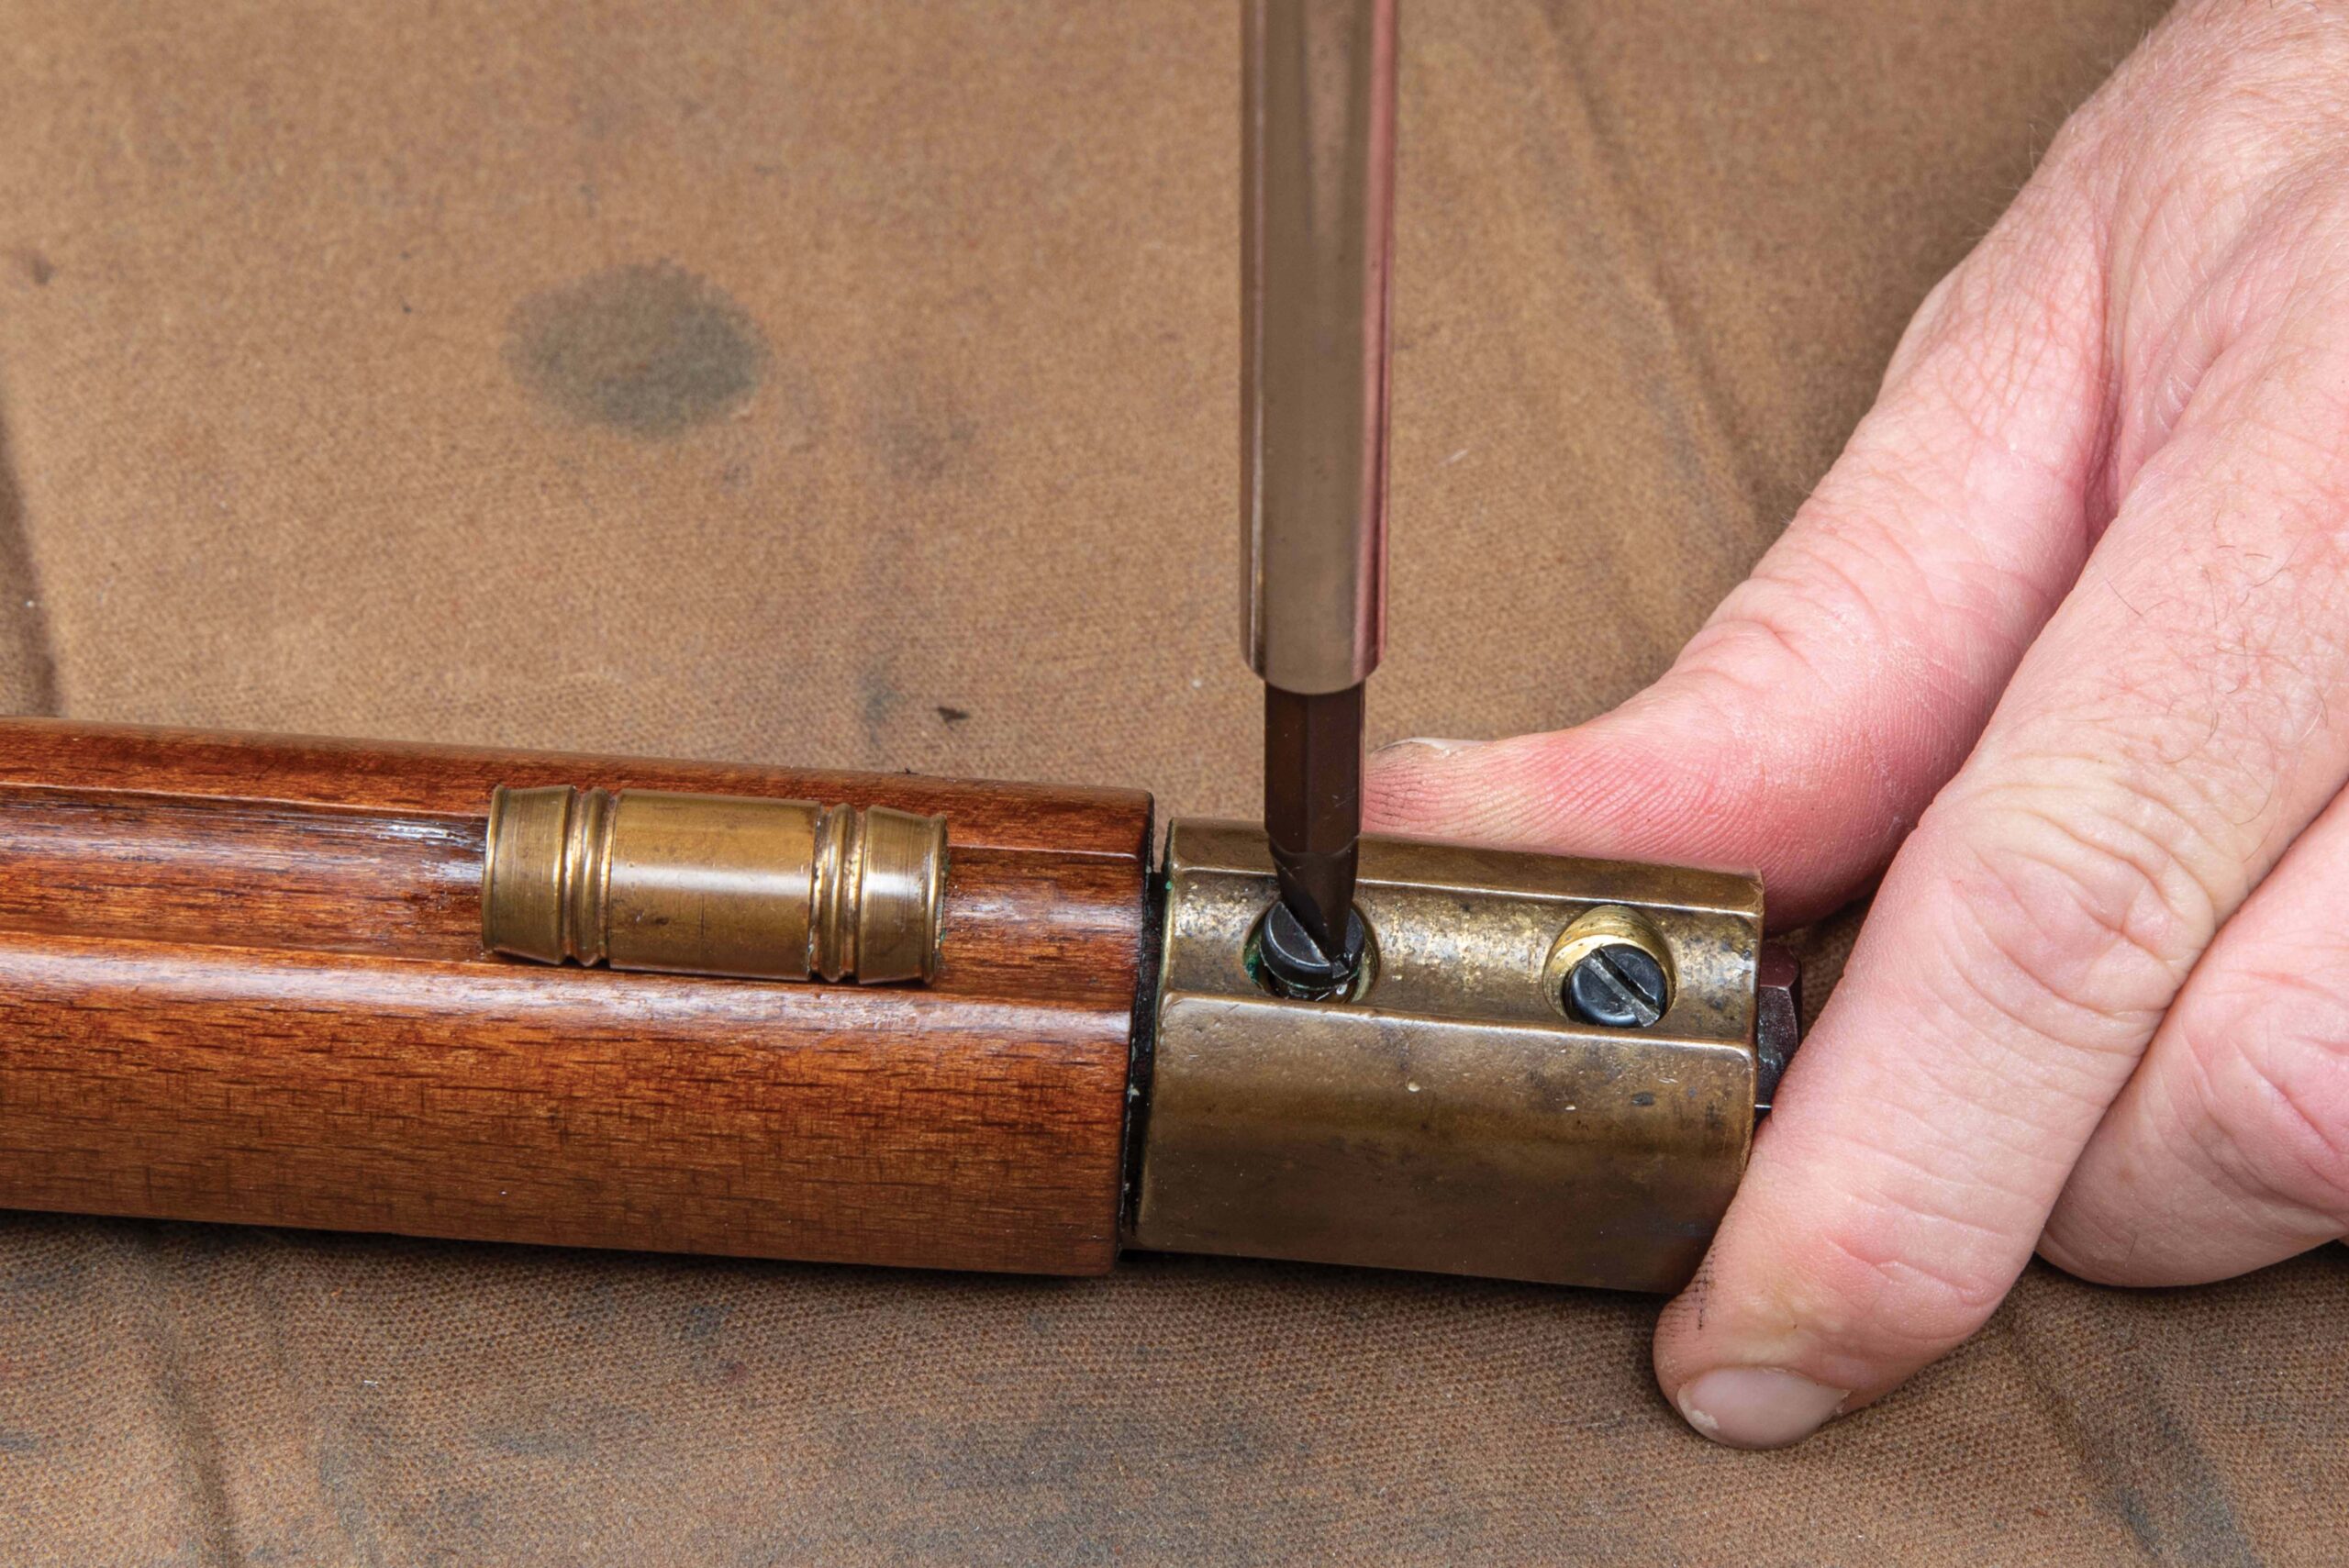
9. The nose cap on this rifle must be removed to separate the stock from the barrel.10. This style rifle has a two-piece stock. The forestock should be separated from the buttstock before removing the barrel to prevent bending the stock joining pins or damaging the wood.11. Yep, a bit worse than we had imagined. Although this rifle has seen a few deer seasons and its share of foul weather, the amount of rust and grime came as a surprise. This is why it is important to remove your lock and clean it at least once a year.
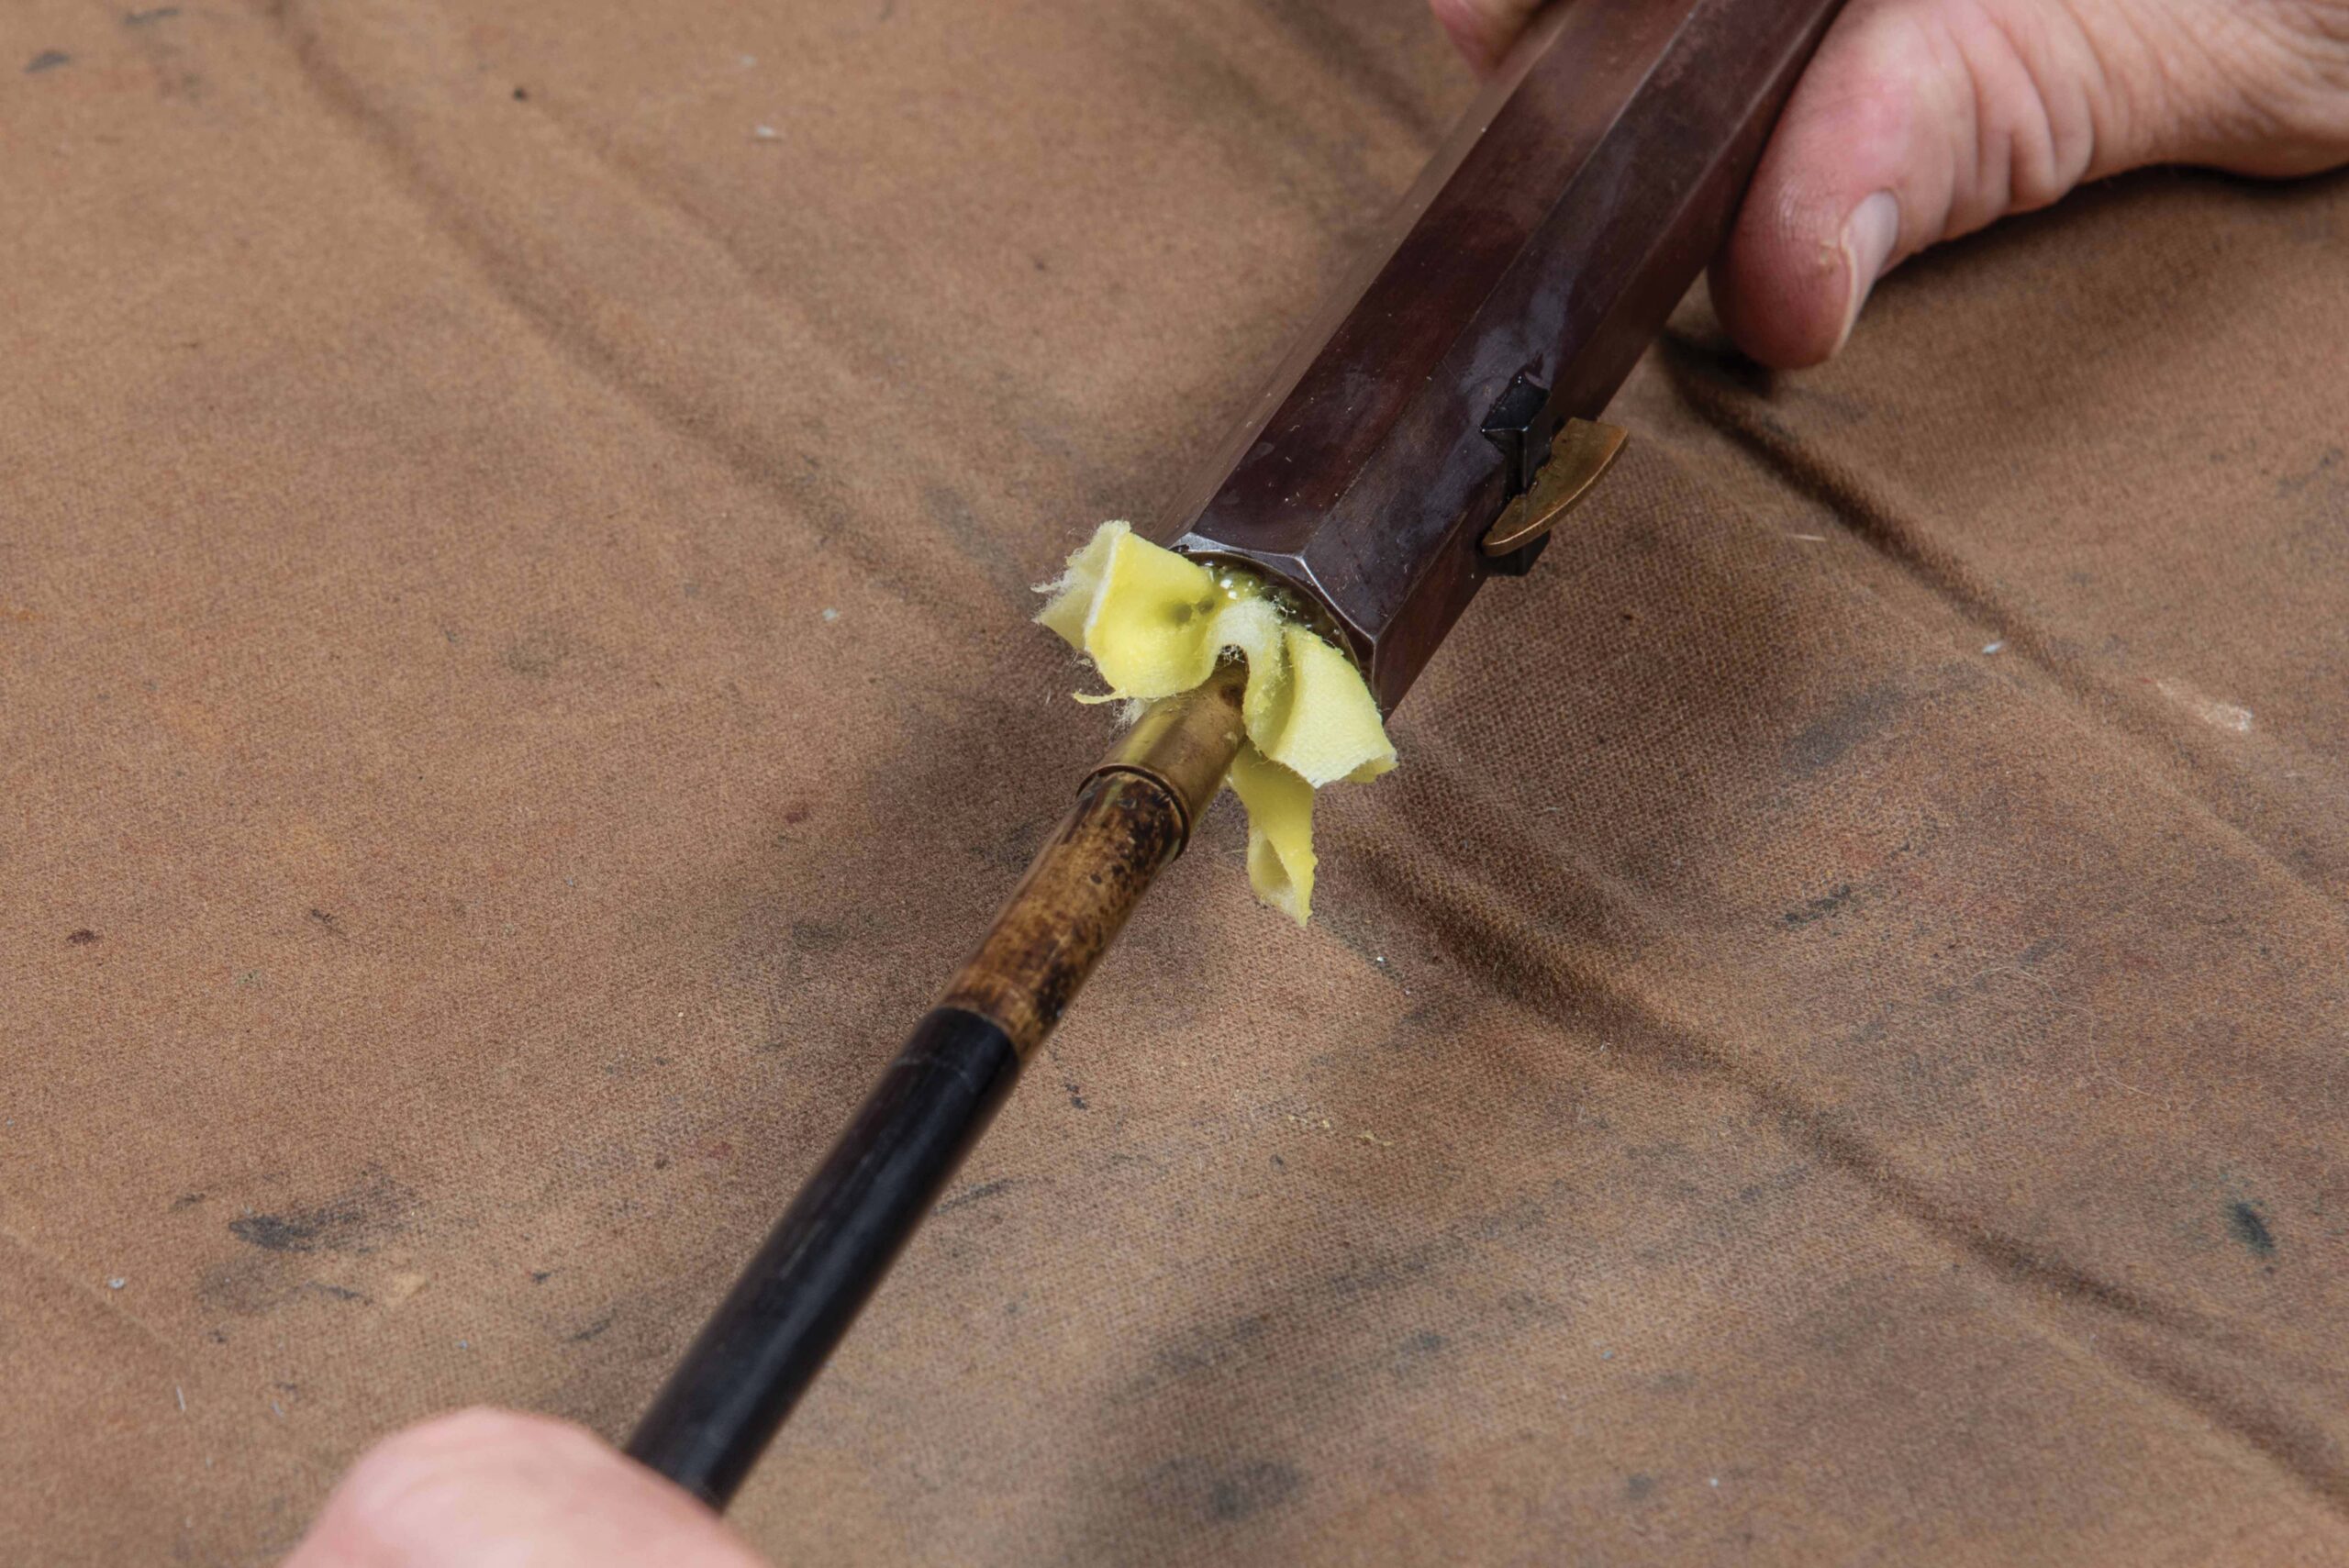
My preferred method is the one used by experienced blackpowder shooters — hot, soapy water. After removing the gross fouling with a couple patches and lube, followed by a patch or two saturated with solvent, my barrel gets a bath. Near-boiling water is funneled into the barrel and allowed to drain into a bucket. The breech end of the barrel is then placed in a bucket with hot, soapy water (dish liquid works well). There needs to be enough water to cover the bolster. Next, I screw a mop onto the end of the ramrod and go to town. Raising the wet mop up and down will hydraulically lift the water up the bore. I will scrub up and down like this for several minutes, change the dirty soapy water with fresh, and repeat until the water is clear.
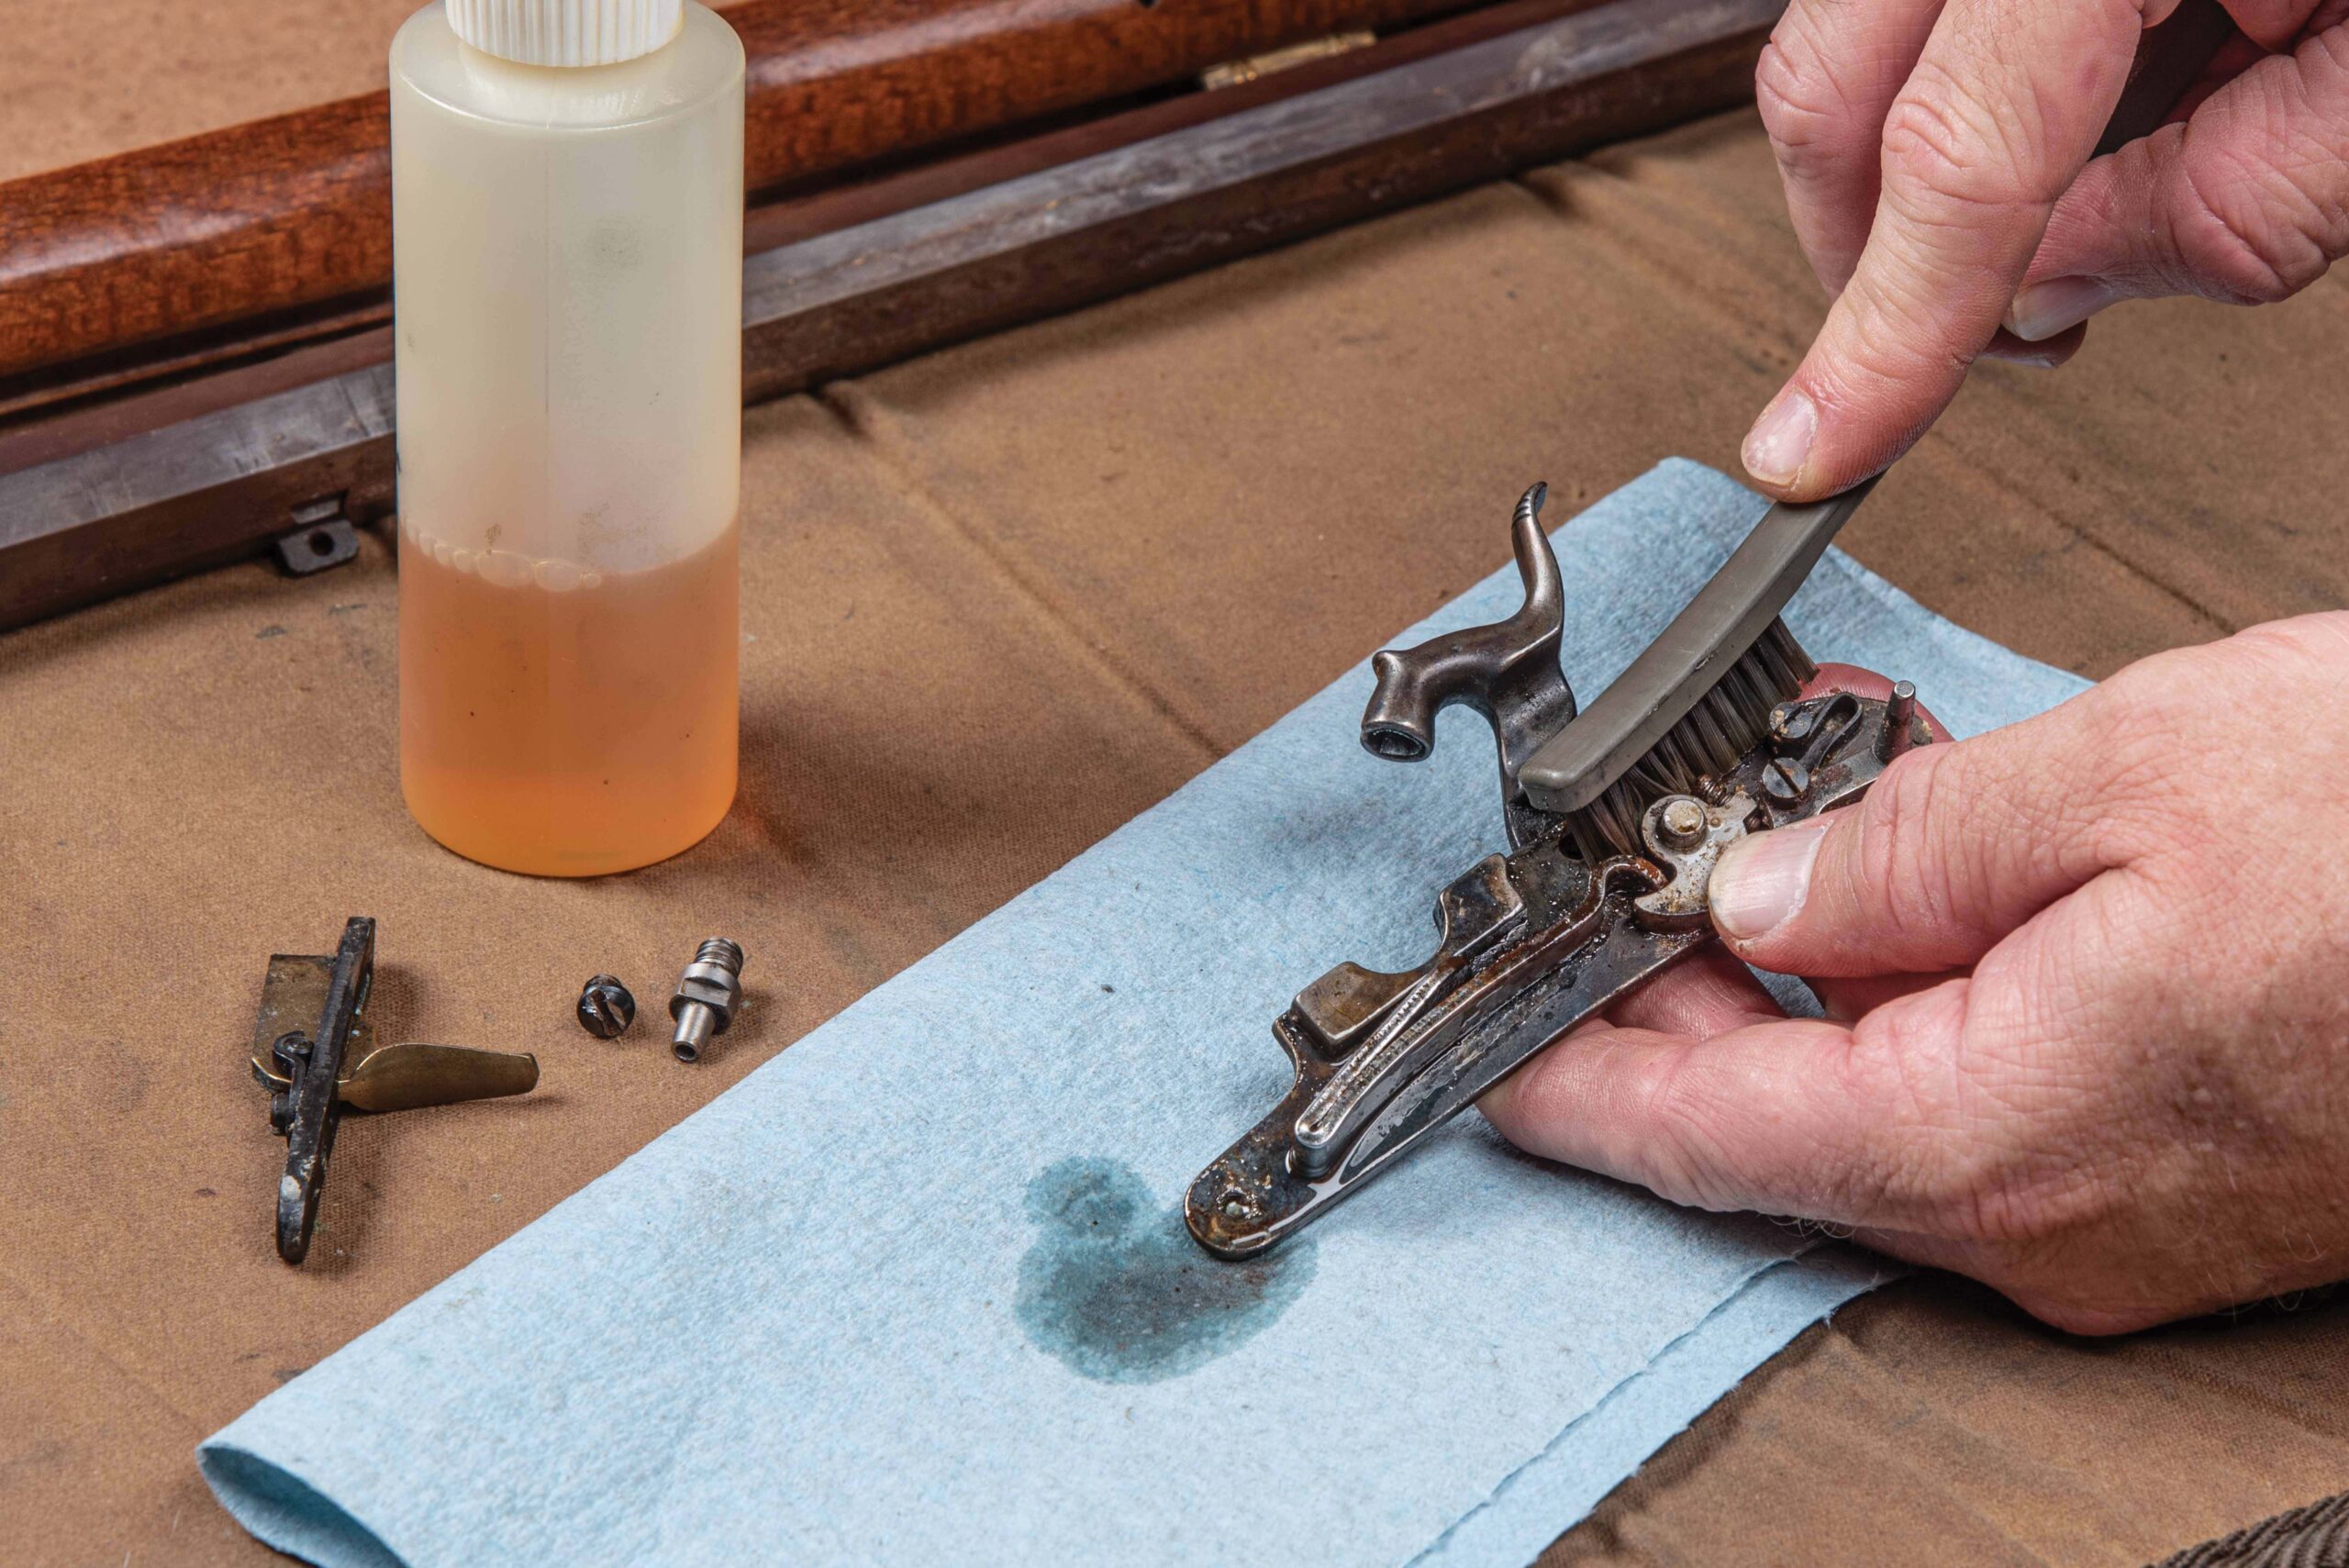
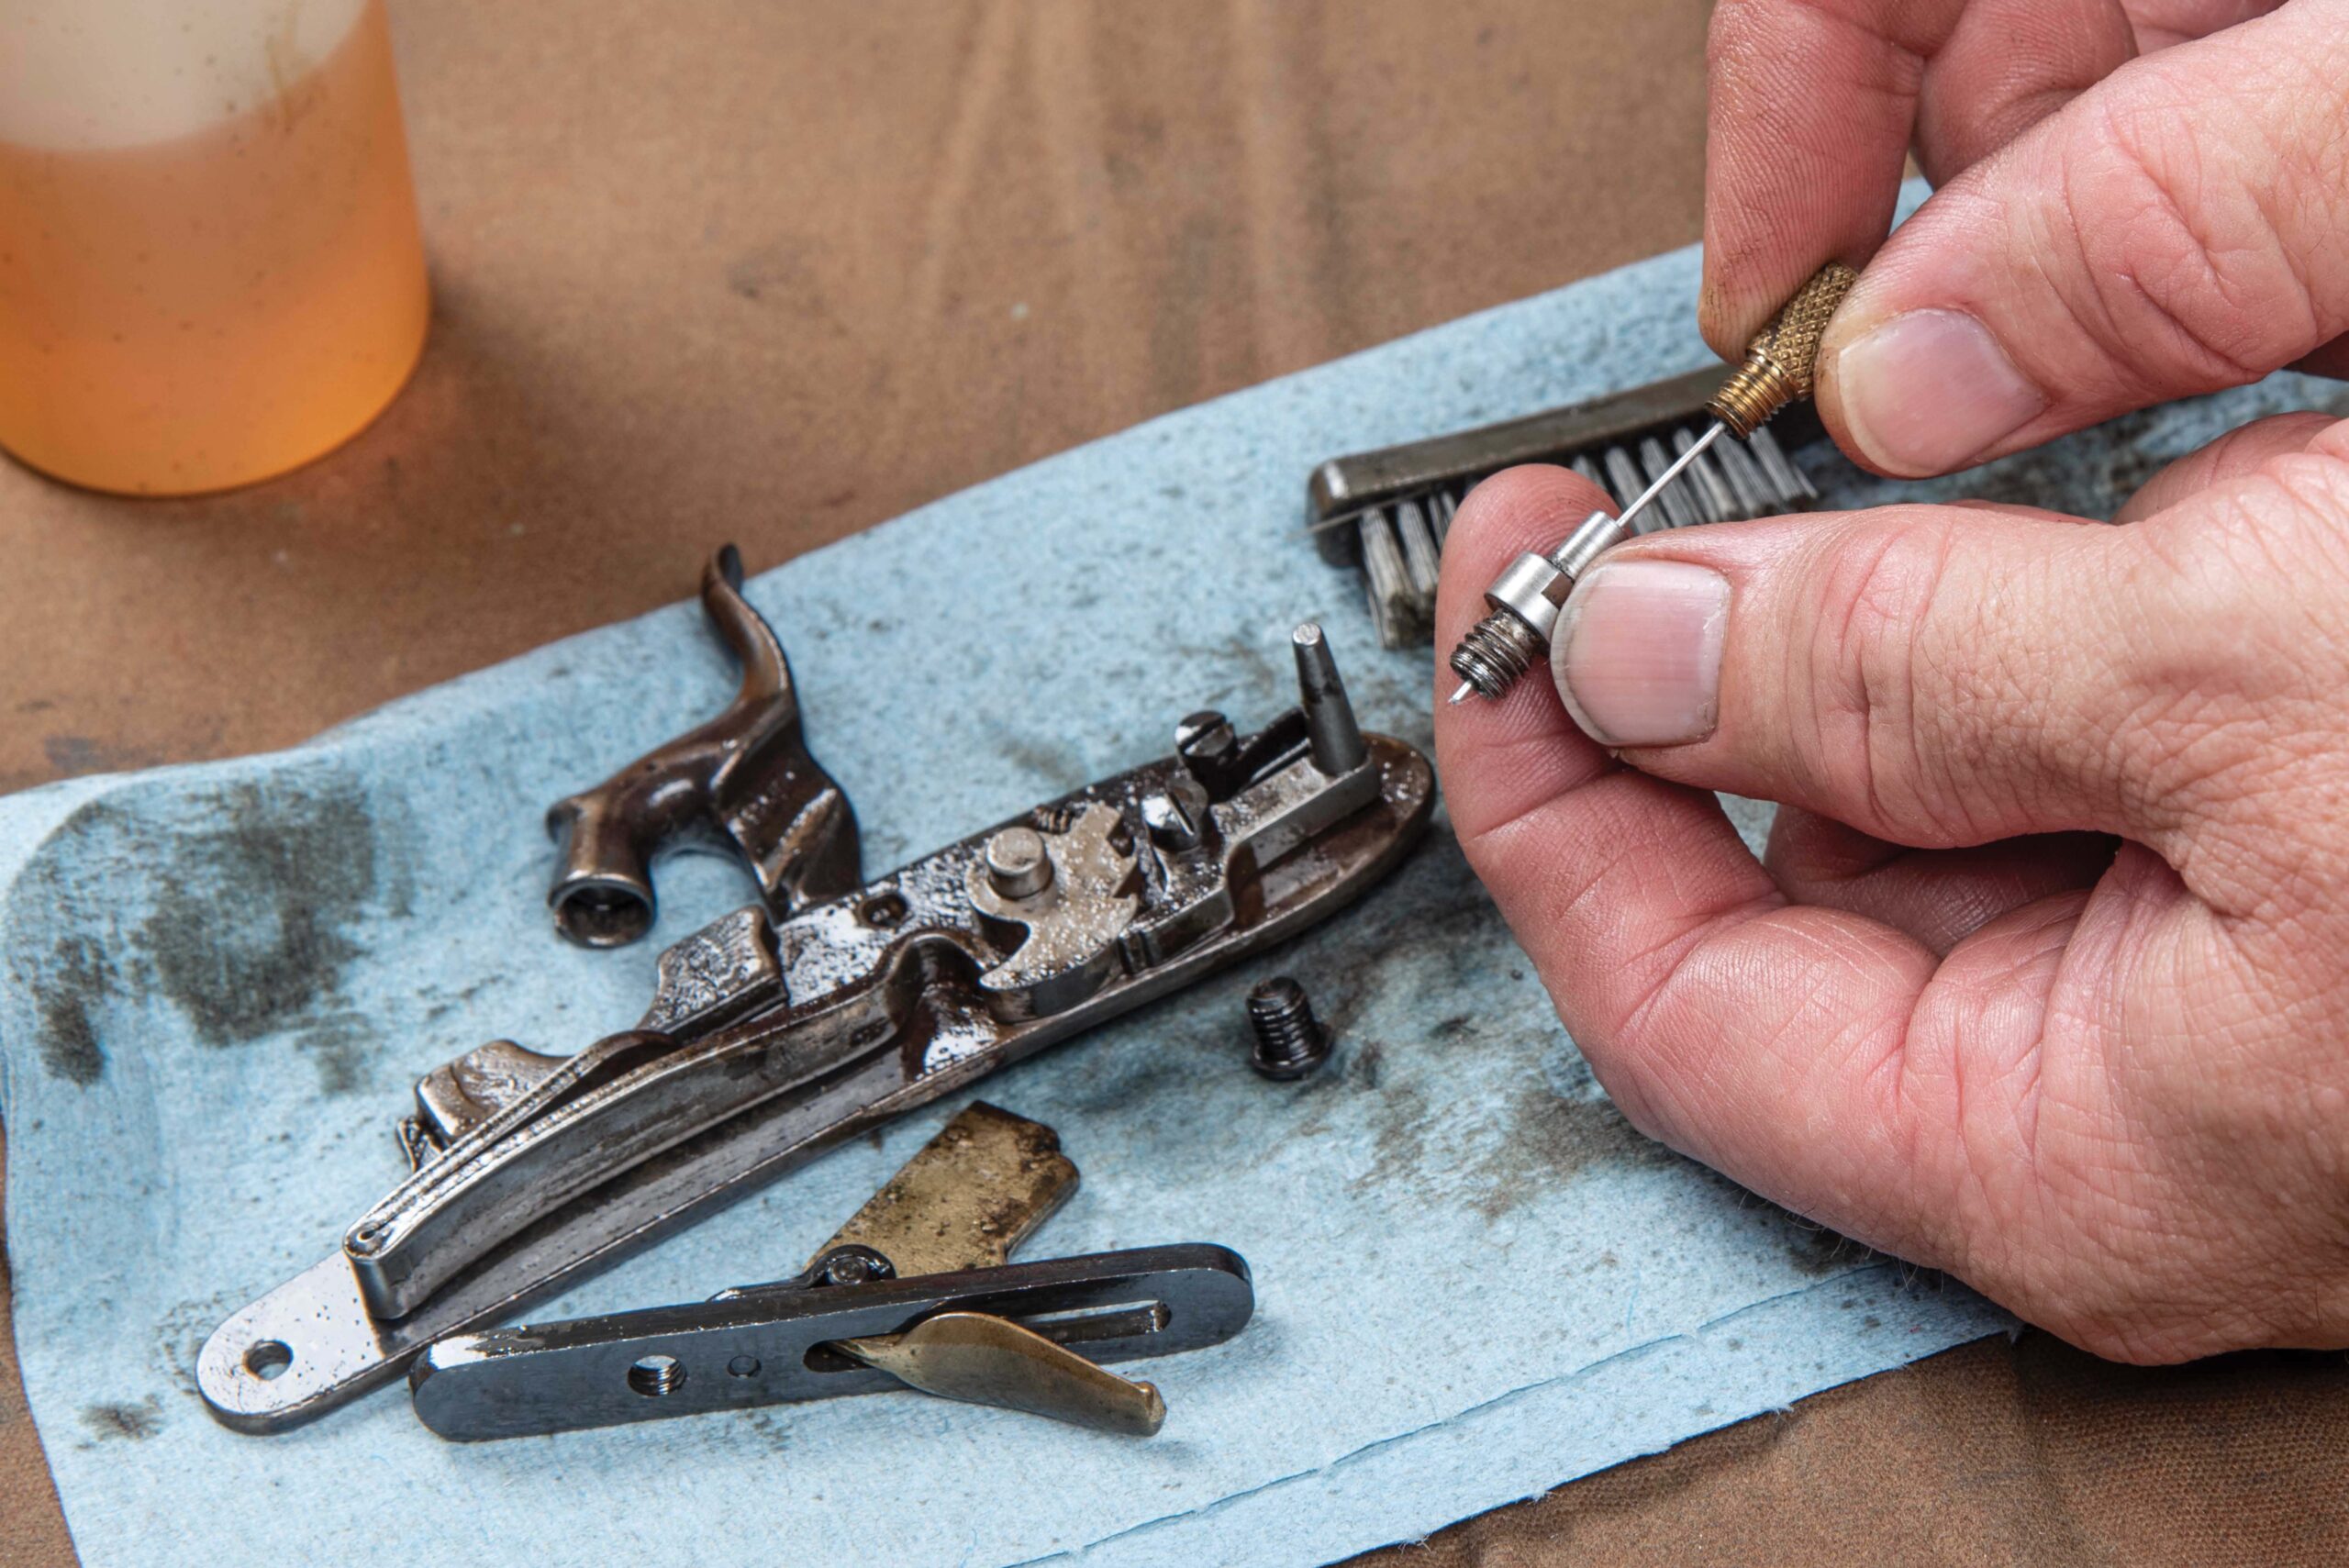
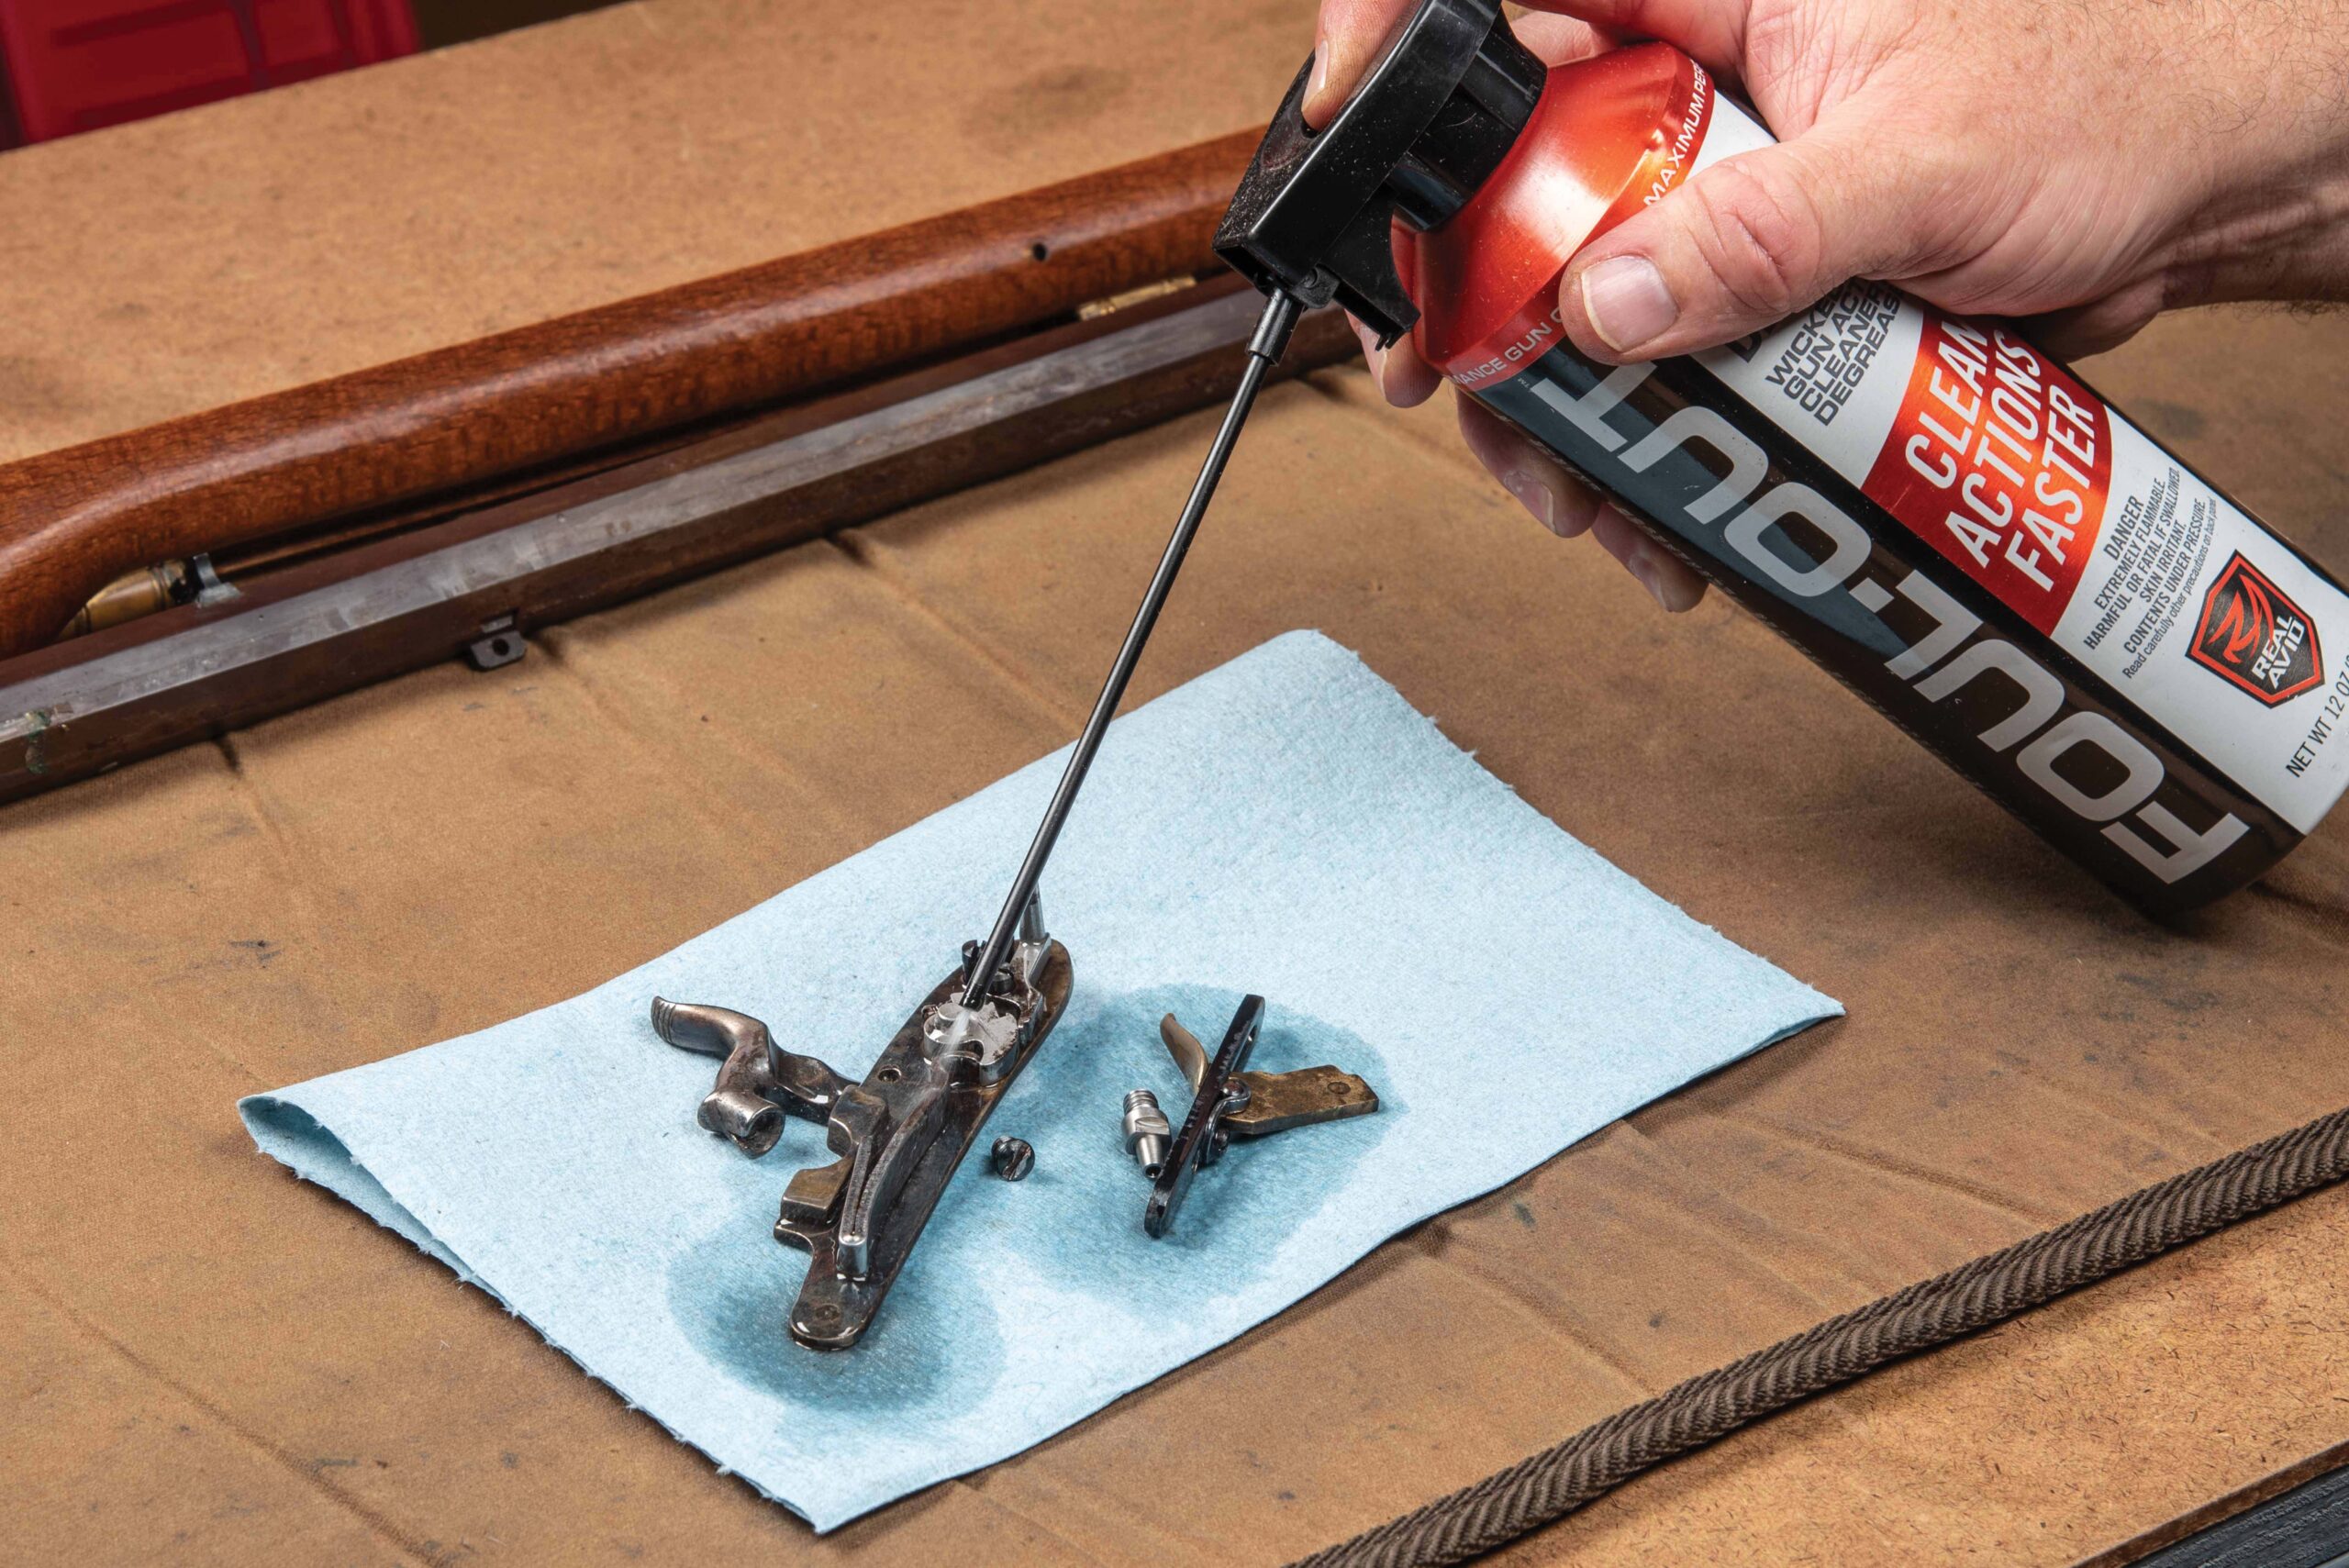
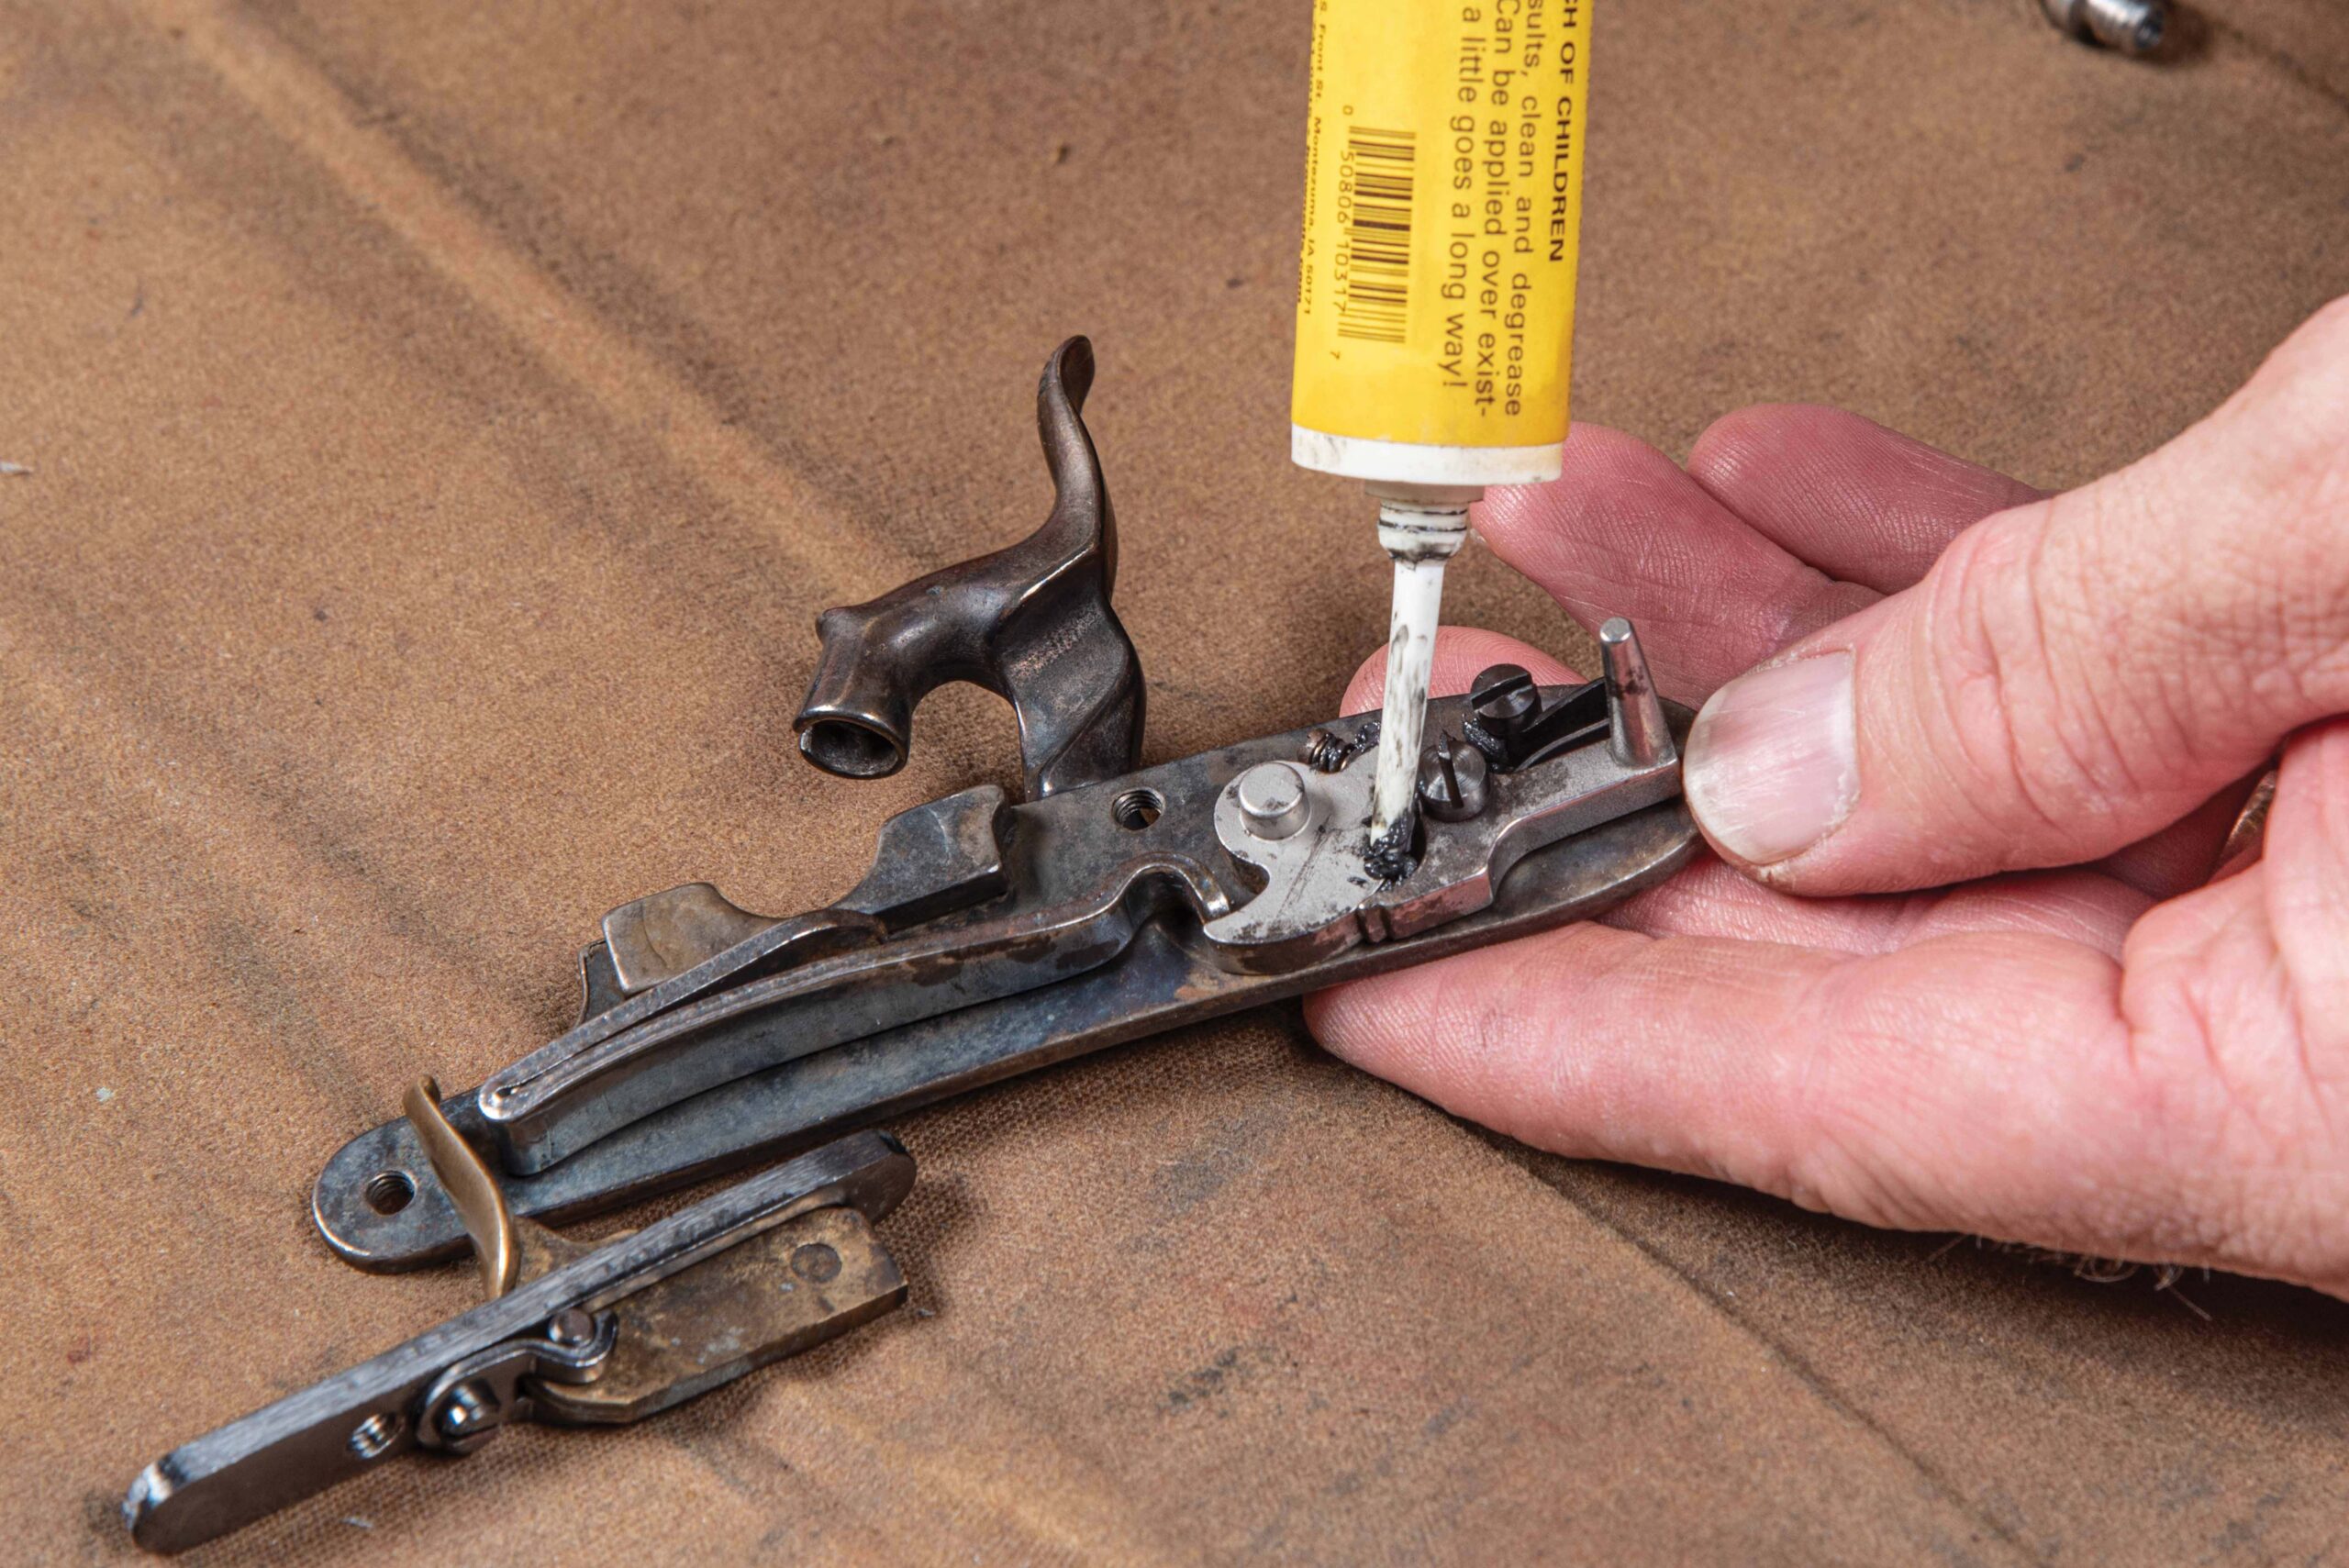
12. To clean the crud, we go back to Hoppe’s #9 solvent and a nylon brush. Saturate the parts with solvent and vigorously scrub to remove all the old grease, oils, powder fouling, and any other junk that has worked its way into the lock mechanism.13. A nipple pick is essential for cleaning out the small fire hole in the nipple.14. Once thoroughly scrubbed with solvent, use a degreaser to remove the slurry. Real Avid’s new Foul-Out is perfect for this. It works like denatured alcohol or brake cleaner to remove oils, but it has a pleasant odor and an adjustable straw that helps direct the spray exactly where you need it.
We mentioned earlier that it’s best not to remove the barrel from rifles that use small tenon pins. We only did this here to show you how it is done. Normally, you would keep the barrel on the rifle assembly when cleaning long rifles, such as the Kentucky- or Pennsylvania-style muzzleloaders. You can still use the hot water method, but instead of removing and placing the end of the barrel in hot water, a tube is secured over a special O-ring nipple and the opposite end placed in hot, soapy water. The tube allows the water to be sucked up into the barrel by the mop to effectively clean the barrel without having to remove it from the stock.
15. Because our small parts were quite nasty, we decided to give them a sonic bath to reach any junk that we couldn’t get to with the nylon brush. A sonic cleaner, like this one from Hornady, is a good thing to have in your gun shop. It not only works for cleaning empty brass cartridges, but you can also use it on small gun parts, as well. For owners of in-line muzzleloaders, this is a great method for cleaning that breech plug.16. After the barrel is scrubbed clean and while the metal is still hot, run several clean cotton patches through the barrel, pausing at the breech to soak up any water at the bottom. Once the patches come out dry, allow the barrel to stand upright for a few minutes so that any residual moisture can quickly evaporate. Next, saturate a patch with bore lubricant and run this down the barrel. The lubricant will protect the bore from rust and corrosion during storage.17. With the barrel clean, apply a light layer of bore lube to the exterior as a rust preventative.18. Before reinstalling the bolster screw, use a pipe cleaner and swab the threads with bore lube to prevent rust and corrosion. Ditto for the bolster’s nipple threads and the threads on the nipple. [TIP: Replace your standard steel nipple with a stainless-steel nipple. They’re easier to keep clean and won’t rust.]19. With the small parts removed from the parts washer, place them in a bowl of hot, soapy water and scrub them clean with a nylon brush. Dry immediately (compressed air is best to ensure all moisture is removed from the nooks and crannies) and lightly lubricate all metal surfaces. For the metal-on-metal moving parts, apply a coat of grease, such as Brownells Action Lube.20. Assembly of the rifle is the reverse of disassembly. Be sure to check your trigger function to ensure it is safe and working properly. Sidelocks can bind up and screws that are torqued too tight can interfere with trigger and hammer operation.
There’s a lot of debate about whether or not deer can swim. Some people say that they definitely can, while others are convinced that the creatures would sink like a stone. So, what’s the truth?
In this blog post, we’ll explore the question of whether deer can swim and offer some insights into their aquatic abilities. Stay tuned!
The simple answer is Yes, Deer Can Swim. Deer are excellent swimmers, reaching speeds of around 15 mph in the water. According to one study, deer can swim up to four miles without rest!
How Fast Can Deer Swim?
Deer can swim quite fast, usually around 15 mph. For reference, most non-Olympic swimmers clock in at approximately 6 mph. Some of the animals that hunt deer are pretty good at swimming too. Some bears can swim at a speed of 6.2mpg, and alligators can get up to 20mph! So the number makes sense to help deer have a chance to get away from their predators!
Why are Deer Such Good Swimmers?
There are several reasons why deer are such effective swimmers. These include:
Body shape: Deer are sleek and streamlined, which helps them move through the water quickly.
Webbed feet: Deer have webbing between their toes, which gives them extra propulsion in the water.
Waterproof coat: The deer’s coat is waterproof, helping to keep them warm and dry while swimming.
Powerful Legs: Deer have long, powerful legs that help them swim long distances.
Why Do Deer Swim?
There are several reasons why deer might swim. These include:
To escape predators: If a deer is being chased by a predator, it may swim across a body of water to escape.
To reach food: Deer may swim to an island or other land mass in search of food.
To migrate: Some deer species migrate between islands, and swimming is the only way to travel between them.
What Dangers do Deer Face When Swimming?
Despite being good swimmers, deer can face several dangers when swimming. These include:
Drowning: If a deer gets caught in a current or tries to swim too far, they can easily become exhausted and drown.
Predators: While swimming, deer are vulnerable to predators such as alligators, crocodiles, and sharks.
Humans: In some areas, humans hunt deer from boats. This can be extremely dangerous for the deer and often results in injury or death.
How Can You Help Protect Deer from Drowning?
There are several things you can do to help protect deer from drowning. These include:
Never feed deer near water: If you feed deer near water, they may become accustomed to coming to the water’s edge to eat. This can put them at risk of getting caught in a current or being attacked by predators.
Keep your distance: If you see a deer swimming, resist the urge to approach it. Getting too close can startle the deer and cause it to panic, which could lead to drowning.
Respect hunting regulations: In some areas, it is legal to hunt deer from boats. If this is allowed in your area, be sure to follow all hunting regulations and use extreme caution to avoid injuring or killing the deer.
Water Deer are Even Better at Swimming:
Did you know that water deer are even better at swimming than their land-dwelling cousins? These amazing creatures can swim up to six miles without resting!
Water deer are native to Asia and can be found in China, Korea, and Japan. They get their name from their unique appearance—they have no antlers and their noses resemble small snouts. Water deer are excellent swimmers and often use rivers and lakes to escape from predators.
What Do Water Deer Look Like?
Water deer are small animals, measuring about two feet long and weighing up to 30 pounds. They have reddish-brown fur and small, round ears. As their name suggests, water deer have a unique appearance—they have no antlers and their noses resemble small snouts.
What Do Water Deer Eat?
Water deer are herbivores and their diet consists mainly of grasses and aquatic plants. They also eat fruit, nuts, and occasionally small insects or fish.
How Do Water Deer Behave?
Water deer are shy and solitary animals. They are most active at night and spend their days hiding in the dense vegetation near waterways. Water deer are excellent swimmers and often use rivers and lakes to escape from predators.
What Are the Biggest Threats to Water Deer?
The biggest threats to water deer are habitat loss and hunting. In some parts of Asia, water deer are hunted for their meat and fur. Habitat loss is also a major threat to these creatures—as development encroaches on their natural habitats, water deer are losing the places they need to live and thrive.
FAQs
How Far are Deer Likely to Swim?
Deer are strong swimmers and can easily cover long distances. In fact, water deer are even better at swimming than their land-dwelling cousins! These amazing creatures can swim up to six miles without resting. So, if you see a deer swimming across a river or lake, don’t be surprised—they’re just doing what comes naturally to them.
Do all Deer Swim?
No, not all deer swim. While most deer are good swimmers, there are some species that don’t swim at all. For example, red deer—the largest type of deer—are not known to swim. Other non-swimming deer include reindeer, elk, and moose. These animals usually avoid bodies of water because they are not good swimmers and can easily become exhausted and drown.
How Do Water Deer Communicate?
Water deer use a variety of vocalizations to communicate with each other. These include grunts, bleats, and whistles. Water deer also communicate through body language, using their tails, ears, and antlers to send signals.
Can Deer swim in the ocean?
Yes, deer can swim in the ocean. In fact, many deer are excellent swimmers and can cover long distances in the water. However, not all deer are good swimmers—some species, such as red deer, don’t swim at all.
Do Deer Need to Drink Water?
Deer need to drink water just like any other animal. They usually get the water they need from the plants they eat. However, during dry periods, when food is scarce, deer will seek out sources of water to drink.
Can Deer swim underwater?
No, deer cannot swim underwater. They are good swimmers and can cover long distances in the water, but they cannot breathe underwater.
How Do Water Deer Avoid Predators?
Water deer have a few different strategies for avoiding predators. They are most active at night, when predators are less likely to be around. They also spend their days hiding in the dense vegetation near waterways. And, if all else fails, they can use their excellent swimming skills to escape from danger.
Best all terrain tires for snow: In the world of all-terrain tires, navigating through the plethora of options can be a daunting task, especially when it comes to finding the perfect set for snow. Two common classifications of tires that you may come across are the M+S (Mud and Snow) and the 3-Peak Mountain Snowflake (3PMSF) certified tires. But how do you know which one will provide the best performance in snowy conditions? In this article, we will focus on the top 3-Peak Mountain Snowflake certified all-terrain tires, as they have been proven to deliver superior traction and safety in snow compared to their M+S counterparts.
M+S tires are designed to offer improved traction in muddy and light snow conditions, but they do not undergo the same rigorous testing as 3PMSF certified tires. The 3-Peak Mountain Snowflake symbol signifies that a tire has met or exceeded stringent industry standards for severe snow performance, making them the optimal choice for those who frequently drive in heavy snow or icy conditions. So, without further ado, let’s delve into the world of 3-Peak Mountain Snowflake all-terrain tires and discover the best options for conquering the snowy terrain.
When it comes to a pick up truck, the main segmentation of tires comes in the form of on/off road terrain groups. However in this class of tires, there is an even further distribution as below:
SegmentOff roadOn road
All terrain road (ATR) is a relatively new segment mainly driven by the R117 regulation over in Europe to ensure tires meet a maximum threshold of noise level as determined by regulation. Due to the relationship between pattern void volume and noise, this forces the industry to shift towards a lower void design to meet the noise requirements. Hence this spurred the creation of this new segment which has 70% on road & 30% off road focus.
All terrain (AT) is a well known segmentation whereby users do tend to enjoy the fair share of off road activities. Most of the pick up trucks who want to explore the off road activities on a monthly basis do tend to choose this segmentation. The AT segment has a 50% on road & 50% off road focus. There is however an even higher off road segmentation called mud terrain (MT) which has 70% off road and 30% on road. Recently most ATR segment tires.
All season 3 peak mountain
All season tires have always been the go to tires for the American market and this segment has been well established across the years. There are 2 types of all season tires, one with 3 peak mountain & one with only M+S. We have covered these 2 types of tire head to head with Michelin’s Defender T+H (M+S) vs Cross Climate 2 (3 peak mountain) and the M+S all season tires usually are worst in winter performances but excel much better in mileage.
If you are in an area which snows quite heavily, 3 peak mountain all season tires would be definitely a good choice. Below are the best all terrain tires for snow rank based on a compilation of test results.
All terrain road (ATR) with 3 peak mountain
1. BFGoodrich Trail-Terrain T/A
When it comes to off-road tires, no brand is as well known as BFGoodrich. Many consider them as the “God” of all/mud terrain tires and have made their name true countless tire wins in the Baja competitions. BFGoodrich launched its latest foray into the ATR segment with the product called “Trail-Terrain T/A” in 2021. Based on the test results, Trail-Terrain T/A had a big advantage in snow & ice performances while having a low wet & dry performance. The main trade off is between winter against summer performance in this case. If you need a winter performance tire, Trail-Terrain T/A would be definitely a good choice for you.
BFGoodrich Trail-Terrain T/A
Launch: 2021
Press test wins: 0/1
Strength: Excellent snow.
Check out our head to head comparison of Trail-Terrain T/A against its competitors.
BFGoodrich Trail-Terrain T/A vs
Falken WildPeak A/T Trail
Price
265/60R18 : $244
PS: Updated snow results
BFGoodrich Trail-Terrain T/A vs Yokohama Geolandar A/T G015 vs Falken WildPeak A/T Trail winter results.
The BFGoodrich Trail-Terrain T/A demonstrates superior snow and ice performance compared to its competitors, the Falken WildPeak A/T Trail and the Yokohama Geolandar A/T G015. In snow braking, acceleration, and handling (both subjective and lap time), the Trail-Terrain T/A consistently outperforming the WildPeak A/T Trail and closely matching the Geolandar in certain aspects. Furthermore, on ice braking, the Trail-Terrain T/A still held its top position with a score of 100%, whereas both the WildPeak A/T Trail and Geolandar A/T G015 lagged behind by up to -20%. In summary, for snow and ice conditions, the BFGoodrich Trail-Terrain T/A is the clear front-runner.
2. Yokohama Geolandar A/T G015
Introduced in 2016, the Yokohama Geolandar A/T G015 has quickly become a popular choice for drivers seeking a versatile all-terrain tire with impressive snow performance. While it came in just slightly behind the BFGoodrich Trail-Terrain T/A in Tire Rack’s testing, the Geolandar A/T G015 still offers excellent traction and handling on snow-covered roads. Combining Yokohama’s advanced tire technology with a focus on durability and comfort, the Geolandar A/T G015 has proven itself to be a reliable option for those who face a variety of terrains and weather conditions.
Geolandar A/T G015
Launch: 2016
Press test wins: 0/3
Strength: Snow & ice
Check out our head to head comparison of Geolandar A/T G015 against its competitors.
Geolandar A/T G015 vs
Falken WildPeak A/T Trail
Price
265/60R18 : $239
3. Falken WildPeak A/T Trail
The Falken WildPeak A/T Trail is renowned for its outstanding performance on both wet and dry terrains. It consistently delivers impressive traction and stability during rainy seasons and on dry roads, making it a top choice for those in predominantly wet or summer climates. However, when it comes to snow and ice, the WildPeak A/T Trail shows some limitations, especially when compared to the Trail-Terrain T/A which excels in winter conditions. For those prioritizing snow and ice performance, the Trail-Terrain T/A stands out. But for those in milder winter conditions and dominant summer weather, the WildPeak A/T Trail is hard to beat.
WildPeak A/T Trail
Launch: 2019
Press test wins: 0/1
Strength: Wet & dry
Check out our head to head comparison of WildPeak A/T Trail against its competitors.
WildPeak A/T Trail vs
Nitto Nomad Grappler
Yokohama Geolandar A/T G015
BFGoodrich Trail-Terrain T/A
Price
235/60R18 : $209
4. Cooper Discoverer AT3 4S
Launched in 2018, Cooper’s Discoverer AT3 4S has quickly made a name for itself in the world of all-terrain tires. With outstanding snow performance as verified by Tire Rack’s comprehensive tests, this tire has proven to be an exceptional choice for those who need reliable traction and safety in snowy conditions. The Discoverer AT3 4S combines innovative technology and Cooper’s years of experience to deliver a tire that excels in both on-road comfort and off-road capability, making it a top pick for drivers looking to conquer any terrain.
Cooper Discoverer AT3 4S
Launch: 2021
Press test wins: 2/4
Strength: Excellent in wet & snow
Check out our head to head comparison of Cooper Discoverer AT3 4S against its competitors.
Cooper Discoverer AT3 4Svs
Kumho Road Venture AT52
General Grabber APT
Continental TerrainContact A/T
Price
265/60R18 : $264
5. Firestone Destination A/T2
The Firestone Destination A/T2 is a noteworthy contender in the all-terrain tire market, having achieved reasonable snow performance results in Tire Rack’s testing. This tire not only offers a dependable grip on snowy surfaces but also excels in various other conditions. Adding to its list of accolades, the Destination A/T2 recently emerged as the best tire in the highly popular 2022 Tyre Reviews All Terrain Tyre Test. With a well-rounded performance across different terrains and a growing reputation for reliability, the Firestone Destination A/T2 is undoubtedly a solid choice for drivers seeking a versatile and high-performing all-terrain tire.
Destination A/T2
Launch: 2019
Press test wins: 1/3
Strength: Dry
Check out our head to head comparison of Destination A/T2 against its competitors.
Destination A/T2 vs
Continental TerrainContact A/T
Price
265/60R18 : $259
All terrain (AT) with 3 peak mountain
1. Mickey Thompson Baja Boss A/T
Mickey Thompson Baja Boss A/T: A Legacy of Dominance
Mickey Thompson’s Baja Boss A/T is not just another tire in the market; it stands tall on a legacy of tire-making excellence. Combining aggressive aesthetics with unparalleled on-road handling and performance, this extreme hybrid all-terrain tire symbolizes the very essence of Mickey Thompson’s commitment to quality. The asymmetrical tread design ensures reduced noise and superior all-weather performance, while its Extreme Sidebiters® offer an extraordinary look and exceptional off-road traction. Enhanced with the Powerply™ XD and a Silica-Reinforced Compound, it guarantees puncture resistance, quicker steering response, and improved wet handling. And with a 50,000-mile tread wear warranty, the Baja Boss A/T doesn’t just talk the talk but walks the walk.
Winter Performances: Defining Snow Mastery
When pitched against its close competitors, the Falken WildPeak A/T3W and the Toyo Open Country A/T III, the Baja Boss A/T showcases distinctive prowess in snow conditions. Let’s dissect the numbers:
AT snow results
Snow Braking: With 60.30 feet, the Baja Boss A/T stops more abruptly than both the WildPeak A/T3W and the Open Country A/T III, requiring 82.20 and 80.60 feet respectively.
Snow Acceleration: This metric is where Baja Boss A/T shines brightly. At just 13.60 feet (0-12 Mph), it accelerates significantly faster in snowy conditions than the WildPeak A/T3W and the Open Country A/T III, which require 19.10 and 19.40 feet respectively.
Snow Handling (Subjective): Scoring 4.92 out of 10, the Baja Boss A/T is ahead of the WildPeak A/T3W’s 3.83, though slightly trailing the Open Country A/T III’s 4.67.
Ice Braking: On icy terrains, the three tires are closely matched, with the Baja Boss A/T stopping at 57.50 feet, slightly ahead of the others.
In conclusion, the Baja Boss A/T by Mickey Thompson doesn’t merely ride on its legacy but establishes itself as a leader, particularly in snowy conditions. The numbers are clear: for those prioritizing winter performance, the Baja Boss A/T stands out as the best snow tire in the market.
Baja Boss A/T
Launch: 2021
Press test wins: 0/1
Strength: Excellent snow !
Check out our head to head comparison of Baja Boss A/T against its competitors.
Baja Boss A/T vs
Falken WildPeak A/T3W
Toyo Open Country A/T III
Price
265/60R18 : $291
2. Toyo Open Country A/T III
The Toyo Open Country A/T III is an embodiment of technological advancement in the realm of all-terrain tires. Designed to cater to the needs of light trucks, SUVs, and crossovers, it stands as a testament to Toyo’s commitment to revolutionize the tire industry. Following the footsteps of its predecessor, the Toyo Open Country A/T II, this latest iteration introduces a more aggressive tread pattern, advanced rubber compounds, and numerous features that enhance its grip and durability. Among these, its new tread compound ensures enhanced wet braking, improved handling, and resists cut-and-chip, making it a reliable companion for both off-road adventures and city drives. The tire’s evenly distributed void area improves traction, both on and off the road, and ensures stable handling. Its staggered shoulder lugs offer impressive off-road traction, while the increased lateral grooves magnify its prowess on varied terrains, including snow. The 3D multi-wave sipes not only improve wet and snow traction but also diminish irregular wear. Lastly, the stone-ejecting blocks ensure that the tire remains undamaged, maintaining its performance in tough conditions.
Diving into its winter performance and comparing it to its peers like the Mickey Thompson Baja Boss A/T and the Falken WildPeak A/T3W, the Toyo Open Country A/T III showcases notable strengths. In snow braking, it demands only 80.60 feet to come to a halt, closely tailing the Baja Boss A/T but surpassing the WildPeak A/T3W. When we assess snow acceleration, the Open Country A/T III registers a commendable performance, requiring just 19.40 feet from 0-12 Mph, which is almost at par with the WildPeak A/T3W. As for snow handling, it scores an impressive 4.67 out of 10, beating the WildPeak A/T3W and just slightly behind the Baja Boss A/T. However, its true dominance is evident in ice braking, where it halts at a mere 54.80 feet, outperforming both of its competitors.
Open Country A/T III
Launch: 2020
Press test wins: 0/1
Strength: Great snow handling !
Check out our head to head comparison of Open Country A/T III against its competitors.
Open Country A/T III vs
Falken WildPeak A/T3W
Mickey Thompson Baja Boss A/T
Price
265/60R18 : $283
3. Falken WildPeak A/T3W
When it comes to exceptional winter performance in all-terrain tires, the Falken WildPeak A/T3W undoubtedly stands out. Specifically crafted for those who seek unmatched performance without compromising on safety and durability, this tire is a testament to Falken’s dedication to innovation and quality. Its advanced engineering ensures that the tire not only grips the road seamlessly in harsh snowy conditions but also offers longevity and reliability.
Looking at its winter performance metrics and juxtaposing it with competitors such as the Mickey Thompson Baja Boss A/T and the Toyo Open Country A/T III, the WildPeak A/T3W showcases its merits. In the snow braking test, it requires 82.20 feet to stop, which is slightly longer than both the Baja Boss A/T and the Open Country A/T III. However, it’s in the snow acceleration where the WildPeak A/T3W weakness was shown, registering an 19.10 feet from 0-12 Mph, placing last in the group. While its subjective snow handling score of 3.83 out of 10 trails the other two tires, it’s essential to note that this is a subjective measure, and preferences can vary based on individual experience. But where the WildPeak A/T3W genuinely shines is in ice braking. Stopping at just 55.80 feet, it surpasses the Baja Boss A/T and is incredibly close to the leading Toyo Open Country A/T III.
WildPeak A/T3W
Launch: 2013
Press test wins: 0/4
Strength: Good ice braking
Check out our head to head comparison of WildPeak A/T3W against its competitors.
WildPeak A/T3W vs
Mickey Thompson Baja Boss A/T
Toyo Open Country A/T III
Bridgestone Dueler A/T Revo 3
Price
265/60R18 : $275
4. Goodyear Wrangler Workhorse AT
Goodyear’s Wrangler Workhorse AT was launched in 2021 with an all season focus and it is specific only for the American market. Based on the head to head comparison below, Wrangler Workhorse AT was good in dry, noise & objective ice/snow but was weak in wet and subjective snow performances.
Wrangler Workhorse AT
Launch: 2021
Press test wins: 0/1
Strength: Dry. noise & objective ice/snow
Check out our head to head comparison of Wrangler Workhorse AT against its competitors.
Wrangler Workhorse AT vs
Cooper Discoverer Rugged Trek
Price
265/60R18 : $251
5. Cooper Discoverer Rugged Trek
Cooper’s Discoverer Rugged Trek was launched in 2021 and has been developed specifically for the North American market. Based on the head to head comparison below, Discoverer Rugged Trek was strong in wet and subjective snow performances while lacking behind dry, noise & objective ice/snow.
Discoverer Rugged Trek
Launch: 2021
Press test wins: 0/1
Strength: wet & subjective snow
Check out our head to head comparison of Discoverer Rugged Trek against its competitors.
Discoverer Rugged Trek vs
Goodyear Wrangler Workhorse
Price
265/60R18 : $275
Summary
In conclusion, selecting the right all-terrain tire for snow is crucial for ensuring optimal performance, safety, and driving comfort. Among the top contenders, the 3-Peak Mountain Snowflake certified tires stand out for their superior traction and handling in snowy conditions. Each tire mentioned in this article offers its unique set of strengths, making it essential for drivers to weigh their specific needs and preferences. Whether it’s the Cooper’s Discoverer AT3 4S, Yokohama Geolandar A/T G015, Firestone Destination A/T2, Mickey Thompson Baja Boss A/T, or Toyo Open Country A/T III, all of these options have proven their worth in the all-terrain tire market. By carefully considering the features and performance aspects of each tire, you can make an informed decision and confidently conquer the snow and various terrains that lie ahead.
For many hunters, harvesting a moose is a once-in-a-lifetime bucket list trip. In that case, you want to make sure that you do everything possible before the hunt to ensure that it is successful once you arrive in your moose hunt camp.
One of the most important things you can do to set yourself up for success is to choose the right moose hunting cartridge.
If you ask ten people for their opinion on the best moose hunting cartridge, you’ll get ten different answers – or maybe more. That is to say, there’s no one best cartridge for a moose hunt. There are a variety of variables that you have to take into consideration and make a personal decision for you and you alone.
With that in mind, here are ten moose hunting cartridges for you to consider.
.30-06 Springfield
It has been said that there’s not a single big game animal in North America that cannot be felled by a .30-06 bullet, and that’s no exaggeration. The .30-06 was the caliber of choice for hunters of all kinds for most of the 20th century. Even though newer calibers have come on the market, the .30-06 has remained a faithful standby that is certainly more than capable of harvesting a moose.
30-30 Winchester
There are plenty of old deer rifles floating around in .30-30 Winchester. You may have inherited one from your granddad, picked one up at a pawn shop, or even bought one new because of the cartridge’s versatility for lots of different hunting opportunities. Whatever the case, there’s absolutely no reason that you can’t take a moose with the old “Thutty-Thutty” standby – so long as you know the limitations of yourself as a shooter, your rifle as a platform, and your chosen load in the cartridge.
.308 Winchester
While the .308 Winchester is certainly not restricted to semi-automatic rifles, it’s a caliber that is certainly well-suited to them. If you wanted to hunt a moose with a semi-auto, then an AR-10 style rifle chambered in .308 is a good place to start. You’ll also have the advantage of using a platform that many shooters are already very familiar and comfortable with, making it an easy transition from the training or tactical environment to the hunting environment.
6.5 Creedmoor
For hunters who want the utmost precision in their shot, it’s hard to beat the 6.5 Creedmoor. Since it was designed for competition shooting, it’s beyond capable of delivering an exacting blow to the vitals of a moose so long as the shooter behind the rifle is capable of making the shot. Another advantage for the 6.5 Creedmoor is its availability in a wide variety of firearms, including semi-auto, lever-action, bolt-action, single-shot, and more.
.300 Winchester Magnum
The .300 Winchester Magnum is something of a Goldilocks cartridge for use on a moose. Whether you choose from one of the many factory loads available or you hand-load your own, the .300 Win Mag has proven itself time and time again as a more-than-capable moose cartridge with felt recoil that, while certainly noticeable, is more than manageable for most shooters.
.375 Ruger
If you’re looking to pack an equitable punch to that of the .375 H&H in a more manageable package, look no further than the .375 Ruger. It’s an absolute powerhouse of a cartridge that is more than capable of taking down the moose of a lifetime.
7mm Remington Magnum
Sometimes it all comes down to the proper bullet selection, and that couldn’t be more true than with the reliable 7mm Remington Magnum. If you load a 7mm Rem Mag cartridge with a heavy bullet that is tough and designed to stay together, then it becomes a low-recoil caliber that is hard to beat when it comes to moose.
.338 Winchester
The .338 Win Mag cartridge was made for the challenges of big, tough game, and it is capable of taking on that challenge and defeating it. With the right heavy-grain bullet, you can be confident that your projectile is traveling faster than most comparable loads on the market and will deliver the devastating punch needed for a quick and ethical harvest on your moose of a lifetime.
6.5-300 Weatherby Magnum
Everyone has a 6.5 cartridge these days, and Weatherby is no different. The 6.5-300 Weatherby Magnum claims to be the fastest 6.5 cartridge on the market. Because its case has comparatively larger volume than others in this caliber, it’s capable of fantastic velocities. This makes it a flat-shooting cartridge that is perfect for long-range shots on a moose.
.270 Winchester
The .270 Winchester meets the three A’s: accurate, affordable, and available. Hunters have been using the well-rounded .270 Winchester to bring down all sorts of wild game for decades – and that includes moose. Therefore, there’s no reason that you can’t take your hunting rifle that you use for other pursuits and put it to good use on a moose. A .270 is right at home on a moose hunt as well as in pursuit of deer, hogs, sheep, and more.
What to Look for When Choosing a Hunting Caliber
There are a lot of different things to consider when choosing a hunting caliber, but let’s take a look at three of the most important ones.
Availability
You can do all the research in the world and settle on a specific caliber for your moose hunt, but if you can’t find the ammo that you need, then it’s all been for nothing. That becomes even more important if you fail to bring enough ammo with you on the hunt. Your moose camp may be remote and the likelihood of finding some calibers may be slim if you need to restock.
Performance
Perhaps the most important part of choosing a hunting caliber is evaluating its performance. You’ve got to be sure that the load you choose is going to be capable of taking down the type of game you’re hunting in a quick and ethical manner. This is especially true when it comes to large animals like moose.
Cost
That ammo prices have risen exponentially in recent years is an unpleasant yet cold, hard fact. Similar to our point on availability, you’ve got to be able to afford the ammo when you find it. Some calibers are less expensive than others, but that doesn’t mean that they’re going to be any less effective at bringing down a moose.
Suppressed Hunting
Once you experience your first hunt with a suppressor, you won’t ever want to hunt without one again. If you’ve never done it before, that may sound like an exaggeration, but trust us, it’s not. Here’s why.
Benefits of Hunting With a Suppressor
Even when they were first commercially introduced in 1909, suppressors were actively marketed to hunters, and for good reason – they make hunting safer and quieter, eliminate the need for bulky hearing protection, and improve accuracy when shooting.
Here are just a few of the reasons why suppressed hunting is better hunting:
It makes the outdoors quiet again
Suppressors, when paired with the right firearm and ammo, reduce the sound of a gunshot to hearing safe levels, and “dull the edge” of the sound of a gunshot.
A suppressed rifle doesn’t disturb the game that you are after
Animals have great hearing, and that’s to their benefit – not yours. The hearing of coyotes, squirrels, wild pigs, mule deer, whitetail deer, elk, pronghorn antelope, bighorn sheep, moose, caribou, and plenty of other game animals all have incredible hearing. The sound of a gunshot can keep them out of their known territory for weeks at a time.
Hunting with a suppressor is safer
While in recent years electronic ear muffs that allow you to hear ambient noise while blocking the sound of gunfire have hit the market, the simple fact is most hunters still choose between no ear protection or wearing something that makes it hard to hear what is going on around them. Using a suppressor on your hunting rifle allows you to hear everything that is going on around you, and not damage your hearing when taking a shot.
Accuracy is improved when shooting with a suppressor
This benefit has also been touted since the early 20th century. This is because the physics of a silencer reduces felt recoil and muzzle climb. With both of these factors greatly reduced, shooters find their rifles easier to shoot. So it isn’t that silencers make the gun more accurate per se, but they make it easier for YOU to shoot your gun more accurately.
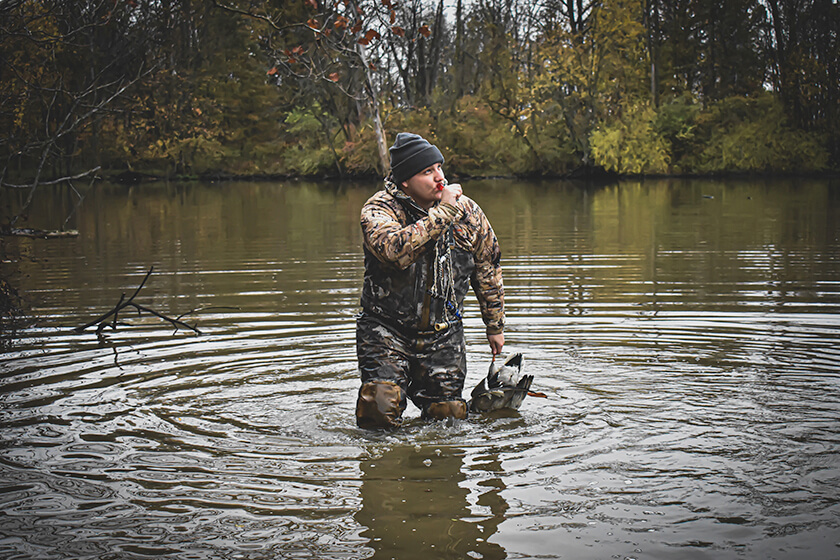
From single reeds and doubles to whistles and specialty calls, we’ve assembled a solid list of duck calls for newbies and flyway veterans alike. (Matthew Hicks photo)
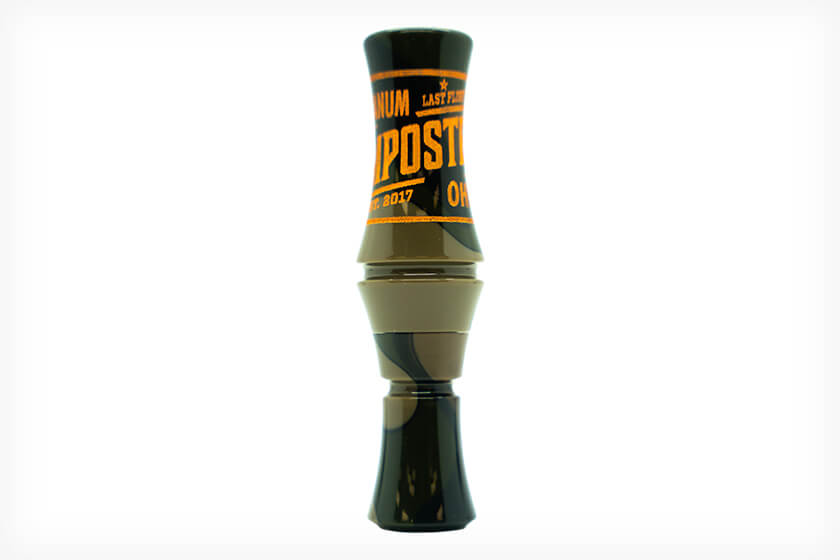
We all know that the decoys are pieces of the puzzle when waterfowl hunting, but to finish the puzzle, the Imposter duck call turns those fakes into the real thing. The Imposter duck call is Last Flight’s double-reed call and the newest in their line. Slightly quieter than its big brother the Illusion, don’t let this double-reed fool you, it can still get loud when you need it to. While the Imposter can cover the full range of duck sounds required to finish them tight, where it excels is in its ability to get nasty in the low-end ranges perfect for sweet talking in tight holes or the timber. Duck-worthy features include an O-ring fit insert, .410” exhaust bore, and a medium hold. It is available in acrylic, Delrin, and a hunter series all varying in price, hunter’s choice.
$120 Acrylic | lastflightcalls.net
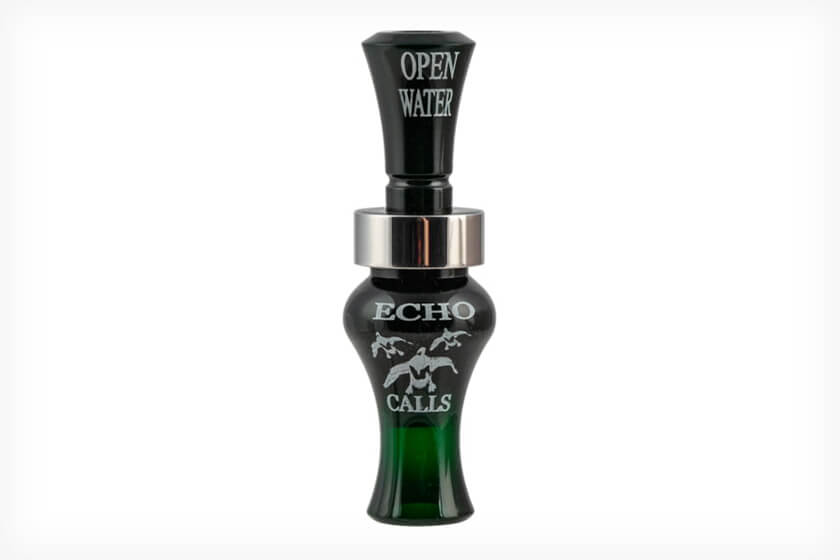
Echo Calls – Open Water
Echo’s open water duck call is simply a classic waterfowl call that every waterfowler either has, or will own at one point. Yes, it is that good and functional. While the name implies that it should be used on big water, no surprise there, don’t let the name fool you. While the Open Water is at home on big water or open fields, it can also perform dual-purpose, with a little user finesse, on small water and in tight quarters when you need it to. Sure, if you need to ring out an ear-ringing hail call, it can certainly up the decibels, but it can also get soft and ducky when the birds get close. It is available in both acrylic and in Bois D’ Arc, bocote, and cocobolo wood configurations.
$140 Acrylic | echocalls.com
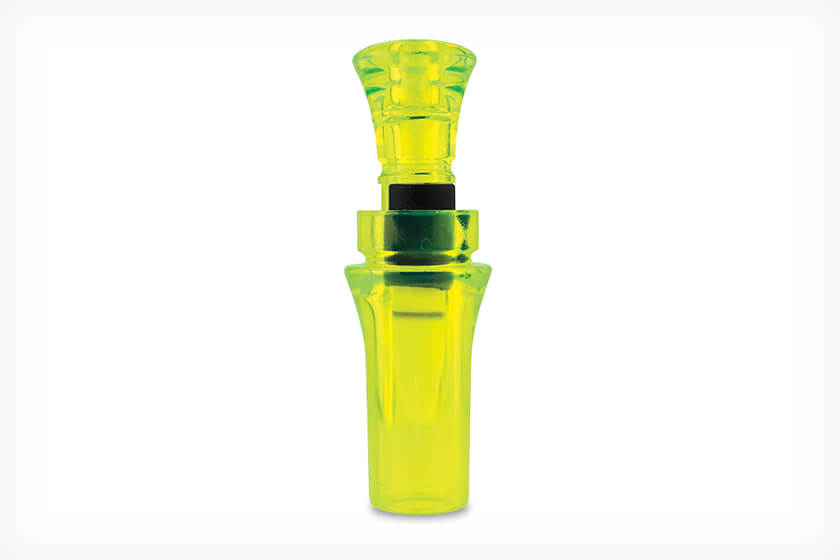
Duck Commander – The Flash
Price isn’t the only indicator of awesome, and the Duck Commander Flash proves that statement correct. Singing a smooth, silky tone that the greenheads can’t resist, the Flash can go from soft to loud in well, a flash! It utilizes Jase’s Pro series modified reed system to resist sticking like the water rolling off a duck’s back and has a double-reed design that uses the air pressure of most single reeds. It is extremely easy to blow, but also serves novices and professional callers by being able to produce the full range of duck-worthy sounds. Just when you thought it couldn’t get any better, it has a short barrel for easier hand manipulation for those of us that don’t have the hand size of an offensive lineman. Oh, and if you want it personalized, Duck Commander can engrave 15 characters for that special occasion.
$35 | duckcommander.com
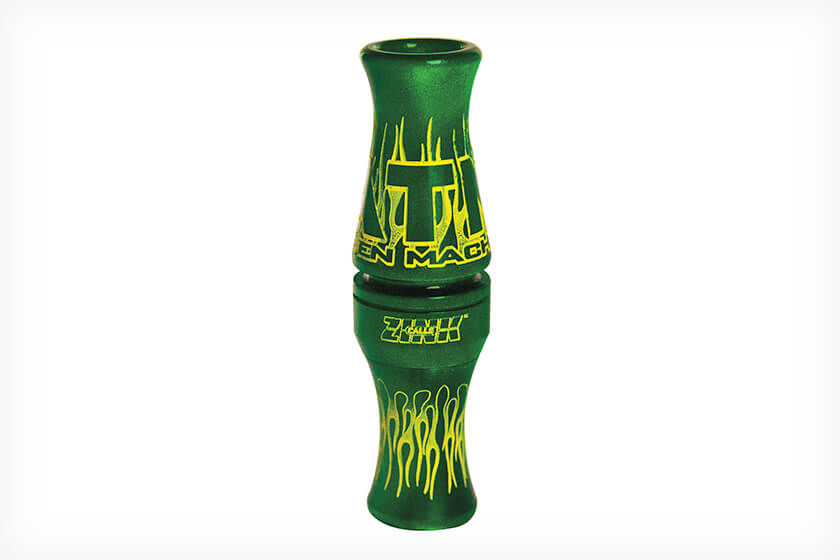
Zink Calls – ATM Green Machine
When you think about an ATM, you automatically think about collecting money, am I right? Well, instead of greenbacks, Zink’s ATM Green Machine was designed to allow hunters to cash in on their favorite green, green-headed mallards that is. Using a double reed design and featuring the smooth, hen mallard sound callers want, the ATM provides greater volume and a radically improved bottom-end feed chuckle to suck them into range. This innovative call features Zink’s Z-cut, no-stick tone channel—a ground-breaking design that permits a huge range of tones while virtually eliminating reed lock, even for heavy spitters. Each call is hand-tuned and ready to rock right out of the box so, if you are looking to cash in, put the ATM on your lanyard, no transaction fees required!
$150 | zinkcalls.com
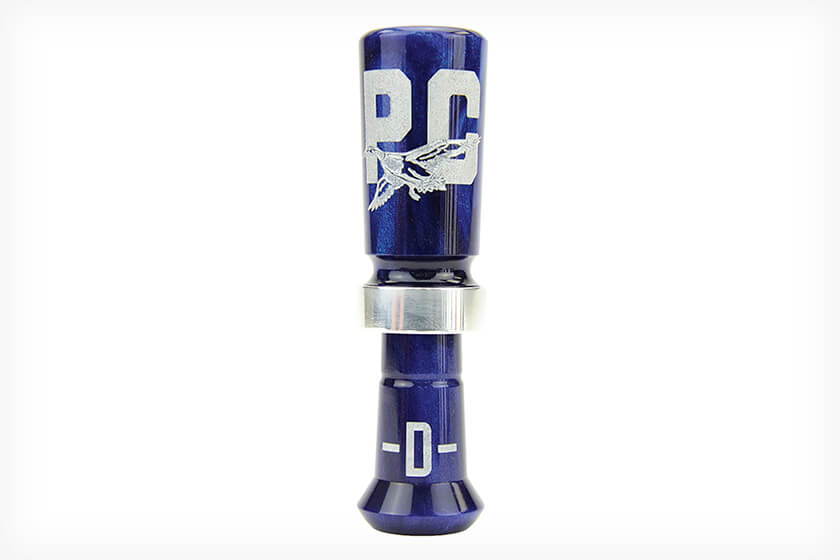
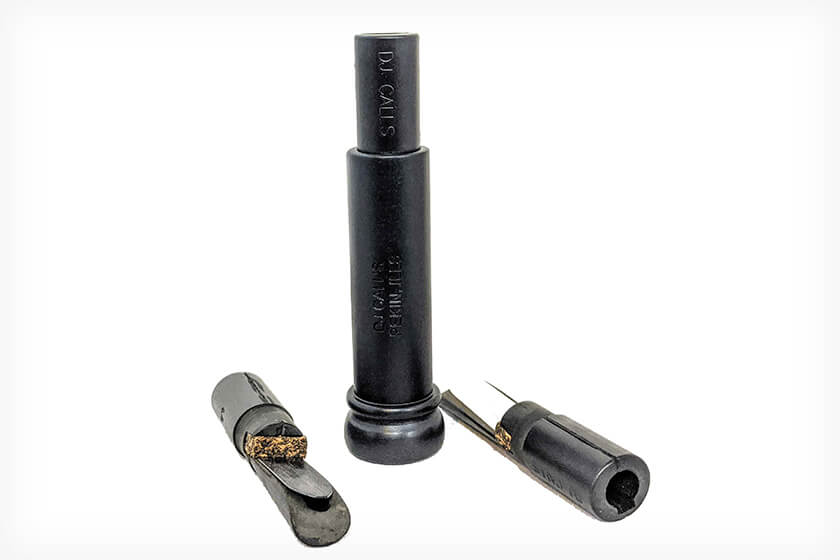
Pacific Calls – PCD
The PCD duck call from Pacific Calls is their loudest, most aggressive duck call they have ever built. Simply put, if you need to break them down from stratosphere, this call will hit them at the moon, at least, maybe further, they are still waiting for the sound to rebound. The PCD is lean, mean and ready to both break them down and finish them in the hole for your viewing pleasure. While it creates high hails like a thing of beauty, it is also at home creating those messy feeds and snotty, raspy hen sounds that the ducks eat up when they get close. Versatile is an understatement for describing the PCD, and if I had to create my own description for the PCD acronym, I would say it stands for Pure Chronic Duck.
$130 | pacificcustomcalls.com
Elite Duck Calls – Edge
As classy as it is pure duck, Elite Calls Edge duck call not only looks good on the lanyard, it produces the guttural sounds that ducks can’t resist. The Elite Edge is a double reed call that combines great volume and range with ease of operation. The Edge has a deeper tone and is raspier than other double reed calls, creating classic ducky sounds usually only found in single reed calls. While many hunters still covet single reeds for their unique tone, the Edge looks to change the game by bringing single reed sound to an easy blowing double-reed. If you are looking for a unique color combination to mix it up on your lanyard, check out the ice/black variation for some real eye appeal and get ducking.
$140 | elitecalls.net
Big Lake Outdoors Products – T-Rex
The T-Rex offers a unique approach to the typical duck call. Big Lake Outdoor Products adds both a metal and a mylar reed in the T-Rex call. This produces the ease of calling that is so well liked in a double reed. But the metal reed produces exceptional raspiness. The T-Rex is built on an open water insert that also allows more air volume. So unlike most double reeds, the T-Rex produces amplified calling characteristics.
Jargon’s Live Duck wasn’t designed for the stage, per say, but it was designed to replicate the real thing, hence the name. The Live Duck can articulate the complete vocabulary of the hen mallard, from the softest scratchy quacks to those loud, nasally quacks that separates the women from the girls. It features a large exhaust port with great hold that blends in a perfect amount of back pressure into every call. These features make the call extremely easy to blow but still allow for advanced note articulation by both novice and professional callers alike. If you need a call for hunting the gamut of waterfowl scenarios, or need one to refine your live duck style contest calling skills, JARGON’s Live Duck may just fit the bill, pun intended. This call will not disappoint you.
$140 | jargongamecalls.com
Haydel’s Game Calls – H2CC Cajun Cutter
Saying that Haydel’s re-invented the Cajun Cutter with their new H2CC variant would be an understatement. Instead, let’s just say that the H2CC puts a new look on a classic, making the attributes of the original not only better, but more versatile. Staring with a J-frame, the acrylic H2CC features a polished steel band and is tuned with maximum hunter versatility in mind. It is offered in both single and double reed configurations and has a small exhaust hole to allow easy control, producing a great natural tone that will produce the fabled Cajun Cutter “squeals.” It is designed and tuned to be lights out on the finesse side and ideal for callers looking to bend those notes to entice those call shy birds. The H2CC is just plain ducky, for hunters who are into that that of thing.
$140 | haydels.com
RNT – Daisy Cutter Xtreme
You know these guys. Rich-N-Tone’s original Daisy Cutter duck call, simply put, is a classic that likely every waterfowl hunter surely knows by name. The Daisy Cutter Xtreme, or DCX for short, is simply a higher-octane version of its predecessor that is still capable of producing those sweet hen sounds that gets the mallard drakes drooling. By modifying the original Daisy Cutter’s design, RNT slightly turned up the volume and enhanced its aggressive nature while maintaining a perfect balance of backpressure all while pushing the calls rasp to an Xtreme jaw jarring new level. If you like raspy, this one has enough rasp for you, your neighbor, and the guy two streets over! It is available in both acrylic and cocobolo or grandillo wood versions, all sure to sweet-talk those greenheads into range.
$145 Acrylic | rntcalls.com
DJ Calls – LLC Cut-Down Kit
Don’t cut down your classic Olt duck call! Instead check out DJ Calls Cutdown Kit. Their Cutdown Kit is a blasted black acrylic barrel with three different tonals, each cut differently. The tonals are made of hard rubber, just like the original Olts used to have back when they made their hard rubber keyholes. Like the Olts, DJ Calls also has the keyhole, for maximum versatility. The three tonal cuts include: Arkansas, Louisiana, and Quincy styles with .015” reed thickness on the Arkansas and Louisiana and a .020” tapered shave on the Quincy. Consequently, the Quincy is slightly harder to blow, but this is the original cutdown call design. While the blasted black acrylic replicates the original to a “T”, DJ Calls also has other variants to spice things up.
$180 | djcalls.com
Big Lake Outdoors Products – Pintail Passion
Pintails are one of the most alluring of all duck species and special attention to quality and sound is deserved with a pintail whistle. Big Lake Outdoor Products offers the well-known “Maurilio” whistles that provide exceptional sounds. The Pintail Passion has a roller ball that produces the beautiful trills and peeps of pintails and wigeon. This jatobe wood call has two ports that allow you to alter the sound from high-to-low to mimic more than one duck.
$40 | biglakeoutdoorproducts.com
Wingert’s Wood-Works – Duck Whistle
They don’t have contests for duck whistles, but they probably should. Truly custom pieces of duck art, each Wingert’s call is one part hunting function and one part conversation piece. Duck whistles are the most underrated calls on a hunter’s lanyard, and not just for hunting pintails or wigeon, but every species. If you don’t already own one, you are truly missing out on a game-changing apparatus for your lanyard. This is where Wingert’s comes in. Their whistles are available in wood, acrylic, and many other variations including stabilized spalted wood and burls and even micarta. While they all serve the same purpose, you are definitely missing out of you don’t go with one of the more custom and unique choices, as these calls are heirloom quality and do not disappoint. And hey, GQ fashion in a duck blind is a thing, isn’t it?
The afternoon sun was settling westward behind a bank of disconsolate grey clouds, as I worked my way across a huge flat-topped mesa just north of Texas’s famous Big Bend country. A huge javelina boar showed briefly through the short-brush. Readying my handmade Osage self bow and stone-pointed arrow, I moved to intercept him. The hunting gods must have been pleased, for the big boar continued his swaggering path directly toward me. My bow was raised, my fingers tight on the string as he crossed behind some brush. Seven short yards were all that separated us when he emerged, broadside, beady-eye gleaming and razor-sharp cutters lifting his lip in a perpetual good-natured snarl. I dropped the string and watched my stone point bury behind his shoulder. It was the second-largest archery-killed Javelina in Texas that year.
Life and Times of JavelinaJavelina (pronounced Hav-uh-leen-uh), or Collared Peccary, reside stateside only in Texas, southern New Mexico and Arizona. Hunting opportunities vary from state to state. Arizona offers the best access to good public-land hunting, but javelina numbers are not terribly high, and in many areas, tags must be applied for and drawn lottery style. Texas is in many ways the reverse—in certain areas of Texas, javelina numbers are super high, and it’s possible to see half a dozen troops in a winter morning’s hunt, with 30 to 40 javelina per band. Most of Texas is private land, however, so you’ll need permission from the owner to hunt just about anywhere, and good properties may require an access fee. Licenses are easy to obtain though, and every hunter is allowed two javies each year with the purchase of a regular Texas hunting license. I’m not familiar with hunting javelina in New Mexico, so I am not in a position to offer an opinion on hunting quality and opportunity there.
Stink Pigs—so called because of the strong musk emitted by a scent gland located atop their hindquarters—are really fun to hunt, especially with a bow. Their sense of smell is superb but their eyesight is pretty bad, so as long as you keep the wind in your face it’s relatively easy to close within 10 or 15 yards of a band of pigs. Their hearing is pretty good, too, but most of the time they make so much noise shuffling about, grubbing for food, smacking their lips and quarreling with each other they rarely hear you. Only pay real attention to being quiet if you’re stalking a lone pig or a herd bedded down for a siesta. If the herd is quiet, you’d better be, too.
Peccary TeethPeccary possess long cutters (or teeth) that protrude fang-like from both top and bottom jaws. These continuously rub against each other, creating razor-sharp edges. Javelinas are tough, courageous critters, very dangerous to dogs and even humans at times, due to their tendency to attack anything that bothers one of their own. When following a wounded javie be careful, and approach any shadowed thicket with caution. If your pig is still alive, you’ll likely hear it popping its teeth at you—a loud, rather intimidating sound—before you see it. Best to put another round (or arrow) into the pig at your first opportunity in this scenario.
Dogs can experience especial problems in confrontations of the javelina variety. A big courageous dog will likely be killed, because he’ll put up a fight and be cut to pieces by the herd. A little dog with more bluster than bite can get its owner in real trouble by picking a fight with a pig, then running to hide behind his owner’s legs when the pig’s buddies all show up with blood in their eyes.
In Texas, Javelinas are scored exactly like a bear or lion, by measuring the length and width of the cleaned skull, then adding the two measurements together for a final score. The biggest, oldest boars usually have worn or broken their cutters down short, so often the best skull mounts come from middle-aged boars that still possess long, impressive fangs. Live weight usually ranges from 35 to 55 pounds. The two biggest Texas boars I’ve weighed pushed the scales to 65 pounds. Females are usually more petite than boars, but still sport long cutters and make admirable shoulder, full-body or skull mounts. Indeed, unless you’re very experienced, it can be quite hard to tell male and female apart while hunting.
Hunting JavelinasFinding javelinas is sometimes the toughest element to hunting them. If you’re new to an area, I suggest spending a day scouting for sign left by the little pigs before getting serious about hunting them. Look in dry washes and arroyos for little blunt tracks—somewhat reminiscent of deer tracks, just much shorter. Keep an eye out for chewed-up prickly pear cactus; javelina love to eat the pads, leaving bite-shaped chunks missing. The bite edges will be ragged and stringy, since stink pigs don’t have cleanly meshing front teeth. Look for water sources with sign around them, for though javelina don’t need to drink much when feeding on prickly pear, they prefer to stay hydrated, and will frequent seeps, water troughs and such. In hot or buggy weather you might find evidence of wallowing activity in muddy areas. Also, if there are corn feeders around (as are common in Texas), keep an eye on them. Stink pigs love corn, and will drive deer away and take possession of the area around a feeder.
Once you’ve located an area with plentiful Javelina sign, ready your bow or shoulder your rifle. It’s not super important to be hunting at the crack of dawn; javelinas are not very early risers, and are more likely to be moving once sunshine warms the area a little. Hunt your area from downwind so the pigs don’t scent you, and keep your own sniffer busy—many times I’ve smelled a herd of stink pigs before I’ve seen them. Keep your ears open, too; occasionally javelinas bark or huff at each other, the sound giving you another way to locate them.
If there is a mesa, ridge, point or other vantage overlooking the area where you found javie sign, it’s a good tactic to sit atop the point and let your binocular do the walking. Be patient and spend plenty of time glassing; an entire herd of javelinas can be hidden in a tiny draw for a couple hours, and you’ll think there’s not a pig for miles. Then suddenly, they stroll out into the sunshine and it seems as though there are pigs everywhere. While sitting and glassing, you can listen, too—you might locate javelina by their sounds.
Once you’ve located a sounder of peccary, it’s time to make your move. Make sure you keep the wind in your favor and approach cautiously, but not too cautiously. Javies stay on the move most of the time, and if you take too long, they may have vacated the area before you arrive. Once you’re within 40 yards, you can slow down and stalk with care. If a pig spots you, just freeze and wait till it relaxes. Then resume your stalk.
Bullets and Broadheads for PeccaryYour regular deer-hunting rifle or handgun will work fine on javelina, just make sure you use a tough bullet. Stink pigs are dense and hard-boned, as you’ll see from the story below.
I almost simply wrote the same advice regarding archery gear—that the same gear you use on deer will work on pigs—but in good conscience, I can’t. From personal experience guiding peccary hunters in Texas, I believe they are tougher to kill than deer. In my opinion you need a really tough, cut-on-contact, one piece broadhead like a Woodsman, Montec G5 or similar. Here’s a true story to illustrate my point:
A friend who guided for me had never killed a peccary before, so we went out one evening to try to get him a pig. He was carrying an archery setup with which he had recently killed a huge bull elk, shooting expandable points. I told my buddy I had previously seen expandable heads fail on javelina, and suggested he use something else, but he was confident in his setup so we went hunting. His bow pulled 70 pounds of draw weight at 28 inches.
We soon located a troop of stink pigs, with one big boar sniffing around the females. The boar crossed in front of us, stopping broadside at 32 yards. My friend is a crack shot, but javies are pretty small and his arrow impacted about an inch and a half forward of the crease, with a sound like a baseball bat hitting a light pole. We tracked the boar over 450 yards up the side of a mesa before leaving him to live another day. The arrow had penetrated only an inch and a half beyond the broadhead ferrule, stopped cold by the peccaries scapula. It is my belief that a solid, cut-on-contact broadhead would have penetrated that scapula and double-lunged the pig. The moral of the story, of course, is that javelinas are small and very tough. Choose your gear and shots accordingly.
Shot PlacementWith a firearm and a tough bullet, you can down a peccary from any angle, but with archery gear the ideal shot angle is broadside, or slightly quartering away. The vitals are small, so take your time and make a careful shot. One helpful tip to remember is that javelinas can’t flex their neck very far to the side, so anytime they hear or see anything they must turn toward the source to investigate. This usually leaves you with a quartered-to angle. That’s fine with a firearm, but don’t risk it with a bow; wait for a better opportunity. Due to the same characteristic, it’s not helpful to make a sound to try to stop a moving pig for a shot—the animal will invariably stop quartered-on.
Following UpWell-hit javies usually (though not always) tip over quickly. The same rules you’d use when hunting deer apply to any blood trail, except for one: if you believe that the pig is wounded and potentially alive, consider him dangerous. Exercise caution, and if possible, carry a hard-hitting firearm to use if he comes at you. A mad peccary is not likely to kill you, but he sure might leave some cool scars on your legs. Just be careful.
Processing MeatThere are two very important elements to keeping peccary meat tasty: keep it clean and cool it quick. When you approach your first stink pig, you’ll wonder how anyone could possibly eat something that smells like that. Get the skin off and away, exercising real care to keep the scent gland with its oily musk off the meat, and the carcass will look and smell fresh and tasty. Get the meat on ice in a cooler and you’re all set. Grind into breakfast sausage or chorizo, or slow-cook for a pulled-pork barbeque. Bon Appétit!
")
")
")
")
")